|
| 85 Notchie Build (Page 15/23) |

|
zkhennings
|
MAY 21, 12:08 PM
|
|
That is cool, I have been wondering if one of those dampeners would be available for these engines. I will have to look into it more and probably get in touch with the manufacturer.
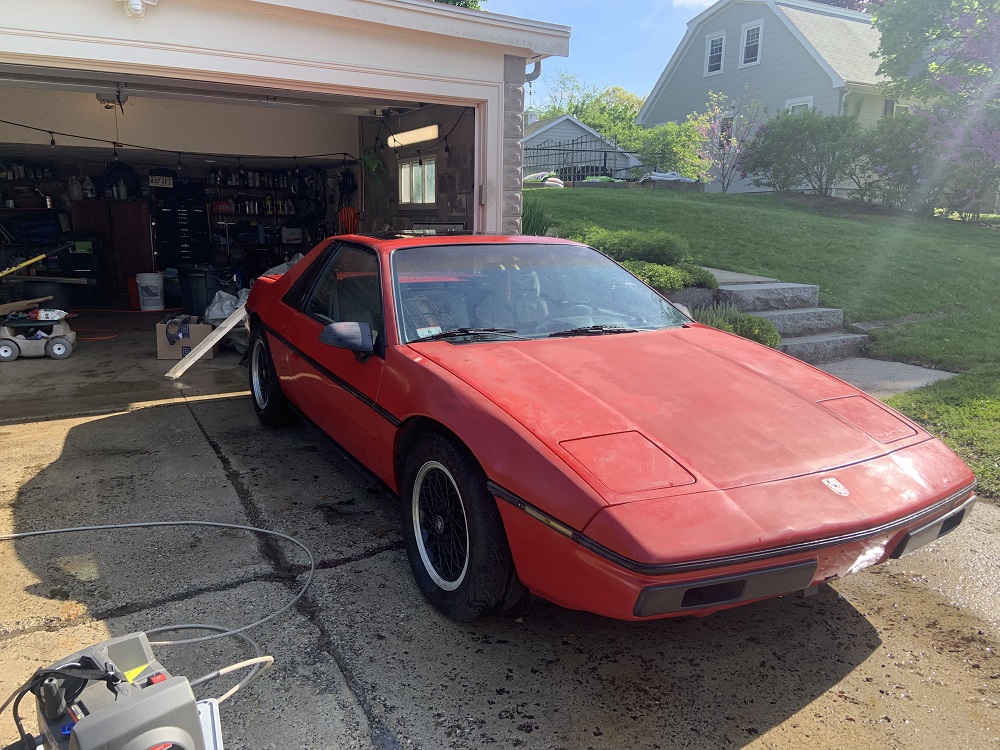
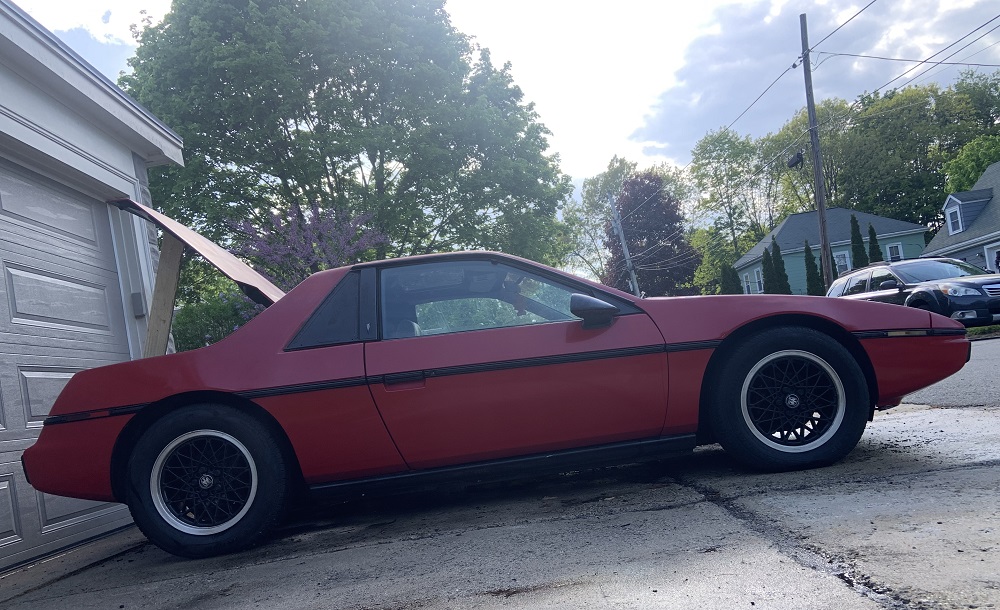
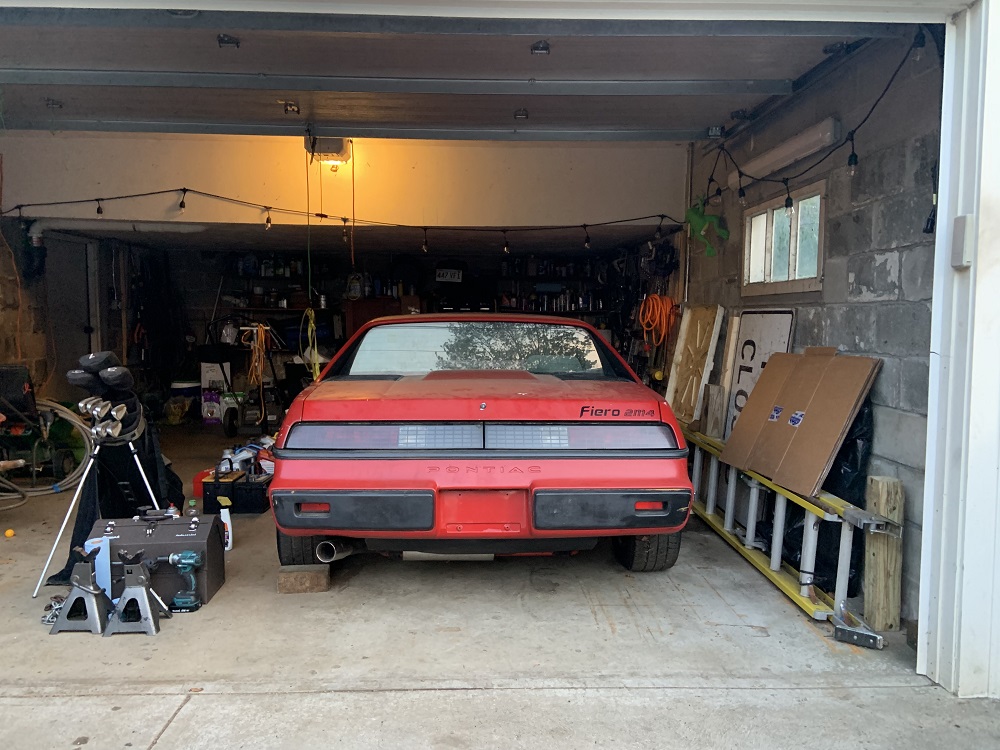
The Fiero was filthy even though it had a car cover, at some point the cover must have lost its protective coating. The pressure washer made an easy but time consuming job of blasting it clean.
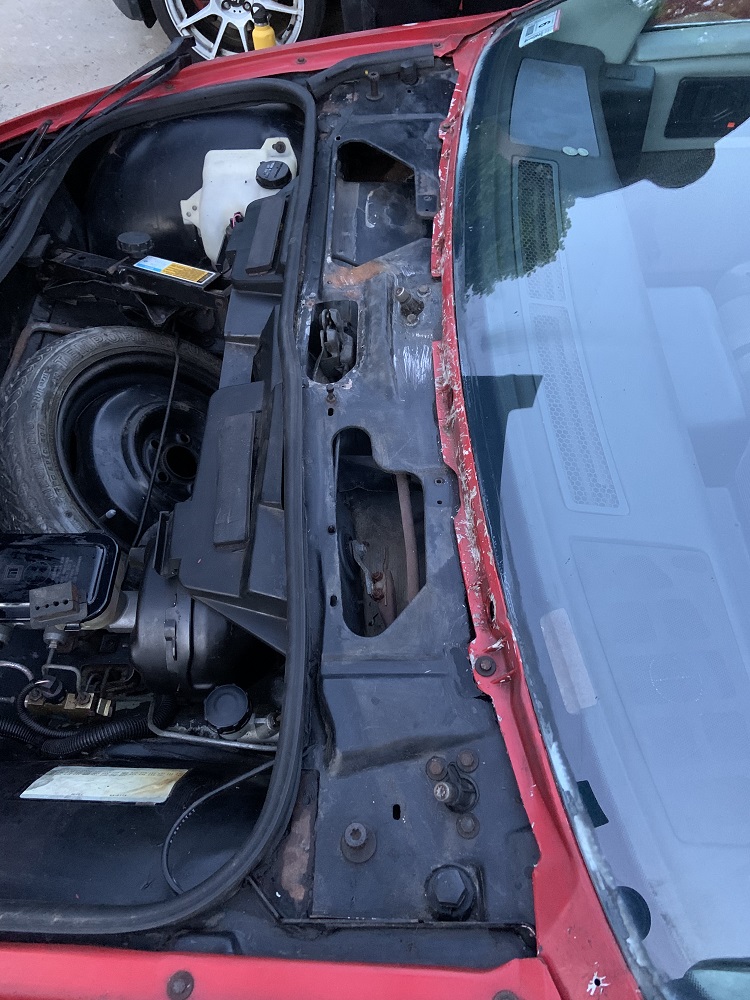
The cowl was filthy, it was full of dirt and acorns and other crap, so I pulled it off, pressure washed everything clean, and removed all the old sealant material. I used a slide hammer to remove the windshield wipers and it only took one light hammer pull each.
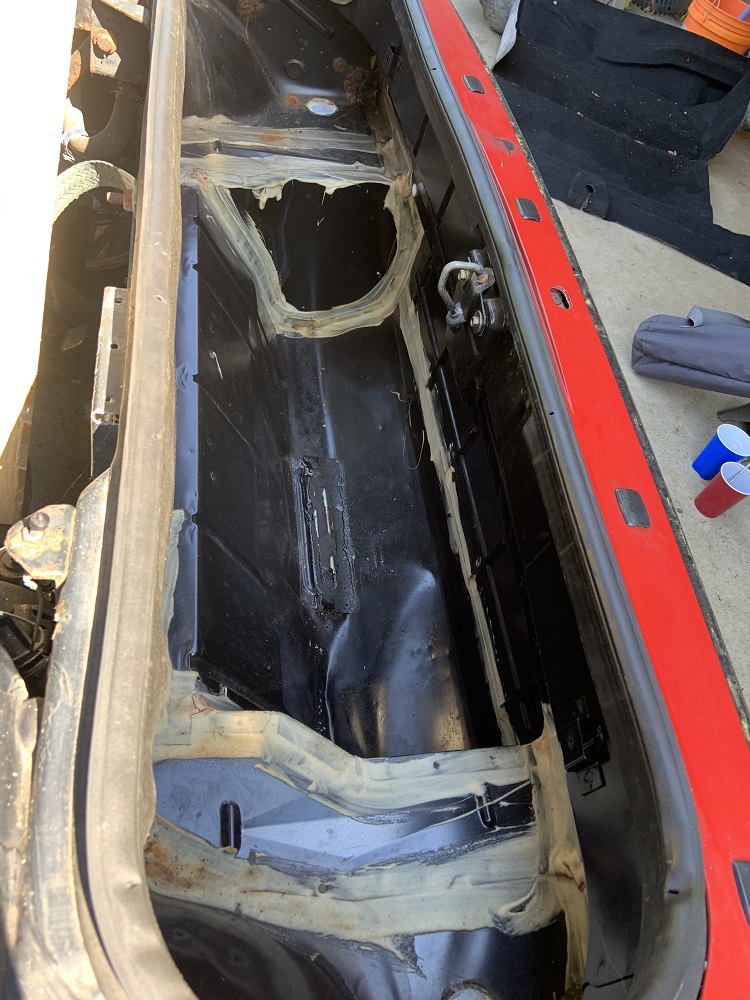
I pulled the trunk carpet out and soaped and pressure washed it. The trunk is in pretty good shape, it is very clean asides from 3 or 4 small rust spots I will repair. I have to pull the rear shell and make sure the frame rails are still in good shape.
I power washed the whole car, all in the engine bay and lifted the car up and washed underneath it too. I hate working on a filthy car.
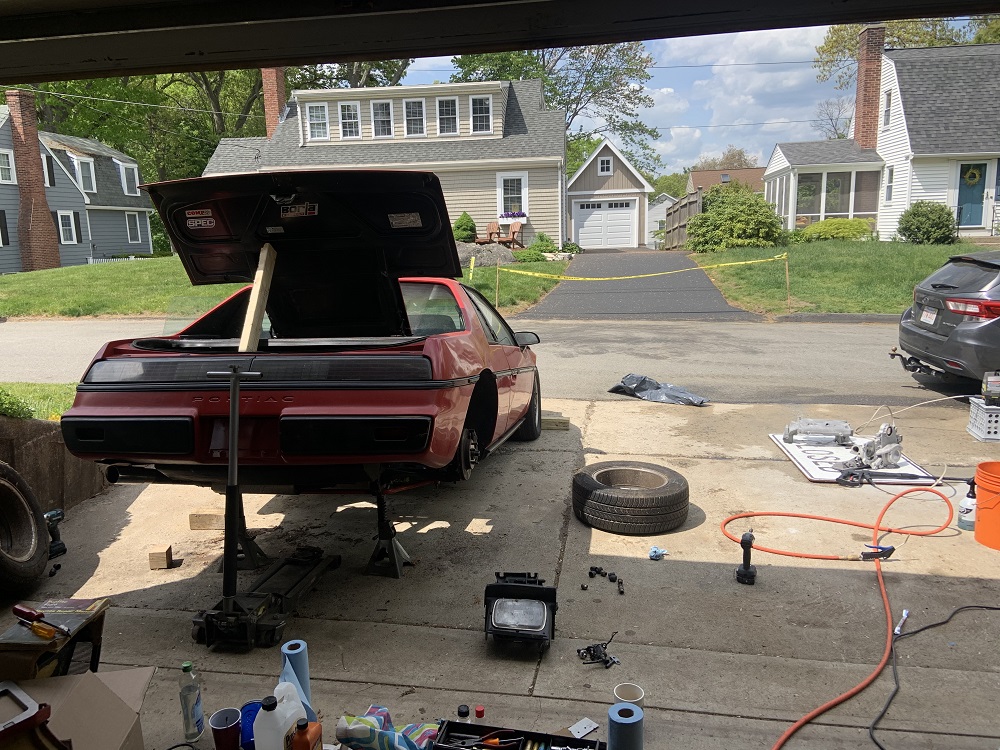
Here is the car all cleaned up
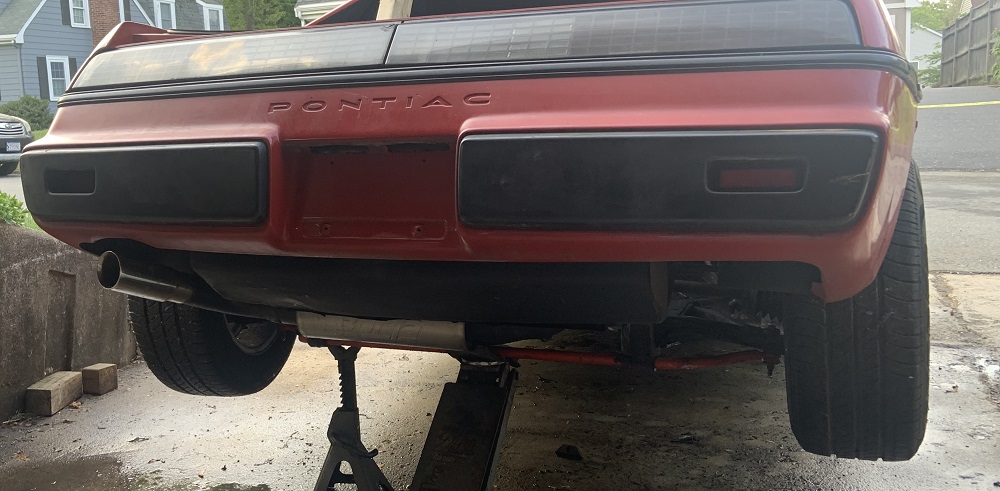
Also here is a pic of how my exhaust was routed and will be routed out the back. I will be using 3" stainless instead of the 2.5" mild tubing I made the 2.8 exhaust with.
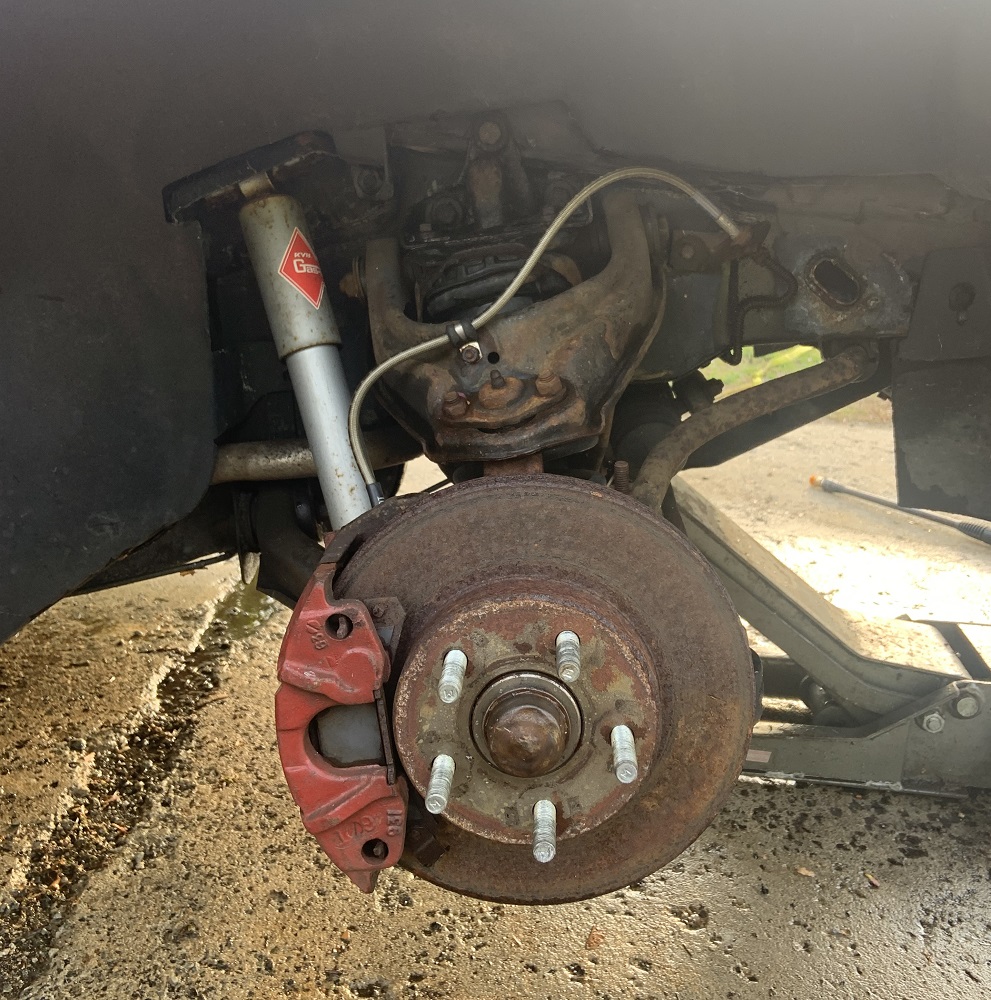
Here's the brake upgrades on the front, I may try and clean the rotors with electrolysis, but I may just get new ones. The pads have a ton of life and will be fine.
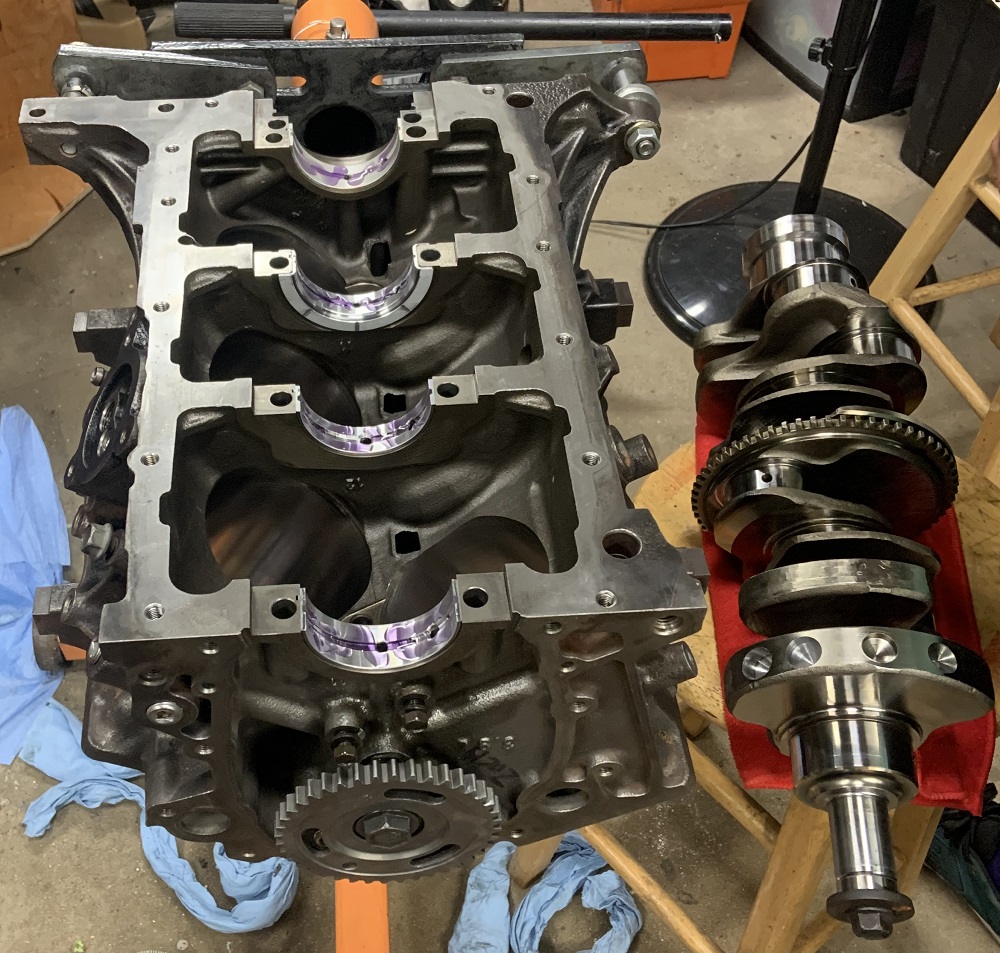
I spent time soaking parts in degreaser and then pressure washing them until they were clean. Here is the oil pan soaking.
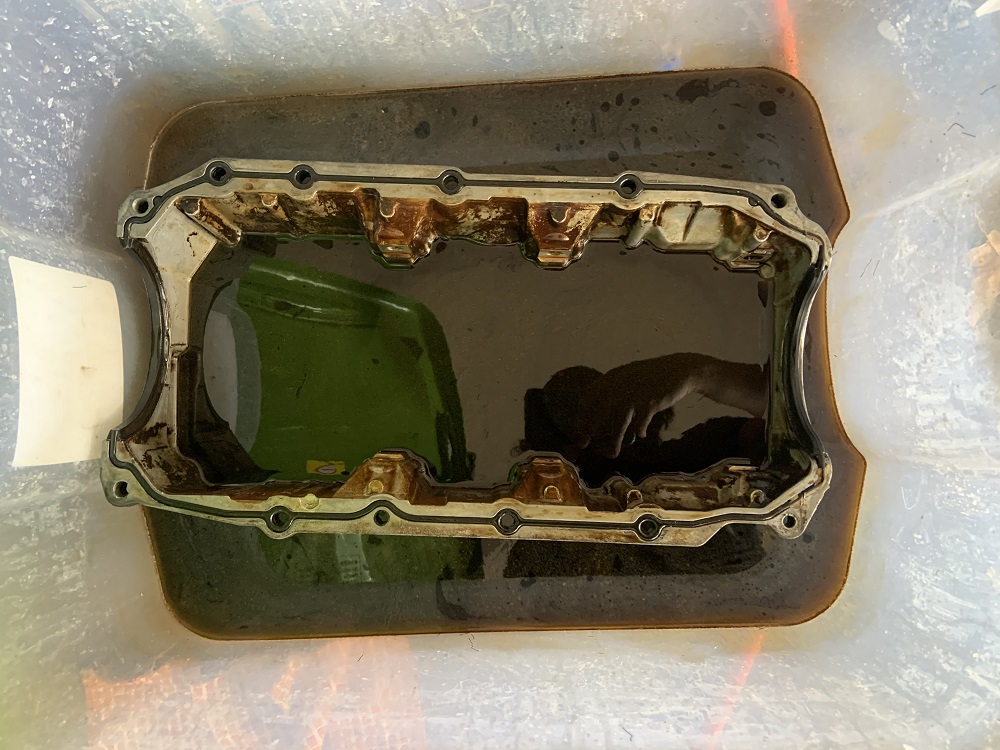
And here it is clean

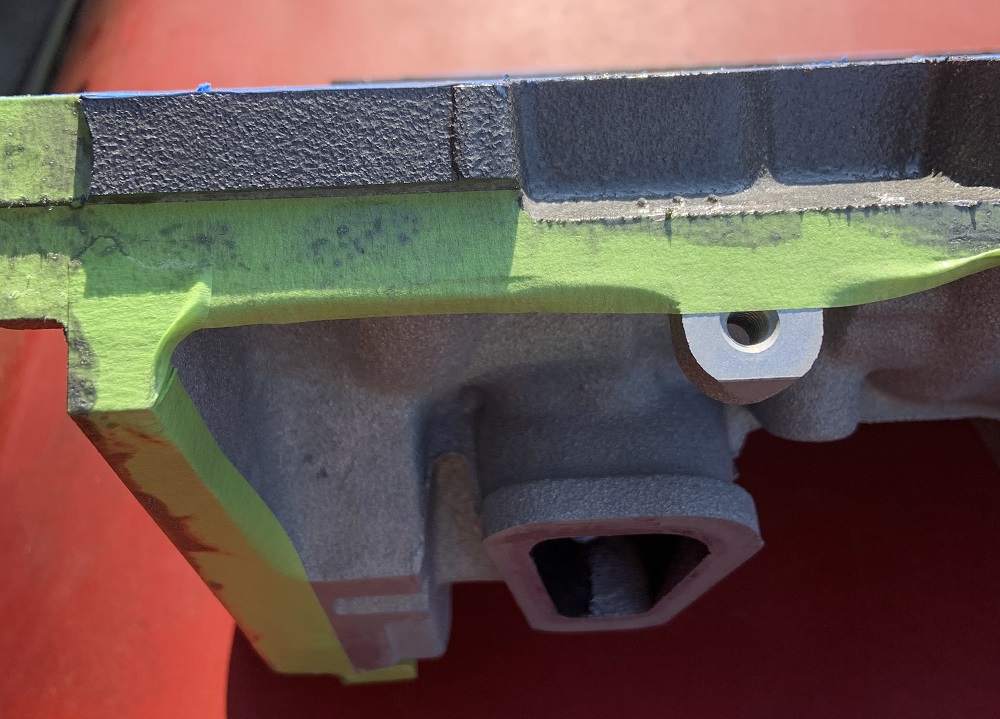
The LIM, crossover, and timing cover all got degreased and then had multiple treatments with the phosphoric acid etching spray. I would spray the parts with it and once it stopped foaming I would pressure wash them off. I went a little too hard with this and some of the parts got a little rougher than I wanted, I wouldn't recommend more than 3 or 4 goes with the phosphoric acid, I probably did around 10+ washing cycles.
Here the parts are mid way to clean
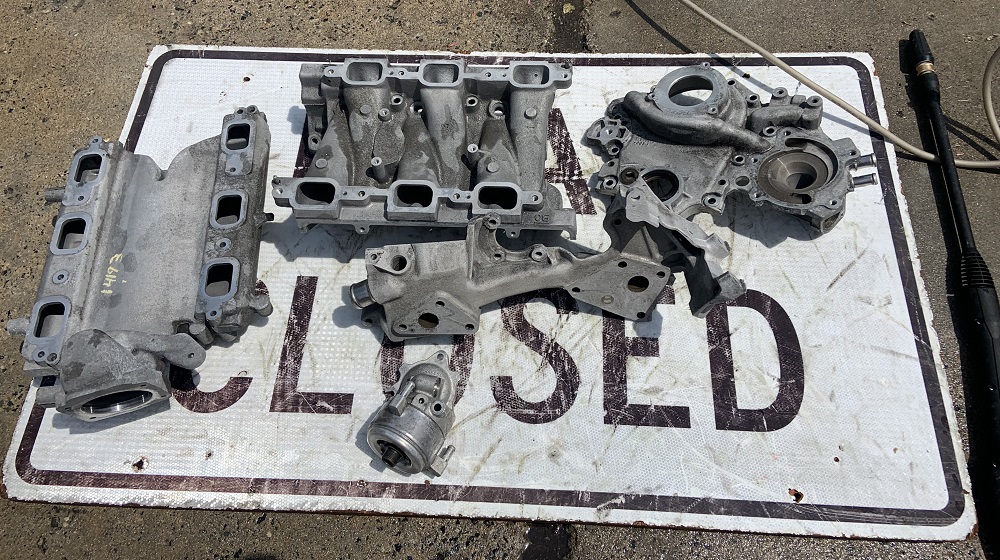
Here they are all foamy with the acid on them

And here are some of the parts fully cleaned.

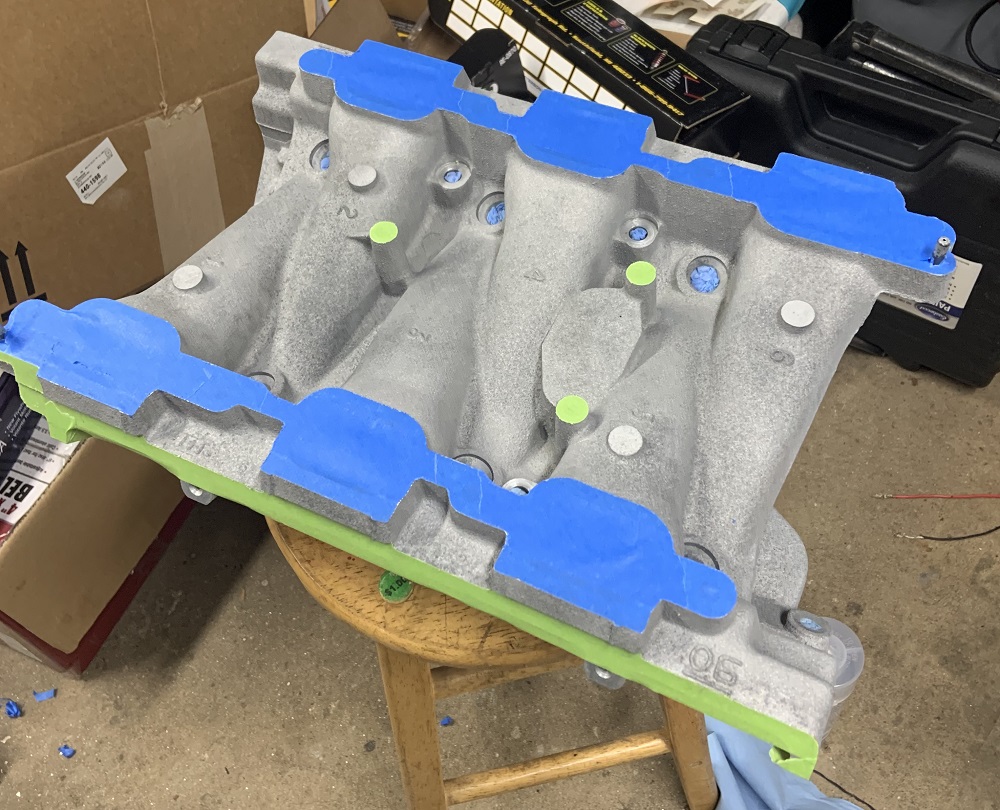
I taped up all the parts for paint.

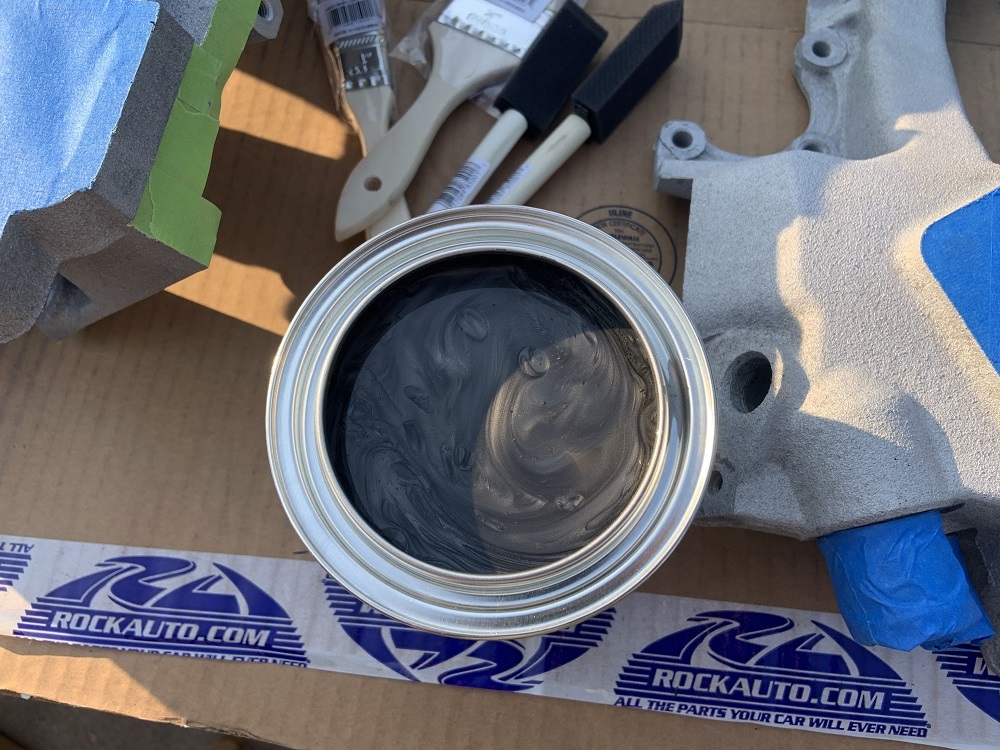
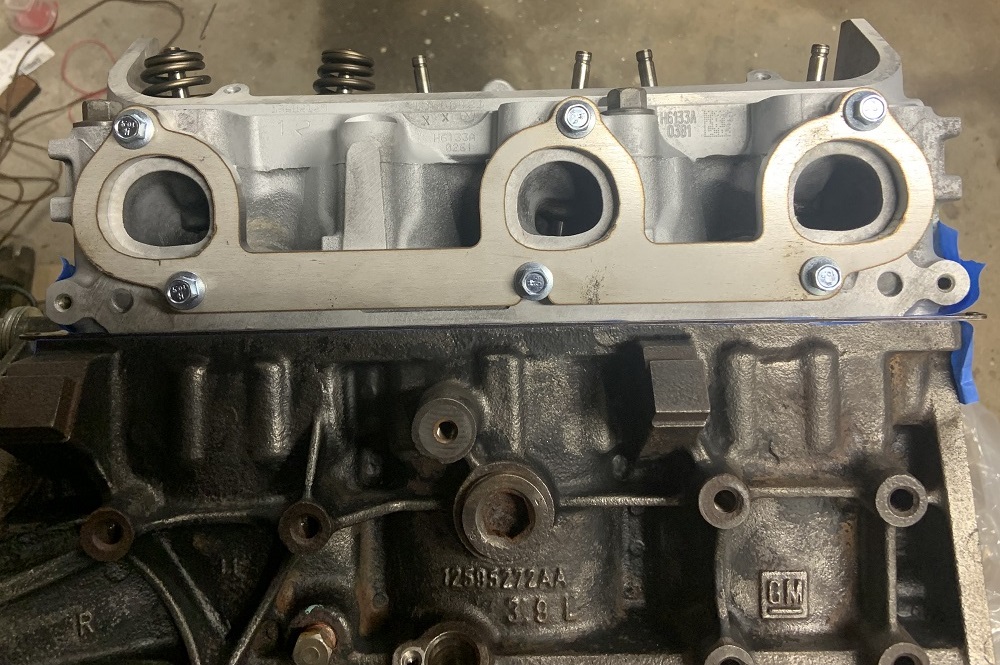
The paint is a 2 part Eastwoods ceramic engine enamel good to 650*, it can be used for brake calipers and things too. The engine builder recommended it over POR's engine enamel, which is what I was planning to use. The paint is a nice metallic dark gray, it will look good, be easy to clean, and seal up the porous aluminum. I will paint the block with it, I will not paint the oil pan, and I may paint the heads with it.
And here are the parts painted, I painted them with foam brushes so there is no brush strokes, I think I may end up spraying a final coat on them with the guns. They have 2 coats here, the first coat was very light in color compared to the second.

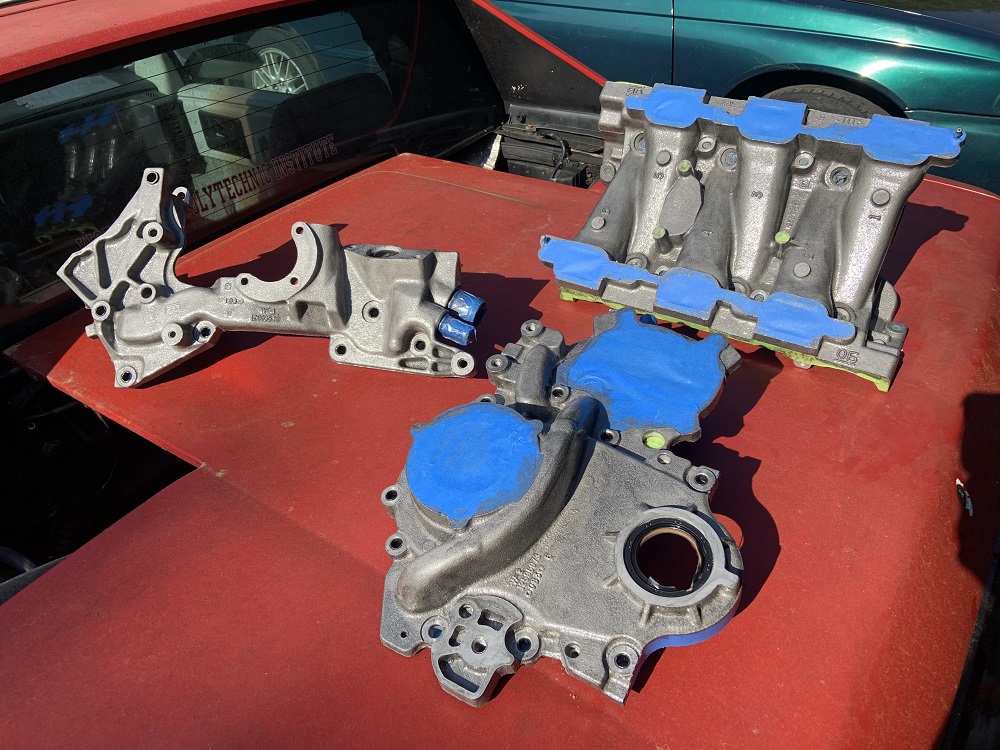
And here is a color comparison to the bare aluminum.
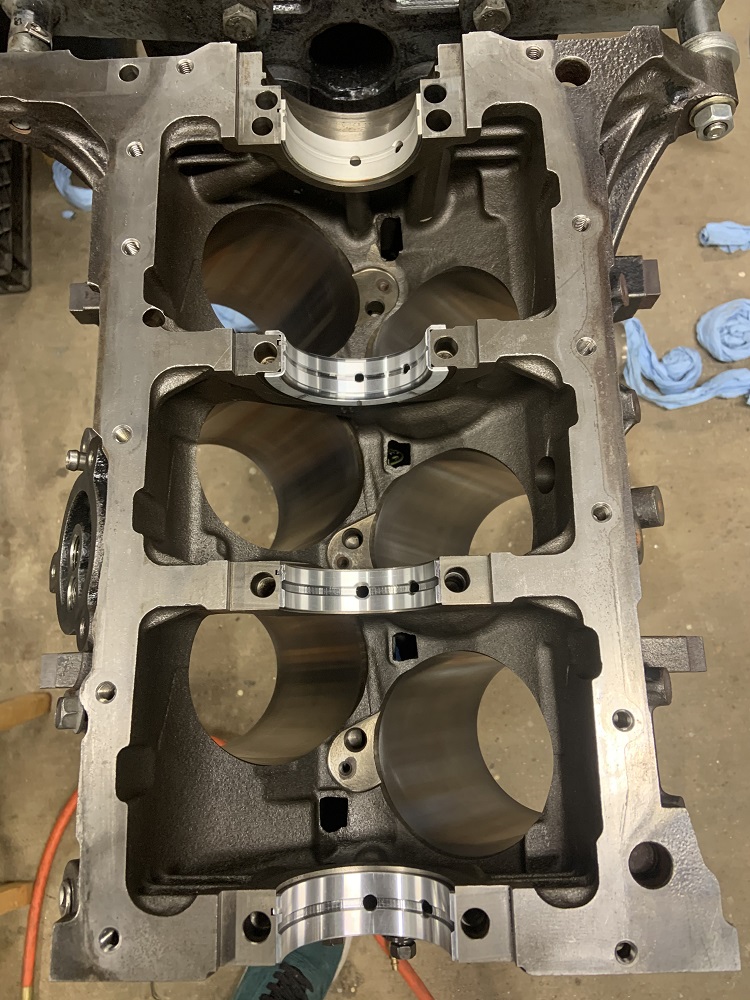
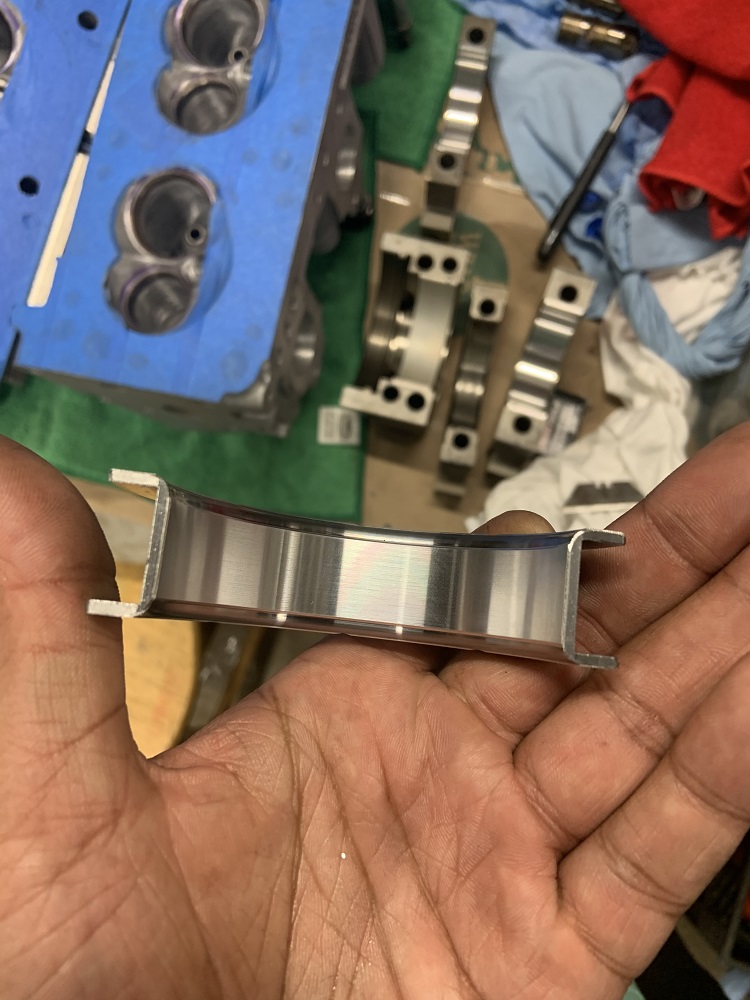
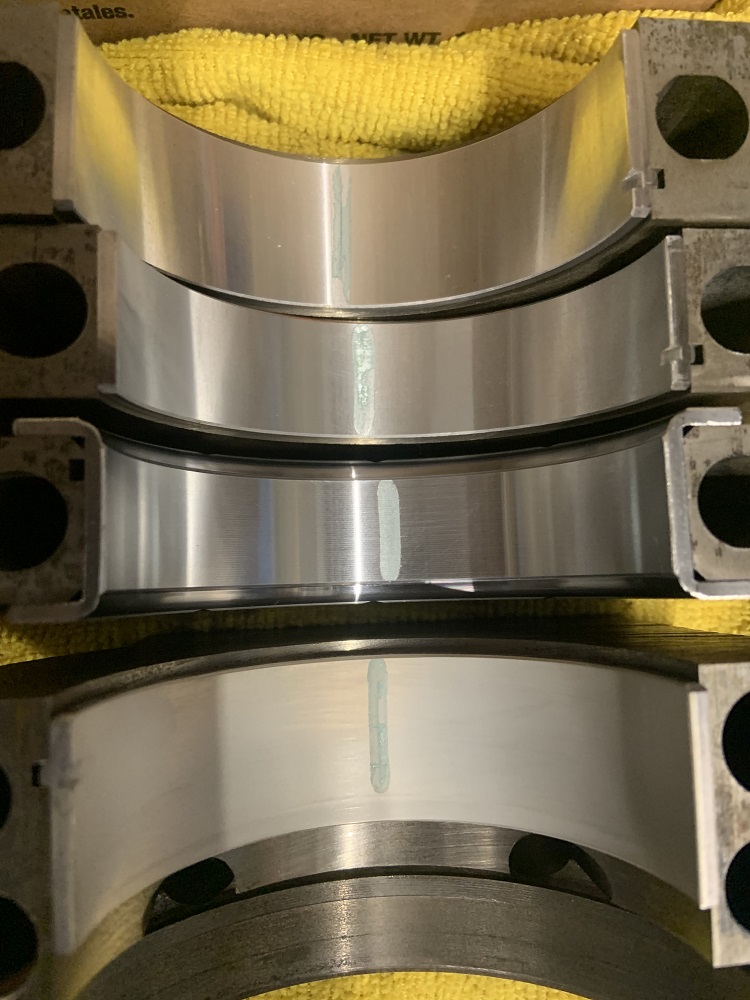
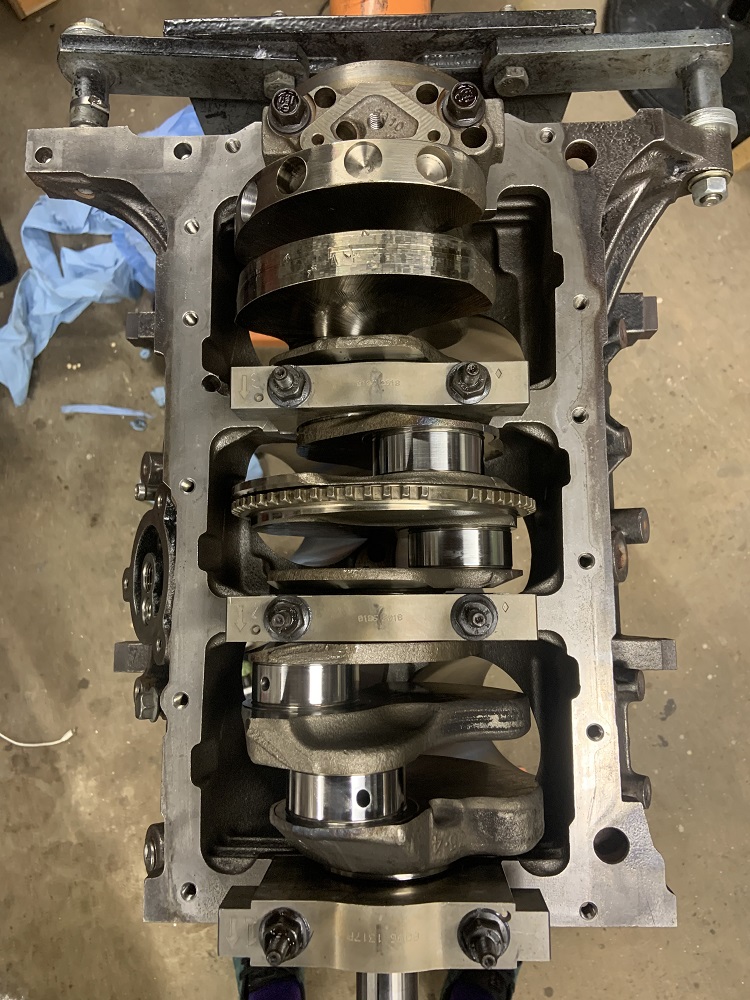
I have been working on this all week, I worked a 70+ hour week last week to hit some deadlines on making functional prototypes, so my boss told me to take most of the week off and I have used this time to get a lot done. The engine assembly starts today, I will be getting the crank in at a minimum after checking clearances. My torque wrench came back from CDI/SnapOn nice and calibrated and ready to put this together. I also got some Royal Purple assembly lube for the rest of the motor. I also received a big package from the Fiero store with lots of odds and ends to spruce up the car.
Oh and I also drove 2.5 hours to weloveour86se's house in Maine to gather a bunch of parts I needed including a fender, bumper, mirror, sail panels, E brake, and various bits. I also grabbed another shifter as I do not like how cut down mine is, but I think I may have left it there sadly. I want to find one from an 84 anyways.
I cleaned up the garage too and pulled all the hazardous waste out to bring to the town hazardous waste center, and I pulled the Fiero in. It had to be turned around and a cop tried coming down the street immediately after I had moved the car into the road to do a 3 point turn with it, pulling it with the Subaru. He was really mad that he couldn't get by, it was the first time a cop hadn't been excited to see the Fiero. He was young though, and I generally have unpleasant interactions with young cops, older cops are almost always cool.
I also got some LS exhaust manifold bolts from Summit, they fit perfectly, I tried them out with the header flanges from OSHcut, they fit good, but they are able to be positioned poorly, I may try and put some bushings in two of the mounting holes to help with alignment, otherwise they seem great.
More updates will come soon.
|
|

|
ericjon262
|
MAY 21, 08:17 PM
|
|
|
progress is looking good! are the bolt holes for the flanges too big? I intentionally made them large so that thermal expansion wouldn't put excessive shear on the bolts. maybe I made them a bit too big. ------------------
"I am not what you so glibly call to be a civilized man. I have broken with society for reasons which I alone am able to appreciate. I am therefore not subject to it's stupid laws, and I ask you to never allude to them in my presence again."
cognita semper
|
|
|
|
zkhennings
|
MAY 24, 03:12 PM
|
|
| quote | Originally posted by ericjon262:
progress is looking good! are the bolt holes for the flanges too big? I intentionally made them large so that thermal expansion wouldn't put excessive shear on the bolts. maybe I made them a bit too big.
|
|
A little too big for locating purposes, I will make some locating sleeves and verify that one or two of the holes could simply be made smaller to locate the flange precisely, no need to have all the holes be smaller. I would imagine maybe the center two holes (hole and slot) could be the locating features as thermal expansion would probably put the least shearing force on those, especially since one is a slot.
Alternatively I could just outline the bolt heads on the flange so I have a visual to line everything up to once they are headers.[This message has been edited by zkhennings (edited 05-24-2021).]
|
|
|
|
zkhennings
|
MAY 26, 11:35 AM
|
|
|
|
|
La fiera
|
MAY 26, 06:56 PM
|
|
| quote | Originally posted by ericjon262:
on a 2.8, this is easy enough, on a later FWD engine, with the FWD timing cover, it gets a little harder, as the balancer is also the crank pulley. one for a gen II SBC may work, if they're even offered. measurements would need to be taken to make sure everything fits as required, and I would also contact someone at ATI prior to purchasing and asking about using it on a 60V6 prior to purchasing, as I'm sure there's a ton of engineering tied up in a balancer beyond basic fitment.
|
|
Well Eric I was able to tell the difference right away. And the 3.4L and 3.7L have inherited the same balancer and it still works flawlessly! The good thing about these balancers is that they can be tuned to different frequencies and they are fully rebuildable.
|
|
|
|
zkhennings
|
MAY 27, 10:48 AM
|
|
|
Would this one fit the snout specifically? I am not sure if they make a serpentine version for the SBC. I would have to call them to discuss the depths I would be looking for as they offer this one in a few different depths. I may have to machine a longer one down to the right depth if everything else checks out. Realistically I will probably run the factory balancer for a bit and see how it goes, it will be a street car the majority of the time and I would like to do some autocross and maybe see how it does at the drag strip. But it is something I will be looking for if I ever do lightweight internals and higher compression and try to push the RPMs a bit more.
|
|
|
|
ericjon262
|
MAY 27, 10:40 PM
|
|
| quote | Originally posted by La fiera:
Well Eric I was able to tell the difference right away. And the 3.4L and 3.7L have inherited the same balancer and it still works flawlessly! The good thing about these balancers is that they can be tuned to different frequencies and they are fully rebuildable.
|
|
I didn't say it wouldn't work, I said it's easier with the fiero timing cover d/t belt requirements. Feeling better doesn't mean optimized either,
| quote | Originally posted by zkhennings:
Would this one fit the snout specifically? I am not sure if they make a serpentine version for the SBC. I would have to call them to discuss the depths I would be looking for as they offer this one in a few different depths. I may have to machine a longer one down to the right depth if everything else checks out. Realistically I will probably run the factory balancer for a bit and see how it goes, it will be a street car the majority of the time and I would like to do some autocross and maybe see how it does at the drag strip. But it is something I will be looking for if I ever do lightweight internals and higher compression and try to push the RPMs a bit more. |
|
The Gen II SBC used a balancer similar to what the FWD 60V6 engines used, something like this
https://www.summitracing.co...del/camaro/year/1996
I might call ATI next week and ask about using one with a V6, it would be nice to have a rated balancer.
------------------
"I am not what you so glibly call to be a civilized man. I have broken with society for reasons which I alone am able to appreciate. I am therefore not subject to it's stupid laws, and I ask you to never allude to them in my presence again."
cognita semper
|
|
|
|
La fiera
|
MAY 27, 10:50 PM
|
|
| quote | Originally posted by ericjon262:
The Gen II SBC used a balancer similar to what the FWD 60V6 engines used, something like this
https://www.summitracing.co...del/camaro/year/1996
I might call ATI next week and ask about using one with a V6, it would be nice to have a rated balancer.
|
|
I know what they are going to tell you, "We don't know and it will not fit". But if you tell them you want to send a balancer to get tuned to an engine they will do it for you. So, my advice is that if that ribbed damper has the dimentions of the snout, get it and I can guarantee you it would work. If you want it tune to specifally to the frequency of your engine then you can order a tune up kit for your frequency, just different "O" rings. How do I know this? Because I called them 8 years ago when I got mine and they said it wouldn't work and it did for me.
Now, as far as the "feel doesn't mean is right" thing, tells me you don't have a highly tuned "BUTT" dyno like me. 
|
|
|
|
zkhennings
|
MAY 28, 12:13 AM
|
|
Thanks for the info guys.
I don't think Eric is saying you aren't correct or that it isn't helping dampen your engine vibrations, he is just saying that when it comes to optimizing the performance and getting it to be the best it can be, it might take a little more than feel, even though your feel is better than most. Some accelerometer data or equivalent would give you a more complete picture, and is what the manufacturer is going to use to tune the dampers for specific setups.
But like you said, if they do not have the data already for the application then they may say it is unsupported, and feel may be all you have to get it as dialed as possible. And like Eric said, having a balancer that is rated for the abuse is worthwhile already even if not tuned to maximum potential.
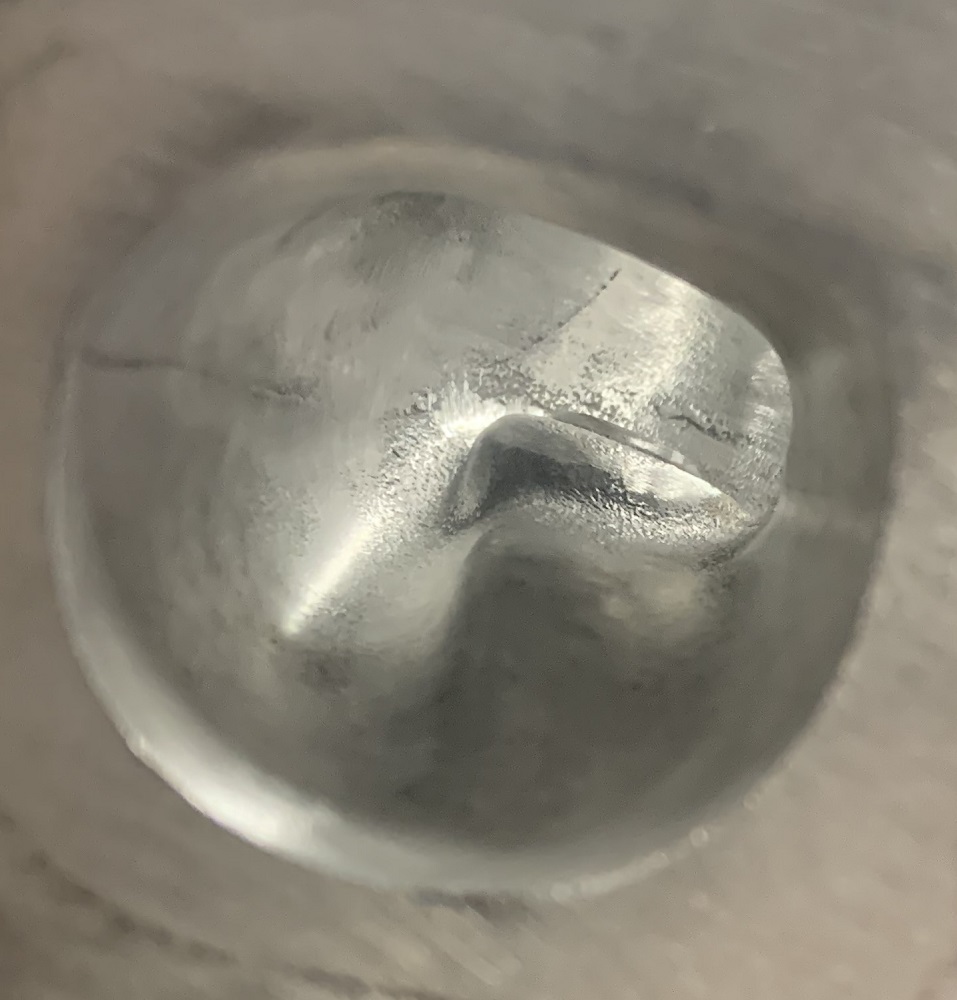
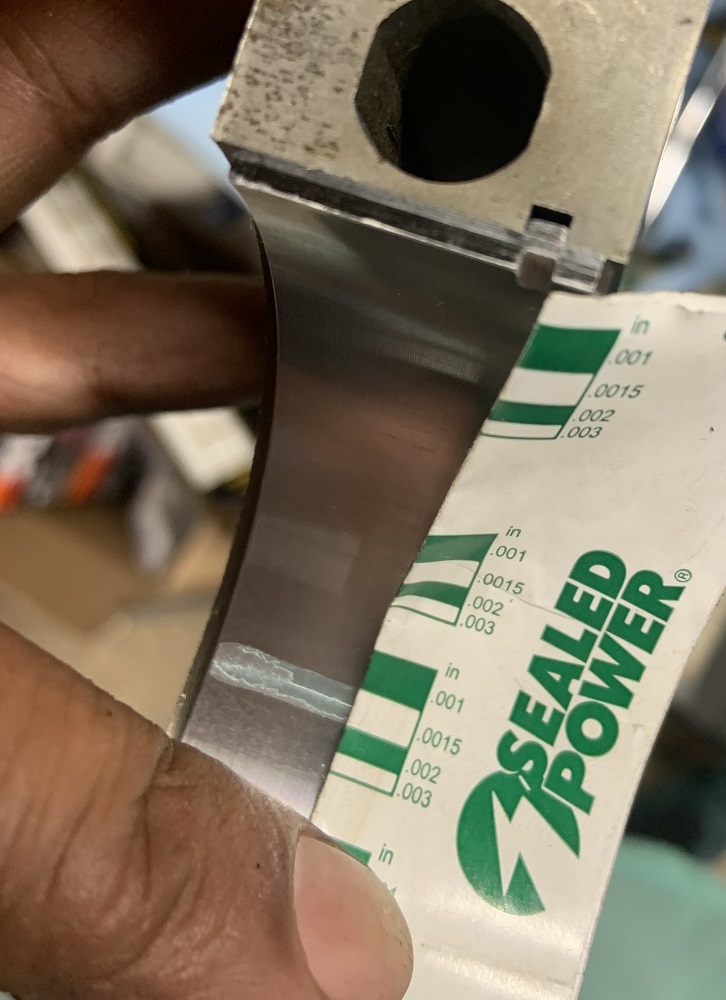
I done goofed and was looking at the metric specs for ring gap when setting ring gaps but measuring in thousandths.... I had taken a pic of the service manual page with my phone and it is the tiny pics fault hah. I should have noticed that it was a full decimal place off of what I was measuring, but long story short I gapped the first ring to 0.0015" (metric value was 0.15mm) instead of leaving it alone and having it be in the correct range of 0.0006 to 0.0011". Unfortunately had to order another full set.
Edit to say I also put in an order for all of my connectors from Ballenger Motorsports, the TPS connector is for the N* TB, the alternator connector is for the 99 Astro, and the air temp connector is Fiero style, but I ordered a fast response air temp sensor. Probably unnecessary for an NA application but hey you never know. Also put in what should be a final RockAuto order for odds and ends, but ordered a new TPS, new MAP sensor, and new crank position sensor. I figured I would rather start with new sensors when getting this thing tuned.[This message has been edited by zkhennings (edited 05-28-2021).]
|
|
|
|
zkhennings
|
JUN 02, 11:38 AM
|
|
Looking through my documentation for my build I found I had already found a source for single sets of the MAHLE piston rings.
Turns out I could have saved myself $123.
Progress is going well, will post an update soon.
|
|
|
|