|
| 85 Notchie Build (Page 14/23) |

|
ericjon262
|
APR 13, 06:46 PM
|
|
|
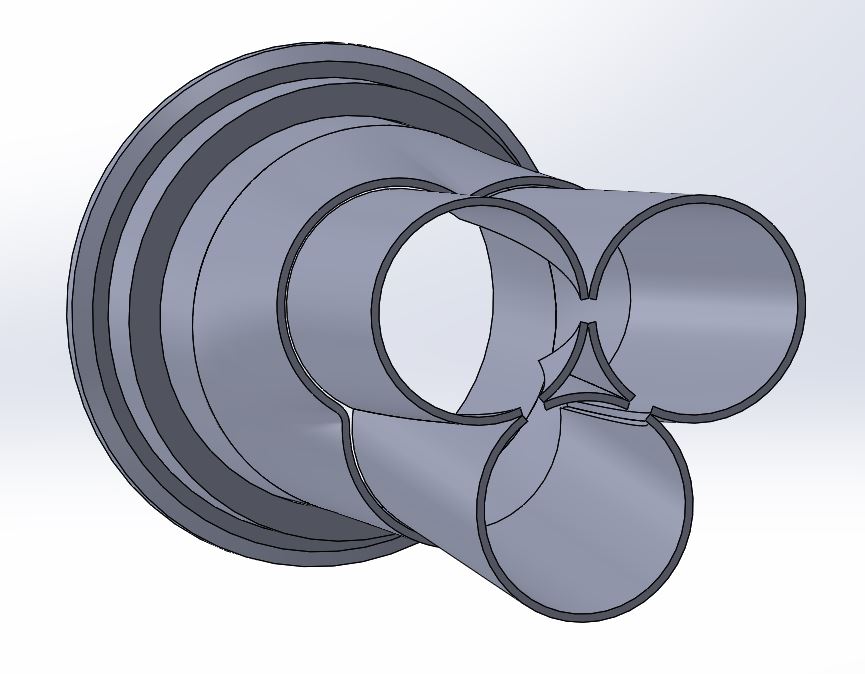
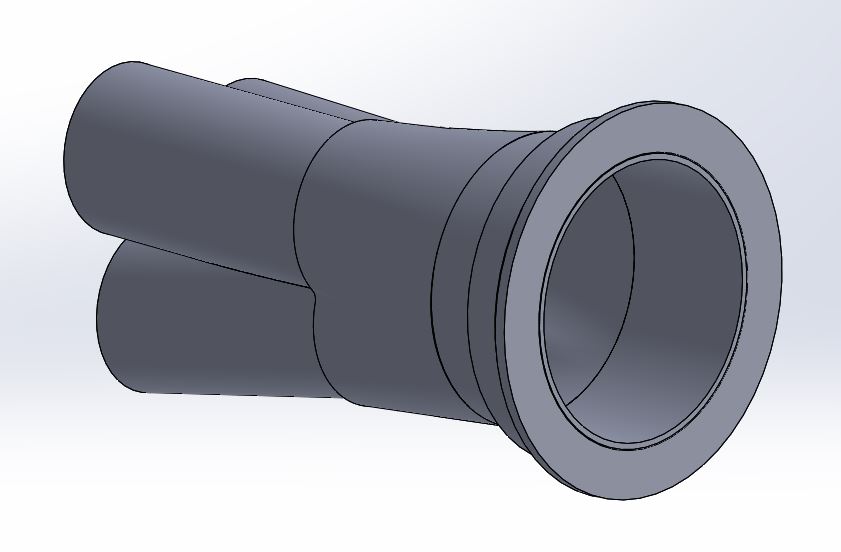
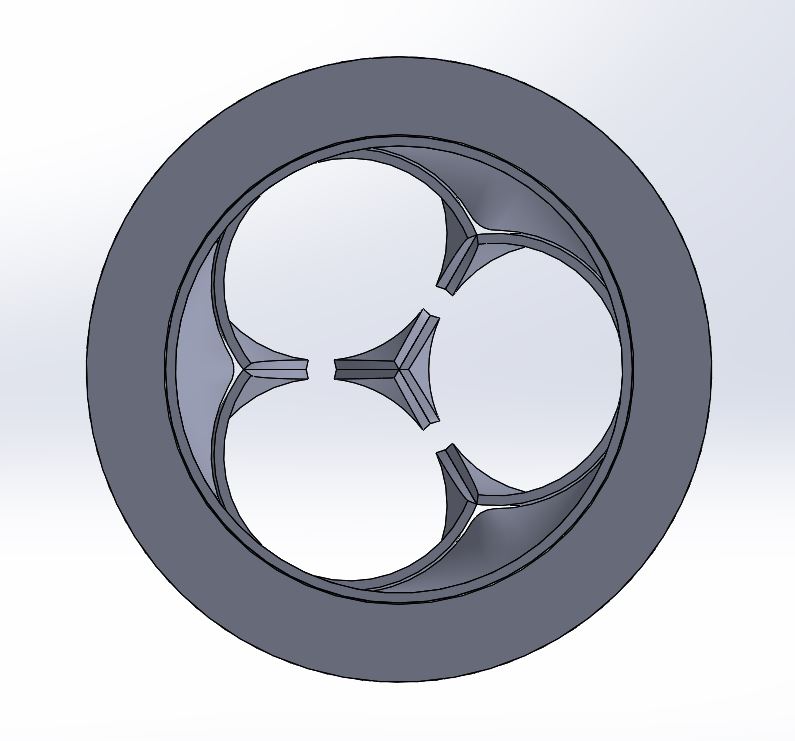
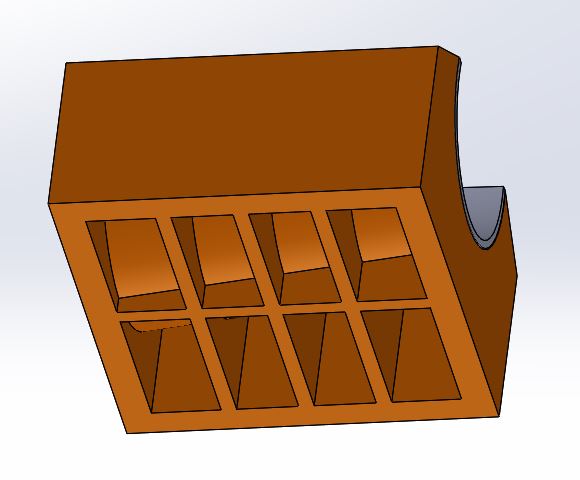
the flanges are drawn so that each "D" port has the same perimeter as a 1.75" tube, so fitup should be fairly straightforward. I can draw up a set of dies to press the tube into shape if you want. ------------------
"I am not what you so glibly call to be a civilized man. I have broken with society for reasons which I alone am able to appreciate. I am therefore not subject to it's stupid laws, and I ask you to never allude to them in my presence again."
cognita semper
|
|
|
|
zkhennings
|
APR 27, 03:04 PM
|
|
Thanks Eric but with your DXF I will be able to get that made if I need it, I did see that the perimeter of the D shape was the same as the perimeter of the 1.75" tubing when I checked in SolidWorks.
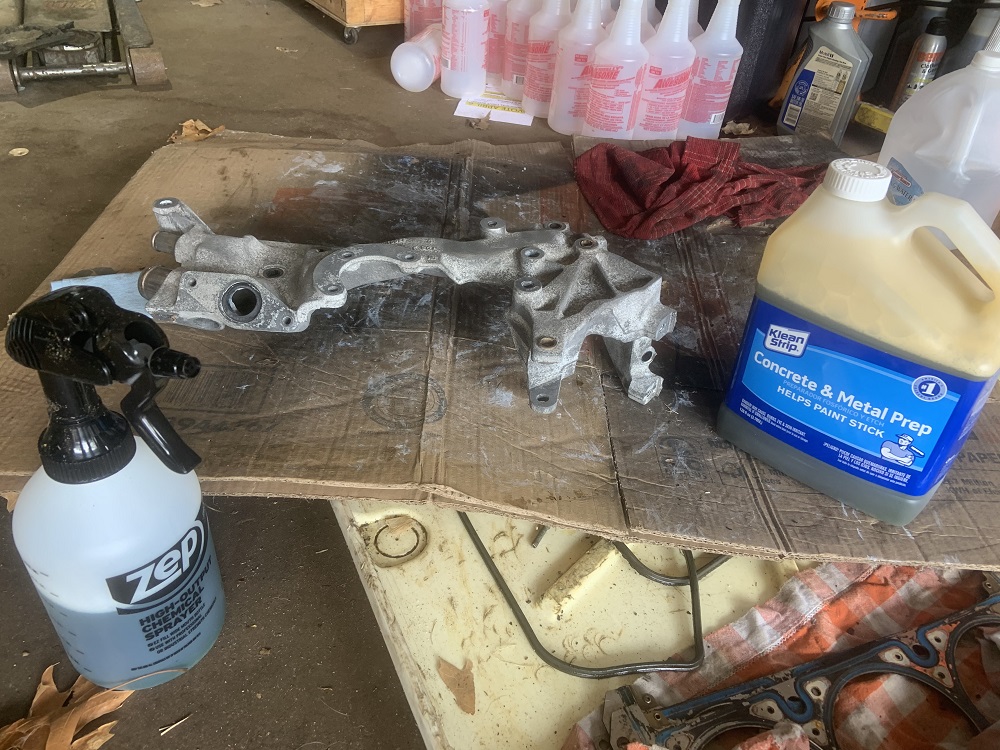
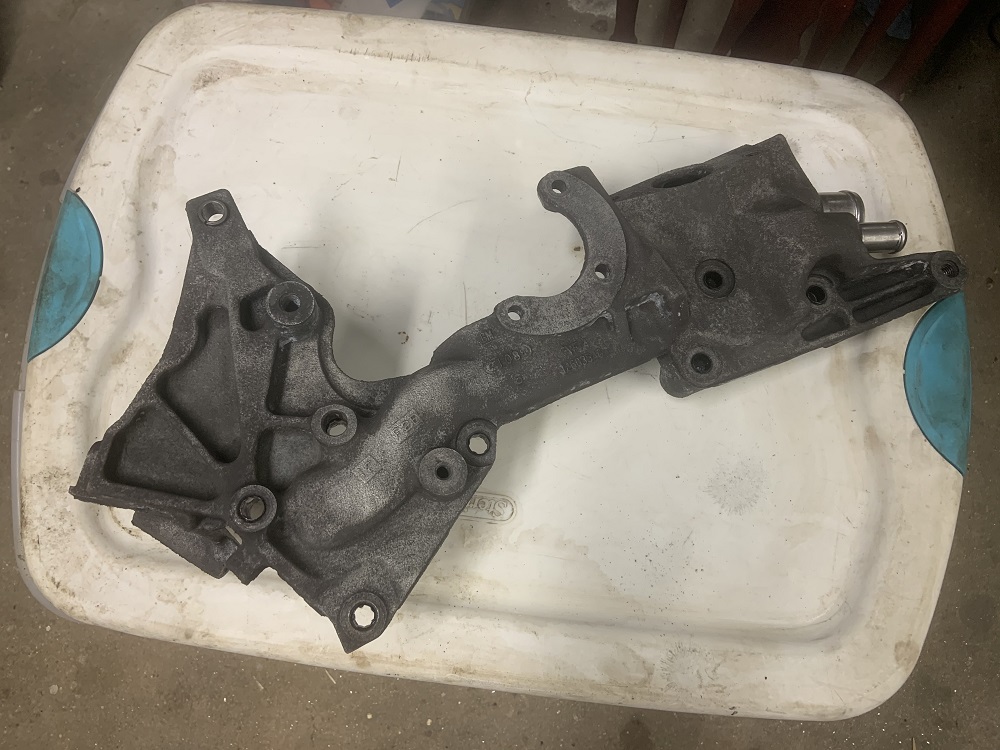
I have been picking away at the various items needed to be done, I have had a vat of degreaser that I have been cleaning all the parts in and now they just need a hand clean up to get rid of oxidation.
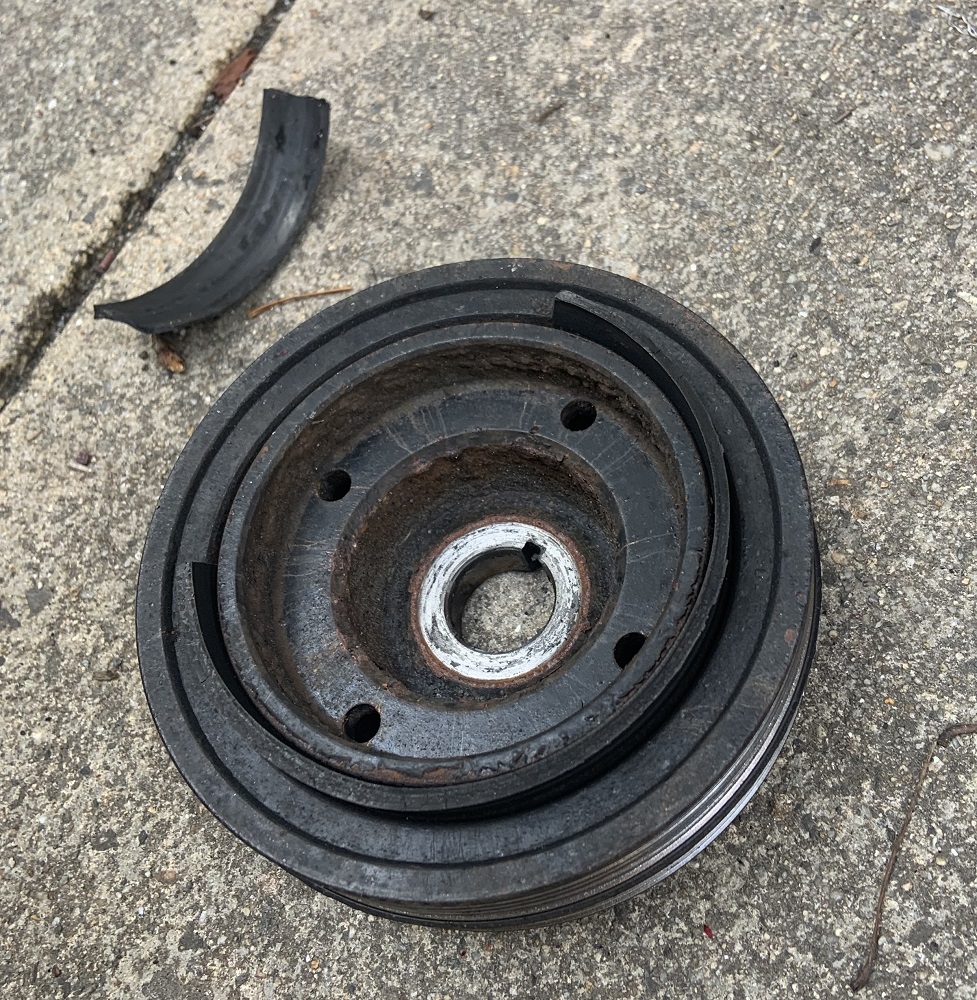
My WRX's harmonic balancer came apart and came close to messing things up under the hood, I caught it before it destroyed the timing cover.
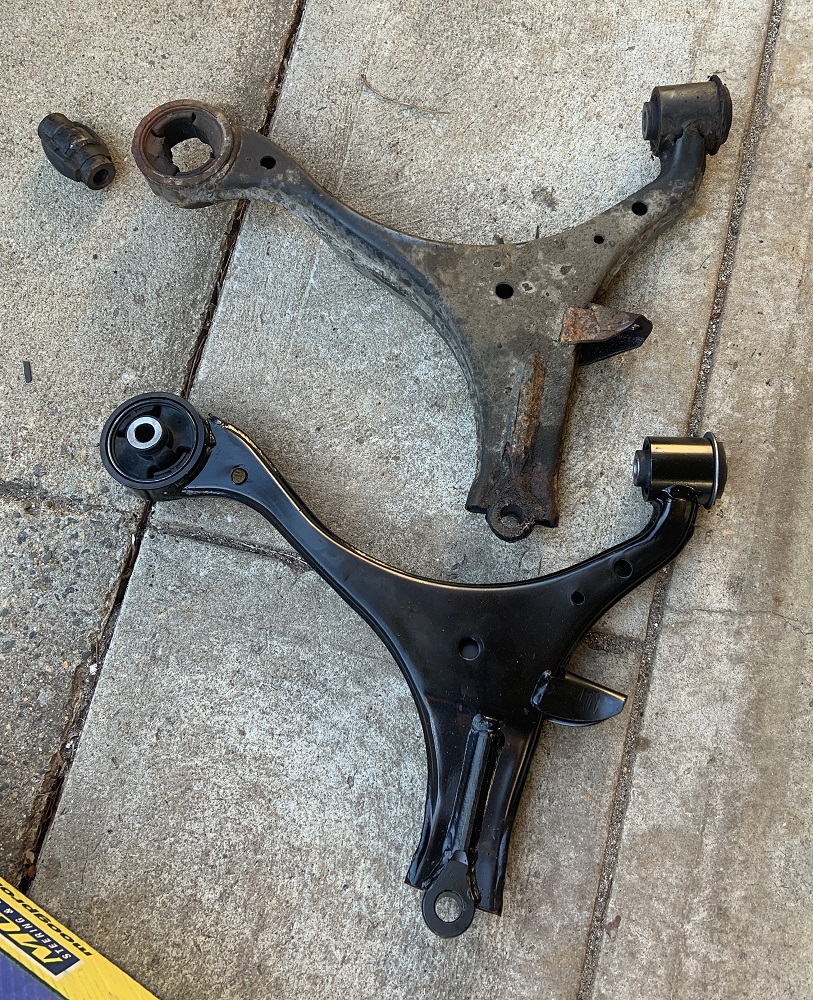
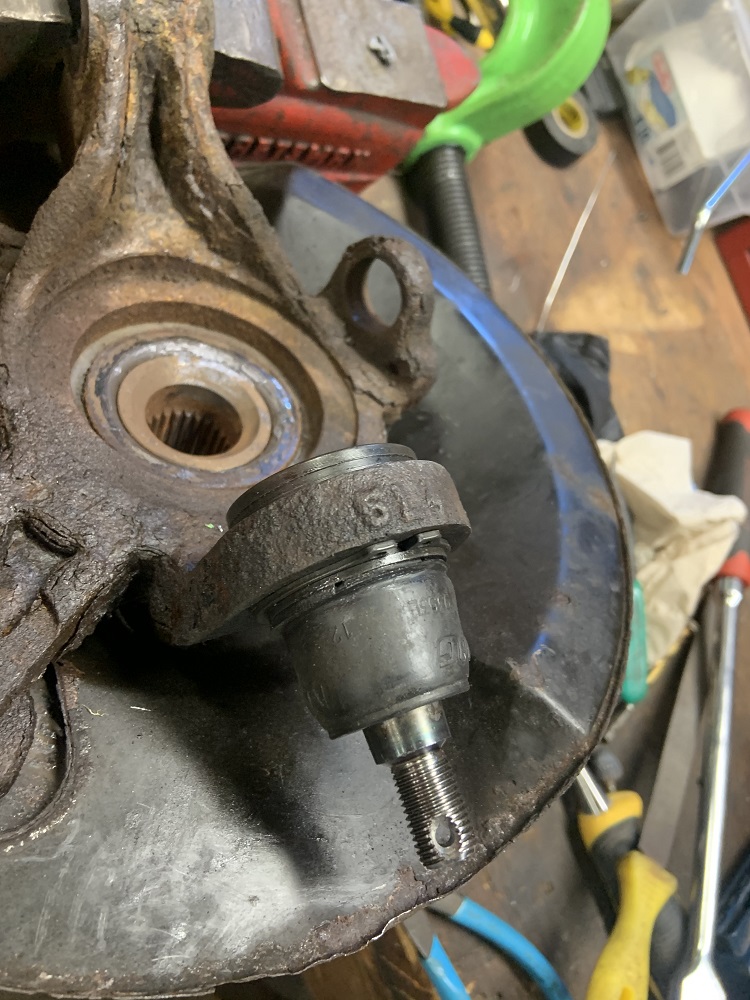
I helped my brother rebuild our other brother's 02 Civic, it came out good, in addition to new brake lines that he made, we installed new control arms and bushings, ball joints, tie rod ends, and endlinks. The car drives awesome now. As you can see from the pic, the front bushings on both sides had completely separated and it was driving like garbage.
And the result of all this Honda work was that I could move the Fiero into the driveway in front of the garage where it sits ready to be worked on. It had not been moved in 6 years so it was pretty nostalgic to see it in the driveway again.
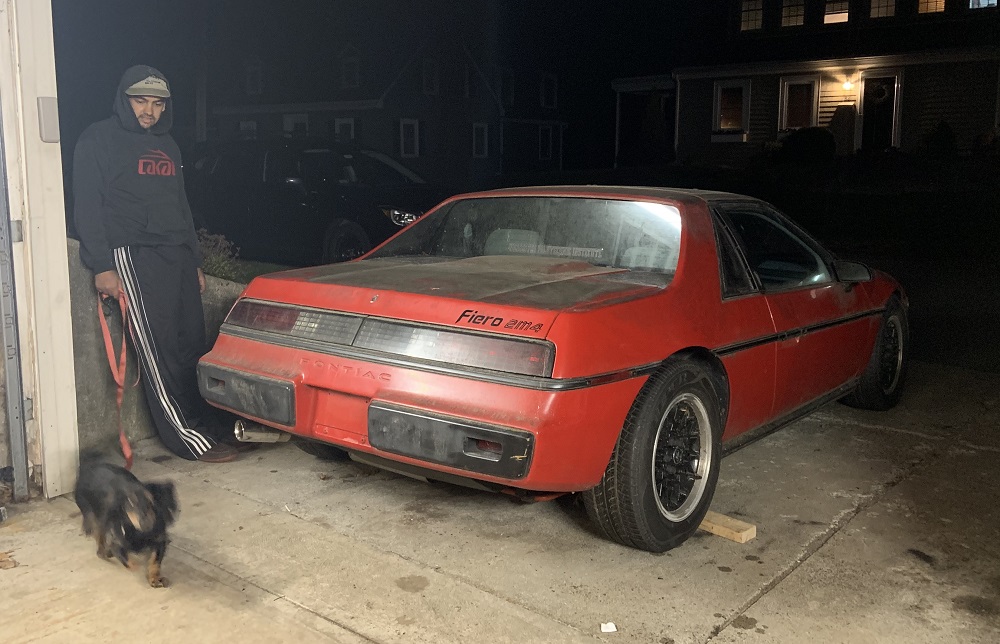
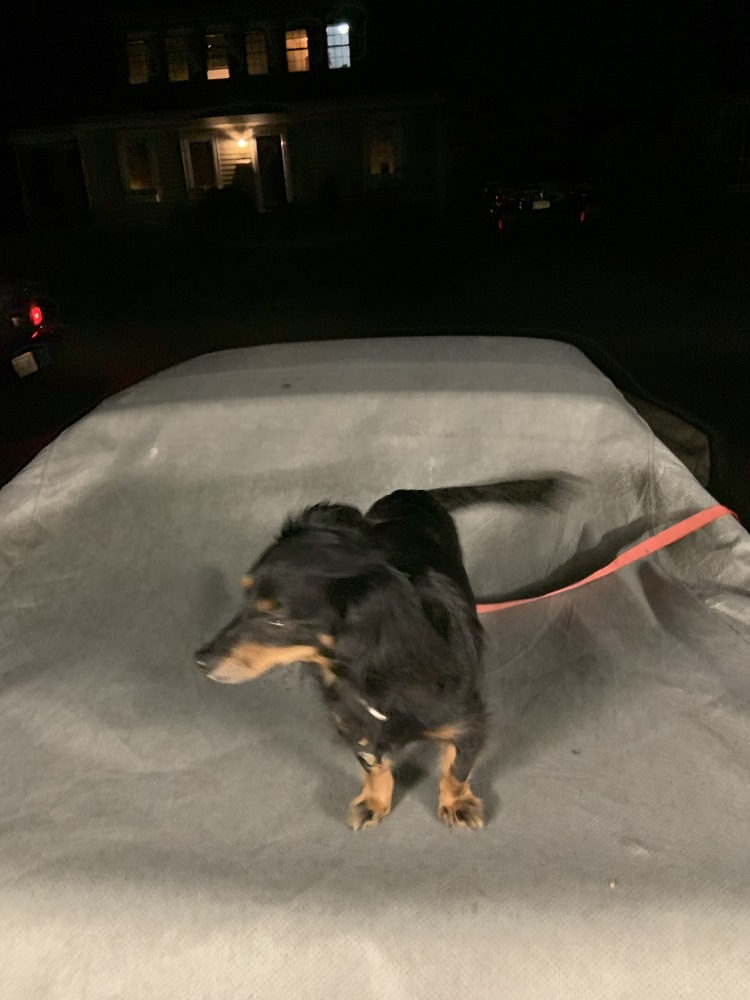
My girlfriend's dog Limo loves cars and bikes and motors, he loves leaning into the turns in the car, and he goes in a backpack when my girlfriend rides her GSXR 600 and he loves it. He comes to the motocross track too and watches all the riders go by. I introduced him to the Fiero and he explored inside and then I put him on top of it to chill.
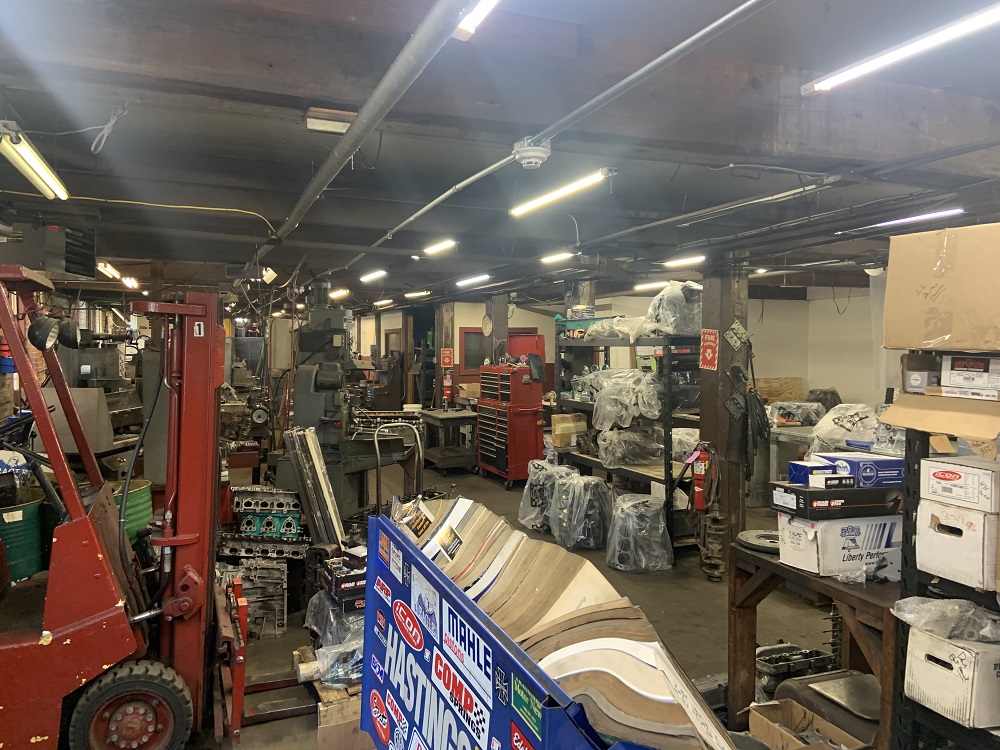
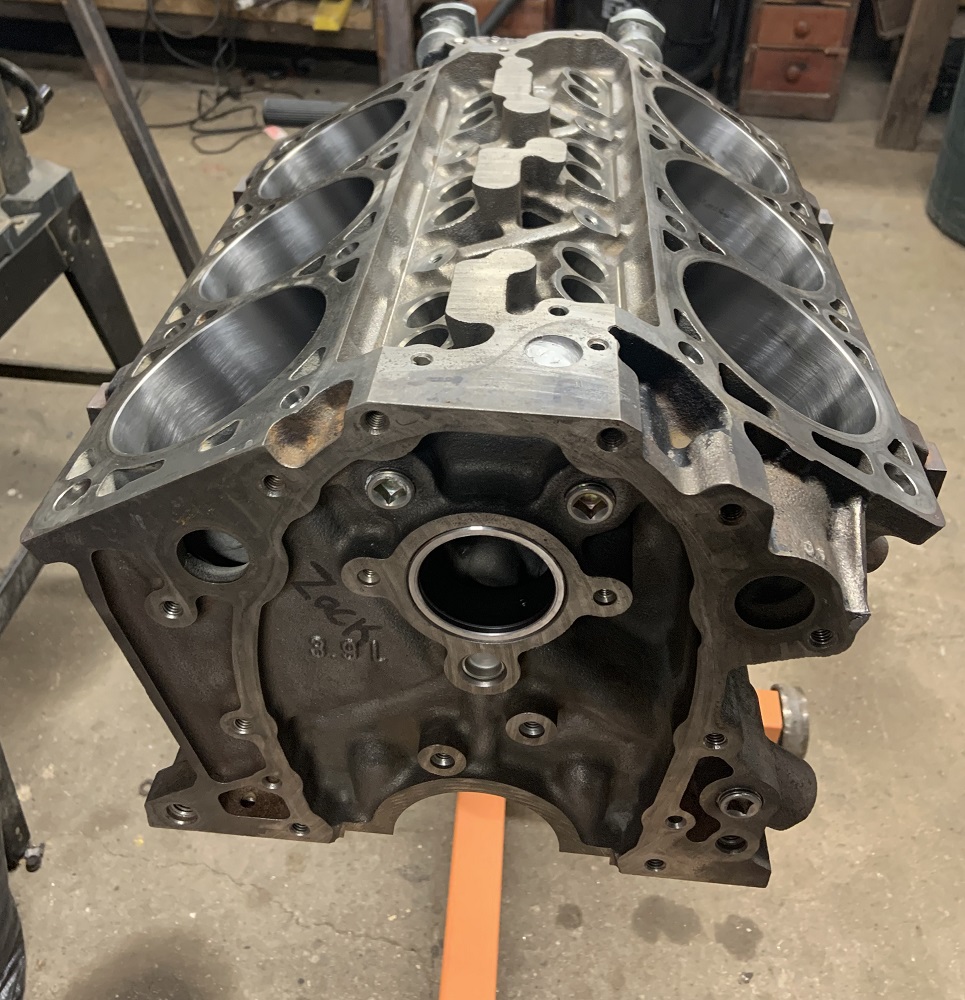
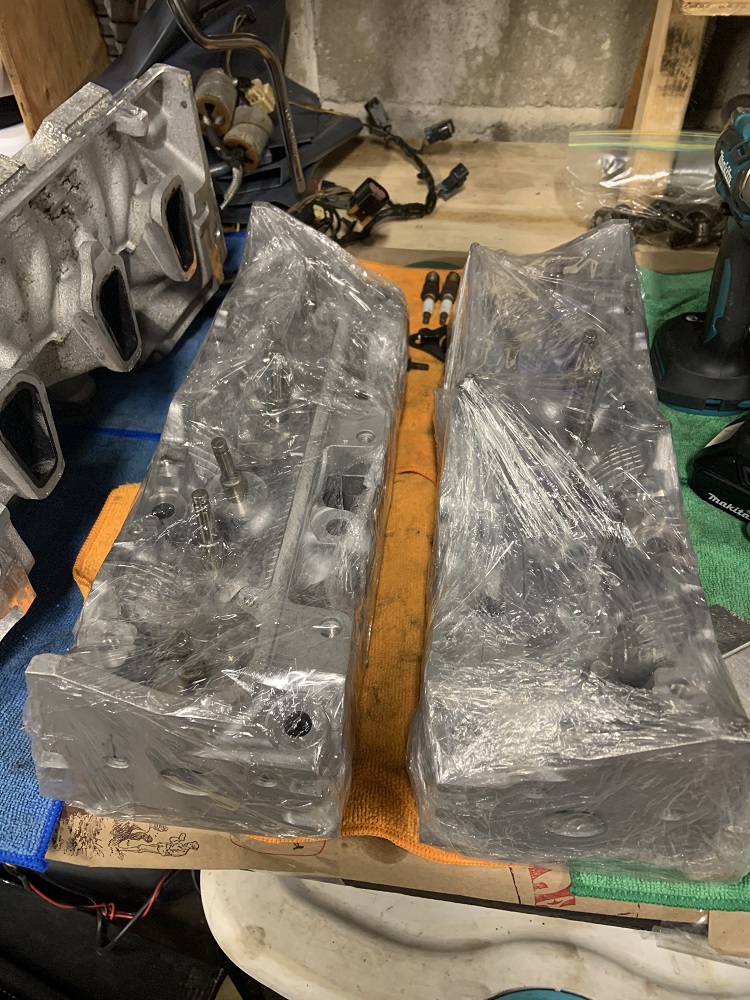
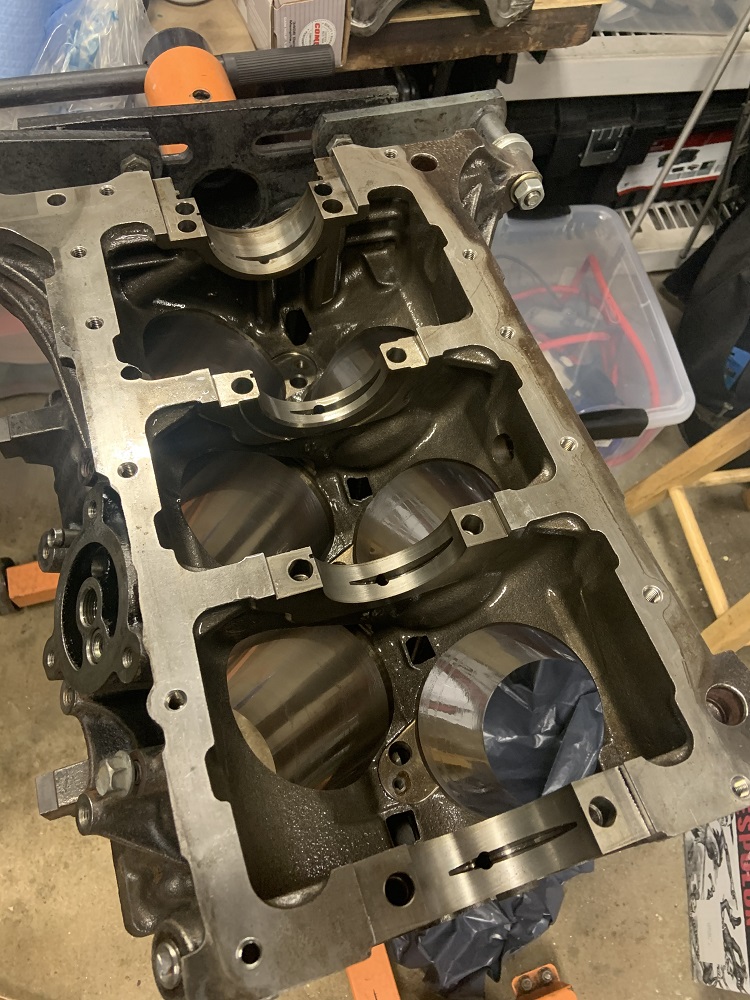
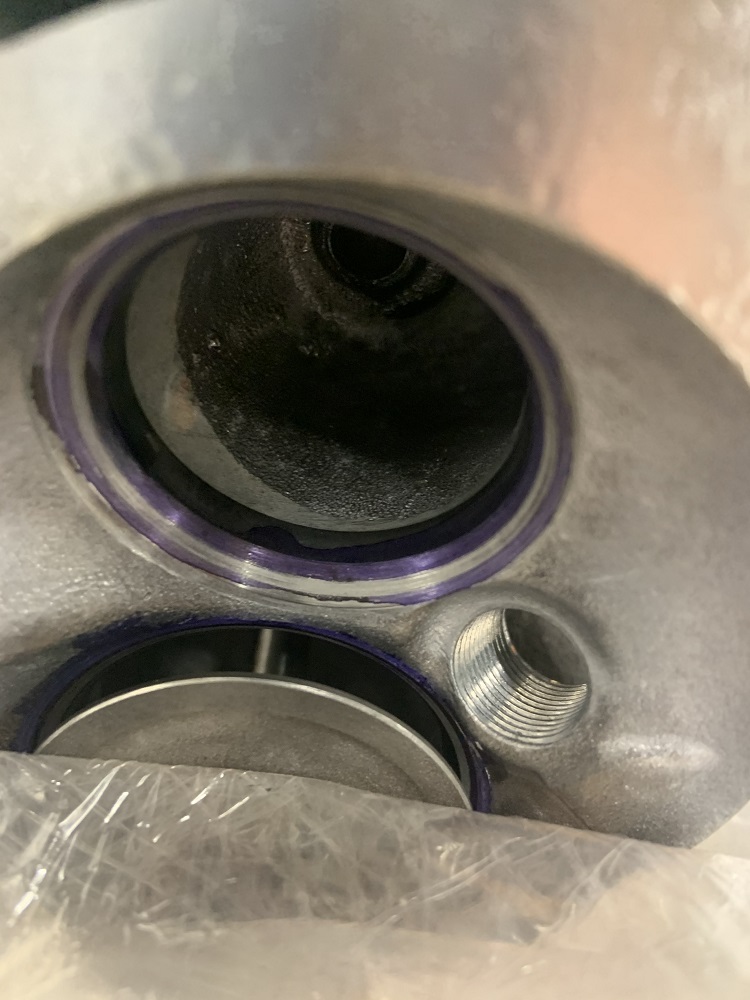
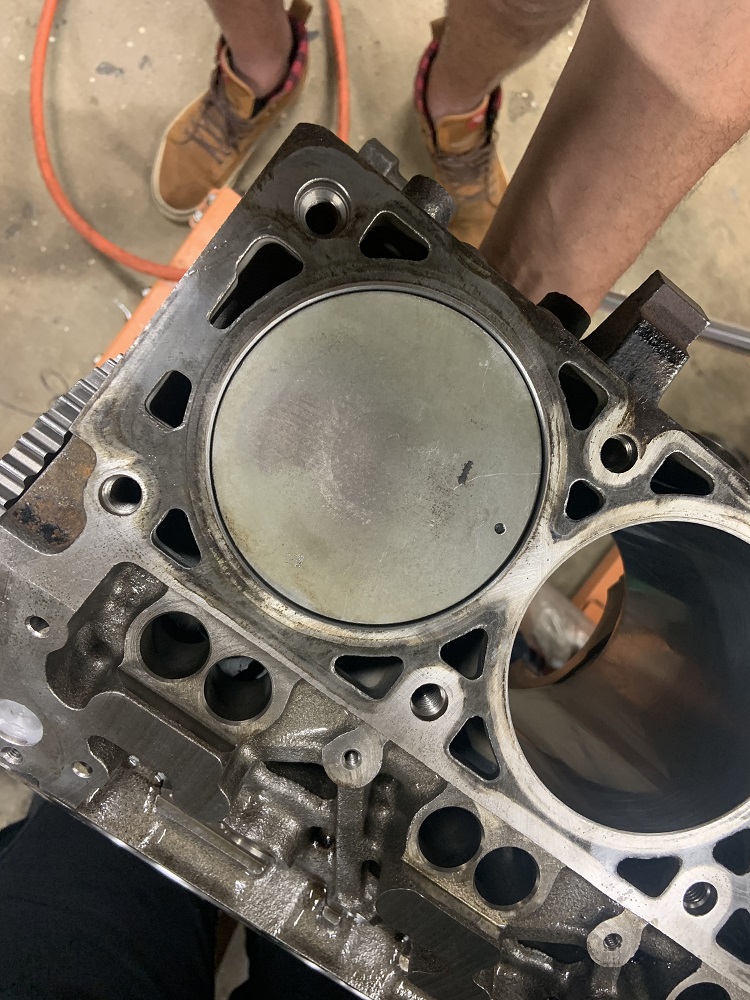
I also managed to pick up the engine block and heads from the machine shop a day before my surgery. I got the block back on the stand and ready to go. They cut the valves, the valve seats, skimmed the heads, honed the cylinders, put in the cam bearings, and I brought the cam with me and we checked the fit and it is perfect. They said the bores were very round and straight and only needed a light honing. They still have my rotating assembly for balancing but I am not worried about picking that stuff up, and it is not affecting me measuring my pushrod lengths to get those on order.
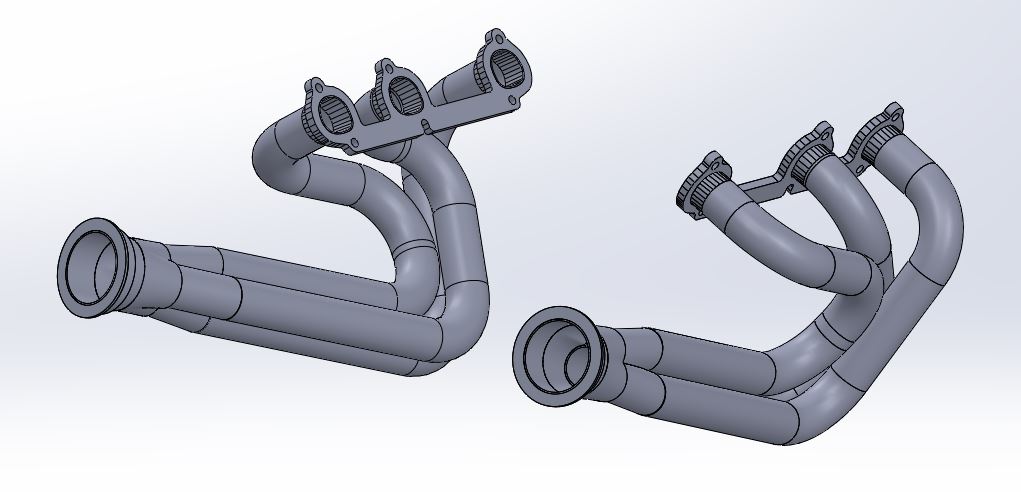
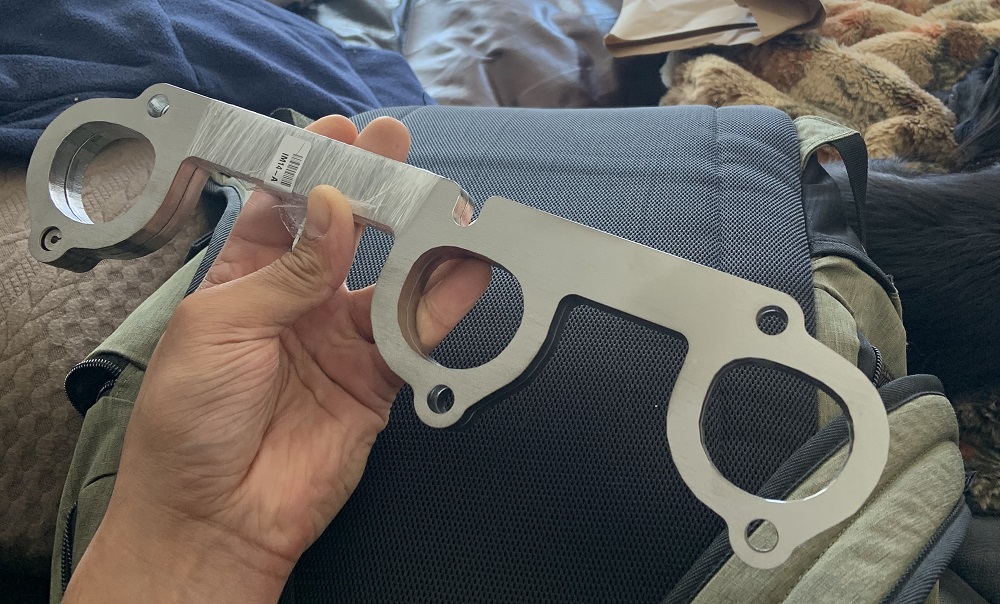
I had my surgery the next day on April 22, and the following day my header flanges came in from OSHcut, 3/8" thick 304 SS. They came out great and need minimal clean up. They are slightly bent but the welding will make them warp anyways.
Hopefully I will be off crutches soon and able to continue my progress, there are plenty of little tasks on the car to do.
|
|
|
|
ericjon262
|
APR 27, 03:18 PM
|
|
|
oooh shiny! let me know how they fit up, and if I need to make any adjustments to the design! ------------------
"I am not what you so glibly call to be a civilized man. I have broken with society for reasons which I alone am able to appreciate. I am therefore not subject to it's stupid laws, and I ask you to never allude to them in my presence again."
cognita semper
|
|
|
|
zkhennings
|
MAY 06, 11:44 AM
|
|
I picked up the remaining parts from the machine shop last weekend, the crank has been balanced and polished, and it turns out the rods when torqued to 40ftlbs with the ARP rod bolts were still within factory clearances, so I did not need the .002" over OD rod bearings.
I got sick of waiting to not be on crutches anymore to do more work, so I got ahead of some longer lead items.
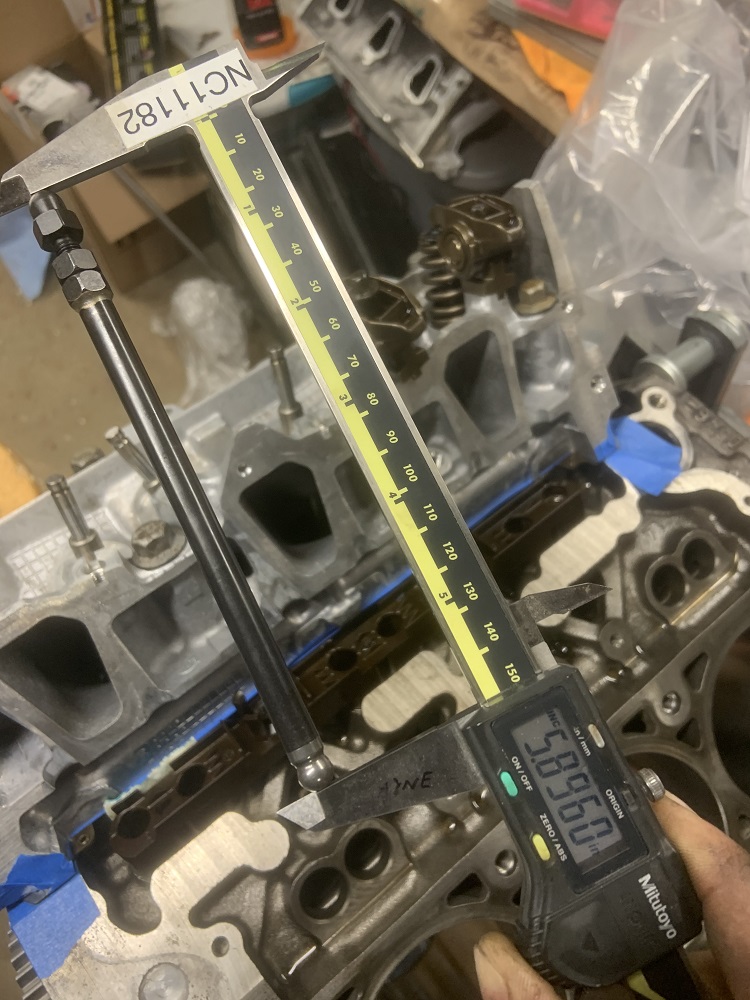
I needed to confirm that the PAC -0.050" valve locks were going to give me an install height that was 1.800" or a little less, and I need to still measure my pushrods so I can order a custom set along with new lifters.
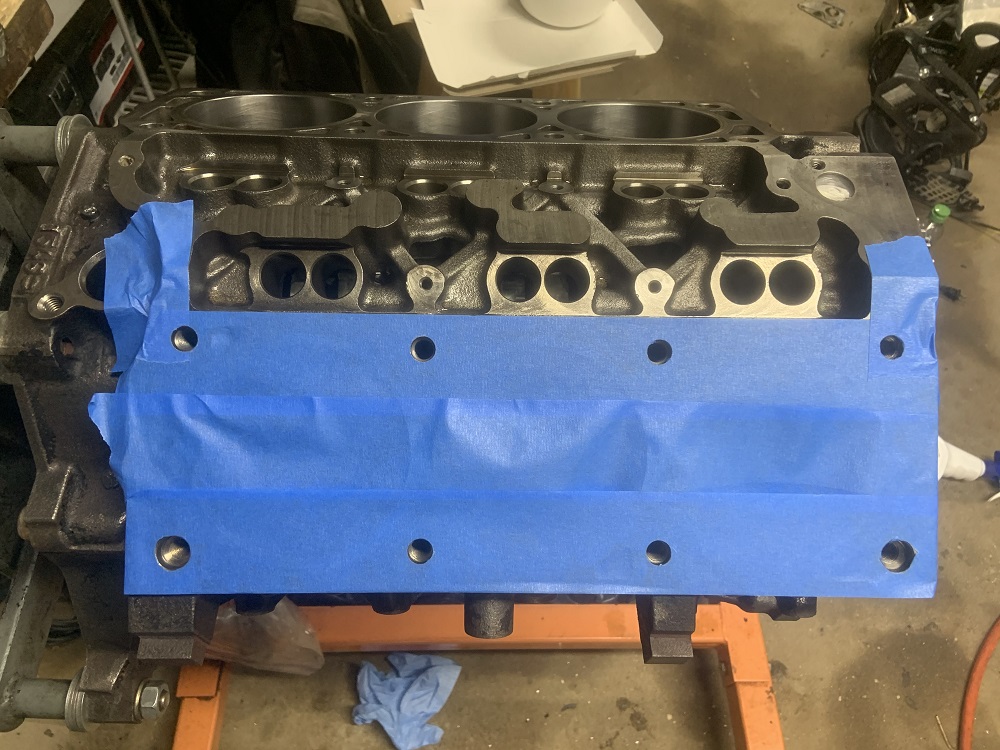
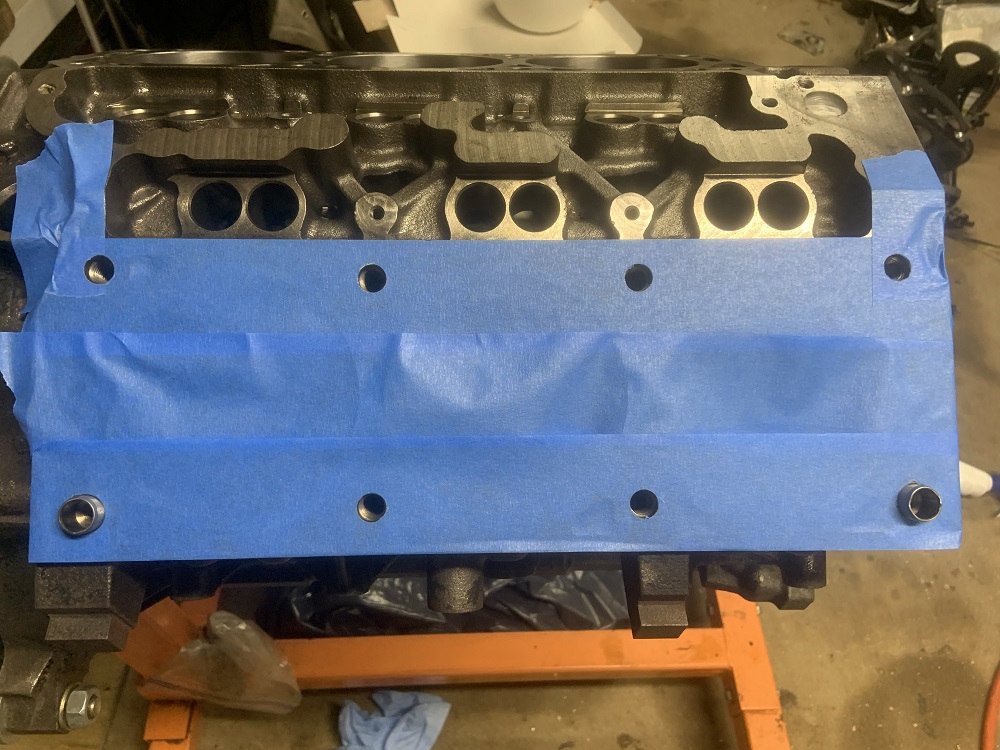
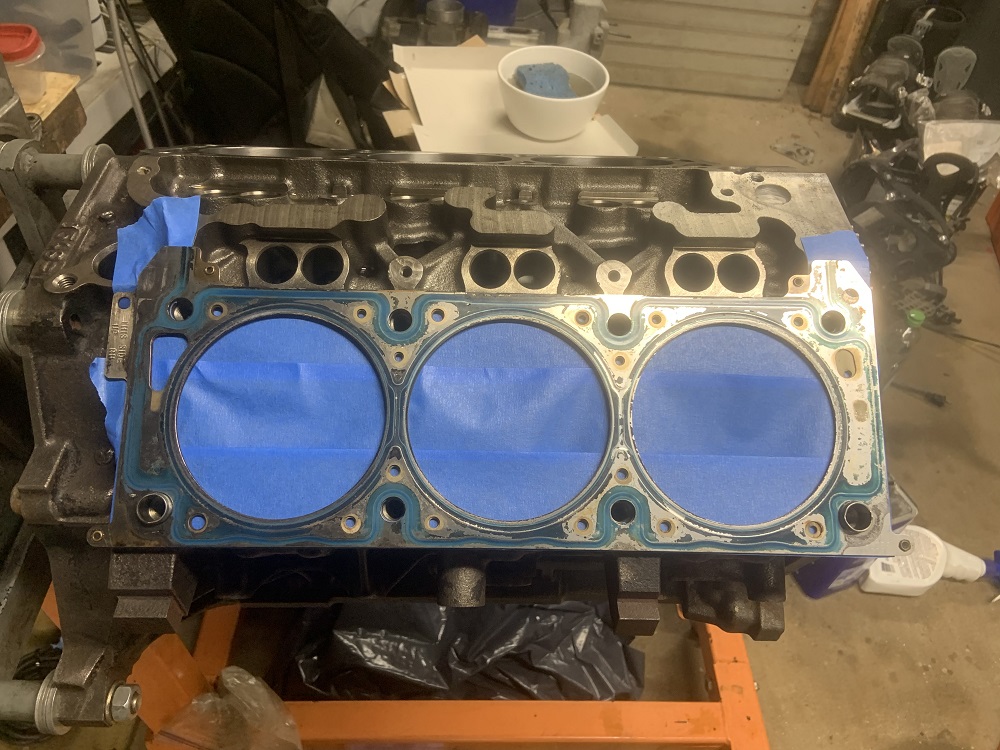
First I cleaned the block with some unscented dish soap and water and blew it free of any minor debris from the hot tanking process. I then coated the motor internal surfaces in WD40.
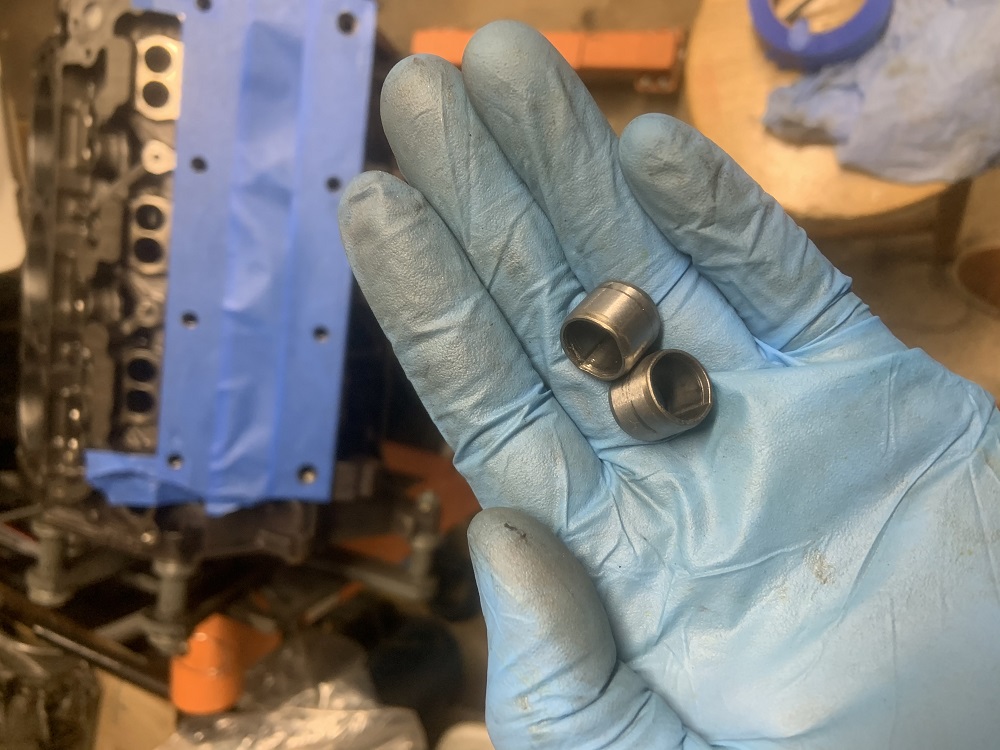
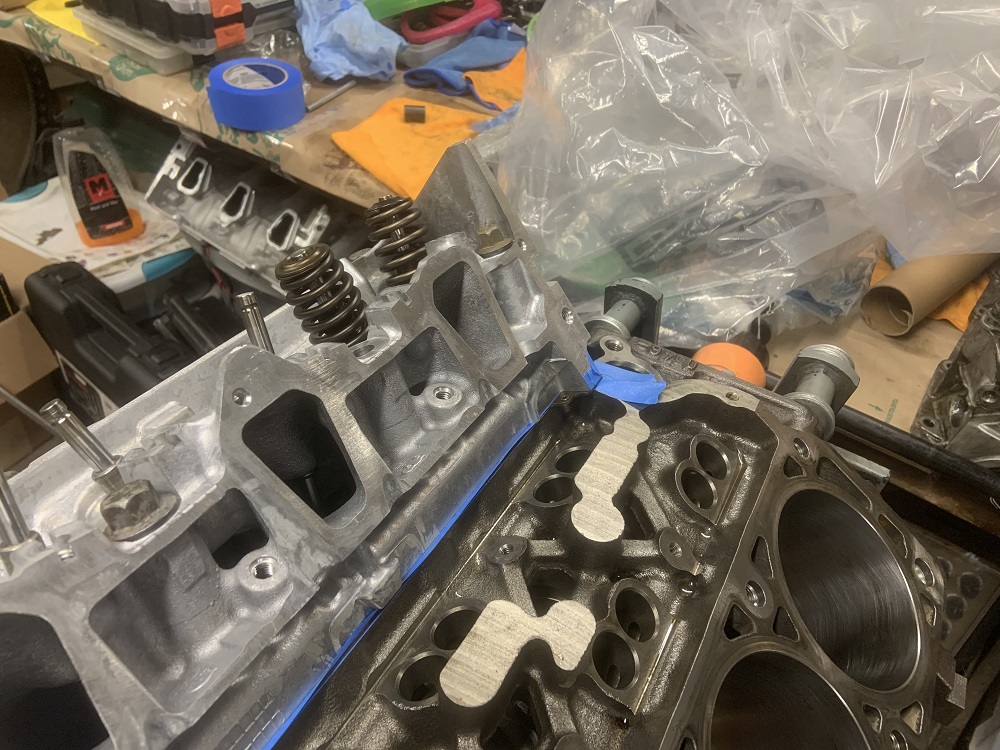
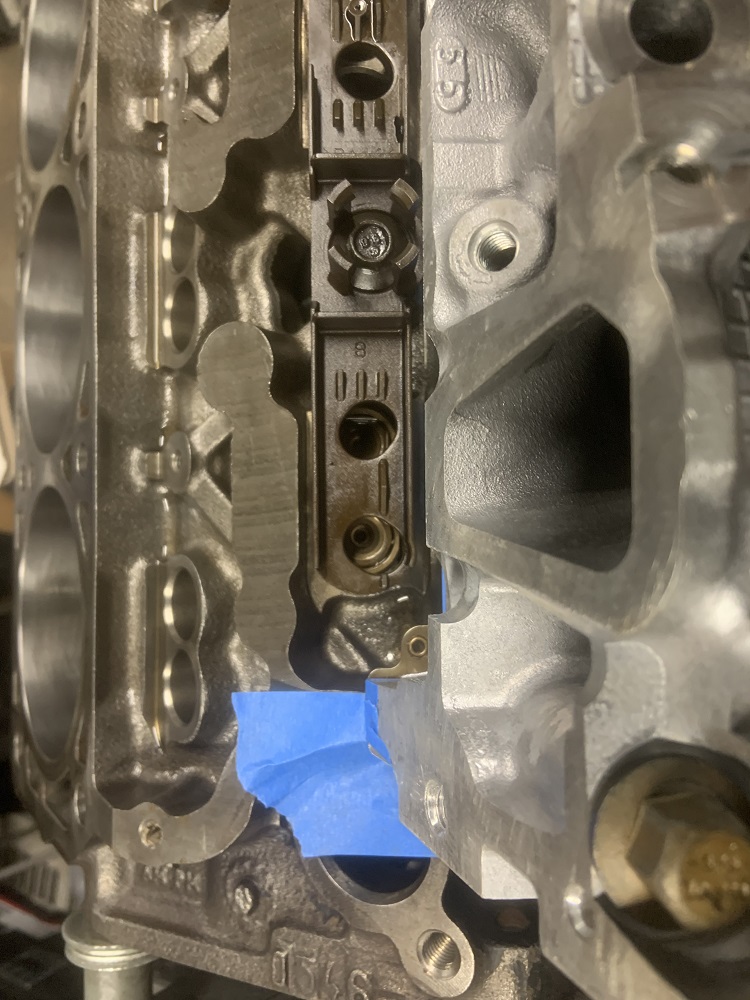
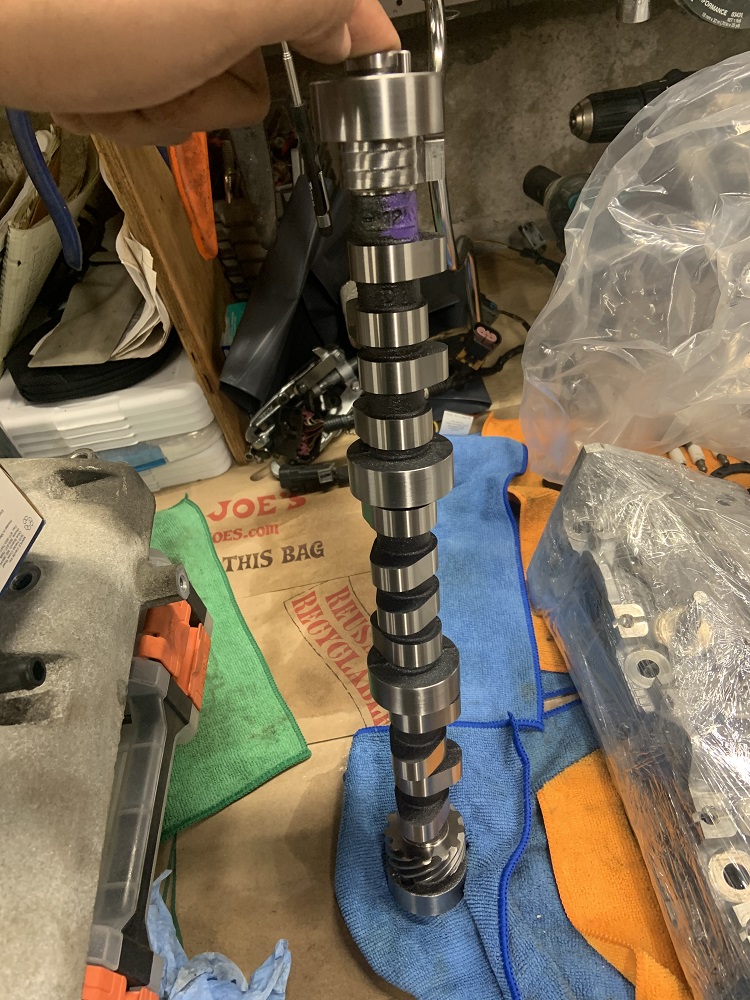
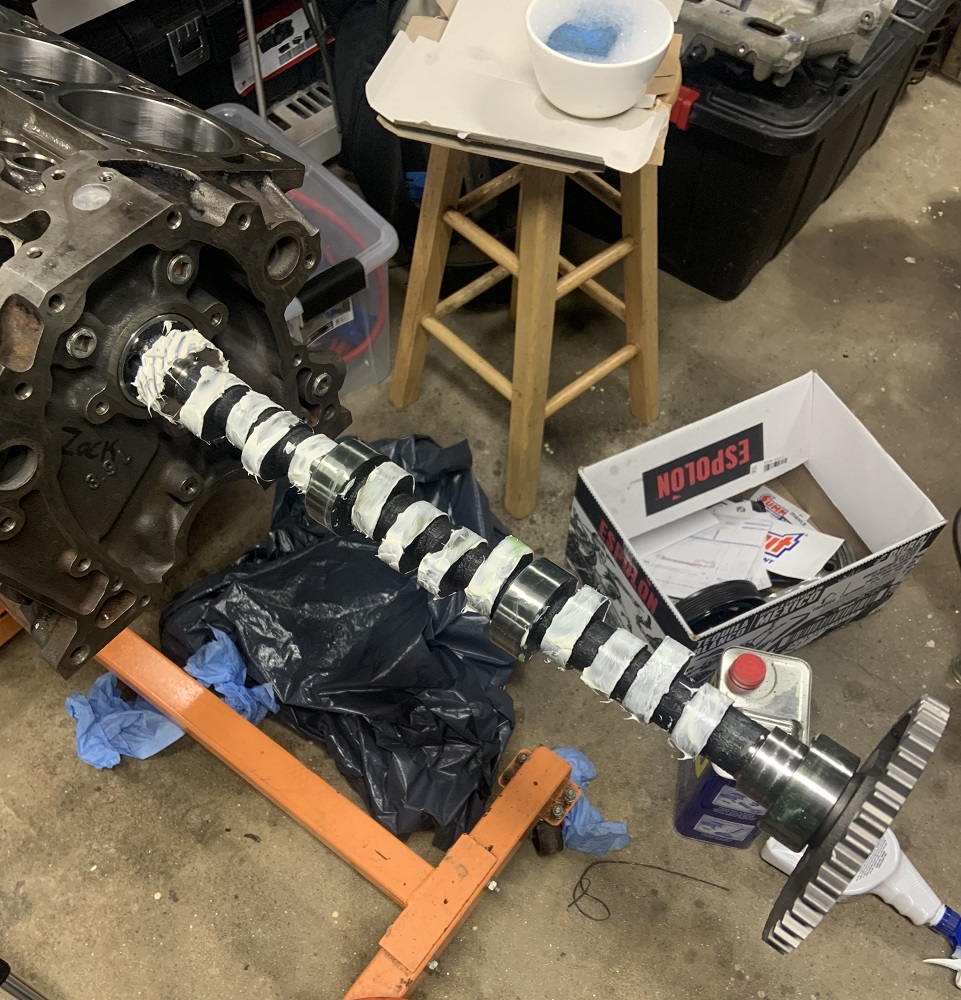
Time to install the cam. I wiped it clean and then coated the journals in assembly lube, and the lobes with a Comp Cams valvetrain assembly paste. I thought I would be able to use the paste on the whole motor, but doing a little research it seems it is just for valvetrain. I installed the thrust plate as well.

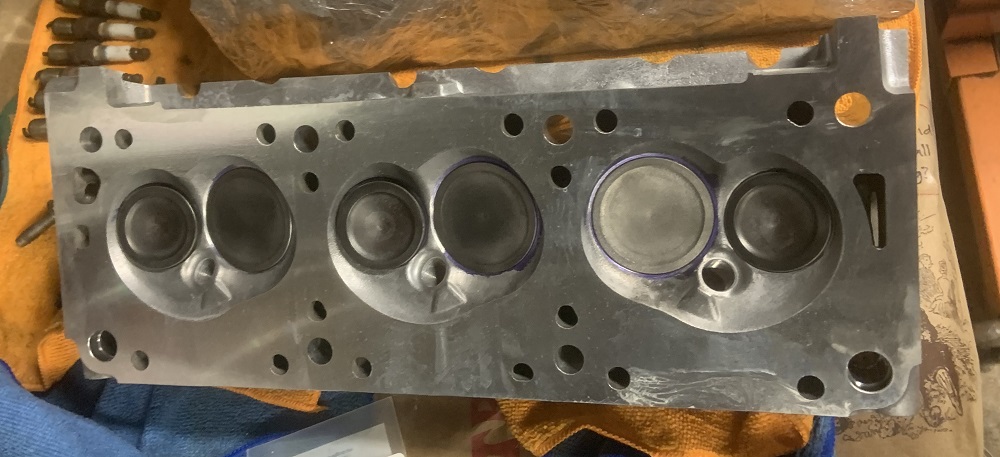
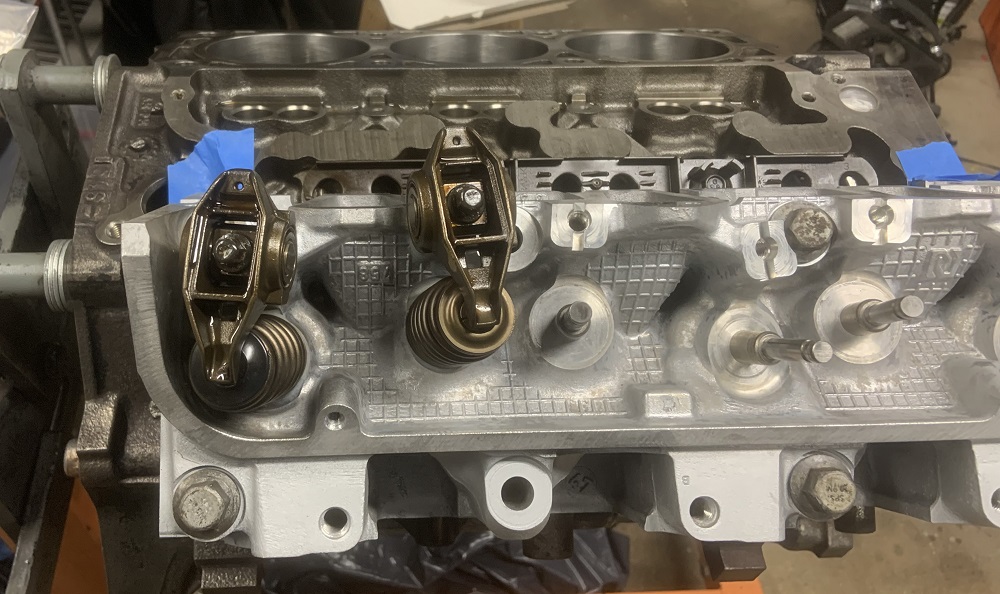
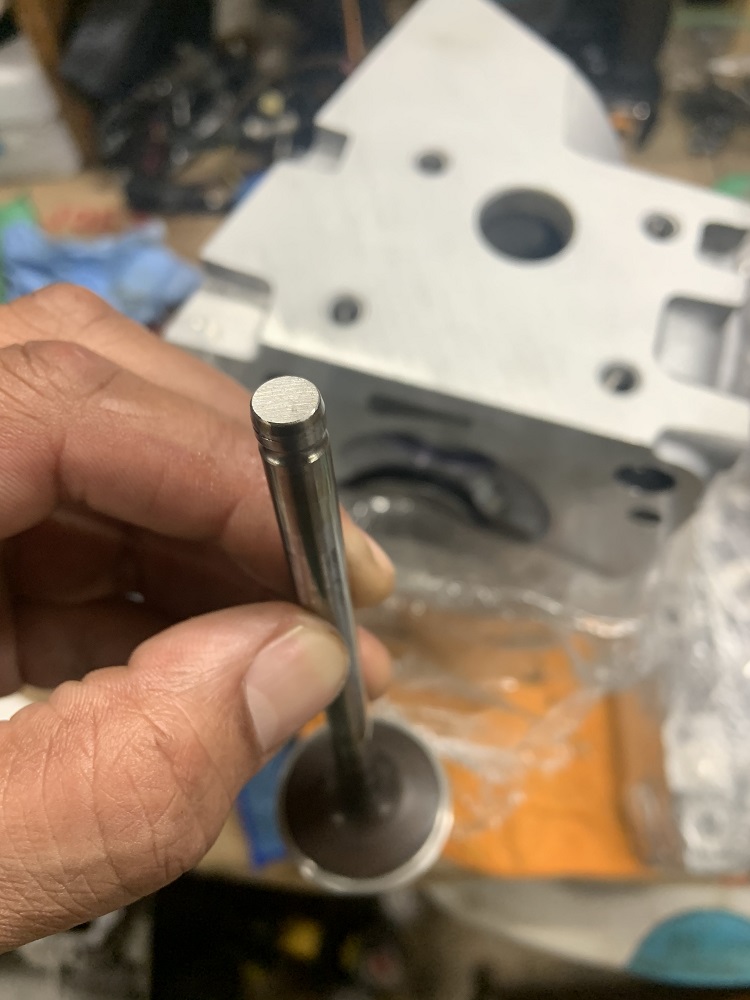
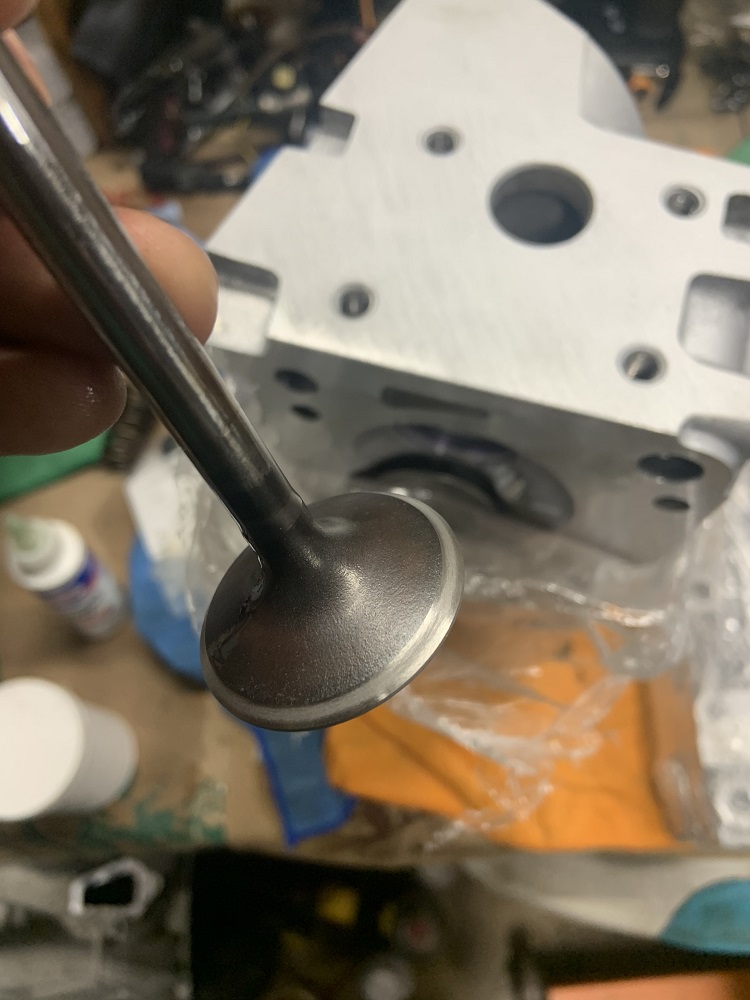
My old lifters were at my apartment so I was unable to go further with measuring the pushrod lengths, so I assembled one of the valves with the PAC springs, locks, and retainers. The valve tips and face have been ground, the valve seats were given a valve job, and the valves were lapped to their seats.
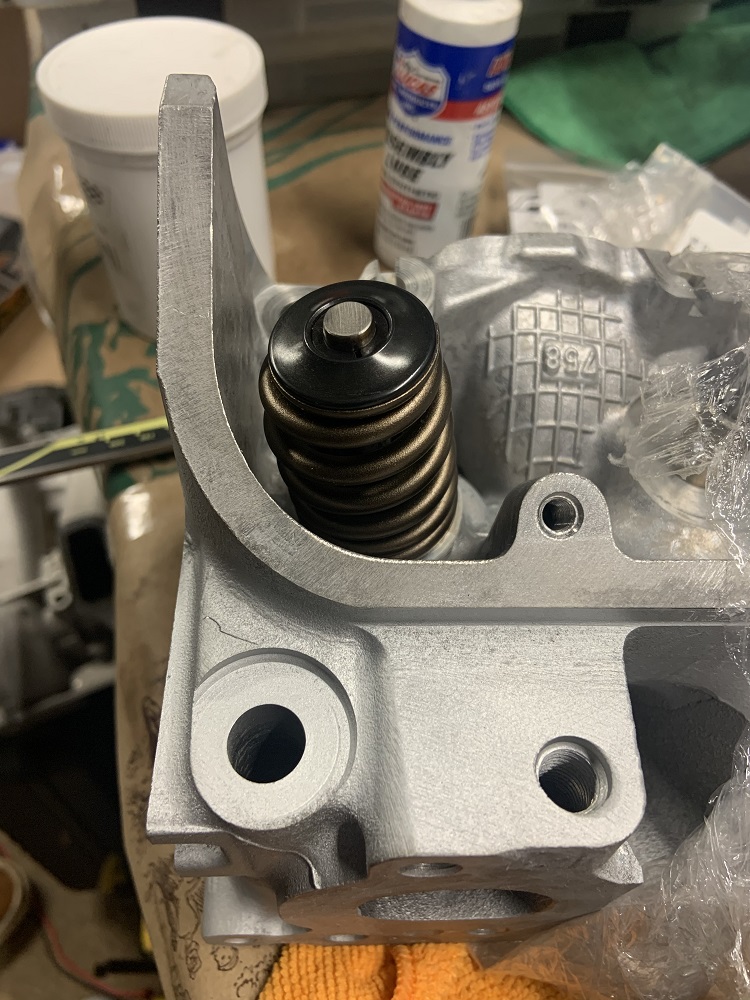
The install height came out perfect, when measuring from the top of the seat to the underside of the retainer it came out to 1.800" exactly. Therefore it is a little less than 1.800" as the calipers have to be slightly angled to make the measurement since it is a beehive spring. If I retained the stock spring seat retainer thing (which did fit, but were unnecessary with these stronger stiffer springs) then the install height would have been closer to 1.750" which is what the locks advertise. But I will be fine without the additional seat and open pressure as the valvetrain on the 3900 is lighter than on the LS that these springs are intended for. I went ahead and ordered the remaining locks and retainers from Summit along with an Optima Red Top battery. The retainers are in stock but the locks have some lead time so I wanted them ordered ASAP.
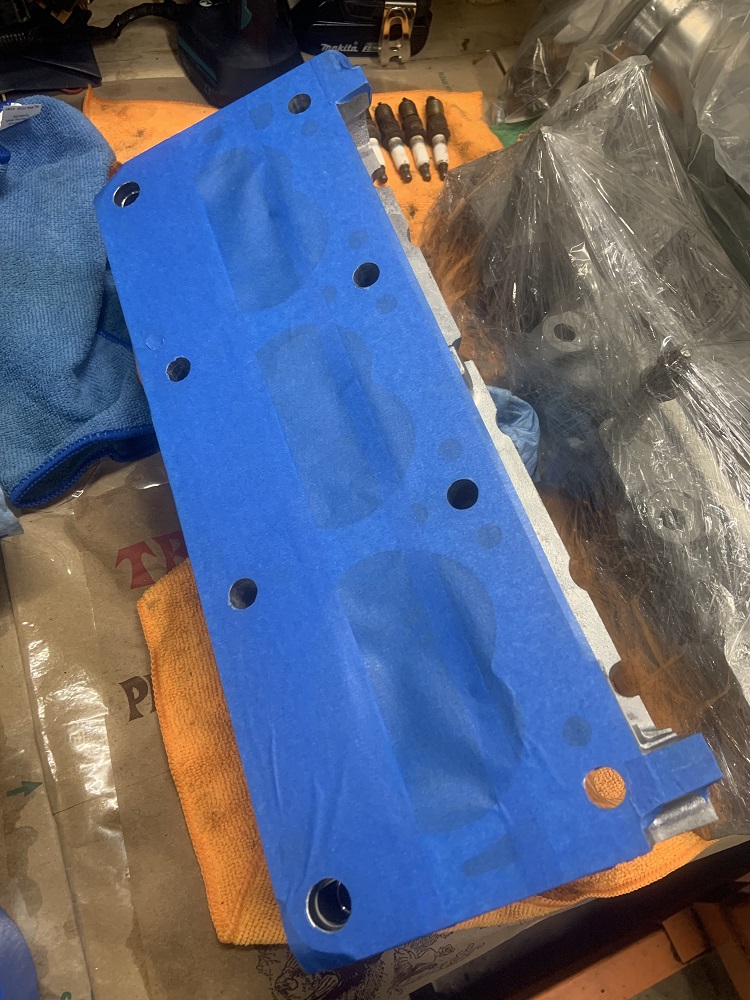
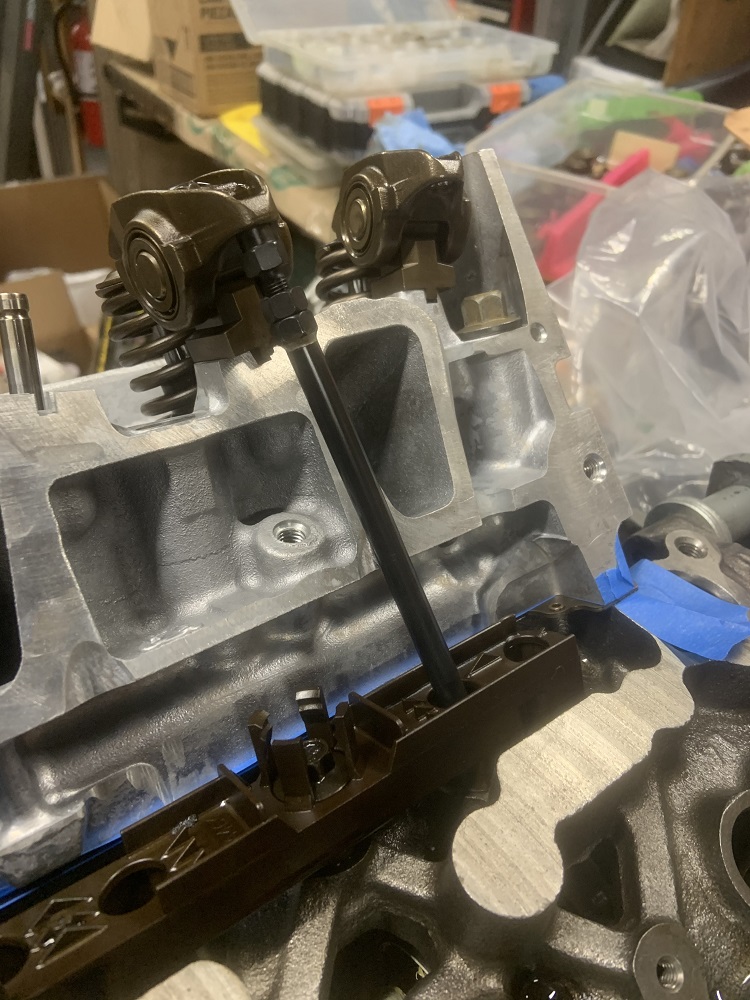
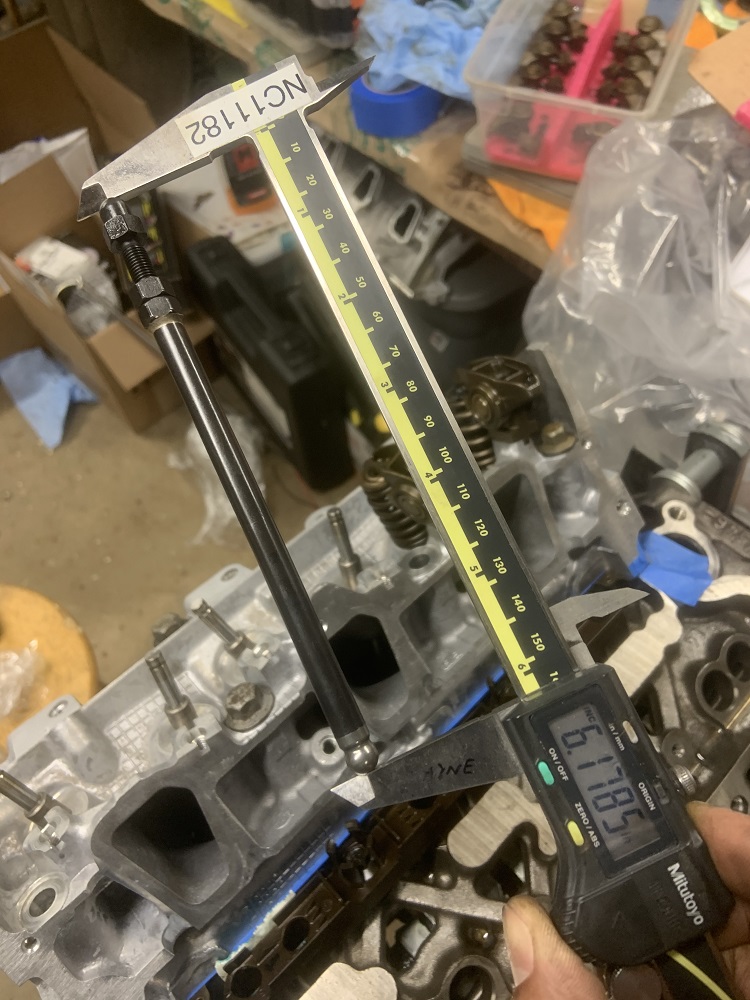
Next steps include installing a stock valve spring, retainer, and lock on the second valve for the cylinder, installing two of my old lifters, installing an old head gasket with some painters tape on the head and block surfaces, and measuring the pushrod lengths. I will also install the crank and Plastigauge it to confirm that none of the clearances are too tight or loose, and I will probably Plastigauge the rod ends too just to verify the machine shop's readings.
I need to send out my torque wrenches for calibration as well and get a degree wheel (bought). I may only need to send out my 0-75ftlbs torque wrench as the highest torques are in the 50ftlbs range. They are all finished with an angular displacement. The 3400 camshaft sprocket bolt needs 103ftlbs of torque, but I am not too worried about my larger torque wrench being far enough off to cause any issues.
And here is a pic of the LS piston in the 3900, once the crank is installed I can 3D print a thin bearing to make it bolt up and I can measure where everything ends up with a stock LS1 rod. There is confusion as to the lengths of the 3900 rods, the manual says 5.9", but others have measured otherwise. This will give me an additional data point.
I ordered a tapered 99mm ring compressor as well as I realized while writing this post that I had not procured one yet. It is unfortunate because my brother has the same one in 99.5mm size, and we tried it and it was, well, half a millimeter too big.[This message has been edited by zkhennings (edited 05-06-2021).]
|
|
|
|
zkhennings
|
MAY 08, 06:38 PM
|
|
|
|
|
zkhennings
|
MAY 10, 11:26 AM
|
|
My friend had a pretty sweet 944, it was all rebuilt, long tube headers, rolling on Toyo Proxes. He smelled gas the other day and pulled over.
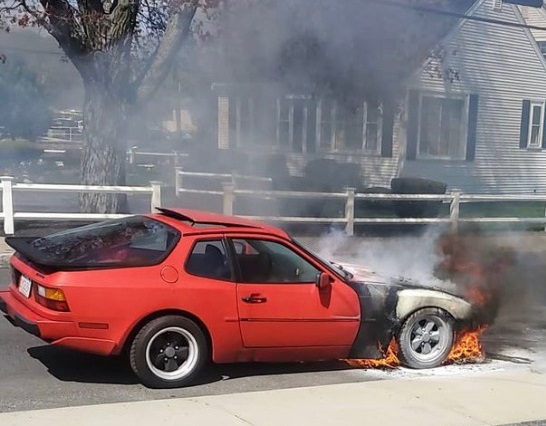
And suddenly I decided I was no longer going to keep my rubber fuel lines. No one needs to hear about more Fieros catching on fire.
I needed a fuel pressure regulator as the stock fuel rail only has a single line in and I needed to route a return. I bought this Aeromotive unit, it is adjustable 30-70 PSI, 1:1 rising rate if I ever want boost, comes with a liquid filled pressure gauge, and three -6an fittings. It is a very reliable and stable unit, and I do not want to take chances with the fuel system.
I bought this 3/8" aluminum fuel line that will run from the tank to the regulator, since the Aeromotive unit has the same size inlet, outlet and return lines, I figured it would be fine to run 3/8 line for the feed and the return line. I can always add in a restrictor to the feed line if the fuel pressure creeps.
I bought some nylon braided fuel hose as well as some right angle fittings to go from the regulator outlet to the fuel rail. The fuel rail will get a -6an male compression fitting. I want to flip the fuel rail so the inlet is on the front of the motor, that will keep the fuel system short and compact and away from the exhaust, but whether I do or not will depend on difficulties with securing the rail to the LIM.
I will put a bead into the aluminum line where it will be coupled with short rubber hose sections and hose clamps to the fuel sender outlets on the tank, and then the fuel feed line will have this compression fitting to mate it to this K&N fuel filter, the fuel filter can flow up to 18gpm so it should have no problem dealing with any possible future mods that require more fuel, it also has a SS mesh screen filter element so it can be pulled out and cleaned with nothing to replace. I know it is pricey for a fuel filter but it will never need to be replaced and is made in the U S of A. There is another compression fitting to aluminum line on the other end of the filter, and then a compression fitting to the regulator inlet.
On the return side of things I will have the same female compression fitting above or below the fuel filter, and then this male compression fitting to aluminum line to another female compression fitting to the regulator return outlet. This way if I need to drop the tank I can undo the aluminum lines at the fuel filter and drop the tank without long cumbersome lines attached.
Let me know what you think, in the past I have welded some AN fittings to stock stainless lines and run off the shelf built hoses, but this is my first time doing custom AN lines. Pretty positive my scheme will work well, but open to input.[This message has been edited by zkhennings (edited 05-10-2021).]
|
|
|
|
ignorant prodigy
|
MAY 11, 11:49 AM
|
|
|
|
|
zkhennings
|
MAY 15, 12:04 AM
|
|
|
I don’t think the nylon braided lines are nitrile, they seem like rubber line with an interal braid, and they have a nylon braid going on on the outside instead of stainless. I got them in today and checked them out.
|
|
|
|
La fiera
|
MAY 20, 08:16 PM
|
|
| quote | Originally posted by zkhennings:
My WRX's harmonic balancer came apart and came close to messing things up under the hood, I caught it before it destroyed the timing cover.
|
|
That happened to me at the track bach when I had the 2.8L V6. It was the second one I shreded, too much RPMs for the stock balancer.
Since you are putting all this time and effort on this engine invest in one of these!

The ones for the SBC has the same snout size as the stock and it fits perfectly. I had to grind the timing cover a bit to clear it but let me tell you; If you asked me that if there is ONE part that I can say made a night and day difference, this is it! Engine revved smoother and I was able to rev it higher, no vibrations, nothing.
Wish you the best mate!
|
|
|
|
ericjon262
|
MAY 20, 10:39 PM
|
|
| quote | Originally posted by La fiera:
That happened to me at the track bach when I had the 2.8L V6. It was the second one I shreded, too much RPMs for the stock balancer.
Since you are putting all this time and effort on this engine invest in one of these!
The ones for the SBC has the same snout size as the stock and it fits perfectly. I had to grind the timing cover a bit to clear it but let me tell you; If you asked me that if there is ONE part that I can say made a night and day difference, this is it! Engine revved smoother and I was able to rev it higher, no vibrations, nothing.
Wish you the best mate! |
|
on a 2.8, this is easy enough, on a later FWD engine, with the FWD timing cover, it gets a little harder, as the balancer is also the crank pulley. one for a gen II SBC may work, if they're even offered. measurements would need to be taken to make sure everything fits as required, and I would also contact someone at ATI prior to purchasing and asking about using it on a 60V6 prior to purchasing, as I'm sure there's a ton of engineering tied up in a balancer beyond basic fitment. ------------------
"I am not what you so glibly call to be a civilized man. I have broken with society for reasons which I alone am able to appreciate. I am therefore not subject to it's stupid laws, and I ask you to never allude to them in my presence again."
cognita semper
|
|
|
|