
 
     |
| 85 Notchie Build (Page 12/23) |

|
zkhennings
|
MAR 23, 04:20 PM
|
|
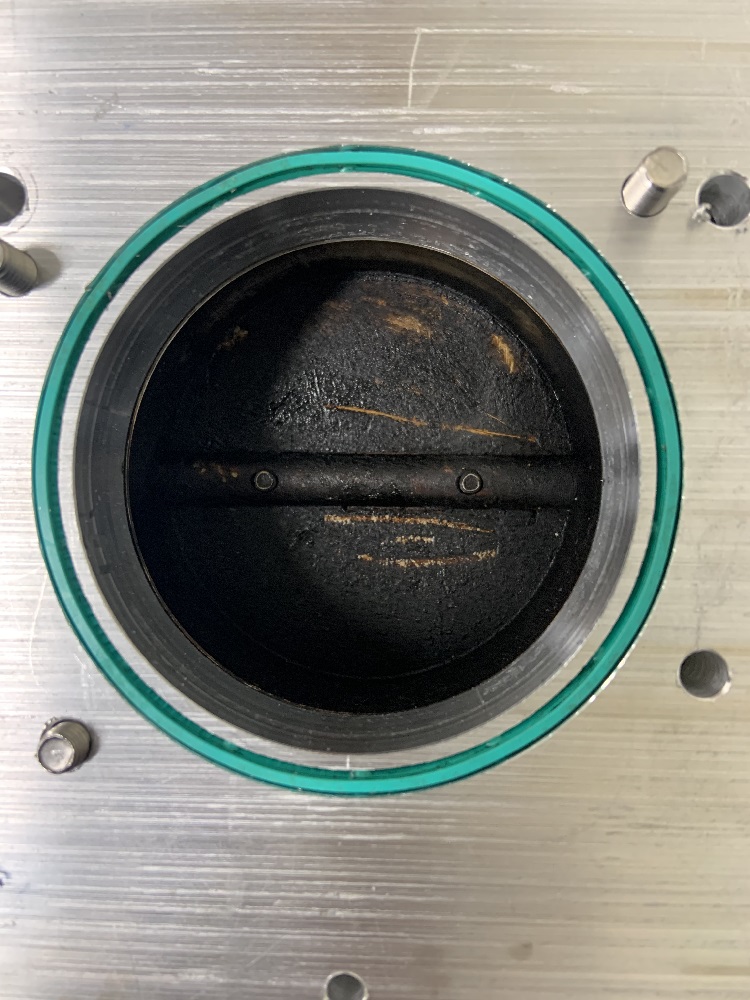
Finished up the throttle body adapter CAD after work, put together an assembly with hardware for kicks. The N* TB has two 10mm locating dowels that there are recesses for at the top two M8 studs, the TB is 15.5mm thick up top and 13.5mm thick where the bottom M6 bolt will secure it, the hardware is spaced accordingly in the CAD. The ring cut into the rear is to use the stock LZ9 TB gasket between the adapter and the intake.
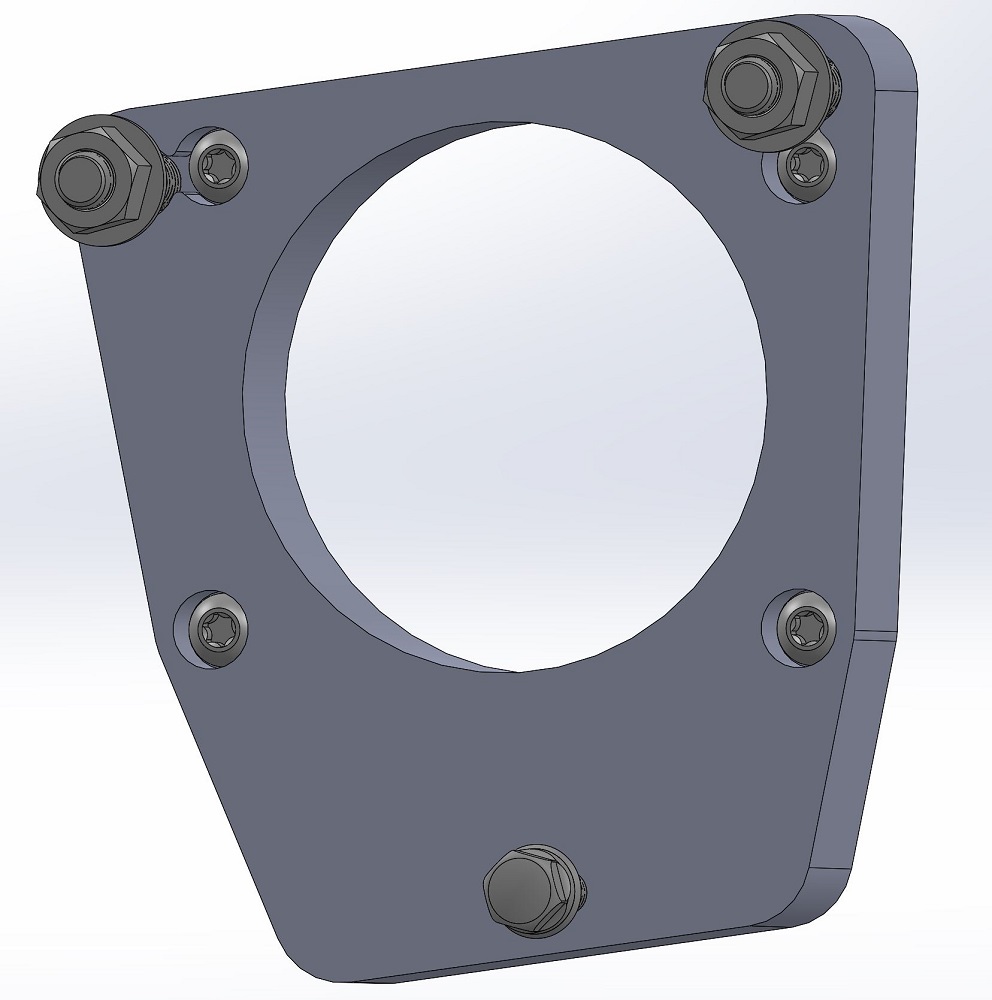
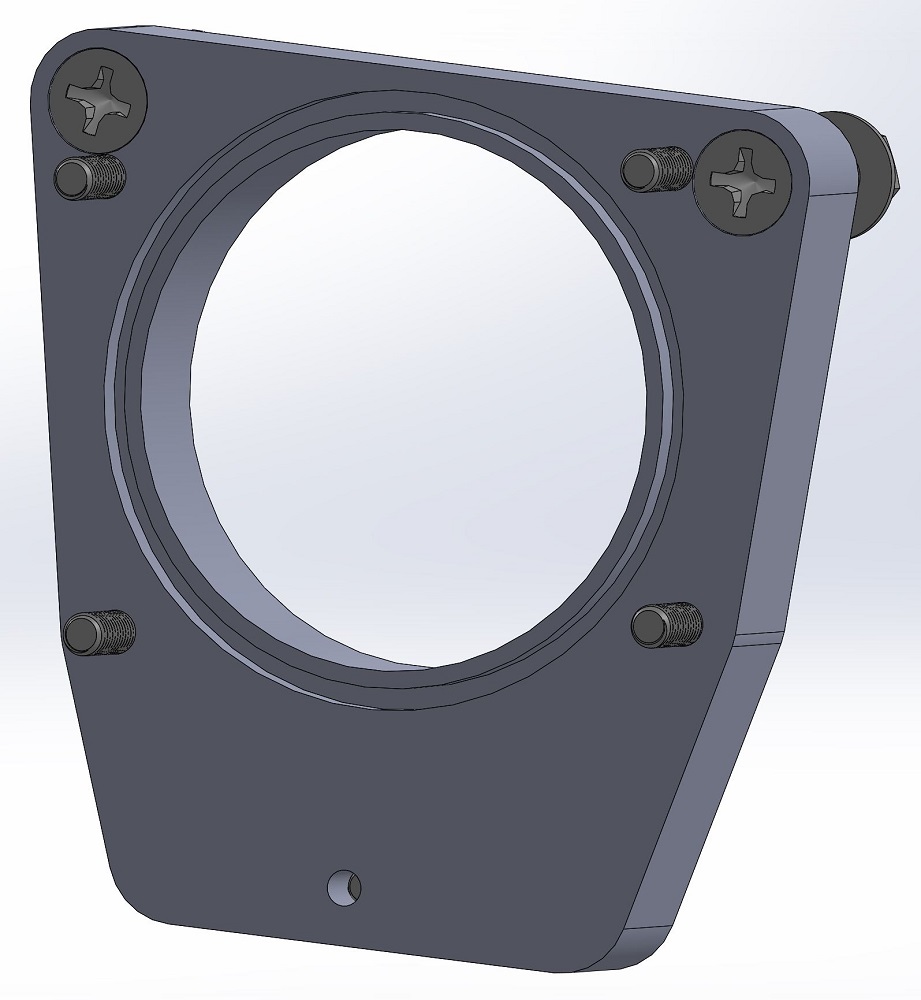
Once I make it and confirm that it works well, I can send the solid body file out if anyone wants to have one made. Just PM me.[This message has been edited by zkhennings (edited 03-23-2021).]
|
|
|
|
zkhennings
|
MAR 25, 03:09 PM
|
|
Got the hardware in for the TB adapter, might try my hand at machining it today or tomorrow.
Also received an LS1 piston, rod, and a forged 5.7" SBC rod and the bearings for it. I will see how everything will work out when I get the 3900 parts back from the machine shop. I am thinking I will 3D print some thin rod bearings to allow the SBC rod and the LS rod to fit on the rod journals of the 3900, and I can take some measurements of where things end up in the block. My plan is to get as much data recorded as I can using these stock dimensioned components so that it will be simple to see how aftermarket parts with their various lengths and heights will work out to give me the clearances I need, and the correct compression ratio. I hope I can get some 6.0" rods in there at the stock stroke with all the LS piston options that exist.
When I do stage 2 of the build I don't want it to be down for long, I have been there done that lol. That is the main reason for getting this data now.
|
|
|
|
ericjon262
|
MAR 26, 12:12 AM
|
|
| quote | Originally posted by zkhennings:
Got the hardware in for the TB adapter, might try my hand at machining it today or tomorrow.
Also received an LS1 piston, rod, and a forged 5.7" SBC rod and the bearings for it. I will see how everything will work out when I get the 3900 parts back from the machine shop. I am thinking I will 3D print some thin rod bearings to allow the SBC rod and the LS rod to fit on the rod journals of the 3900, and I can take some measurements of where things end up in the block. My plan is to get as much data recorded as I can using these stock dimensioned components so that it will be simple to see how aftermarket parts with their various lengths and heights will work out to give me the clearances I need, and the correct compression ratio. I hope I can get some 6.0" rods in there at the stock stroke with all the LS piston options that exist.
When I do stage 2 of the build I don't want it to be down for long, I have been there done that lol. That is the main reason for getting this data now. |
|
I bought a 2nd cradle recently, and plan to build a 3900 with another FY1 F23 on it, and then have it ready to swap into my car once it's "done" that way I can take my time with the 3900, and still enjoy the car for the most part.
I look forward to seeing the TB adapter finished!------------------
"I am not what you so glibly call to be a civilized man. I have broken with society for reasons which I alone am able to appreciate. I am therefore not subject to it's stupid laws, and I ask you to never allude to them in my presence again."
cognita semper
|
|
|
|
zkhennings
|
MAR 26, 09:48 AM
|
|
|
That is a good idea, I have been thinking about getting a second cradle (88 this time, or making a custom cradle), F23, and second motor to build the bottom end while the Fiero is running and driving around. It would be nice to have a second set of everything anyways, there aren't a ton of loose LZ9 parts available for purchase.
|
|

|
zkhennings
|
MAR 28, 06:11 PM
|
|
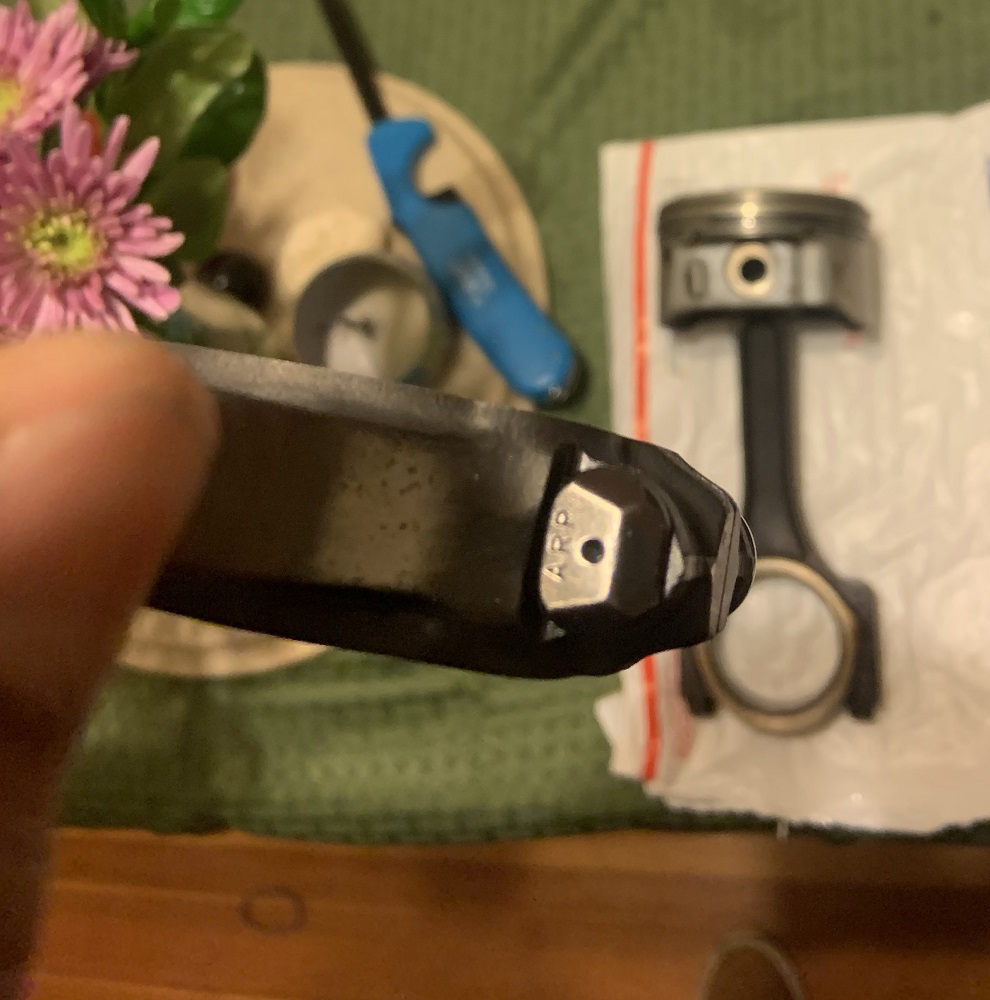
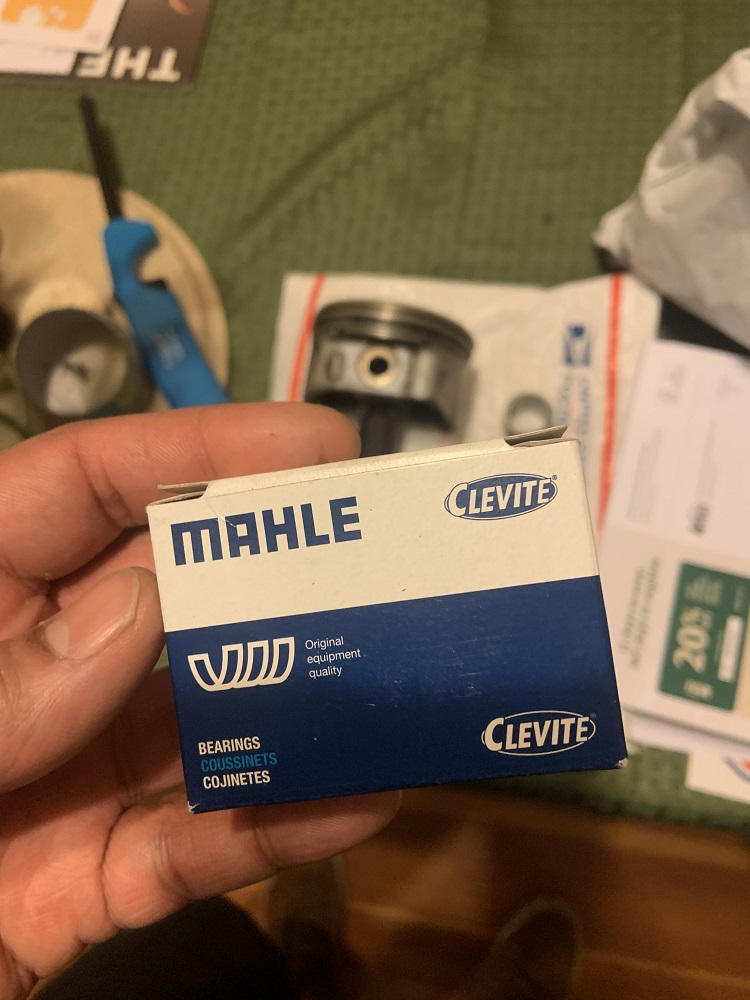
Got the LS1 piston and rod in as well as the forged 5.7" SBC rod and some bearings for it too see how far I could narrow it to get it to fit the LZ9 crank.
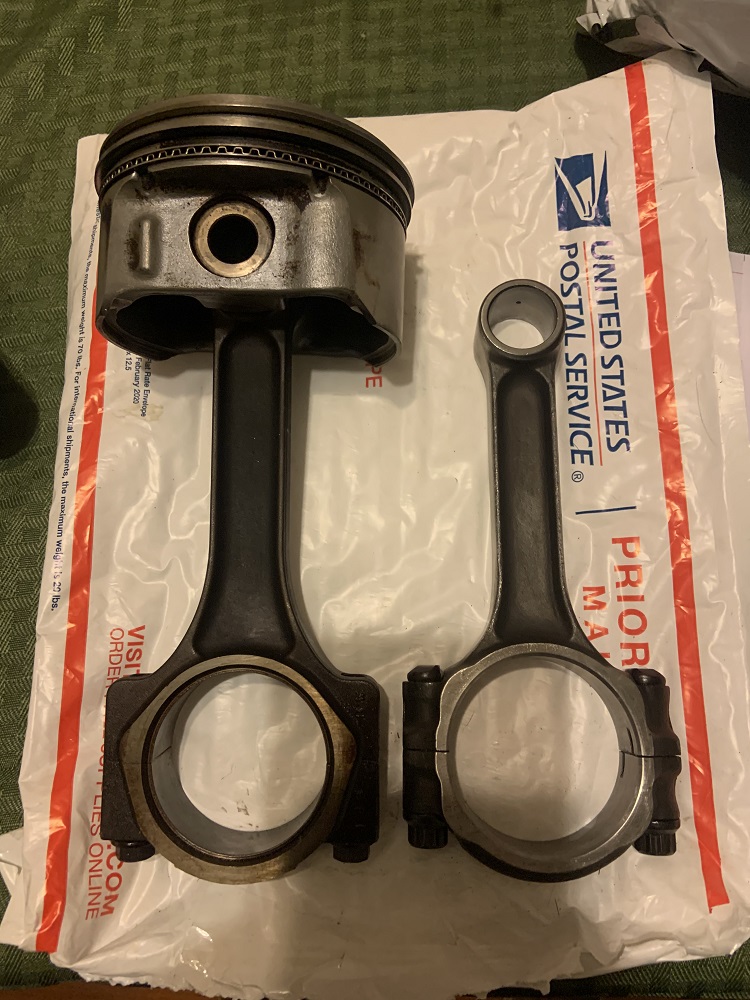
SBC rod has ARP bolts.
SBC rod bearings.
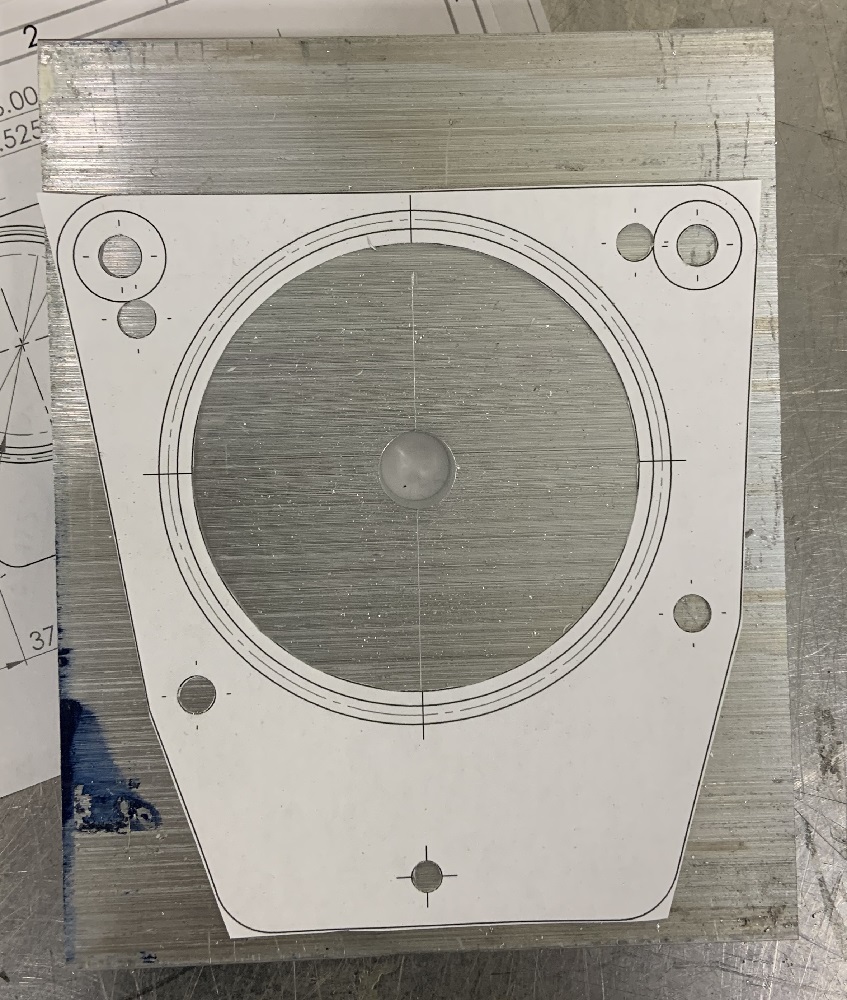
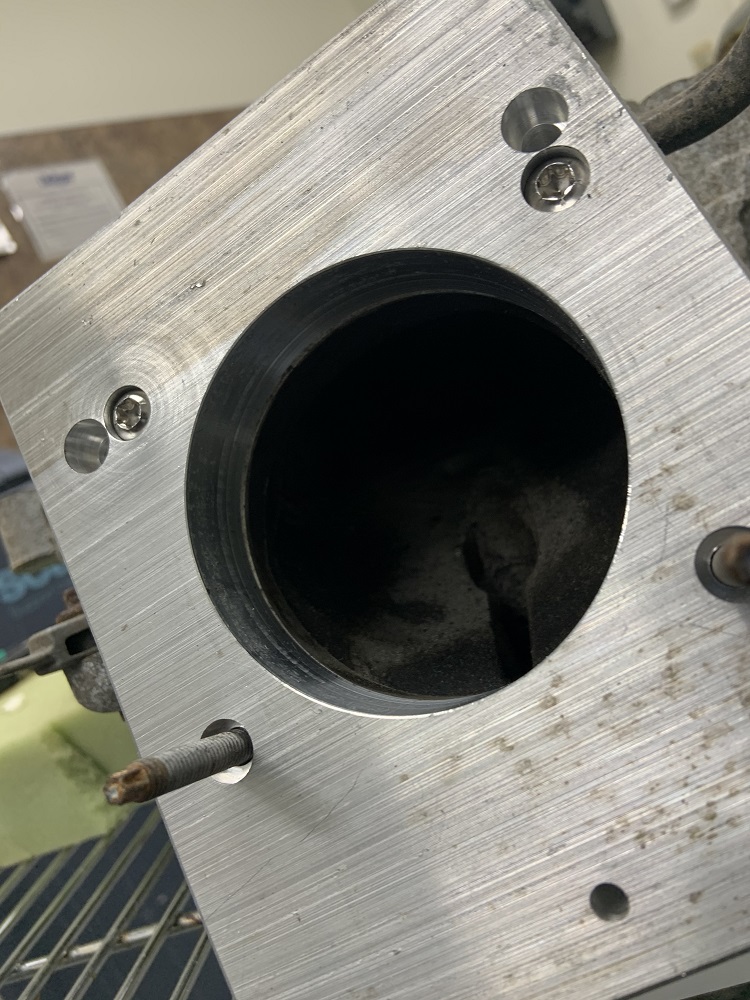
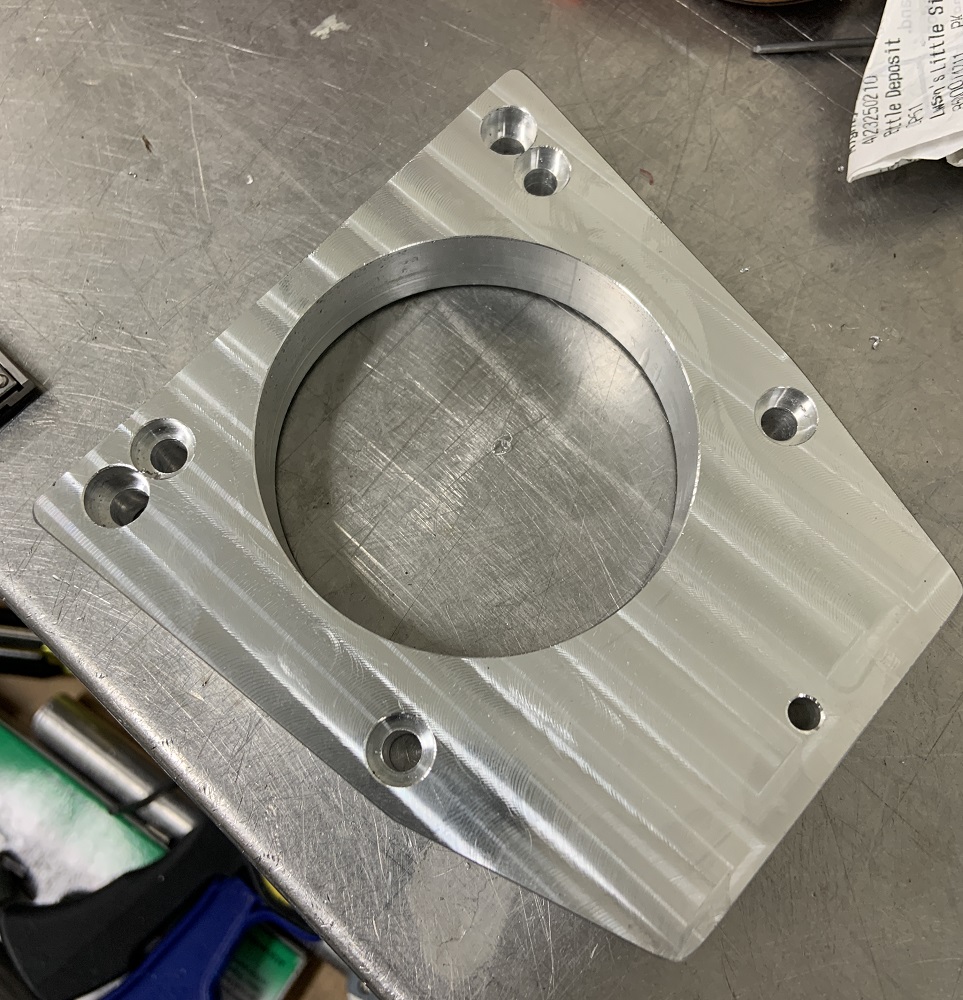
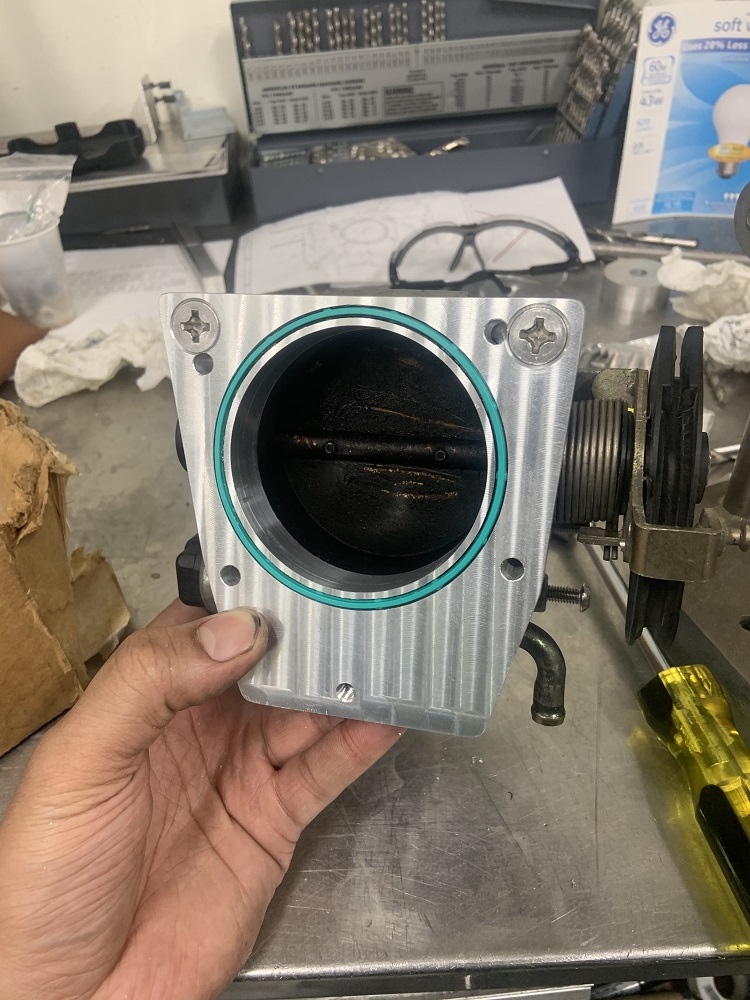
I also got a chance to get the throttle body adapter machined. First I cut a rough rectangle out, cleaned it up on the mill, and drilled a hole through the center where it lined up on the template so I could center it regardless of which side I was machining.
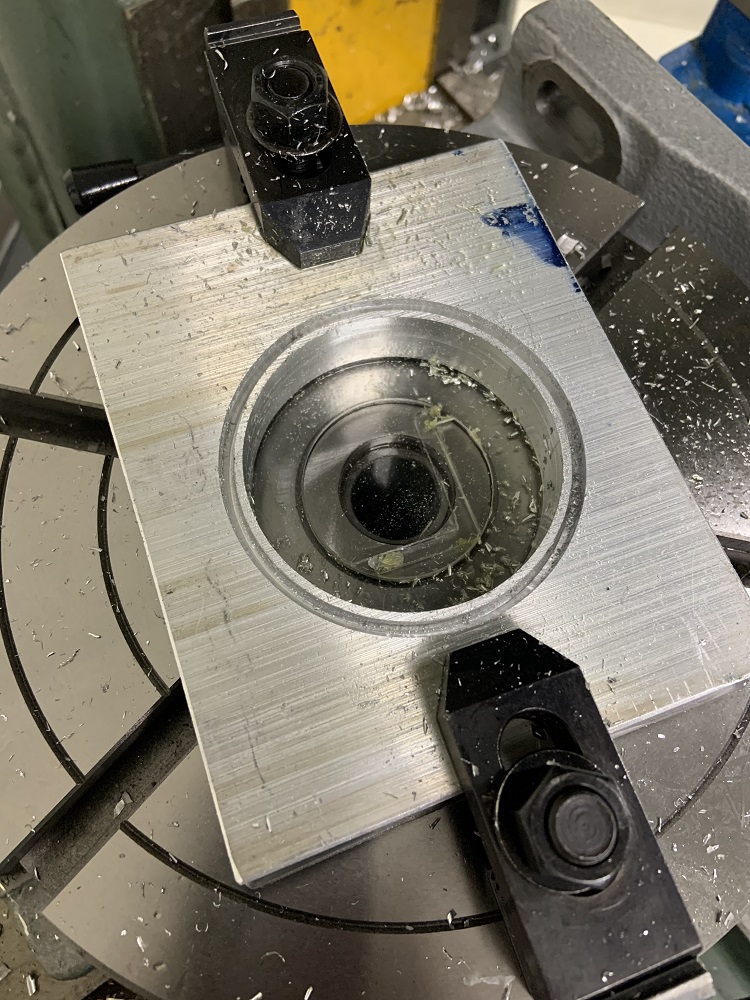
Cut out the 75mm hole.

And cut out the groove for the LZ9 TB gasket. I had a flat bottomed bit break on me halfway. I did not have another flat bottom endmill so I used the same diameter in a ball end, I had to machine it a little deeper to compensate. The gasket stick-out is not as much as I would like, but it was "a happy little accident" as I had to face it eventually anyways and the stick-out ended up correct.
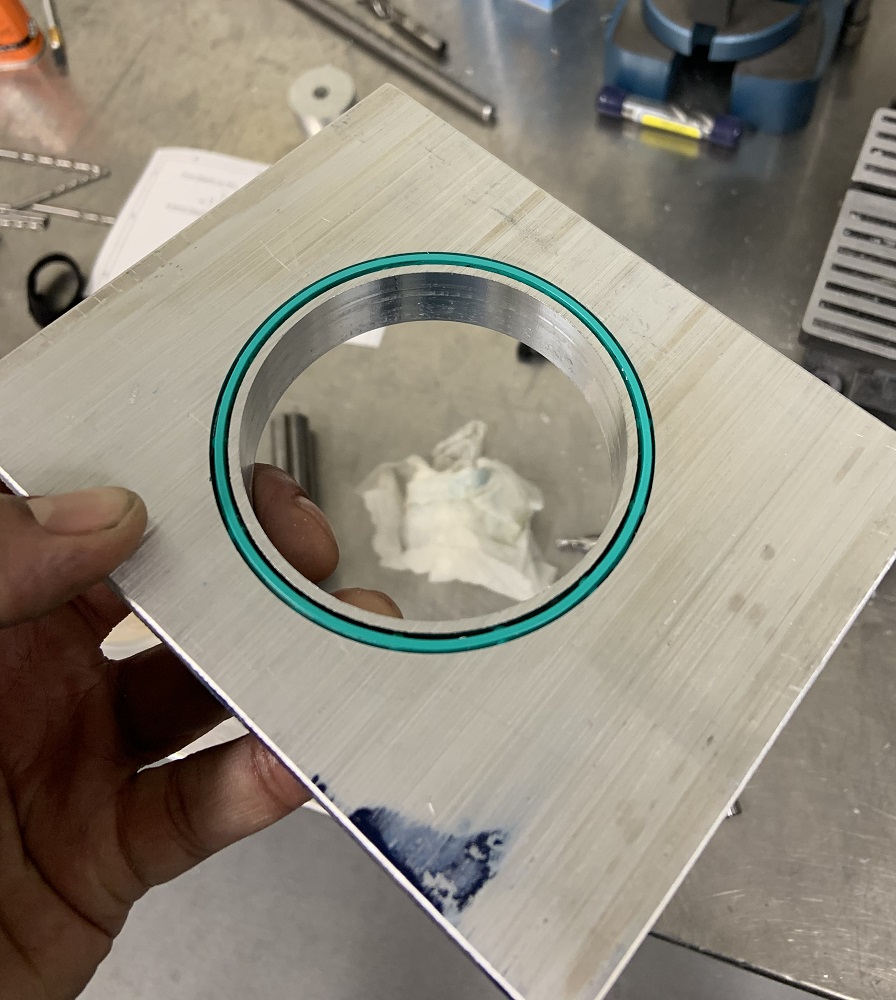
This stick-out ended up back near stock after facing (shown here before facing).

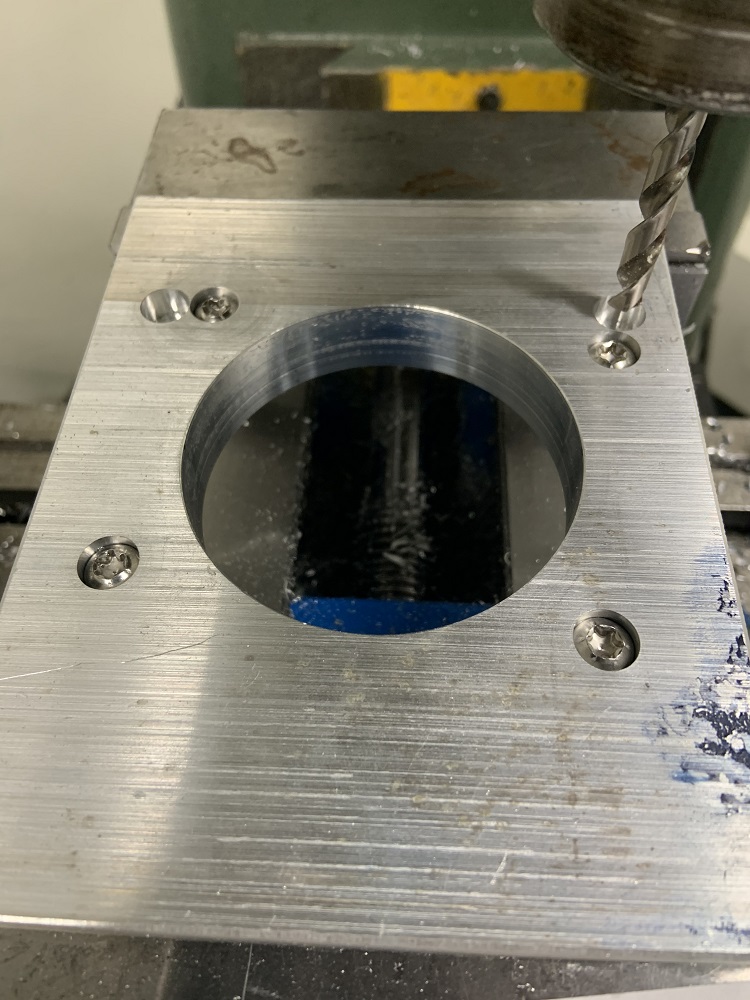
Next I flipped it back over to machine the pockets for the bolt heads, and the pockets for the N* TB locating dowels.

Checked the clearances for the pockets.
Drilled the through holes for the LZ9 intake bolts, and drilled the holes to be tapped for the N* TB.
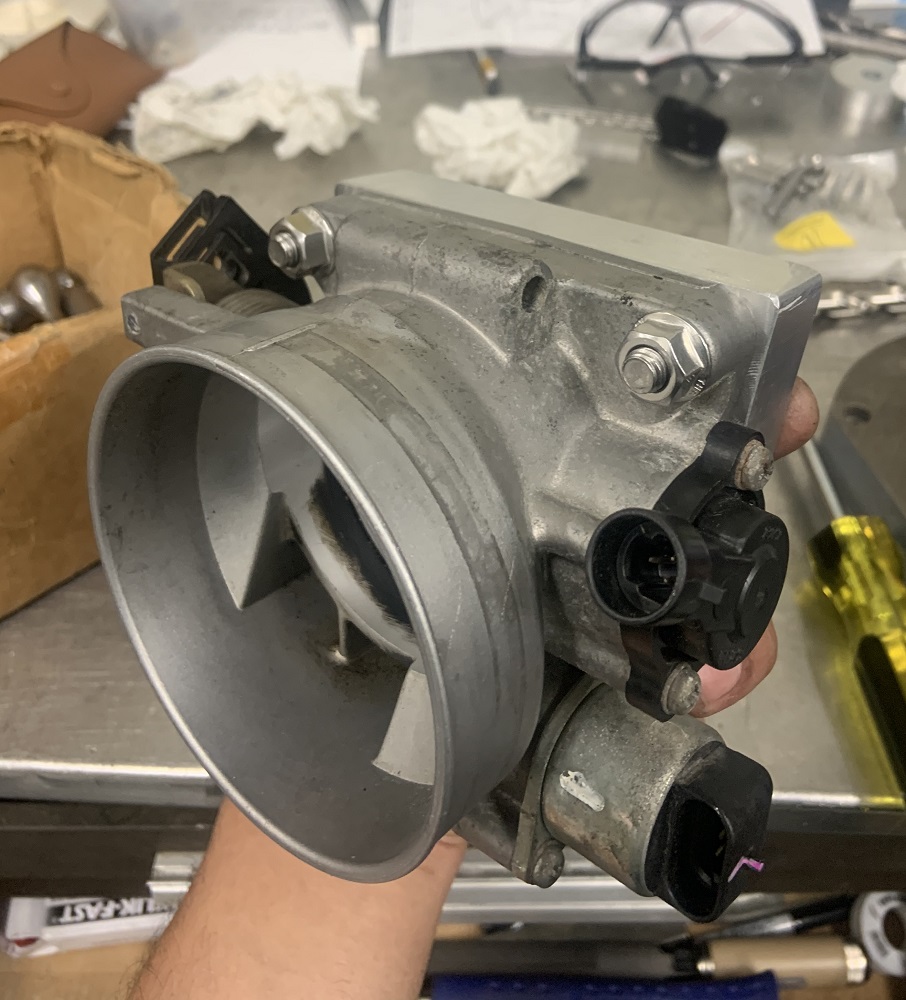
Checked the fit of the adapter to the intake.
And the fitment to the TB.
Got the final shape outlined.
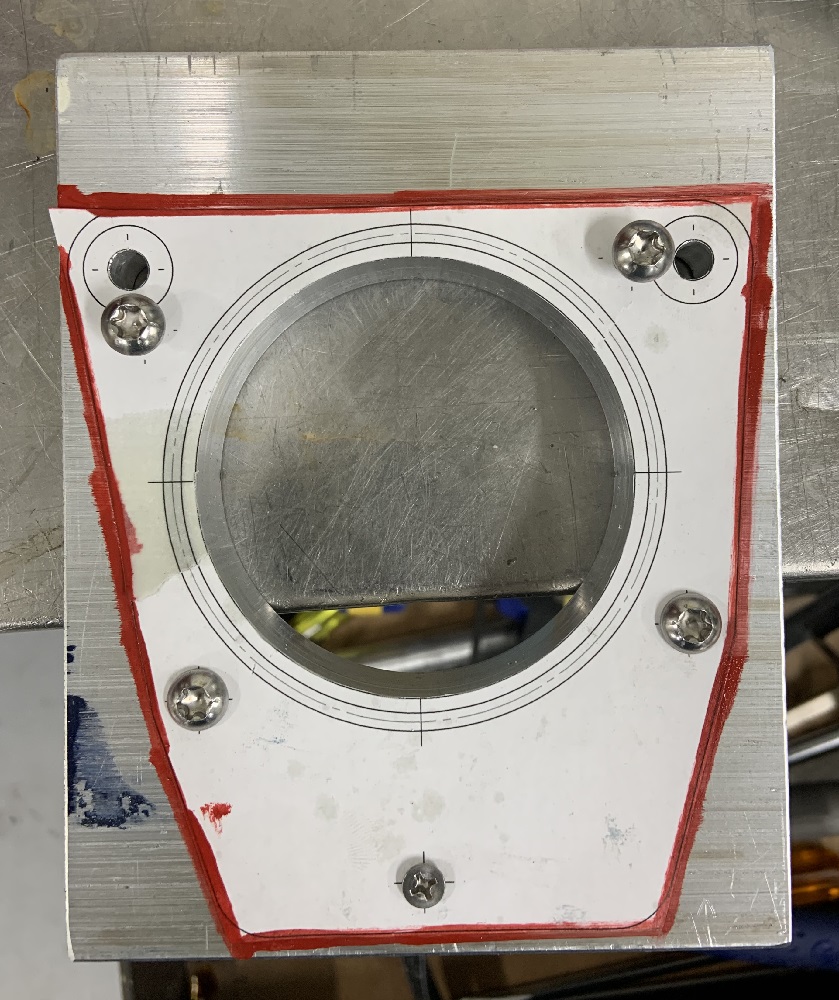
And cut it out.
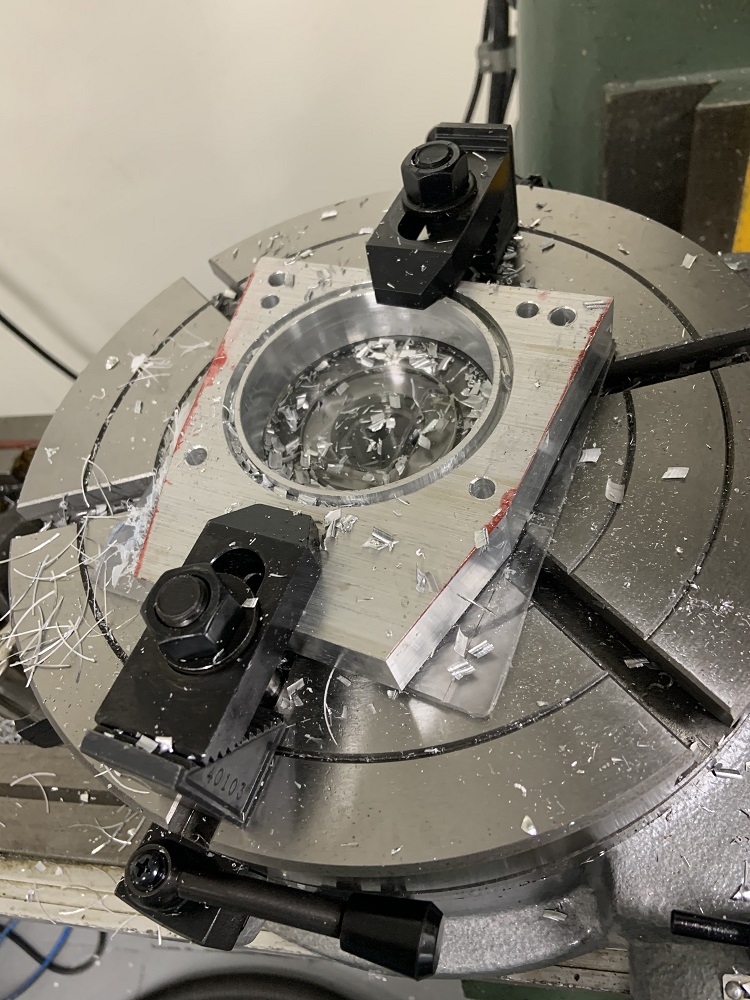
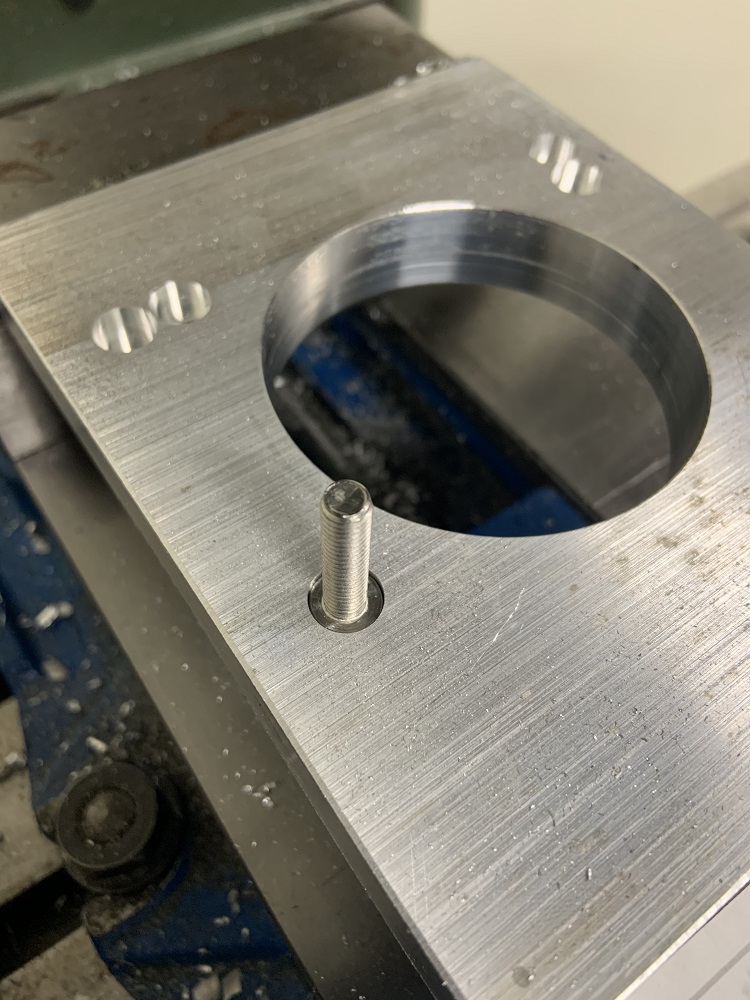
Faced both sides, and countersunk the holes for the studs for the N* TB.

Tapped the holes for the N* TB.

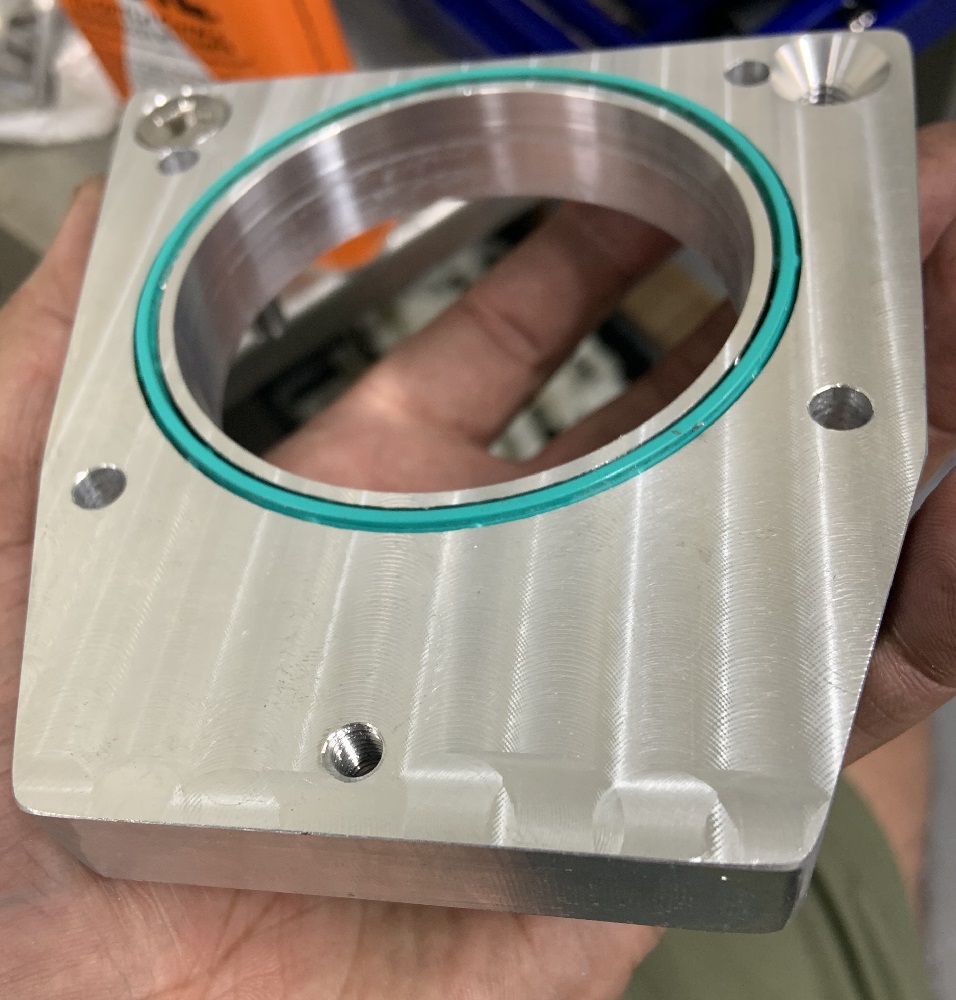
Finished adapter.
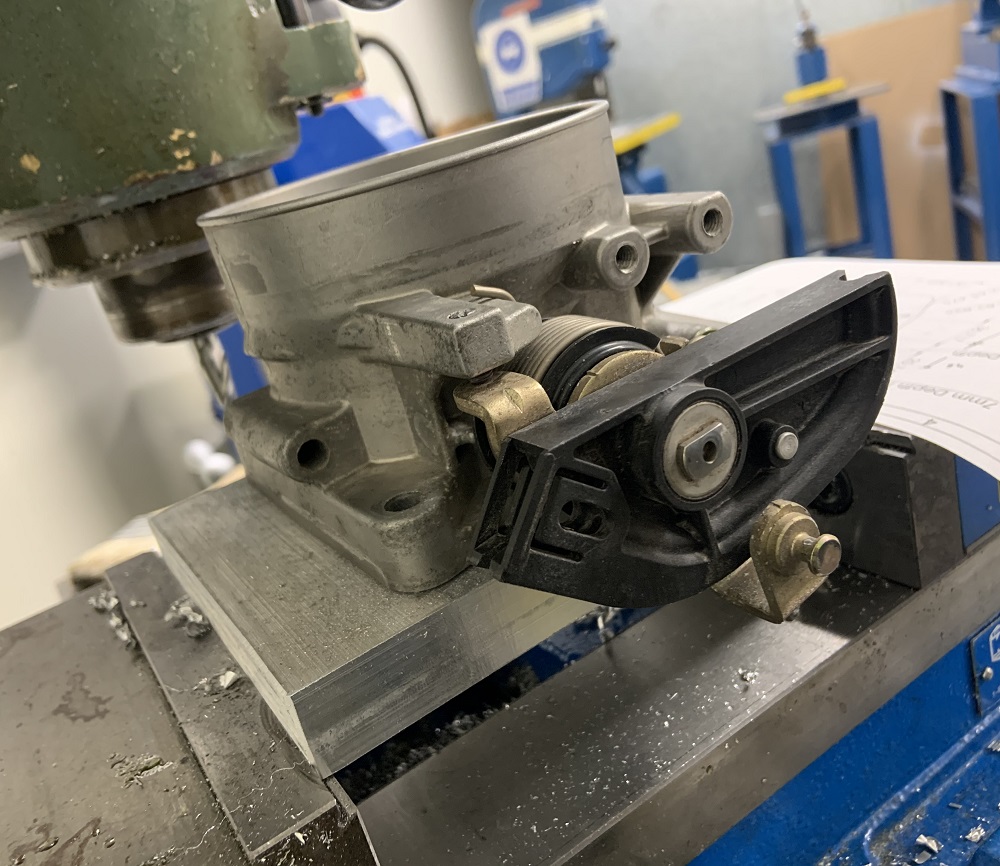
Did a final check of the fit to the TB with the studs. Everything lines up perfectly.
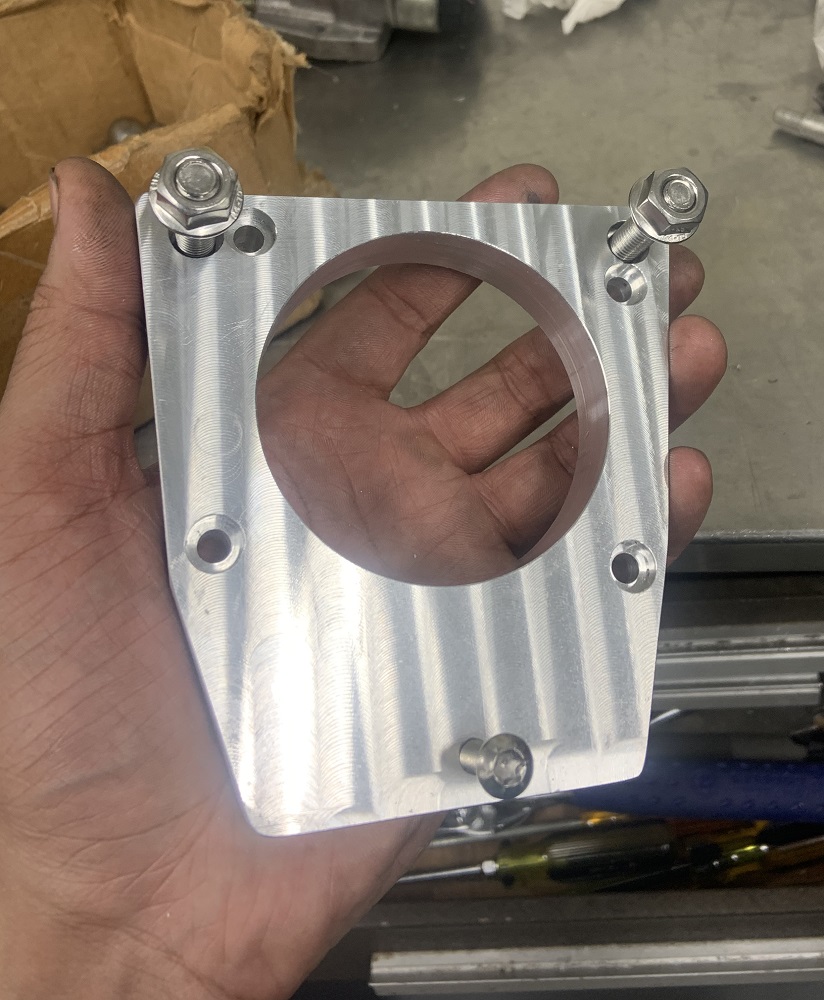
And then assembled the whole thing.

I am pretty pleased with how it came out. I am at a standstill asides from cleaning parts until the machine shop finishes up. I have started the process of acquiring some odds and ends for the Fiero, a front fender, non sagging bumper, and a driver's side mirror. The weather is looking nicer, I can put it in the garage in April to pull out the cradle to start getting ready for fitting everything.[This message has been edited by zkhennings (edited 03-28-2021).]
|
|
|
|
ericjon262
|
MAR 28, 11:04 PM
|
|
|
I would make sure to test fit the plenum on a LIM to make sure the adapter doesn't hit anything on the LIM. Otherwise, nice work! ------------------
"I am not what you so glibly call to be a civilized man. I have broken with society for reasons which I alone am able to appreciate. I am therefore not subject to it's stupid laws, and I ask you to never allude to them in my presence again."
cognita semper
|
|
|
|
zkhennings
|
MAR 29, 08:27 AM
|
|
| quote | Originally posted by ericjon262:
I would make sure to test fit the plenum on a LIM to make sure the adapter doesn't hit anything on the LIM. Otherwise, nice work!
|
|
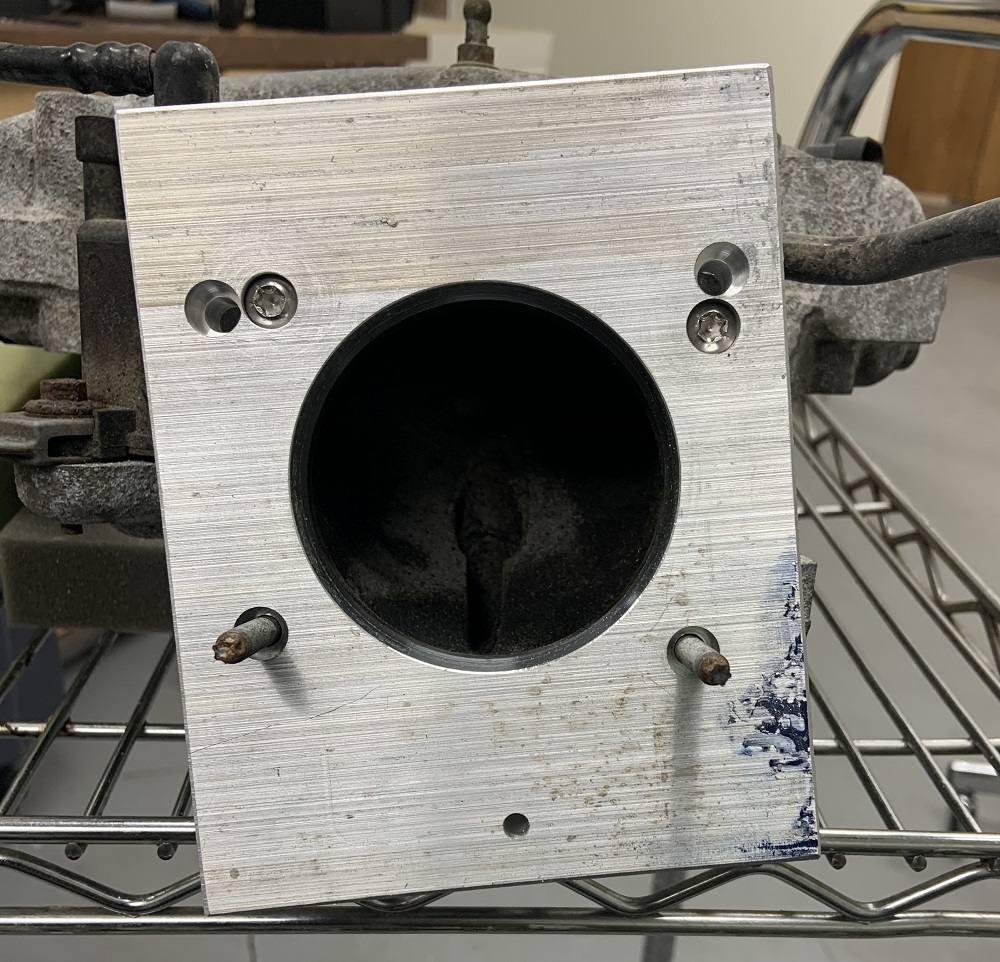
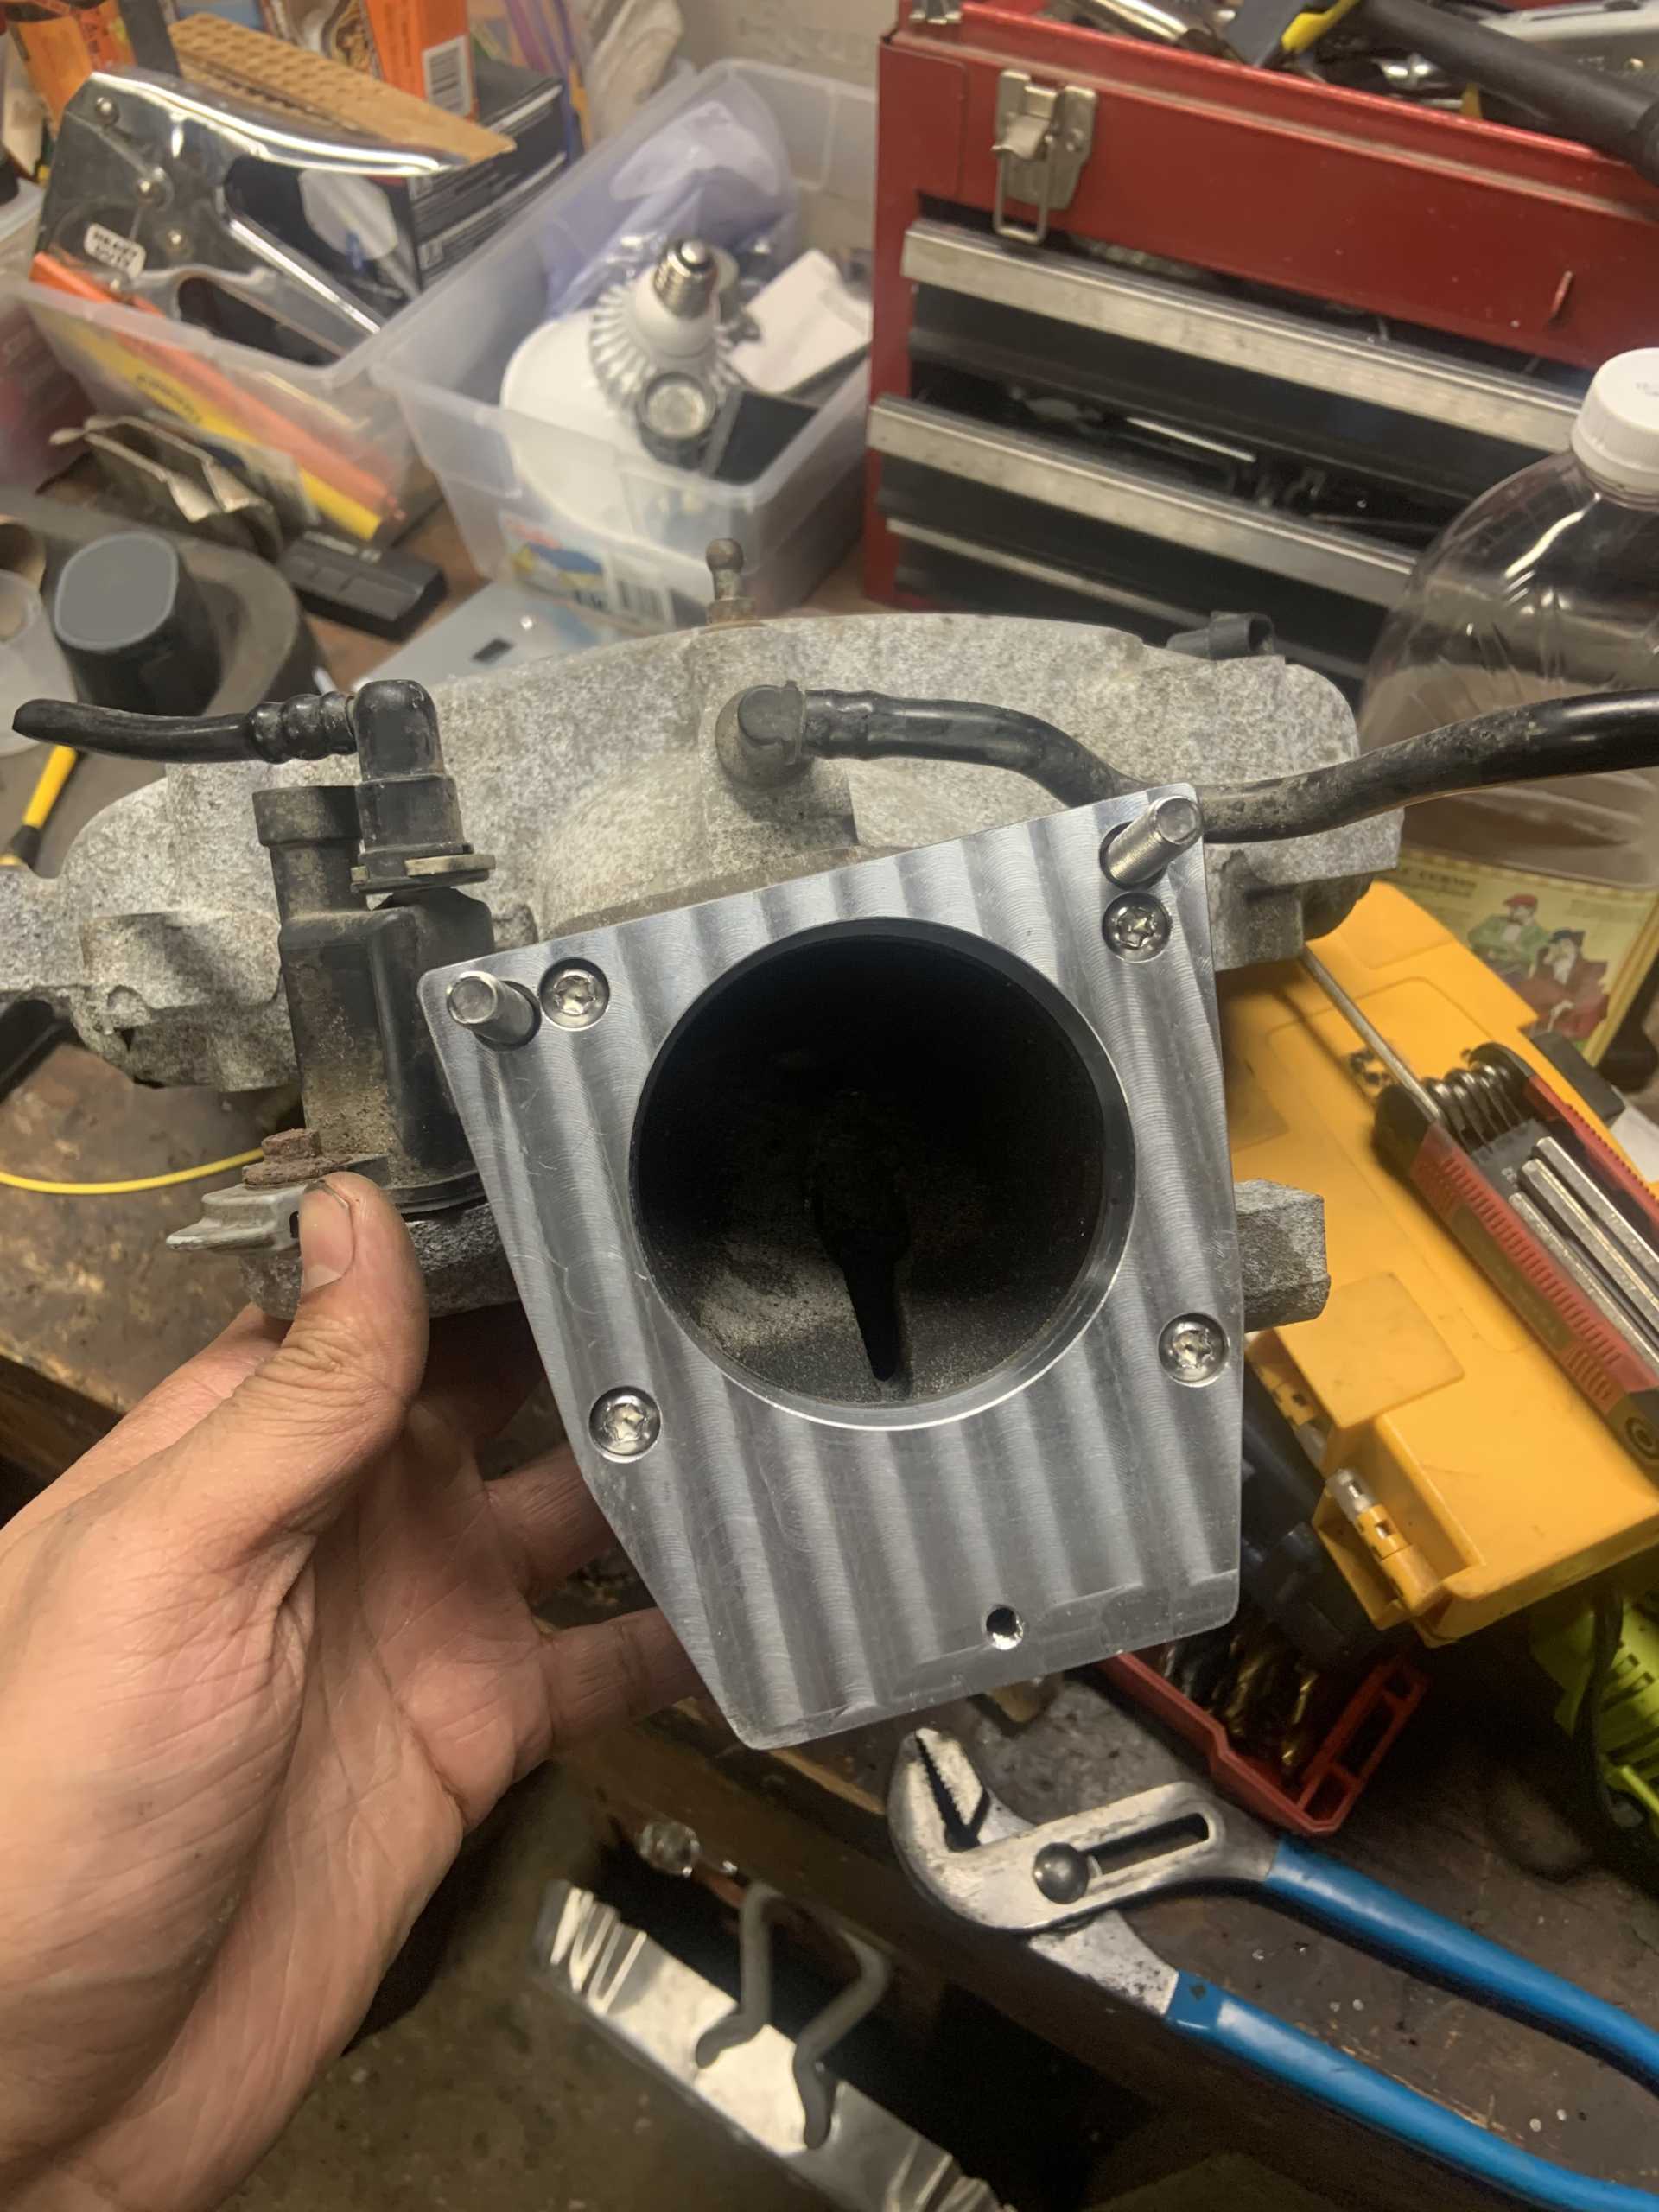
Thanks, I haven’t test fit it, but if you look at this picture of where it should end up I don’t think it will cause any issues.
If someone were going to keep the stock heater core lines from the LZ9 that attach to the lower studs that mount the TB, they would have some issues using this adapter.[This message has been edited by zkhennings (edited 03-29-2021).]
|
|
|
|
zkhennings
|
MAR 30, 11:07 PM
|
|
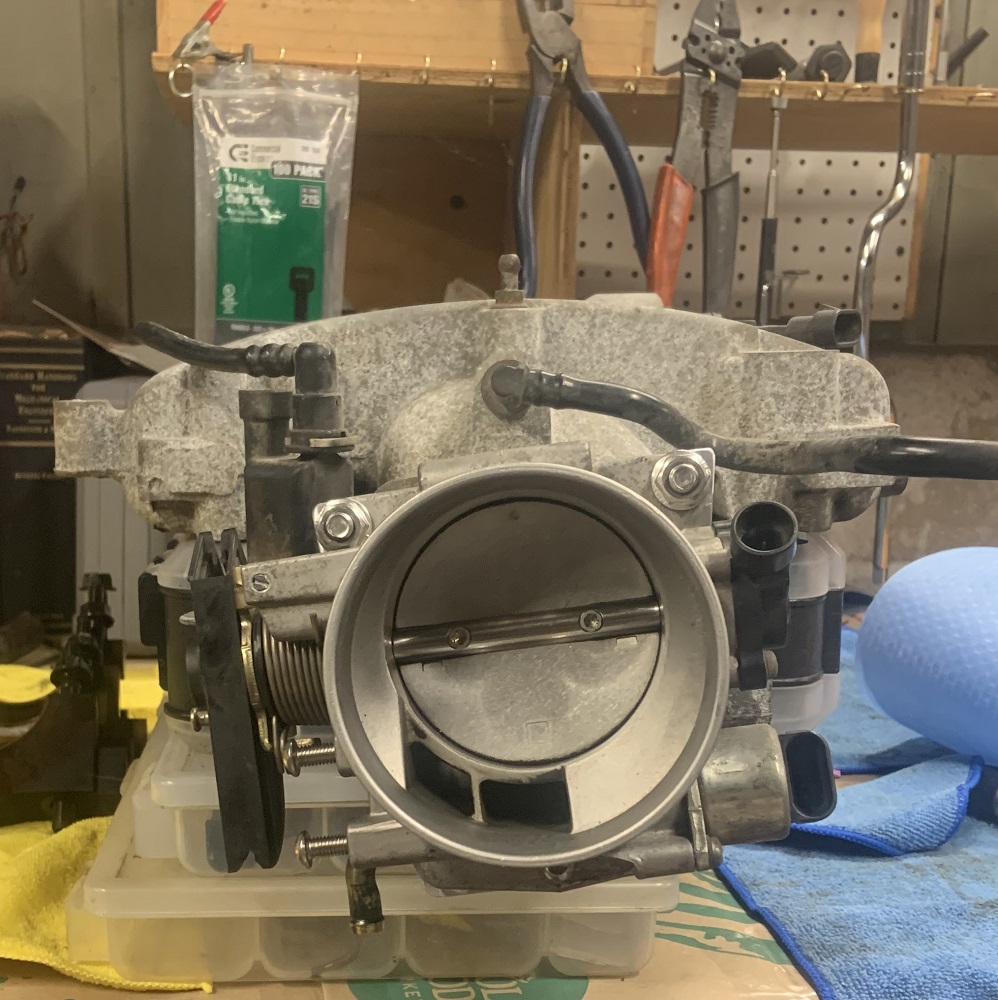
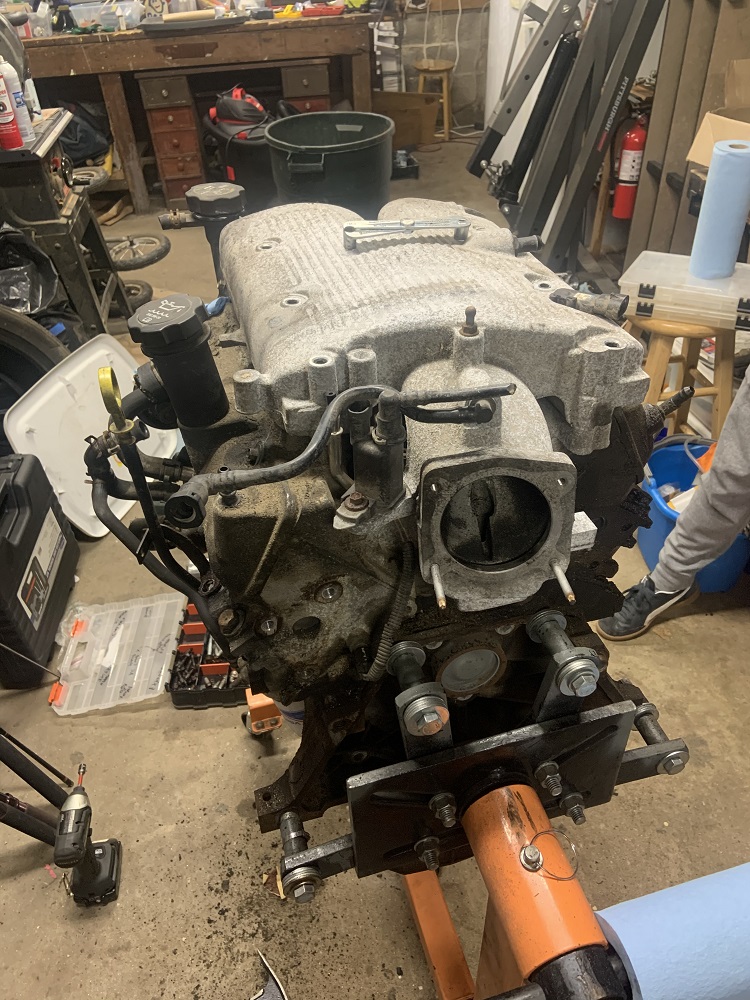
Side view of the TB mounted on the intake.

|
|
|
|
ignorant prodigy
|
MAR 31, 08:23 AM
|
|
|
|
|
zkhennings
|
APR 02, 06:07 PM
|
|
Thanks!
Some minor updates, checked out the -0.050” PAC LS locks I got as well as the PAC LS retainers. The stock 3900 retainers do not fit the PAC 1218 springs well, I am sure they could be forced onto the LS valve springs but I would be worried about that failing at some point.
I measured the ID of the locks when they are in the retainer and it is around 7.4ish mm at their deepest point, so they should work fine with the LZ9 valves which are 0.05mm smaller diameter than the 8mm LS valves.
Also the locating rib on the locks seems to be right at 0.050” higher than on the stock retainers, so this is good, I will check install height when I get my parts back.
I also need to weigh the valves when I get my parts back to see how much lighter they are than the LS valves and decide if I want to use the -0.050” locks or get standard height ones. If they are significantly lighter then I don’t necessarily need the extra seat and open pressure that PAC recommended to me.
I will take some comparison pics tomorrow.
I am in contact with a cryogenic treatment place in Worcester and planning to take my valves, rocker arms, pushrods, lifters, and timing components to get cryo treated. It shouldn’t cost much more than $100 and should help prevent wear of these components that are taking greater forces than stock. Going to take my lifters apart tomorrow one by one and inspect and clean them in the ultrasonic parts cleaner to make sure I can reuse them.
Other topics I have been investigating are rebuilding the headlight motors, mine need new bumpers I will make from 80A polyurethane. I am going to get brass gears from Rodney and new brushes as well, and hopefully they work consistently from now on.
I am also trying to locate a WS6 steering rack, I found one at a nearby yard but it is $200 so I may wait on that for a better deal.
Priced out the exhaust tubing and bits I will need to fabricate the headers and exhaust, not cheap but I am going with 304 USA made stainless tubing.
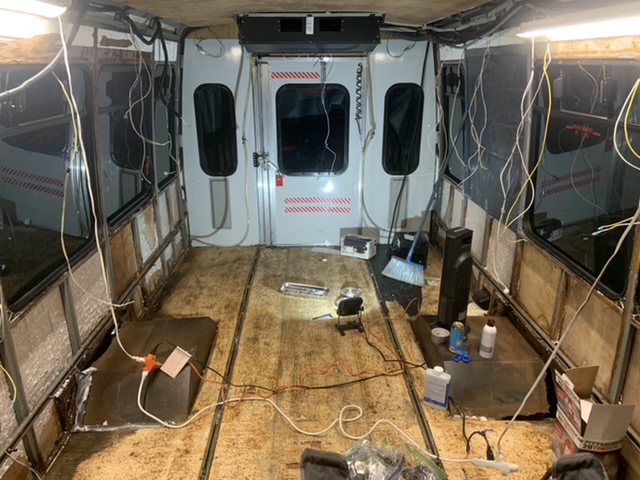
And finally I have finished stripping the bus interior of foam and can start the floor removal to replace all the rusted support beams. The foam removal has taken many hours every week for months, it has been brutal and I am glad it is finished. Need to make a jig to support the frame when I remove the supports.
 [This message has been edited by zkhennings (edited 04-02-2021).]
|
|
|
|