|
| 85 Notchie Build (Page 10/23) |

|
ericjon262
|
MAR 04, 08:06 PM
|
|
|
My sample header flange is on the way, I need to do a little more engineering once I get it in hand, but it shouldn't be long before I'm ready for production. I take it you want to do 304SS? ------------------
"I am not what you so glibly call to be a civilized man. I have broken with society for reasons which I alone am able to appreciate. I am therefore not subject to it's stupid laws, and I ask you to never allude to them in my presence again."
cognita semper
|
|
|
|
zkhennings
|
MAR 05, 12:59 PM
|
|
| quote | Originally posted by ericjon262:
My sample header flange is on the way, I need to do a little more engineering once I get it in hand, but it shouldn't be long before I'm ready for production. I take it you want to do 304SS?
|
|
304 would be ideal, but 18-8 would be ok. But a definite preference for 304. Sign me up for two header flanges 
I am trying to figure out what size exhaust tubing would be good for the crossover pipe, the primaries will be 1.75" going into a collector of maybe 2.25" or 2.5" that will then go into the crossover at whatever the collector size is, and then the crossover will merge into a 3" exhaust. I am trying to size it in a way that will keep up exhaust velocities and gradually slow down. The exhaust will cool and shrink the farther away it gets from the heads, and with the increase in volume at the crossover it will cool even more, so the crossover diameter can probably be closer to the same size as the 3" exhaust. I am not going to make the headers quite as long as they should be due to space restrictions, I am more going to focus on making them as long as I can without taking up the entire engine bay and making sure the primaries are all almost exactly the same length and equally as convoluted. I will try and get them around 28" to 30" each but we will see what happens.
1.75" tubing x-section = 2.4in2
2" tubing x-section = 3.14in2
2.25" tubing x-section = 4in2
2.5" tubing x-section = 4.9in2
3" tubing x-section = 7.1in2
I am currently leaning towards 2.5" crossover tubing.
|
|
|
|
zkhennings
|
MAR 06, 08:25 PM
|
|
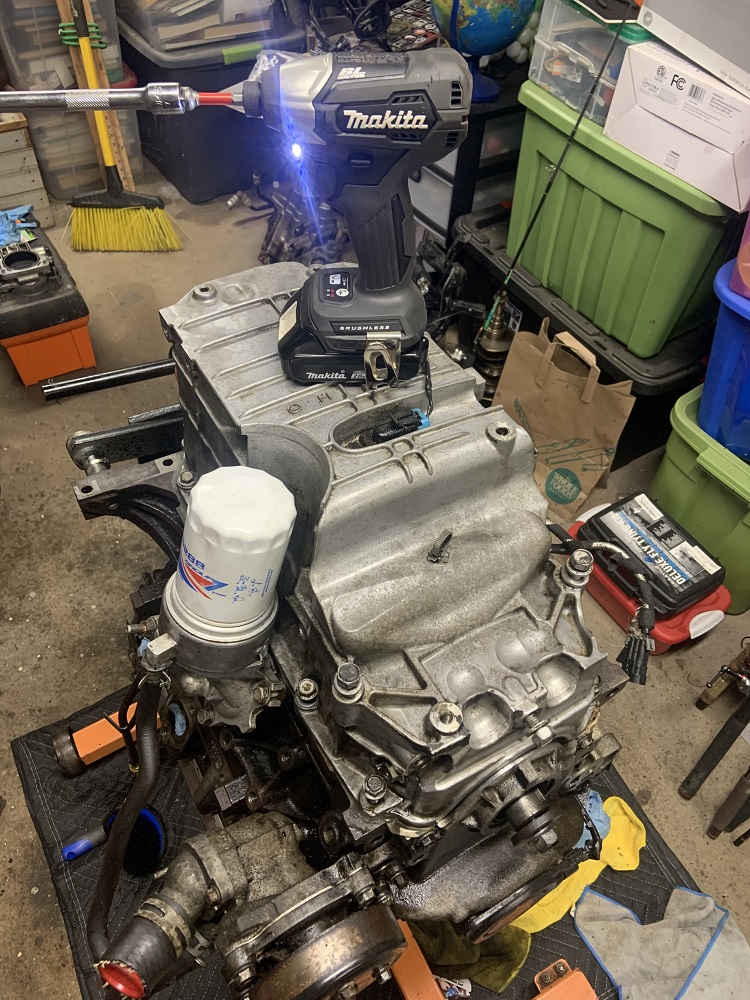
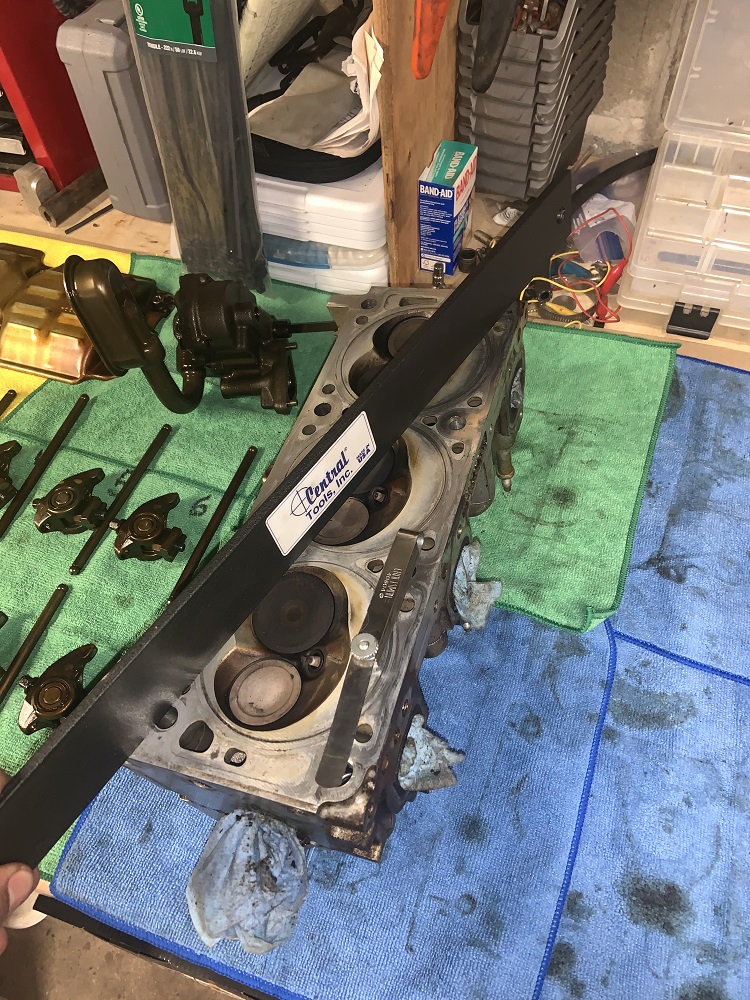
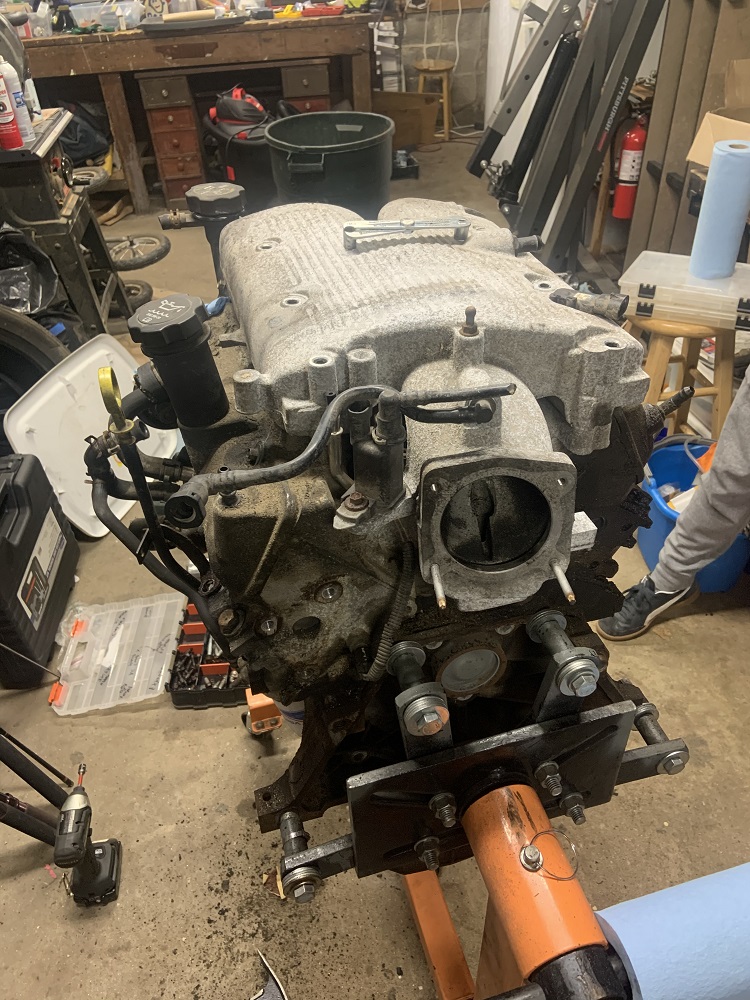
Got a bunch done to the engine today, took off all the extra bits, labelled everything and organized all the fasteners. Spun the motor over by hand and the compression is great. I do want to get a starter and hook up a battery and compression test each cylinder before I possibly pull the heads.
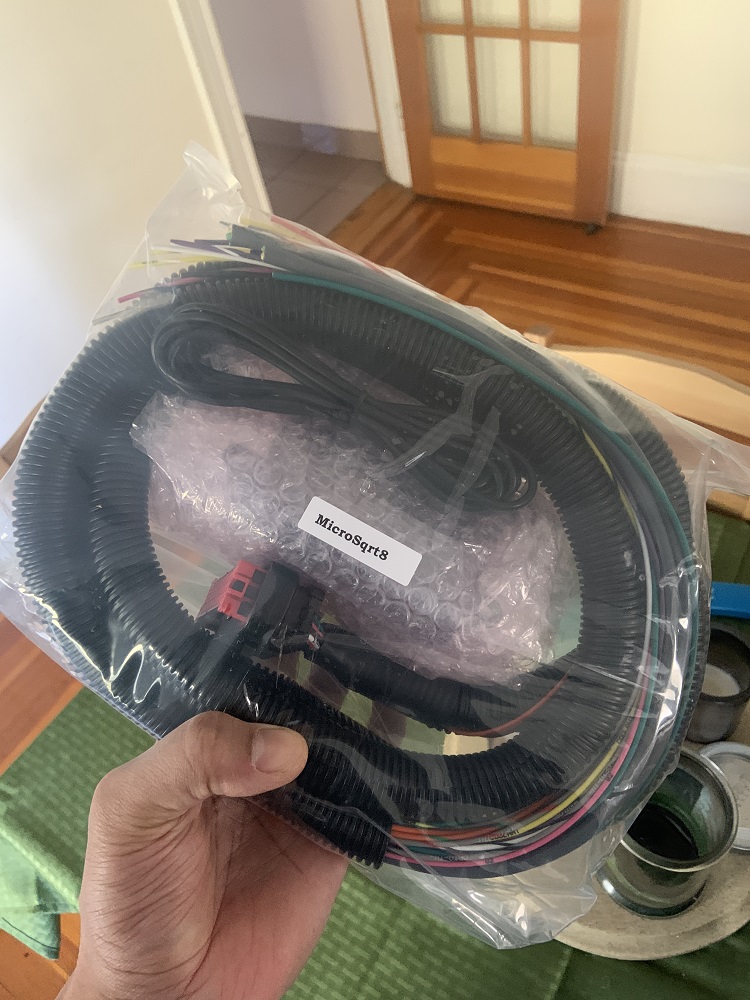
MicroSquirt came in
Throttle body comparison, not exactly a good comparison as the N* throttle body is closer to the camera

Motor stripped of bits and LZ4 intake in place. Nothing broke except 1 exhaust bolt, it spun with 0 resistance and the head came right off. The rest I took it slow and went in and out a little bit until they came out nice and easy. Plenty of stud is sticking out, I will screw a nut onto it and weld the nut to the broken bolt and it should come right out.
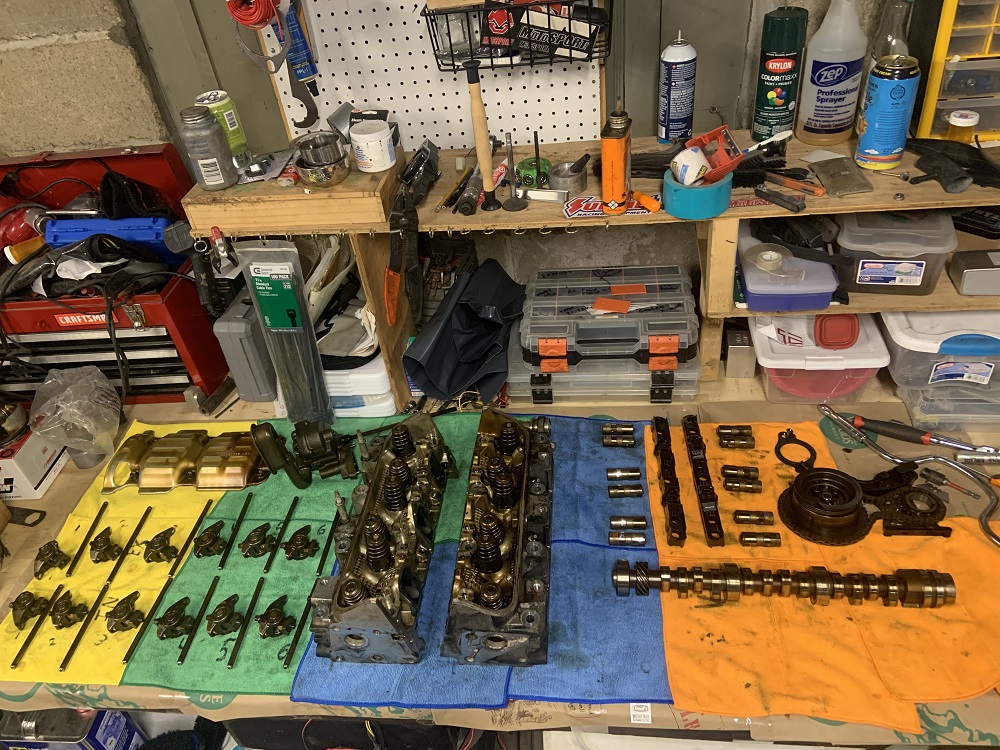
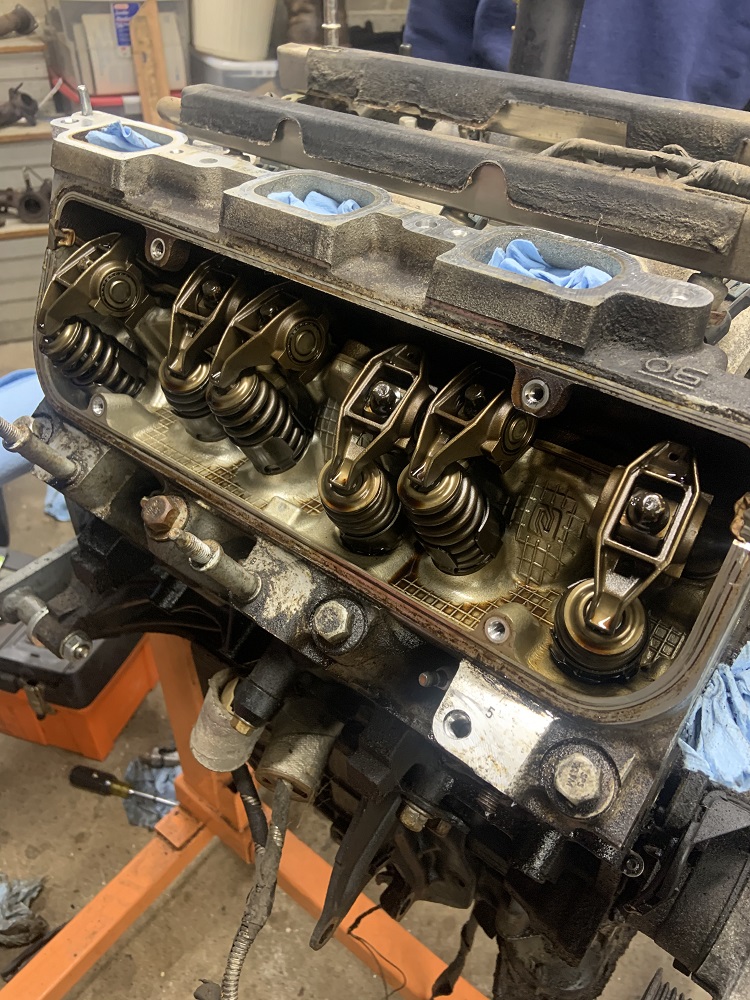
The valvetrain looks very clean
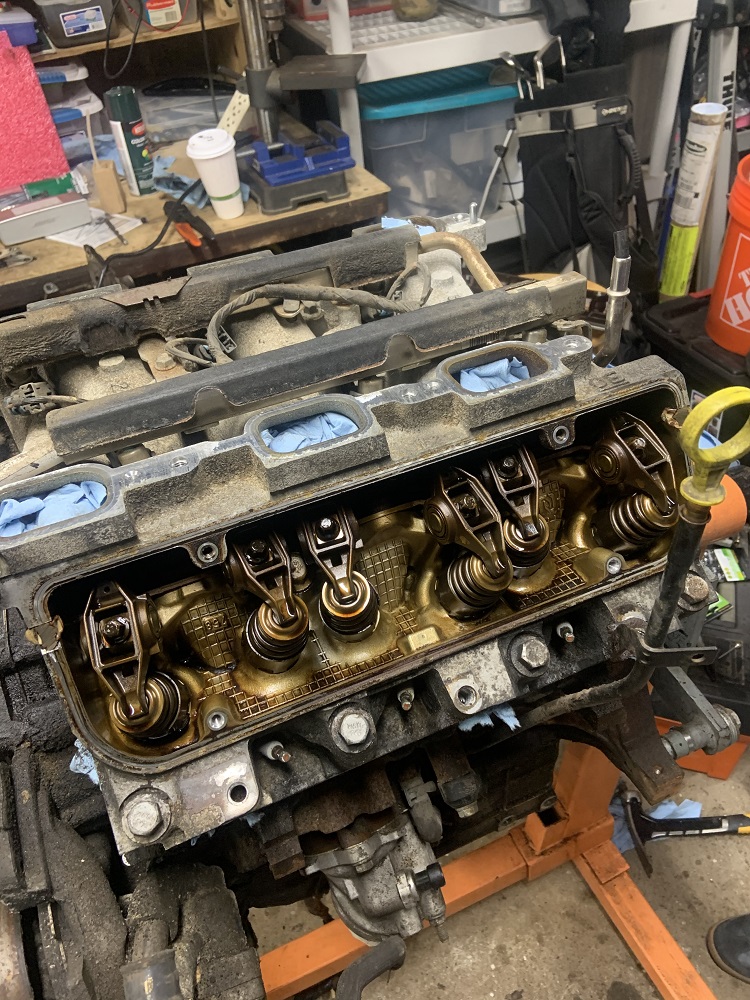
And the lifter galley area looks great too
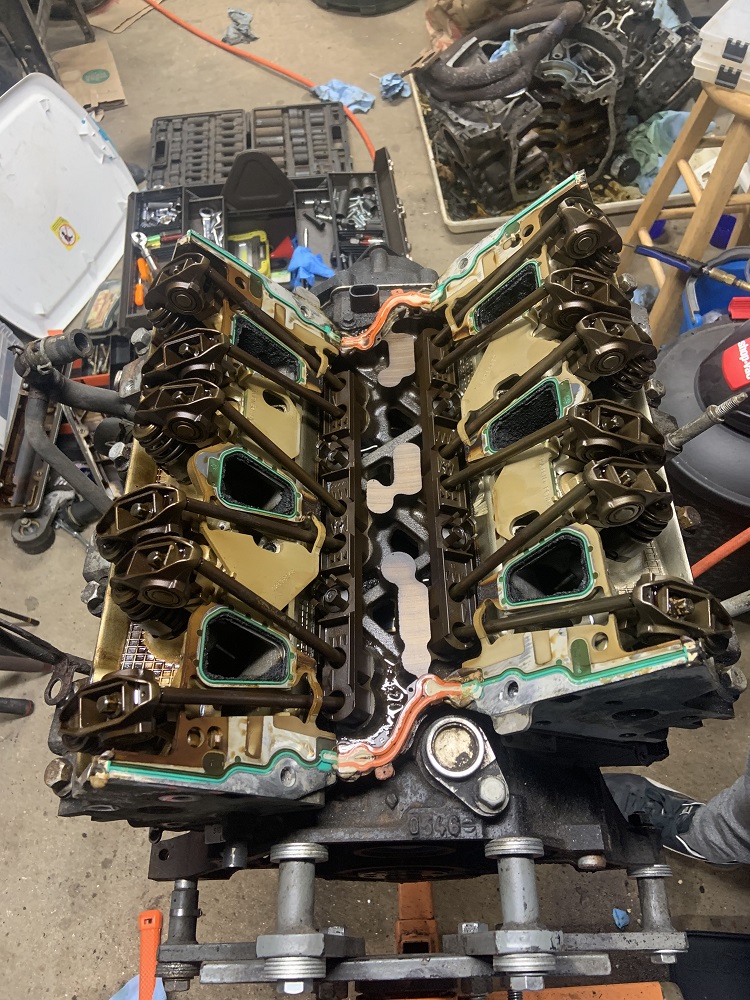
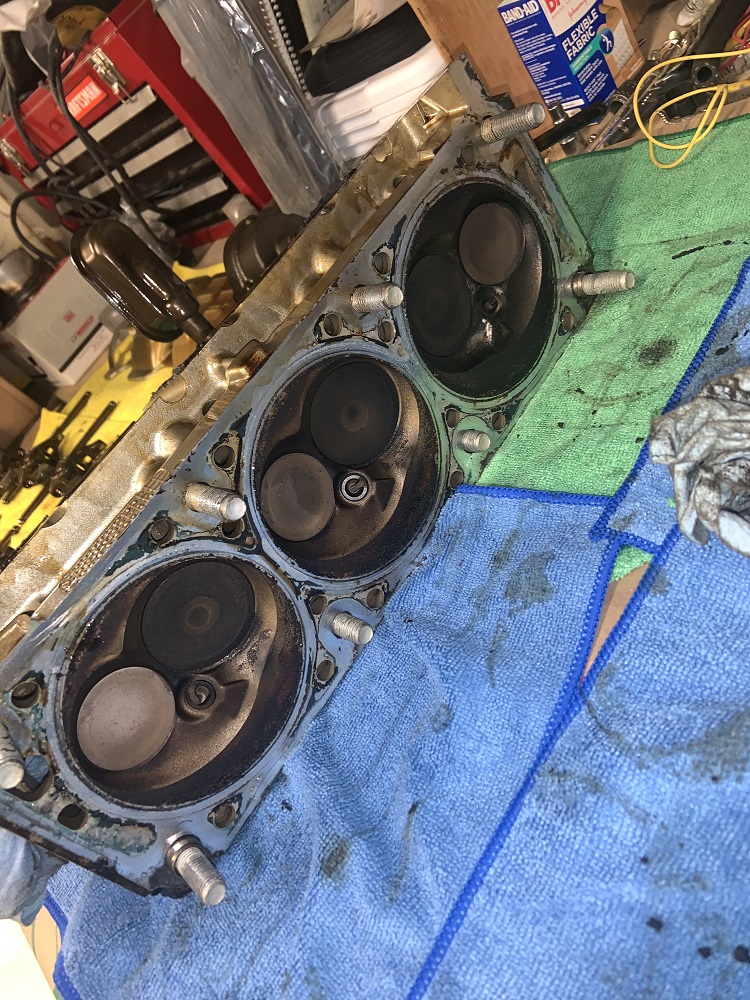
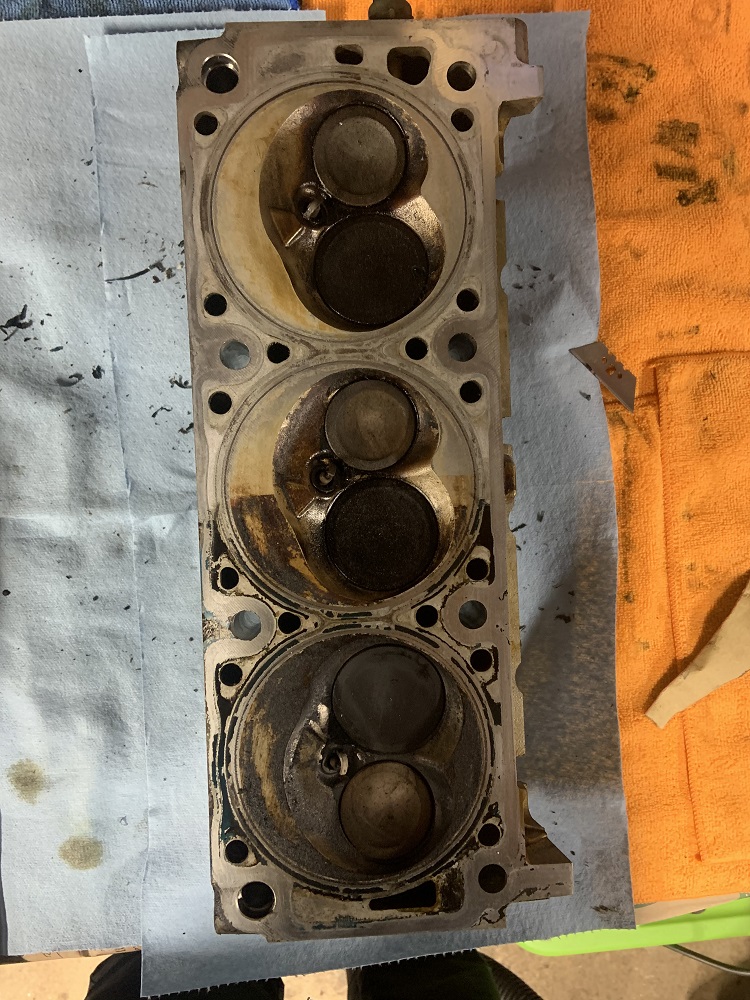
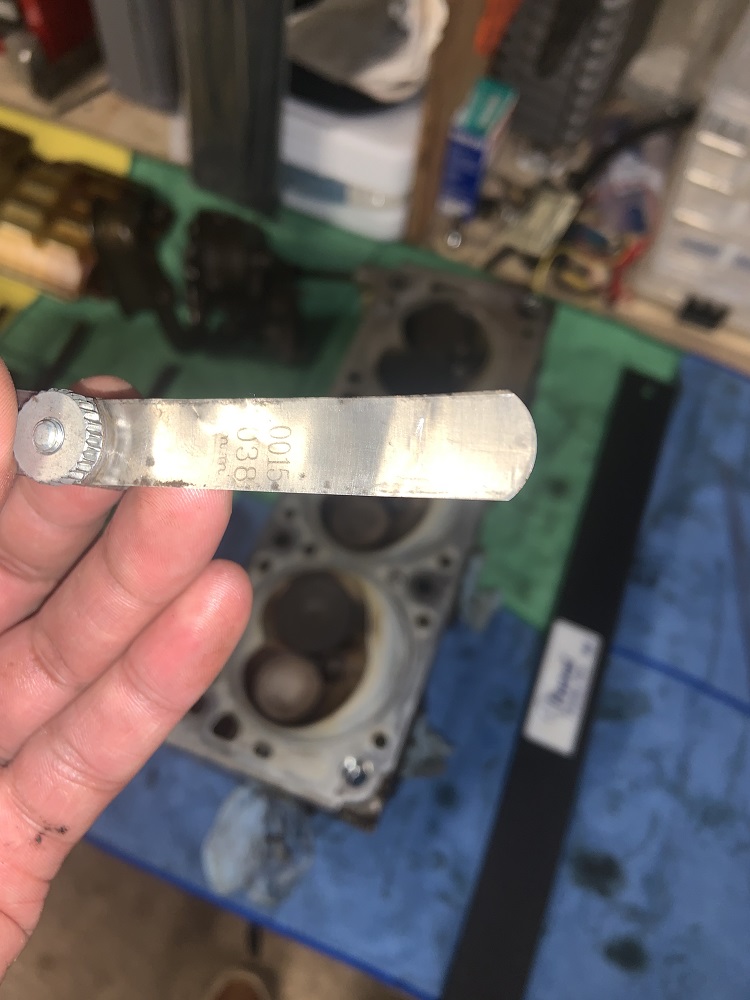
So I planned to pull the heads off to do the headgaskets, but are these the Cometic gaskets? They have the gold rivets at the corners. I may keep them together for now if the compression test checks out good. Let me know if these look like the Cometic gaskets or if this is not an indication that they are anything special. Edit to say that looking at pics of the head gaskets on RockAuto, multiple of them have these gold rivets, so I doubt they are anything special. I will most likely pull the heads but still check the compression before hand to make sure the cylinders are all ok.
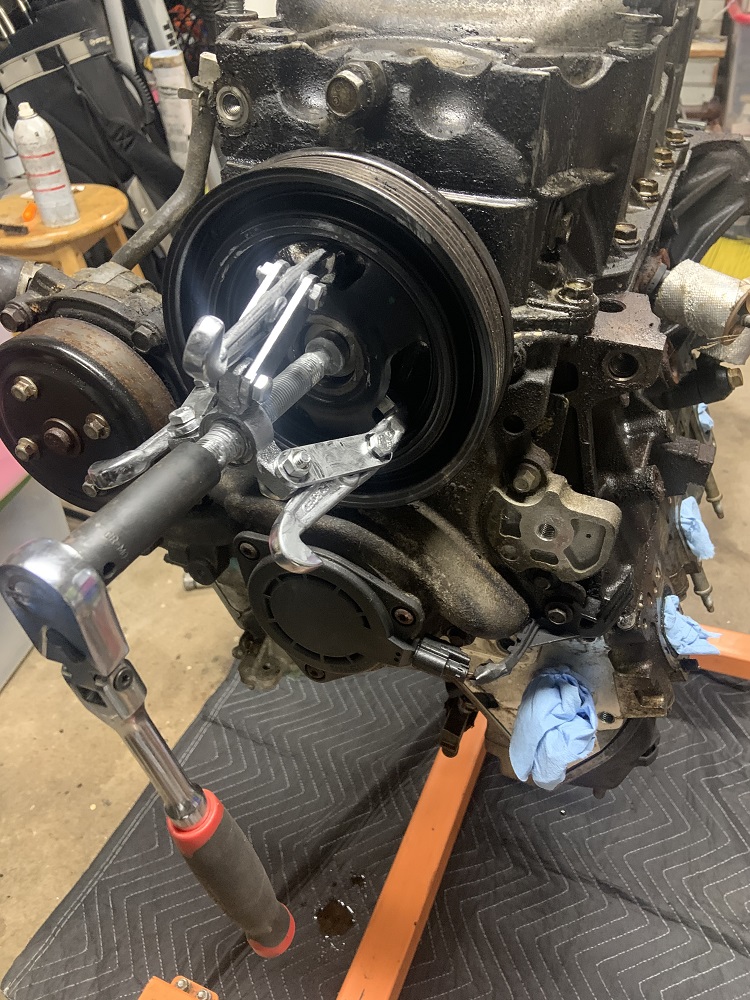
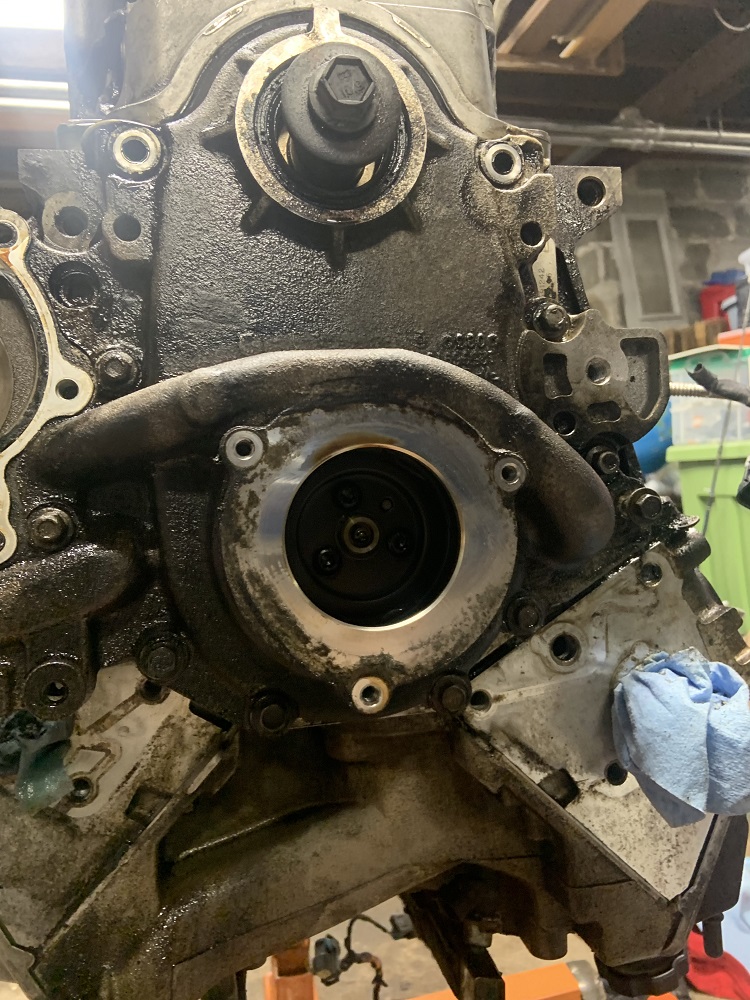
Going to get a new crank puller tomorrow as I guess I threw mine out, the threads were a little messed up and I must have gotten sick of it. Then I can pull the timing cover and oil pan off and check out the bottom end.
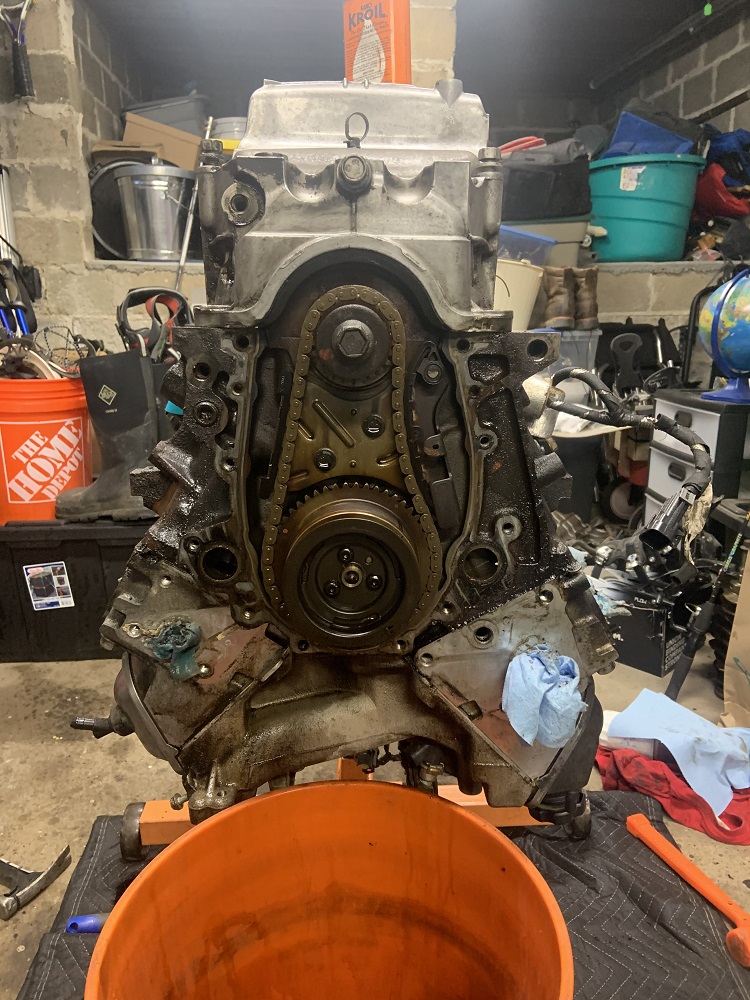
I may stick with this timing cover as I realized that I could create a nice access panel where the VVT actuator is, and I could inspect the timing chain periodically since I will not be running a double roller. It also takes up less space that I originally thought. Time will tell.[This message has been edited by zkhennings (edited 03-06-2021).]
|
|
|
|
ericjon262
|
MAR 07, 03:55 AM
|
|
Engine looks good!
I doubt they're cometics, the factory gaskets are MLS on the 3900. I also don't think cometic makes a gasket for the 3900 yet.
------------------
"I am not what you so glibly call to be a civilized man. I have broken with society for reasons which I alone am able to appreciate. I am therefore not subject to it's stupid laws, and I ask you to never allude to them in my presence again."
cognita semper
|
|
|
|
zkhennings
|
MAR 07, 09:31 PM
|
|
|
|
|
zkhennings
|
MAR 08, 03:28 PM
|
|
Just put in a big order from WOT Tech, I ordered:
- Strip Performance Cam with cam bearing spacers for the 3900, it is only $99 to get them included instead of $150 separately
"The WOT-Tech NA Stage 2 cam, also known as the Strip cam. It has a mild lope to it and suffers a slight torque loss in exchange for more RPM and HP. Shift points anywhere from 6500-7000 should consider this one, racing or street use. Tuning won't be too difficult for this one either.
276 / 264 Duration @ .006"
224 / 212 Duration @ .050"
.335" / ..325" Lobe Lift
.536"/.520" 1.6 Rocker
109 ICL
111 LSA"
- The Performance Timing Set for a 3400/3500, worked out to be a couple dollars cheaper than sourcing the same parts from GM directly
- PAC 1218 Valve Springs
Specs
130# @ 1.800"
318# @ 1.200"
Coil Bind @ 1.100
313 lb/in spring rate
- Performance SBC Cam bearings, and I opted for the teflon coating for added protection, for $30 extra it can't hurt!
- ARP Connecting Rod Bolts for Powdered Metal Rods - These I have questions about, I have to do more research because I want to make sure I am not going to oval the journal if the ARP bolts get torqued higher than stock.
- Adjustable Pushrod to figure out what length pushrods I need - Another area I need to do more research, I tried to see how many turns it took to seat the stock rockers from the point that the lash was taken out of the pushrod, and it seemed like 1.25 turns, which is what the Fiero called for as well. Need to double check that
I did not order new lifters, mine seem pretty mint, I will take them apart and throw them in the ultrasonic parts cleaner and inspect them to make sure all the needles are nice and round. If I need new lifters I will order them when I order pushrods.
I also ordered a bottle brush hone from Summit, it seems like a really nice one, and it should fit mine and my brother's Subarus as well as the LZ9, and some of the LS motors.
Next on the list is figuring out what connectors I need to order from Ballenger, and figure out and buy the crimping tool that I will need. I will order a depinning kit as well to save myself the headache.
I need connectors for:
- LZ9 Crank position sensor
- Fiero Coolant Temp sensor, I need to get the 3 pin one so I can run the gauge too
- Fiero or LZ9? Oil pressure sensor
- LZ9 MAP sensor
- LZ9 IAT sensor
- N* TPS
- Bosch EV14 Injector Connectors
- LZ9 Coil Pack Connector
- Fiero Alternator Connector
- Fiero VSS Connector
At some point I may get the connector for the N* IAC, I have not decided whether I will be using it or not yet.
I already have an Innovate LC-2 Wideband sensor and gauge so I don't think I need a connector for it.
Also I called around to some machine shops and it seems like the going rate for resurfacing heads is $125 each, it includes a cleaning in the bath. So I am going to pay more than half the cost of the motor to get the heads resurfaced  but it is what it is. If anyone knows a shop in the Boston area that has better prices let me know, because I called like 5 machine shops and they all quoted me the same price. I doubt I would need the heads resurfaced again though until I put some serious miles on this thing, so it is acceptable. but it is what it is. If anyone knows a shop in the Boston area that has better prices let me know, because I called like 5 machine shops and they all quoted me the same price. I doubt I would need the heads resurfaced again though until I put some serious miles on this thing, so it is acceptable.
Excited to be making progress[This message has been edited by zkhennings (edited 03-12-2021).]
|
|
|
|
zkhennings
|
MAR 09, 02:25 PM
|
|
Ordered a lot of remaining things, all the gaskets and seals and whatnot, piston rings, a new Uplander engine mount (which is the same as a 3800 mount), 88 Fiero flywheel, all the parking brake cables, the newer model starter motor, and an alternator from a 99 Chevy Astro 4.3.
I was looking at the 2009-2011 Lucerne alternator which physically looks like the Astro alternator (it will be very easy to make a bracket for), and the Lucerne alternator (and Uplander) only have a 2 pin connector, and I was only planning to use a 2 pin setup so I was thinking this was perfect. Turns out at least one of the pins needs to see a PWM signal and it adjusts the output based upon that. A neat feature but a complexity that I would rather not deal with right now. I was happy to see that the 99 Astro alternator has the same mounting scheme. It is also quite a bit cheaper which was nice.
My current thoughts are that I will make the tensioner that originally bolted to the timing cover be between the crank pulley and the alternator in the original AC spot. I should have space because I need to put the alternator a little far away from the motor to get the belt routing to work, leaving space in between the alternator and crank pulley. Instead of tensioning the belt with the alternator, I can tension it with the tensioner and it will also be doing double duty to improve alternator belt wrap. It should be very easy to attach to the alternator bracket/front motor mount combo with the help of a mill to carve the necessary slots for the tensioning features. Since this bracket is so long I may take it all the way to the front crossmember and have it tie in there to either replace or just aid the dogbone. Edit to say that if I wanted to reuse the stock tensioner I would need to put a smooth pulley on it, but there are models from plenty of other cars with a smooth pulley if the stock one isn't going to work for me.
Since I want to keep the oil cooler/heater but don't necessarily want to notch the frame, I will probably use an oil filter relocation setup which I could always use for an external oil cooler if I ever needed it, but I would probably mount the oil filter under/ behind the alternator to the same big bracket that I am trying to have serve for many functions. It would be in a great spot for access, it would be nice and cool, and it wouldn't spill oil on anything[This message has been edited by zkhennings (edited 03-09-2021).]
|
|
|
|
zkhennings
|
MAR 12, 10:25 PM
|
|
Few updates, mostly research.
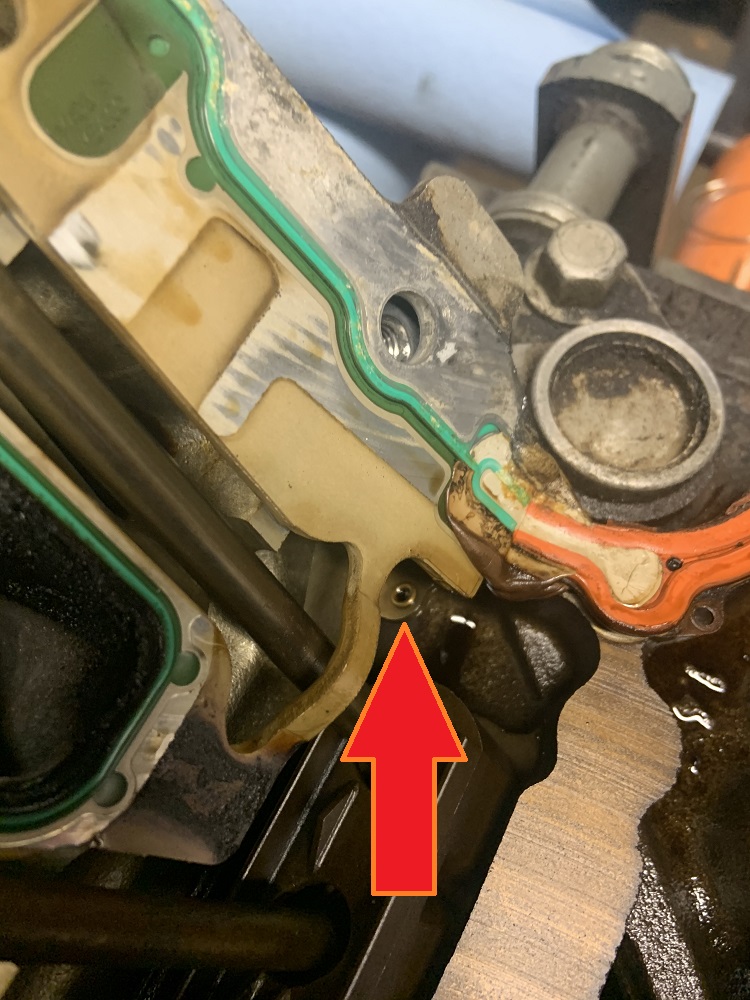
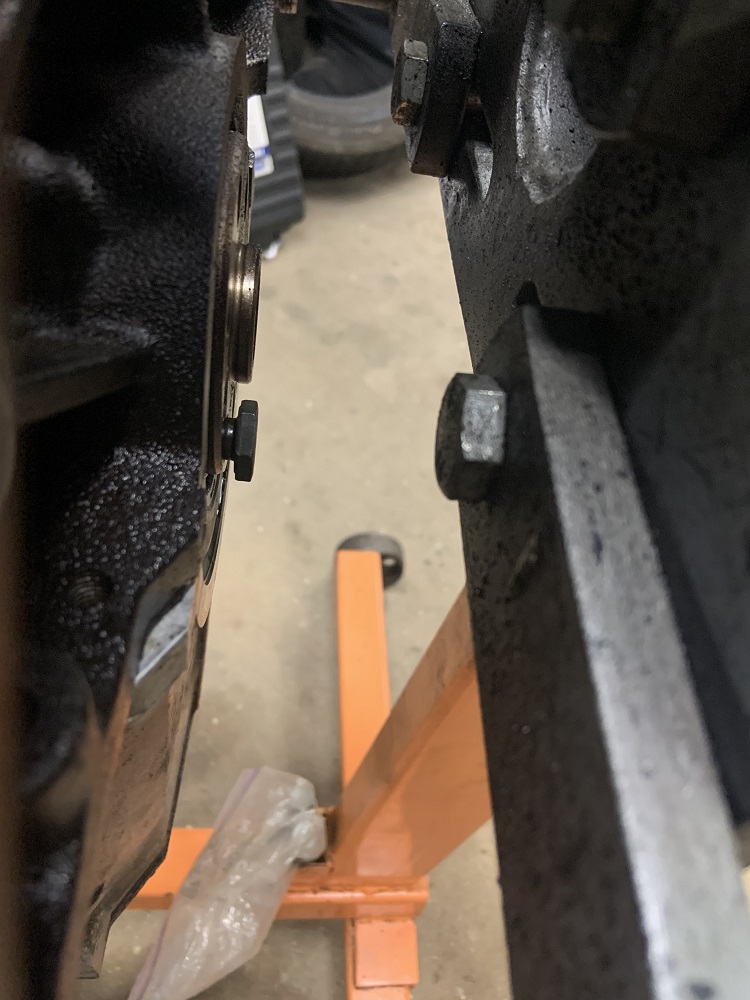
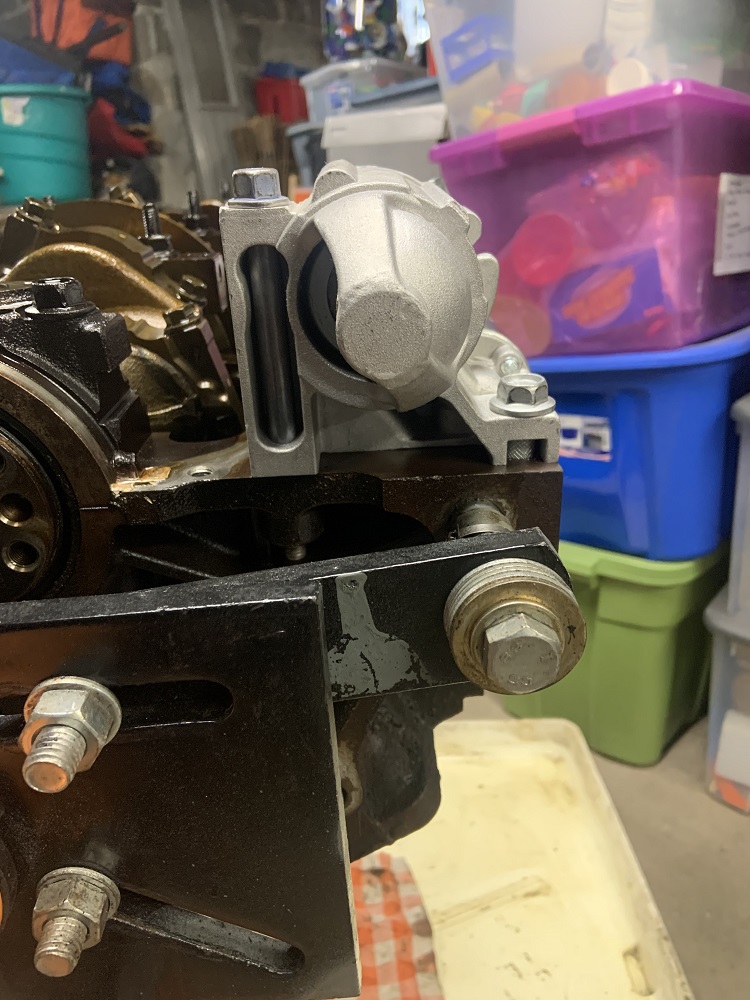
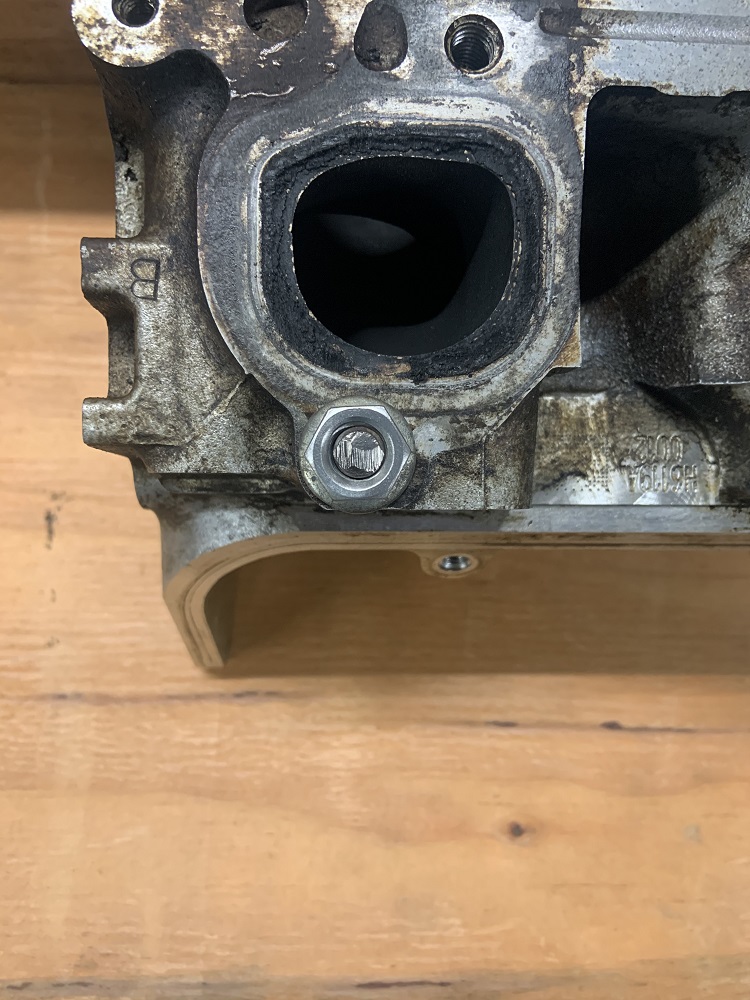
I wanted to confirm the bolt sizes that I will need for my motor mount/alternator bracket. Here are the bolts in place, and on the side I may or may not need to reinforce with that one. On the even side bank of the motor there are two holes in the same plane where the AC compressor normally bolts, I think that if I make the steel in this area thick enough I may not need to support the alternator from the backside (it will be in single shear)
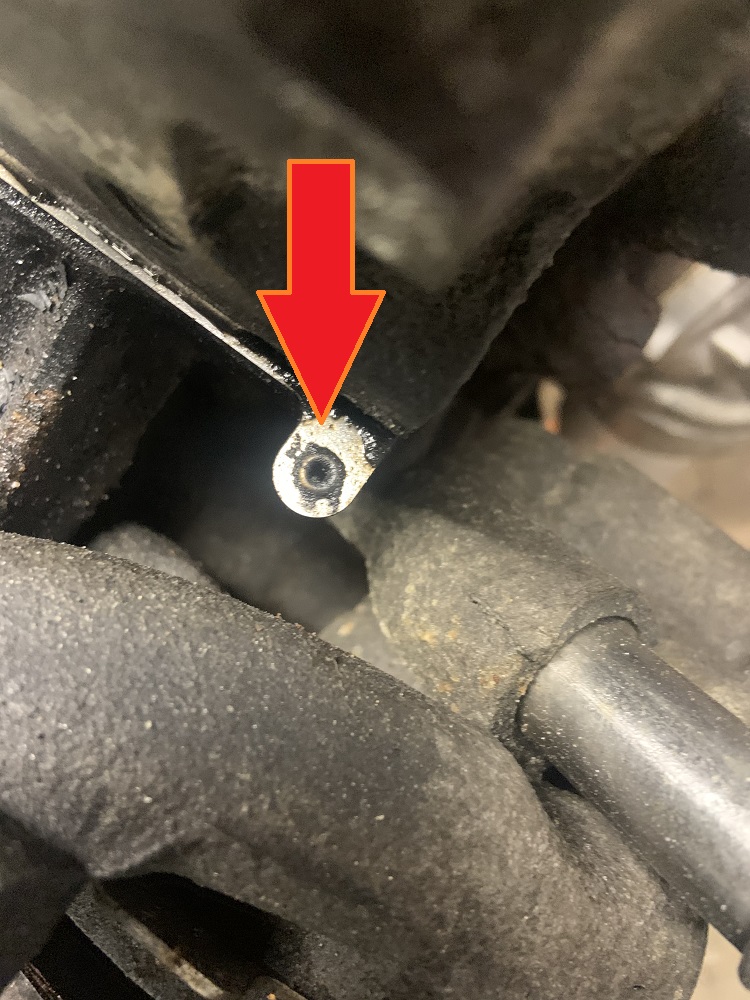
Side bolt hole I may need

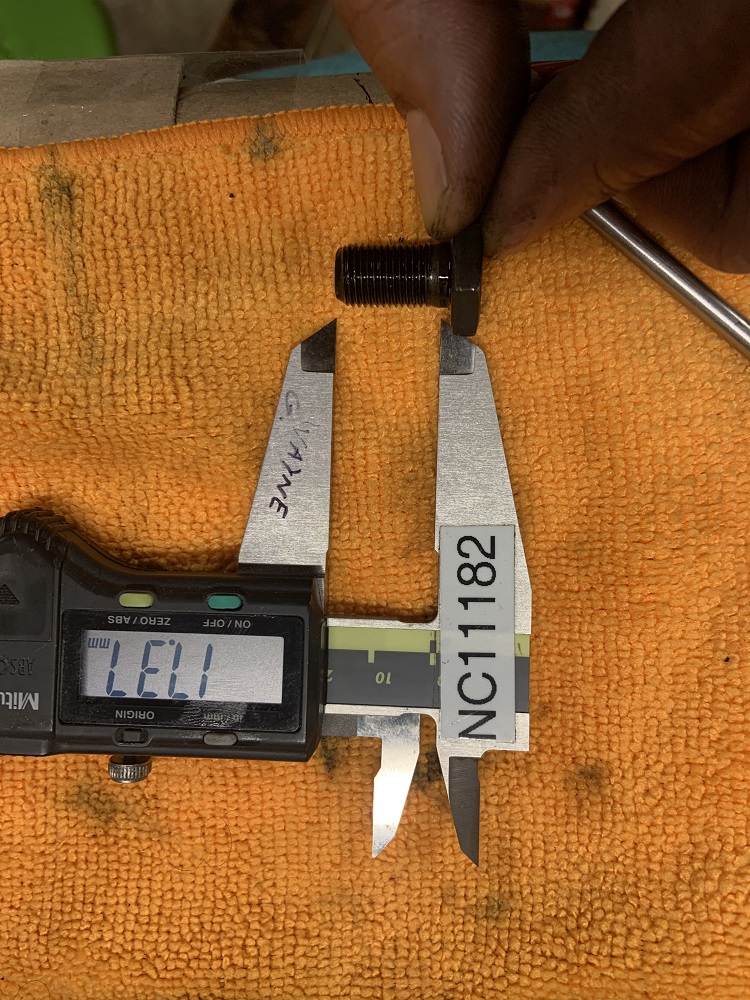
The sizes are M10x1.5 and M12x1.75, I double checked with some taps


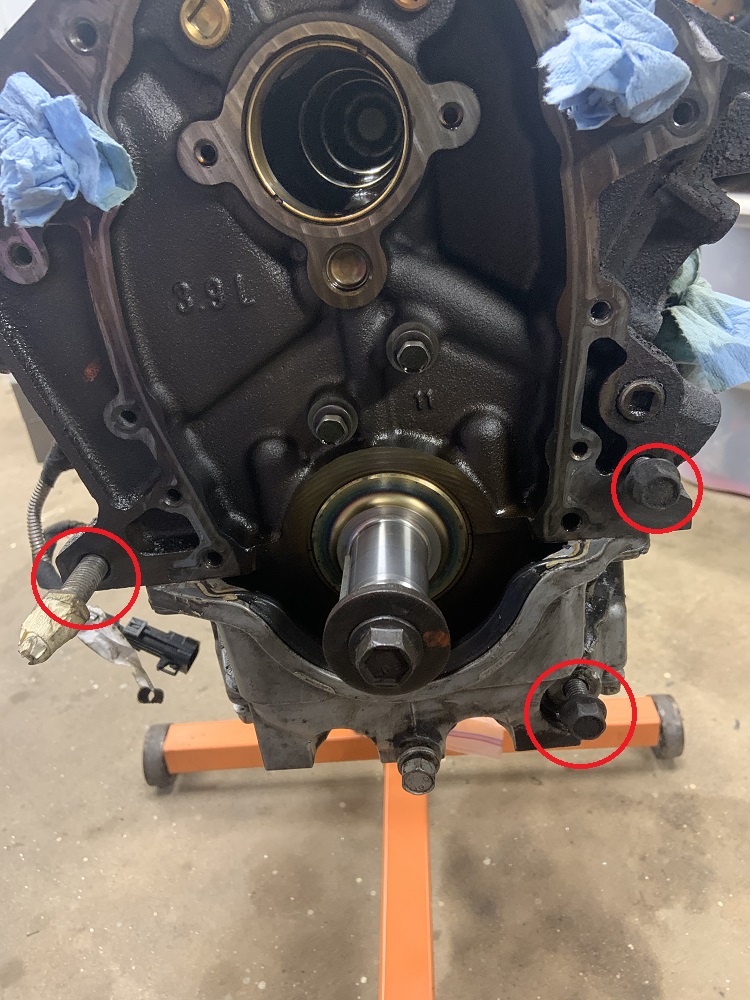
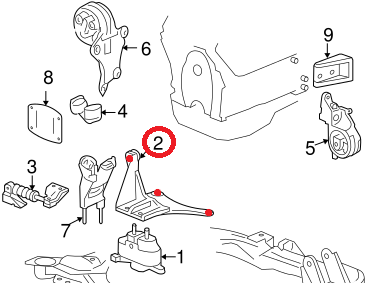
I may order some fresh bolts for these. Here is what the G6 engine mount looks like, and the two oil pan bolt holes I plan to attach to
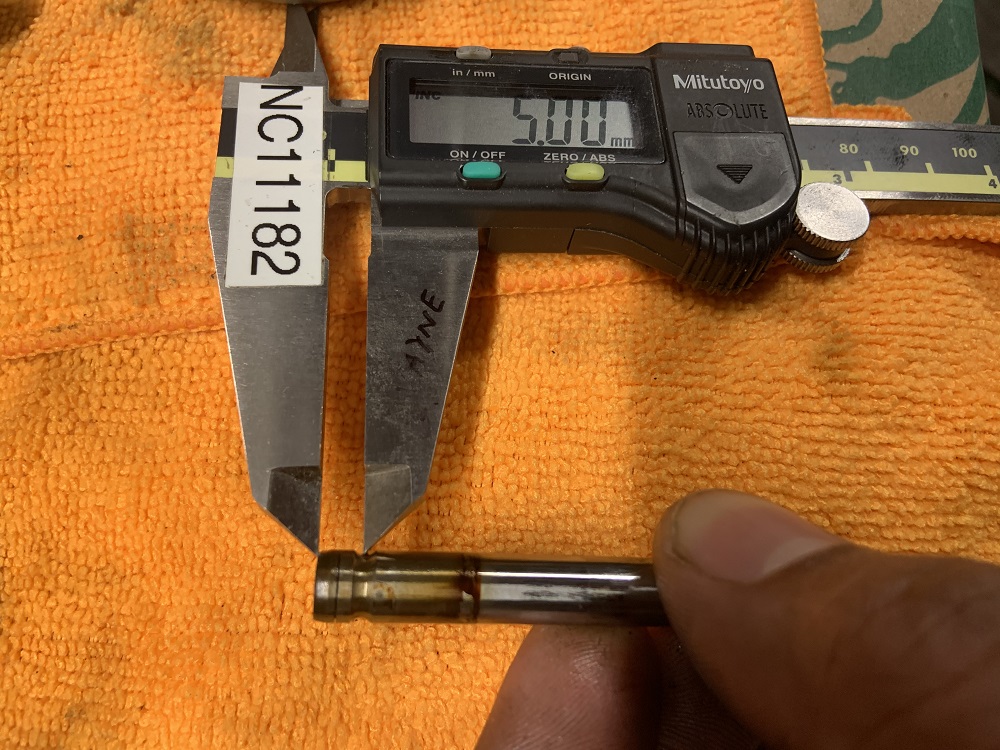
Next I needed to figure out what flywheel bolts to get, I planned to get 23mm ones like stock Fiero, but could only find 23.5mm ones, and I wanted to make sure they would fit.
Here is around how deep it threaded in, so I will be fine it has a lot of leeway. I ordered these ARP bolts for the flywheel and these ones for the pressure plate.
Flywheel - ARP102-2803 for Nissan 2.0L SR20DE/DET - M10x1.0 - 23.5mm
Pressure Plate - ARP 108-2201 for Honda D series engines - M8x1.25 - 25mm (stock is 22mm but these were closest they had and I think they will be fine, if not I'll shorten them)
I also talked to PAC today about retainers and locks for the 1218 springs and my application. They suggested these 311 retainers and these -.050" locks to increase my seat and open pressure. I ordered one set of both just to make sure they will fit before ordering the rest.
Part numbers:
PAC-R311
PAC-L8116
LS valves are 8mm in diameter, LZ9 are 7.95, close enough

The locks use a rounded cutout 5mm from the valve tip, I will compare the height to stock to make sure they are at the correct install height.
And finally, parts came in, nice.
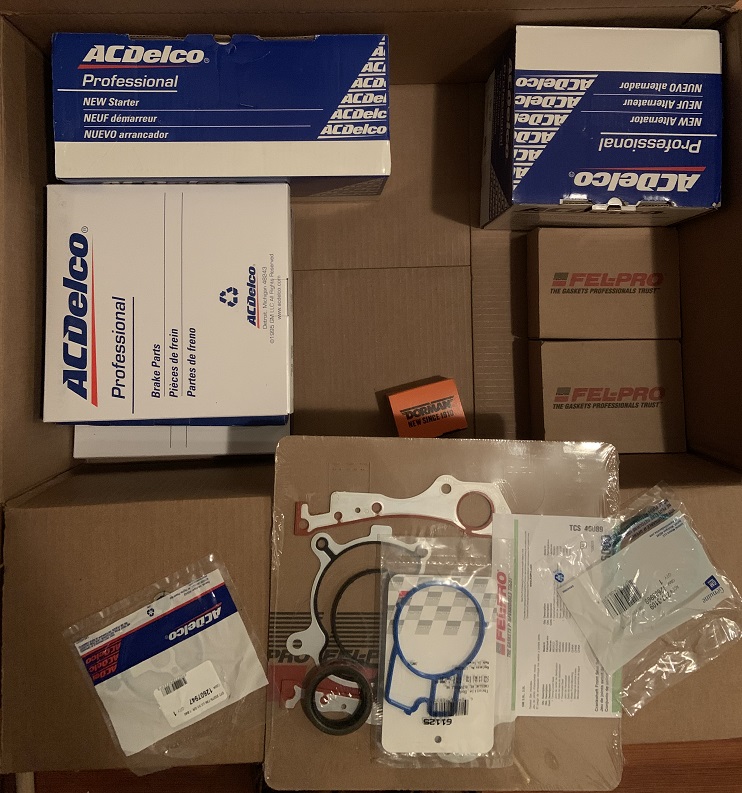 [This message has been edited by zkhennings (edited 03-12-2021).]
|
|
|
|
ericjon262
|
MAR 13, 02:04 PM
|
|
I'm 90% on the header flanges, just a little more work to do. I'm looking into production options, ATM, but will probably be setting up a run later this next week.
For the oil pressure gauge, you have 2 options, you can use the stock fiero sender and wire it up like stock fiero, or you can input the LZ9 OPSU into the microsquirt, and use a spare PWM output to drive the gauge (assuming you have a spare) I used the 2nd option in a more round about route with my LX9.
For the temp gauge, you can machine a 3 wire sending unit to fit where the LZ9 sender fits, or you can do as described above for the oil pressure gauge, again, if you have an unused PWM output. there's also the third option, of drilling and tapping a coolant passage for the stock fiero style sending unit.
Here's the thread I started about using the PWM outputs, I see that I never made the video like I said I would though... I'll have to fix that.
https://www.msextra.com/for...ic.php?f=131&t=72898------------------
"I am not what you so glibly call to be a civilized man. I have broken with society for reasons which I alone am able to appreciate. I am therefore not subject to it's stupid laws, and I ask you to never allude to them in my presence again."
cognita semper
|
|
|
|
zkhennings
|
MAR 15, 02:14 PM
|
|
Interesting stuff and good to consider, here is a diagram for the MicroSquirt, I have to do more research to figure out which of the remaining outputs could be used to drive the coolant temp and oil pressure gauges.

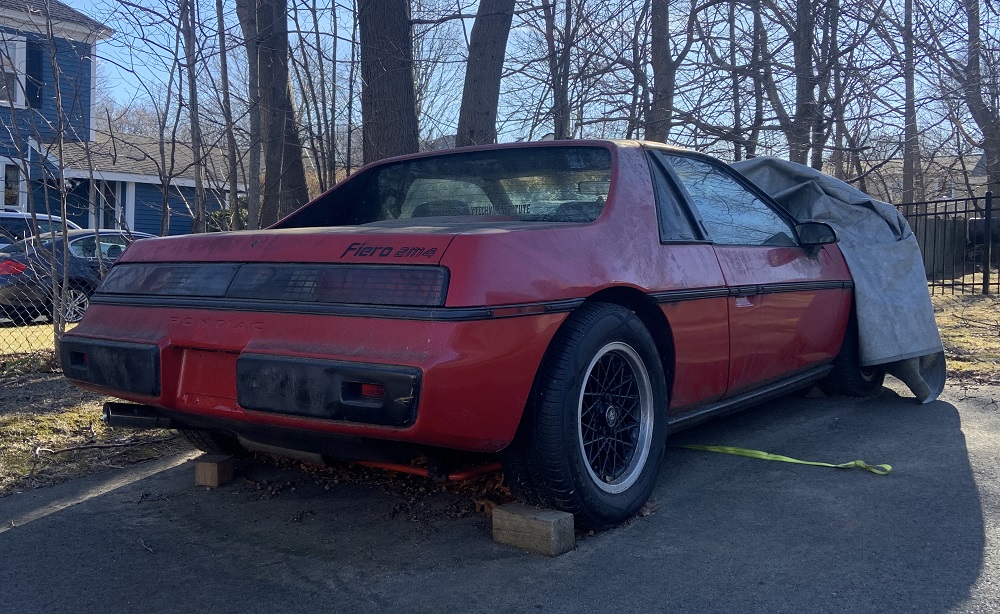
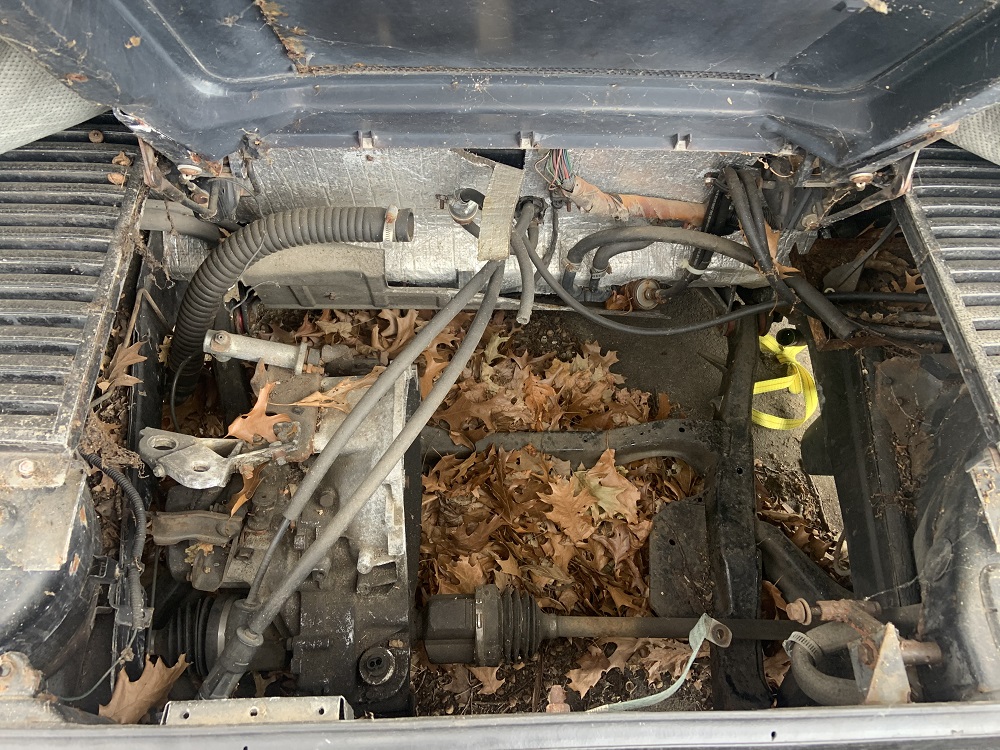
Weekend updates. I found my Fiero's keys which was a relief, and checked it out. It was dirty and the engine bay had accumulated some leaves, but nothing too bad for sitting for 6 years.
Mounted the starter with the new starter bolts I bought to make sure everything was good, it is a slightly newer starter than what was on the 2007 Uplander, it was for a 2011 Lucerne. It is incredibly light, multiple times lighter than the original Fiero starter.
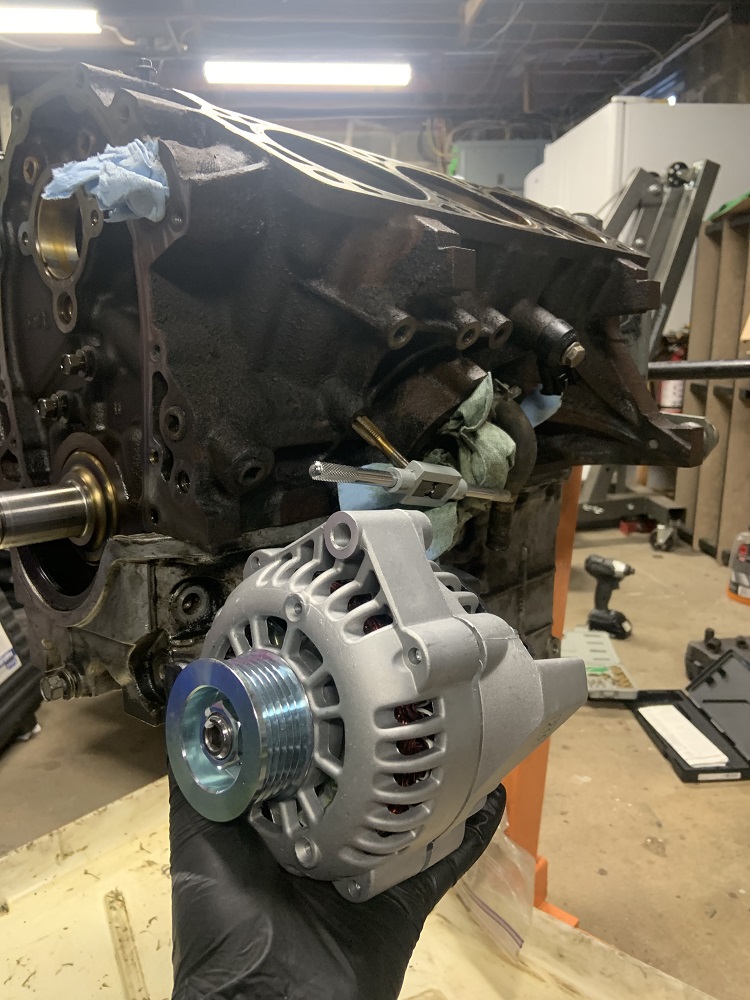
Also checked alternator placement, and I have a tap cleaning out an unused hole on the block. That hole plus the one above it could mount a small bracket to support the rear of the alternator, and it would turn the alternator into a semi load bearing member for the motor mount which would be cool, it is done all the time in motorcycles where their engines complete the frame.
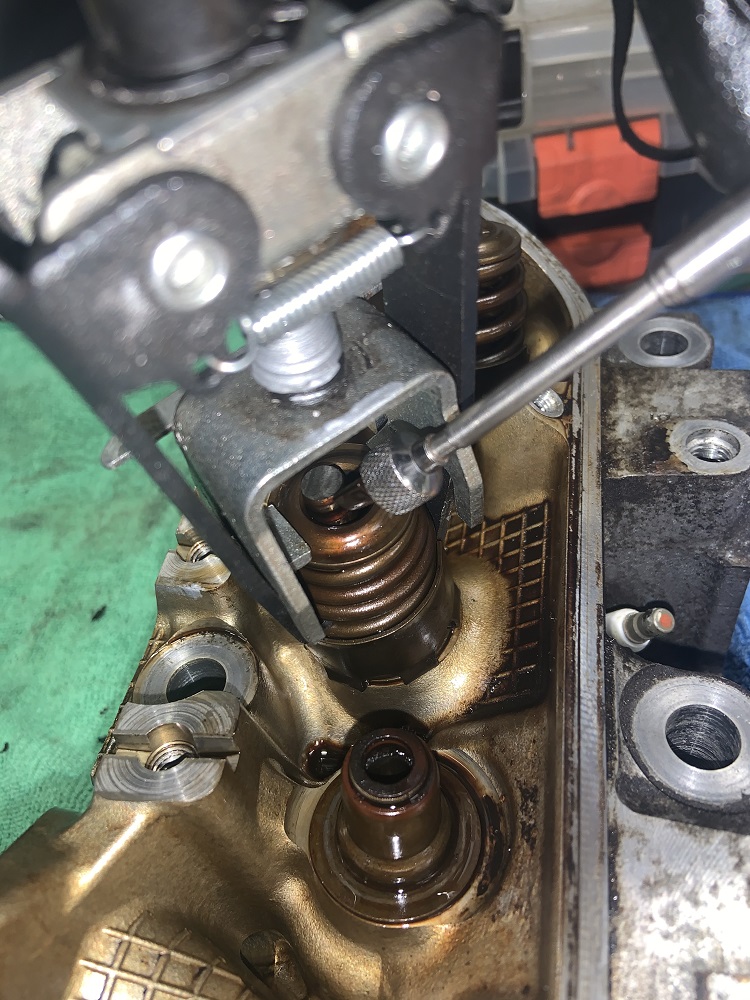
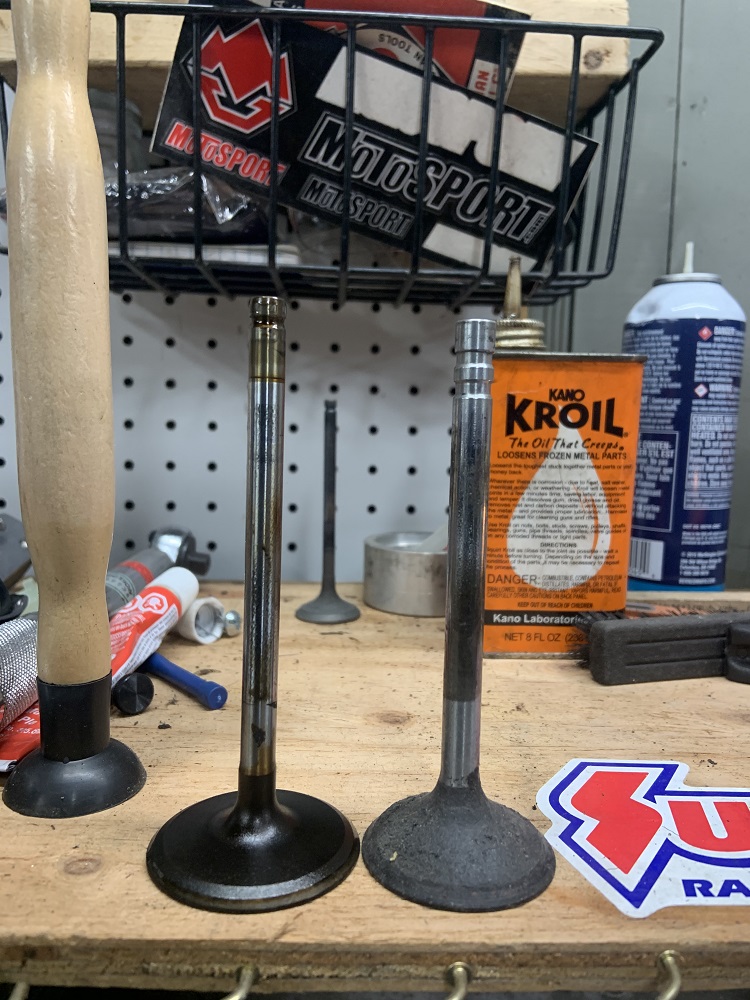
I stripped the heads fully and removed all the valves.
Here is a comparison to the 2.8 valves, note the 2.8 stem diameter is much larger, and the valve head is much thicker. Interesting how some parts evolve to be beefier and some get slimmer.
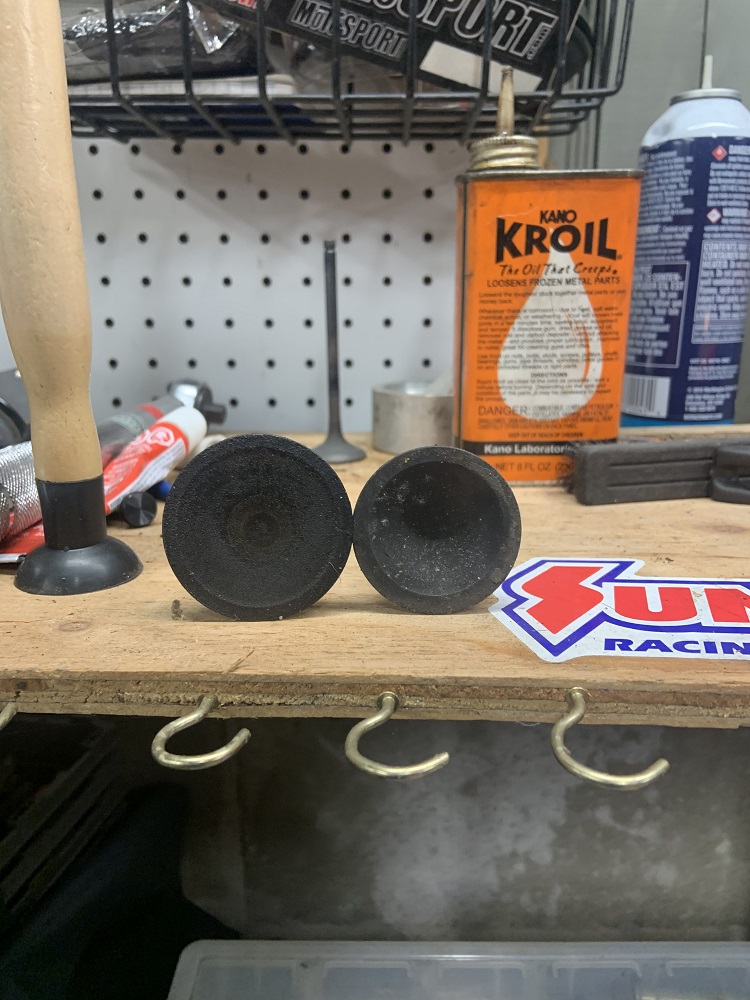
Here is a pic of the wear on the valve tips, should I get these and the rocker tips resurfaced or as long as a I reinstall in the original position will they be fine? I will get new valves and rockers eventually but I have already spent much more than I want to and they are 20-25$ per valve for the stock stuff and 25$ per rocker arm. I COULD BE CONVINCED THOUGH. Maybe.

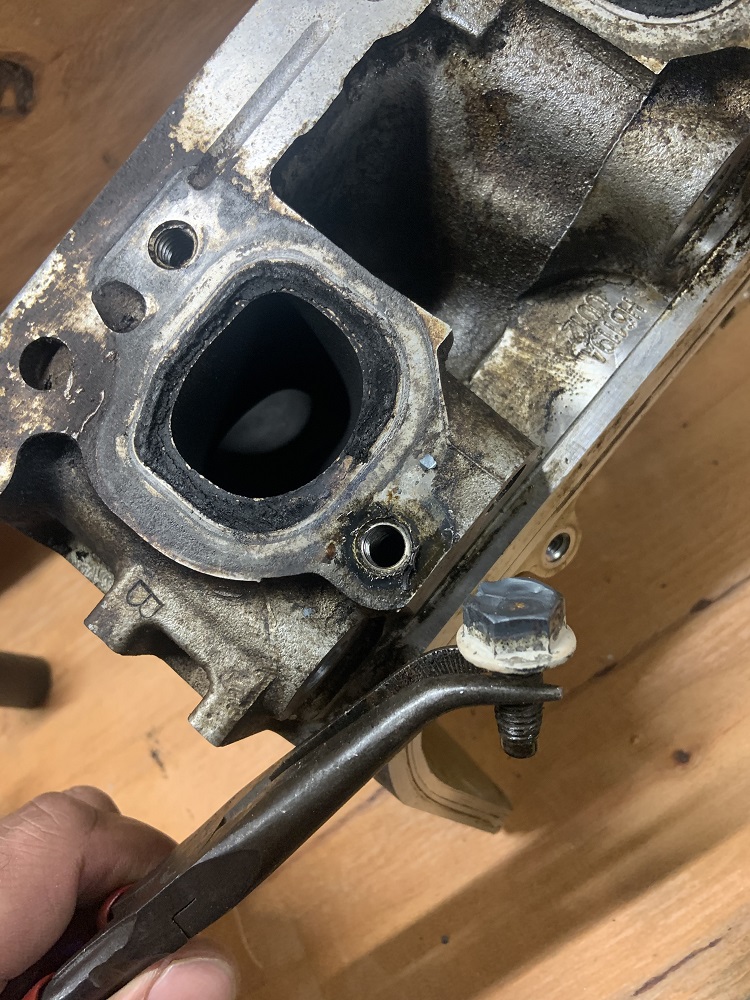
Cylinder heads were totally stripped, but I still had a broken exhaust stud on one. The castings on these 3900 heads are amazing, very impressive.

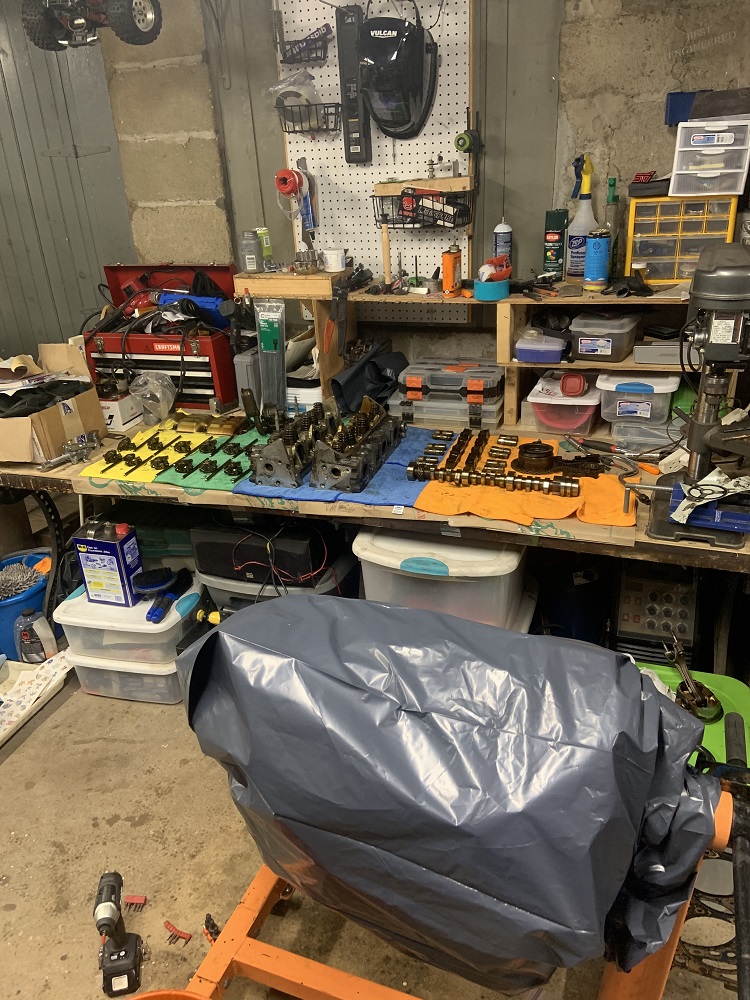
I needed to weld a nut to the stud to take it out and I could have broken out the Mig, but since I have a bunch of stuff to Tig and my Tig was not set up, I dedicated some time to getting it set up and I built this portable wooden Tig welding zone that I can also bring to my apartment.

I used a Subaru turbo flange nut which slipped over the broken stud. I hit them both with the wire wheel to get them clean.
Welded.

Removed. Easy.
Heads are now ready for porting and going to the machine shop. And the Tig welding zone turns into a speaker enhancer lol.

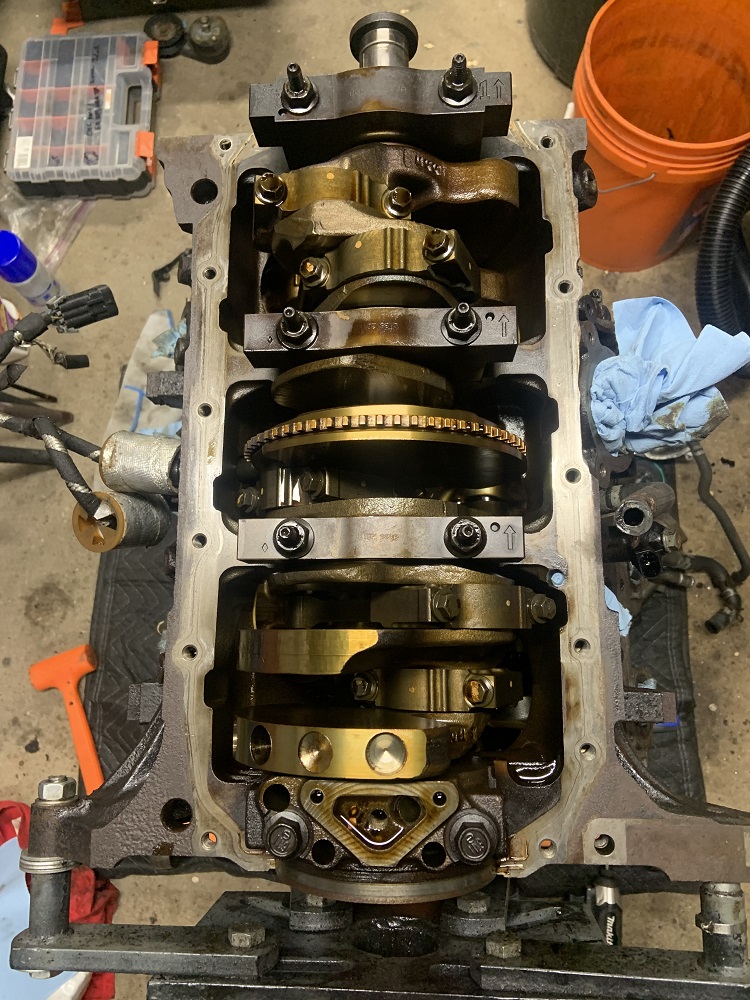
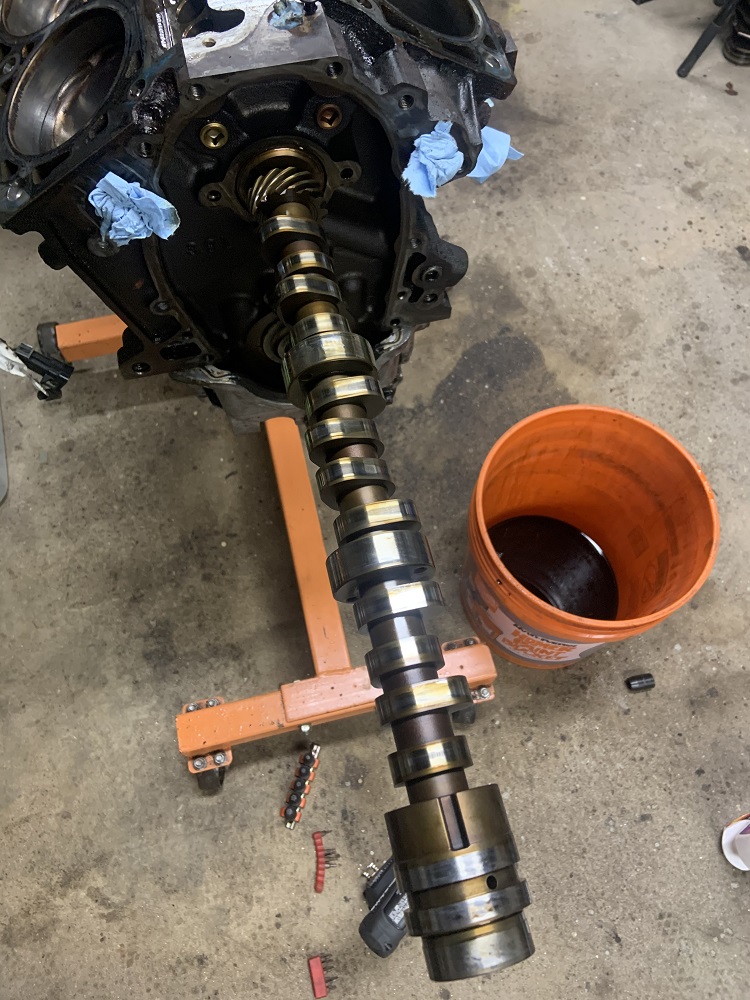
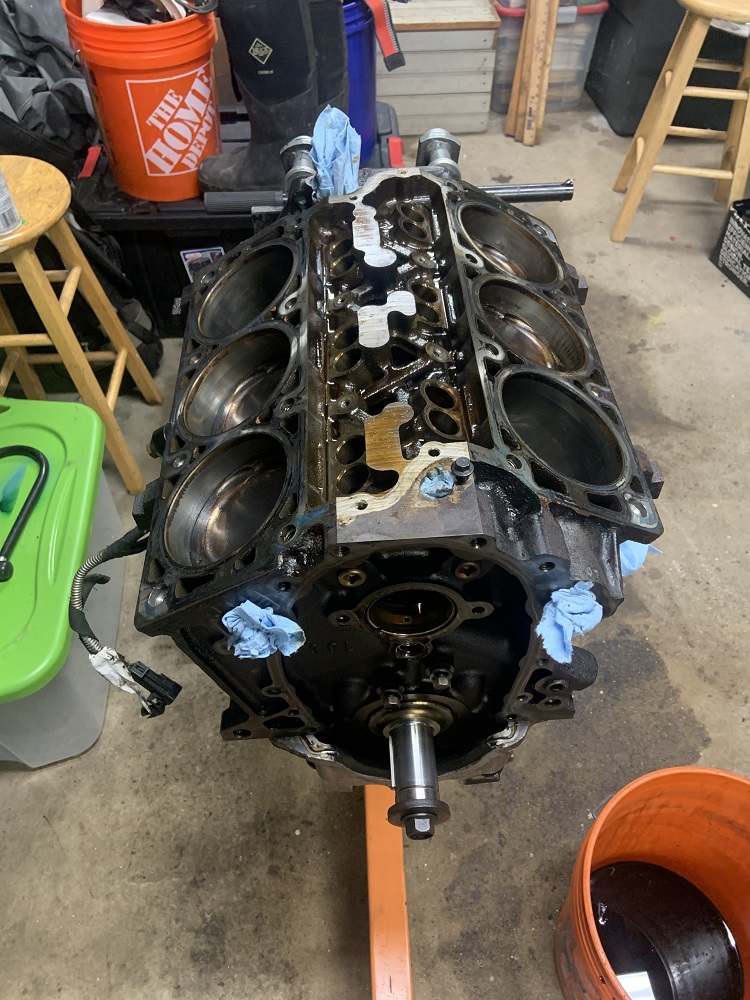
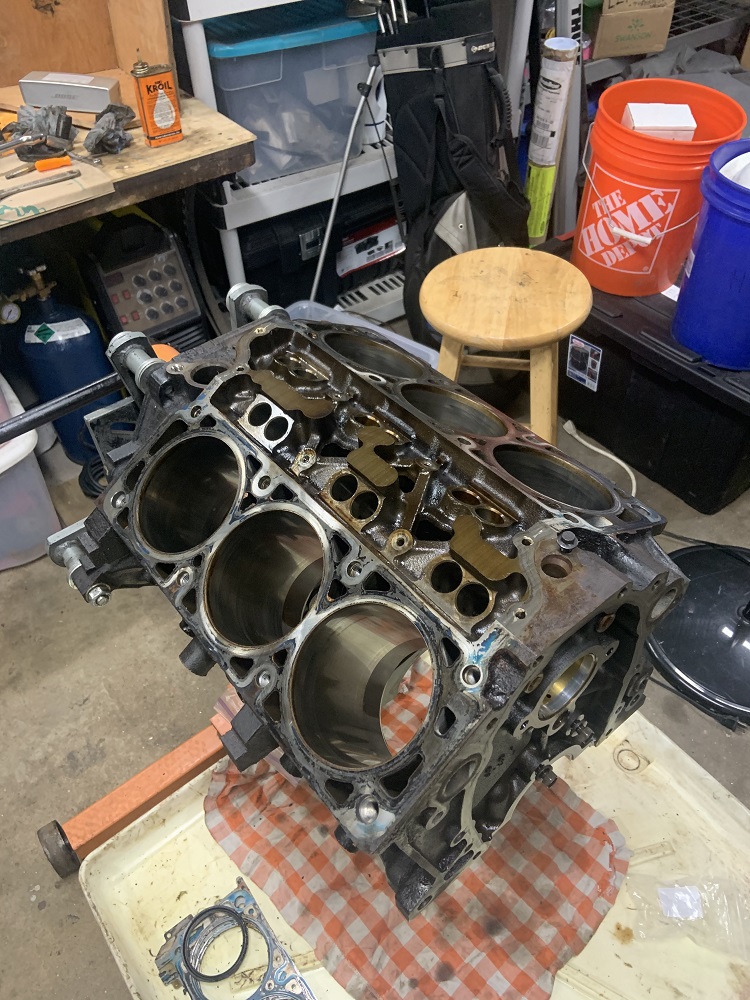
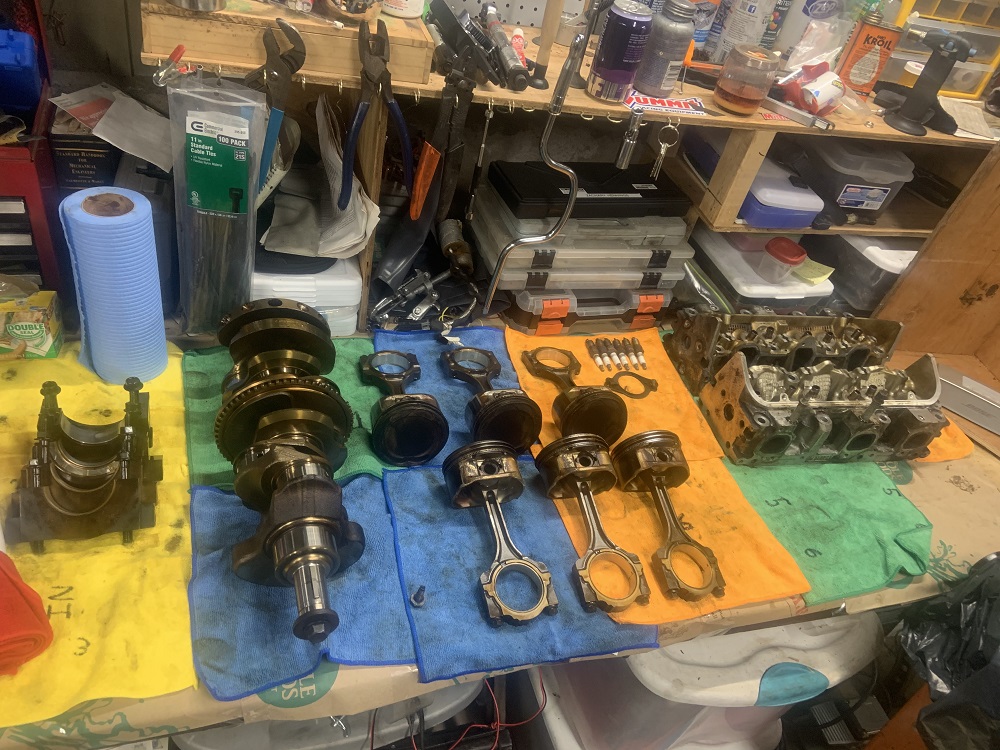
I turned my focus to the block and removed all of the pistons and rods and then all the main caps.
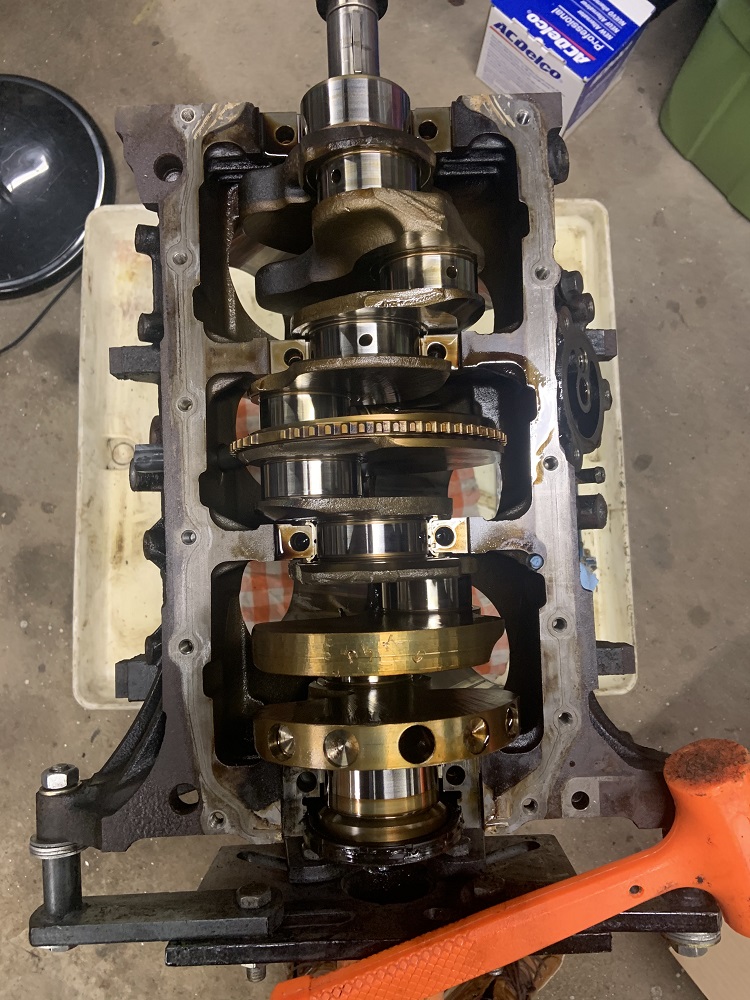
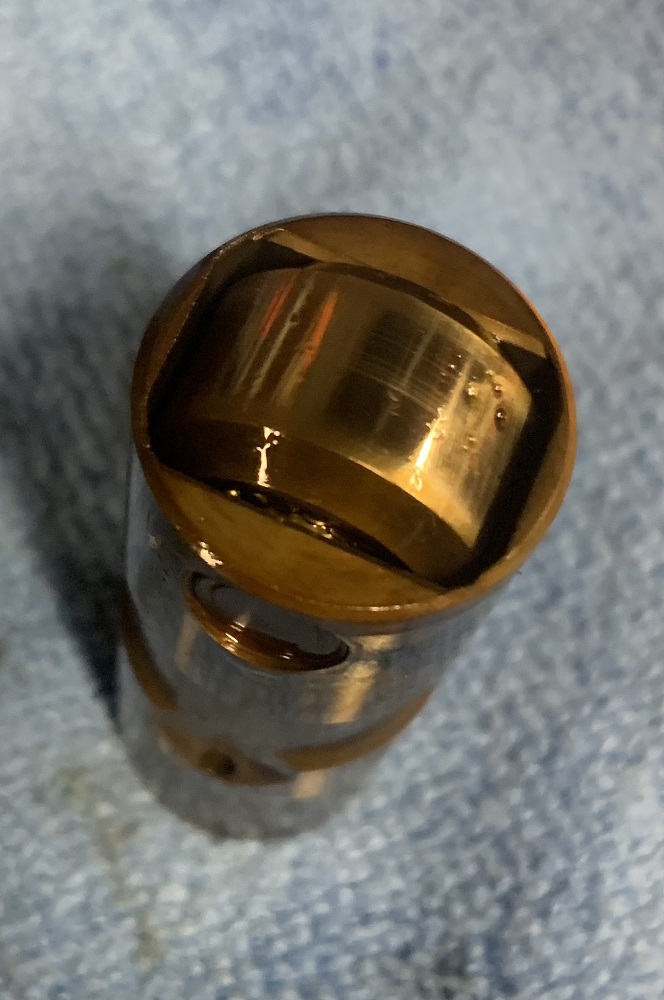
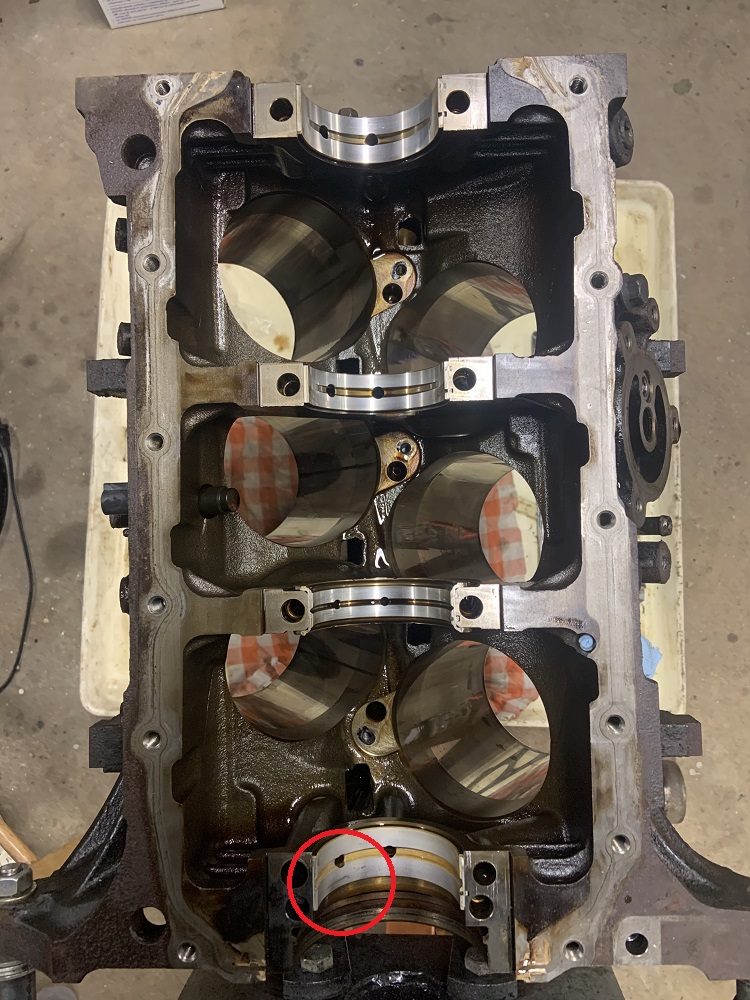
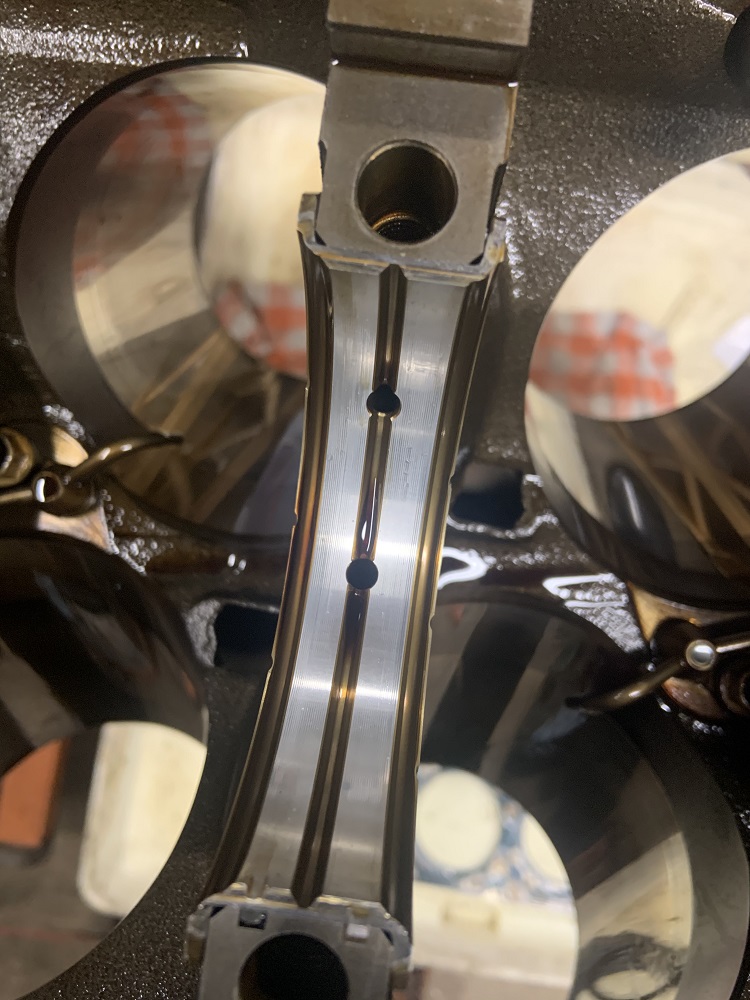
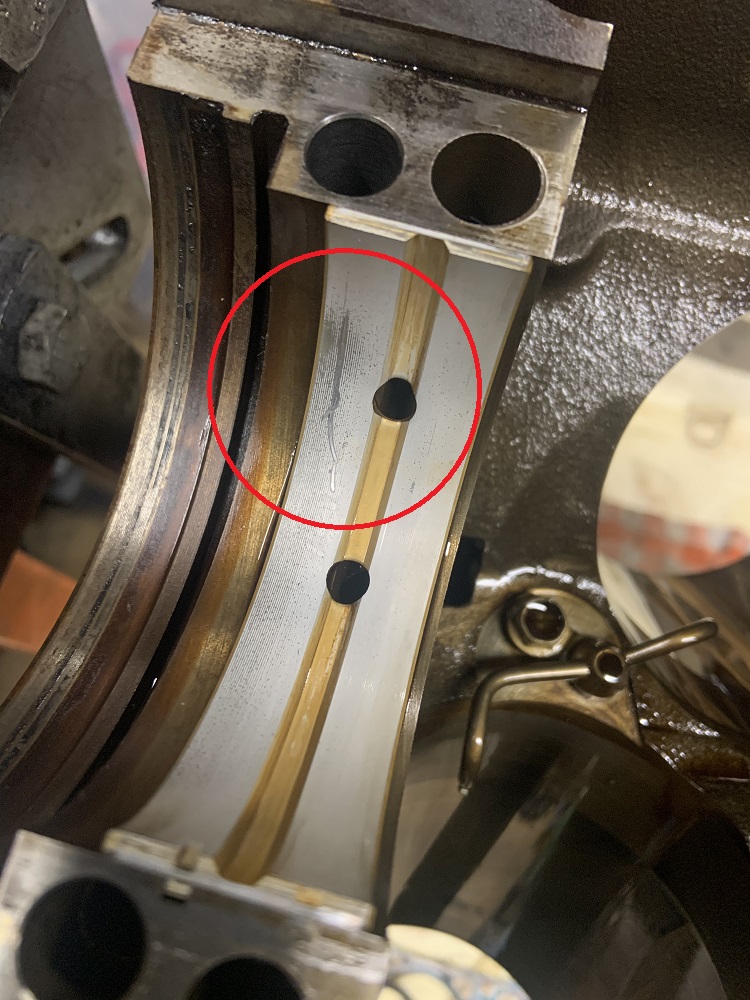
The main and rod journals on the crank look perfect. The rod bearings look perfect. The bearings in the block look decent, but the rear bearing looks not amazing.
Front.
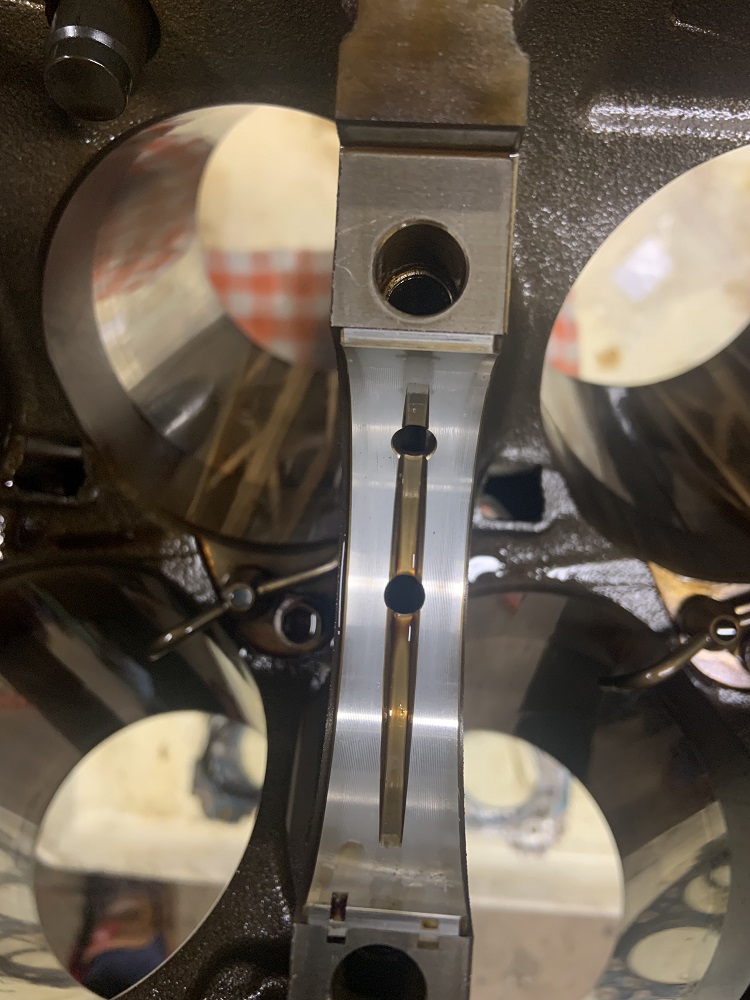
Middle.
And the suspect rear bearing.
The rear journal of the crank looks great.

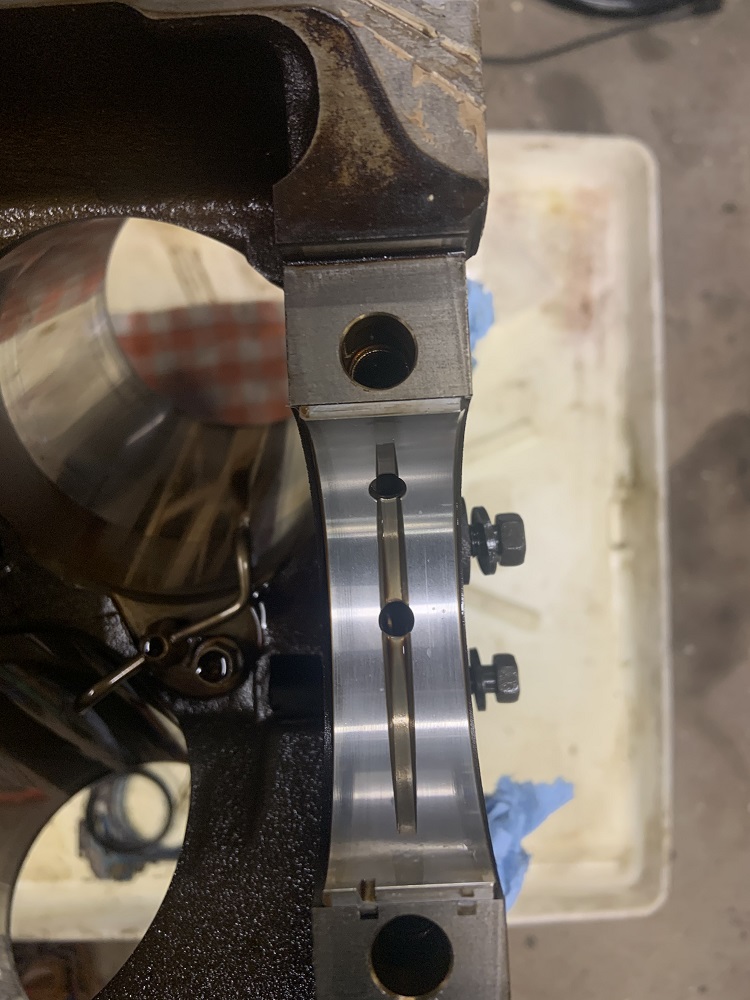
Here are the main caps. I circled some damage in the rear bearing.
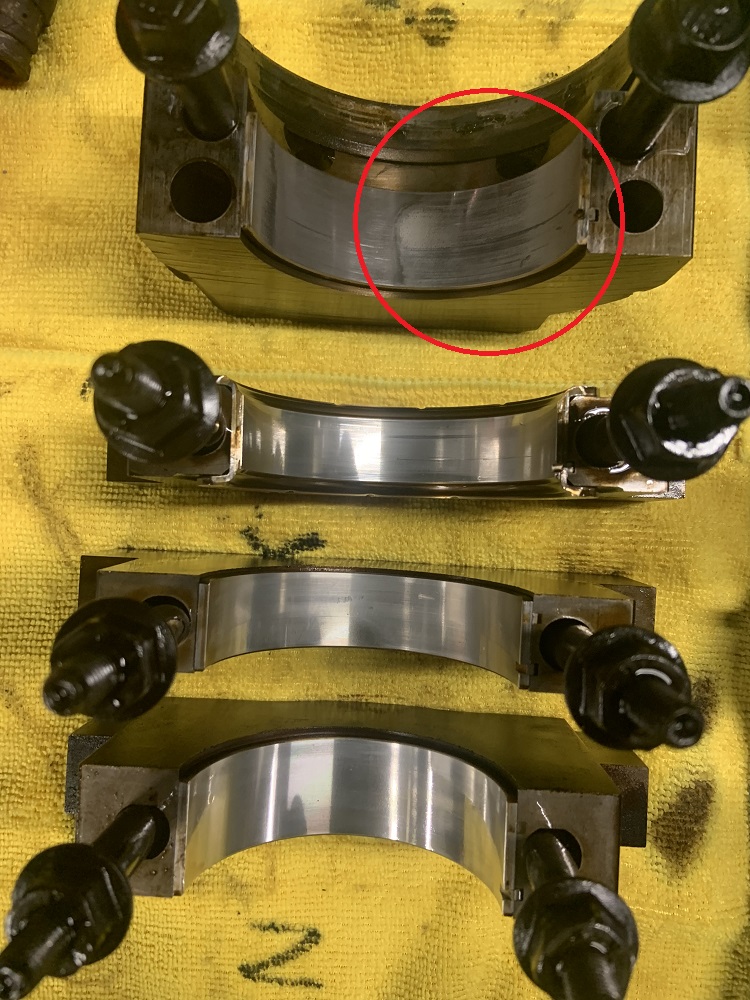
In light of this I will get new main bearings and probably rod bearings too. Since I will be using ARP rods I may need to get the rods honed if the ARP bolts oval them out. I will bring them to the machine shop to check.
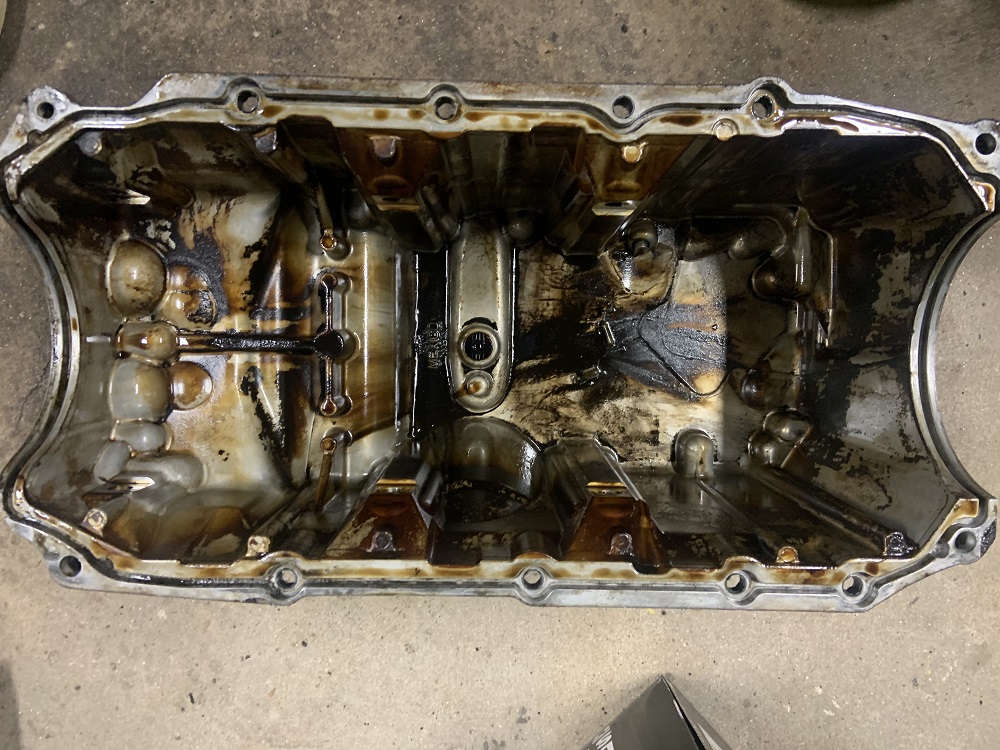
Here is the bare block. I am going to put it in a big tub full of degreaser from the dollar store to clean it up. I may bring it to the machine shop for a hot tanking depending on the cost.
And I stored and organized all the stuff that was on the bench to make room for how it currently sits.
Now it is time to clean things and wait for more parts and tools to come in, as well as port the heads and get the heads resurfaced. I will start painting some components, and I am going to do some major trimming on the coolant crossover.[This message has been edited by zkhennings (edited 03-15-2021).]
|
|
|
|