
 
     |
| Building a 3800 SC...Never Worked on Cars Before! (Page 2/3) |

|
ragoldsmith
|
DEC 21, 07:15 PM
|
|
So I started a video series all about my Fiero. It's on me and my buddy's YouTube channel, Bro Builds. It's a brand new channel for us (gonna be all about cars and around the house projects), but I've been doing YouTube exclusively as a career for about 5 years. I'm not going to use this thread as a platform to push my videos or anything. I just thought I'd share the first video here, if anyone is interested, and leave it at that. Hope you guys enjoy!
My New Project Car
And yes, the title is...uh...provocative. On purpose! Ha ha!
Ryan
|
|

|
cliffw
|
DEC 24, 04:55 PM
|
|
| quote | Originally posted by ragoldsmith:
I'm not going to use this thread as a platform to push my videos or anything. |
|
You just did.
|
|

|
Patrick
|
DEC 24, 08:10 PM
|
|
| quote | Originally posted by Frenchrafe:
And wow, your car / garage / motor is clean!!
|
|
| quote | Originally posted by cam-a-lot:
That is the CLEANEST garage I have ever seen...
|
|
| quote | Originally posted by ragoldsmith:
I've been doing YouTube exclusively as a career for about 5 years.
|
|
Is that how you paid for such a nice clean garage? Damn, I've been wasting my video talents all these years. 
|
|
|
|
ragoldsmith
|
DEC 24, 08:42 PM
|
|
| quote | Originally posted by Patrick:
Is that how you paid for such a nice clean garage? Damn, I've been wasting my video talents all these years. |
|
Yeah man, it actually is.
|
|
|
|
IMSA GT
|
DEC 24, 11:10 PM
|
|
|
Just watched the video and noticed you have the stealth wingstands on the car. Very nice.
|
|
|
|
ragoldsmith
|
DEC 24, 11:59 PM
|
|
| quote | Originally posted by IMSA GT:
Just watched the video and noticed you have the stealth wingstands on the car. Very nice. |
|
Thanks, the previous owner installed them. I really like the way they extend the back end just a touch. The previous owner really did a fantastic job with the car. I hope to continue the quality improvements!
|
|
|
|
ragoldsmith
|
DEC 29, 12:34 PM
|
|
Disclaimer: I am very much an amateur and this is my first time doing anything like this. Also, the names I call things are mostly my own so...just go with it.
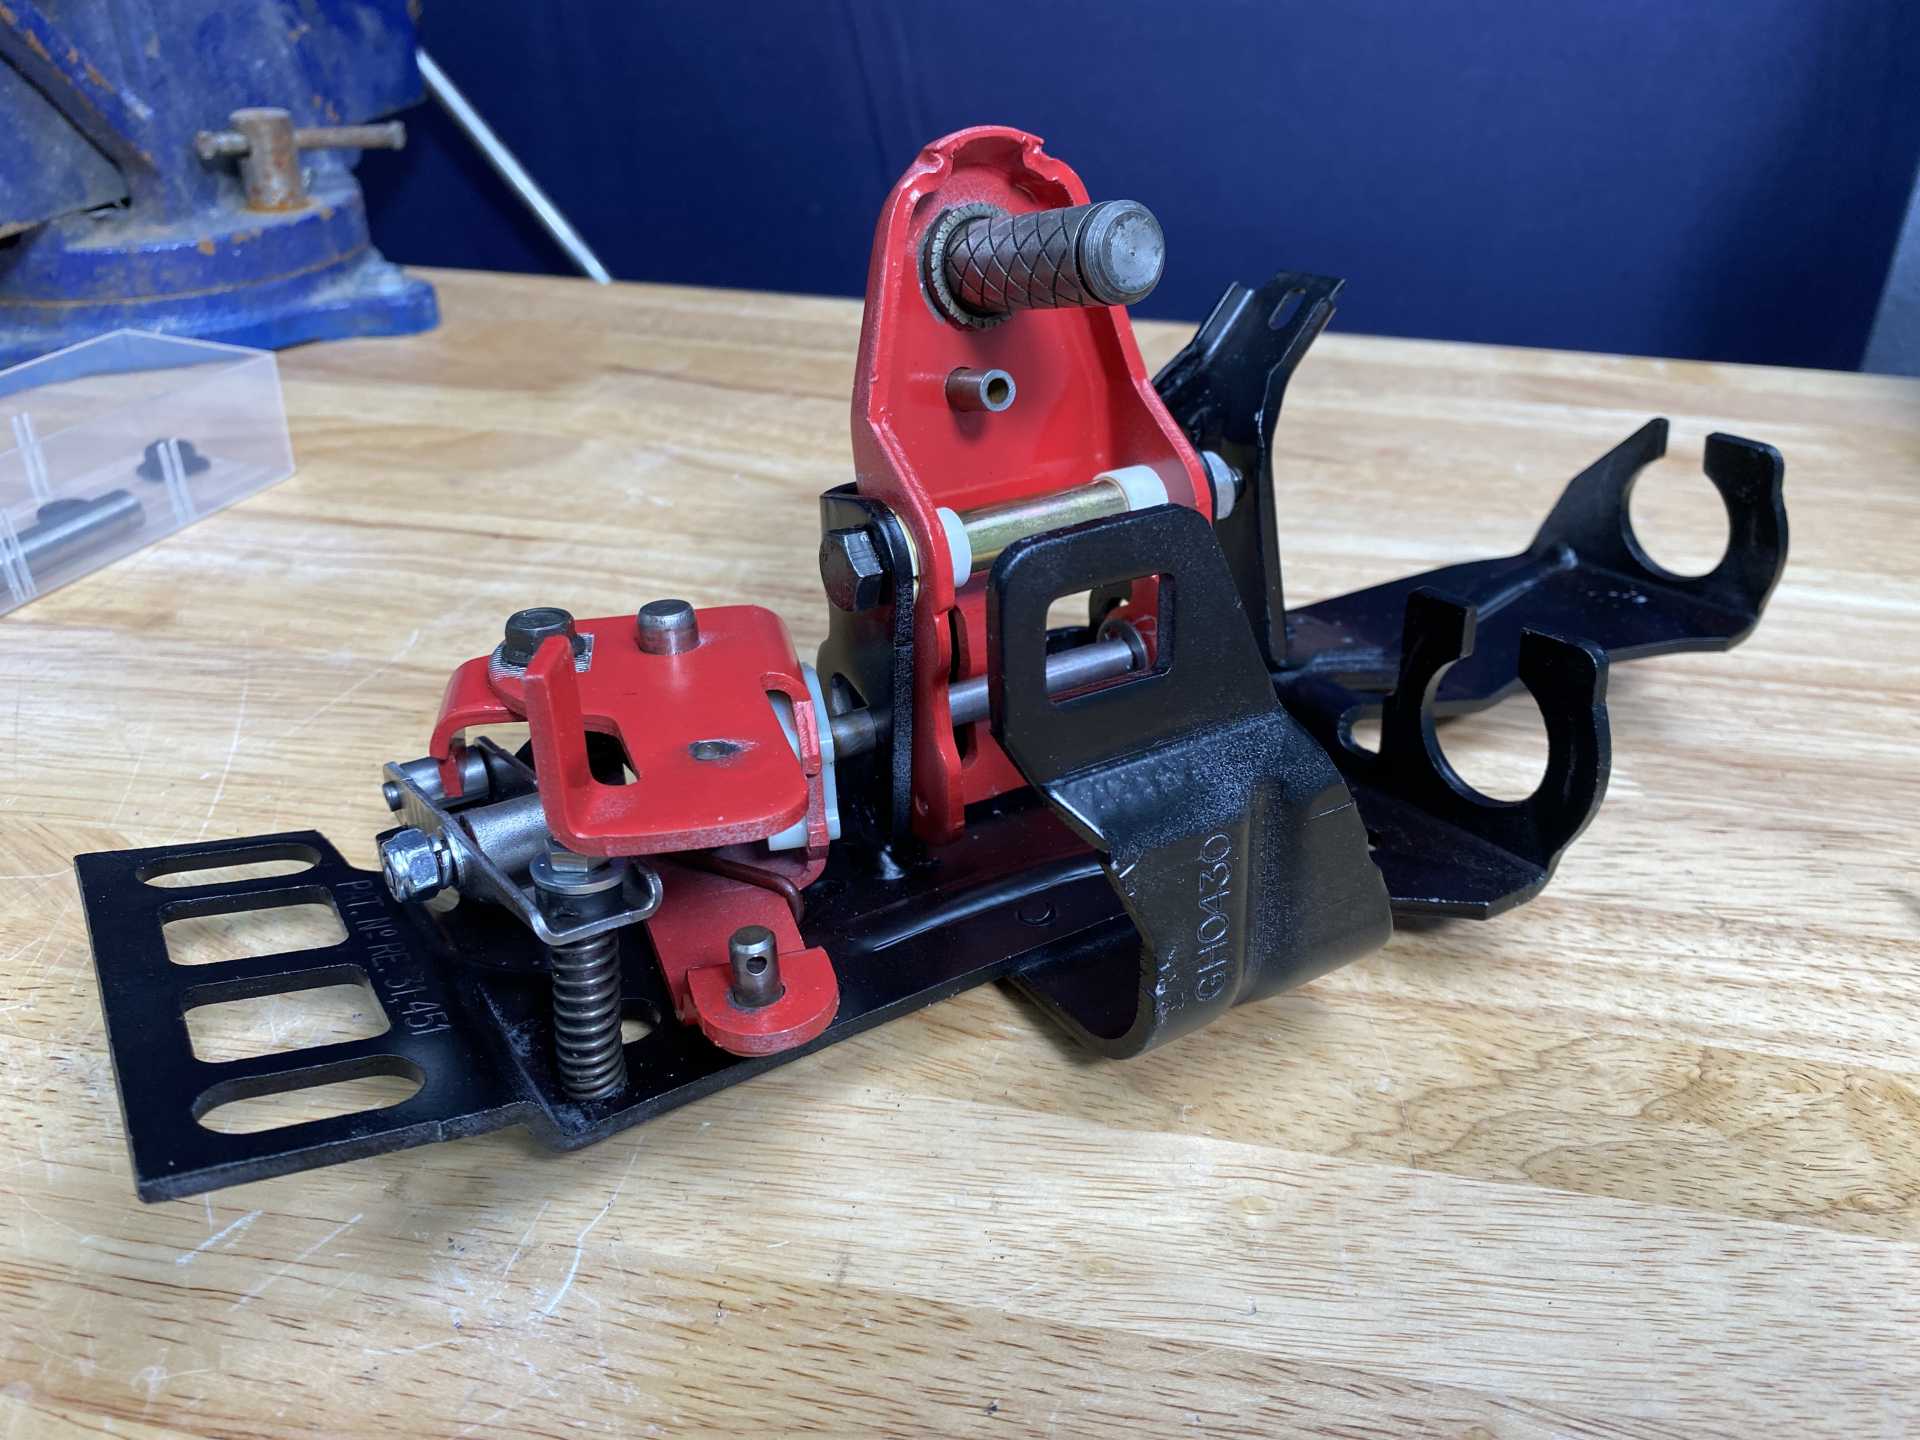
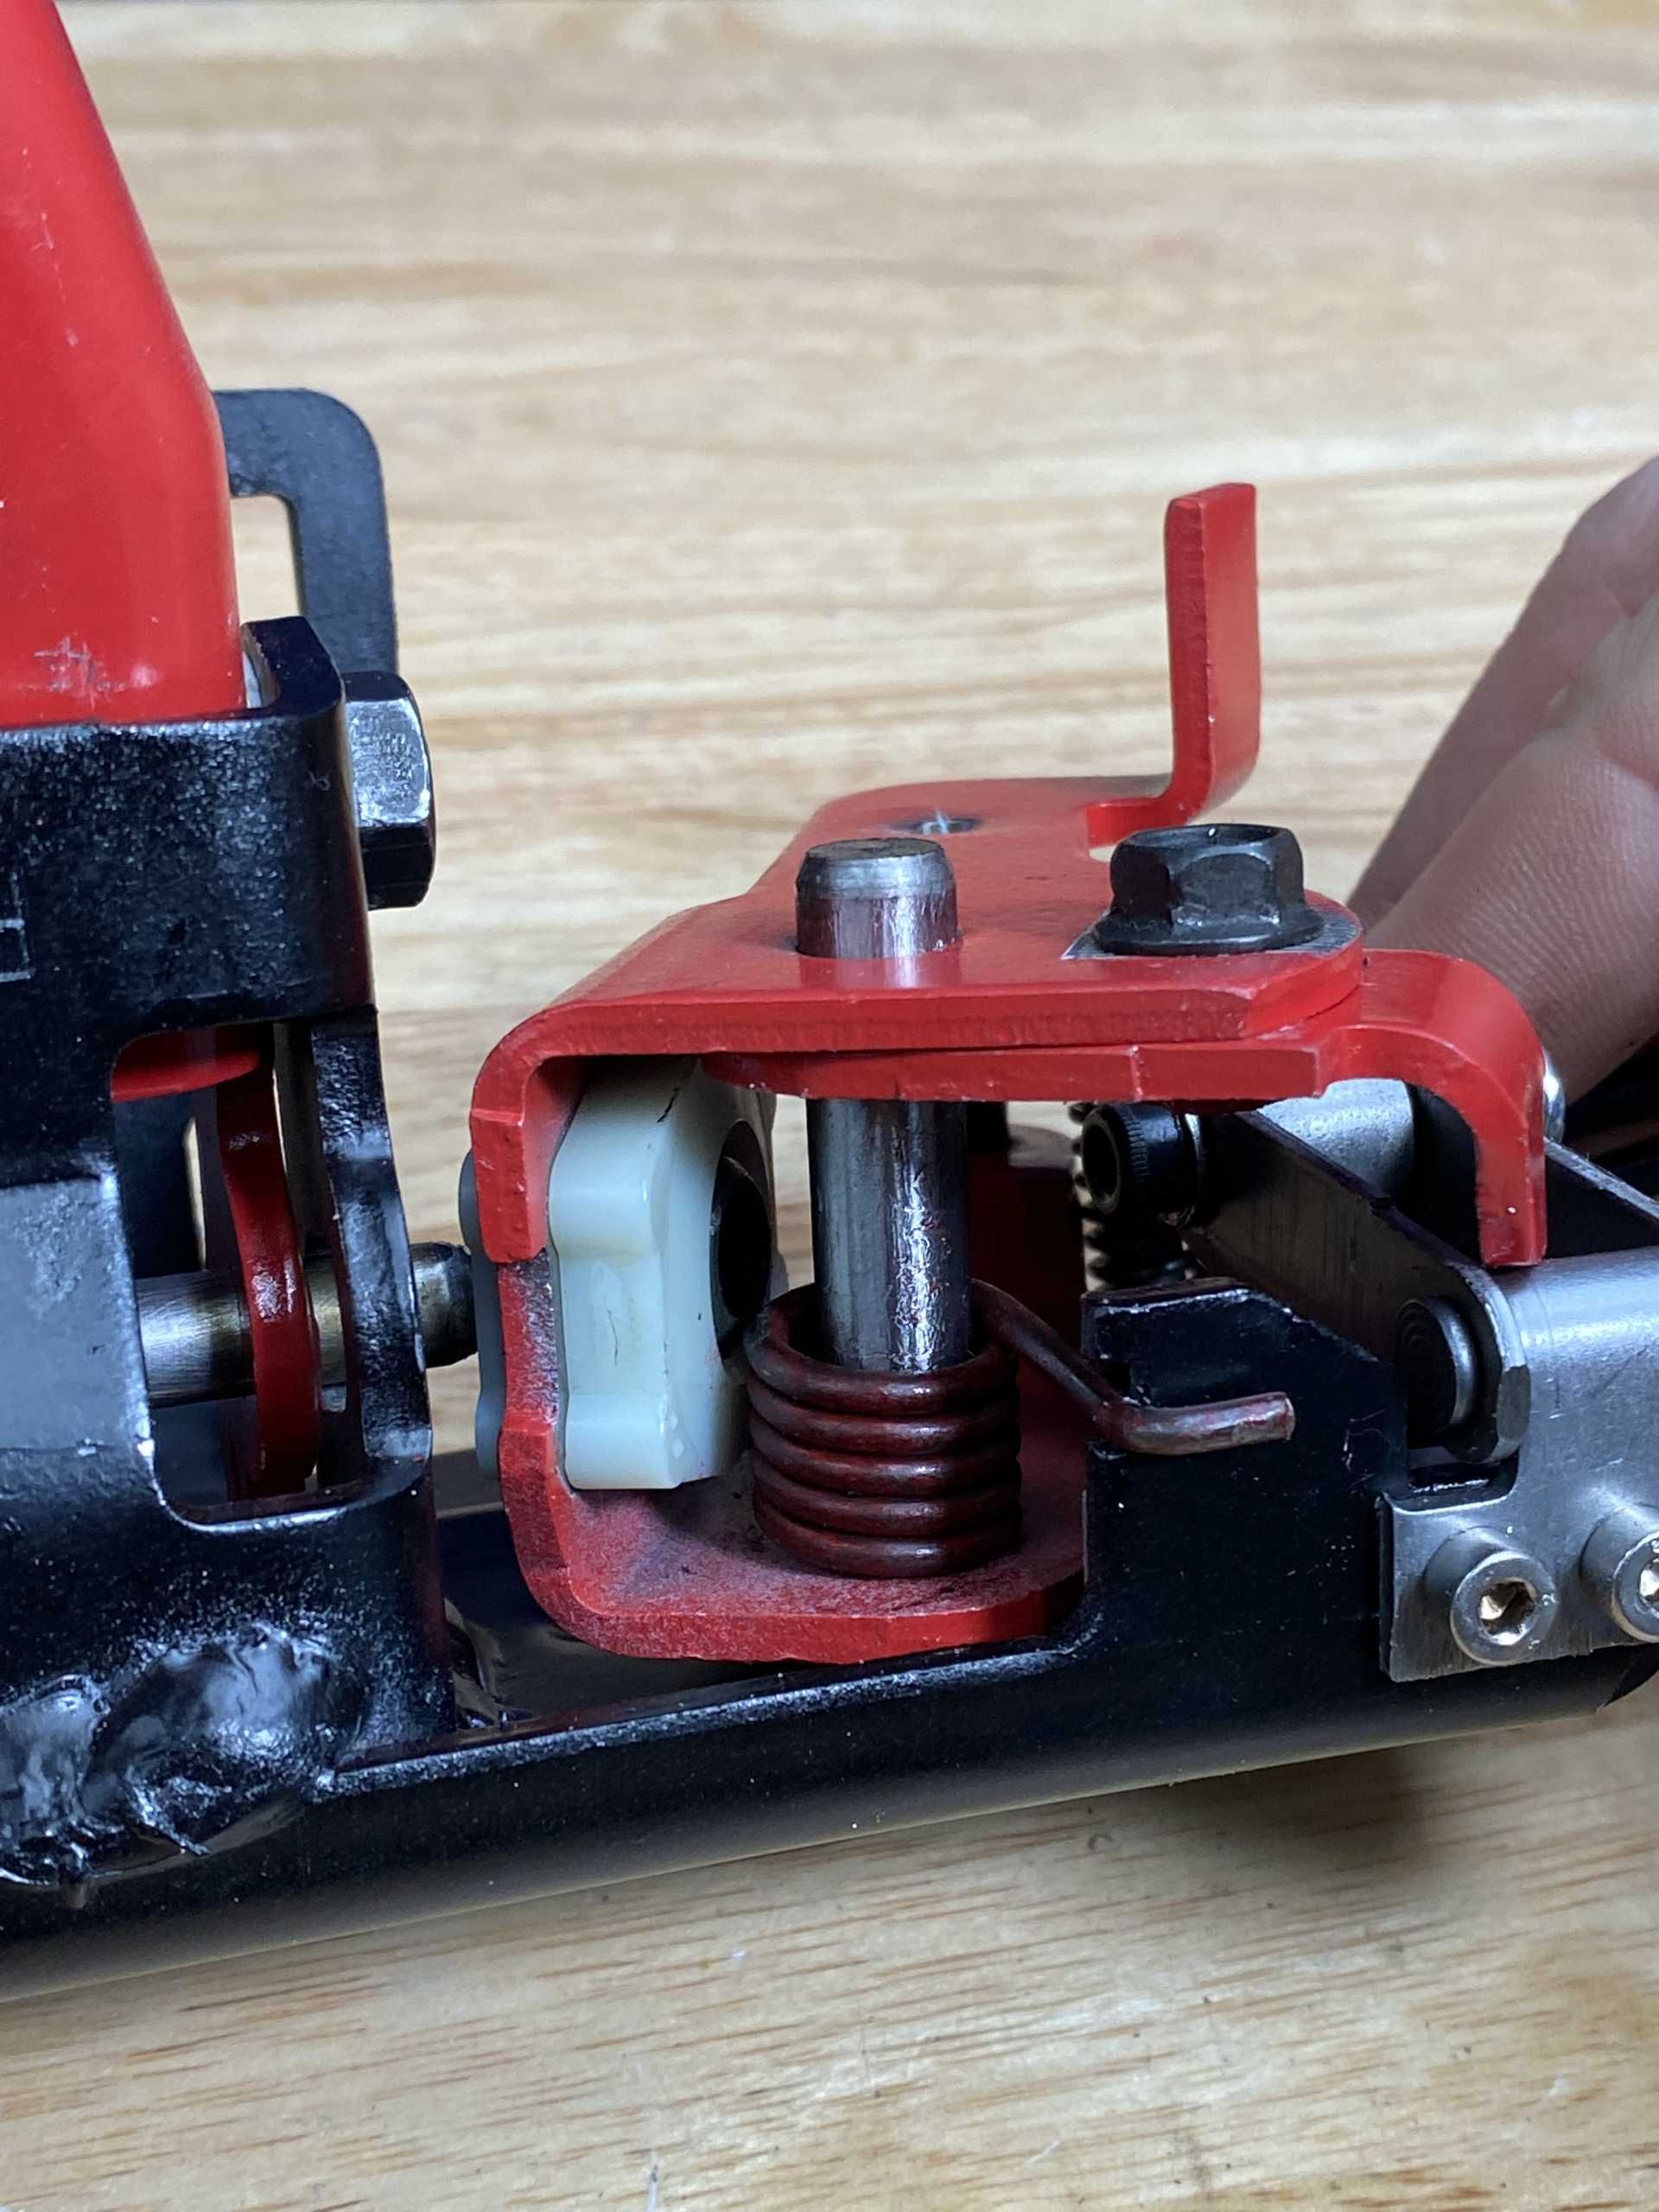
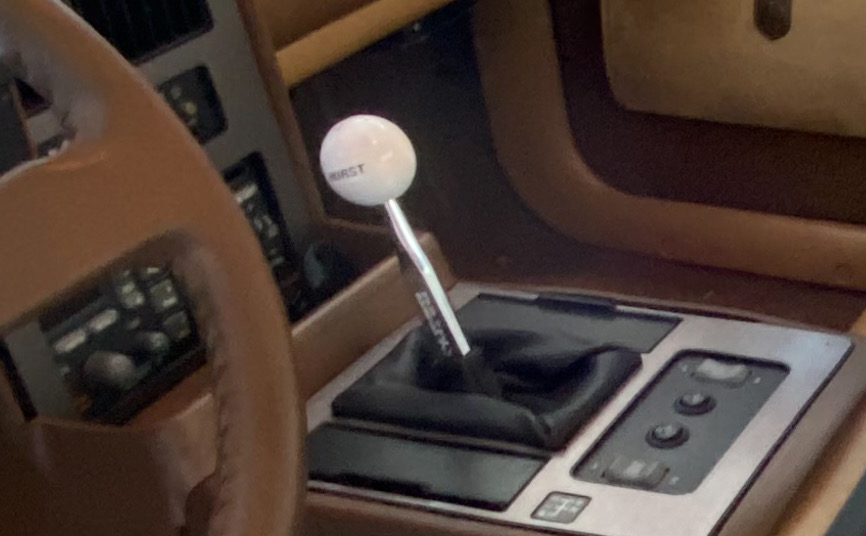
Just finished my first project. Rebuilding the shifter. It started with just installing a new shifter (RD comp short throw), but when I opened everything up and saw the surface rust on the shifter assembly, I figured I might as well pull it out and clean it up. And since it was all going to be apart...I might as well get Rodney’s rebuild kit.
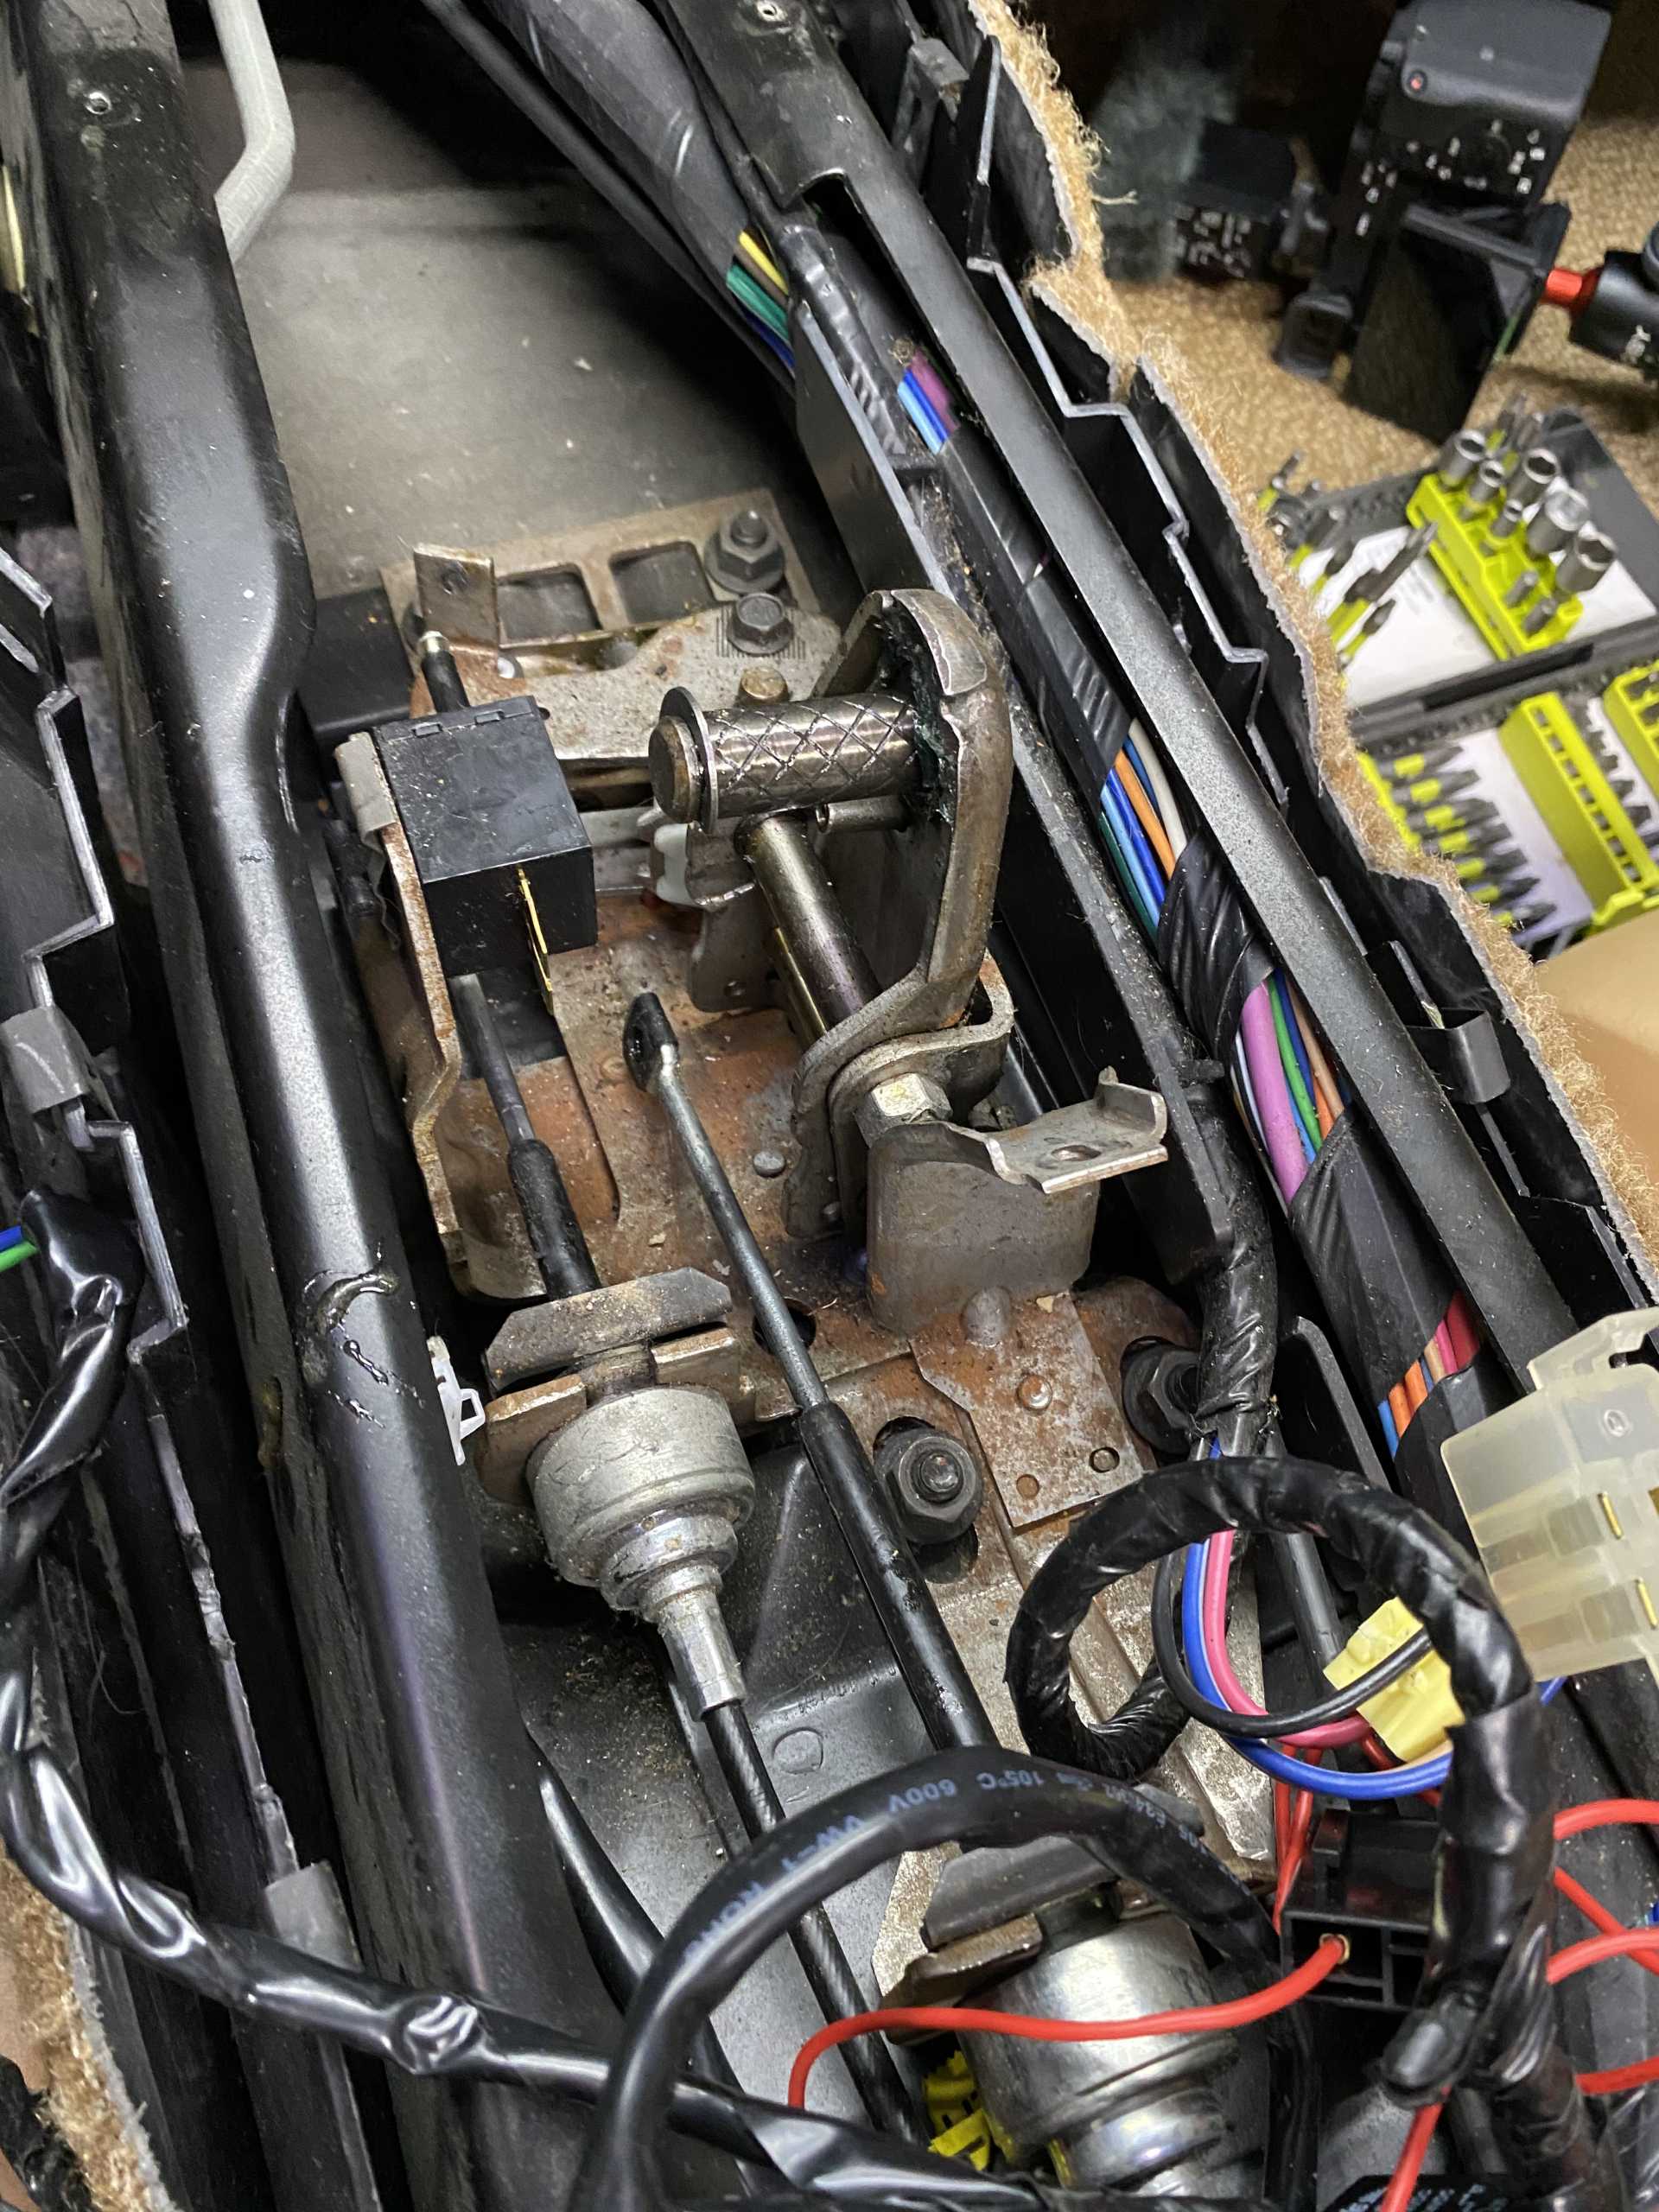
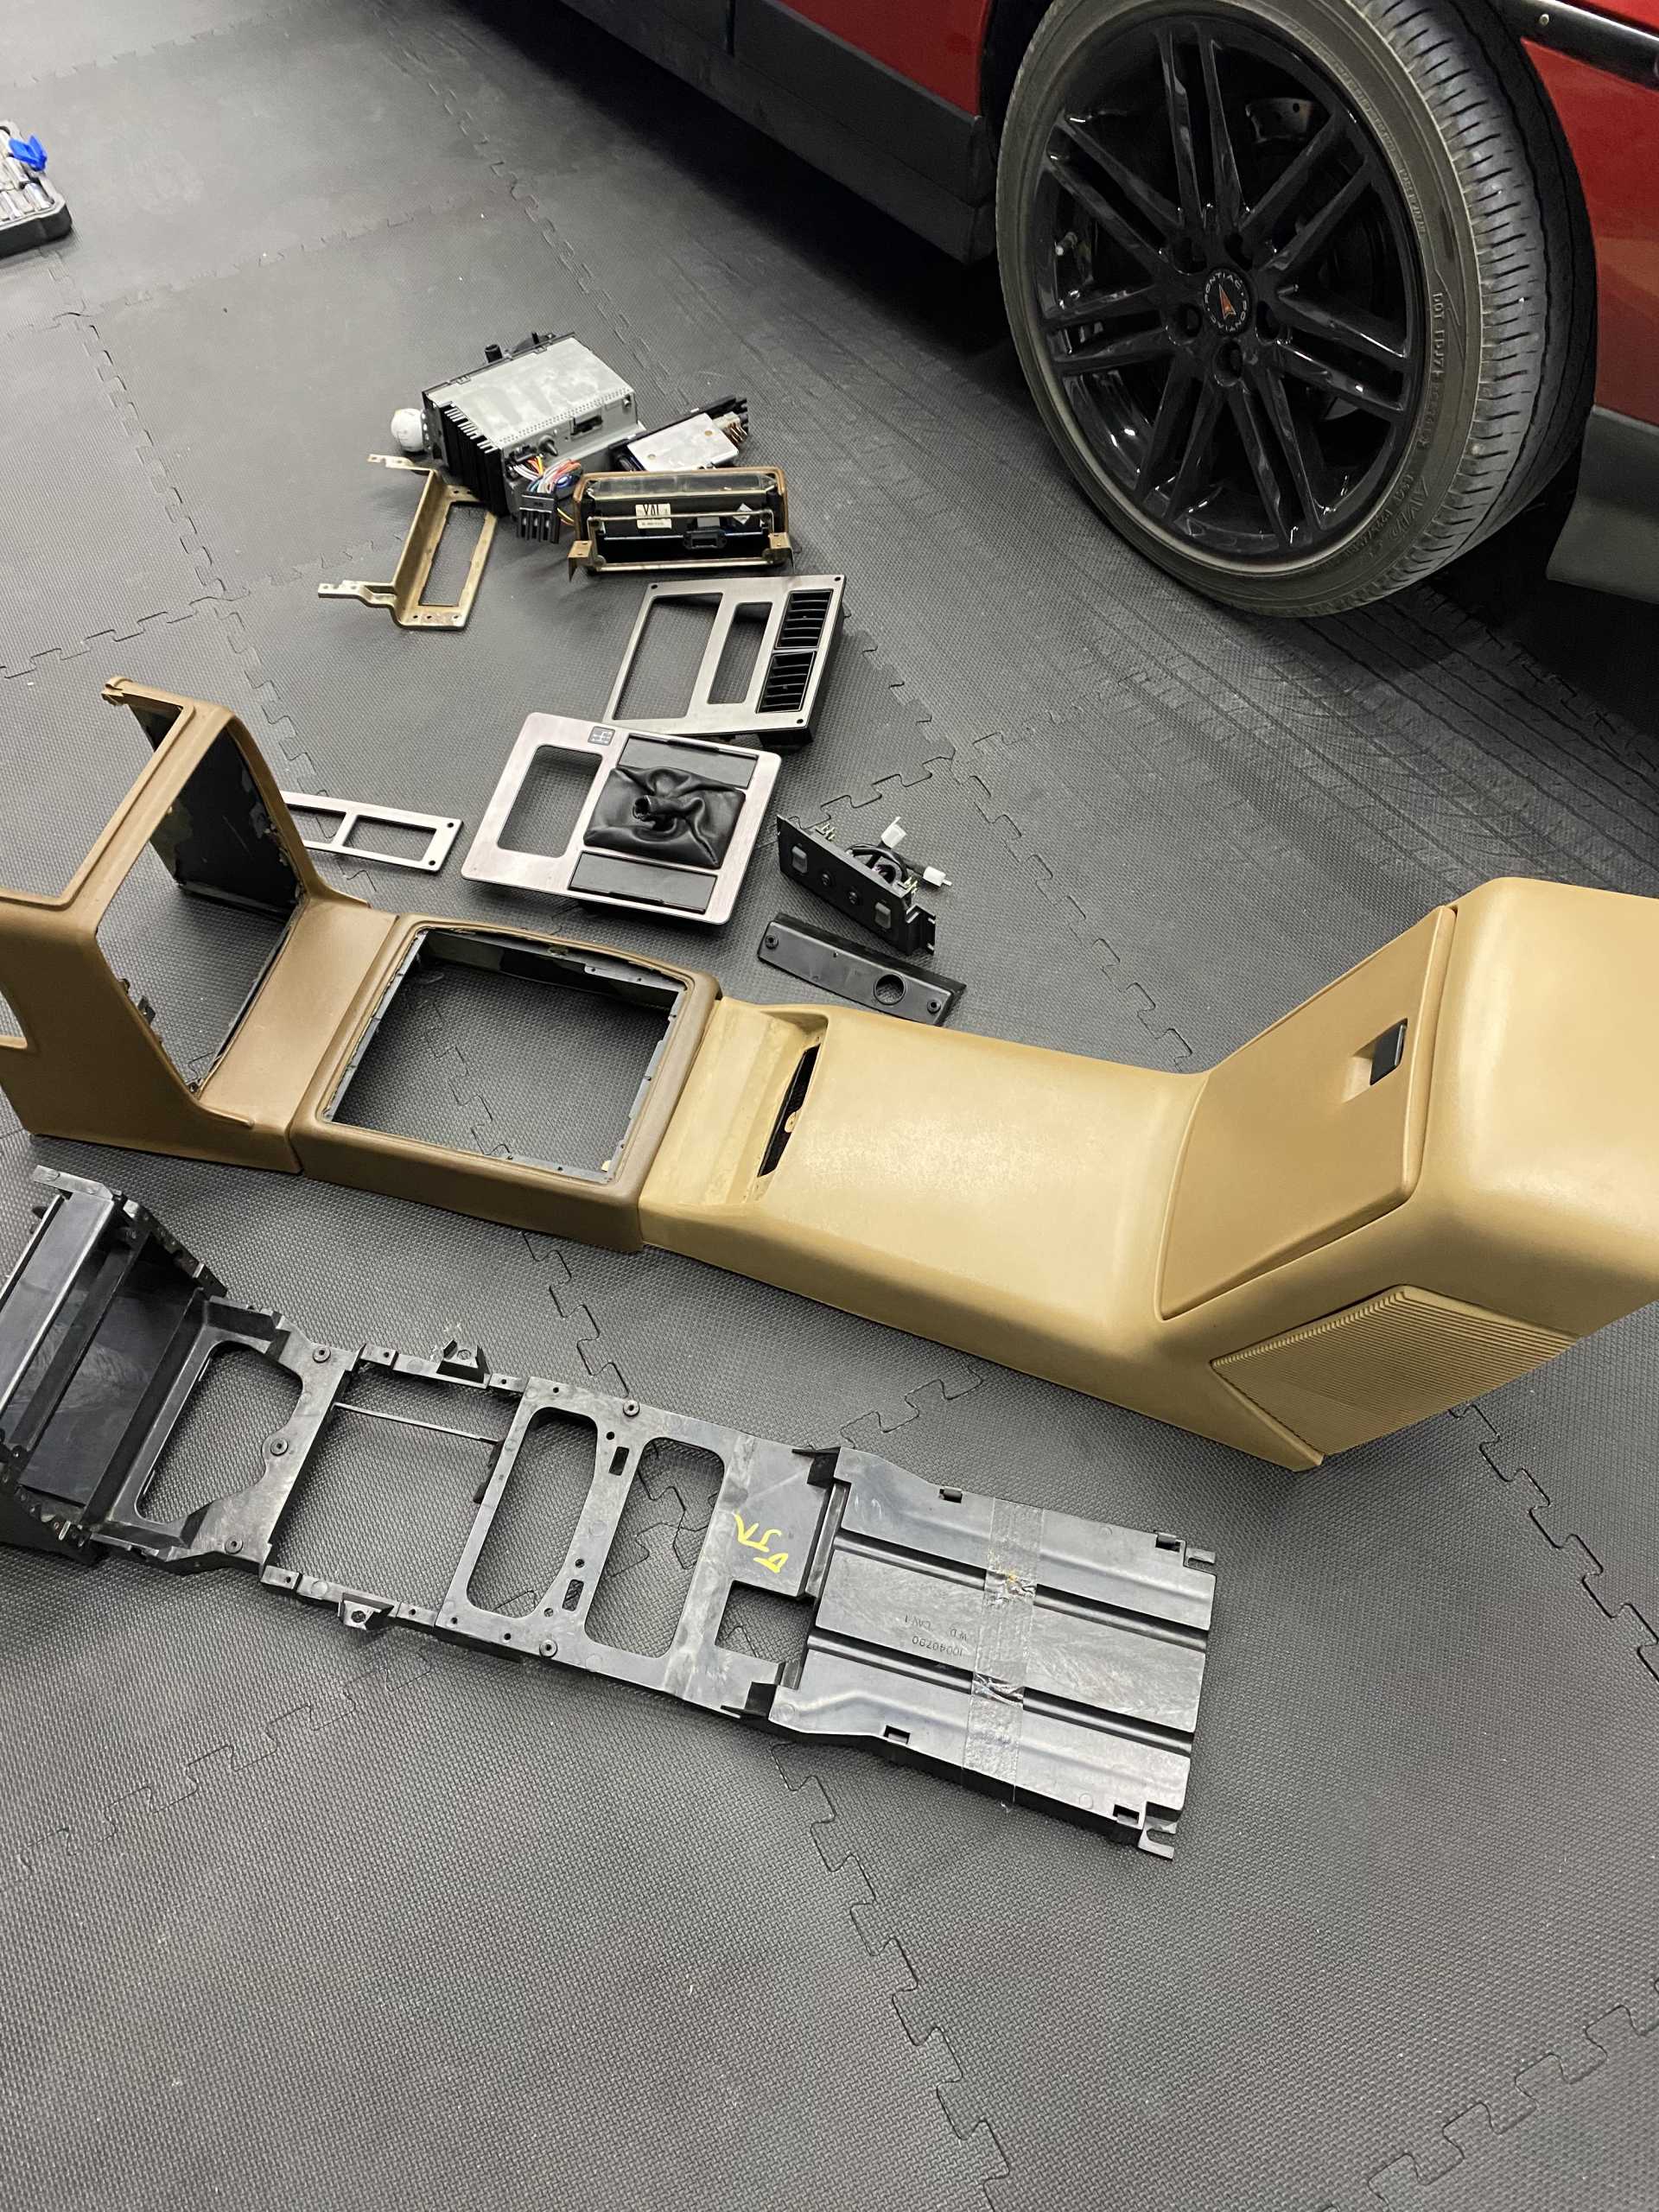
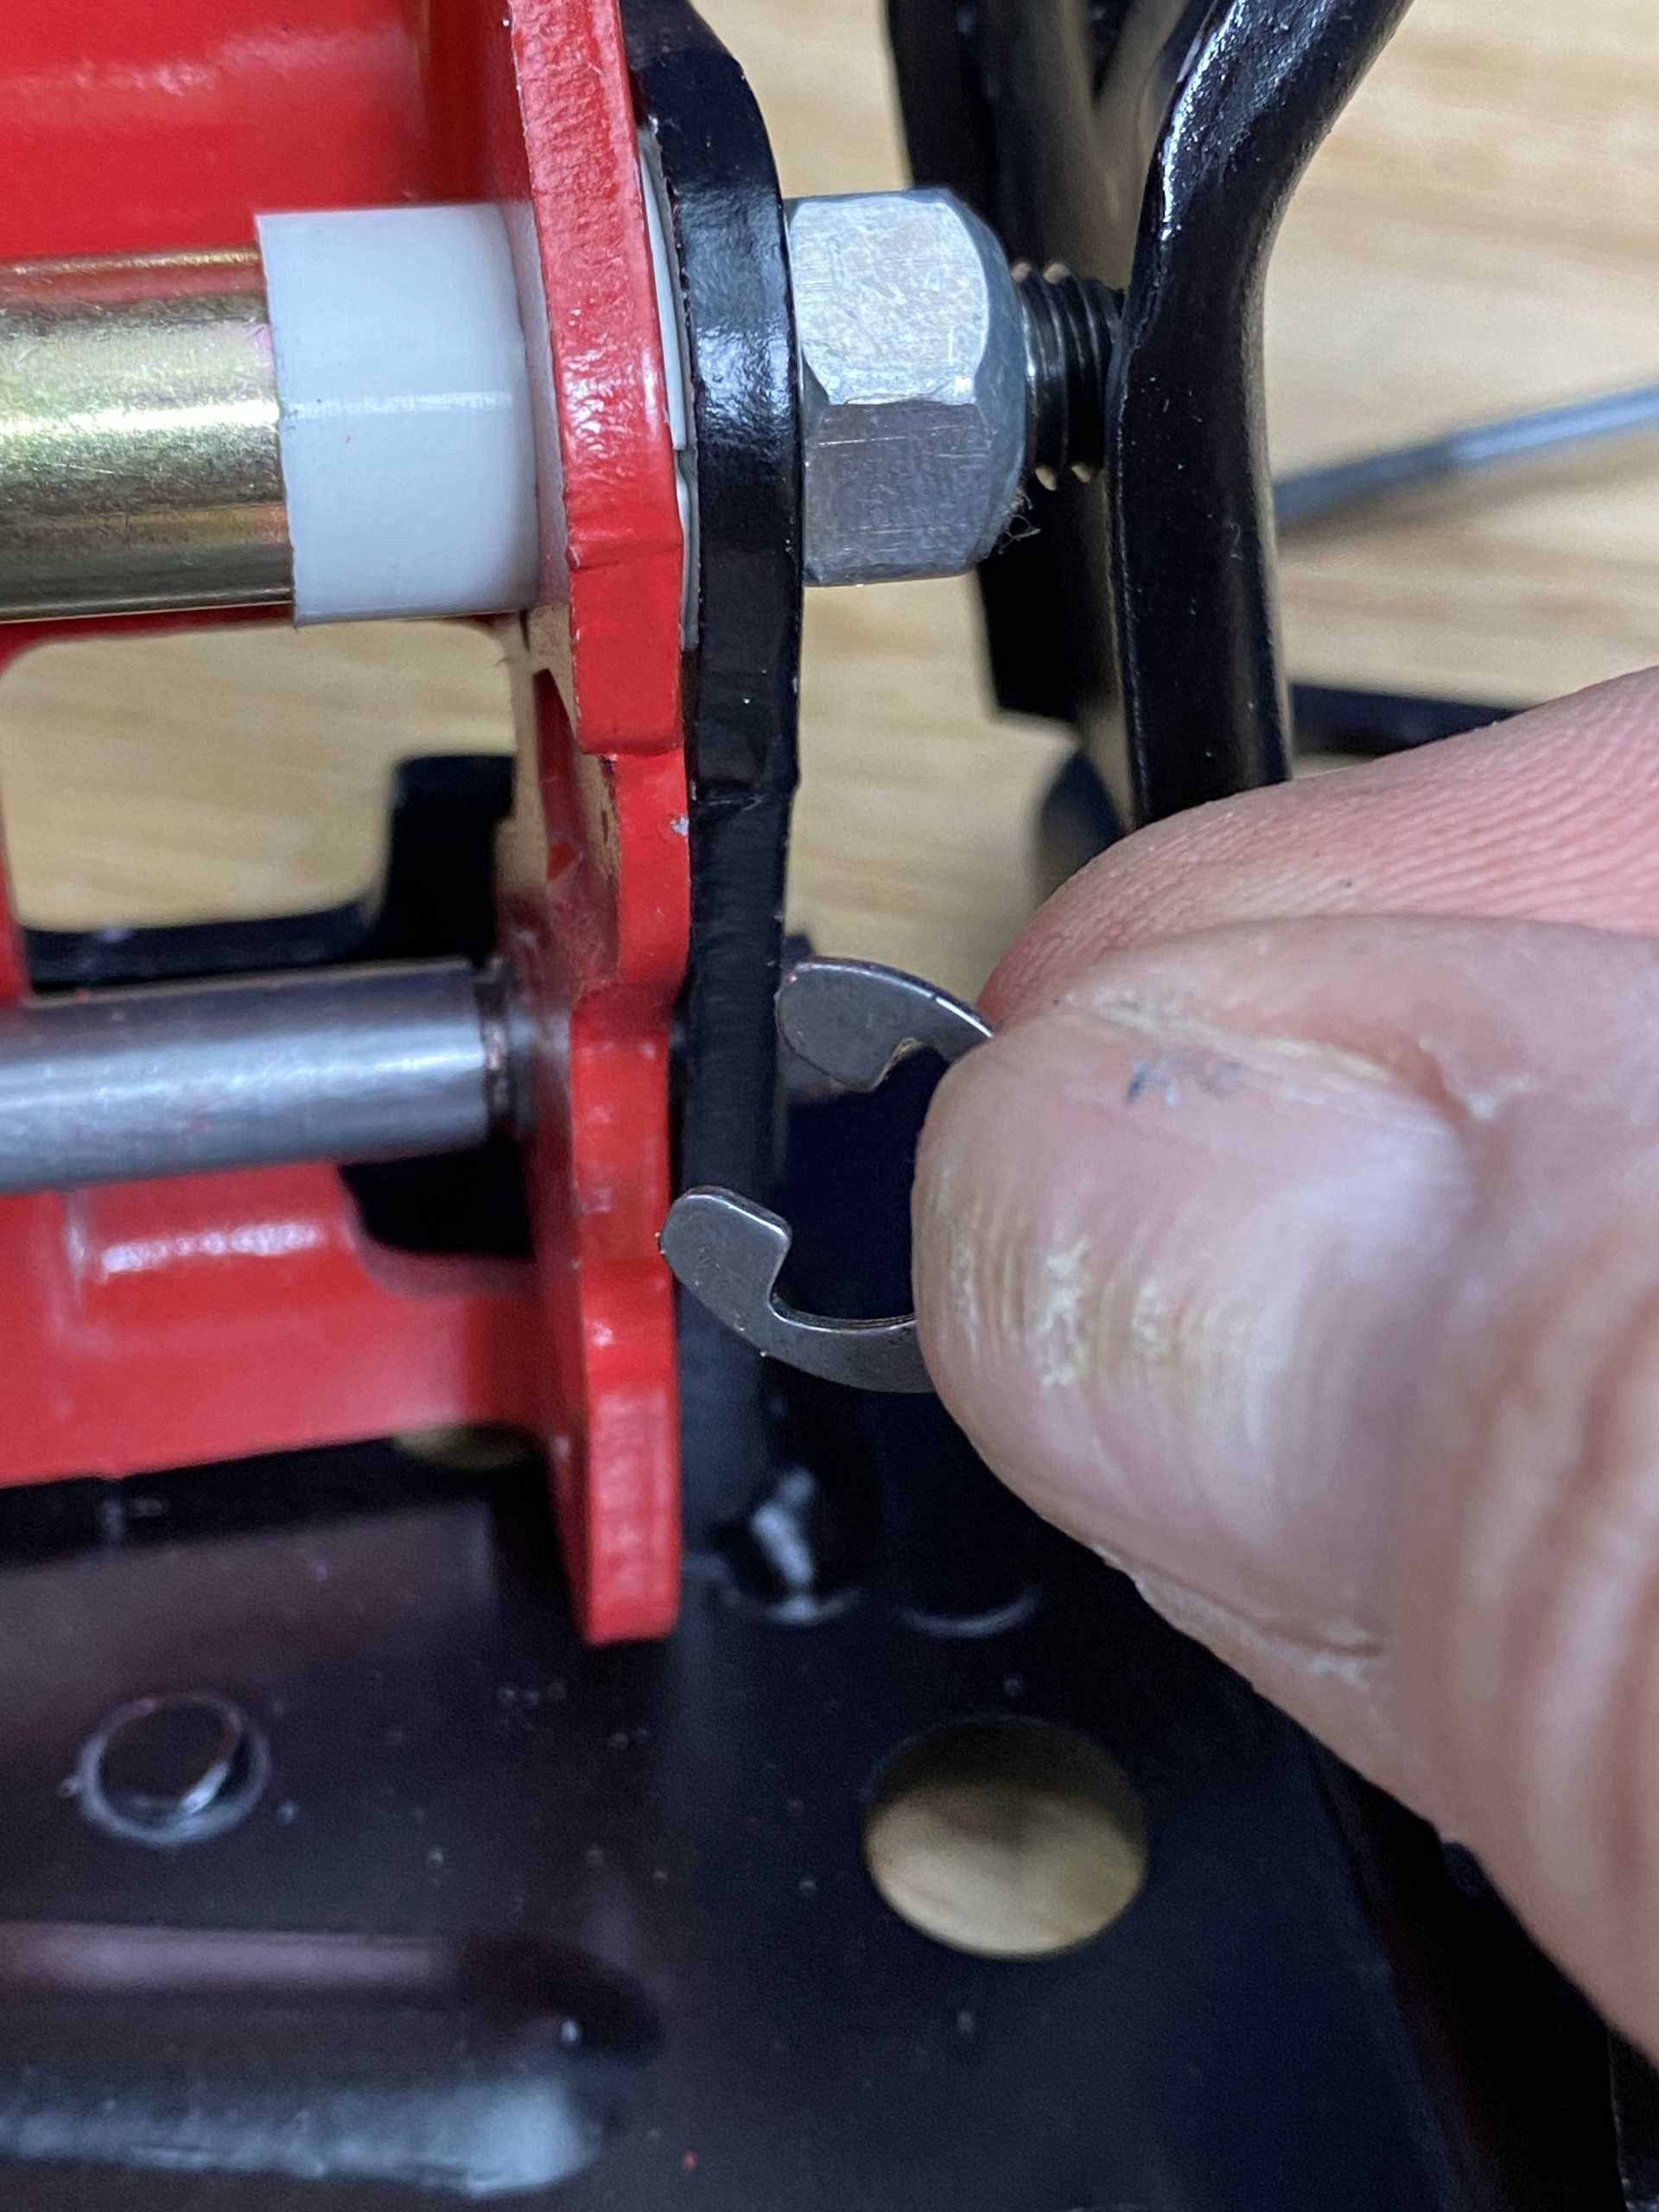
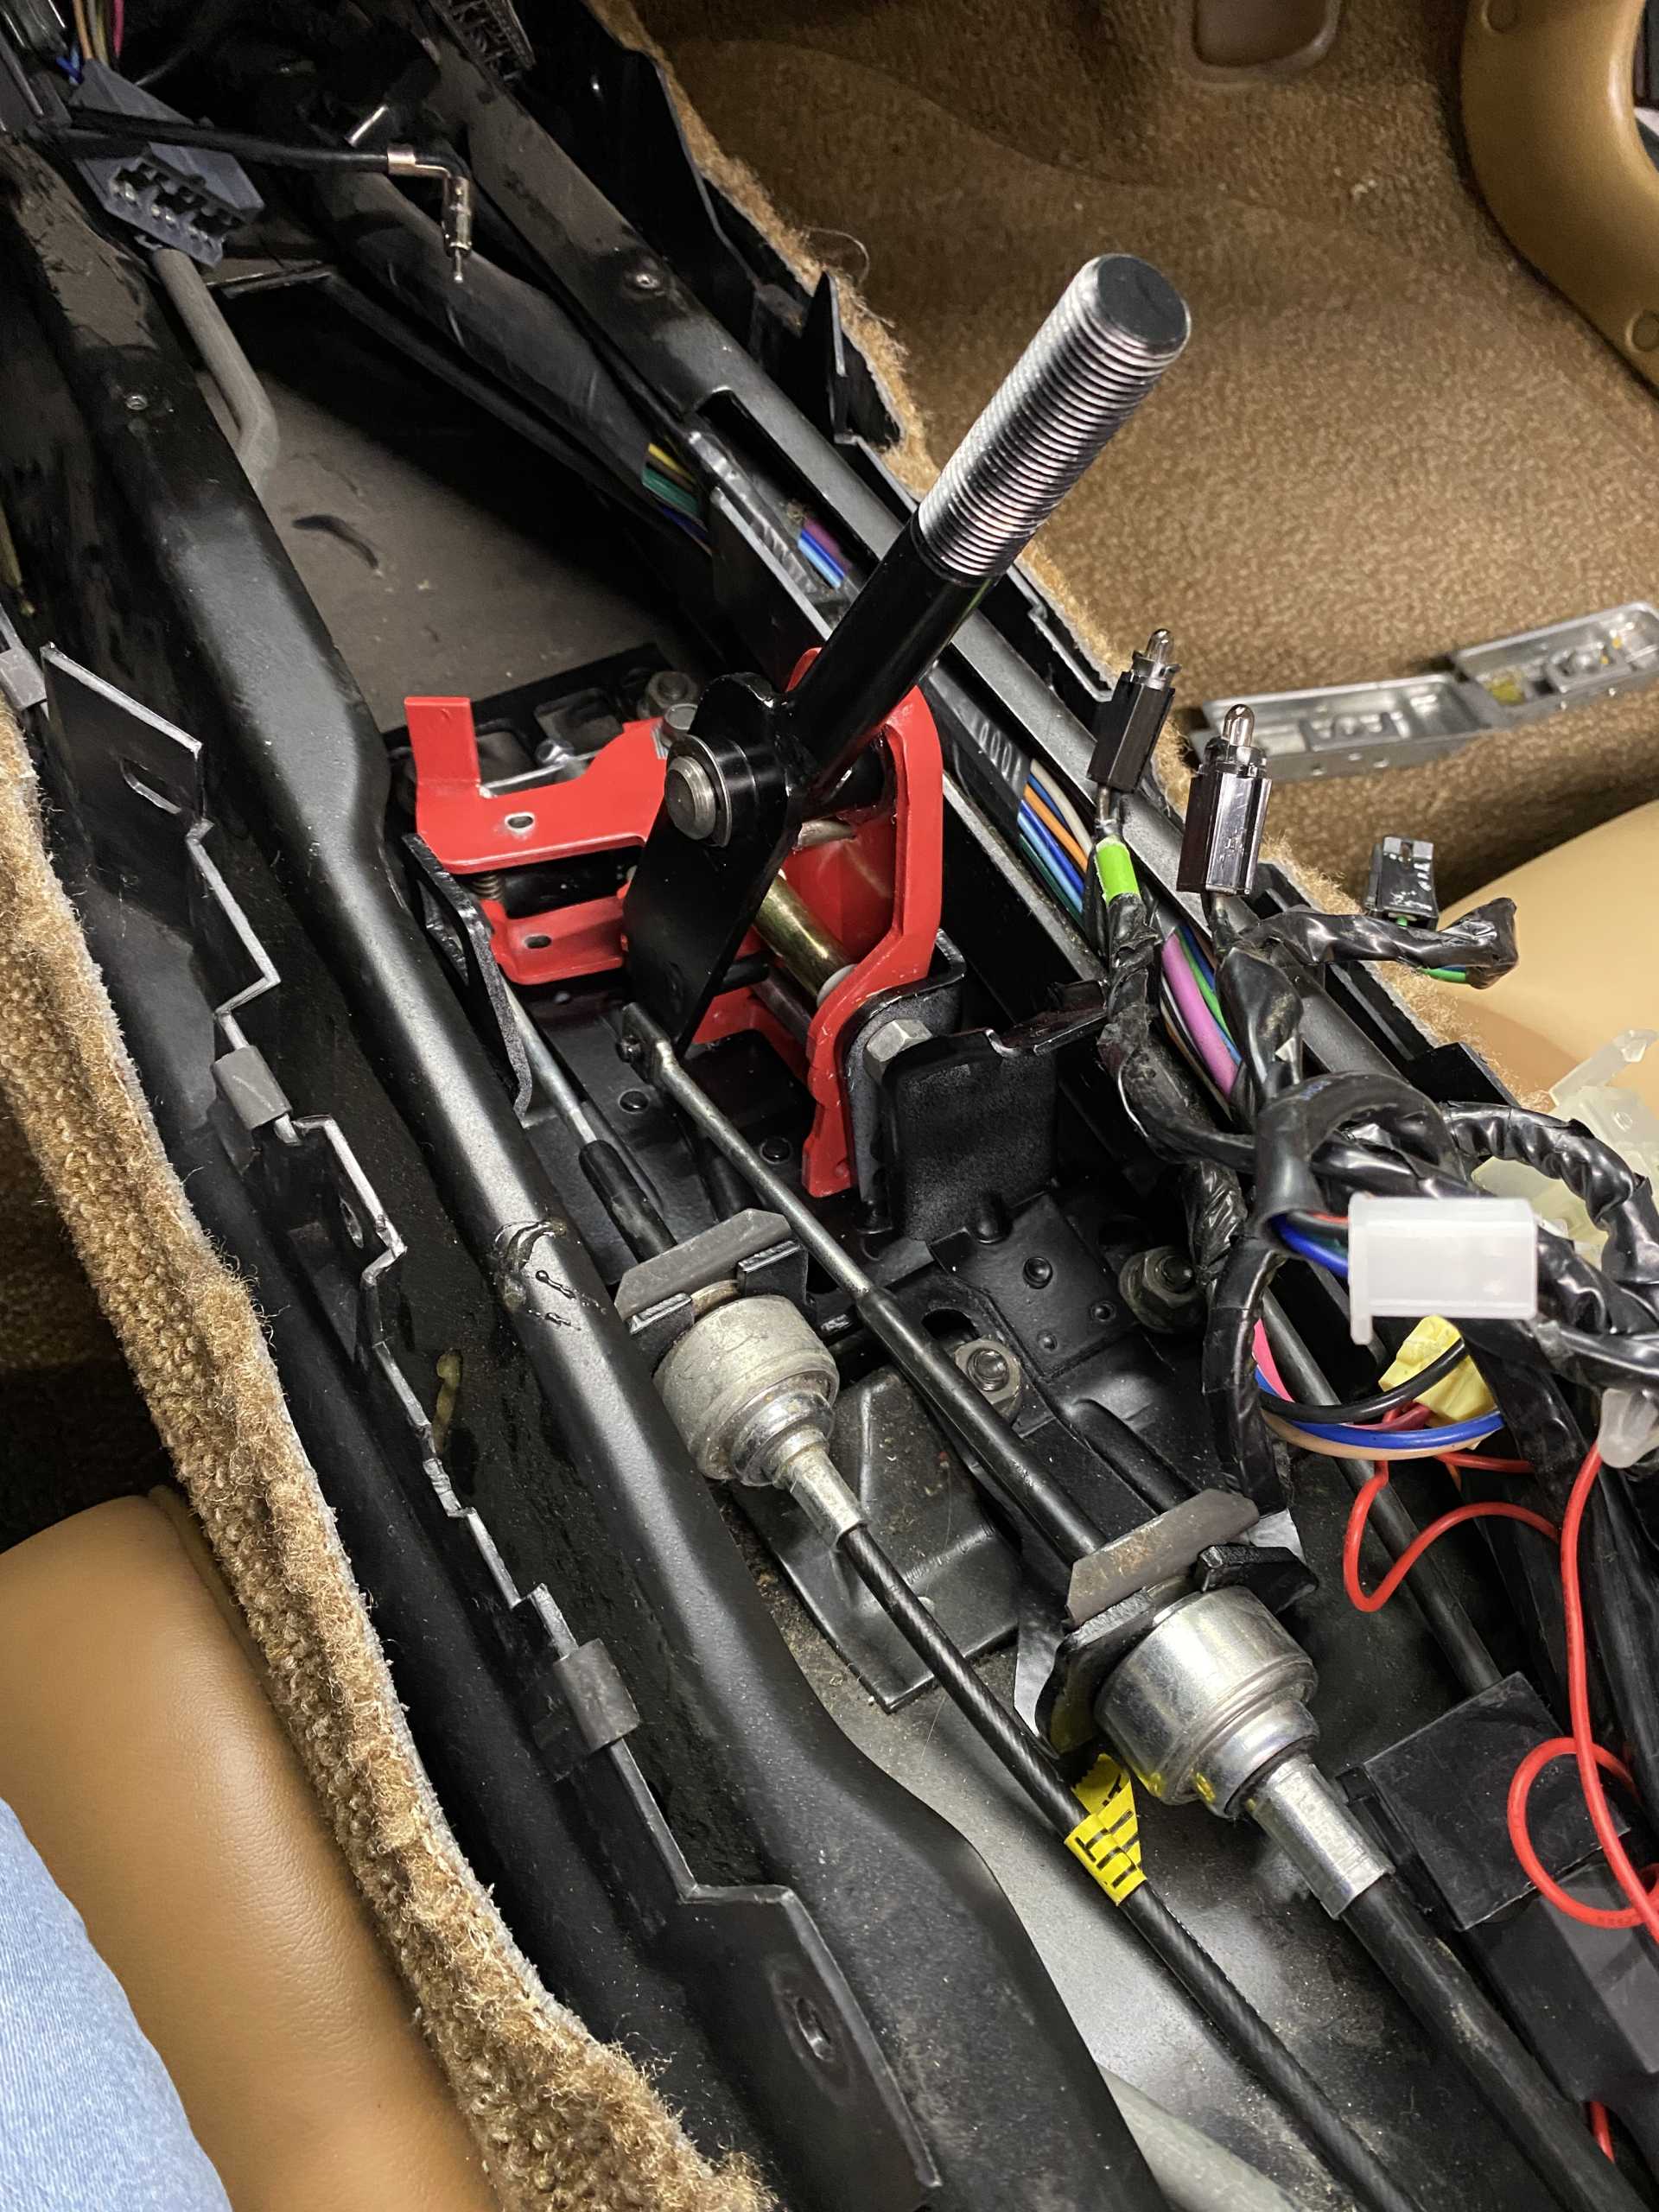
Disassembly is pretty easy. Just keep track of all your nuts and bolts and take pictures. The most frustrating part was the dang carpet clips. They kept reattaching themselves to the carpet. But overall, it went very smoothly. The shifter cable retention clips (not sure what they’re actually called) were pretty tight but came out with a pair of pliers. Here’s all the center console pieces.
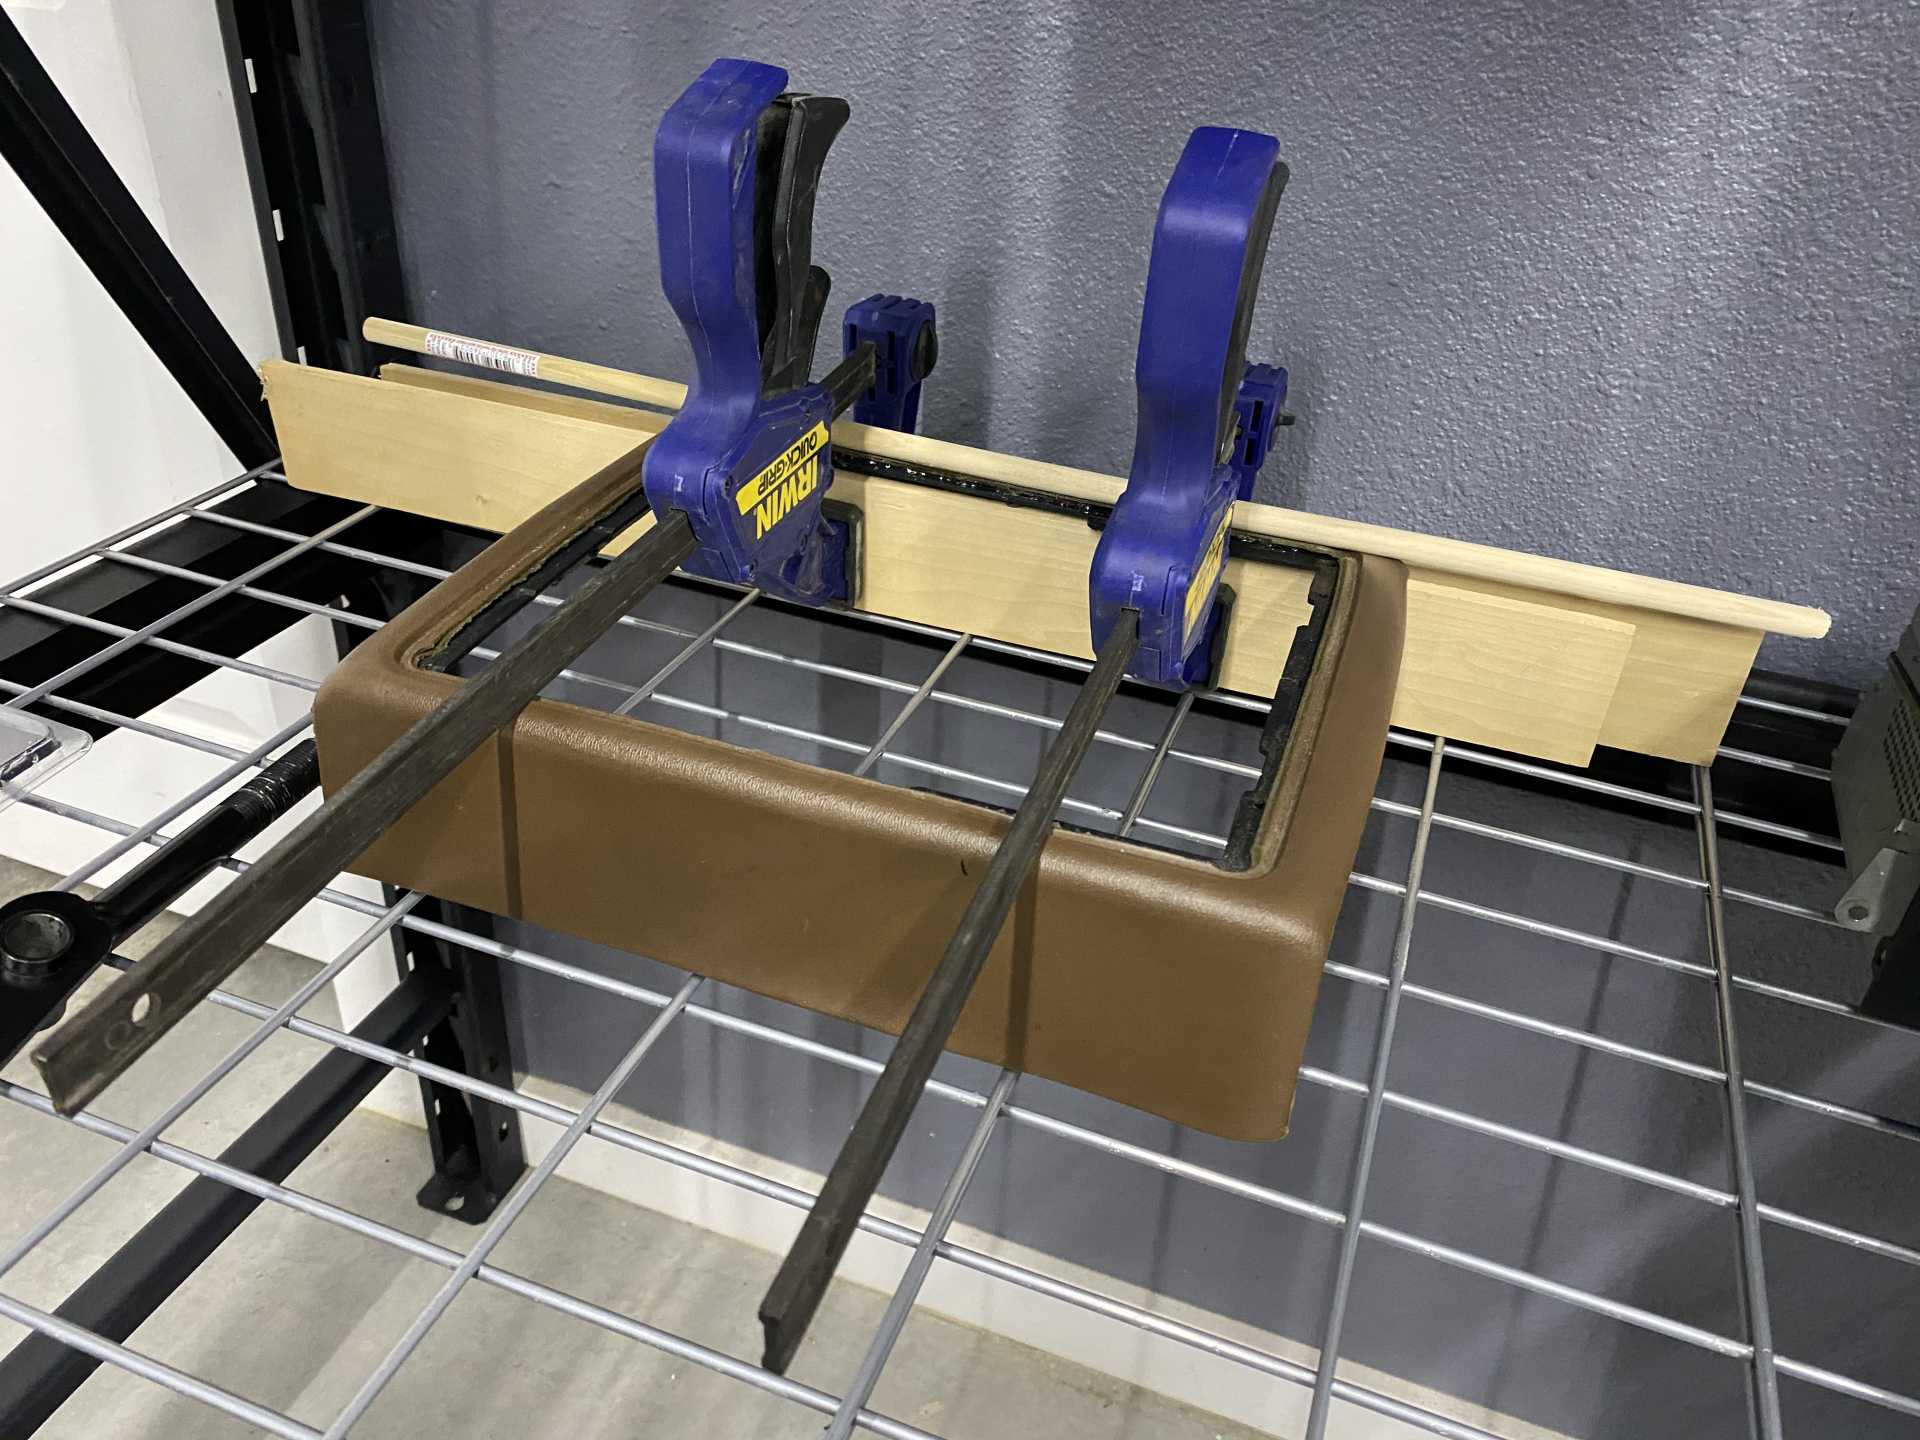
I’m also working on some interior repair. I still have some work to do. I’m not super happy with how it’s turned out so far.
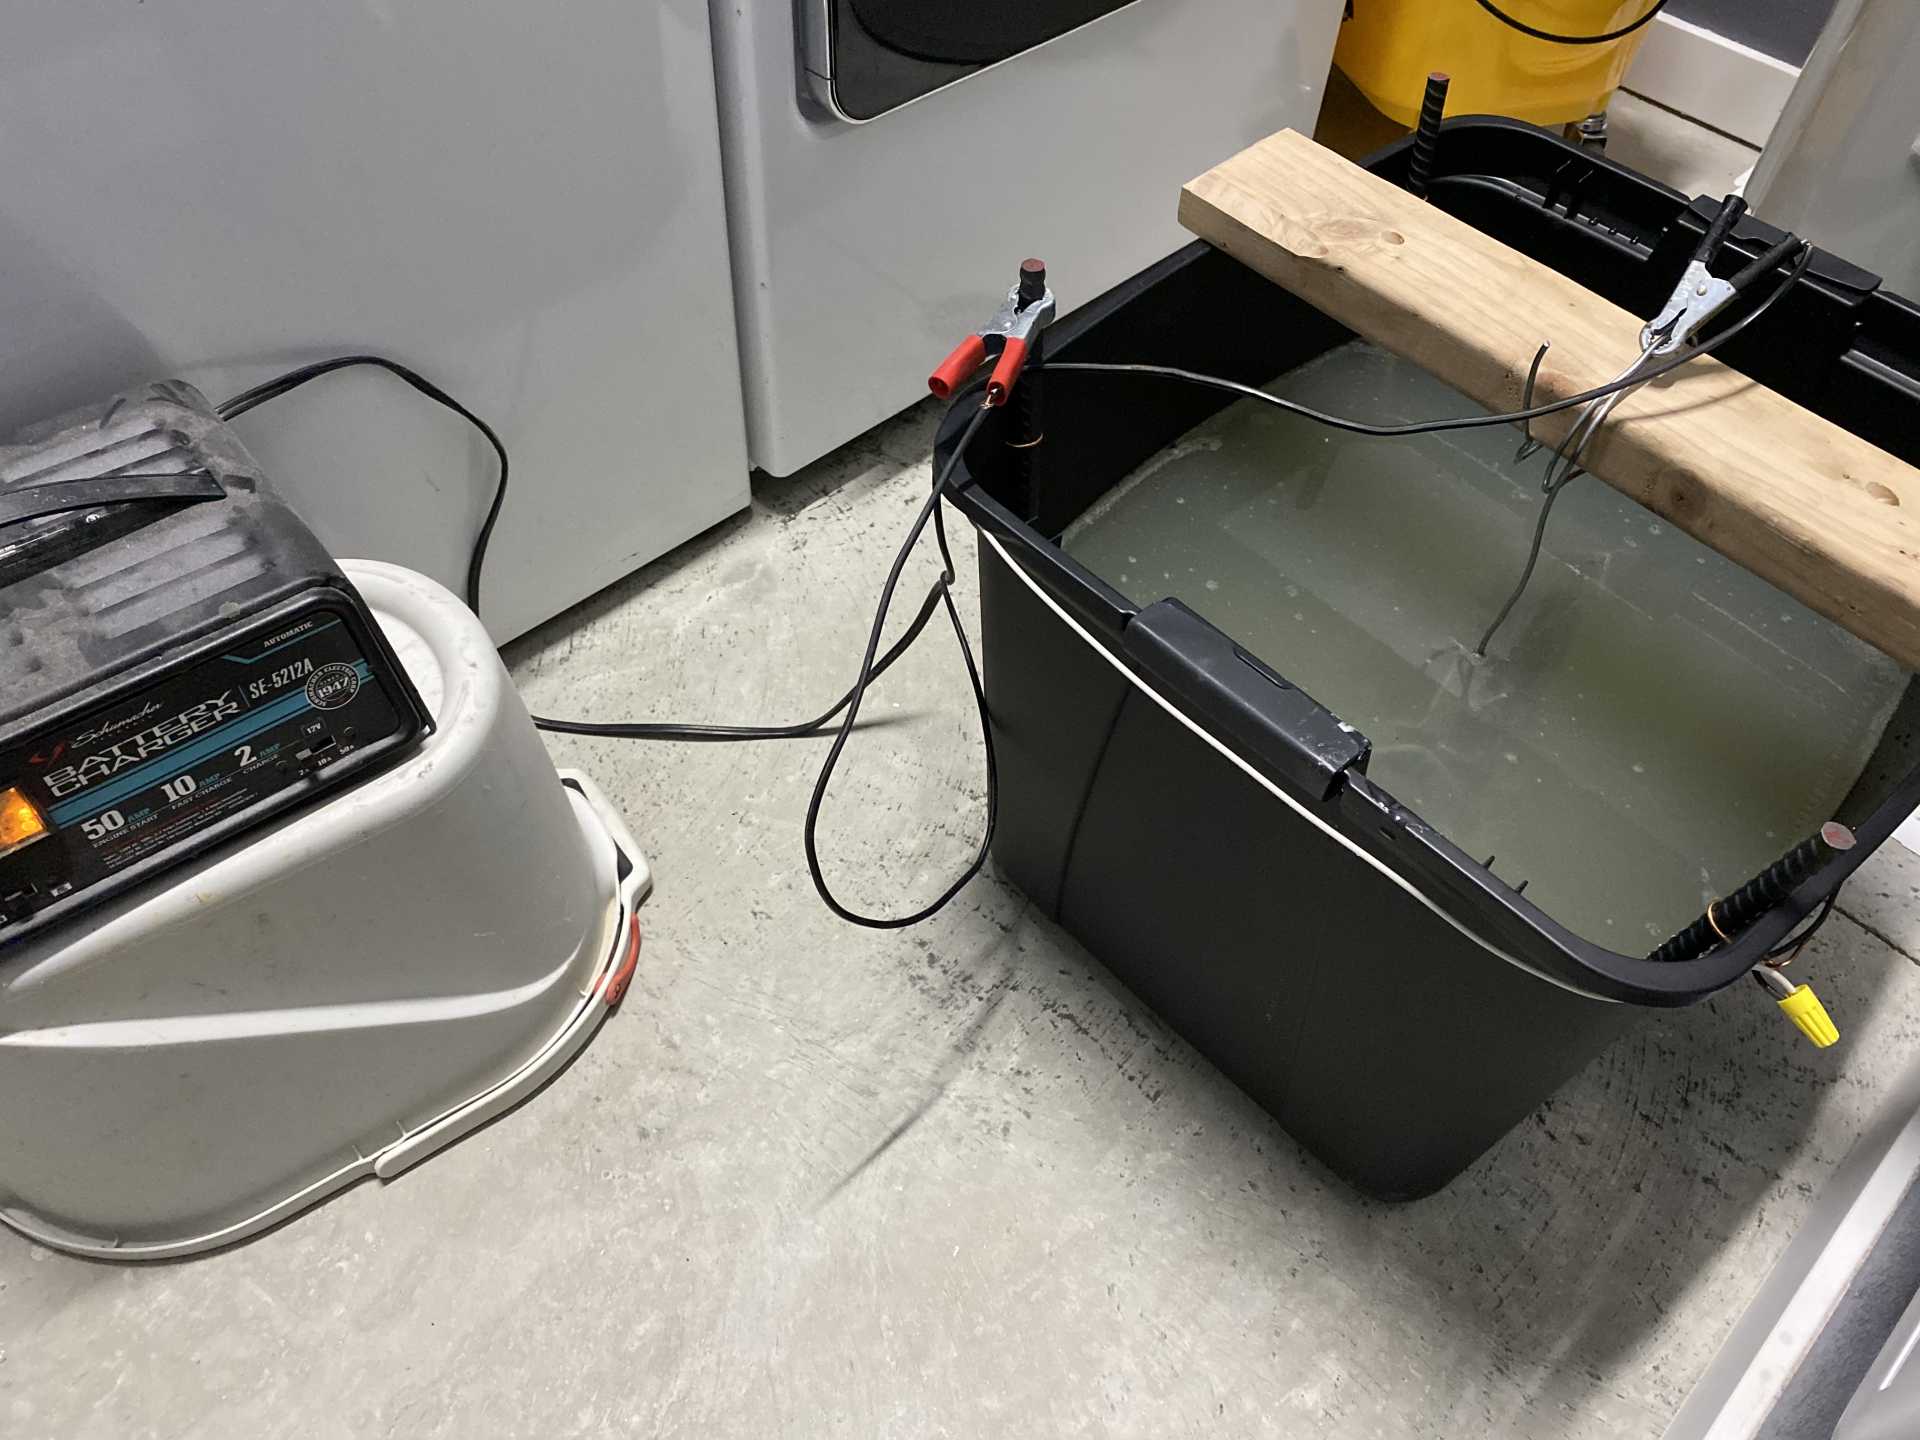
I decided to use electrolysis for the rusted parts. It worked really well! It was mostly practice for using electrolysis on future parts that are horribly rusty.
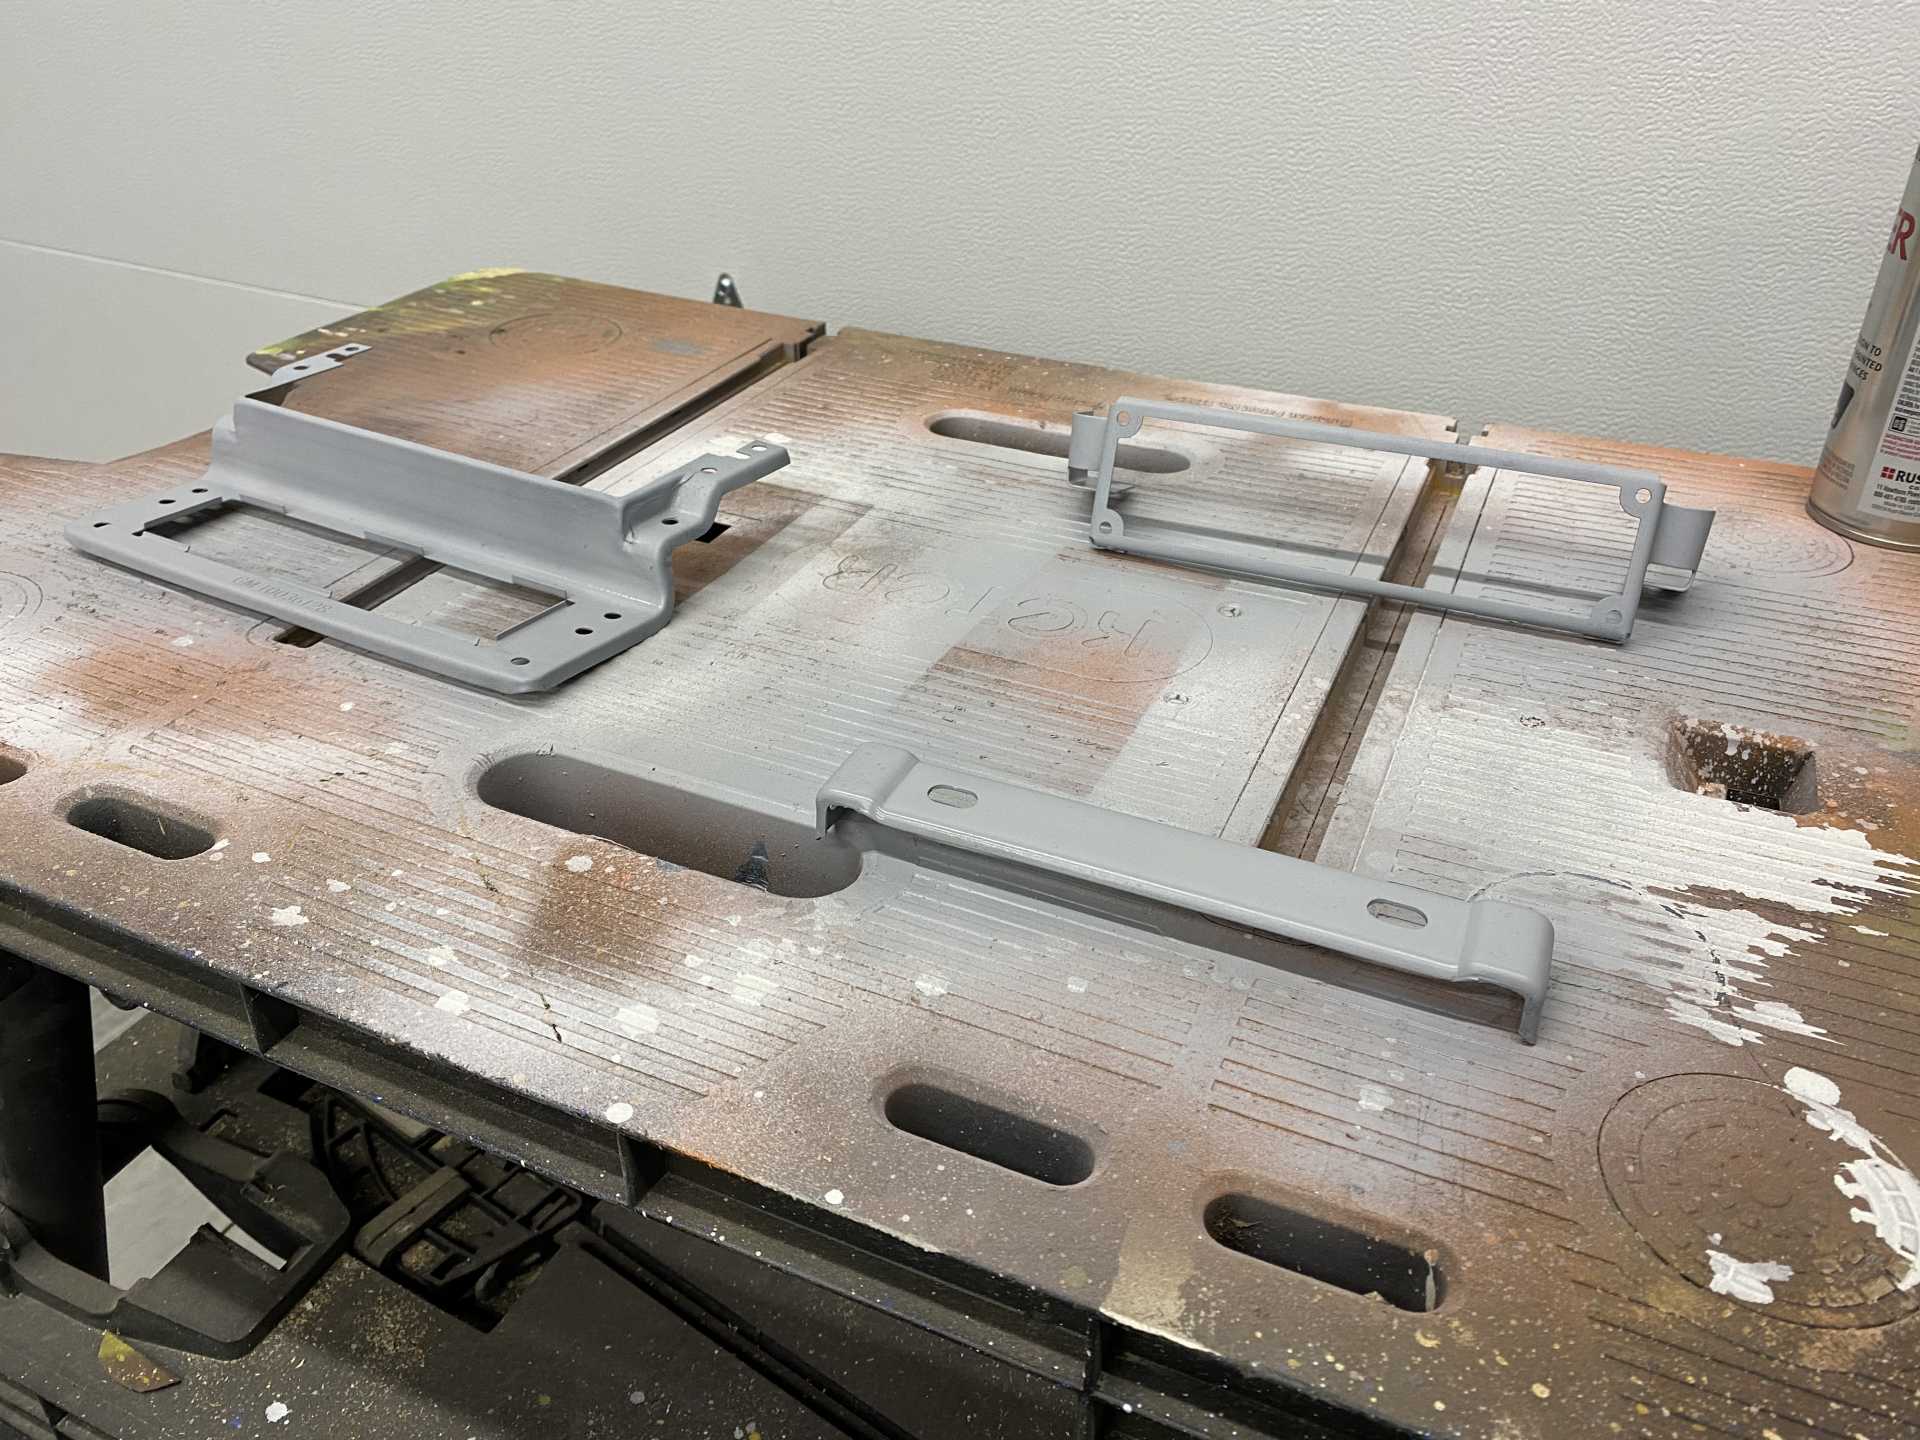
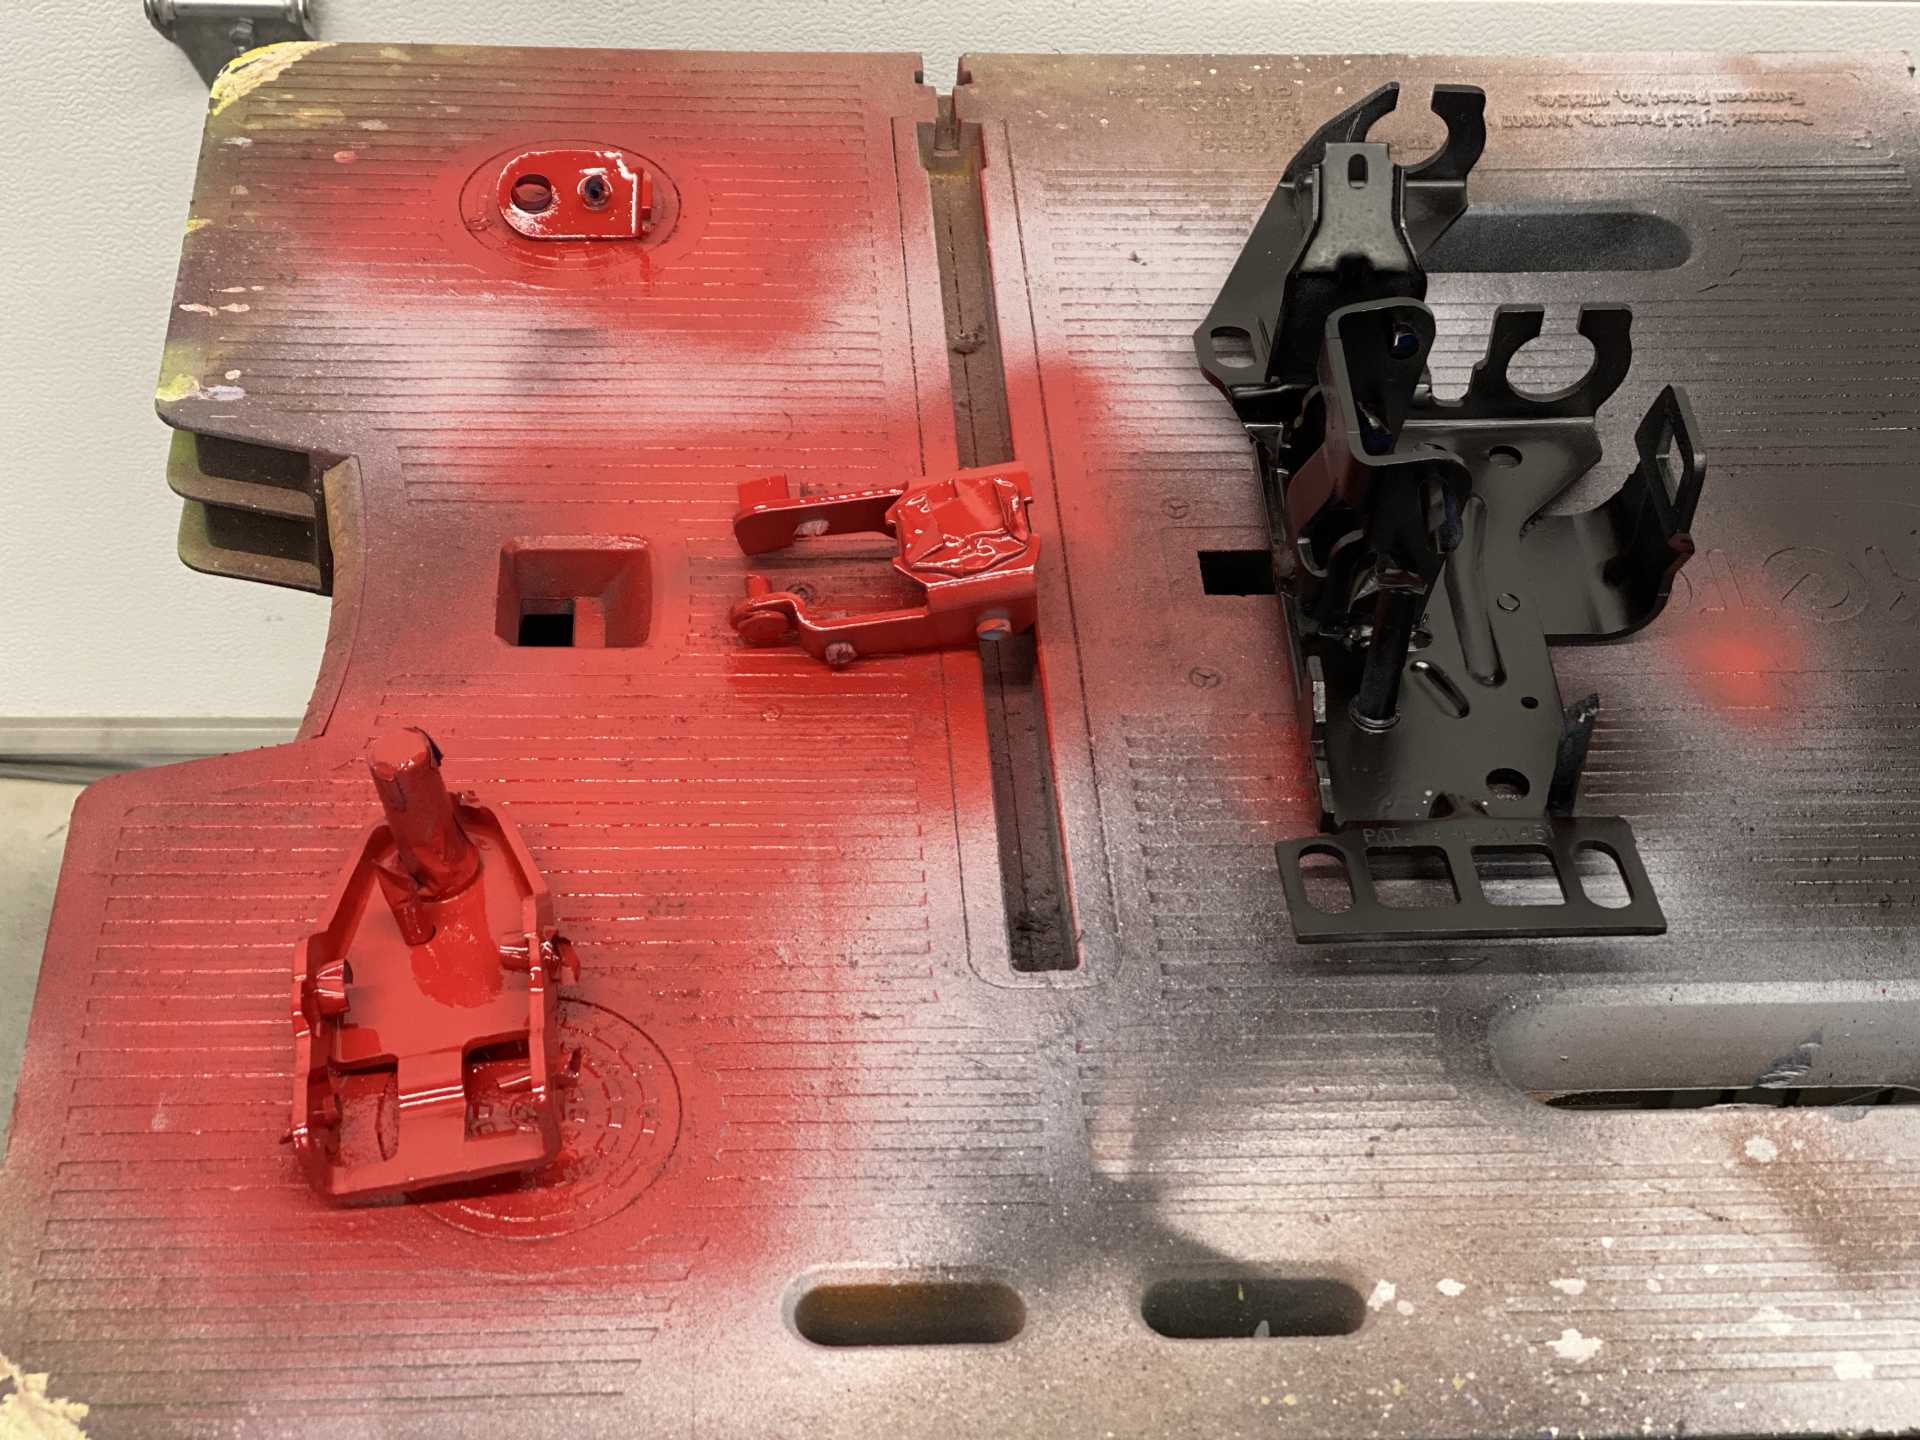
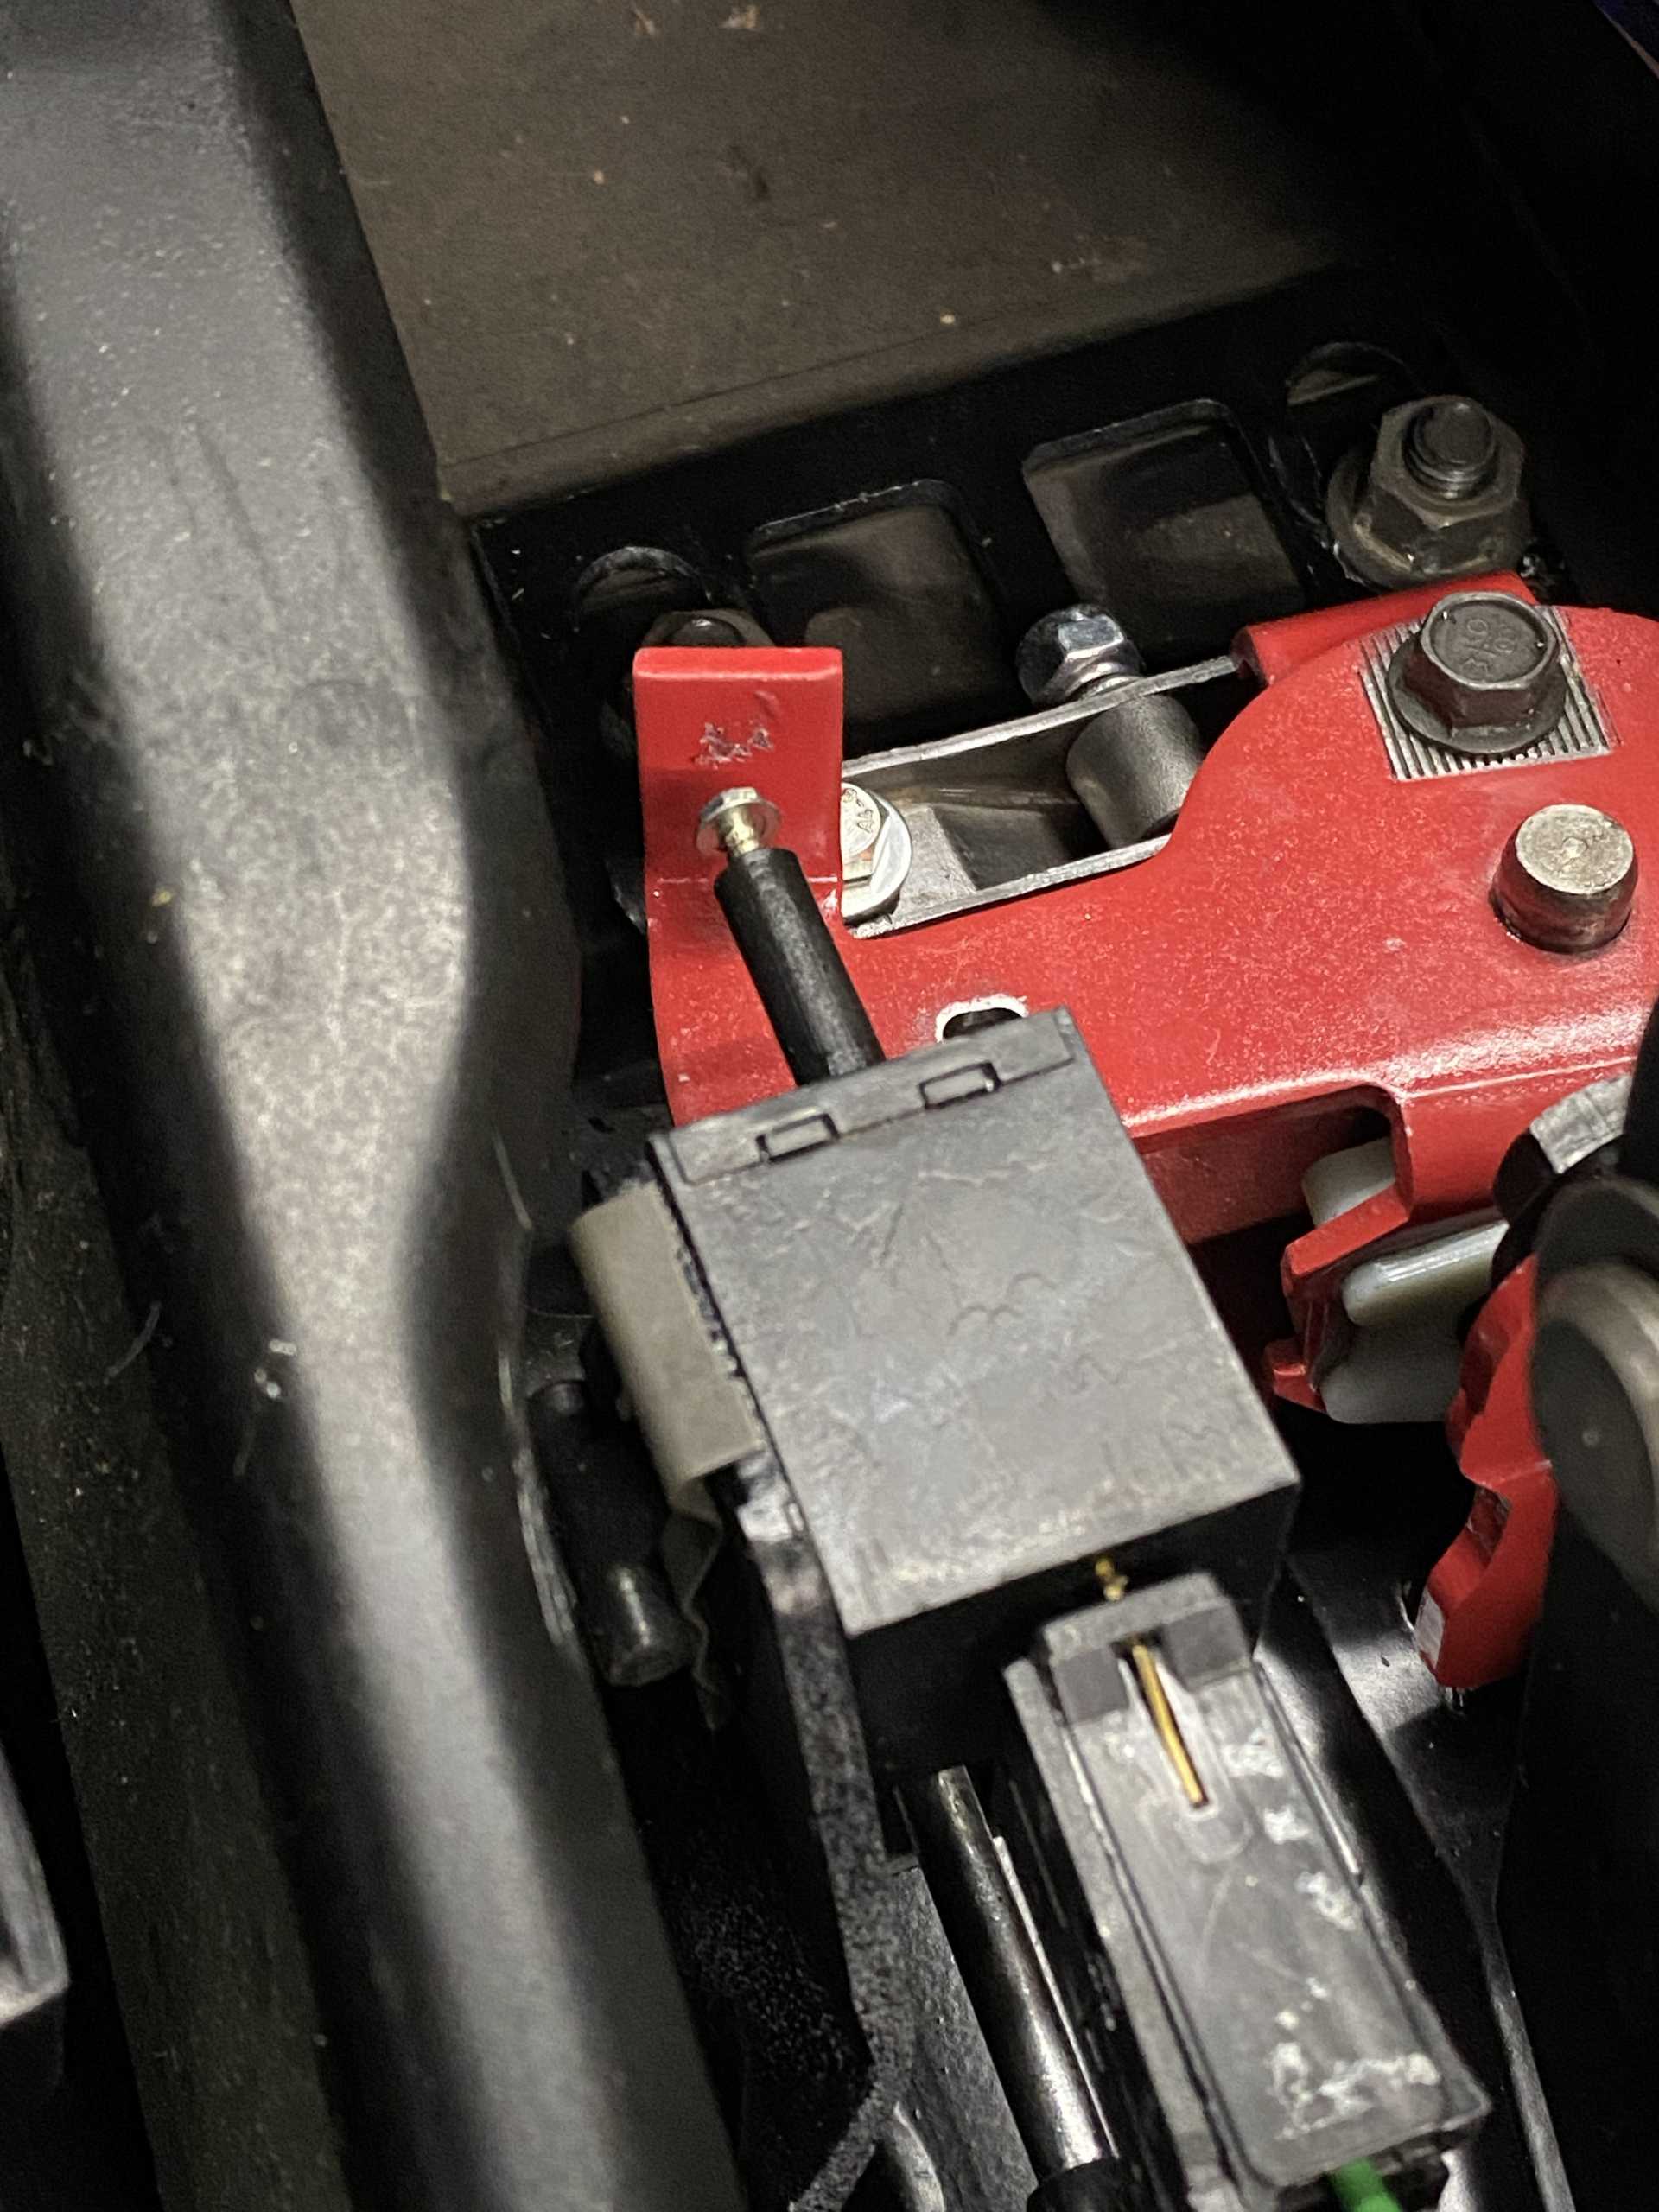
Then I primed and did a completely unnecessary but awesome color matching paint job. I went pretty light on the paint so you might notice some parts that aren’t covered really well. Everything does have a good coat of primer though. The primer photo below is the other metal pieces from the center console. They had very minor surface rust but I figured I might as well clean and paint them to keep it from happening in the future.
The Mishimoto knob has (I think) 18mm threads. Luckily, up past the threads, it has a smooth bore small enough to tap out to the 16mm x 1.5 of the comp shifter. I bought a $15 tap from Amazon but didn’t have a handle that would fit. I used a vice grip and it worked great! No issues at all getting it tapped out to fit the shifter correctly.
During reassembly I figured out what would have been a much easier way to dissemble. If you remove the retainer clips from the lower pin (the one that translates lateral motion) then push it from the opposite end away from the direction it will come out, it will disengage from the assembly and allow you to lift it all off. Once all that is out of the way, you will be able to pull the pin out. I didn’t do it this way when I was original taking everything apart and it was much more difficult.
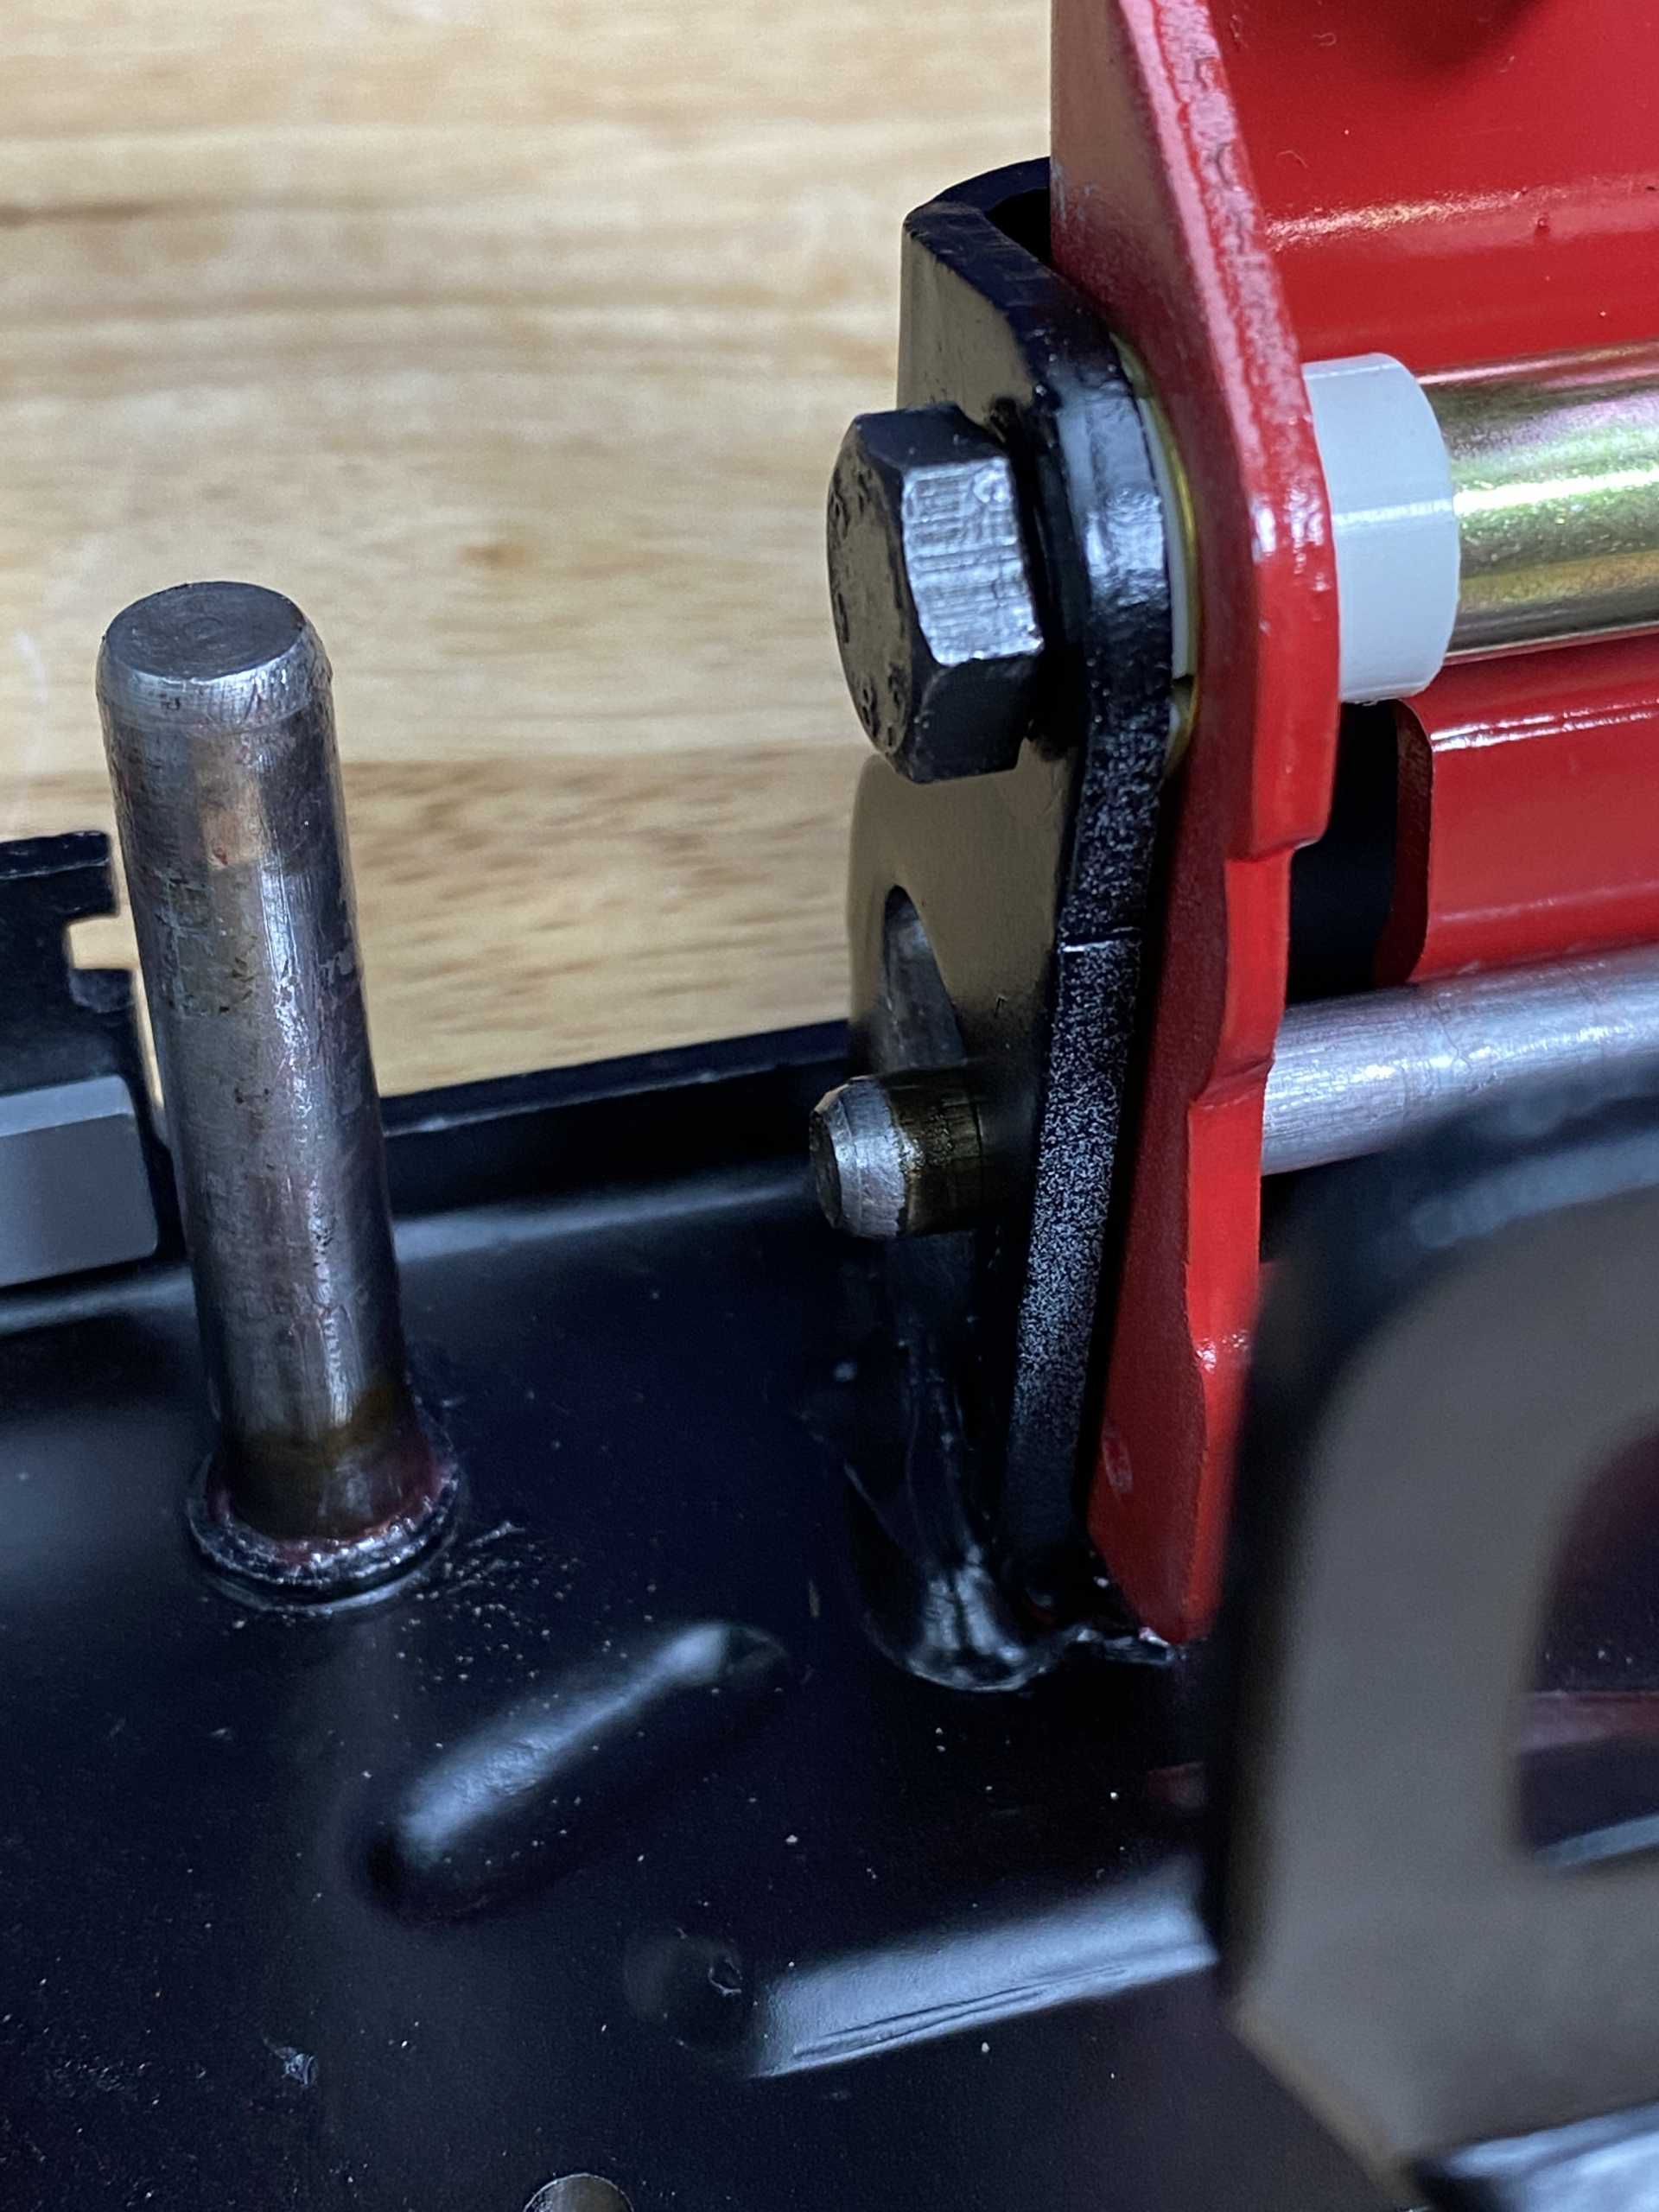
This is the direction to push the pin to make disassembly easy. And yes, it’s missing the spring.
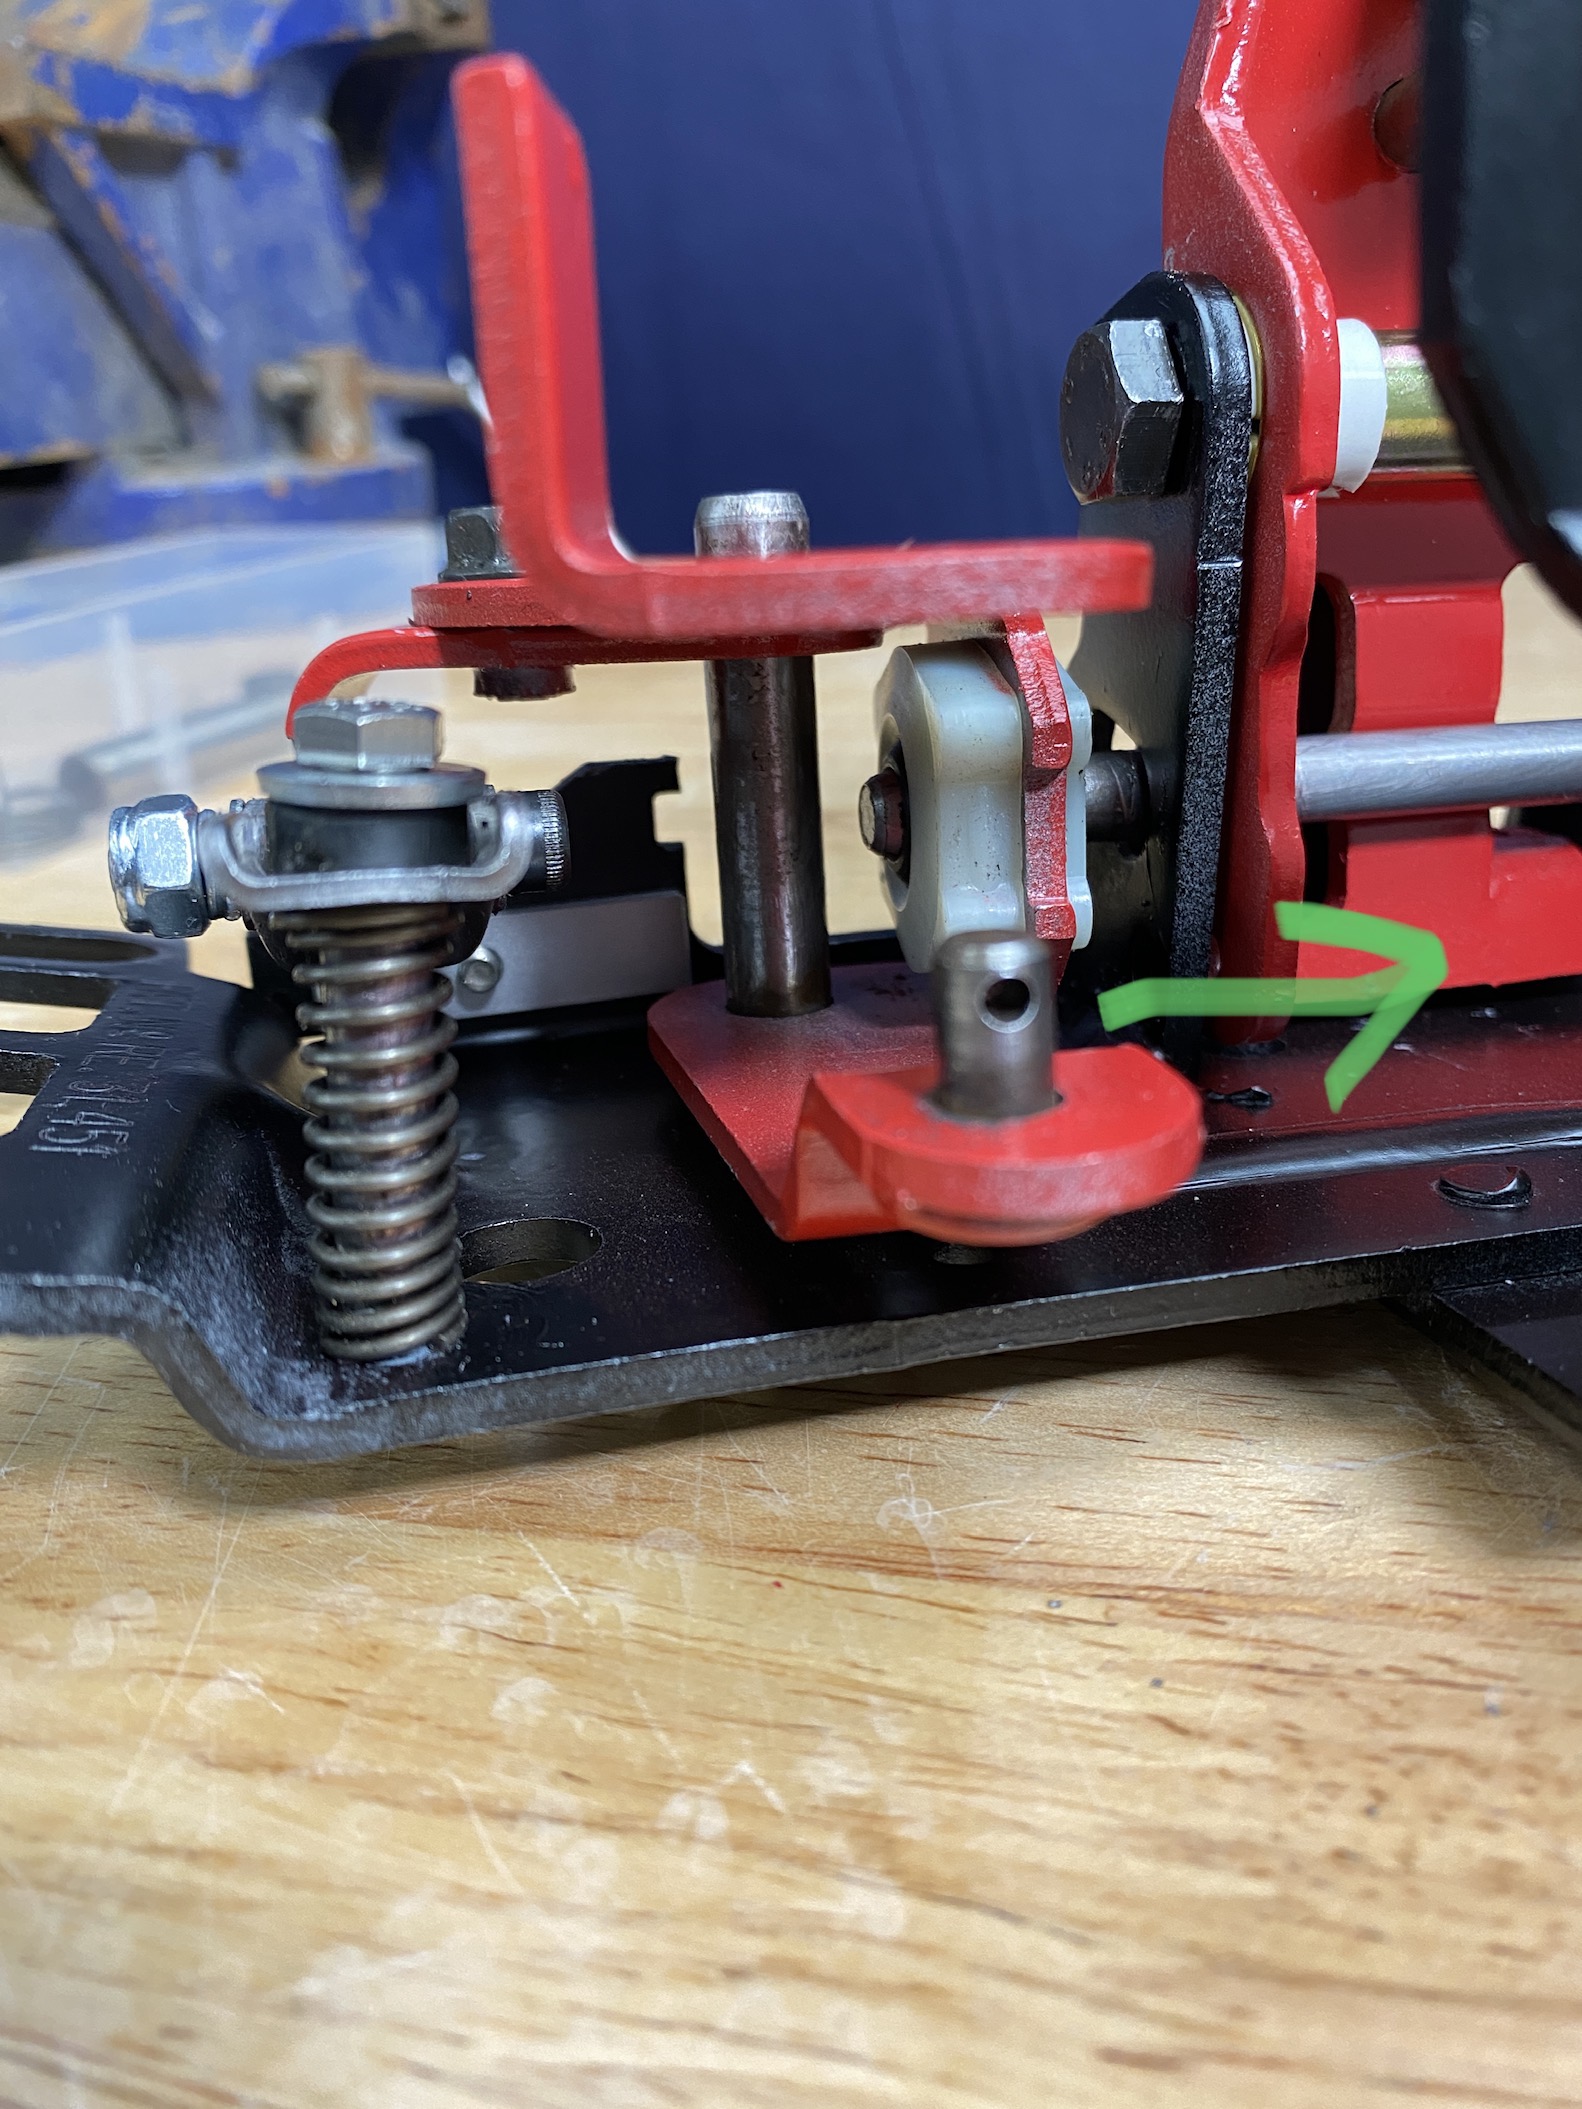
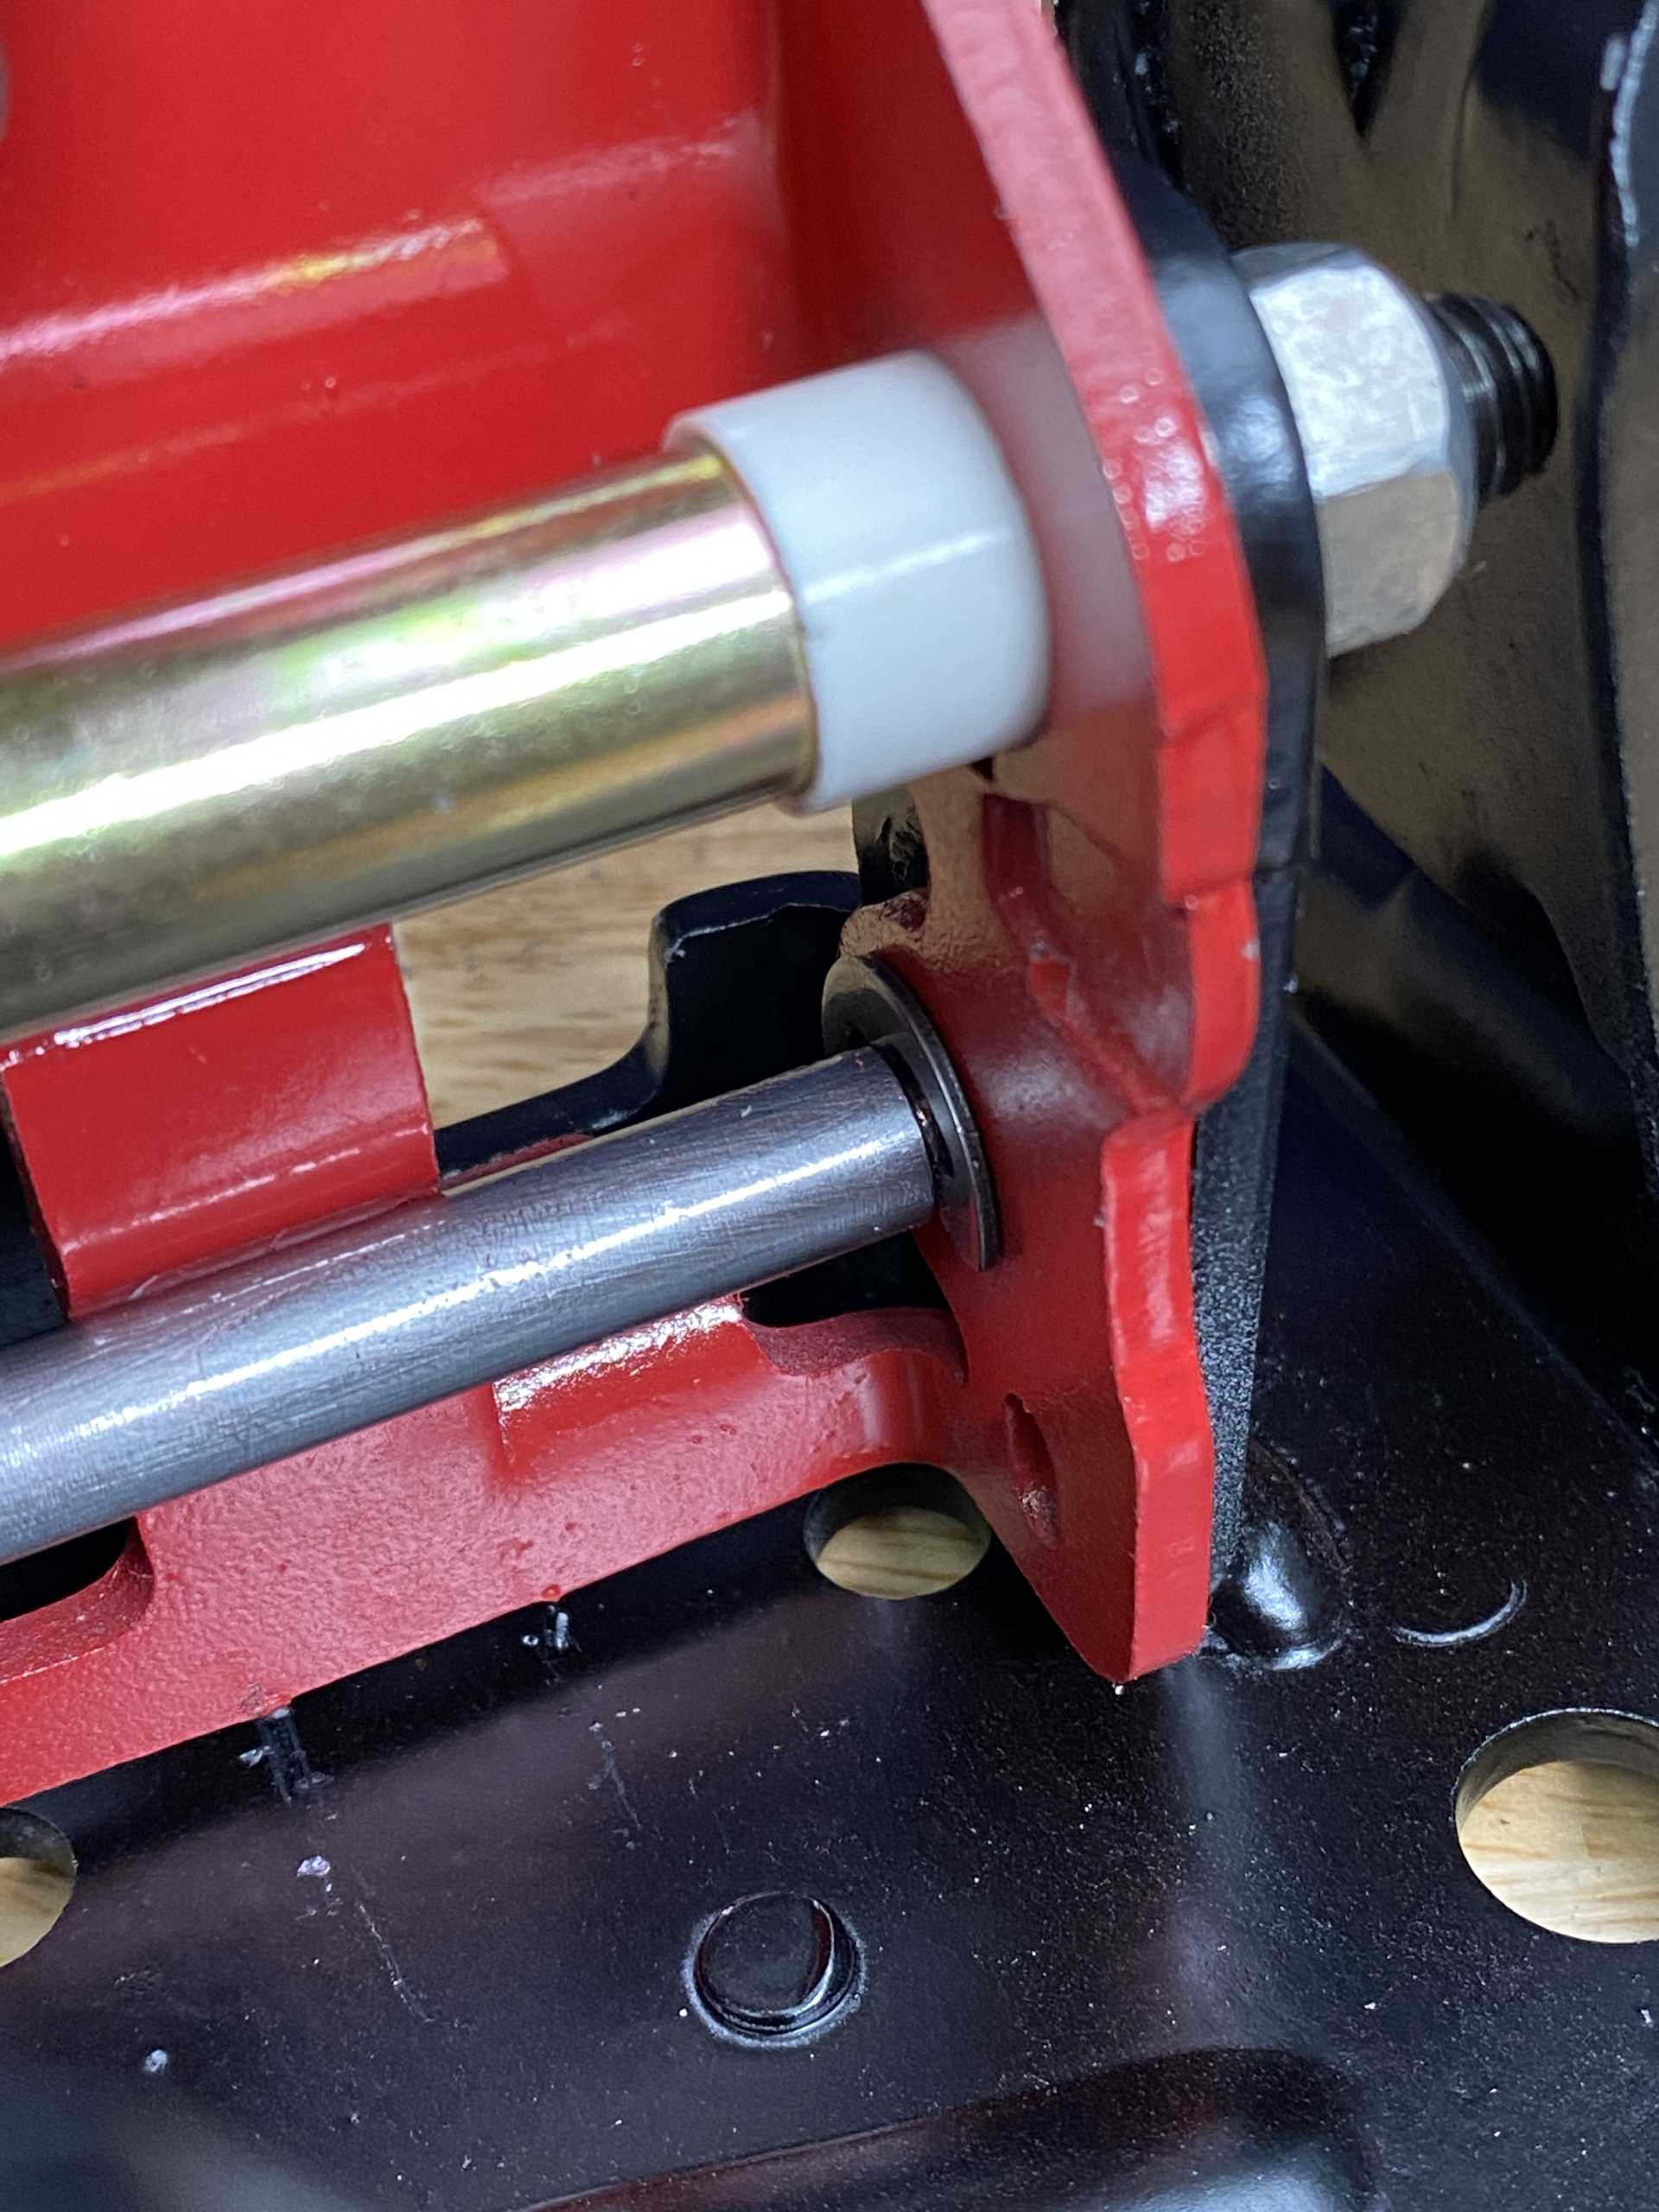
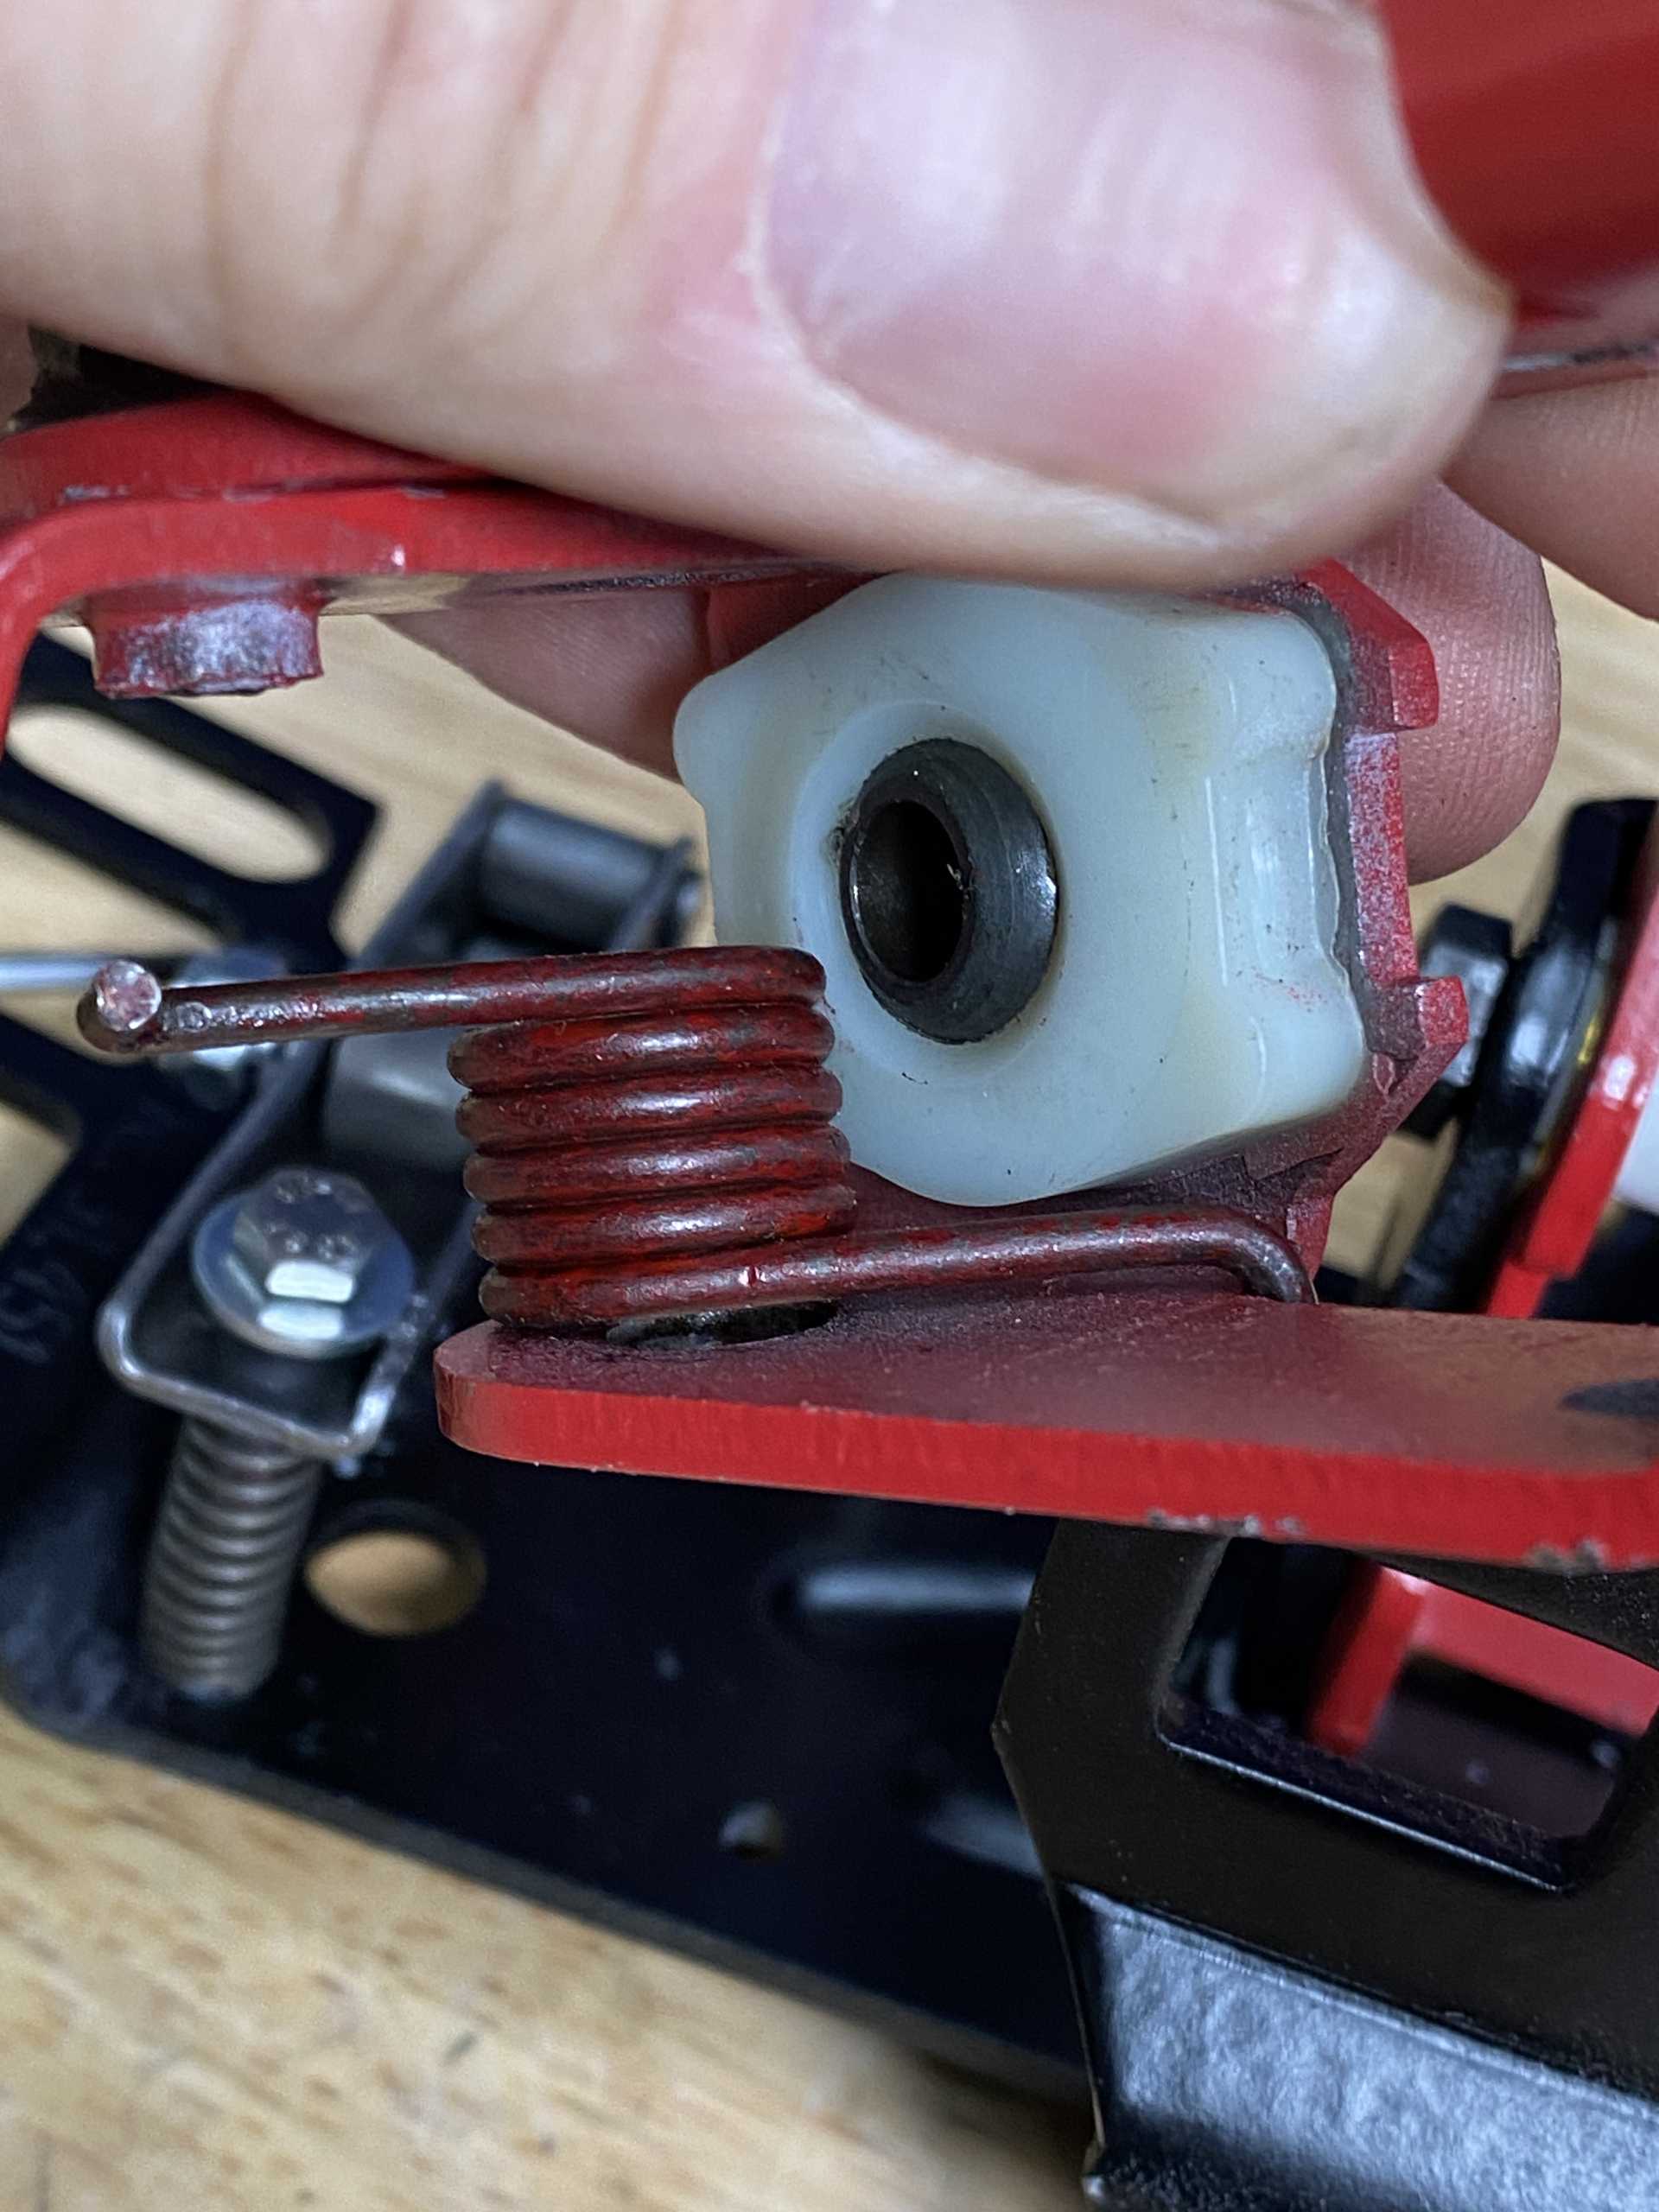
I forgot to install the spring and realized I didn’t have a picture of how it was supposed to be installed. I had a hard time finding a good picture of how the spring is supposed to be installed online, but was able to figure it out using a couple different photos for reference. Here are some good pictures of the shifter spring installed.
Reinstalling it was a breeze. No issues at all.
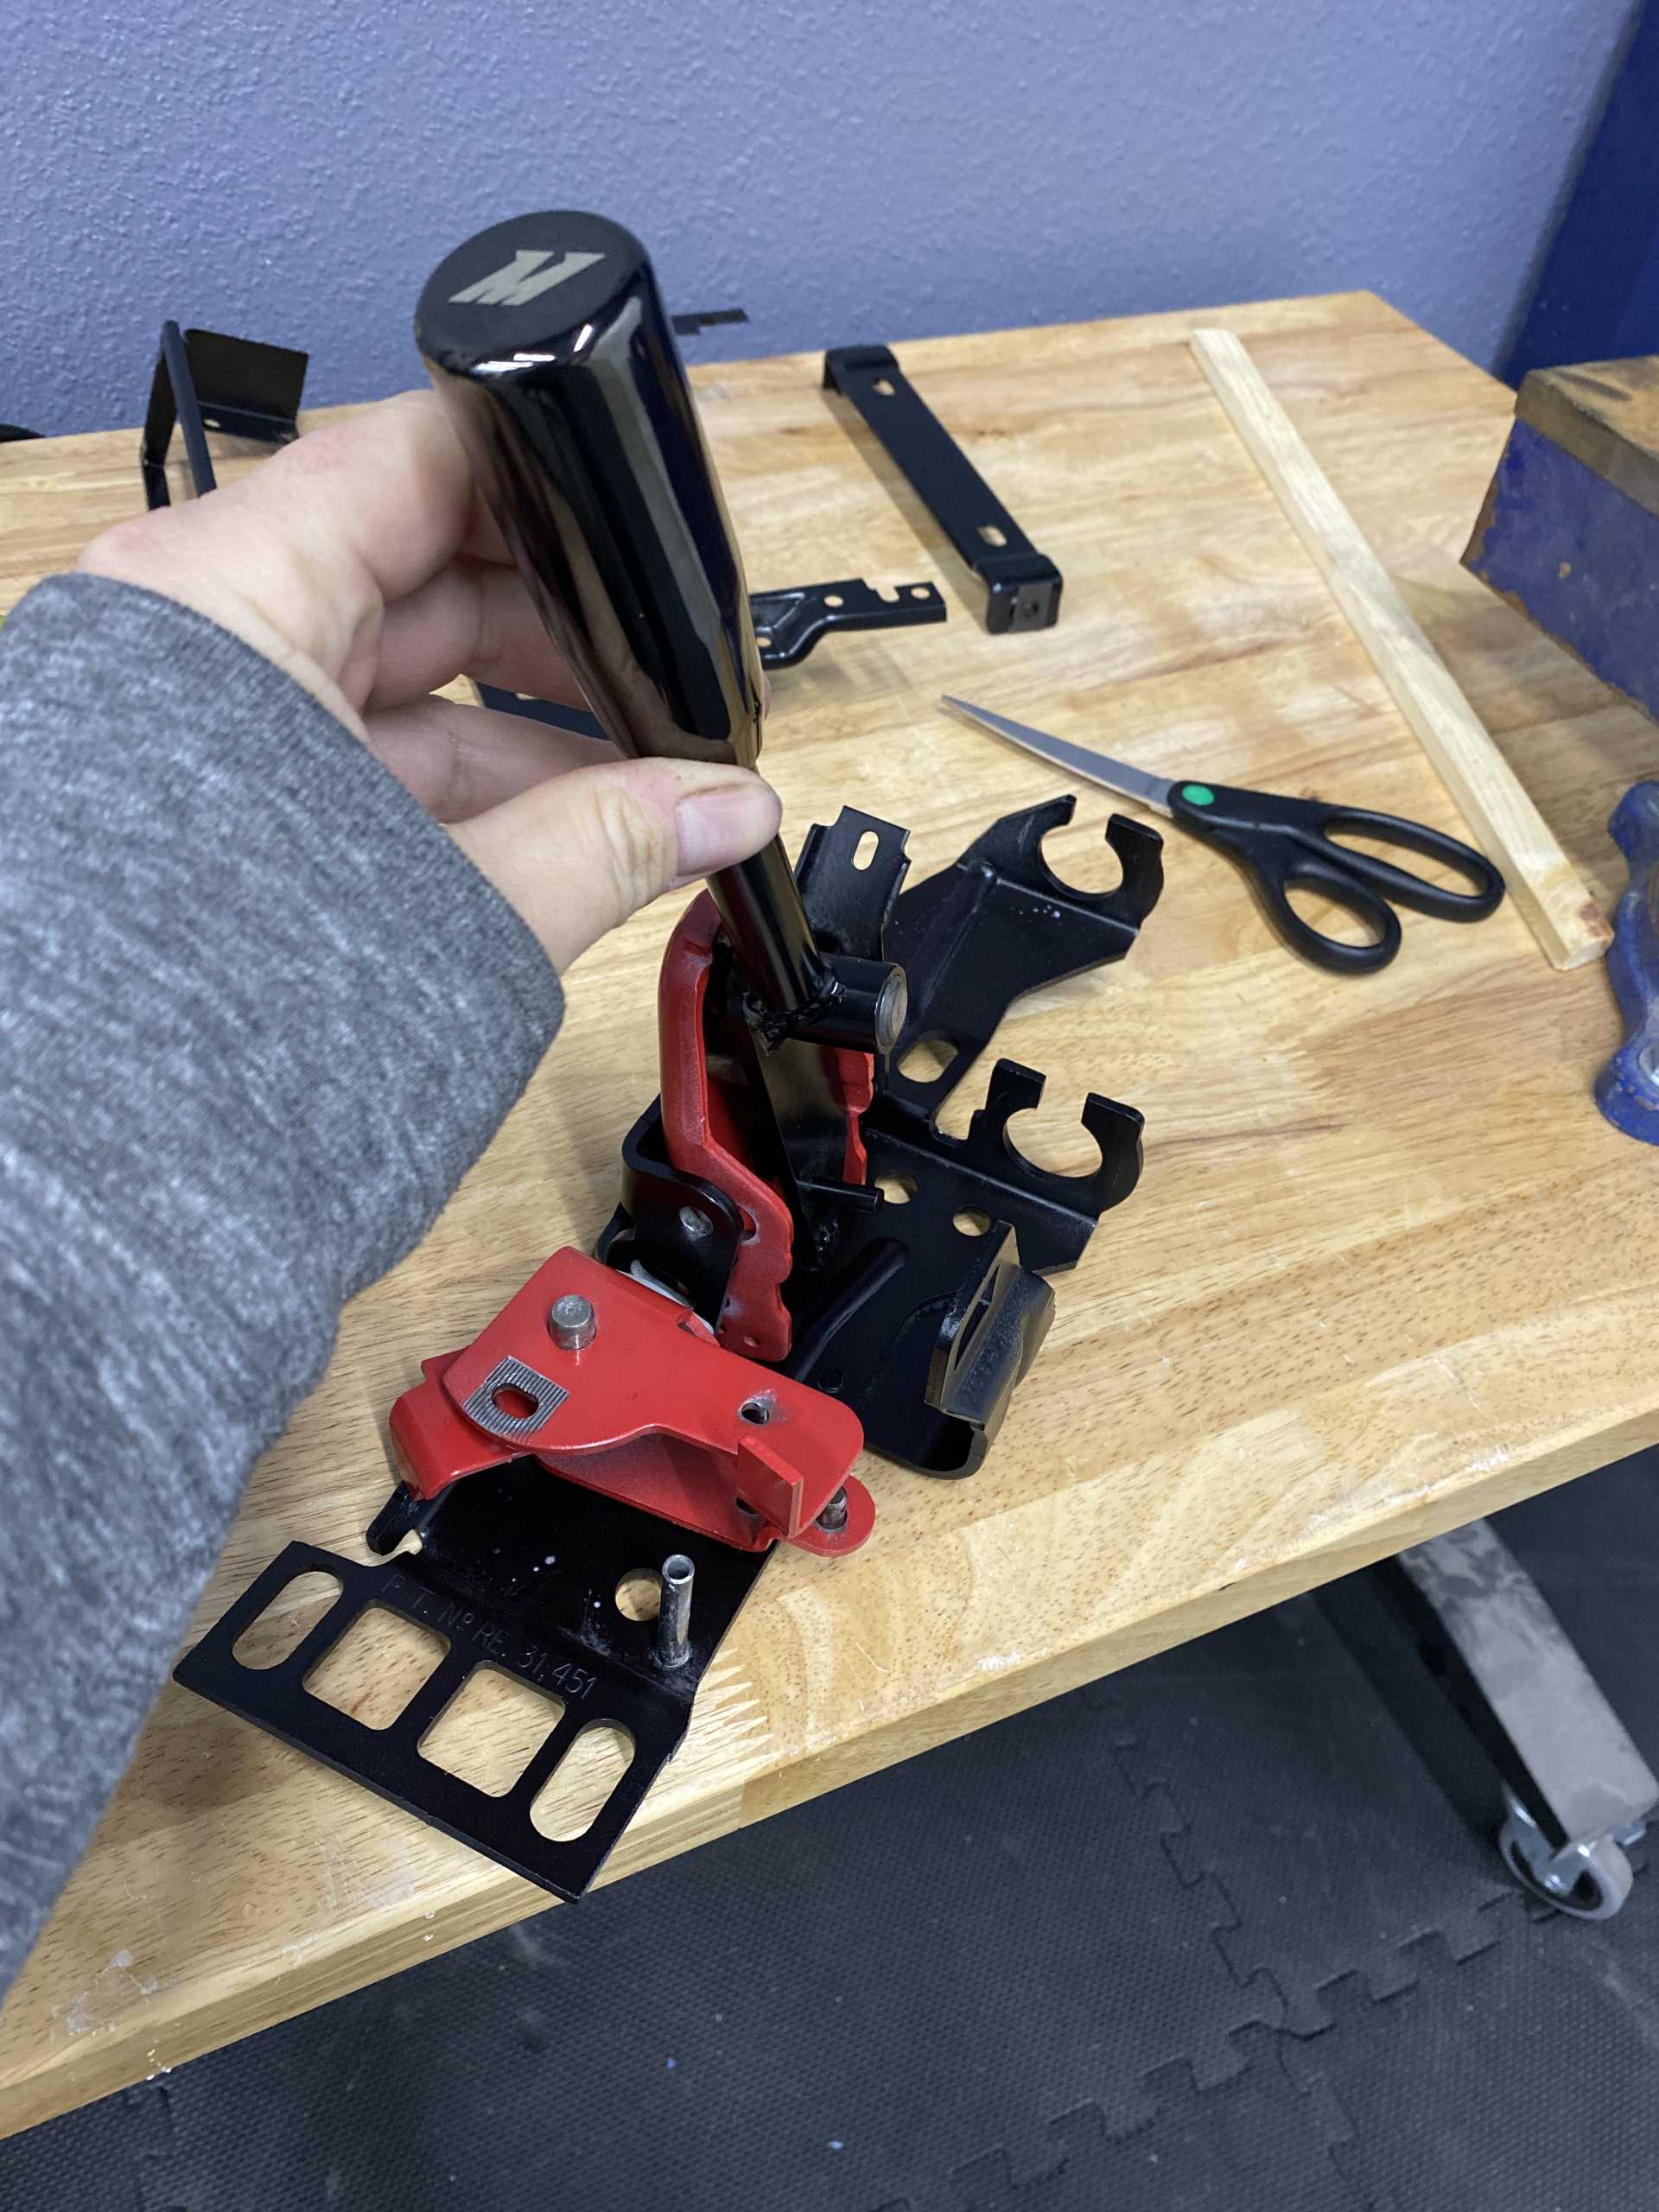
And wouldn’t you know, now that I’ve written this whole thing up I don’t have a photo with the new weighted Mishimoto shift knob! (actually installed in the car). I’m out of town but will add a photo when I get home tomorrow.
Edit: I forgot to mention how it all works now. It’s great! I like the competition short throw shifter a lot, and the Mishimoto knob. I need to add another shim or two in order to take the rest of the play out of the shifter.
When I got the car, it had the Hurst shifter (from RD I assume). It’s a cool shifter but doesn’t fit the style I’m going for. I like the Mishimoto a lot more. If anyone wants the Hurst shifter, it’s yours. Just pay shipping. This is the only photo I could find.
 [This message has been edited by ragoldsmith (edited 12-29-2020).]
|
|

|
fierogt28
|
DEC 30, 01:21 AM
|
|
I'd take your offer on the hurst shifter...would need to determine the shipping to E1G 5V1, Canada.
LMK,
Thanks,------------------
fierogt28
88 GT, Loaded, 5-speed.
88 GT, 5-speed. Beechwood interior, All original.
|
|
|
|
ragoldsmith
|
DEC 30, 07:37 PM
|
|
| quote | Originally posted by fierogt28:
I'd take your offer on the hurst shifter...would need to determine the shipping to E1G 5V1, Canada.
LMK,
Thanks,
|
|
PM sent.
|
|
|
|
ragoldsmith
|
JAN 04, 08:49 PM
|
|
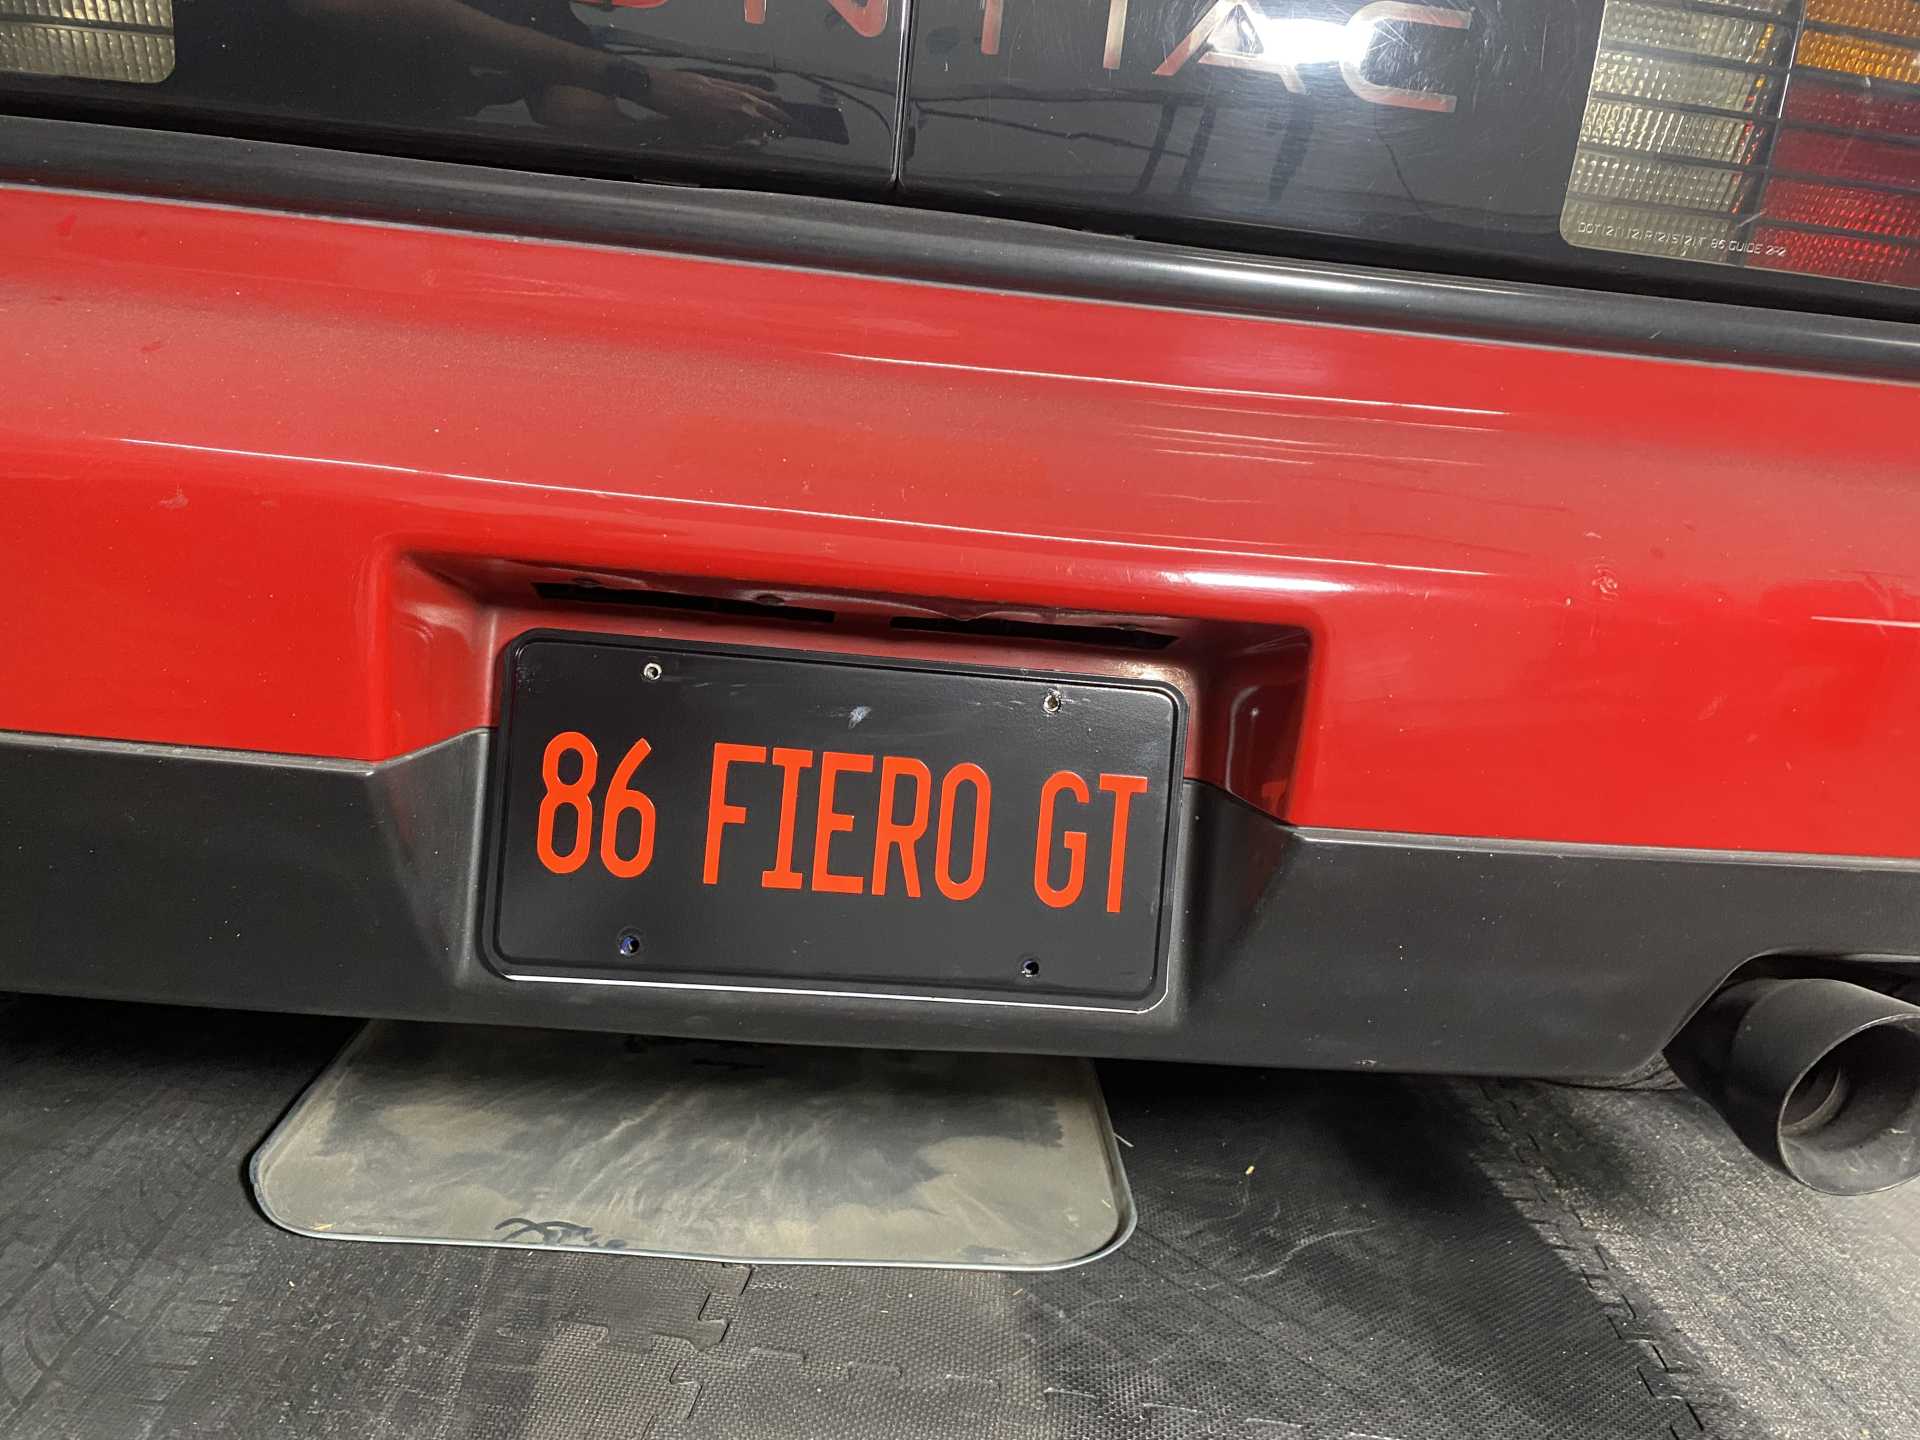
Had a little spare time and an extra license plate, so I made this. I thought it would be fun to throw on for car shows and making videos. I painted the plate black, then used my vinyl cutter for the letters and numbers. I clear coated over everything for a little added protection. Then I superglued some super strong magnets on the back.
Then...I stupidly set the plate face down on some superglue (and the paint wasn’t totally cured yet), which is why the paint has that splotch on top in the middle above Fiero. Oh well. Should be easy to fix.
And this has nothing to do with the plate, but it was 50 degrees yesterday! (Crazy for January in Idaho.) So I went for a drive!

|
|
|
|