|
| Kahines decklid vent install. Tips welcomed! (Page 1/5) |

|
weloveour86se
|
JUL 07, 11:10 PM
|
|
|
|
|
IFLYR22
|
JUL 08, 01:11 AM
|
|
Looking good!
The deck lid is SMC, use an SMC to FRP bonding adhesive like Evercoat's Corvette Panel adhesive to bond the vent on. Then use an SMC compatible filler where needed. The Evercoat adhesive can fill minor gaps, but add in fiberglass (I have taken Mat fiberglass and hand shredded it to add to the adhesive) for larger gaps (bigger than 1/4 inch).
-Dave
|
|
|
|
weloveour86se
|
JUL 08, 02:26 AM
|
|
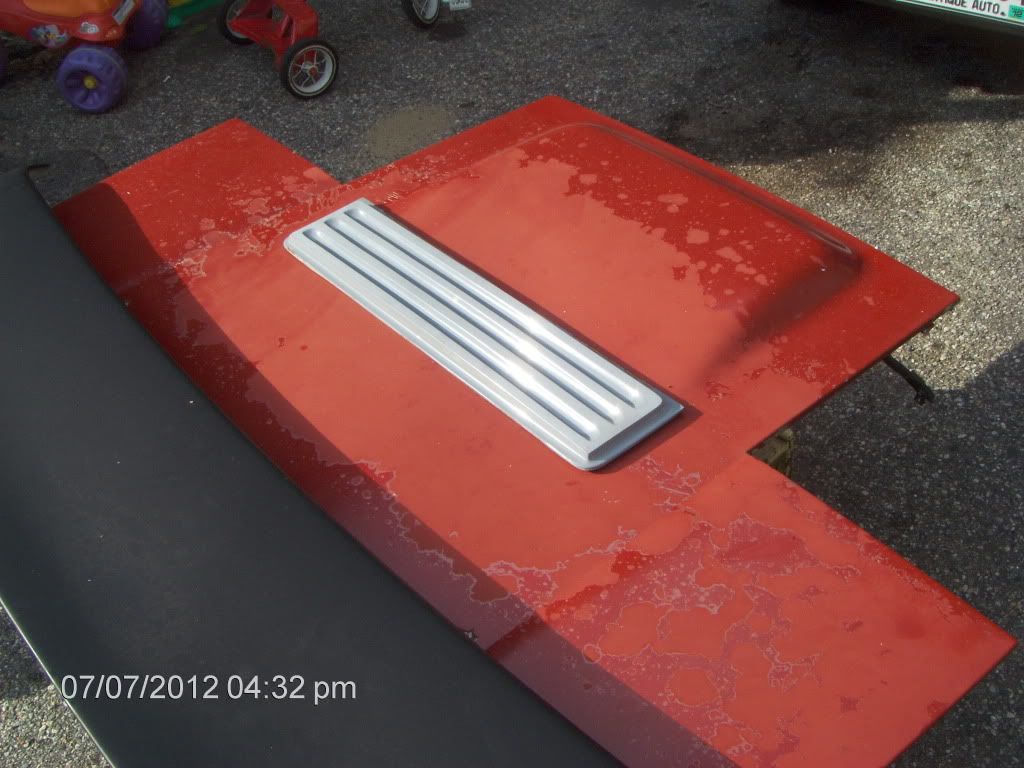
Well I kinda like the cut out look. The edges. Clean them up, make them match the Kahines vent edges. I whacked one back edge corner of the decklid but can fill it, make it match the rounded corner of the Kahines vent. The front corners would be square like the Kahines vent. If you look close you can see the difference. In the first pic we had it backwards because we were debating which way to put it, just for conversations sake. We will mount it turned the other way.
Also we still have to cut the vent strips in the Kahines vent. Oh man that is gonna be interesting!!
Man my cam sucks, I'm srry bout that.
Let me just say here that this Kahines vent is beautiful! Sorry but it's true! I can't for the life of me figure out why i didn't start this sooner...sigh.
|
|
|
|
revin
|
JUL 08, 09:25 AM
|
|
It looks like it is sitting to far back. I am not sure, but it looks like you are venting the trunk.
Nice vent!! he does good work!
|
|
|
|
weloveour86se
|
JUL 08, 06:23 PM
|
|
| quote | Originally posted by revin:
It looks like it is sitting to far back. I am not sure, but it looks like you are venting the trunk.
Nice vent!! he does good work! |
|
I hope not! I mean venting the trunk. Pretty sure I'm okay. If you check the underside of a standard declid theres a factory rectangle shape in the same location. Almost as though there could have been a vent there.
I really wanted to do some yarn tests with the before and after effects of the vent but I don't have time for it.
Curse you Revin, now I gotta go out and double check it 
|
|
|
|
weloveour86se
|
JUL 08, 07:08 PM
|
|
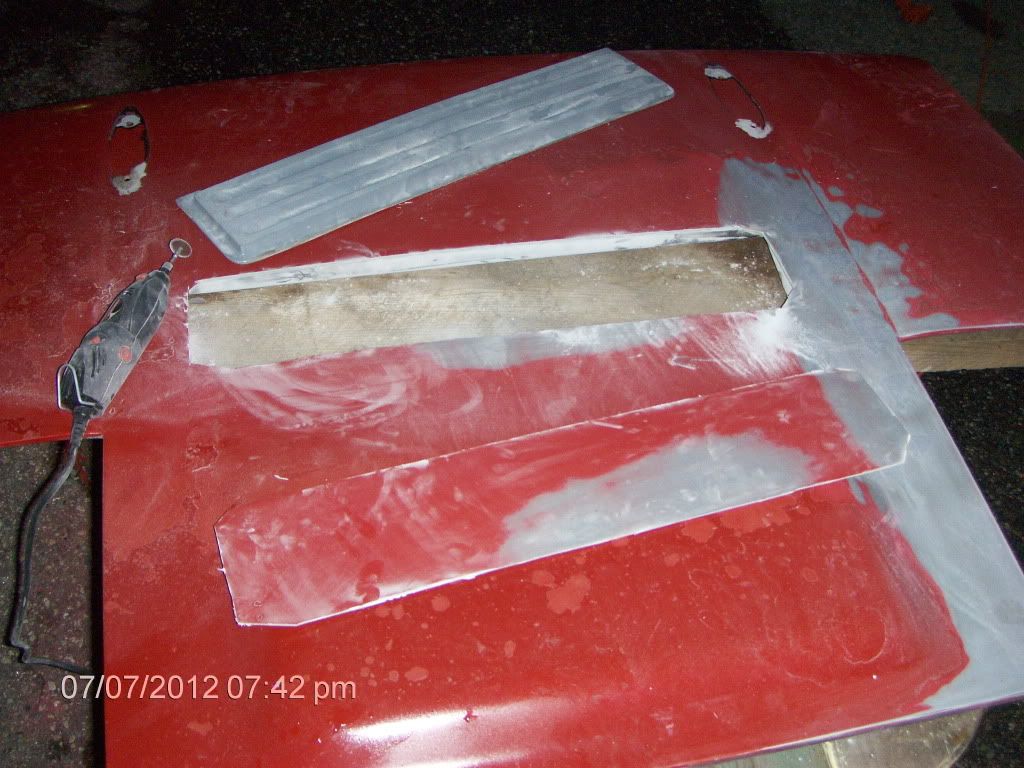
Pshew. Its in front of the trunk seal. It will be situated in the area above the gap between the motor and trunk wall perfectly. IIRC the vent was made for a fastback but I don't really see why it won't work here. Looks sharp IMO.

I read somewhere to bevel the mating edges when glassing? Maybe take it down a small bit around the edges. Then build it up for shaping and more sanding. This is definately reaching for me... Can't hurt to try tho. WTH. Plus I can cure the dreaded PO shaker can paint. Hopefully.
|
|
|
|
weloveour86se
|
JUL 08, 11:12 PM
|
|
|
|
|
IFLYR22
|
JUL 09, 01:08 AM
|
|
On my Vette build, I have gone through about a gallon. It goes a long way, if you only mix what you need...
Almost all the Bondo style fillers use the same hardener, so I have mixed various fillers together to make things easier for me. For example: add the Evercoat Vette panel adhesive with the long strand filler, or short strand filler for the gaps. I like to alternate hardener color for each application of filler, so I know when I have hit a prior layer when sanding.
You definitely should "V" the edges where the panels meet.
When cutting the vents open, take your time and go slow. It's much easier to remove the FRP than to add it back in...
-Dave
|
|
|
|
Arns85GT
|
JUL 09, 10:26 AM
|
|
That is an interesting location for a vent. In theory it should vent out, but, you'll find it won't do that. When underway, the forward air movement is strongest in that part of the deck lid. This means you are going to get air moving down over your engine when at speed. This is actually good. Cool air over the plenum.
The negative on the design is rain. Every time the car is out in the rain, you're going to get an engine bath. But, as long as you expect it, you can plan for it.
Looking good so far.
Arn------------------

|
|
|
|
revin
|
JUL 09, 04:24 PM
|
|
lol sorry  I was just thinking.... I was just thinking....
Looks good! I like it!!!
|
|
|