 
     |
| 88 3800SC F23 Build (Page 7/8) |

|
paulsobj
|
APR 04, 10:51 PM
|
|
Paul,
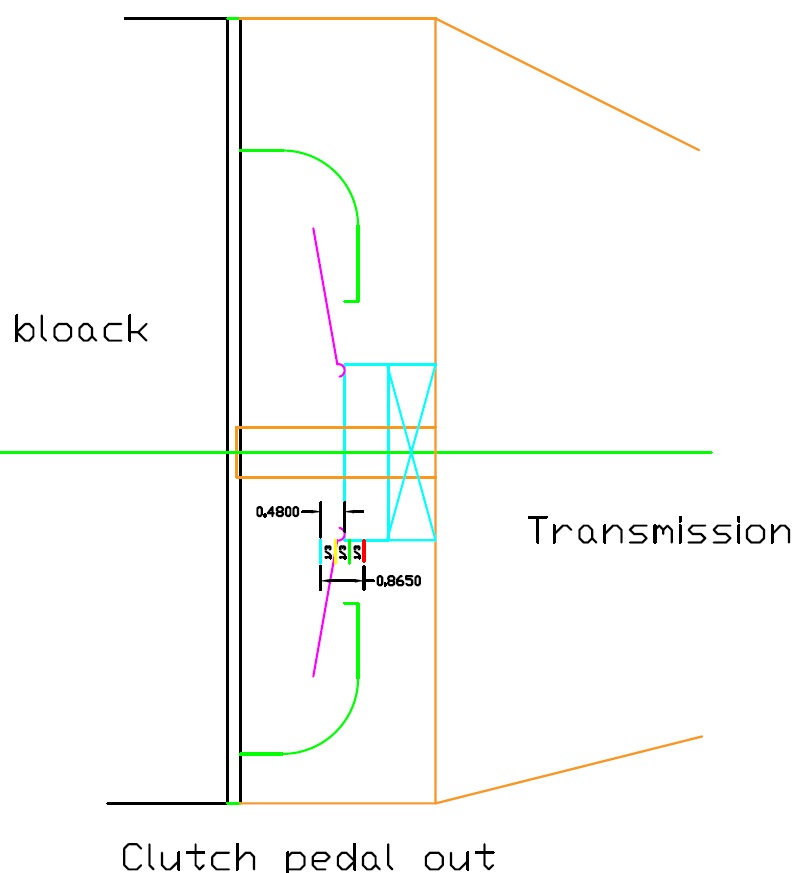
I see that I had a few things backwards. I also think I didn't measure something right after looking at it more. So I decided to get it drawn up in CAD and then be able to really check myself. I remember that i was going to us a 1/4" trans spacer based on the face that most people machine down the flywheel 1/4" to get clearance with the pressure plate and the trans case. Those same people seemed to unusually needed a 1/4" HTOB spacer. Now, after throwing out all old measurements and starting fresh. I think I need 1/4" trans spacer, 1/4" HTOB spacer. Don't mind the misspelling....

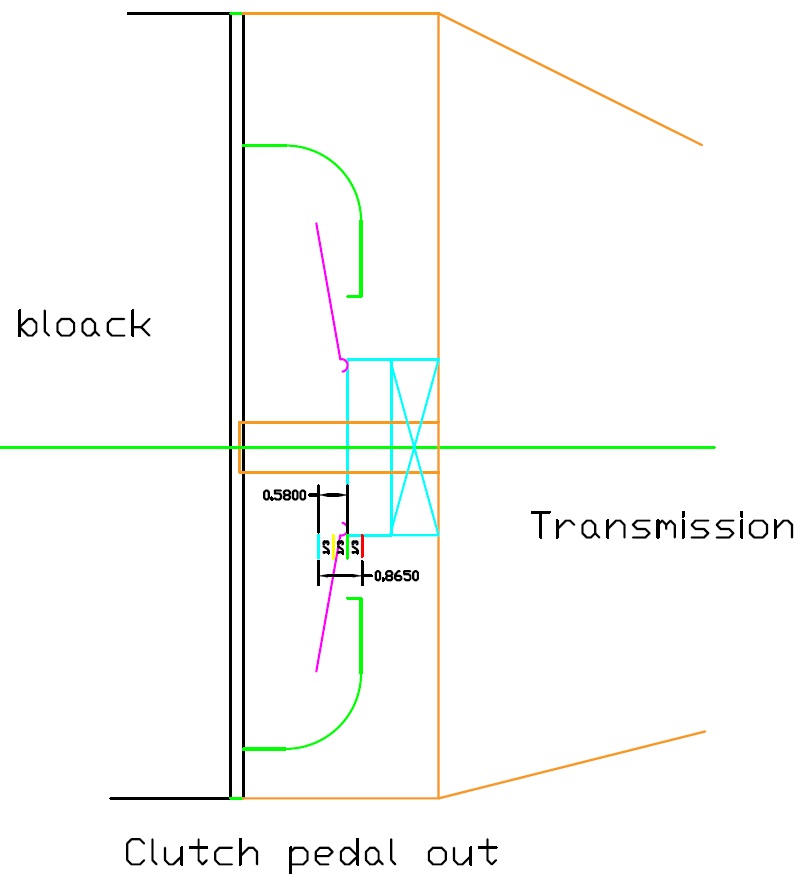
Here is with an additional .100 washer added to the Spec HTOB .25" spacer.
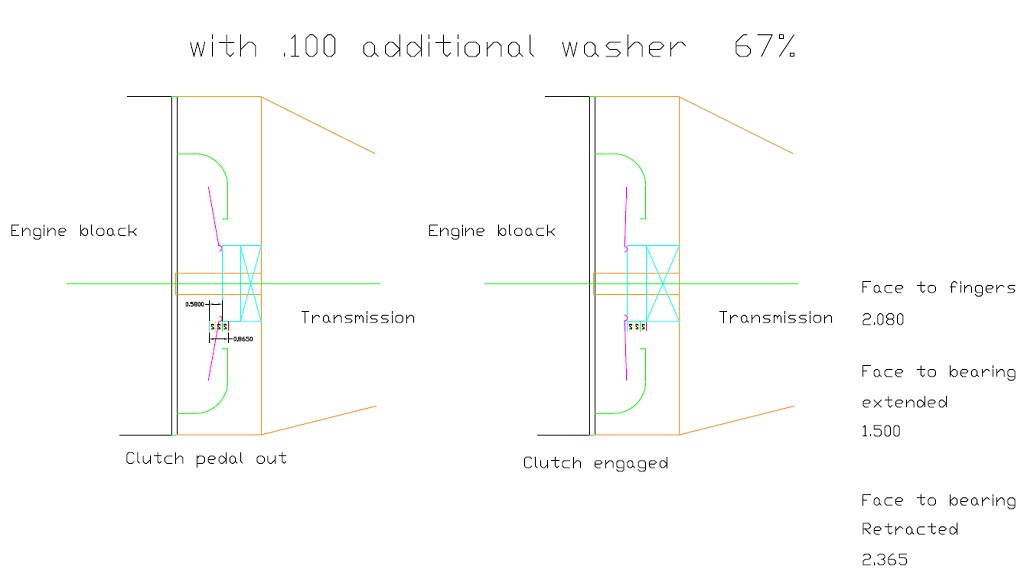
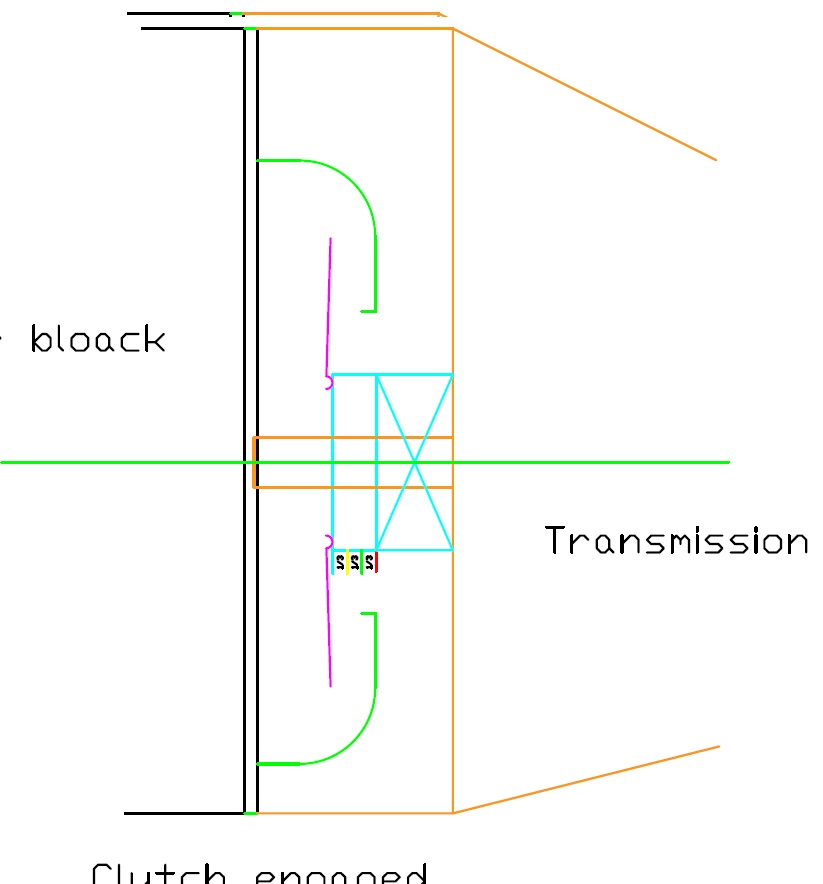
I hope this is the final cut.
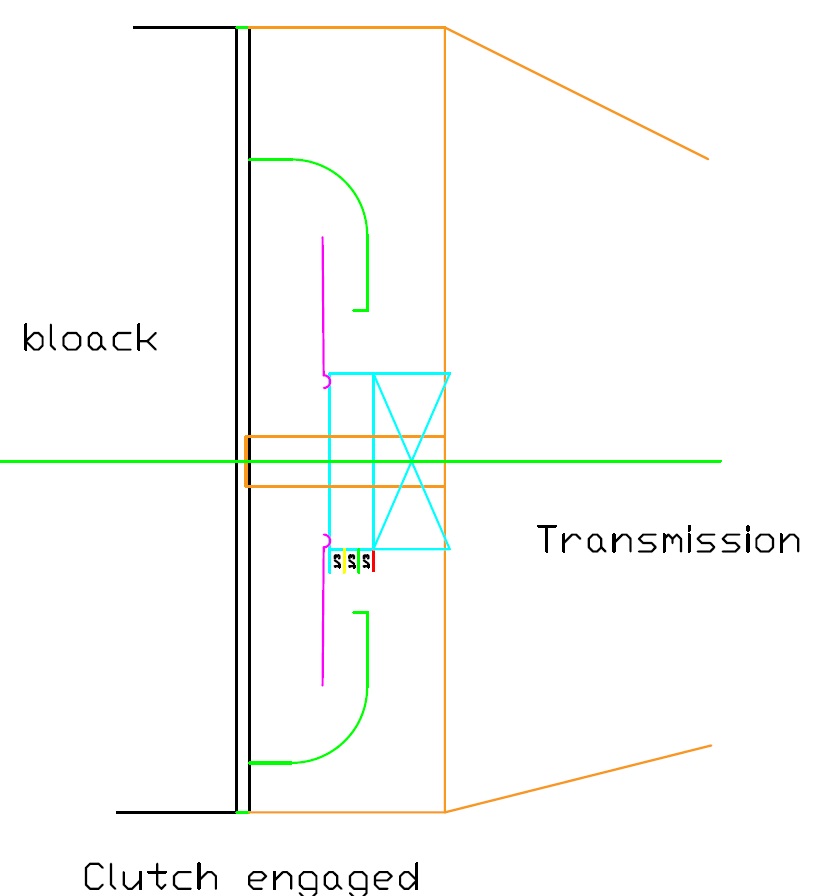
With the HTOB .25"spacer.

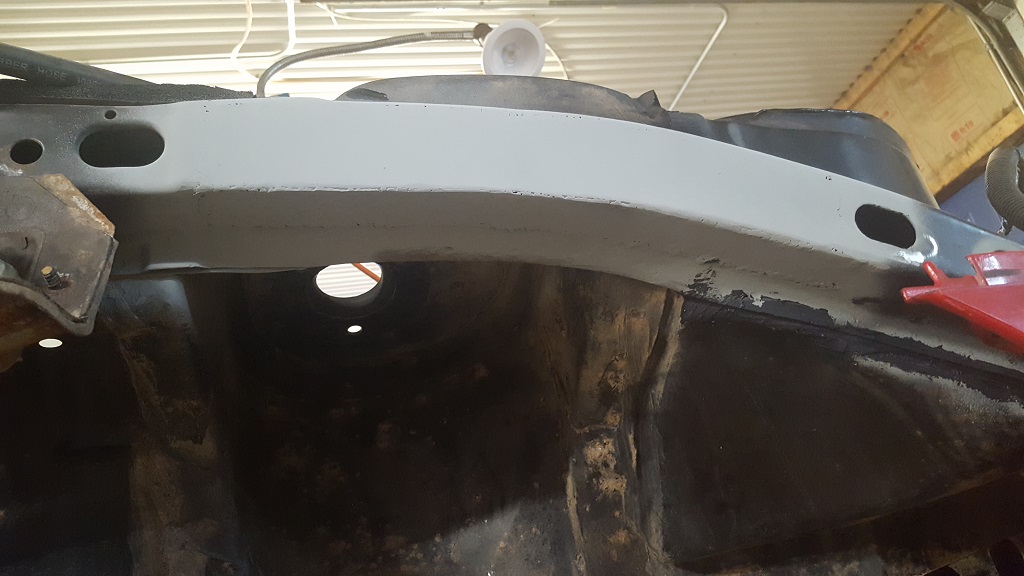
Some rust repair.
I installed all new SS brake and clutch lines from TFS along with poly bushings. I found that I had a full set of ball joints and tie rods that i forgot about. Gas tank is almost back in.
I have other things I would like to update on but I feel its incomplete. I also broke the rear brake line junction block and found how hard it is to get ...even used...
|
|
|
|
paulsobj
|
APR 23, 10:48 PM
|
|
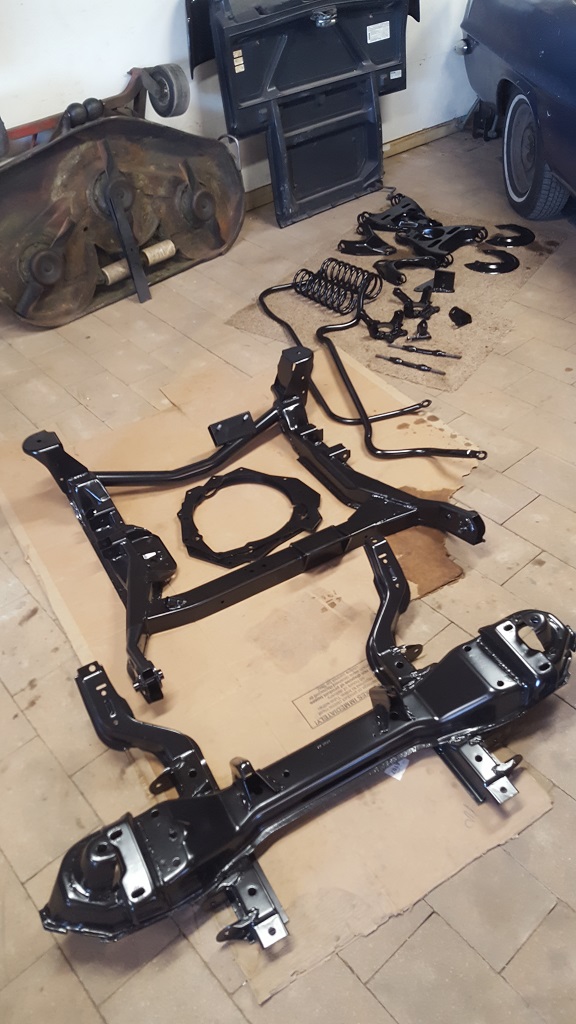
I have been working on my '75 T/A while I was waiting for sand blasting and powder coating. Blasting was done at my dads old business Blast Master in Shakopee, MN for $200. I just picked up the parts today from Extreme Powder coating in Blooming Prairie, MN for $425.
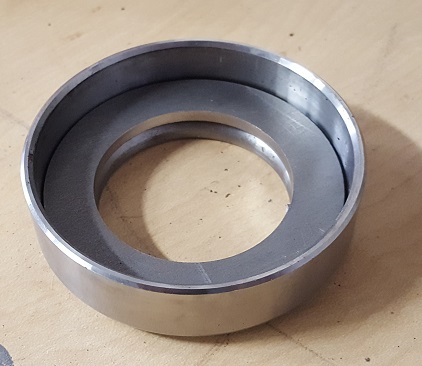
Here is the spacer that I made to get the correct spacing.
|
|

|
motoracer838
|
APR 24, 08:44 PM
|
|
| quote | Originally posted by paulsobj:
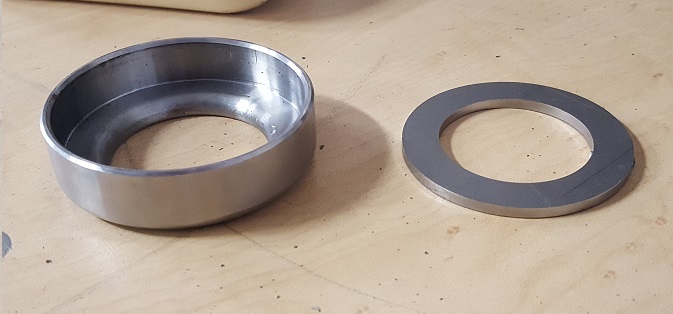
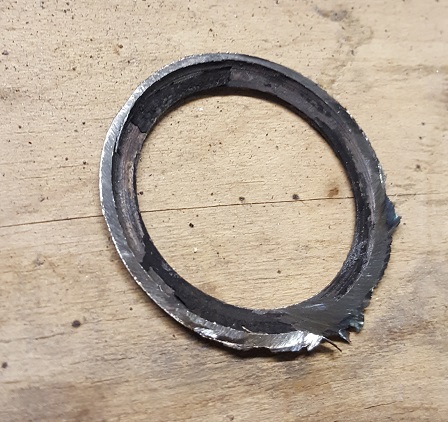
I got the thicker 3/8" spacer done. You can see i took some material out for weight and no real reason to have it.
I found the 1/4" cleared the flywheel but this thicker one interfered with it. I had to machine off some material to clear it. I didn't want to cut all the way through to keep some strength as a full circle. I have an extra one that I machined the wrong side. So if you want it you will need to cut it so its not a full circle. This is a picture of the mistake.

. |
|
I'm interested in your bad plate, It will make a good starting point for what I need for my Nstar/f23 swap, 3/8" will give just enough room to clear the flywheel/clutch combo I got from CHRF. Nice work on your build.
Joe
|
|
|
|
paulsobj
|
APR 25, 11:11 PM
|
|
motoracer838 email me and I can get that to you. Thanks for reading my build.
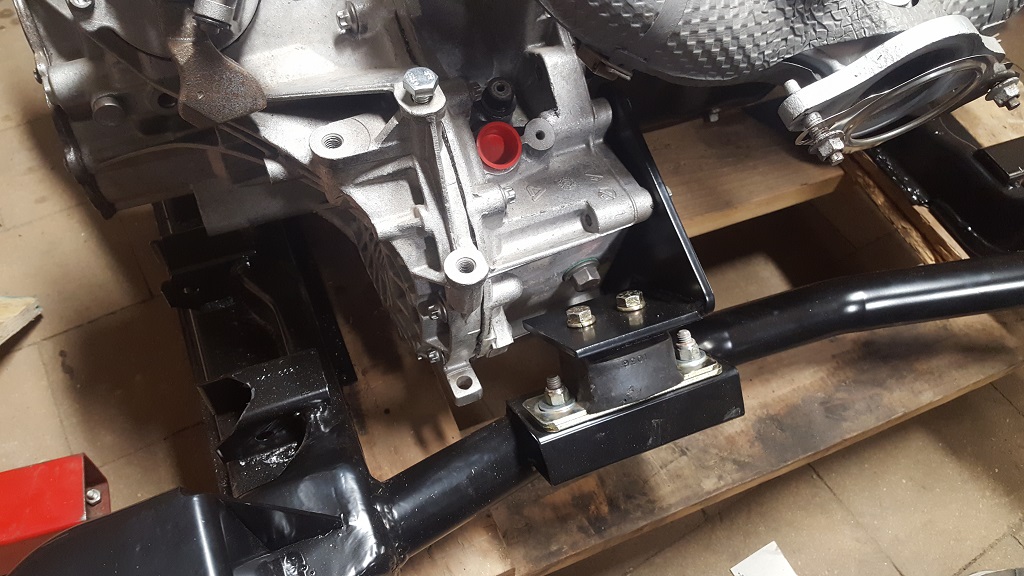
I am glad to start assembling and not taking apart the frame and suspension. Here are some pics of my engine mounts.
Here is the final trans spacer (I hope haha)
The cradle
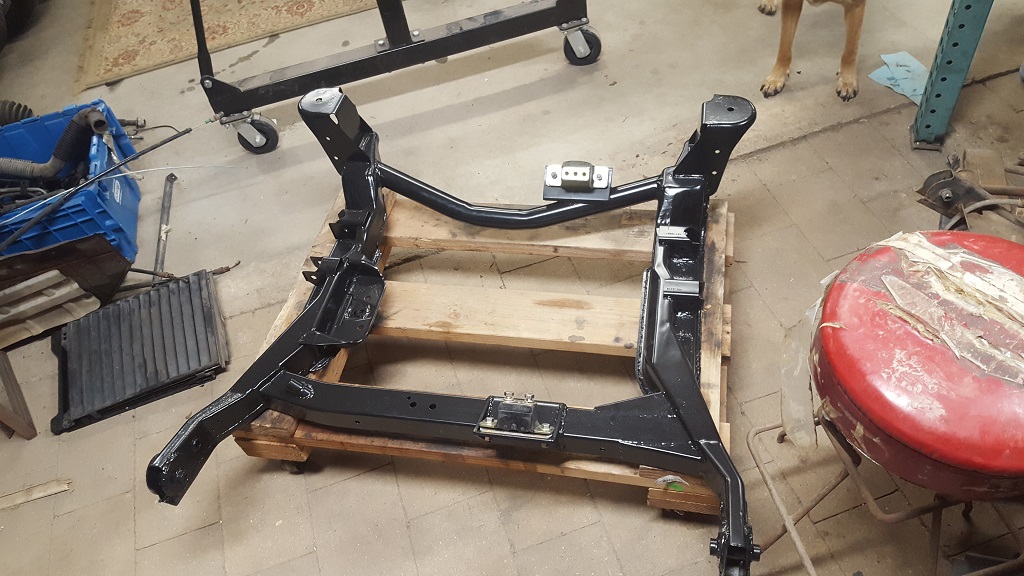
This is the front trans mount. I have not welded it completely but you get the idea. It is welded to the trans spacer I made. We added a small tab to use as a mount point.
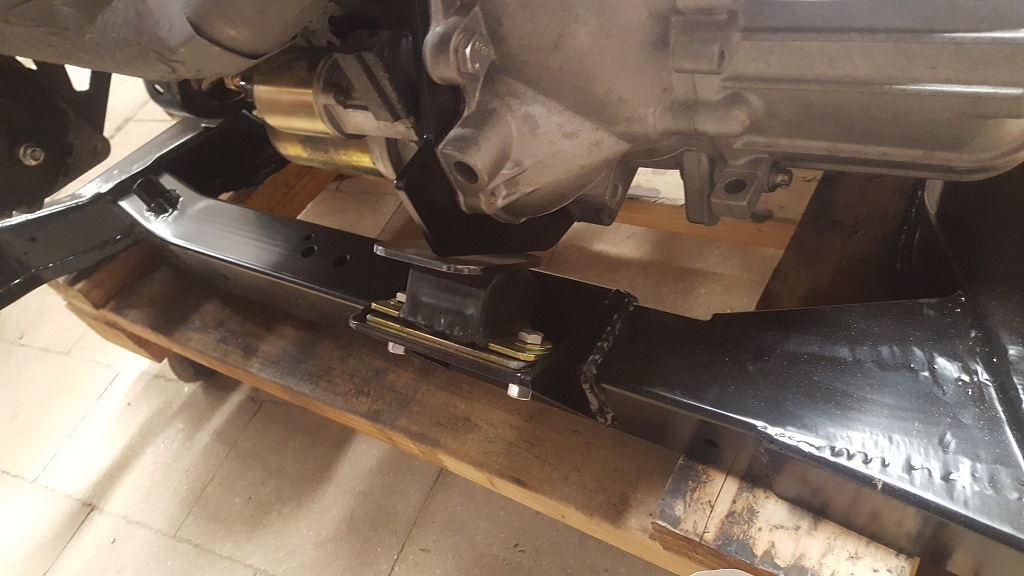
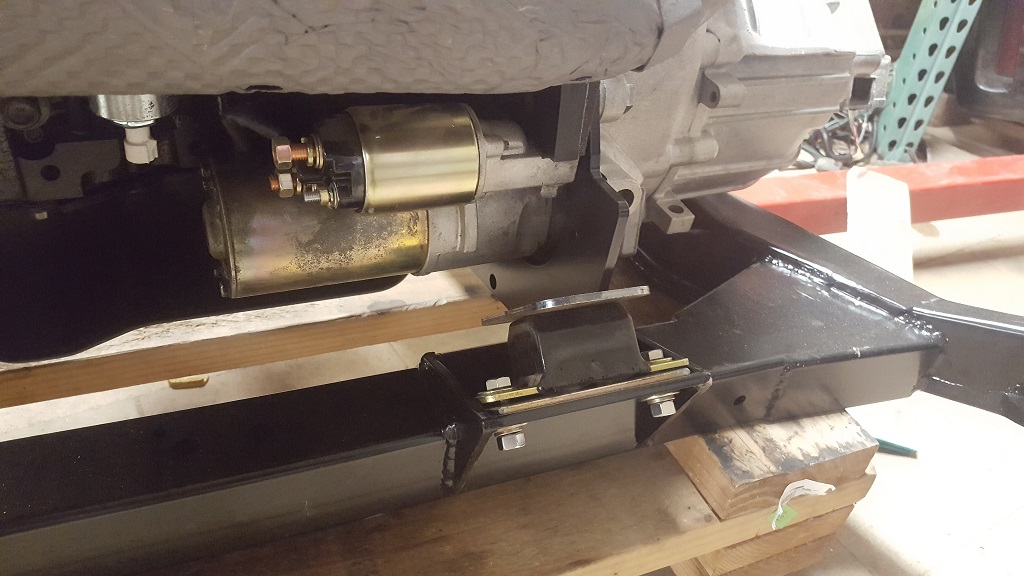
Here is the rear trans mount. We drilled and tapped the three spots on the F23.
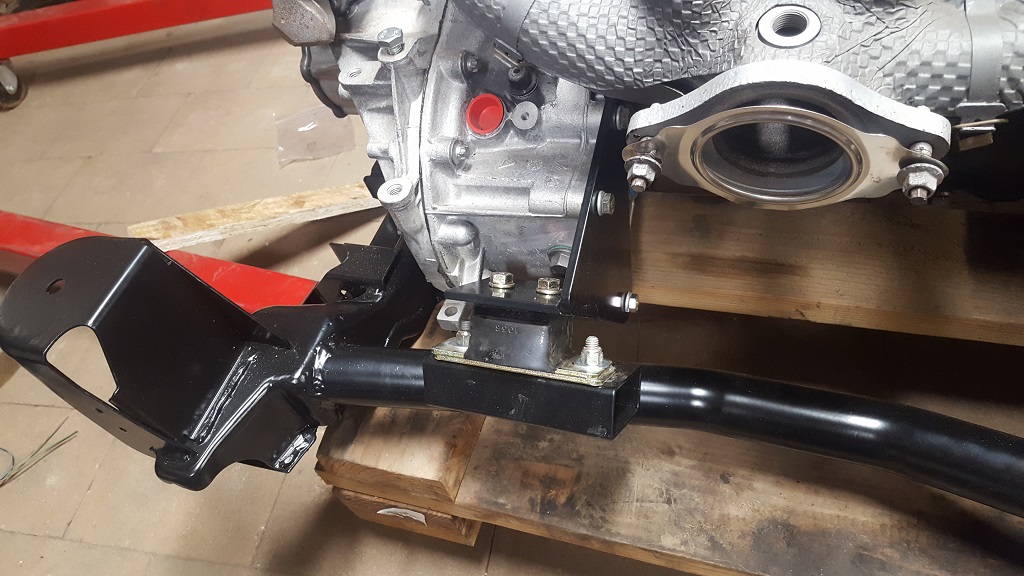
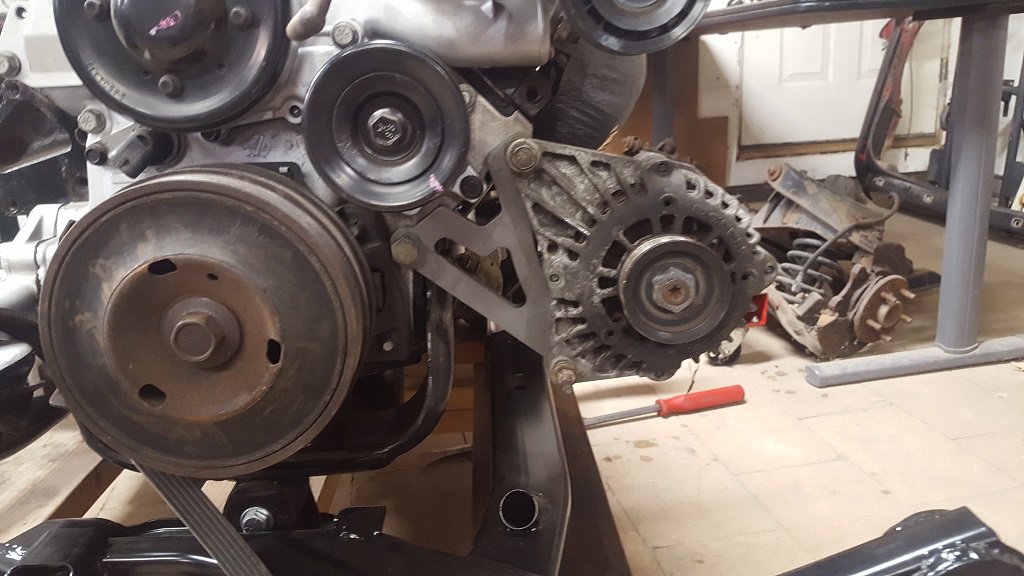
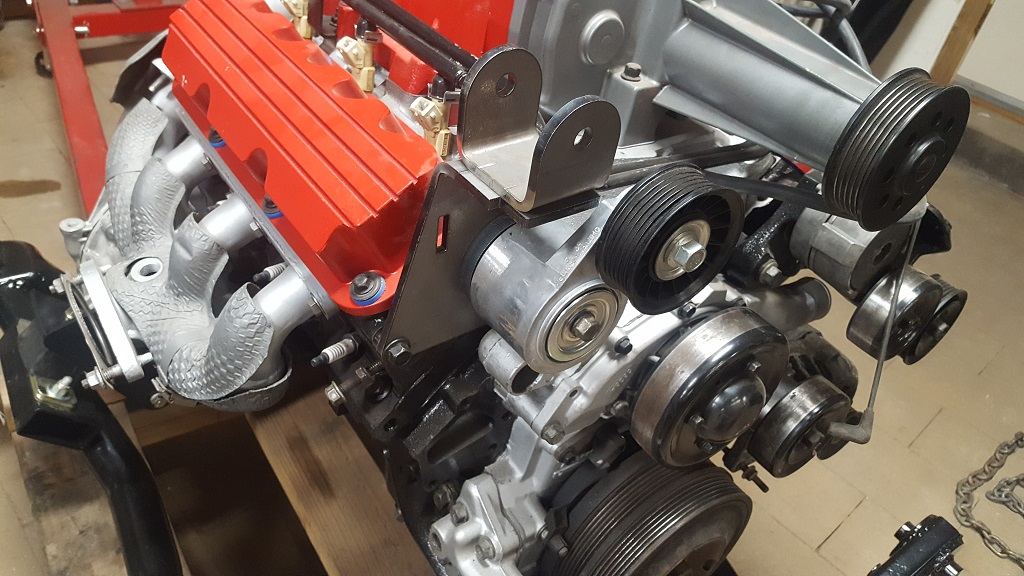
Alternator mount
Dog bone mount
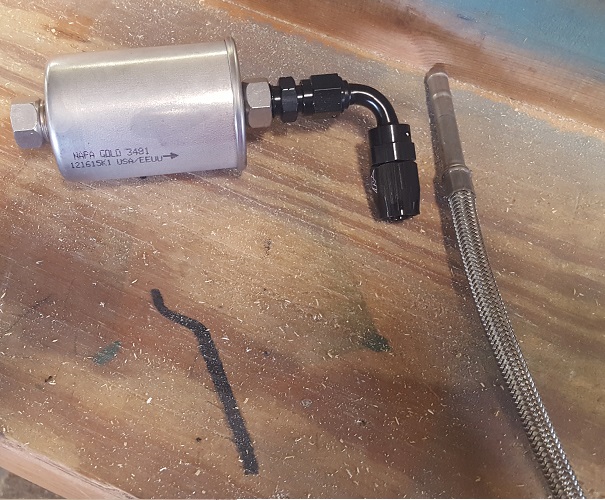
Sorta random but If I don't post now I will forget. This is the AN adapter for the stock fuel filter to stainless steel lines I am using.

|
|
|
|
motoracer838
|
APR 26, 01:24 PM
|
|
Email sent.
It's good to reach a point when things start going together for the last time.
Joe
|
|
|
|
paulsobj
|
APR 30, 10:46 PM
|
|
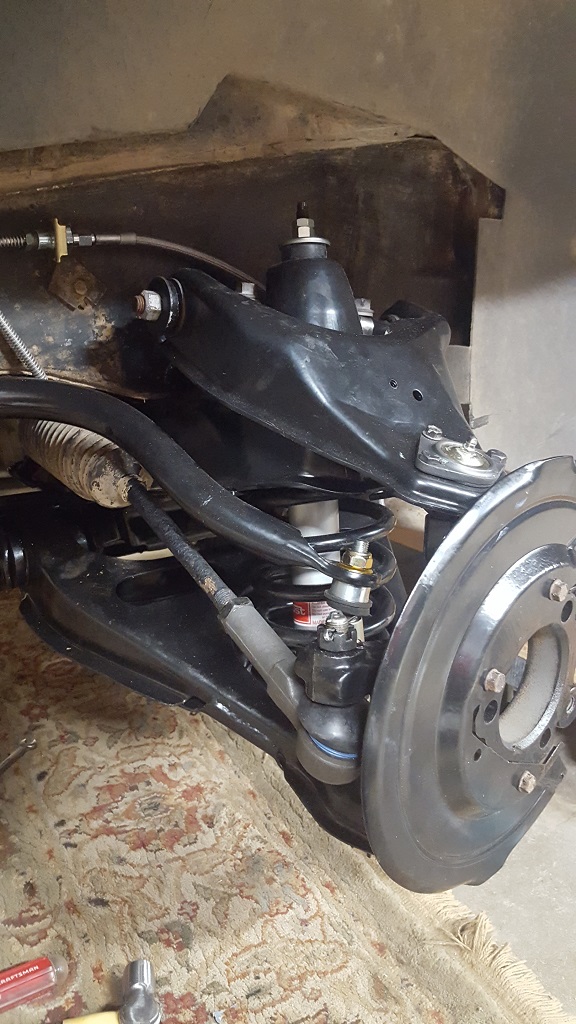
I got most of the drivers side front suspension done tonight. I had issues with the bushings. I didn't know that I needed to keep the OD metal from the original bushings for the poly that I bought. So I had to buy a whole new set and push them in and heat up the lower rubber until it popped out and pressed out the upper rubber. I destroyed my vice doing so. It was a really old good vice that I will have to replace soon. After I got the bushing OD figured out i put the poly into the A arms and noticed it was not right.
You can see the gap.

But it was all the way in.

So I found the OEM bushings did not have the inner lip. So I cut it off.
Here is what I got done tonight.
|
|
|
|
longjonsilver
|
JUN 18, 09:44 PM
|
|
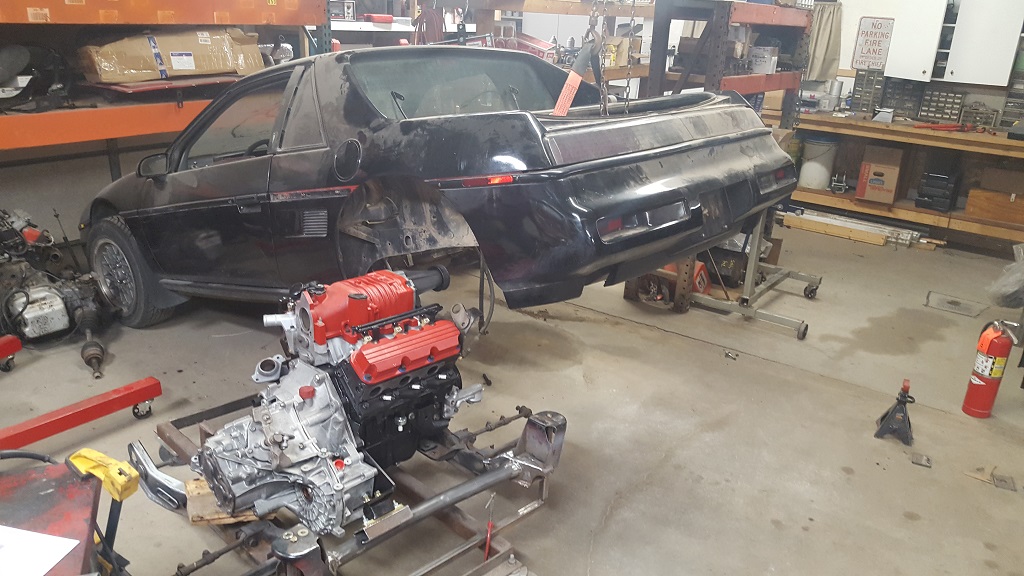
| quote | Originally posted by paulsobj:
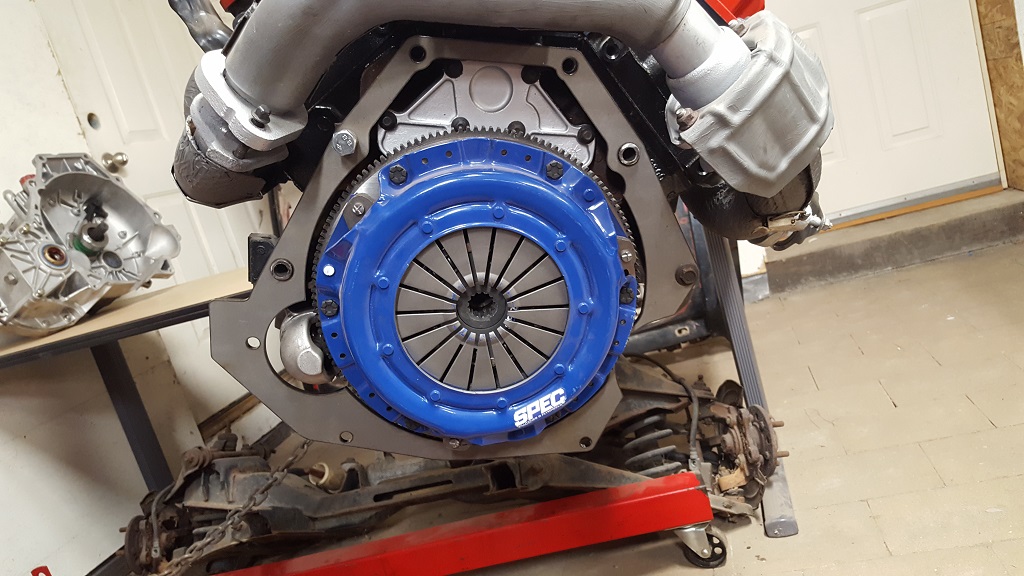
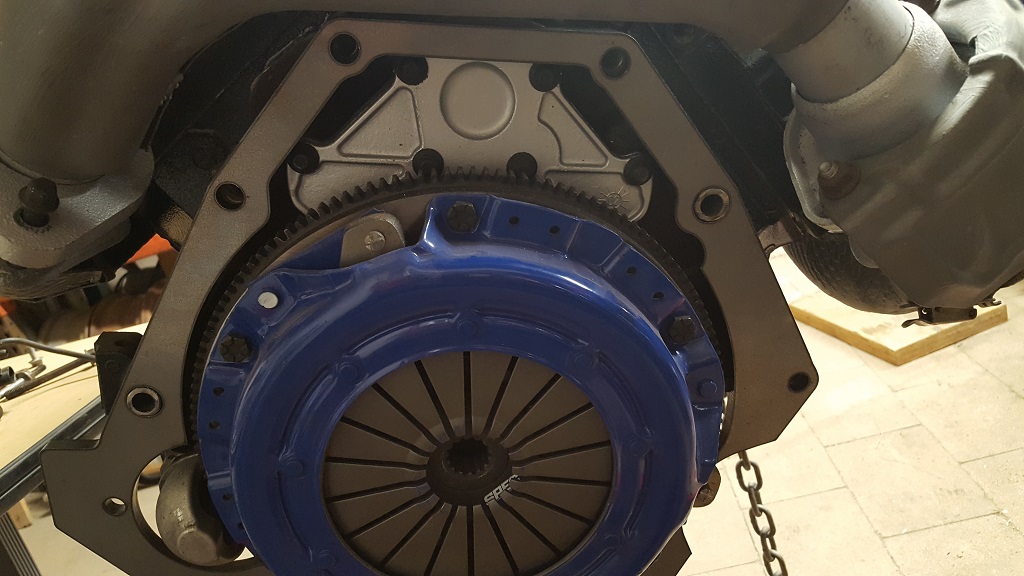
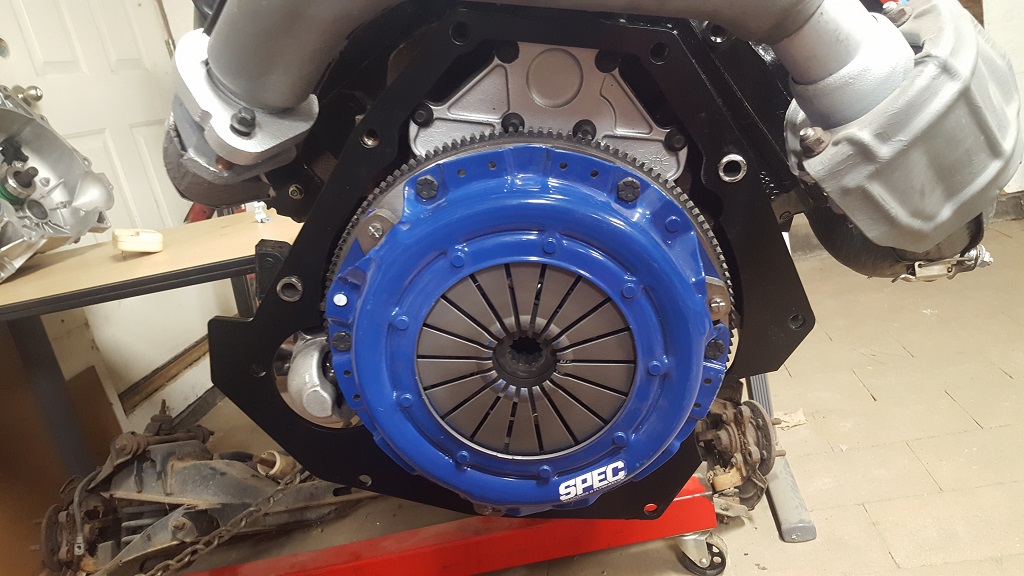
Here is the first test fit.
|
|
Beautiful paint job on the engine/trans. It looks like you're painting it just the way i plan on painting it. The valve covers and the supercharger look super!
jon
------------------
I'm the original owner of a white ' 84 2M4 purchased Dec 10, 1983 from Pontiac. Always garaged, no rust, 4-wheel drifts are fun! 3800 SC swap to come!
|
|
|
|
paulsobj
|
JUN 22, 11:20 AM
|
|
Jon,
Thanks for reading my build!
I have not had time to get around to working on it in a month or so. My parents just moved and I have been helping them. I think next is drilling the bolt pattern for the front hubs. I bought RD blank rebuildable hubs. I always seem to get busy in the summer around here. I am going to the Pontiac Nationals Monday and Tuesday in The Dells. I think we are taking the Solstice and mainly going for the swap meet. I might take another vehicle as the Solstice doesn't have much room for parts if we buy any.
|
|
|
|
paulsobj
|
FEB 20, 10:53 PM
|
|
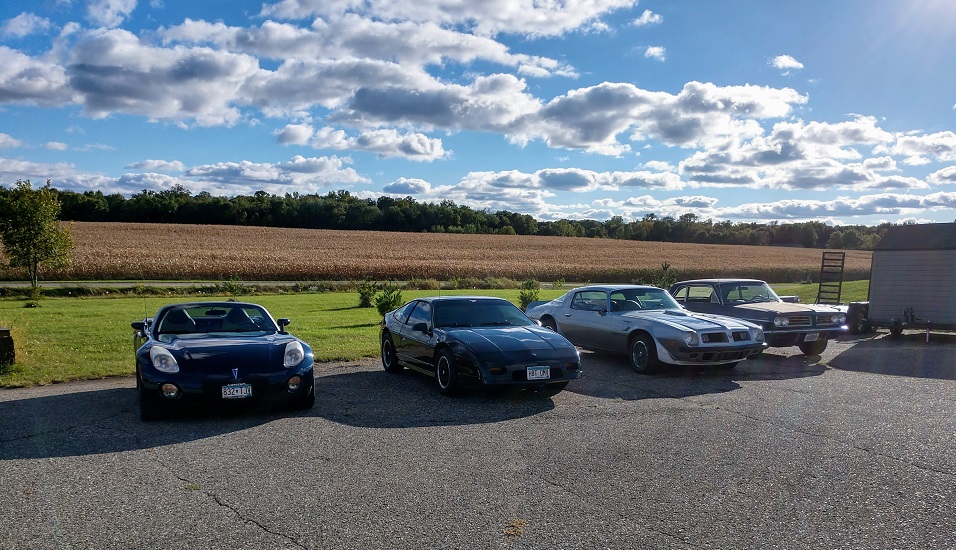
Another long period of no updates. I do have some finally! This summer was very busy and since my last post I have one more member of my family. I also bought a 15 Explorer Police car for the growing family. I picked up a new toy for the shop last week, a CAT skid steer. I had to install Rodneys input shaft bearing seal for the other Fiero. You mightt remember that I did it in March and the Seal was bad for the rubber piece came out. I wasn't taking chances and installed the kit in November.
Here is a picture that my dad took this fall.
I would love to post pictures but after copying and shrinking it they are smaller then a postage stamp. what a joke. I guess I will have to get my old cell to take pictures. I might take less pictures and post less because of this size limit.
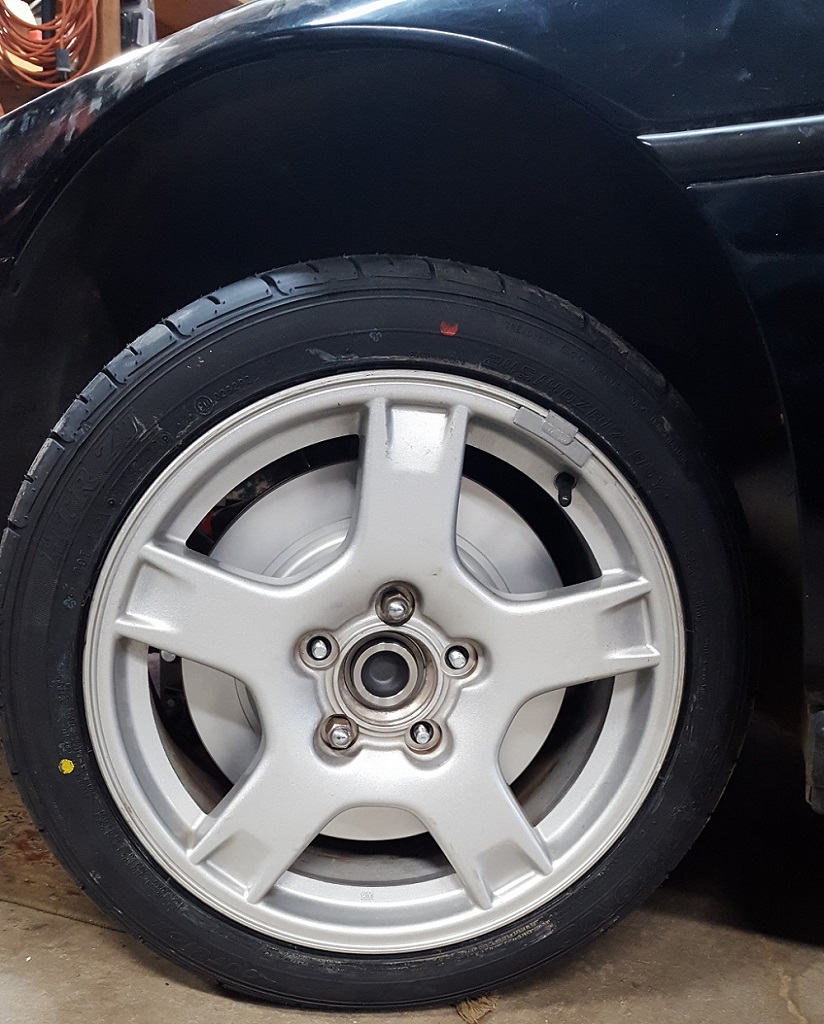
I got the front hubs drilled and the studs pushed in. I bought some tubing to make centric rings and made brackets to get the caliper moved out to make room for 13" rotors. I had to make some 1/4" spacers for the caliper to clear the thickness of the rotor. I ordered tire today, I got 245/40ZR17 SUMITOMO HTR Z III XL for the front and 285/30R18 for the rear. So the front should be done except for bleeding the brakes.
If anyone knows a good program to reduce the quality of pictures let me know. I do have lightroom and PS but I am not fluent in it.[This message has been edited by paulsobj (edited 02-21-2019).]
|
|
|
|
paulsobj
|
FEB 23, 02:52 PM
|
|
I took a few pictures with my dads cell. I hope they are poor enough quality to be under the maximum.
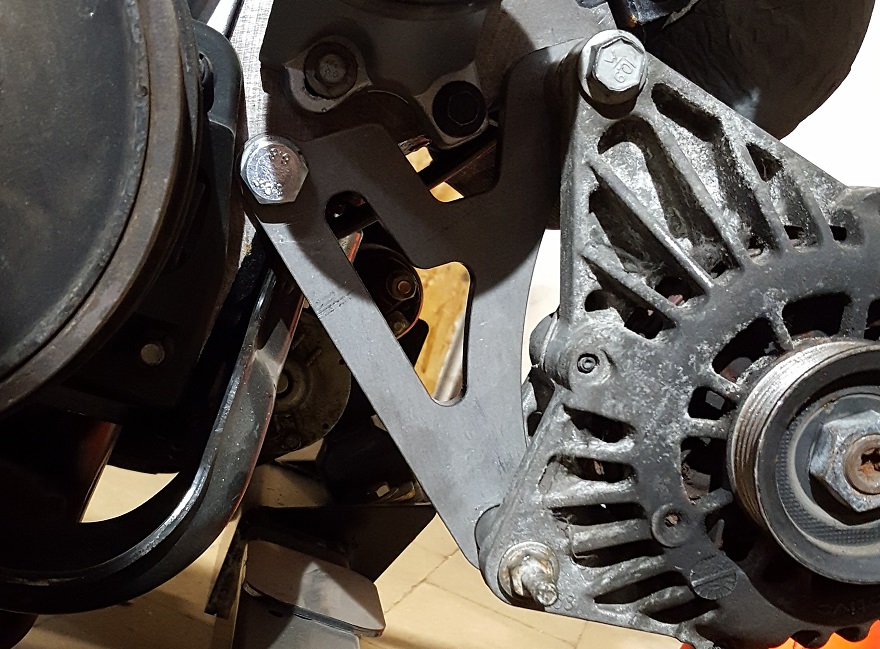
Here is the alternator bracket i made.
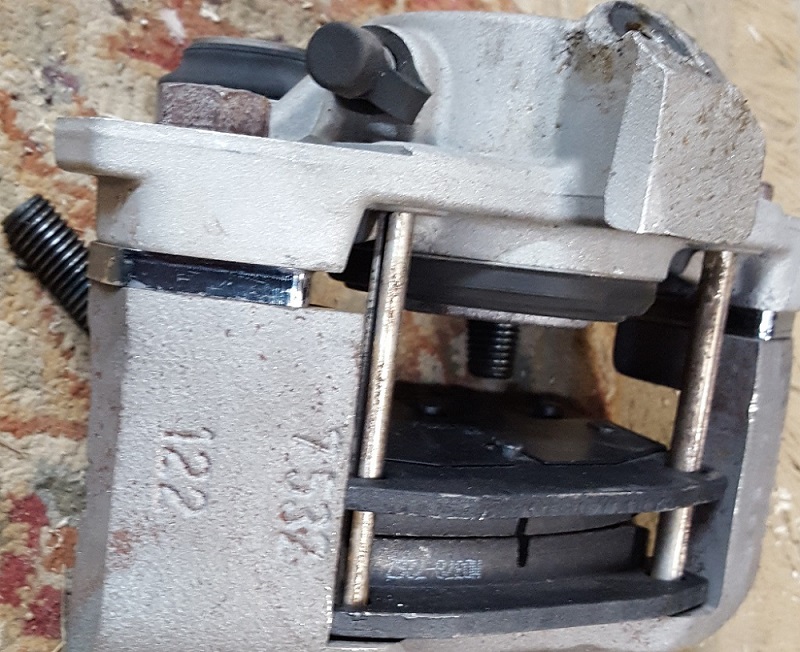
Here is the caliper spacers.
We made the caliper bracket in two parts to get the offset. To get the correct spacing it would be hard to measure. So we bolted the two parts to the caliper and the spindle and set the caliper on the rotor. I used two small ~1/8 spacers to keep the caliper from resting on the rotor. Spun the caliper to the correct position and tac welded the two parts. Took it apart and welded the bracket up.
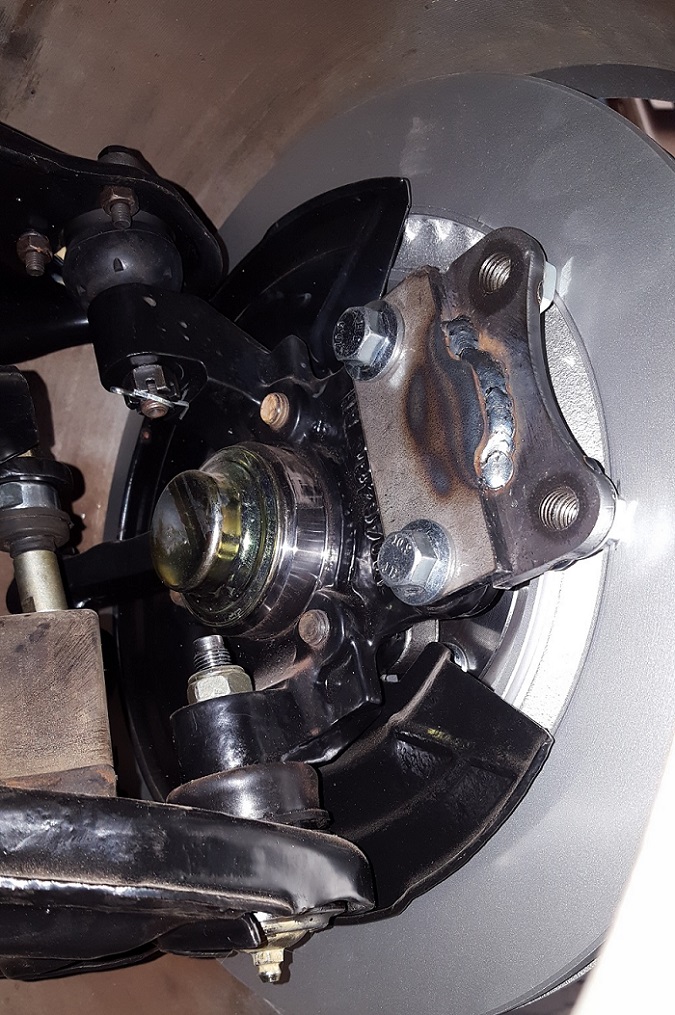
Here is the set up
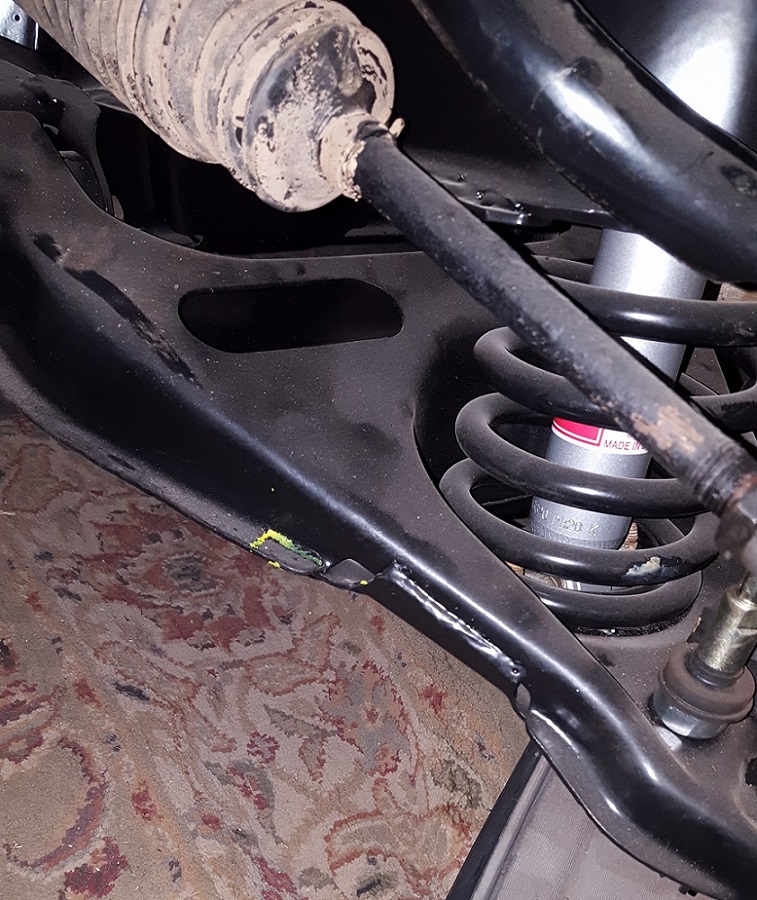
I found i need to notch out a small area on the lower A Arm.
|
|
|
