
 
     |
| RCR's body mods... (Page 48/67) |

|
motoracer838
|
MAY 19, 04:33 PM
|
|
I like where your going with the vent, keep up the good work...
Cheers Beers n Gearz, Joe
|
|

|
RCR
|
MAY 20, 04:16 PM
|
|
Hey Steve, hey Joe. Thanx for dropping in.
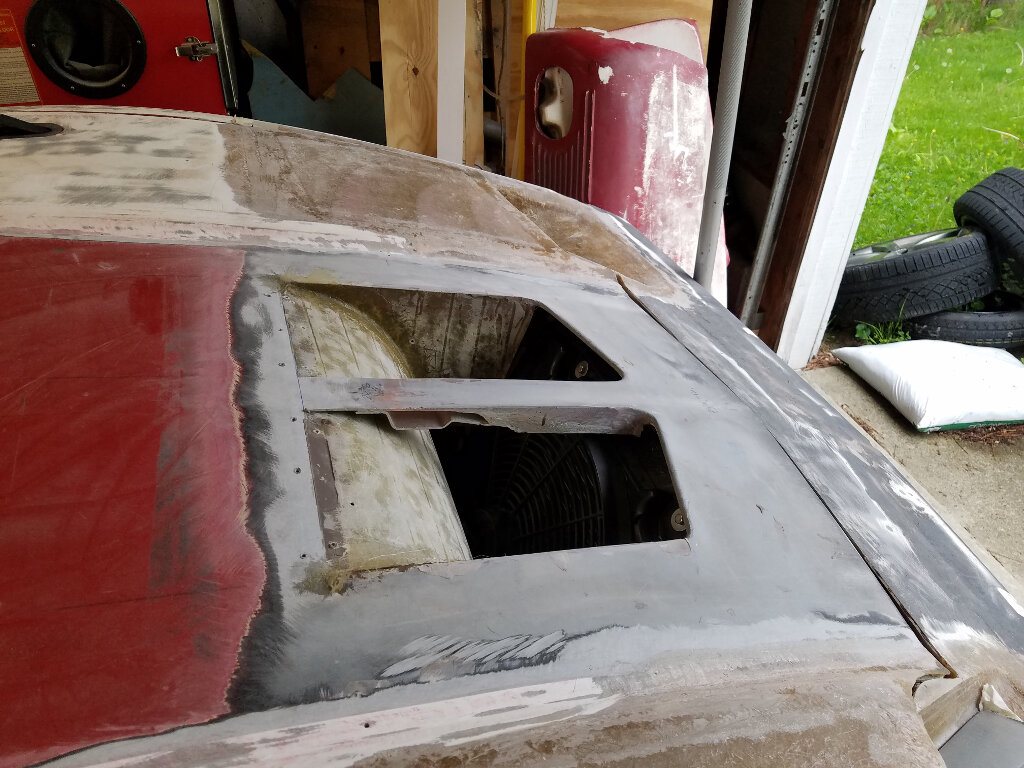
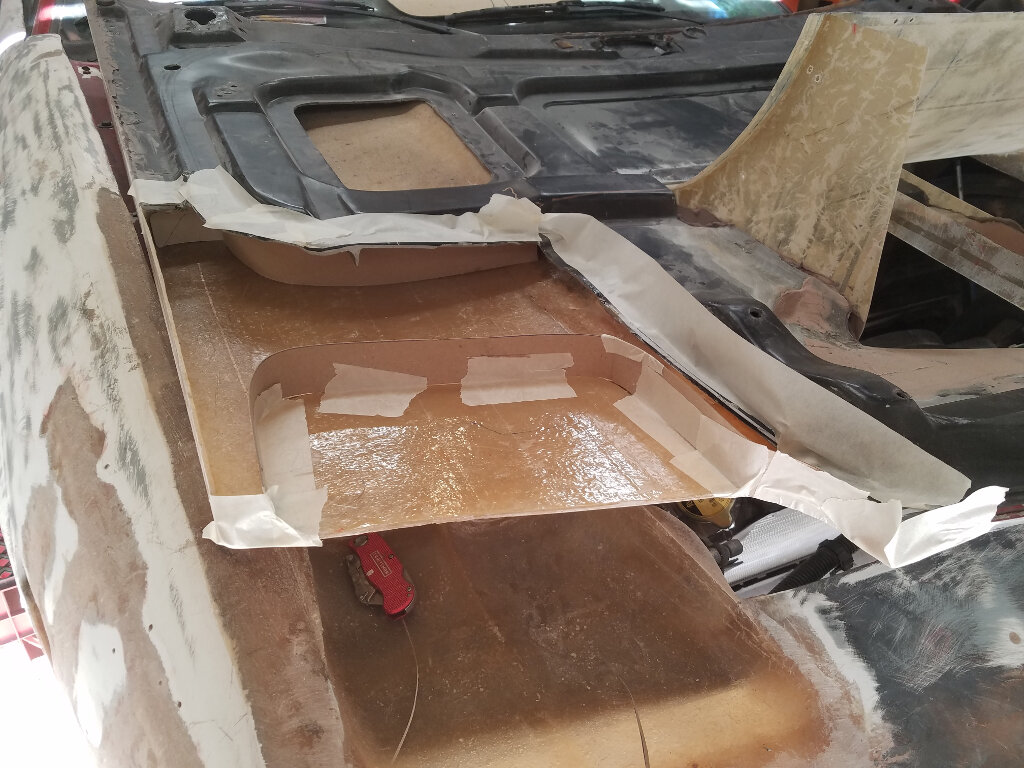
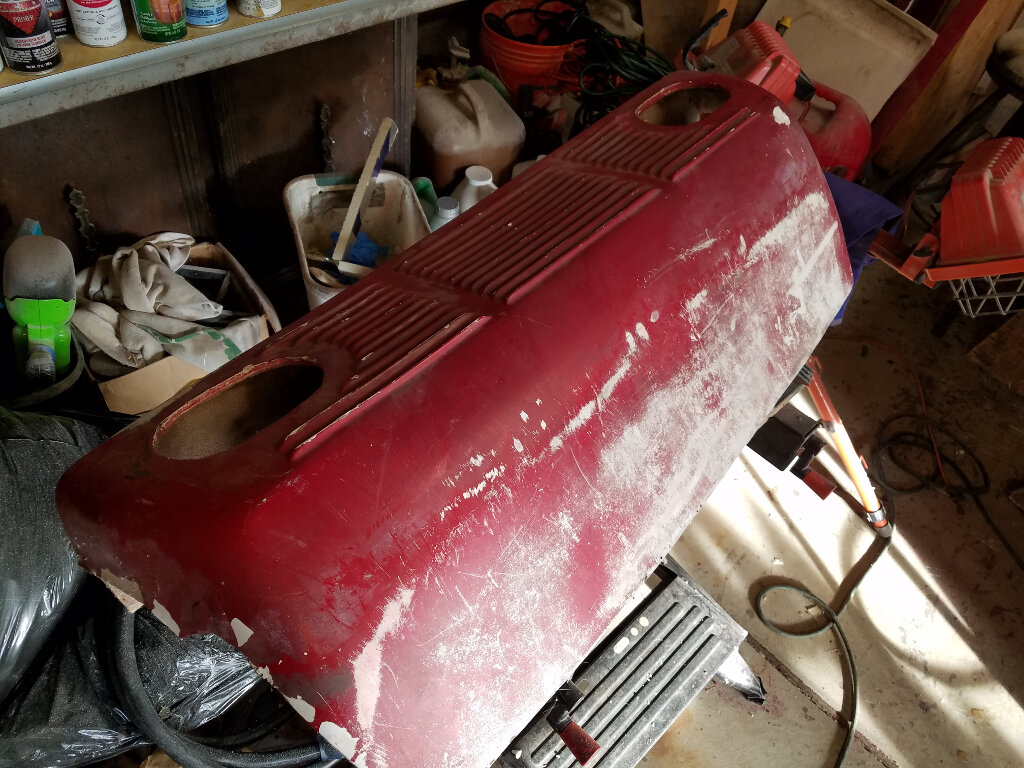
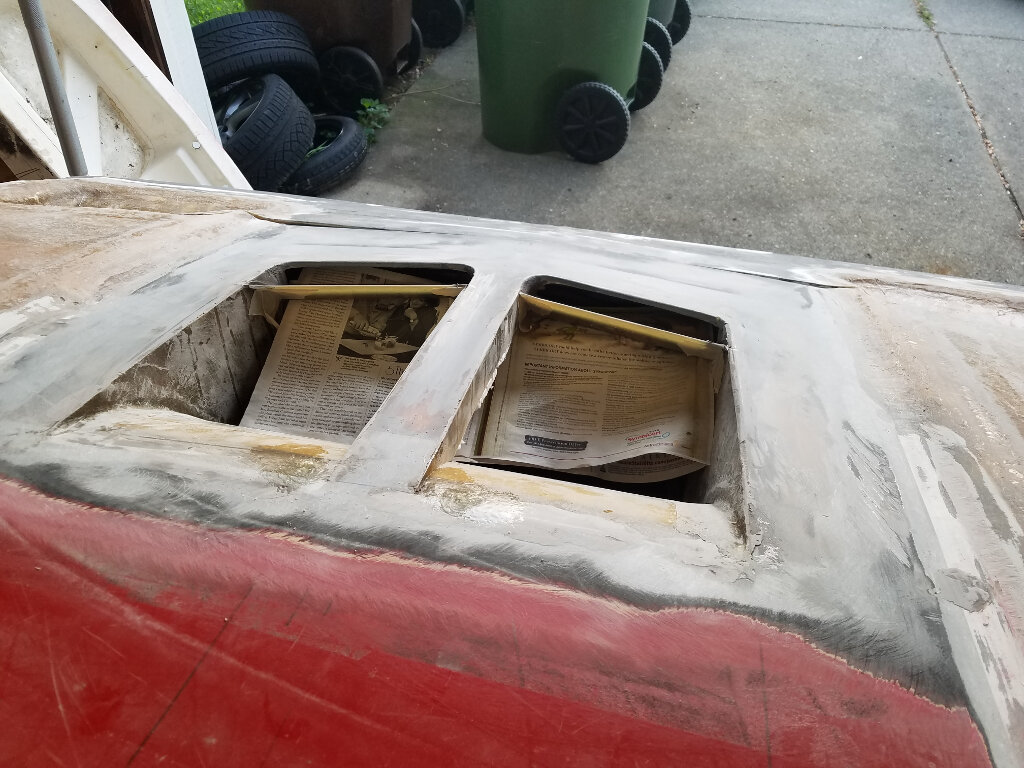
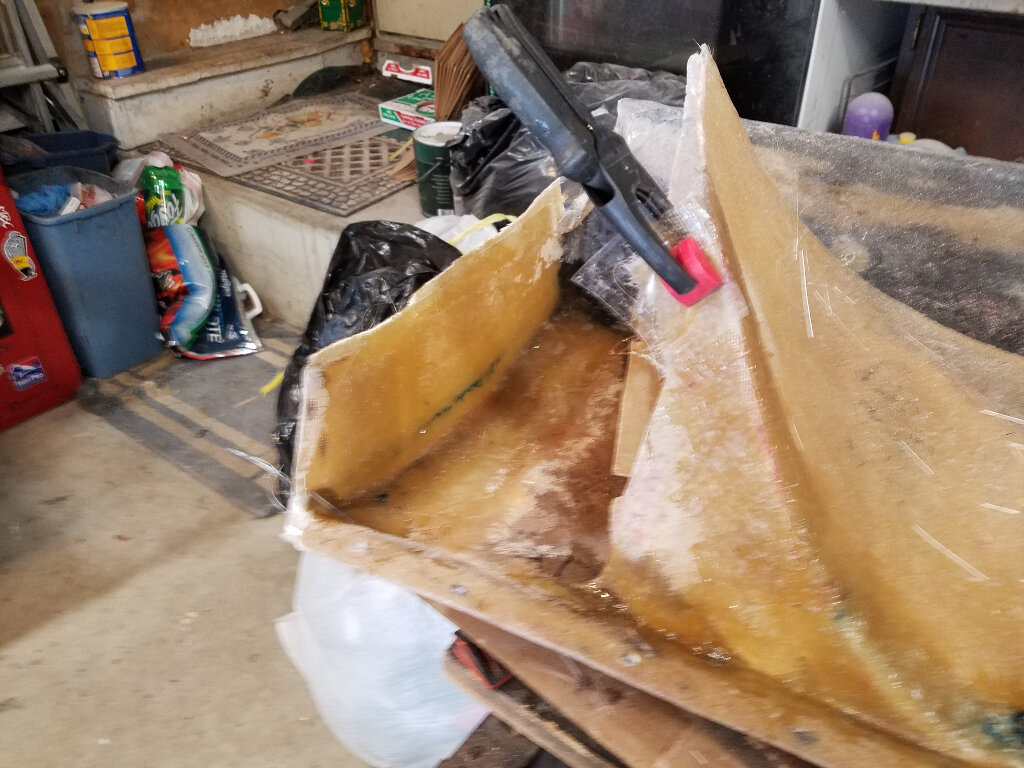
I've been plugging away at the vent. It's coming out pretty good if I don't say so myself.
Still need to add some layers of glass, but I'm just about out of resin and just haven't picked up any yet.
As I showed previously, I started using CAD (cardboard aided design). Here, the sides are mocked in.
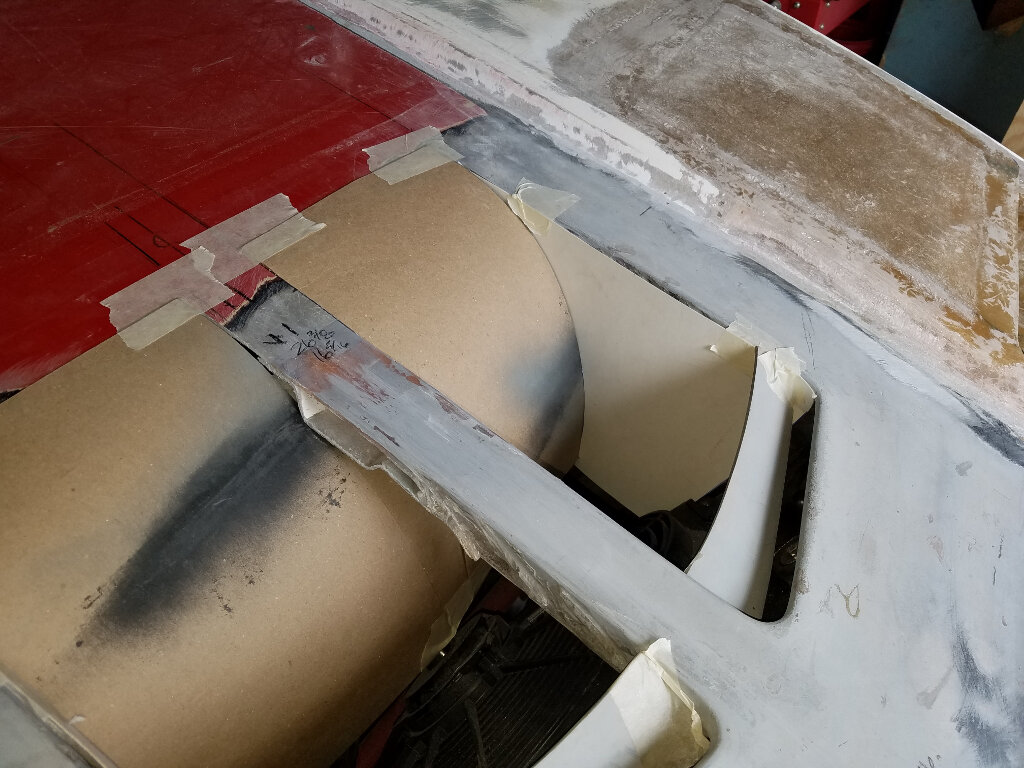
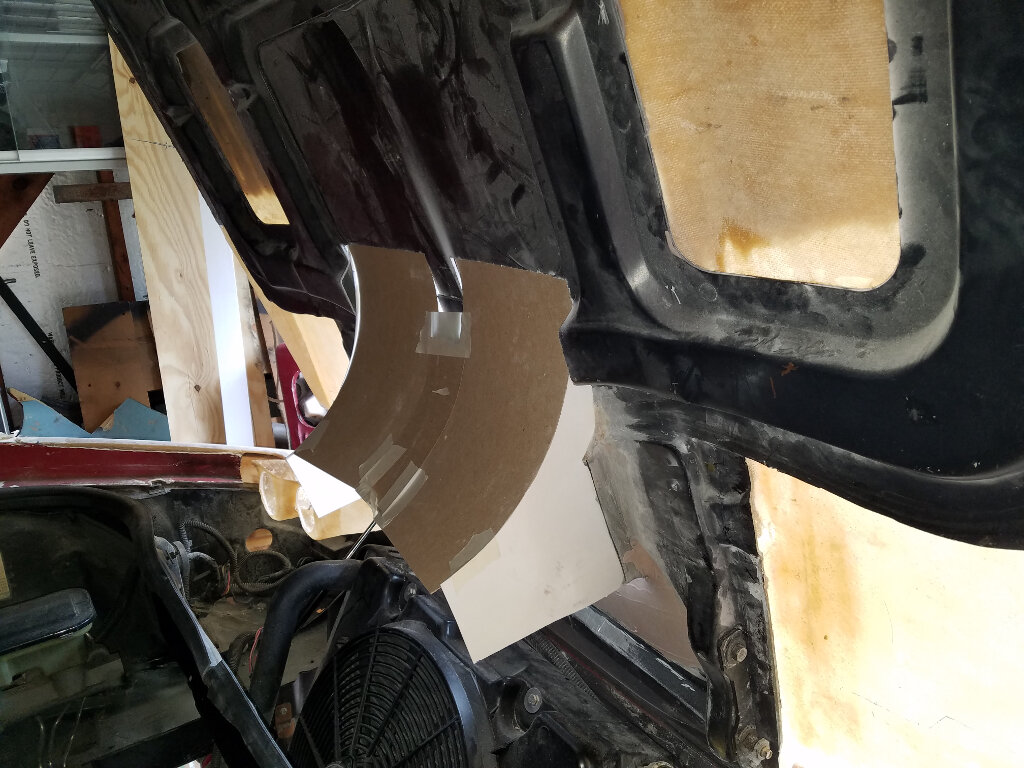
And here Im starting to cut out the patterns from the single layer of FG.

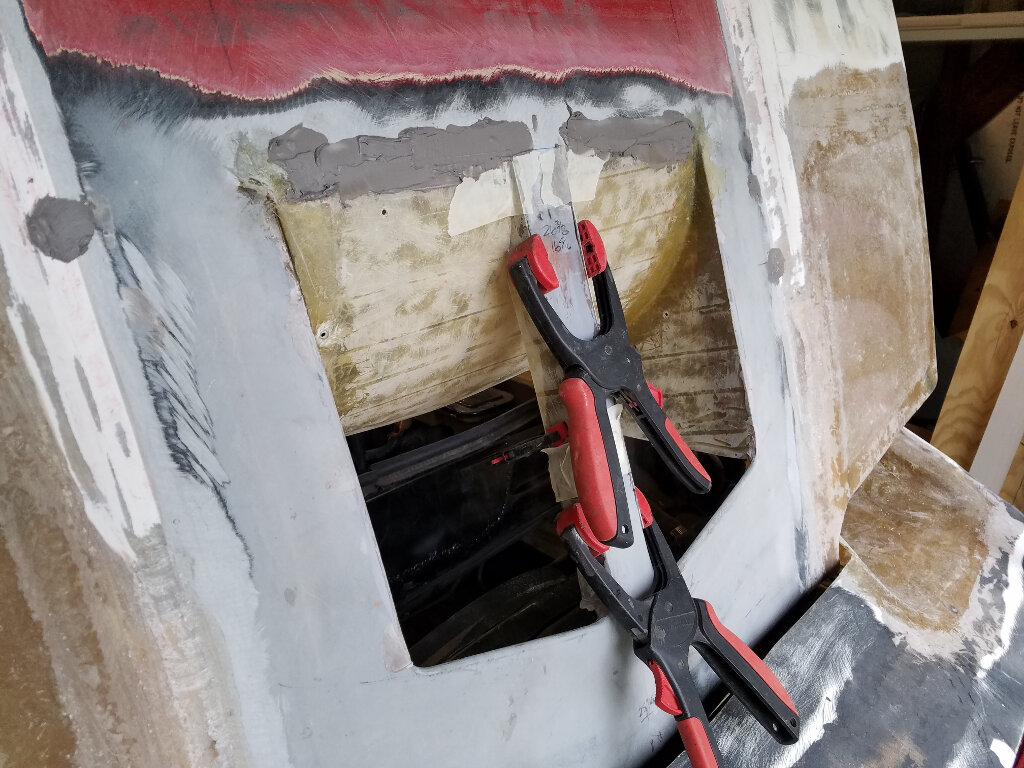
The sides are then glued in using SMC adhesive. The angle gage ensures the panel stays at the right angle to clear the fan.
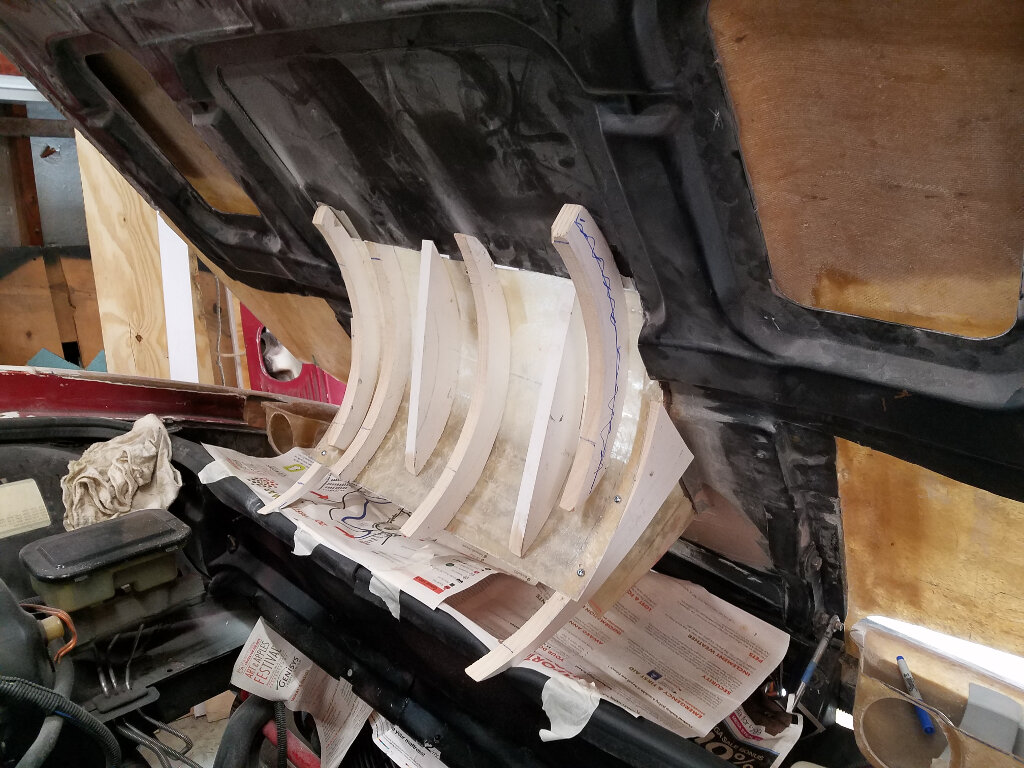
I used the side templates to make some forms to help maintain the shape of the waterfall. All screwed together here it's ready to be glassed in.
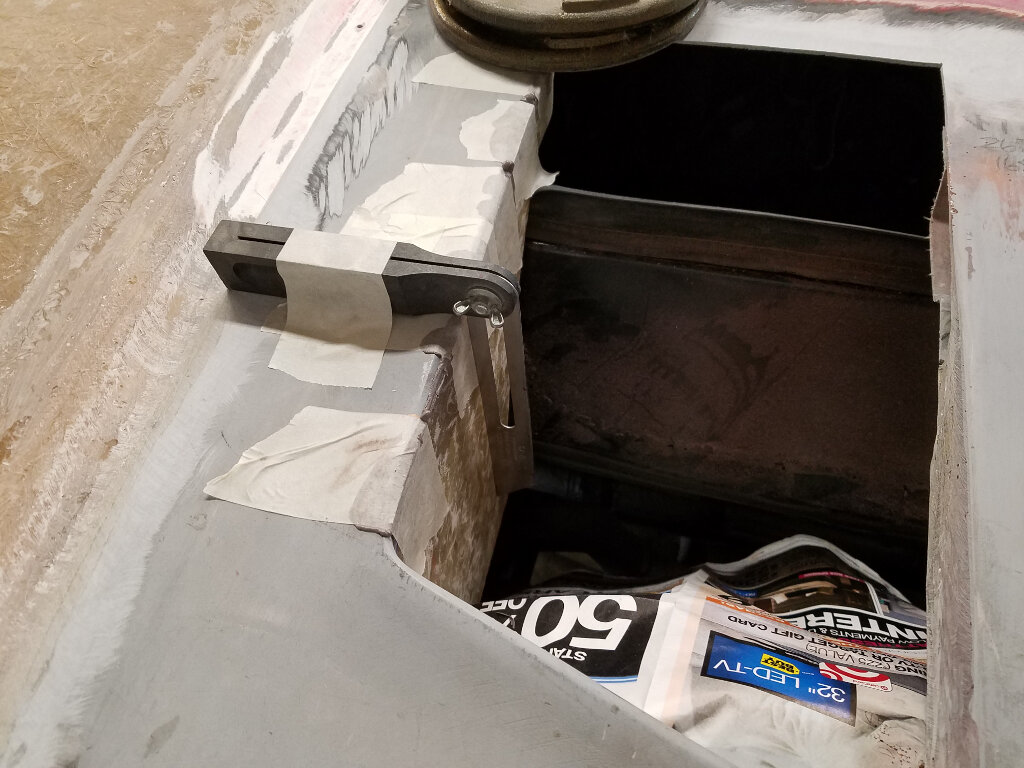
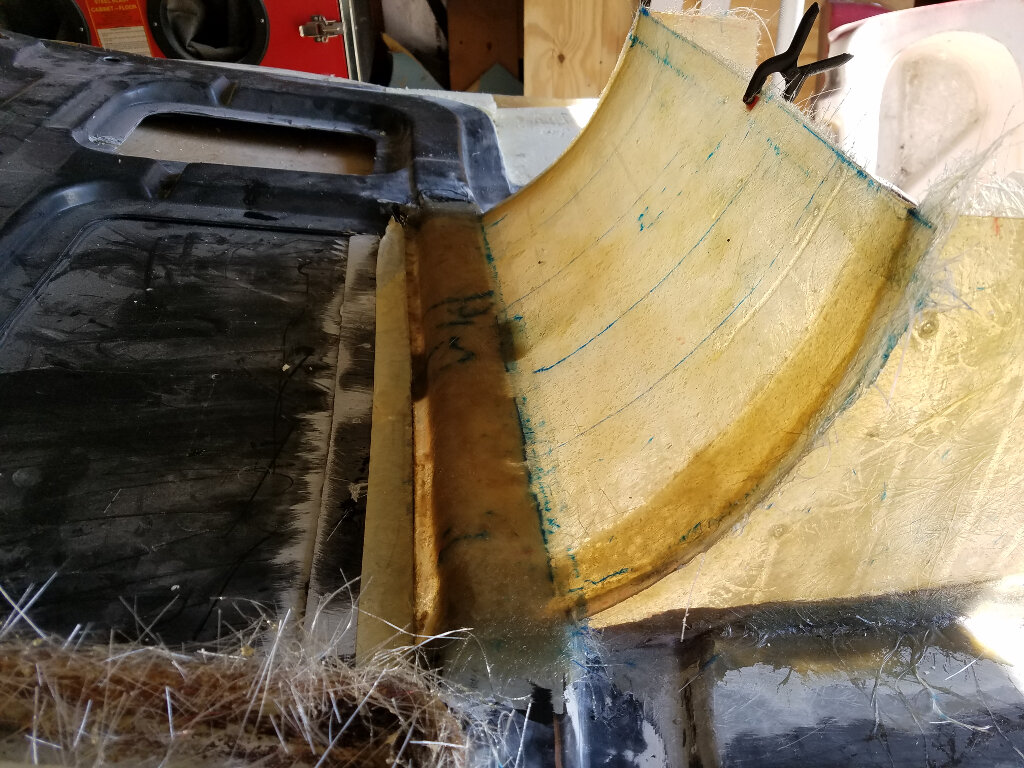
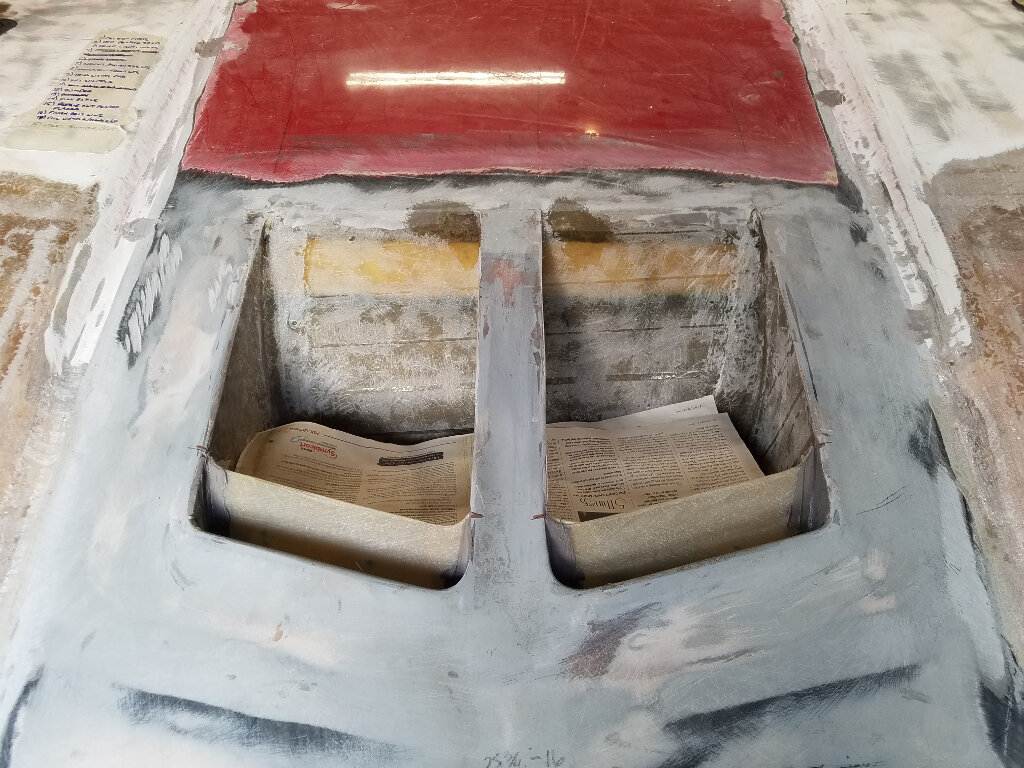
Once the side joint received two layers of glass, the top was glued into place. I made a piece that would support it from the bottom and glued it together. The angle pieces ensure the vent stays flat to the hood.
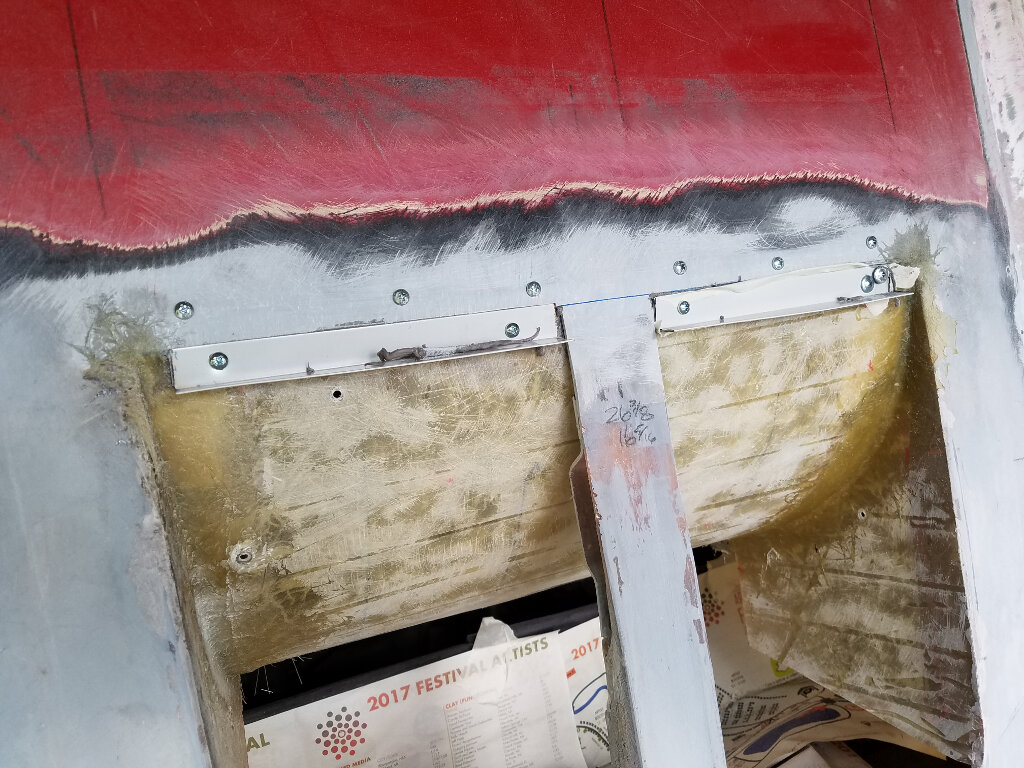
The next step is cover the center section. Couple pieces of left over glass due the bill. Here they're being glued together.
That's it for this weekend...
Thanx for visiting.
Bob
|
|
|
|
RCR
|
JUN 07, 08:51 PM
|
|
So, moving along...
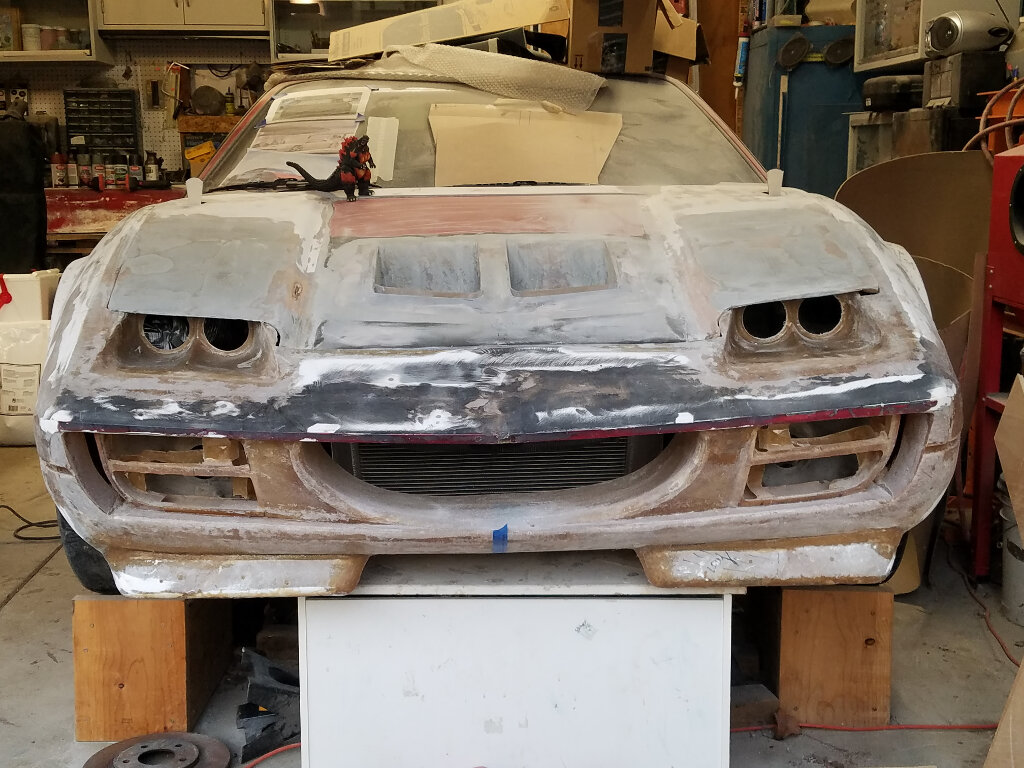
Flipped the hood over to work on the bottom. I wanted to fix the area where the head lamps used to be. Broke out some spray foam (Locktite worked better than DAP) and started filling the gaps. First off, I made some dams out of cardboard, then sprayed away.
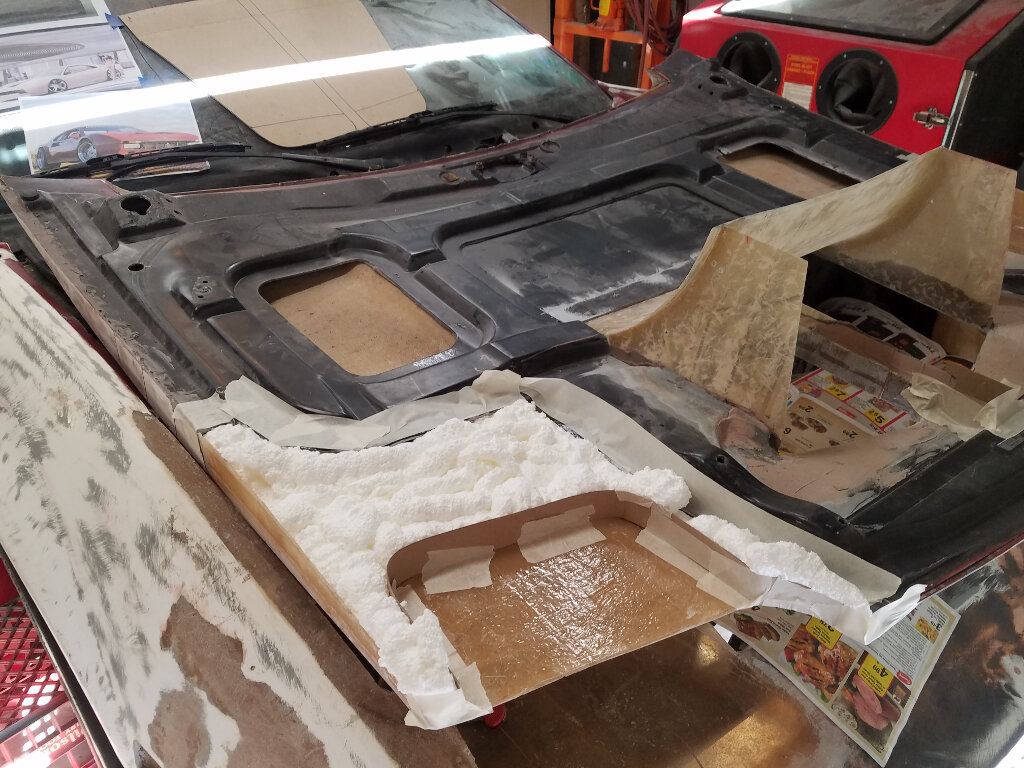
After forming, I placed a thin layer of FG over it.
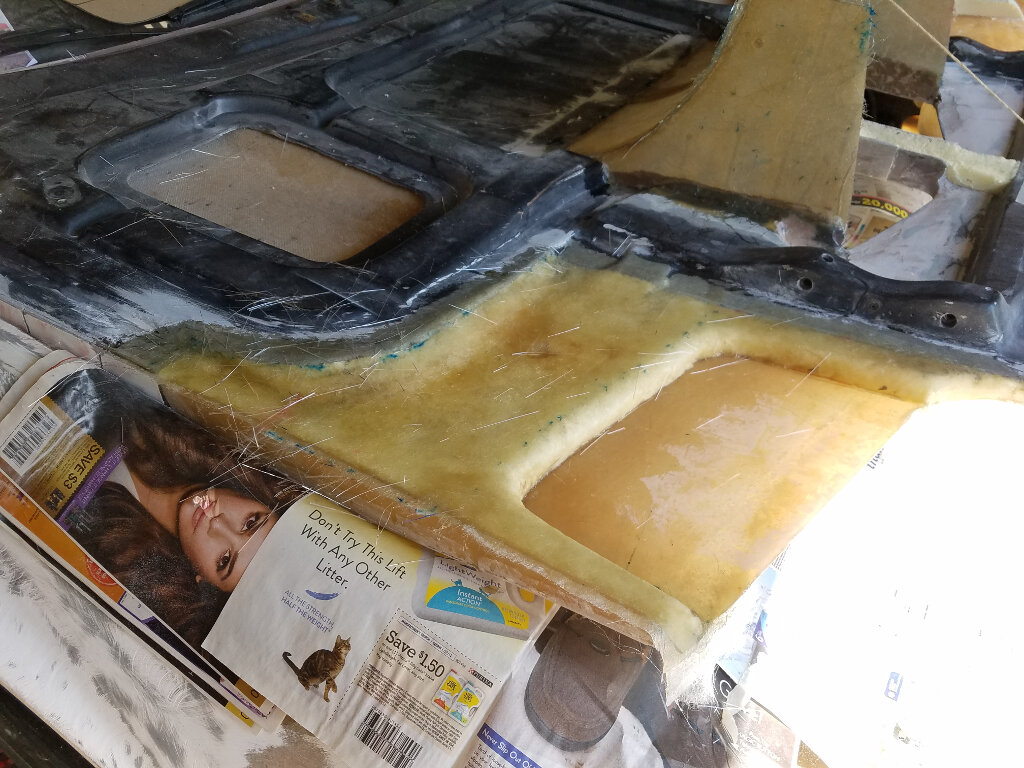
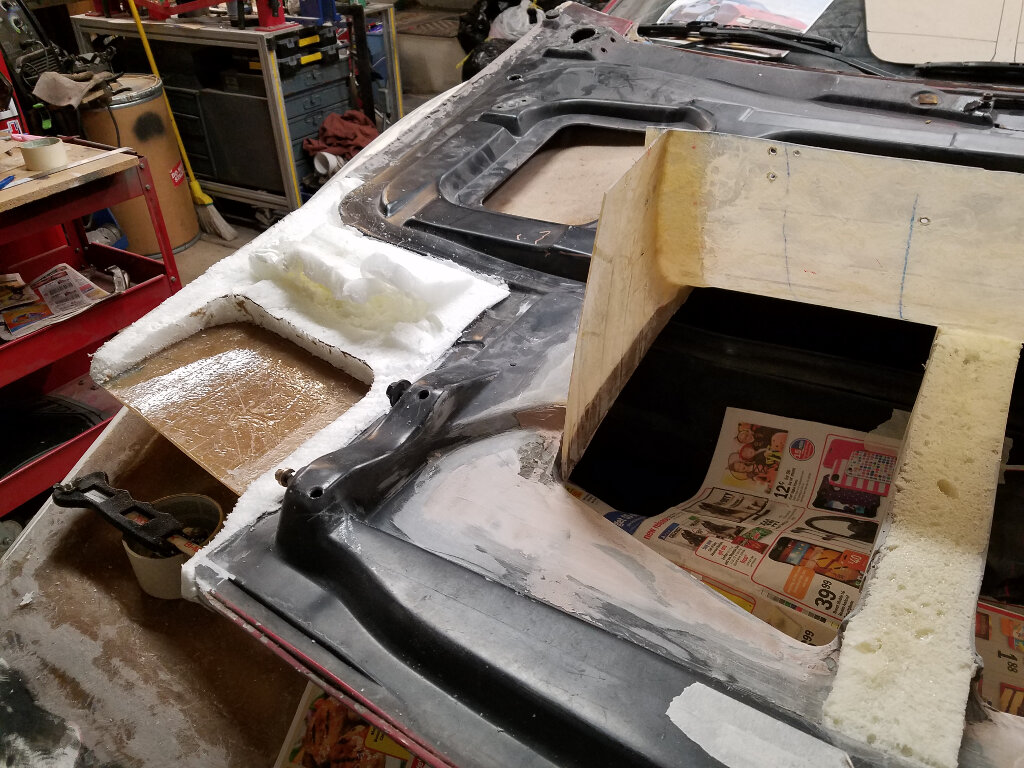
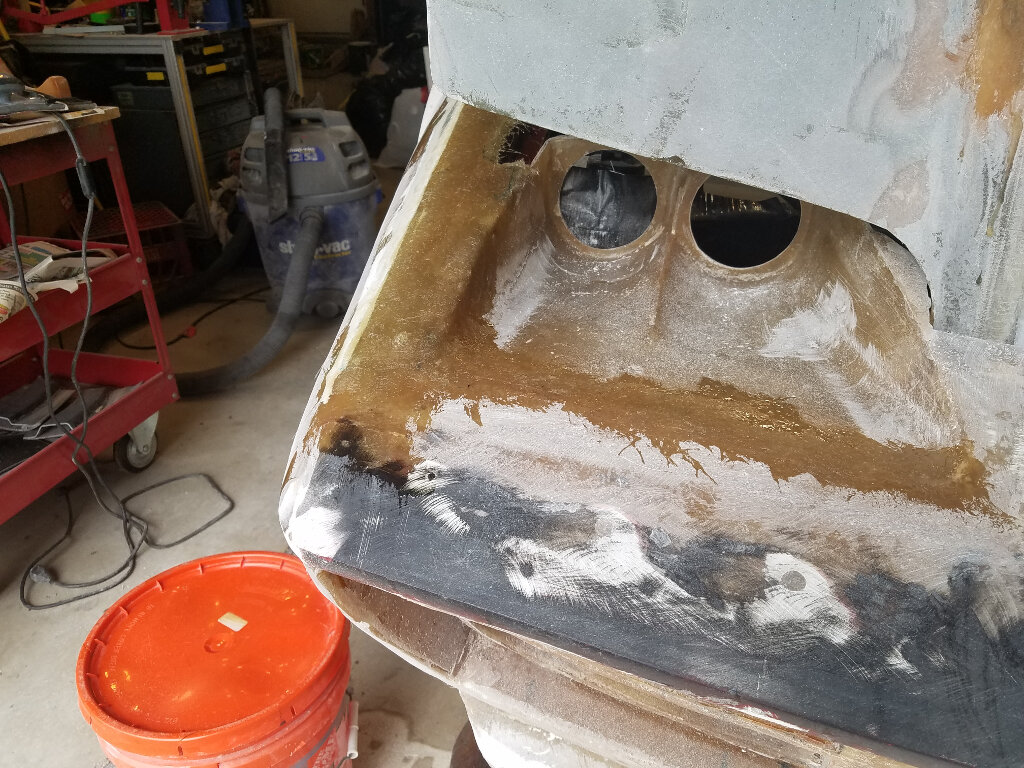
Then onto the other side.. Once that was done, I worked on the vent. I put down two more layers of FG on both the sides and back. Then I built up the step that was cut out.
With that tied together, I broke out the old diaper (engine vent from rear)
There isn't anything particularly good about the diaper, except that it's the right shape for what I needed. Louvers for the hood.
Here it is with 4 layers of FG, and sanded down.
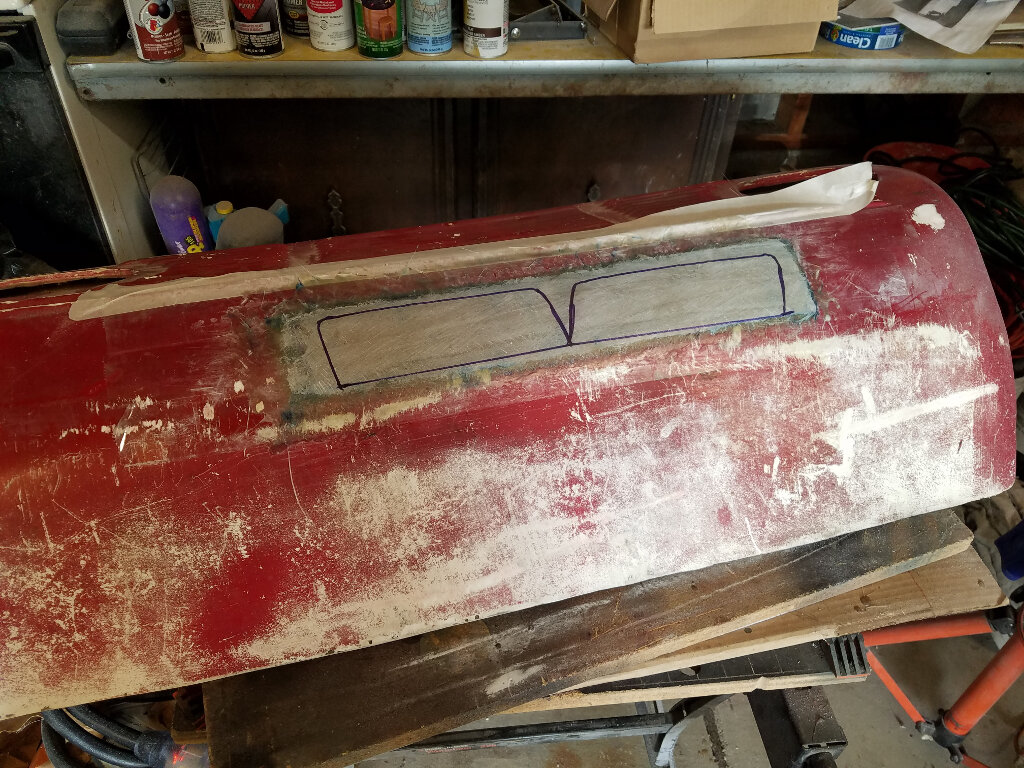
Oops, no intermediate shots, but suffice to say there was sanding, and fitting, and more sanding,,, And here are the final results glued in.
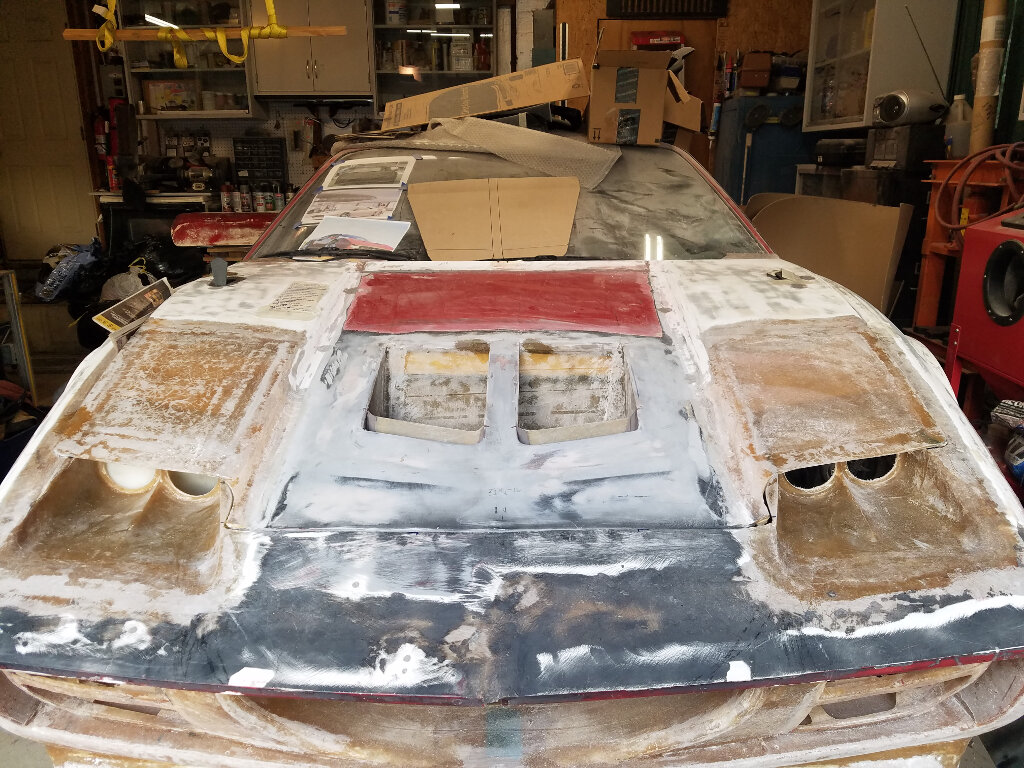
There is a reason for the louvres. I wanted to hide the top of the radiator when viewed through the vent. That and it keeps the 308 theme going.
More later...Thanx for checking in.
Bob[This message has been edited by RCR (edited 06-07-2018).]
|
|
|
|
motoracer838
|
JUN 07, 09:27 PM
|
|
Looking good, I'm thinking a one piece front for mine, the way the 308 hood is done there's a lot of unneeded fiberglass...
Joe
|
|
|
|
Dennis LaGrua
|
JUN 14, 05:46 PM
|
|
This project started 9 years ago . It makes for good reading of an interesting and artful project but what is your target completion date to get it finished and on the road? IMO, Fieros are no fun sitting in a garage when they can't be displayed at shows or driven.
Its a shame but over the years we have seen many custom projects here that never came to fruition. ------------------
" THE BLACK PARALYZER" -87GT 3800SC Series III engine, custom ZZP /Frozen Boost Intercooler setup, 3.4" Pulley, Northstar TB, LS1 MAF, 3" Spintech/Hedman Exhaust, Autolite 104's, MSD wires, Custom CAI, 4T65eHD w. custom axles, HP Tuners VCM Suite.
"THE COLUSSUS"
87GT - ALL OUT 3.4L Turbocharged engine, Garrett Hybrid Turbo, MSD ign., modified TH125H
" ON THE LOOSE WITHOUT THE JUICE "
|
|
|
|
RCR
|
JUN 15, 06:37 PM
|
|
| quote | Originally posted by Dennis LaGrua:
This project started 9 years ago . It makes for good reading of an interesting and artful project but what is your target completion date to get it finished and on the road? IMO, Fieros are no fun sitting in a garage when they can't be displayed at shows or driven.
Its a shame but over the years we have seen many custom projects here that never came to fruition.
|
|
I hear you Dennis, and I wish I could answer. I've set targets and missed them too many times. Life has gotten in the way many times. The only thing that's consistent is that I do keep working on it.
All I can say is that I'd love to show it off because I think it's going to be killer and different when done.But I'm also enjoying the ride, trying new things and hopefully putting ideas in other's heads.
Thanx for checking in and your thoughts. Always appreciated.
(time to hit the garage) Bob
|
|
|
|
shemdogg
|
JUN 18, 11:35 PM
|
|
Your cars going to look so damn sweet when done, I wanna see it done too! The only way to get on top of ll the fiberglass is to do 2-3 sections at once. See what you need and where, cut the mat out, and make multiple trips running back to mix more resin before it starts to chunk. Its a mad dash I know ive had stuff dry in less than 5 mins here when its kinda warm. I do at least 2-3 sections on mine each time. Only takes maybe 30 mins to set the fb. Go sand later, im lucky when I can throw an hour at mine so baby steps r getting mine done. Its such a pita the fiberglass. Then the dust. then bondo. then more dust lol. Just imagine the day when youre laying paint down, yeah... thats my motivation
get to work lol
lets see some whole body pics, been awhile
shem
|
|
|
|
RCR
|
JUN 21, 12:46 PM
|
|
| quote | Originally posted by shemdogg:
Your cars going to look so damn sweet when done, I wanna see it done too! The only way to get on top of ll the fiberglass is to do 2-3 sections at once. See what you need and where, cut the mat out, and make multiple trips running back to mix more resin before it starts to chunk. Its a mad dash I know ive had stuff dry in less than 5 mins here when its kinda warm. I do at least 2-3 sections on mine each time. Only takes maybe 30 mins to set the fb. Go sand later, im lucky when I can throw an hour at mine so baby steps r getting mine done. Its such a pita the fiberglass. Then the dust. then bondo. then more dust lol. Just imagine the day when youre laying paint down, yeah... thats my motivation
get to work lol
lets see some whole body pics, been awhile
shem |
|
Thanks Shem... It's been fun watching your build.
Bob
|
|
|
|
RCR
|
JUL 13, 07:45 AM
|
|
What's up peeps? Small update. Honestly it's been slow going. Hard to stay motivated with all that's going on, but keep trudging forward, one step at a time.
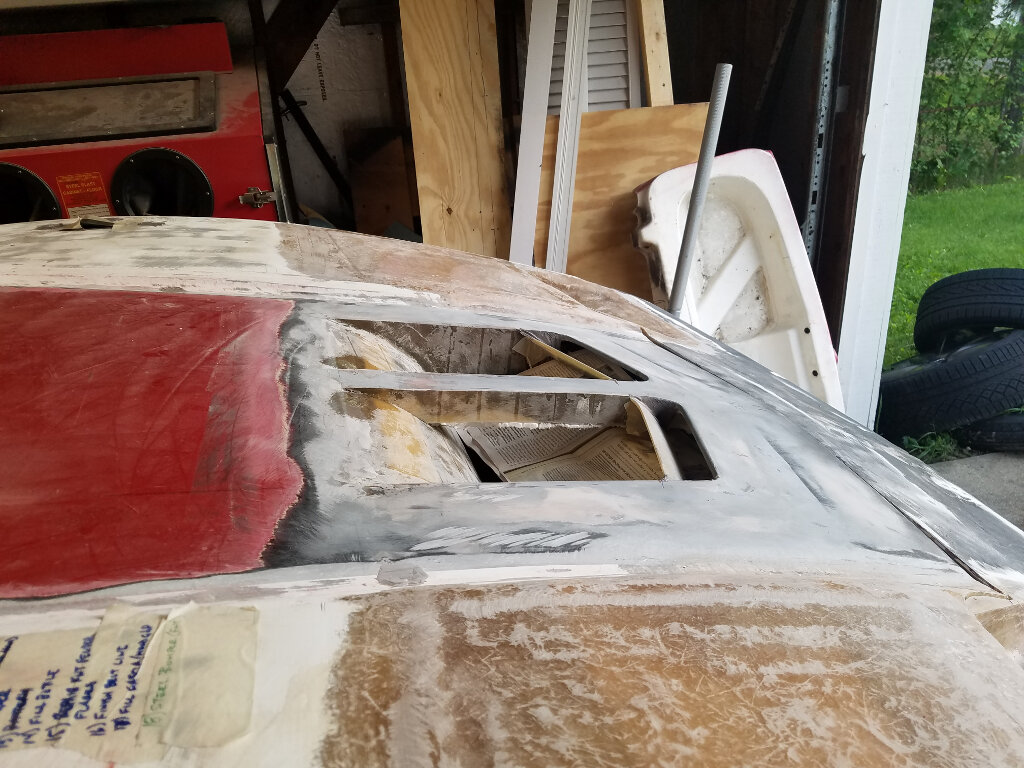
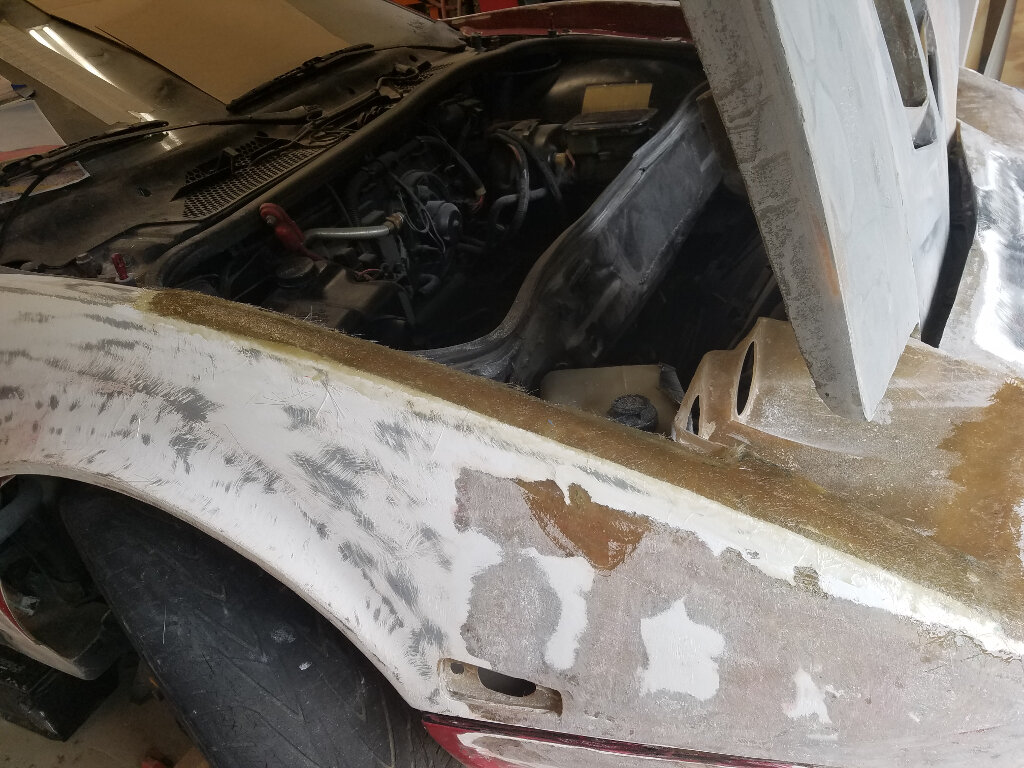
So, I've been trying to get the hood to a point where it's "done". It's not there yet, but I've been adding short-hair filler and smoothing it out. Fixing blemishes and trying to tidy it up.
Hood is back on the car so I can work on panel alignment and fixing some of the damaged mounting points.
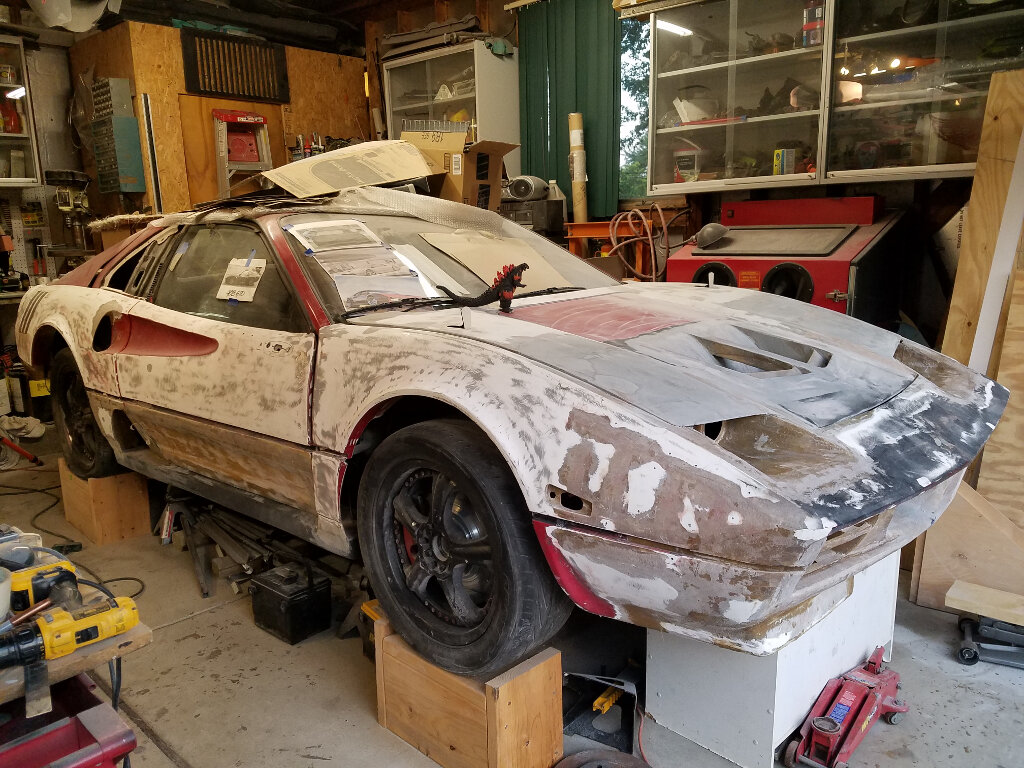
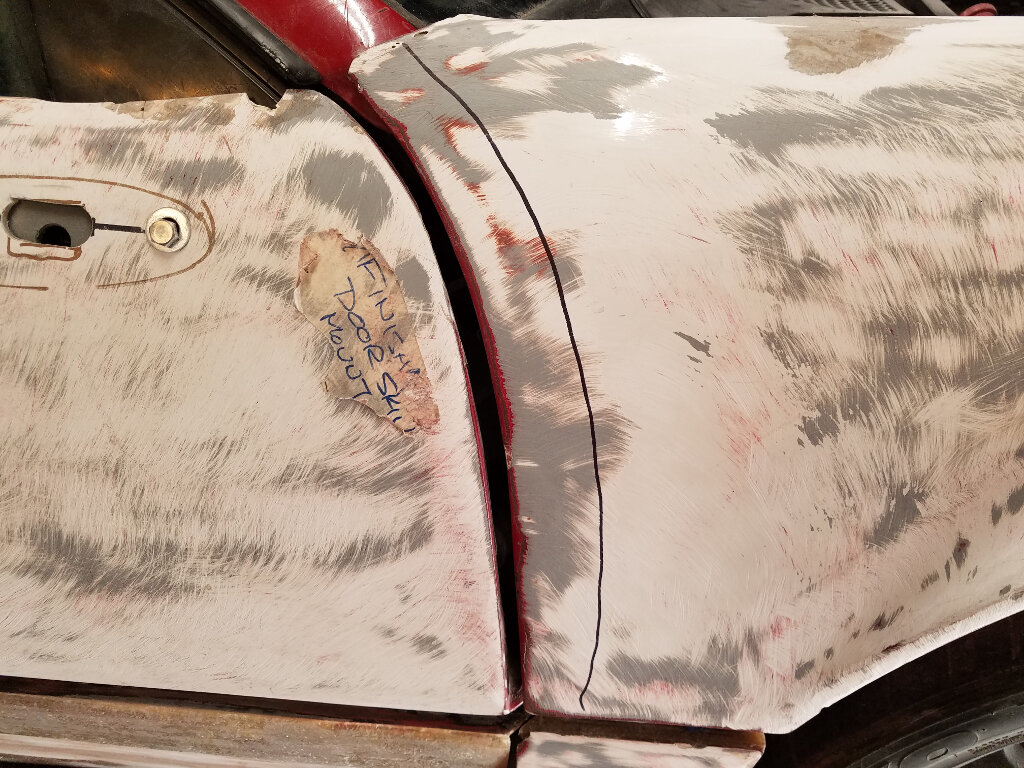
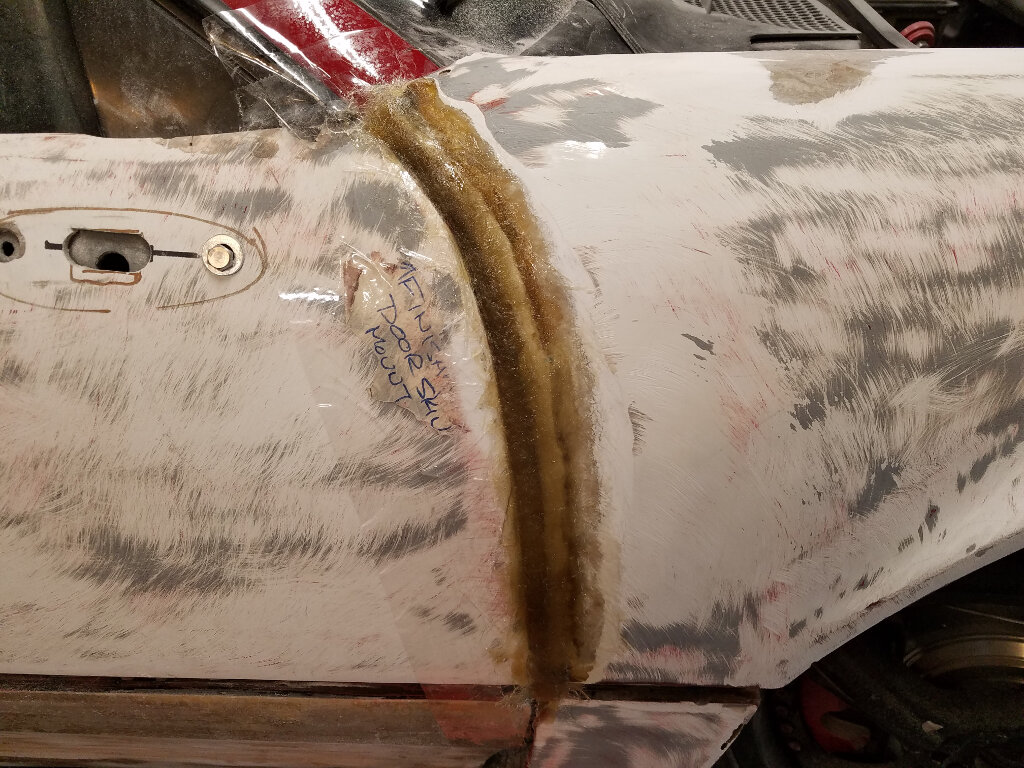
I also fixed the large gap between the door and fender.
That's it for now...
Bob
|
|
|
|
RCR
|
JUL 22, 07:08 PM
|
|
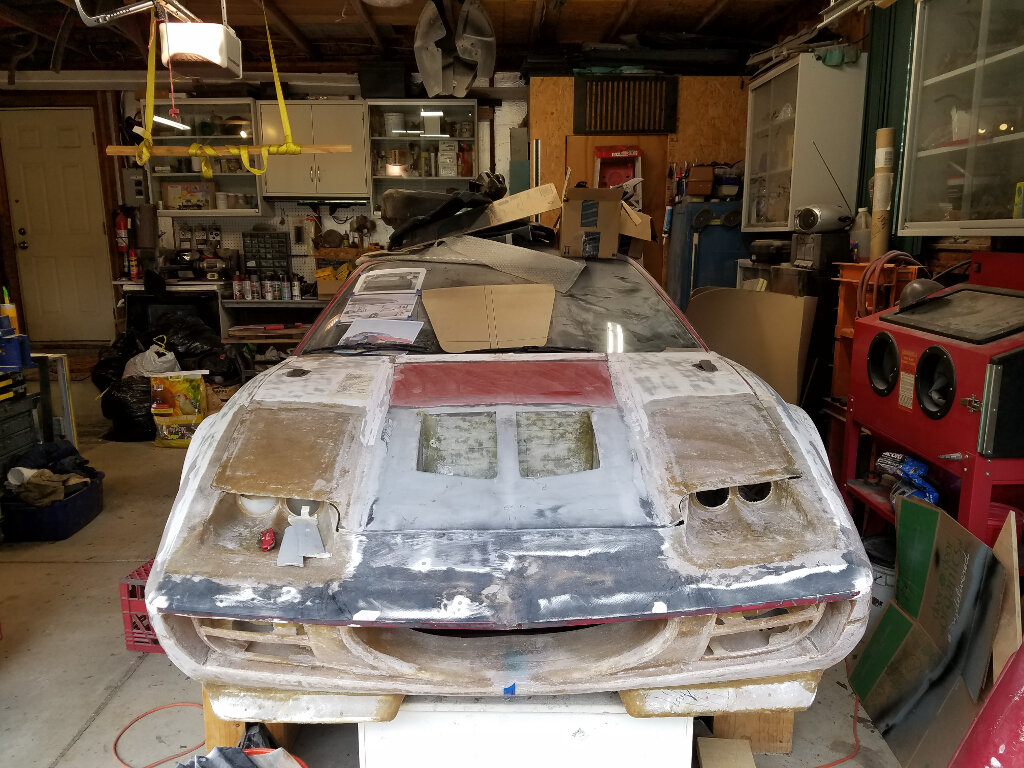
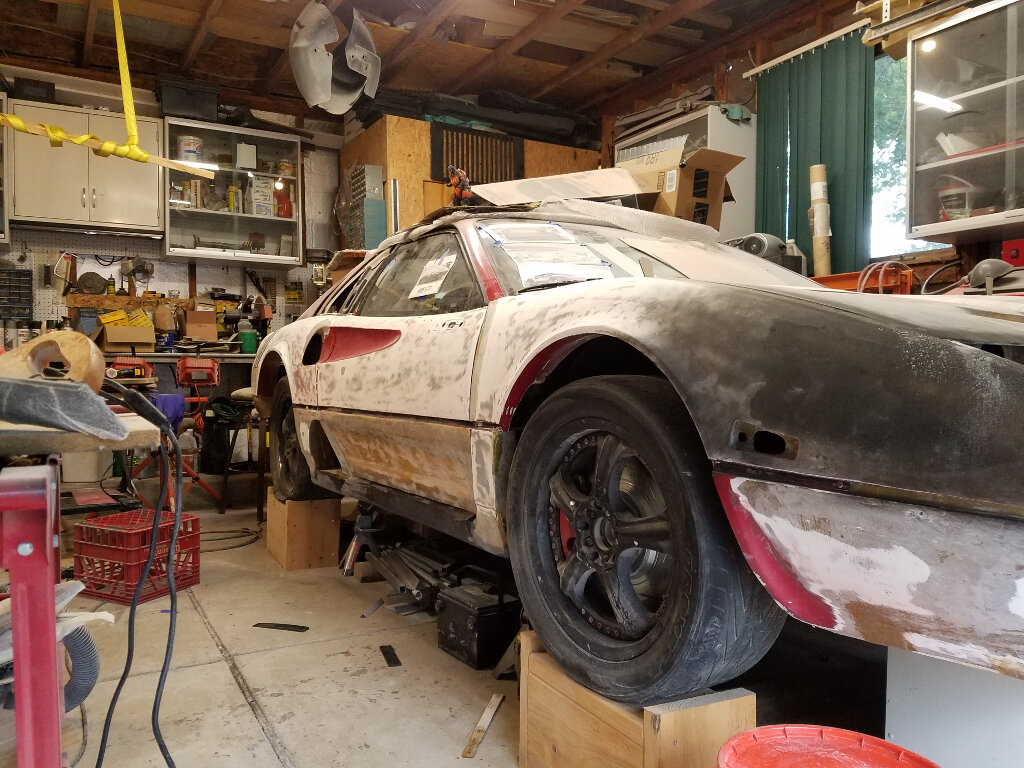
The progress continues, but seems to be real subtle, as it doesn't really look too different. Got a bunch of pics, though.
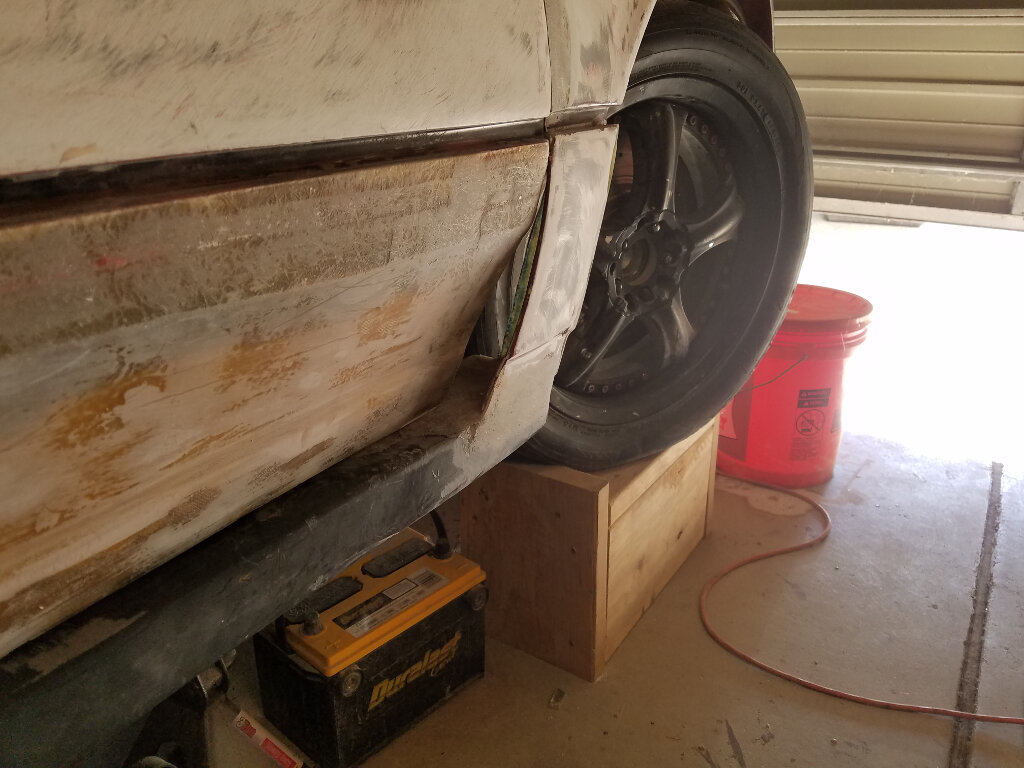
The picture I didn't have for the last post: the gap, fixed.
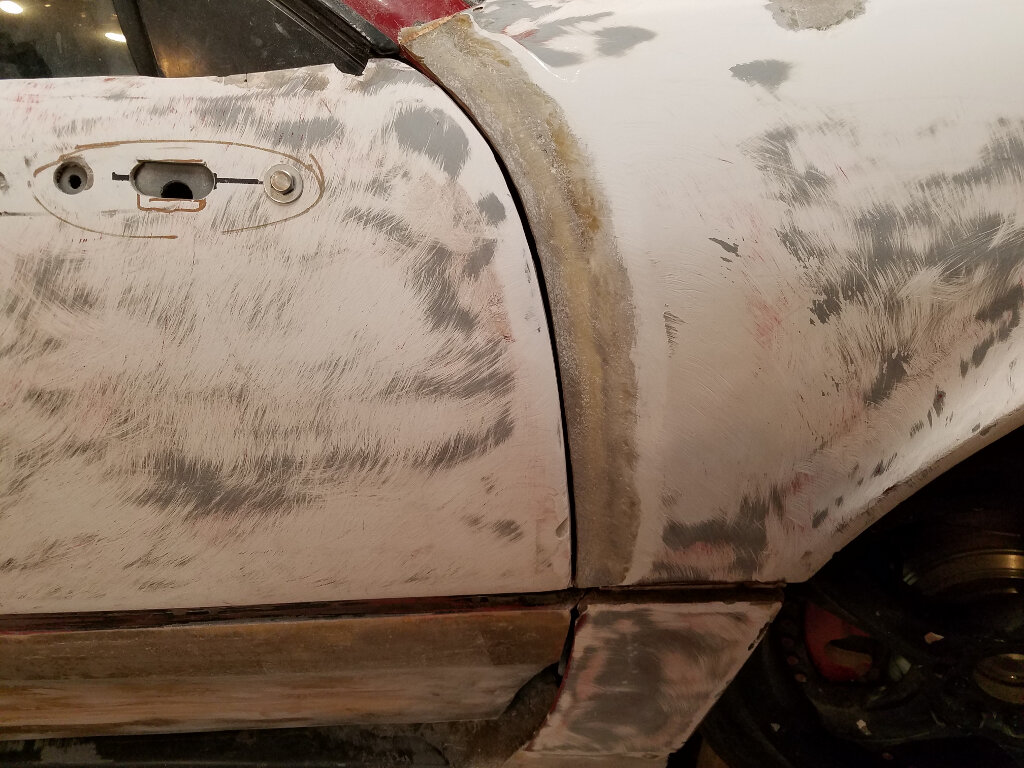
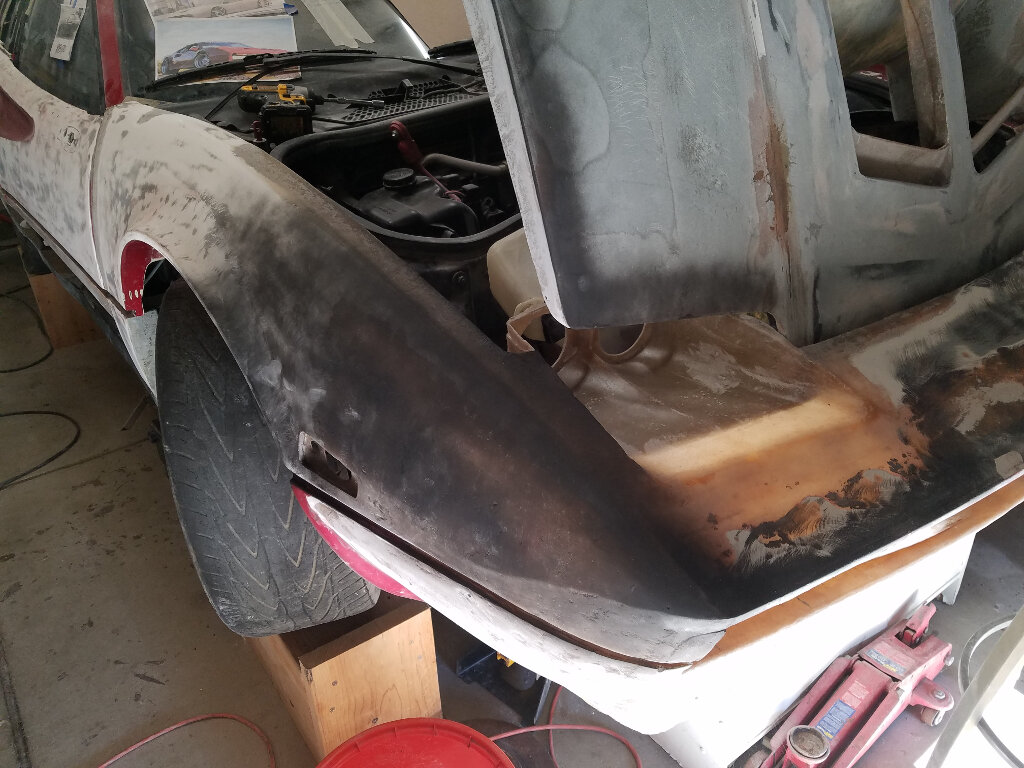
After that, I worked with the fit of the head light pod and the fender. here I'm filling low areas with glass.
Then I moved on to the rocker. I filled in the wheel inner wheel well that will eventually support the wheel tub.
I couldn't help myself, so I shot some black primer to see how the shape is coming out.
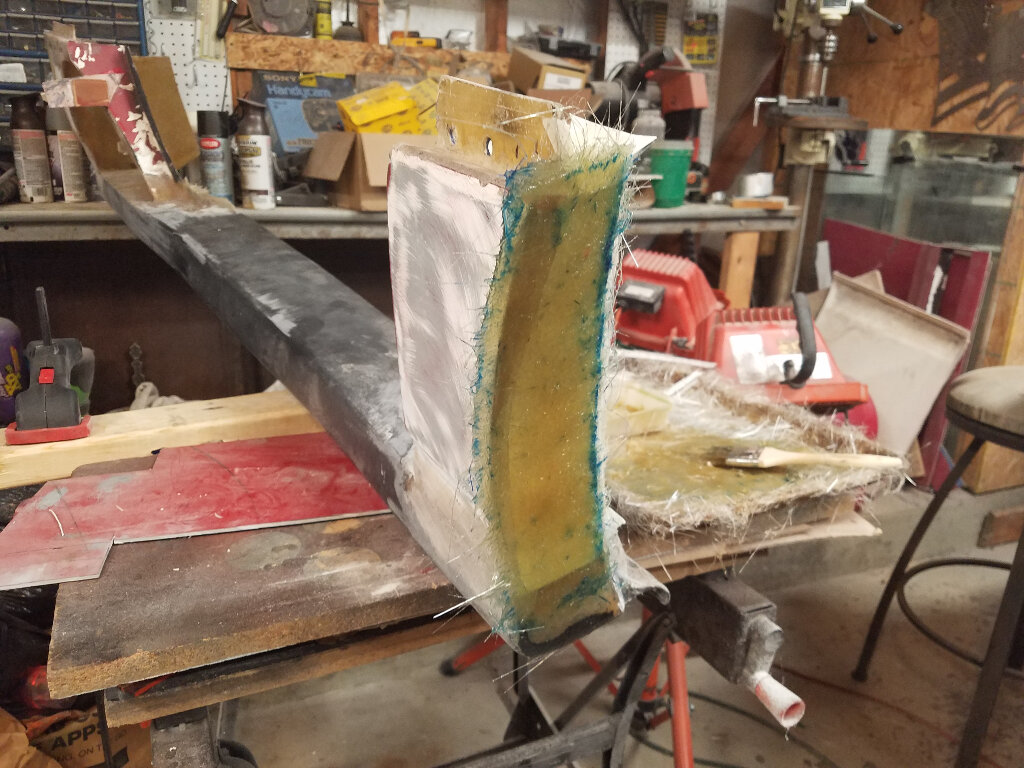
Continuing on with the rocker, I needed to work on the rear flange that was previously used to help mount the body. I don't think I'll need it for that now with the other mounts, but it needs to be cleaned up. In this pick, you can see the build-up of filler the previous owner used.
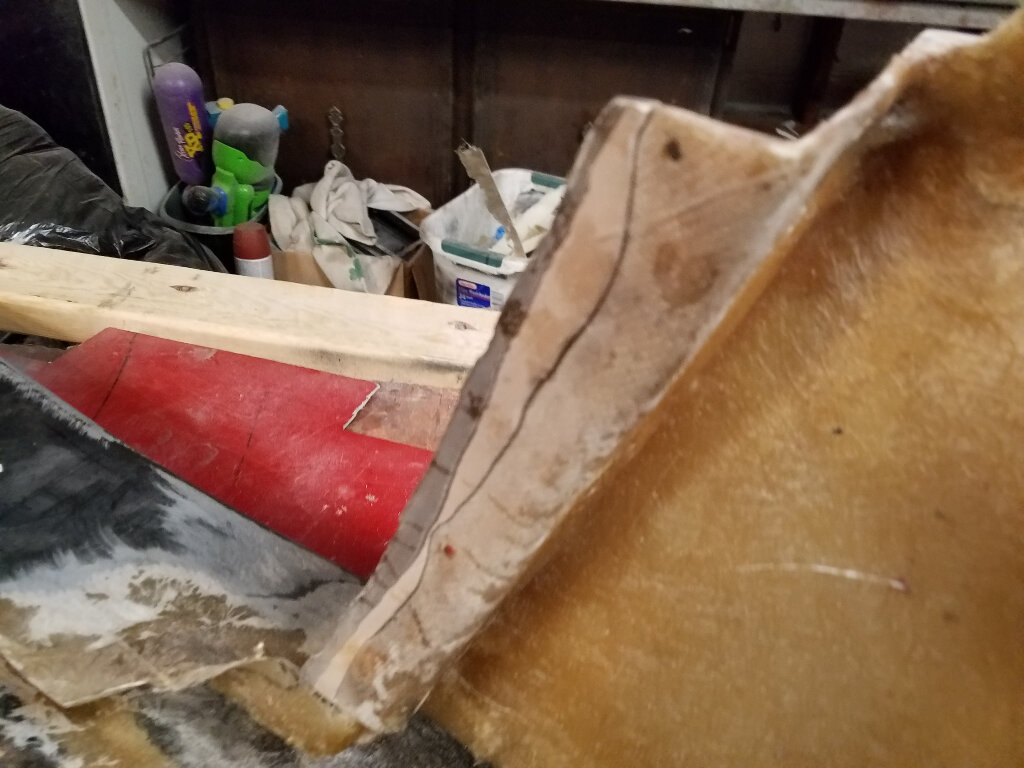
I cut the entire flange off flush to the body. Then used the body to make the new one. With the body taped up and the rocker mounted in place, several layers of fiberglass were applied. Then the panel was popped off and cleaned up
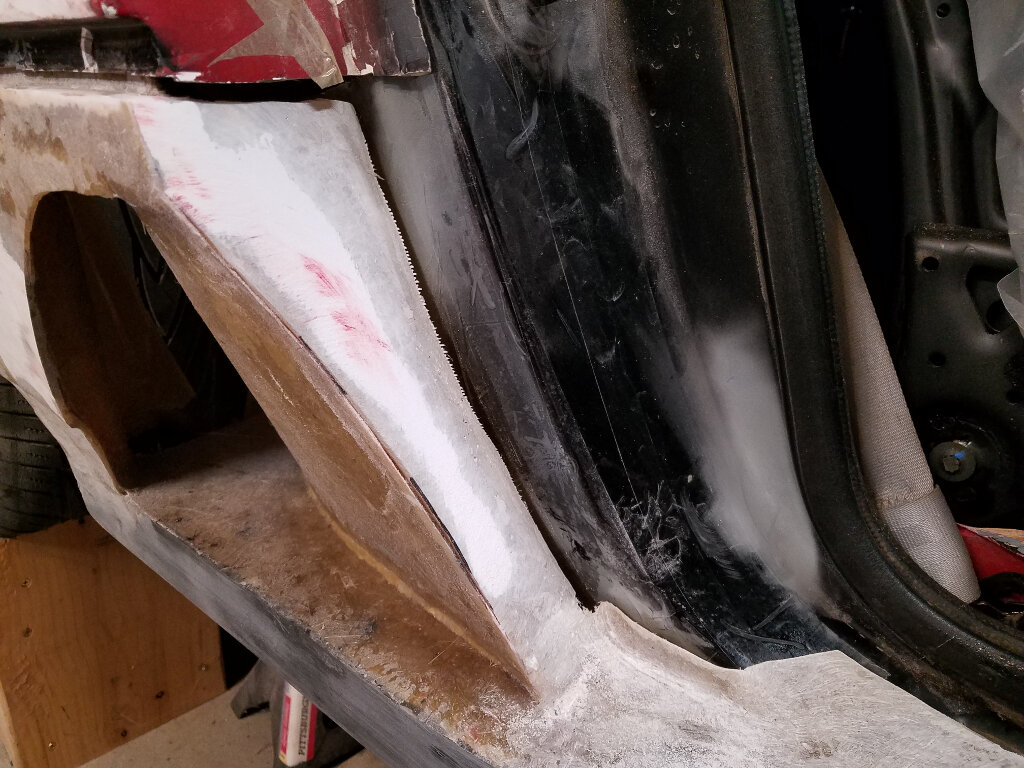
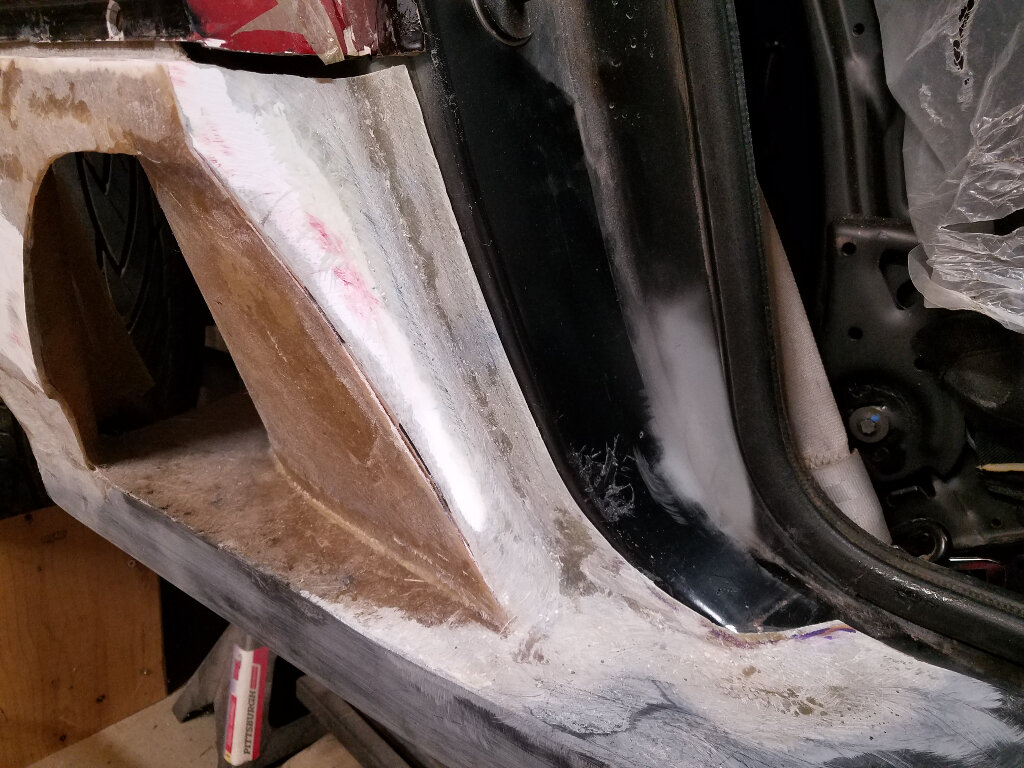
Then, today it was a little maintenance and reinforcement. I added some glass to reinforce the edges on the vent. Then added some to the wheel well edge.
And finally, a side shot.
Thanx for tuning in.
Bob[This message has been edited by RCR (edited 07-22-2018).]
|
|
|
|