
 
     |
| Say hello to project Wallet Drainer. (Page 11/14) |

|
Chief08
|
AUG 28, 10:27 PM
|
|
|
Is there a brake rotor upgrade that will work with the RD lowering ball joints?
|
|
|
|
Chief08
|
AUG 30, 01:18 PM
|
|
|
Tap, Tap, is this thing on???? Lol.
|
|
|
|
Chief08
|
OCT 03, 01:07 AM
|
|
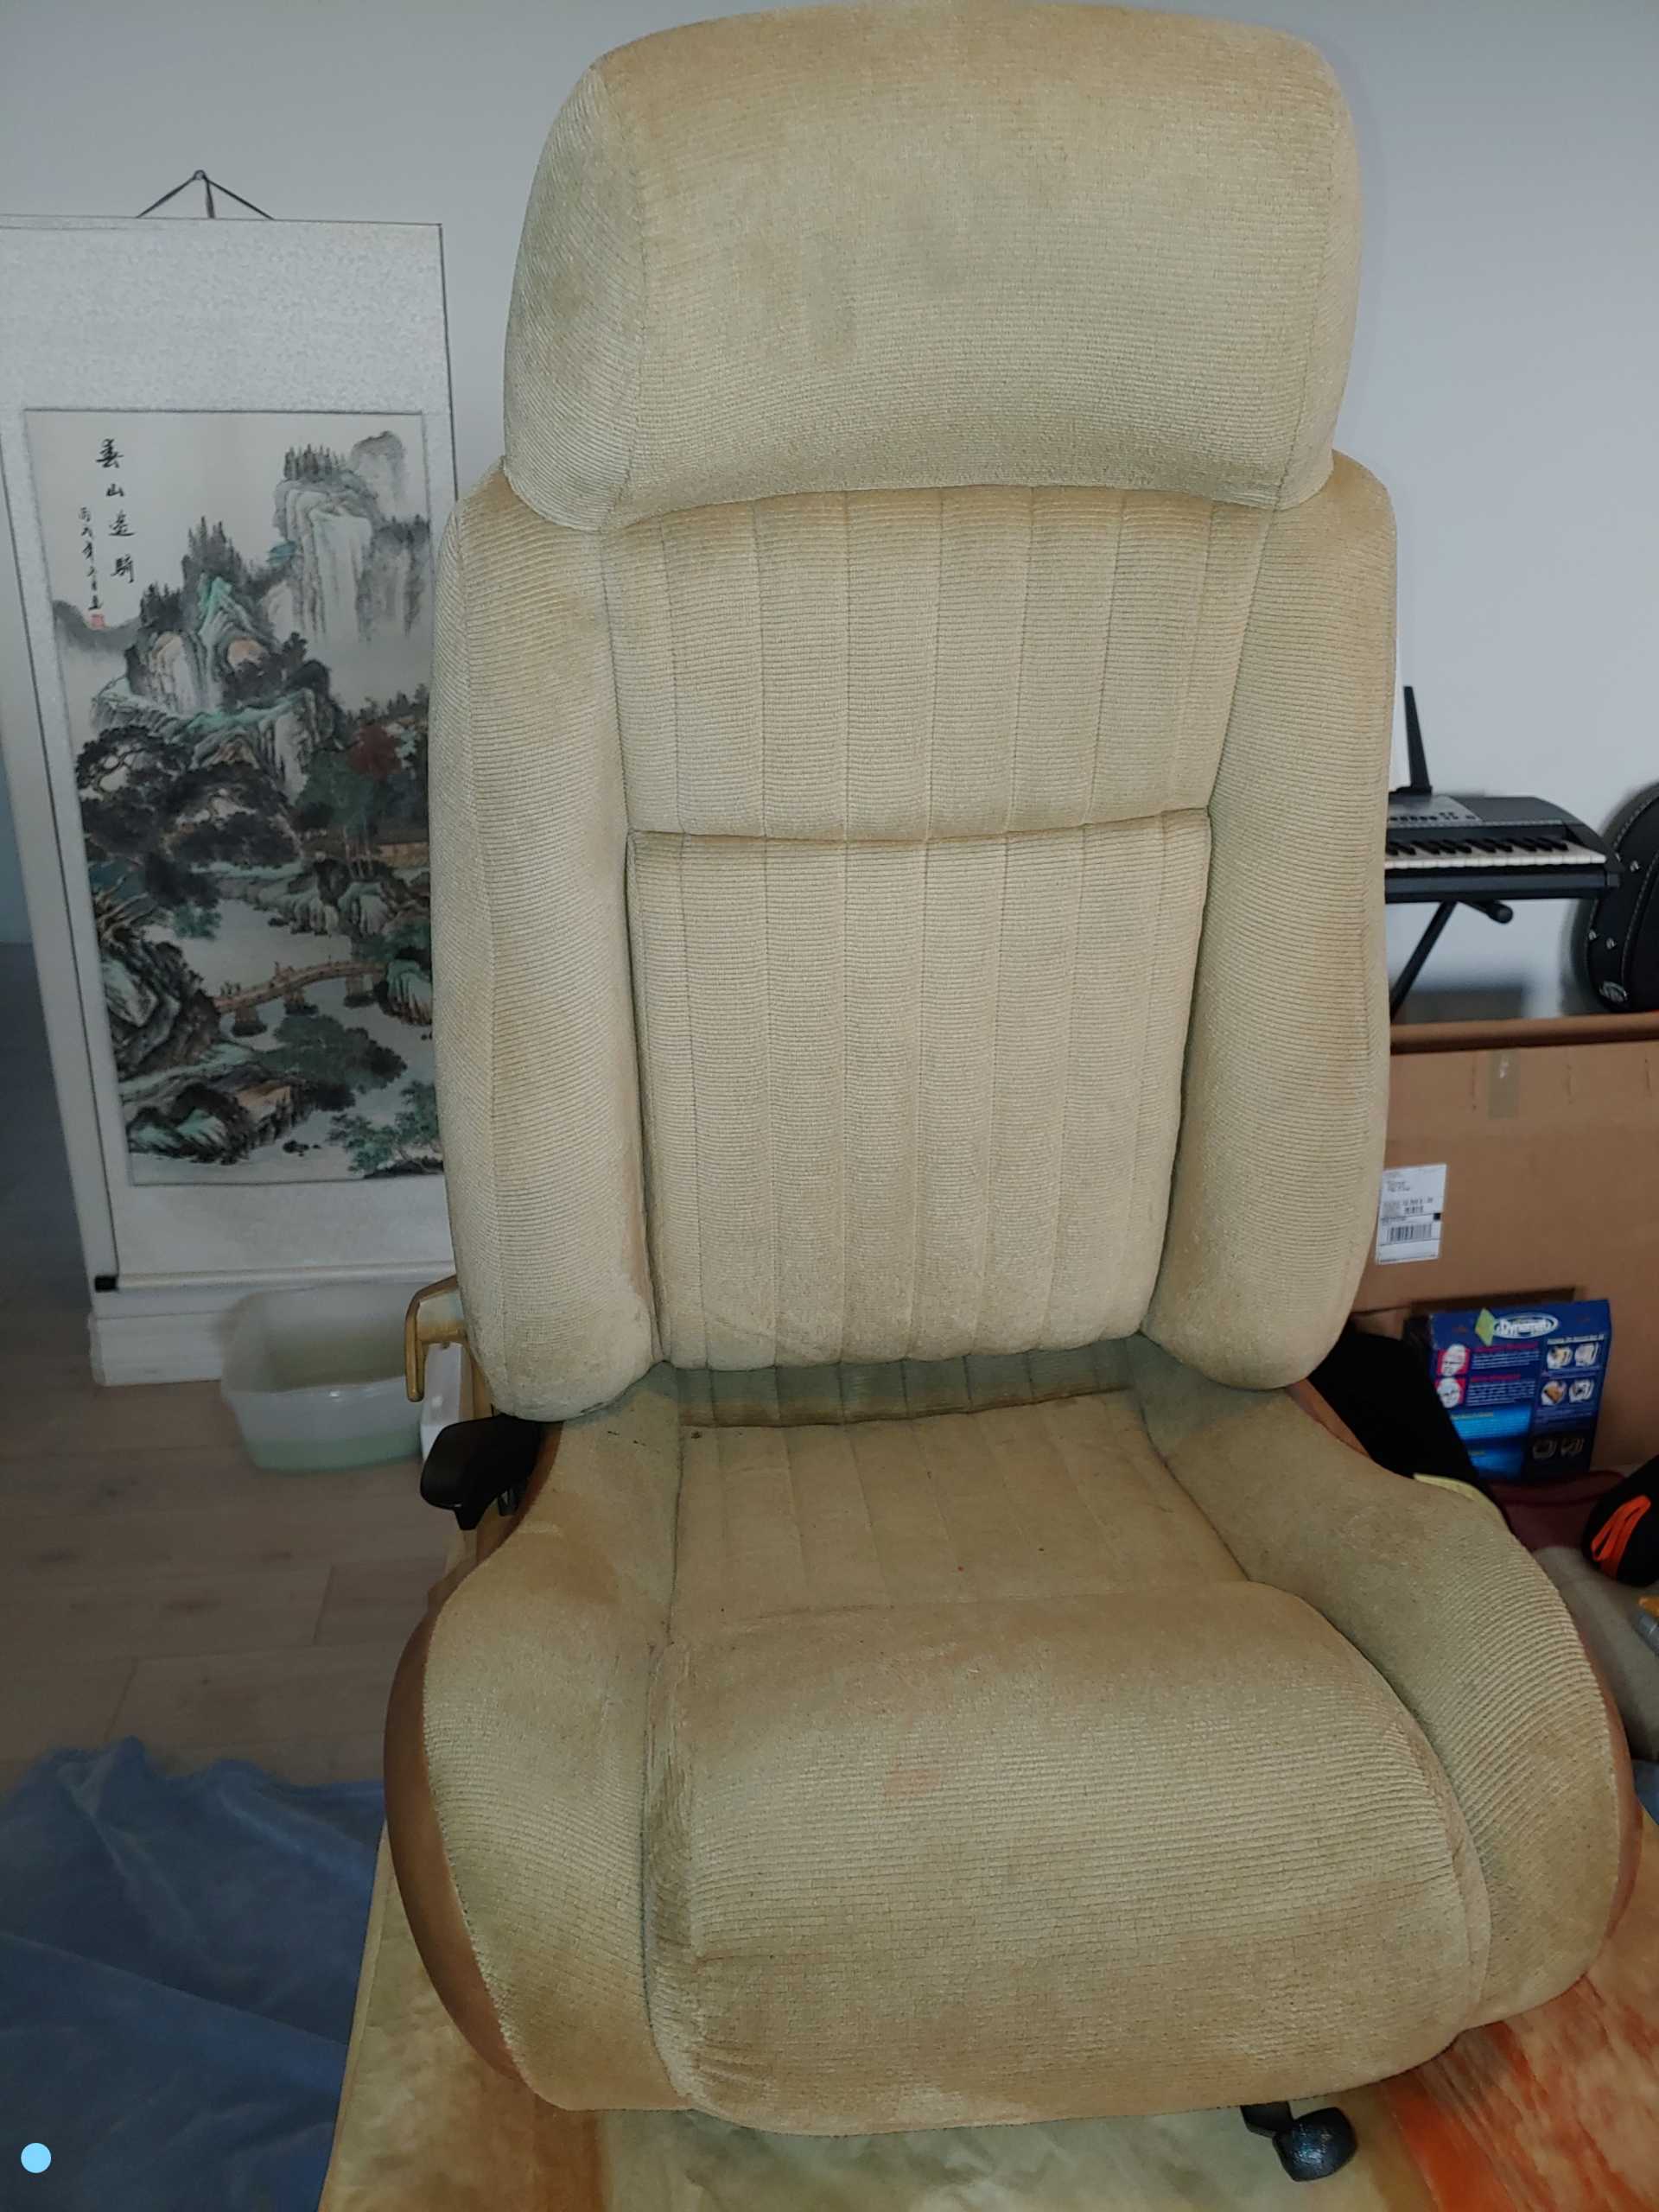
So, it's still too hot to paint and work in the garage, I decided to work on my seats in the AC. I am adding Mr. Mike's leather seat covers, heated seat kit, and liquicell gel pads. The first thing to do is to remove the seats from the car. First, move the seat all the way forward to remove the rear mounting nuts, then remove the front two nuts (giggity).
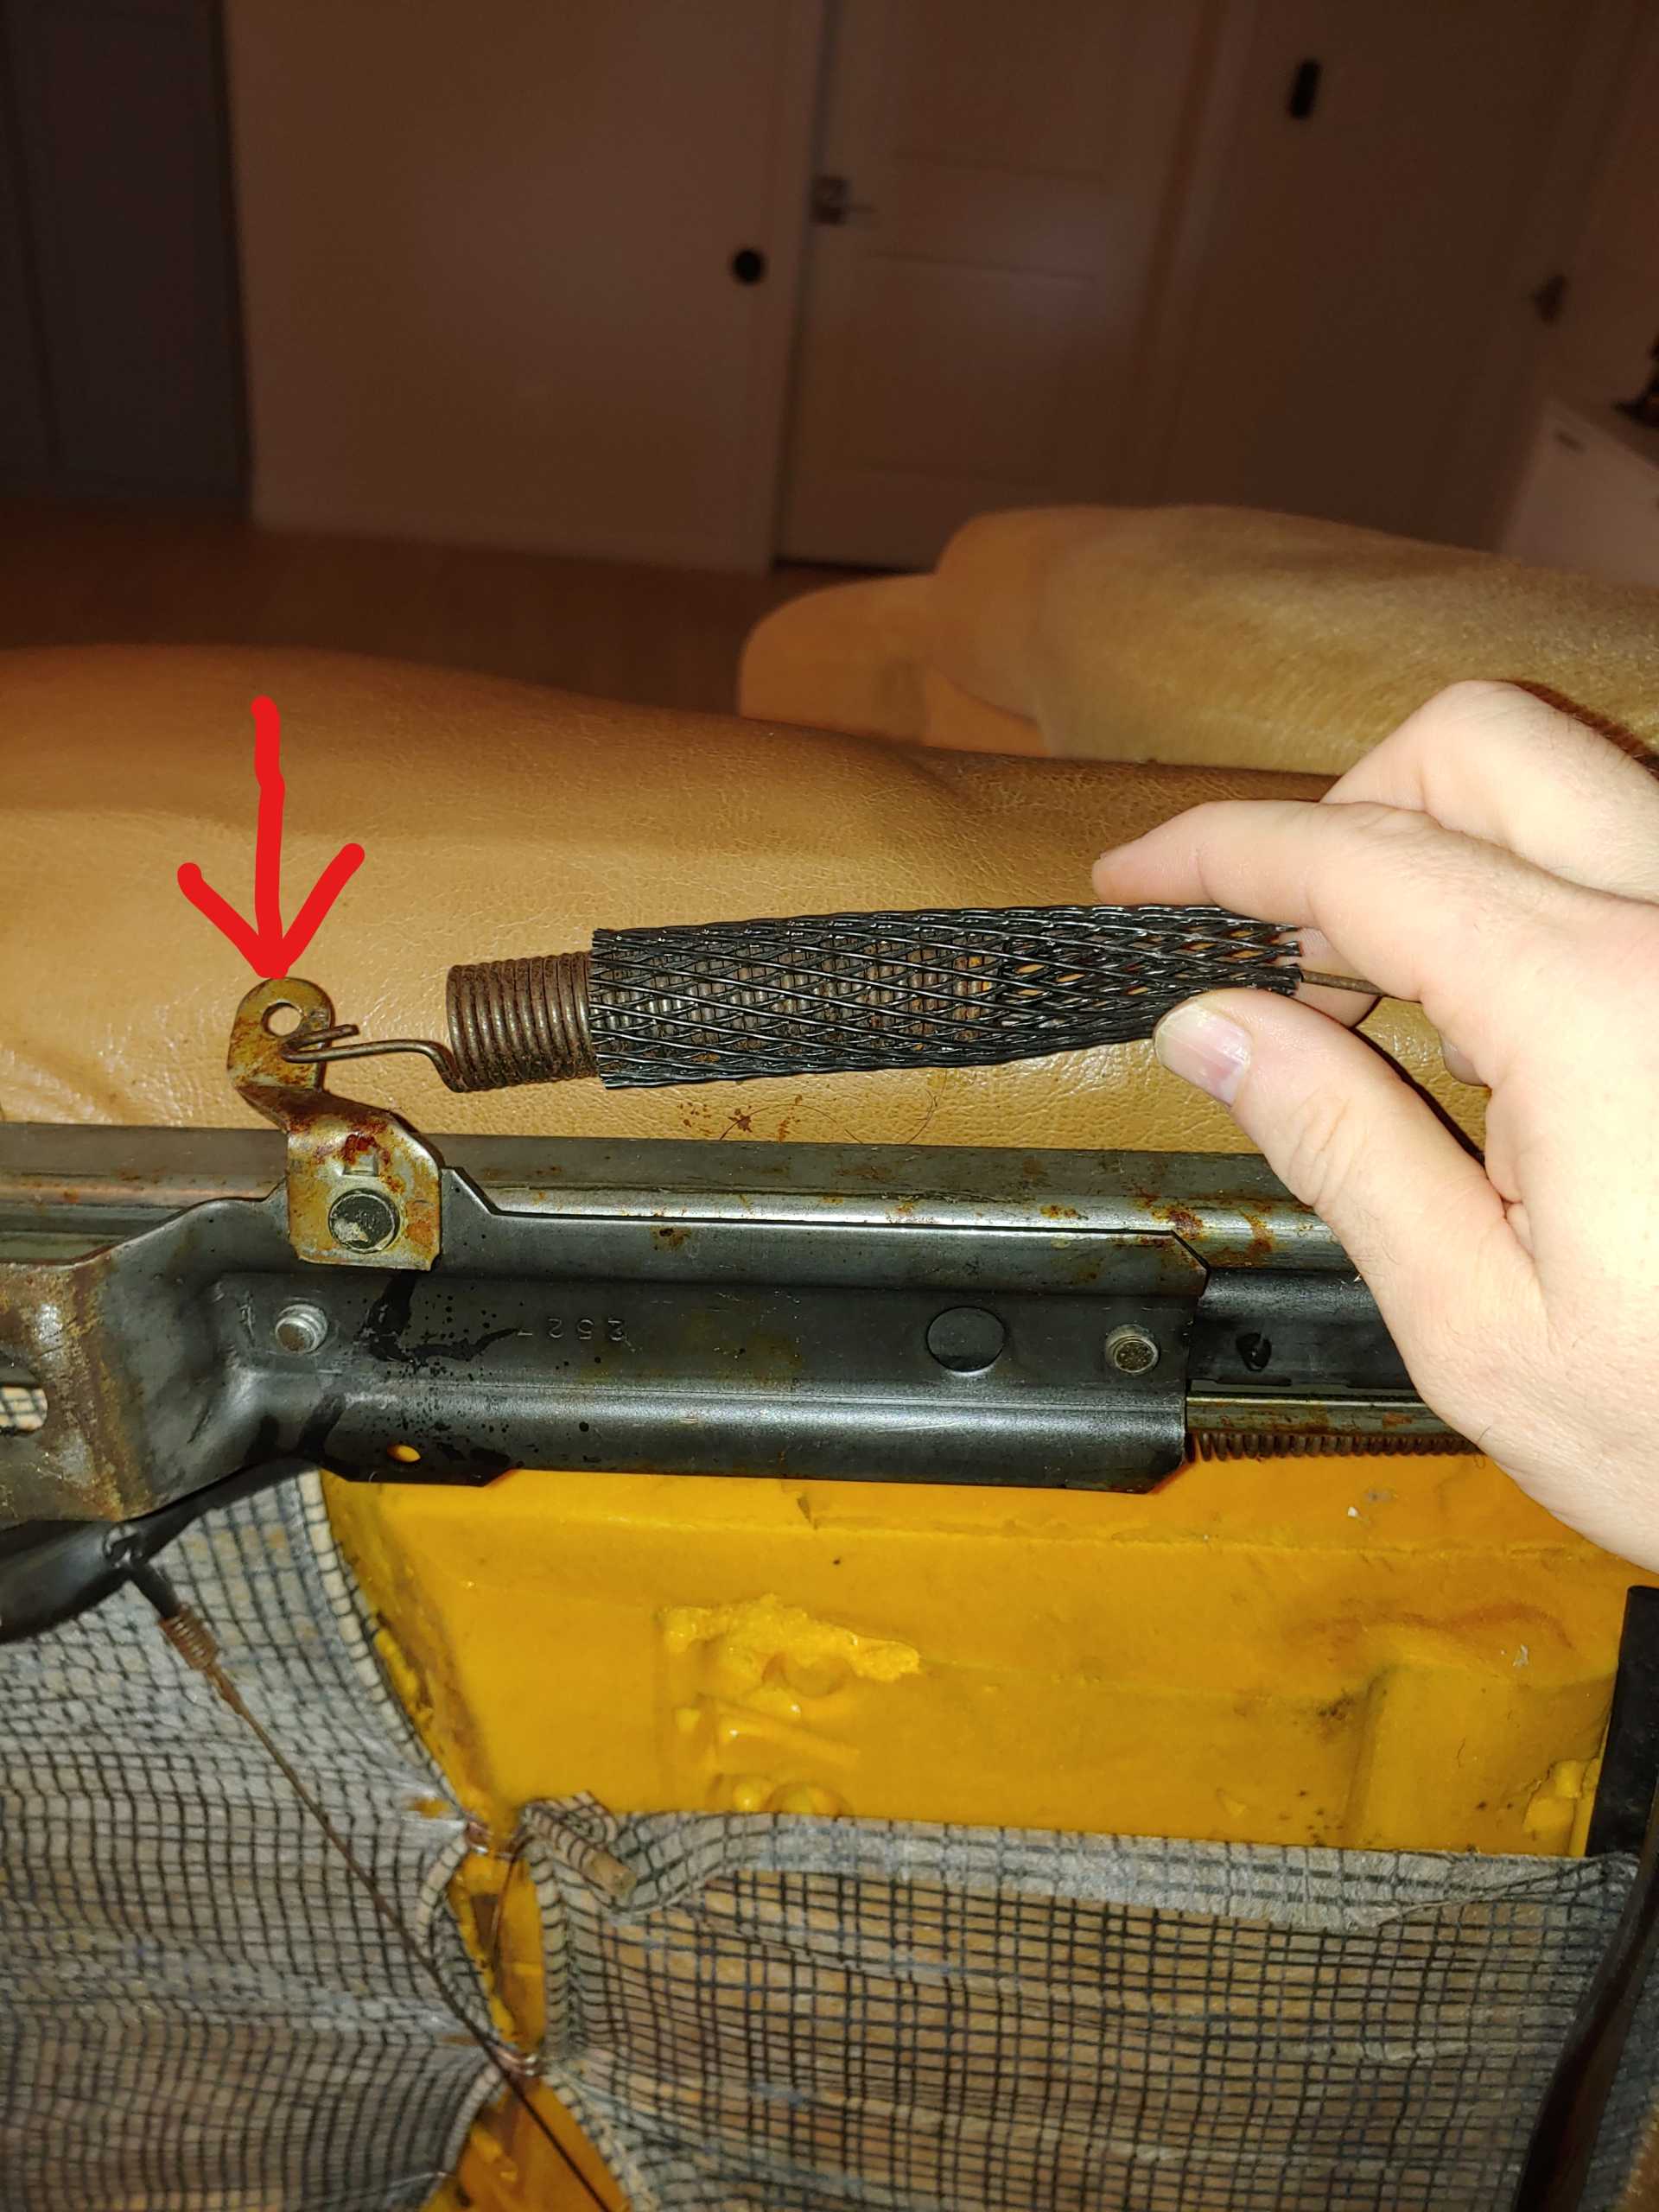
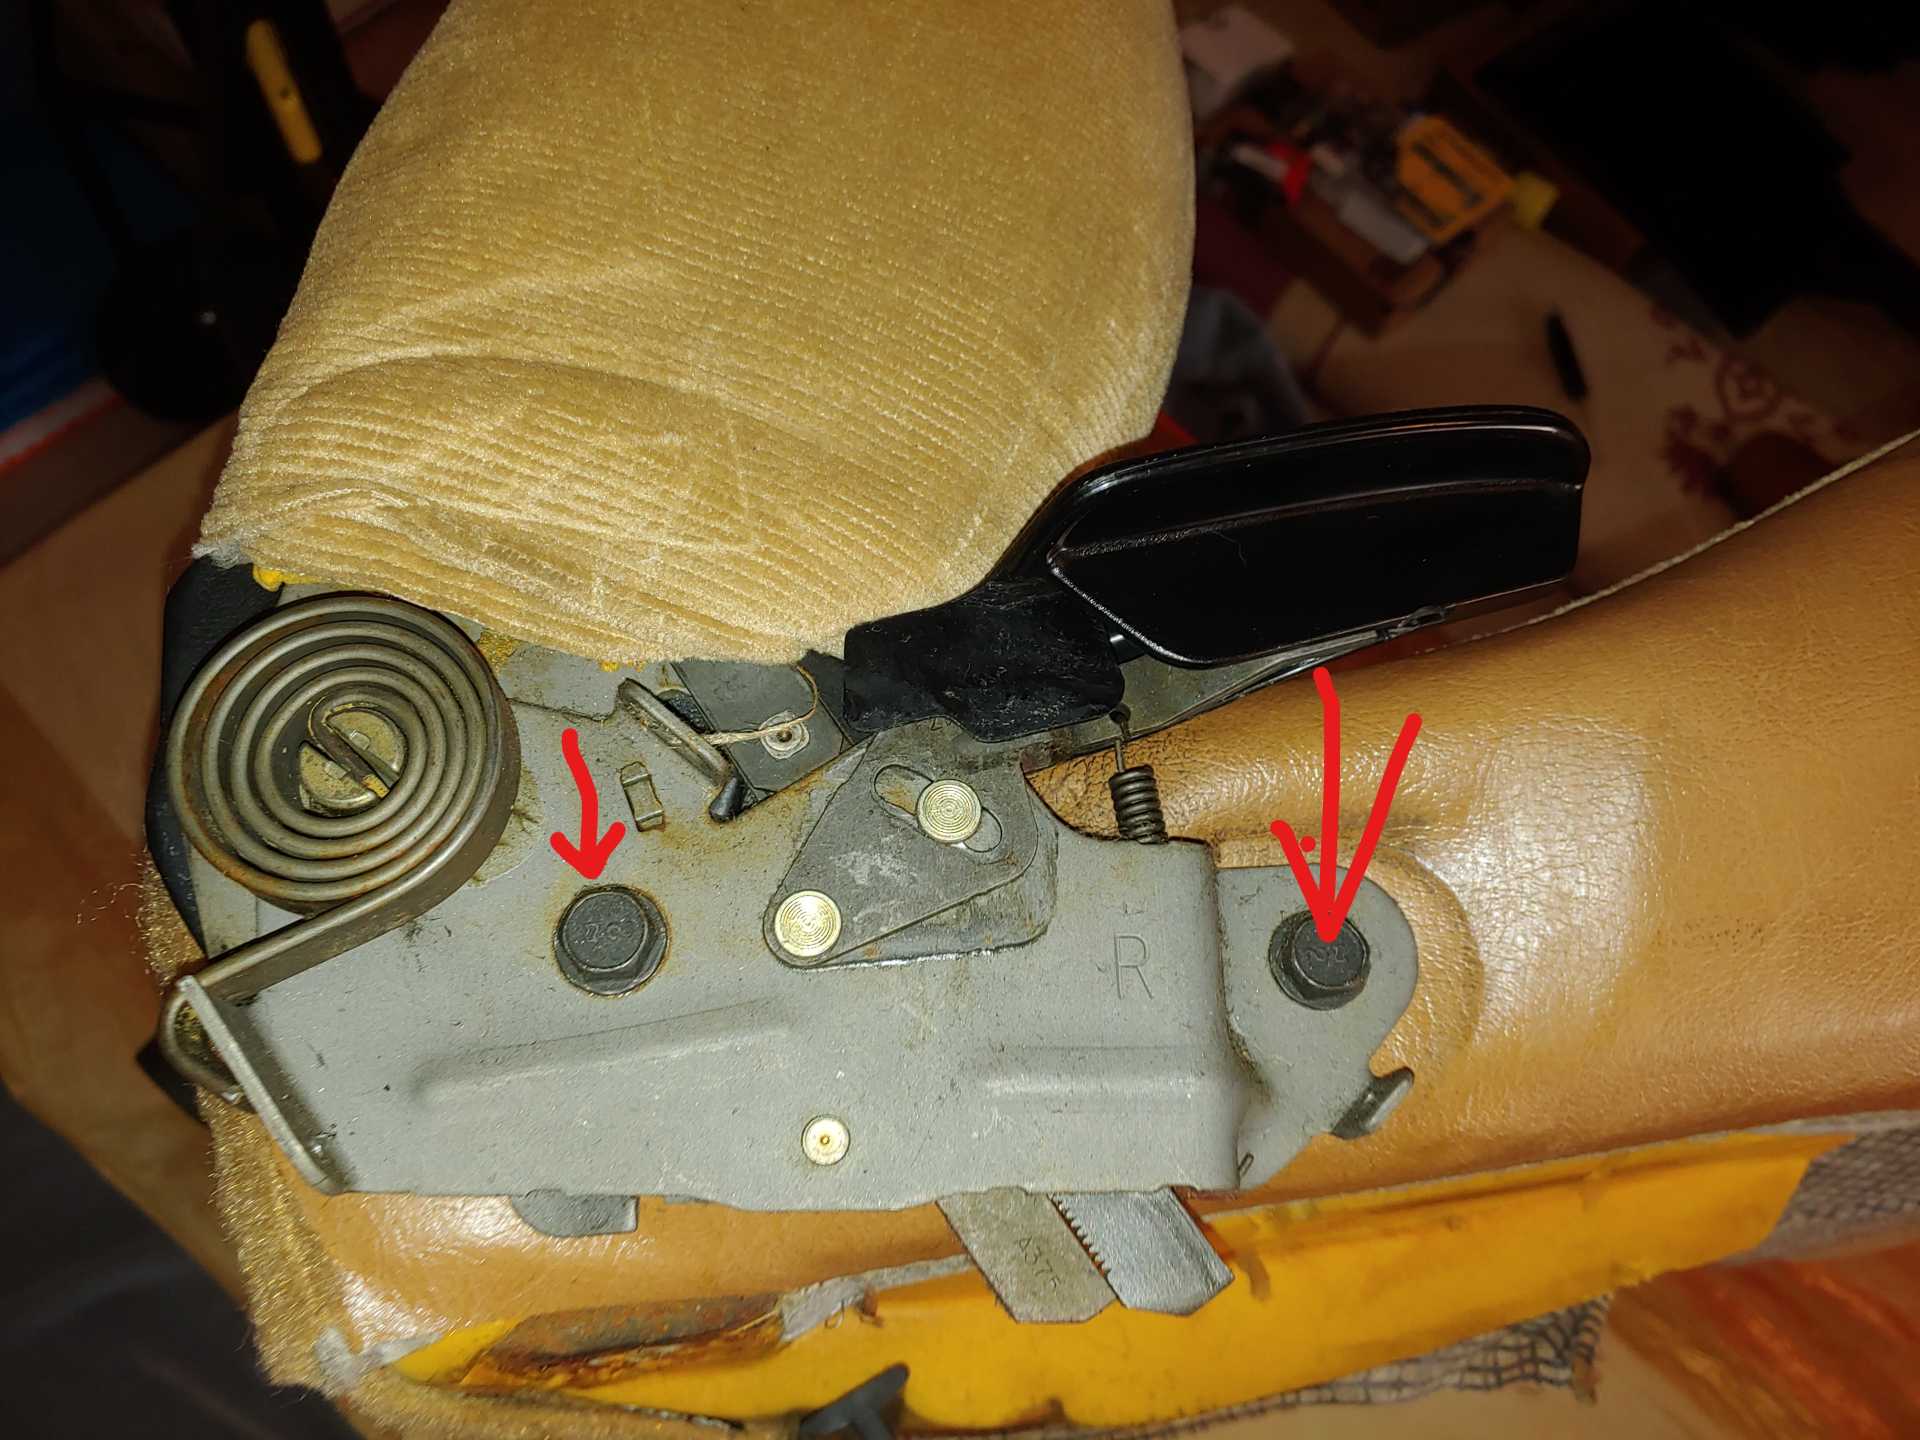
Next, remove the spring attached to the side of the seat rail.
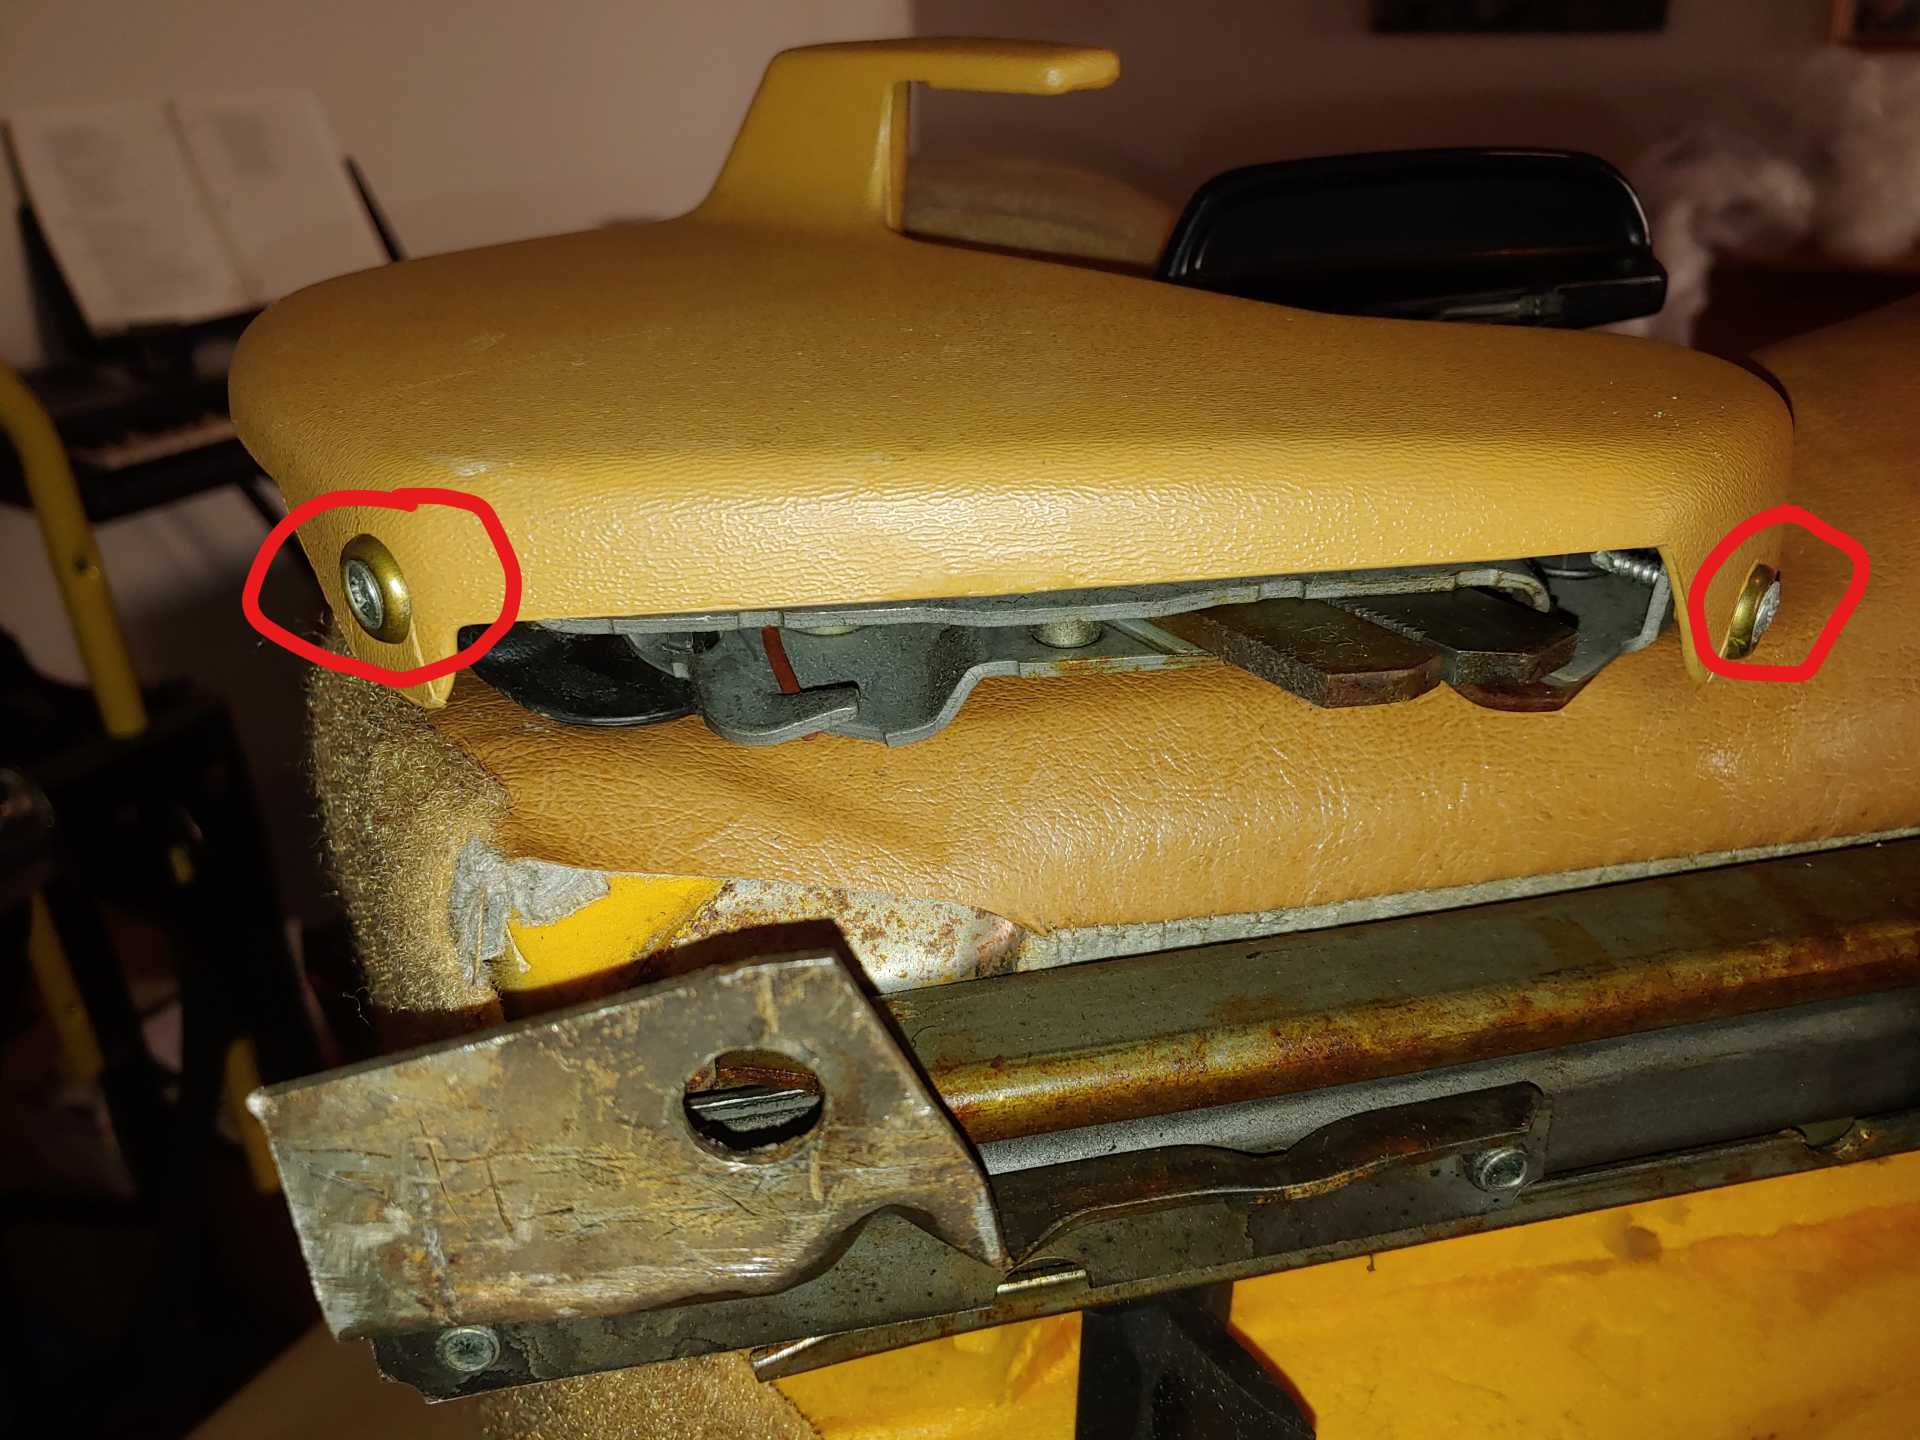
Removed the hinge cover which is held on with two Phillip's head screws.
Remove the seat rails, held on by four 13mm bolts. Mark the rails with tape, chalk etc. to indicate the front side.
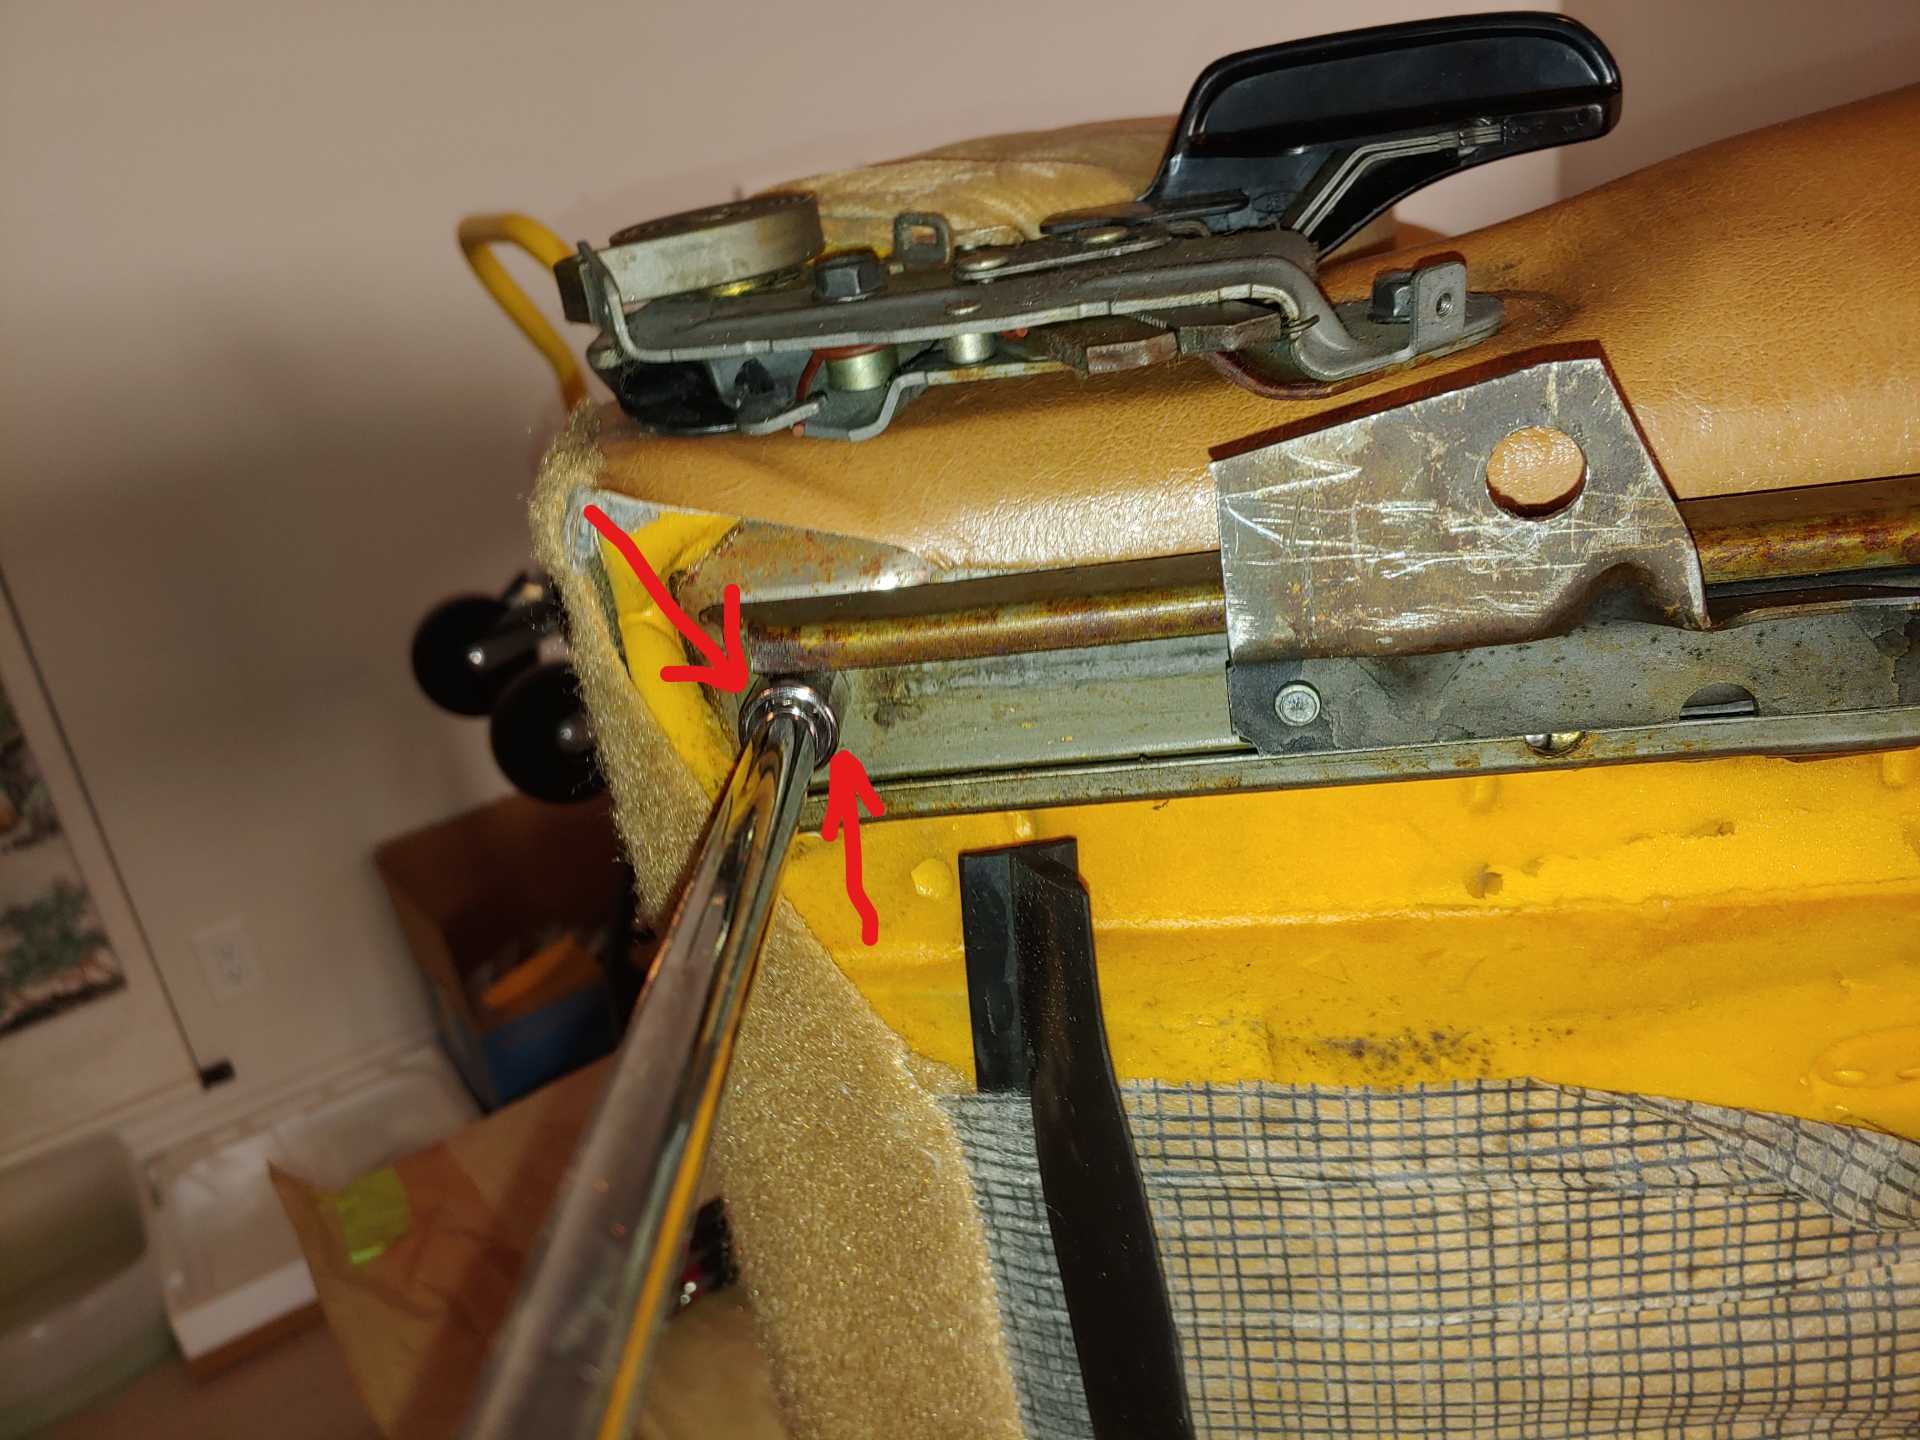

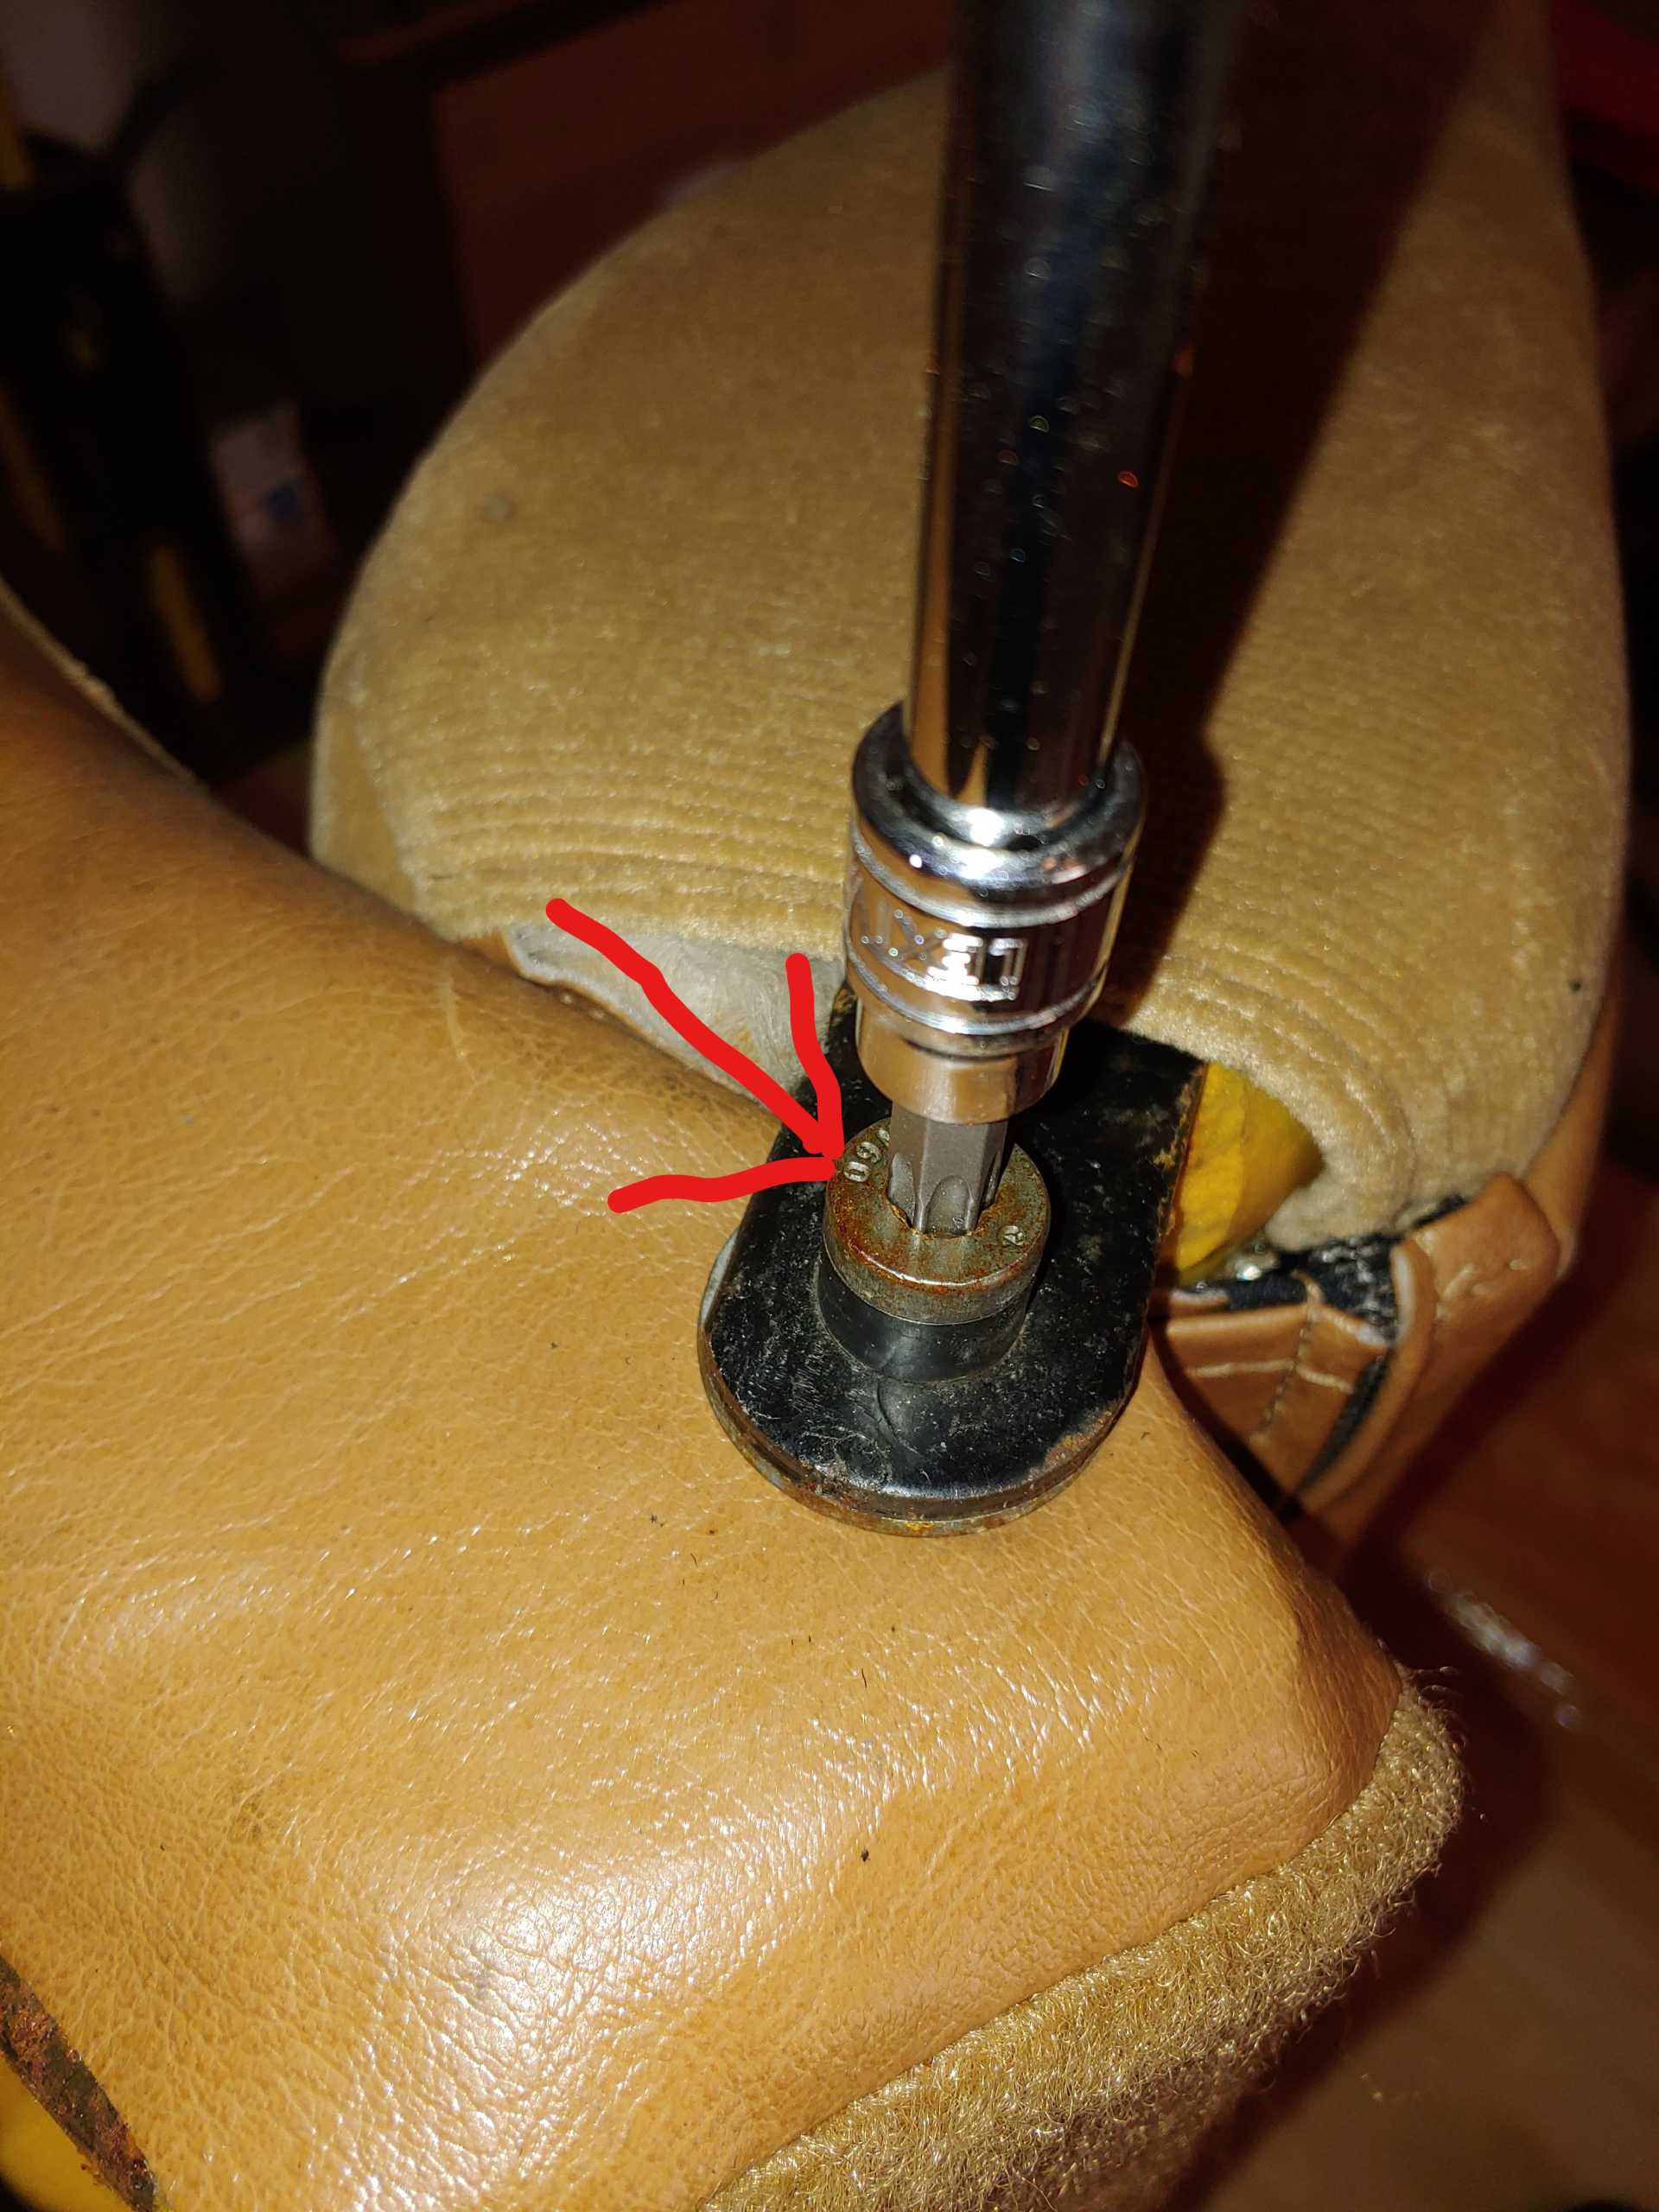
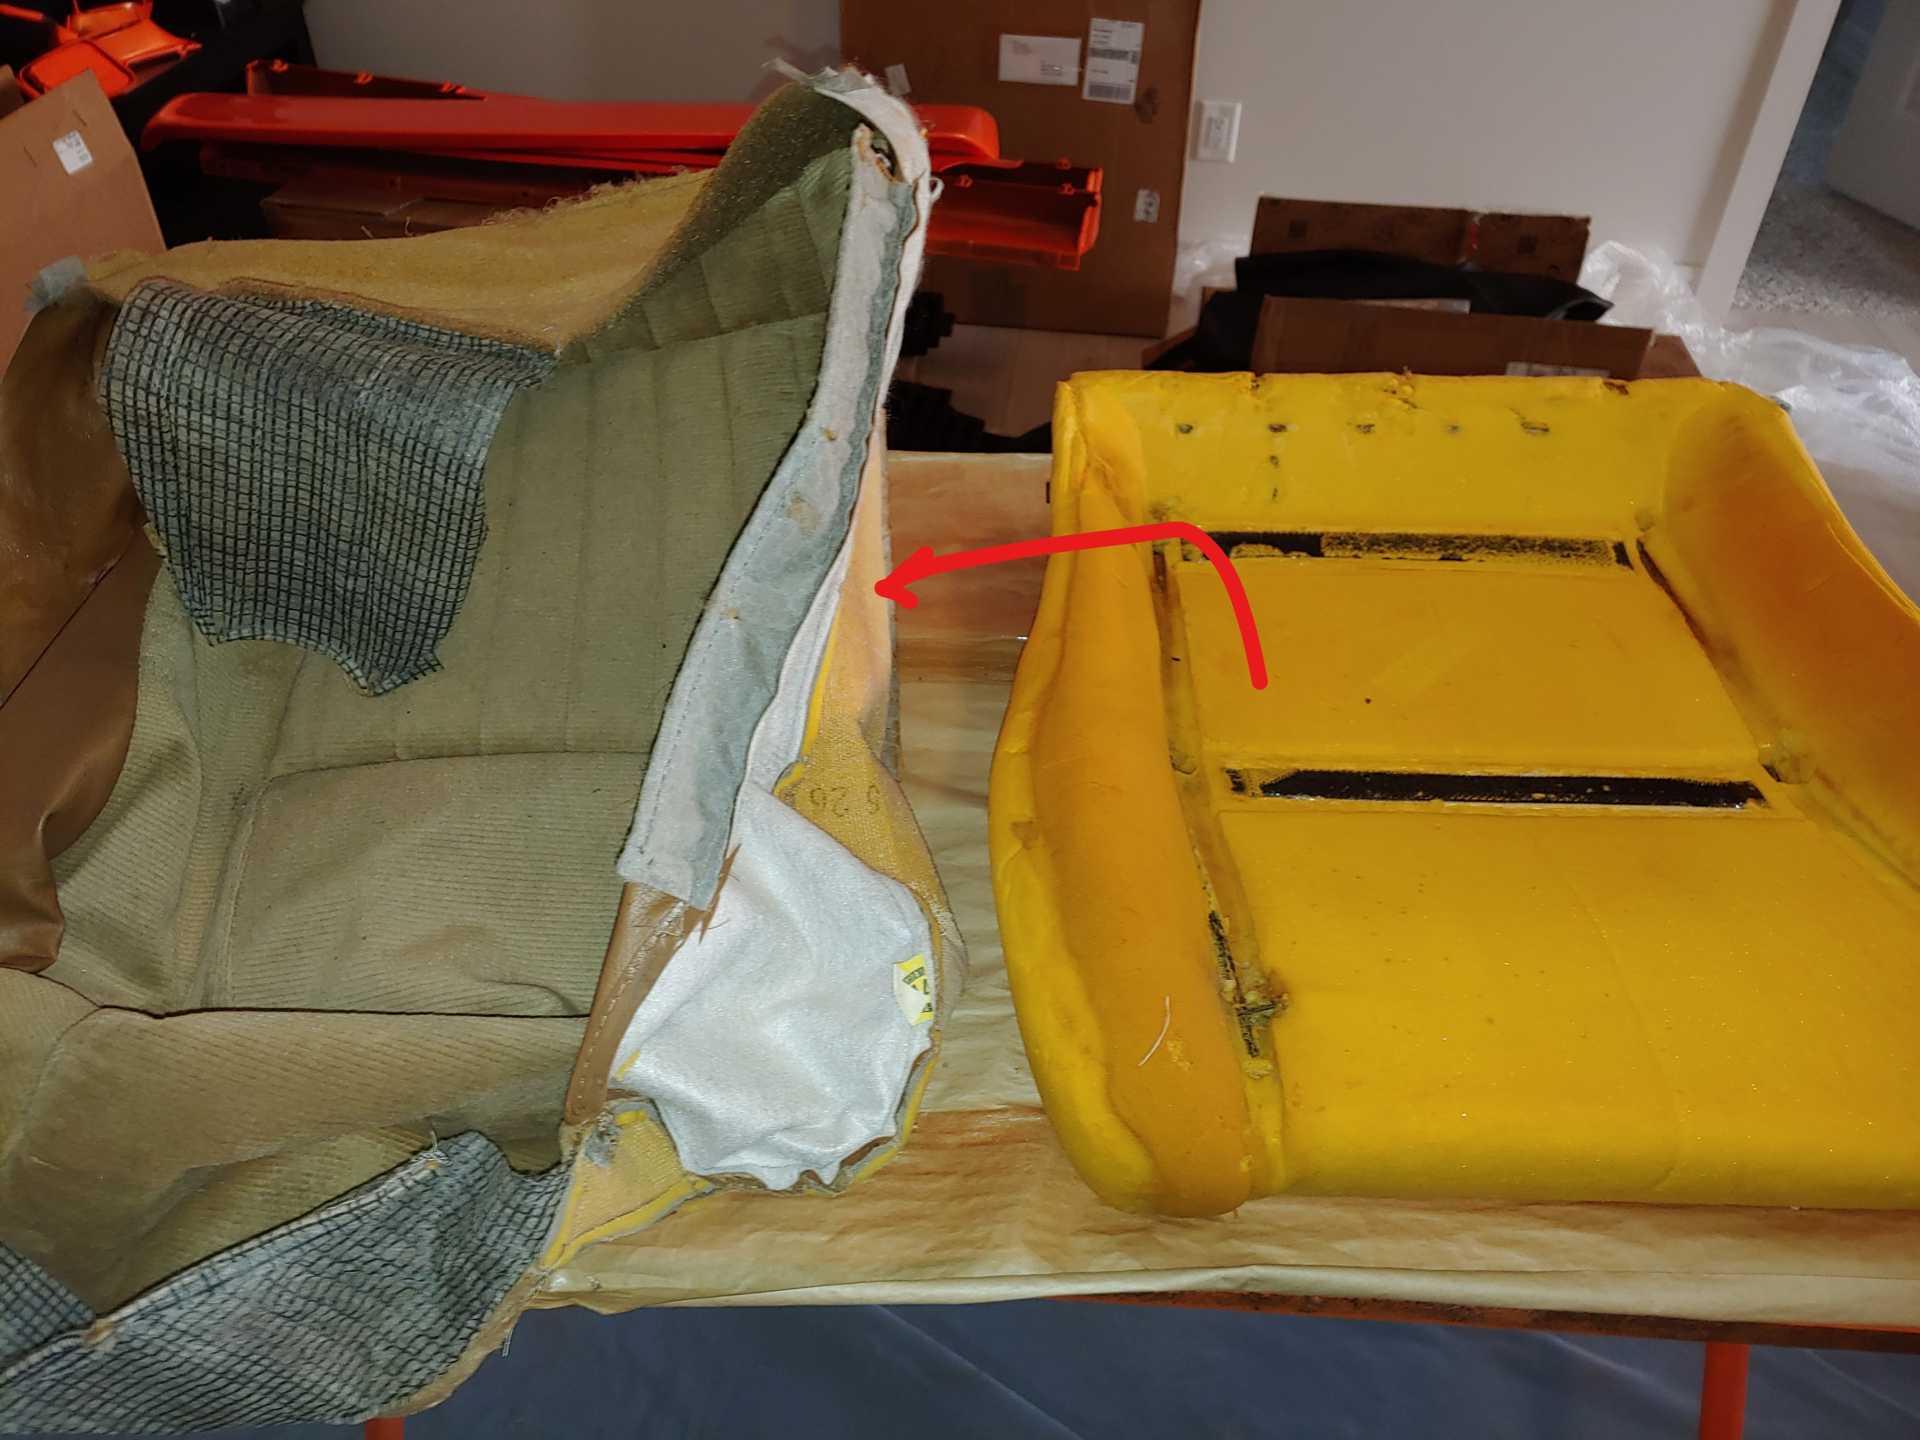
Remove the two 13mm hinge bolts, and the hinge rod pin on the opposite side using a T50 torx bit. Now, separate the seat back from the seat bottom and reinstall the two hinge bolts.
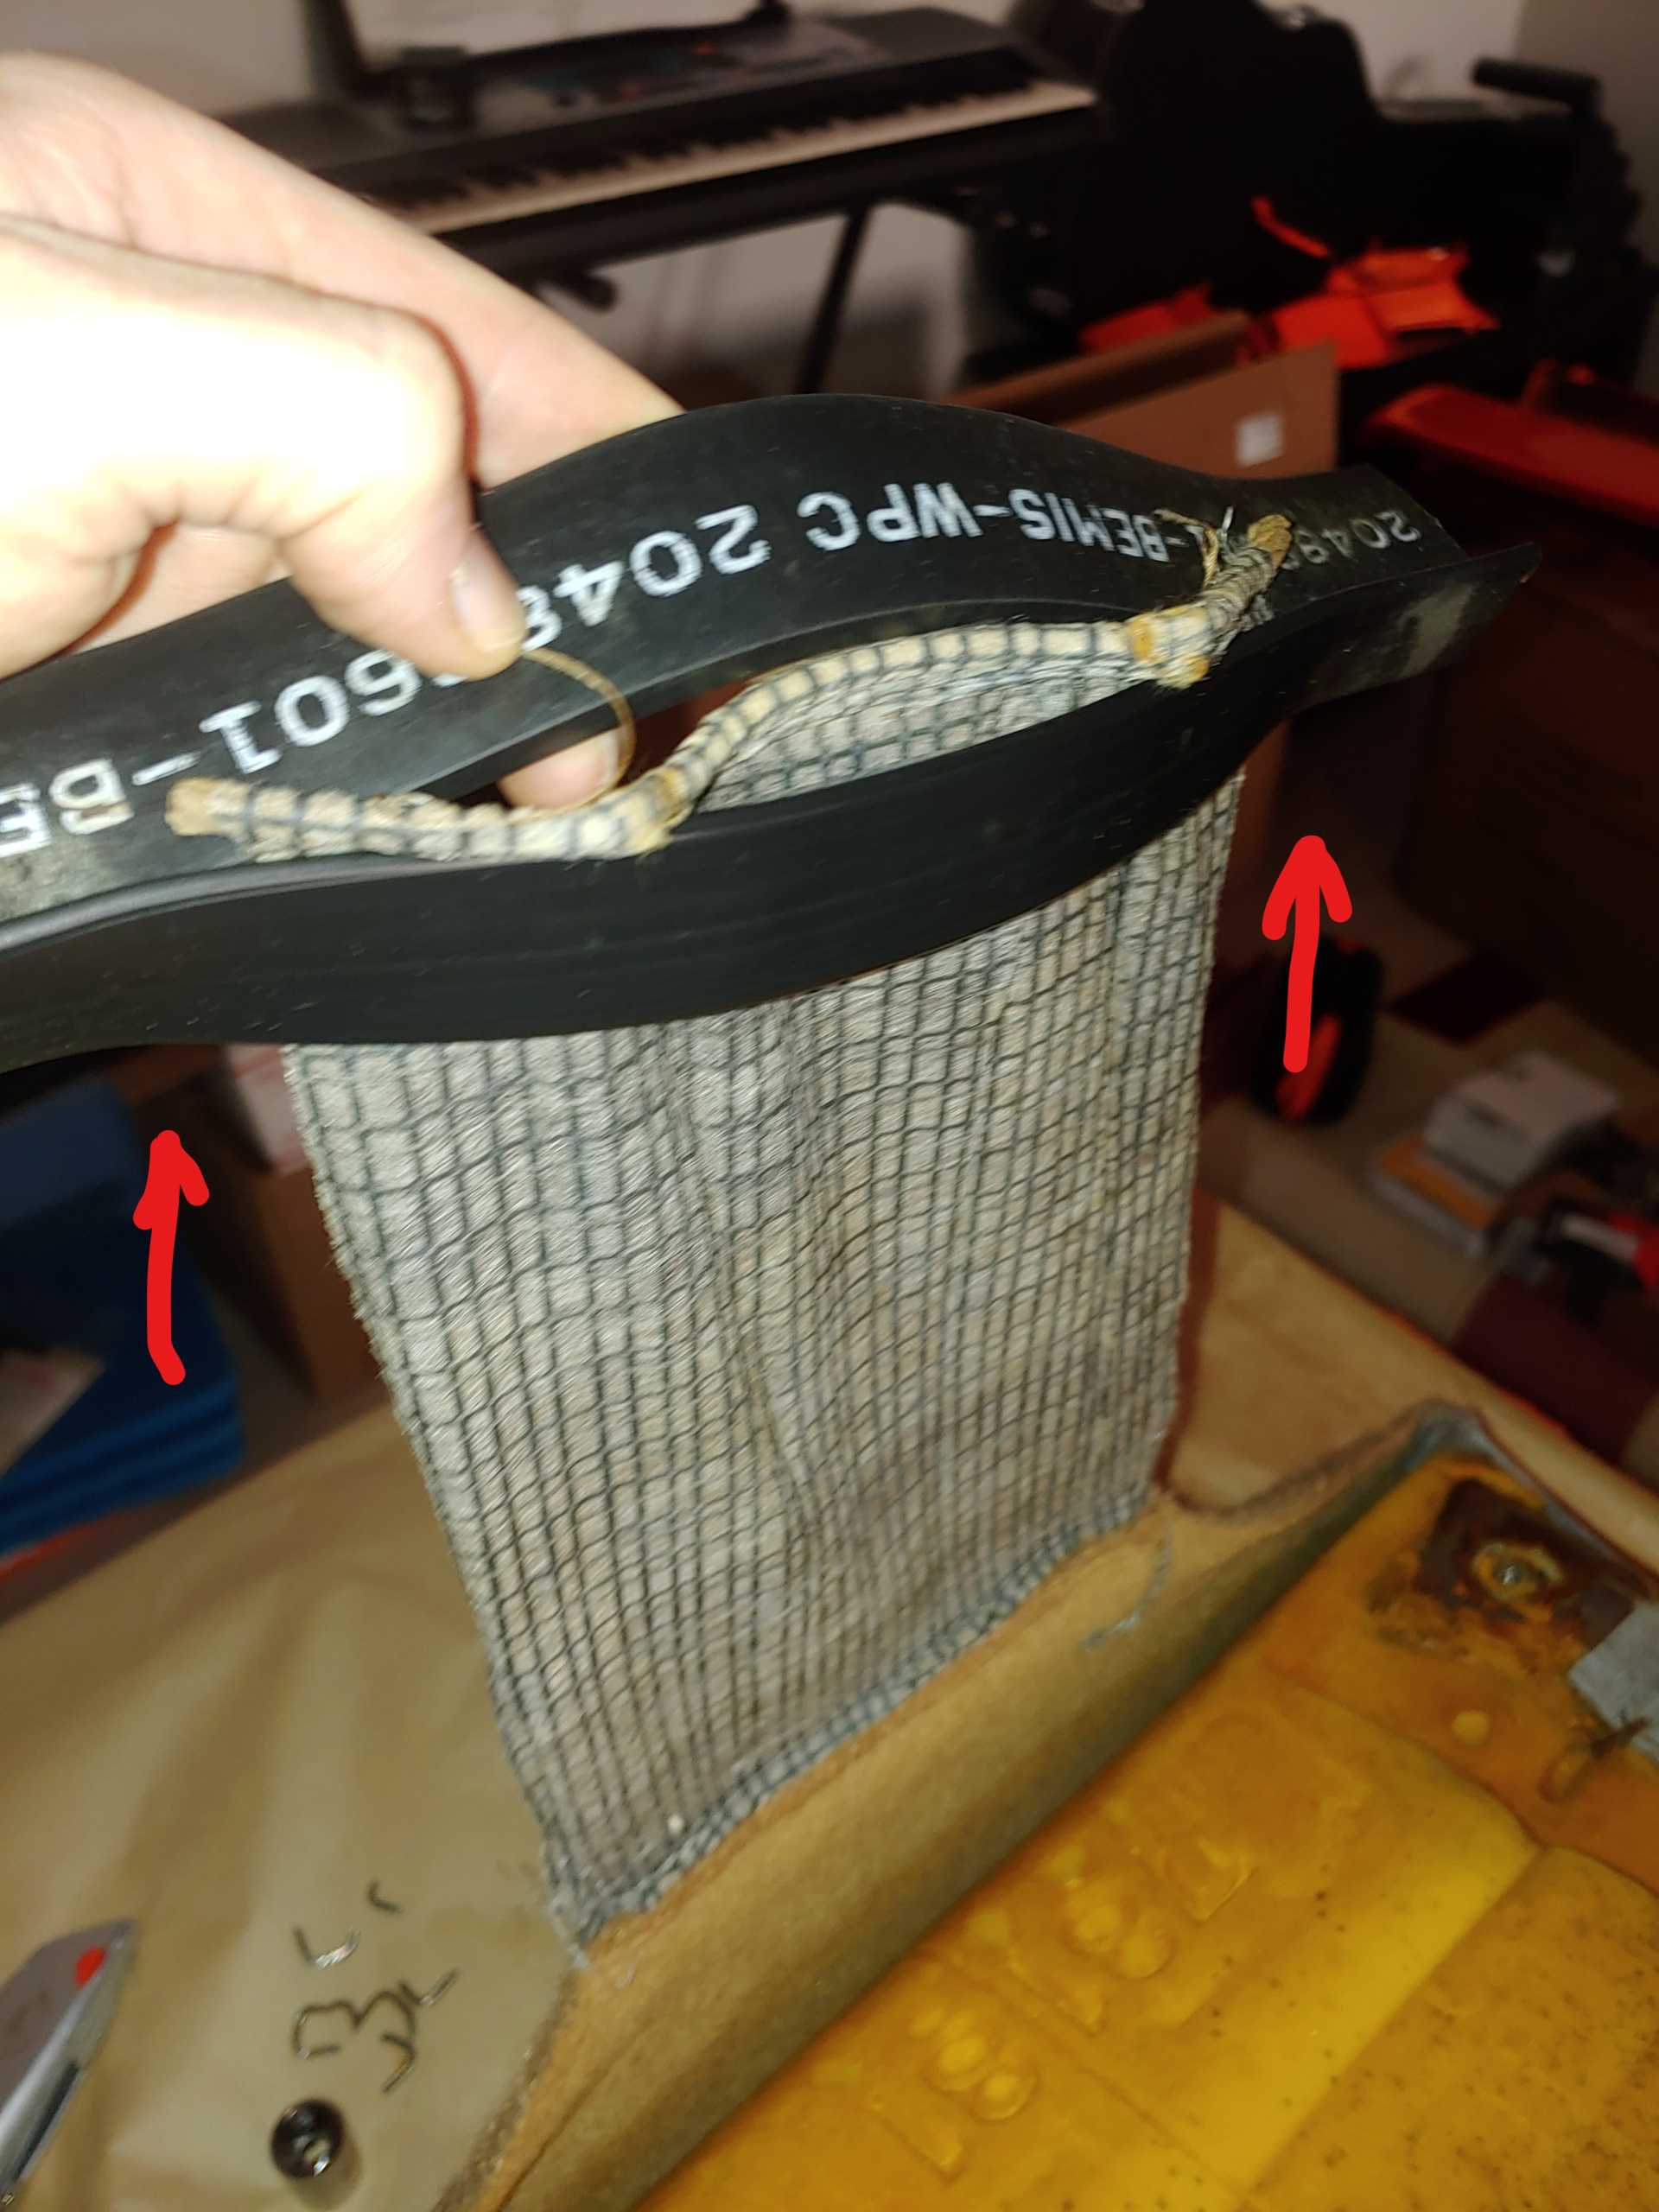
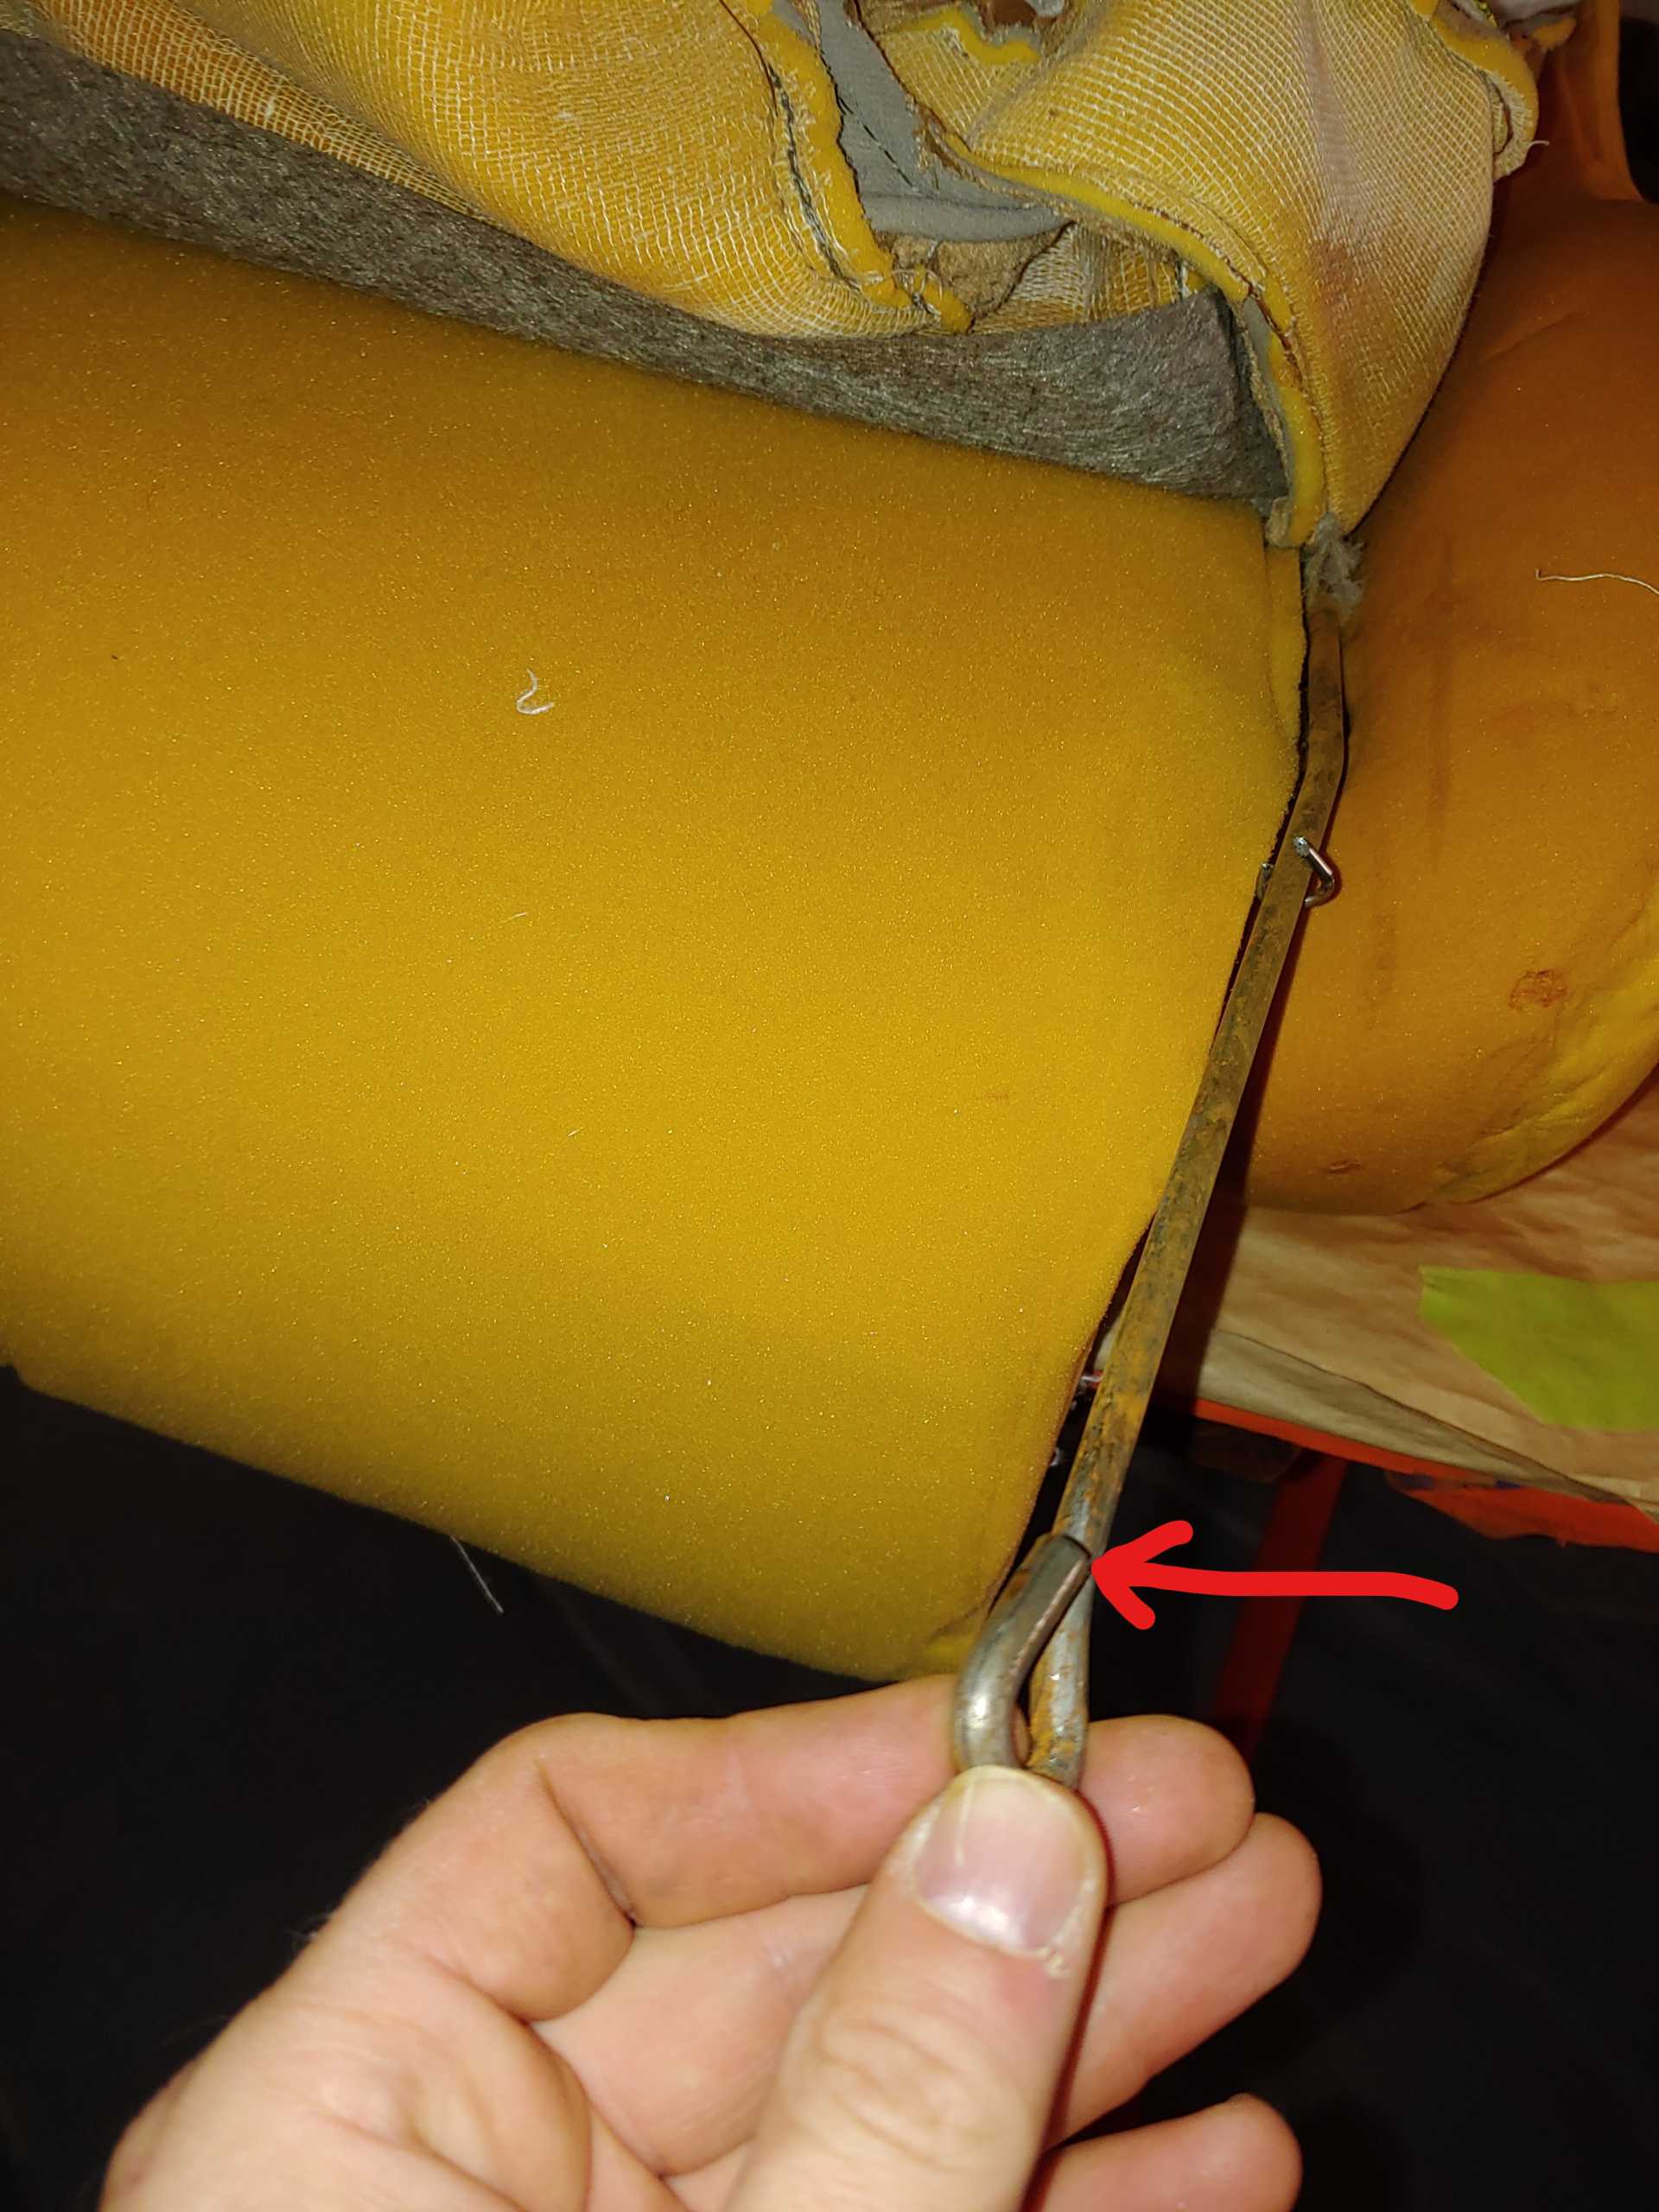
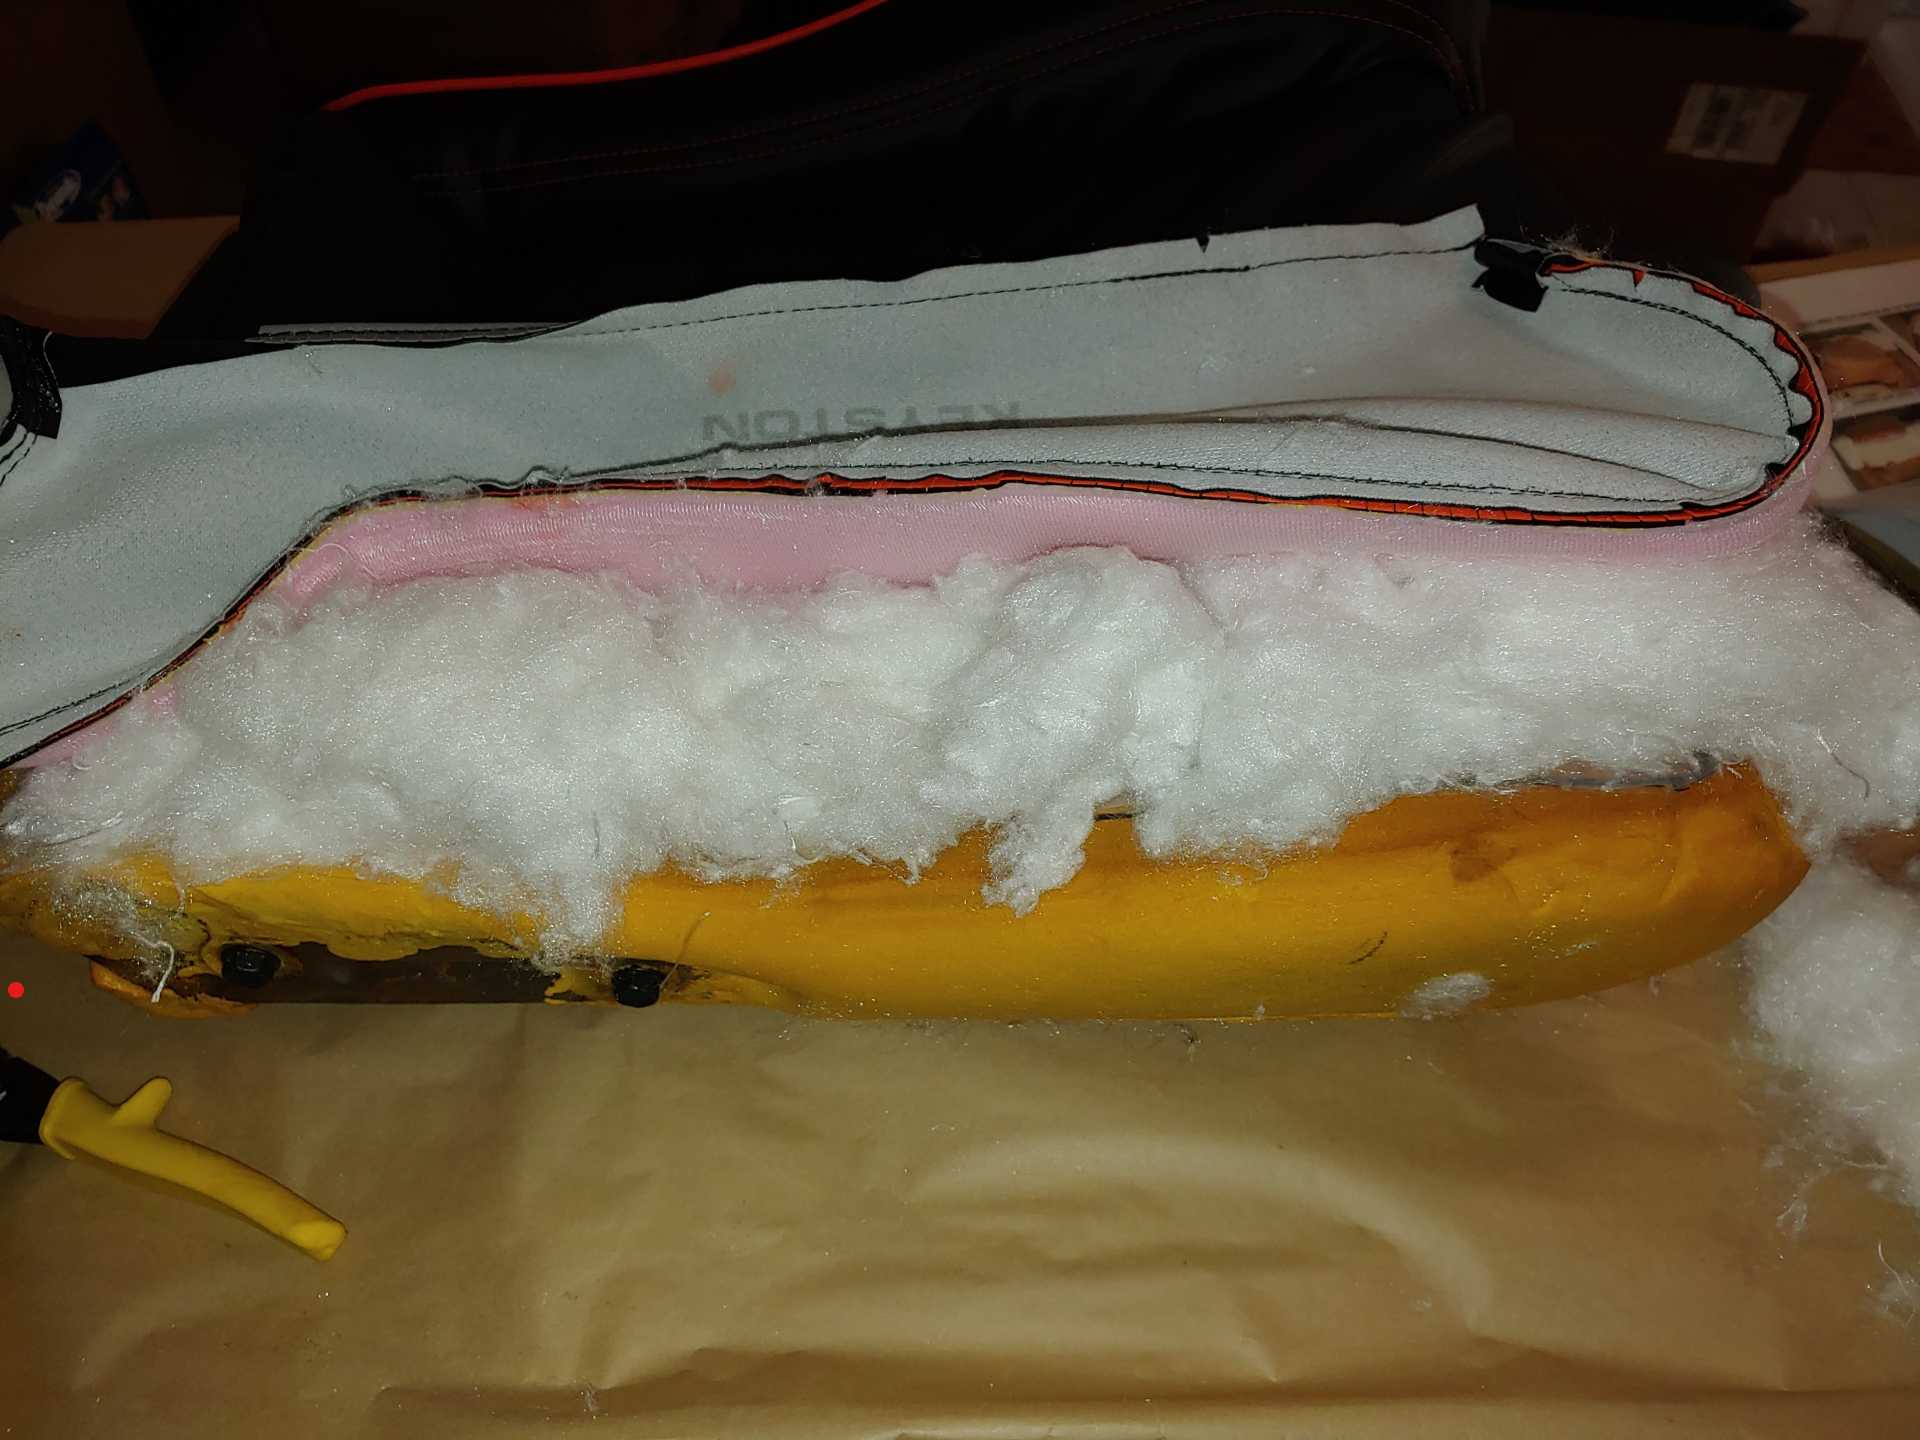
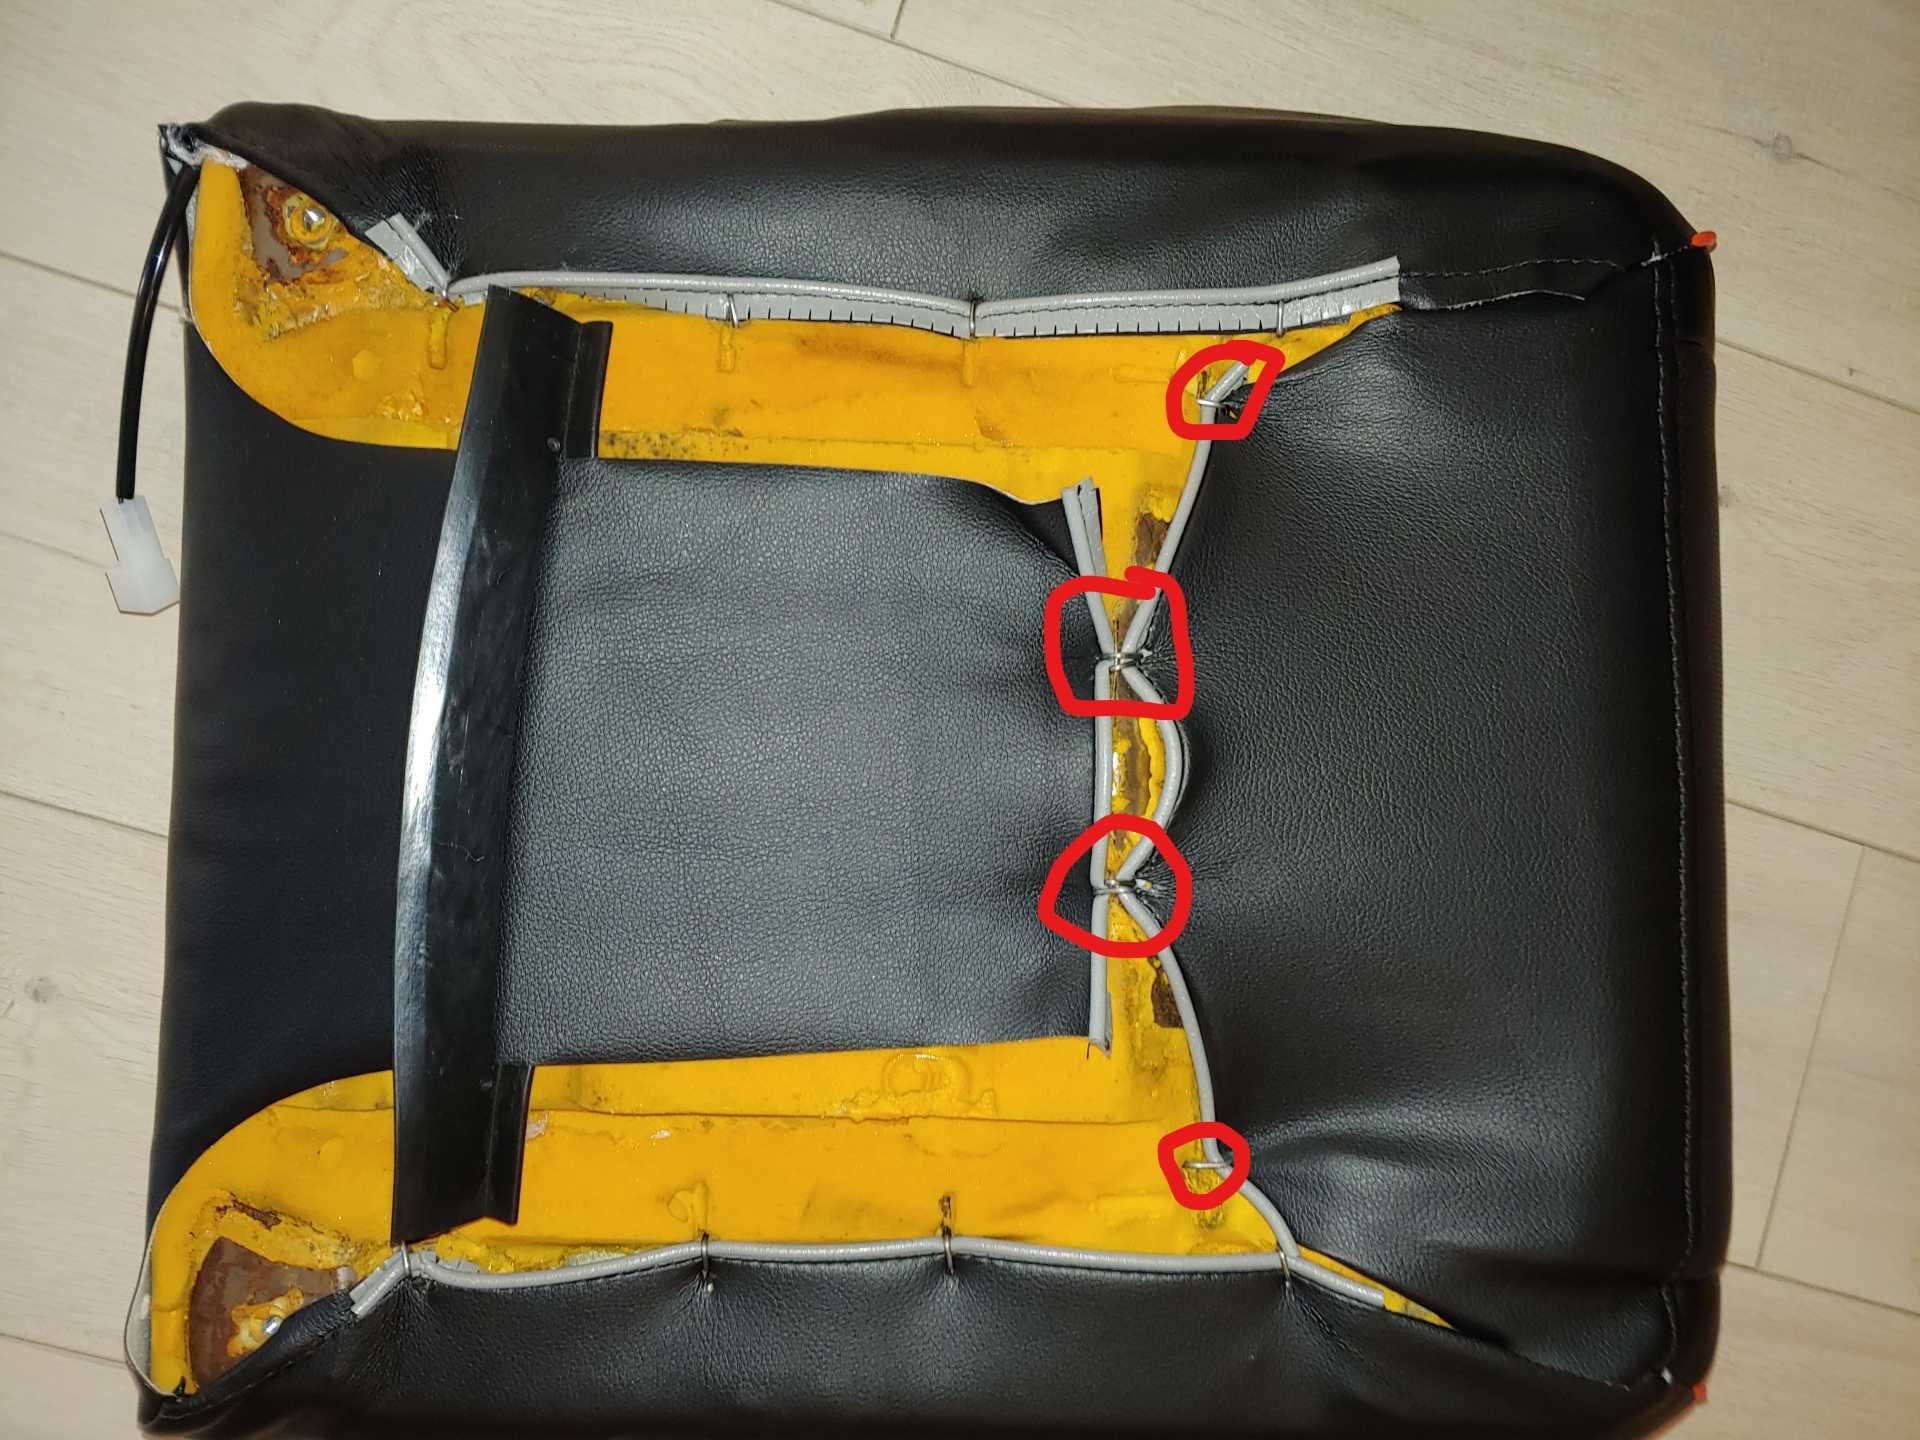
Flip the seat bottom over and remove the hog rings used to secure the front and back flaps to the seat frame. Slide the rubber dirt guard off of the flap and set it aside.
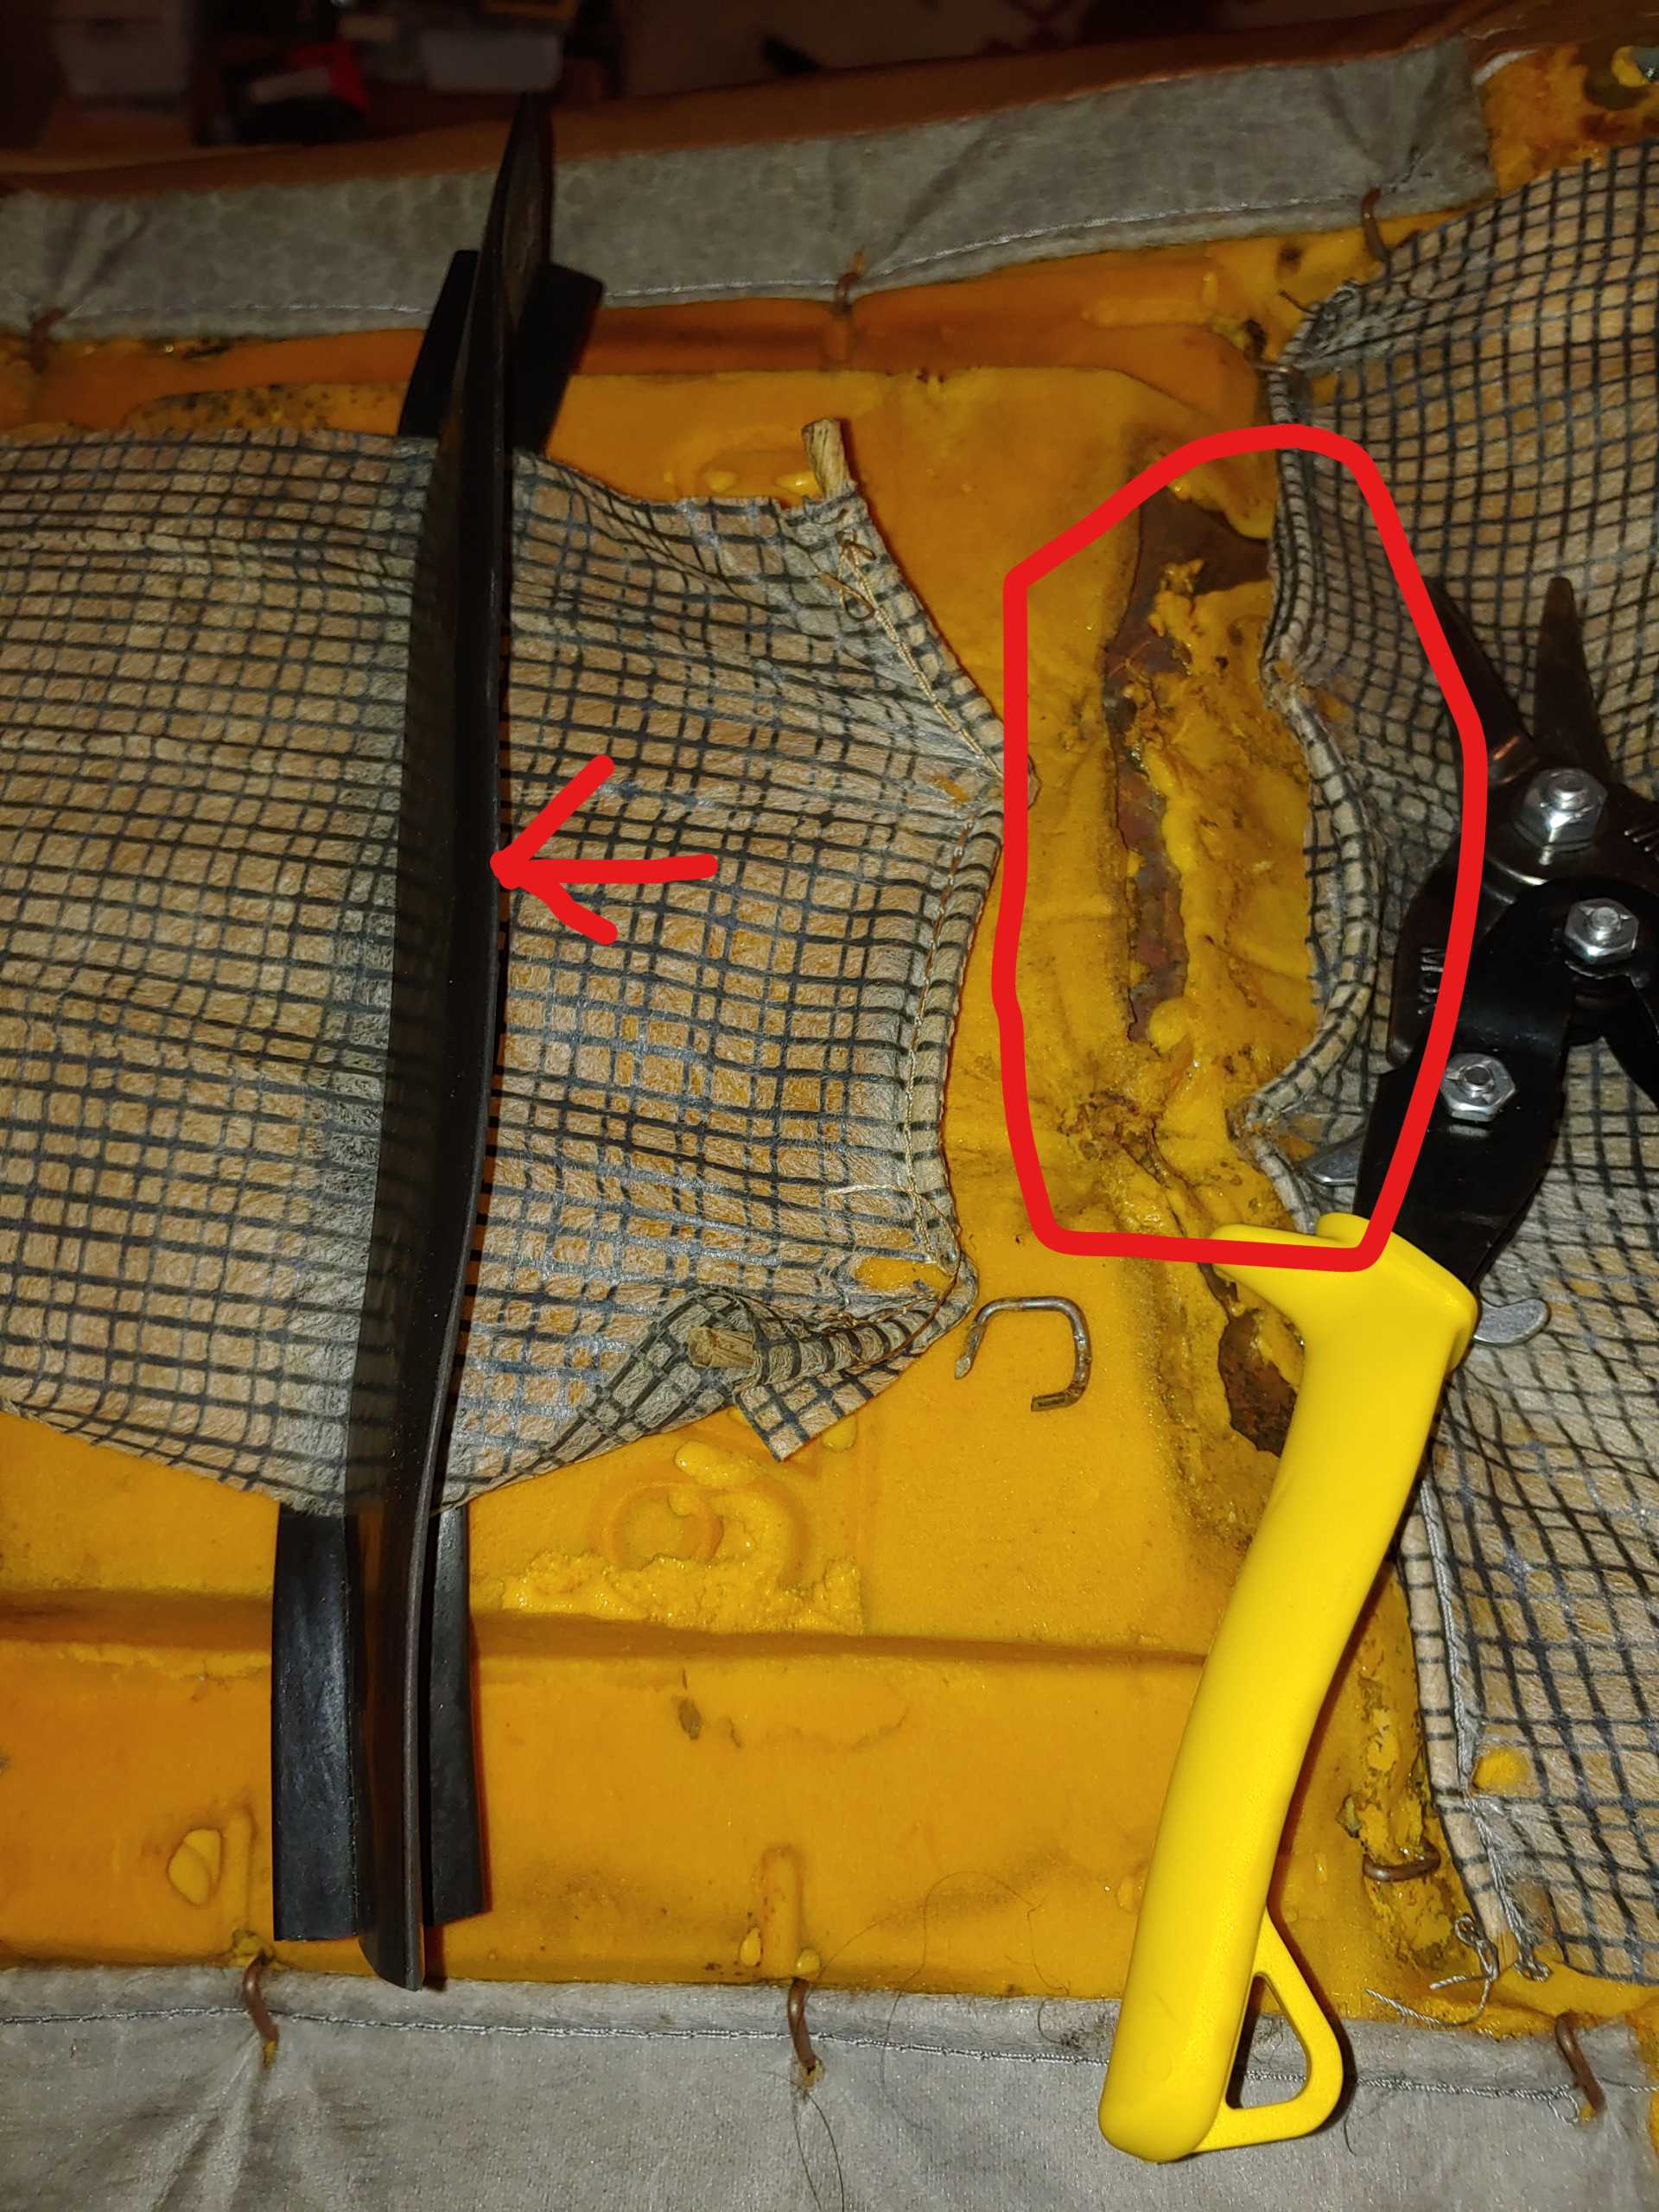
Next, remove the four hog rings on each side of the seat bottom, and roll the fabric up on to the top of the cushion.
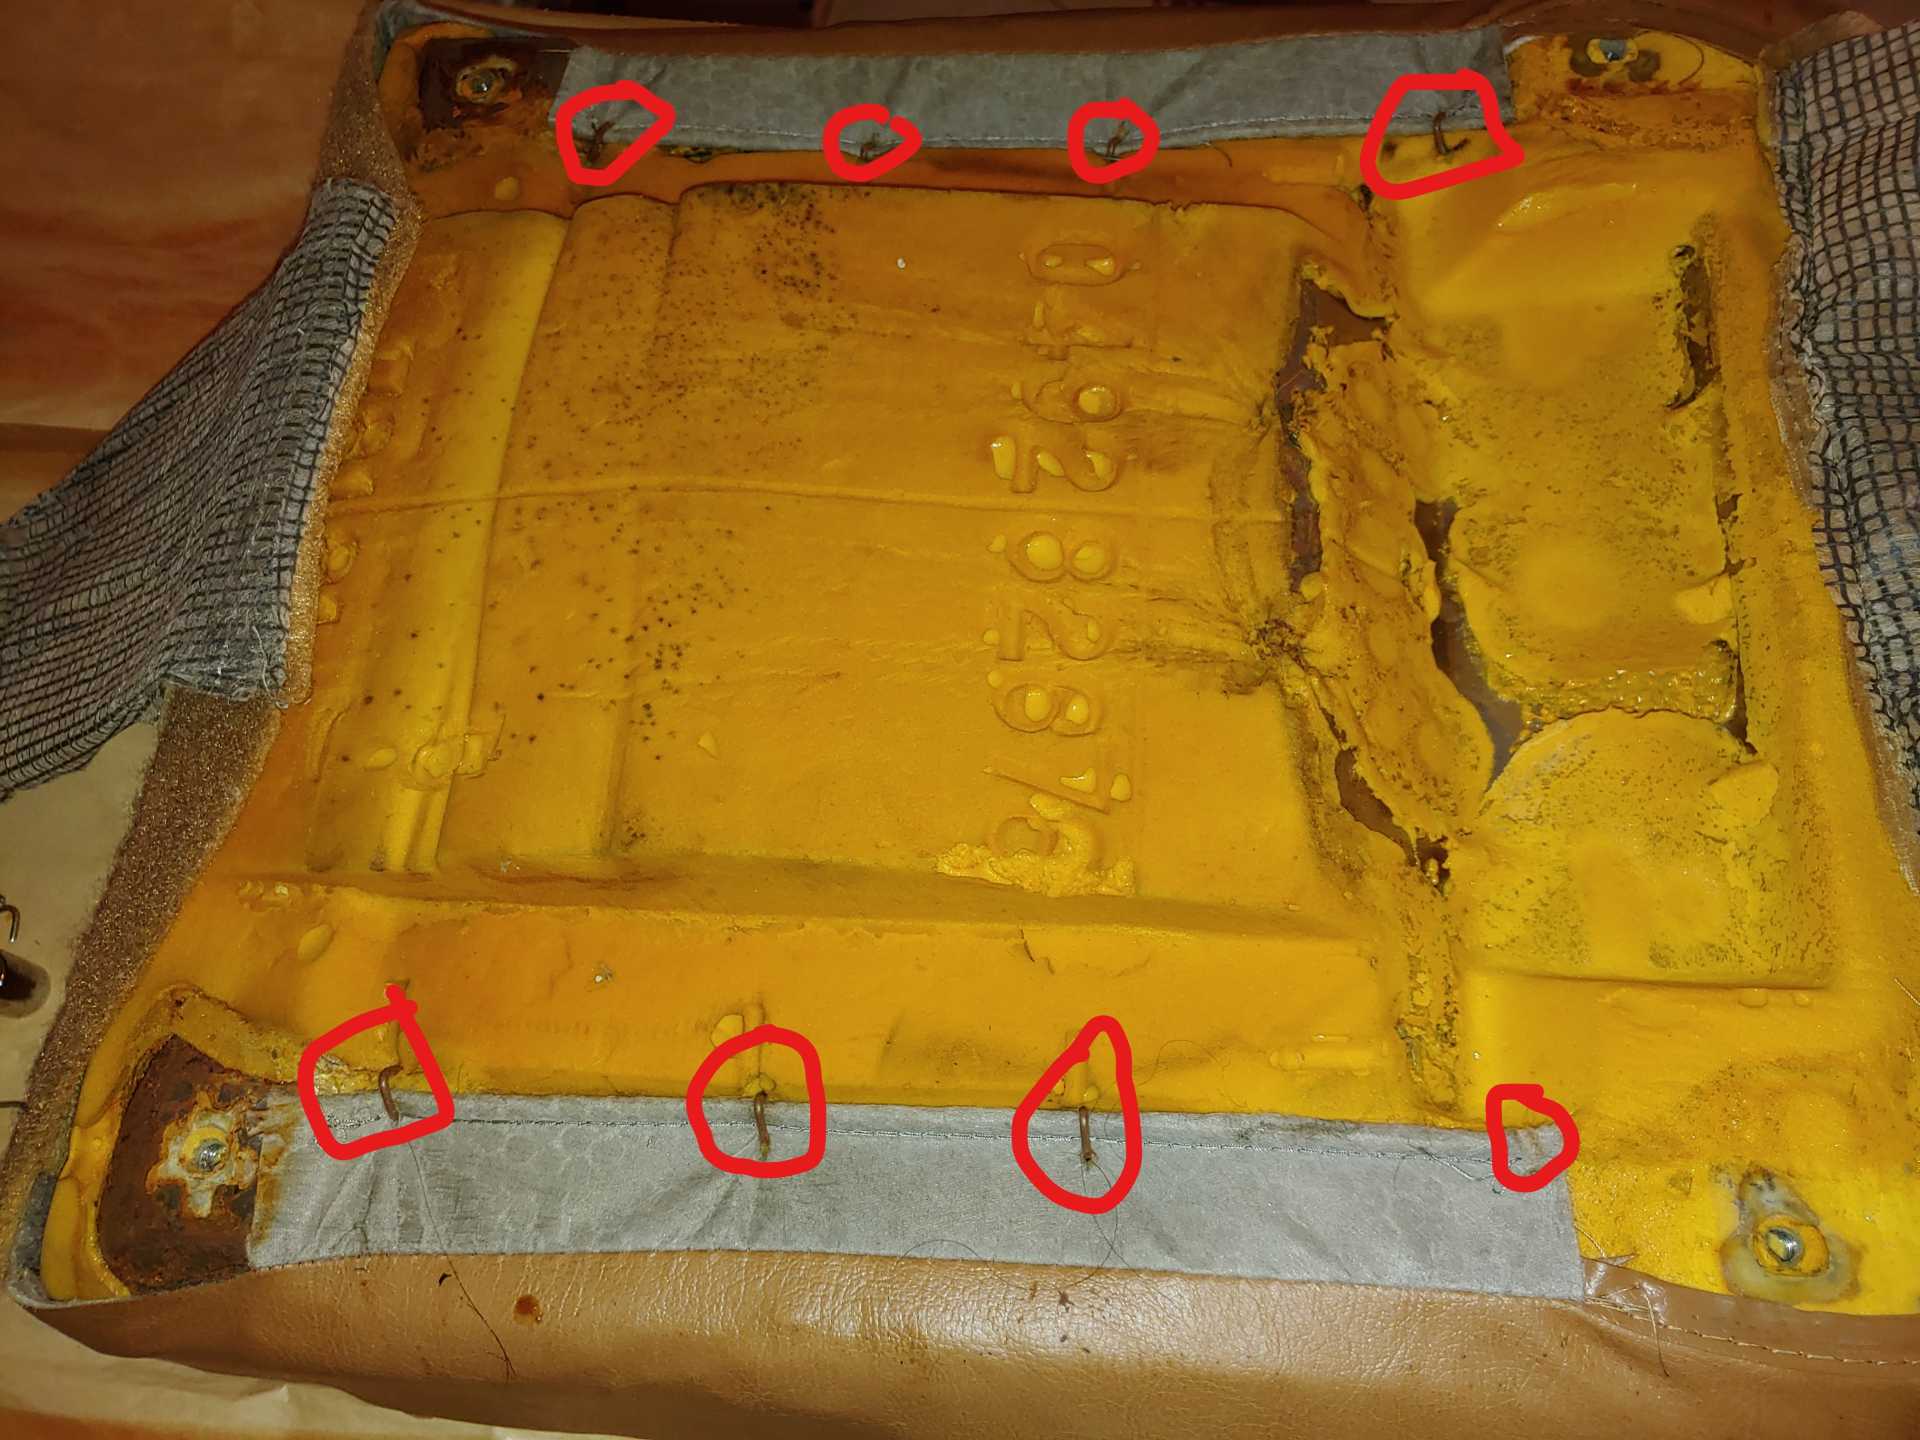
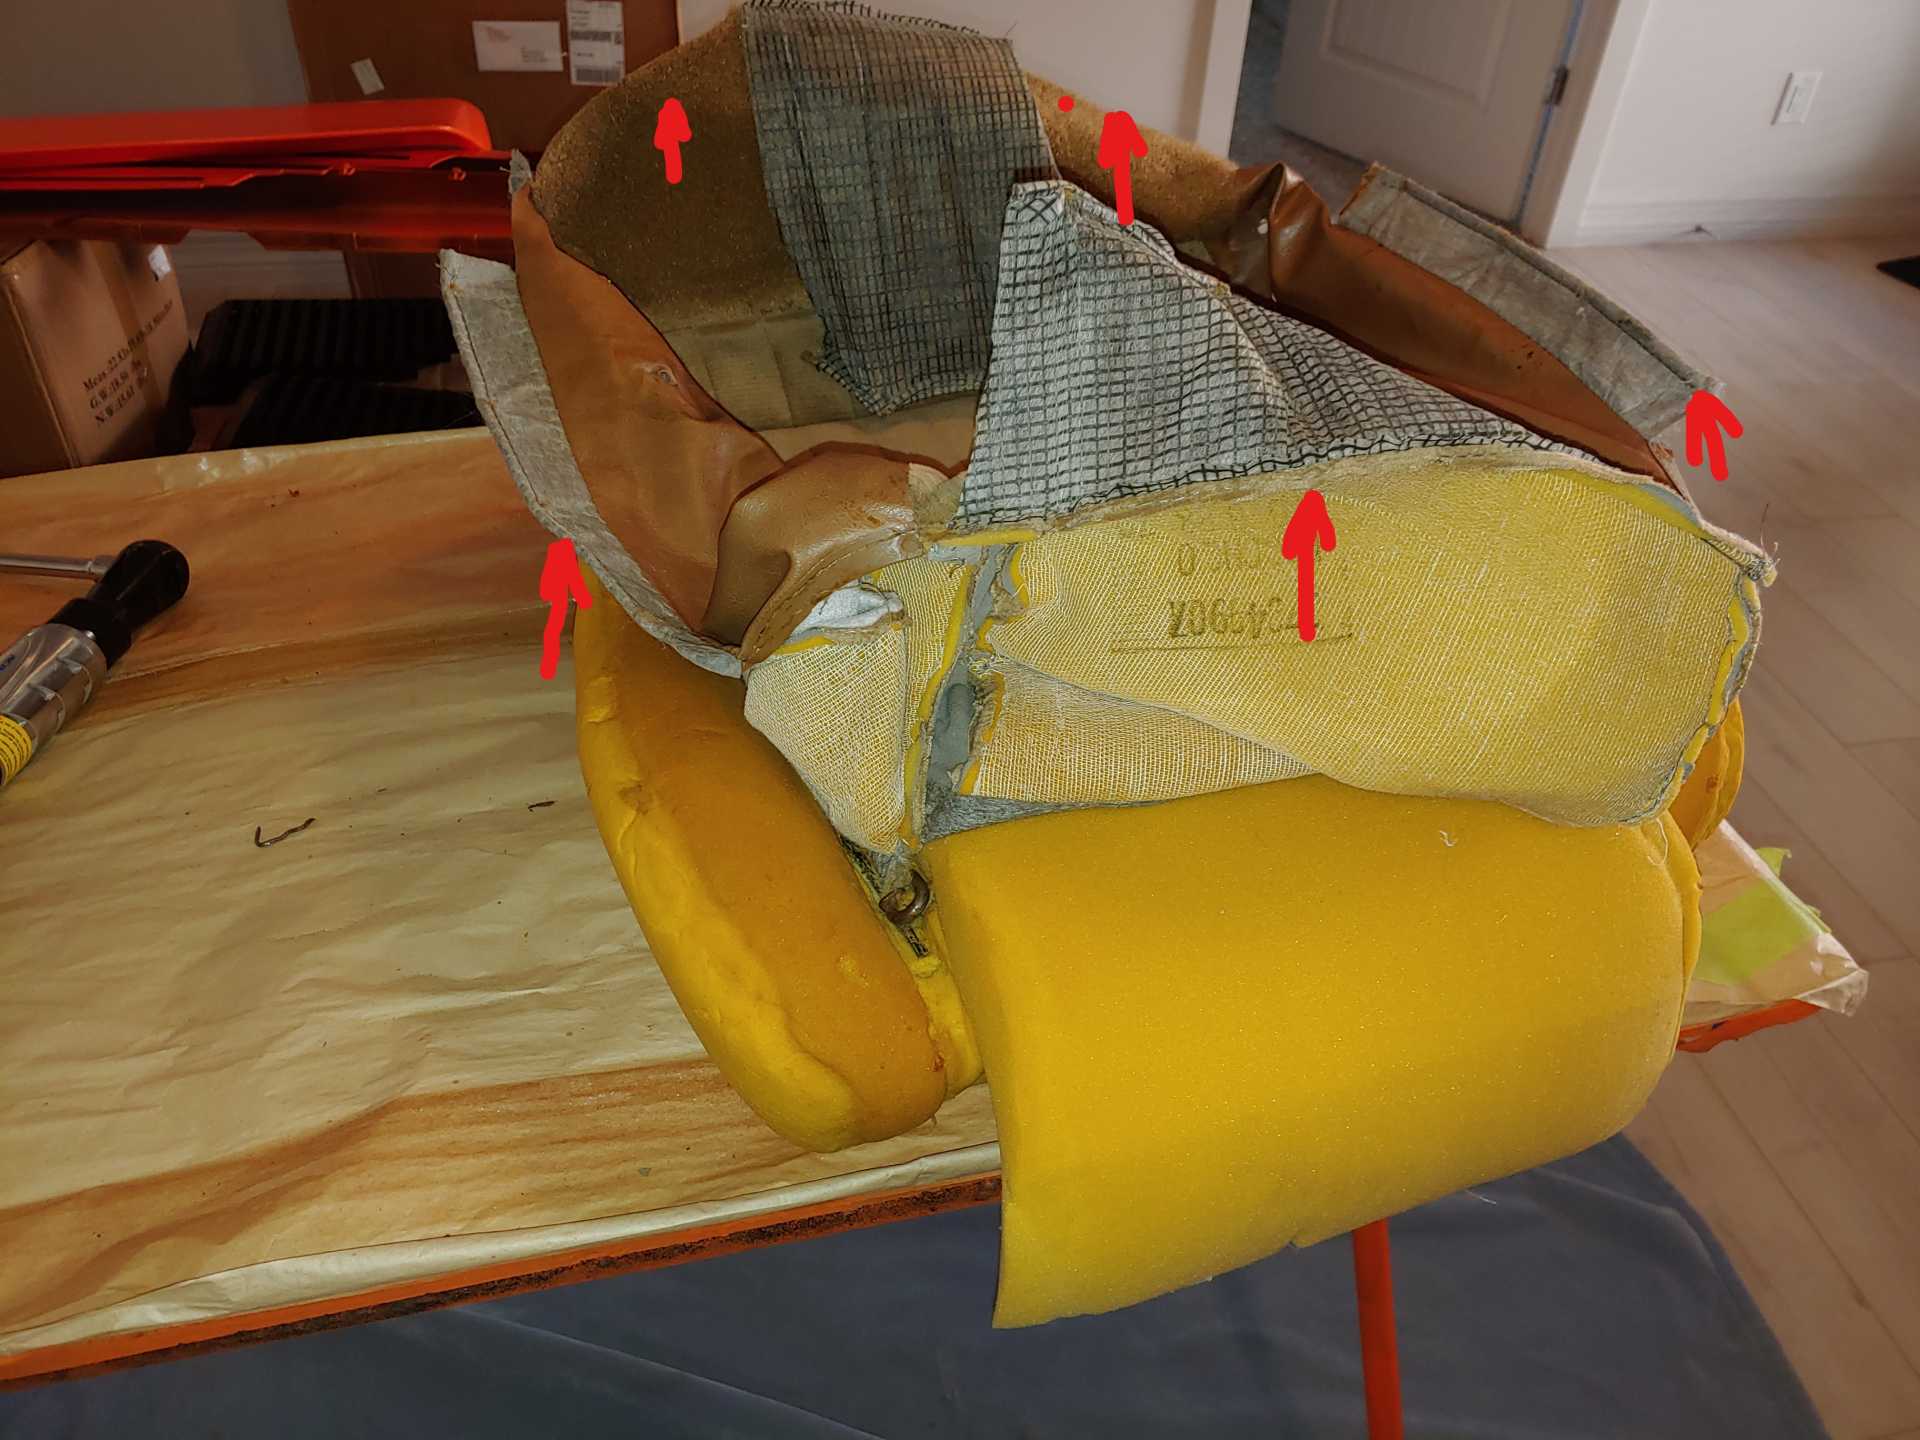
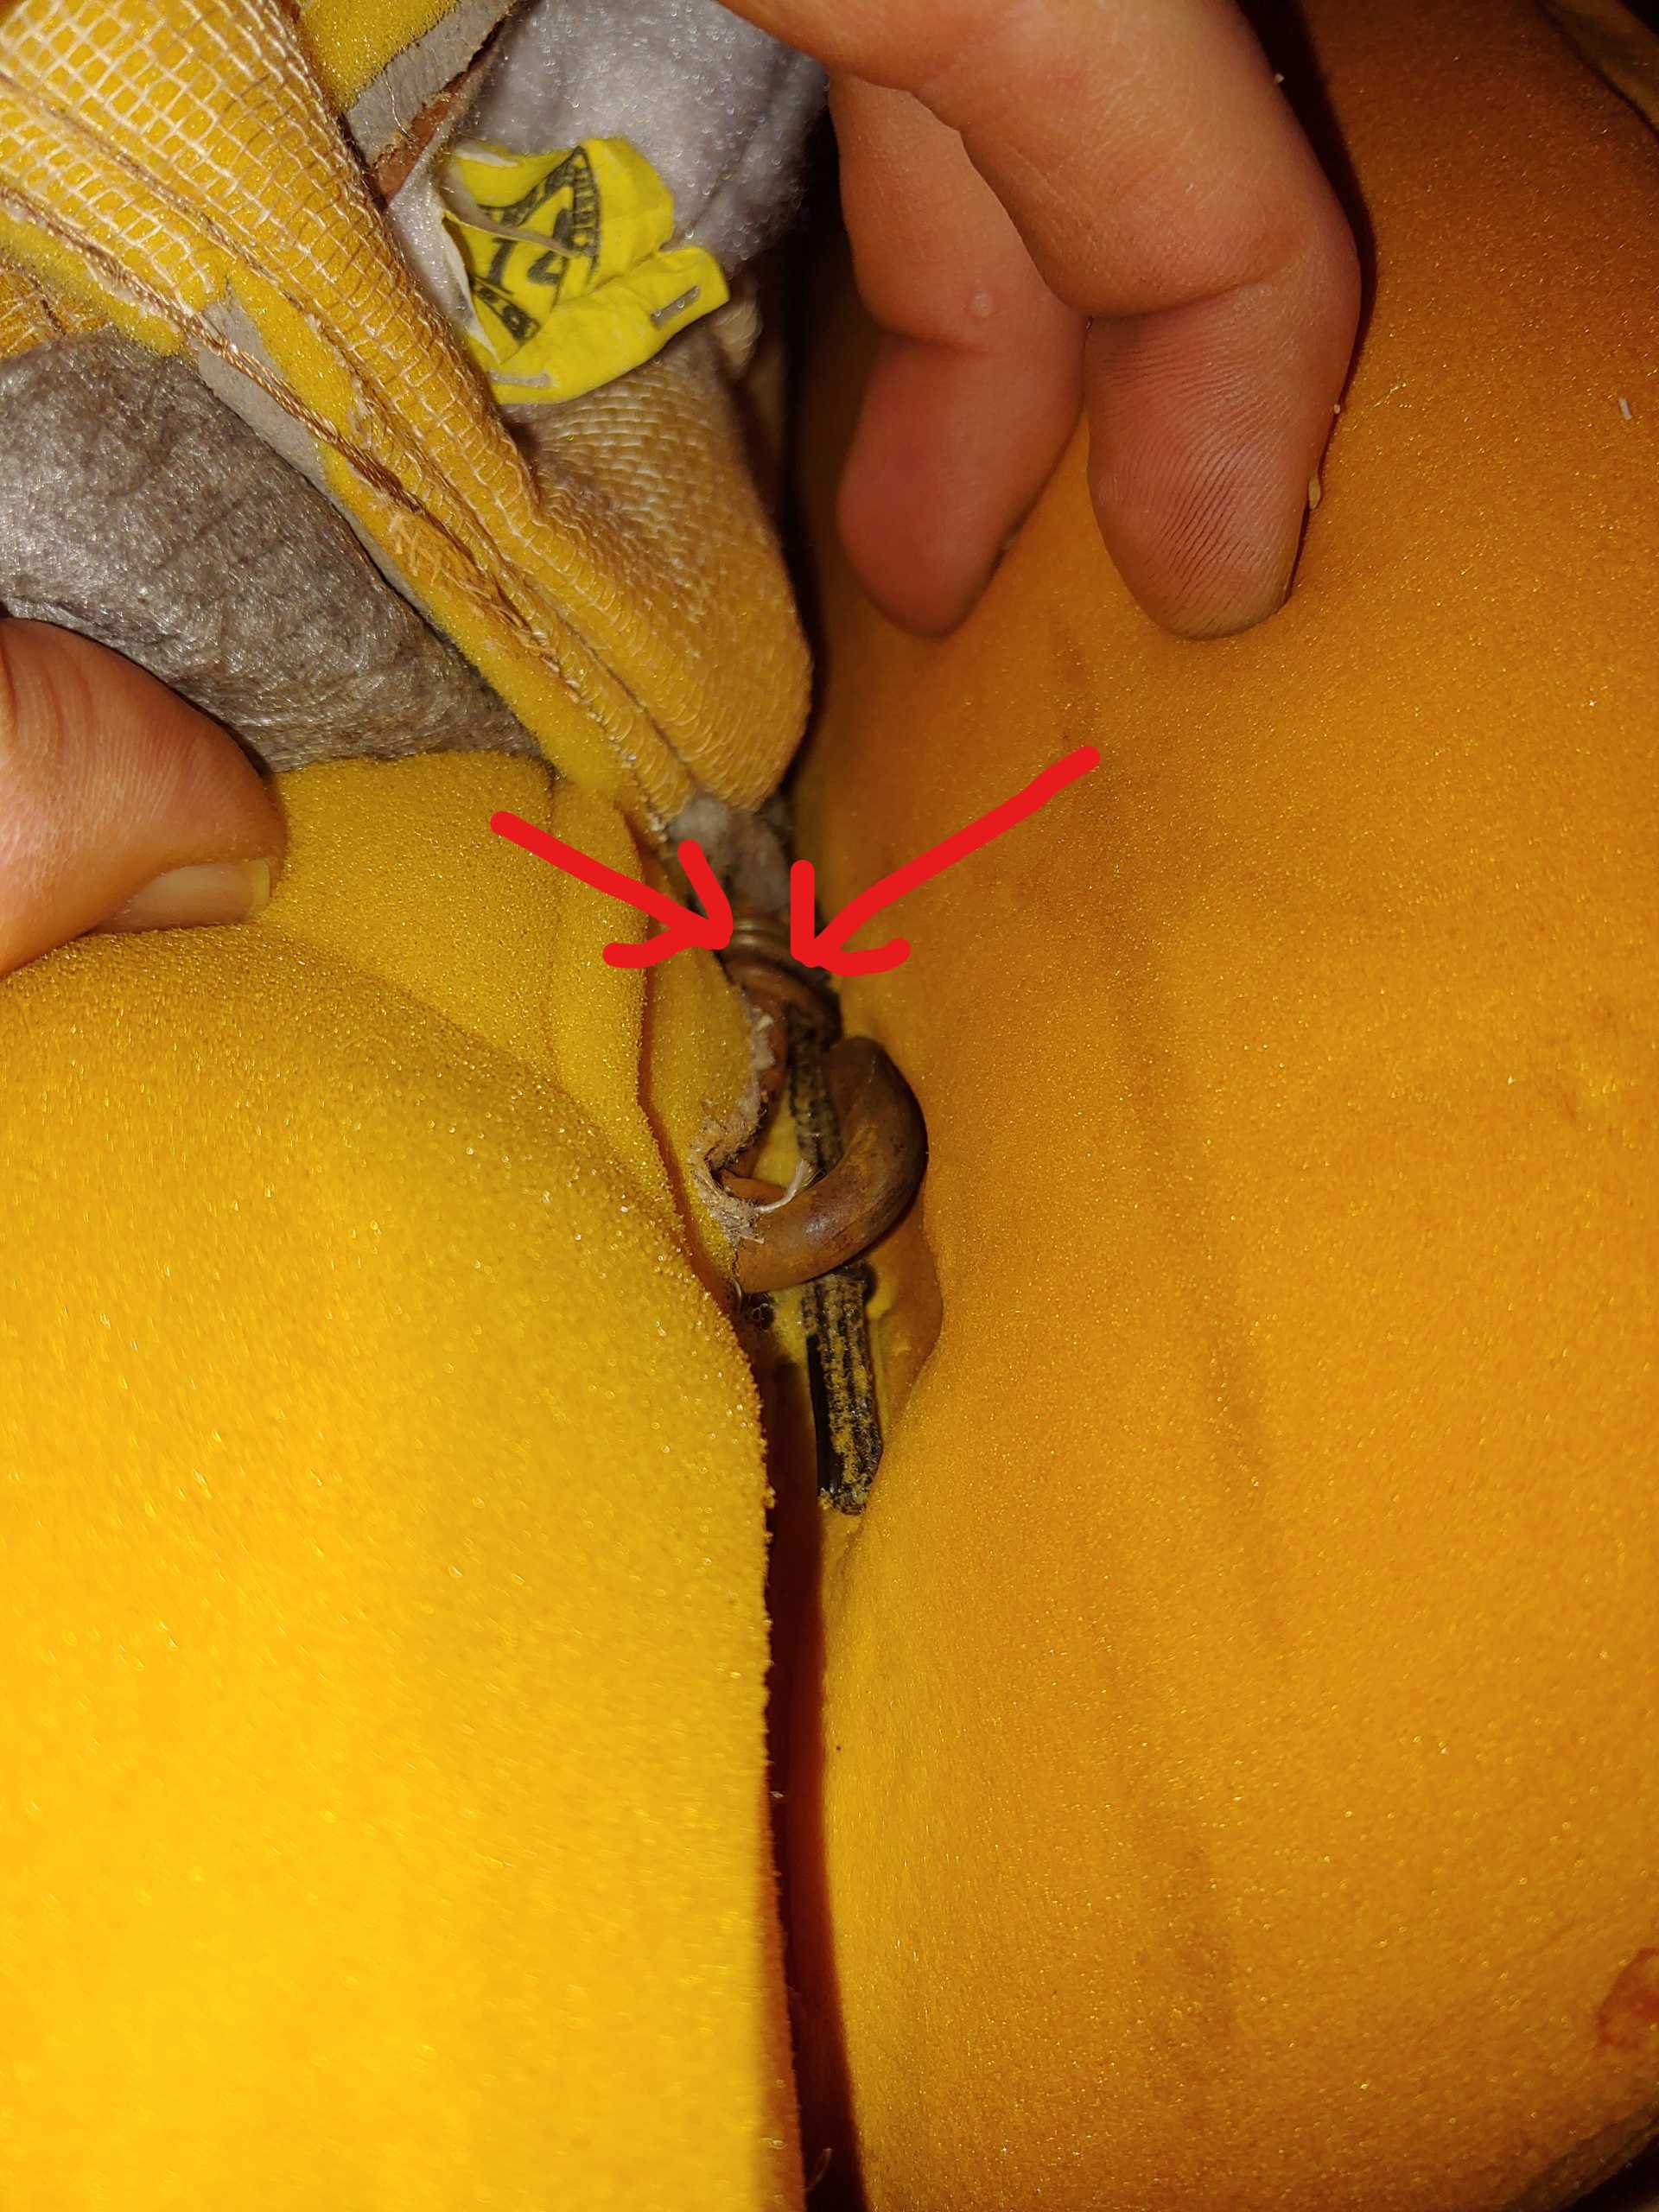
Remove the hog rings from the listing rods which are located between the side bolster and the seat cushion. Pull the listing rods out and set aside.
Remove the fabric from the seat bottom.
Remove the velcro strips (88 only)
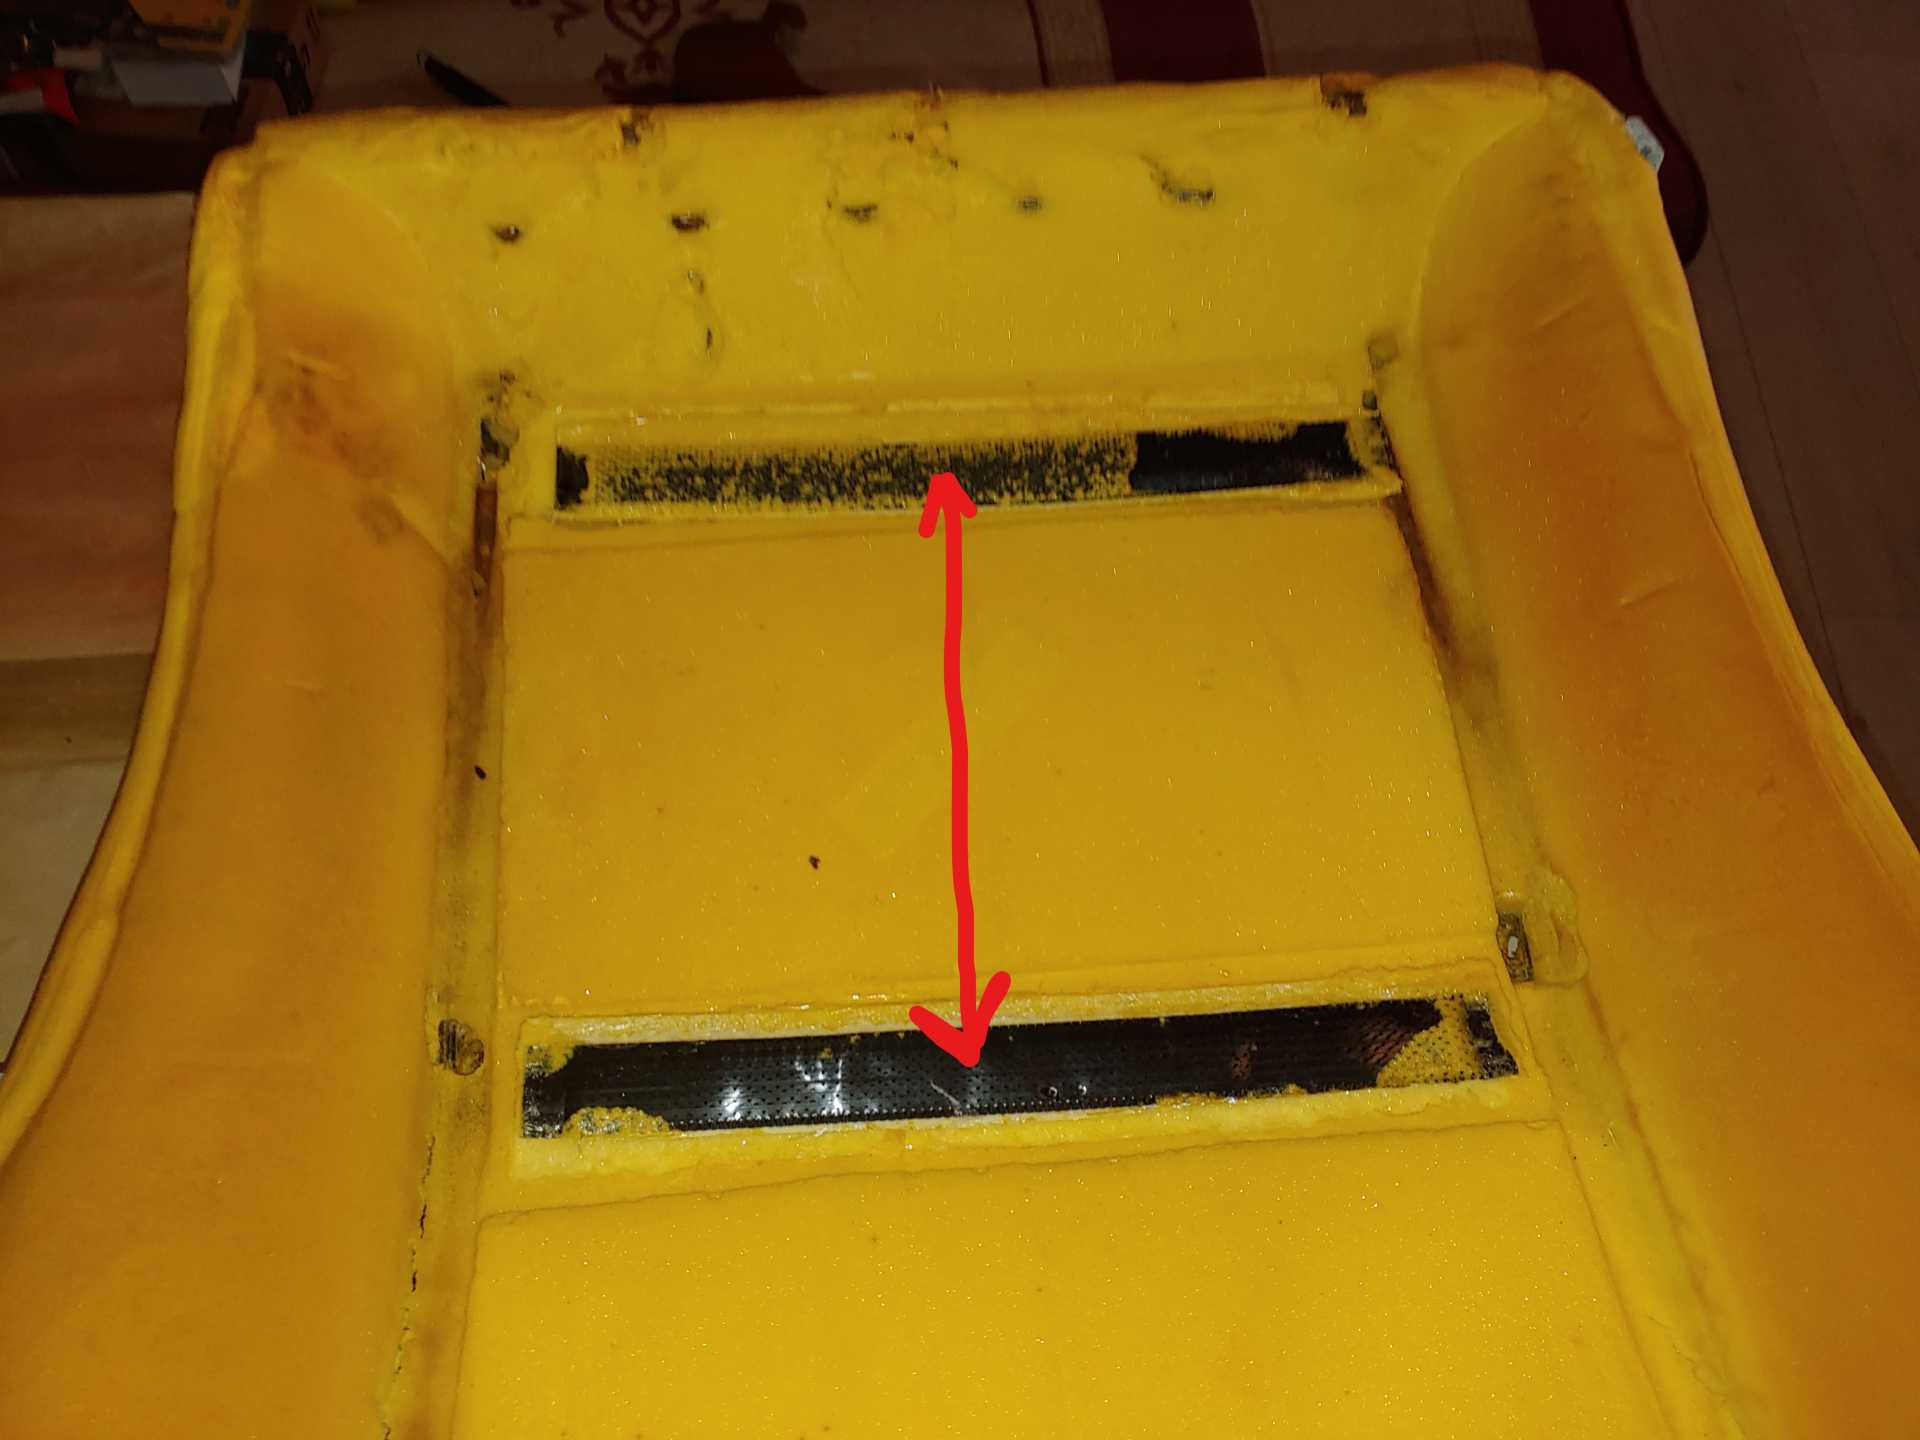
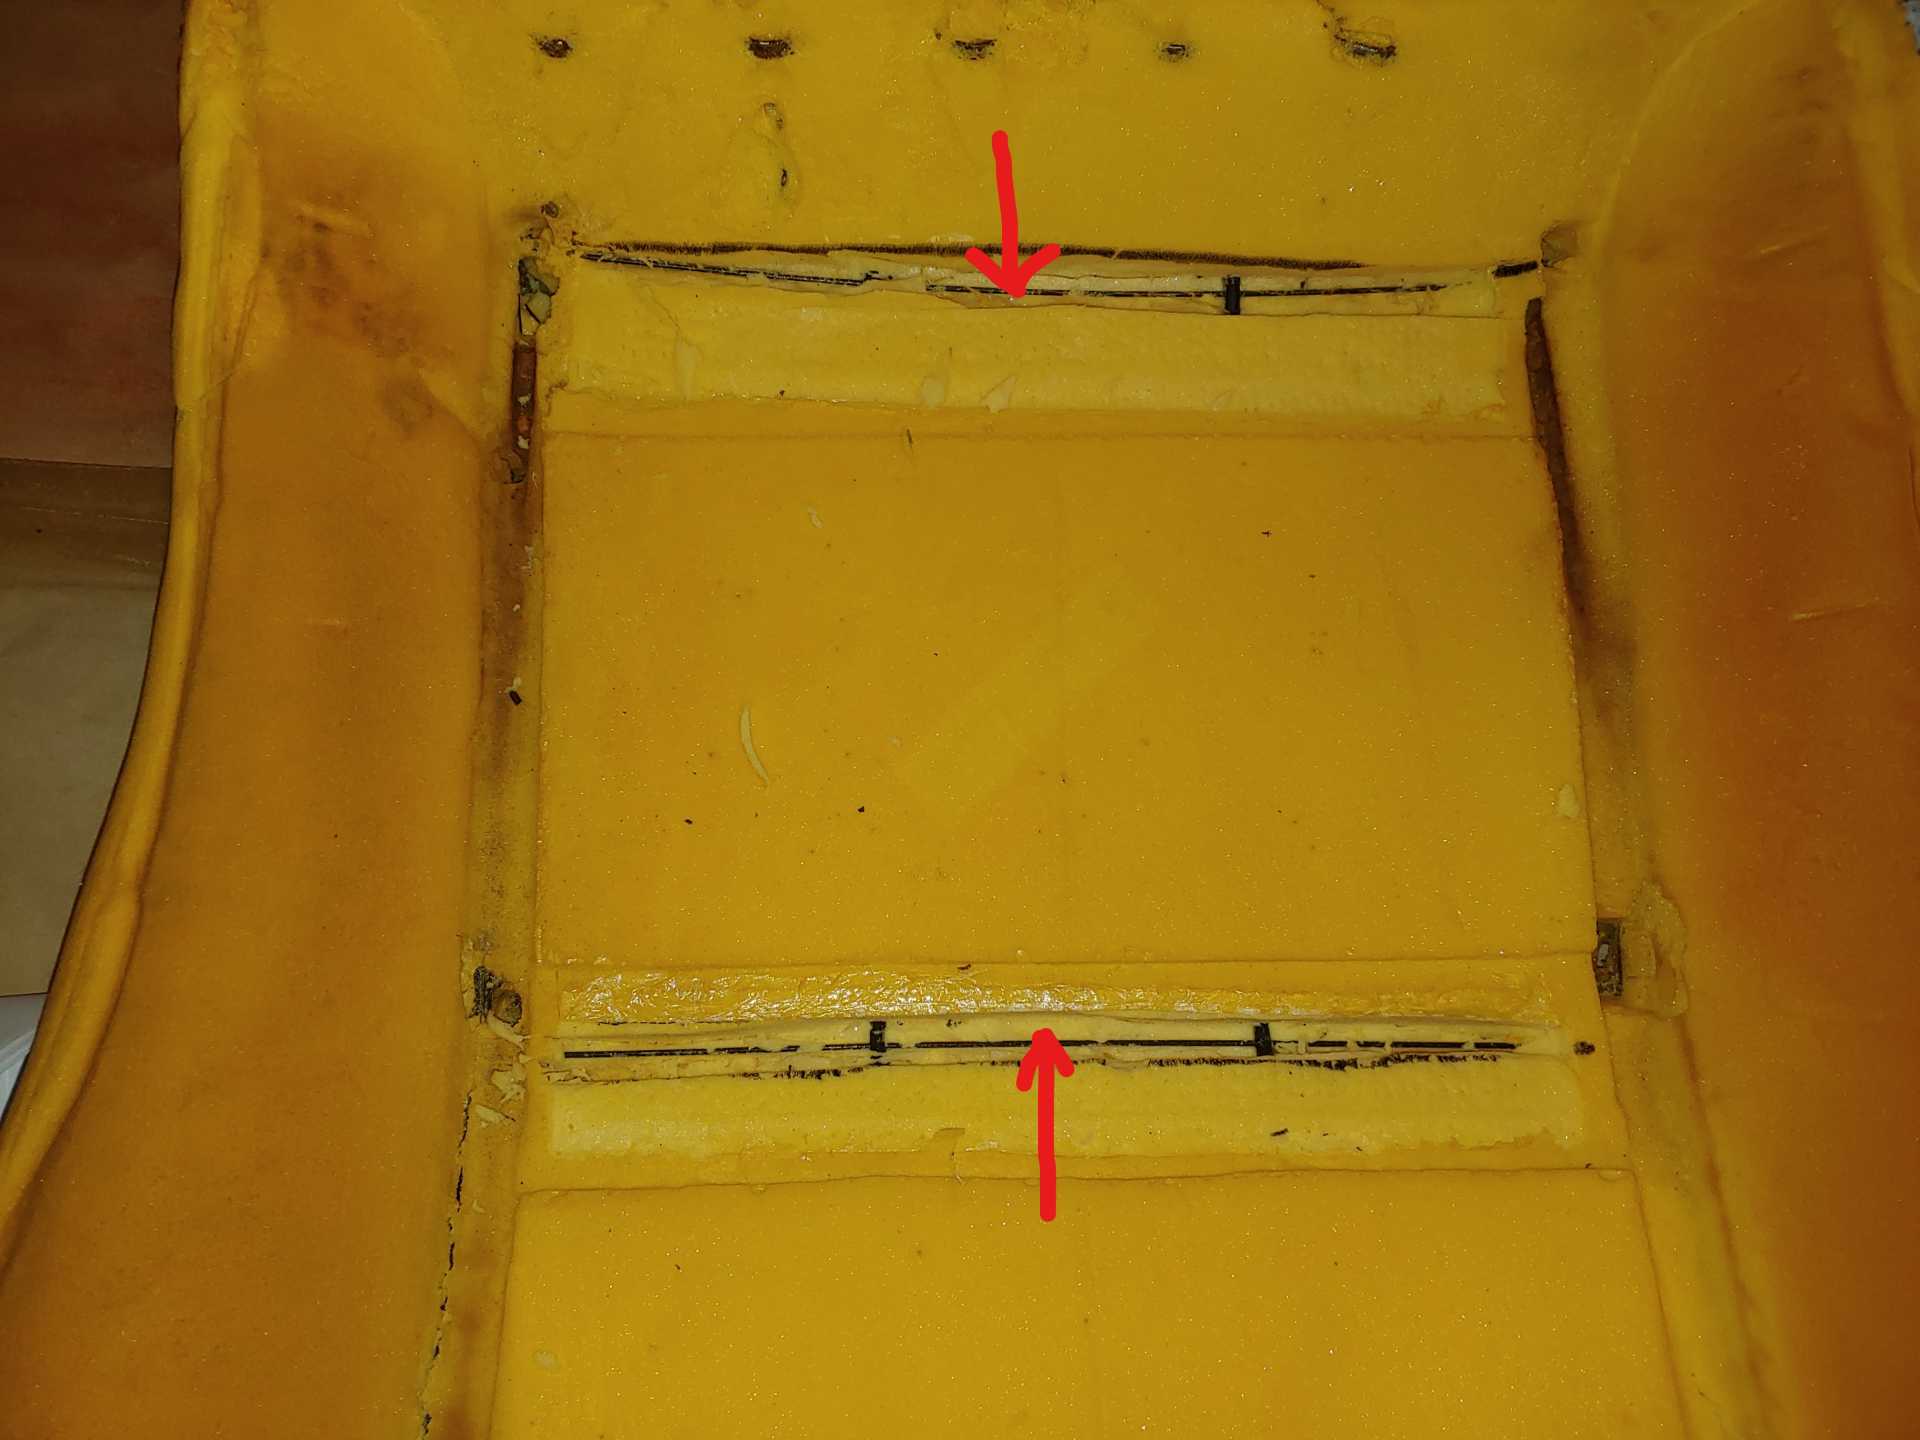
Use a razor blade to remove two small strips of foam to reveal the front and center listing wires.
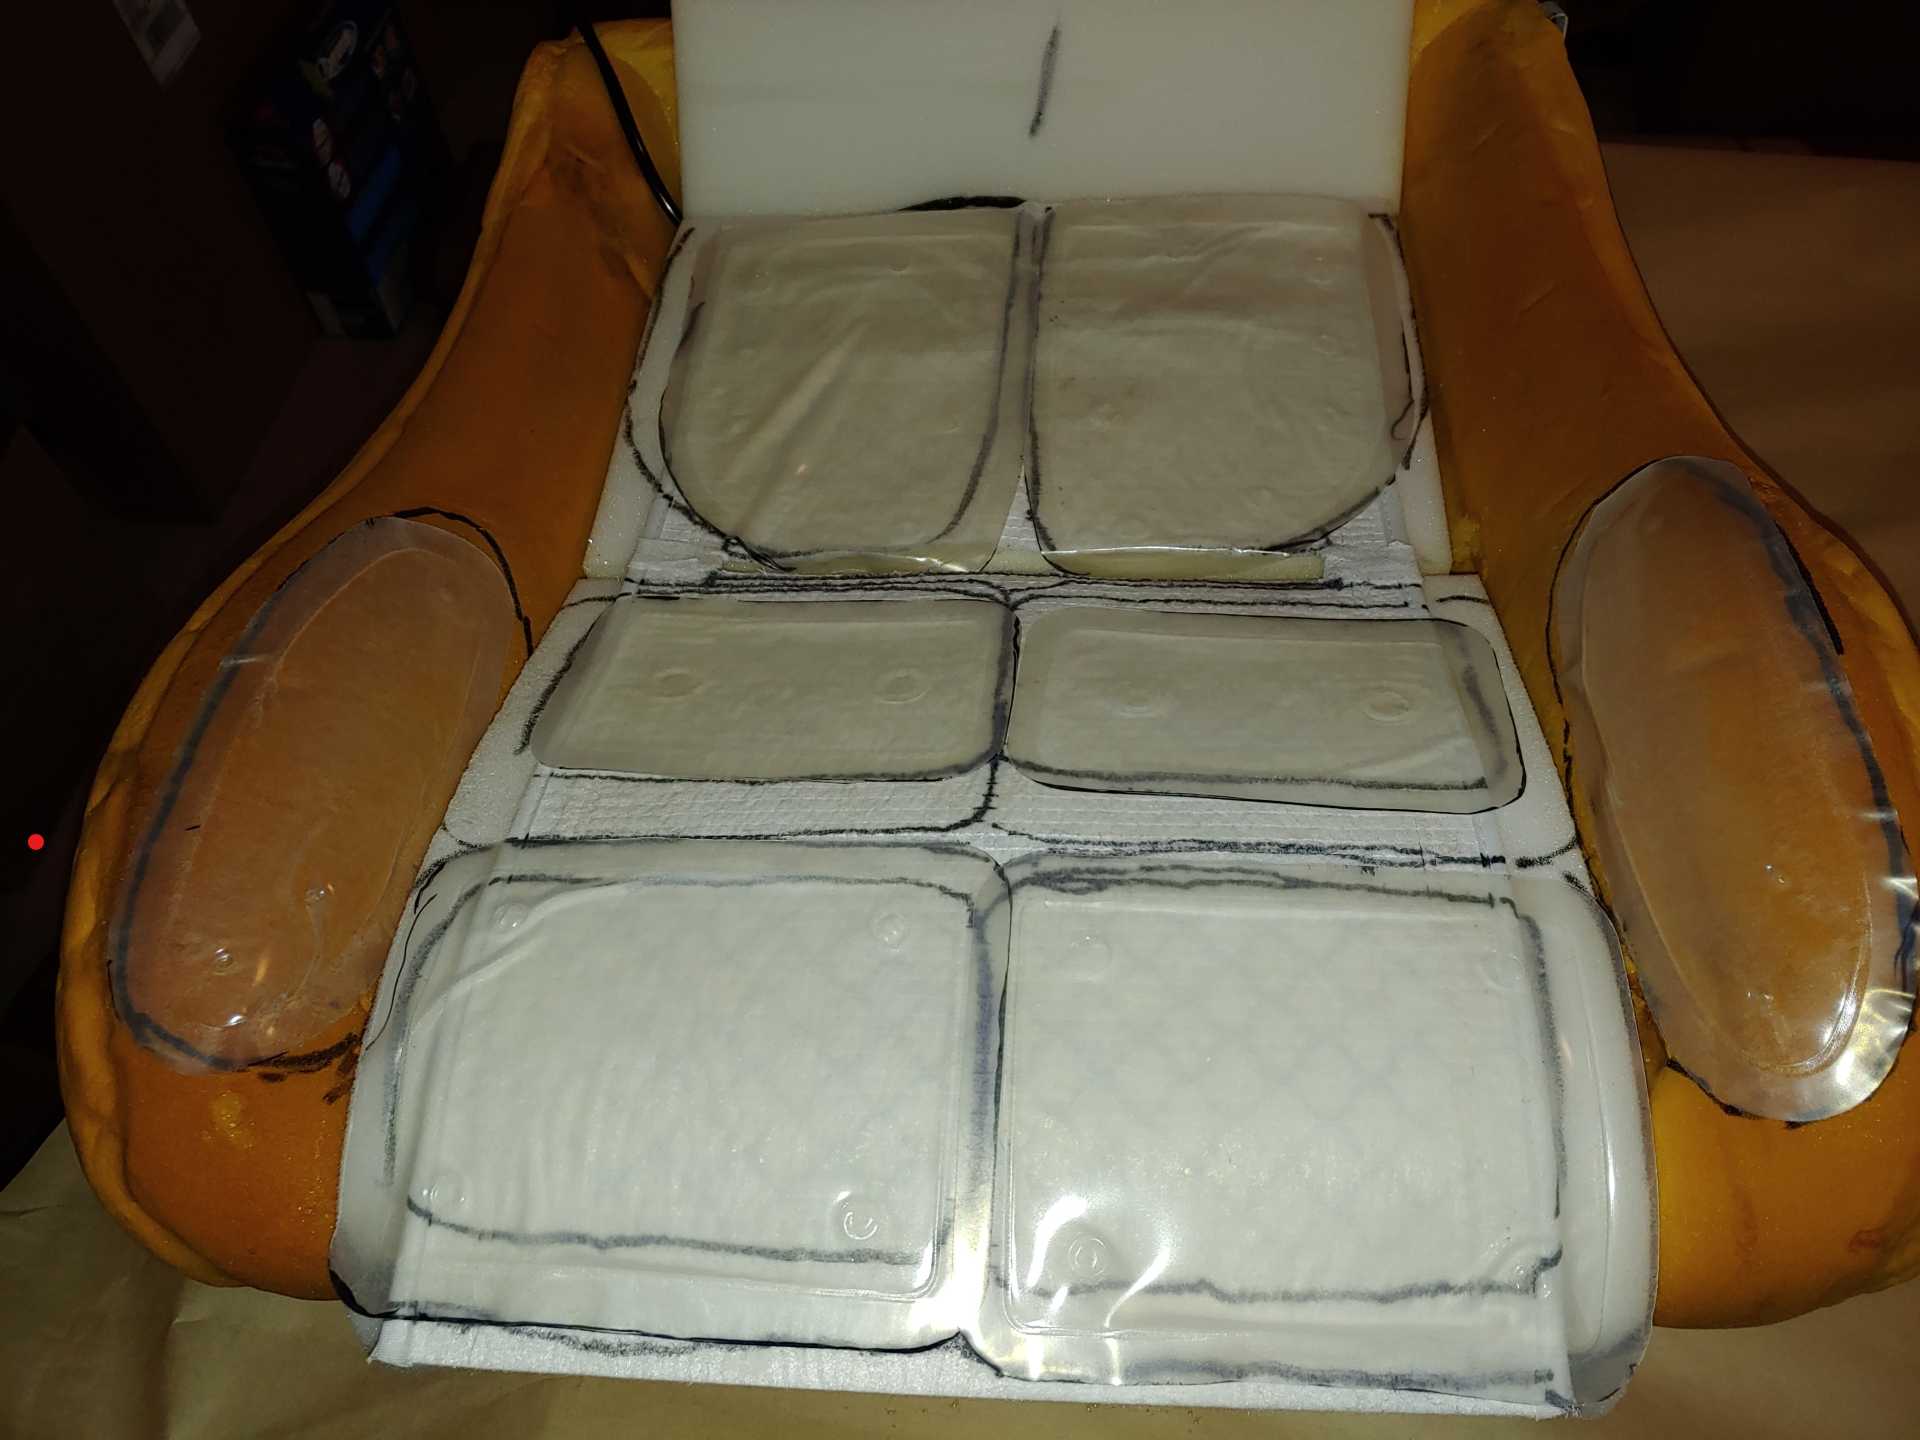
There are three foam pads marked 1, 2, and 3. Starting with pad #1 spray the back side of it, and the corresponding area on the seat bottom with adhesive, and press pad firmly into place. Repeat these steps for pads 2, and 3 making sure to leave enough space between them to access the listing wires.

Lay the seat heater on the seat bottom tape side down with the wire harness toward the back. Make sure that the heater is centered and laying flat. Next, cut out a section of the heating element to access the listing wire, Leave the areas shaded in red intact (do not cut all the way across).

Now, the heating element can be secured to the seat cushion by lifting each edge and removing the adhesive backing, and applying pressure to the area. Make sure that the element is smooth and flat again.

Liquicell Pads: Lay out pads on the seat cushion and draw a line around them once they are properly placed. Next remove the pads from the seat cushion, lay them out and spray them with adhesive. using the provided templates, spray adhesive on the seat cushion also, two coats are recommended. Apply the pads to their marked locations ensuring that they are smooth and flat.

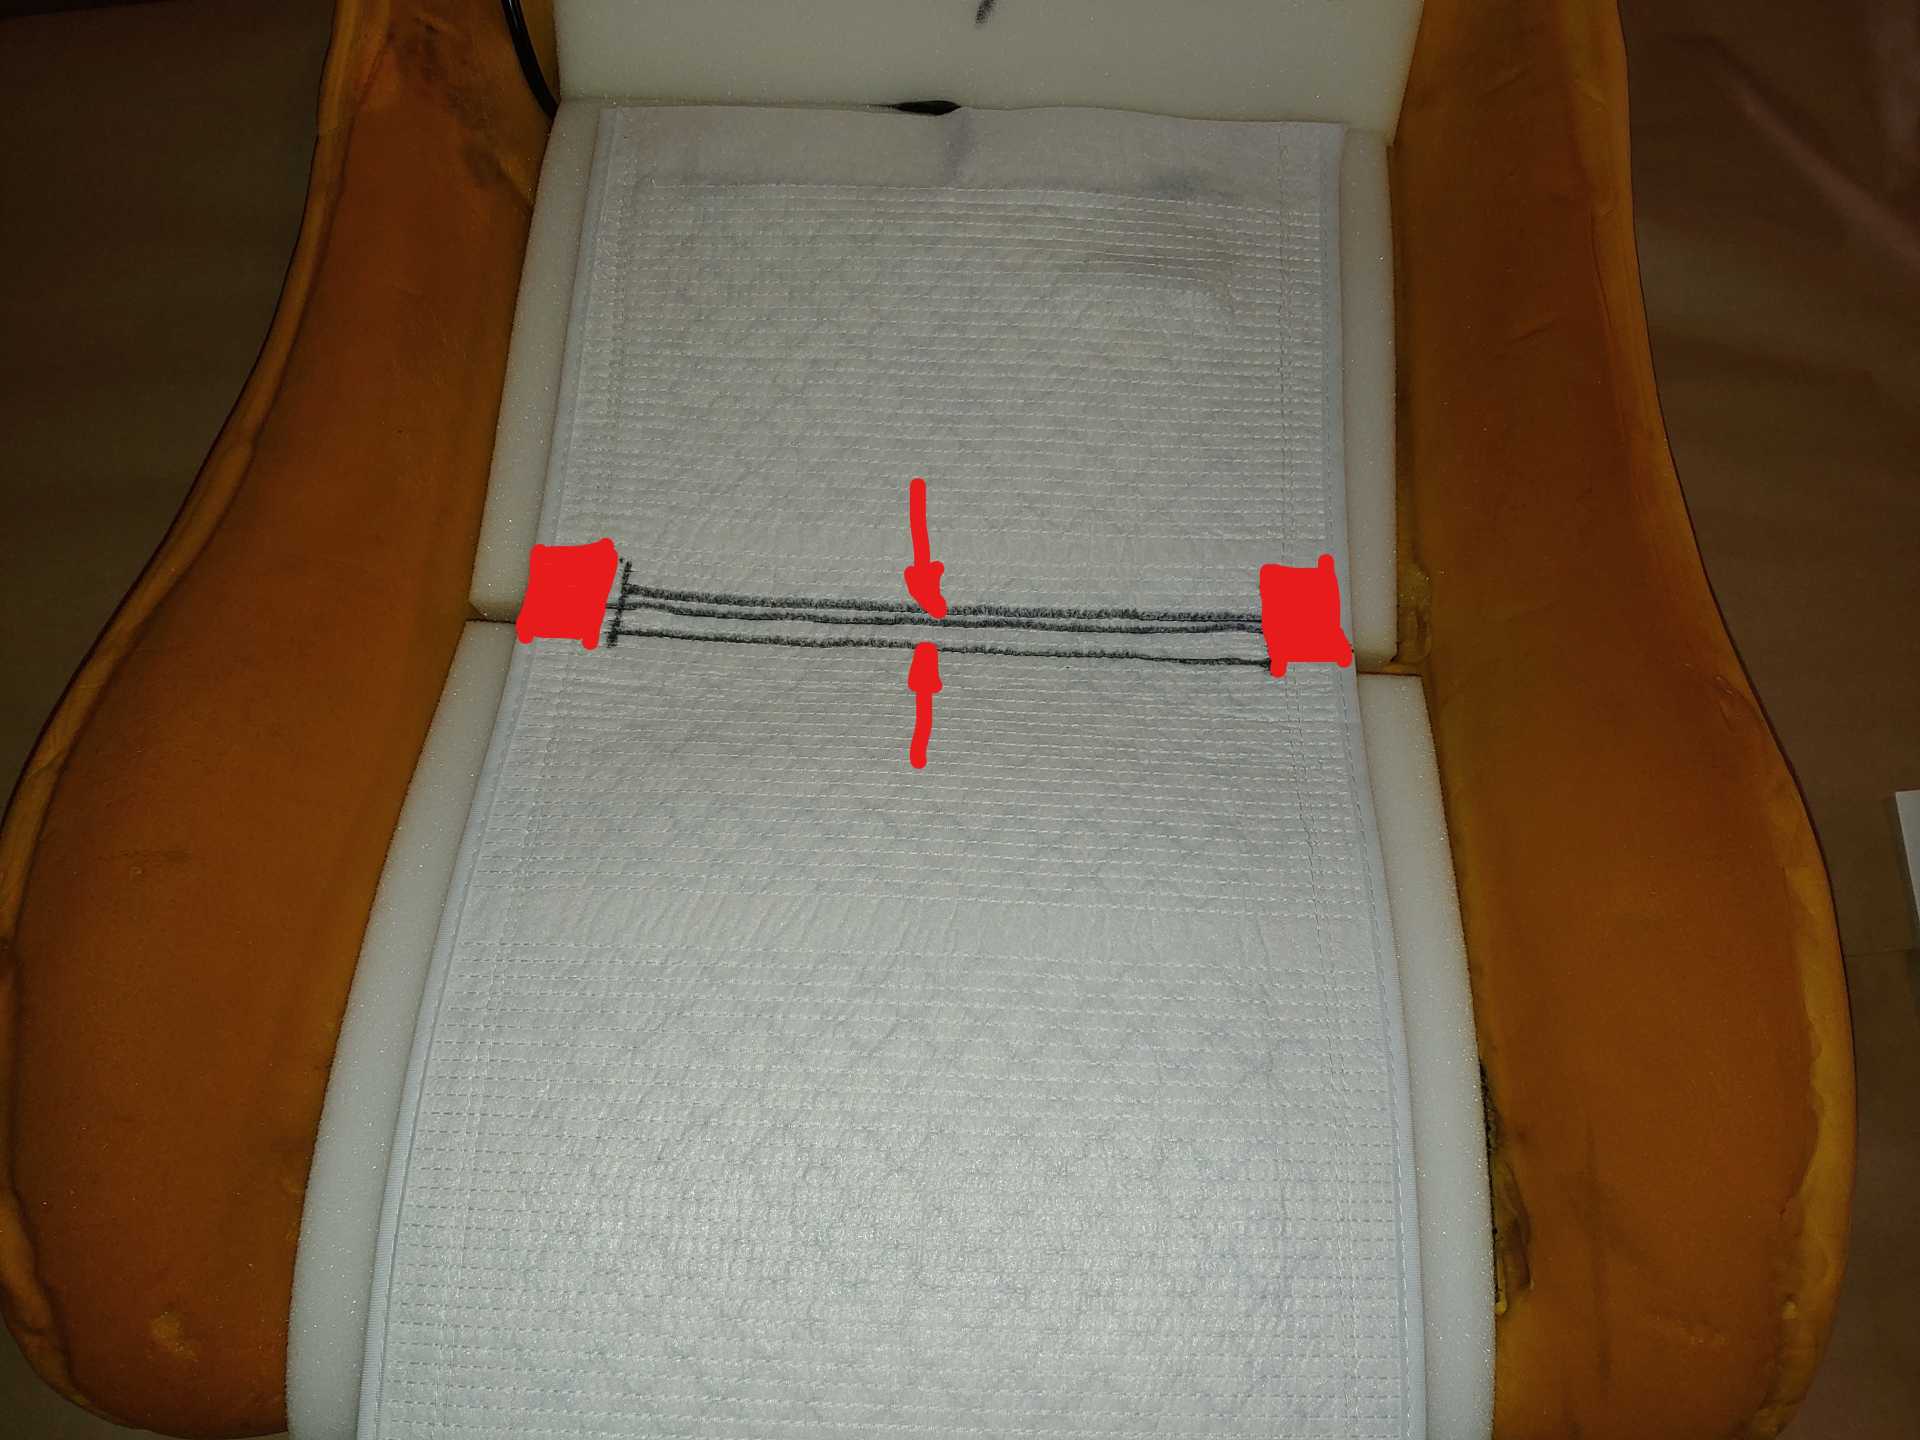
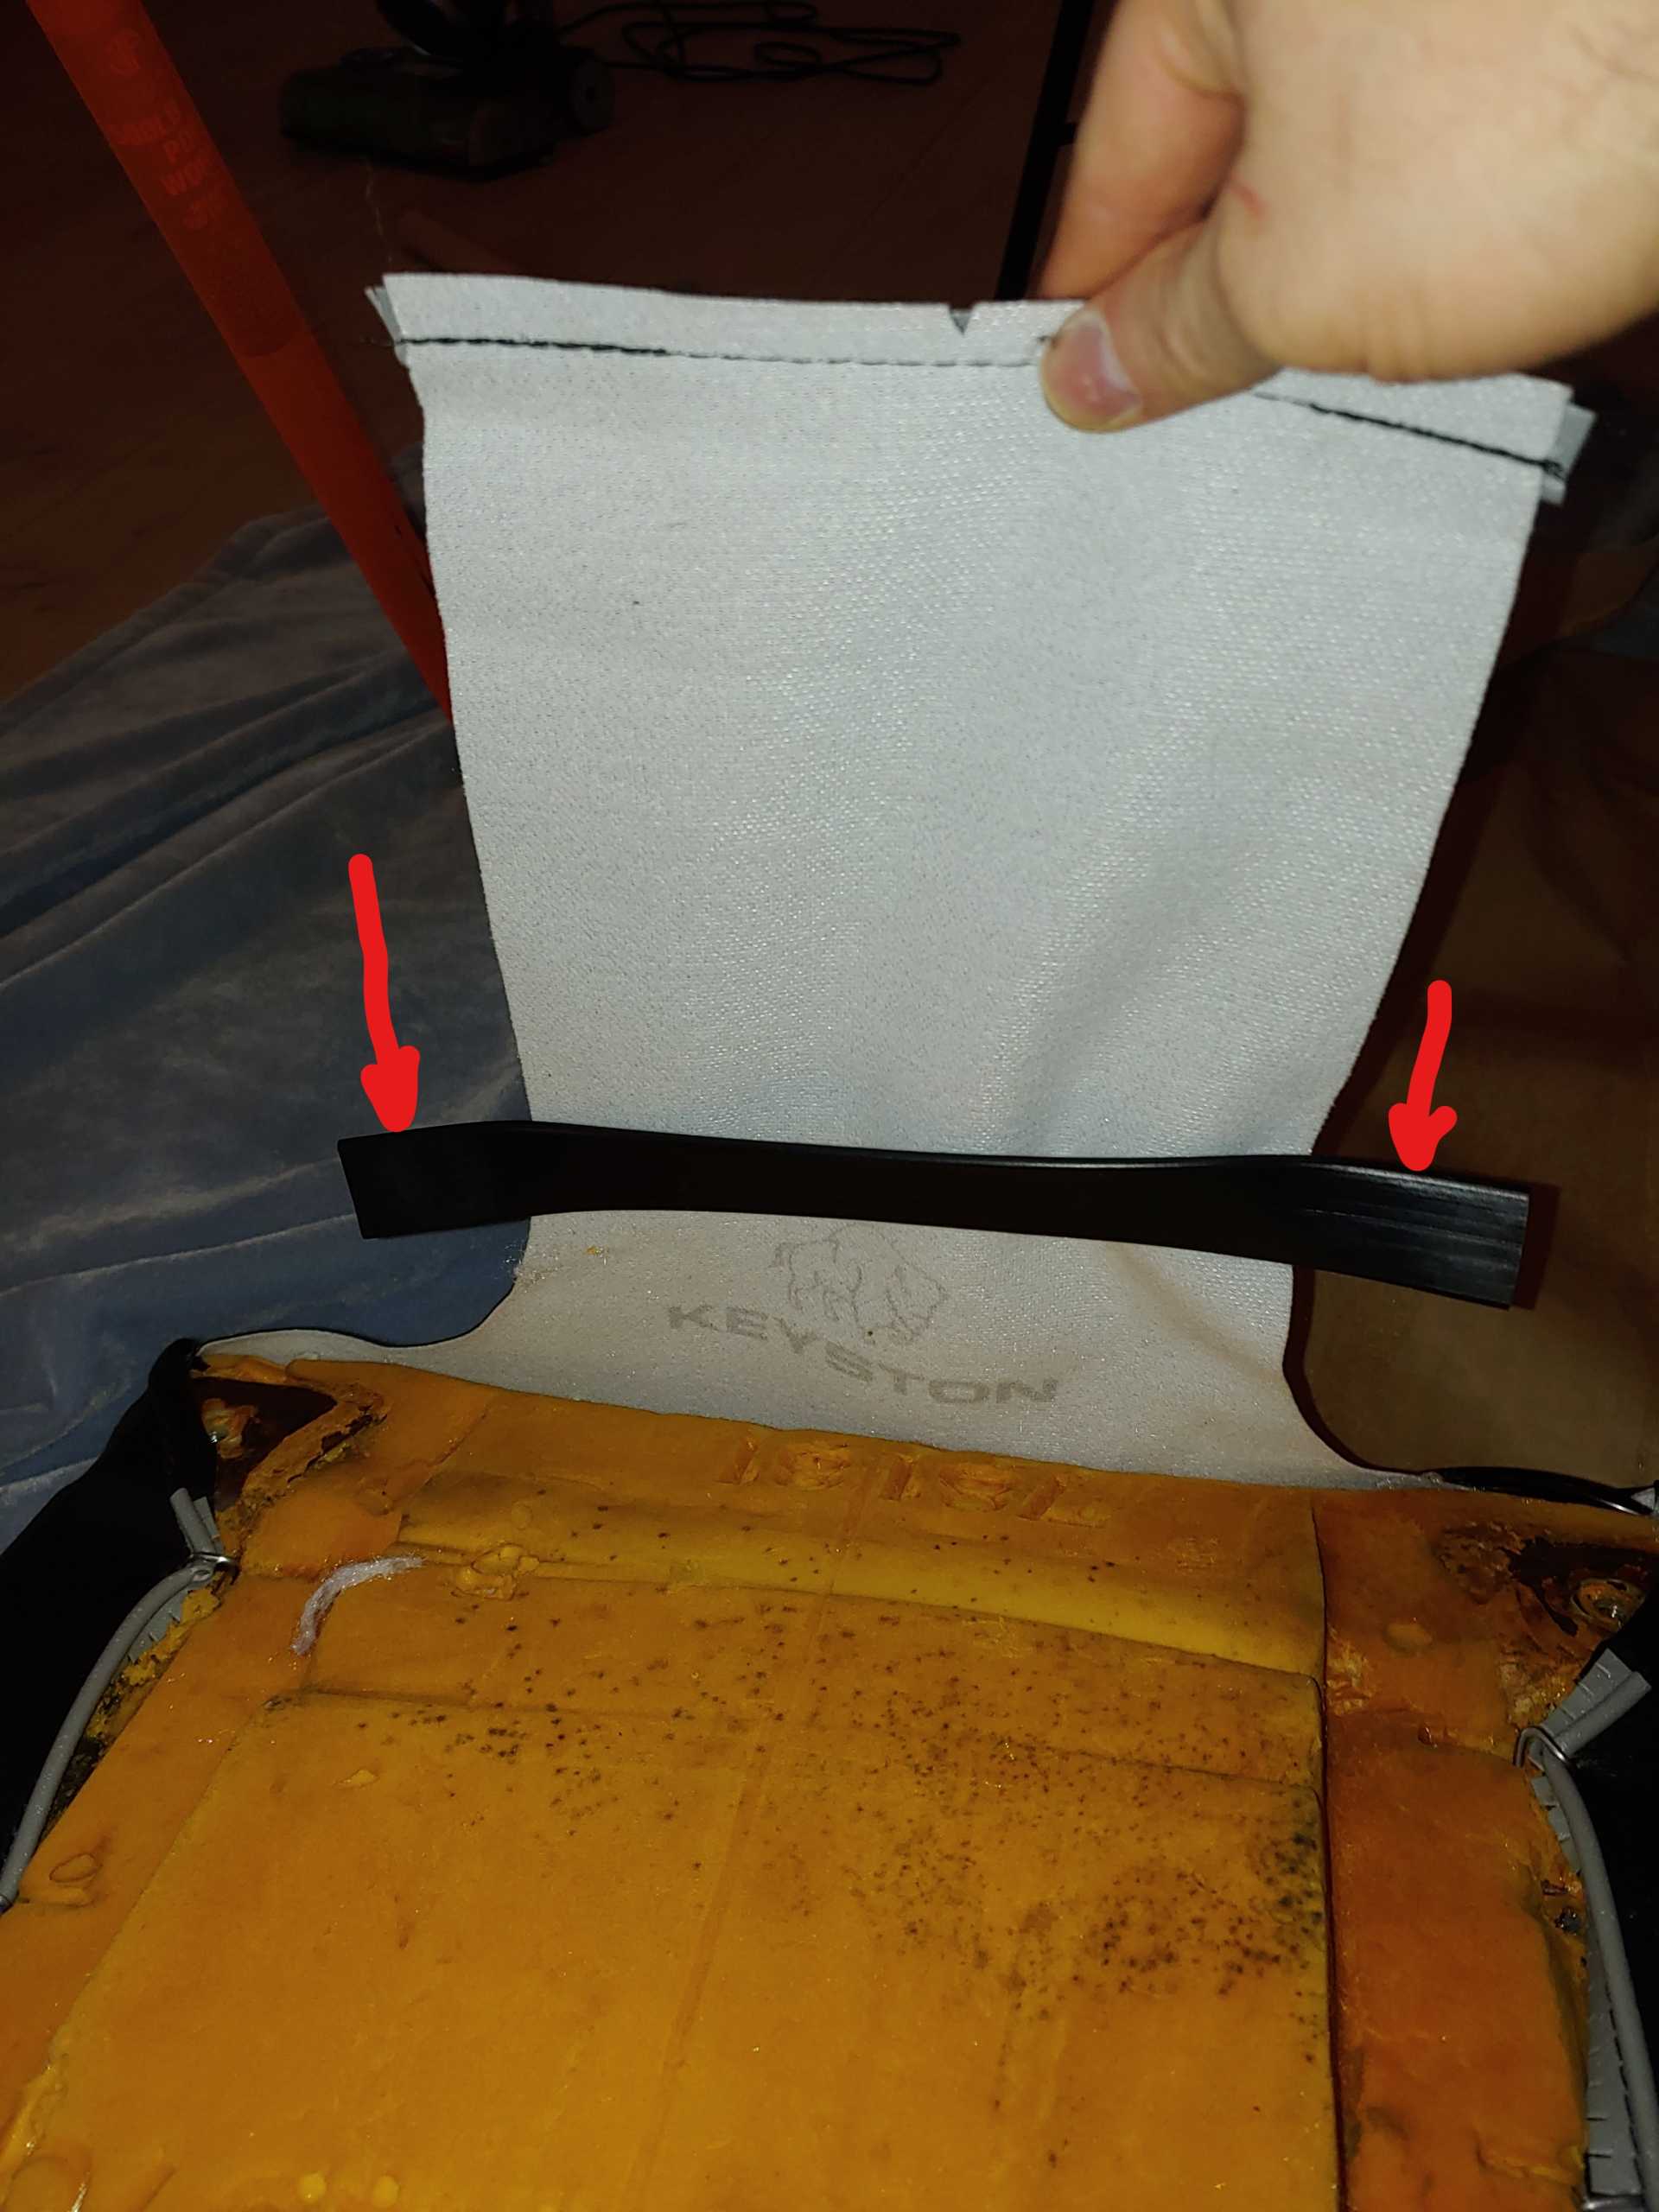
Seat cover: Take the new bottom seat cover and set it on top of the seat bottom. Locate the center listing wire on the underside of the seat cover and attach it to the center listing wire in the seat cushion using three hog rings.

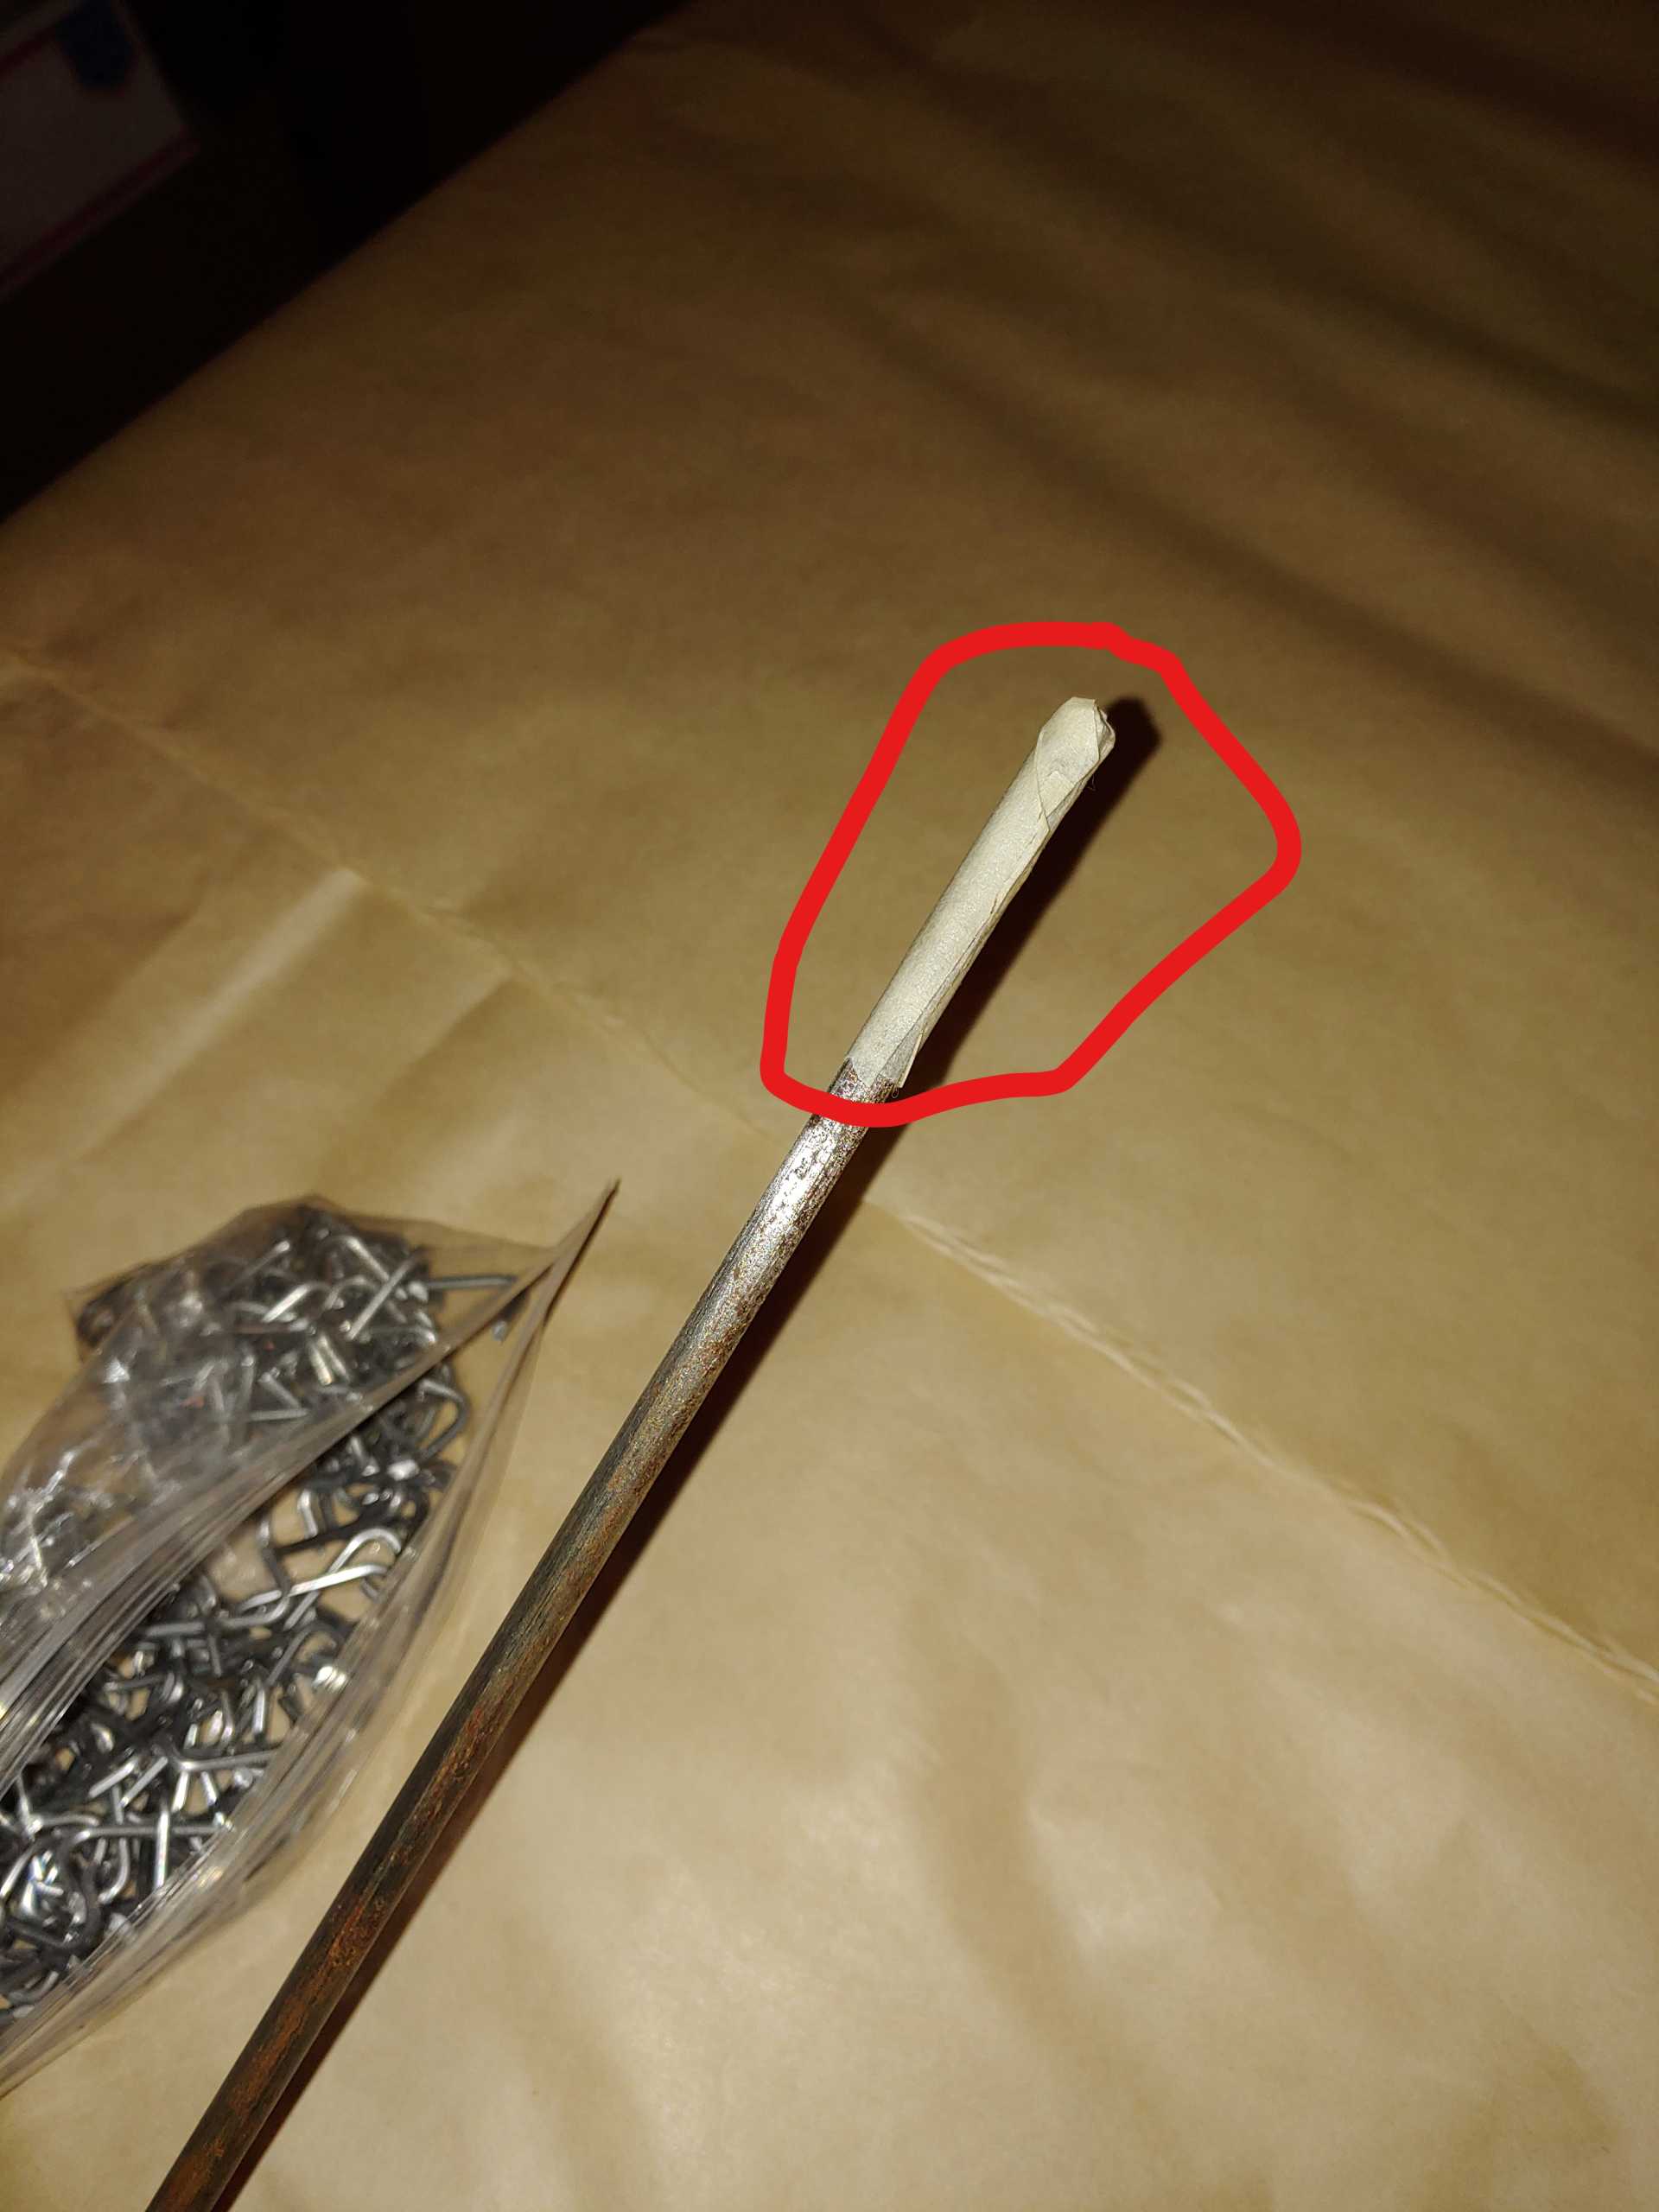
Take the listing rods (sand them down if needed) and wrap some tape around the end which makes it slide through the seat easier. Next, insert the listing rods (one at a time) into the sleeves on the underside of the bottom seat cover until the end of the rods protrude out the back. Attach the rods to the rods in the seat cushion with two hog rings.
Attach the rear bottom seat cover listing wire to the seat cushion listing wire with three hog rings.
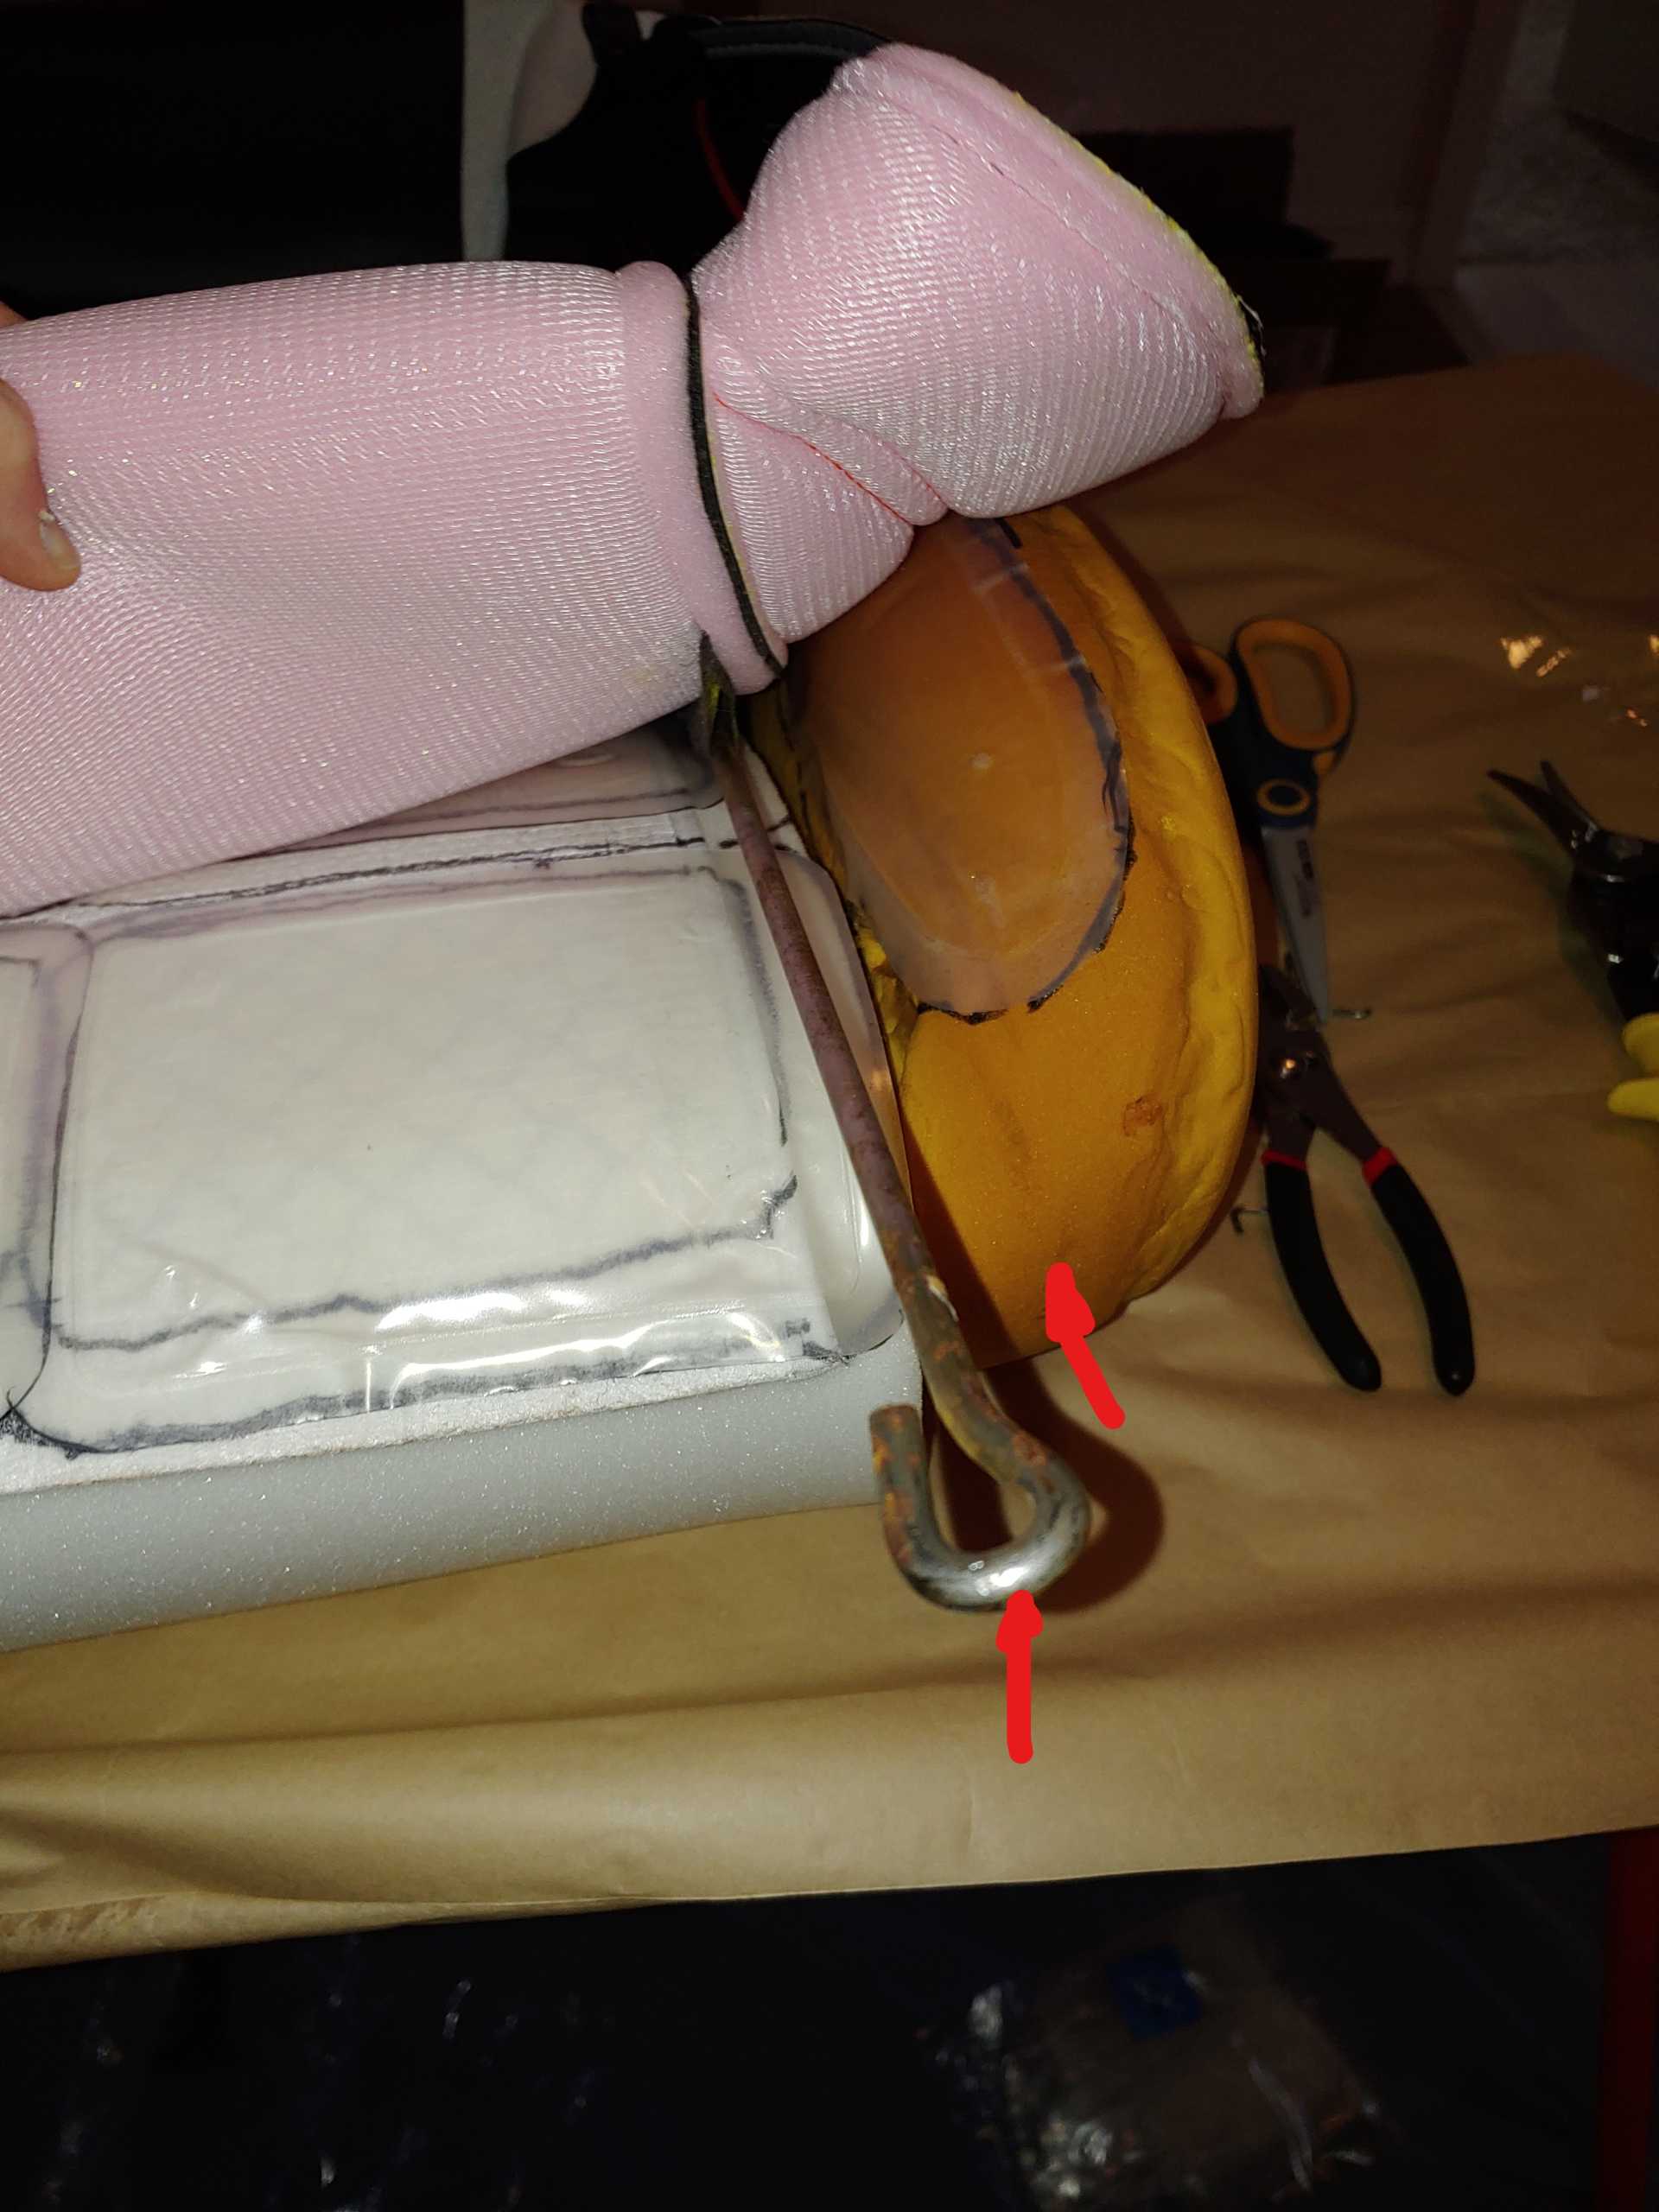
Take some of the supplied cotton material and place it on top of the bolster, gather the cotton and seat cover material and roll over the edge and down, repeat on other side.
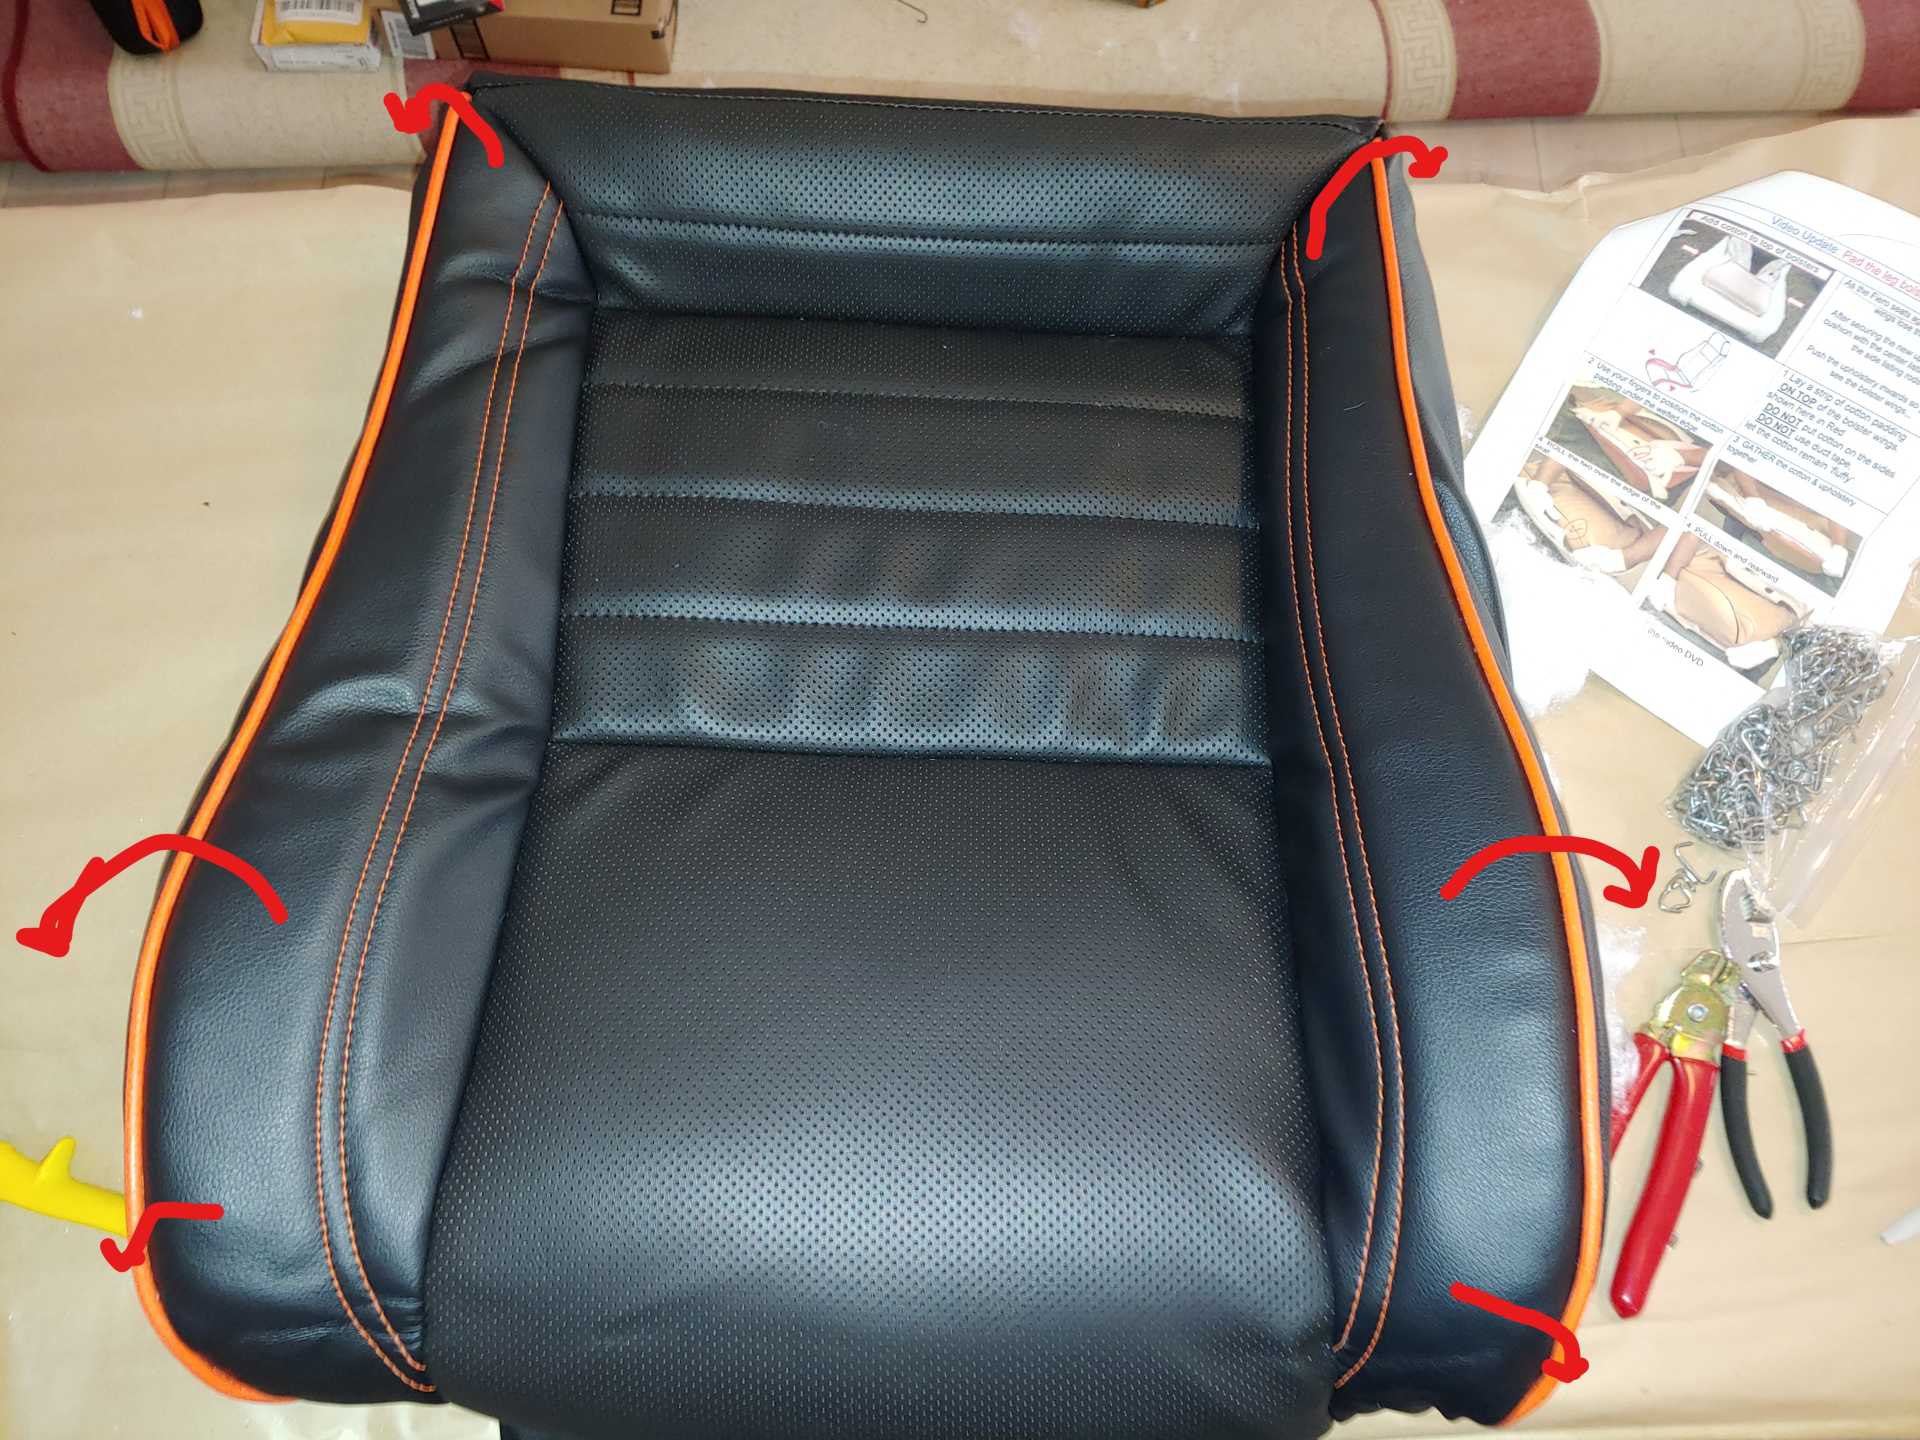
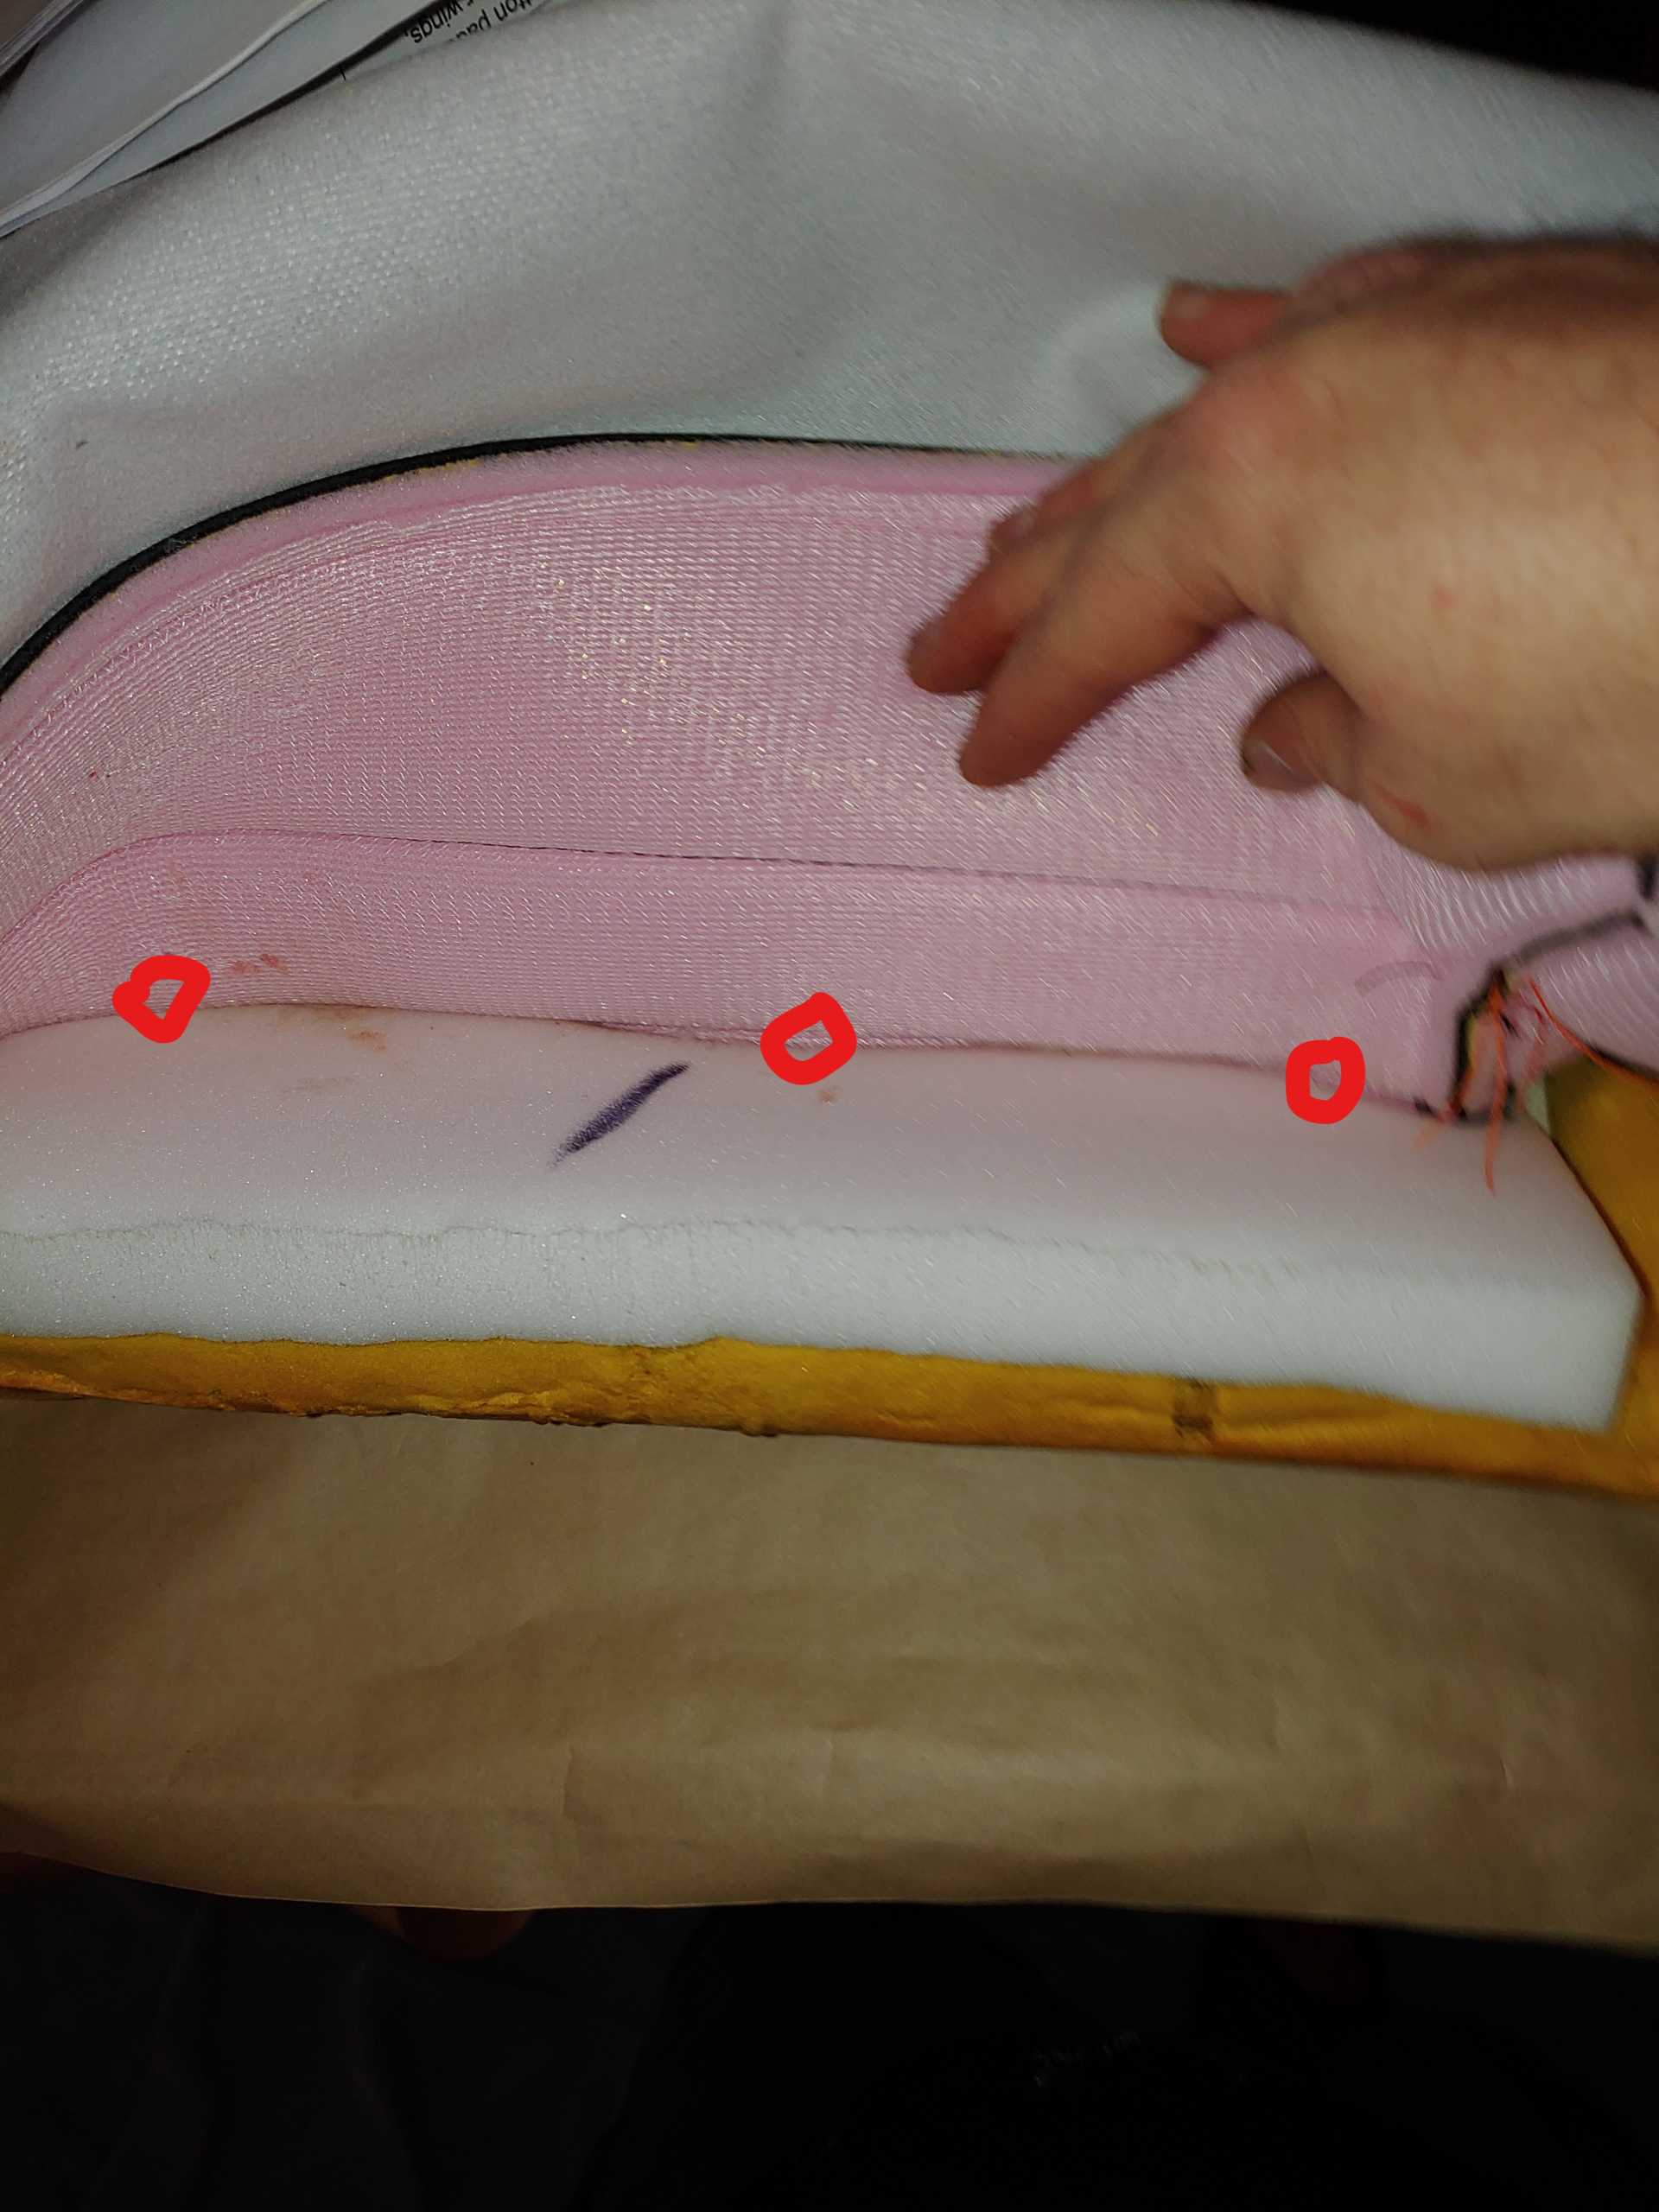
Attach each side, and front flap to the factory attachment points under the seat bottom using hog rings.
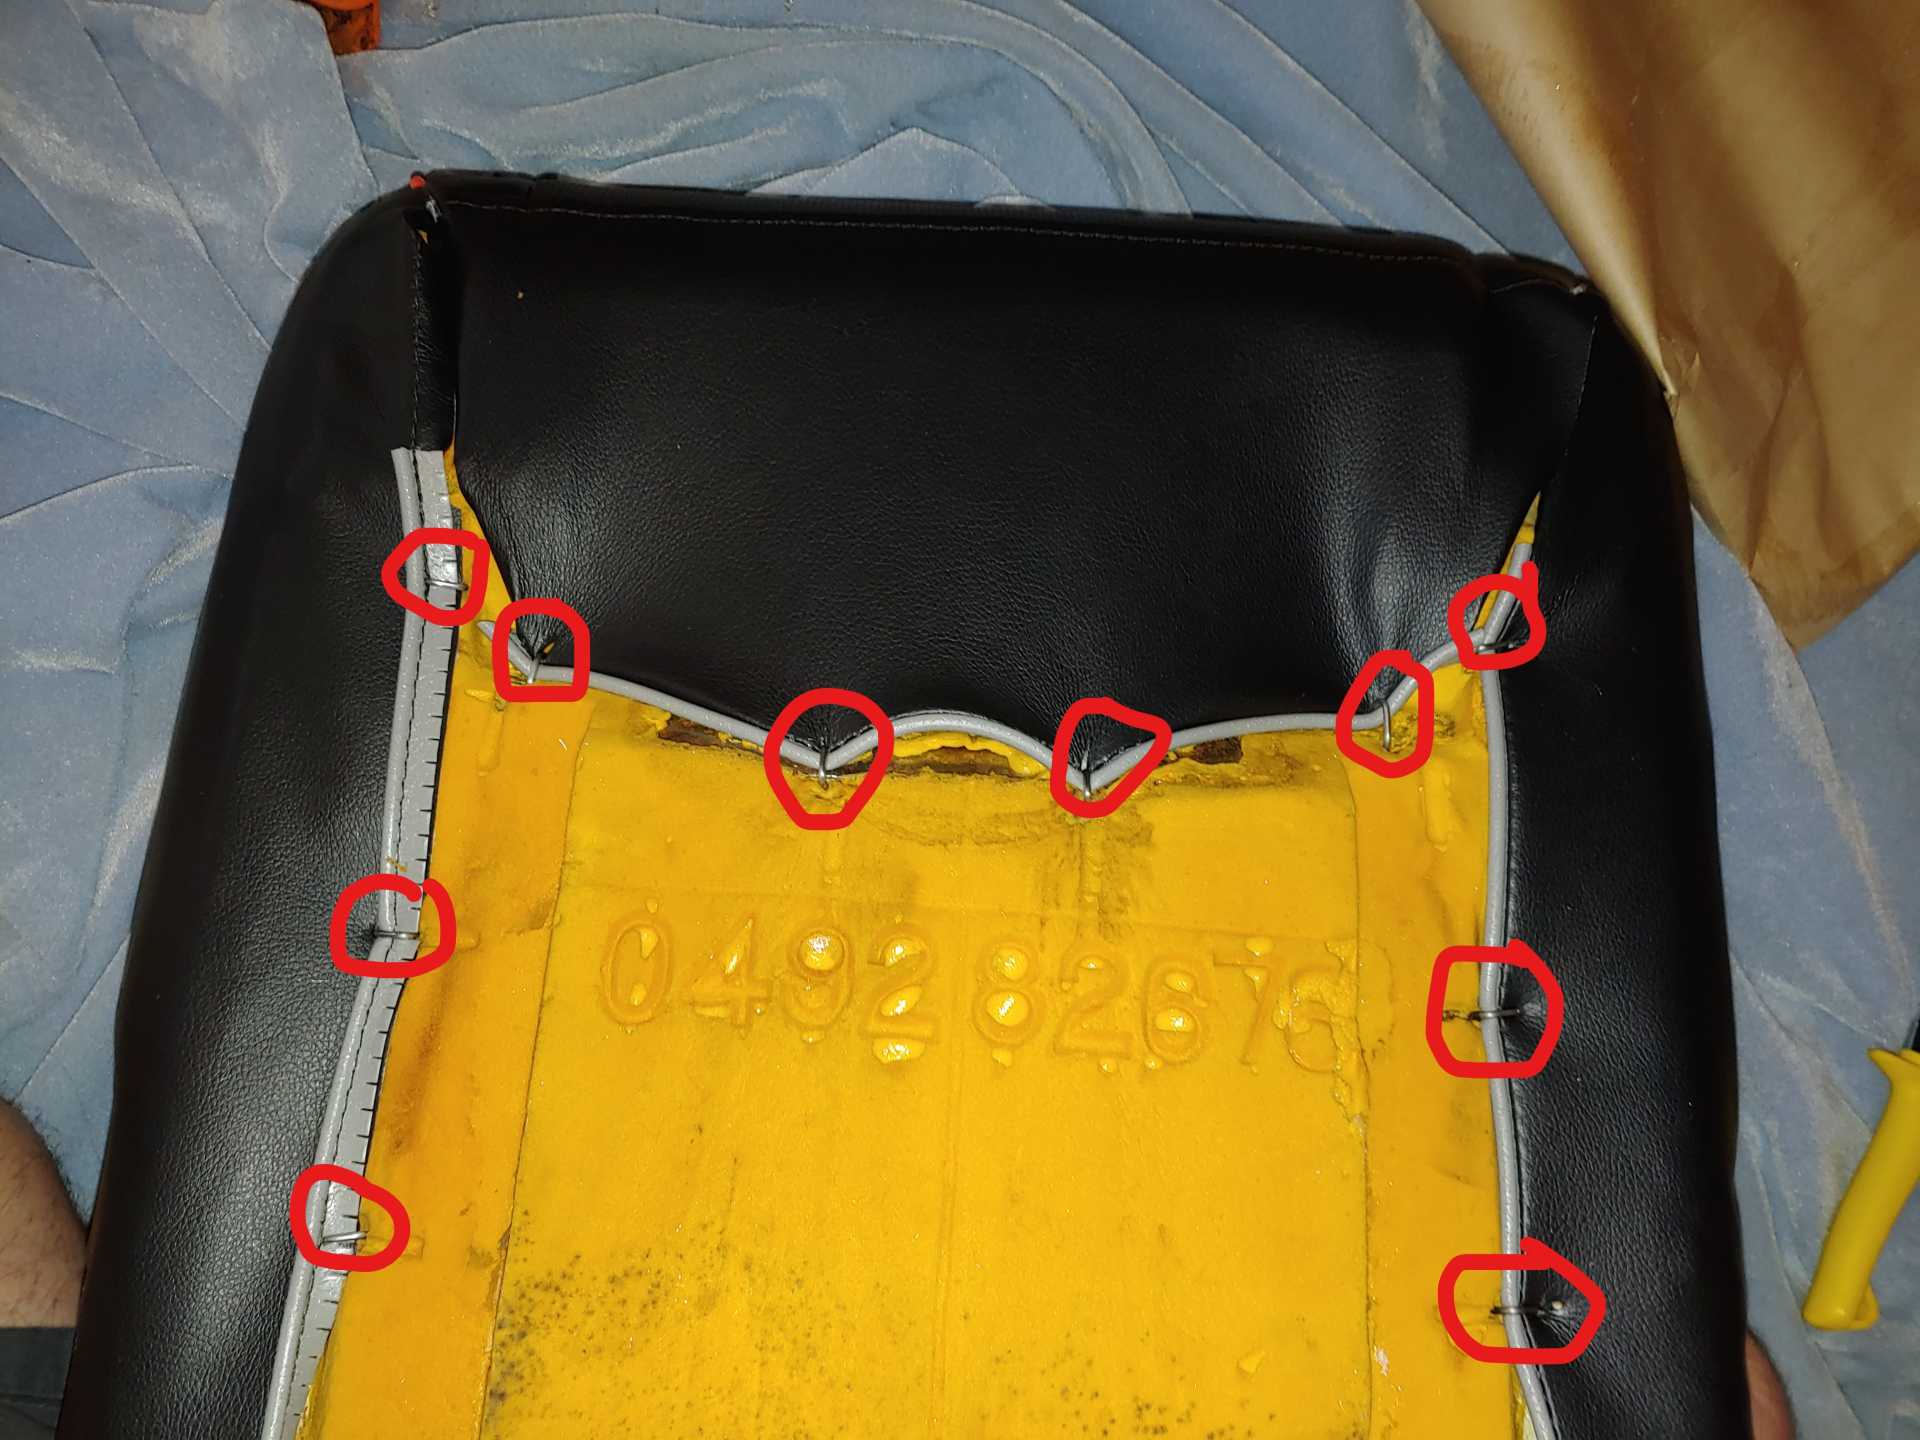
Take the rubber dirt strip and slide it onto the rear flap, then attach the rear flap to the factory mounting position using hog rings.
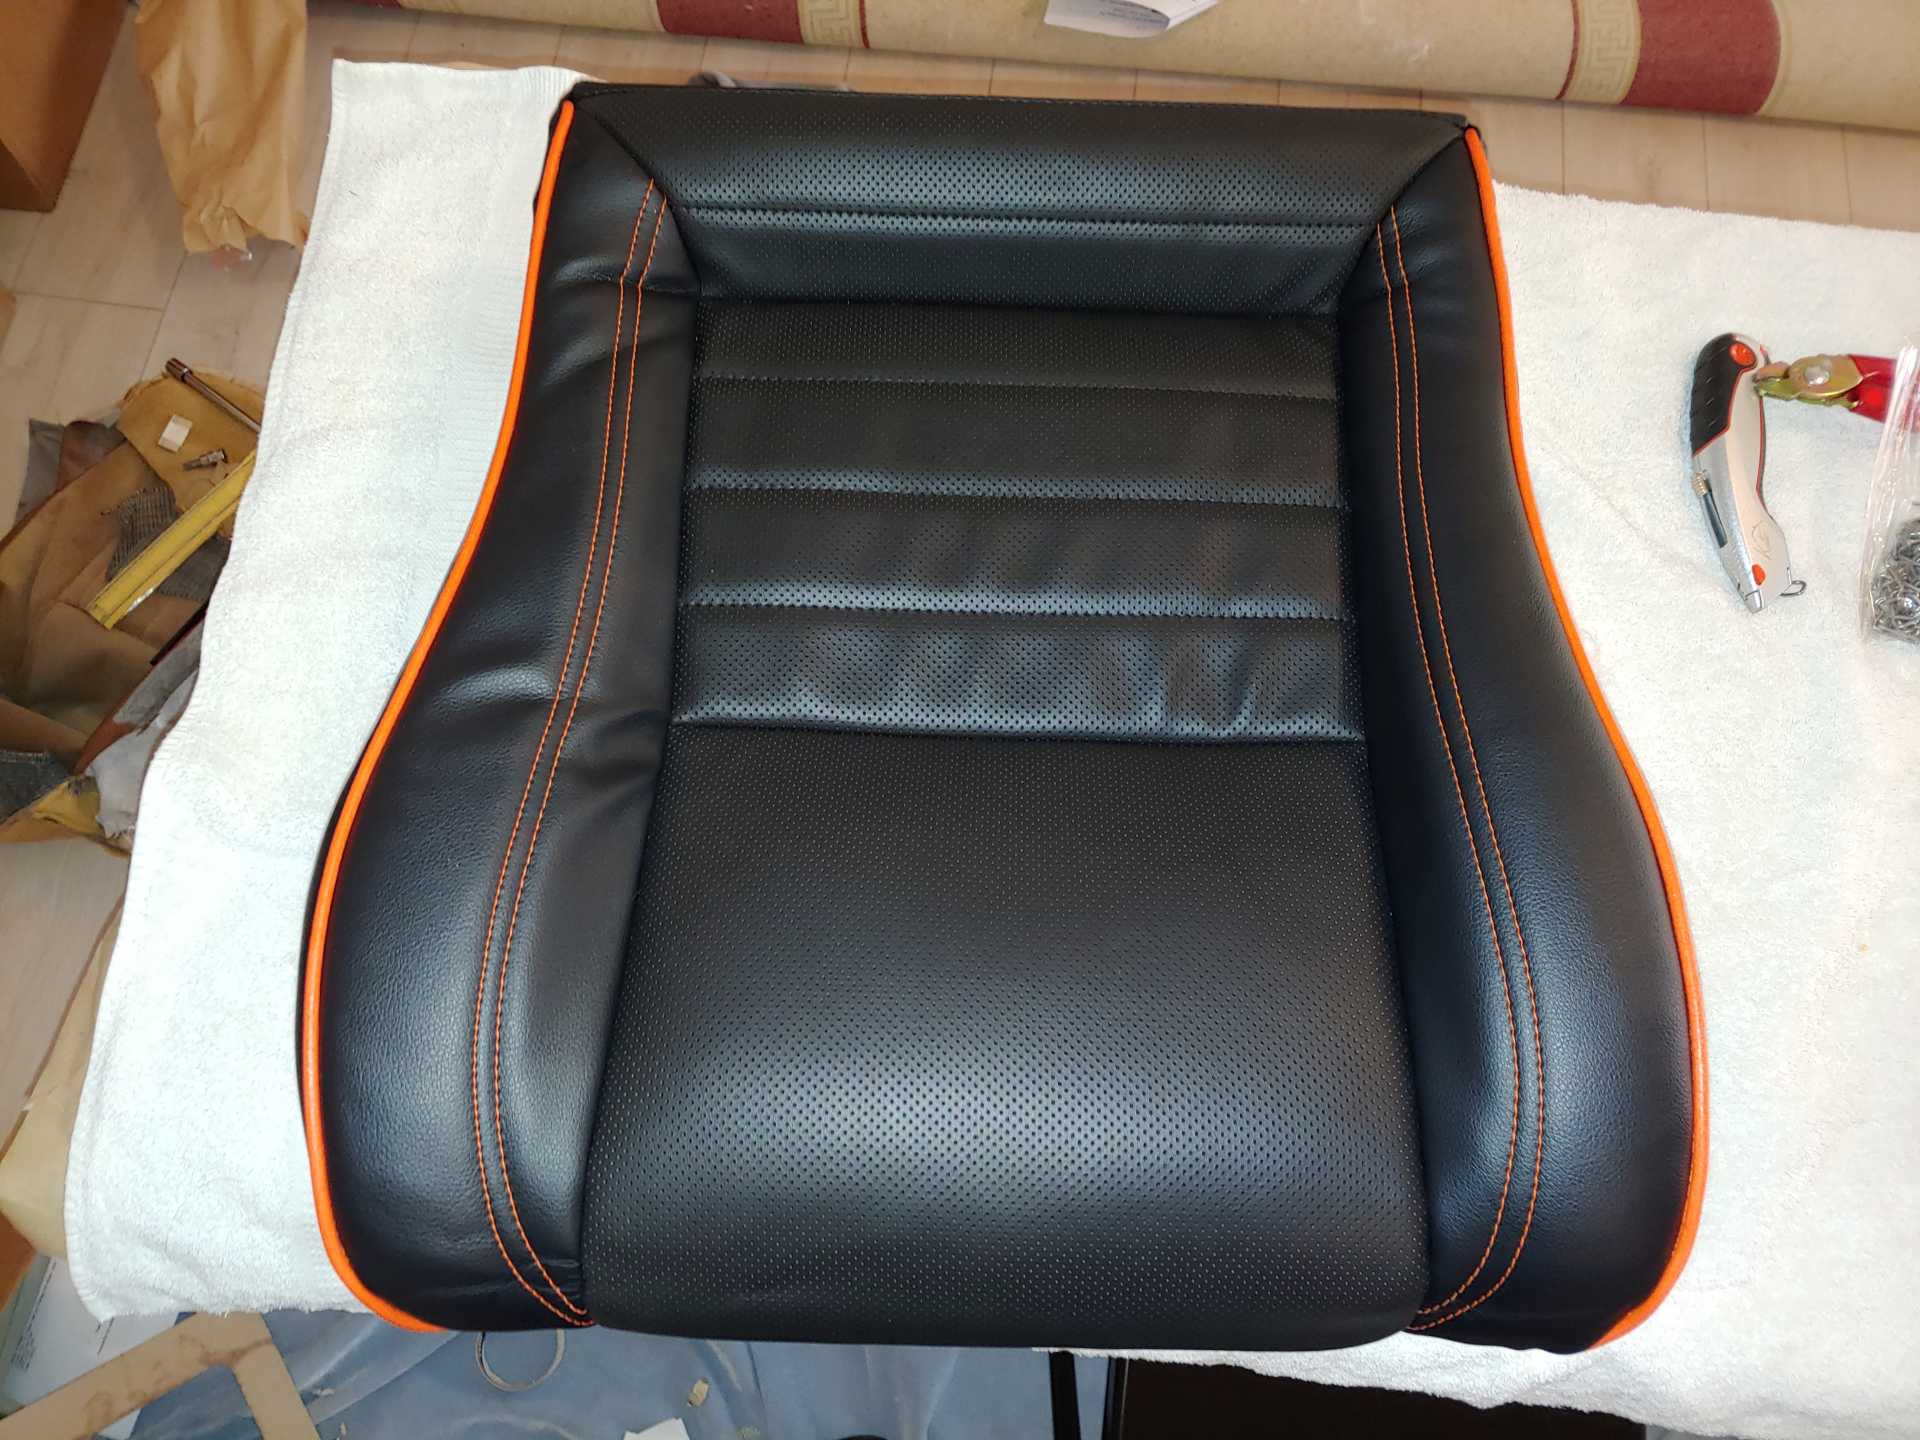
I just need to smooth out the wrinkles and then I can start the seat back.
|
|
|
|
Chief08
|
OCT 28, 08:07 PM
|
|
Here is the before and after.

|
|
|
|
Chief08
|
OCT 28, 08:08 PM
|
|
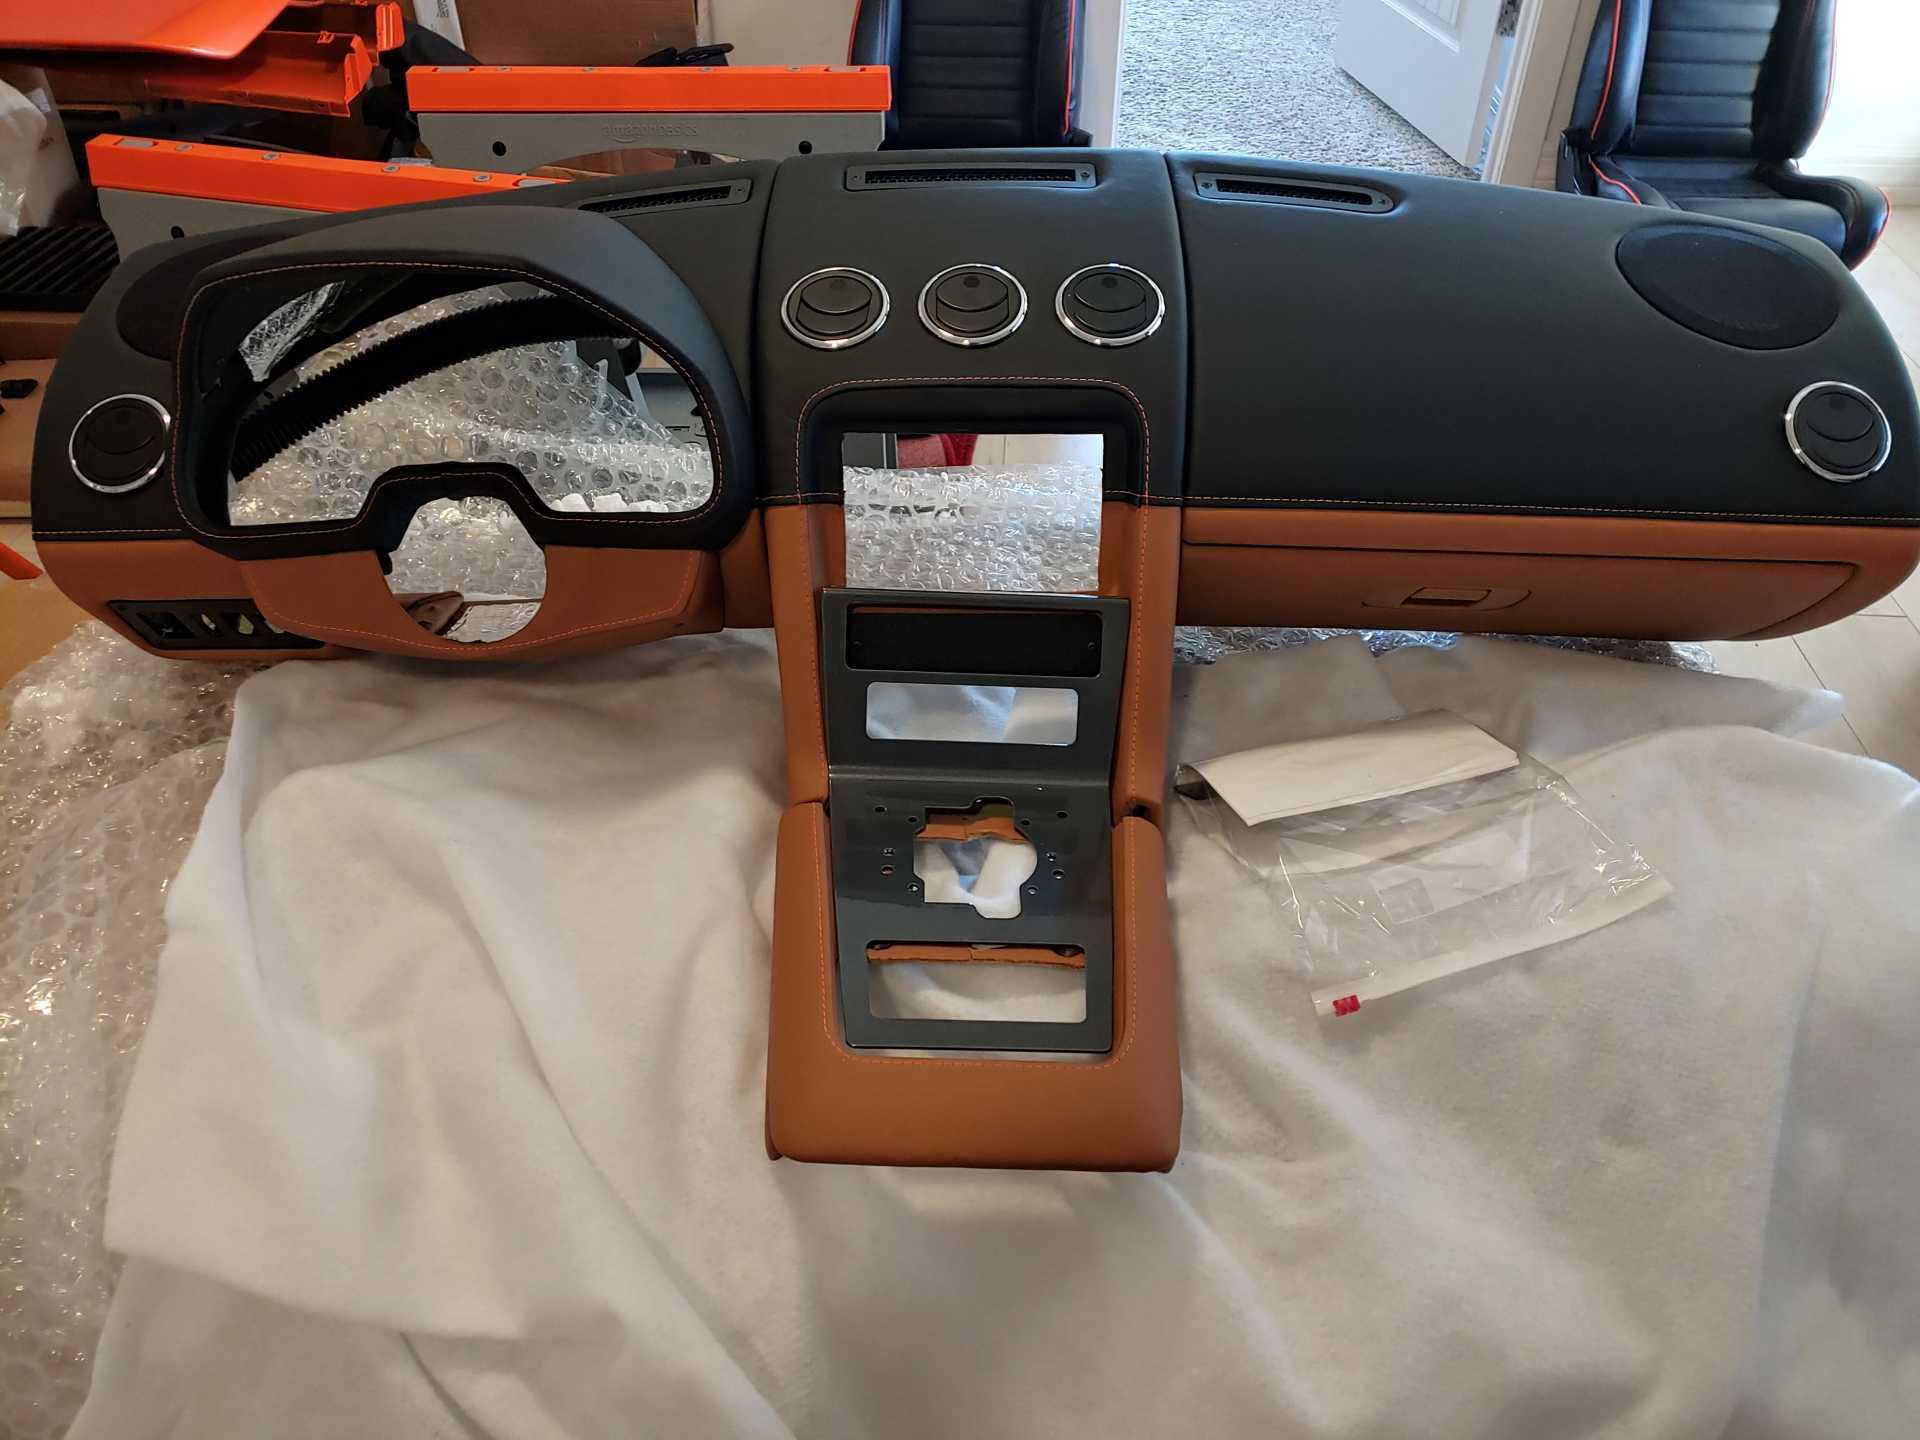
My dash finally arrived today.
|
|
|
|
bjc 350
|
OCT 28, 10:28 PM
|
|
|
Very nice. I see why it is titled "wallet drainer".
|
|
|
|
Chief08
|
OCT 28, 10:37 PM
|
|
| quote | Originally posted by bjc 350:
Very nice. I see why it is titled "wallet drainer". |
|
Yeah, this project is true to its name.
|
|
|
|
predmeister
|
NOV 01, 12:00 PM
|
|
|
what double din are you looking at putting in your car?
|
|
|
|
Chief08
|
NOV 01, 12:15 PM
|
|
|
|
|
Rickady88GT
|
NOV 02, 08:56 PM
|
|
| quote | Originally posted by Chief08:
I'm going to be doing my engine swap soon, and it's between an LS4 and the 3800 SC. Let me know your opinion and the reasons behind your choice.
Thanks |
|
I would rather have an LS4 than a 3800SC. But honestly it is just a preference of mine. I think the V8 sounds better than the V6. BUT the 3800 may be an easier and cheaper swap. Both have amazing power and very reliable long lasting power.
|
|
|
|