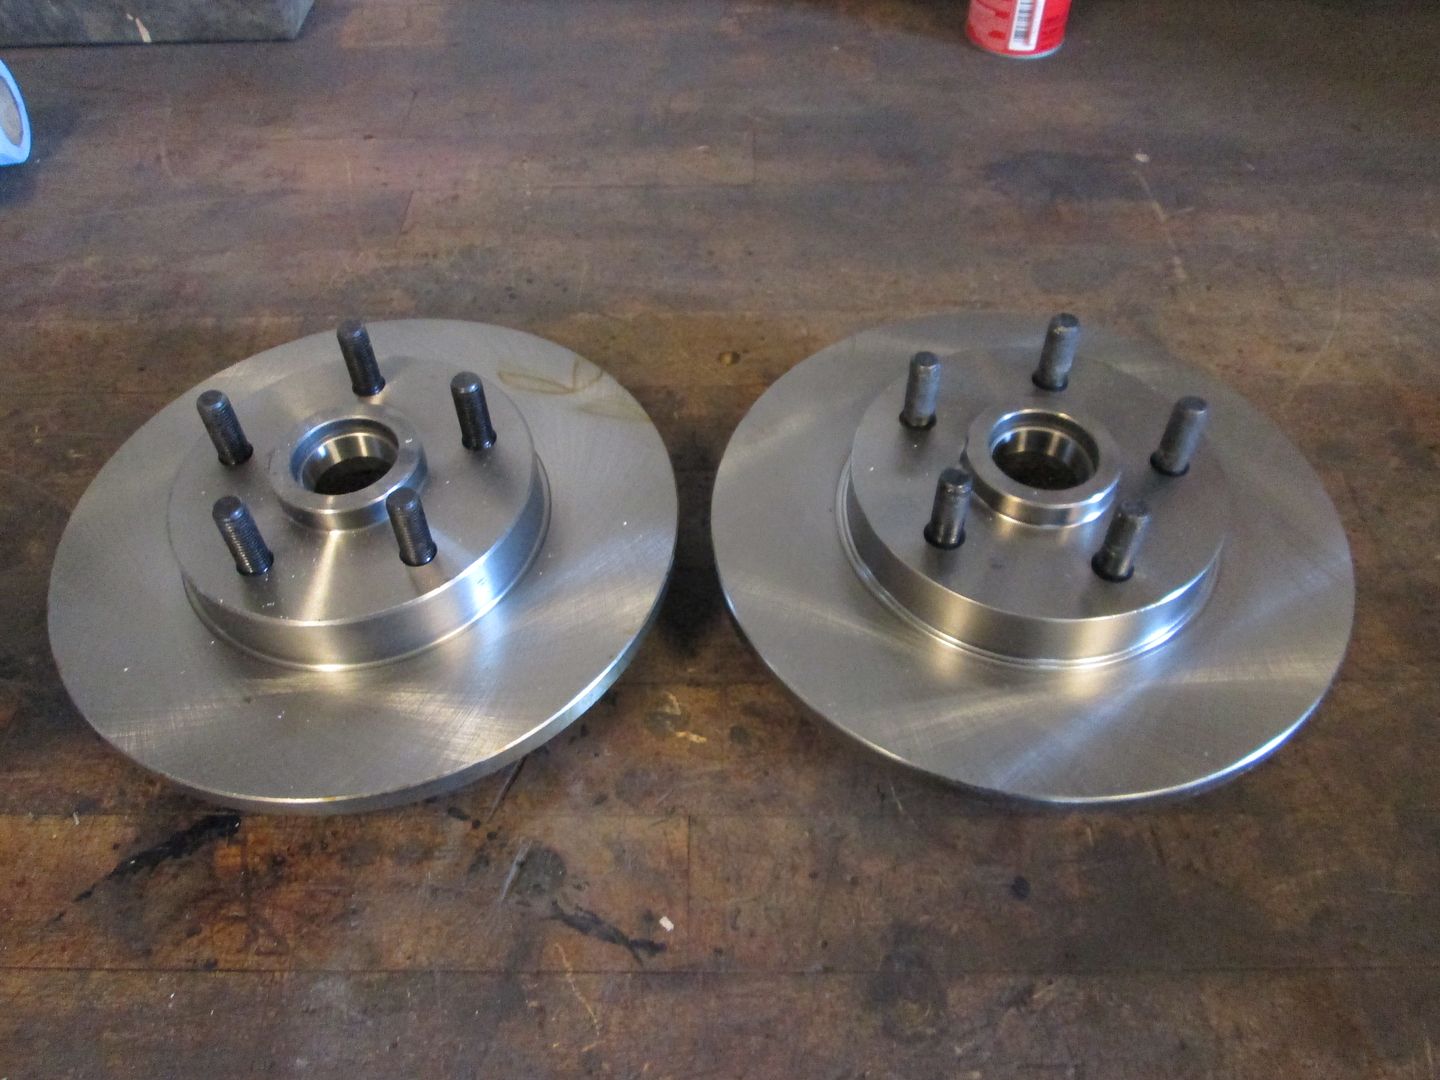
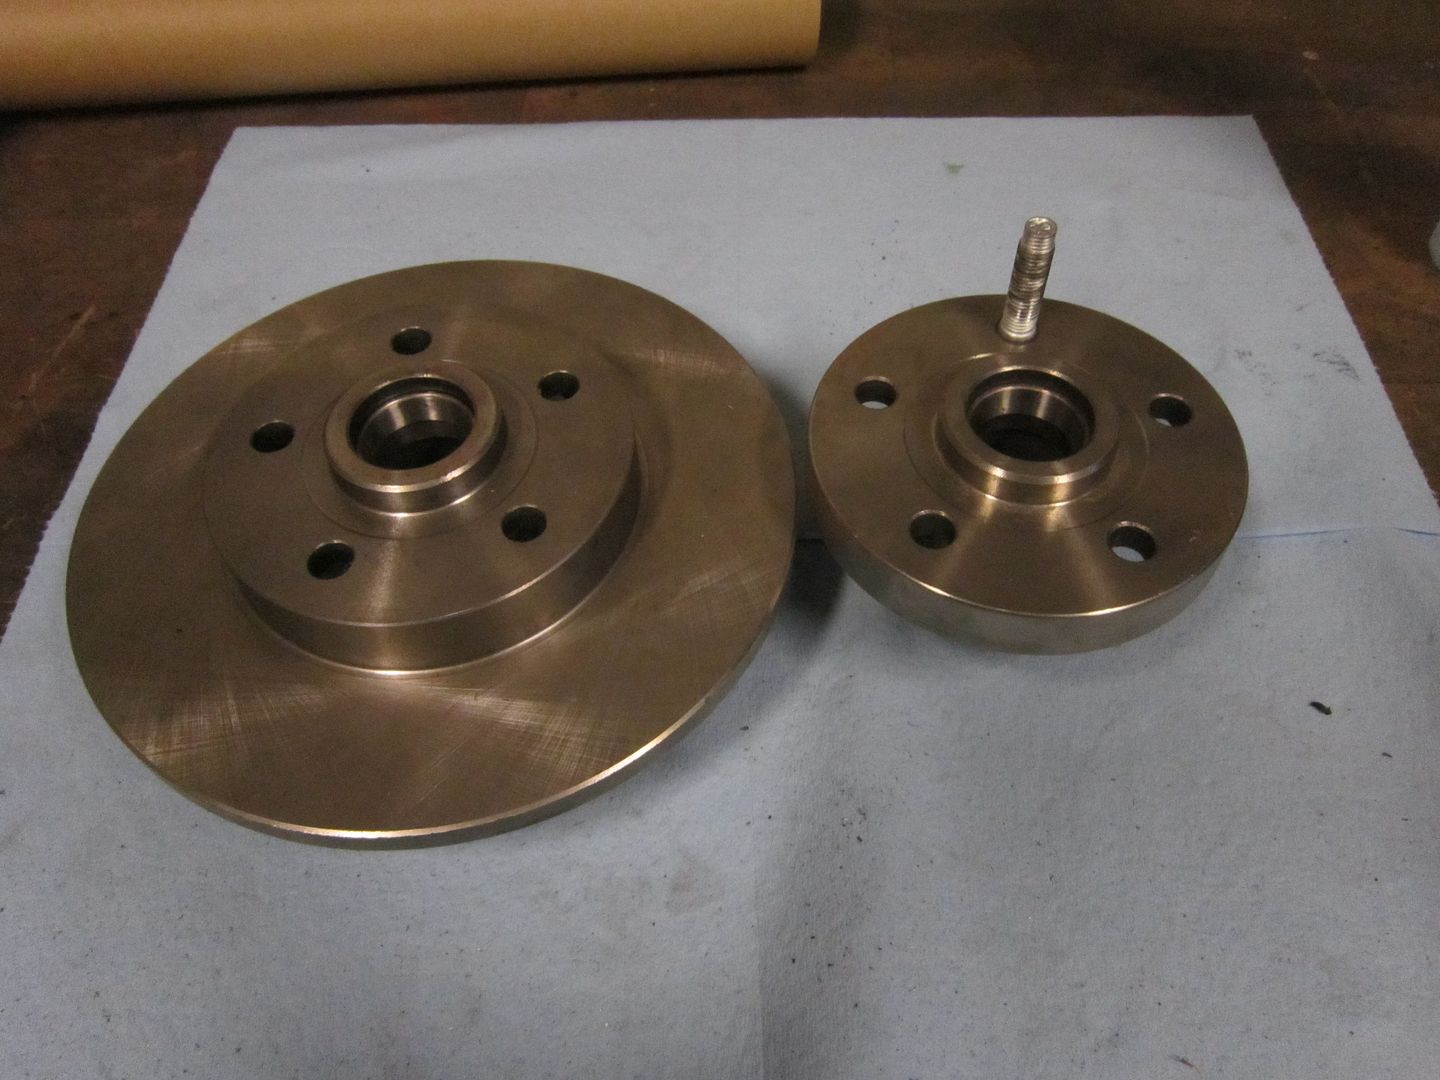
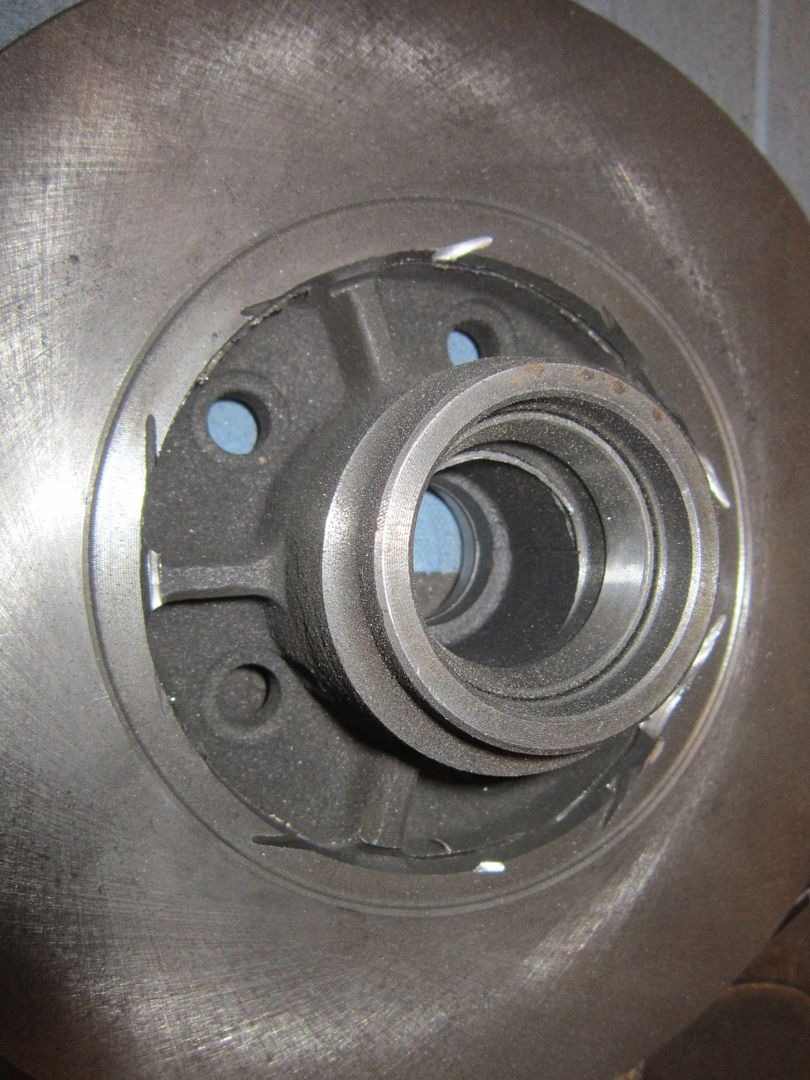
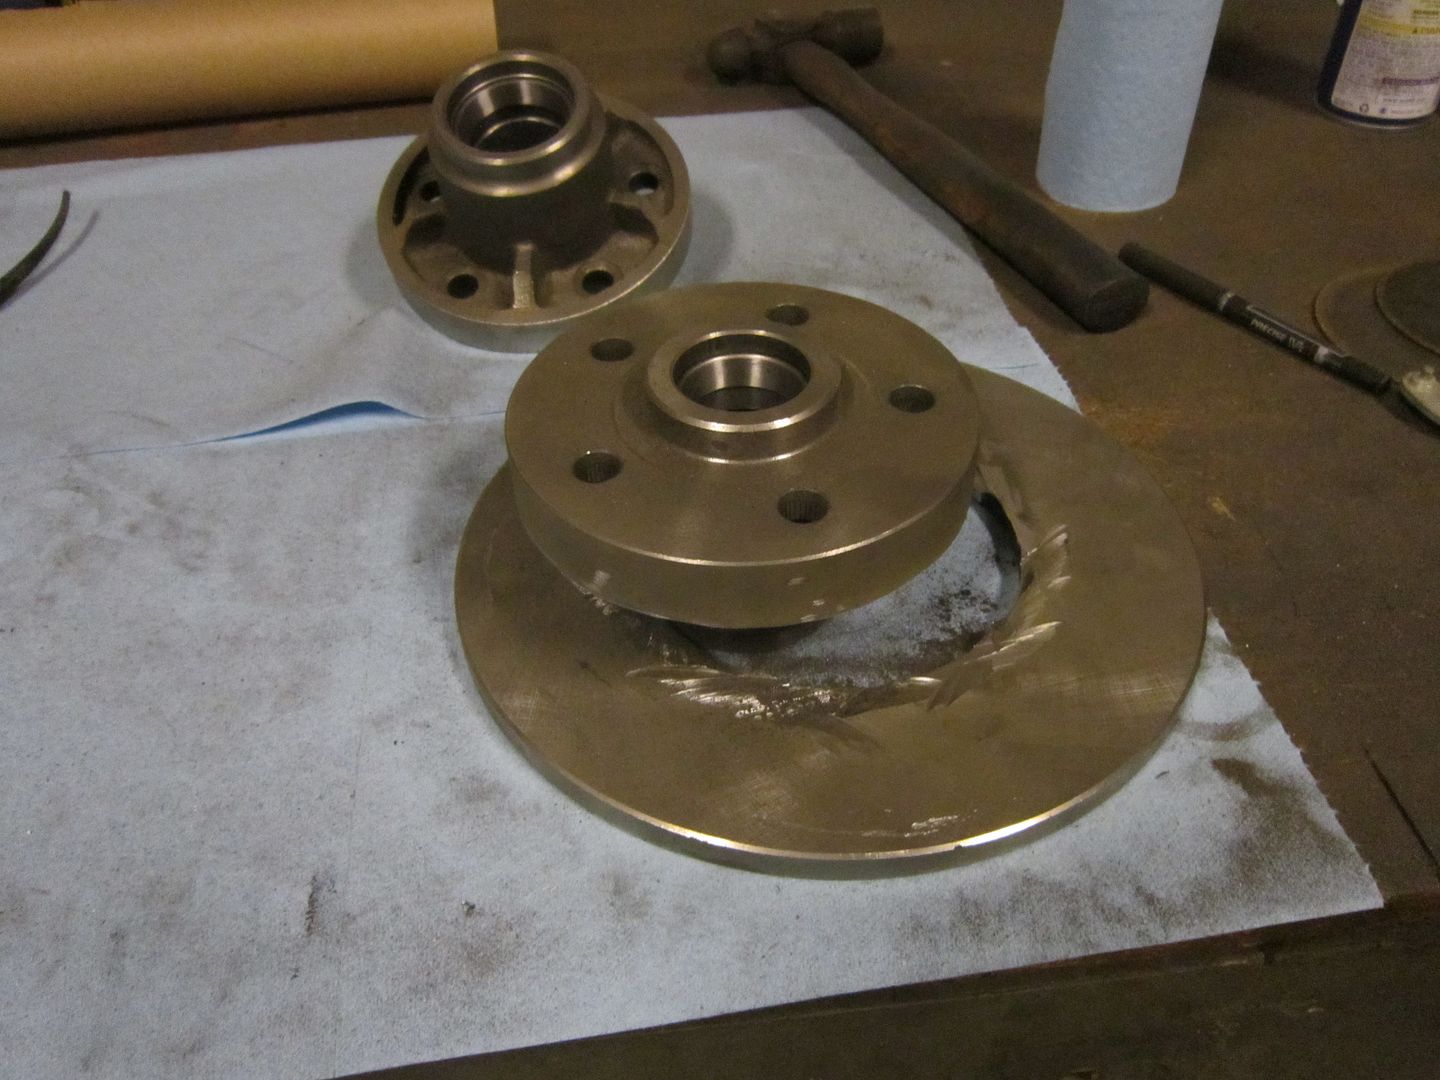
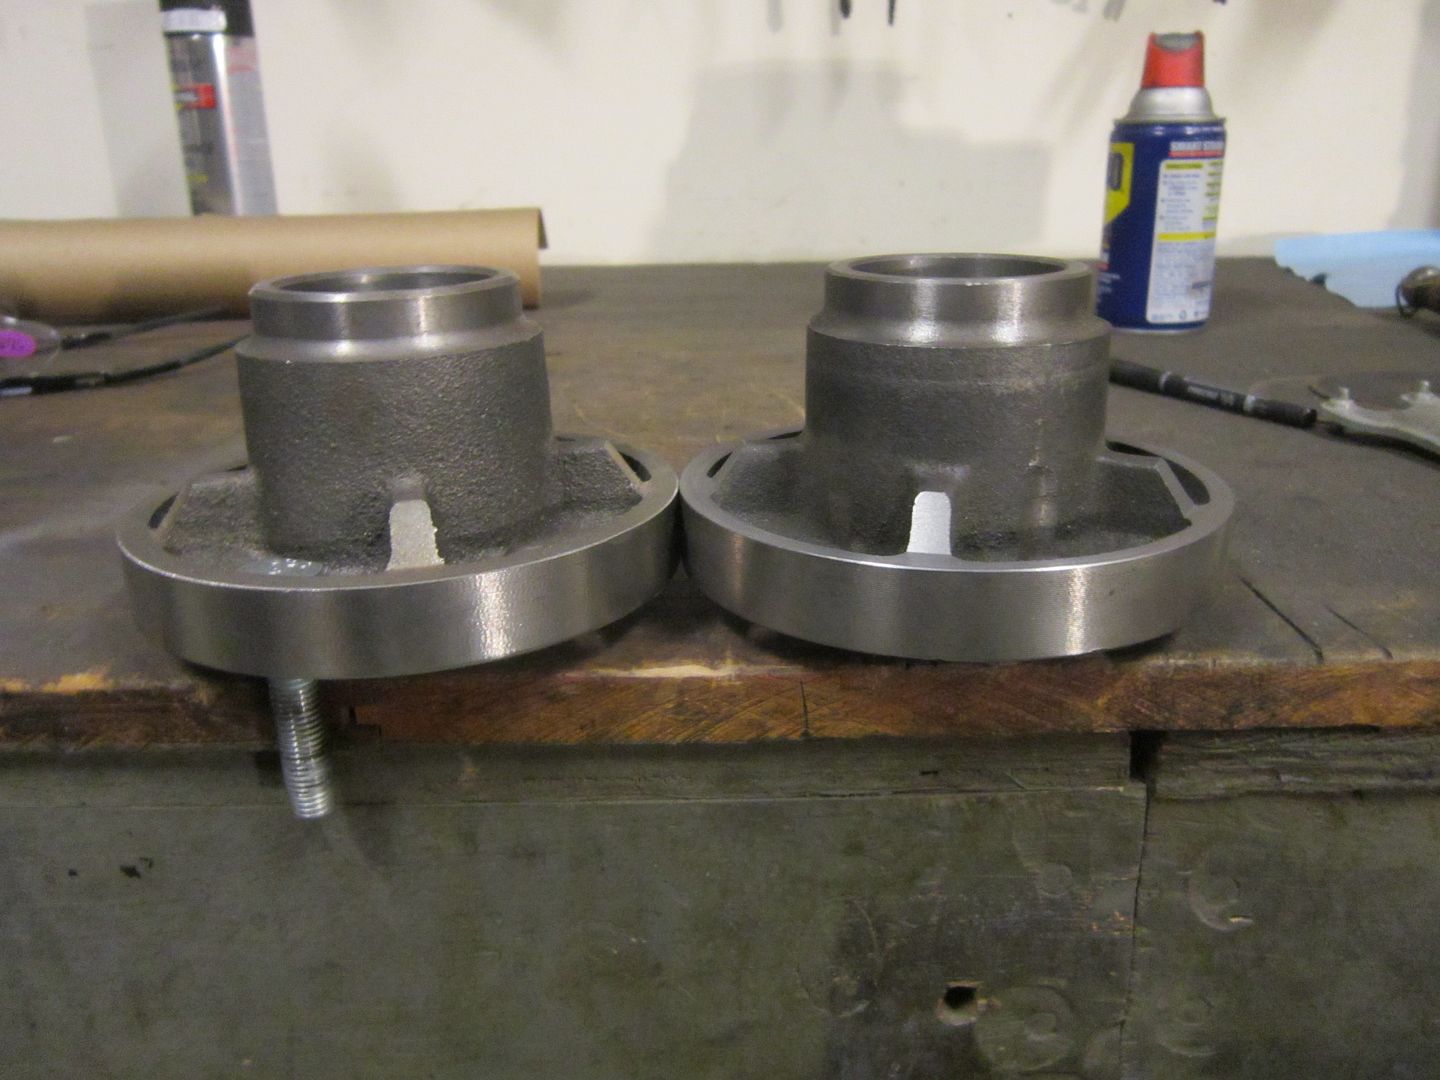
If you want to put any brake upgrade onto the front of the 84-87's, you must first convert the front rotors to hubs. In the picture below are two new rotors, one has been modified, the other has not. It the following pictures I will walk through the process of modifying the second one.
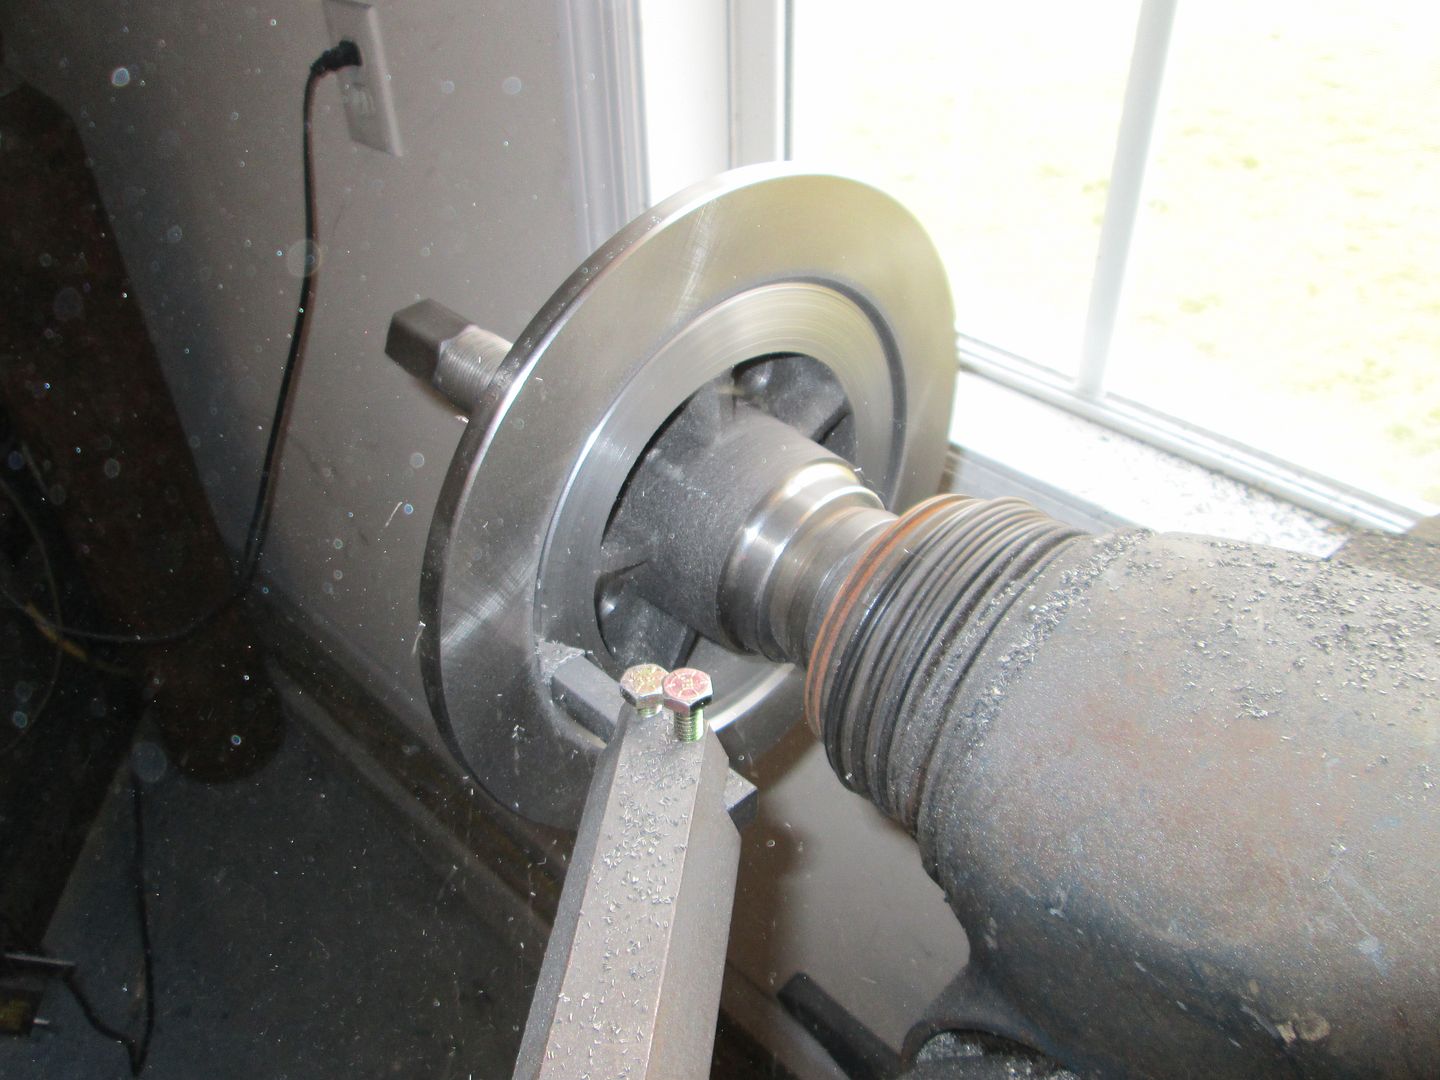
A quick/crude method for removal of the rotor portion is to use an angle grinder with a 4 1/2" cut off disk:
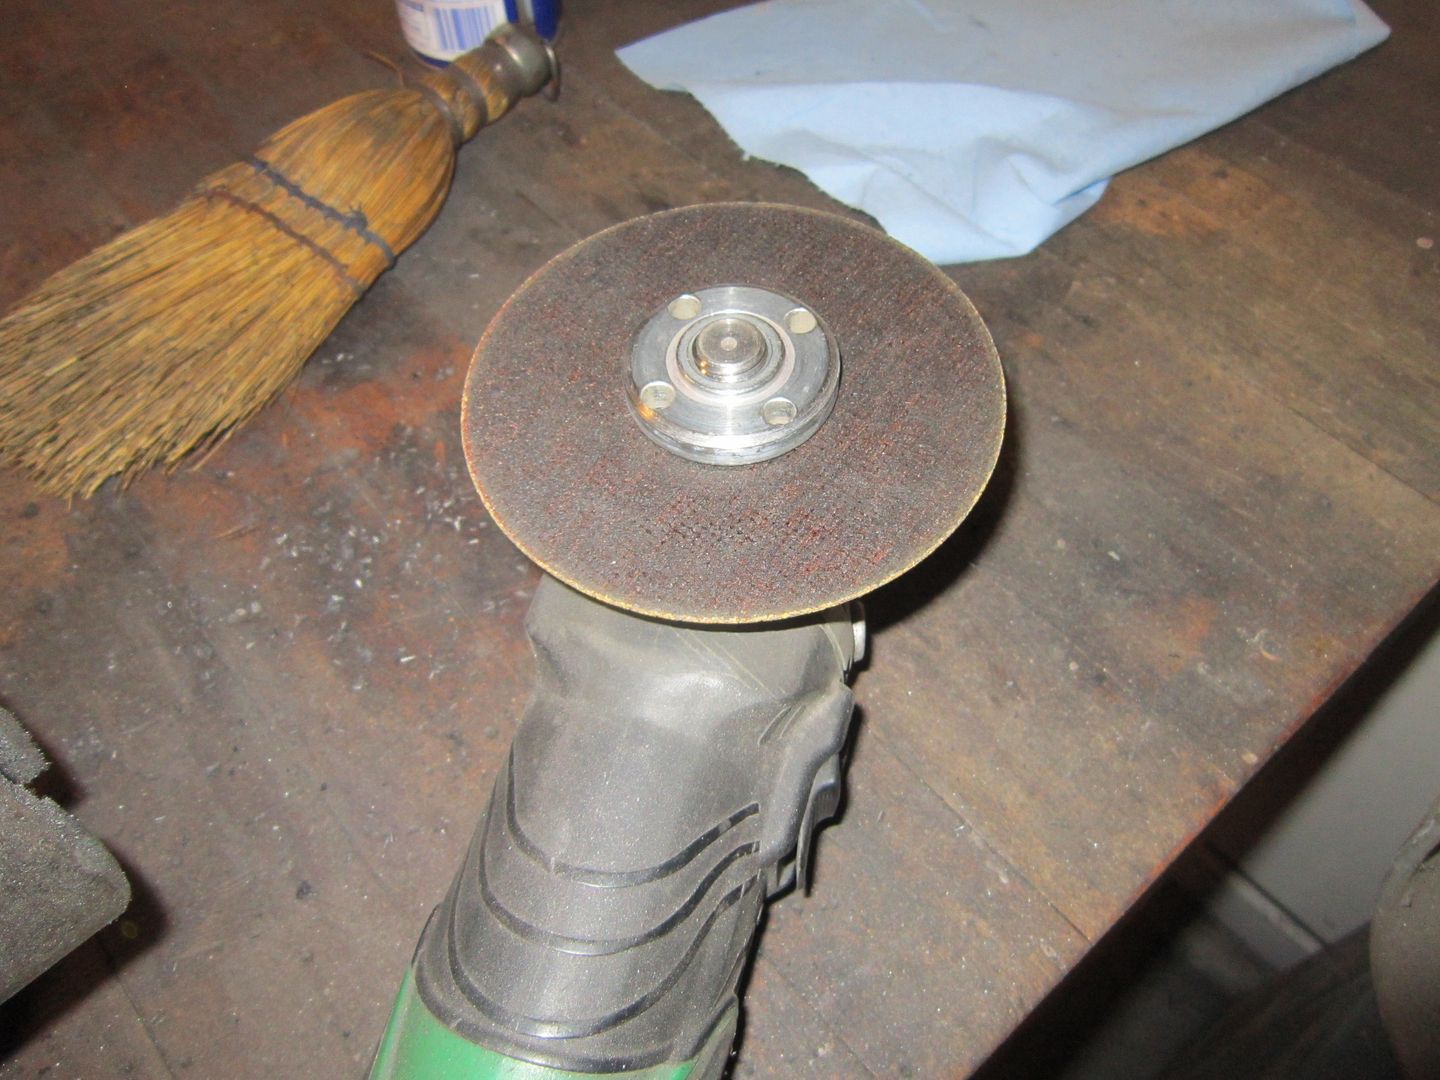
Cut the rotor off at the corner with the cutoff disk making sure you can see daylight through the cut, then rotate and cut some more.
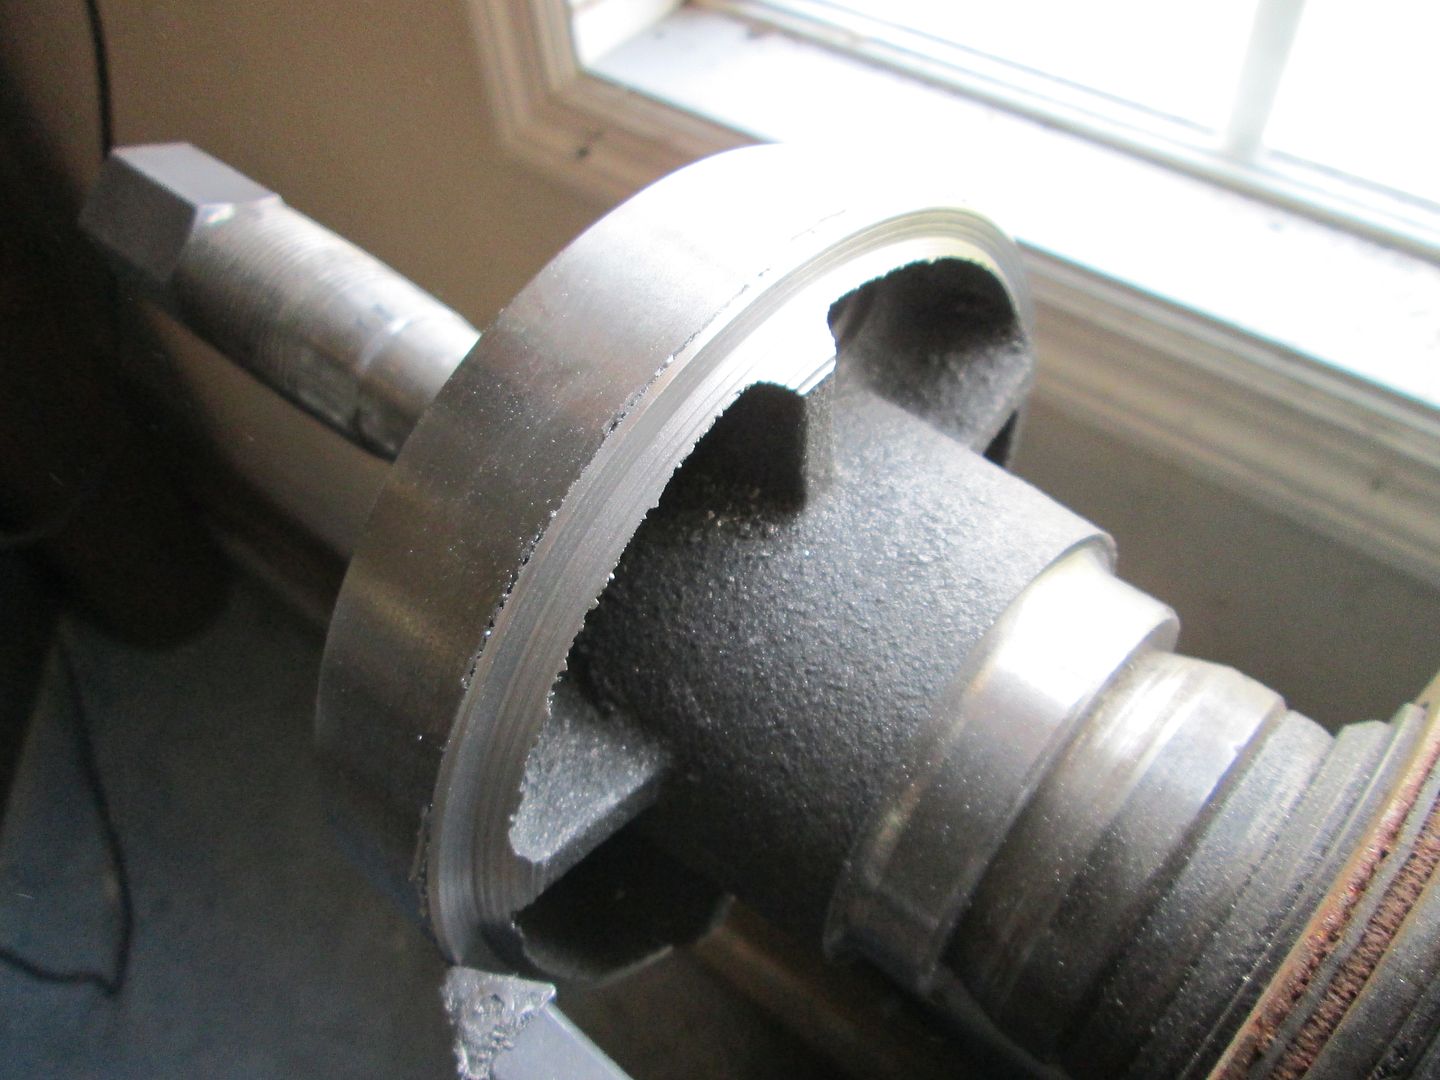
Once the perimeter is cut, the rotor is still attached by the ribs on the rear, cut these as shown, but be careful not to cut too deep.
If the rotor hasn't came off yet, flip it over and smack the rotor with a large hammer and it should come free:
Like I said this is a simple/crude method of removing the rotor and faster than doing this part on the lathe (or at least in my lathe)
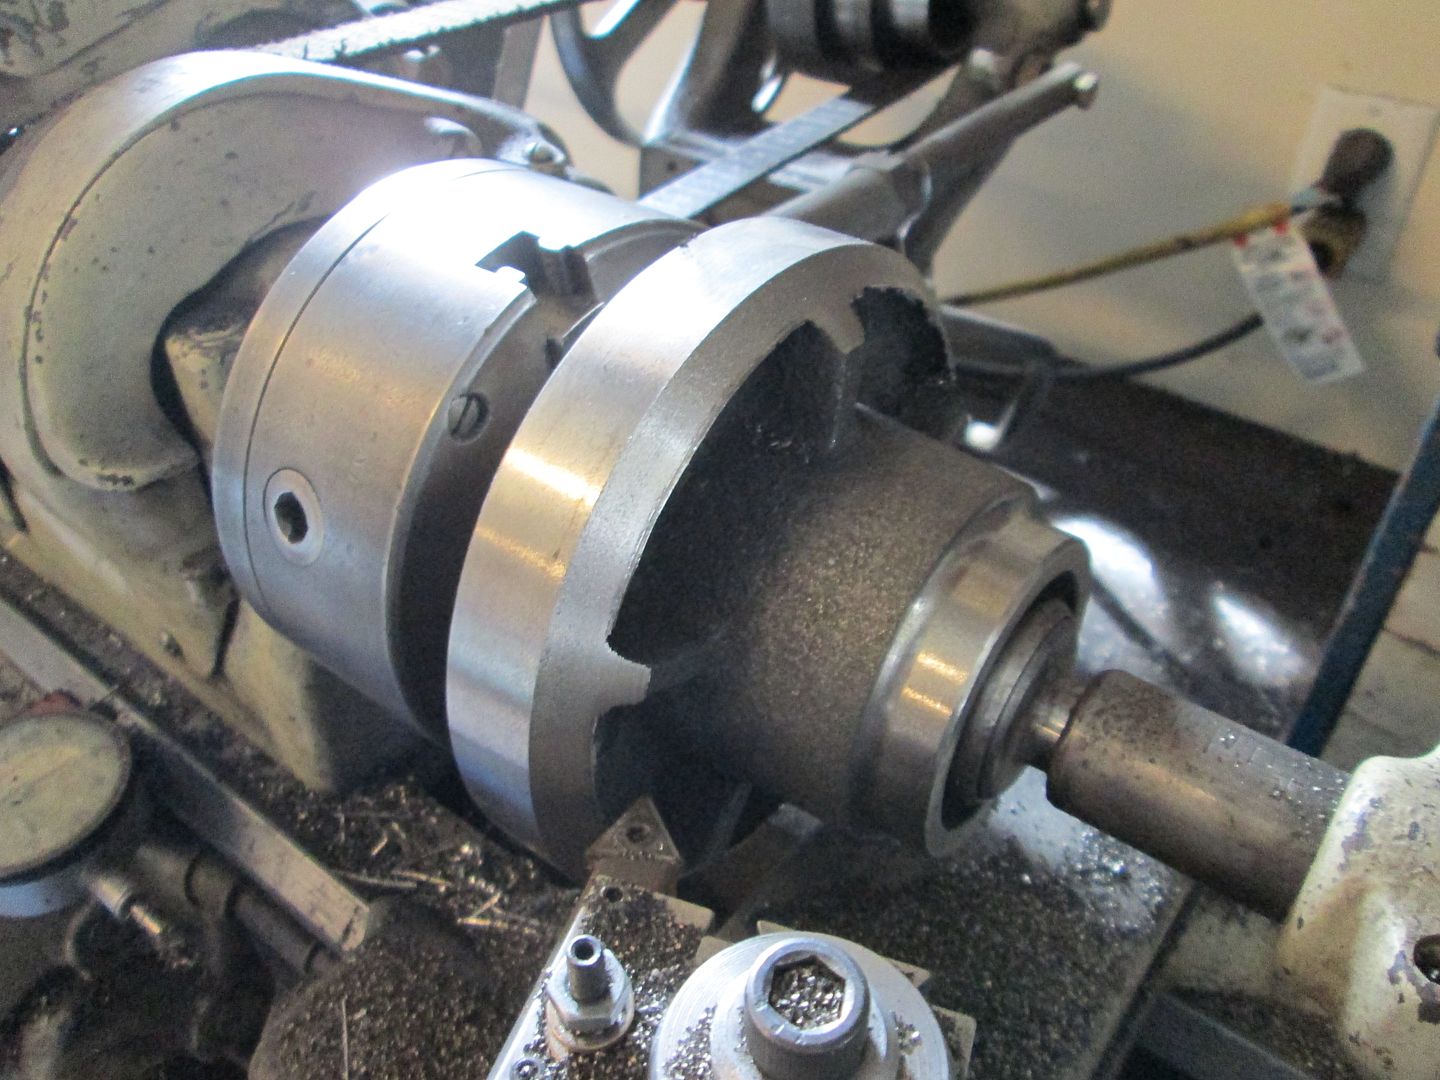
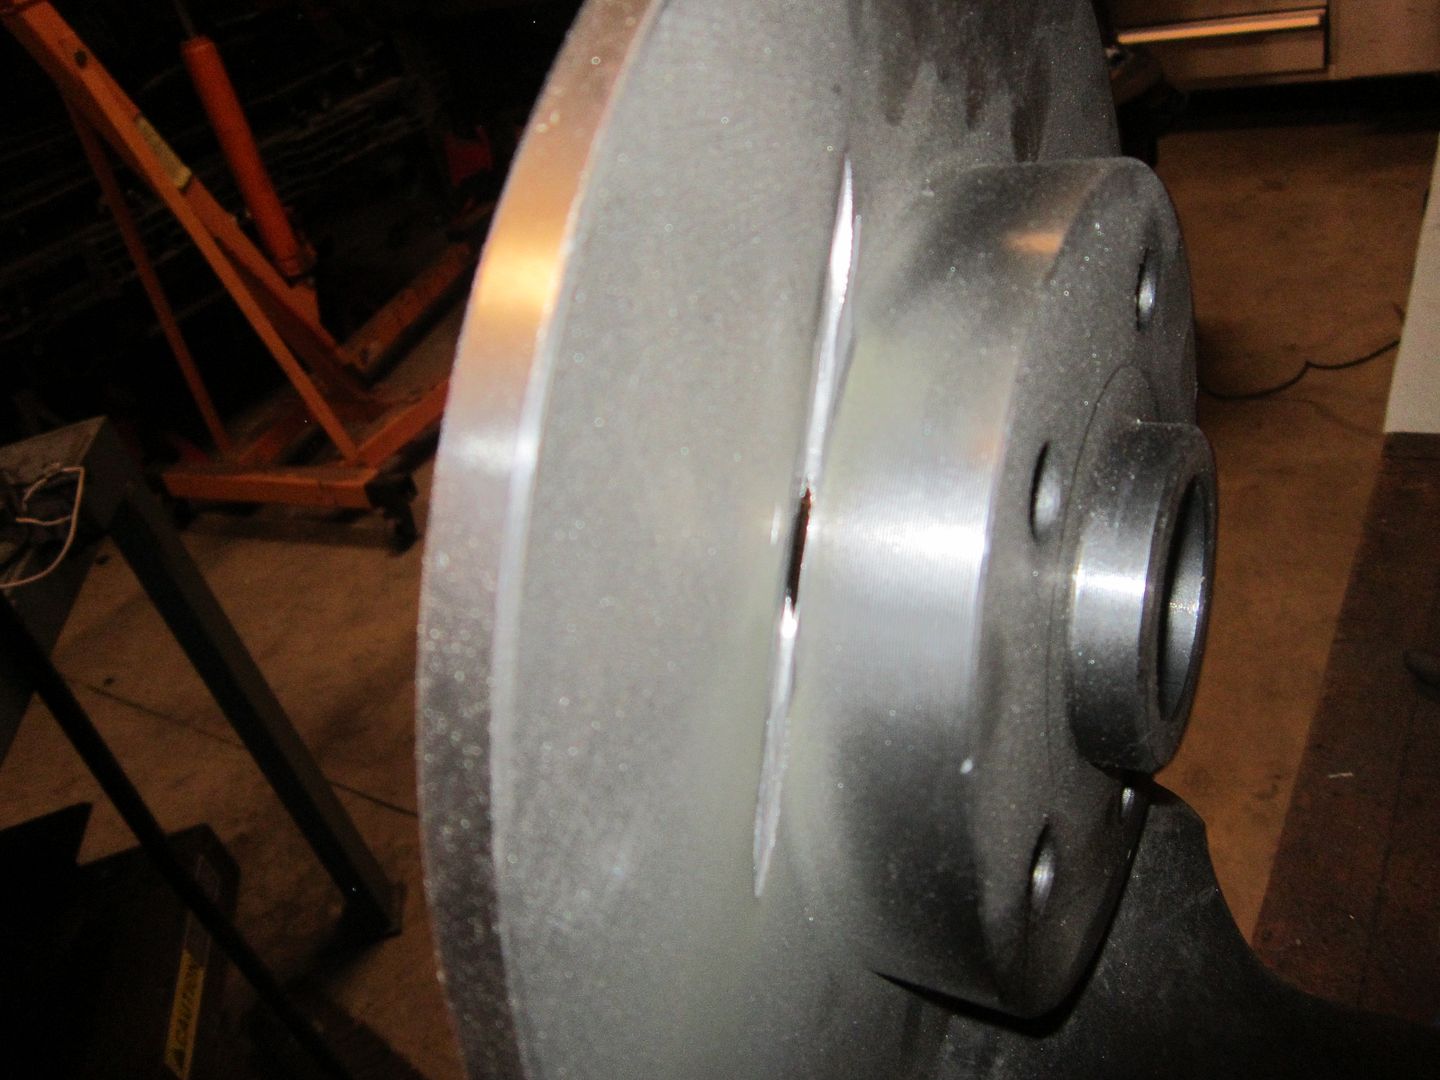
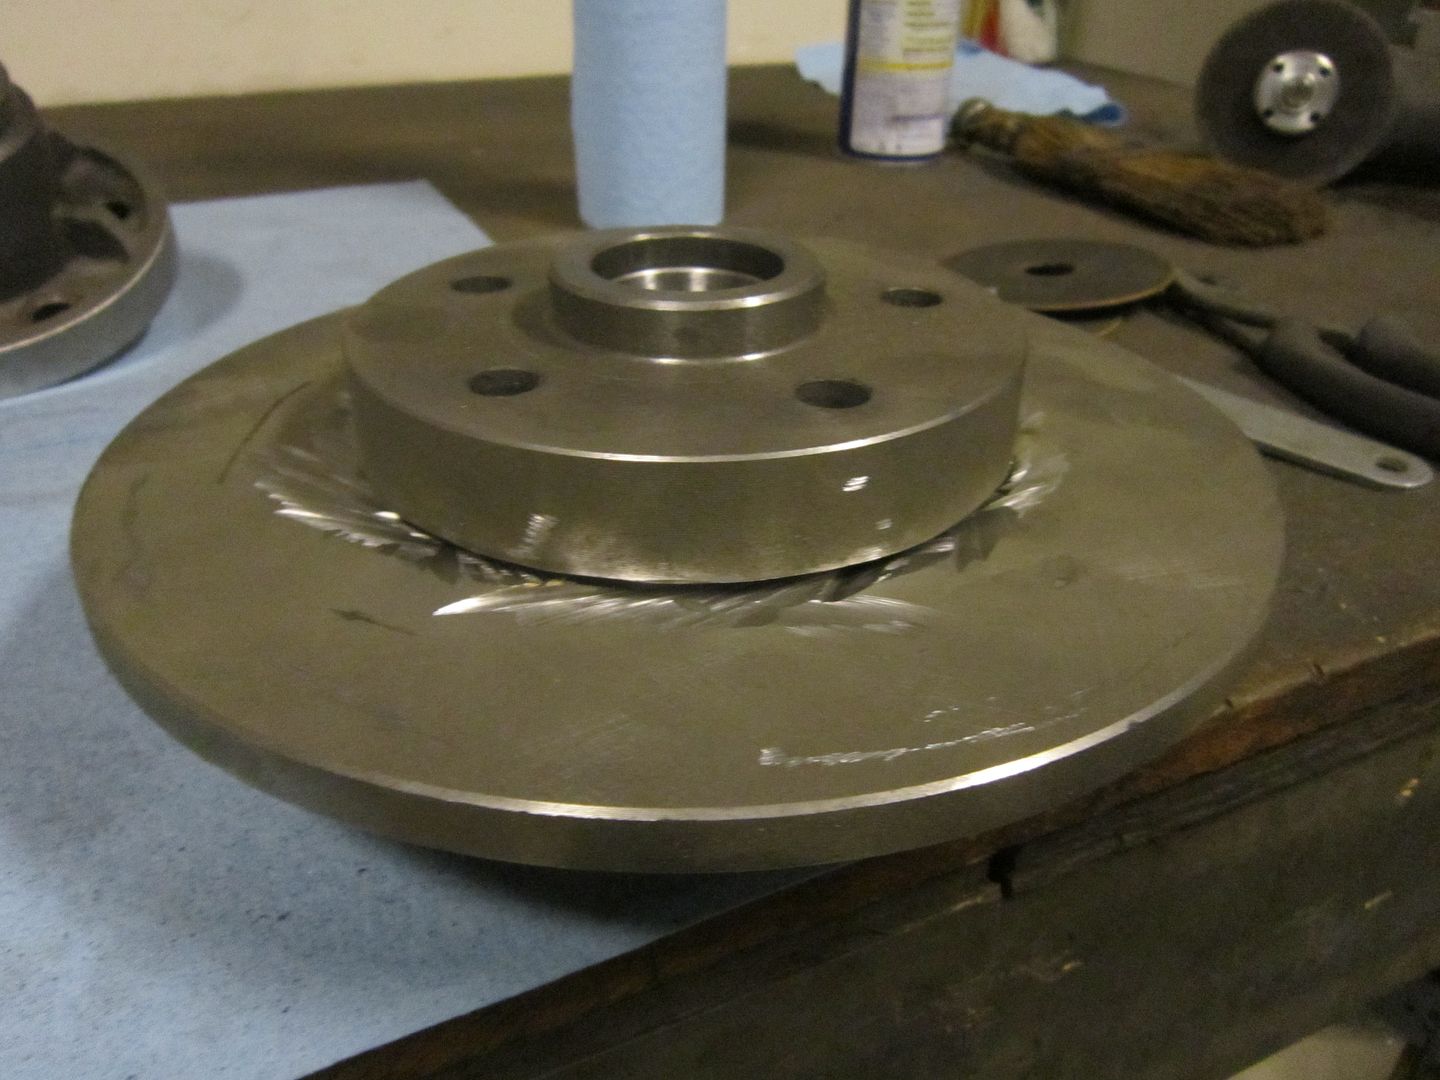
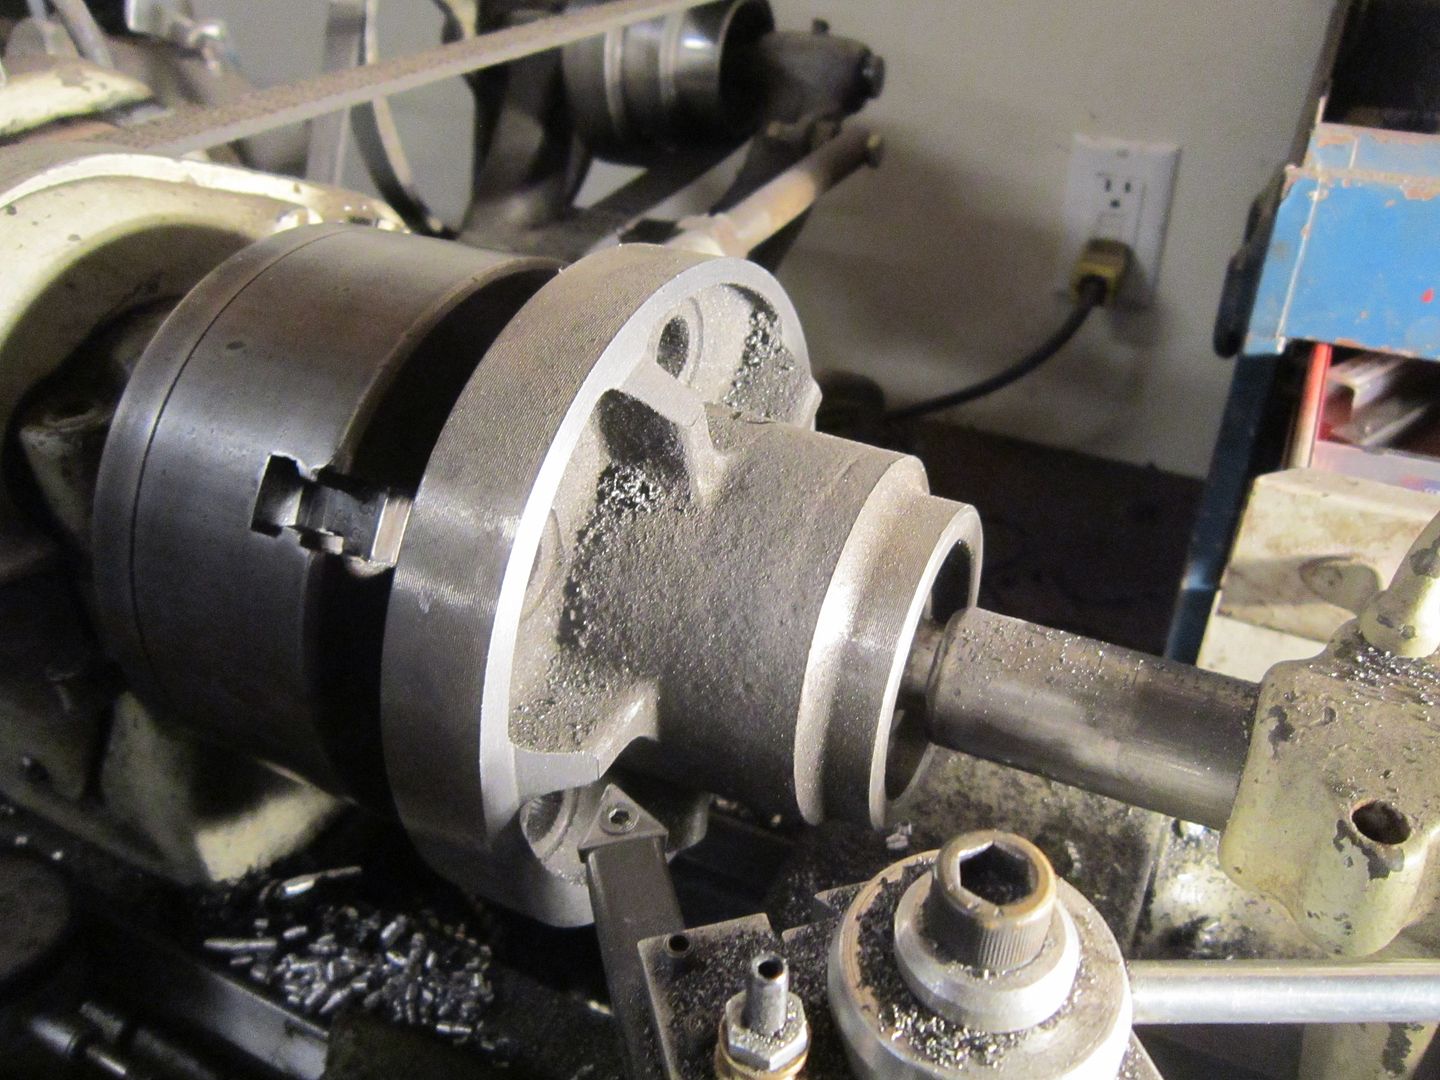
Then chuck it up in the lathe and clean up the crudeness and taper the ribs back at a 45 toward the center.
Now if you installing the GrandAm rotors, then you also have to cut the OD of the hub down so the rotor will slide over it. Since these are for a 12" brake upgrade, there isn't any need to turn down the OD unless you really wanted to to reduce weight.
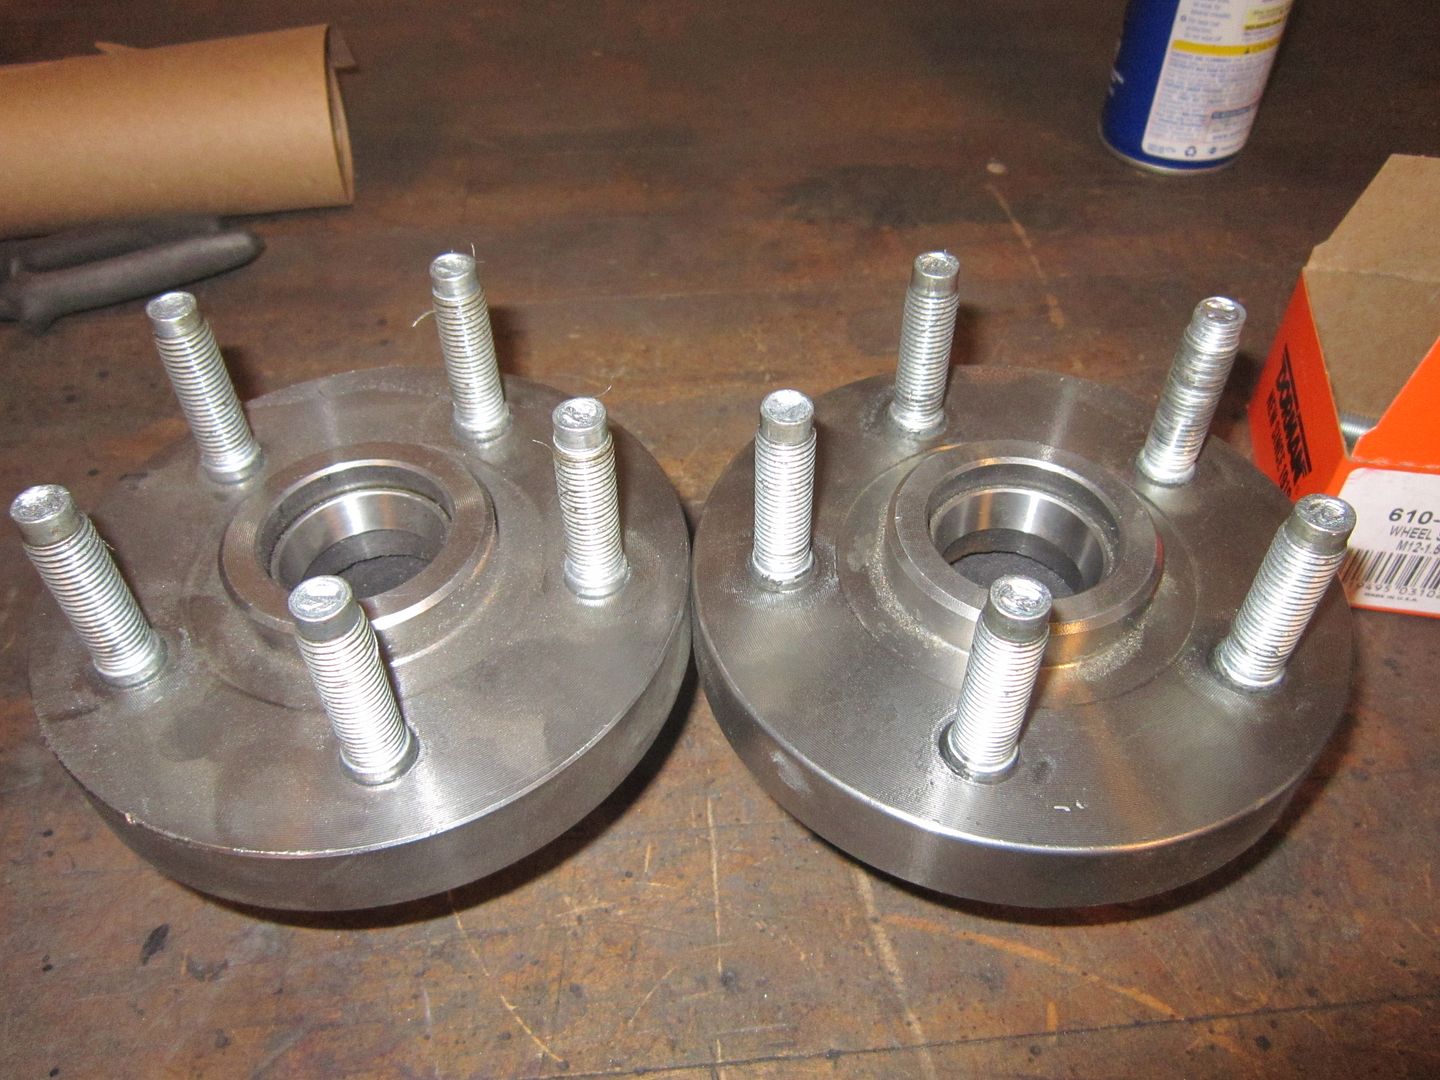
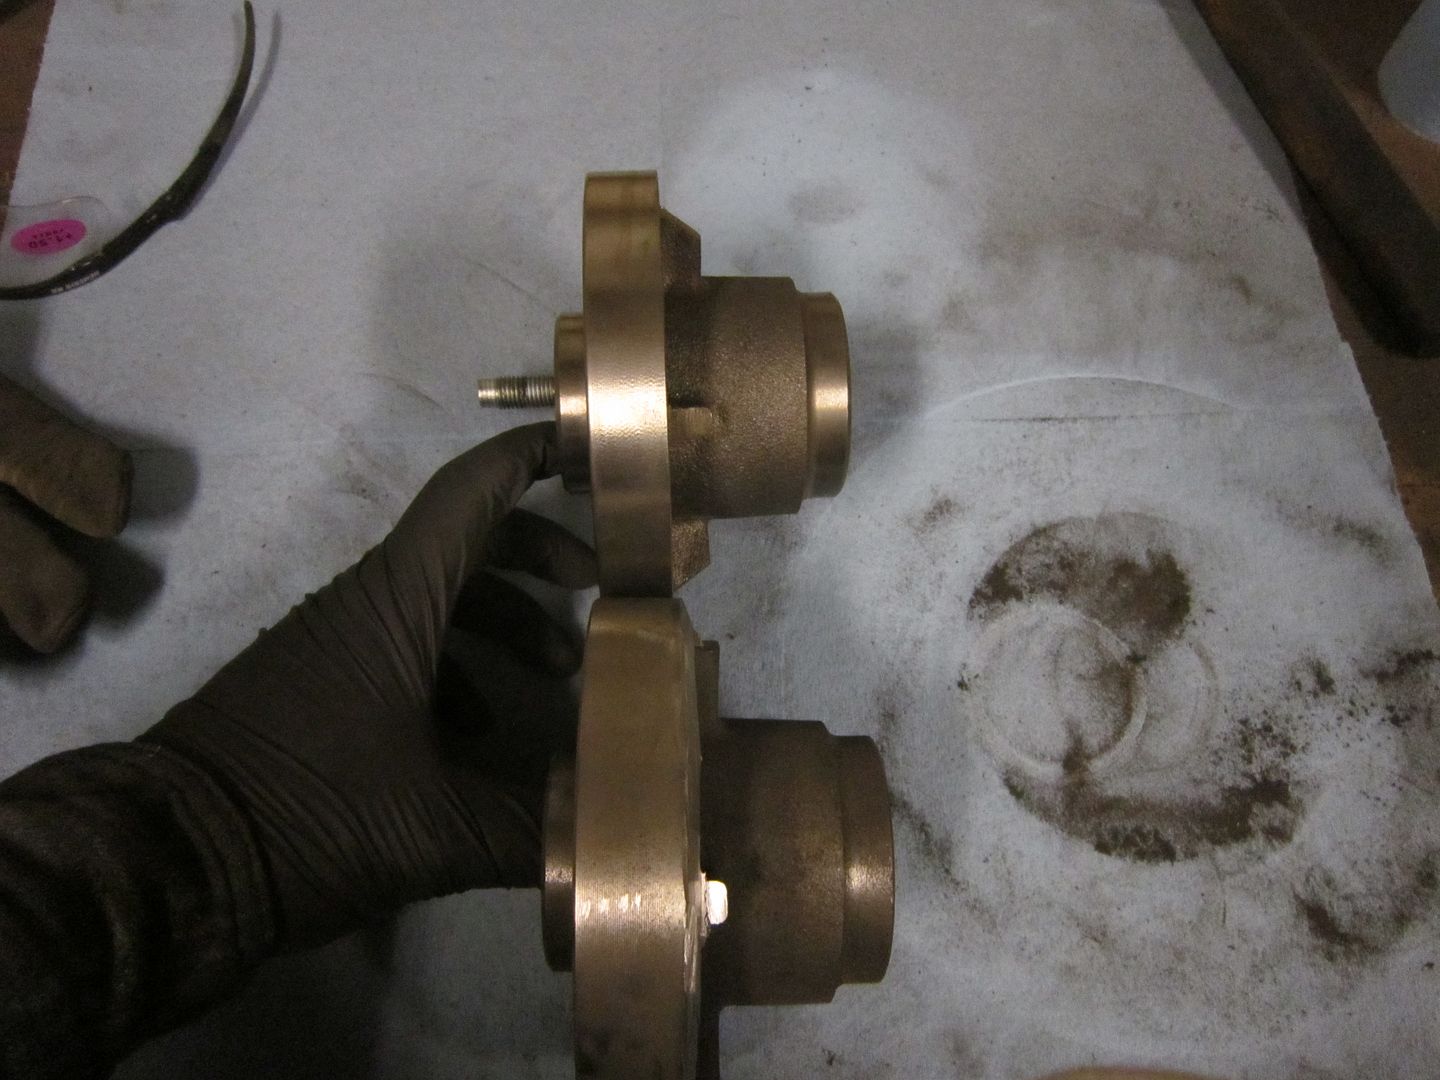
Here is the matched set:
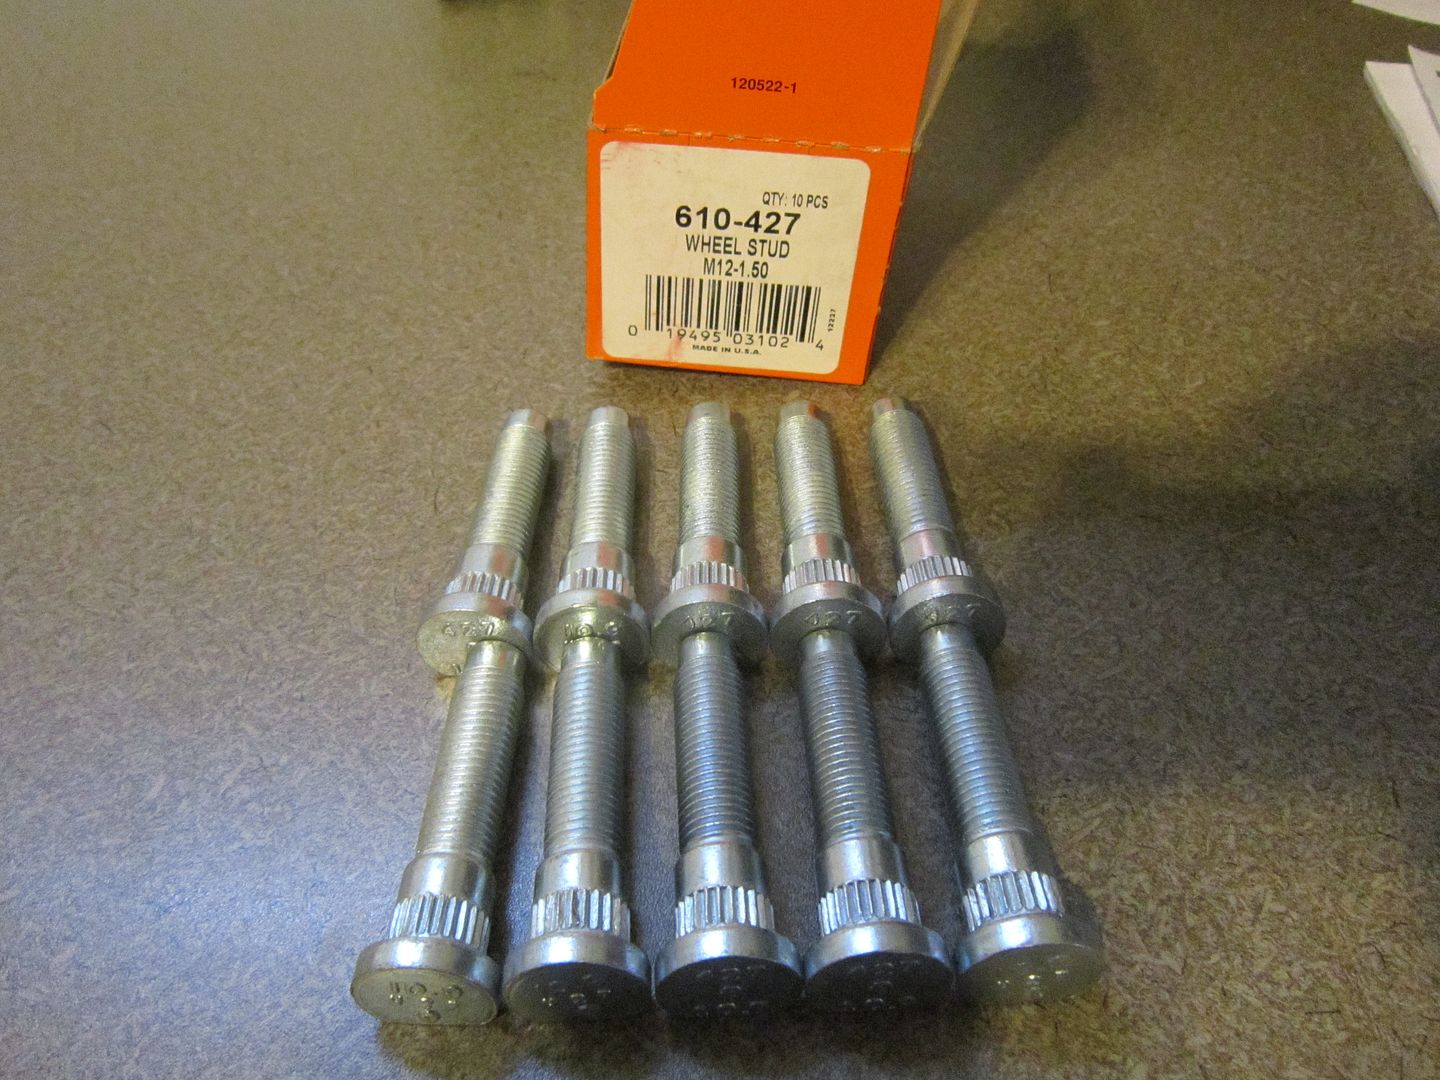
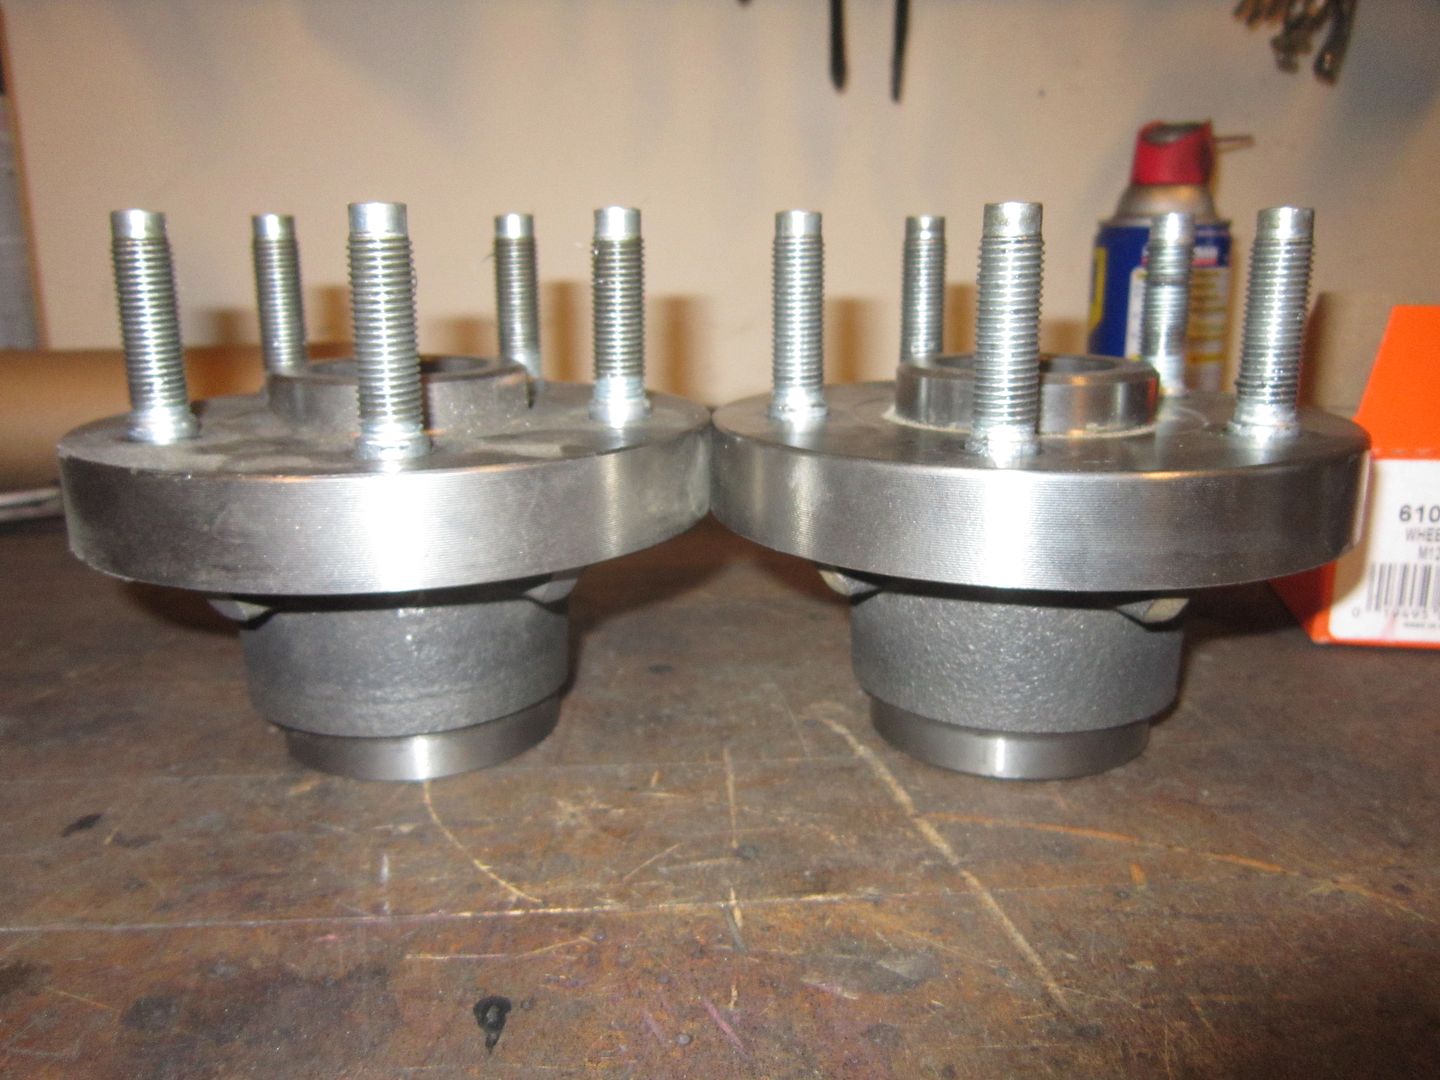
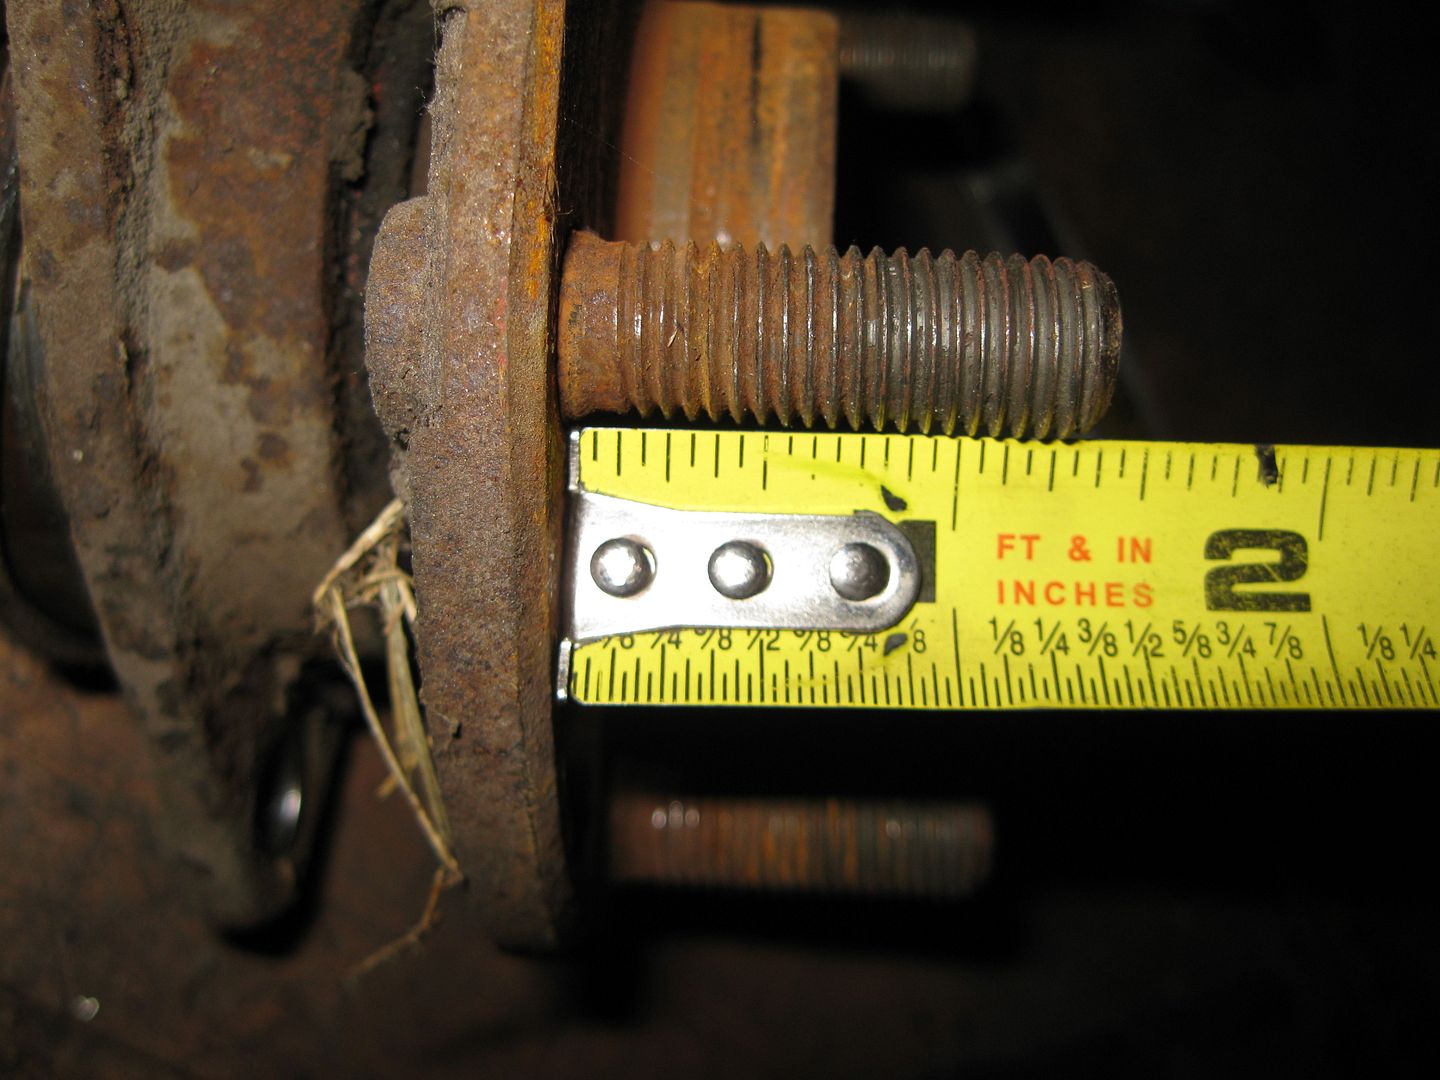
The last order of business is to install the longer wheel studs since these hubs will now be used with removable rotors. A good indication of the needed stud length is to ckeck a rear wheel bearing since they all had removable rotors from the factory. About 1 3/8":
If you are converting OEM rotors to hubs, then the longer stud is Dorman PN 610-323 Qty:10
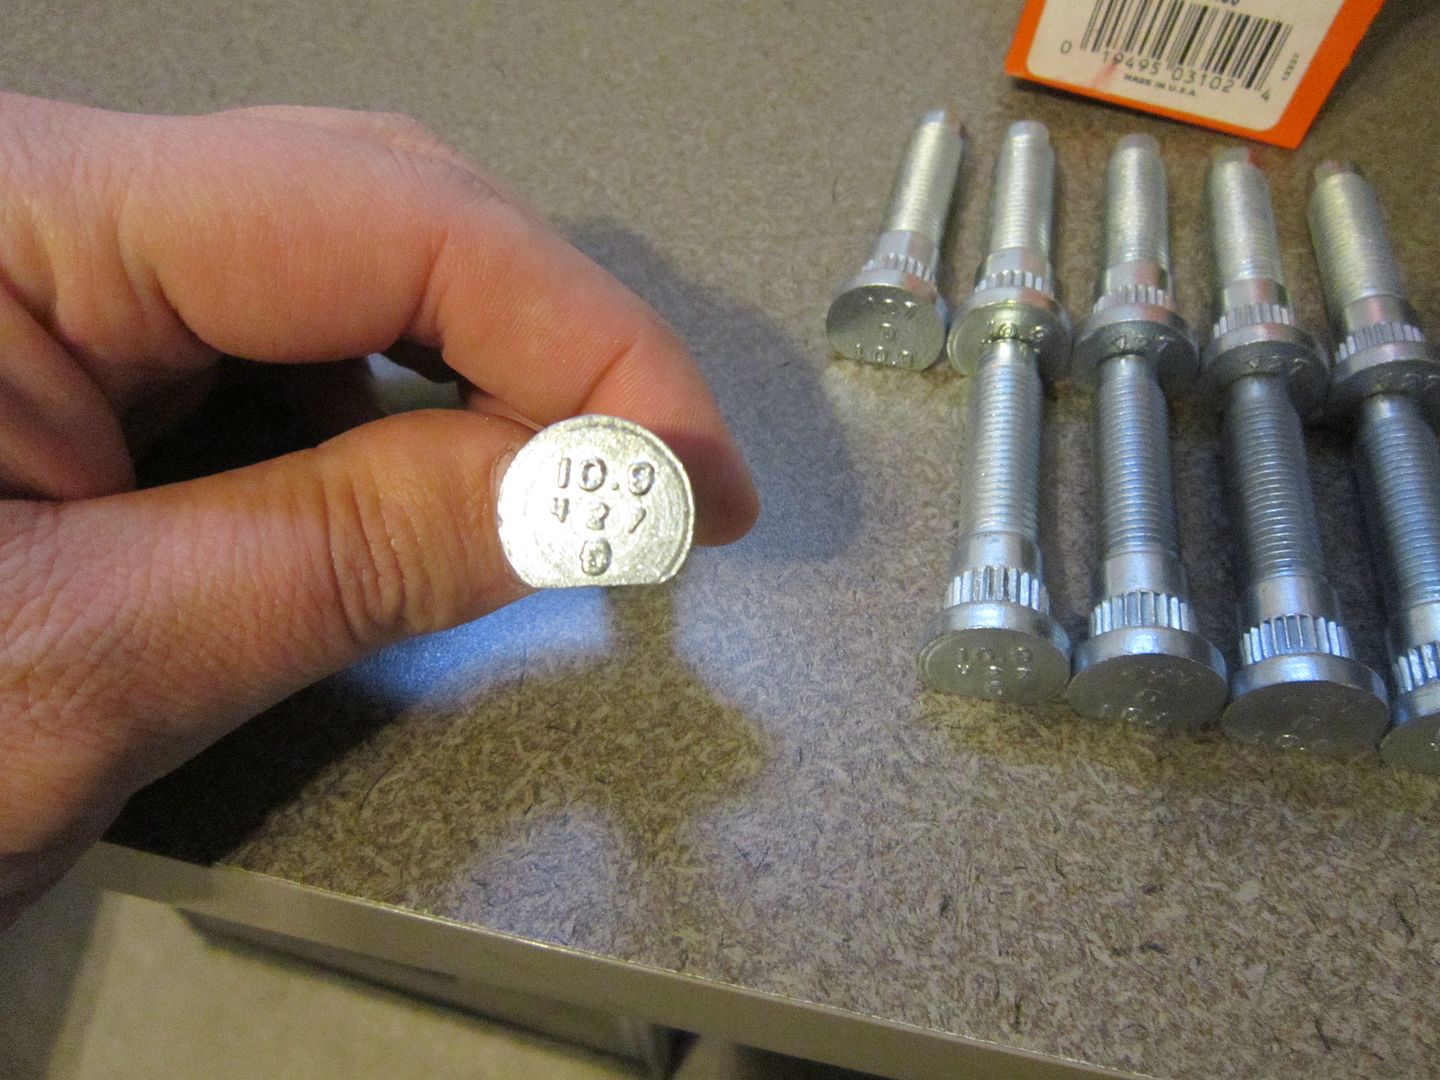
However, if you are using new aftermarket hubs, then the holes for the wheel studs are often larger and you need another stud option (which was the case with these hubs). Here is a side by side of the stock fiero wheel stud and the one from the aftermarket hubs with the larger shank:
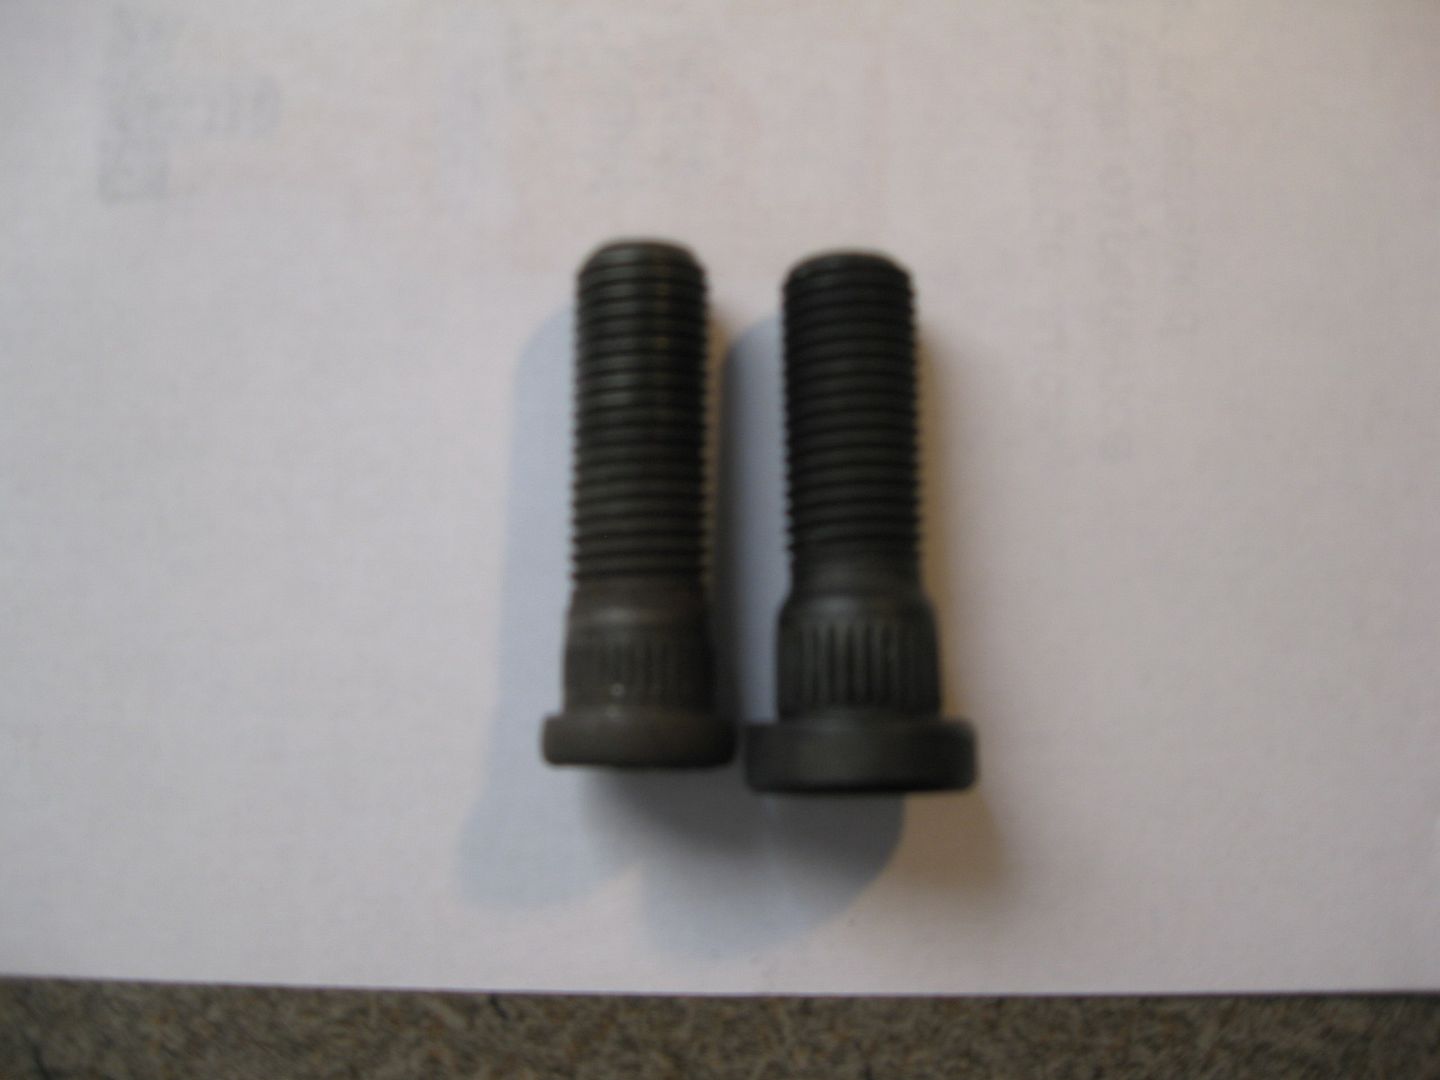
So if stock fiero wheel studs don't fit the hub hole, then use this part number: Dorman 610-427. It has a stepped shank and will fit the hole in the rotor while still retaining the M12-1.5 thread pitch.
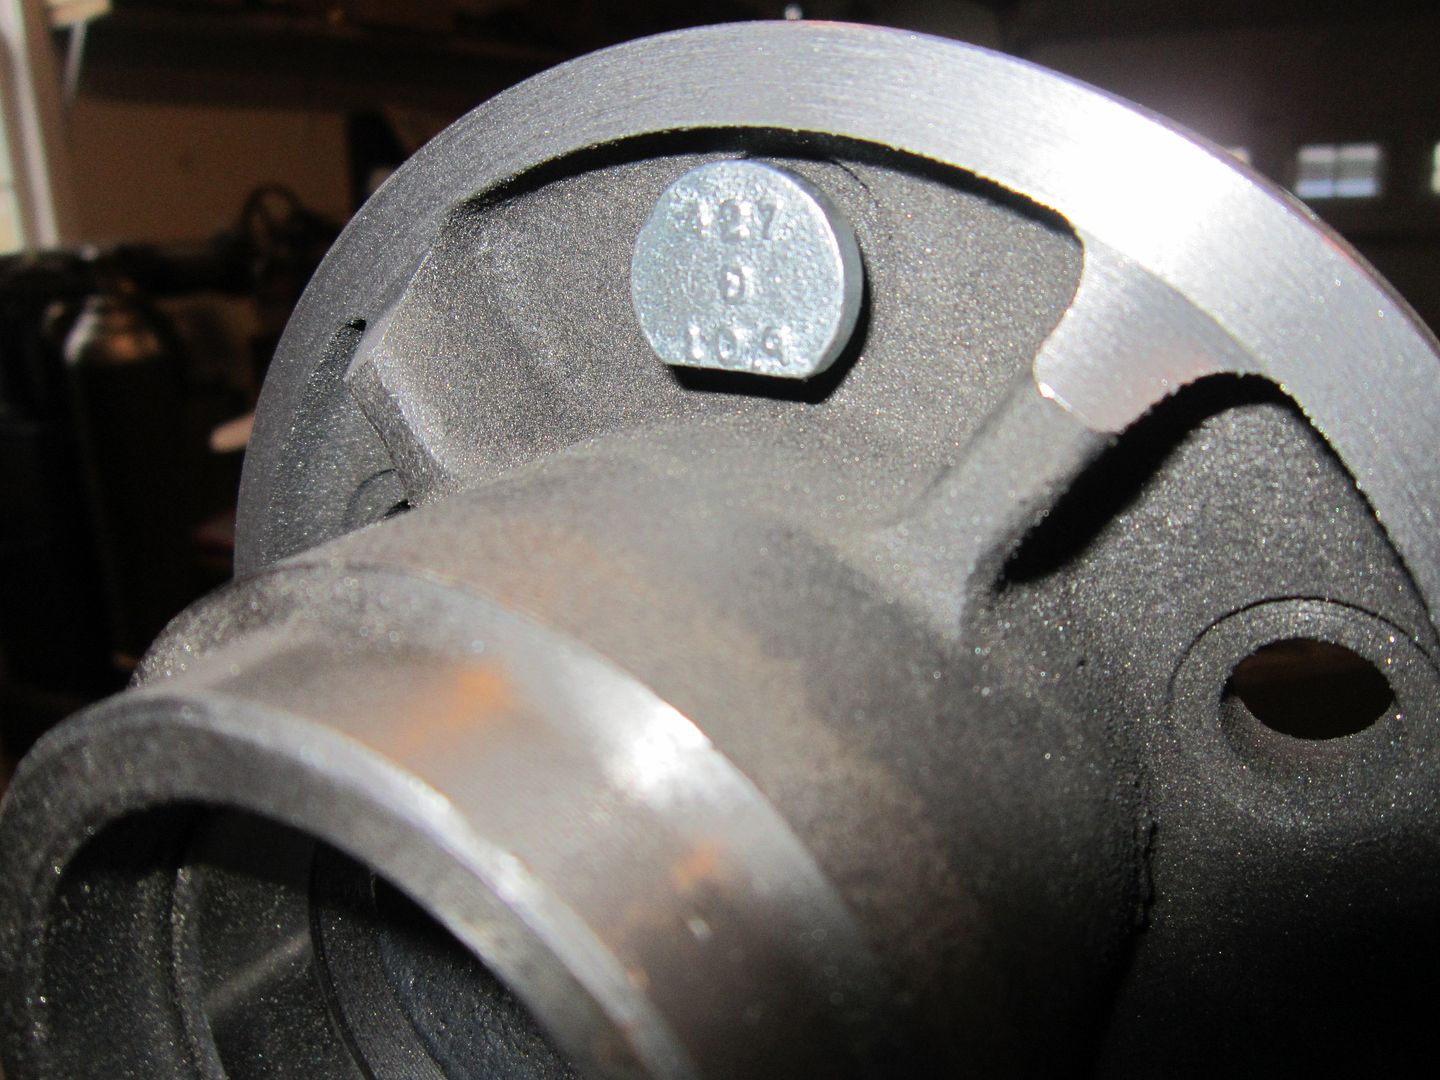
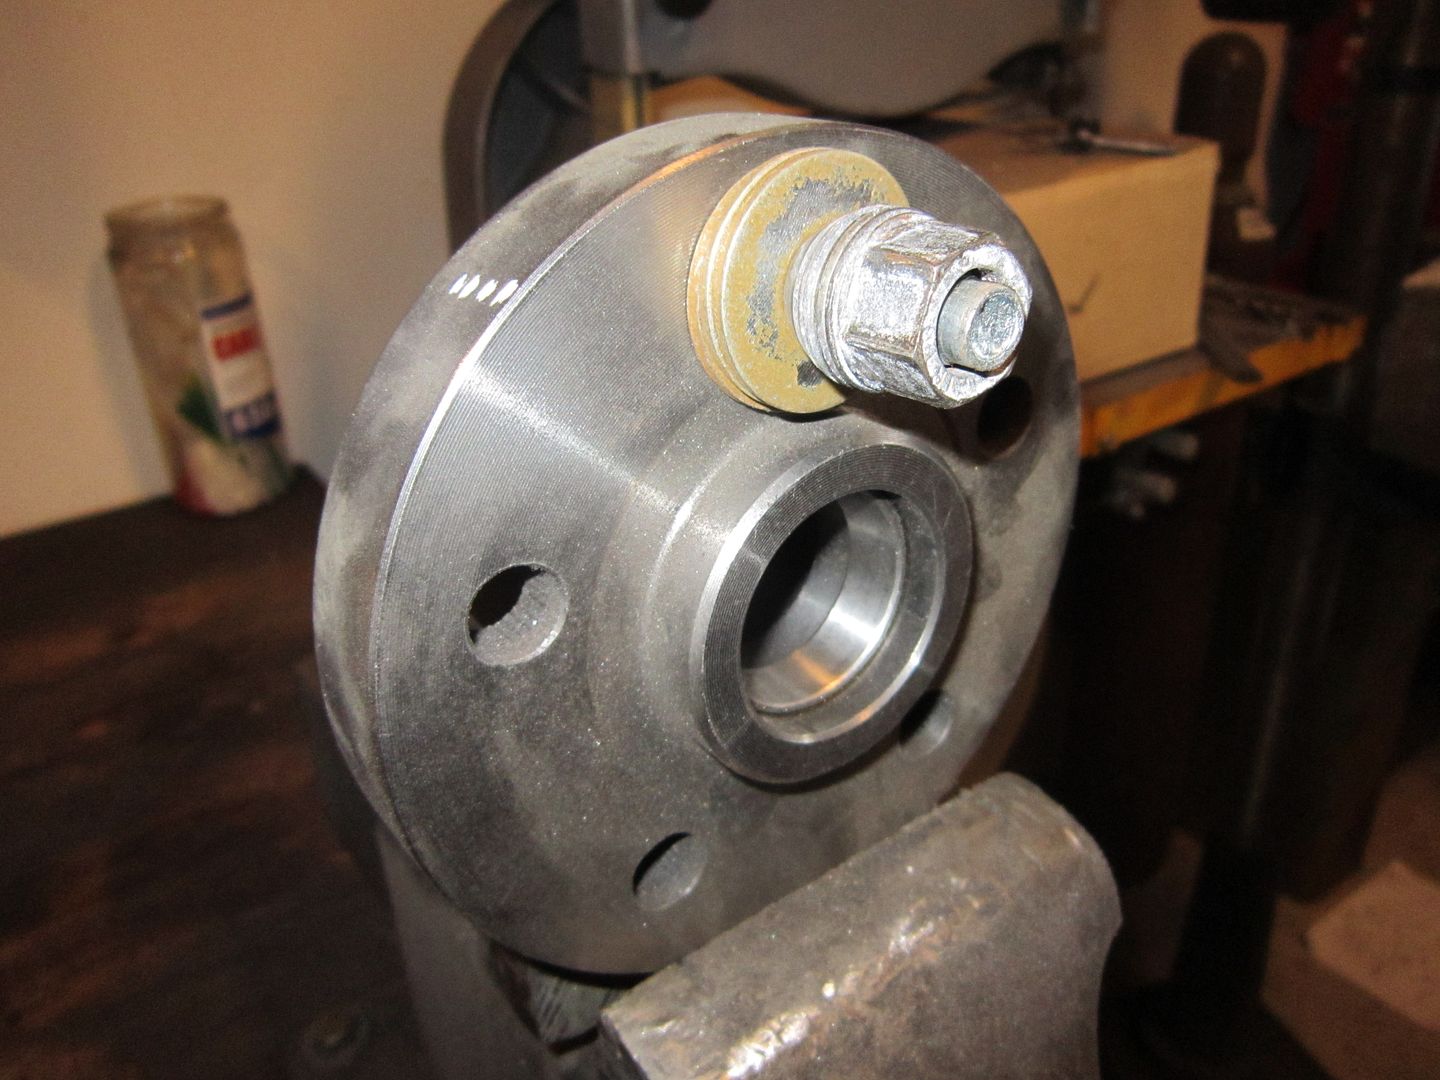
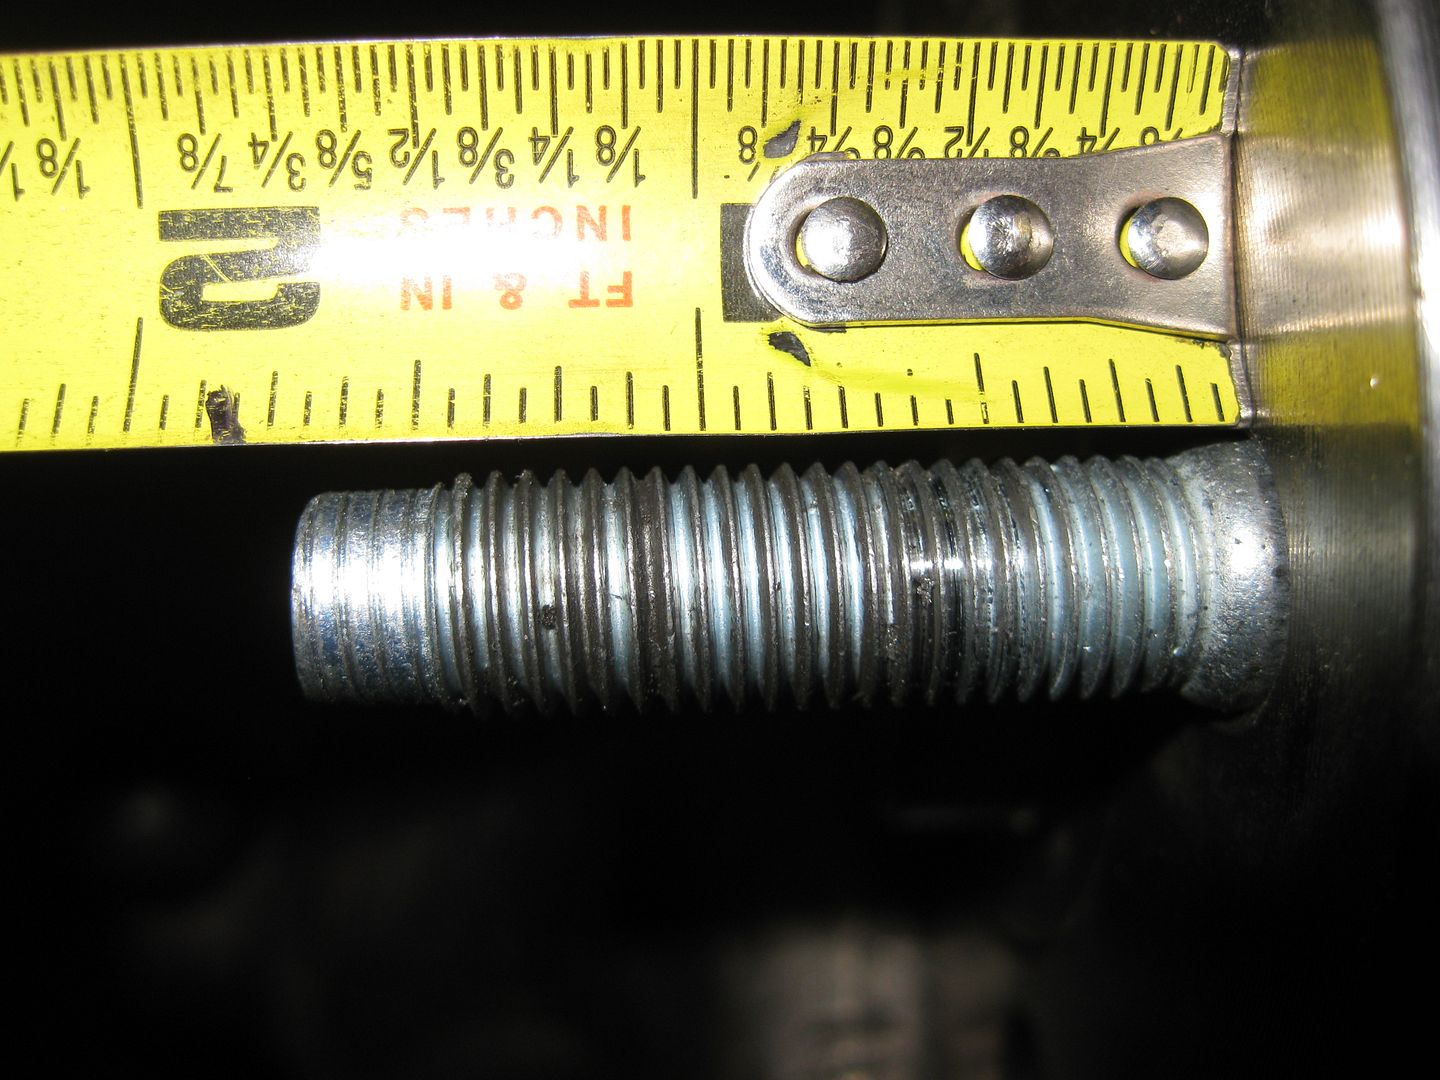
Here is what these studs look like installed. Notice it has slightly more than 1 7/16" threaded length, but more importantly notice the protruding shank:
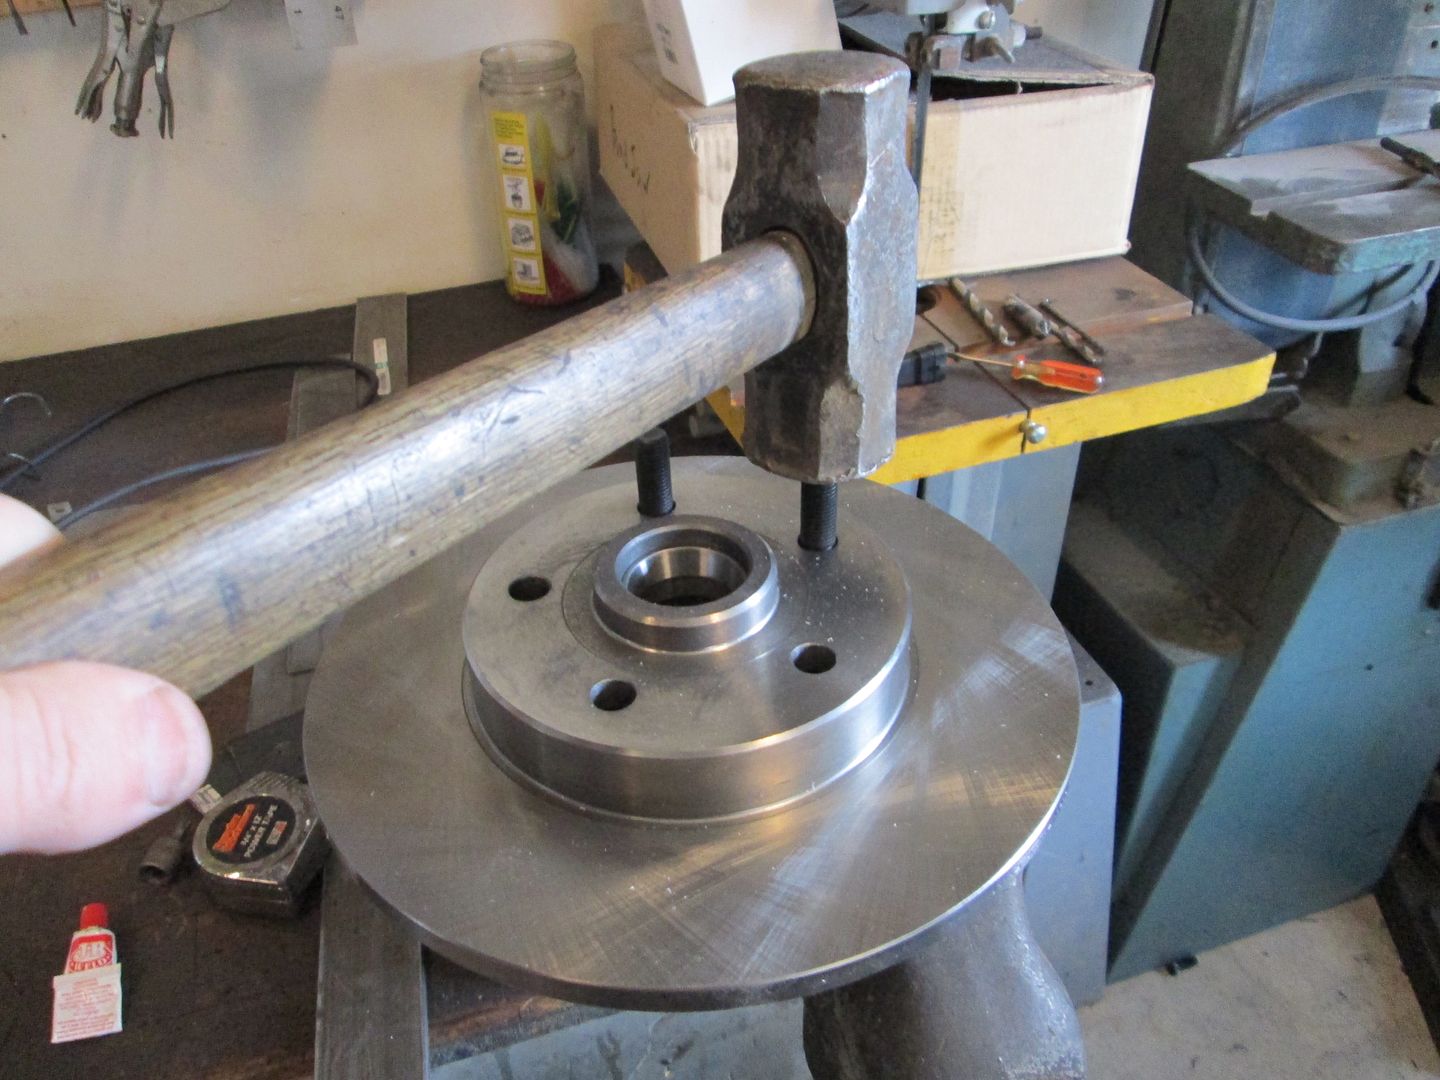
To use these wheel studs you will need to bevel or enlarge the backside of your brake rotor holes so they slide over the enlarged shank. Your concentric rings between the hubs and the rotors will keep them centered, so you don't need a tight fit to the studs. Also, this enlarged shank will not protrude past the rotor.
I am still waiting for all the studs to arrive for this set of rotors, then I will show some better pictures of the studs and the installation process.
By using this process above, it takes me about 1 hr per hub to perform the modification and I charge $175 shipped (lower 48) for 2 new hubs, 10 new/longer wheel studs installed, and all machine work necessary for the conversion. PM me if you are interested in having me supply these parts for your brake conversion.