By the means of member fierohoho’s great post and photos to study, plus a lot of more PFF searching to gather additional details; I attacked the outer door panel with a slightly different strategy…
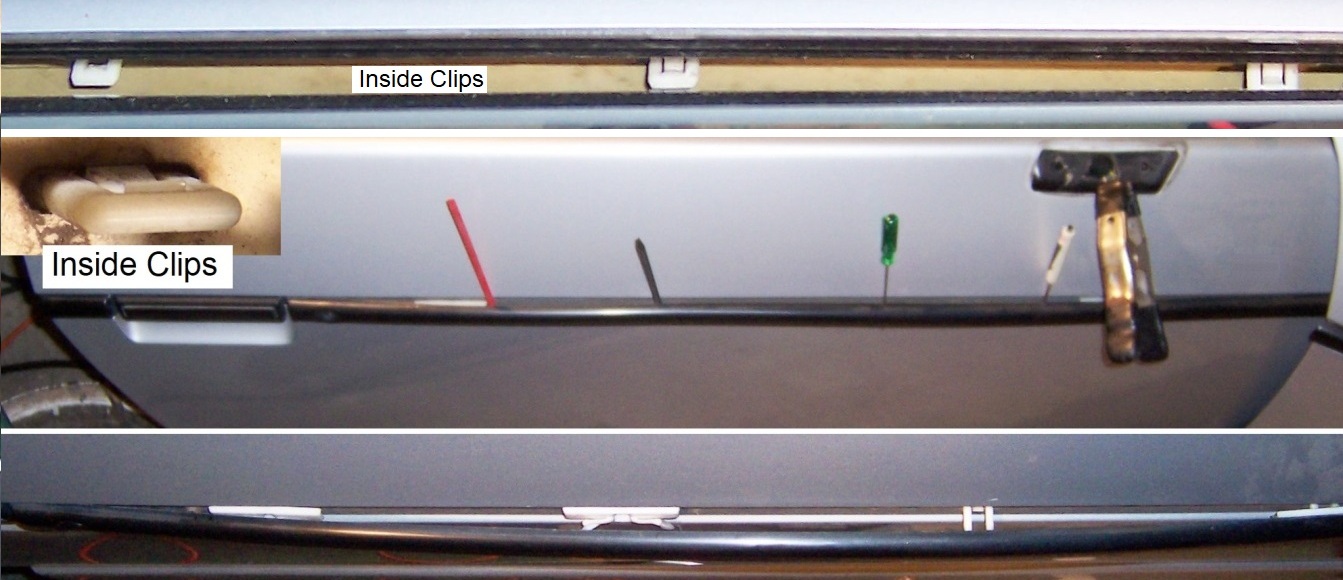
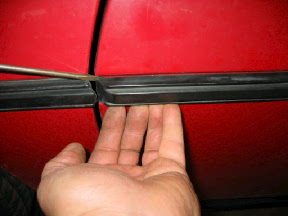
Molding Strip
Plastic Rivets
Edge Screws
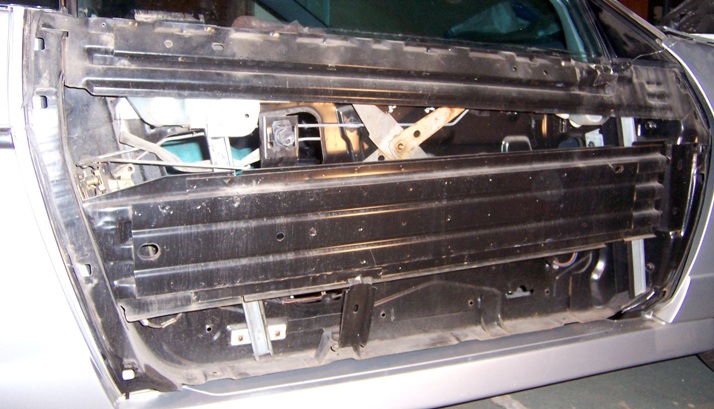
I began with the inner door panel, mirror and glass seals/dew wipes removed; plus the window fully rolled up.
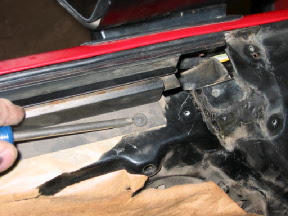
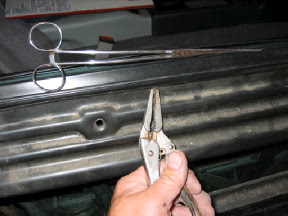
Molding StripI didn’t want to ‘pry’ on the outer finish, so I started inside of the door with a long heavy flat screwdriver by popping/breaking the visible four middle clips. With the inside middle clips loose, the molding was slightly ‘bowed’ away from the outer panel. Using thin tools; I carefully inserted the tools under the loose molding and then pulled the strip outward more.
Back to the inside of the door, I next ‘snipped’ the end of the small ‘Christmas tree’ or ‘carrot’ type push fastener, which was holding the molding under the door handle. With the fastener loose, it was easy to pull the rear end of the molding from the outer panel.
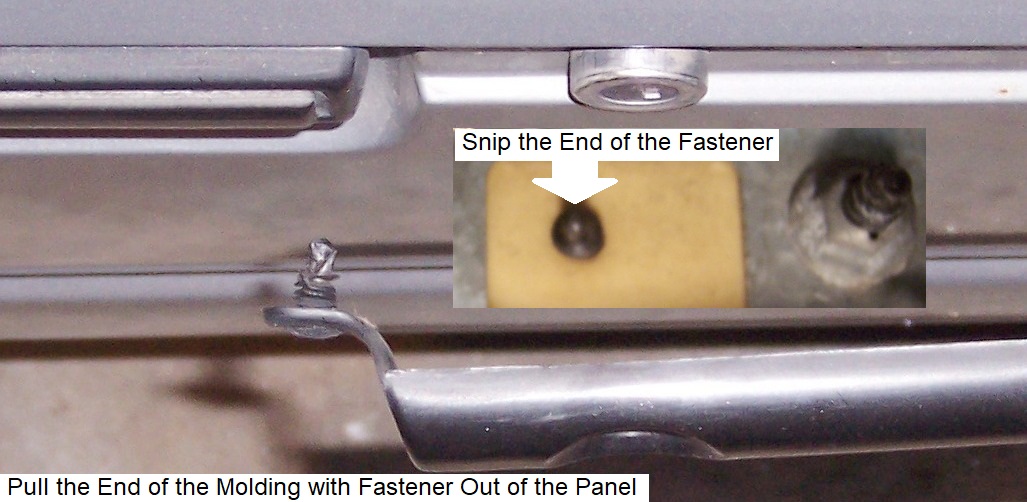
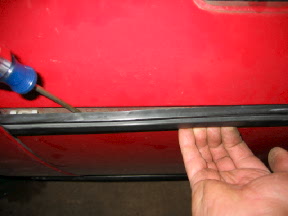
With the molding away of the panel, I grasped the trim with my hand and carefully ‘twisted-it’ outward, and the front clip released the molding strip from the door without a fight.

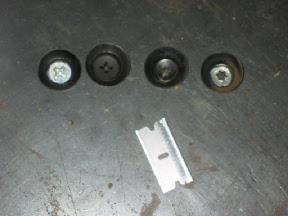
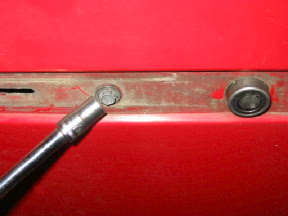
Remove the 2 screws that were exposed from under the molding trim with a 7mm socket
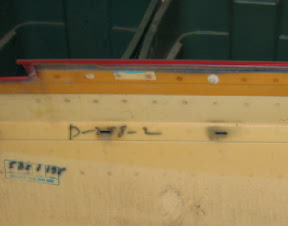
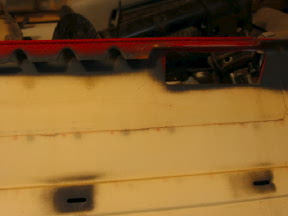
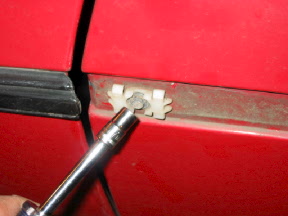
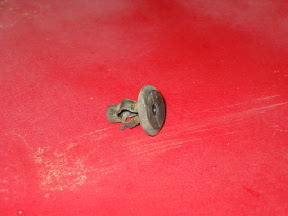
Plastic RivetsNote: The factory plastic rivets have ‘teeth’ or ribs on the center shaft which holds or 'bites' into grooves of the outside flange. By forcing inward on the center shaft with a smaller diameter punch, you can ‘pop’ the center shaft out from the outside flange, which releases the rivet.
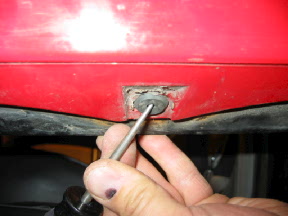
My Fiero was sitting on the ground so the workspace was tight under the door.
Instead of a small punch to punch the center out; I used a spring driven center punch at the middle of the rivet to start a drill bit. I slowly drilled the center shaft of the rivets with a 1/8-inch bit, which some broke the rivet, others needed to be pried with side cutters from the center and the flange edge as
fierohoho suggested.
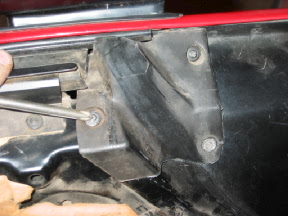
Edge ScrewsThese screws are infamous of stripping out the plastic covers; made sure that the screw heads are clean. Remove any ‘grime’ so you get a good bite into the bottom of the screws with the tool. Also made sure you’re using the correct tool; mine were Torx heads and needed a T-30 bit.
My Tip:With the tool firmly into the bottom of the screw, TIGHTEN the screw a ‘tad’, and then loosen. If the screw resists, apply penetrating oil, tighten the screw a bit again, and then loosen.
Use the ‘back and forth’ technique to ‘tap’ the screw out.
For me, I didn’t have any problems to remove my screws; all came out with the plastic covers intact.
FYI - If you need new door panel Torx screws; Rodney Dickman
still has them as I write this post…
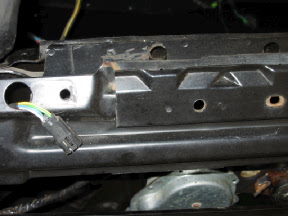
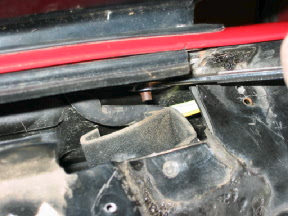
The next step is a little awkward which is disconnecting the lock linkage from the outer panel.Don’t attempt the lock linkage from the inside of the door, many tried. The best method to release the lock linkage is when the outer panel has been ‘freed’ from the door frame.
To do that,
either a helper is needed
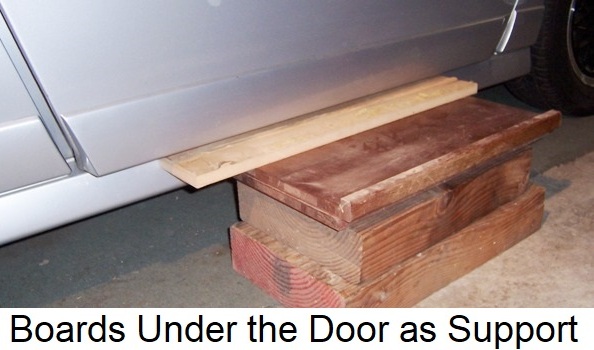
or a ‘support’ which the ‘free’ outer panel can be placed on beside the door, as you work with the lock linkage; I used the latter.
I put boards under the door as ‘support’ to hold the panel when it is time to lift the panel from the frame.
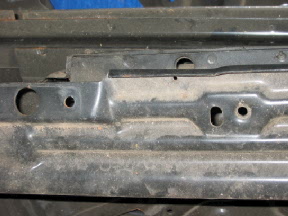
Slightly pull out the bottom edge of the outer panel away from the frame, and then lift the skin up to disengage the panel lip that hooks over the edge on the frame, and then place the panel on the support.
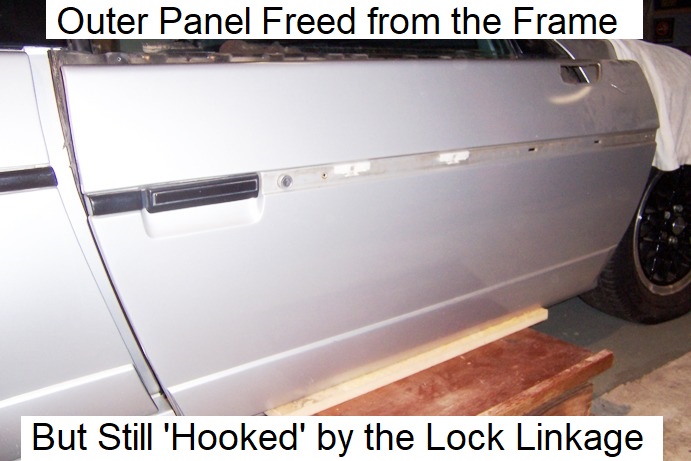
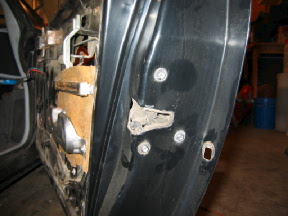
NOTE: By lifting the panel up from the frame, the door handle linkage slides out of the latch; notice where the rod exited the latch for reassembly. I can already see that when putting the outer panel back on the frame, ‘dropping’ the door handle linkage back into the latch will be tricky, but I’ll cross that bridge later.
With the panel loose on the support, be careful as at this point the only thing holding the panel is the lock linkage which still needs to be disconnected.
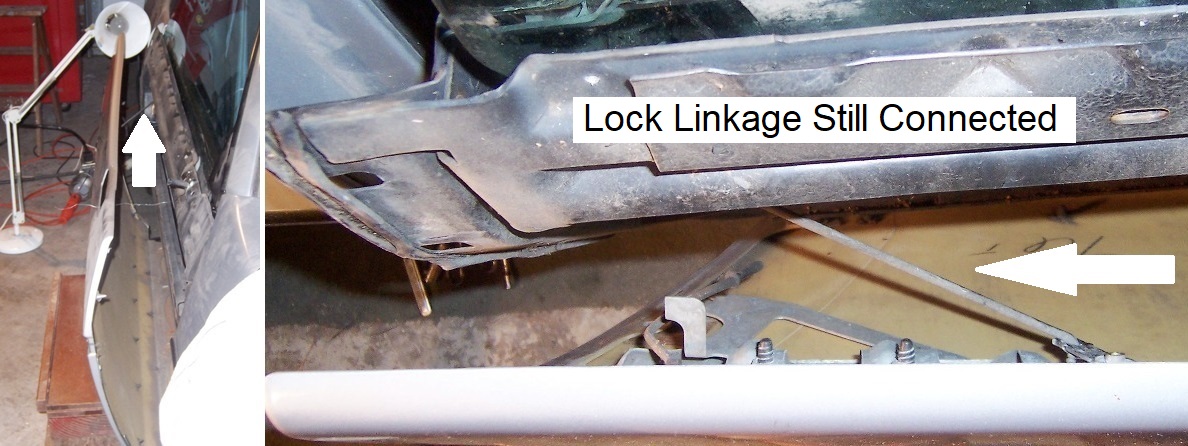
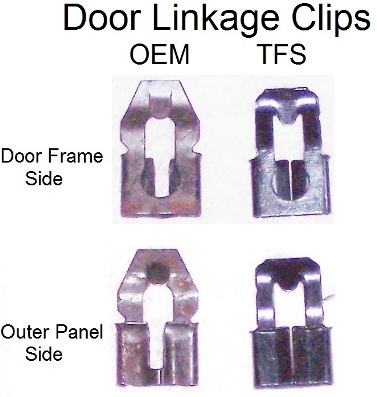
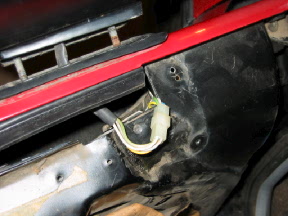
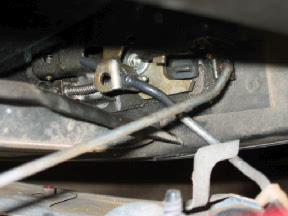
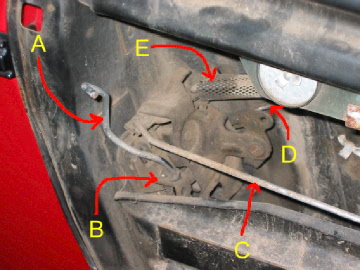
To disconnect the lock linkage, gently ‘hook’ the top of the clip and at the same time; pry/push the clip away from the lock cylinder ‘tab’ and push the clip down on the linkage.

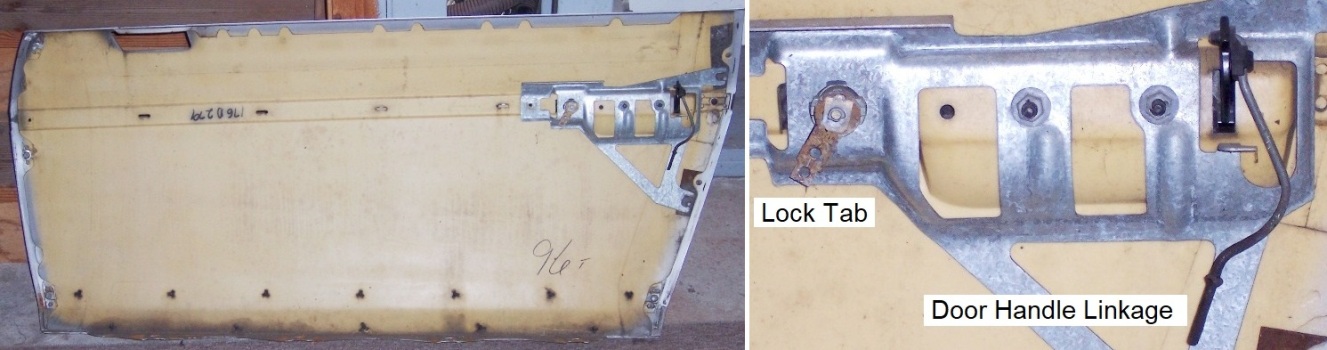
This will unfasten the linkage but the rod will be still into the lock tab; the next step is to guide the 90-degree angle bend of the linkage out from lock cylinder tab.
When the end of the lock linkage is out of the lock cylinder tab; the outer panel will be really ‘free’ from the door…
-----------------------------------------------------------------------------
ReassemblyPurchase Parts as Needed:
I brought
The Fiero Store Door Molding Clip Kits than separately parts {TFS Part # 81003} and Plastic Rivets {TFS Part #83026} which needs a special tool.
{The Fiero Store sells the tool; I used MAC Tools Plastic Rivet Gun model RG-75}
When putting the outer panel back on the door frame, I fully rolled the window to the bottom, so I was able to observe when it is time to guide the door handle linkage into the latch hole.
When the door and panel are ready; put the lock linkage clip onto the end of the rod; place the outer panel next to the lock linkage; install the lock linkage to the lock cylinder tab, and then the fun begins…
At the end of the lock linkage is a ‘groove’ which this smaller diameter area ‘locks’ into a ‘U’ channel of the clip. Aligning and pushing this smaller diameter area into the ‘U’ channel of the clip was difficult, as both the rod and the tab needs to be parallel before the clip will fit into the rod groove.

Obviously, your hand will be in the way between the door frame and the outer panel, so the lock linkage goes outward at an angle. I found that the front end of the panel needed be ‘skewed’ away from the car to align the lock cylinder tab with the lock linkage.
Make a note that if the linkage ‘groove’ is pushed too far beyond from the clip channel {not locked}, the rod can bind at the lock cylinder tab.
Special Note: I brought TFS Door Latch Rod Clips {#88197} and they didn’t have the ‘U’ channel. Thus, I didn’t try to force their clip onto the lock linkage groove.
Next is to carefully raise the outer panel as you hold the bottom of the panel away from the frame slightly and then guide the door handle linkage into the latch.
With the door handle rod into the latch; lower the panel slightly more and guide the panel’s top ‘lip’ and engage with the door frame, making sure it ‘hooks’ completely, and then let the bottom of the panel fall in place.
Align the front molding screw of the panel with the door threads, and with a clip under the head, lightly thread-in the screw.
Lightly thread-in the rear molding screw too.
Lightly thread-in the seven edge screws behind the panel.
With the door closed, check the alignment and tighten the front screw first, then tighten the rear screw at the door handle.
*If the outer panel alignment isn’t correct; alter the screw threads in the plastic ‘plugs’ in the steel frame.
Tighten the seven edge screws behind the panel.
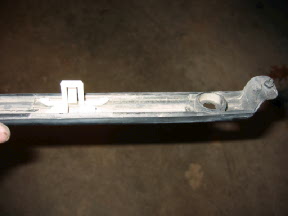
Molding StripThe molding trim has clip ‘guides’ inside of the strip where the four middle clips go; the larger ‘legs’ of the clip sits next to these guides.
With the clip legs between the guides and holding the legs firmly in place; push the clip down until the upper side of the clip ‘snaps’ into the molding.
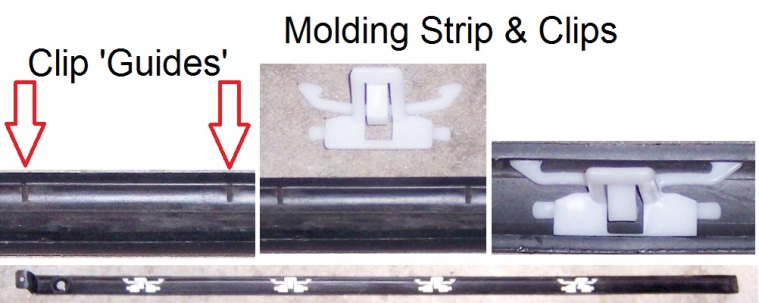
Install the small ‘Christmas tree’ or ‘carrot’ type push fastener into the molding strip at the door handle end.
‘Twist’ the front end of the molding trim on the front clip which is under the front door screw; then adjust/align the middle clips to the outer panel and at the same time, align the ‘carrot’ fastener on the door handle end.
Push the ‘carrot’ fastener at the door handle end of the molding into the door panel and then push all the middle clips into the panel.
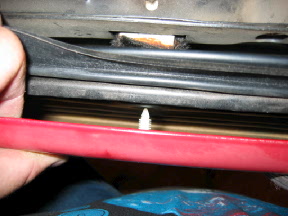
Plastic RivetsInstall the four bottom plastic rivets using a plastic rivet gun.
------------------
Original Owner of a Silver '88 GT
Under 'Production Refurbishment' @ 136k Miles
[This message has been edited by Vintage-Nut (edited 12-17-2025).]


 HoHo you seriously should have. Just the color pics alone makes a big difference.