Heater core replacement can be a real pain in some cars, but on the Fiero, it's actually pretty easy, if it's not entirely obvious how to proceed at first. Anyone with a basic set of hand tools can pull this off.
Some signs you may need to replace the heater core include
-A wet spot on the passenger side floor mat or carpet -A sudden sweet smell in the interior -The heater no longer gets warm -The windows fog up and it takes forever to clear -Steam coming out of the vents
Which Heater Core Do I Have?
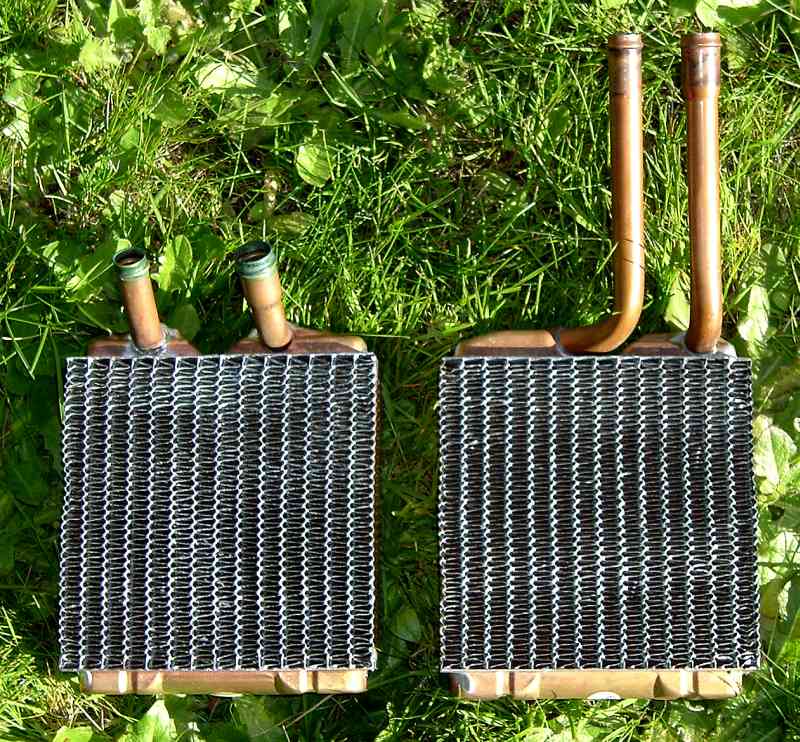
The Fiero would have come with one of two heater cores, depending on whether the car originally came with AC or not. Pictured below, non-AC heater core on the left, AC core on the right (pic originally posted by Patrick)
This writeup will cover the AC heater core replacement. Replacing the heater core in a non-AC car is actually simpler, since it's removed entirely from the front compartment.
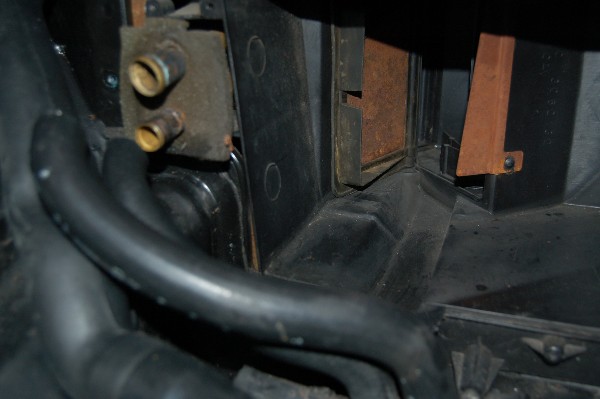
The most difficult part of the replacement is getting the hoses off the old core. As a last resort, you can cut the hoses off, but in order to replace the hoses, you would have to remove the front compartment tub. Usually there's enough slack in the hoses that you can cut off some of the hose, and use that to start working the hoses off. You can also crush the tubes inside the hose, and remove them that way. In order to prevent spillage, you can clamp off the hoses, or once disconnected, run them into each other using a scrap of smaller hose or a small pipe. There will still be some coolant left in the heater core, so remove it carefully once it's loose.
The washer fluid reservoir can be unbolted and moved aside without draining it, creating much more room to work. It's held in with two 10mm nuts, an extension makes them a little easier to reach.
Originally there was also a foam insert with a couple holes that goes around the tubes, and sealed the box from the front compartment. This can be reused, or you can make a new one out of insulating foam from the hardware store.
Interior Work
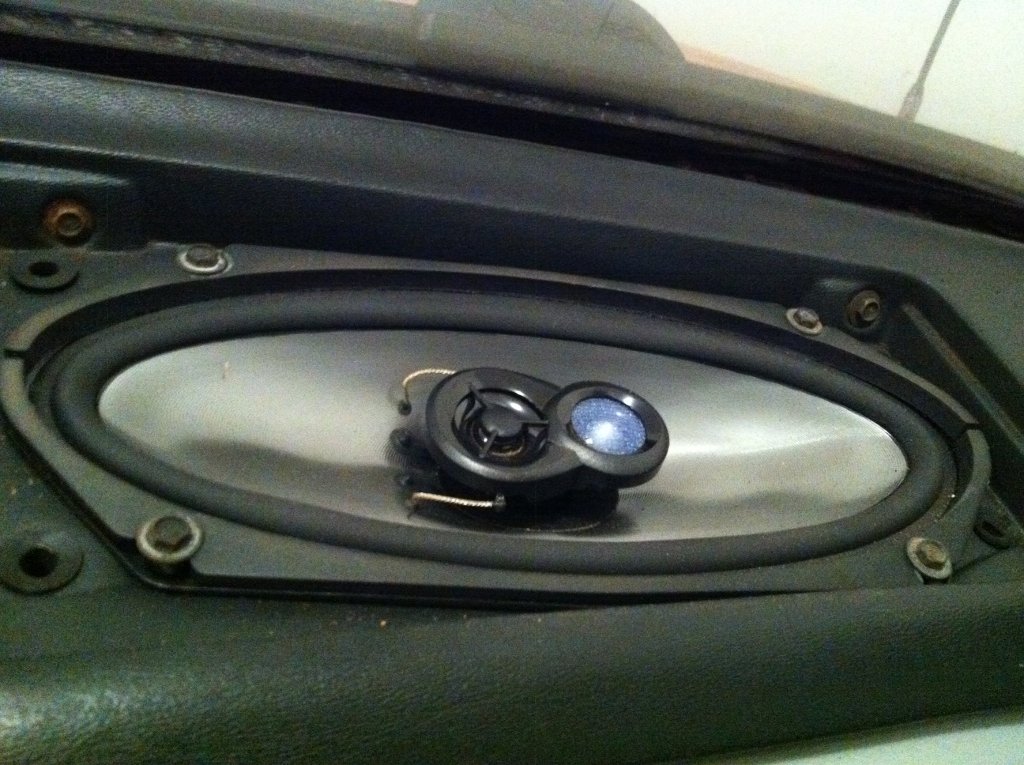
Most of the remaining work is done from inside the car, which is nice if you're doing this in February and it's 10 degrees outside. The first step is to remove the passenger speaker cover and speaker to gain access to one of the four screws that holds the heater core cover in place. Carefully, using a wide plastic spreader or similar, pry the speaker cover up and off, being careful not to apply too much pressure to the dashboard. This can result in cracking the dash, as pictured. Which was done on purpose so as to demonstrate what NOT to do. Yeah, that's it...
Next, remove the 4x10 speaker, held in with four 7mm screws. It then lifts out, and can be unplugged from the back.
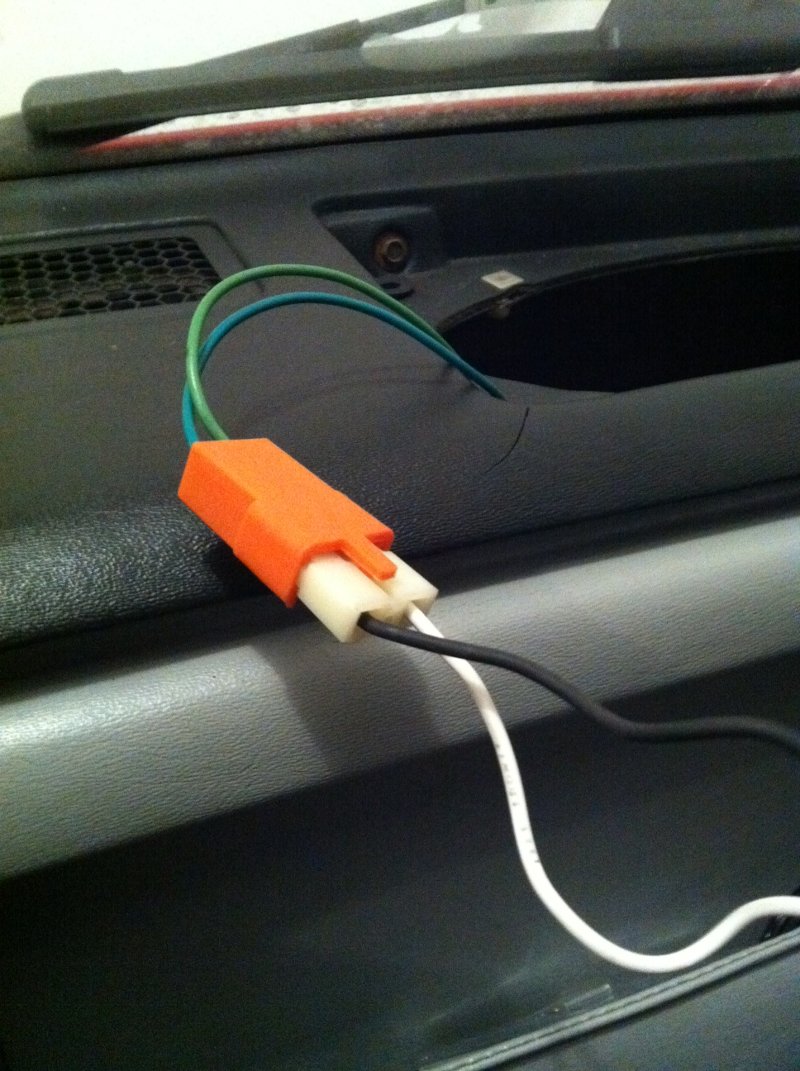
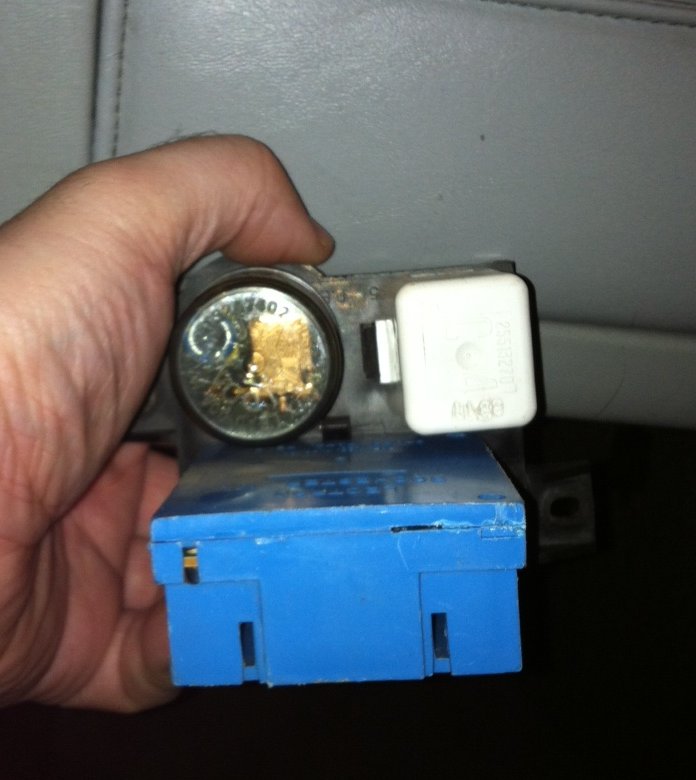
Remove the convenience center, which has the flasher unit, horn relay and sometimes the chime unit (aka the blue dingy thingy), held in with a couple 7mm screws.
Now under the dash, remove the subwoofer assembly if equipped, held in with two more screws by the interior light bulb, one where the convenience center was, and the same type of speaker connection as the front speaker
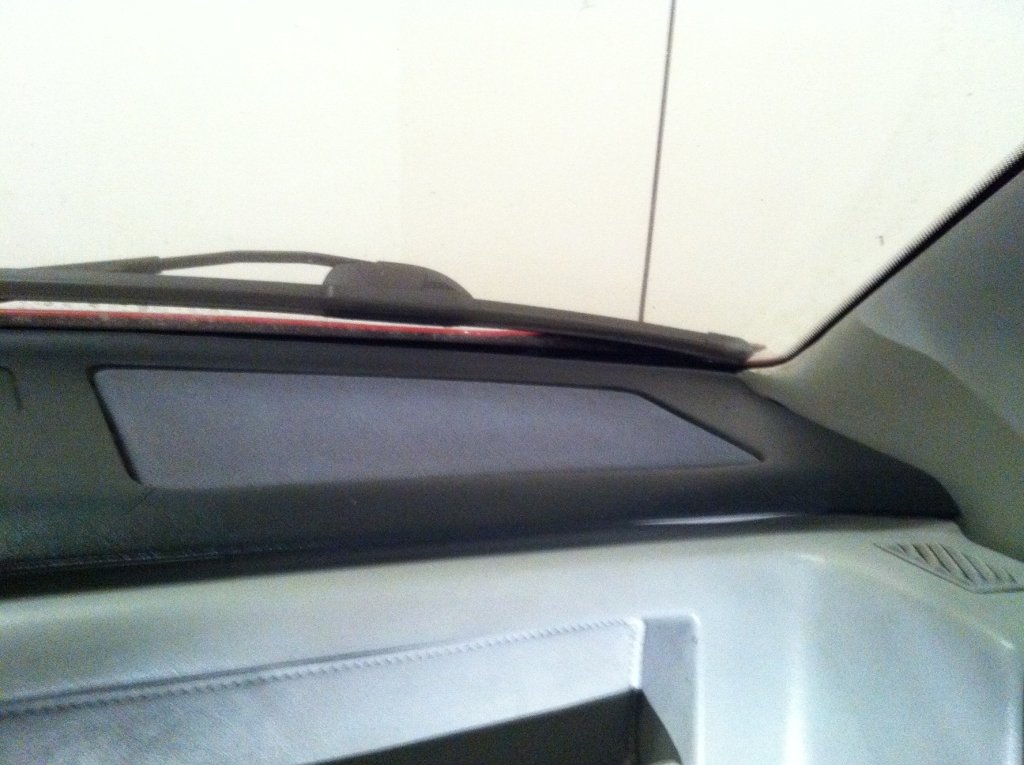
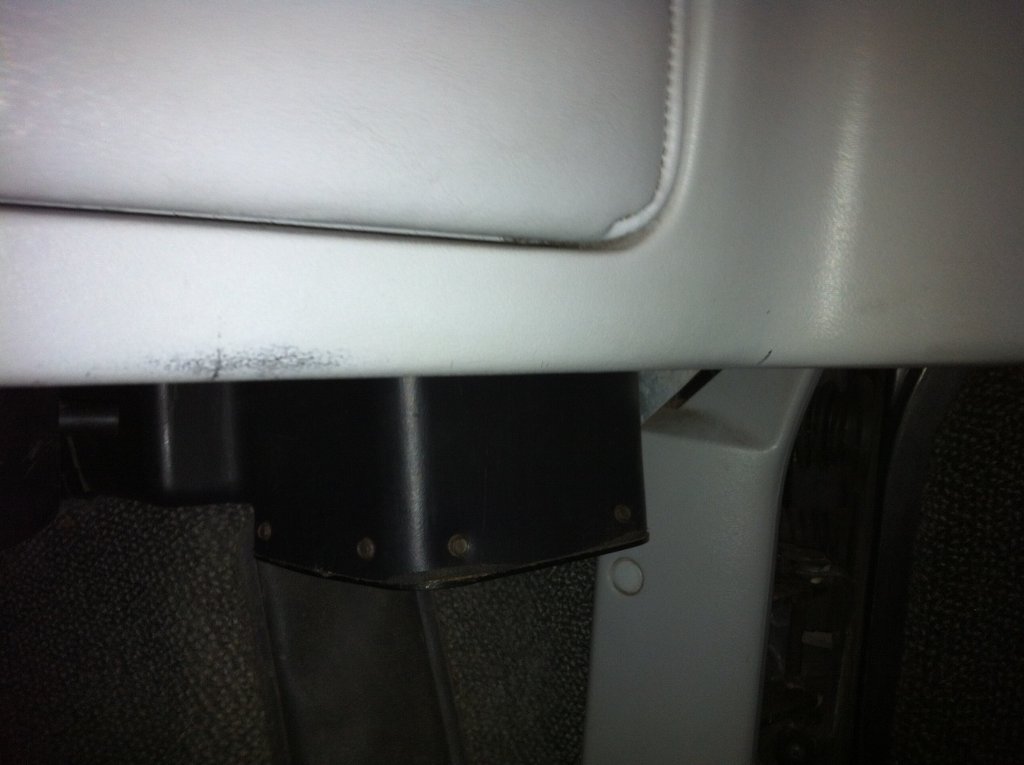
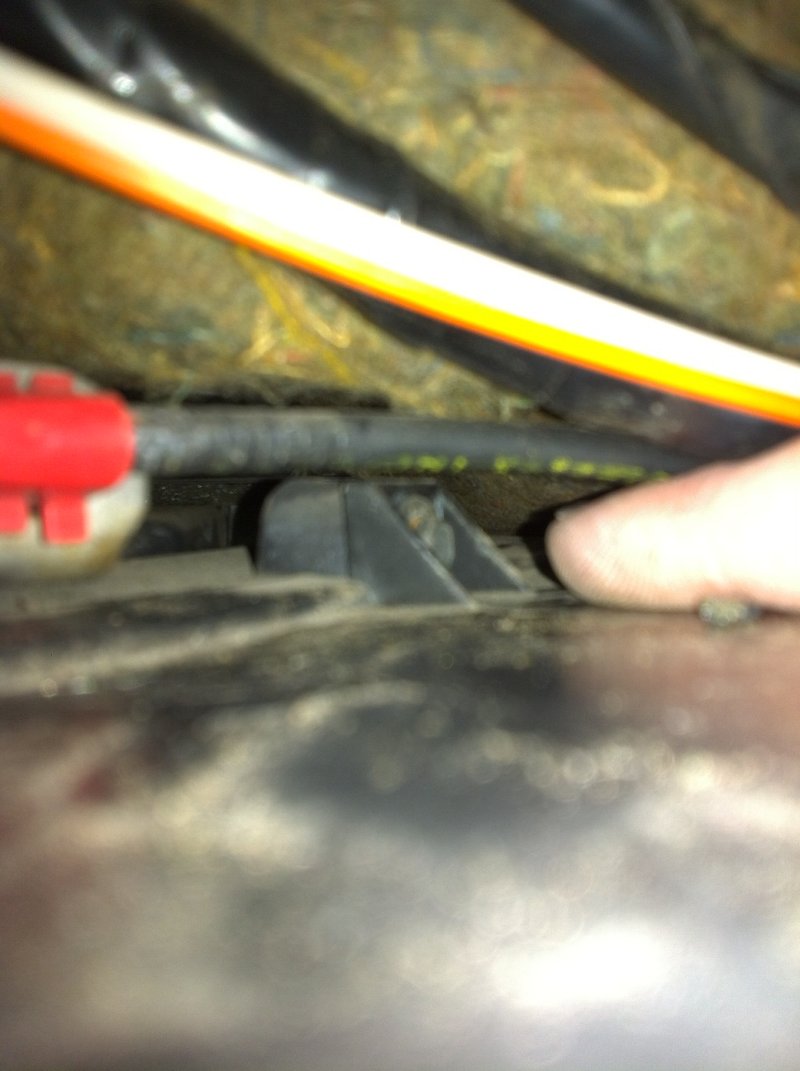
Now you should have access to the screws holding the heater core cover on, located on the sides, top, and bottom of the cover
Here's the hard-to-get-to top screw
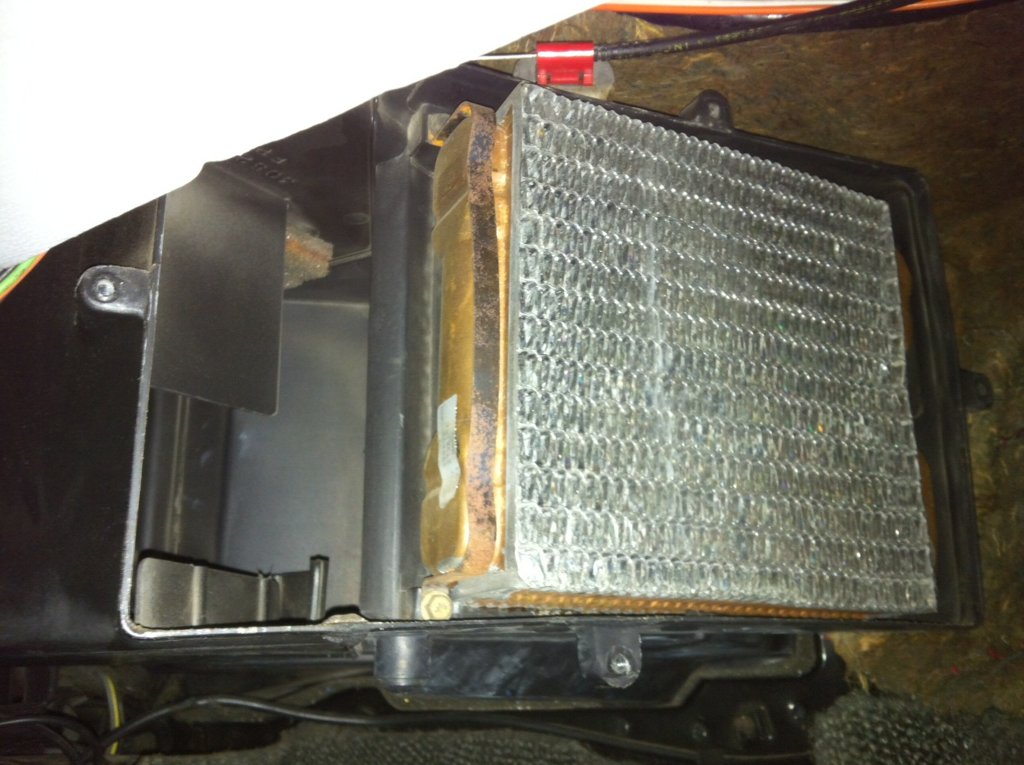
And just for clarity, here is what the heater core cover looks like outside the car. The four tabs sticking out on each side of the cover are where each of the screws go in
This is the early 84-85 cover. In 86, they changed it to one with a bracket that allows the convenience center to be mounted facing the passenger's feet, instead of sticking out towards the passenger's door, thus allowing the subwoofer to be installed in the Performance Sound cars. The screws are in the same place on both covers.
Before removing the cover, lay down some old towels or a bunch of paper towels to keep the coolant off your carpet. The only thing left holding the core in are two 7mm screws holding the bracket to the heater core. Here, you can see the entire face of the core, and the bosses where the four screws go in around the perimeter.
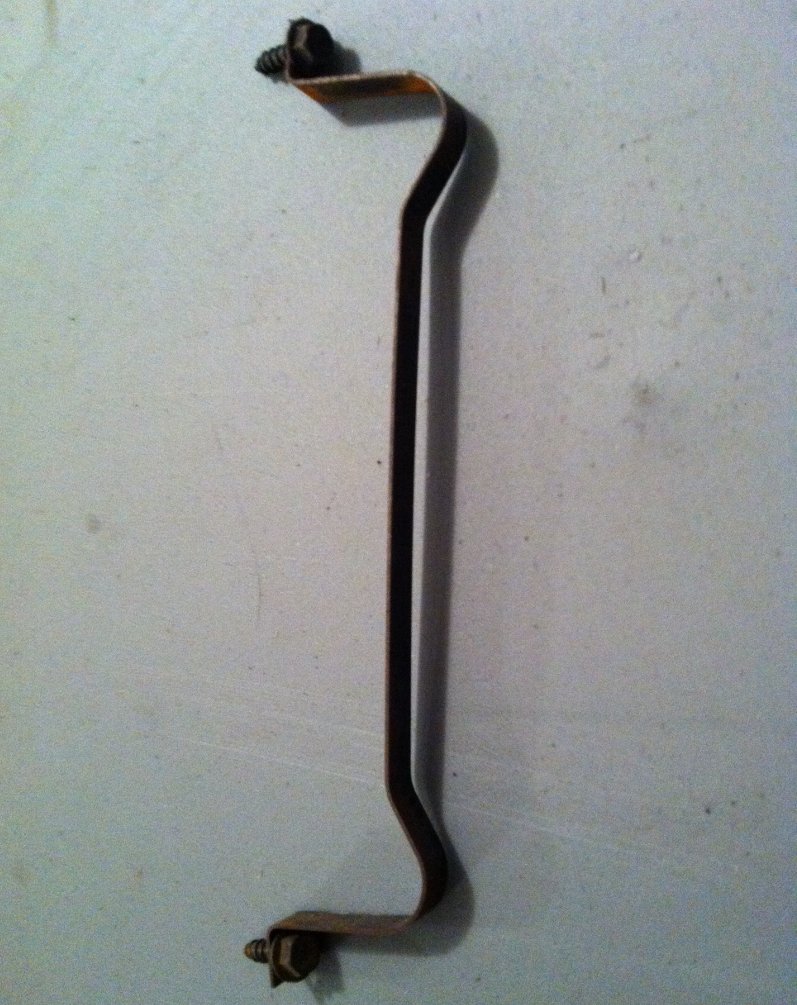
Two 7mm screws hold in a small bracket on the left side of the core. Once this is removed, the heater core comes right out. Be careful no to spill the remaining coolant inside the core on the carpet.
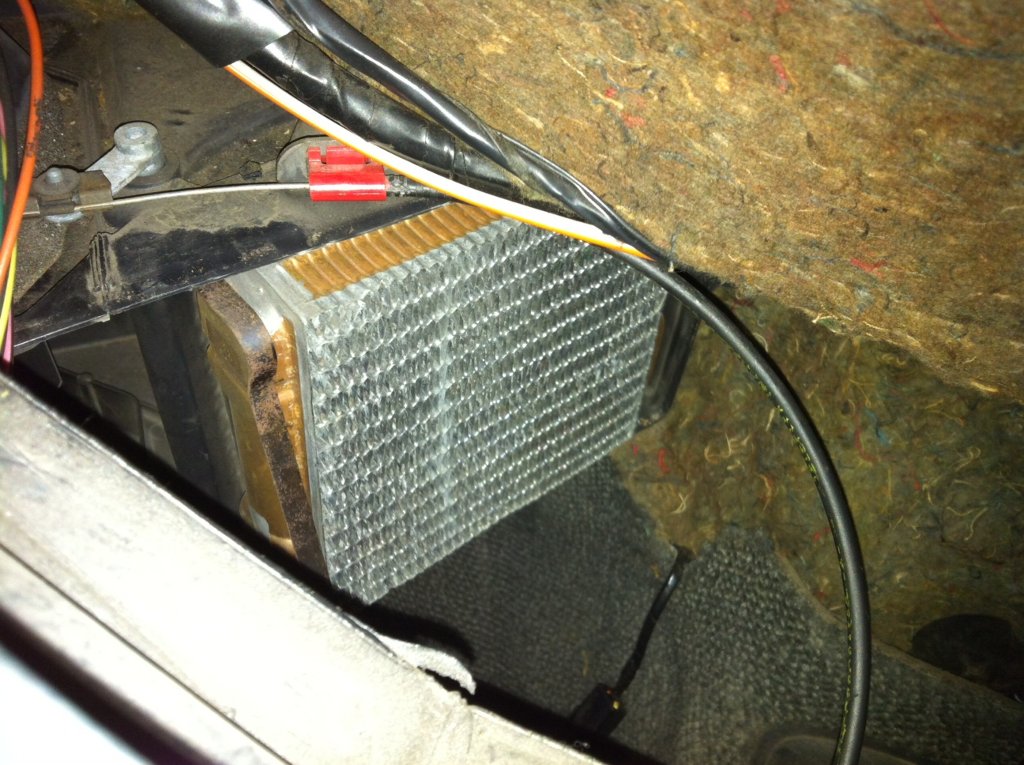
Here's what it looks like from the top through the speaker hole
Clean out any spilled coolant in the box, or the smell will persist. I like Tuff Stuff foaming cleaner and paper towels.
From this point, installation is the reverse of removal. Follow theogre's procedure to burp the cooling system to remove any air that was introduced as a result of opening it up.
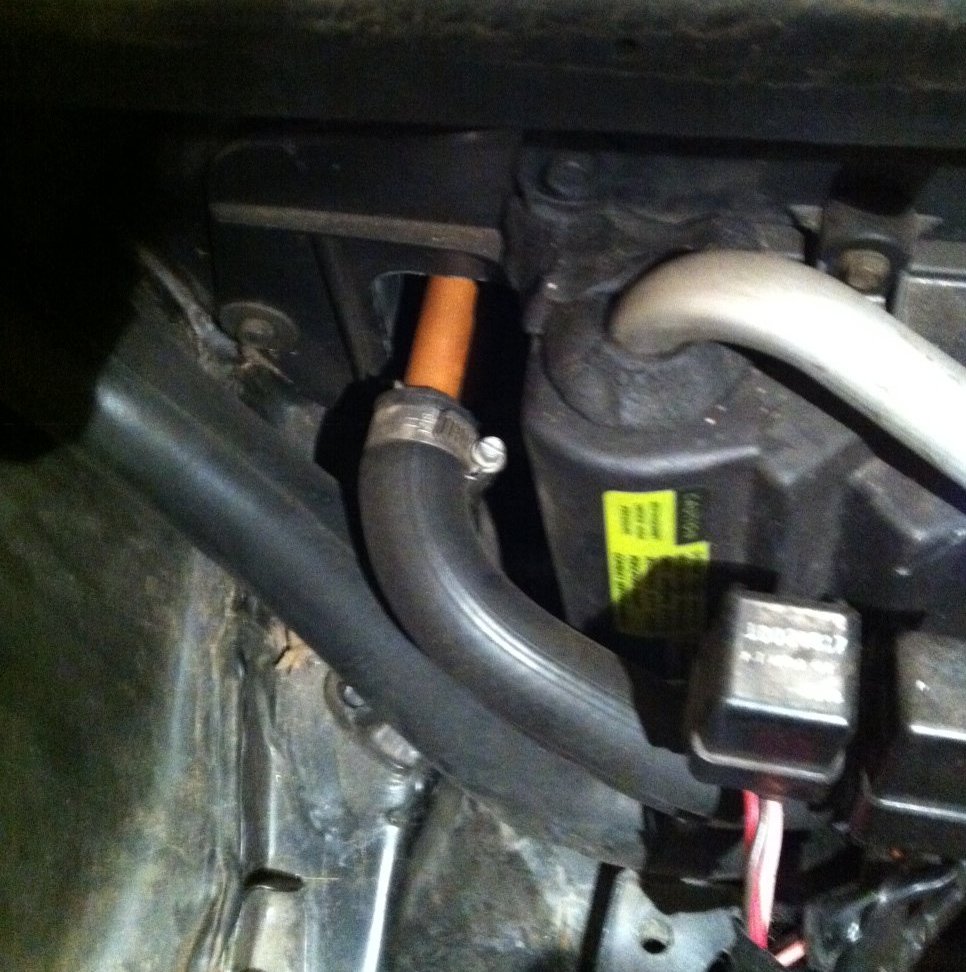
The a/c drain line is in the evaporator housing, which is downstream of the heater core. You can see the drain tube from the front compartment. I can't remember if you can see it from inside or not.
Beautiful write up. One question: I get a dripping inside the car when I run the A/C. Is the drain located in this same box?
The heater core and evaporator core are in two different boxes. If the dripping is coming from the passenger side under the dash, it probably is the heater core. The heater core doesn't have a drain because it's suppossed to be a closed system, when it leaks, it leaks out the seam in the box where the cover is.
The drain for the evaporator core may be clogged up or damaged, it's located under the car. If the system is low on refrigerant, it may be causing the evaporator the freeze up, producing ice and a lot more water that will drip off it, and that may be making it's way into the cabin somehow.
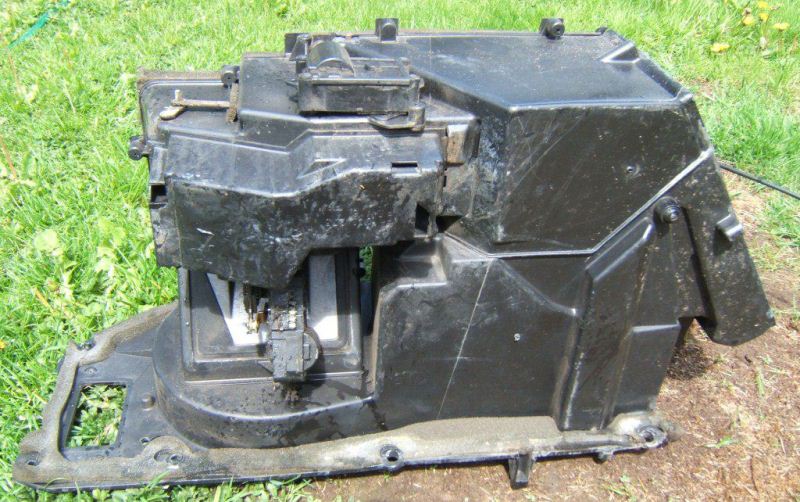
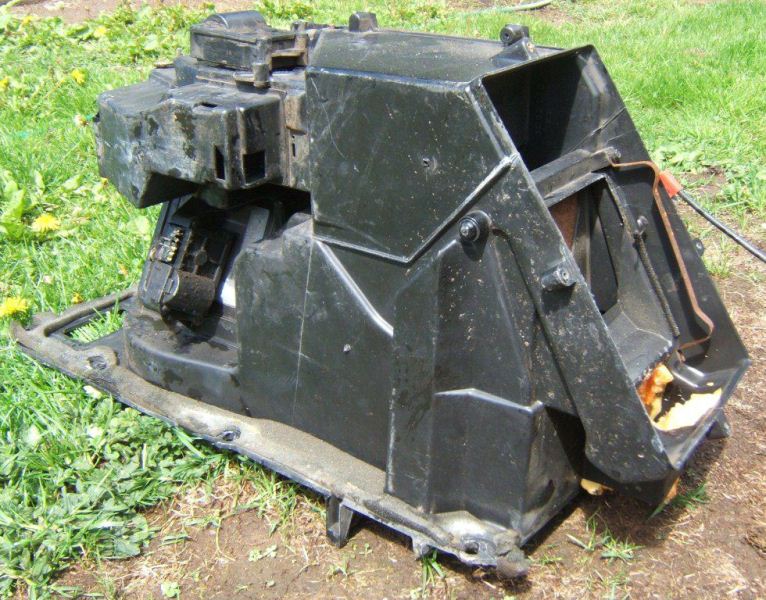
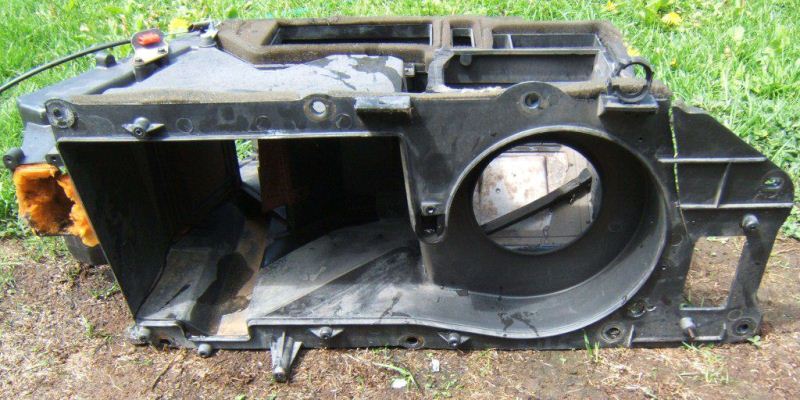
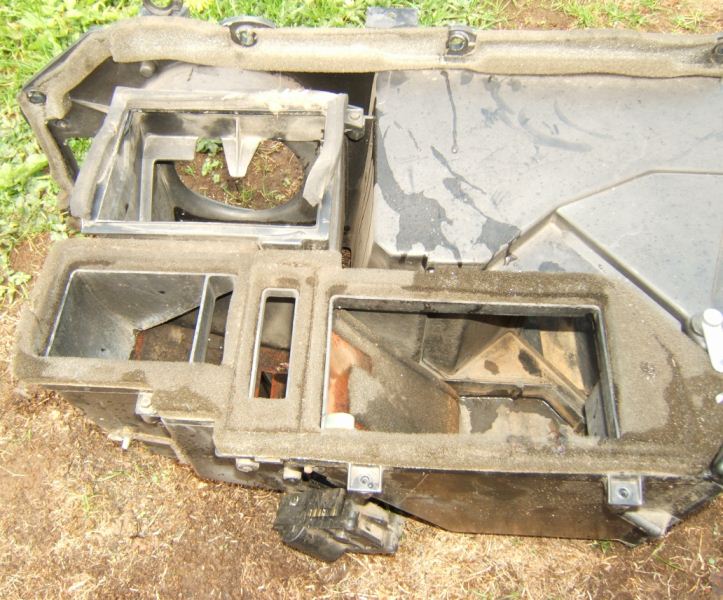
Here's the box where the evaporator goes, you can see the heater core tubes on the left side (originally posted by randye)
The AC and heater box itself (originally posted by Capt Fiero)
[This message has been edited by RWDPLZ (edited 12-12-2011).]
I wish there was some way this could be stored on PFF in a how to fix-it file. I have already done this repair on my 88 GT and 87 GT. I'm getting too old to remember how I did them and would need a refresher if I need to do it again.
Harbor freight has a tool you will need. It looks like an ice pick, but it has two right angle bends in it so the sharp point is pointing back at you when it is in your hand. (sorry mine is not available for picturing) Along with some lighter fluid (no flame) or some paint thinner, you need this tool to get the hoses off the nipples on the heater core. CAREFULLY insert the hook between the hose and the nipple from inside the front compartment and after applying copious quantities of solvent to the crack between the hose and the nipple, work the hook around the joint to loosen the hose.
OK, mine is done. No more stench, no more slimy windows. Not too bad....the only snag I ran into was getting the hoses off of the old heater core....which if I had read and heeded this first......
quote
Originally posted by FieroG97J:
Harbor freight has a tool you will need. It looks like an ice pick, but it has two right angle bends in it so the sharp point is pointing back at you when it is in your hand. (sorry mine is not available for picturing) Along with some lighter fluid (no flame) or some paint thinner, you need this tool to get the hoses off the nipples on the heater core. CAREFULLY insert the hook between the hose and the nipple from inside the front compartment and after applying copious quantities of solvent to the crack between the hose and the nipple, work the hook around the joint to loosen the hose.
.......wouldn't have been such a struggle. Took me 45 minutes to get the damn hoses off. They literally weld themselves on. Next time (if there is a next time) I will just cut them and put in a splice and call it a day. At any rate, hoses notwithstanding, I could change the next one in 30 minutes.
Thanks again to all who contributed to this thread.
If you don't have the tool to disengage the hoses from the old heater core, you can take a dremel or a hacksaw blade and just cut off the pipes coming from the heater core right at the firewall(don't worry, your old DEAD heater core won't mind)
once you have access to the end of the house, you can deform the remaining pipe piece with needle-nose pliers and then get them off.
i had to replace the heater cores on both of my GTs back in the day.
I was almost to that point when my top one broke free. Dremel and cutting wheel were coming out very soon.
From this point, installation is the reverse of removal. Follow theogre's procedure to burp the cooling system to remove any air that was introduced as a result of opening it up.
I've updated that page and Change the filling procedure... Why? Most of us, myself included, removed the Thermostat during Fill operation. That will work to fill if engine or radiator was low/empty but heater need the Thermostat in.
By installing the Thermostat each time before running the engine, the system will force coolant thru the heater core and burp the air out to the engine. (See Thermostat or heater article... show plumbing path.)
You shouldn't need to mess w/ the heater hose but still there if you have problems.
------------------ Dr. Ian Malcolm: Yeah, but your scientists were so preoccupied with whether or not they could, they didn't stop to think if they should. (Jurassic Park)
More info to add: This is the later 86-88 heater core cover, it has the bracket for the cars with the Performance Sound option, so the subwoofer can mount under the dash, but all 86-88 cars had this cover. I bolted it up to my 84 heater box, and it fits and seals perfectly, just as the original did, so they are interchangeable.
If your fingers are nimble enough and you have the right sockets (I used a 1/4" drive deep well 7mm / 9/32" and a ratchet) you can remove that top screw without removing the speaker, it's how I did mine.
I have an '87 Fiero which needs heater core replacement.
However, the pictures above appear to be from an earlier model. The heater core looks like it's easily accessible to the right underside of the passenger area.
Mine is over to the left, with a large black unit in front of it. I thought this Fiero had air conditioning, but the tubes are wide apart, so it appears to be the non- air conditioning type.
It appears infinitely easier to go under the dash, but I'm not sure where to start. I've included a link to a picture of how this looks. This is taken from the open passenger door, looking to the left.
Can someone please advise as to how to remove this type of cover?
Thanks, but I'm still not getting how to remove this though. So far I've taken the convenience center aside, as you can see in the above link. I've also taken out two screws from the underside, which don't seem to do much.
The eighth picture down in the original discussion shows a square black box to the right underside of the passenger dash, which is the heater box. My 87 Fiero doesn't have this at all; it's to the left as in the picture link. I'm not sure where all of the screws are? Only two taken out so far.
The tenth picture down shows an 84-85 heater core cover. It's somewhat different from mine, but I can see the similarity. I was thrown off by the square cover to the right in picture eight, which isn't in my car.
So I can see the core cover. But if you look at the picture link in my original query, you'll see that the cover appears to be under a flap, and I need to either remove or move that front black portion to get at the core cover to the side. When I say the 'front portion,' I mean the part which is scratched up and scuffed in the picture.
How can I do this? I don't see any screws, except the two underneath, which I removed already.
First, I see that the square cover in picture 8 is actually the sub-woofer assembly to the right side underneath, which my Fiero doesn't have. I mistook it for the heater core cover. Apologies.
Second, my Fiero does have something unusual: A non-standard air conditioner. This threw me off too, because I thought at first that because it was A/C t I could do this through the dash, but my heater core is actually a non-A/C type. There is a large non-standard A/C unit in the front compartment attached to it. I'll post a picture of this afterward.
Doober, if yours is identical to mine, and you replaced it through the dash, could you confirm that yours is non-A/C like mine?
If so, I'll have a chance. If your core is A/C type, I guess I'll have to go through the front.
I'd love to see pics of an aftermarket setup installed in a Fiero. It would only make sense then that the core in the car is either a non-AC Fiero core, or an altogether different one compatible with the aftermarket system.
Okay, here's a picture of my non-standard A/C, in the front compartment.
You'll see that the heater core pipes are short, and 2-3" apart, indicating this to be a non-A/C core.
The climate controls are the usual two slide bars. The top bar directs air flow, and the bottom bar is cool to the left, and hot to the right. This is another indication that it's non-A/C; no fancy controls.
Yet, when I first got the car, I distinctly remember cold air blasting out in the summer. This only lasted 3-4 months, before the A/C gave up the ghost. I was told it would be expensive to replace, so I didn't bother at the time. I may try now, as a separate project, after the heater core. If I can.
So, it was a bit confusing for me because I thought that I might be able to do this under the dash, being A/C (or so I thought). But I might only be able to do this through the front, which means I'll have to get that monster unit out of the way.
That's why I want to hear from Doober, who says his was exactly the same, and he did it under the dash. But I don't see how to detach the unit I have.
In this picture, the clip fasteners are missing from the hoses, as I'm trying to remove them. Tough going.
Here is a picture of my heater core cover under the dash.
I don't see how to get the front part (that is scuffed up and marked) detached or out of the way, so I can get to the side panel. None of the screws, as described in the original pictures above, are visible. Only two underneath. There appears to be a flap on the side, which the heater core panel fits into.
My impression is that the only way to do this would be to remove the dash?
Unless someone (Doober?) says this absolutely can be done.
If this is typical of non-A/C types, I guess my only option is to go through the front, and try to get that monster non-standard A/C unit out of the way?
Yep, you'll have to remove that AC unit to remove the heater core through the front compartment. Even though the AC doesn't work, the system may still have refrigerant in it. I wonder if it can be moved out of the way without opening any of the pipes, and if the evaporator comes out with the unit? Where is the accumulator, or filter drier?
Also looks like there's a label added for it below the RPO code sheet, that might tell you the manufacturer and model number of the unit, and the refrigerant type used? It was probably installed way back when and uses R-12 refrigerant.
Okay, I managed to get the panel open, and the heater core out:
And it was indeed a non-A/C core:
... A real pain to get that aftermarket A/C unit out. I was contorting into all kinds of human-pretzel shapes to get at the bolts underneath. Fortunately it moved just enough forward to the left side that I could get the core out. But again there was the bolt holding the core inside, which was pointing at just the wrong angle for me to work at it. Finally got it...
Guess I'm over the hump now, just have to reverse everything!
Bit of a delay there, but I've finally found time to reverse the process and put in the new heater core. Trying to fit it into the cavity through the narrow space between the aftermarket A/C and the back of the compartment was a challenge, but it's done. Everything else is put back.
I've read a number of postings about "burping" the coolant system after repairs. What is the best way to do this in a Fiero?
Ditto! This thread was a huge help to diagnose my heater core failure and get to it. I had never experienced a heater core failure before so this was a first. I just got my new core so I will be removing the bypass I had temporarily installed and it will be going in this weekend. The best part about finding this thread was getting the broken one out, bypassed and getting the air box cleaned out. After that I was able to drive the car again without getting a massive headache from the fumes.
Only thing I have to note is that after getting the top speaker out and finding where the top screw in the air box was supposed to be my car did not have a screw installed. It does not appear that it had ever been taken apart before but I could be wrong. Especially since I found that my car is missing the "blue thingy dingy". Yeah another part to try and find...
Thanks for the help,87 a/c . As so not knowing if water would come out of the 2 hoses i clamped them. The fiero stores heater core came with plugs. Hoses off, plugs on., not a drop spilled .: out with the old or in with the new. Hoses on clamps off. No mess. When I put my inside cover back on I had to remove the metal bracket that pushes on the heater core so I could put the door on. On the inside where the metal hit plastic I removed the flat foam and put some sticky back felt for cushion. Everything is good a/c works and so does heat and no dripping or smell and no wife telling me what is this dripping here.
The hardest part was loosening the hoses from (my) short neck tube ferrules. I made a tool similar to what Fiero 97 described. I think I used either wire or thin sheet metal to create a U at the end which allowed you to go past the hose end, pull toward yourself and work around the tube. Use lube. I have not seen the H-Frt tool, but sound good.
[This message has been edited by hobbywrench (edited 06-20-2013).]