Hello fellow Fiero enthusiasts and welcome to my build.
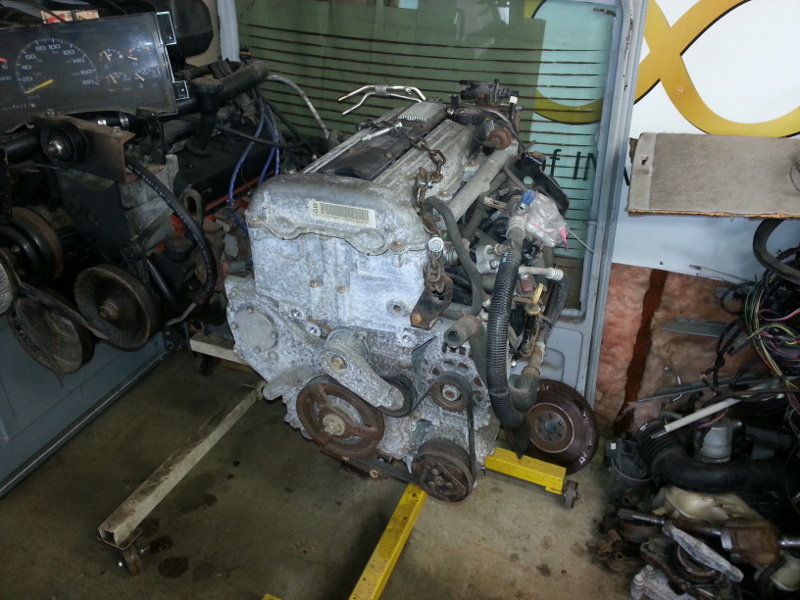
In my quest for a project, I decided on the Fiero. My car is a base 84 model notchback with no options, Duke and automatic transmission. Yuck, I know. However, I'm going to change all that! Follow along as I swap in a 2.2 litre normally aspirated Ecotec (with F23 manual transmission), install a T-Top roof panel and add a fastback. I'll also build a custom cradle and utilize 88 suspension components. I'm sure there's more but we'll cross that bridge when I get there.
Before I start with the pictures, I'd like to thank a few people first. -My place of work. For providing me the opportunity to use the CNC laser, brake, etc. -Bloozberry - For providing me with rear suspension components and his awesome and detailed drawings! -rourke_87_T-Top - For proving me with a few hard-to-find items and the 88 back half from his parts car. -X-Thumpr-X- For selling me a T-Top space frame. -WFTB - For the rear spoiler and cool parts. -cam-a-lot - For some miscellaneous parts. -My wife and her understanding of my hobby.
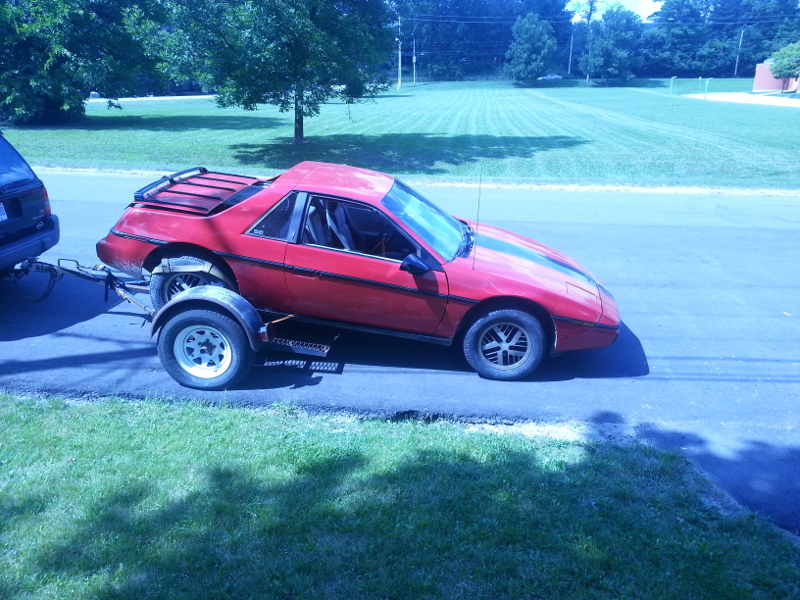
Anyhow, let's start with the car. Here's what it looked like when I first brought it home in the fall of 2013. Nothing special and just a plain Jane 84.
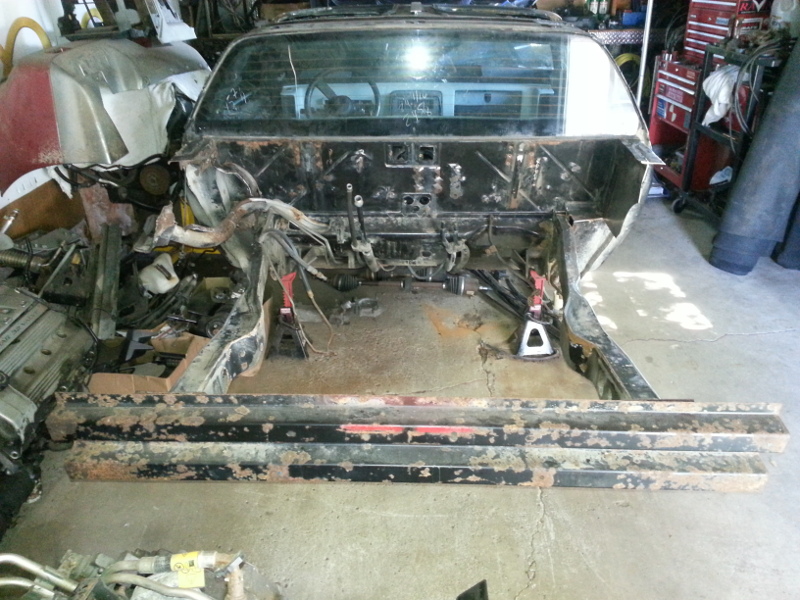
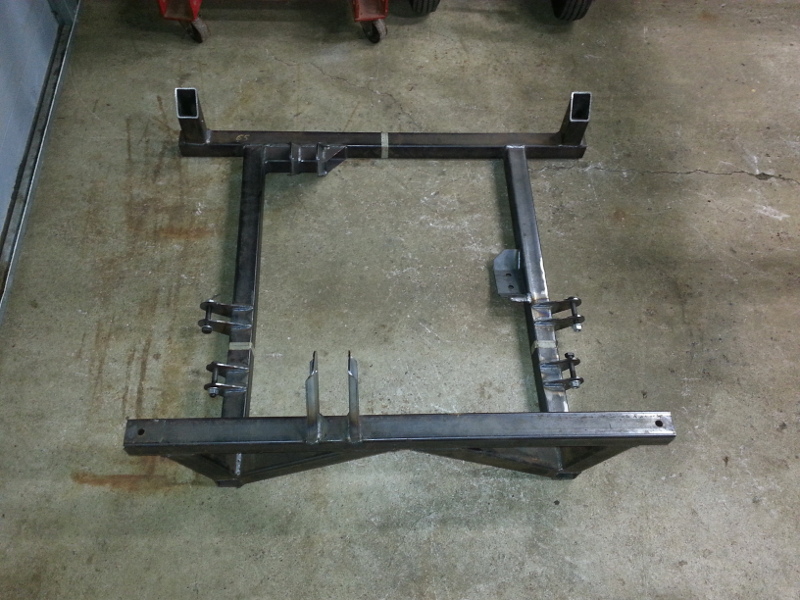
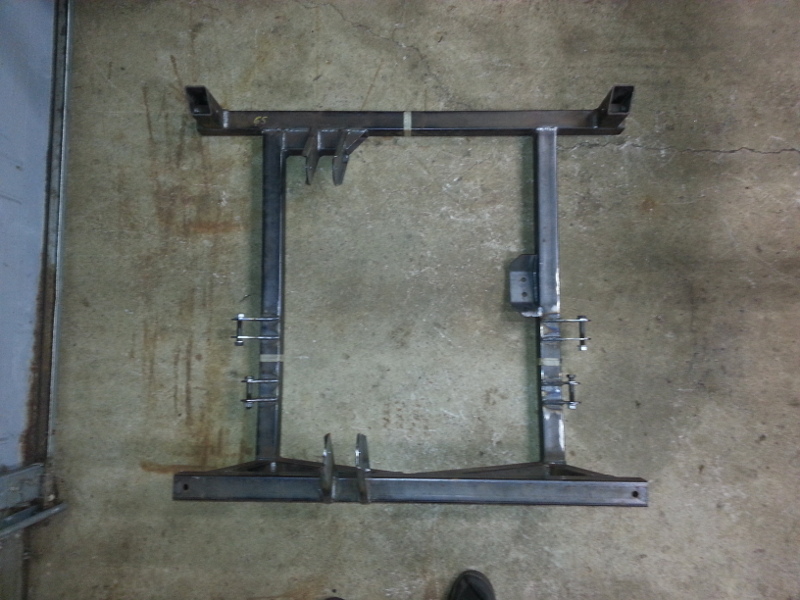
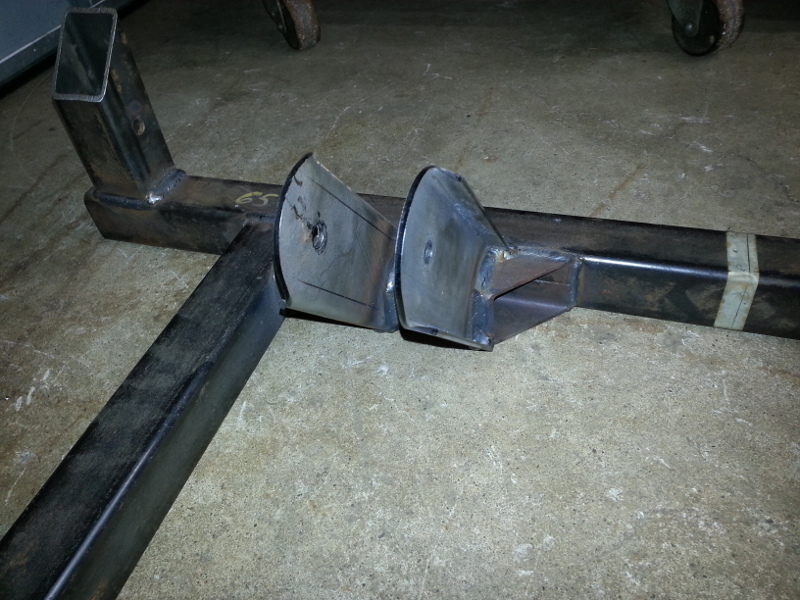
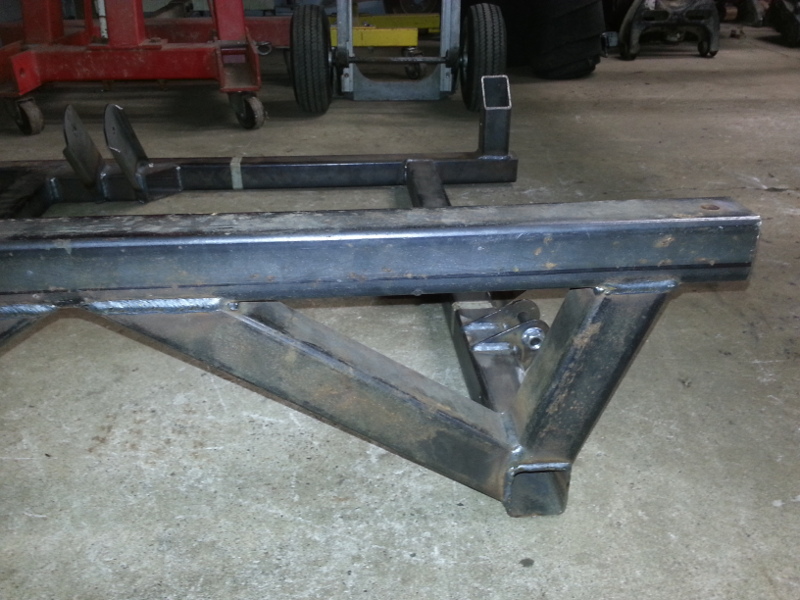
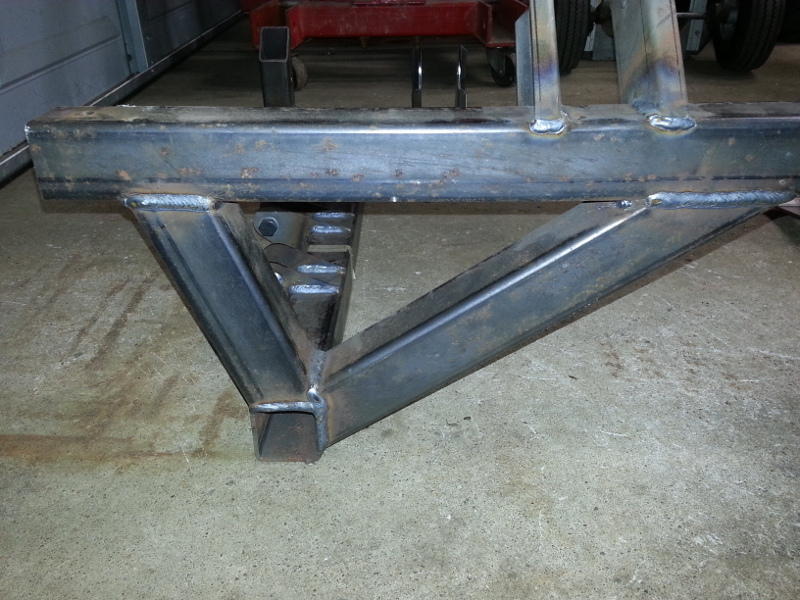
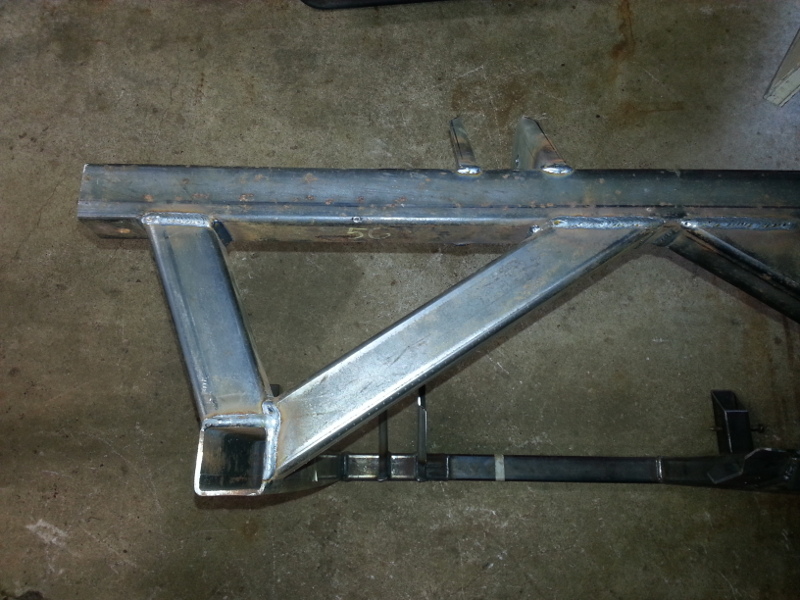
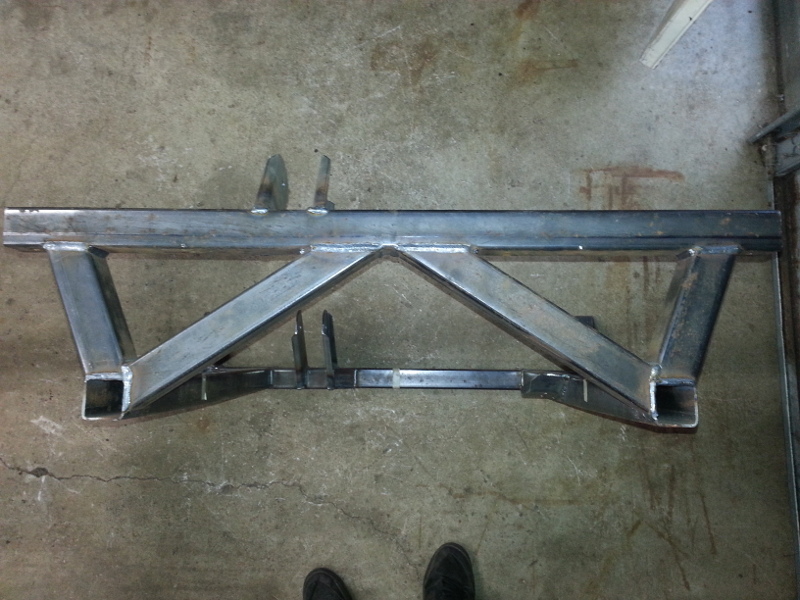
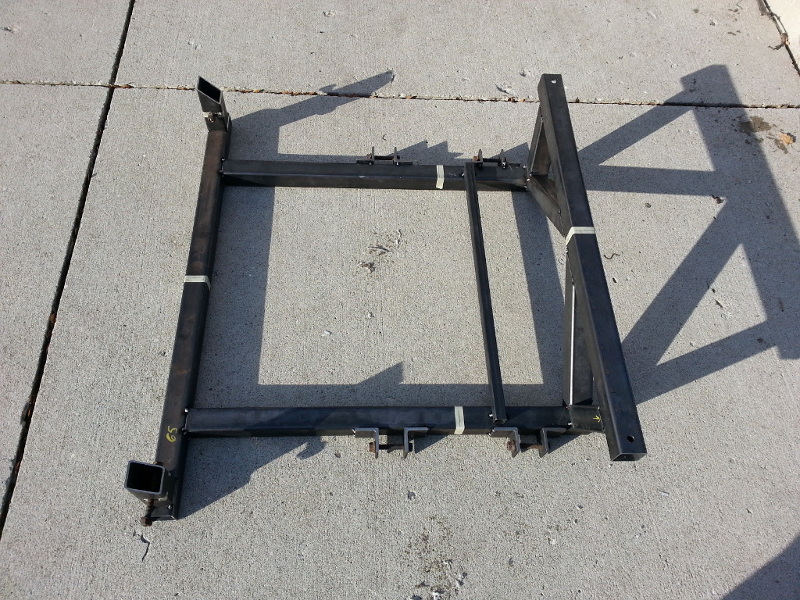
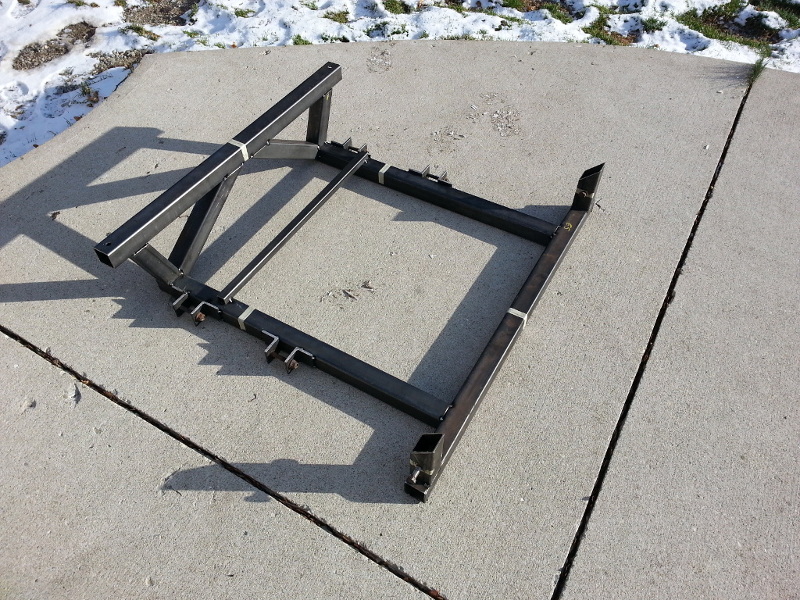
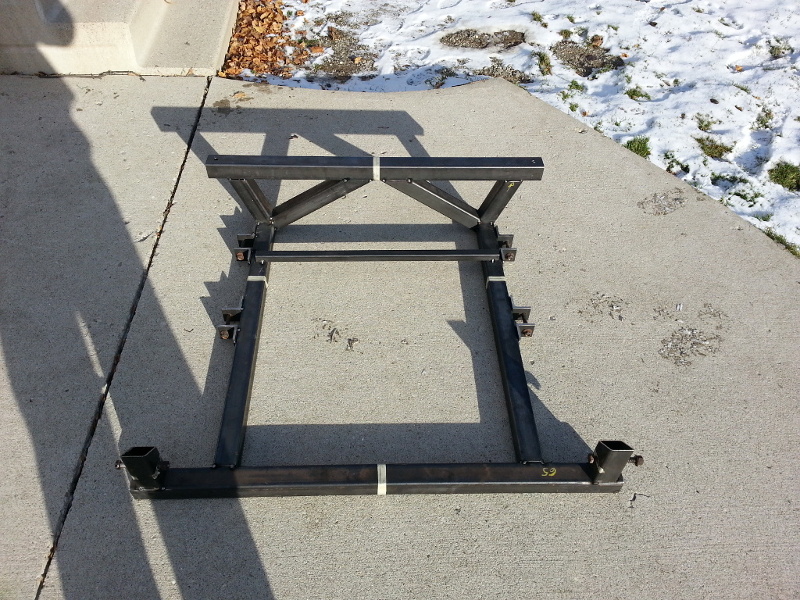
Shortly after bringing the car home, I removed all the body work. Where to start? Let's build a simple cradle, shall we? Okay guys, here's my take on a "simple", square tube cradle that I whipped up. It's only tacked but fits in the car like a glove. Since I'm going to install an L61 2.2 Ecotec and matching F23 transaxle, I wanted something I knew was square and strong so I could have some place to mount my drive line to. Now, the design changed slightly. I built it with the 84 lower control arms in mind. However, I've now decided to use the 88 knuckles and suspension instead. This cradle is heavier then stock but it's also stronger. Besides, the one on my car was a little too crusty for my liking.
Now, for a "test fit".
[This message has been edited by Lunatic (edited 06-02-2016).]
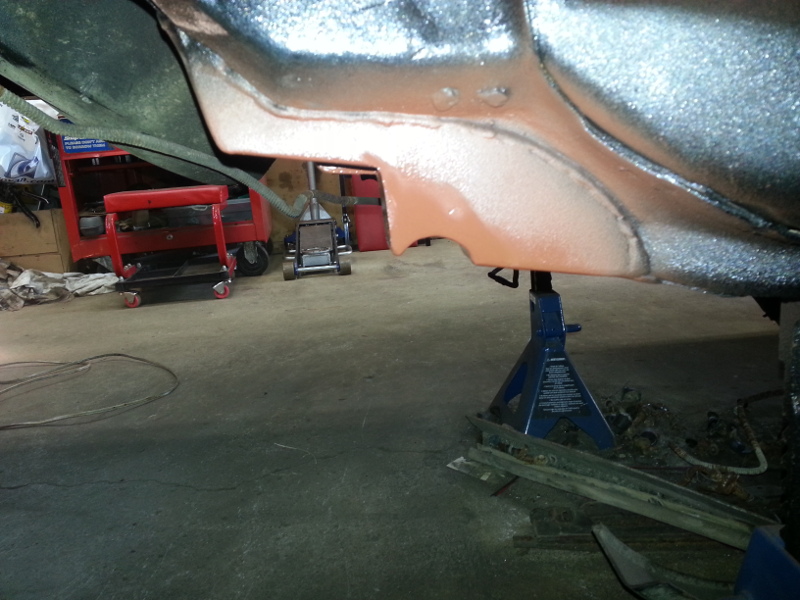
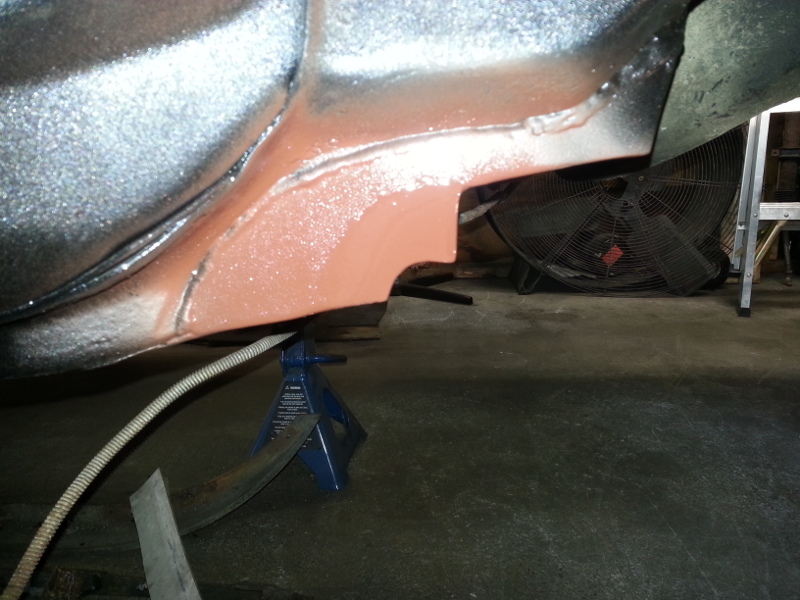
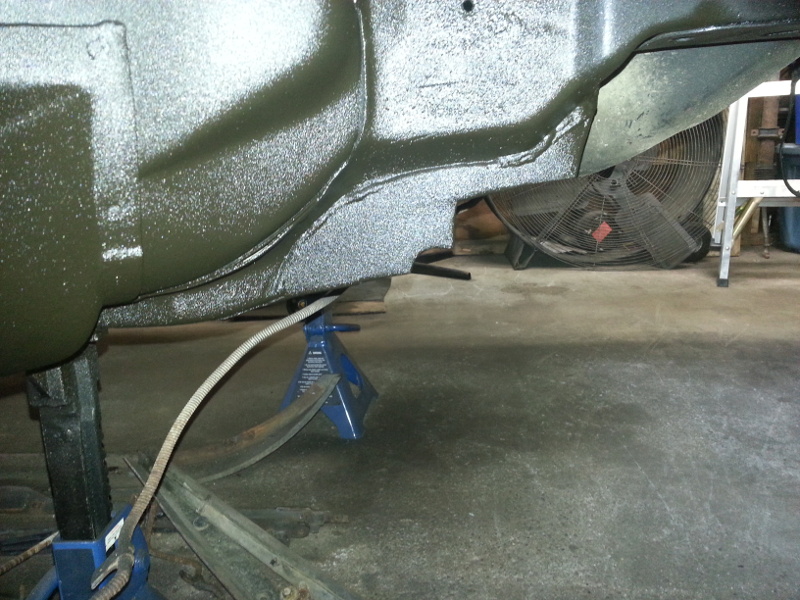
I've decided to remove the rear sheet metal from my car. The previous own decided to cover the rust with Bondo. While it looked good, really good actually, I just wouldn't have any part of it. So, off it came.
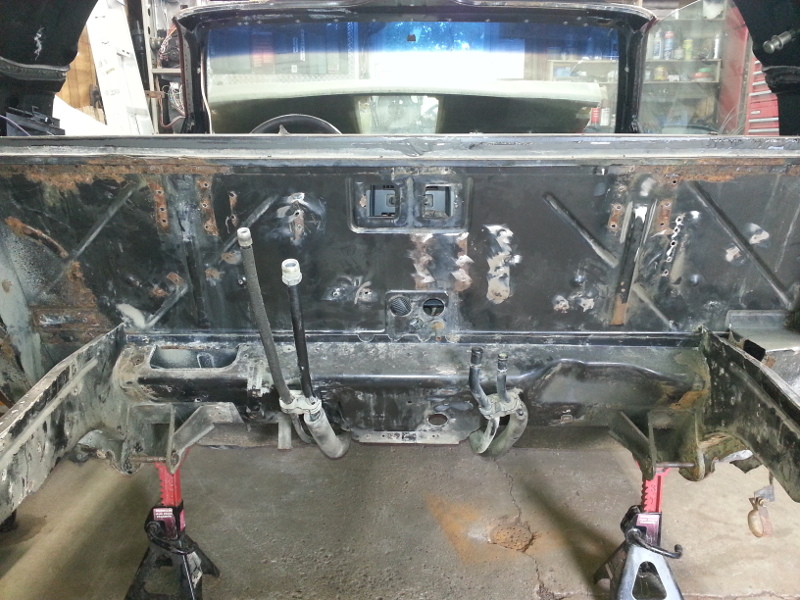
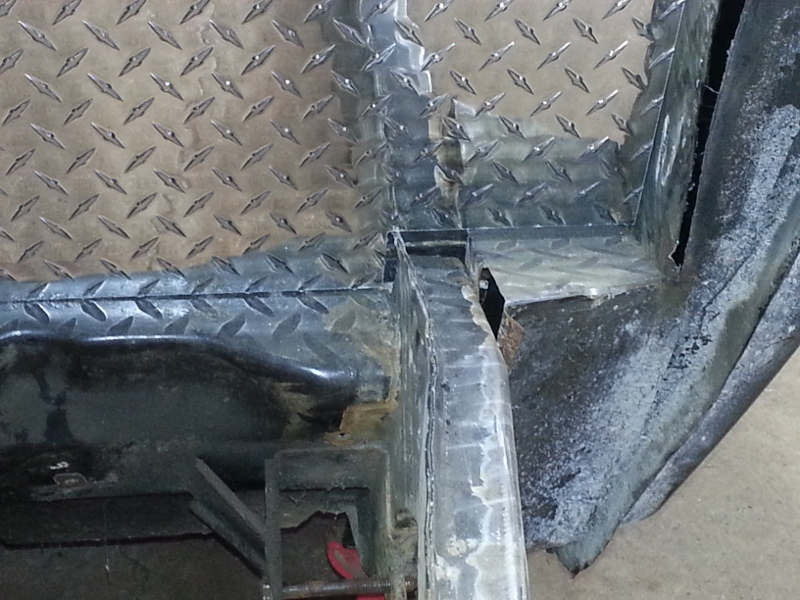
With that out of the way, I could visualize mounting points. Also, I've decided to shave the firewall in order to install a nice aluminum checker plate panel. I'll also relocate the hinges while I'm at it. For the record, I'll be installing this engine "straight up" versus the factory tilt of 10° like GM did.
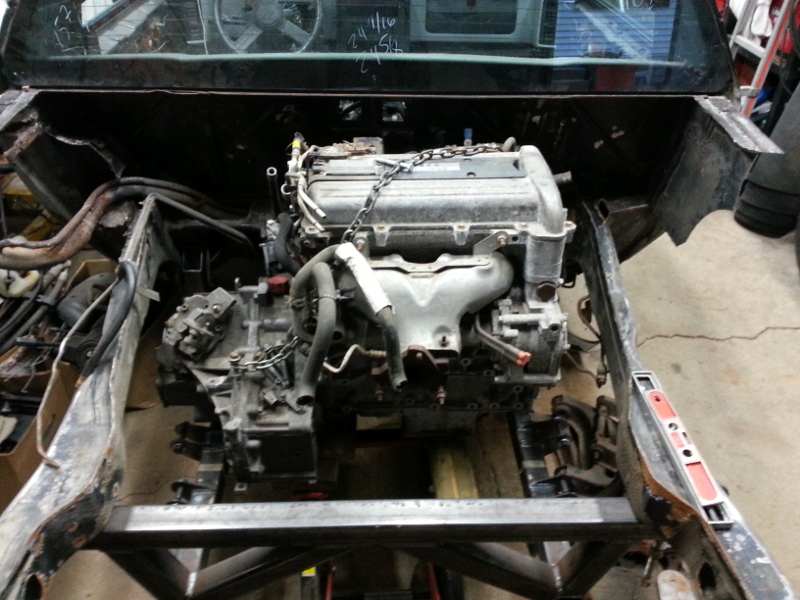
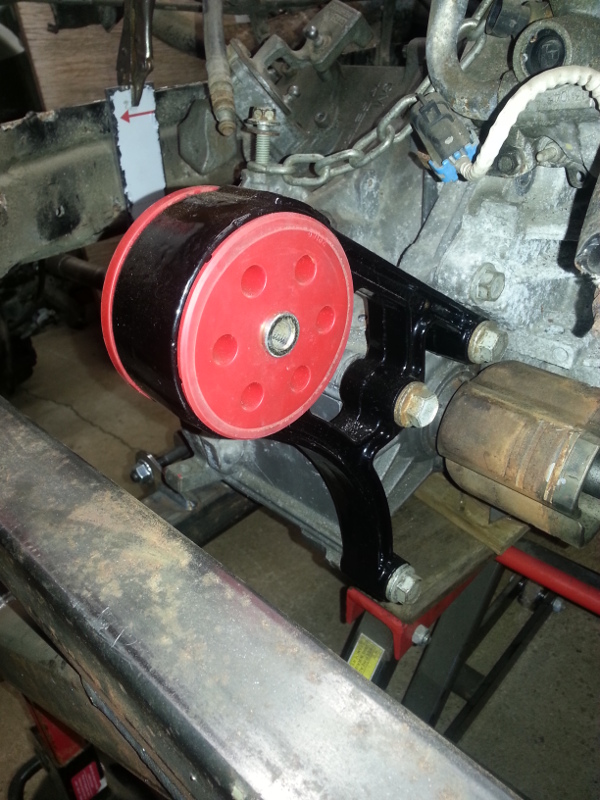
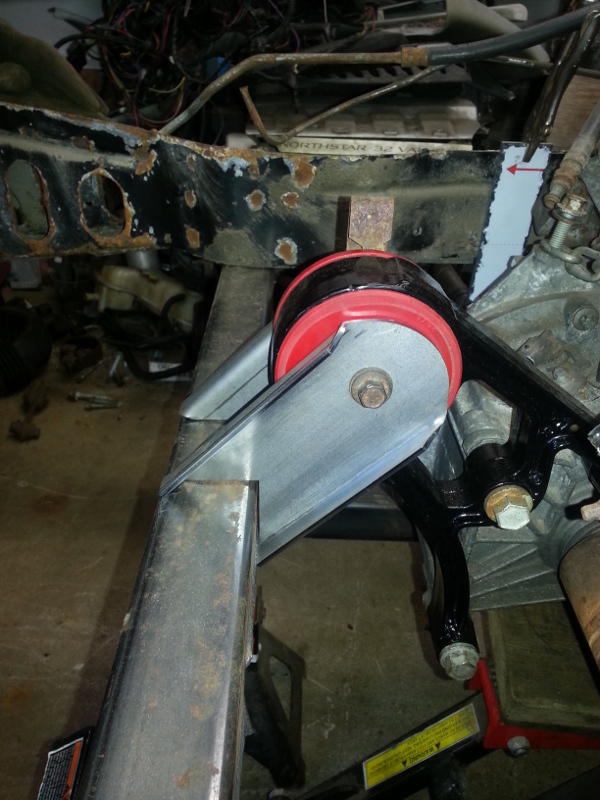
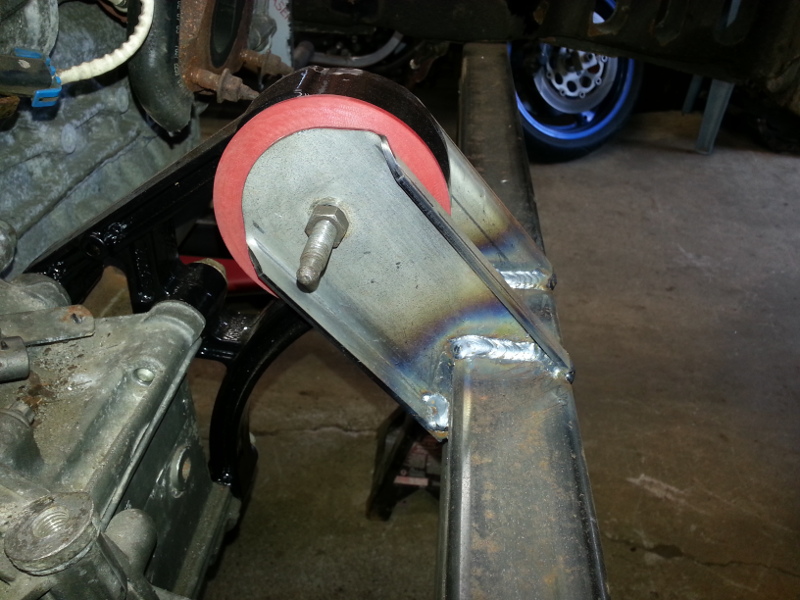
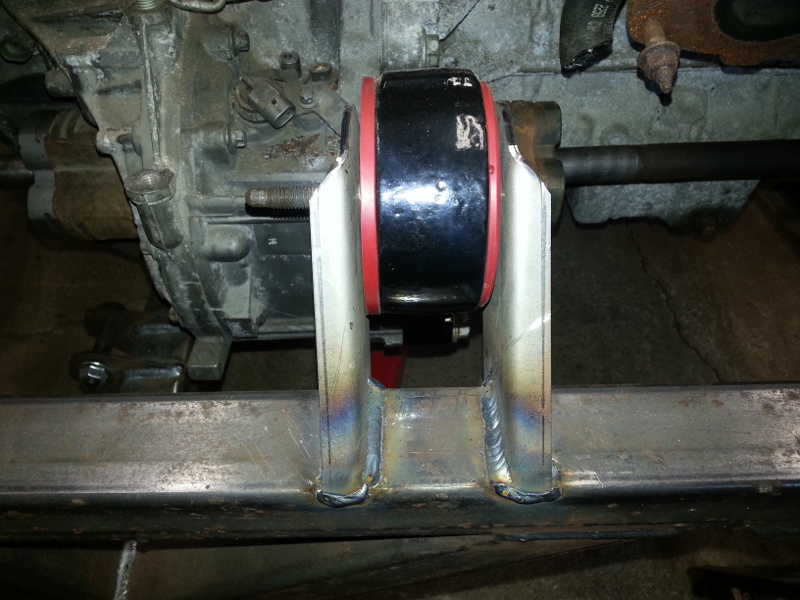
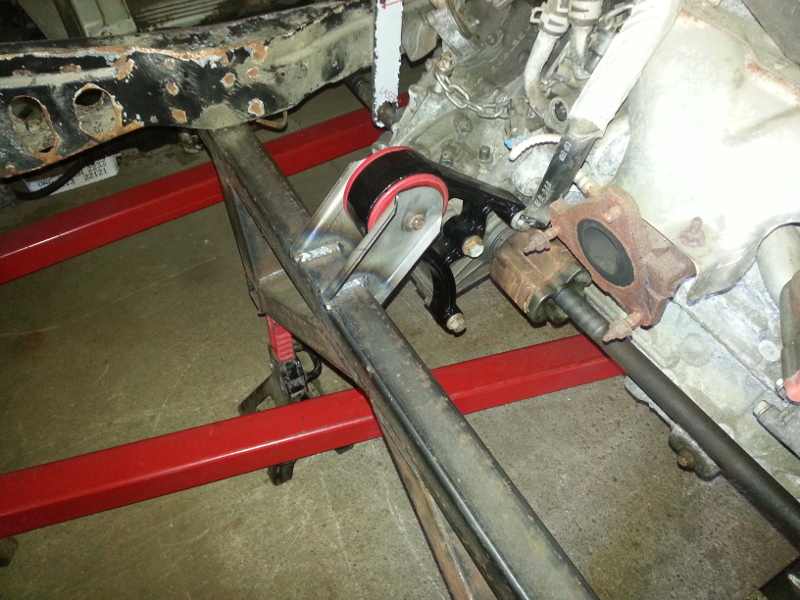
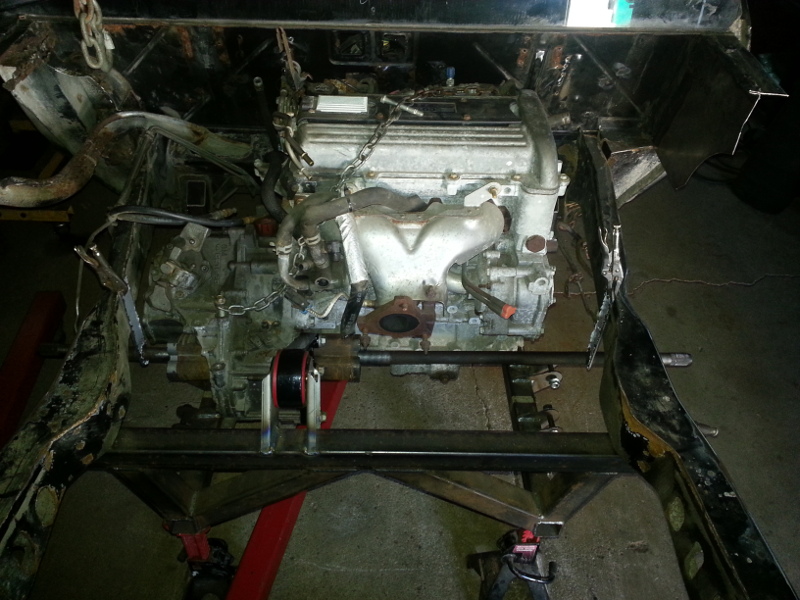
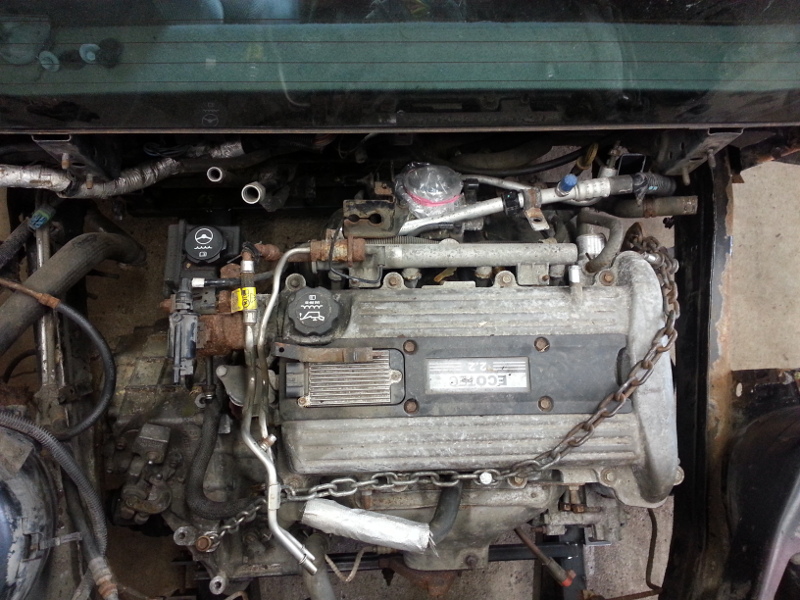
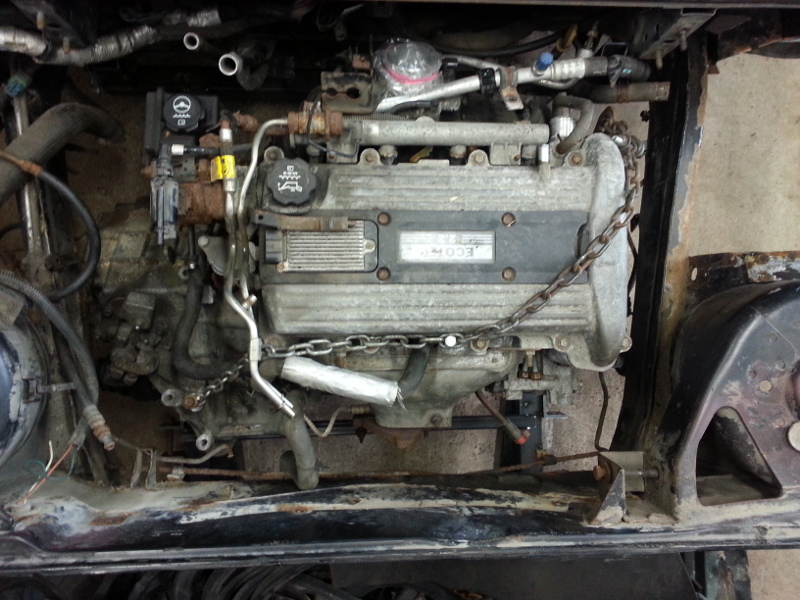
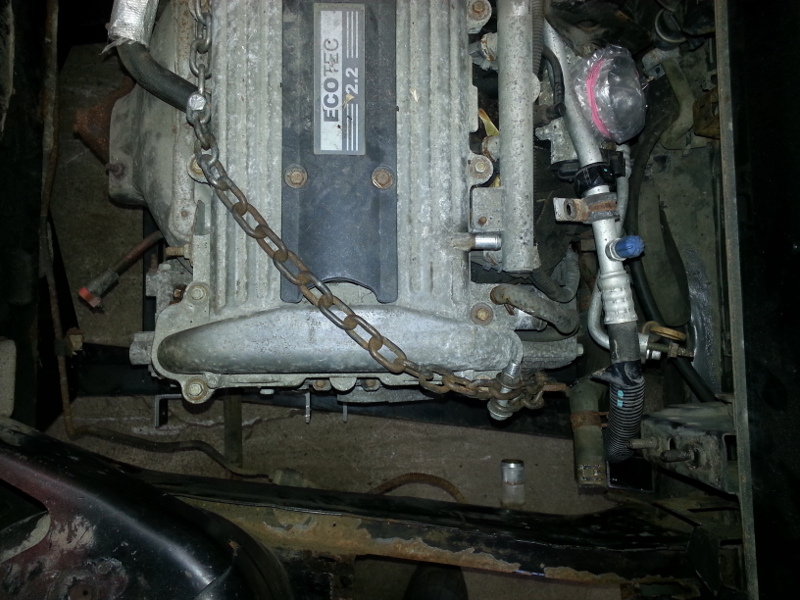
Here's my take on mounting the Ecotec and F23 to the custom cradle. Note: the Ecotec powered (2003) Cavalier mounting brackets are all in the wrong place for my cradle. But, they can be adapted quite easily onto the stock Fiero cradle with minimal effort. I actually had it mounted on the stock cradle. Since I chose to run the 88 rear suspension, it was just easier to make a new cradle with the mounts where I wanted them. So, I chose to use (2003) Grand Am Ecotec/F23 mounting brackets. They're just in a better location for me.
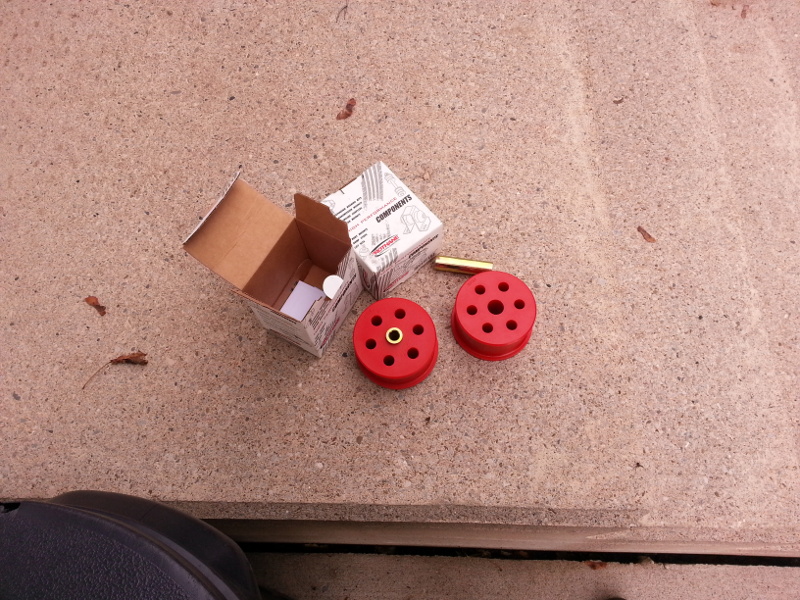
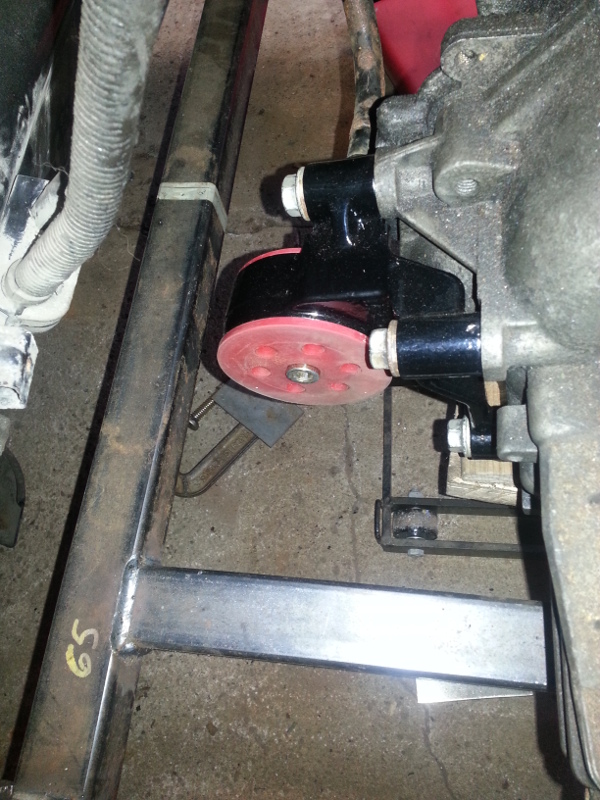
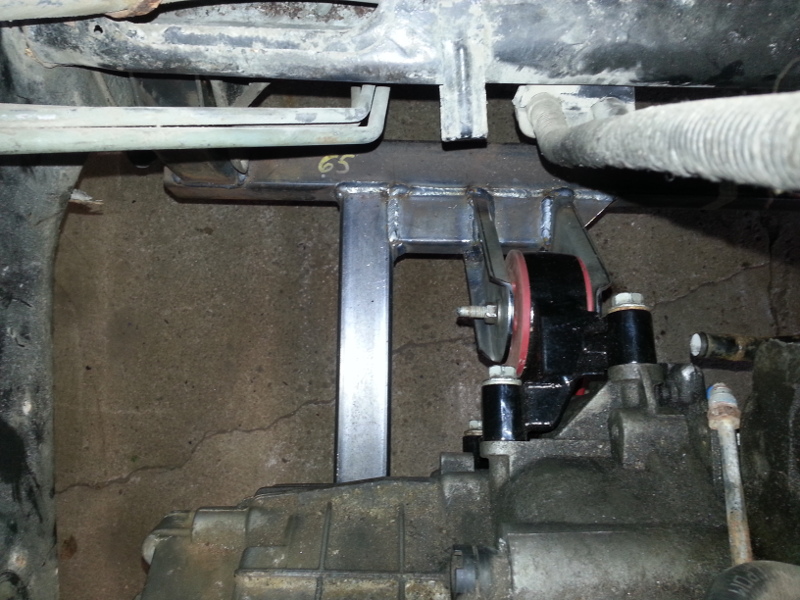
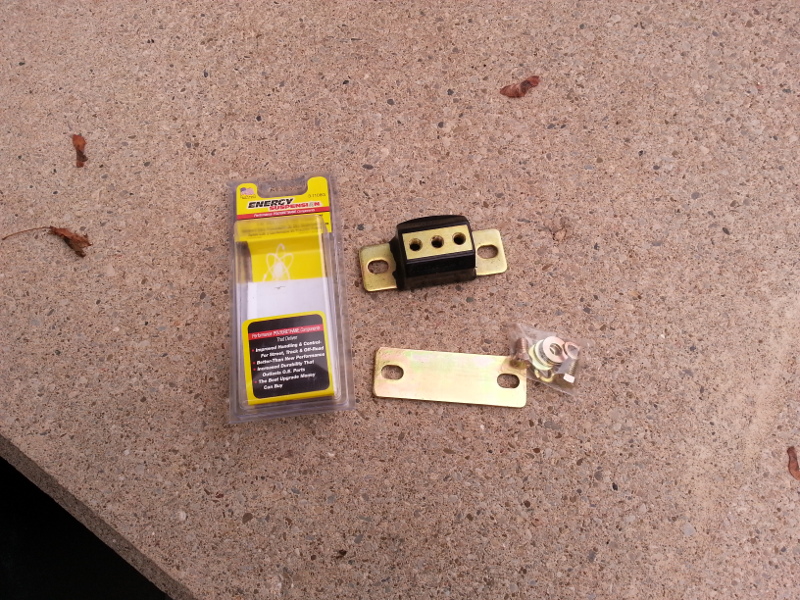
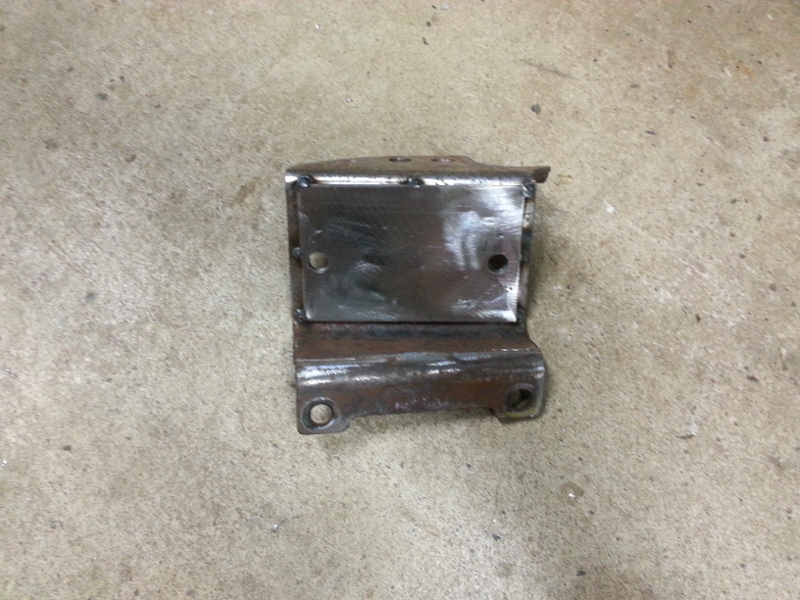
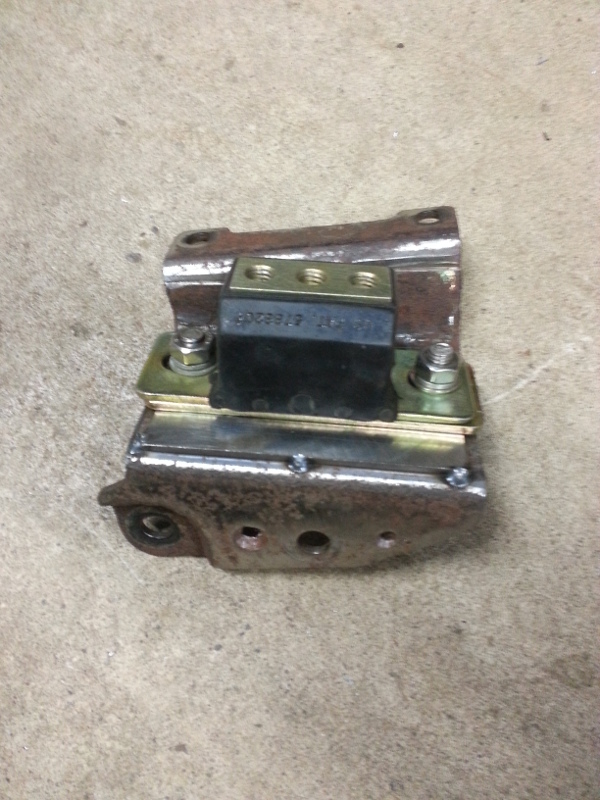
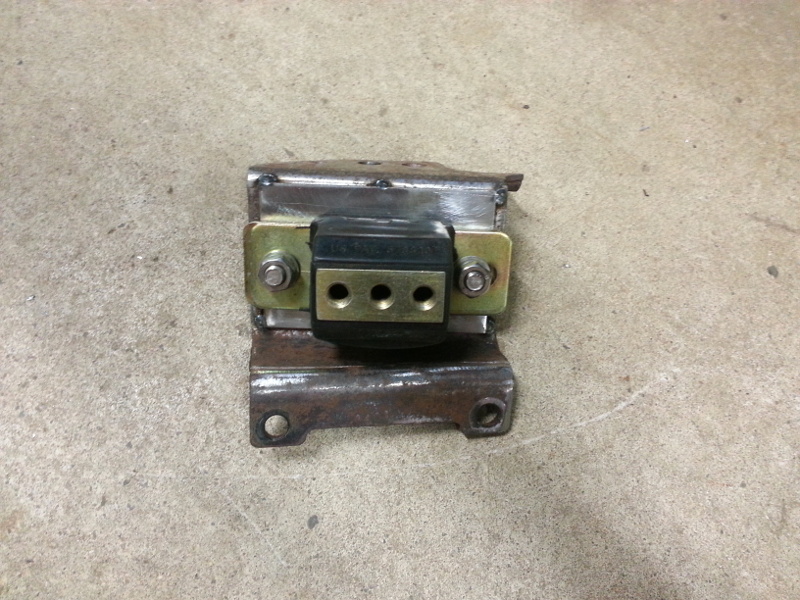
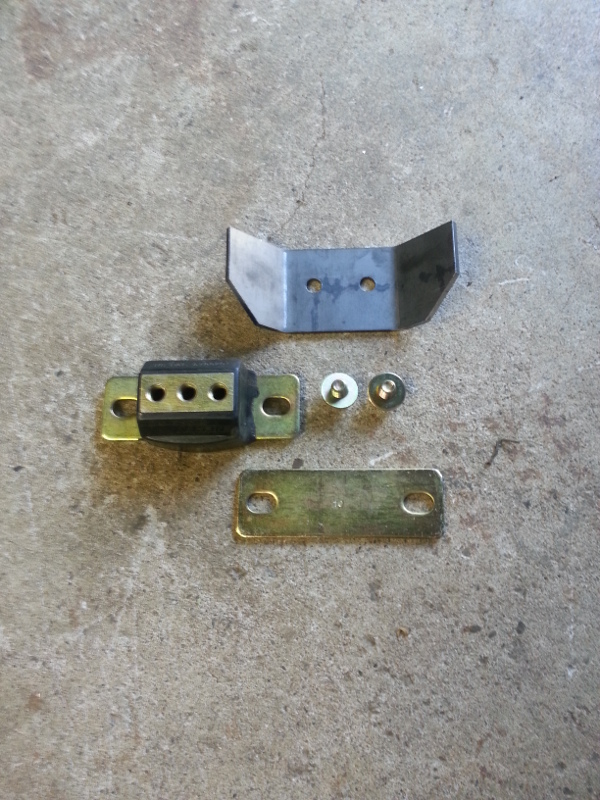
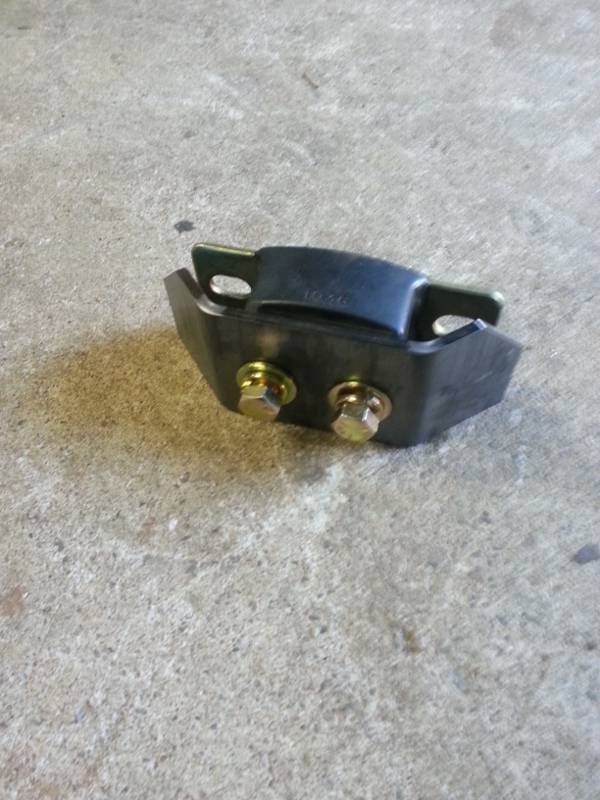
Onto the lower engine mount. I chose an Energy Suspension poly mount (Part number 3.1108G) used for GM RWD transmissions for my lower mount. Here's how I went about doing it. I used the stock Ecotec lower dog bone mount and modified it.
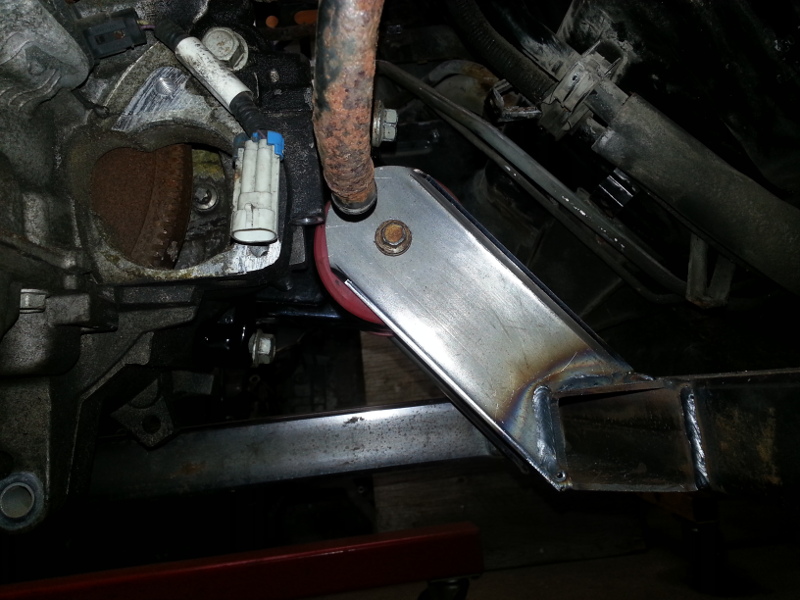
Here's the engine and transmission sitting on it's new mounts.
[This message has been edited by Lunatic (edited 07-27-2014).]
Looks great Shayne!! Maybe I will pay some shady mob enforcers to kidnap you, lock you in a garage my my shitty swap, and threaten to cut off a finger each week until the engine and tranny mounts are replaced with something like this... Looks awesome bud!! You are an artist
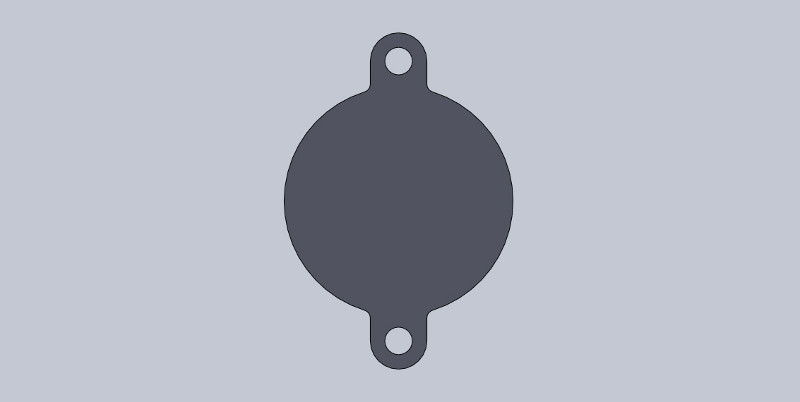
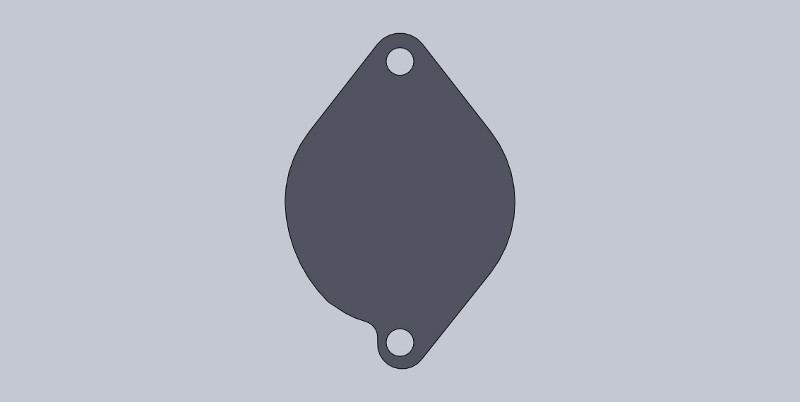
Nice build , good to see all the progress .If you want to get really fancy with your PS pump block off plate you can get an OEM one .The 06-07 2.2 eco's came with one from the factory .Any car of those years with 2.2 and electric power steering I think .Newer versions of the 2.2 have the PS pump mount removed completely from the cylinder head .
Keeping an eye on your build, I would really like to do the same swap into my 84 Convertible. I think I can do the mechanicals, but wireing is not something I think I can get past. Nice thing about my car It is a manual trans, no AC, no cruise type of car. A lot less stuff to hook up. I have been driving my friends 09 Cobalt around for a few days while he is on vacation and like the feel of the 5 speed, 2.2 combination, but maybe a turbo would be nice?
------------------ Mark Hoagland 86 1/2 GT 3.4 5-speed 355 nose and tailights REAL bright yellow
Thanks Bob. Enjoy the show. I'll try and make weekly progress on it.
quote
Originally posted by Tony Kania:
Good luck with you build!
You Canadians make me smile. Not sure why, but there seem to be a lot of great ones.
Now, on with the show...
Thanks Tony. Pennock's is full of great builds from all over the world. Mine is no where near as elaborate as some but I'm having a lot of fun working on it.
quote
Originally posted by Bloozberry:
Look at all that room between the rails! No friggin' fair!
Dave, I might just have a little more room under the hood than you do! LOL. Mine is going to be real easy to work on.
quote
Originally posted by rourke_87_T-Top:
Hello Shayne, that's my username on the G.T. Fiero forum. 8 throttle positions on locomotive.
Hey Rob. I didn't realize that you had a different name on this forum. Now I know and I changed it as seen above.
quote
Originally posted by cam-a-lot:
Looks great Shayne!! Maybe I will pay some shady mob enforcers to kidnap you, lock you in a garage my my shitty swap, and threaten to cut off a finger each week until the engine and tranny mounts are replaced with something like this... Looks awesome bud!! You are an artist
Thanks Pete. I like to do nice work as often as possible. No one like poor quality workmanship. I'll look at your swap one of these fine days and give you my opinion. This will buy me some time before the mob shows up.
quote
Originally posted by wftb:
Nice build , good to see all the progress .If you want to get really fancy with your PS pump block off plate you can get an OEM one .The 06-07 2.2 eco's came with one from the factory .Any car of those years with 2.2 and electric power steering I think .Newer versions of the 2.2 have the PS pump mount removed completely from the cylinder head .
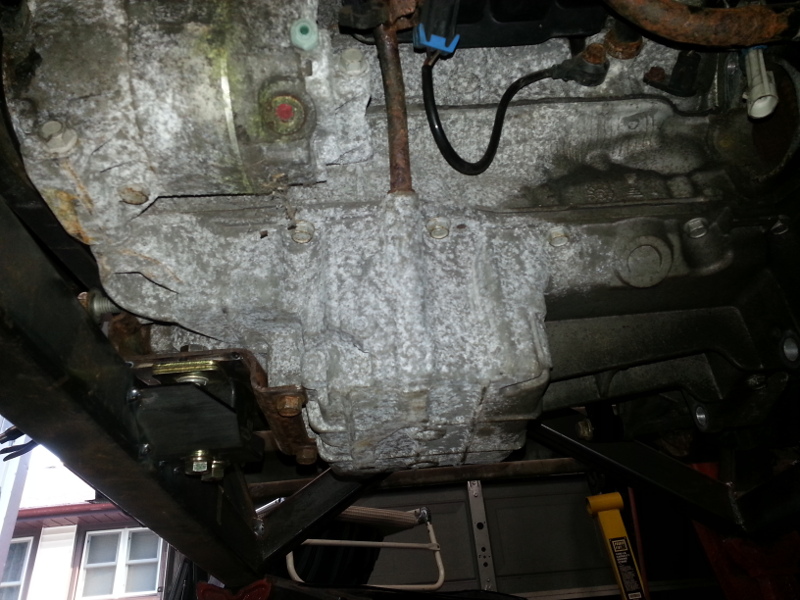
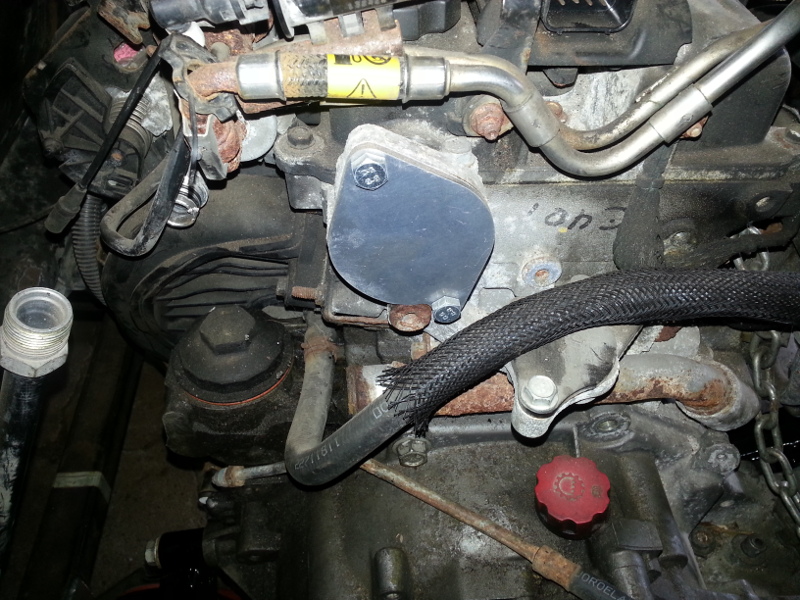
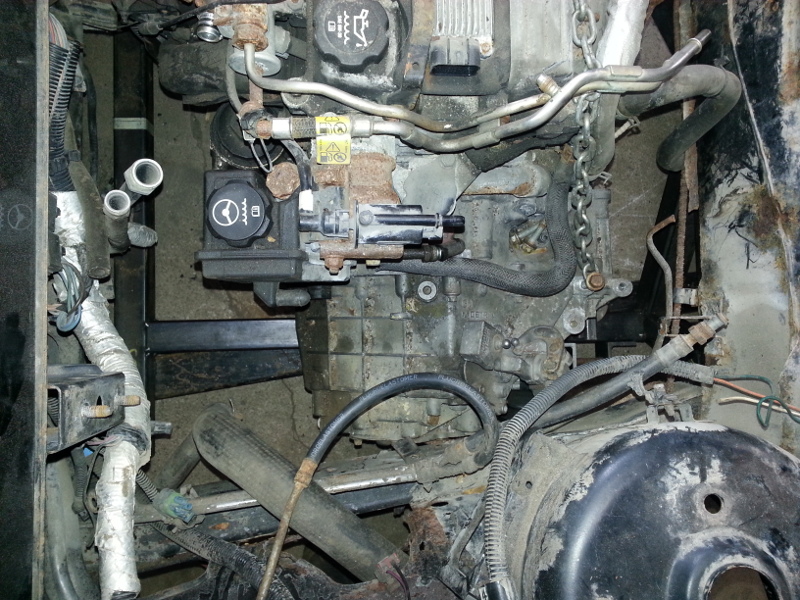
Thanks Steve. Progress is steady. It's sometimes difficult to balance riding the motorcycle, life, work, etc. I'm doing the best I can with the time that I have. The power steering pump was something I whipped up at work. It's a little more personal then just buying and installing a factory block-off plate.
quote
Originally posted by foxgapfiero:
Keeping an eye on your build, I would really like to do the same swap into my 84 Convertible. I think I can do the mechanicals, but wireing is not something I think I can get past. Nice thing about my car It is a manual trans, no AC, no cruise type of car. A lot less stuff to hook up. I have been driving my friends 09 Cobalt around for a few days while he is on vacation and like the feel of the 5 speed, 2.2 combination, but maybe a turbo would be nice?
Wiring is easy. If you follow this thread, I'll post the wiring in time. And yes, some nice detailed schematics as well. Enjoy the Cobalt. Before long, you'll have to give it back! I too would like a turbo but for now, I'll just try and get it together first. Then the power adder can come in play.
[This message has been edited by Lunatic (edited 07-27-2014).]
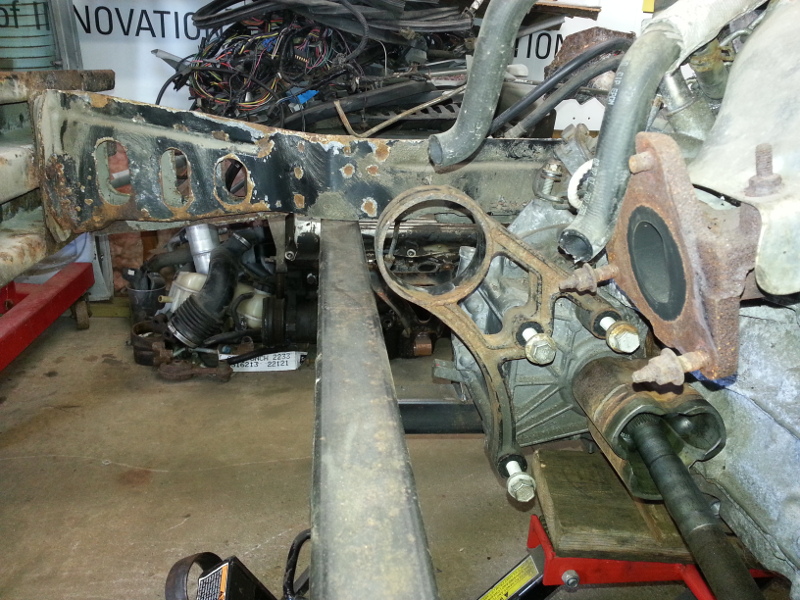
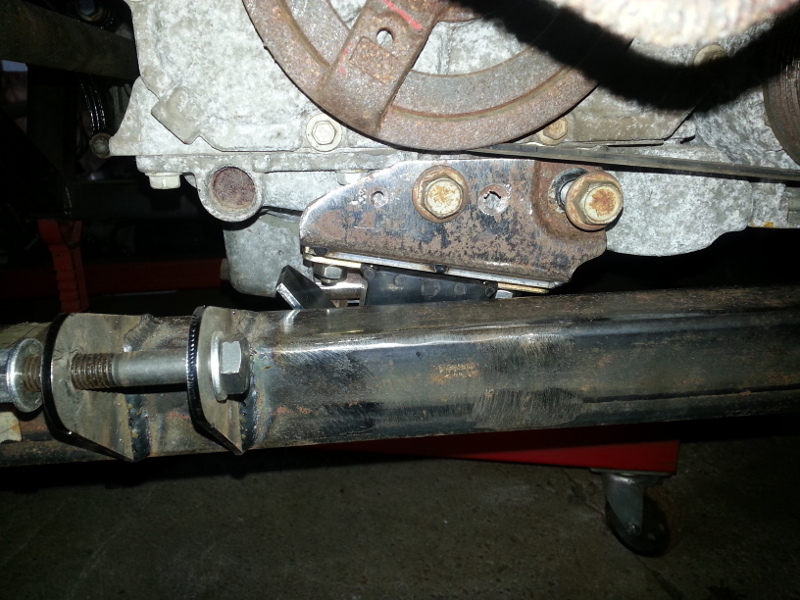
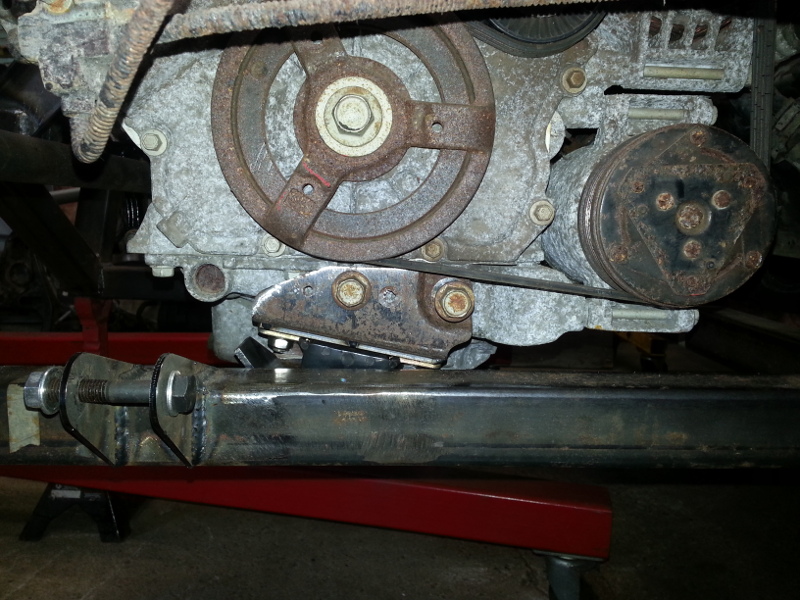
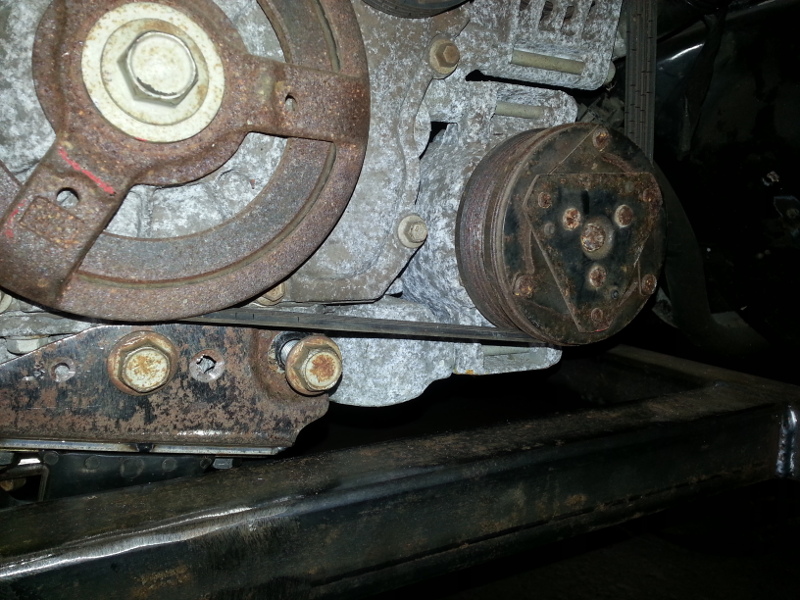
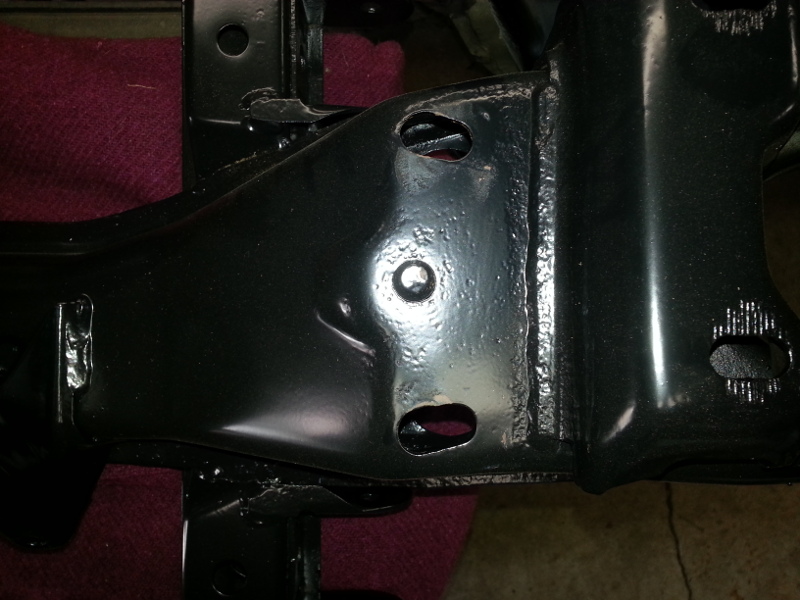
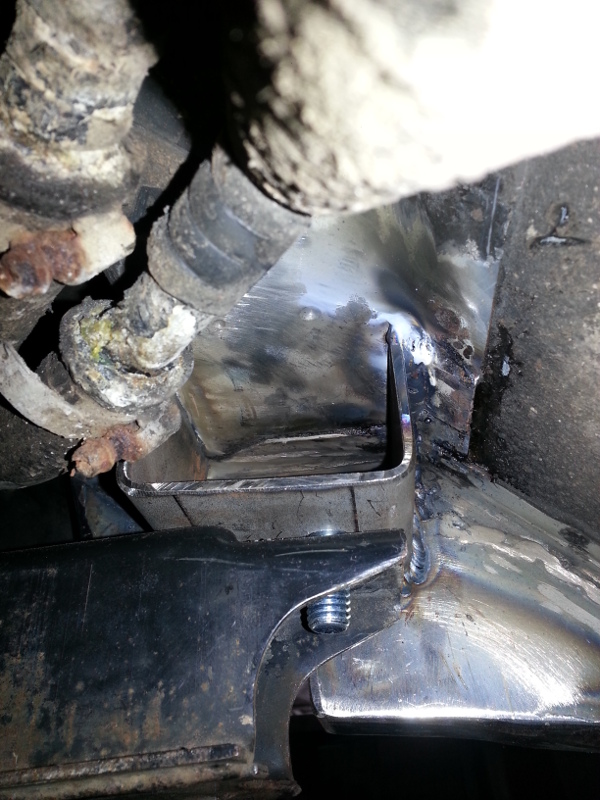
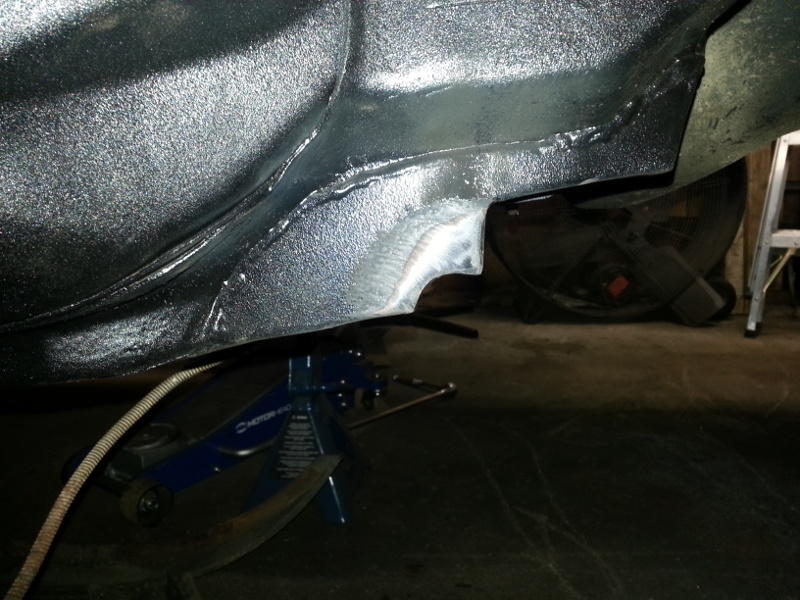
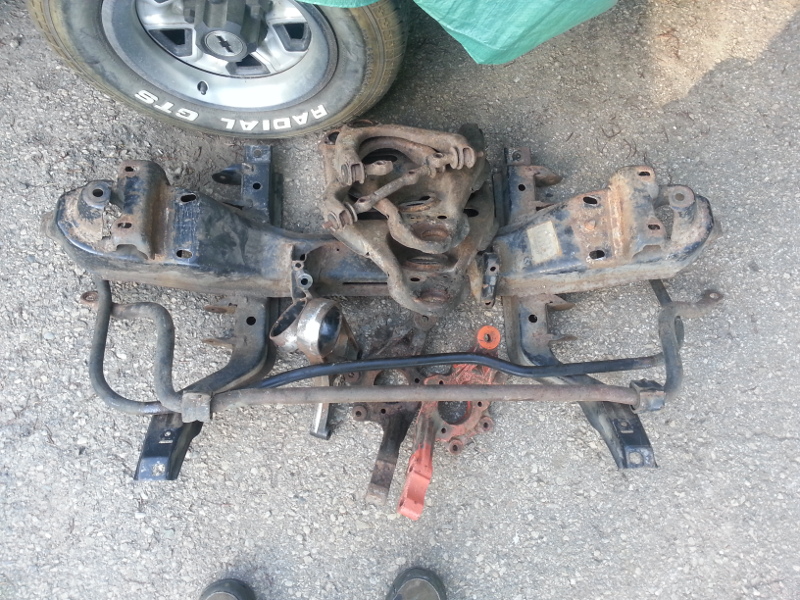
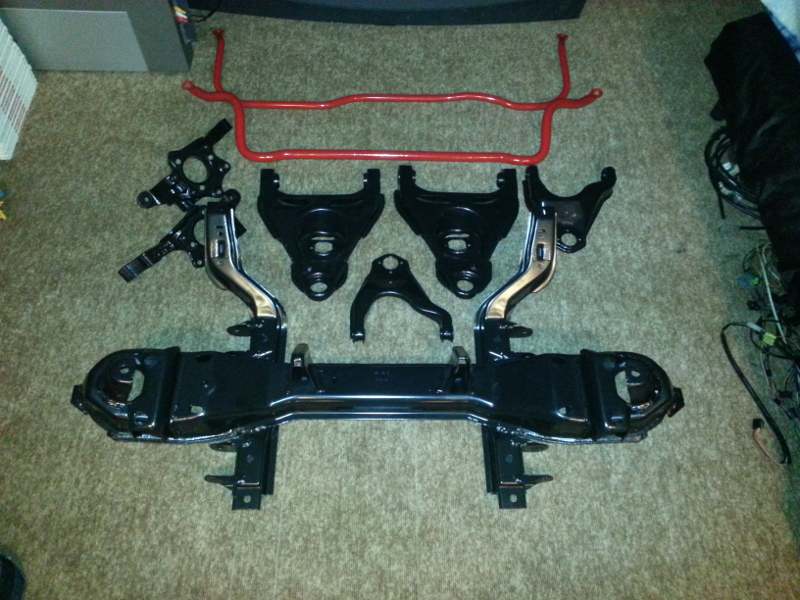
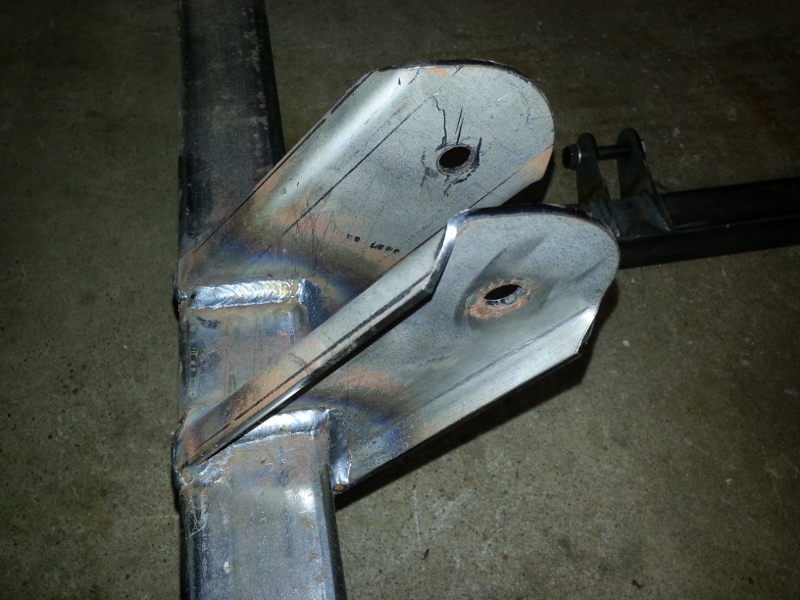
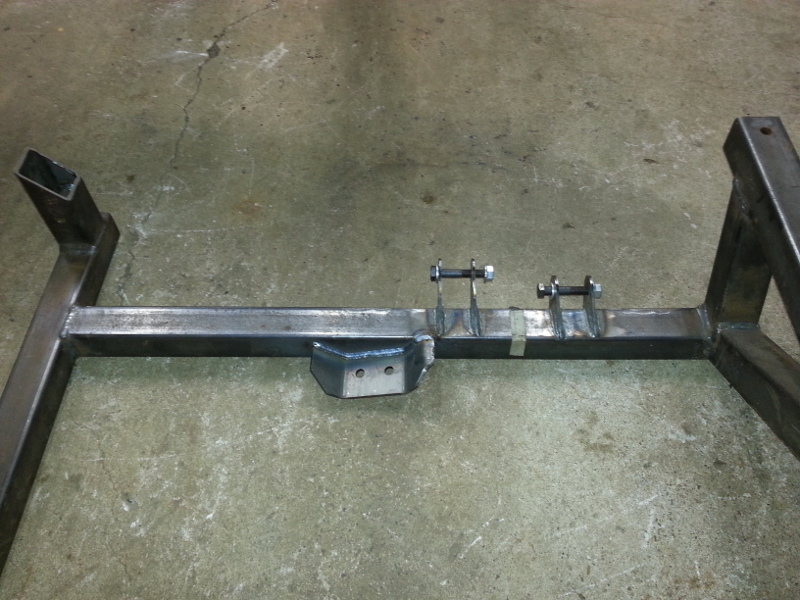
This next part of my build thread is for anyone interested in swapping the 88 front suspension into the 84-87 chassis. This is not quite a bolt-in affair but it's pretty easy to do. Some frame notching, welding, elongation of a few holes and a little patience is all it takes. As you can see, at this point of the build, I have the cradle bolted into place using all eight bolt hole locations. (Six were stock while the two rear mounting locations were fabricated). I left the locating stud intact and measured side to side and fore & aft. Note: Before you begin, you'll need to find a complete 88 front cross member assembly. The control arms, steering rack (and intermediate shaft), sway bar, spindles, calipers, etc are 88 specific and are different than the 84-87 parts.
Start by removing all the old parts. Steering rack, sway bar, brake lines, etc. No pics, you get the idea.
Here's the notch of the frame rail that has to be cut in order to clear the 88 front cross member. Note: Leave additional clearance for the coolant tubes! I had to go in later on and notch for this additional clearance!
Here are the elongated holes that I had made to the crossmember. Notice the locating pin?
Here you can see the 88 cross member in place after notching.
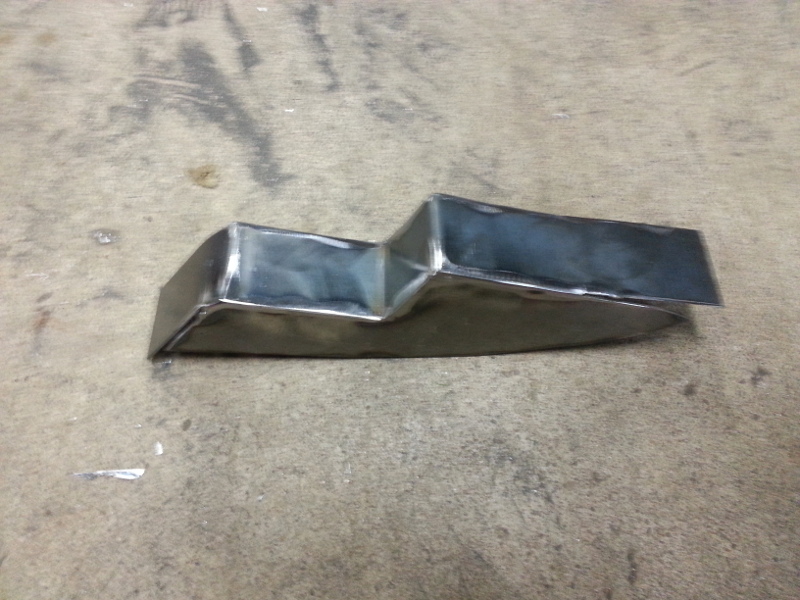
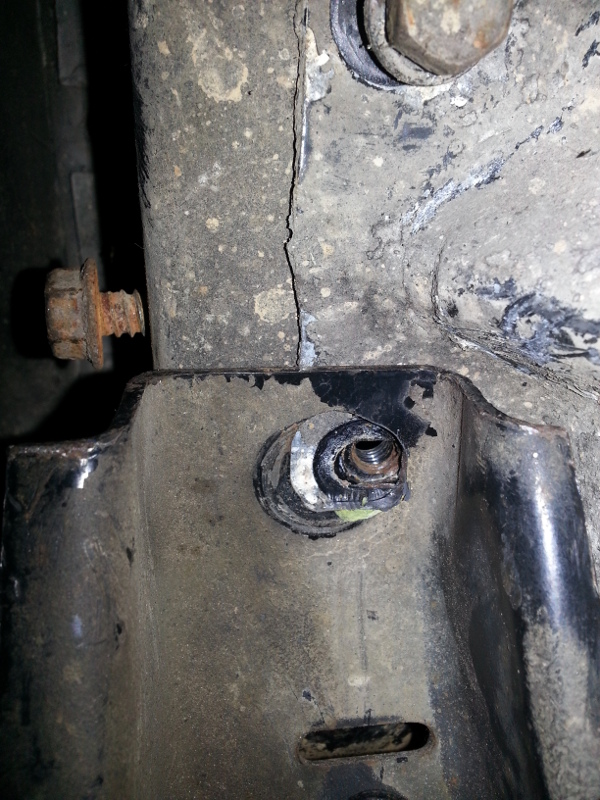
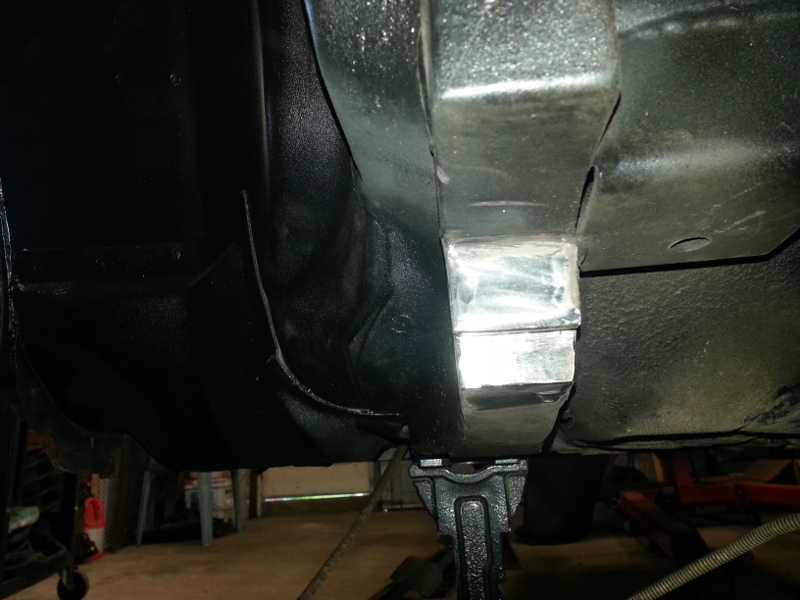
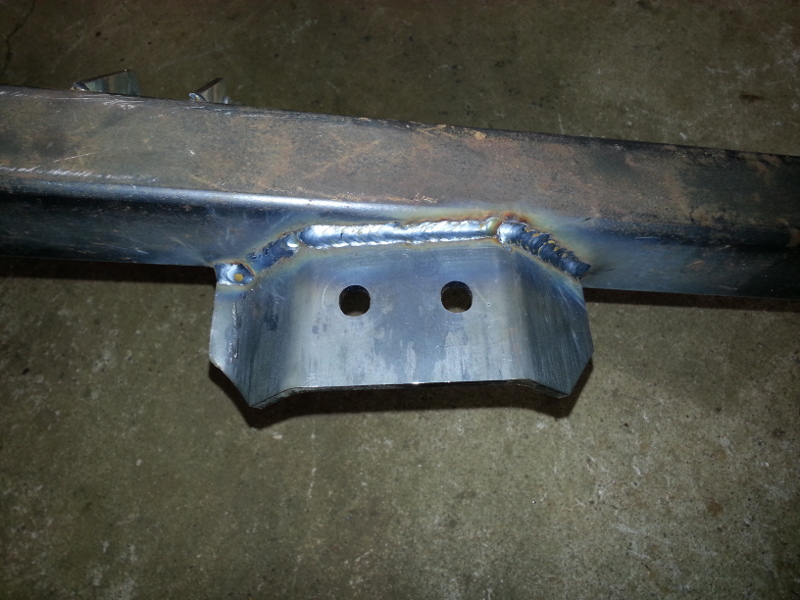
Now, the gap is a little large. This is due because the offending area on the 84-87 frame. Remember, the back portion of the lower control arm mounts to the bracketry associated in that area. I wanted to fill in the gap and make it look nicer, almost factory. So, I created "caps" for both sides using 14 gauge metal.
Here's the passenger side cap installed. Notice the smaller gap(s) and the control arm clearance.
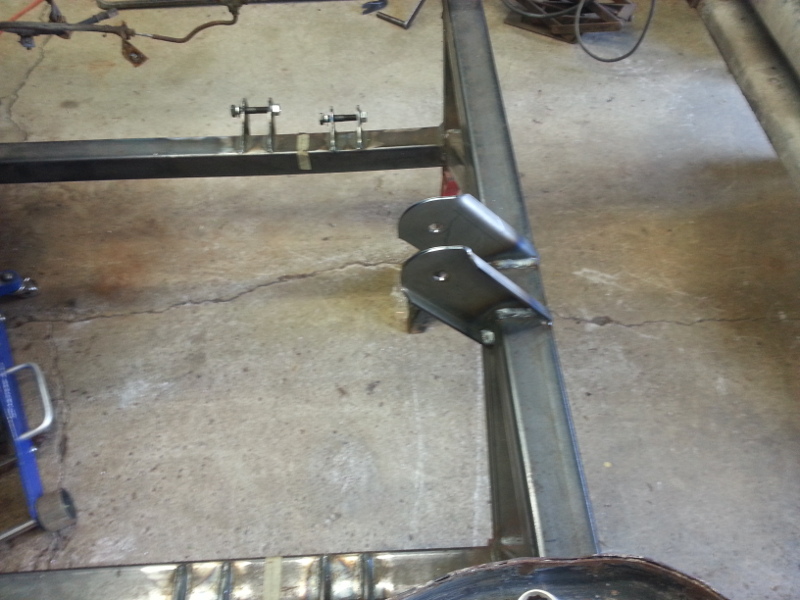
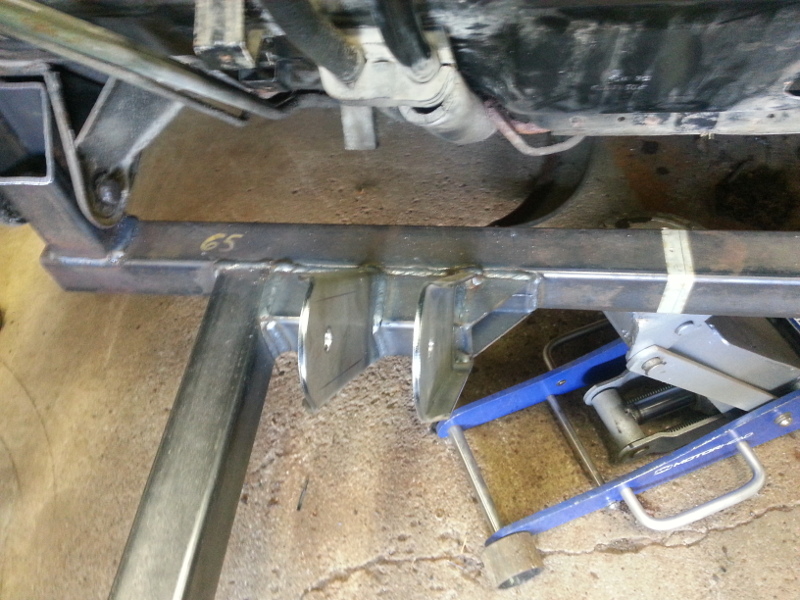
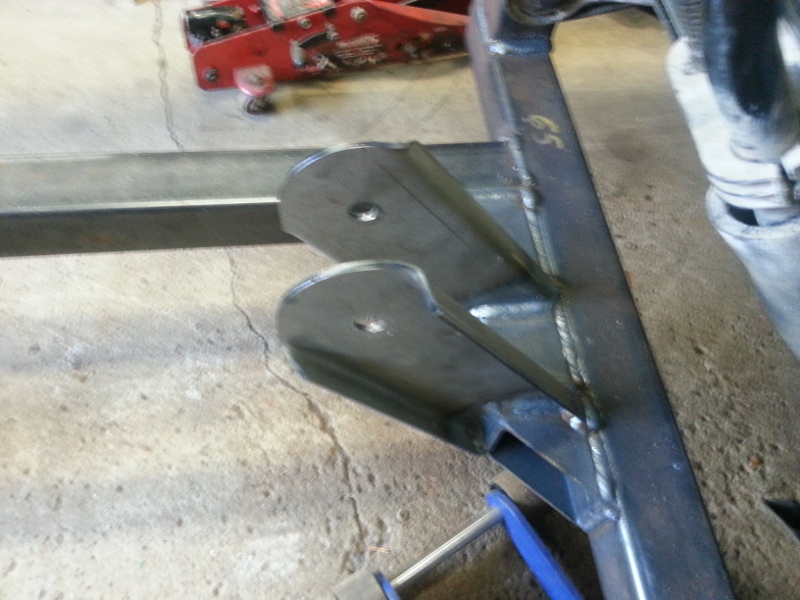
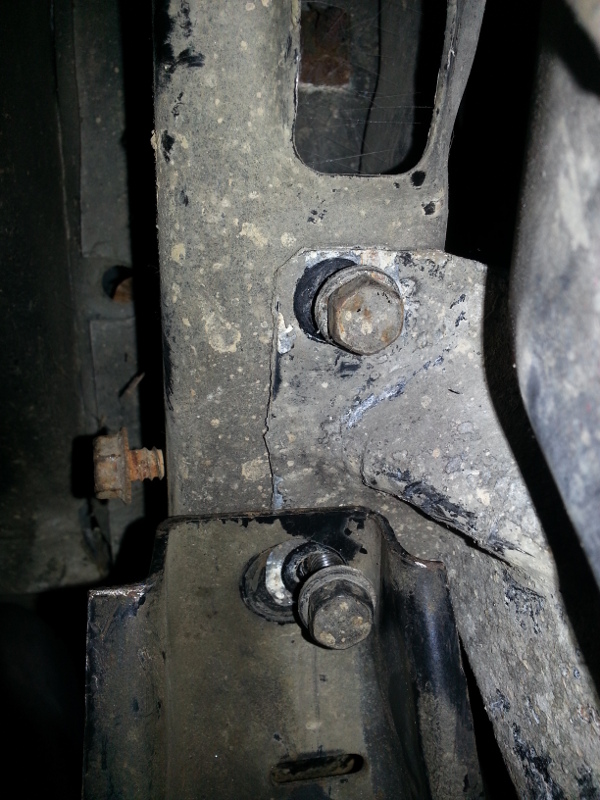
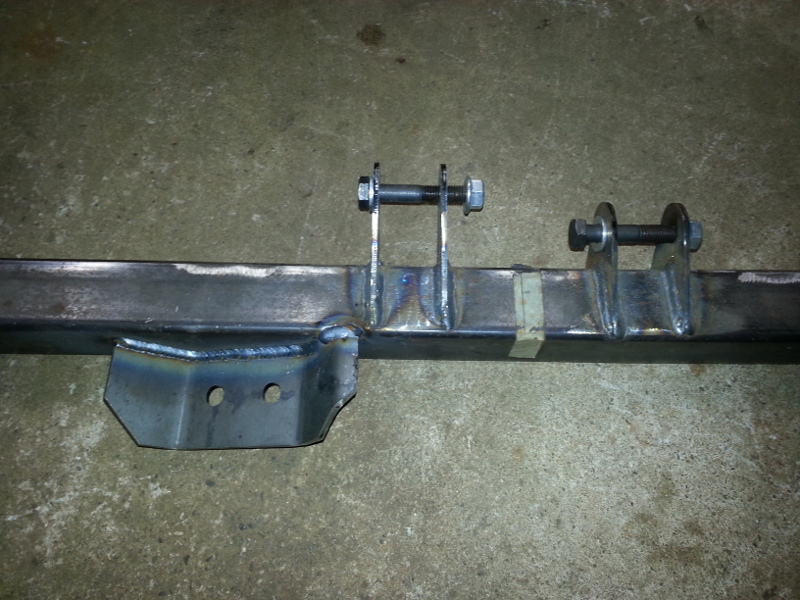
There are a few more area's that must be addressed. After removing the factory bracketry, you can clearly see the back two mounting locations are floating in the air.
I simply took some 10 gauge steel and formed up a "U" channel, then welded it in. It's around 3" long, and 2" tall. Now, you can also see the step the 88 cross member has. I just added a small plate, of the appropriate thickness, to take up the extra gap. I then drilled a 1/2" hole through the "U" channel and secured the assembly with a 1/2"-13 x 1 1/2" bolt, nut and washers.
Don't mind the corroded and ugly looking coolant lines! They'll be addressed.
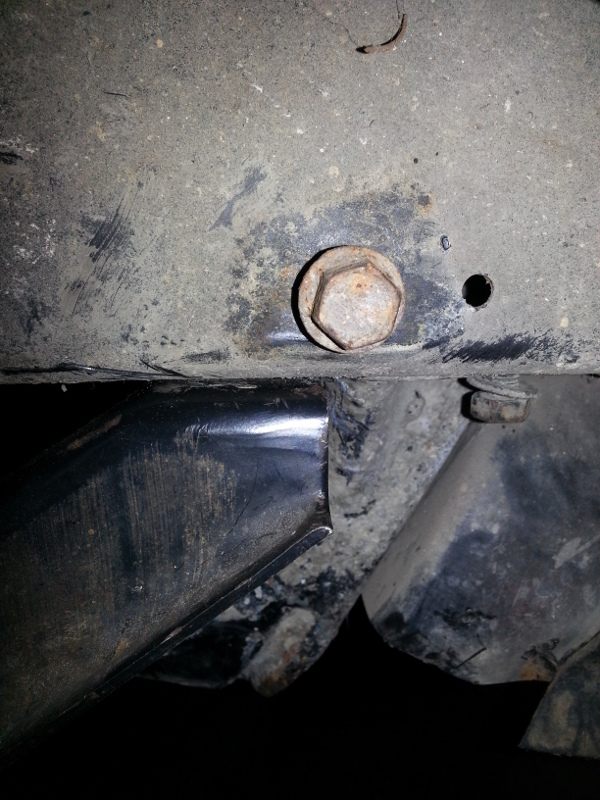
The front mounting locations line up almost perfectly with the rear factory lower rad saddle bolt holes! A little slotting with the die grinder, and voila.
That's it, that's all. Reinstall all the 88 specific parts and you're good to go. Note: The 88 coolant tubes are a little different than the 84-87 units. I will use the 88 tubes as that's what I have. (After I repair the kink from the previous owner first).
[This message has been edited by Lunatic (edited 07-13-2014).]
Keeping an eye on your build, I would really like to do the same swap into my 84 Convertible. I think I can do the mechanicals, but wireing is not something I think I can get past. Nice thing about my car It is a manual trans, no AC, no cruise type of car. A lot less stuff to hook up. I have been driving my friends 09 Cobalt around for a few days while he is on vacation and like the feel of the 5 speed, 2.2 combination, but maybe a turbo would be nice?
Stand alone "plug n play" harnesses with PCM's are available for the Ecotec. My friends son has the supercharged version of the engine in his Cobalt and he claims that it really moves. This build thread is really incredible and complex. That's why I stick to the easier swaps for now.
------------------ " THE BLACK PARALYZER" -87GT 3800SC Series III engine, custom ZZP /Frozen Boost Intercooler setup, 3.4" Pulley, Powerlog manifold, Northstar TB, LS1 MAF, 3" Flotech Afterburner Exhaust, Autolite 104's, MSD wires, Custom CAI, 4T65eHD w. custom axles, HP Tuners VCM Suite. "THE COLUSSUS" 87GT - ALL OUT 3.4L Turbocharged engine, Garrett Hybrid Turbo, MSD ign., modified TH125H " ON THE LOOSE WITHOUT THE JUICE "
Although your endcaps look good, I think you made a mistake.
The area between the cross member and the frame rail needs to be open for the coolant tube to clear (unless you were planning on doing something different or the angle of the picture is misleading).
Stand alone "plug n play" harnesses with PCM's are available for the Ecotec. My friends son has the supercharged version of the engine in his Cobalt and he claims that it really moves. This build thread is really incredible and complex. That's why I stick to the easier swaps for now.
In this case, I'll be using the stock GM PCM part number 12576162. HP Tuner's supports it and there are a few options within the parameter's that allow for fuel enrichment (boost applications) and such. Besides, GM spent a lot of time making this work and if it's good enough for them, it's good enough for me! LOL. So far, this has been an easy swap. I'm just doing a few other things along the way.
Although your endcaps look good, I think you made a mistake.
The area between the cross member and the frame rail needs to be open for the coolant tube to clear (unless you were planning on doing something different or the angle of the picture is misleading).
Bob
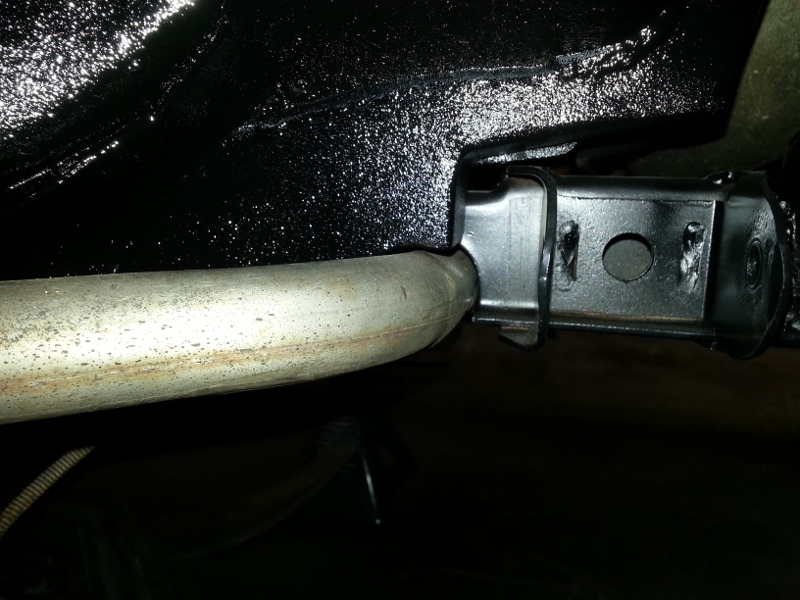
Indeed RCR you are correct. Since I never removed the coolant tubes from the 88 parts car, they were already off, I didn't know how "exactly" they were installed. The 84-87 cars had them snake through the control arm and therefore were mounted differently. So I just figured that I could mount them as high as possible. Well, I just worked on the car this weekend and I didn't really like the way the coolant tubes "hung down". Mind you, it was only like an inch but still. Onto the modifications. Thanks Bob for causing me more work. LOL.
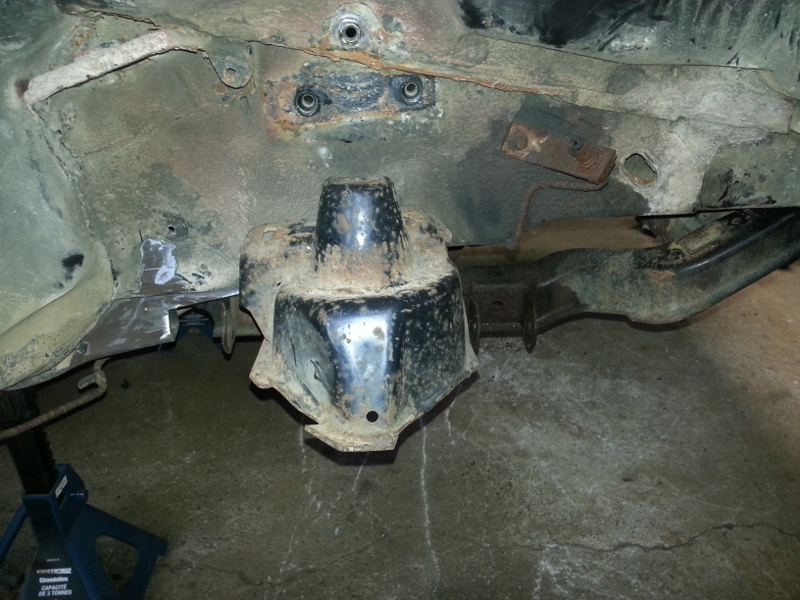
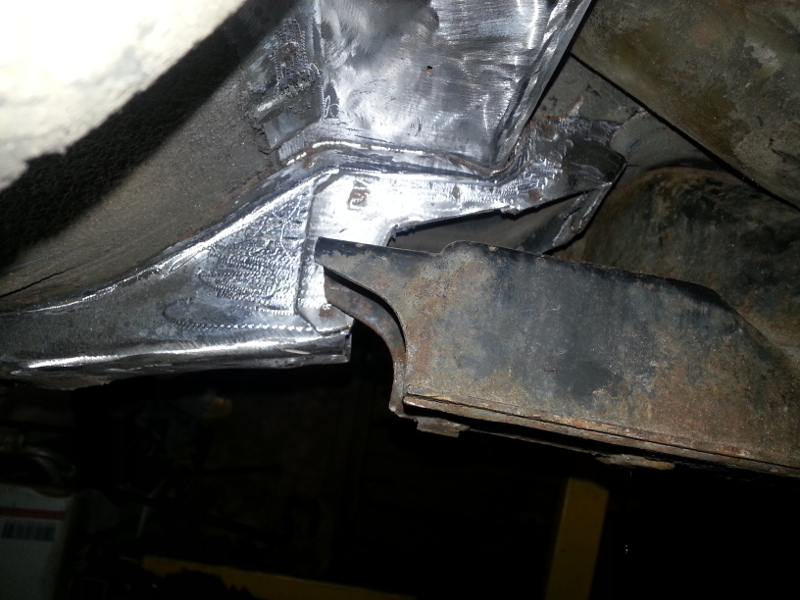
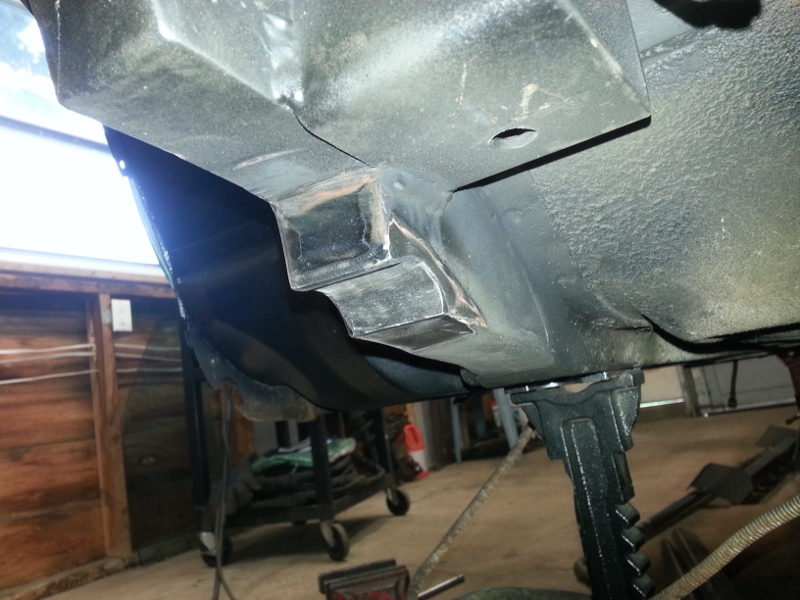
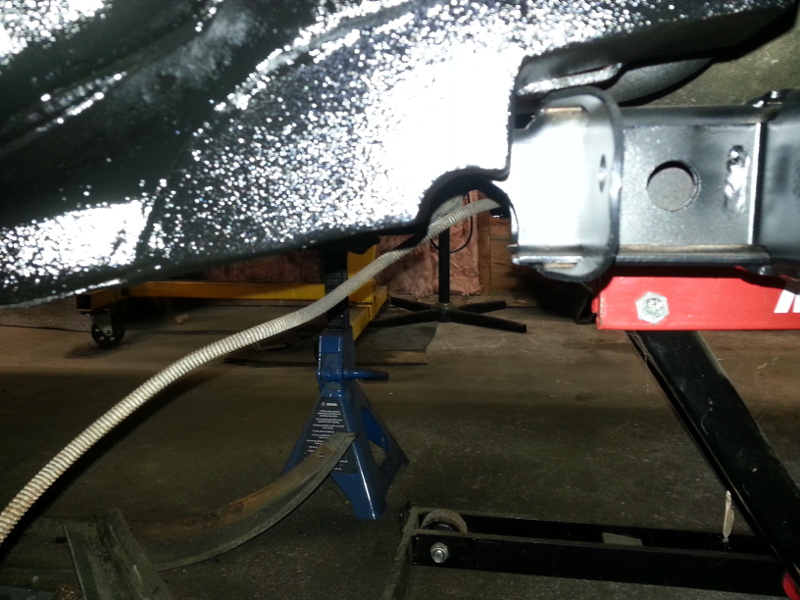
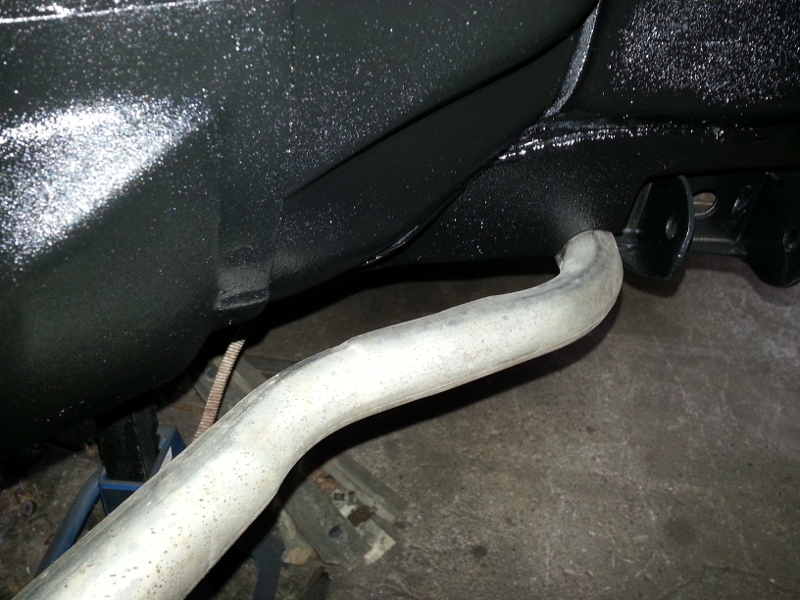
Okay, lets try to protect the coolant tubes and raise them higher within the frame. Here's the offending area.
Now, if you look at this view, you can see there is a semi-circle relief in the factory crossmember. Let us use this as a reference point and make a notch to match this.
Without showing you all the cutting, grinding and welding, I ended up with this.
Add a little primer.
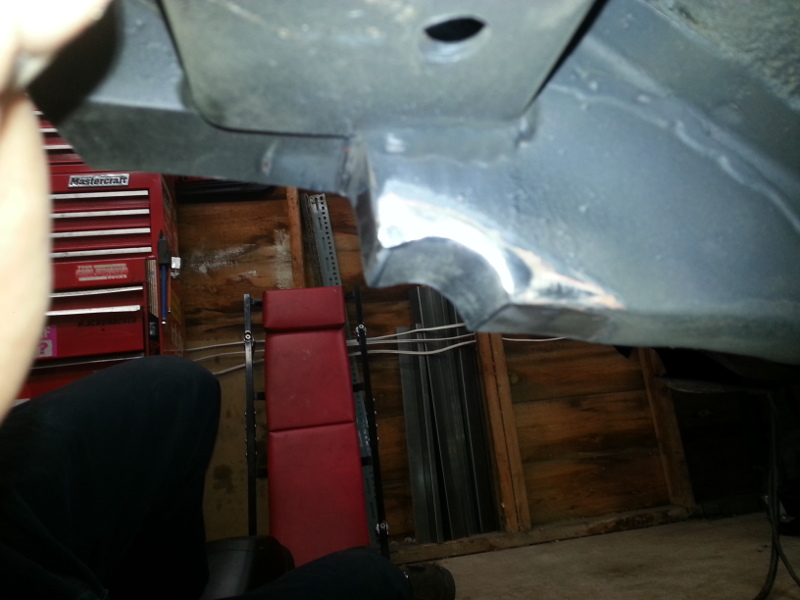
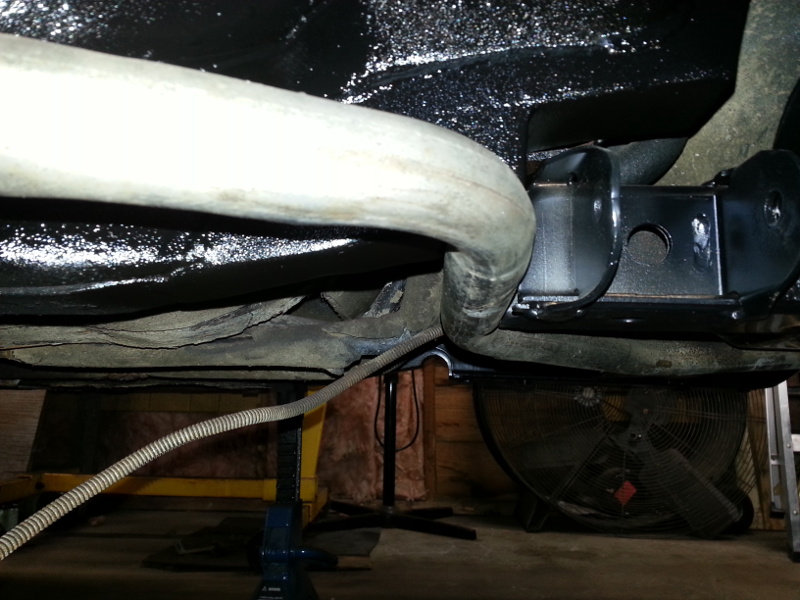
After some paint and undercoat, we have this.
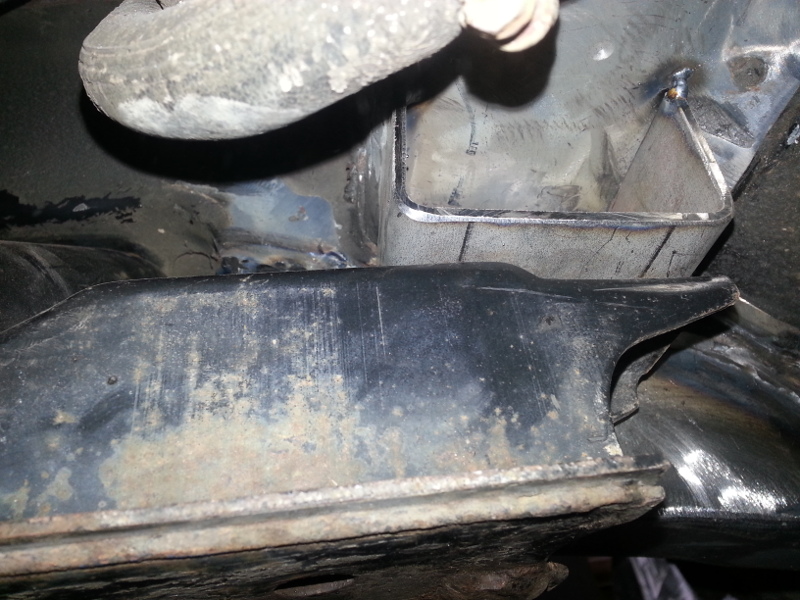
Here's the additional clearance with the crossmember installed.
I can still push the coolant tubes and have them almost touch the inner wheel well. They are slightly pulled out for the photos.
[This message has been edited by Lunatic (edited 07-13-2014).]
Loving this build. I'm a huge fan of the 2.2 Ecotec. Super reliable, easy to work on, and puts out lots of power for how small and light it is. I don't have the skills to pull this swap off, but one day...
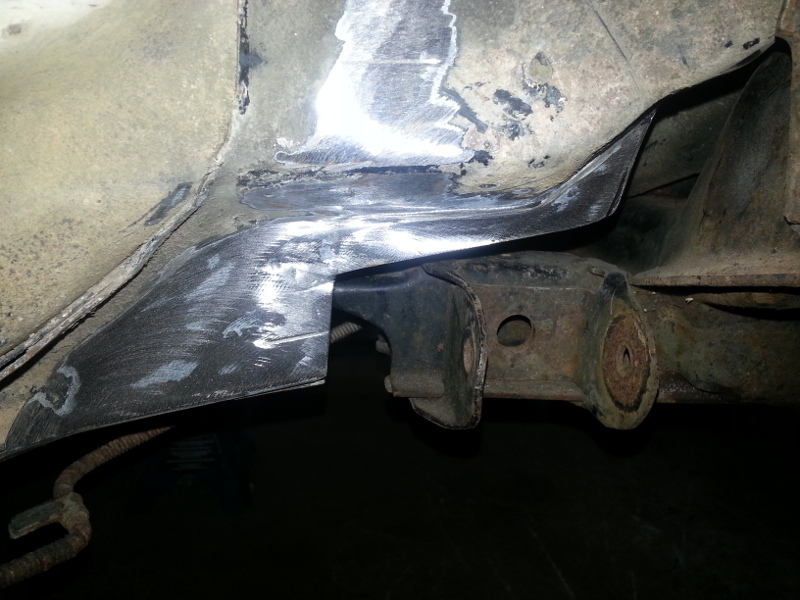
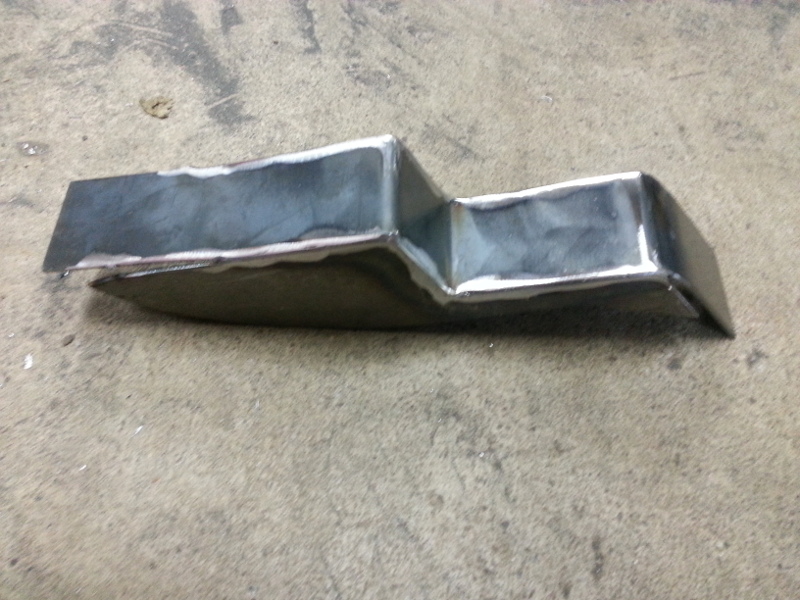
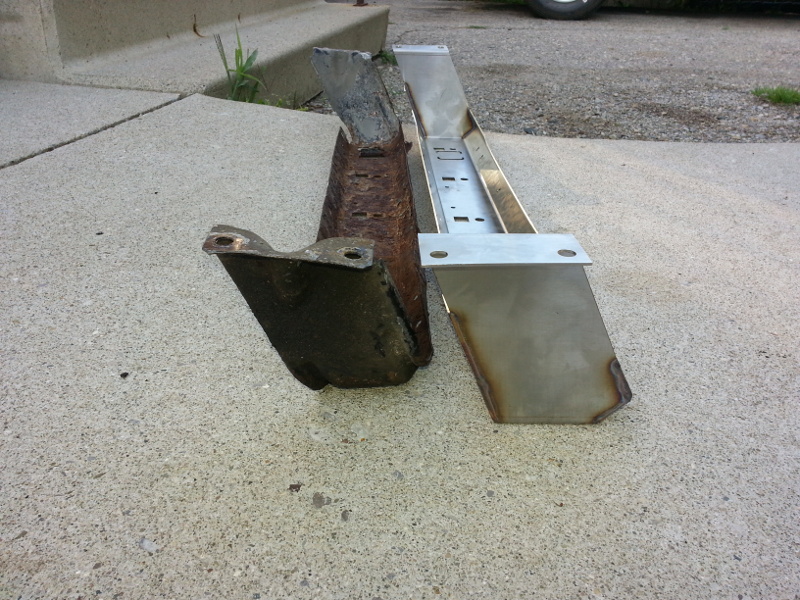
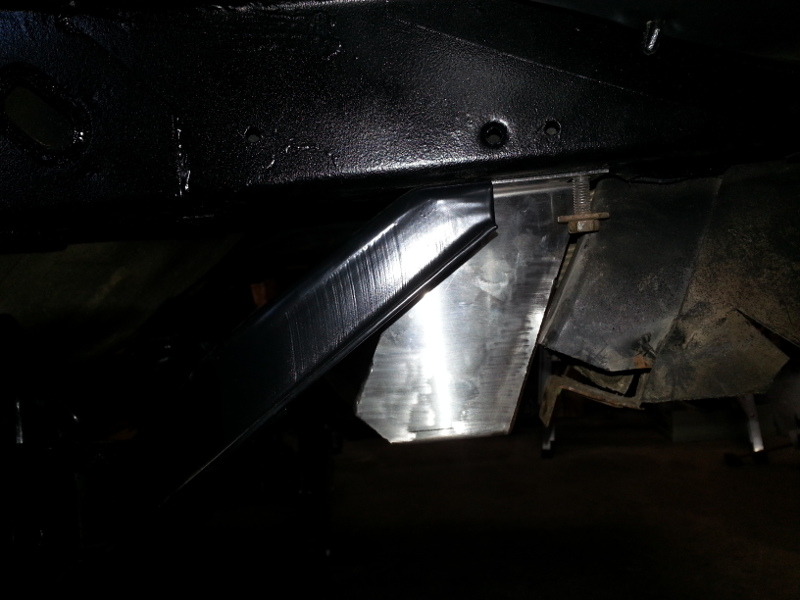
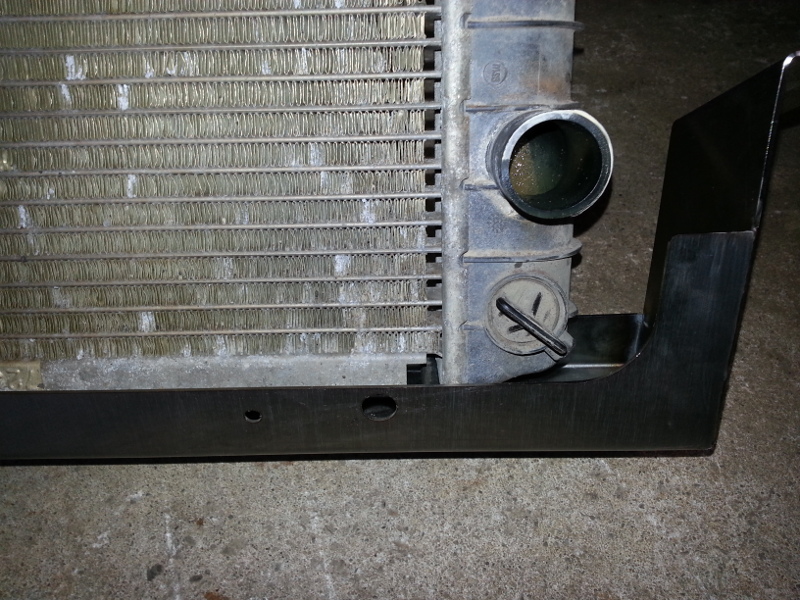
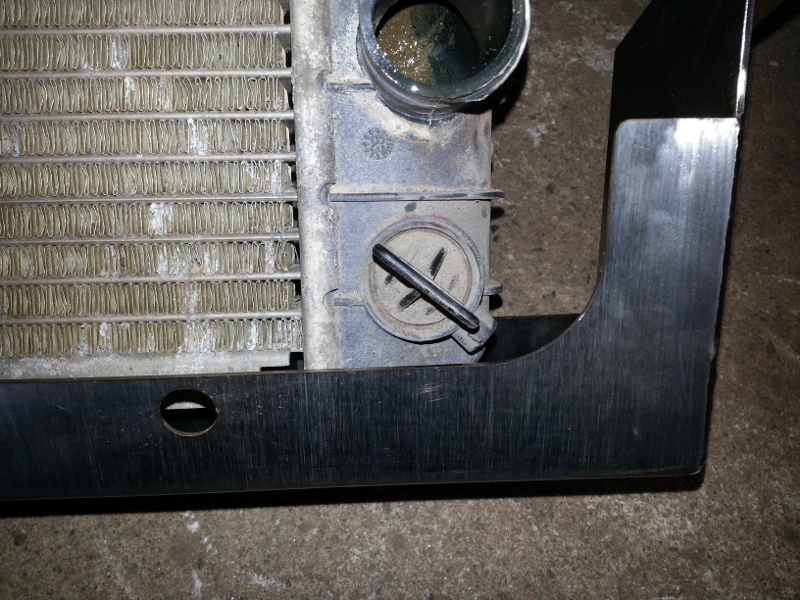
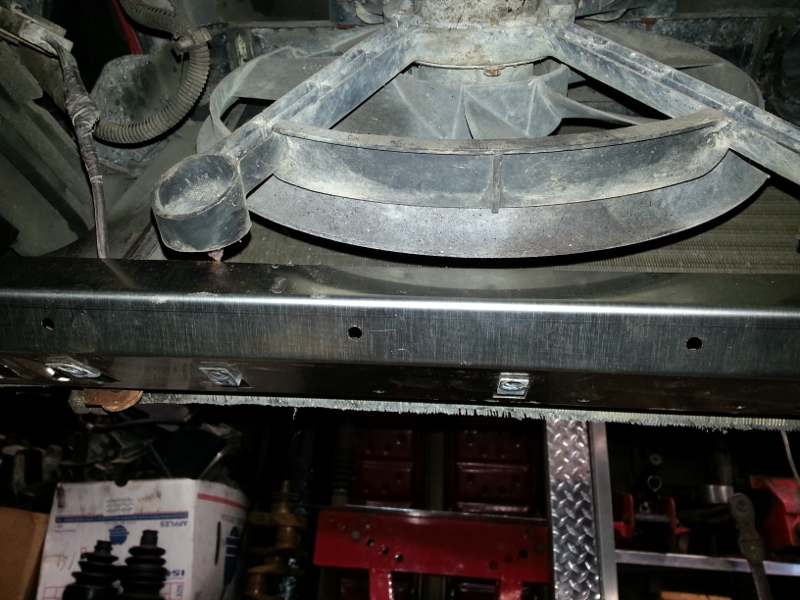
In hopes of finding a "nice" rad saddle, and not finding one, I decided to just make one. I whipped this up, cut on the laser and formed on the brake. Just for something to do of course. Lol. Ooh, aah, stainless too! No crusty crap here any more.
As you can see, the small amount of clearance. I made this rad saddle as wide as possible. (Think larger radiator.)
[This message has been edited by Lunatic (edited 07-18-2014).]
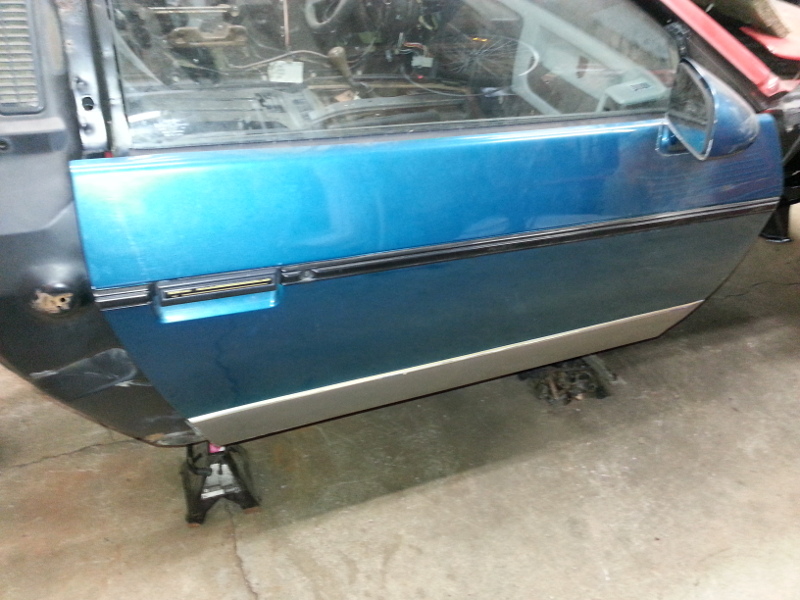
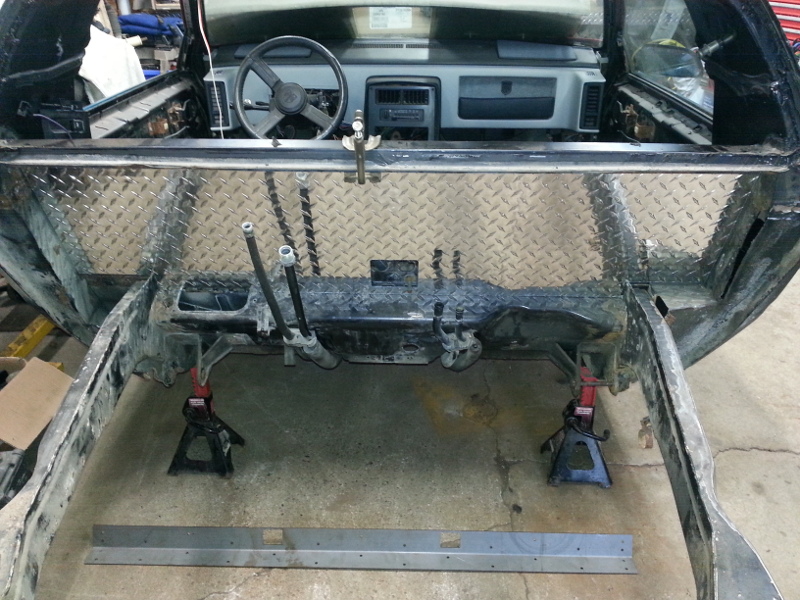
It was a busy weekend with assembly and some disassembly. With having the engine and trans exactly where I want it, I yanked the driveline out. Now I can tear down and inspect the engine and trans adding new components, gaskets and seals where needed. I removed the fuel tank and filler neck. I also removed all the offending areas on the firewall too! I've decided to shave the firewall and add checker plate to cover it. In addition, I'll relocate the hinges to the underside of the rear window ledge and relocate the C500 as well. Since my car was a no option, plane Jane, it was just easier to install both doors that had all the power windows, mirrors, locks and the GT skirting. I cleaned the nice dash from the parts car and installed it. And, I pulled anything related to the automatic transmission and installed the clutch pedal, wiring and short throw shifter.
[This message has been edited by Lunatic (edited 07-20-2014).]
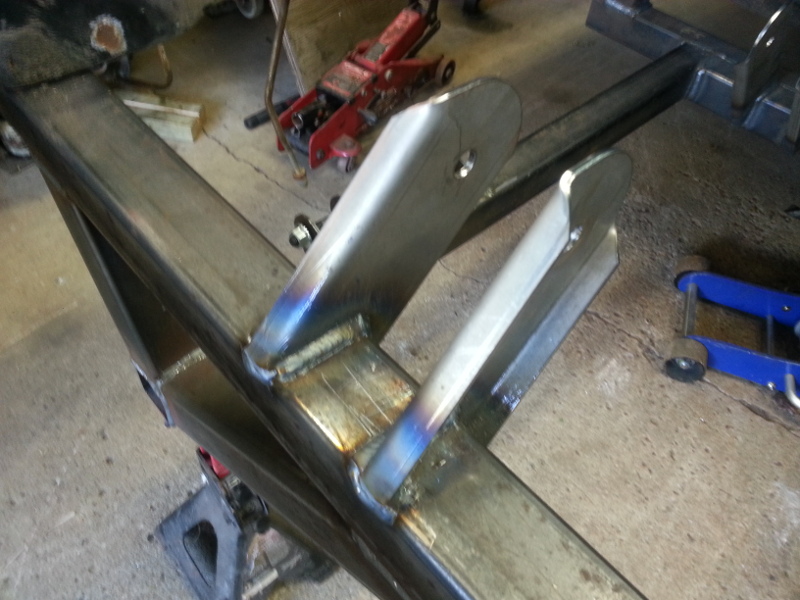
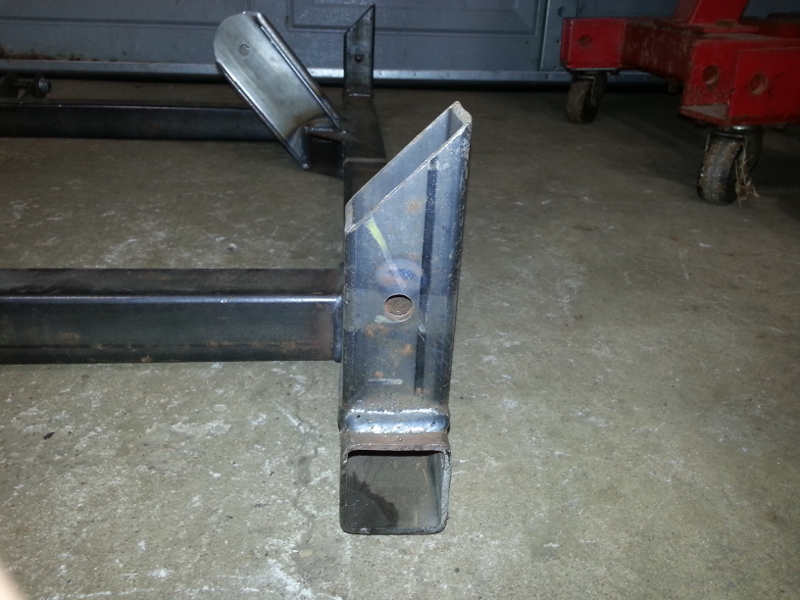
I would recommend capping the end tubes on your cradle to prevent dirt, bugs, road debris, water ect. from getting in there, and possibly causing a corrosion issue from the inside out.
I would recommend capping the end tubes on your cradle to prevent dirt, bugs, road debris, water ect. from getting in there, and possibly causing a corrosion issue from the inside out.
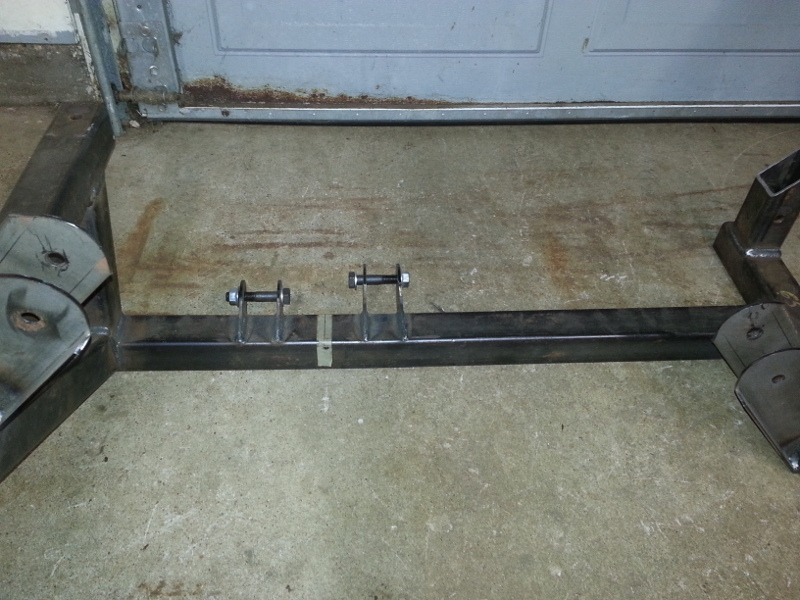
Indeed I will. The next time I fire up the welder I'll cap the ends as well as add the mounting point for the trailing arms. Then it's off for powdercoat.
[This message has been edited by Lunatic (edited 07-21-2014).]
I finally took the time to read through this post and check out all the pictures. I gotta say Shayne that you have got some seriously good welding skills. I've seen a lot of posts in this forum with people showing off things they have fabricated for their cars, and very very few demonstrate the welding abilities that you have shown here.
I finally took the time to read through this post and check out all the pictures. I gotta say Shayne that you have got some seriously good welding skills. I've seen a lot of posts in this forum with people showing off things they have fabricated for their cars, and very very few demonstrate the welding abilities that you have shown here.
Thank you the nice words and for taking the time to read this thread. I enjoy my hobby and welding goes hand-in-hand with this hobby. Good welds are a must for strength. I too have seen a few pictures of poor looking weldments. With just looking at those pictures, one can quickly see the possible failure. All I can say is, "set up your welder properly and practice". There are many tutorials online for this. If one cannot weld, at least tack it and have a friend come over that can weld.
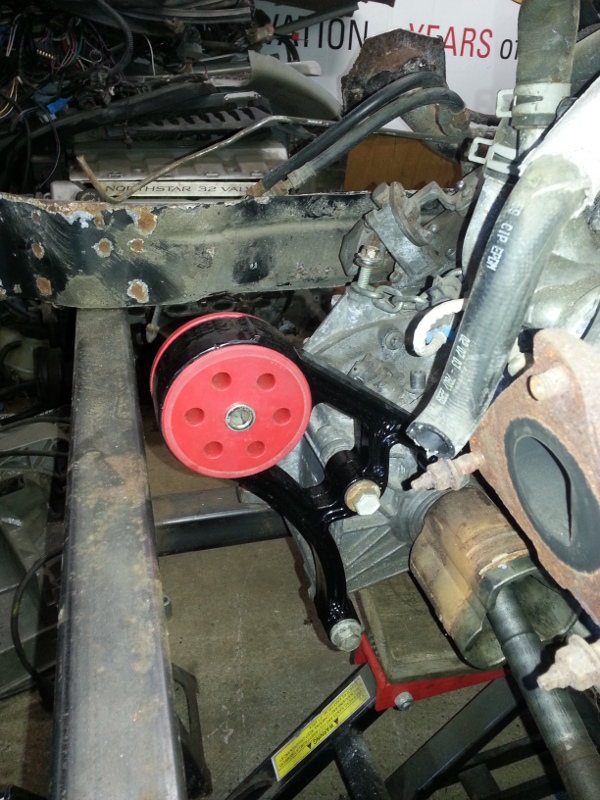
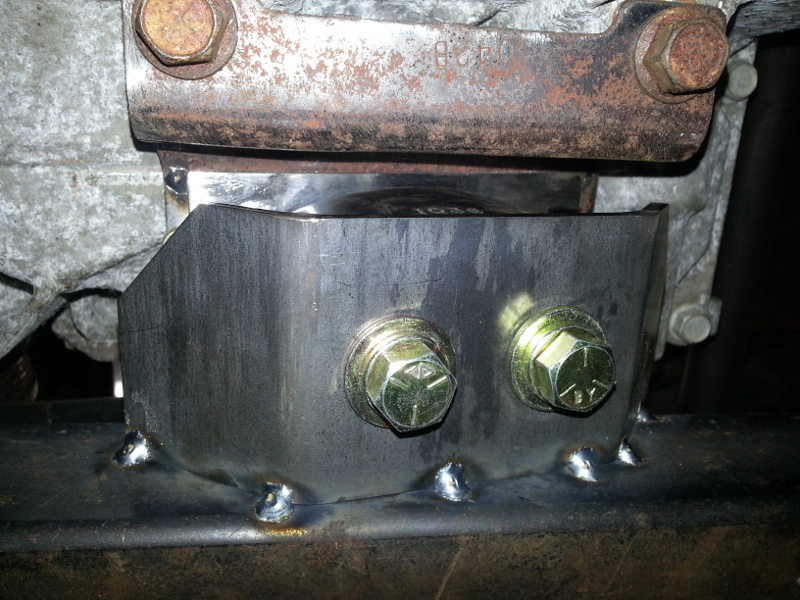
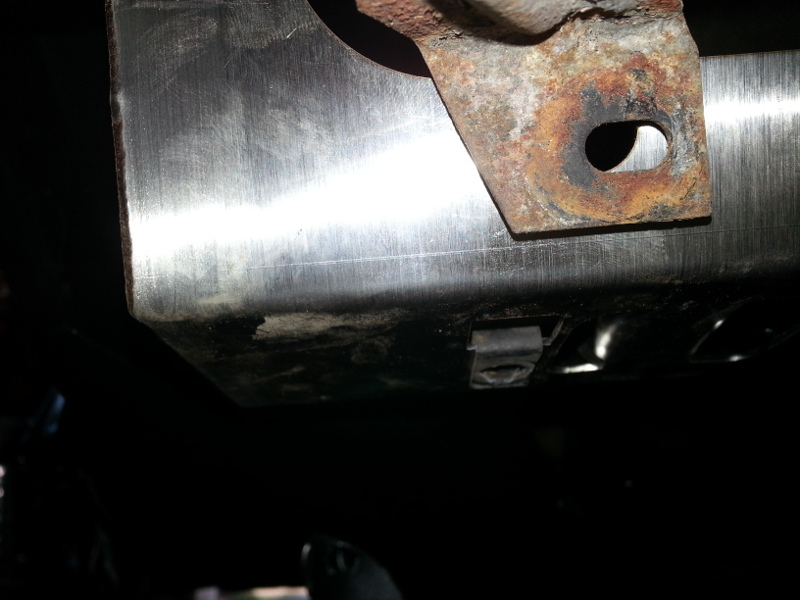
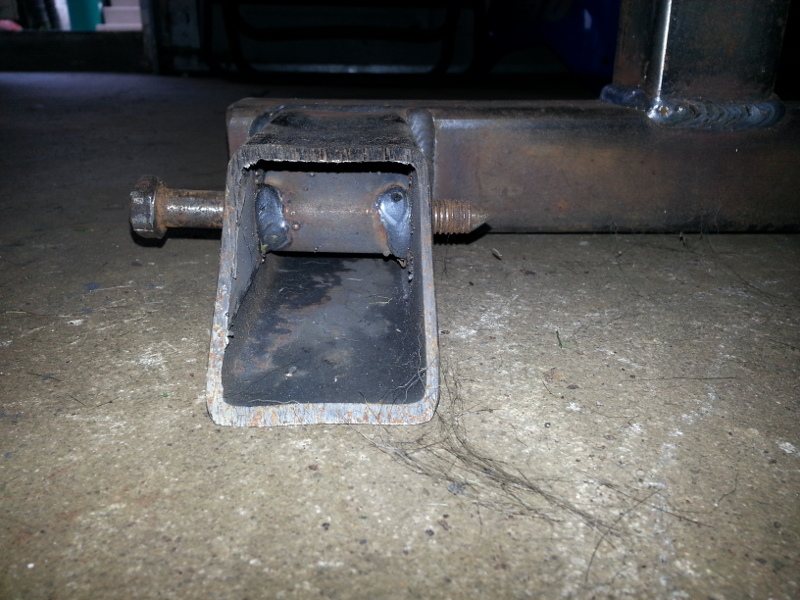
Just make sure you install sleeves where the cradle bolts pass through. That is the only way they will stay tight and not collapse the tube.
Nothing gets past you, does it Paul? Lol. I agree with this statement and I'm one step ahead of you. I've already done this. For those following this reply, here's what fieroguru is talking about.
[This message has been edited by Lunatic (edited 07-27-2014).]
This weekend I met a fellow member, cam-a-lot. Very nice guy. He gave me some 88 specific parts that I'm sure I'll make use of. It was nice meeting you, your family and your Fiero. I hope we meet again my friend.
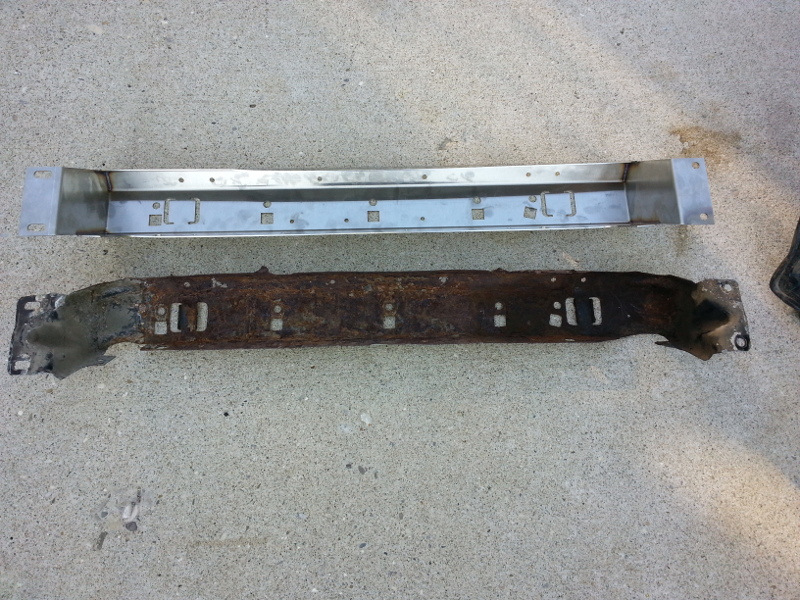
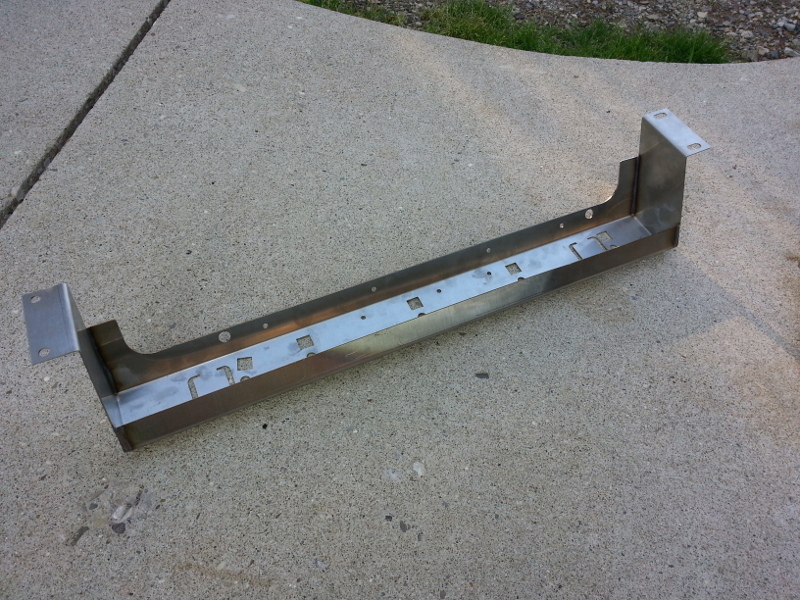
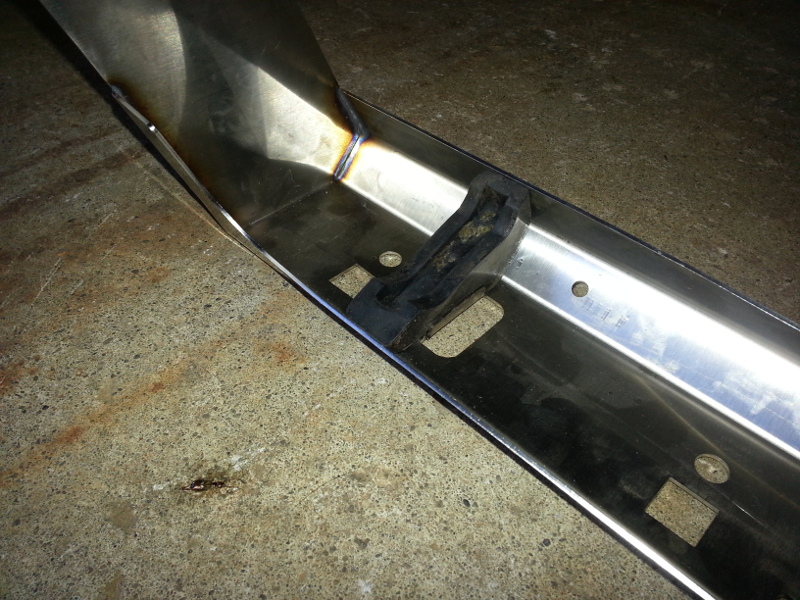
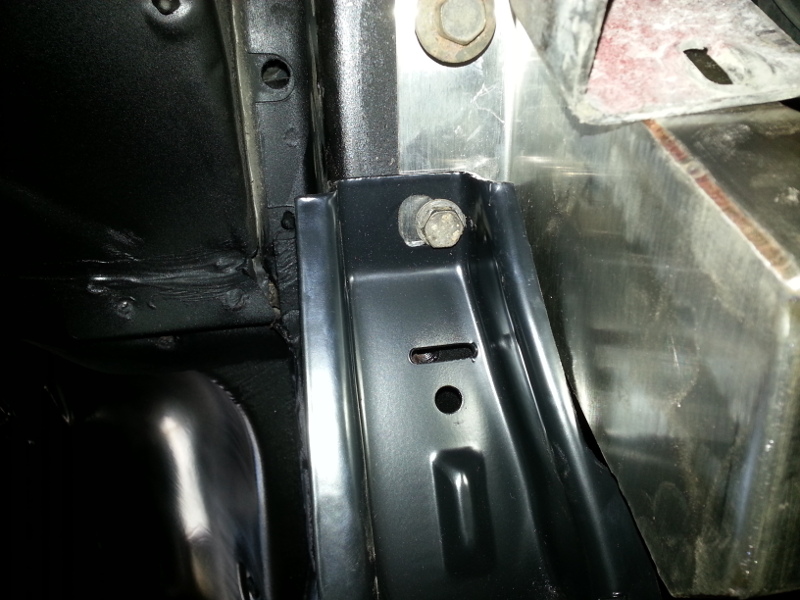
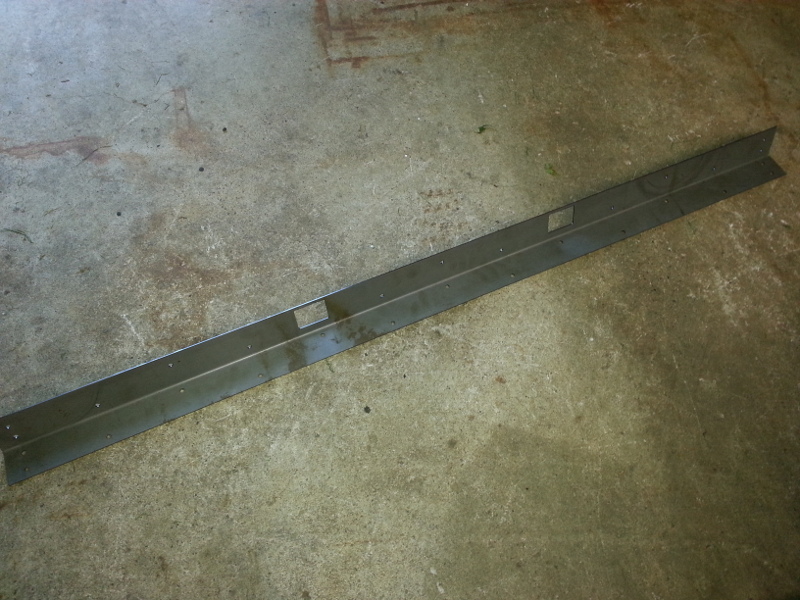
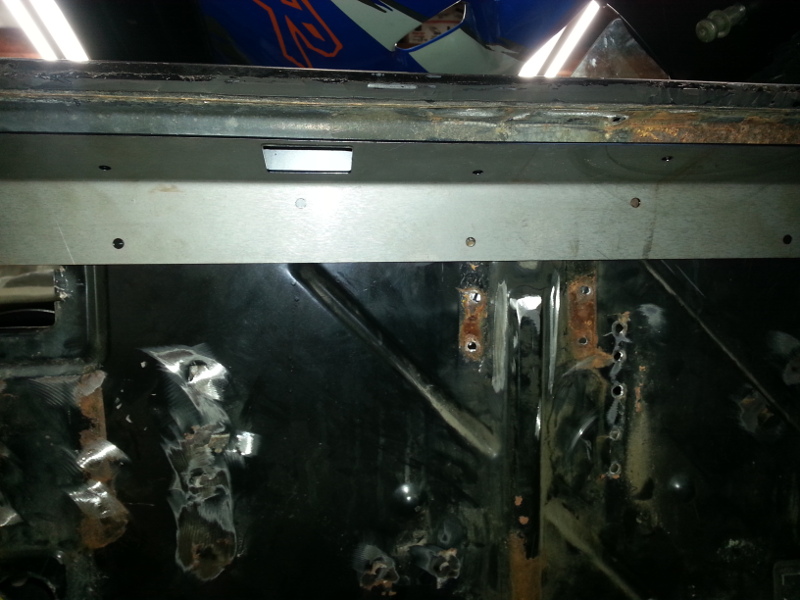
Not too much happened with my build as I spent some time cleaning the carb's and installing a jet kit on my ageing GSXR-1100. But I did find time to share with you some small things. Since I'm going to relocate the trunk hinges to the underside of the window, I wanted a little extra support in that area. The thinner metal that GM used under the window may (or may not) be strong enough to support the deck lid. So, here's a 14 gauge metal strip that I'll attach either by 1/4" rivets or small plug-type welds. The damn camera makes the rust look real bad on my car. It's not as bad as it looks and I'll take care of that before I install this reinforcement.
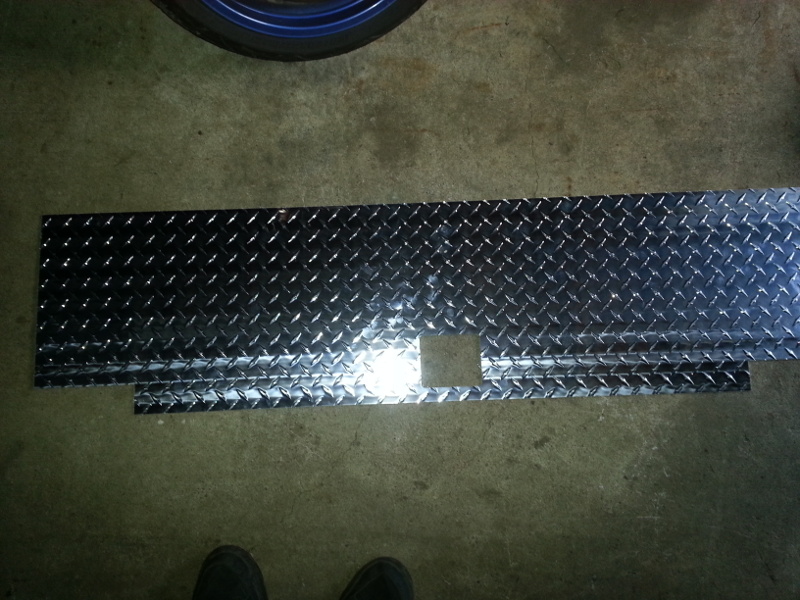
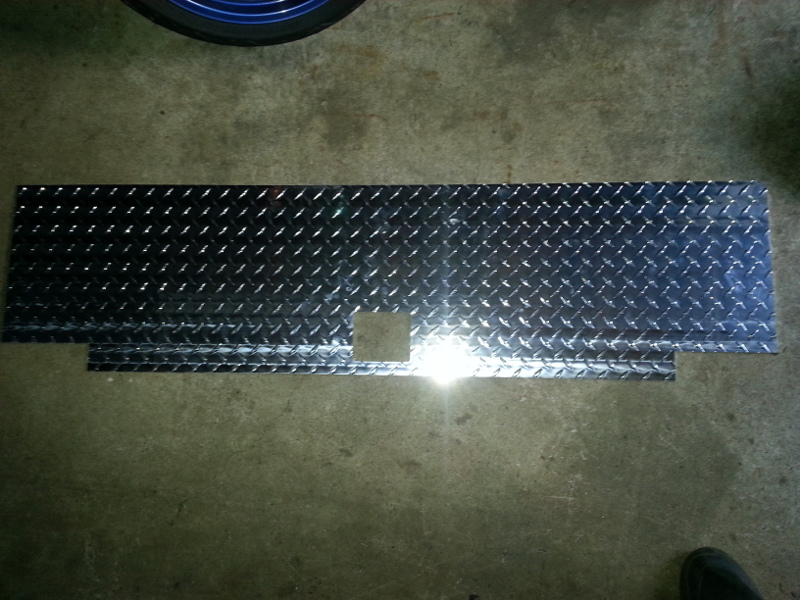
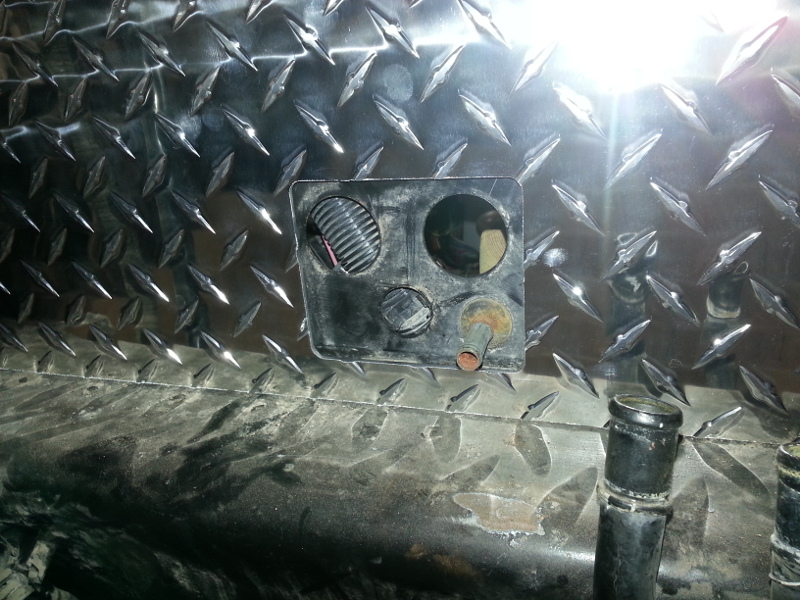
I also want a little bling in the engine compartment. So what better way than with some aluminum checker plate. (Loosely installed for the pictures).
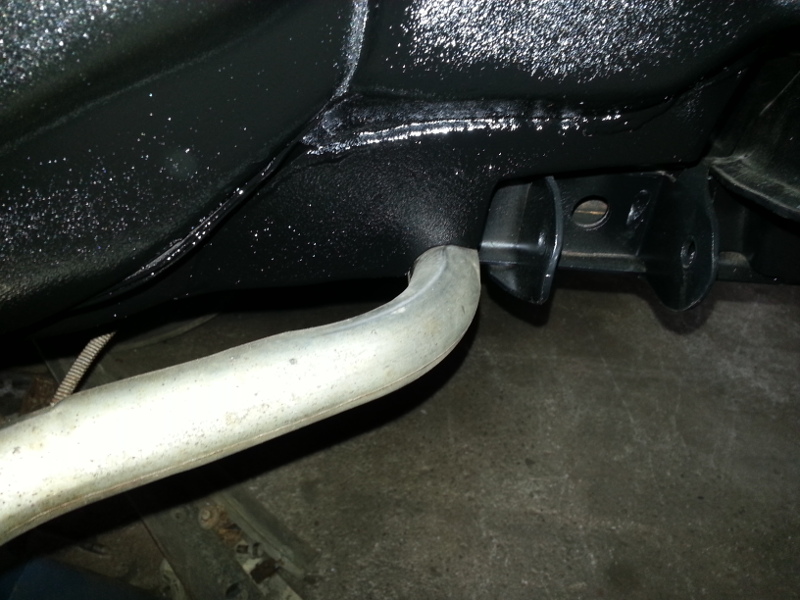
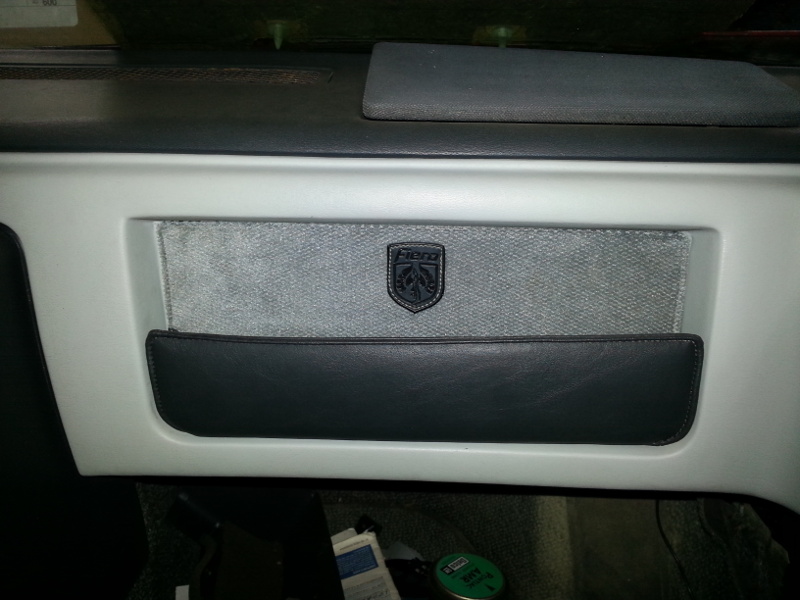
Oh, I was at a salvage yard not to far from me and I found a Fiero in the yard. I ended up with a few little parts and here's one piece I installed.
[This message has been edited by Lunatic (edited 08-03-2014).]


 Not sure why, but there seem to be a lot of great ones.