Pennock's Fiero Forum
  The Construction Zone
  Ecotec, Fastback, T-Top Build. (Page 6)

Post New Topic  Post A Reply
Email This Page to Someone! | Printable Version

This topic is 6 pages long:  1   2   3   4   5   6 
Previous Page | Next Page
next newest topic | next oldest topic
Ecotec, Fastback, T-Top Build. by Lunatic
Started on: 06-29-2014 08:15 AM
Replies: 212 (14989 views)
Last post by: wftb on 11-02-2022 10:34 AM
Lunatic
Member
Posts: 313
From: Canada, Where the maple syrup is.
Registered: Sep 2013


Feedback score: N/A
Leave feedback

Rate this member

Report this Post10-12-2018 06:52 AM Click Here to See the Profile for LunaticSend a Private Message to LunaticEdit/Delete MessageReply w/QuoteDirect Link to This Post
 
quote
Originally posted by longjonsilver:

i have found when attempting the conversion that there is a hole in the bottom due to a rust spot, that was not visible until i began cleaning it. Will this hole negate my vacuum?

How in the world did you get that snap ring off down deep in the hole of the cylinder?

thanks
jon

edit: since the booster is in vacuum (it is in vacuum no?) couldn't i repair the hole by cleaning well with a wire brush and sandpaper and solvent, and then use JB weld? The vacuum will be sucking in the repair, not pushing it out. ;-)


Jon,
I did mention to look for the nicest, cleanest booster that you could. And this is exactly the reason why.
We cannot have any leaks in the booster or else it will not work as intended.

A quick run down on booster operation.
The purpose of a brake assist unit is to decrease brake pedal effort without decreasing braking forces. This assist allows for less pedal travel and drastically reduces driver fatigue when operating. The vacuum brake assist uses engine vacuum and controlled atmospheric pressure to apply mechanical force to the primary master cylinder piston.

1) In the "released position", we're in a vacuum suspended mode. The vacuum port is open, the atmospheric port is closed and the return spring keeps the booster in the home position.
2) In the "applied position", the vacuum port is closed, and the atmospheric port opens. This happens only when the pedal is moving downward.
3) In the "holding position", the vacuum port and the atmospheric ports are both closed.

When the brakes are released, the booster returns to a suspended mode. To get there, the following happens.
-Foot pedal pressure is released.
-Vacuum port opens.
-The atmospheric port stays closed.
-Engine ingests the filtered air from the rear chamber.
-Return spring pushes the booster to the home position.

With where your hole is, you'll be losing vacuum and allowing in unfiltered atmospheric air. Both of which are not good. Remember, there are huge forces in the booster.

Take the rear shell to someone with a welder and weld the hole shut or find a better booster.

As for the circlip, I have a decent set of snap ring pliers. If you choose to use an awl or pick to dislodge the clip, there's a good chance that you'll deform the clip. You should always replace circlips, they almost always deform to some extent.

[This message has been edited by Lunatic (edited 10-12-2018).]

IP: Logged
wftb
Member
Posts: 3692
From: kincardine,ontario,canada
Registered: Jun 2005


Feedback score: (4)
Leave feedback

Rate this member

Report this Post10-21-2019 09:58 PM Click Here to See the Profile for wftbSend a Private Message to wftbEdit/Delete MessageReply w/QuoteDirect Link to This Post
Any updates?

------------------
86 GT built 2.2 ecotec turbo
rear SLA suspension
QA1 coilovers on tube arms

IP: Logged
Lunatic
Member
Posts: 313
From: Canada, Where the maple syrup is.
Registered: Sep 2013


Feedback score: N/A
Leave feedback

Rate this member

Report this Post10-27-2019 06:46 AM Click Here to See the Profile for LunaticSend a Private Message to LunaticEdit/Delete MessageReply w/QuoteDirect Link to This Post
 
quote
Originally posted by wftb:

Any updates?


I'll admit, I haven't really worked on this project in a while. Let me explain why.

I woke up one morning feeling kind of blah. I was kind of upset with my current career, and despite all my accomplishments, I didn't have anything to show for. I decided to change career paths and went back to college. I took the "automotive service technician" course. They say 6,500 hours and three to four years from start to finish. Not in my case.

The college offers exemption tests. If you get over 70%, you bypass that level and they put you into the next level. This essentially removes one semester of school. So I took the level one test and passed. Great! Now I moved up one level. A little time later, I then took the level two exemption test. Again, I passed with a mark over the required 70%. The kicker is, I had to take the last semester of in-school training as there was only two exemption tests for my trade. However, if I had worked in the field, and 6,550 verifiable hours, then I could just write the final test and receive my certificate of qualification (license).

So the one and only semester of schooling had come and gone. As you can imagine, I had nowhere near the required 6,500 hours. Since I had the experience already, all that was required was a decent, well written, letter of recommendation from my employer. They wrote my letter and we filled out my log book. All that was left was to take the final exam. Earlier this year, I took the final exam and passed. I'm now a licensed auto technician and have some certificates on my wall showing my progress. Woo hoo!

Back to the Fiero. I removed the cover and dusted off the car. I then installed the rear wheels and lowered it back to the ground. This is the first time since I brought the car home that it's sitting on all four tires. It sits a little too high in the front end so it looks like I'll have to cut off another half coil and see how I like it. From there, I'll take the car to the shop and do an alignment. I'm also going to speak to my friend as he owns a body and paint shop. If all goes well, I'd like to drop the car off there and he can have it over the winter. So close yet still so far.

[This message has been edited by Lunatic (edited 11-10-2019).]

IP: Logged
wftb
Member
Posts: 3692
From: kincardine,ontario,canada
Registered: Jun 2005


Feedback score: (4)
Leave feedback

Rate this member

Report this Post10-27-2019 10:07 AM Click Here to See the Profile for wftbSend a Private Message to wftbEdit/Delete MessageReply w/QuoteDirect Link to This Post
Thanks for the update, and congratulations on your COQ and your License.
IP: Logged
ericjon262
Member
Posts: 3082
From: everywhere.
Registered: Jan 2010


Feedback score:    (10)
Leave feedback


Total ratings: 66
Rate this member

Report this Post10-29-2019 01:16 AM Click Here to See the Profile for ericjon262Send a Private Message to ericjon262Edit/Delete MessageReply w/QuoteDirect Link to This Post
would you at all be interested in sharing some of your drawing? the shifter base and trunk floor would be pretty handy for my car.

Thanks-

Eric

------------------
"I am not what you so glibly call to be a civilized man. I have broken with society for reasons which I alone am able to appreciate. I am therefore not subject to it's stupid laws, and I ask you to never allude to them in my presence again."

"The day I tried to live, I stole a thousand beggars' change and gave it to the rich."
//www.fiero.nl/forum/Forum2/HTML/119122.html

IP: Logged
Lunatic
Member
Posts: 313
From: Canada, Where the maple syrup is.
Registered: Sep 2013


Feedback score: N/A
Leave feedback

Rate this member

Report this Post11-10-2019 06:53 AM Click Here to See the Profile for LunaticSend a Private Message to LunaticEdit/Delete MessageReply w/QuoteDirect Link to This Post
 
quote
Originally posted by ericjon262:

would you at all be interested in sharing some of your drawing? the shifter base and trunk floor would be pretty handy for my car.

Thanks-

Eric


Hey Eric.

I'll message you once I get set up again. I'm redoing all the networking and computers in the house. This will take some time.

Shayne

IP: Logged
Lunatic
Member
Posts: 313
From: Canada, Where the maple syrup is.
Registered: Sep 2013


Feedback score: N/A
Leave feedback

Rate this member

Report this Post11-10-2019 07:11 AM Click Here to See the Profile for LunaticSend a Private Message to LunaticEdit/Delete MessageReply w/QuoteDirect Link to This Post

Lunatic

313 posts
Member since Sep 2013
I'm feeling giddy.

I drove the car out of the garage under its own power. Woo hoo!

This car was towed home on a dolly and pushed into the garage several years ago. It has now emerged as a running, driving entity. Albeit an ugly duckling in its current state. I feel good about the car and I now have a desire to continue on and actually finish it. It will need an alignment, body and paint and finishing. My friend owns and runs his own body shop. I'm hoping that I can leave the car at his shop over the winter and he can pick away at it.

IP: Logged
longjonsilver
Member
Posts: 1057
From: Lower Sackville, Nova Scotia
Registered: Nov 2001


Feedback score: N/A
Leave feedback

Rate this member

Report this Post11-10-2019 02:16 PM Click Here to See the Profile for longjonsilverClick Here to visit longjonsilver's HomePageSend a Private Message to longjonsilverEdit/Delete MessageReply w/QuoteDirect Link to This Post
Congradulations. i'm sure that you will love her when she is done.

hib

------------------
Astronomy says we will find a coded signal from outer space. Then we'll KNOW that life exists there, for coded signals aren't by chance.

Biology says there are coded genetic signals in every cell, but we KNOW that no intelligence created life.

I'm the original owner of a white ' 84 2M4 purchased Dec 10, 1983 from Pontiac. Always garaged, no rust, 4-wheel drifts are fun!

IP: Logged
cam-a-lot
Member
Posts: 2120
From: Barrie- Ontario, Canada
Registered: Oct 2010


Feedback score: (3)
Leave feedback


Total ratings: 99
Rate this member

Report this Post11-10-2019 08:07 PM Click Here to See the Profile for cam-a-lotSend a Private Message to cam-a-lotEdit/Delete MessageReply w/QuoteDirect Link to This Post
Nice to hear you are happy with the career change Shayne. I am really glad it worked out for you. Hopefully you end up in a place where you can also put your customization and fab skills to use!
IP: Logged
wftb
Member
Posts: 3692
From: kincardine,ontario,canada
Registered: Jun 2005


Feedback score: (4)
Leave feedback

Rate this member

Report this Post11-11-2019 09:21 AM Click Here to See the Profile for wftbSend a Private Message to wftbEdit/Delete MessageReply w/QuoteDirect Link to This Post
What did you do with the custom cradle you made?

------------------
86 GT built 2.2 ecotec turbo
rear SLA suspension
QA1 coilovers on tube arms

IP: Logged
Lunatic
Member
Posts: 313
From: Canada, Where the maple syrup is.
Registered: Sep 2013


Feedback score: N/A
Leave feedback

Rate this member

Report this Post10-10-2022 03:11 PM Click Here to See the Profile for LunaticSend a Private Message to LunaticEdit/Delete MessageReply w/QuoteDirect Link to This Post
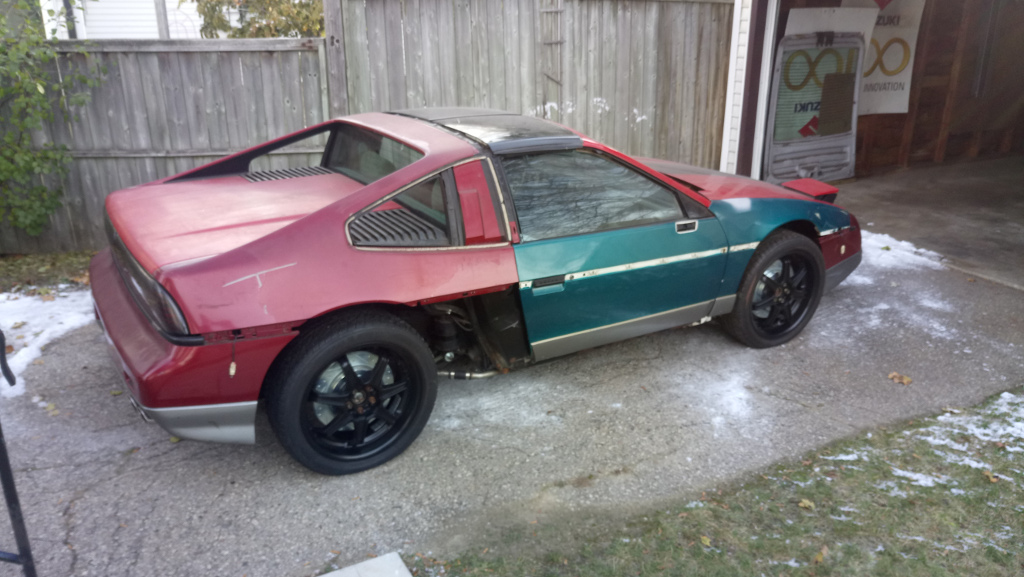
After a long automotive hiatus, too long and I apologize, I decided to pull the cover off the car and do some work.

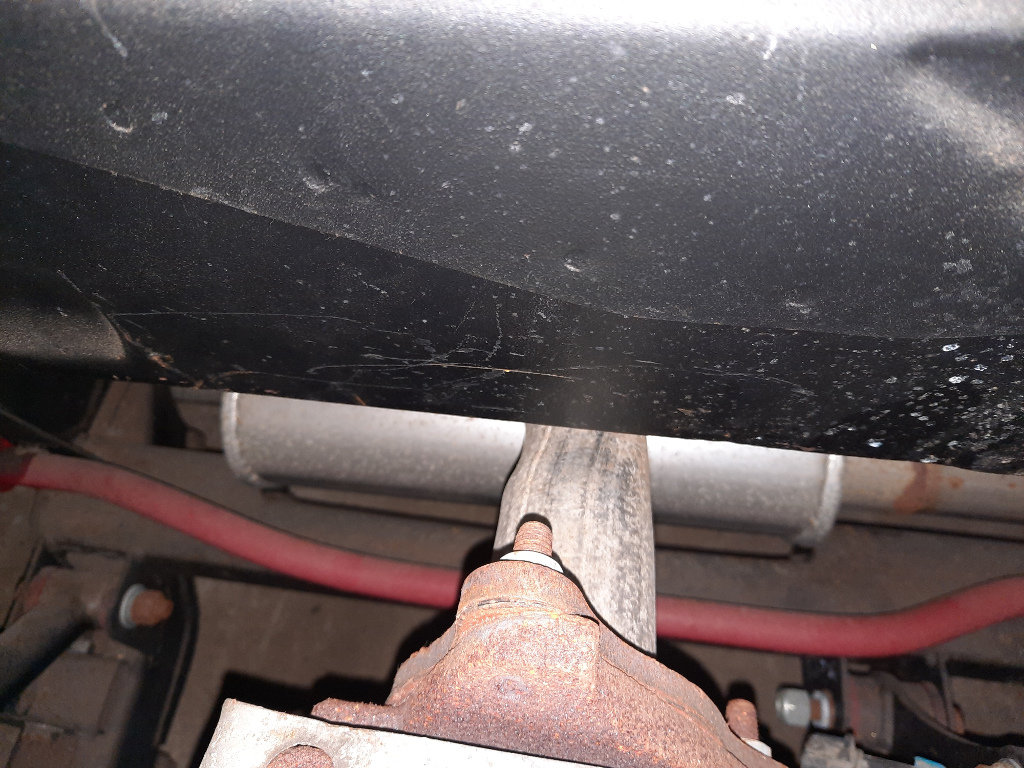
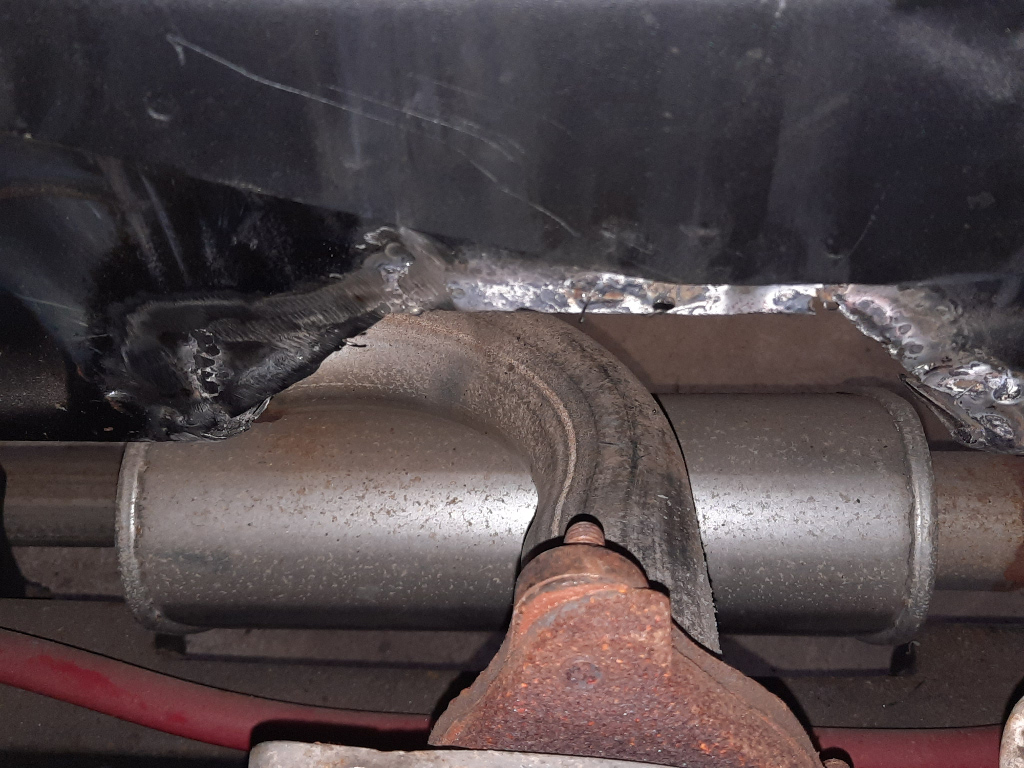
The first hurdle was insufficient down pipe to trunk wall clearance. While difficult to see, there was only about an inch of air gap.


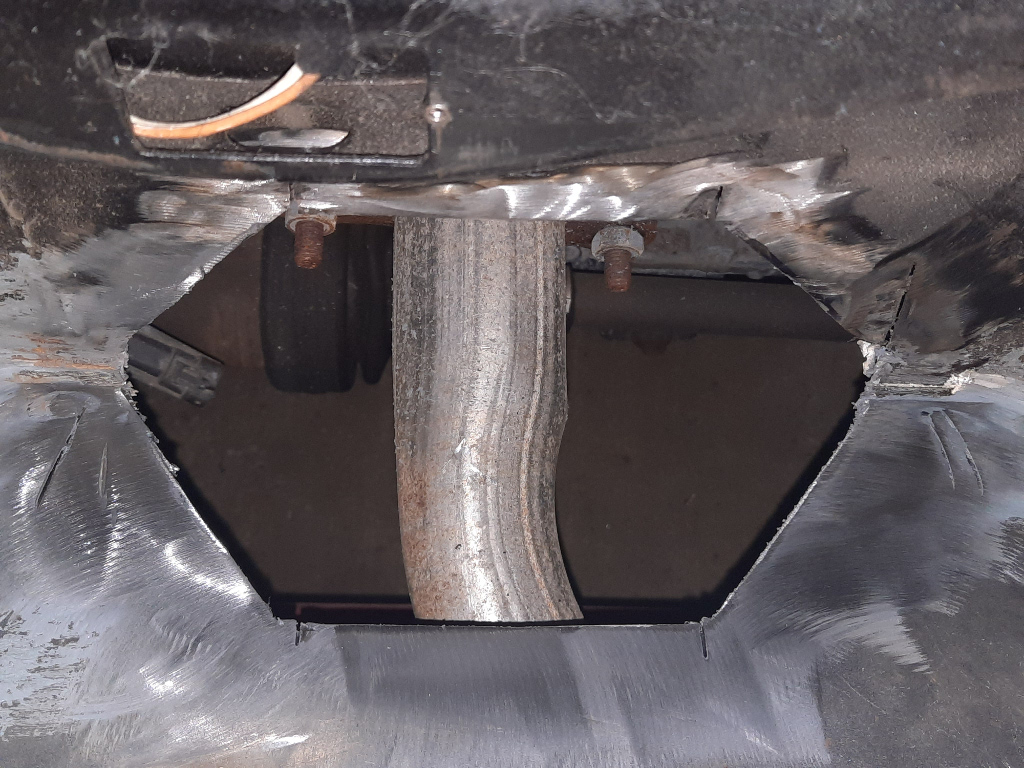
I marked the centre of the pipe and made a sufficient sized opening.


A few 16 gauge pieces were cut and this is the result.


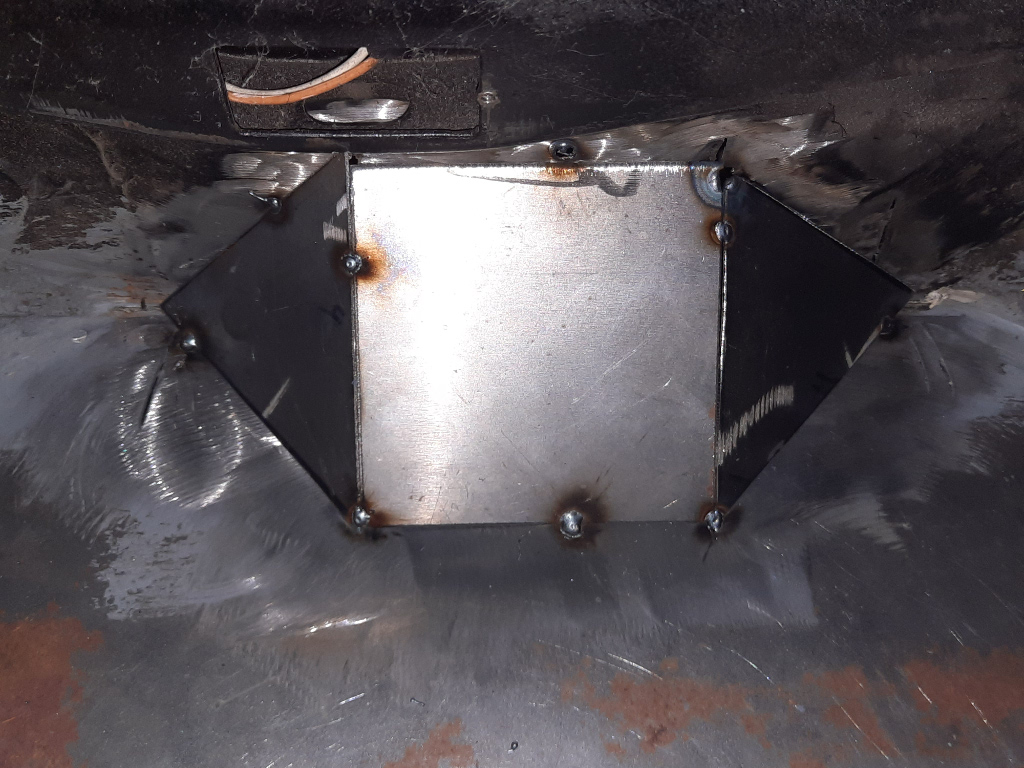
I only had a little seam sealer left in the can. So I used it all up.


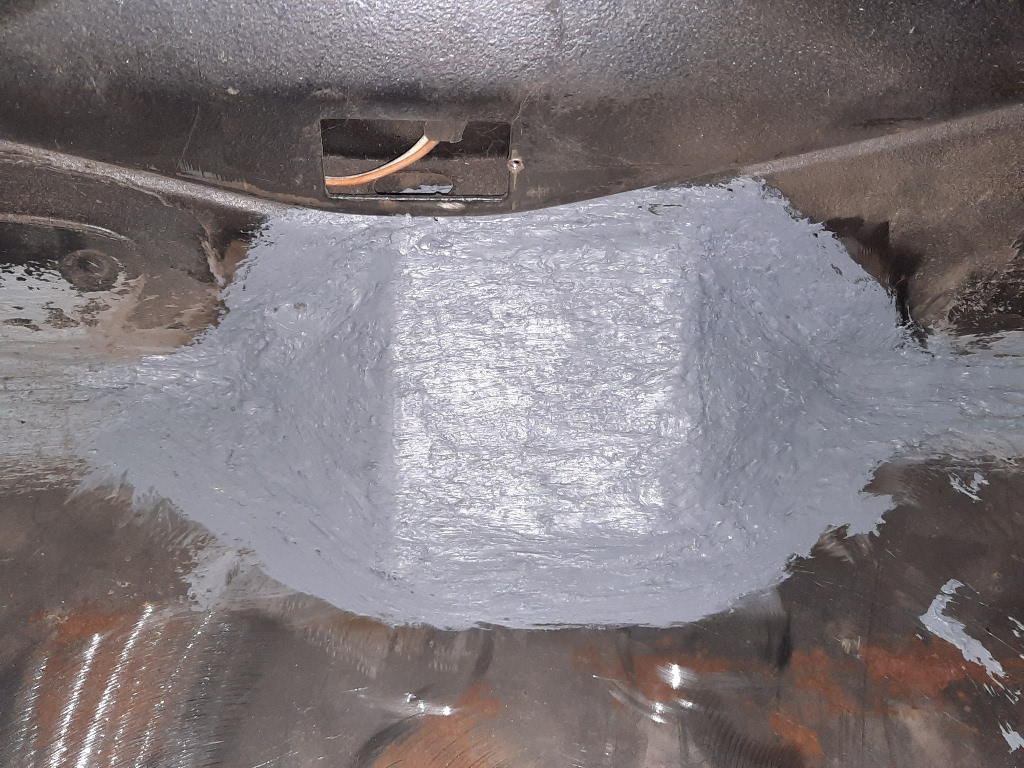
Since I had removed the exhaust in preparation for some post-process welding cleanup, the trunk underside was also treated to seam sealer and a coat of paint.


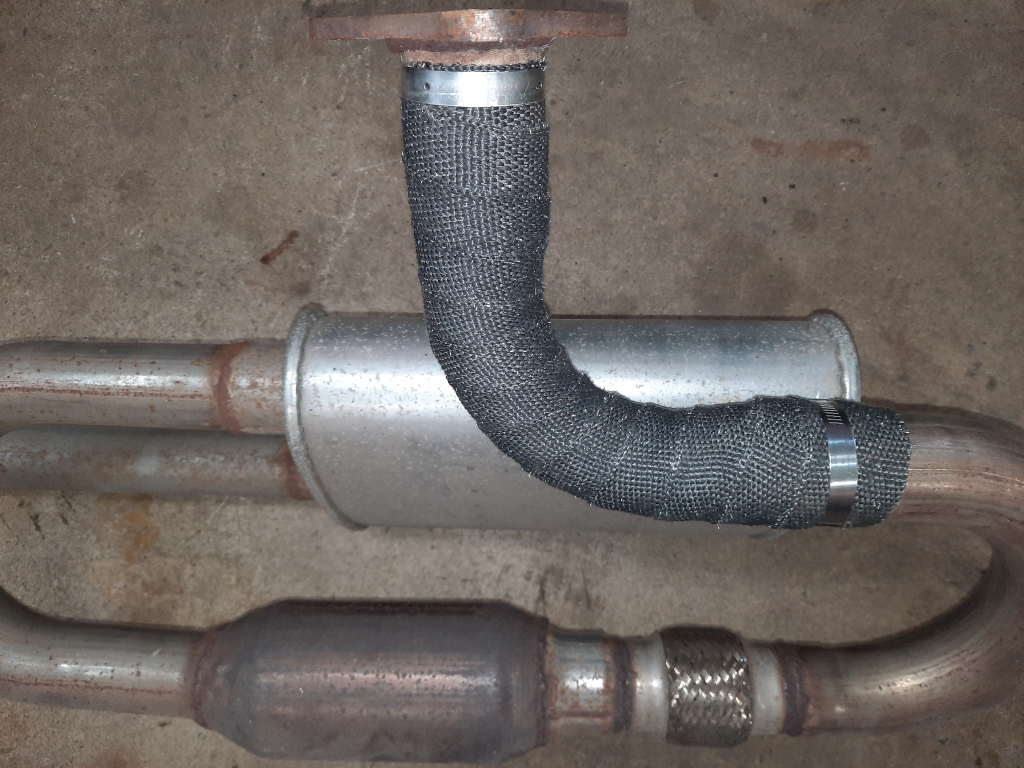
I had some left over exhaust wrap and applied it to the down pipe.


Okay, now onto some electrical/wiring.
As you've seen previously, I had all mechanical Equus gauges. I've since changed my mind and decided to go back to factory gauges.

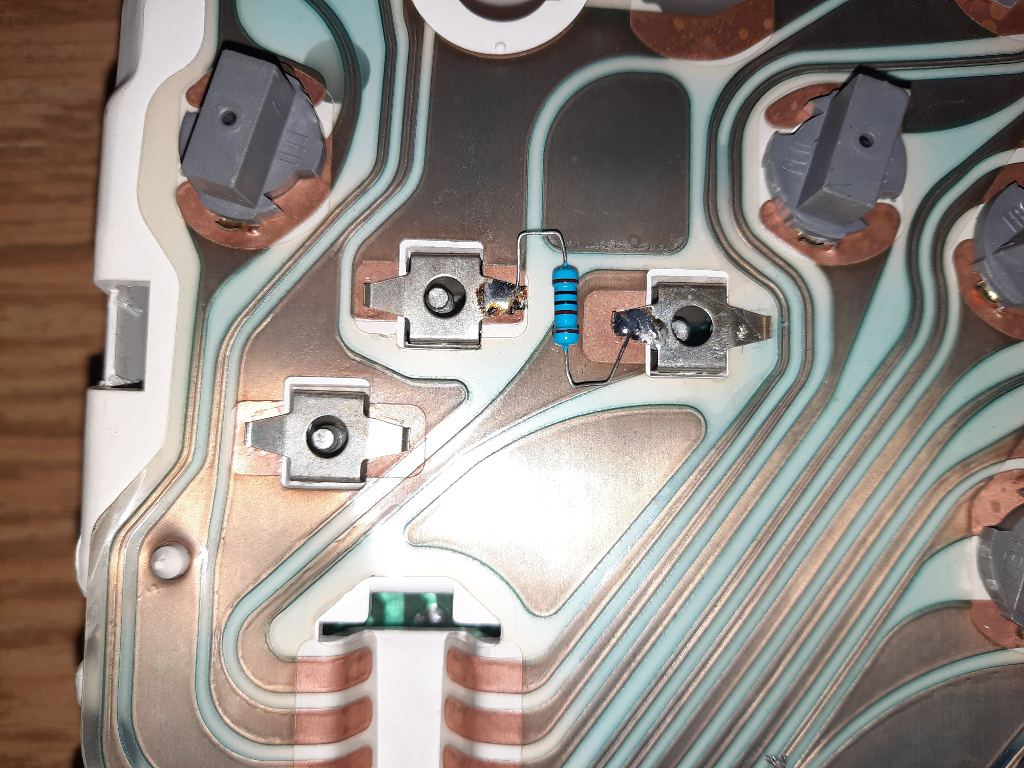
The factory tach will not work with the P11 PCM as is. It needs a pull up resistor to make it work.
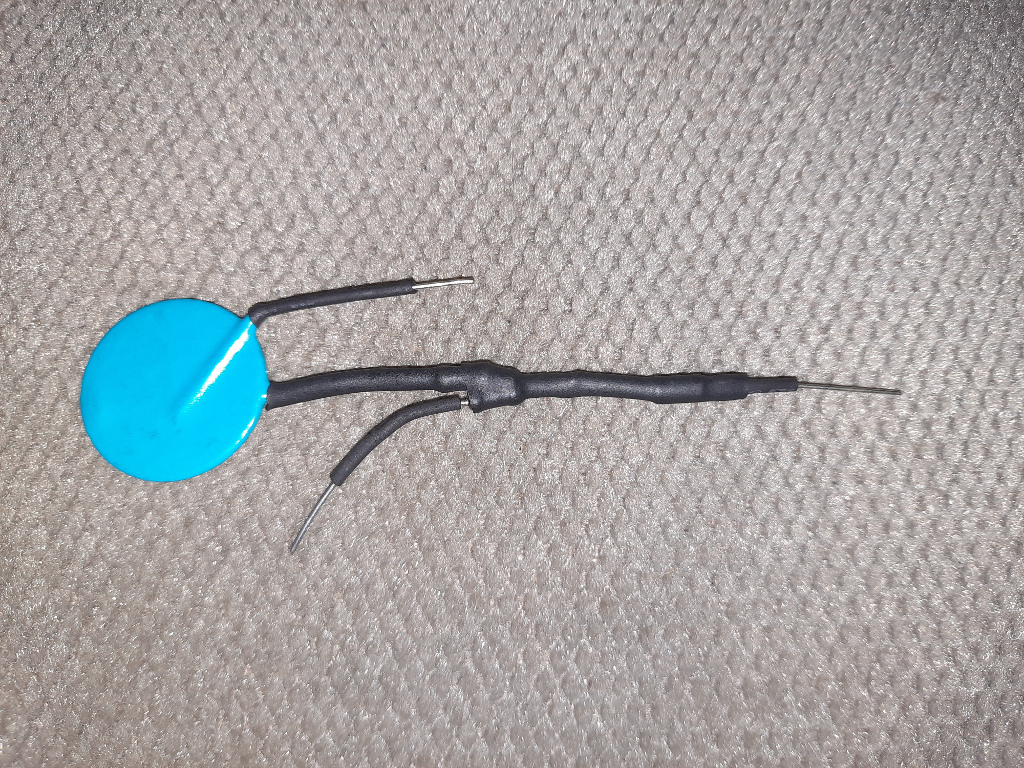
Now, on the back of the instrument cluster, just add in a 1K ohm (1000 ohm) as seen.
This provides switched power for the tach pull up signal. Yes, it's that easy.


My '84 gauges were kind of ugly and had a low redline. I had an instrument cluster from an '85 GT V6. I chose to use these as the redline was higher and the gauges looked better. After swapping out the six cylinder circuit board from the tach, I placed the four cylinder one in its place. This was the best course of action since it had the proper 0.1 uF capacitor in there.

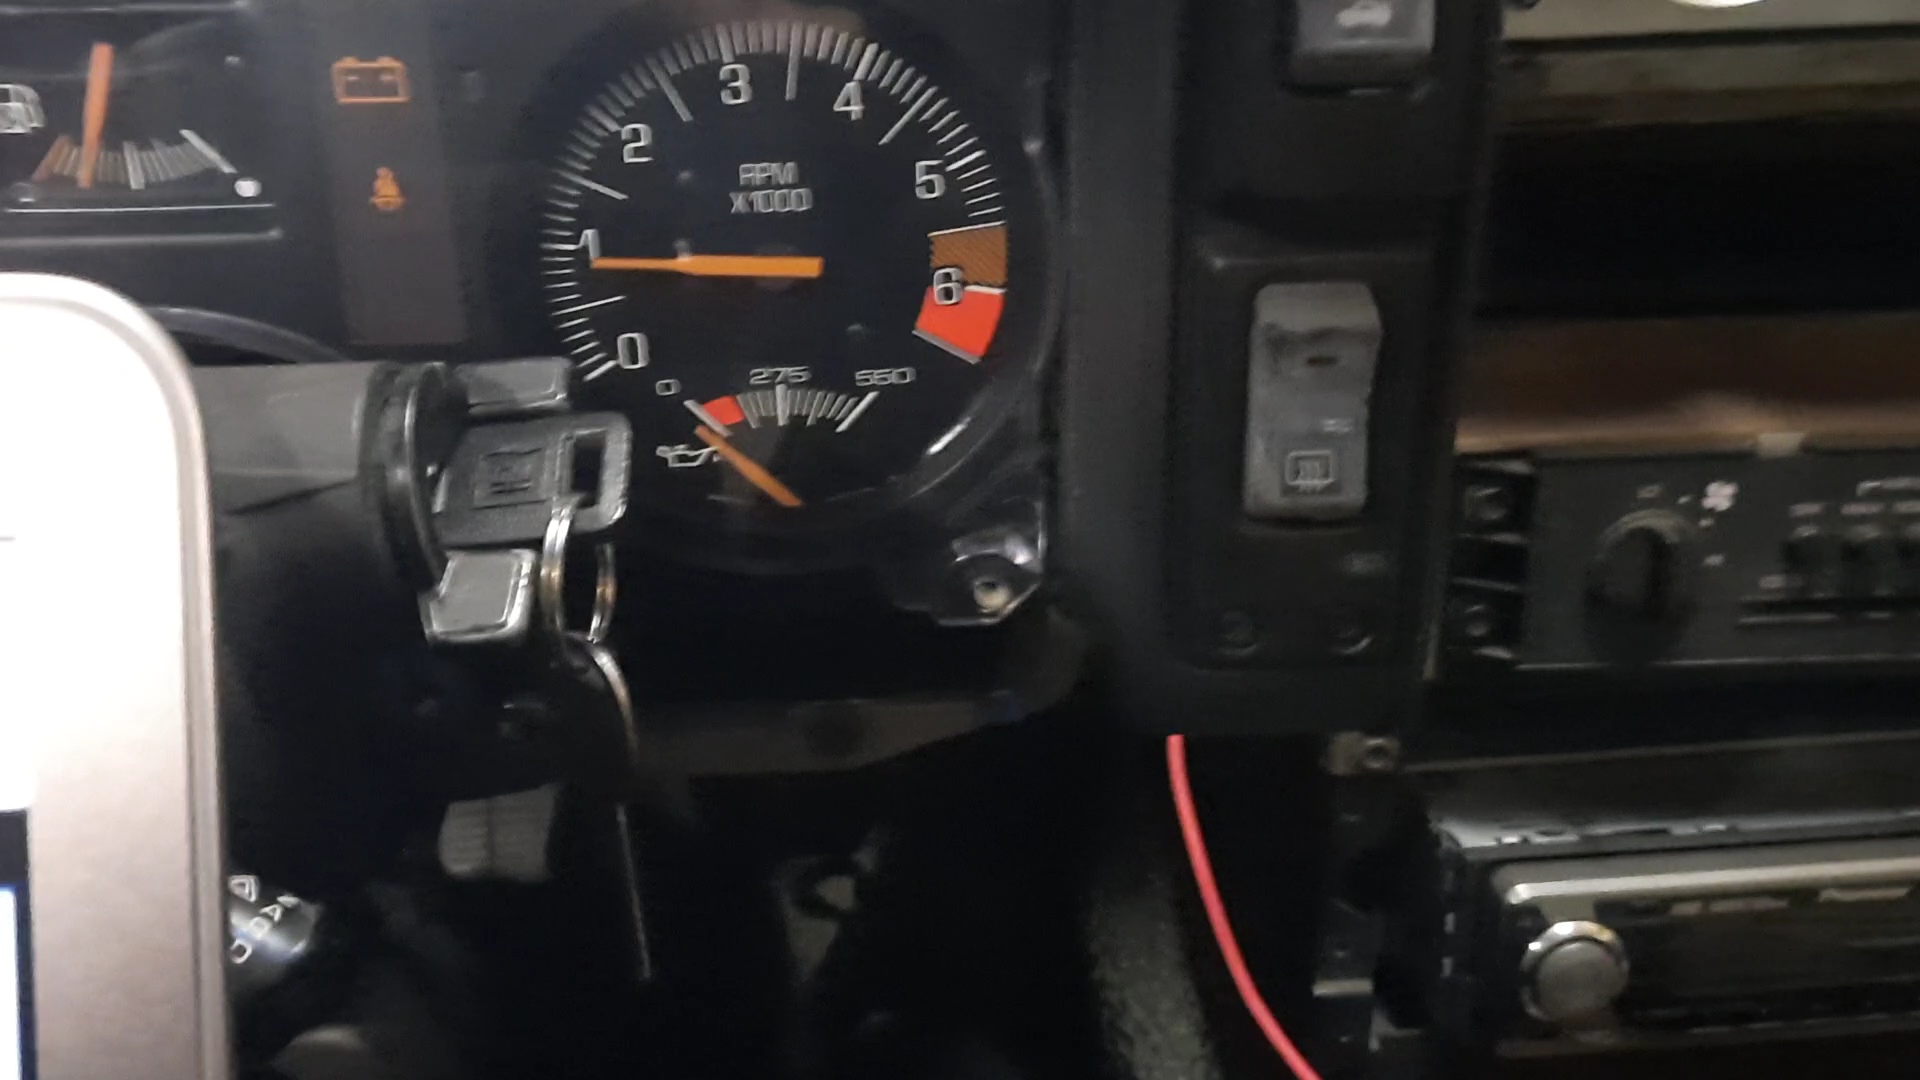
I turned the key to on, and the tach settled on the zero mark. So far, so good. I then started the engine. While the tach was working, it sure didn't seem right. It was showing about 3-400 too high as seen from the live data stream on my scan tool. Okay, no biggie. Time to calibrate it. The tach was removed from the cluster and modified.

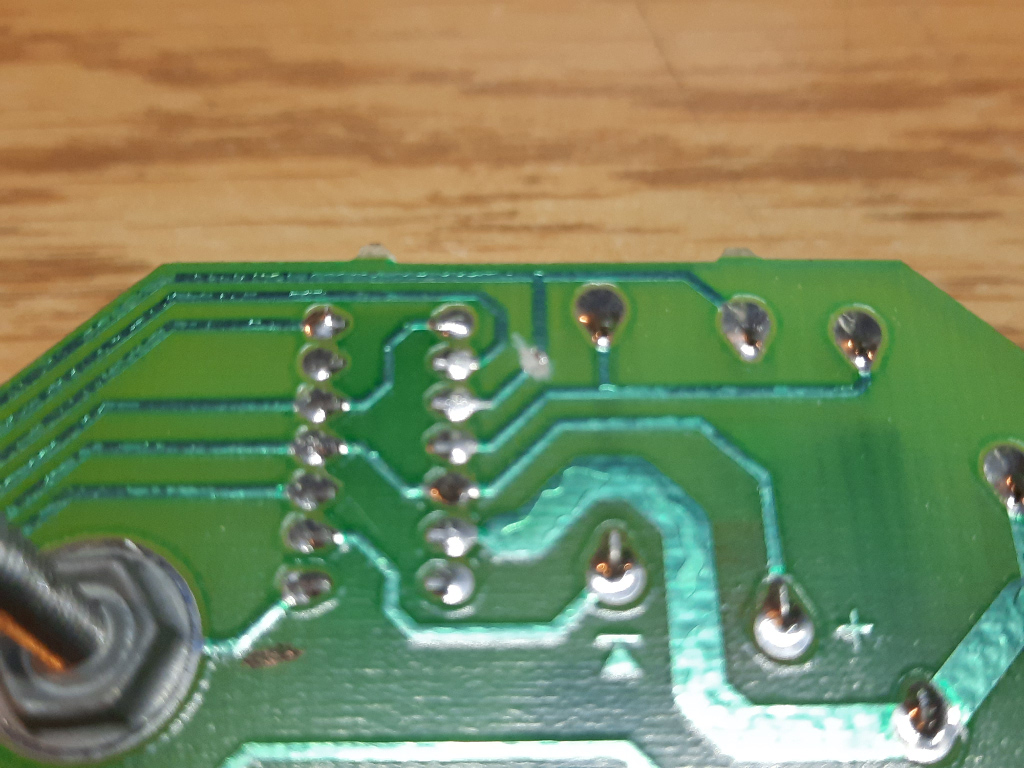
Measuring the resistance between pins 4 and 10 on the laser cut resistor, I had 277,000 ohms. I needed this in order to know what size of potentiometer I had to use.


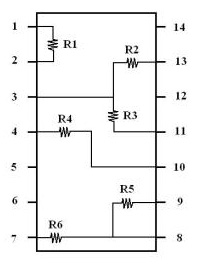
Note: Pin one is bottom left in the photo. Remember, it's upside down.


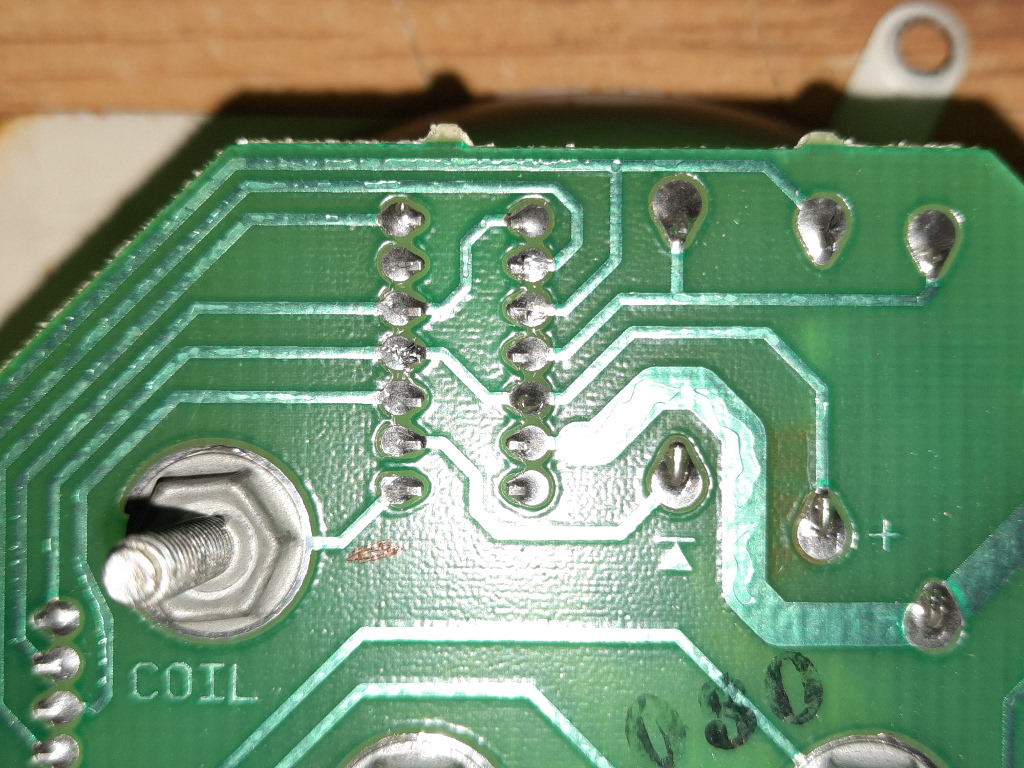
There is a small trace that I'm going to cut. While one could use a resistor in parallel with the factory original, I'd rather cut the old trace and use new components. Here is the offending trace that must be cut.


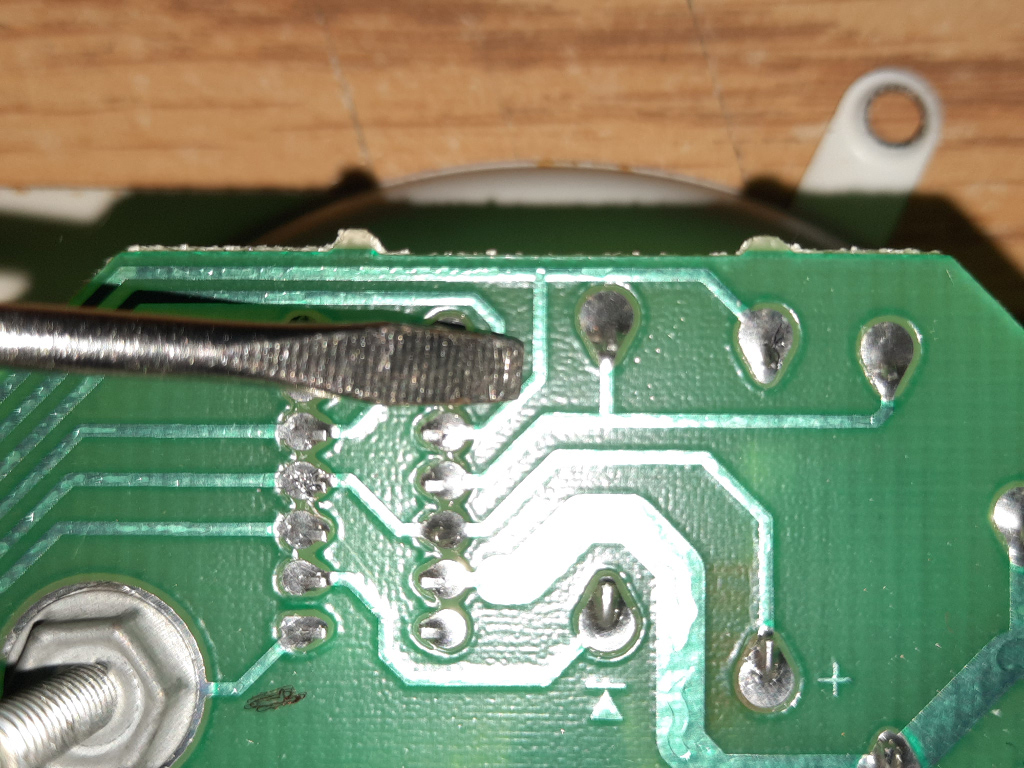
And here it is severed.


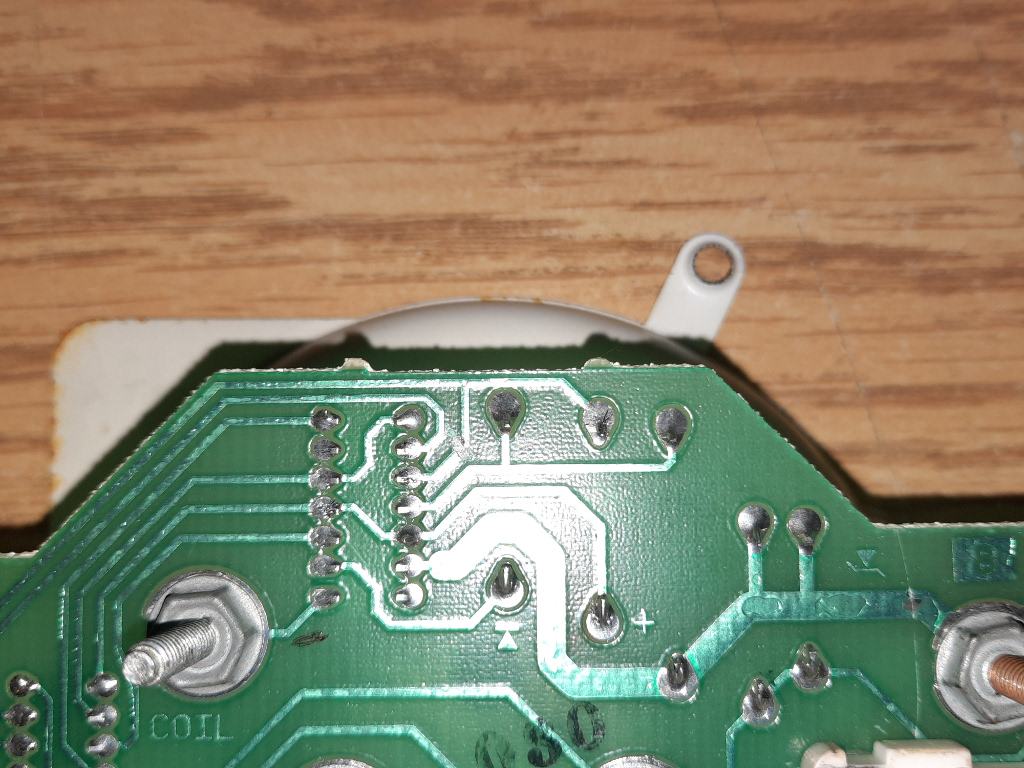
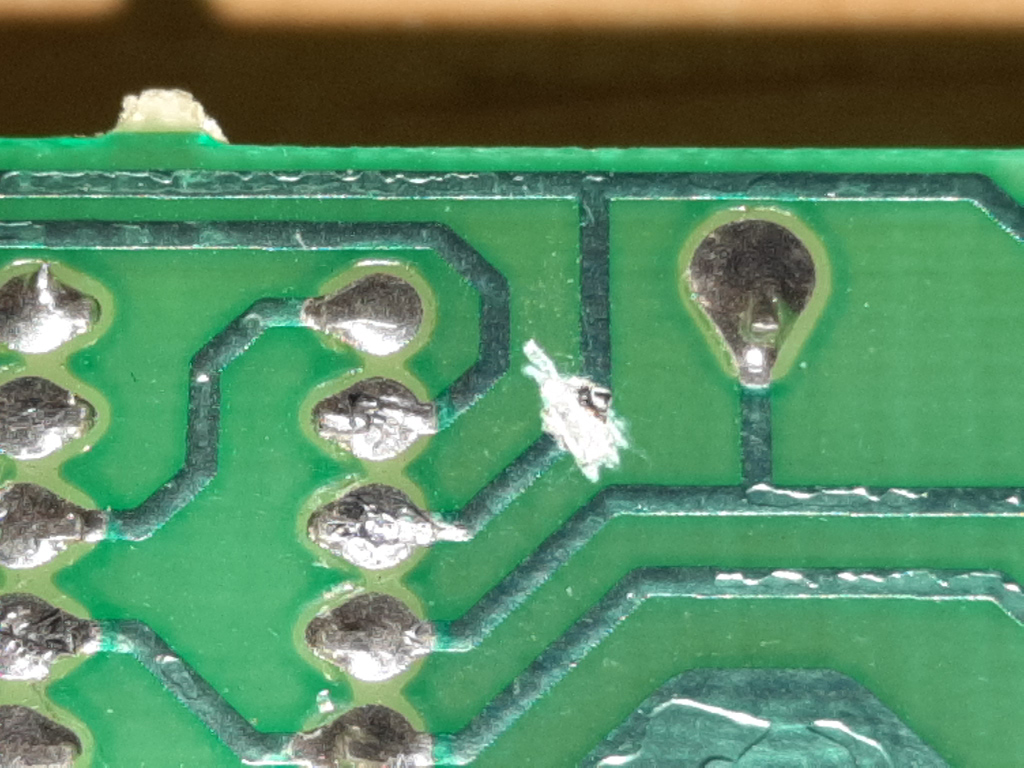
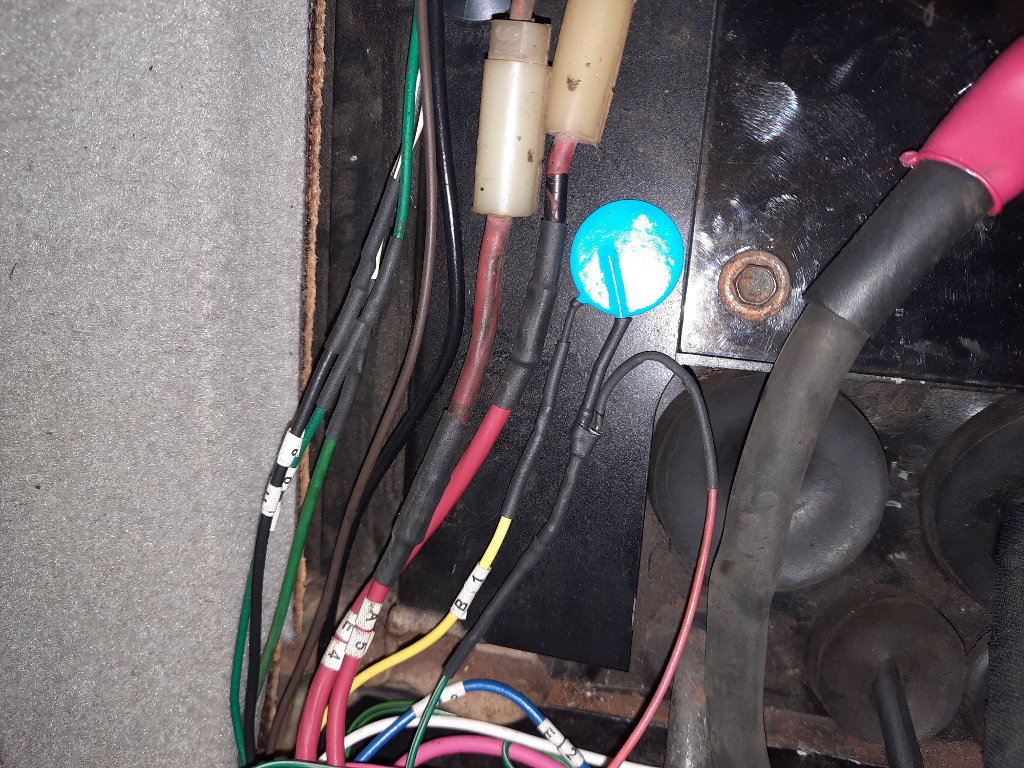
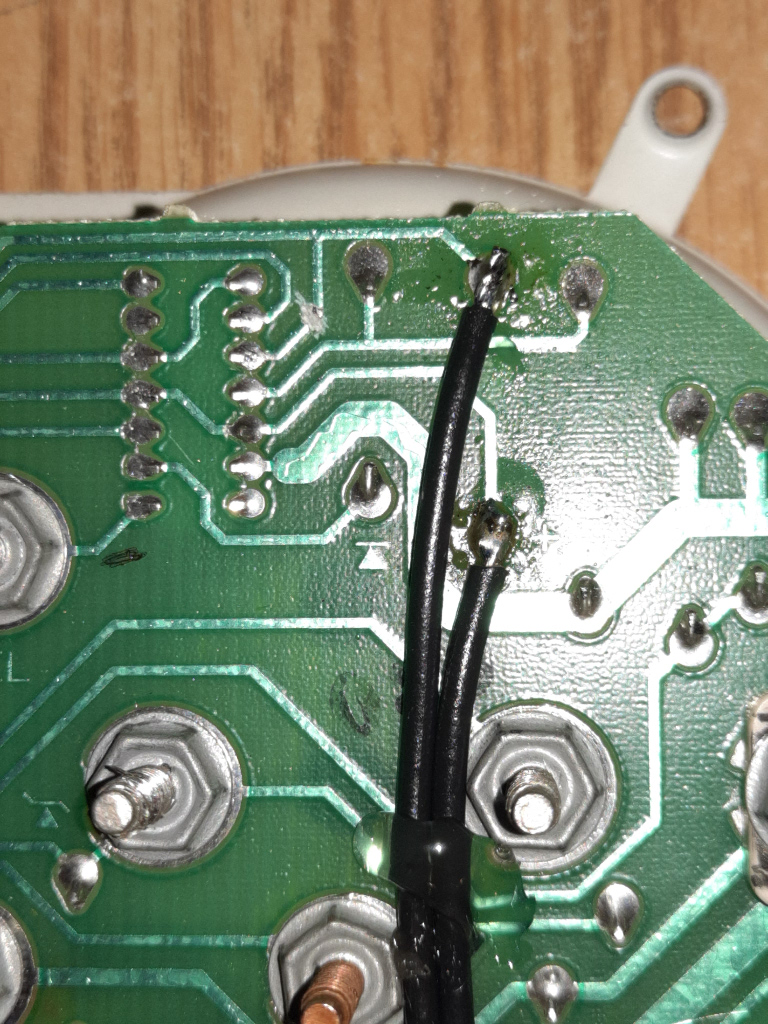
Two black wires were soldered to the two points as shown. This will allow me to remotely mount the potentiometer and make adjustments easier without having to remove the tach over and over. The tach went back together and the instrument panel was secured back in place.
As a side note: I had some flickering and dimming of the dash lights and some weirdness that comes from a poor ground. I cleaned the copper traces and ran a dedicated wire from three spring clips to a better chassis ground.


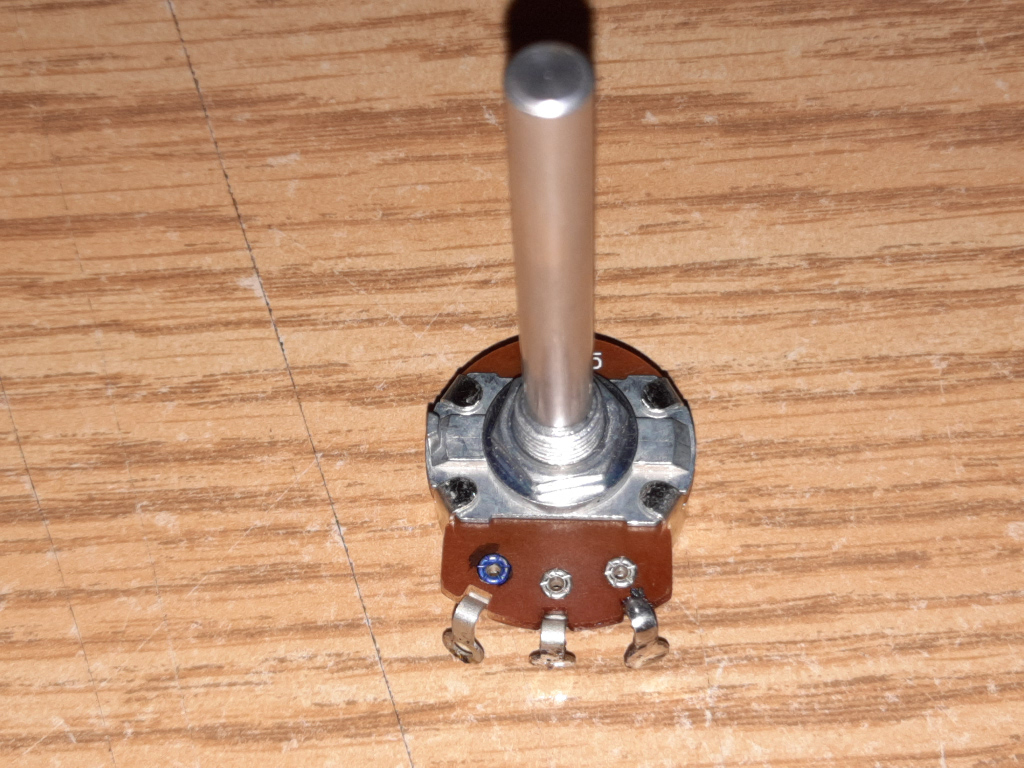
I looked in my bin and found a 1 Mega ohm trim pot. Albeit large in physical size, this will work perfect for my testing purposes.


The engine was then started again. With having the live data stream showing RPM directly from the PCM, I then adjusted the trim pot accordingly. The tachometer was now calibrated to what the PCM was seeing. I verified at 1000, 2000 and 3000 RPM and back at idle. It was nice seeing it that accurate. Well, as accurate as it could be. They're never perfect.

The trim pot resistance was measured after the tach was adjusted. I ended up at 242,000 ohms. Now, I could find the proper resistor and solder it in. Or I could keep the trim pot in place. Due to its size, I wanted a smaller unit. I picked up a 7 mm unit for a few bucks at the electronics store. After soldering the leads to that one, I placed it just behind the bezel. If needed, future calibrations will be easy. Yes, it's tiny.


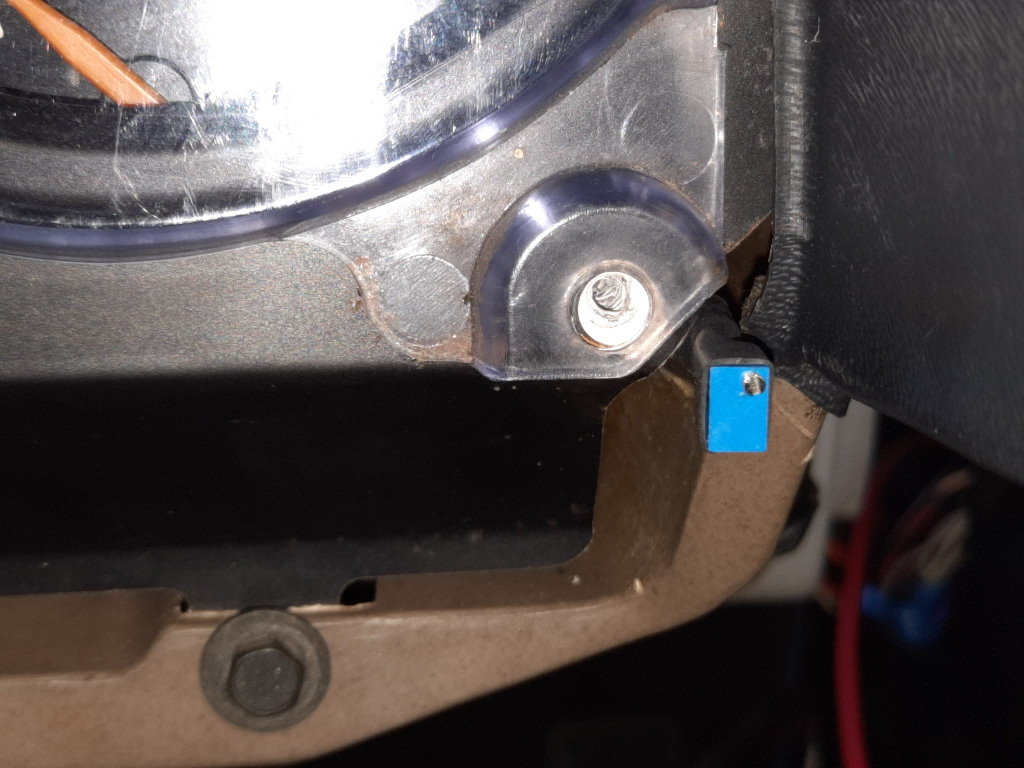
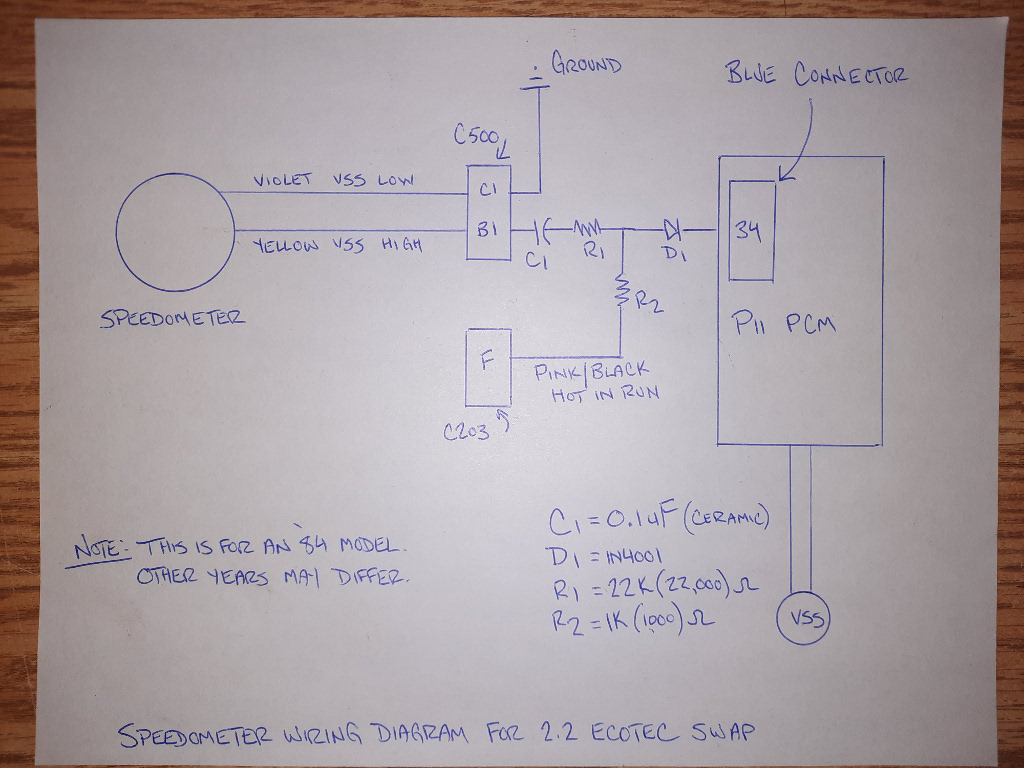
My PCM is mounted in the engine bay, attached to the trunk wall. This diagram is correct and my stock tachometer works as intended,


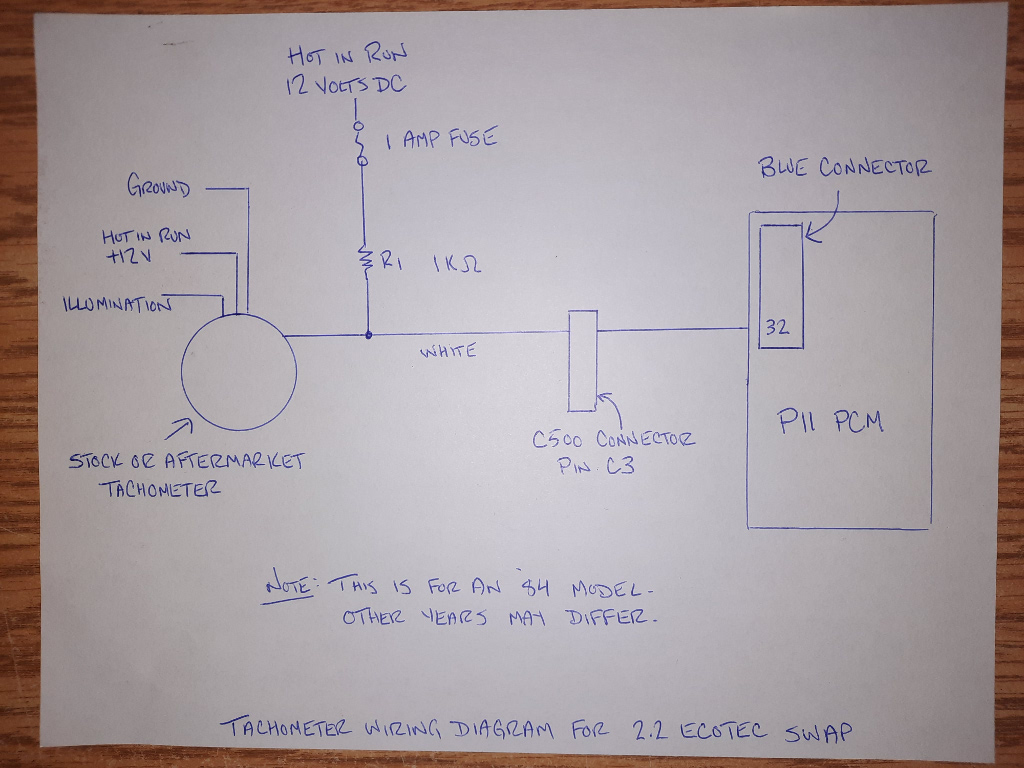
By using the above shown circuit and calibration technique, the video is proof of a P11 PCM feeding a Fiero tachometer correctly.
https://imgur.com/6VtGKNN

[This message has been edited by Lunatic (edited 10-17-2022).]

IP: Logged
PFF
System Bot
Lunatic
Member
Posts: 313
From: Canada, Where the maple syrup is.
Registered: Sep 2013


Feedback score: N/A
Leave feedback

Rate this member

Report this Post10-17-2022 07:36 PM Click Here to See the Profile for LunaticSend a Private Message to LunaticEdit/Delete MessageReply w/QuoteDirect Link to This Post
Now onto making the speedometer function.
The P11 PCM has a speedo output signal on pin 34 of the blue connector. After a simple buffer circuit is made, and installed, the speedometer works as intended.

Using my diagram below, the buffer circuit was made.


Here is the buffer ready to install.


I placed it on the firewall in the location shown. I'll probably hot glue it place later on once I clean up and secure all the other wires.


Here is a small video showing the speedometer operational.
https://imgur.com/SCW0lpA


P11 PCM information.

If you're looking to do a stand alone Ecotec swap, whether in a Fiero or another vehicle, then following information may be of use to you.

My engine runs on the stock PCM. At this point, the only thing done to the PCM was VATS (Vehicle Anti Theft System), was turned off using HP Tuners software.

While I chose to install the BCM (Body Control Module), I only wired up the interior light control circuit.

The stock 12576162 PCM can run the Ecotec with the following subsystems removed.
-EBCM (Electronic Brake Control Module)
-Instrument panel cluster
-Inflatable restraint sensing and diagnostic module
-Passlock lock cylinder
-Radio
-Vehicle communication interface module
-BCM (Body control module)

This PCM has tachometer and speedometer outputs. As shown, they can be wired up easily in a Fiero.
IP: Logged
wftb
Member
Posts: 3692
From: kincardine,ontario,canada
Registered: Jun 2005


Feedback score: (4)
Leave feedback

Rate this member

Report this Post11-02-2022 10:34 AM Click Here to See the Profile for wftbSend a Private Message to wftbEdit/Delete MessageReply w/QuoteDirect Link to This Post
Great work Shayne. That is awesome info for ecotec swappers so they can keep their interiours stock.
IP: Logged
Previous Page | Next Page

This topic is 6 pages long:  1   2   3   4   5   6 
next newest topic | next oldest topic

All times are ET (US)

Post New Topic  Post A Reply
Hop to:

Contact Us | Back To Main Page

Advertizing on PFF | Fiero Parts Vendors
PFF Merchandise | Fiero Gallery | Ogre's Cave
Real-Time Chat | Fiero Related Auctions on eBay


Copyright (c) 1999, C. Pennock