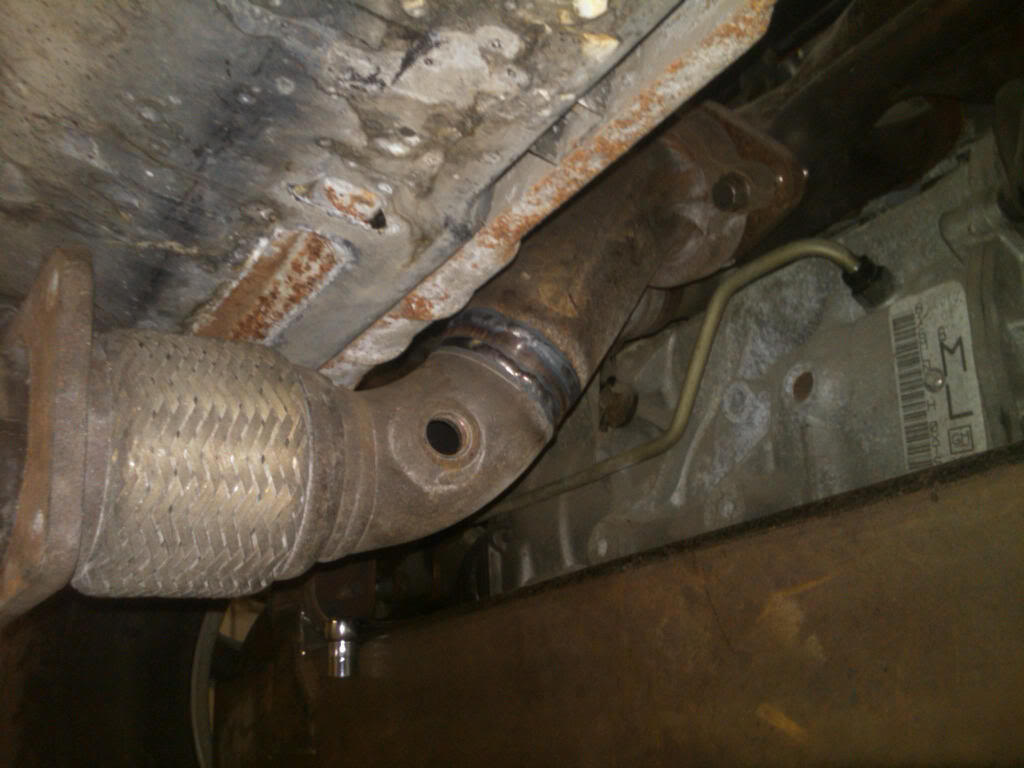
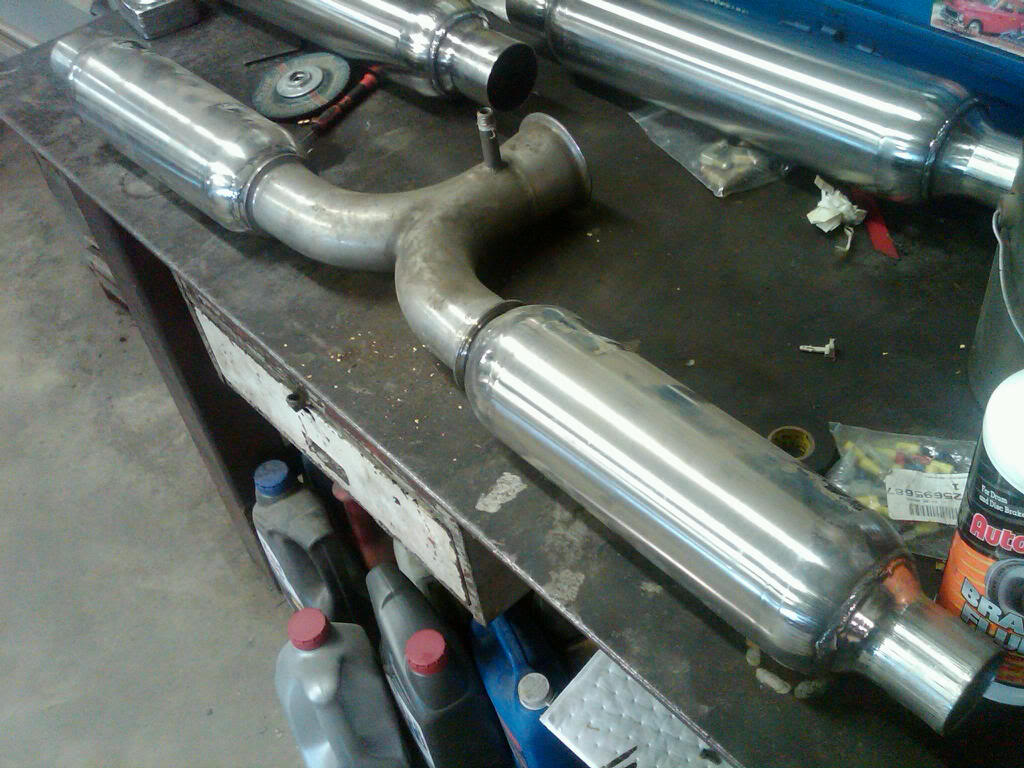
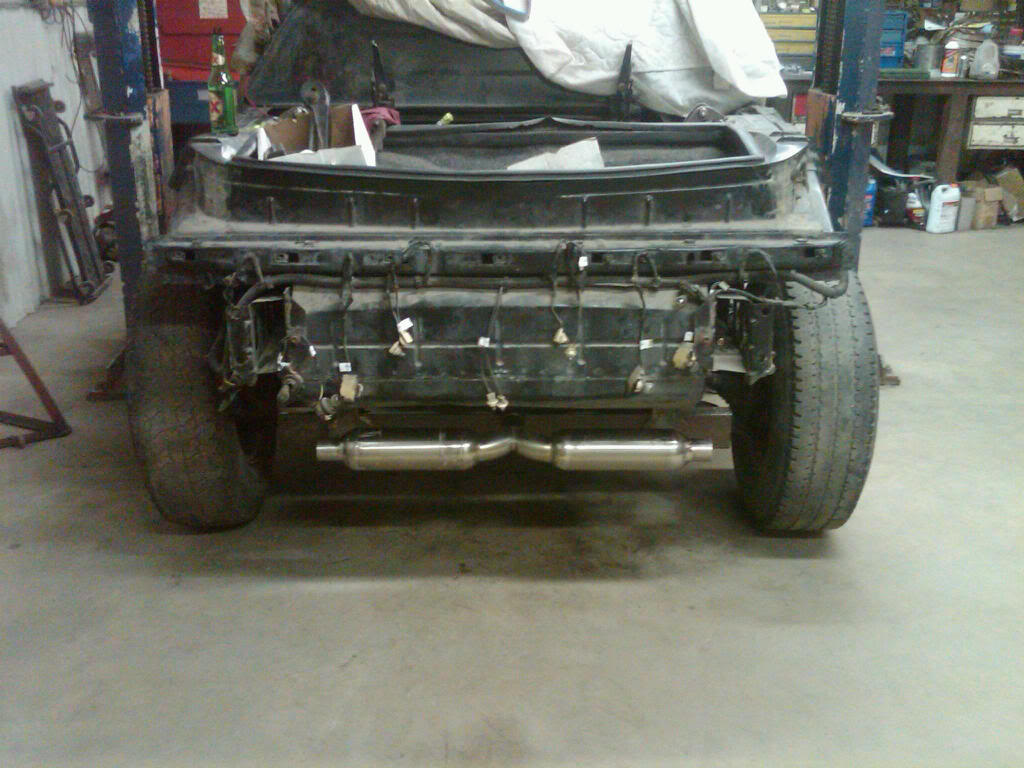
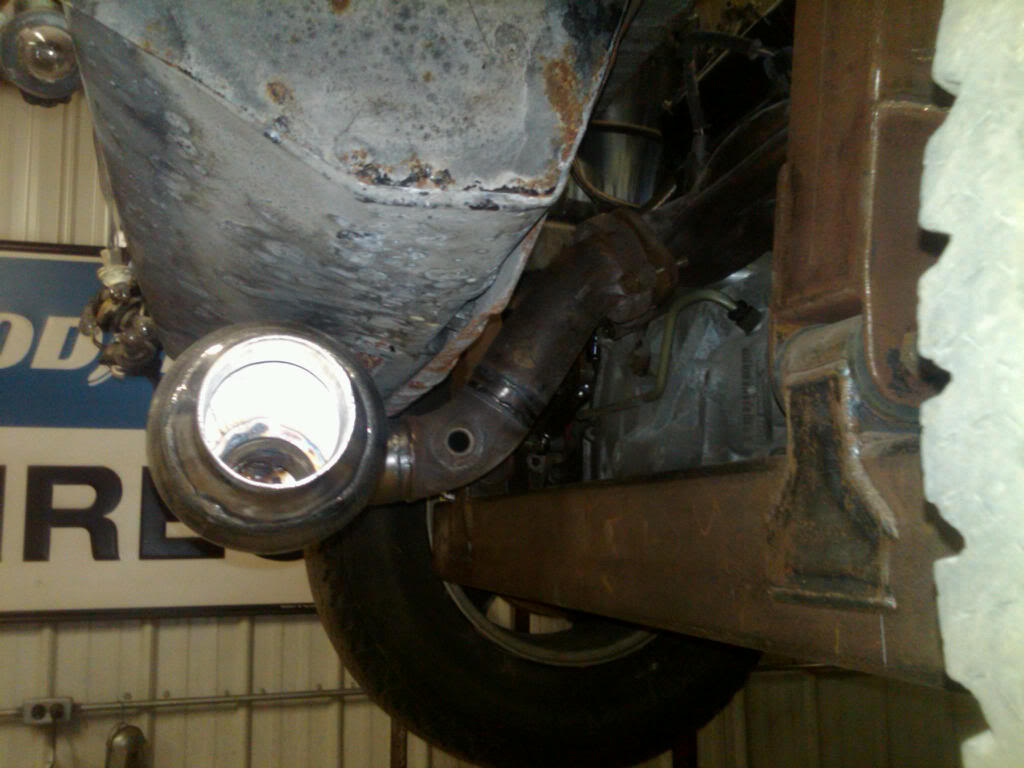
Starting to figure out the exhaust system. The first photo is the stock Northstar downpipe which has been shortened a few inches. You can see the O2 sensor bung hole at the end of the pipe. The second photo is a bench mockup of what we're thinking for exhaust. The "Y" pipe is stainless dairy line and the two mufflers are custom shorties that fit nicely into the Y. Now we just need to graft the parts together and find some sanitary looking tips.
[This message has been edited by artworks (edited 07-14-2017).]
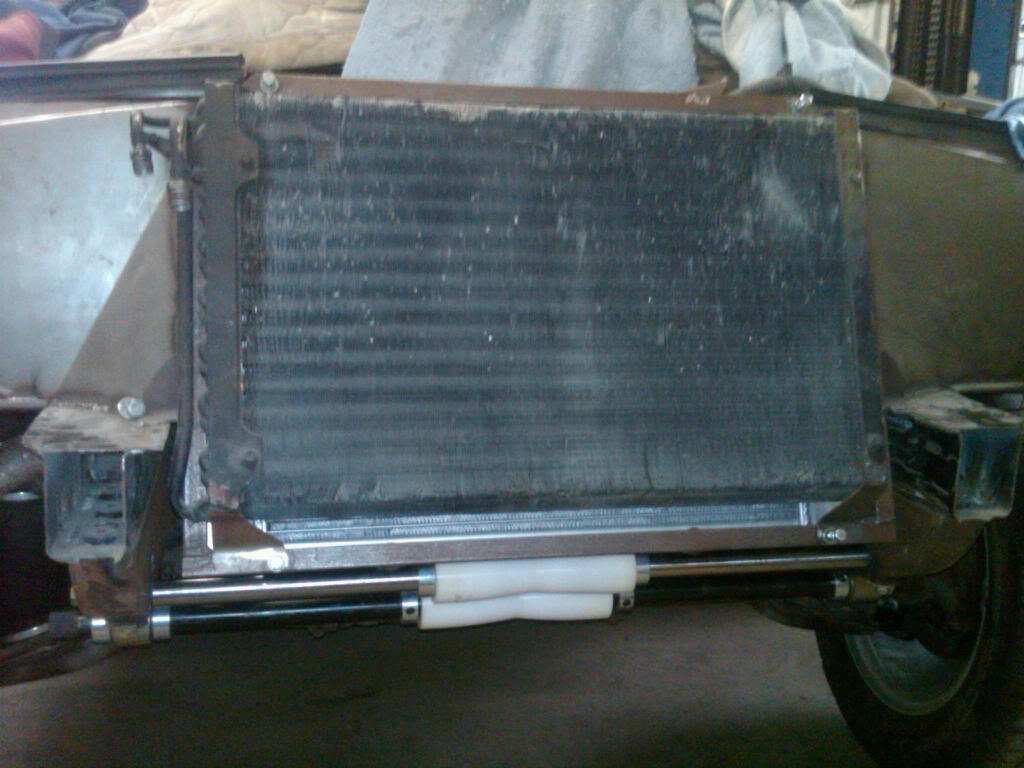
Good progress last night. The trans lines are in (sorry, no photos - too boring) all hard line and braided line connections to the trans. The radiator plumbing is (finally!) done and I'm pleased with the final look. A few looms still need to be installed to keep anything from rubbing. Gary and I started figuring out the exhaust system. I had the original Northstar downpipe already so that seemed like a good place to start. We took a few inches out of the middle of the pipe (it's stainless). As the photos show, we're working on an idea for two short stainless mufflers to Y out of the downpipe and exhaust just behind the rear tires. It's dirt simple and I think it will look good - kind of VW dune buggy. We'll see.
I could use some help. I think I've installed the A/C condenser upside down. From the research I've done I can't seem to find anything that tells me this will be a problem (other than having to create new lines). Thoughts?
[This message has been edited by artworks (edited 07-14-2017).]
Took a piece of 2-1/2" dairy stainless (we have a lot of dairy farms in this area and this is an old scrap piece) wye and cut off the flanges, then welded the wye to two short stainless resonator mufflers. The assembly was then welded to the Northstar downtube (which is GM stainless). The downtube has been shortened a bit.
[This message has been edited by artworks (edited 04-13-2012).]
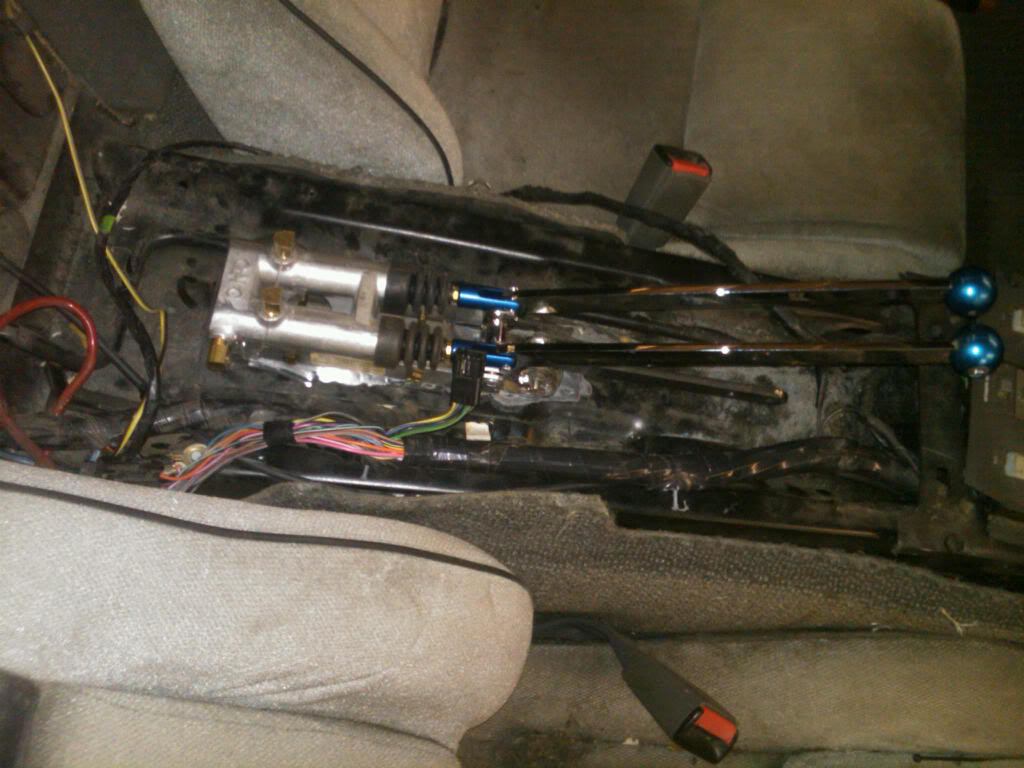
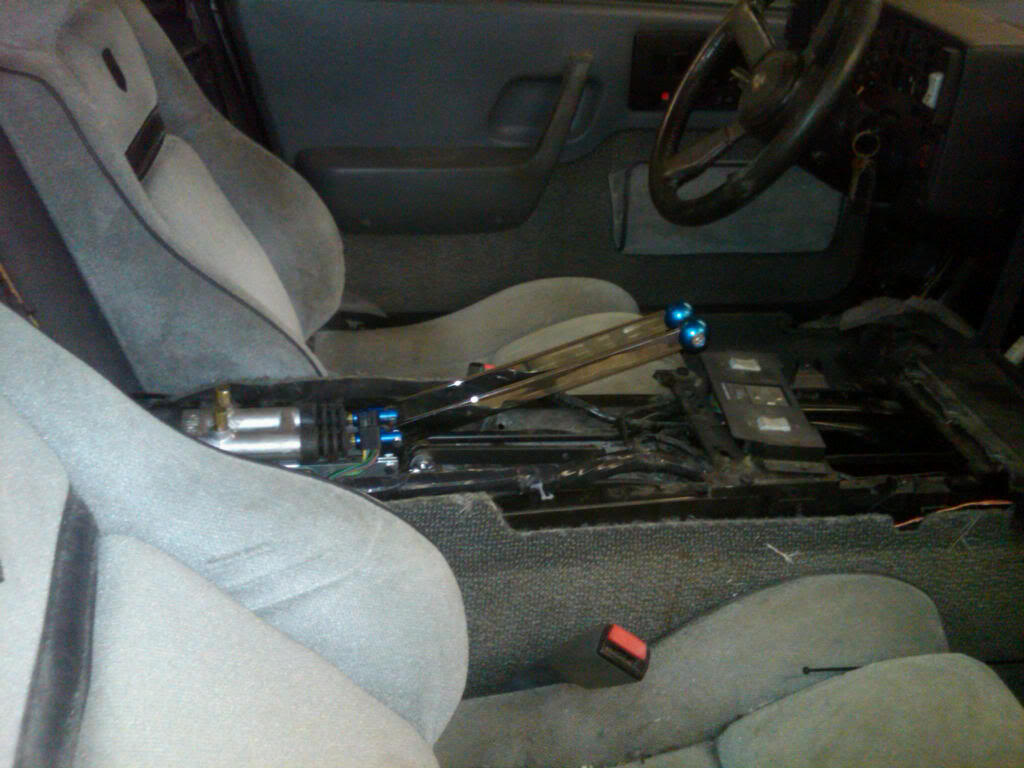
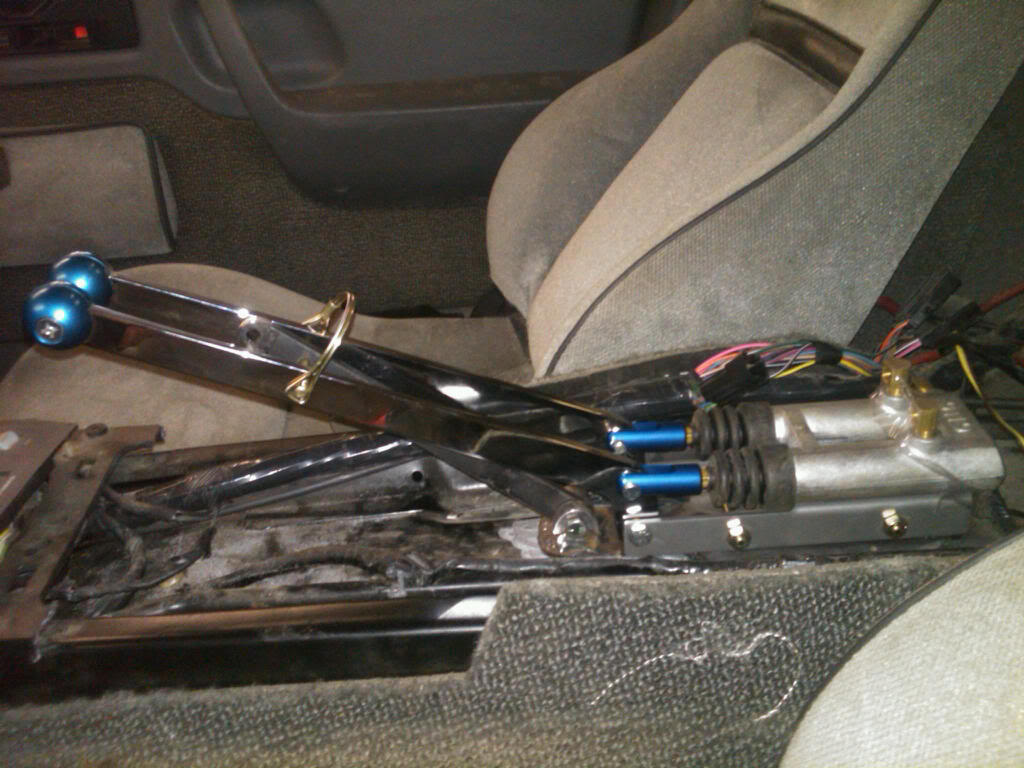
I installed the cutting brakes today. Usually these are only used on sand rails and dune buggies, but as a part time farmer I've seen the value of being able to independently control left and right drive wheels when driving in the slop. Of course, using cutting brakes on the road is both dangerous and probably illegal. However, I came up with a way to lock the brakes out, and as a side benefit they'll work as the e-brake. I need to get better pictures than the ones I ahve here, and of course I still need to plumb the system.
[This message has been edited by artworks (edited 07-14-2017).]
my old rail buggy had cutting brakes! loved em in the sand and yeah, pretty sure they're illegal on street cars. only problem with using them as an e-brake is if the hydraulics go down you dont have a manual override system.
Risk is a four letter word. You're right about the potential hydraulic loss and no mechanical backup, but technically they're supposed to be parking brakes, not emergency brakes. I definately need to post a close up of the lockout arm I fabricated. Hopefully it will pass inspection (if it ever comes to that).
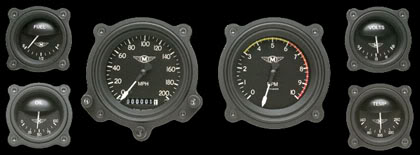
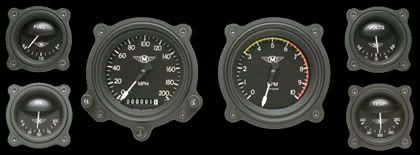
I think I've found the gauges I want to install in the car. I want to go with the cockpit look. I don't know if they'll fit in the stock pods. I need to do some "ciphering"
[This message has been edited by artworks (edited 07-14-2017).]
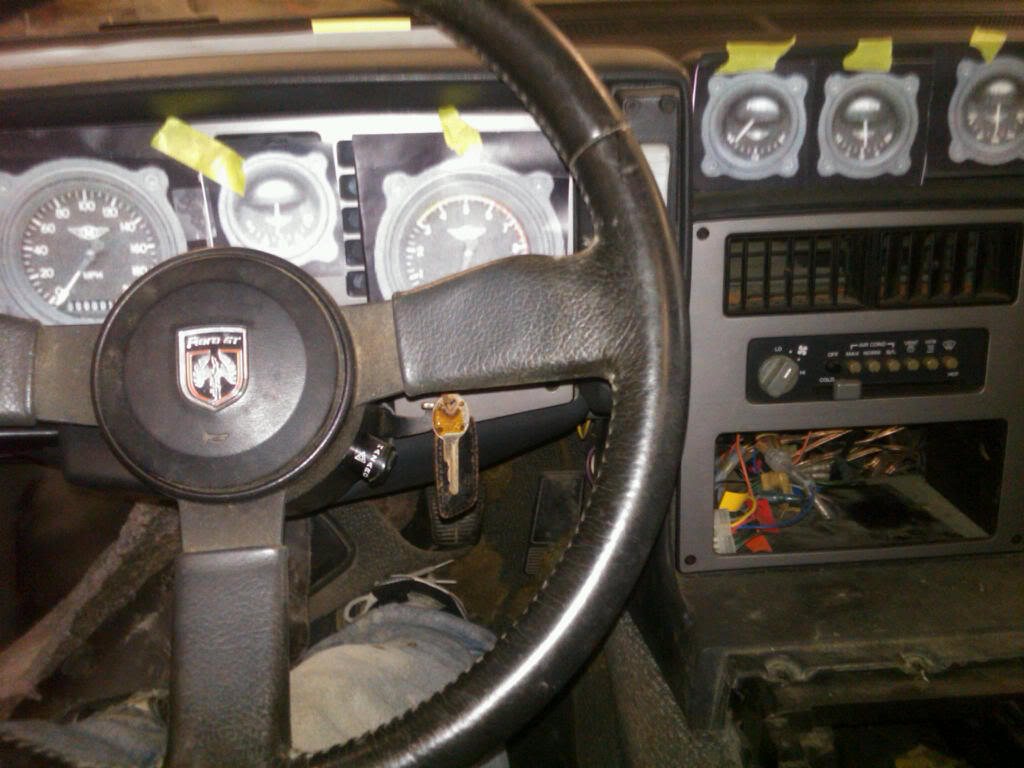
Fastest gauge install ever - I enlarged the color copy to full size, cut it out and taped the gauges in place where I'm thinking they should go. Now that's cheesy!
[This message has been edited by artworks (edited 07-14-2017).]
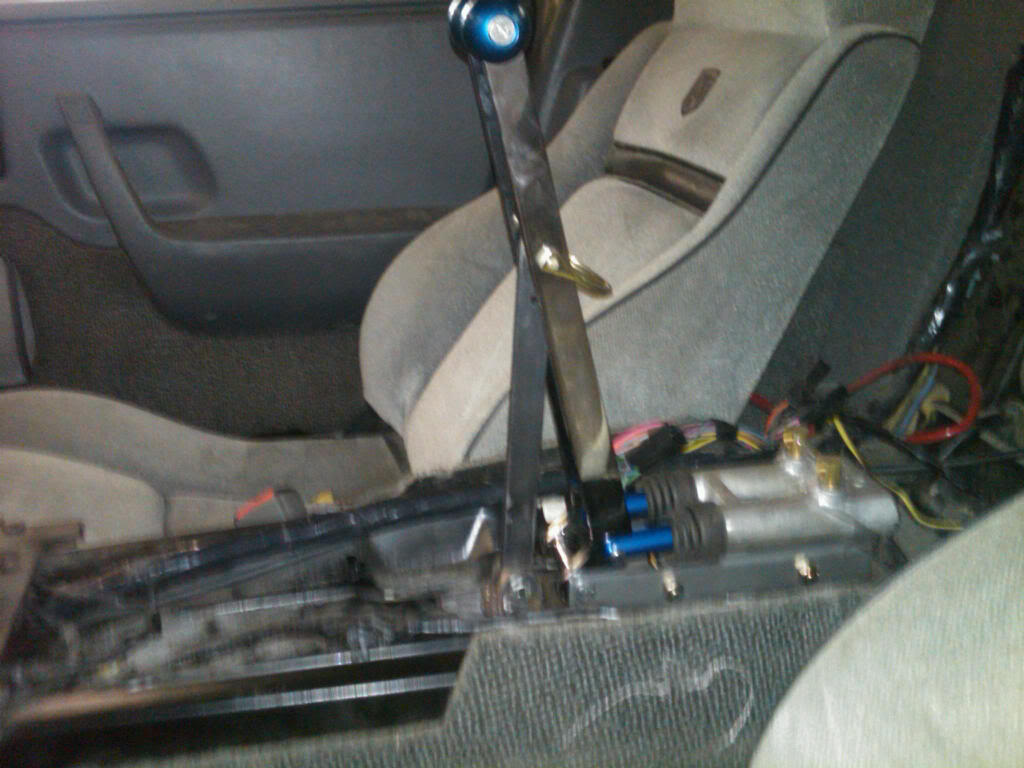
This is the cutting brake with the locking bar installed. By pulling the pin, pulling up on the brake levers and putting the pin back in the second hole, they become a parking brake. Time for plumbing the lines.
[This message has been edited by artworks (edited 07-15-2017).]
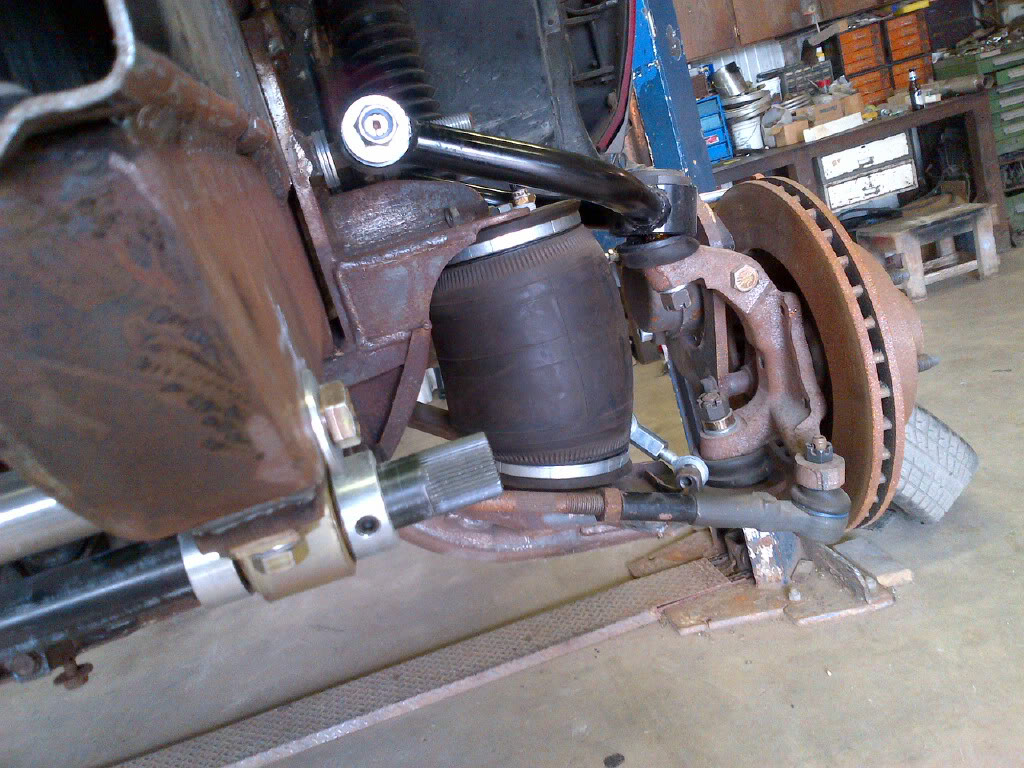
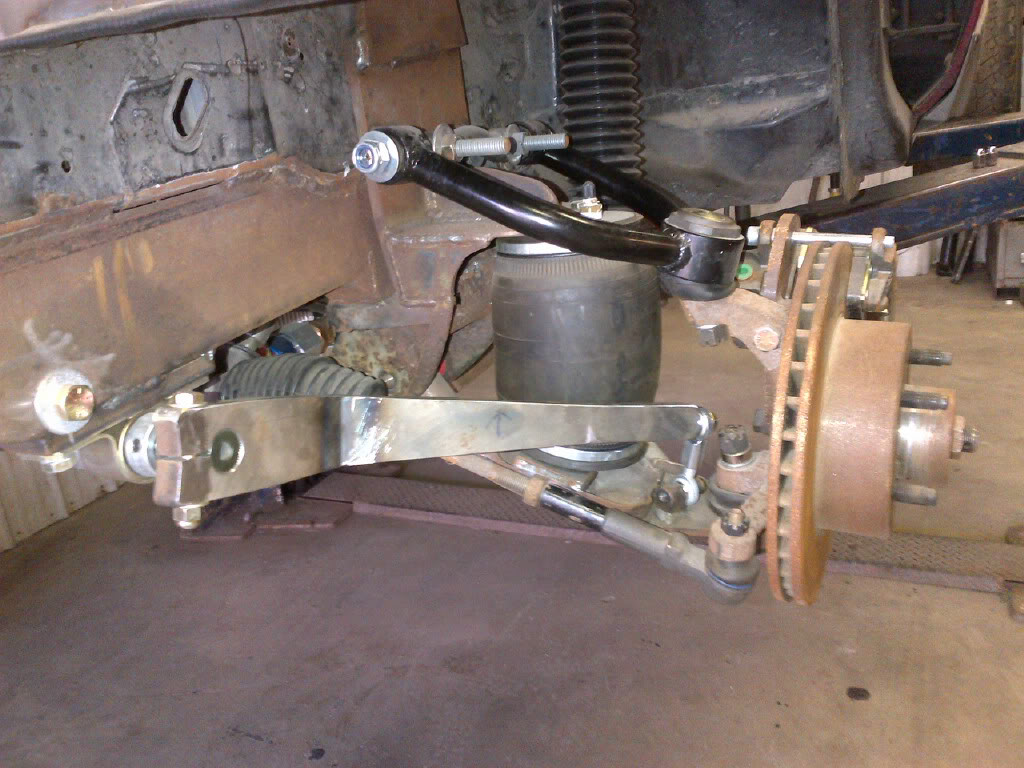
More photos - We finished the rear ladder bar and it works great!
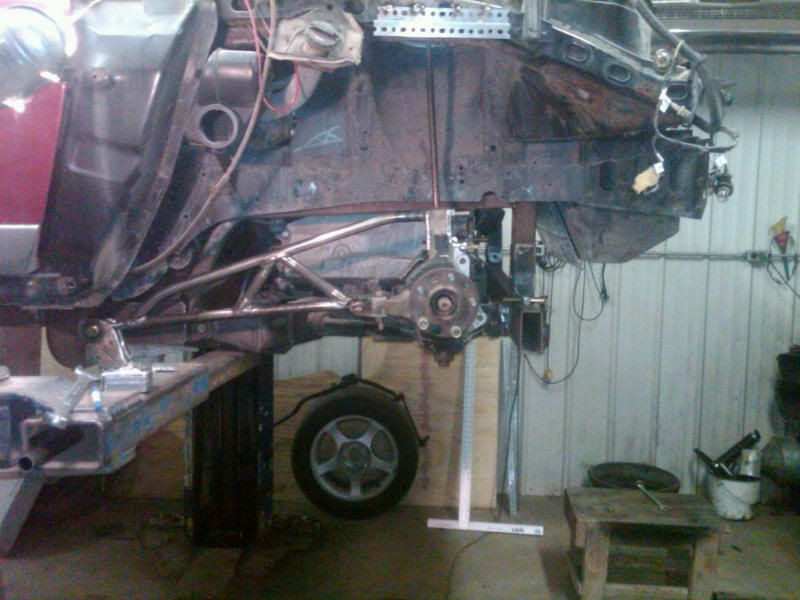
Hey, I thought this suspension design was a neat way to solve the McPherson strut to double A arm suspension conversion, but something about it was bugging me. I finally figured it out. The lower mount point being an A arm will cause a binding issue when the suspension goes through its full travel of motion. Because of your long arm design your lower ball joint will want to move frontwards and backwards as the suspension travels. You may want to look at changing the lower mount to a single bar, with a hiem joint at both ends, it would free up the motion at the bottom of the knuckle. The suspension becomes just a little more like a dune buggies trailing arm suspension.
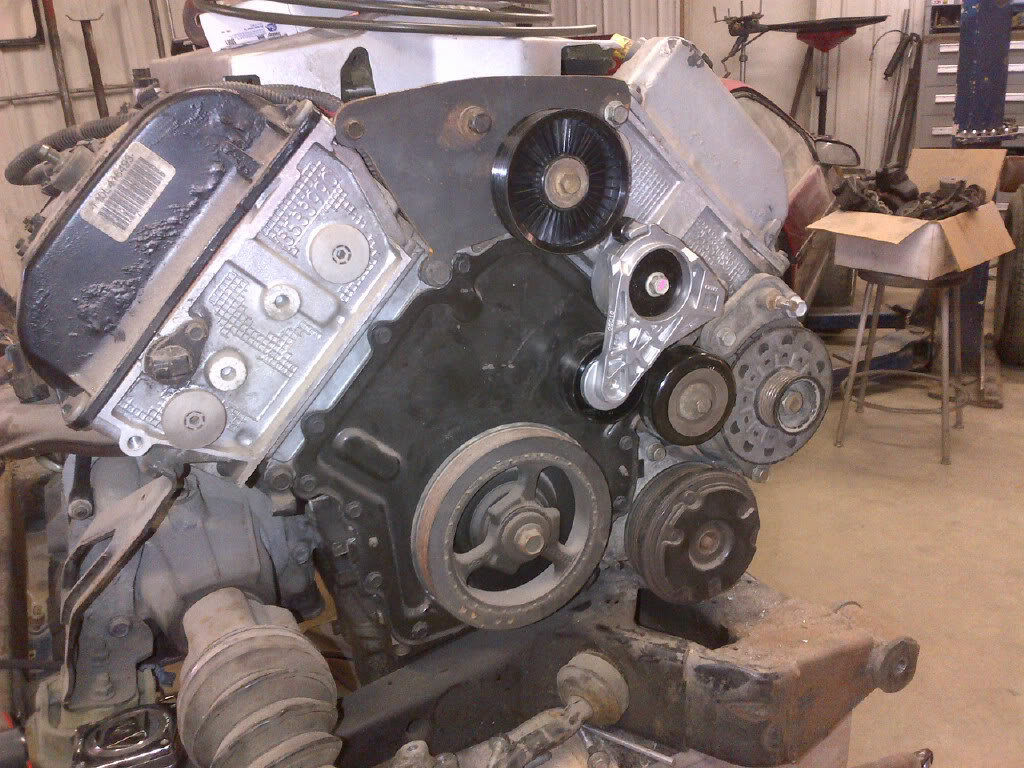
I need some help running the serpentine belt. Has anyone seen photos or sketches of the best way to run the Northstar belt without the power steering pulley but with the A/C compressor in place?
Mwhite, you are technically correct. I went back through my AutoCad drawings this evening, after having taken off the rear wheel and shock to test the range of motion for the suspension system. The AutoCad plan shows that the ball joint would need to move forward by about 1/8" as the suspension moves up or down through its range of motion (about 3" either way off center). But practicaly speaking the suspension moves up and down fine. I think the reason is the rubber bushings on the original Cadillac lower arm - they're permitting the required movement. I moved the spindle up and down easily by hand and didn't feel any binding. Thanks for your comment. I'm sure you're right that the hot ticket would be a lower bar with a heim joint. Here are two photos showing the axle going through its range of motion. With the shock and spring back on I needed to use a floor jack to raise the spindle, but there was very little effort. Total range of motion is about 6"
[This message has been edited by artworks (edited 07-15-2017).]
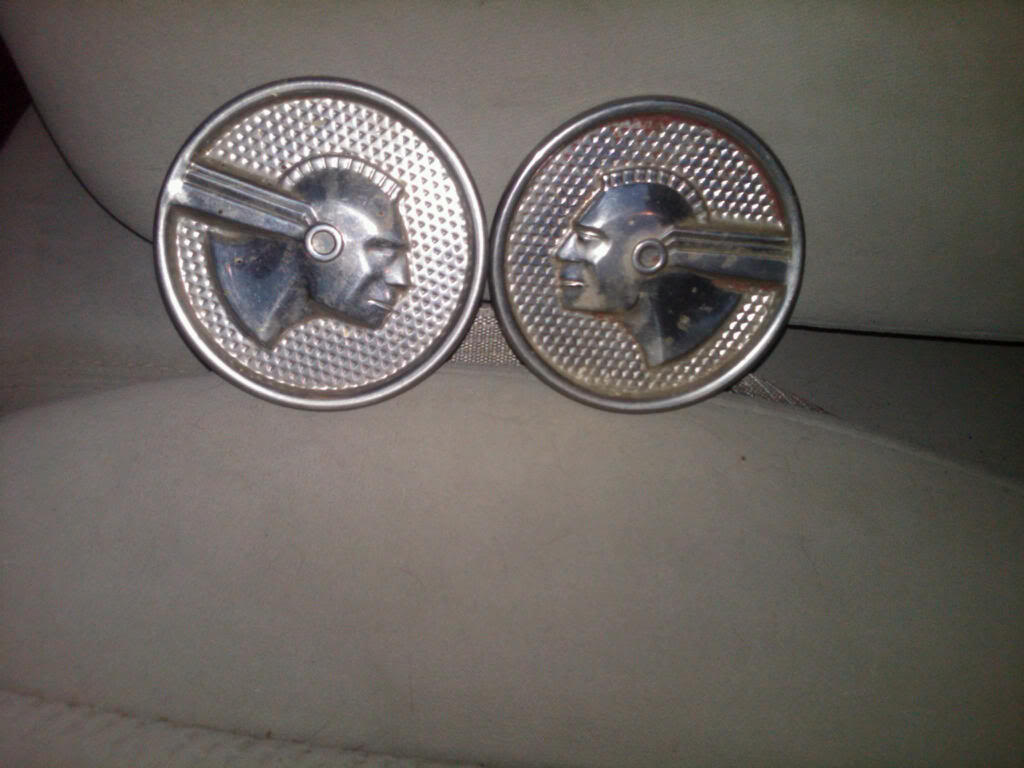
Look what I got for my birthday! I'm going to repaint the badges with the original background in red, then mount them on the massive B pillar. They're from an early 1950's rear quarter panel on the Chieftan.
[This message has been edited by artworks (edited 07-15-2017).]
Mwhite, you are technically correct. I went back through my AutoCad drawings this evening, after having taken off the rear wheel and shock to test the range of motion for the suspension system. The AutoCad plan shows that the ball joint would need to move forward by about 1/8" as the suspension moves up or down through its range of motion (about 3" either way off center). But practicaly speaking the suspension moves up and down fine. I think the reason is the rubber bushings on the original Cadillac lower arm - they're permitting the required movement. I moved the spindle up and down easily by hand and didn't feel any binding. Thanks for your comment. I'm sure you're right that the hot ticket would be a lower bar with a heim joint. http://i1195.photobucket.co...70-20120424-1729.jpg http://i1195.photobucket.co...69-20120424-1726.jpg Here are two photos showing the axle going through its range of motion. With the shock and spring back on I needed to use a floor jack to raise the spindle, but there was very little effort. Total range of motion is about 6"
Having been under the back end of my vette for the last few days I don't know that I would have made it this far before heading for a C4 in the junk yard. But I appreciate the work and thanks for sharing looking forward to seeing it on the road.
Not much new lately, except that I've been collecting parts and traveling to Brazil for work - that really takes a bite out of my wrench time. I've collected a second dogbone for the "back" of the motor (lots of torque to keep under control); a shifter out of a 2000 Seville; and more plumbing parts - this time for the heater core. I'm getting to a new status level on eBay and I'm not proud of it. Photos soon.
I think you are going to want to install that A/C condenser the other way. The condenser is supposed to *condense* the refrigerant back to a liquid state, so having the suction, (output) port at the top of the unit would likely make it difficult for the system to pull refrigerant to the top of the condenser. This is another case where gravity is your friend.
You can try the unit as you have it installed but you will obviously have to plumb the A/C system to flow refrigerant through the condenser the *opposite* direction from normal.
[This message has been edited by randye (edited 05-12-2012).]
Look what I got for my birthday! I'm going to repaint the badges with the original background in red, then mount them on the massive B pillar. They're from an early 1950's rear quarter panel on the Chieftan.
Have you given any thought to what steering damper you might use ? From what i know, monroe is the ONLY one who makes a direct replacement for fiero (i've had it and it sucks). Supposedly, this Trail Master universal one is supposed to fit:
Actually, I hadn't given it much thought. I bought a rebuilt rack and pinion for the car and it came with a new stabilizer. It would be nice to have something with better damping given the larger tires and off road use. thanks for giving me something (else) to think about!
i tried to order it and JC Whitney is a nightmare. Withheld my order for a day and said they needed to call my bank because the billing address was too far a distance from my delivery address (!?). Then it ships from their Carson, CA warehouse so i pay almost 10% sales tax. Carson is about 35 minute drive from me, but it has been 2 More days and i still don't have it - looks like they do business out of Chicago and shipping might as well be from Chicago but still pay the sales tax; deal with customer service, voice menu phone system, they CALL my bank while I'm on hold ... Looks like a new generation of morons took over from the people i used to order from way back when. No more ....
If you can get another one, i'd recommend doing it and forget about JC Whitney. Maybe Summit or Jeggs, or a 4-wheel drive shop ..... My local NAPA guy offered to try to match one up for me if i brought him the old one - i should have gone to him.
UPDATE 05/30/2012. Still Nothing !!
UPDATE 05/31/2012: Got it today - wrong part. Came from arizona, but i got charged almost 10% tax because they DO have a place in CA even though my part didn't come from there. No possible way to mount this thing and 30 minute phone call through voice menu confirmed they sent the wrong part. They will expedite a replacement - today is thursday, too late to ship from wherever the vendor is (maybe arizona again); will process on friday, but even overnight will not get here until monday At The Earliest. Are you thinking about shopping with JC Whitney ? - stay tuned ...
[This message has been edited by PaulJK (edited 05-31-2012).]
I think I've found the gauges I want to install in the car. I want to go with the cockpit look. I don't know if they'll fit in the stock pods. I need to do some "ciphering"
Cool (and expensive) gauges, but they will be a bear to install in the stock instrument pod IF you want to keep any of the stock features (turn signal, Check Engine, etc.) All the electrical connections to the factory stuff are made using a super cheap plastic printed circuit that wraps around the back of the pod. Somehow you'd need to keep it to feed factory stuff and manage to wire your aftermarket gauges around it. Or try to wire the factory stuff directly without terminals or pigtails .....
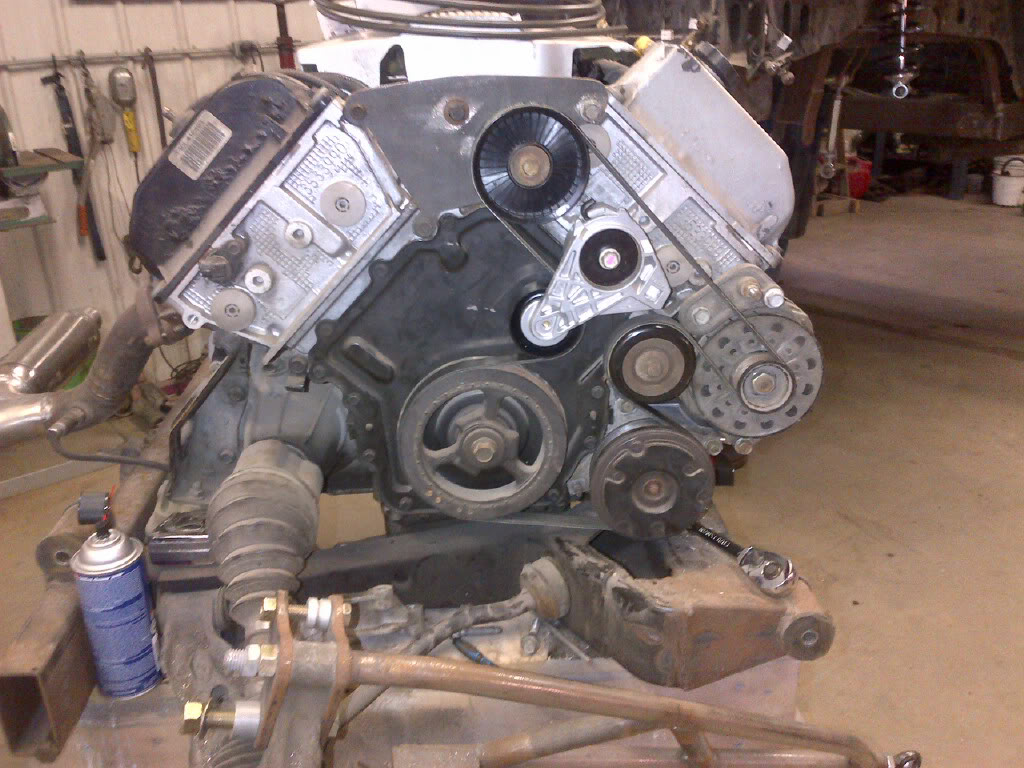
Progress! Pulled the motor and trans out (again) - we're getting to be experts at it. Here are some pics of the pulleys and serpentine belt in place.
While the motor was out, the rear brake lines were installed (from the cutting brakes to the rear calipers) and a bracket for a second dogbone was installed. Then the motor went back in and the car came back off the hoist. Here's a pic of the pulleys and belt back in the car:
[This message has been edited by artworks (edited 07-15-2017).]
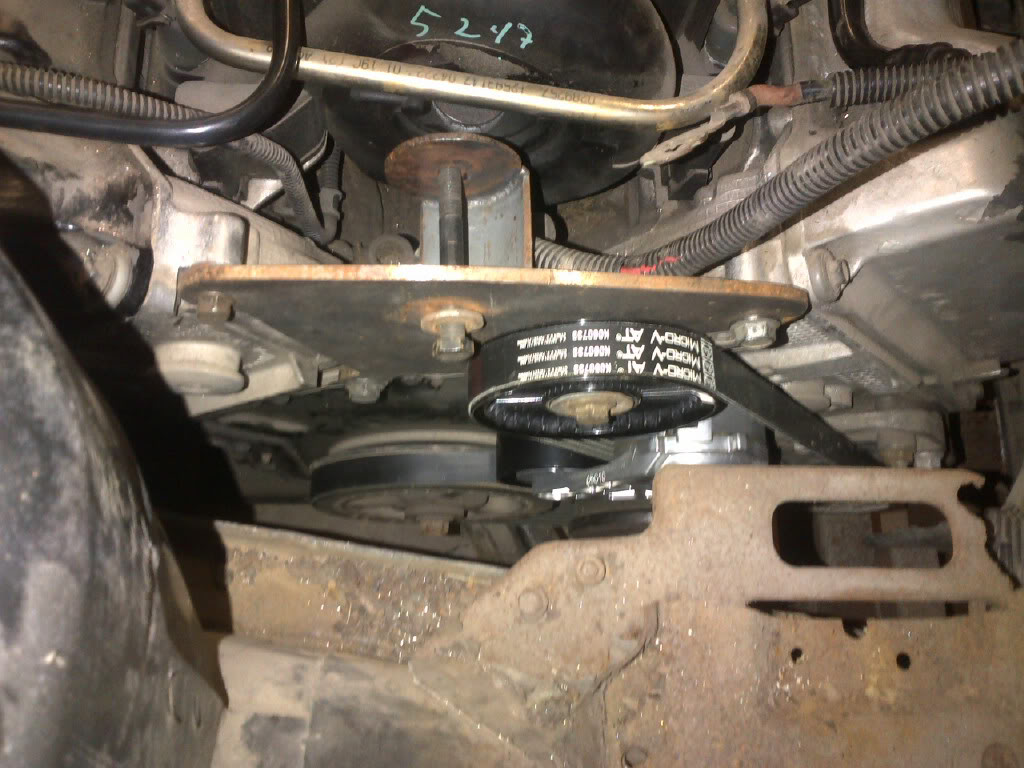
The second dogbone was installed last night - first the motor needed to be pulled so the firewall bracket could be installed. Then back in the car to fit the dogbone. Unfortunately, the water pump shroud will need to be modified to miss the new pa The cutting brakes also got plumbed last night. We ran the line feeding the cutting brake through the hole where the clutch master cylinder used to go, then along the driver's door sill to behind the driver's seat. More pics soon.
[This message has been edited by artworks (edited 07-15-2017).]
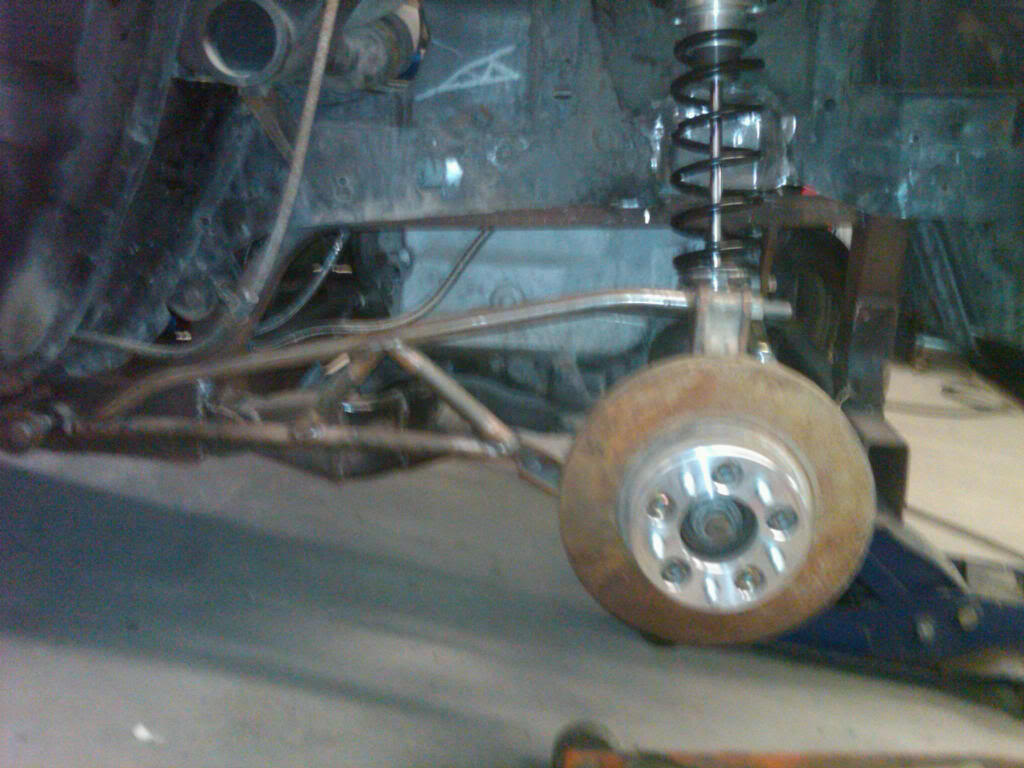
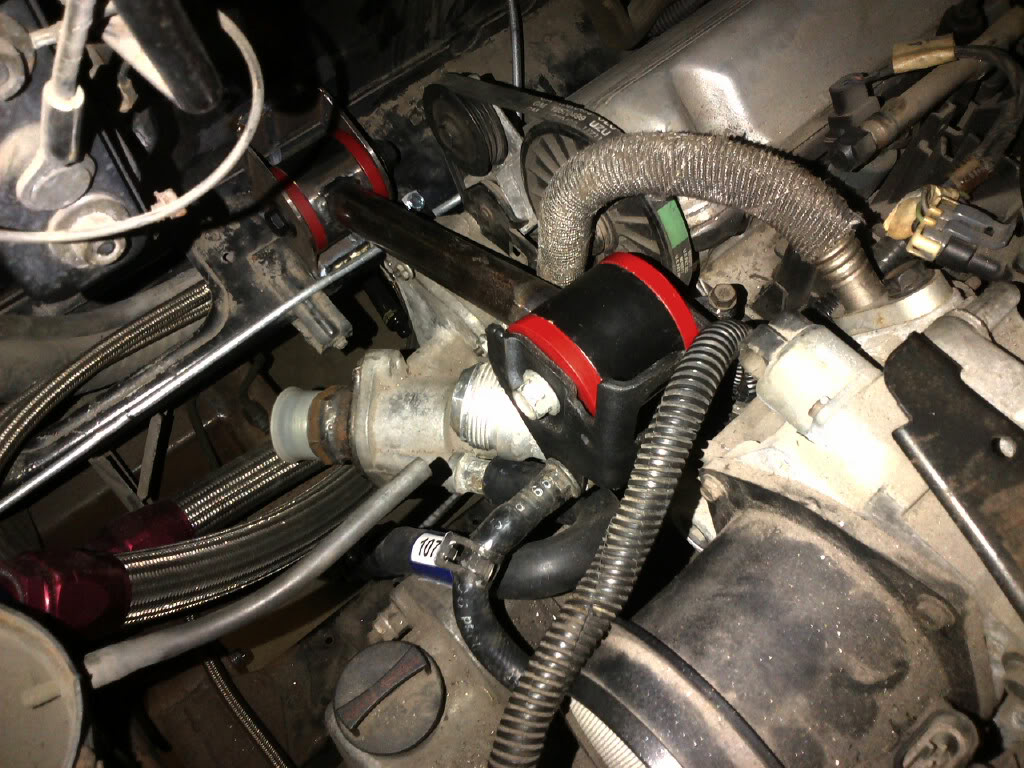
I used the stock proportioning valve but upgraded the master cylinder to an S-10 - it mounts up to the stock brake booster just fine and provides a larger piston to support the bigger brakes. The front lines run as stock. The rear runs to the cutting brakes then split to the left and right rear wheels just like a tee fitting would. I'll take some photos so you can see what I mean.
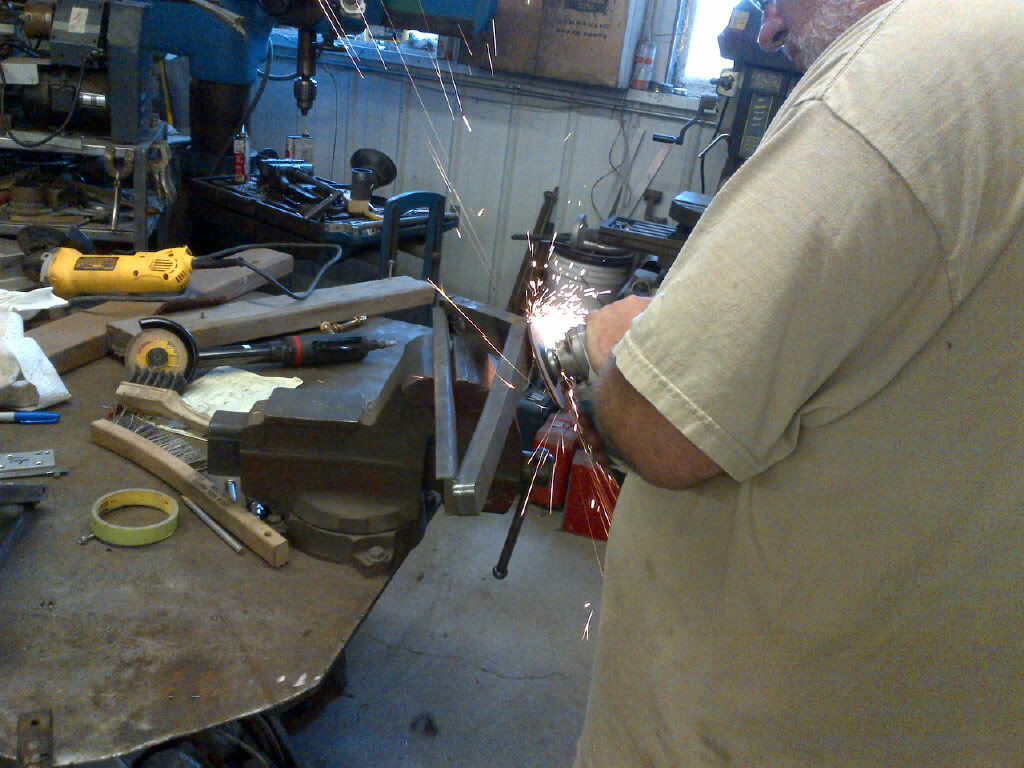
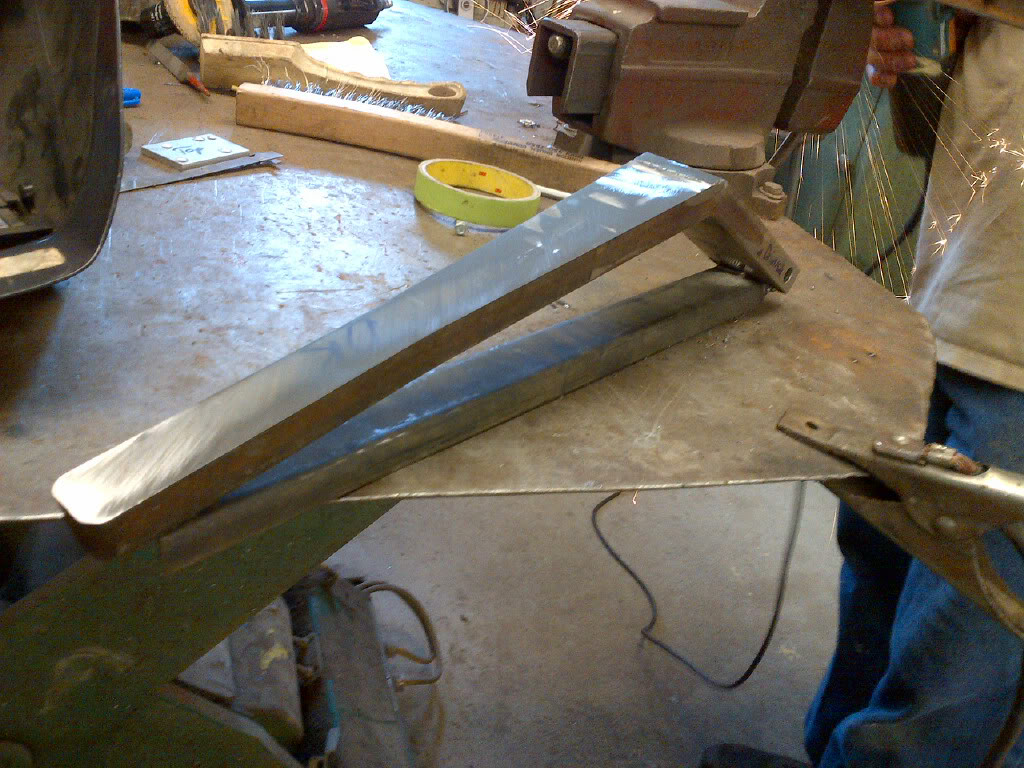
Finally some forward motion! We got the sway bars finished last night. These are stock car type arms with a 1" torsion bar. The hard part was bending the 3/4" arms to the right shape.
[This message has been edited by artworks (edited 07-15-2017).]
Look what I got for my birthday! I'm going to repaint the badges with the original background in red, then mount them on the massive B pillar. They're from an early 1950's rear quarter panel on the Chieftan.
Those are cool! Is there a source for those (new or used)? Ebay? What is the approximate diameter on those? 2'?
The "Chief" emplems are from the rear quarter panels on Pontiacs from the early 1950's. I've seen a few at swap meets but these came from my wife - she convinced one of my hot rod buds to sell her these for my birthday. They're about 3.5" diameter and stainless steel. I polished them up and am having the background painted red by a pinstriper friend. Good luck finding them - I've seen a few on ebay over the years.
[This message has been edited by artworks (edited 10-14-2012).]
Sorry I haven't been posting - I finally got the car to my shop so the bodywork can begin. But first I needed to finish a cutting block for a friend's wedding gift. I've just started working on the front clip - the grille is being reworked for a Pontiac "moustache". I'll post pics soon. Now that the chassis and running gear are done and I have the car close to home I can make some progress on those long winter nights.


 i love Odyssey's always wanted one.