First a little history of this car. I don't know a whole lot about it but let me tell you how it came to become my Girfriends car.
When I was having problems getting kitcarman to complete my swap, I had no other option but to buy another car cause work made me return the work truck that they were letting me use while my swap was being done.
CoolBlue87GT sold me this car for $900.00. I drove it for awhile till my car was completed. My girlfriend (Danielle) really took an interest in my Fiero and even starting going to a lot of car shows with me. On Christmas of 2006 I gave her the title as a Christmas gift. Since then, we have not done a whole lot to the car other than general maintenance and a few repairs as things broke.
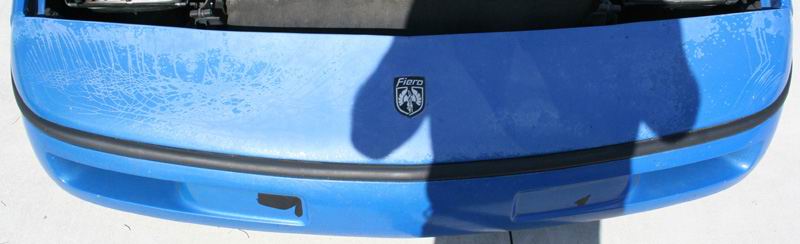
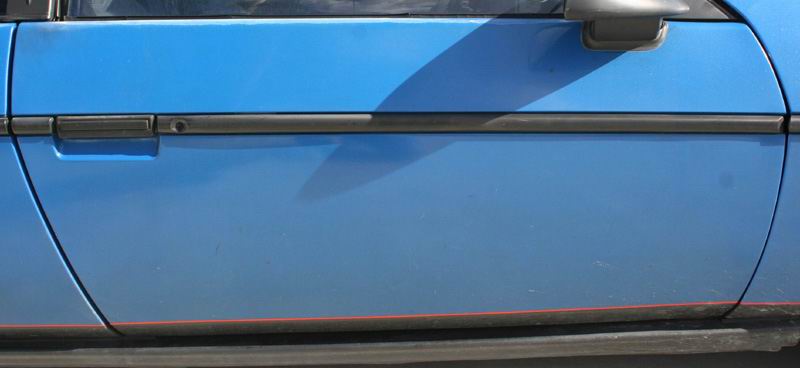
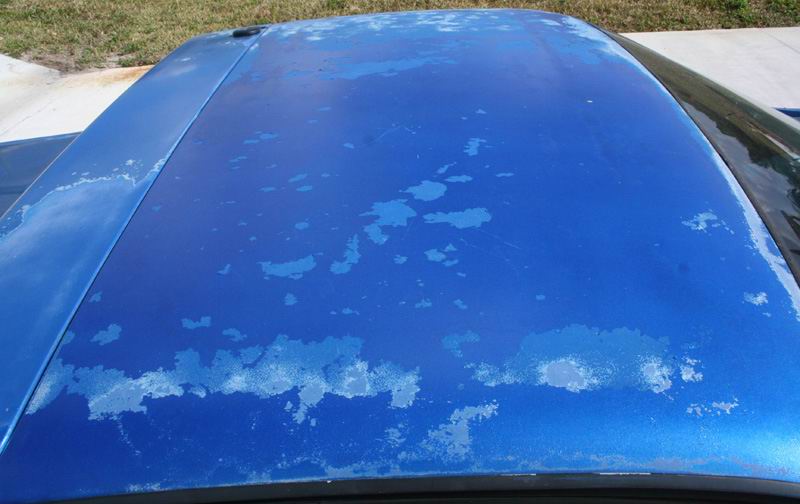
The paint on this car was trashed to say the least. It had been repainted at one time (prior to my buying it) and whoever painted it, did a horrible job.
I have pretty much given up on relying on other people to work on our cars and decided that from that point on (kitcarman fiasco) that I would do everything to our cars myself. I kept reading and reading and reading up on how to paint cars.
I had been pricing air compressors and stuff for the past 3 or so months.
This Christmas, Danielle and I went up to Ohio to spend Christmas with my family. We go every other year. When we returned from Ohio on Dec. 27th, her mom came over so we could exchange our gifts with her. Her mom really went overboard this year. She got danielle a WII with a bunch of games and accessaries. She also got her a home theatre sorround sound system for the 37" flat screen LCD TV that she bought her last year.
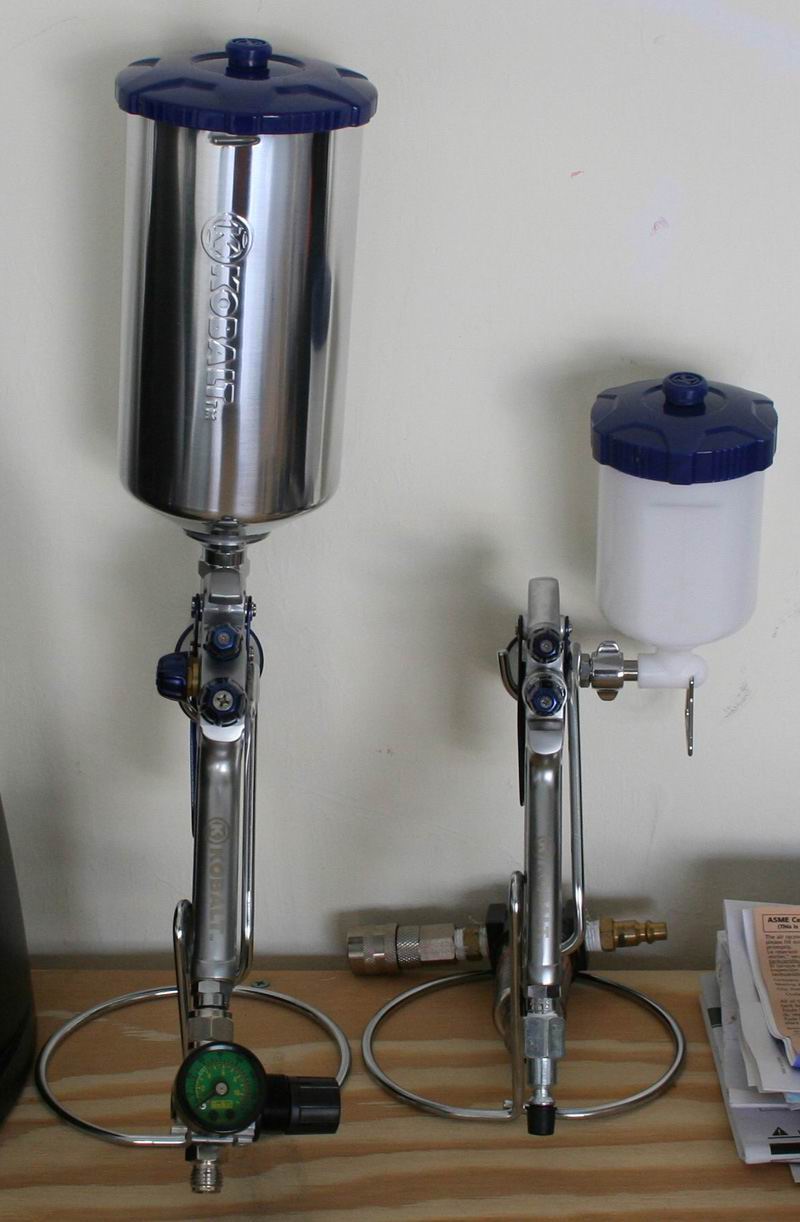
What I got from her mom, blew my mind! She bought me a 60gal. 135psi Campbell Housfeld air compressor with all the trimmings! 50' of hose, water seperator, pressure regulator, 2 spray guns (1 full size and 1 small size), die grinder, fittings and a bunch of other stuff. Danielle gave me $250.00 worth of gift cards so I could buy anything that her mom did not get. I used that money to buy a 6" sander, plumbing to pipe the drain out from underneath the tank, wiring to wire it up for 220 and some other things.
Last Friday, her mom took us to our local auto paint supply store (Finishmasters) to buy all the stuff we would need to paint Danielle's car! She is also paying for Mr Mikes leatherette seats for Danielle's car.
So with all these new toys, I began to start sanding Danielles car down.
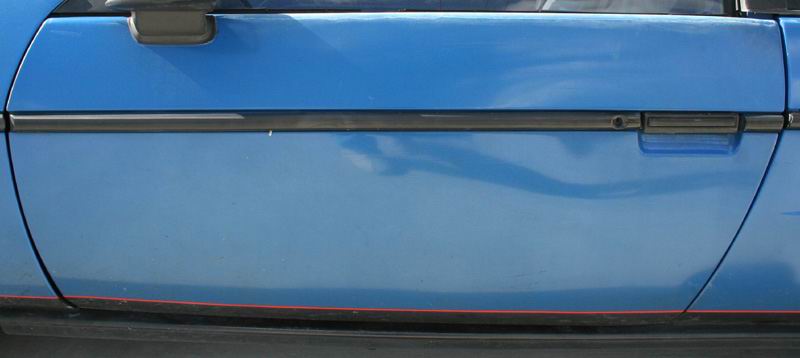
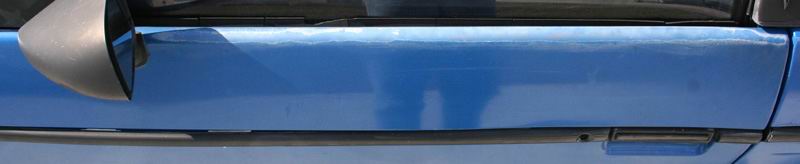
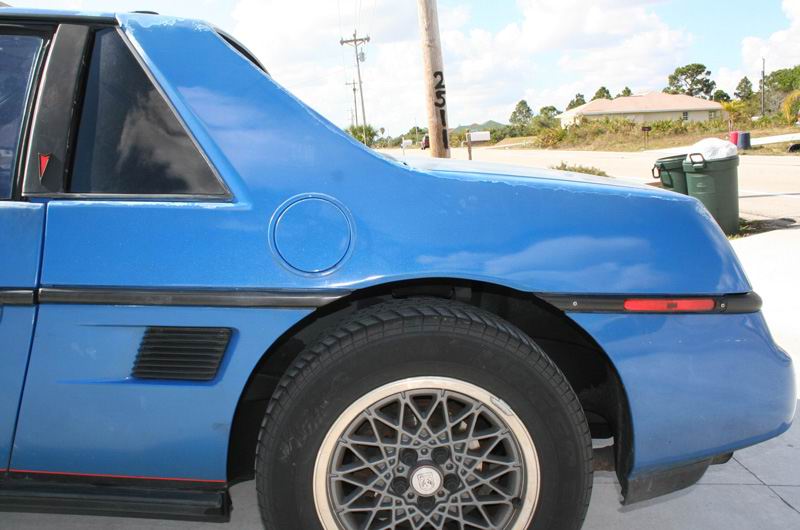
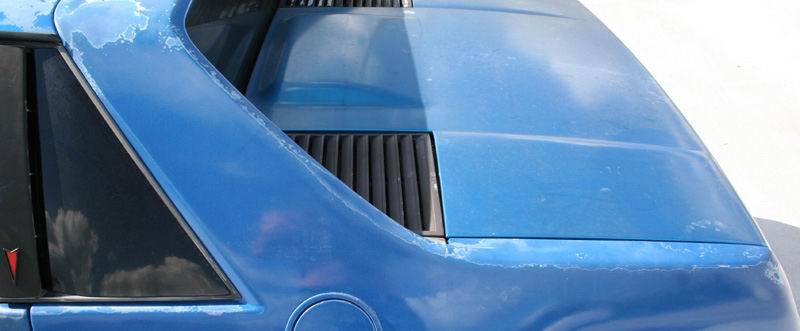
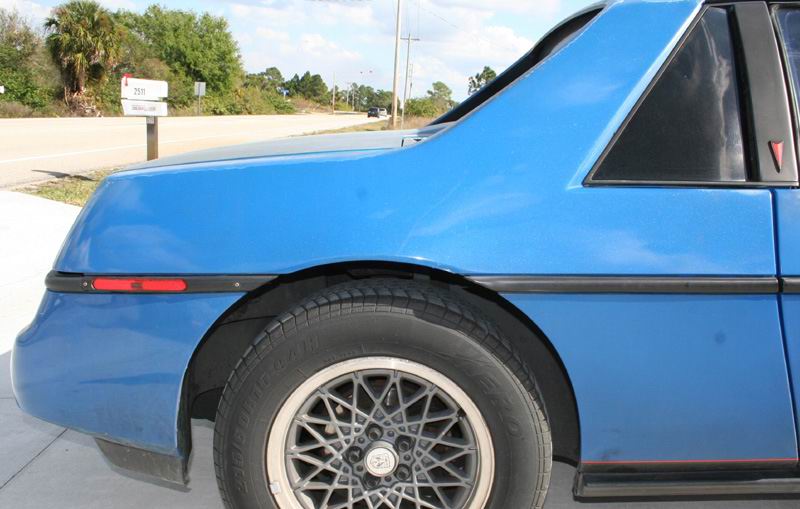
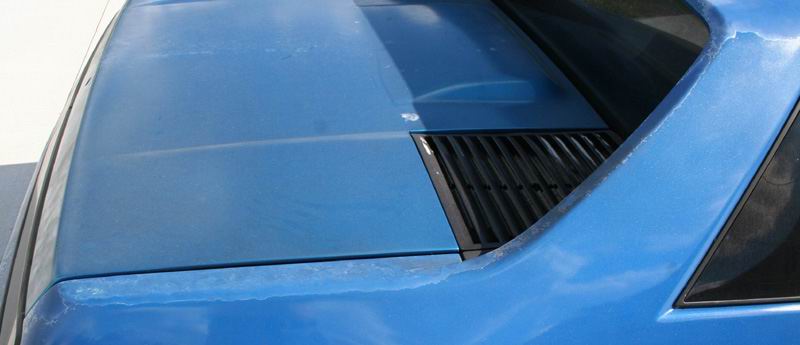
Here are some pics of all her body panels and their condition...
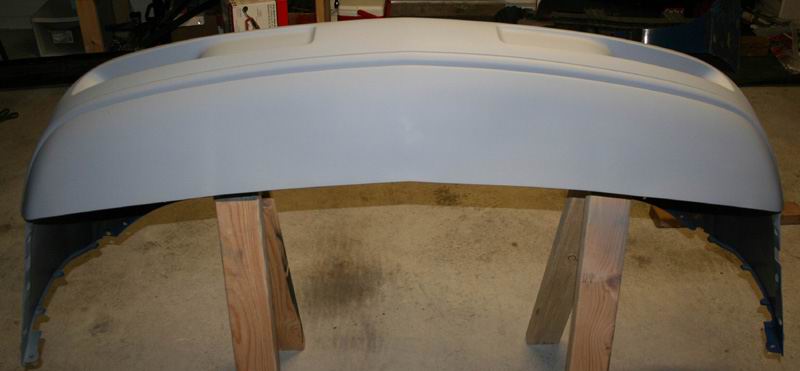
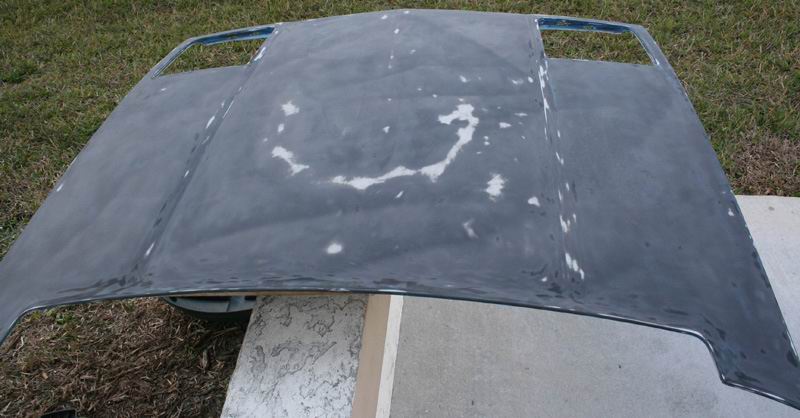
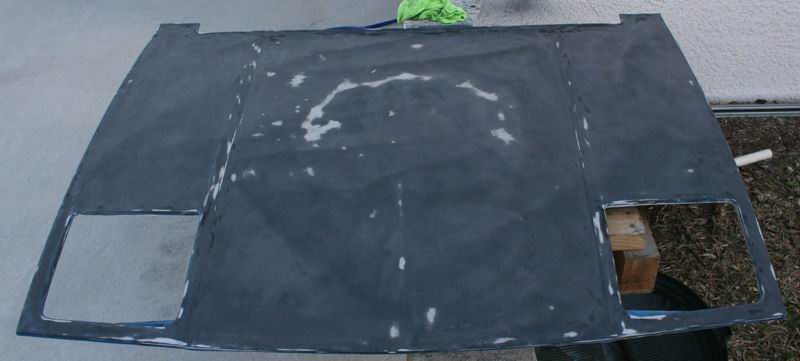
The hood all sanded down to the factory primer and ready for new primer...
I also sanded the underside of the hood so it can be repainted also. The plan is to sand and prime each panel off the car and then lay each panel on the car in the perspective places and then paint. This is going to be quite a long process but I hope to have it completed by the end of Feb.
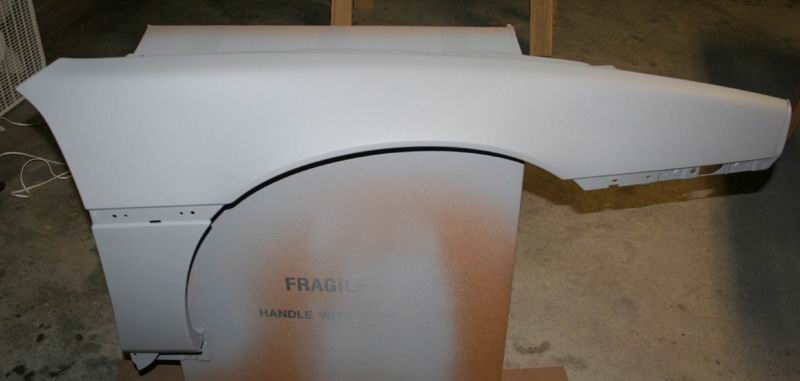
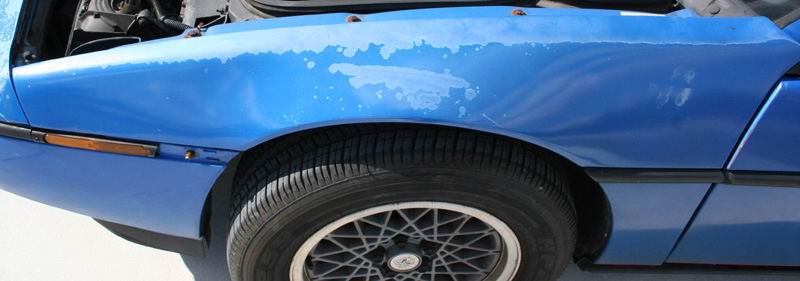
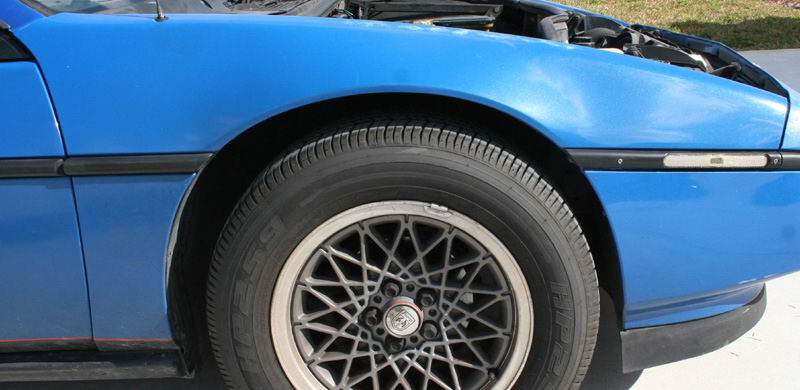
Well after making the first post, I went ouside and removed the drivers side front fender and started sanding. It appears that the car has been in a small fender bender at some point in time. The front fender has a bunch of body work done to it near the front by the bumper. Instead of trying to repair it, I am going to look for a replacement fender.
As for "where does the line start"? No where. I have no intention on painting someone elses car. I don't mind doing it for myself/girlfriend but I don't want the headache of someone else picking out little flaws and wanting me to repair them. I have never painted a car before so this is will be a major learning experience for me.
[This message has been edited by JimmyS (edited 01-05-2009).]
Well after making the first post, I went ouside and removed the drivers side front fender and started sanding. It appears that the car has been in a small fender bender at some point in time. The front fender has a bunch of body work done to it near the front by the bumper. Instead of trying to repair it, I am going to look for a replacement fender.
As for "where does the line start"? No where. I have no intention on painting someone elses car. I don't mind doing it for myself/girlfriend but I don't want the headache of someone else picking out little flaws and wanting me to repair them. I have never painted a car before so this is will be a major learning experience for me.
Look don't make me wine, so you steel my hood scoop design then you wont splash some paint on my car LOL I have been thinking about doing the same thing. I have painted before just not cars, I wonder what the neighbors will think about that Good luck hope it comes out nice.
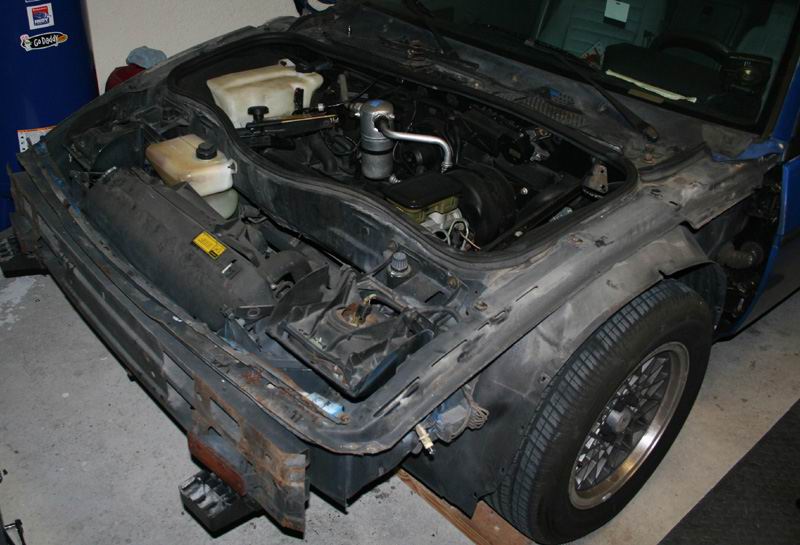
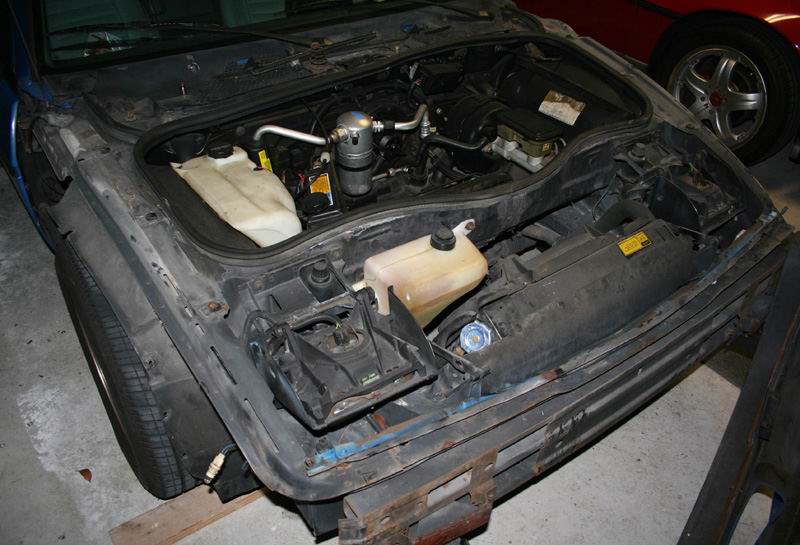
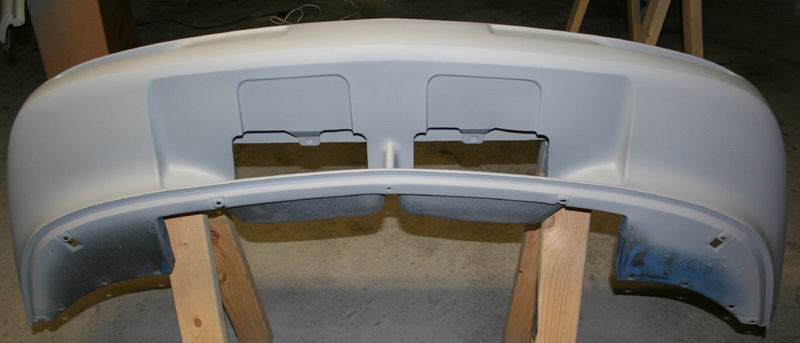
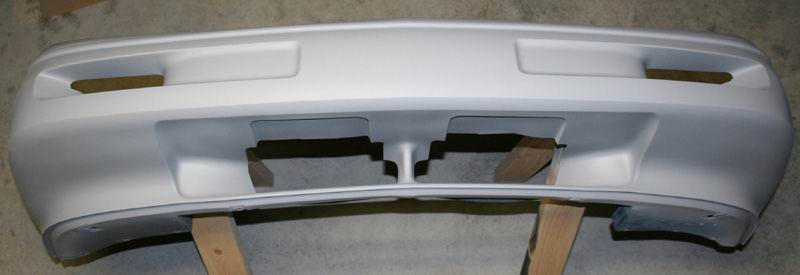
Well, I now have the whole front end off the car...
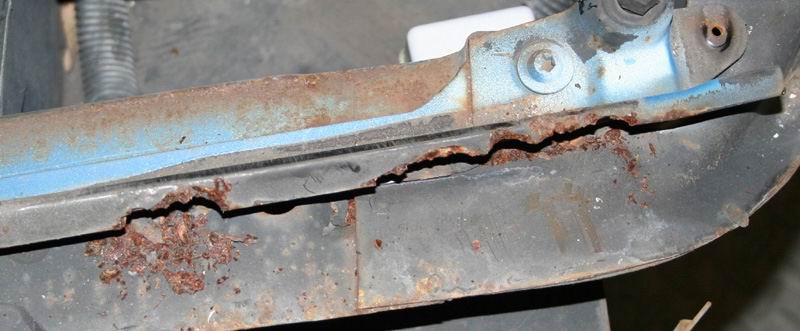
I found a little bit of rust on the metal bracket that the front bumper connects to. Its nothing major but I will blast it and re-paint it so the rust will go no further...
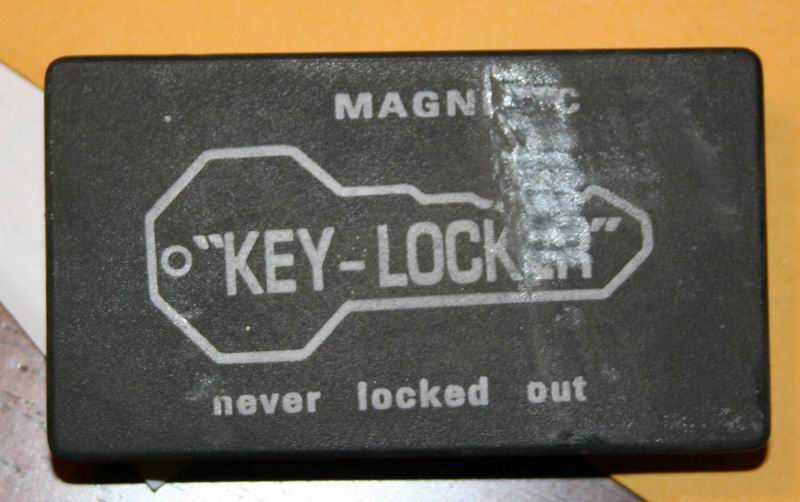
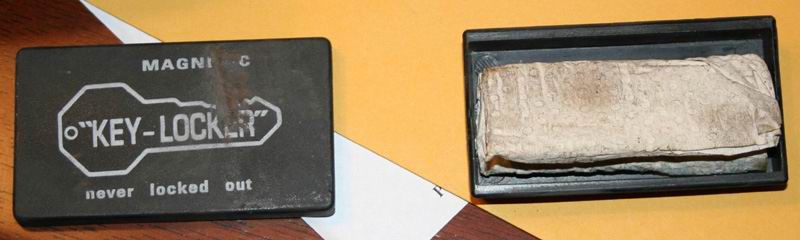
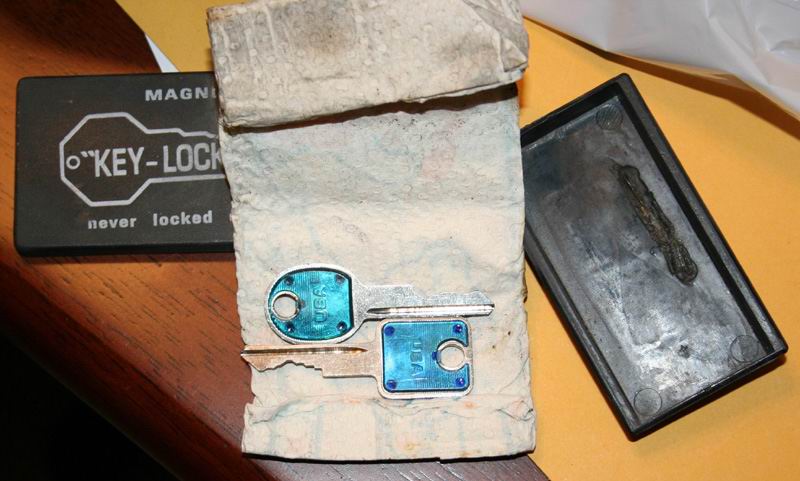
Its also neat to find things you never knew was there. I found this attached to the bottom of the bumper with velcro...
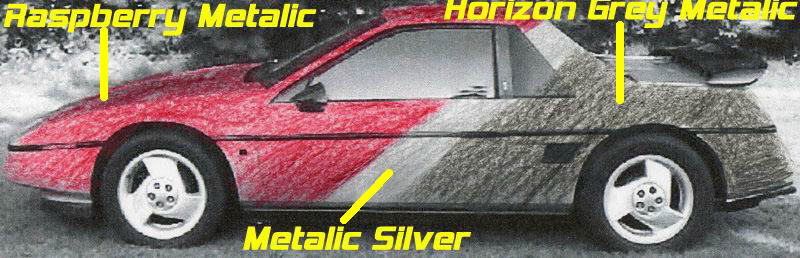
Here is a general idea of the paint scheme we are going for. We did this with colored pencils so the colors arent right but it will give you a general idea...
Just kidding, but you know it would look much better in blue! (How about Michigan State Police blue)
I thought of you when I talked to jimmy about this on the phone...
At least he is not doing the color setup he wanted to do. *shudder*
What was the damage down at finishmasters or did no not go yet?
To save some time and effort, on anything that still has smooth solid paint on it, you can merely just scuff it up with the DA, and you dont need to take it way down if you want to save some time.
[This message has been edited by darkhorizon (edited 01-06-2009).]
I thought of you when I talked to jimmy about this on the phone...
At least he is not doing the color setup he wanted to do. *shudder*
What was the damage down at finishmasters or did no not go yet?
To save some time and effort, on anything that still has smooth solid paint on it, you can merely just scuff it up with the DA, and you dont need to take it way down if you want to save some time.
It was not the color setup that "I" wanted to do. It was the color that "she" wanted to do. PINK! Ewwww Thank god her mother and I talked her out of it.
The total for all the materials at finishmasters, including a resperator, was just over $700.00. Keep in mind that there is enough, of the silver and the black, to do my car also. All I would need to buy is 3 quarts of the blue I want and there would be enough paint to paint my car also. We bought Dupont NASON Urethane Paint and materials.
Here is a list of what we bought... 1qt nason 483-87 2K Urethane Activator 1gal nason 421-19 2K Urethane Primer 1gal nason Ful-Base B/C Black 3qts nason Ful-Base B/C Raspberry Metalic 1gal nason 498-00 SelectClear 2K 1gal nason 441-21 Ful-Base Medium Reducer 1qt nason Ful-Base B/C Silver Metalic 2qts nason Ful-Base B/C Horizon Gray Metalic 1pt nason 483-30 Ful-Base B/C Activator 1qt nason 483-79 High-Temp Activator 2K 2qts nason Semi-Gloss Clear 3 rolls of 1/2" tape 1 roll of fine line tape 1 roll of 18" mask paper Resperator Measuring cups
...I have never painted a car before so this is will be a major learning experience for me.
Let me give you a tip. if you think you are done sanding, start all over again. I painted a dressed motorcyle just a couple of days ago and I have at least 40 hours of sanding in it. I have base color down and I have 3 layers of candy and metalflake to go before clear and even more sanding.
The paint job looks and quality is 90% prep and 10% paint. Get used to sanding, it's all you will be doing on the car for the next month. (faster if you can sand 8 hours a day. I only had 2 hours each night.) also wipe it down twice with tack rags after you wash the car down in solvent to eliminate silicone and wax. I learned the hard way that tacking once does not mean it's clean.
[This message has been edited by timgray (edited 01-06-2009).]
It was not the color setup that "I" wanted to do. It was the color that "she" wanted to do. PINK! Ewwww Thank god her mother and I talked her out of it.
The total for all the materials at finishmasters, including a resperator, was just over $700.00. Keep in mind that there is enough, of the silver and the black, to do my car also. All I would need to buy is 3 quarts of the blue I want and there would be enough paint to paint my car also. We bought Dupont NASON Urethane Paint and materials.
Here is a list of what we bought... 1qt nason 483-87 2K Urethane Activator 1gal nason 421-19 2K Urethane Primer 1gal nason Ful-Base B/C Black 3qts nason Ful-Base B/C Raspberry Metalic 1gal nason 498-00 SelectClear 2K 1gal nason 441-21 Ful-Base Medium Reducer 1qt nason Ful-Base B/C Silver Metalic 2qts nason Ful-Base B/C Horizon Gray Metalic 1pt nason 483-30 Ful-Base B/C Activator 1qt nason 483-79 High-Temp Activator 2K 2qts nason Semi-Gloss Clear 3 rolls of 1/2" tape 1 roll of fine line tape 1 roll of 18" mask paper Resperator Measuring cups
You have enough basecoat to paint 4 fieros, holy crap! 3 gallons of base! I would consider a sealer to lay that metallic over, it will help you do half wet half wet coats and see what your doing. You could also cut the basecoat you need to use down significantly too. 2 quarts of base coat got my fiero done, and then some, I even cut it a bit rich with reducer too!
The semi gloss clear if for the underside of the hood and decklid. I bought 2 quarts so there would be enough to do her car and my car. It is also for the underside of my hoodscoop and the center on my hood that is under the scoop.
What is this sealer stuff you mentioned? Does it go on before the primer or on top of the primer?
Sealer is an inbetween color and body work, it REALLY helps get that chemical bond going, makes everything a nice flat uniform color, and the good sealers promote good dispersion of paint, and helps visualize wetness, which you NEED for all this heavy metallic you are going to be laying down.
The metallic is going to be a nightmare for you if you even make one mistake past the first coat... the heavy spots will build up the metallic, and the light spots will look very light in comparison to the heavier. Also the heavier parts will cause the metallic to fall down to the bottom, causing it to look funny and start streaking, modeling and tiger striping.
I used a pint of clear to get 3 coats on my front and rear bumpers... I think 2 quarts of the semi gloss is enough to do your whole car in 2 heavy coats. I would consider taking that back and just use your normal clear.. You will have tons of it left anyway, without a booth, I would keep the amount of clear you spray down to a minimum, so you dont have issues with dust accumulation (think like, the extra dust you get will just cause more wet sanding time, and you are just pulling the clear back off and down the drain).
I would go and get that quart of blue or whatever you need for your car, and see if they will take back some of your basecoat overload.
[This message has been edited by darkhorizon (edited 01-06-2009).]
I used a pint of clear to get 3 coats on my front and rear bumpers... I think 2 quarts of the semi gloss is enough to do your whole car in 2 heavy coats. I would consider taking that back and just use your normal clear.. You will have tons of it left anyway, without a booth, I would keep the amount of clear you spray down to a minimum, so you dont have issues with dust accumulation (think like, the extra dust you get will just cause more wet sanding time, and you are just pulling the clear back off and down the drain).
I would go and get that quart of blue or whatever you need for your car, and see if they will take back some of your basecoat overload.
Remember that the 2 quarts of semi gloss clear is being used for 2 cars not just one. The under side of both hoods and decklids and the center of the top of my hood and then the whole underside of my hoodscoop. I haven't completely decided yet but I may also be using it to re-paint the whole front compartment on my car. I don't want to use the regular clear under the hoods and decklids cause I don't want those areas to be glossy. I want them semi glossy but protected which is why I am going to clear them instead of using a single stage semi gloss black paint.
I bought as much as I did for 3 reasons. 1st- I have never painted before so if I make a mistake and need to re-do some areas, I have enough material to do so. 2nd- I don't want to be painting and then realize I'm not going to have enough material to finish the job. 3rd- I'm not sure what the shelf life of the paint is but I hope to have some material left over for touch ups in the future.
Let me make this clear... I am not going to do this half assed. I plan on doing it the way it should be done. I have no intention on just slinging some paint on the car just to make it look better than it does and have it peeling in a couple years. I want it to last and I want it to look great, not just OK. Spending extra time prepping is not an issue. Spending extra time wet sanding the clear is not an issue. I am laid off from work so, time I have, money I don't. My time is free for me as I am working on mine and my girlfriends stuff. The way I look at it is... It is time well spent, better than sitting in front of a tv or video game becoming a vegetable. I fully understand that the way I am doing it (sanding all the way down to the factory primer and paint) is not completely necessary and is going to take more time. But in my eyes... It's the best way to do it and is time well spent.
Call me anal, call me crazy, but when i'm done...call me a painter.
[This message has been edited by JimmyS (edited 01-07-2009).]
paint has a basically unlimited shelf life.. but still 3 gallons of color is alot... and repairs with a heavy custom metalics are not really possible on the same level a low metalic or a solid color would be and a full repaint would be the only way to do the repair. So considering it may be a decent idea to have the metalics on hand, but any base colors, such as that gallon of black, it wouldnt be hard to buy extra when you need it..
If quality is your goal here, then it may be a good idea to buy some more high build primer and some "toner'd" sealer, or get a good amount of some epoxy sealer/primer in a color that will sorta match your color schemes. The epxoy will give you a nice "base" primer that you can then put the highbuild primer on. I suggest that because some high builds are not designed to go over raw substrates, and the idea of the high build is to eliminate sand scratches which doesnt work well if the bonding and coverage properties dont work on raw substrates. The epoxy can then be modded slightly and used as a sealer..
I said it before, but I will say it again. I regret pulling as many panels off as I did on my paintjob.
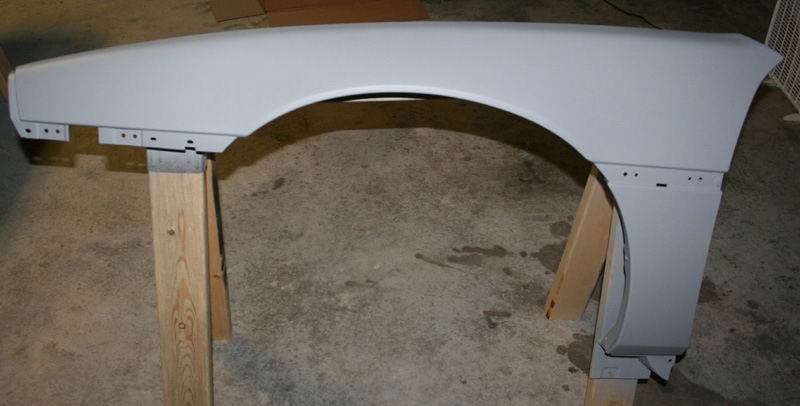
I want to thank GKDINC for hooking me up with a replacement drivers side front fender.
Both front fenders are now sanded. I also did a antenna delete on the passenger fender. Tomorrow I will start work on the front bumper. Once I have the front bumper sanded and repaired, I will prime the hood, fenders and front bumper. Then i|I will spray color on all the edges and clear the edges. Then I will install them all back on the car and start sanding door panels.
[This message has been edited by JimmyS (edited 01-07-2009).]
Ya, thats a LOT of paint, lol. Guess it dont hurt to have too much. I painted a 10 seat twin engine AeroCommander (basicly a commuter airliner) airplane with 6 gallons of acrylic enamel.
Since your stripping it down bare, be sure you block sand the first primer coats to make sure you get out most of the ripples you will get using a DA. No need to block it down everytime you reprime it though, plastic panels will warp back and forth depending on heat and cold anyway. You can get it absolutely perfect, paint it and an hour parked in the hot sun will bring it right back . The hood on my Ferrari kit fit perfect all the way around except in the summer when the rear corners popped up like 1/4 inch. Same with the door fit. When I restored older vettes that were real fiberglass, I had to make sure to leave waves and seam lines in them to look ' original '. A perfect straight one will never get NCRS certificate.
------------------
Owner / Operator Custom Paint and Body... specializing in Corvette & Higher End Autos for 40+ years Ferrari, Mercedes and Porsche Approved ____________________________________________ 88 Corvette convertible 05 Dodge Magnum Hemi R/T 66 Dodge Killer Bee Coronet
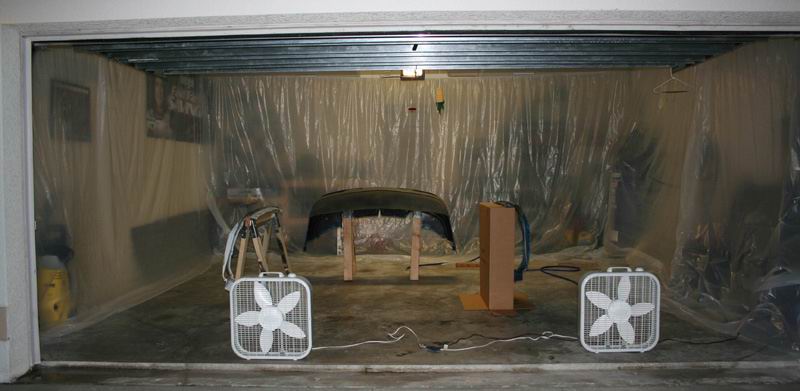
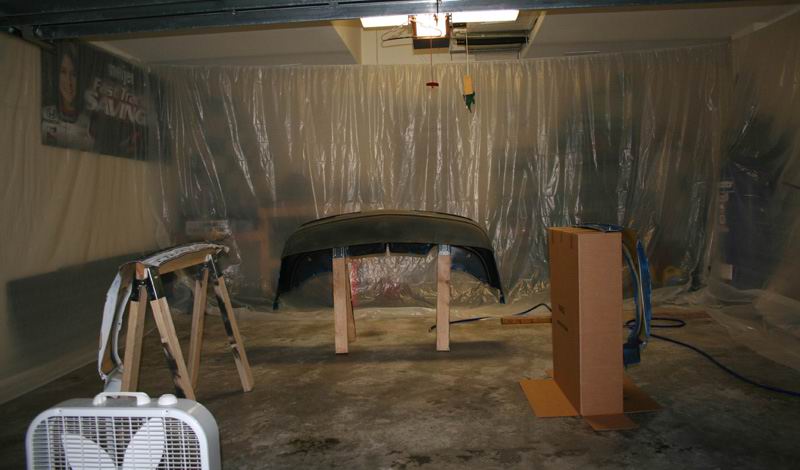
Progress continues. Today I finally got to try out my new spray gun.
First let me show you a couple pics of my garage converted into a makeshift spray booth. I attached 4 eye bolts in each corner of the garage up about 2" from the ceiling. I then ran some clothes line from eye bolt to eye bolt and pulled it really tight. I bought a roll of 10' X 100' plastic and cut it to the lengths of the wall + 6-8" extra. I wraped the plastic over the top of the clothes line 1" and stapled it about every 4-5" to make a curtain. Now when I want to paint, all I have to do is pull the curtains open.
I shut the garage door to the height of the 2 box fans and put the fans blowing out. I fill in the gaps between the fans, the door and ground with plastic so wind does not blow in.
I got both front fenders and the front bumper primered today. Tomorrow I will primer the hood. I also hope to give the primer a sanding and spray all the edges with color and clear.
It took a little bit getting used to the gun but once I got it figured out, everything went smooth. I did get 3 drips on the bumper though but that will sand out.
[This message has been edited by JimmyS (edited 01-11-2009).]
looks like you have the right idea now jimmy, get at er!
Block sand block sand block sand, then sand some more. Wondering what grit papers you are going to be using along the way here, (pre primer, on primer, pre color, ect)
looks like you have the right idea now jimmy, get at er!
Block sand block sand block sand, then sand some more. Wondering what grit papers you are going to be using along the way here, (pre primer, on primer, pre color, ect)
I used 120 to sand off the old paint. I will use 120 to block sand the primer then primer again. I will then use 320 to sand the primer for paint.
quote
Originally posted by DeLorean00:
Very nice at home setup! It looks like you are doing everything right!
After your last thread about compressors, I'm glad she went the Hausfeld route. Good size and pressure. Painting is the most fun part of the car so enjoy
Mine was meticulously sanded with 600 for MANY hours, using squeegees until it was 100% perfect, and I know it was worth my time to get every last little scratch out.
Honestly thought the 320, or 400 wet (400wet cuts the same scratch 320 would) would be more than enough for a high metallic colorful paint job, as those small swirl scratches would not show on a brighter metallic color. I sprayed black, and I had the time to do the extra mile on the prep, so I did all that I could to make it perfect.
There is no issues with adhesion from the 600, mine was shiny as glass before I sprayed with sealer / color. A good sealer should be specifically designed for a 600wet scratch, mine wasnt and I had no issues.
Wont 600 be too smooth for the paint to stick properly?
600 wet is perfect before colour. Industry standard over here to use it. Also a light black guide coat wouldn't go astray to make sure you get it dead smooth.
I sand 320 and 400 dry to rip through the rougher spots and then wetsand it with the 600. 600 CANT dry sand as it will clog up fast.
Be sure you are allowing the right time between coats. If you are not in a hurry, give it a day between coats. I had to fix some wrinkling in a couple of spots because I listened to the can and did a recoat on the sealer after 20 minutes like the can said... when I sanded out the problems and re-sprayed to fix I let it sit 1 day and then recoated with no problems.
Dont rush, and wipe with a tack cloth before every spray no matter what.


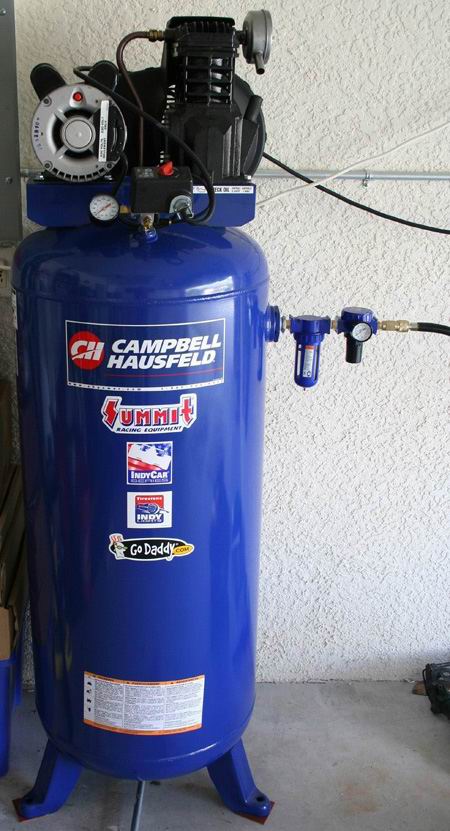


 ! Nice gift
 so you steel my hood scoop design then you wont splash some paint on my car LOL