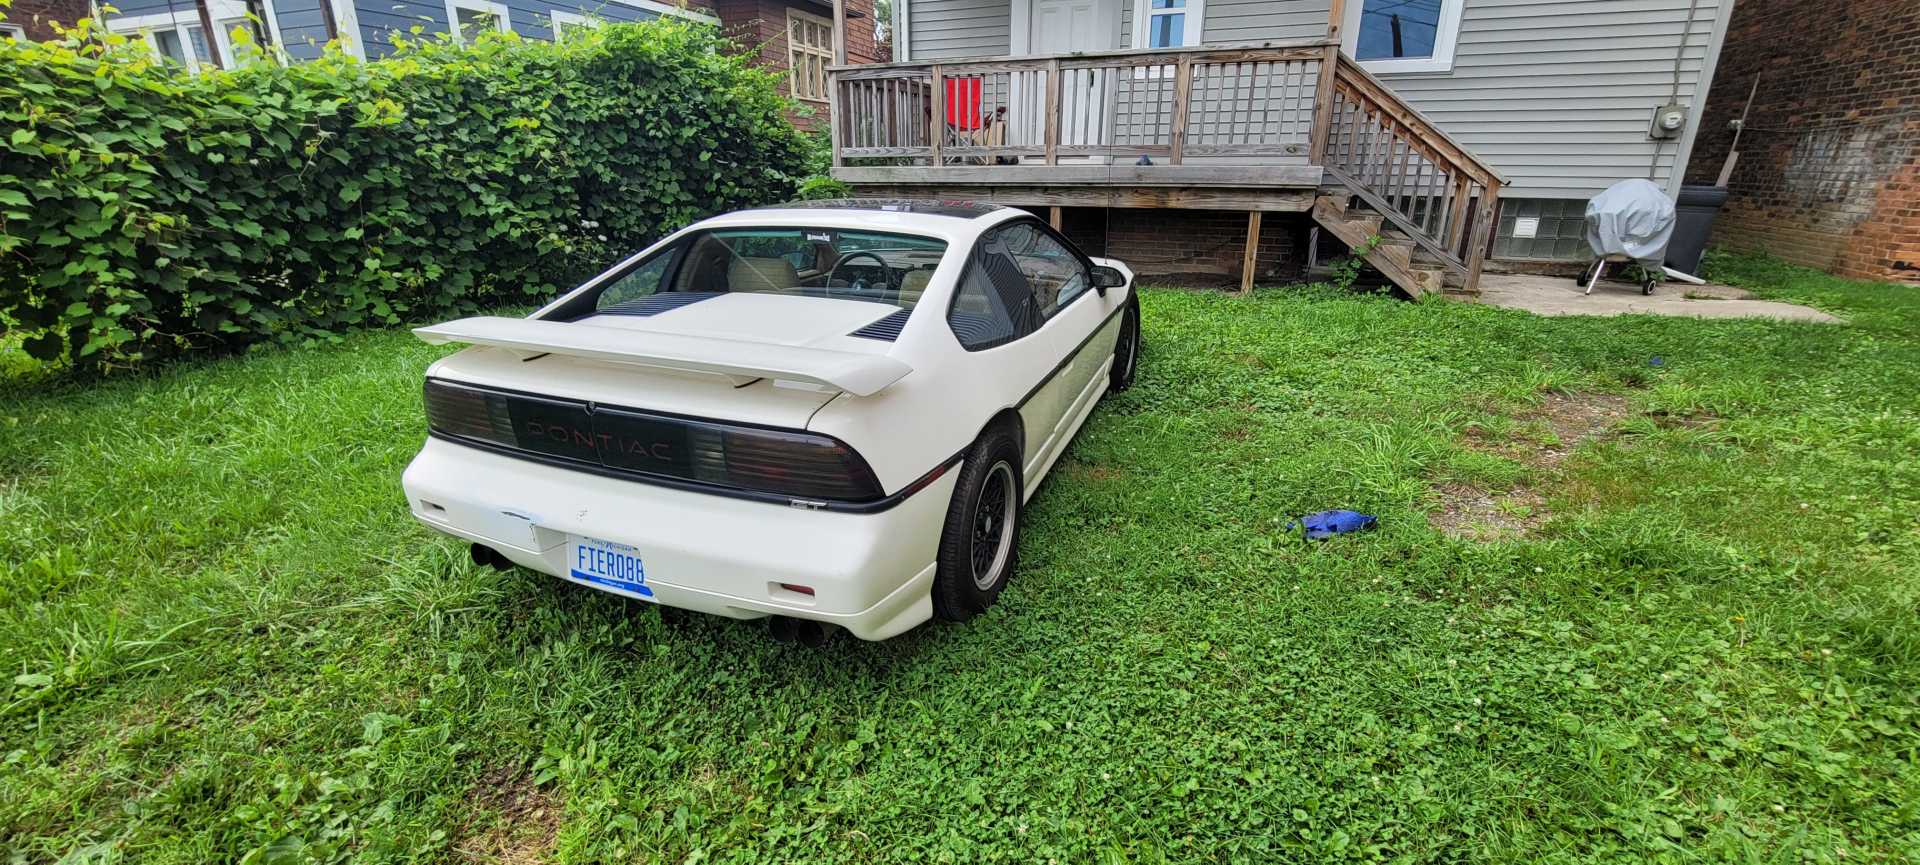
Hey everyone, I've posted a few questions on here as I'm a relatively new Fiero owner and now made enough progress on my car to warrant a build thread (and maybe having one will keep me progressing). I was inspired to get a Fiero from seeing a few youtube videos on it. The background on my car is quite vague, but I purchased it in April 2021 from the previous owner in Ohio with 62k miles on the odometer. He owned it for 10 years, and after seeing the title, realized he only had driven ~250 miles in the ten years he owned it. The interior was very clean other than the typical glue oozing out of the steering wheel.
I towed it 6 hours home and began to do the typical maintenance items: oil change, brake fluid flush, new tires, fuel filter change, spark plugs, transmission fluid change, and a few other things. I got worried when it hesitated to start longer than I expected, but it eventually did but immediately would die. After some investigation and reading this forum I ordered The Fiero Store (TFS) stainless vacuum lines as that was a possible culprit. Got those installed and seemed to have the same issue where it would stall out, looked at the IACV and throttle body and cleaned those out as best as possible despite both looking clean. I decided to try giving a small amount of throttle input after starting to attempt at keeping it alive, to my surprise it did keep it from stalling. After keeping it alive for 15 minutes it was able to idle with a large swing in the RPMs. Long story short, it ended up having a swinging idle and would sometimes backfire which I struggled to diagnose but I was able to put a couple hundred miles on it trying to enjoy the car as it was. I also noticed a lot more yaw under throttle and braking events than feels intended.
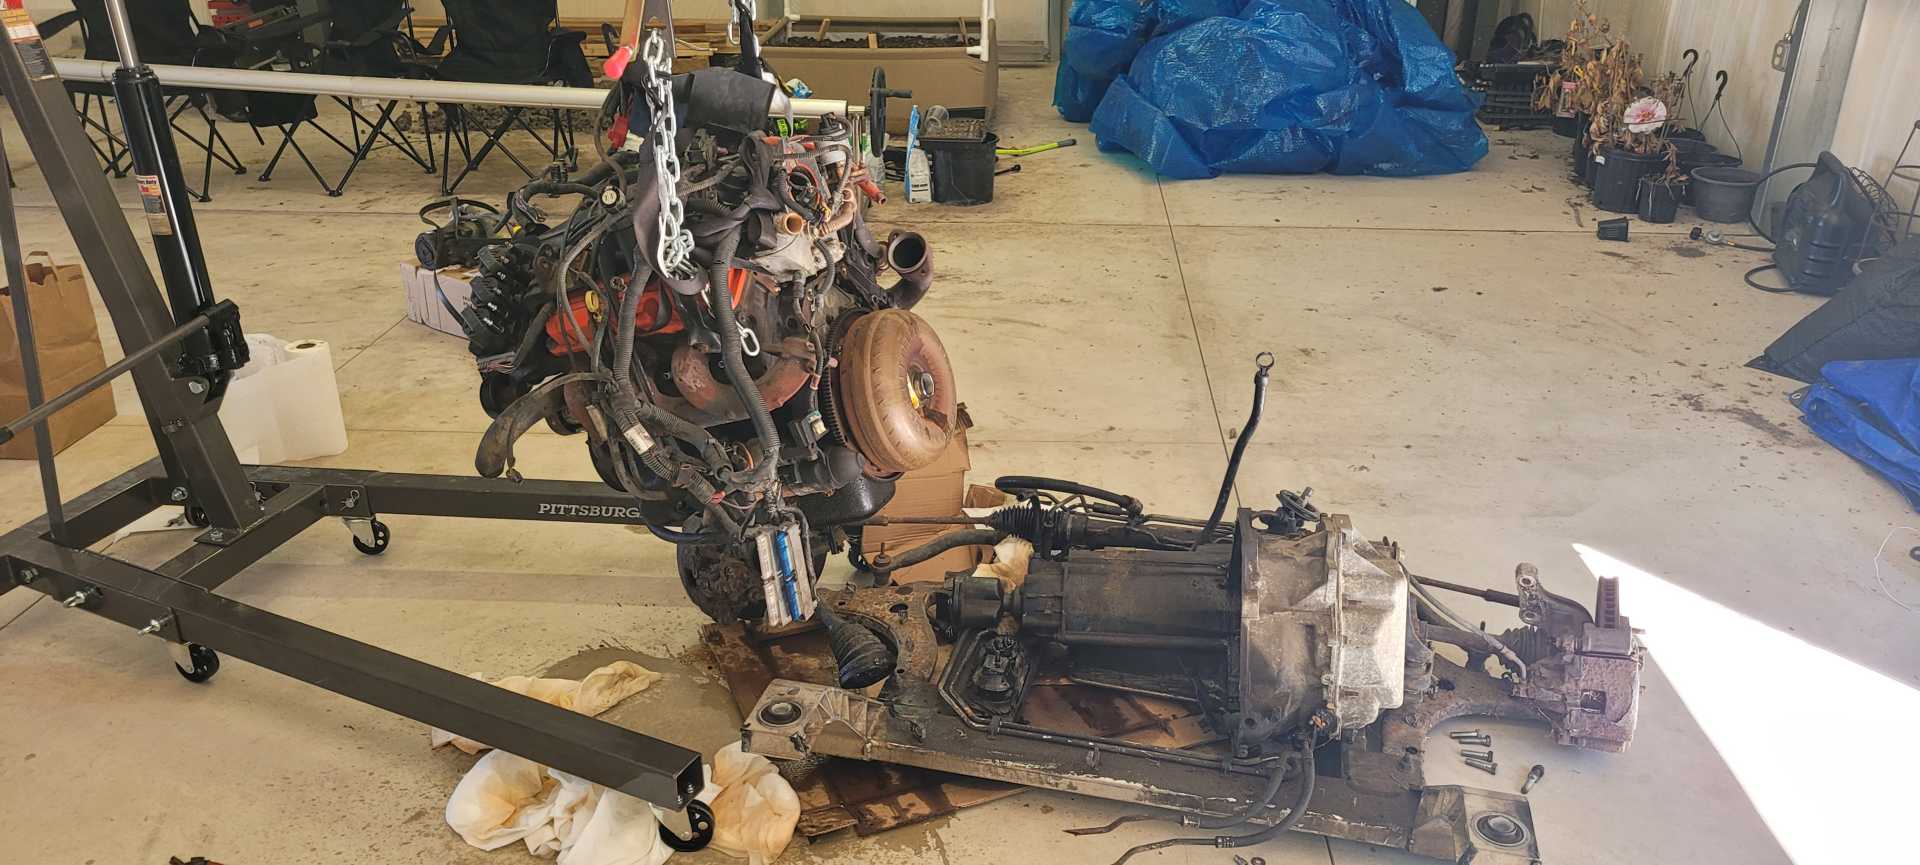
The solution I came up with to the engine troubles was to look into a 3800 swap. Lots of builds on here documenting it and great videos from LostNotForgotton and FieroAustin. At the same time, I decided to also do a steering/suspension restoration with a lot of items from TFS after being inspired by Ronald (Ronnie) Finger's series where he restores his 1985 2m4. I was able to find a full front subframe out of a 05 Monte Carlo SS with the harness and ECU, unknown mileage and condition for 500 bucks. The weekend after purchasing I was finally able to start dissembly on the donor engine because I decided to do it right and do a full bottom-end rebuild. This is the first time I've been doing any work on a car other than the oil, so I've been cautious with things I haven't been able to find forum posts or videos about.
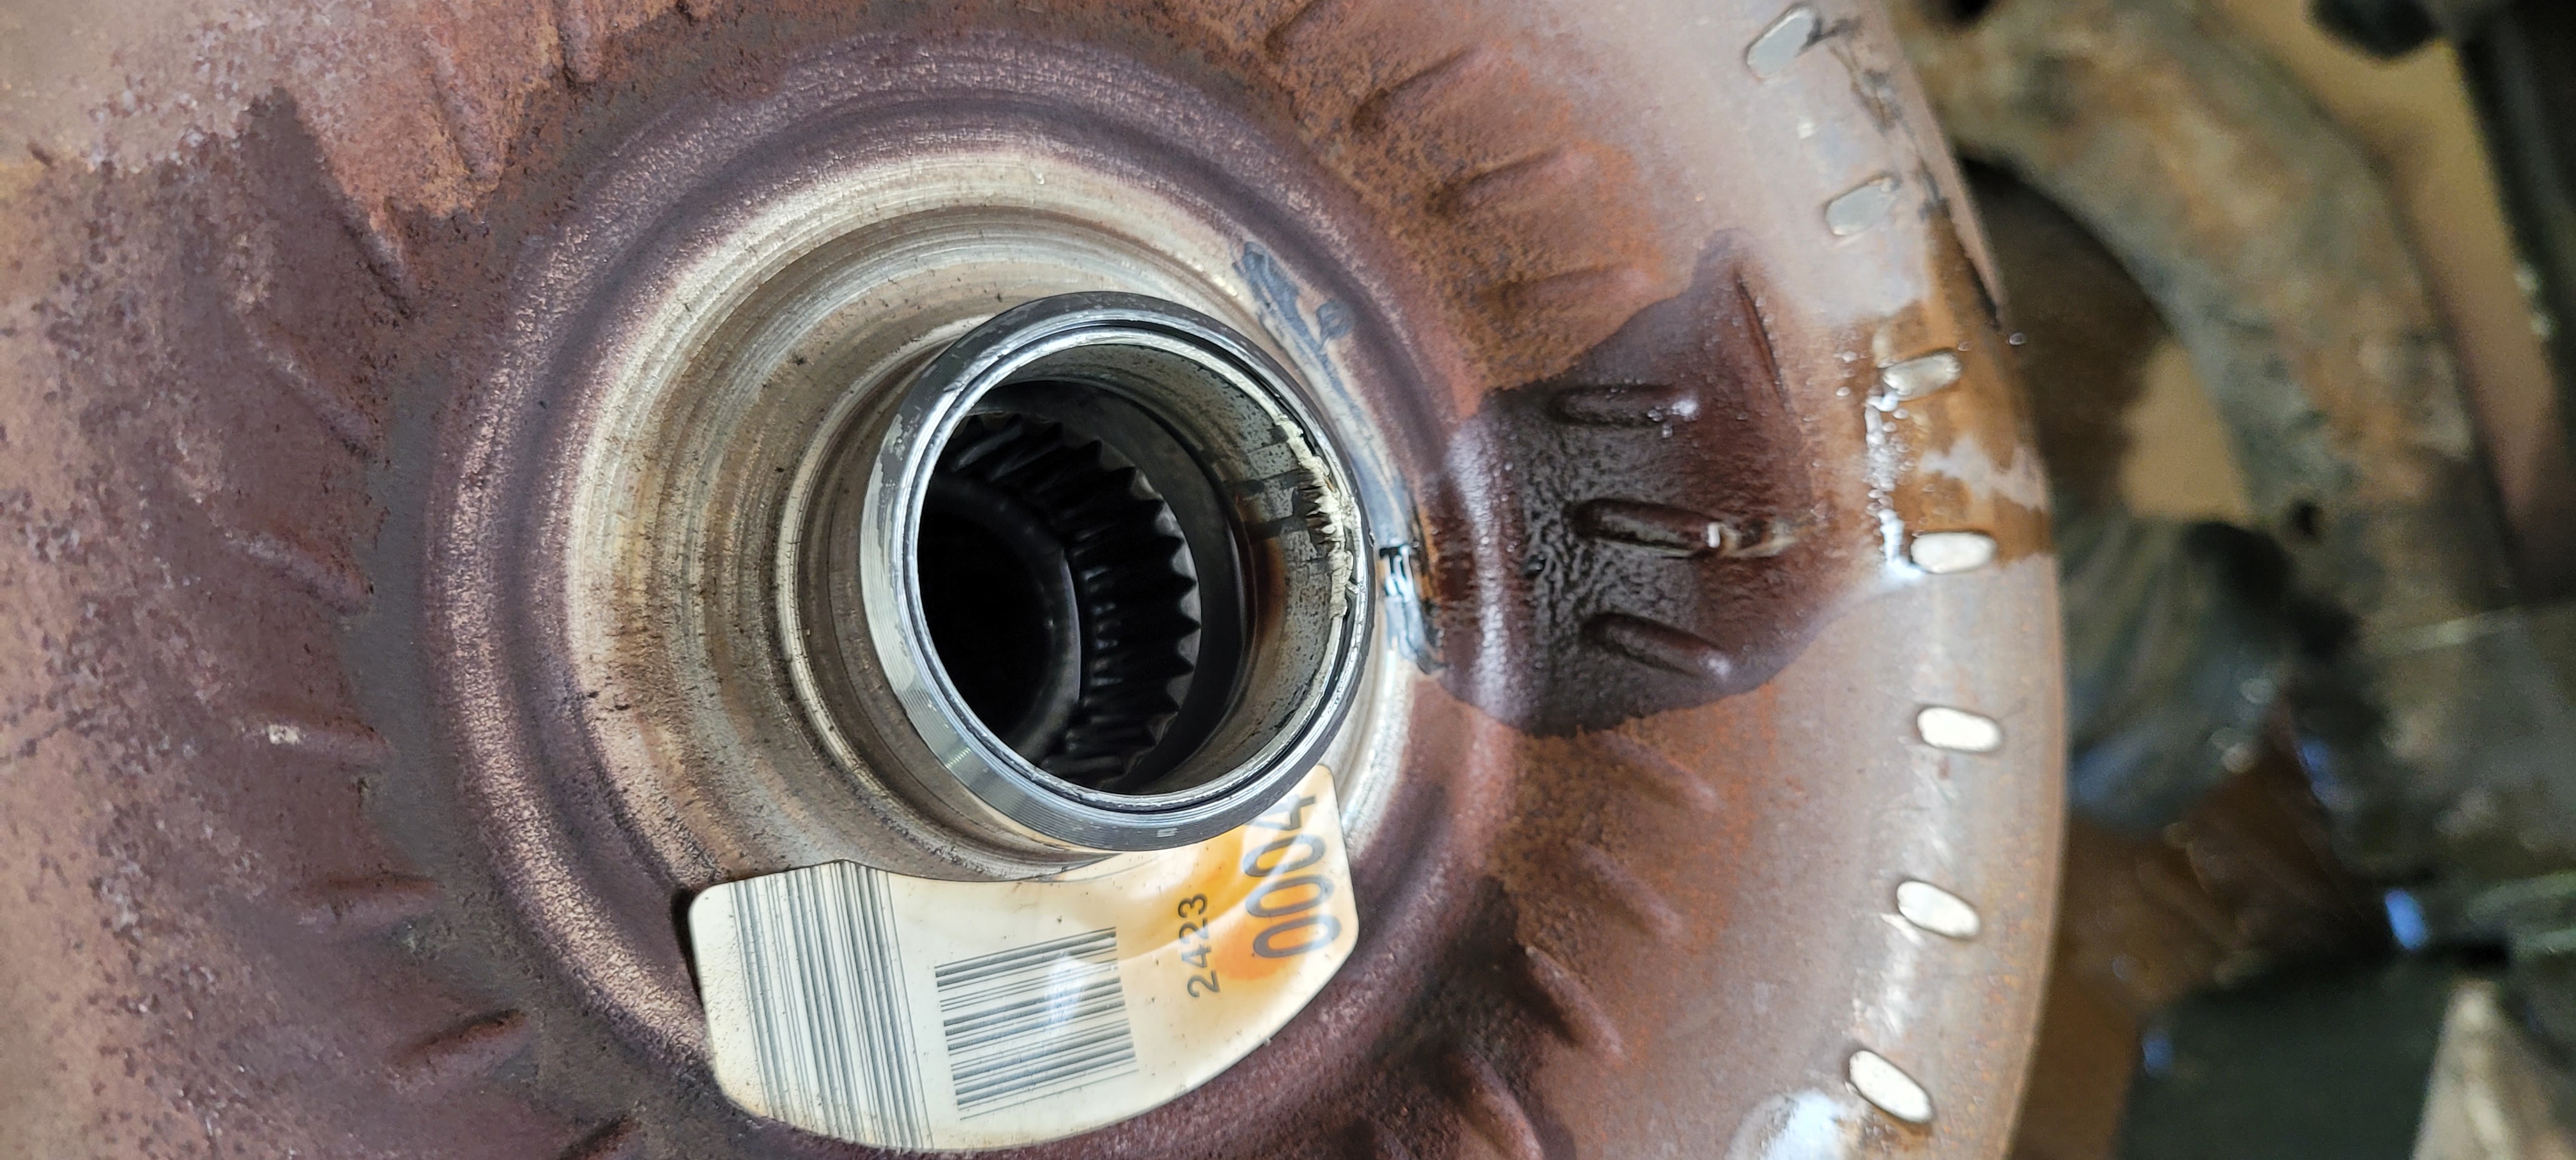
Goof up #1 (Didn't clear the torque converter from the spline and messed up the journal surface):
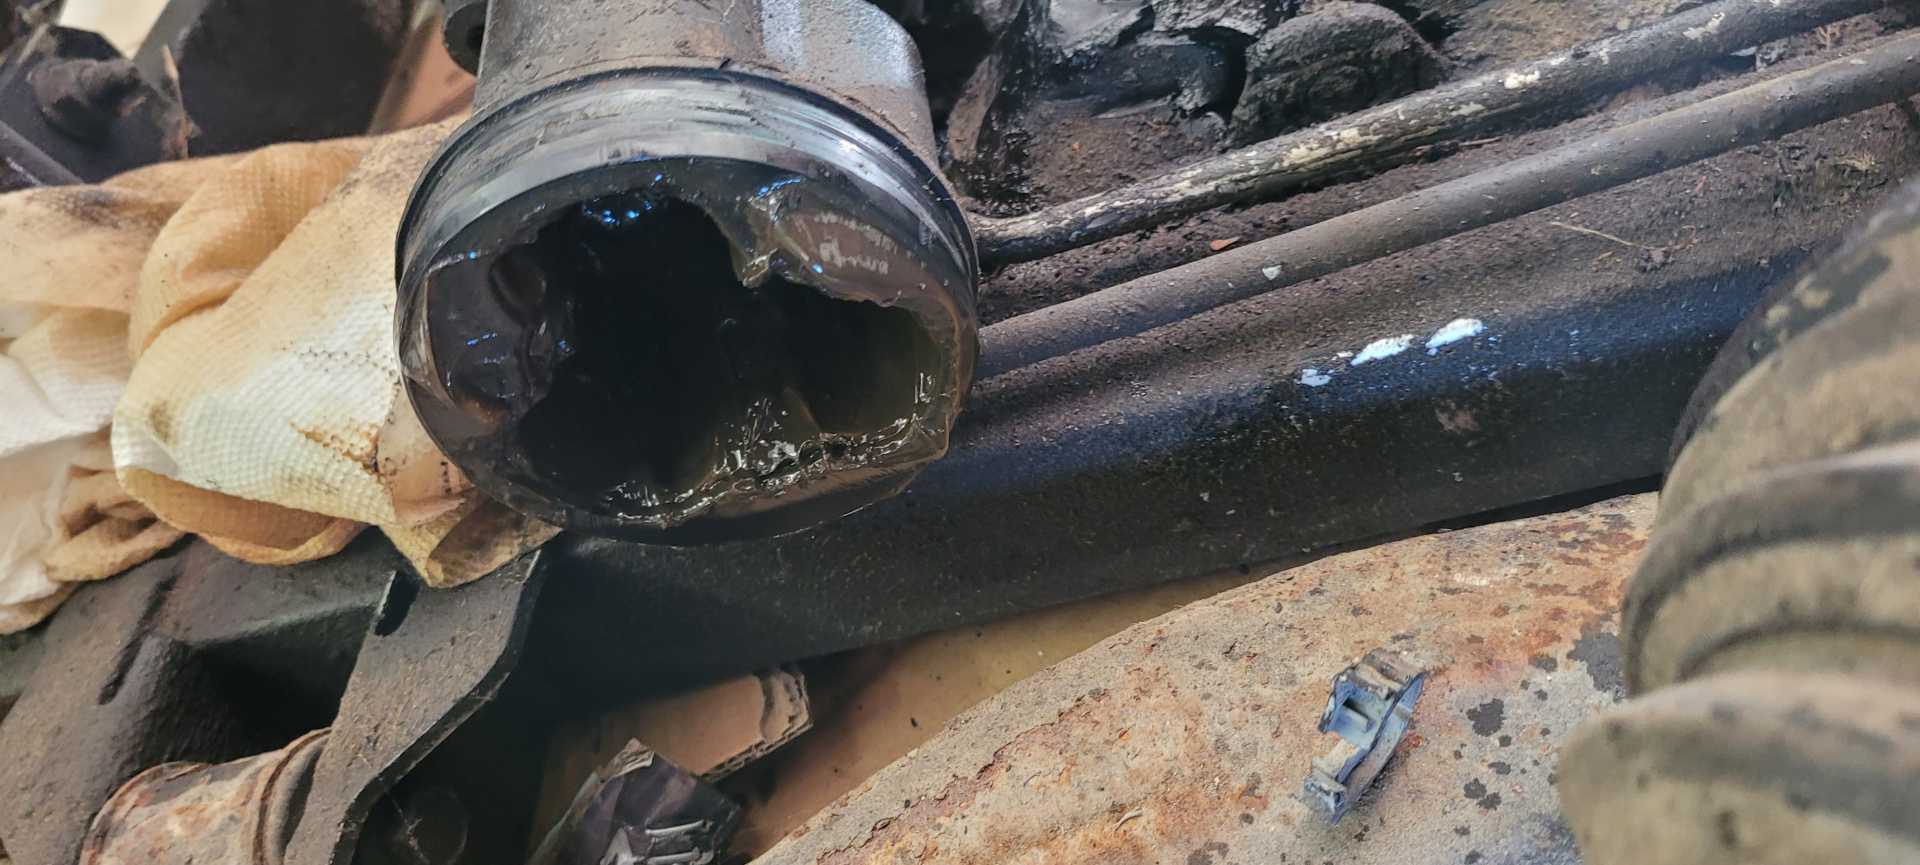
Goof up #2 (Couldn't undo the halfshaft spline from the spindle and pulled the inner halfshaft joint apart on accident) :
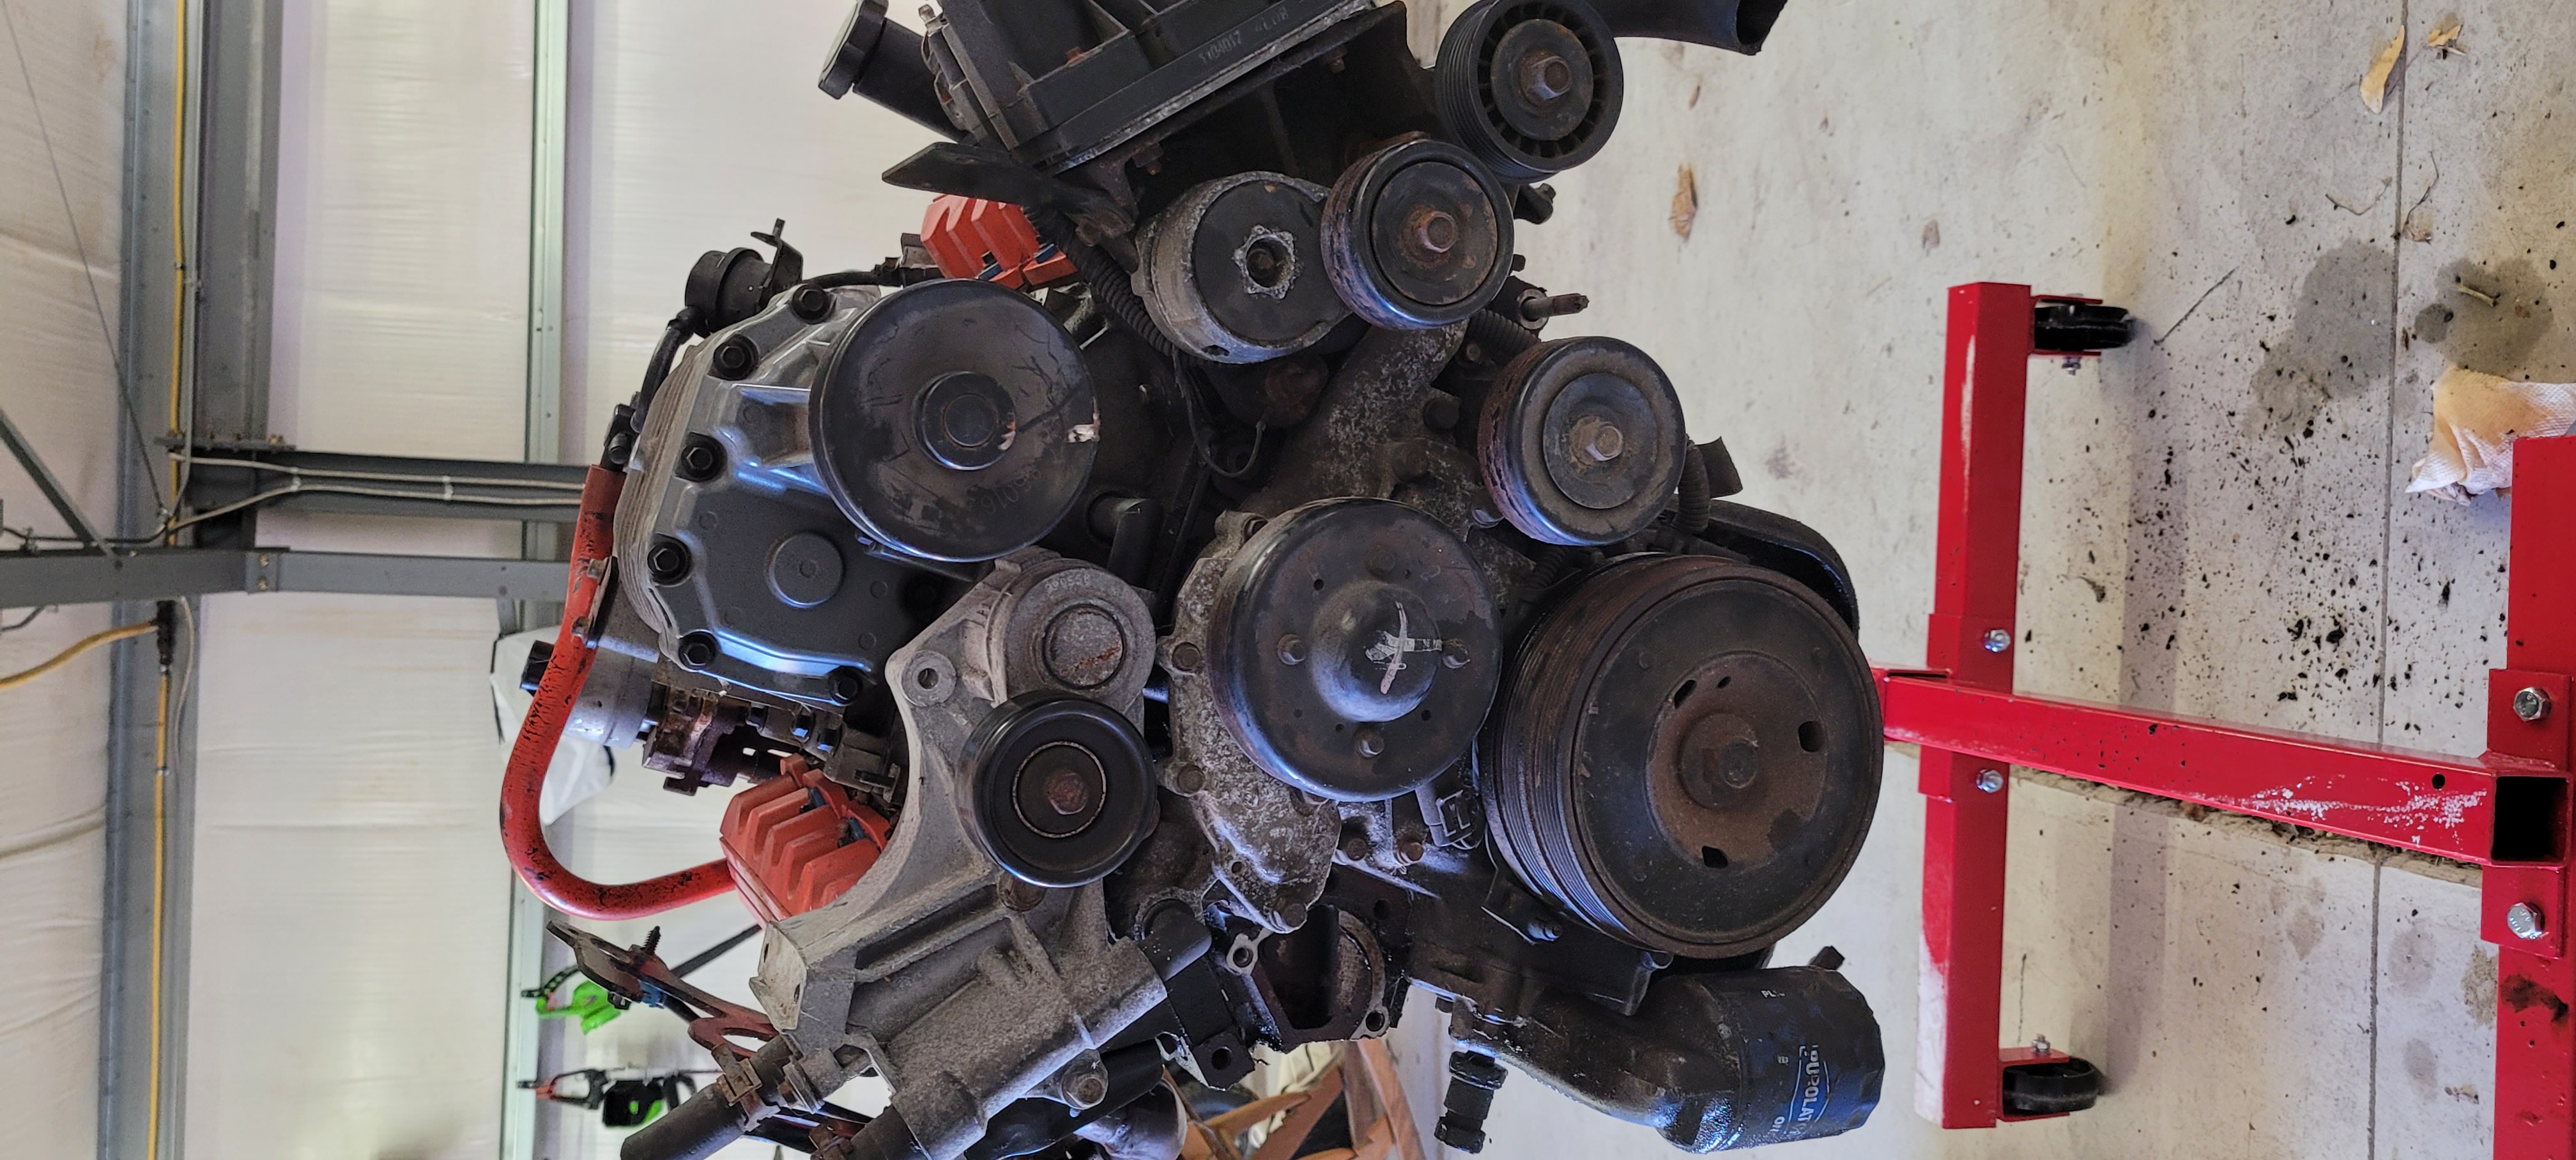
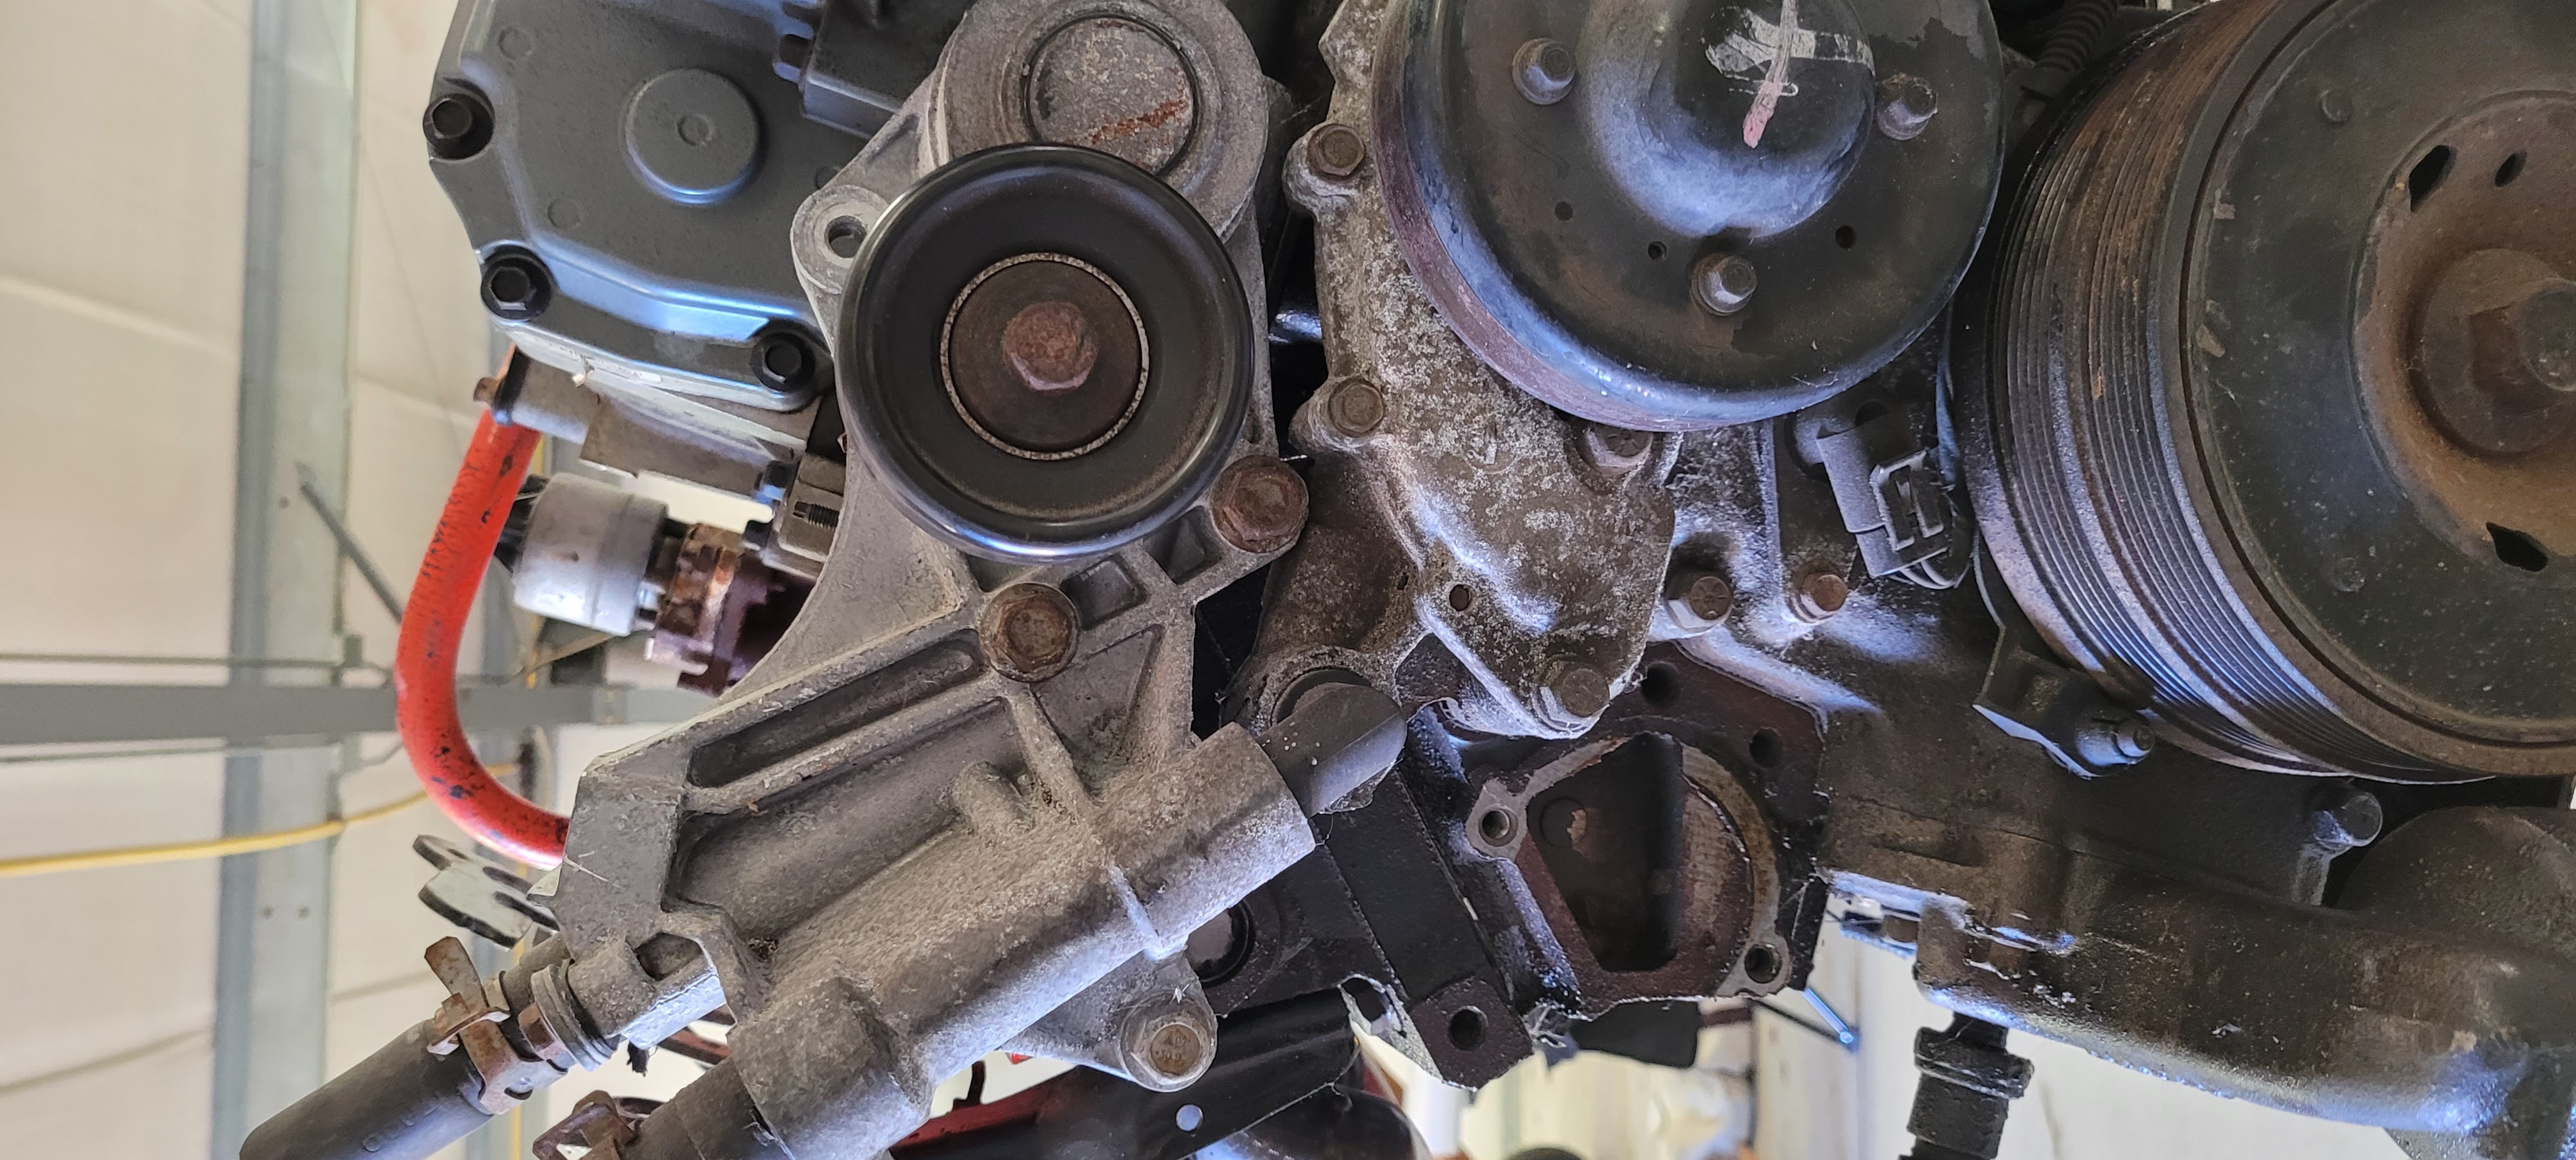
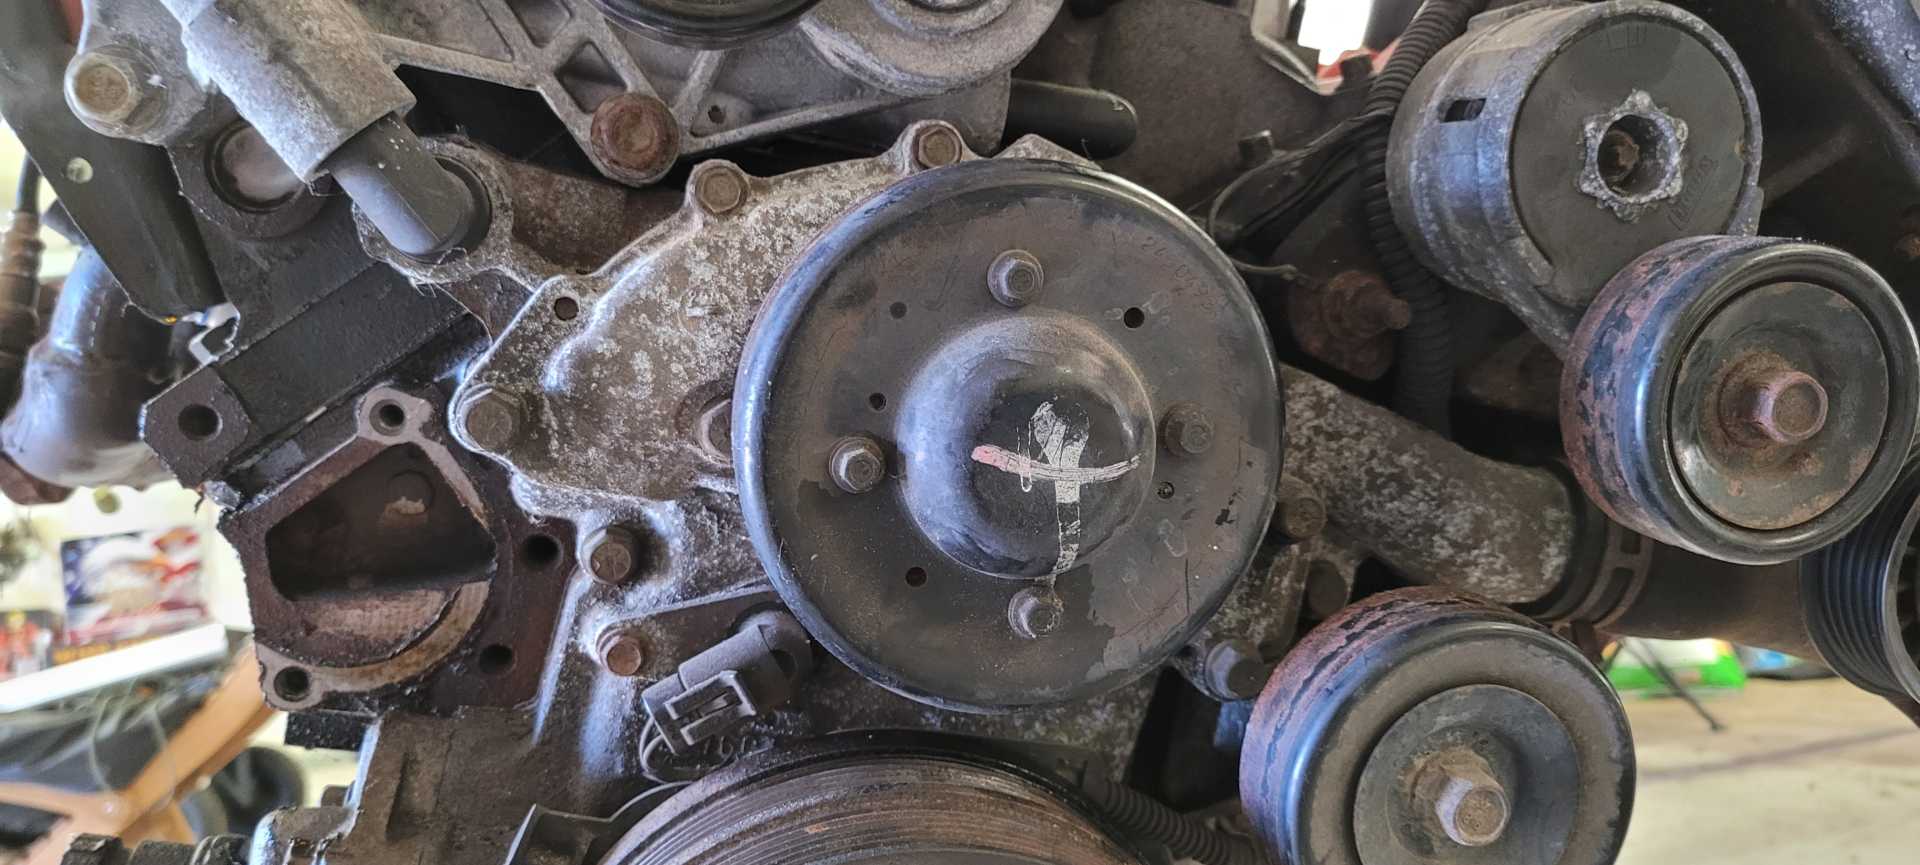
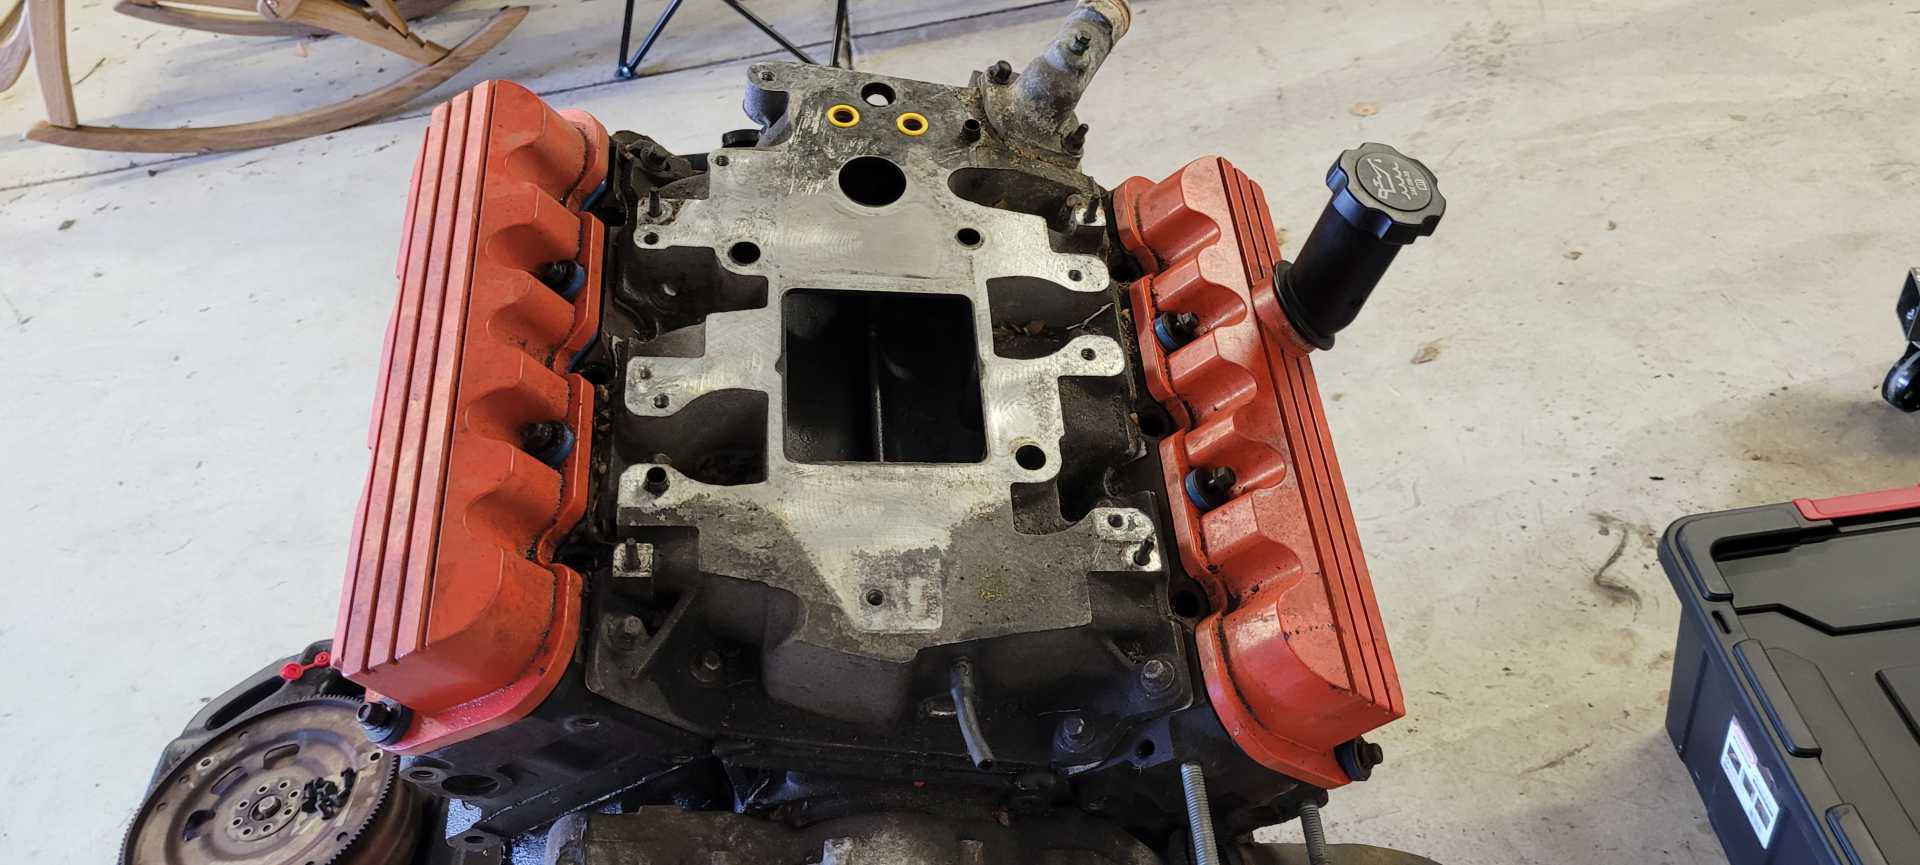
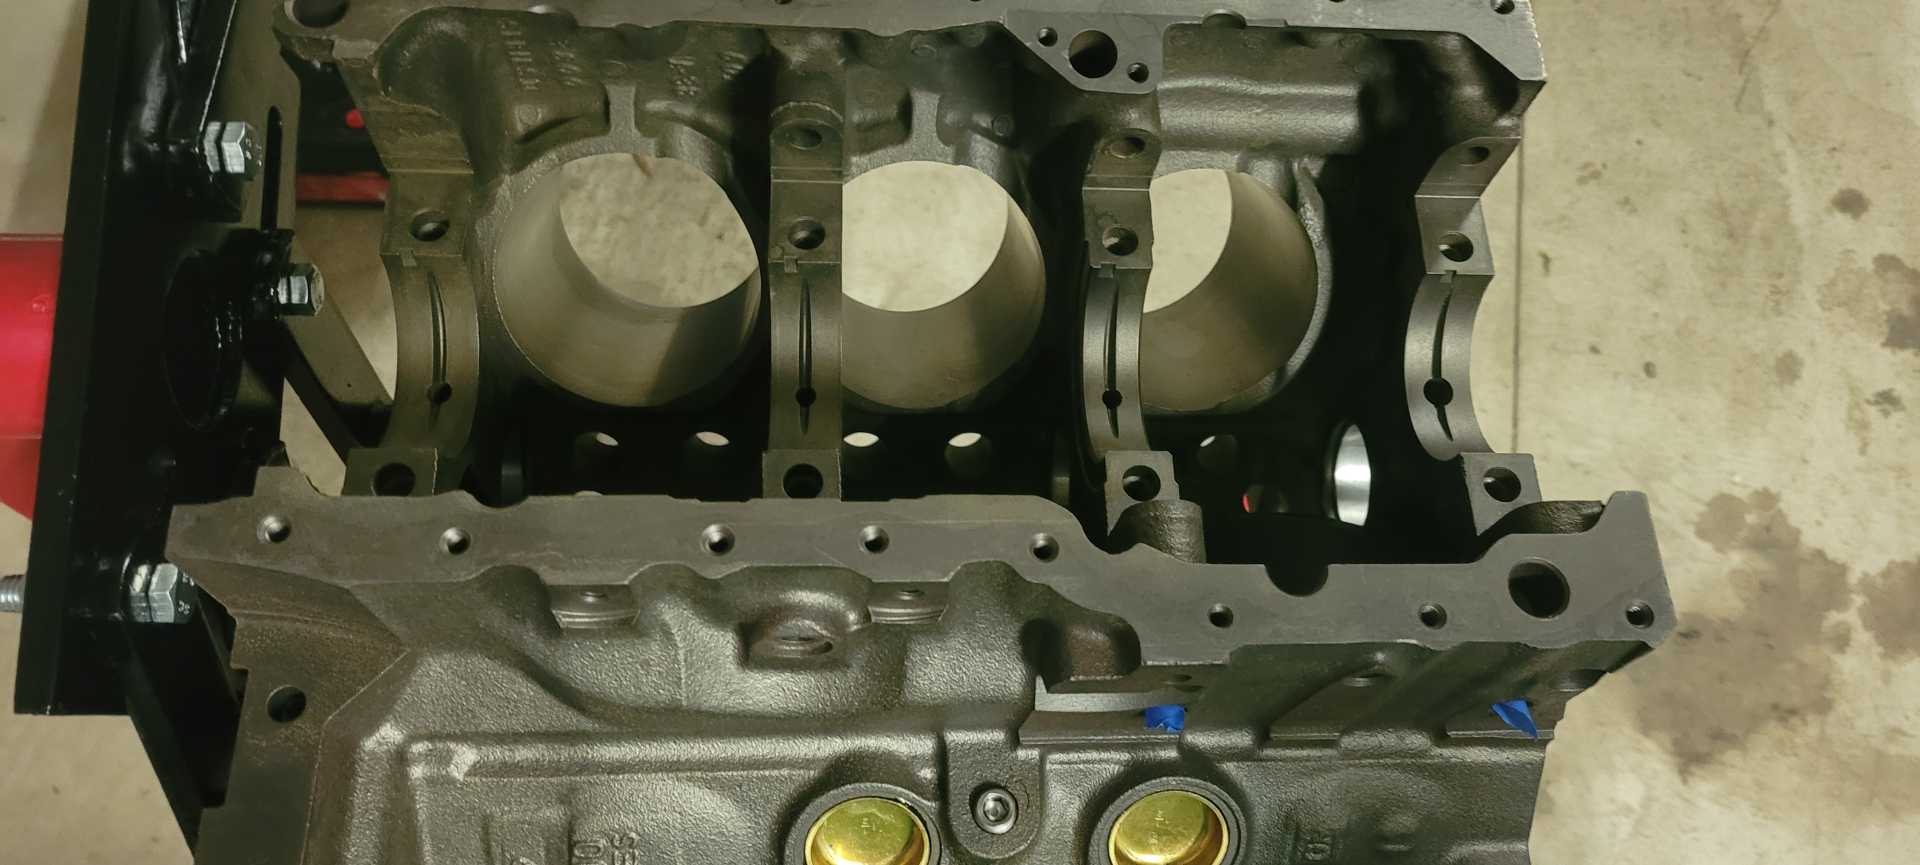
So I finally got the engine on the engine stand and took some reference pictures so I remember on assembly:
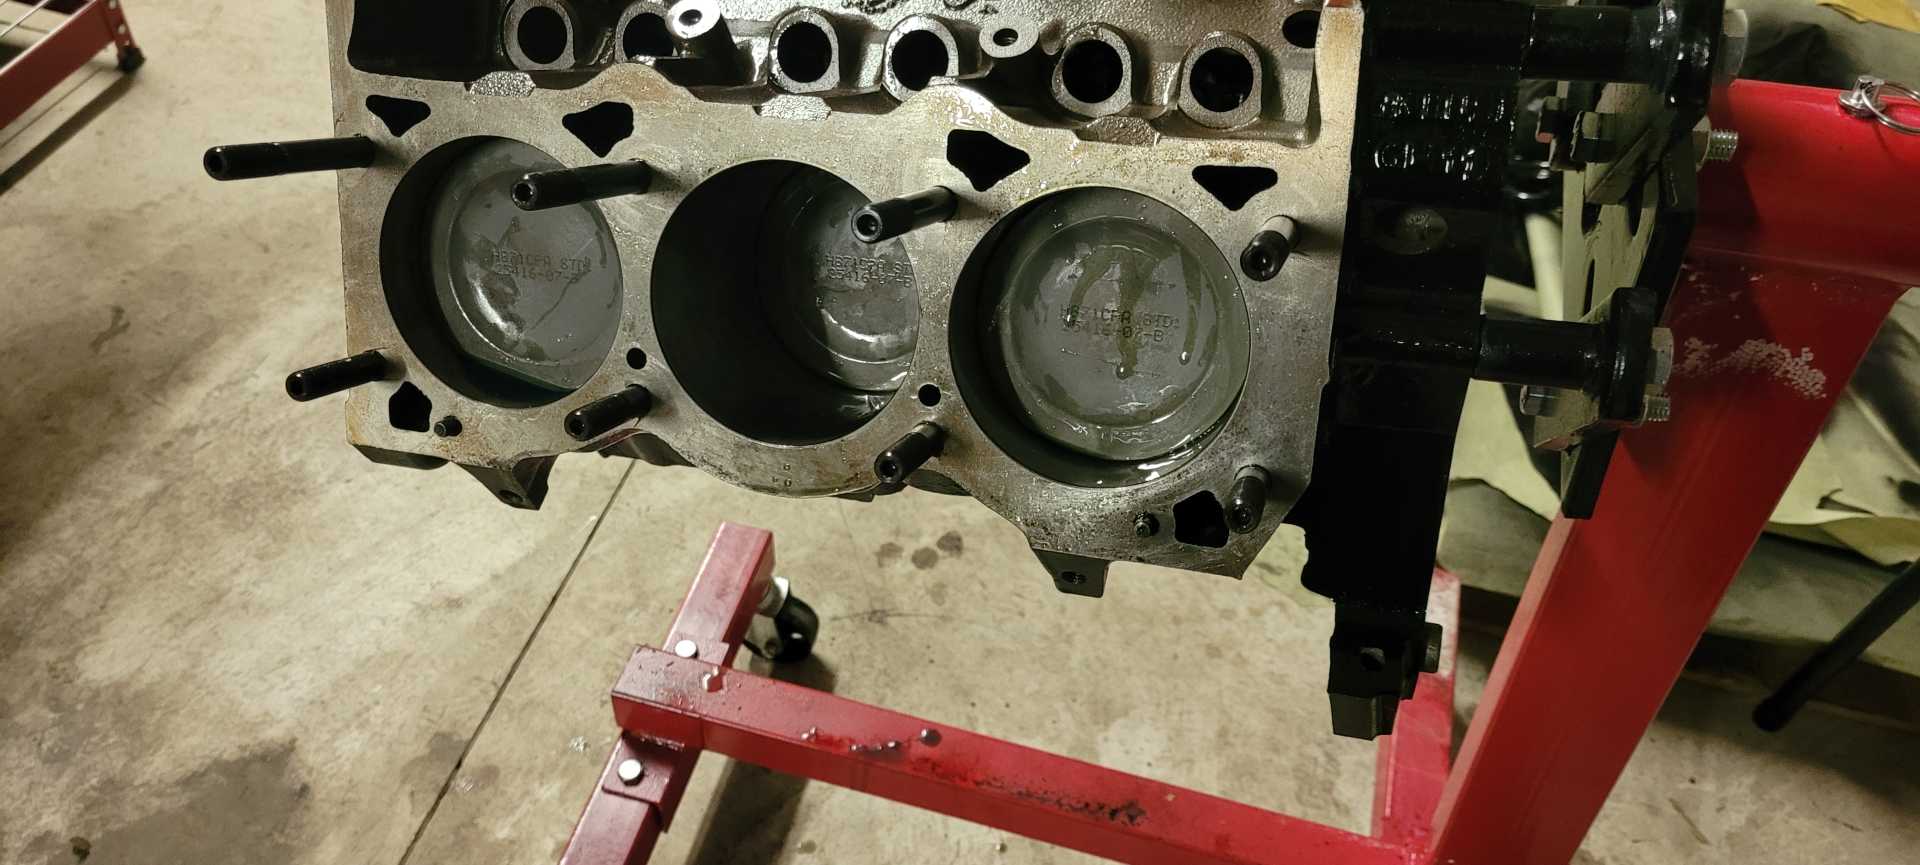
In my opinion the valves and bottom end looked pretty good:
And overall everything else looked good in the 3800:
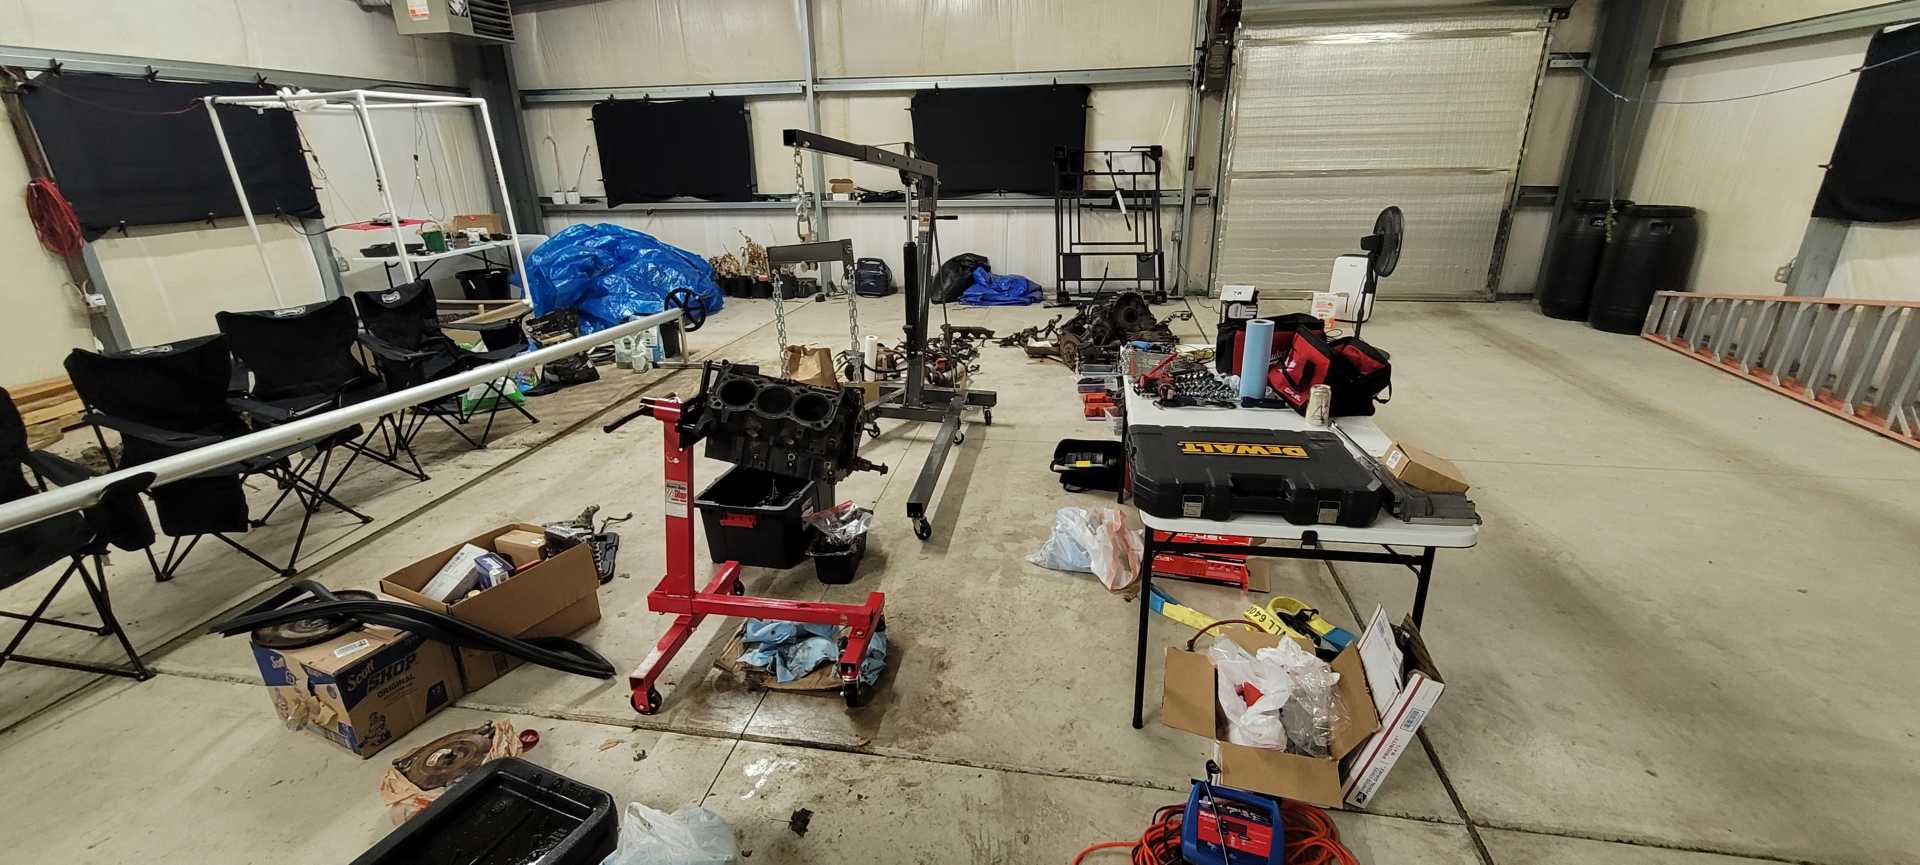
I've been working out of a pole barn that I am renting a section out of from the owner. Big cudos to him for letting my car live there for a few years while I do this.
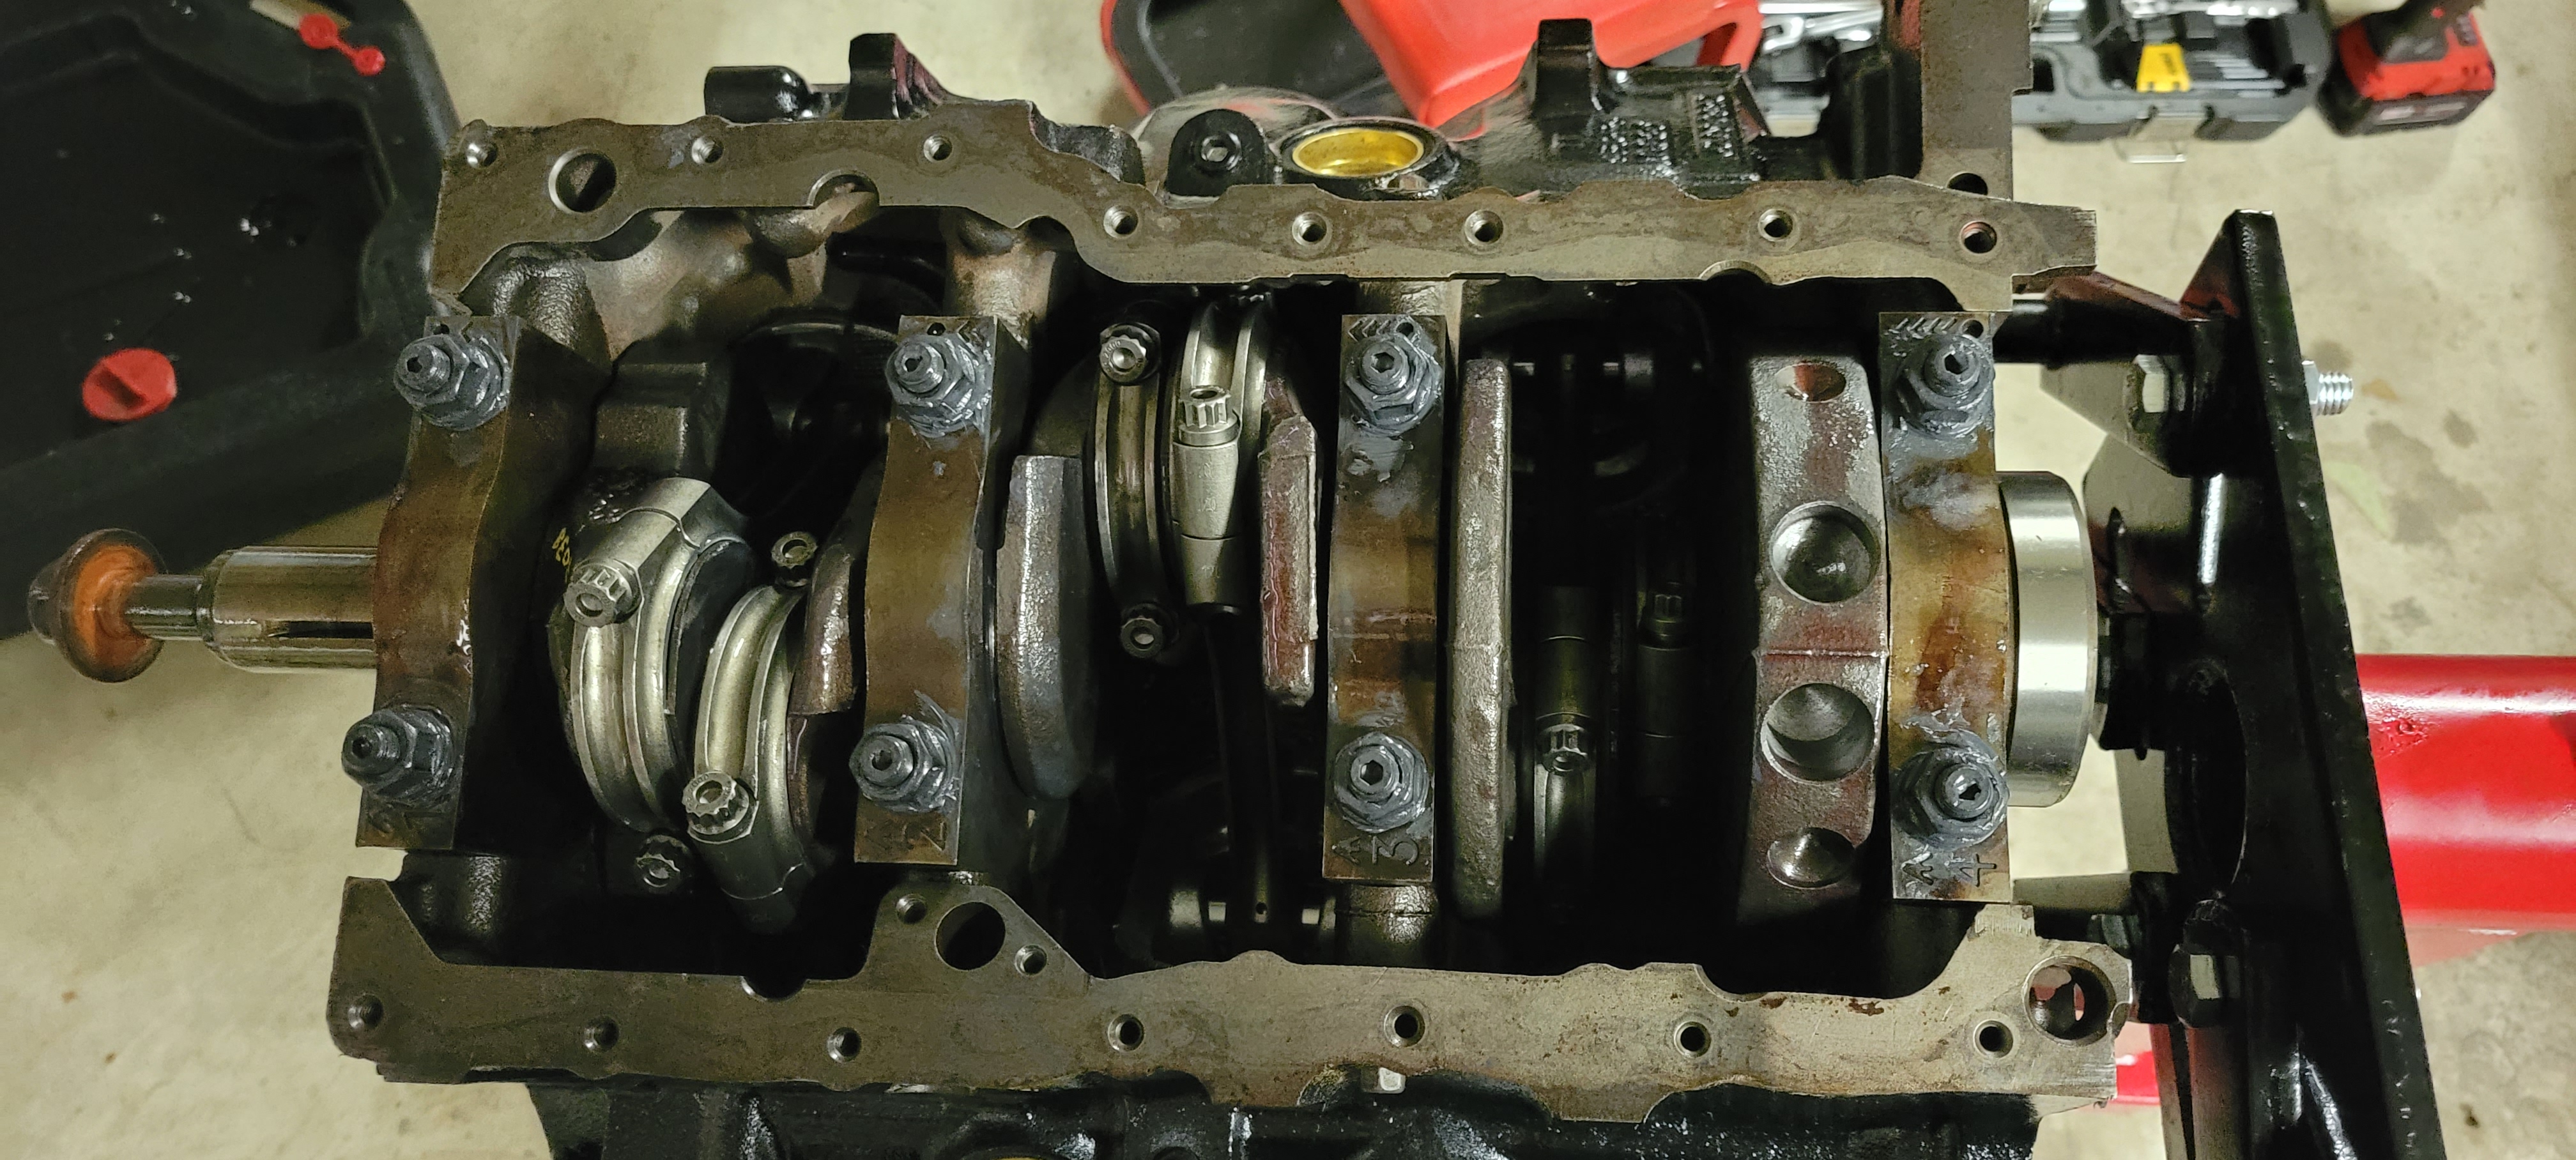
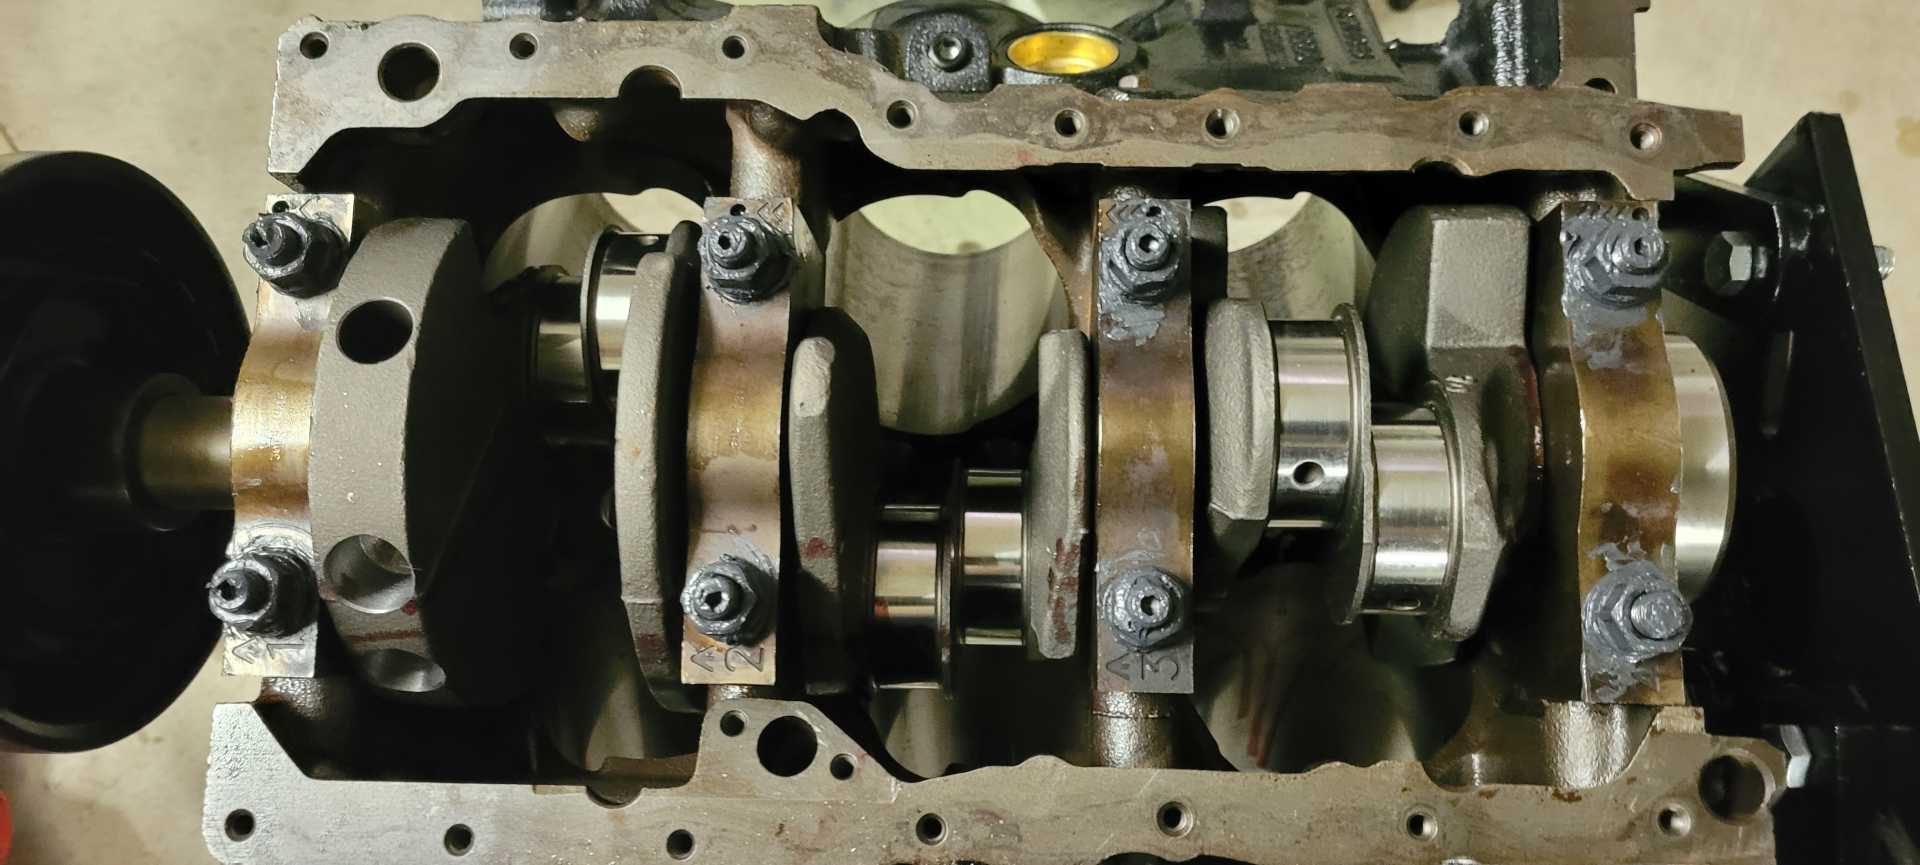
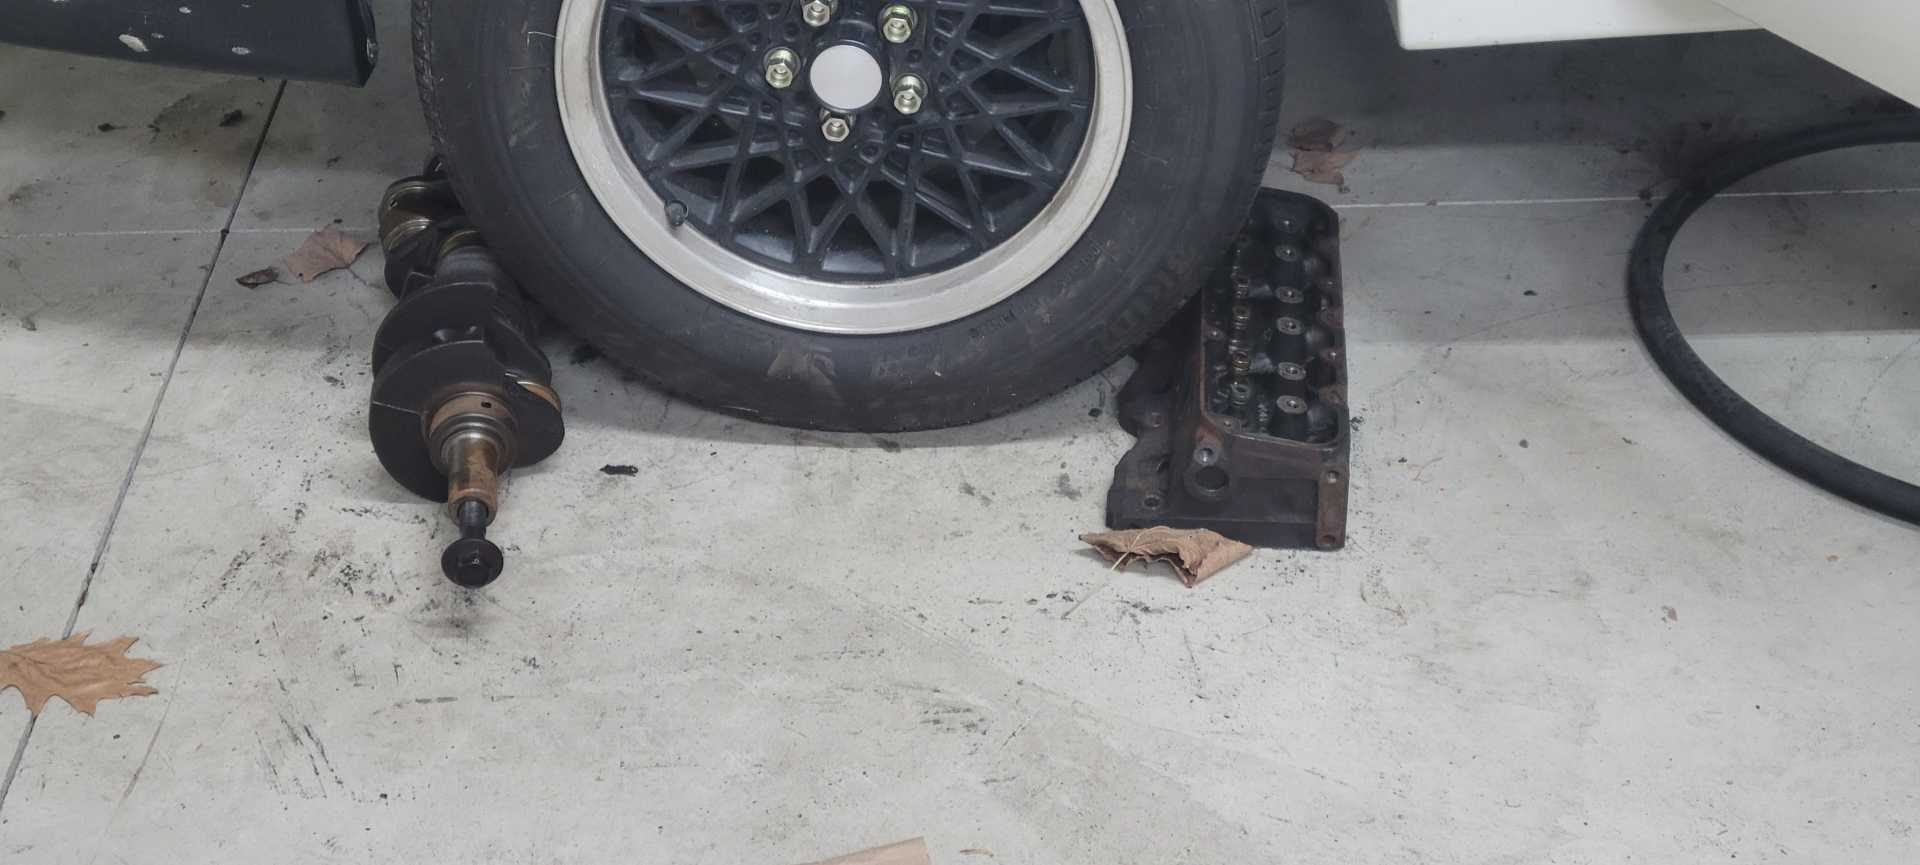
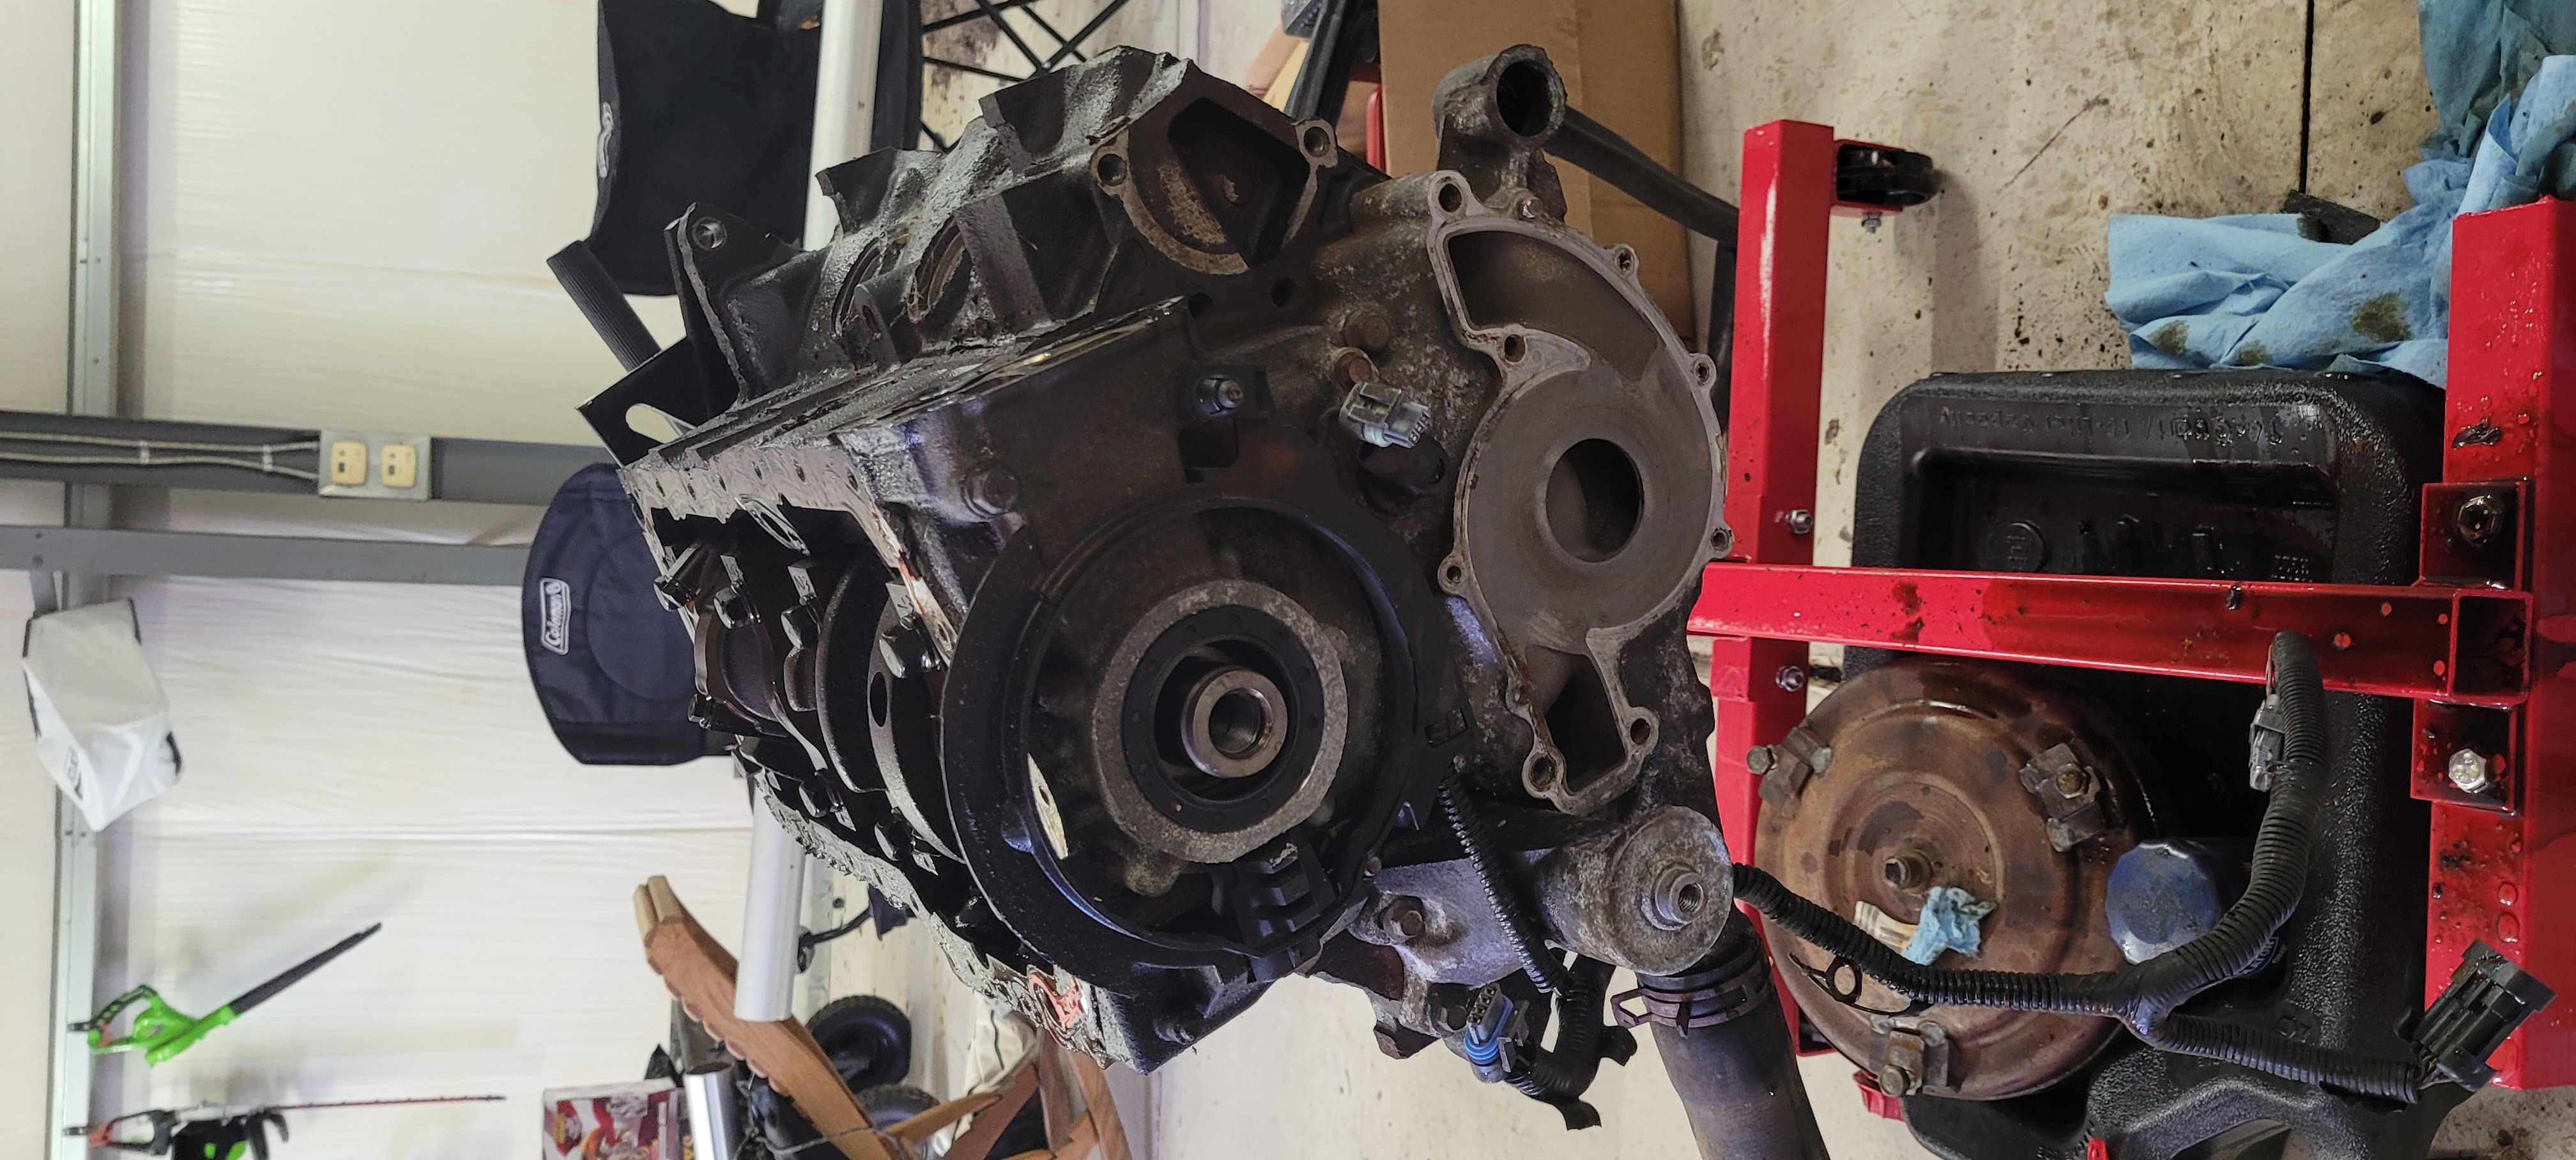
I took the engine completely apart to see what I was working with. Main Bearings looked very good:
Crankshaft also looked excellent:
[In hindsight I would have left the bottom end untouched based on the conditions of the parts, but obviously am glad I opened everything up]
This post will be updated in the coming days, I have made significantly more progress than this first post is showing.
From what I read, it seems that total successful rebuilds of 3800SC engines are difficult. I would just pay close attention to tolerances and torque specs especially on the main bearings. It looks like you have a nice project underway. Good luck with the build . You will love the performance.
------------------ " THE BLACK PARALYZER" -87GT 3800SC Series III engine, custom ZZP /Frozen Boost Intercooler setup, 3.4" Pulley, Northstar TB, LS1 MAF, 3" Spintech/Hedman Exhaust, P-log Manifold, Autolite 104's, MSD wires, Custom CAI, 4T65eHD w. custom axles, Champion Radiator, S10 Brake Booster, HP Tuners VCM Suite. "THE COLUSSUS" 87GT - ALL OUT 3.4L Turbocharged engine, Garrett Hybrid Turbo, MSD ign., modified TH125H " ON THE LOOSE WITHOUT THE JUICE "
Dennis, you'll see when I get more time to get the post created, but I've gone with all new bottom-end components from ZZP. New bearings, crank, cam, pistons, connecting rods. Went fairly all out as a learning experience for me and so I was more confident with diametral clearances and wear through the bearing's PTFE layer. But to those who are reading this in the future, I agree with Dennis that you've got to be careful with just slapping new bearings with an old crank or vice versa.
Hey if you're the guy that messaged me on reddit check your messages. Also I didn't get my mains align honed when I rebuilt my L67 and spun a bearing in about 3k miles. Afterward found people that rebuild them say to always get the mains align honed.
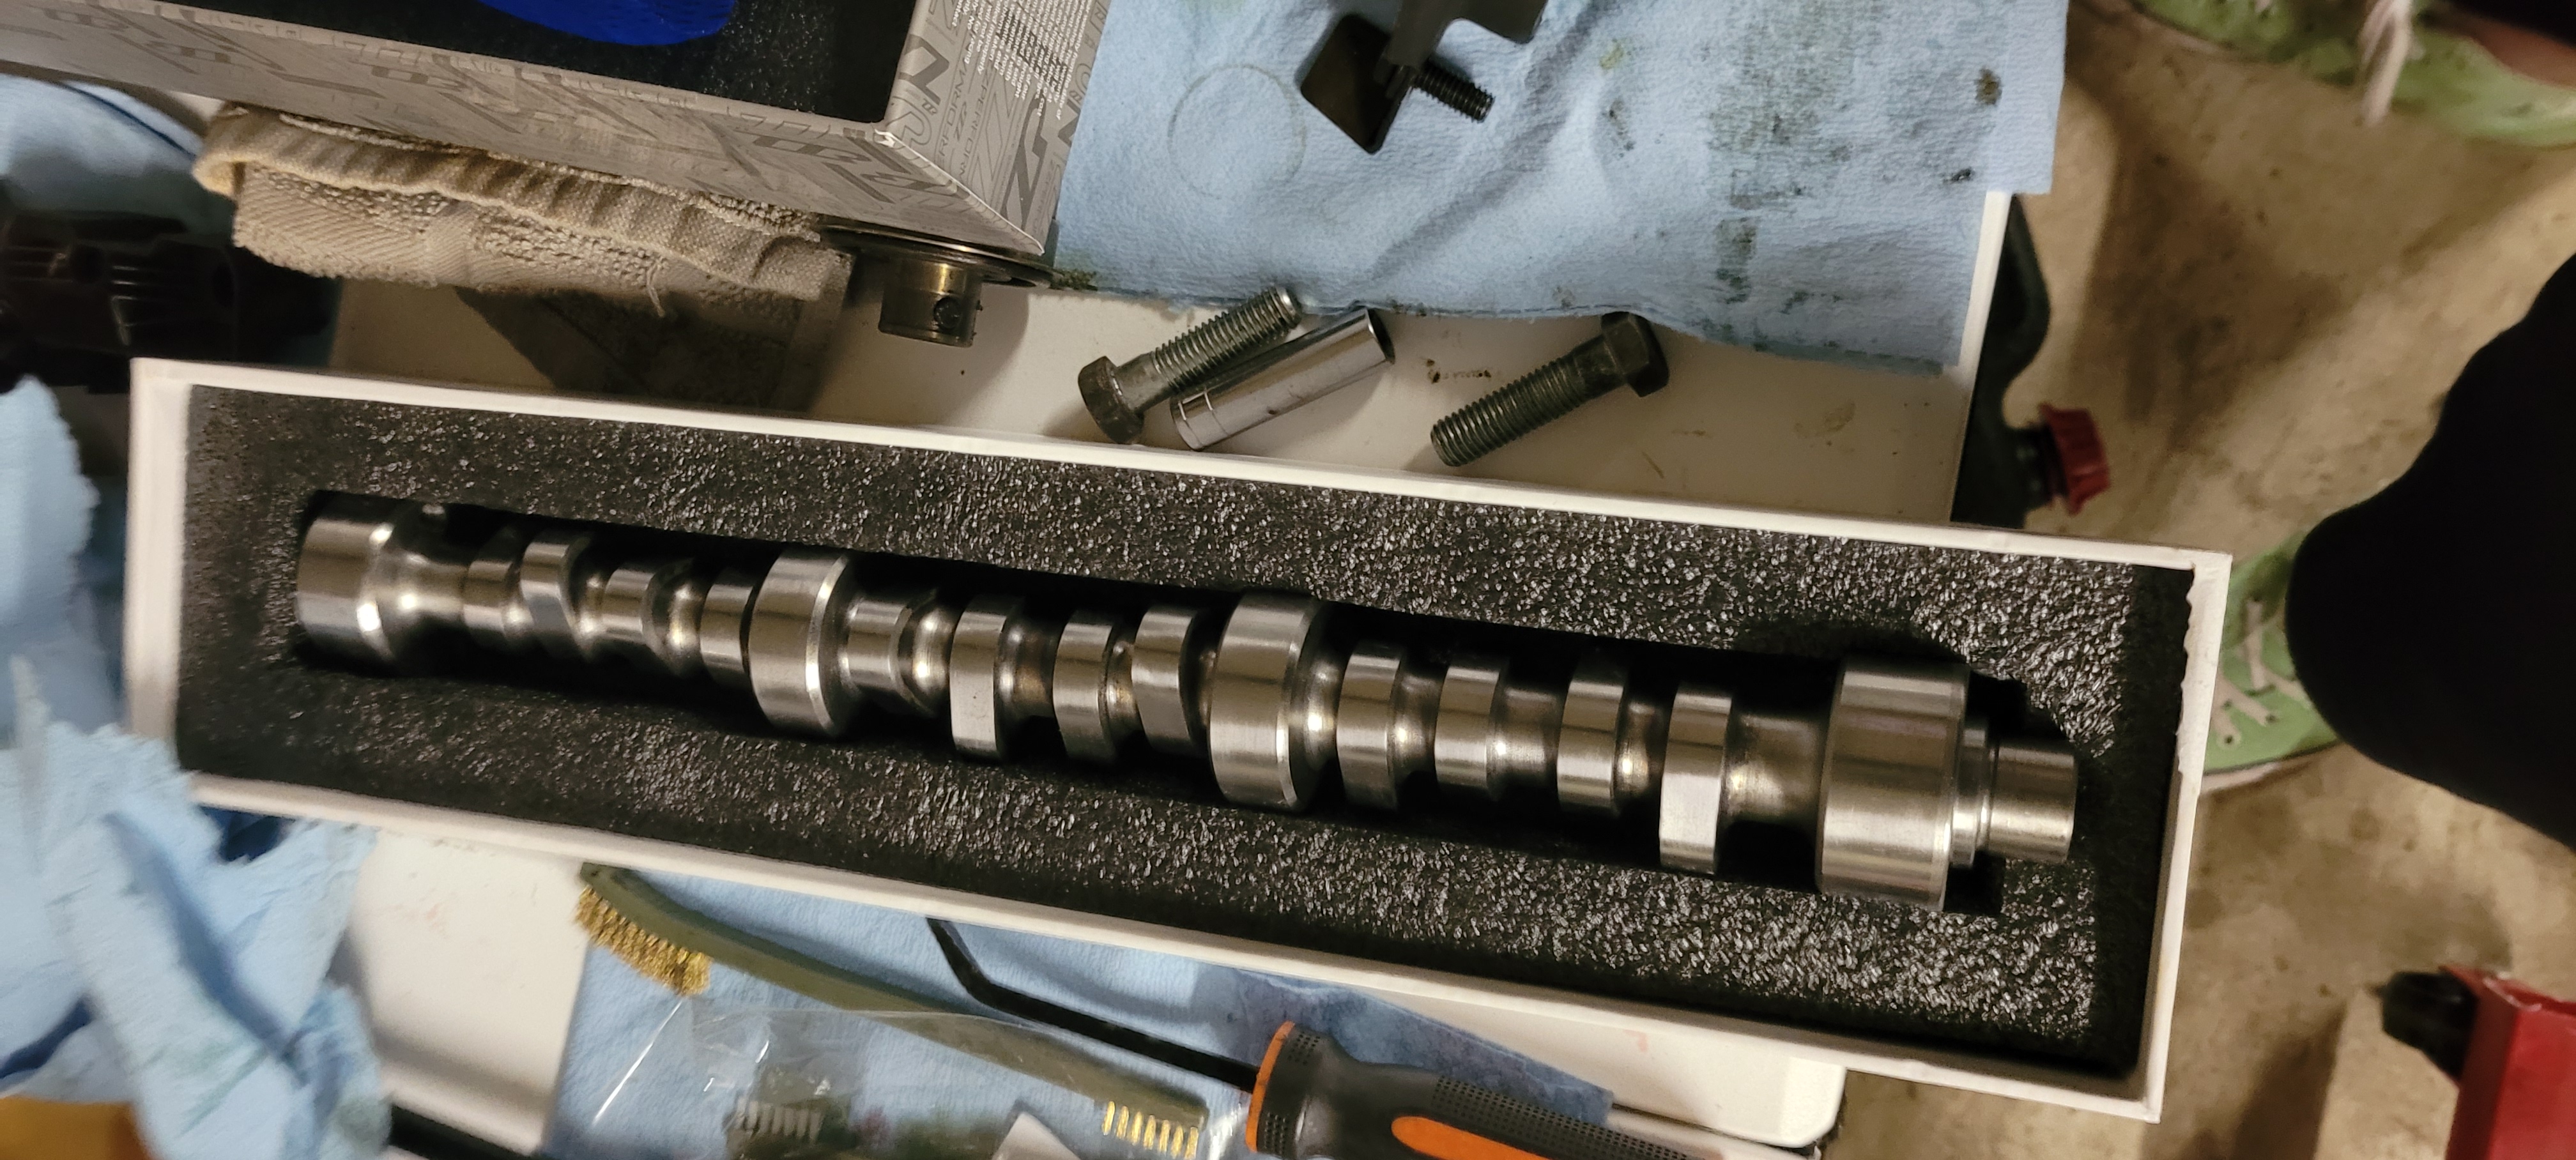
Very shortly after getting the engine apart I had saved enough to buy some engine hardware and get things to my local machine shop. I elected to go with all new bottom end components as a learning opportunity for myself and the lack of confidence in the unknown mileage parts I pulled out.
I bought: ZZP's Remanufactured Crank and Bearing Assembly ZZP's 4340 H-Beam 3800 Connecting Rods ZZP's Federal Mogul Hypereutectic Pistons w/ rings
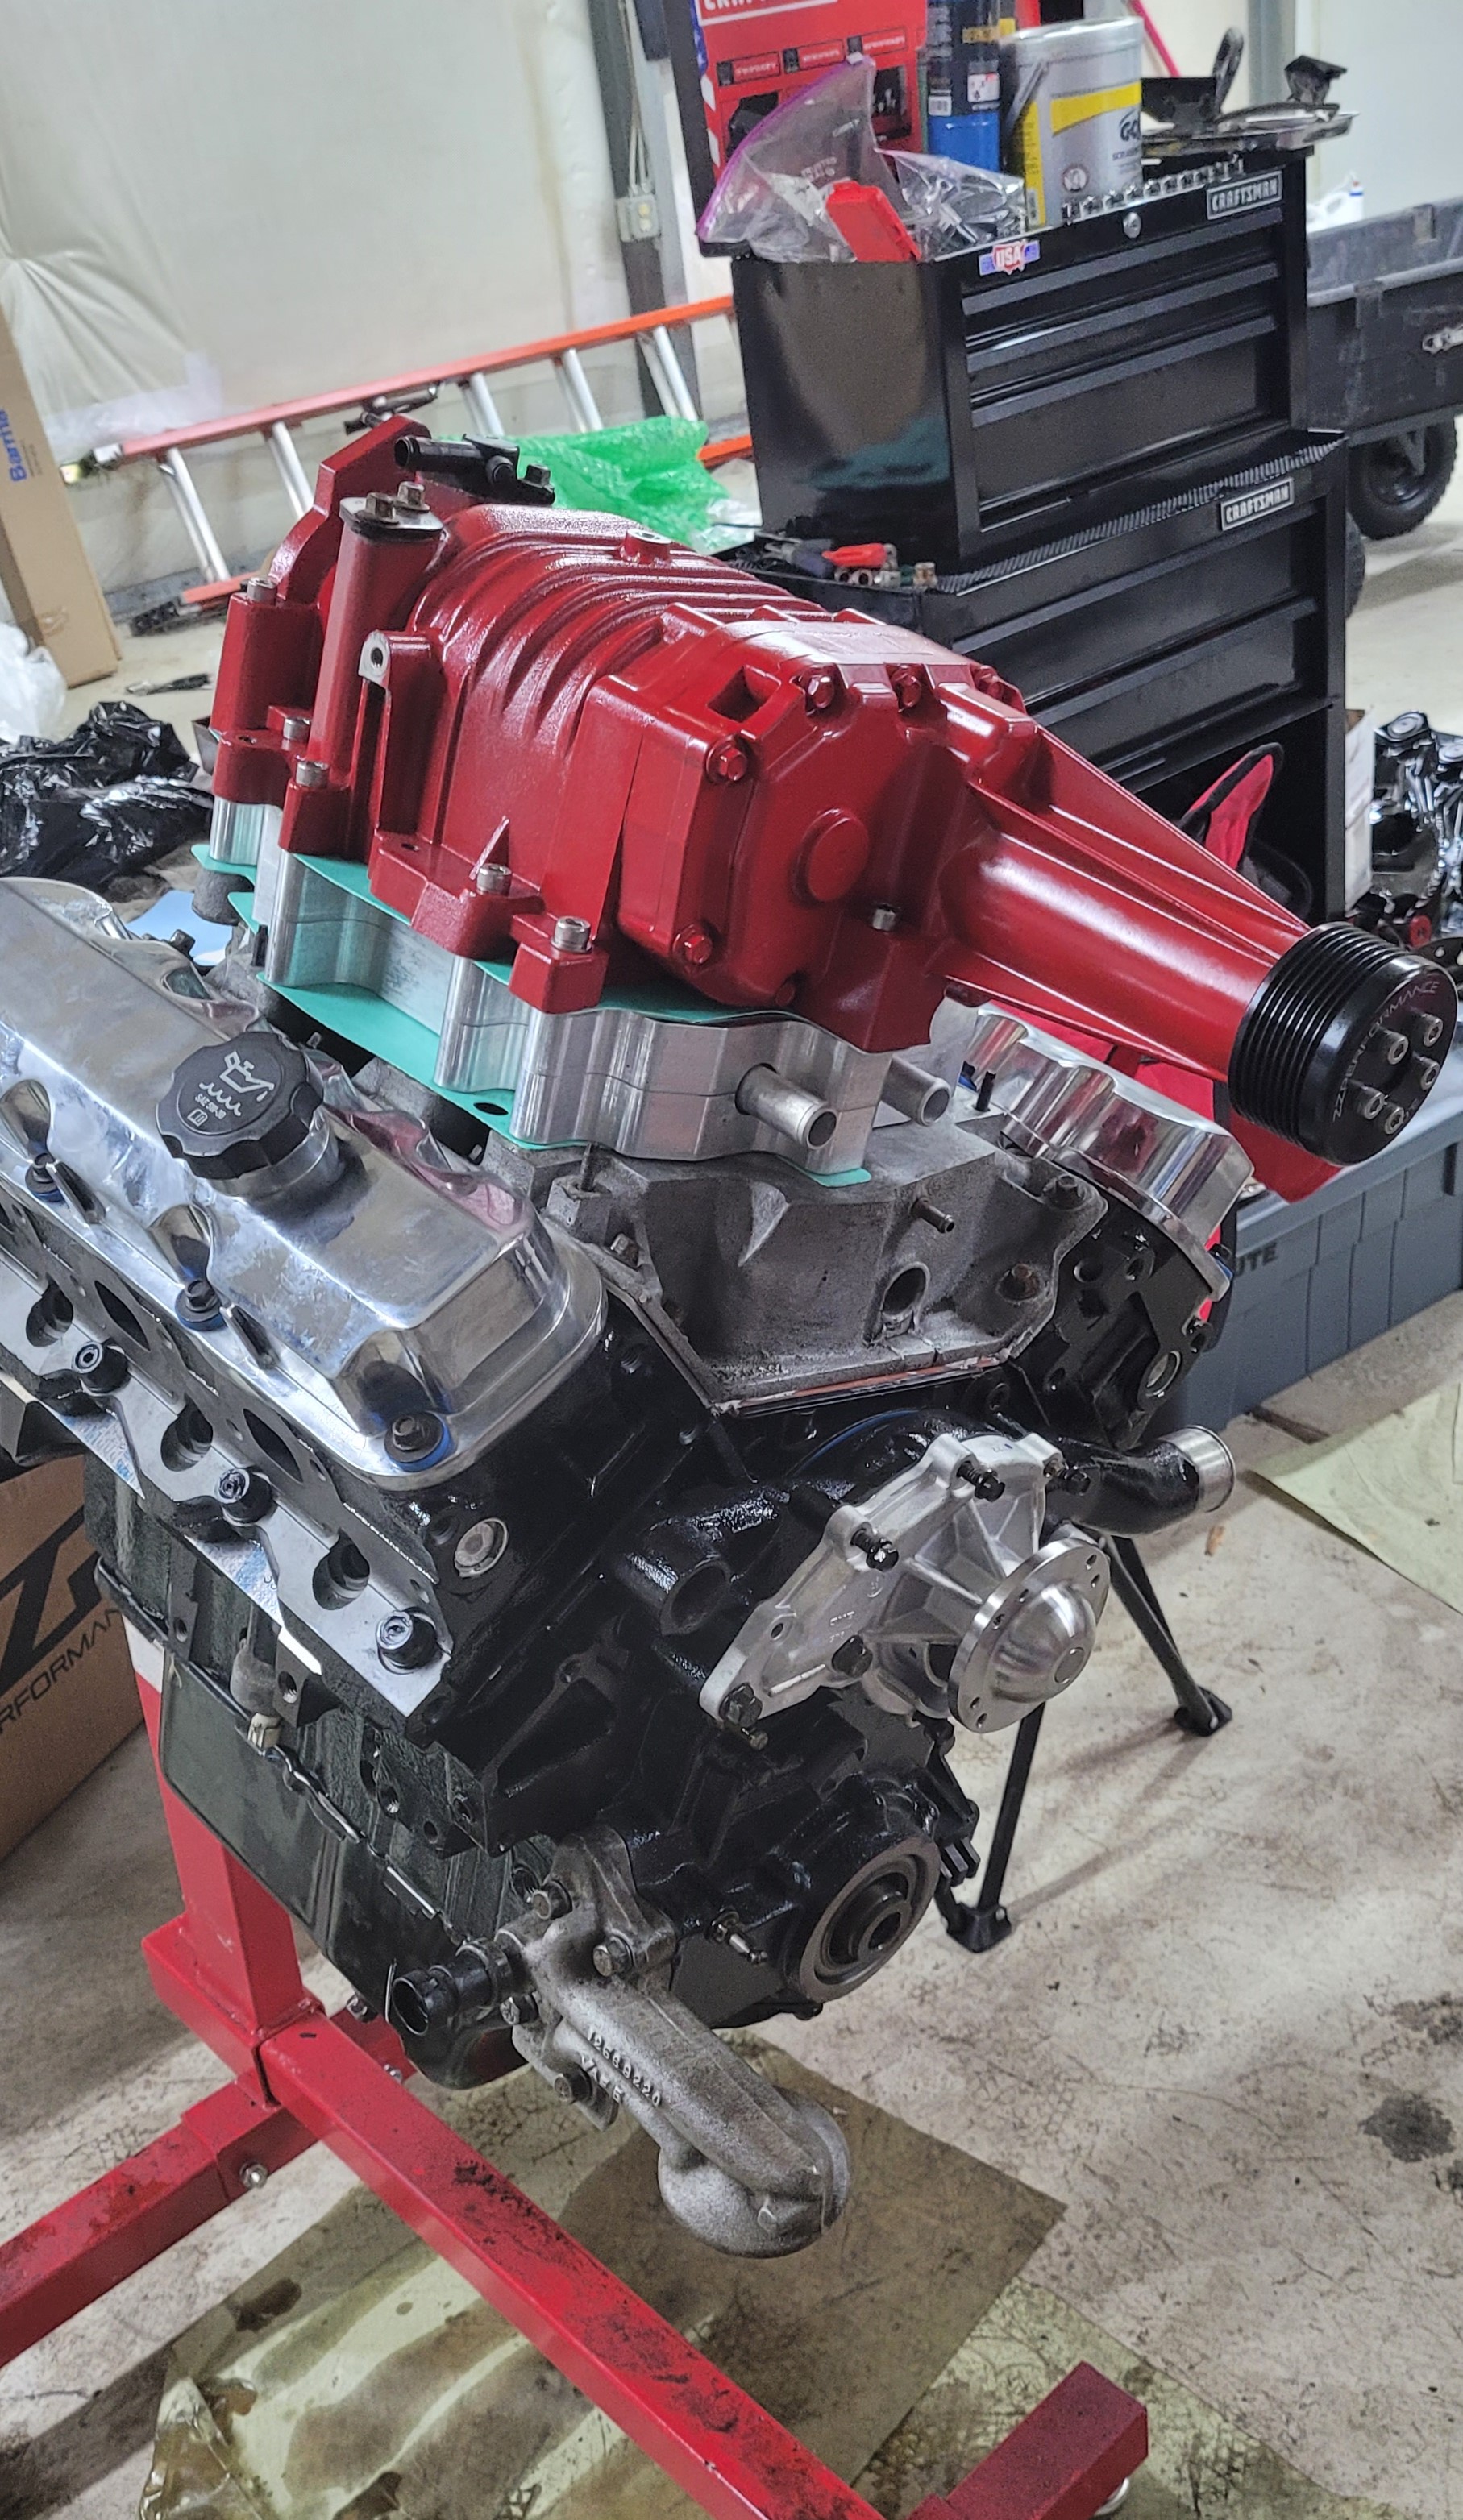
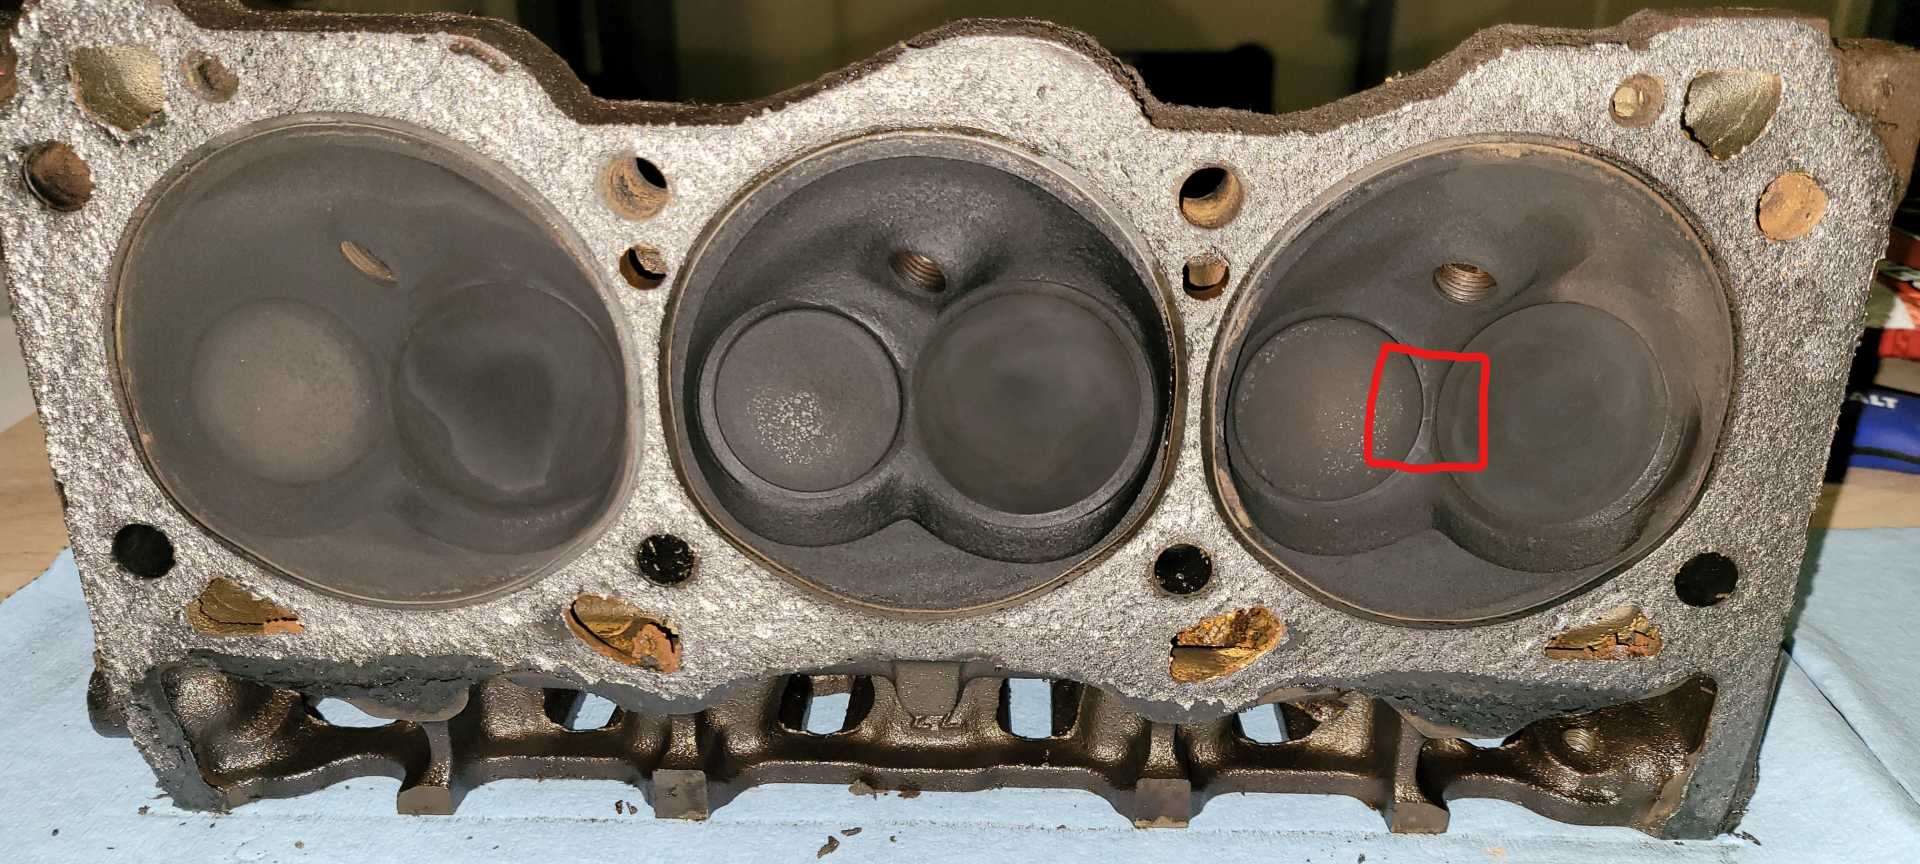
I took my block, heads, rotating assembly, and supercharger to the machine shop for them to work on. On the block: the cylinder bores were in good enough condition to just warrant a hone and did not need to be oversized, head surfaces decked, new cam bearings were installed, it was hot media blasted, and new freeze/galley plugs were installed. Heads were inspected with magnaflux and the machinist noticed cracks in 3 separate combustion chambers between the valves. I actually got a picture of the heads right after teardown and was able to see one of the cracks around all of the carbon buildup:
That threw a wrench into things and I gave ZZP even more of my money by buying a set of remanufactured heads that had 90# valve springs and fresh valves. My rotating assembly got balanced and I had given the machine shop my supercharger snout to put in new bearings and the front seal. I shortly messed up the supercharger snout on the install of my modular pulley hub. I had purchased ZZP's pulley puller/install tool that I had a poor experience with, and I'm not sure if it's the same experience others have had. The tool when assembled has a stud with a sacrificial bronze washer to protect the snout shaft when pressing on it. The stud had poor orthogonal alignment with the pulley and would walk around rather than press squarely on the shaft.
I spent 50+ minutes tightening and untighening the stud, until the threads gouged the side of the pulley and required so much force that the pulley was crushed under the force of the puller. I was okay with the pulley being crushed, but it damaged the threads of the stud that I couldn't repair since I don't own a die for that size. That lead me to try tapping the modular pulley hub onto the shaft with a deadblow hammer, which did put the hub on but also pushed out the new bearings from their pressfit. So I had to take that snout back to the machine shop where they fixed it up for me. My total bill at the machine shop came out to about $1200.
In the time my parts were at the machine shop I figured out the rest of my parts I wanted for this engine: ZZP VS-RPM CAM ZZP Full stack intercooler TBD Heat Exchanger 3.0" Pulley Size
I decided to keep basically stock heads and based off of other builds, I'm guessing I may make around the 320 whp. Because of that I have my transmission with Dave from Triple Edge Performance being rebuilt with his 4T65E-HPS1.5 option. I should expect it back around the middle of August.
Component Painting
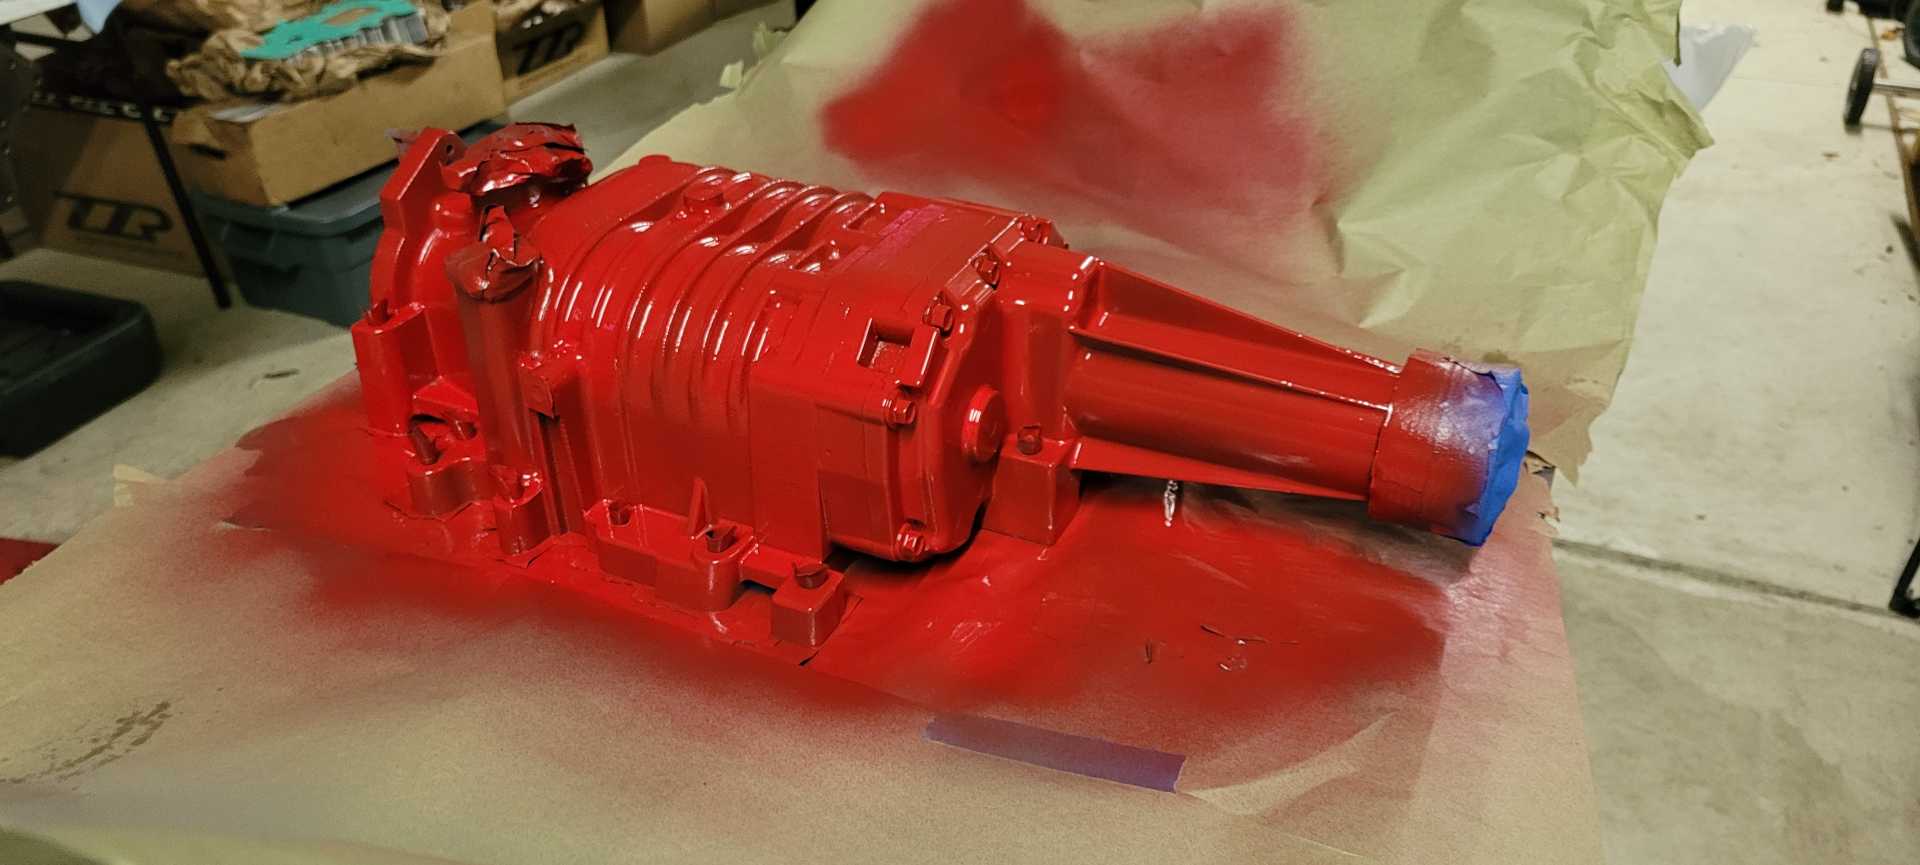
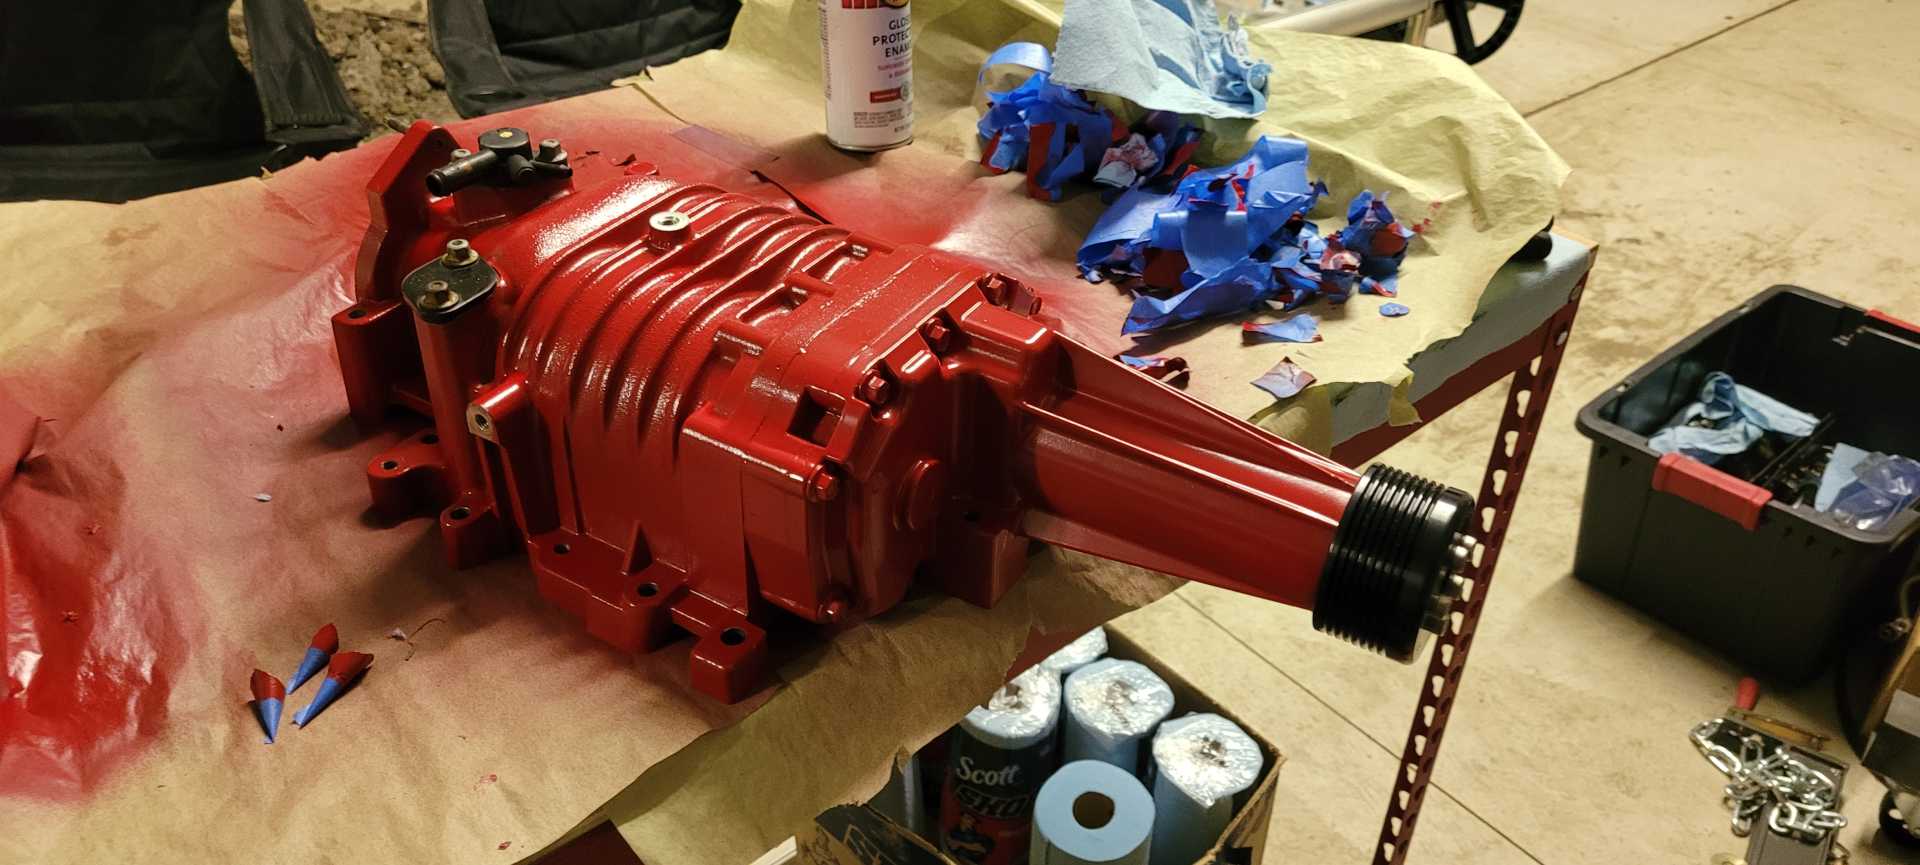
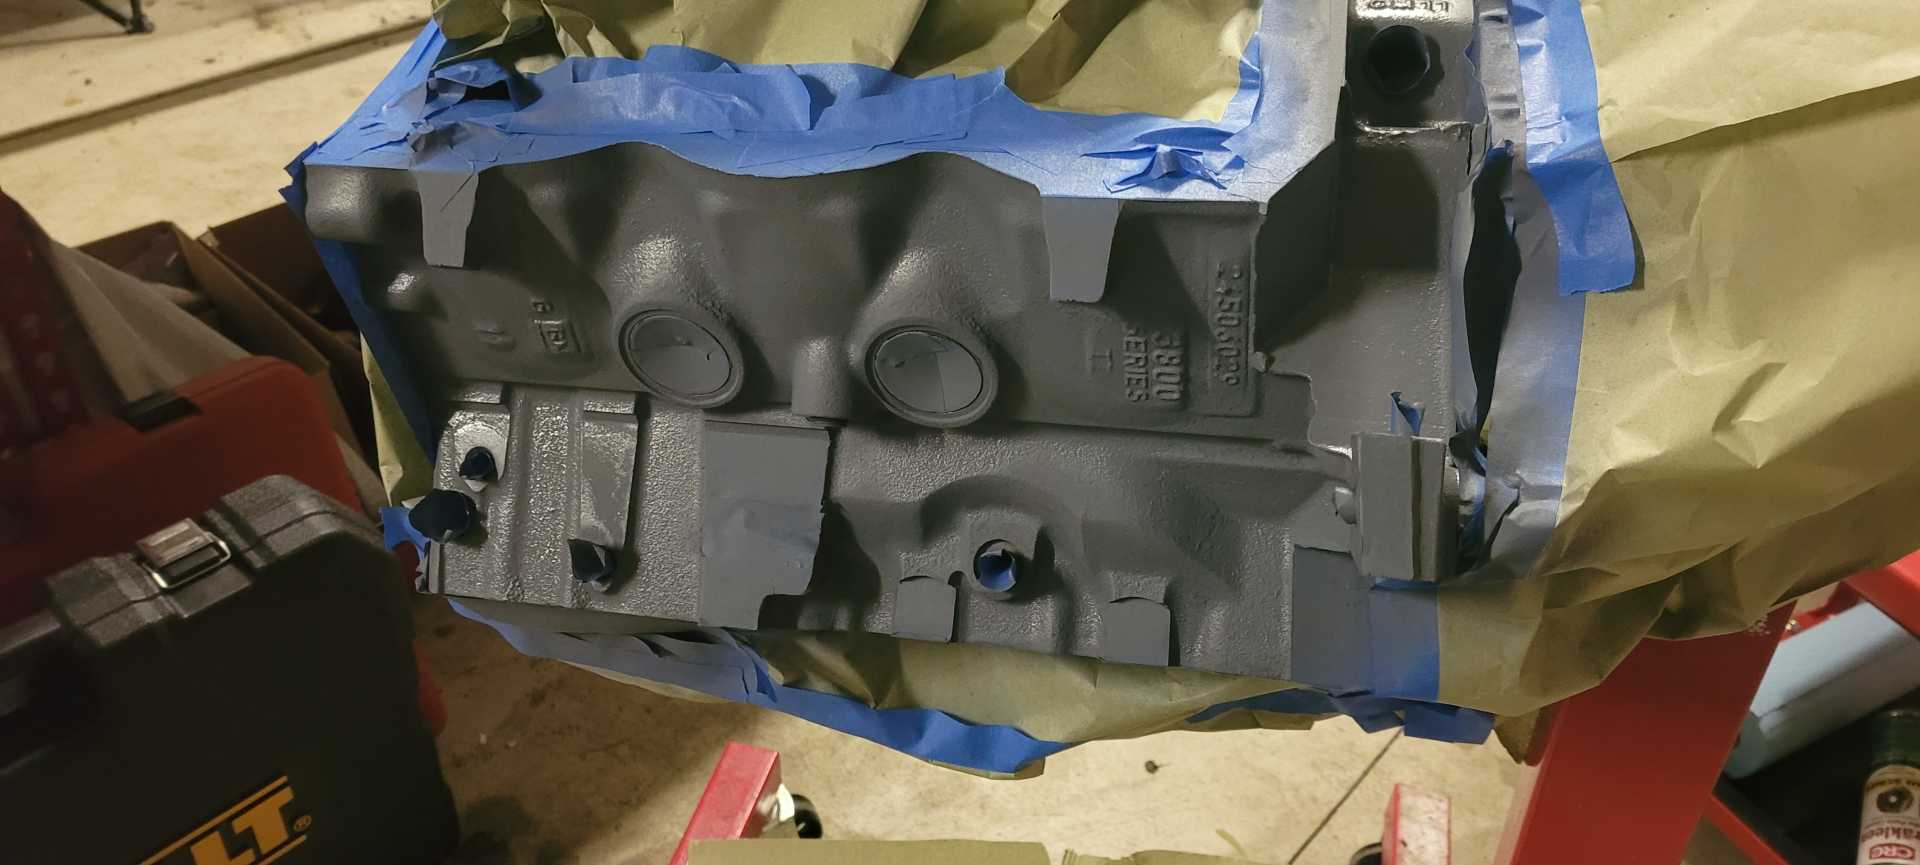
I got all my parts back from the machine shop and hurried up to get the engine block painted to protect it from rust.
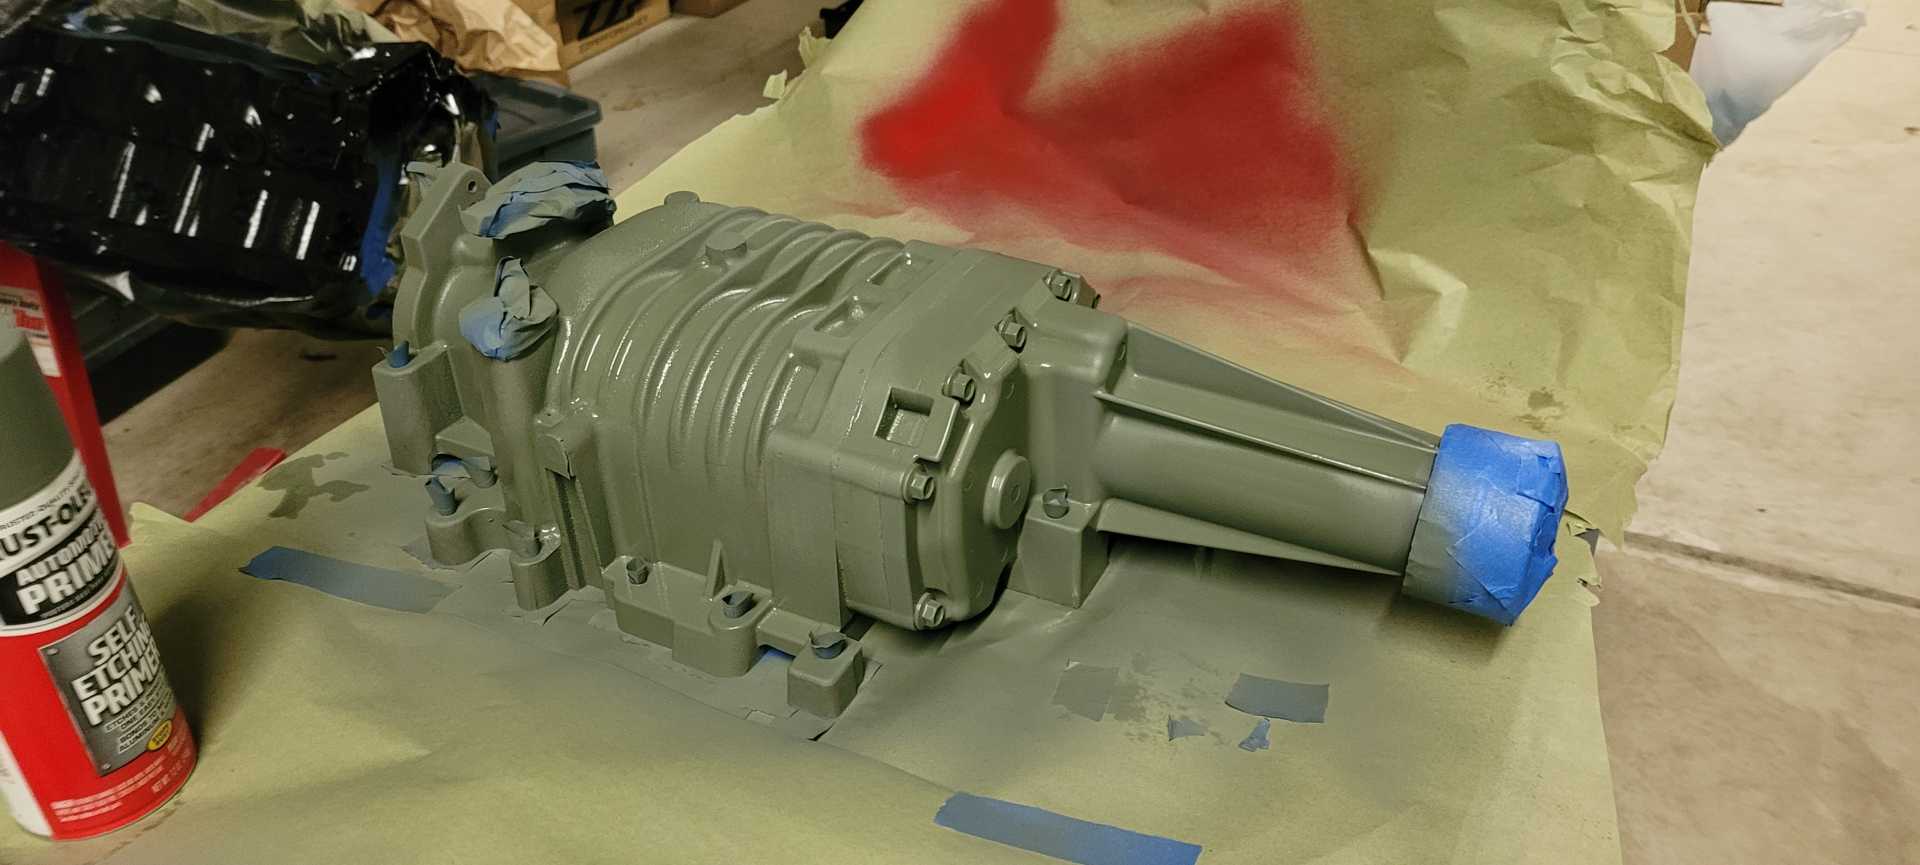
I also got the supercharger painted after I cleaned it up. [img]https://ima ges.fiero.nl/userimages/MichiganReefer/20220409_200443.jpg[/img]
Rotating Assembly Rebuild
I've also been multitasking by tearing apart the front suspension, sandblasting, repainting, and installing poly bushings that I will be showing in another update.
[This message has been edited by MichiganReefer (edited 03-23-2023).]
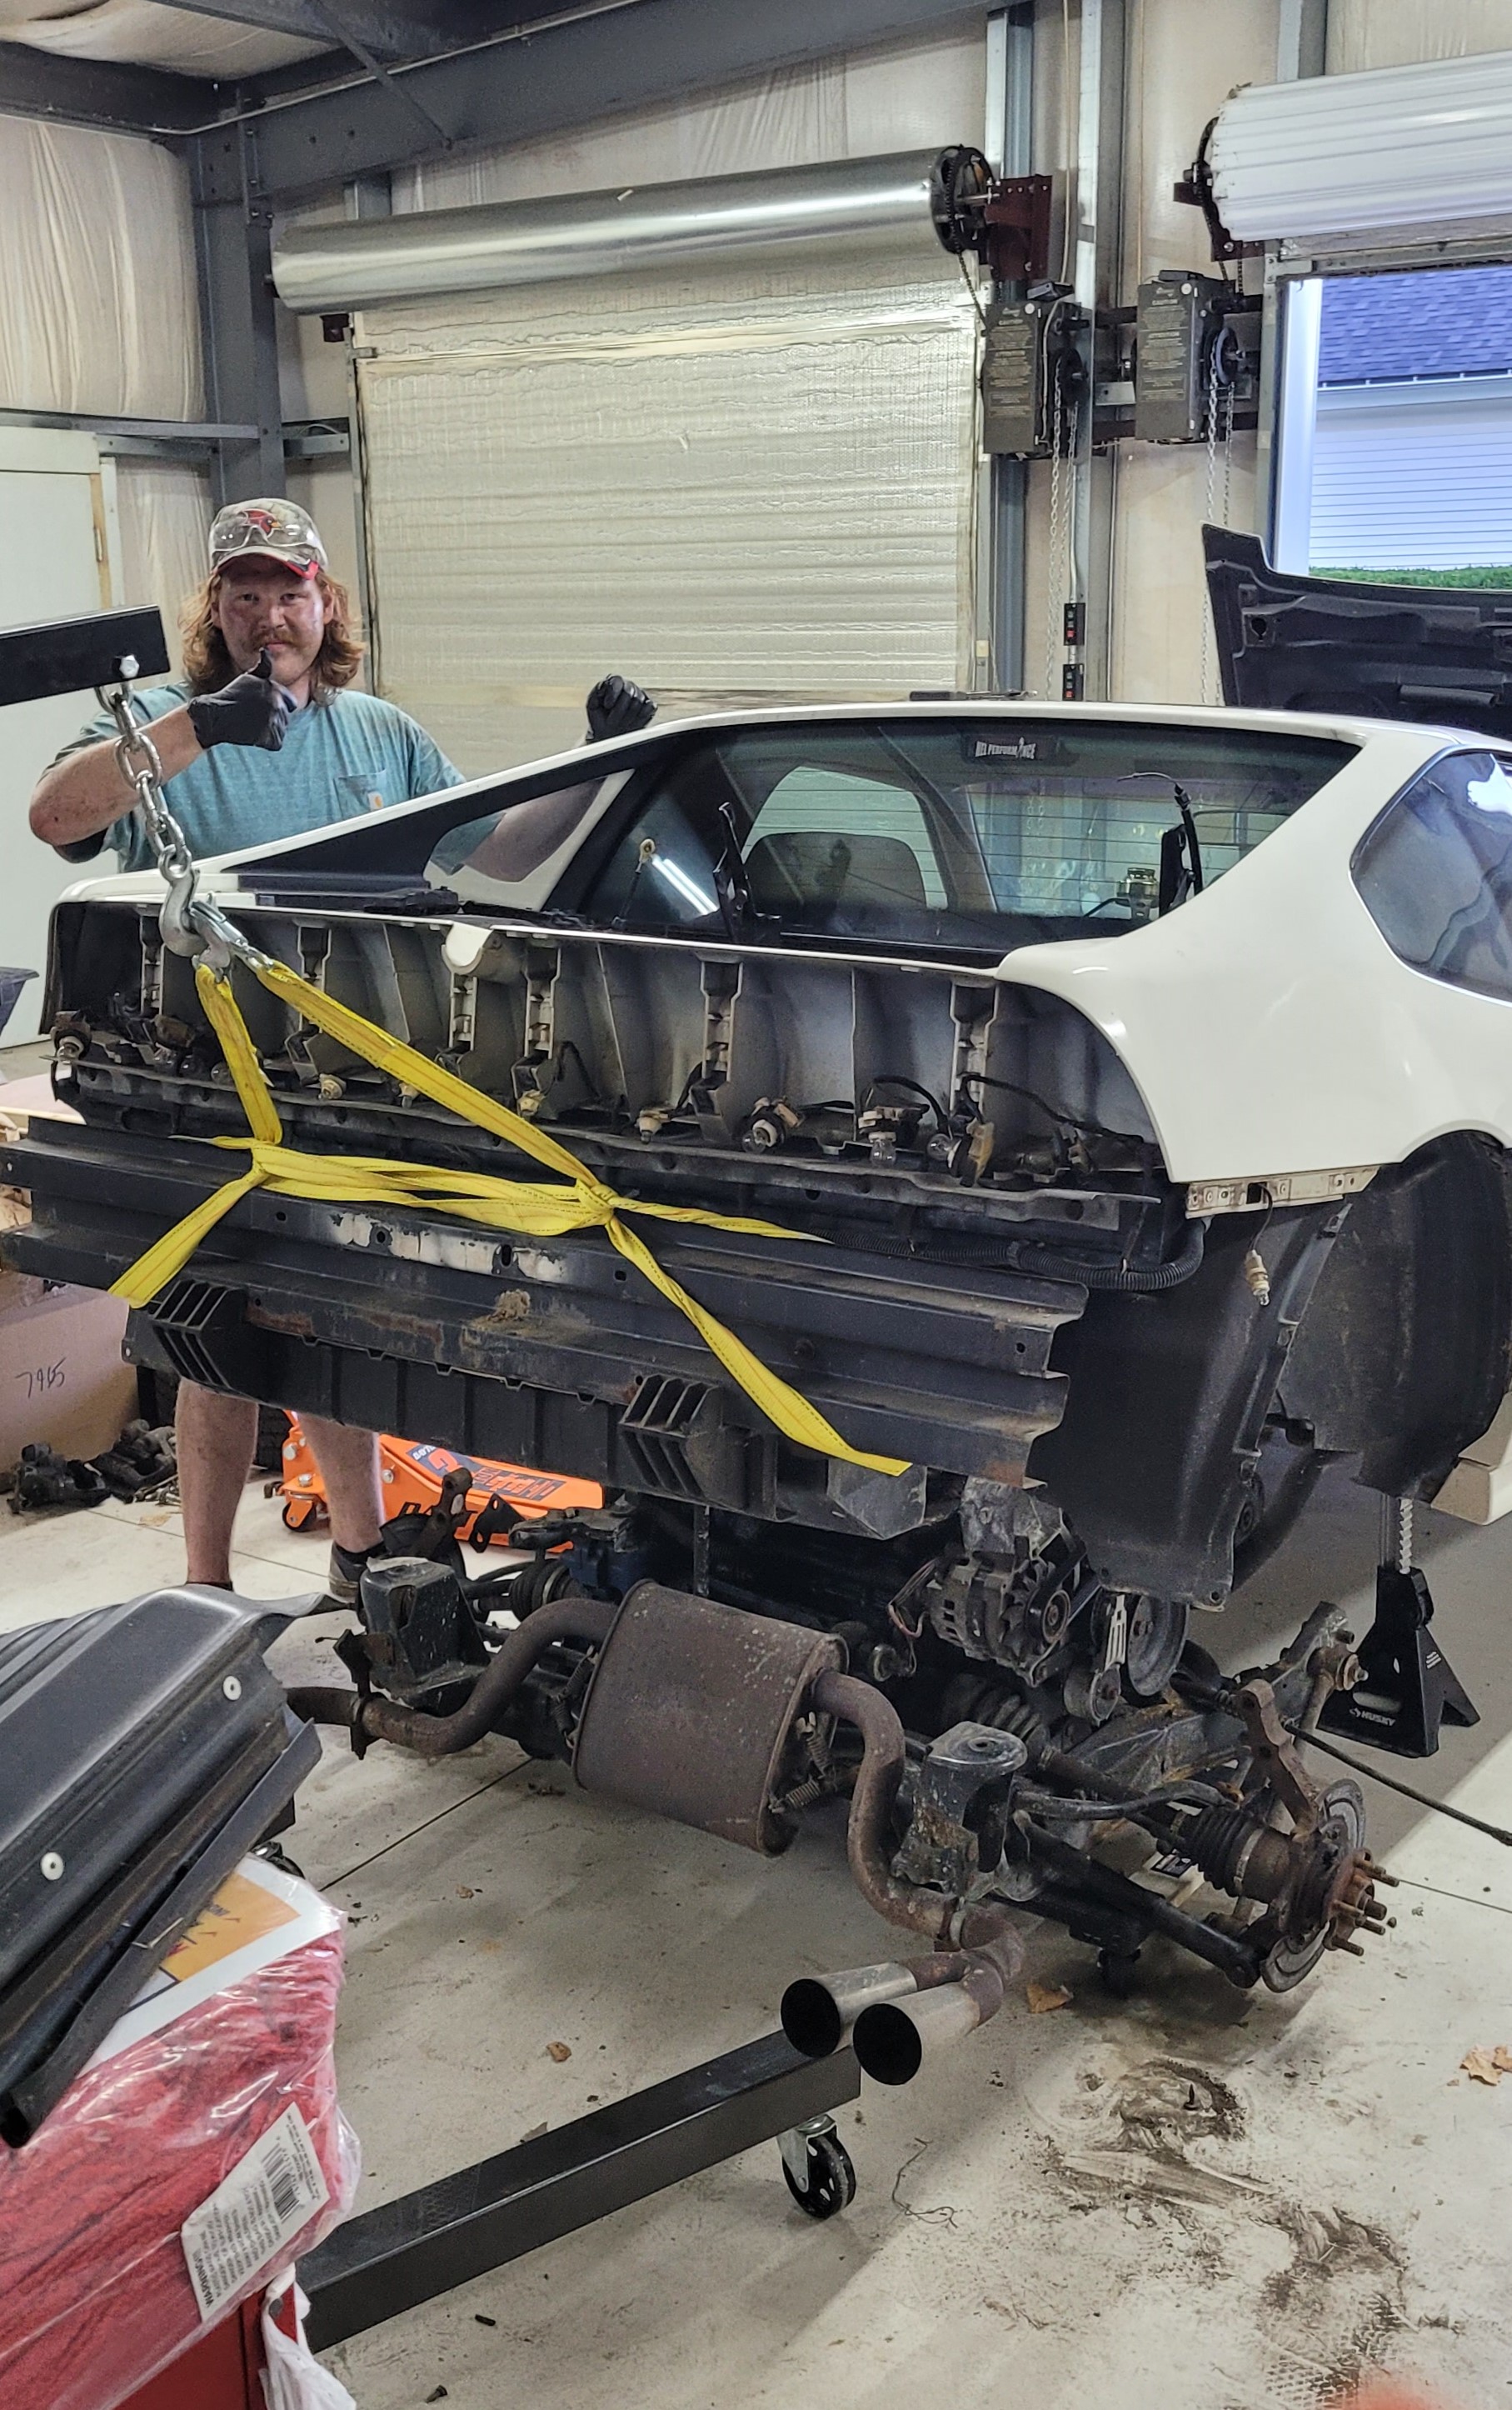
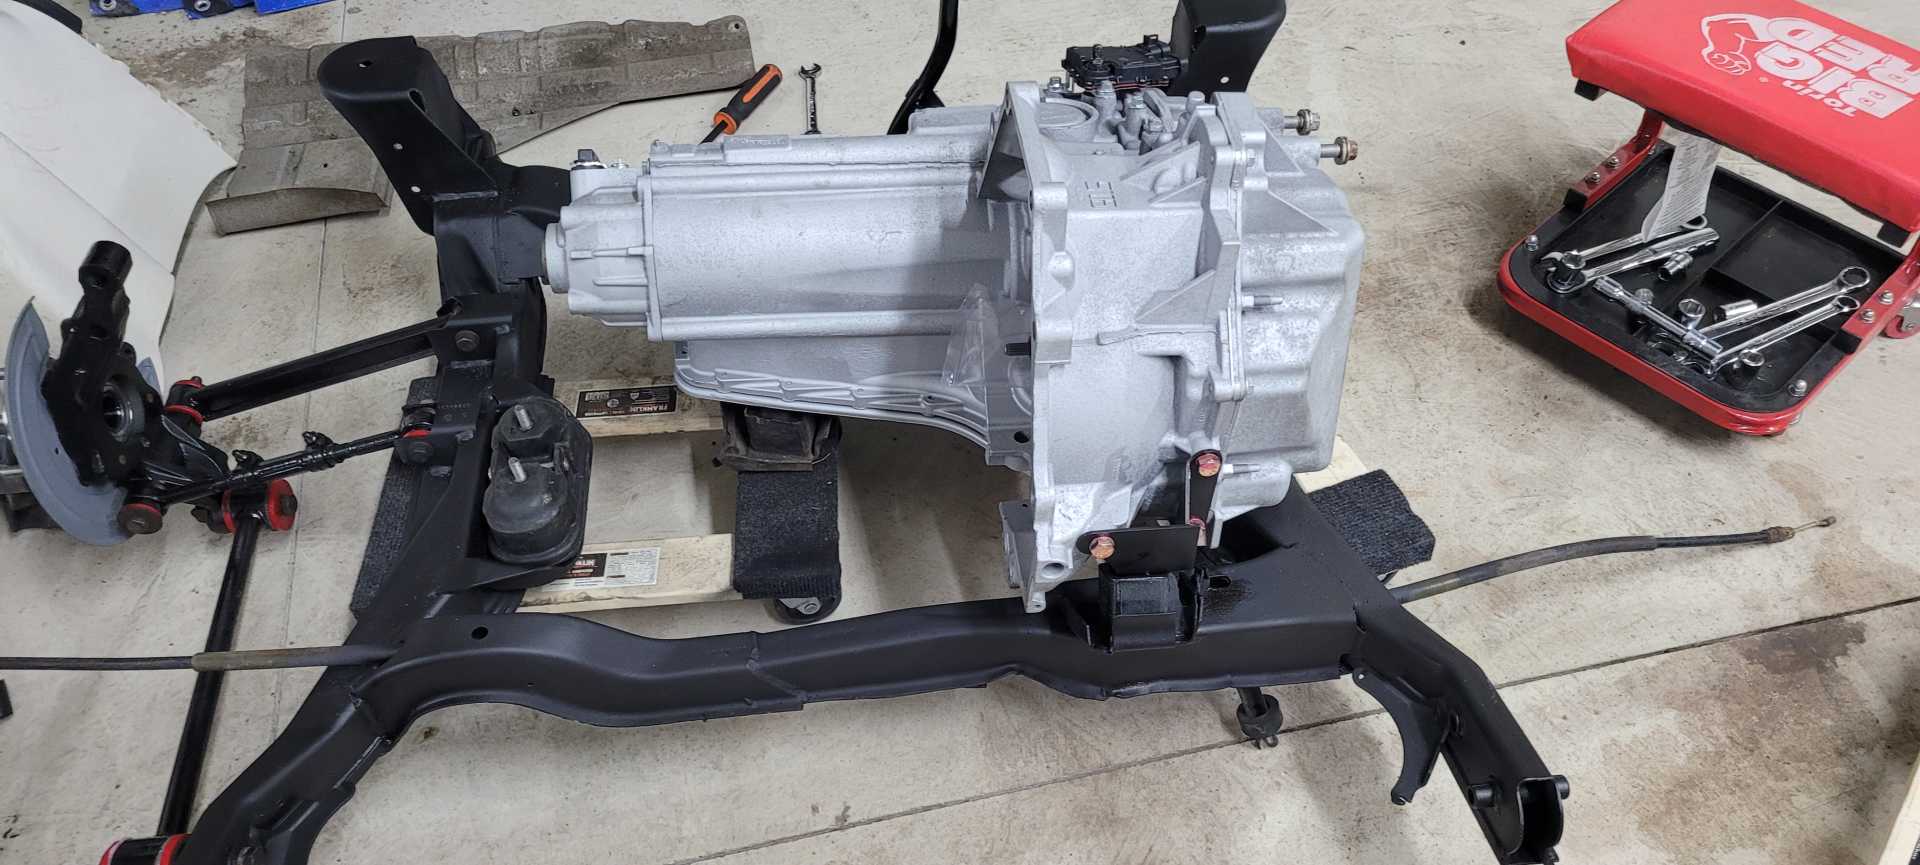
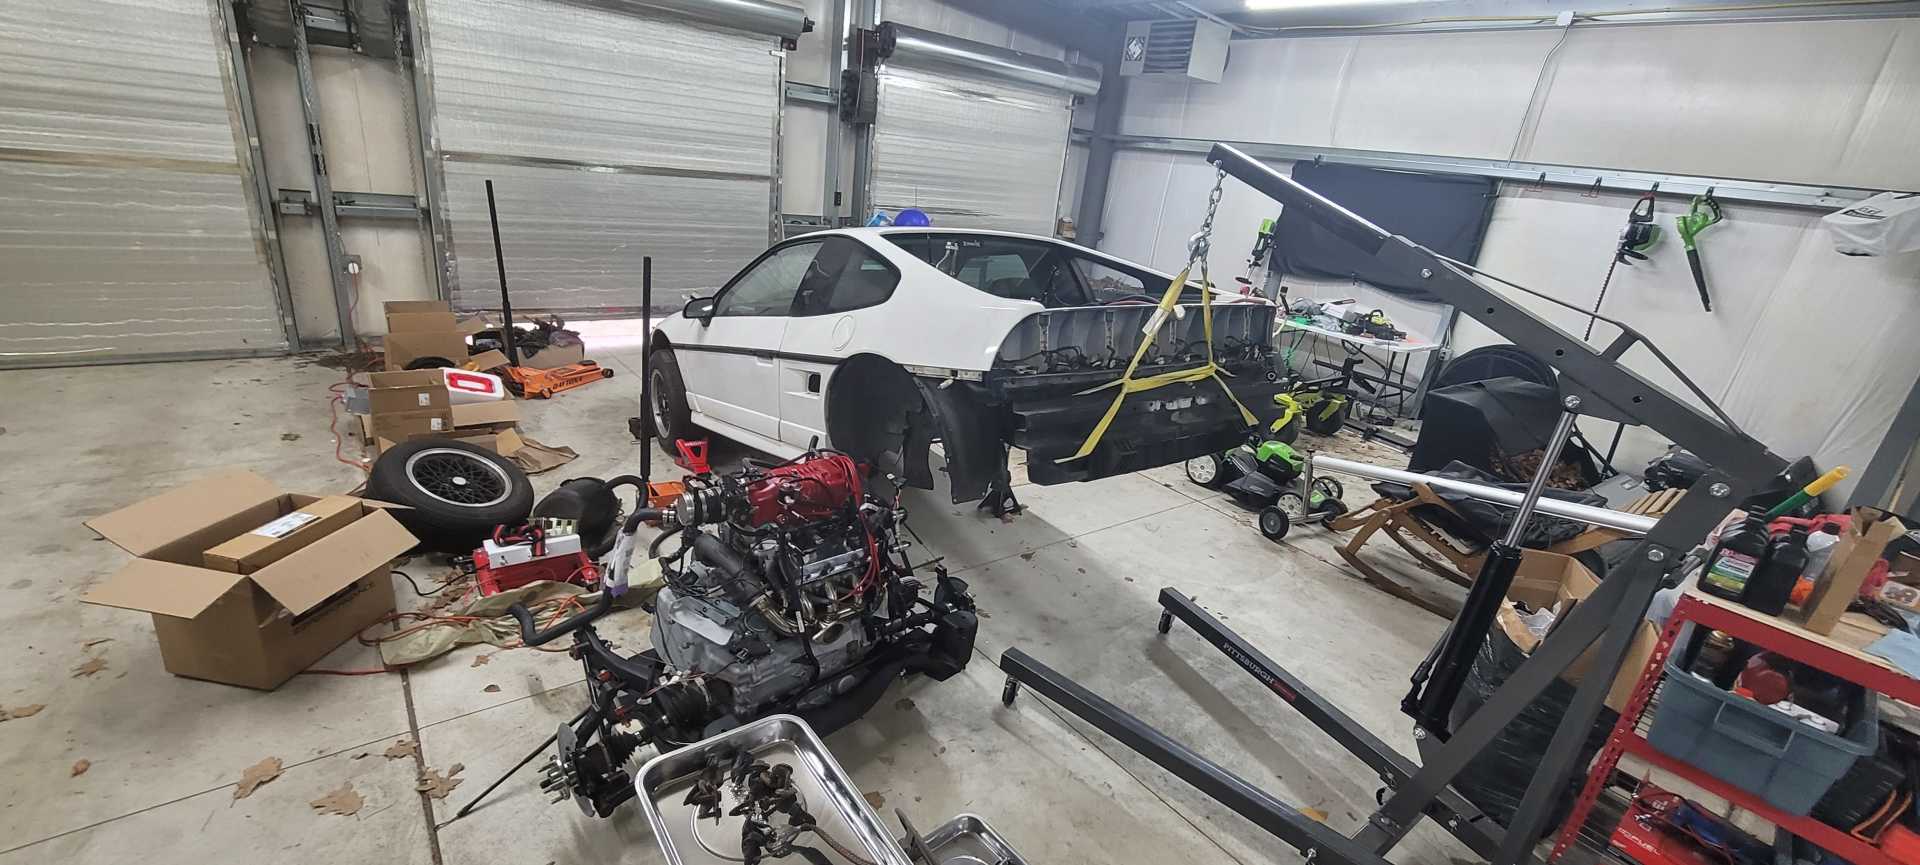
I made huge leaps on my project this weekend- finally got the stock powertrain and the rear cradle removed. A buddy and I (mainly I) made the decision to not install the front suspension yet to make use of the time we had yesterday and use some thinking with jack stands to help us drop down the cradle. We found that the cutout for the front cradle bolts is just wide enough to fit my jackstands in, so we gave it ago. We were cautious because of pivoting the whole car via that area and added two more jackstands in the front spring seat area that were one position lower.
We followed LostNotForgotton's video and disconnected everything, where we differed is how we lowered. We used two 3ton jacks in conjunction with two 1000lb furniture dollies and lowered the rear cradle to the ground that way. We lifted the body upward with my cherry picker lifting the rear crash bar (Note. We had to use the arm at the 500lb setting otherwise the feet of the cherry picker would've been too far under the car) We felt comfortable enough with this because we test lifted the car together and were able to raise it.
Once we rolled the stock powertrain to the back of the shop area, I worked on buttoning up the 3800 I've been building. I still need to locate all of the bolts for the front cover and torque them correctly, install the water pump and other accessories, get my harness built, and get my rebuilt transmission back from TripleEdge's shop. Hoping to get it running before mid-September.
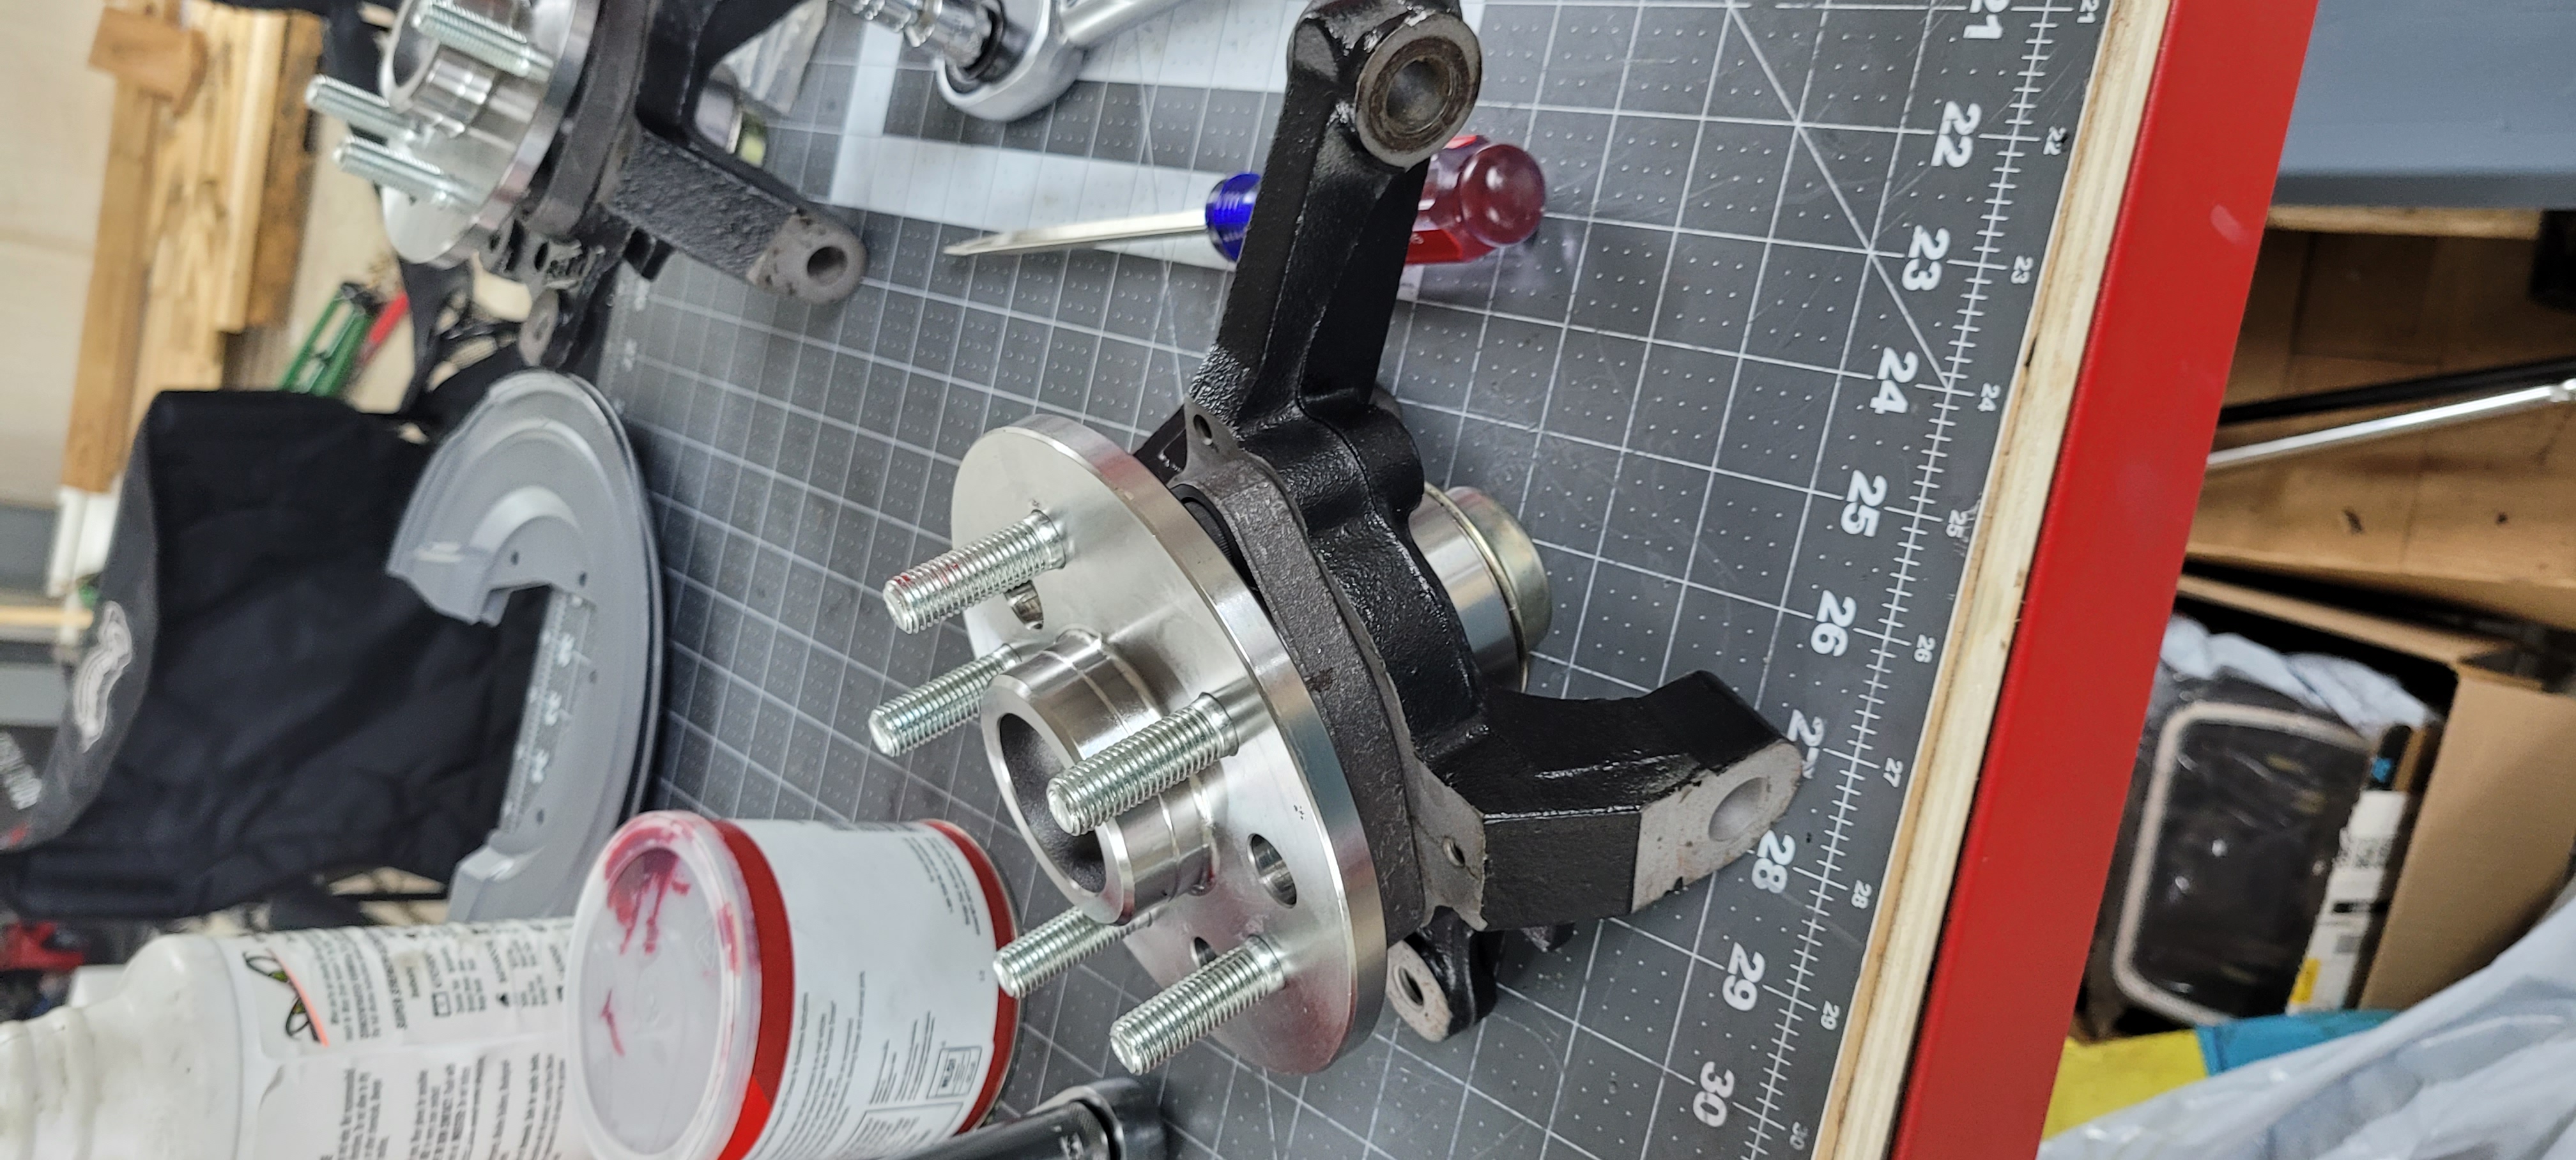
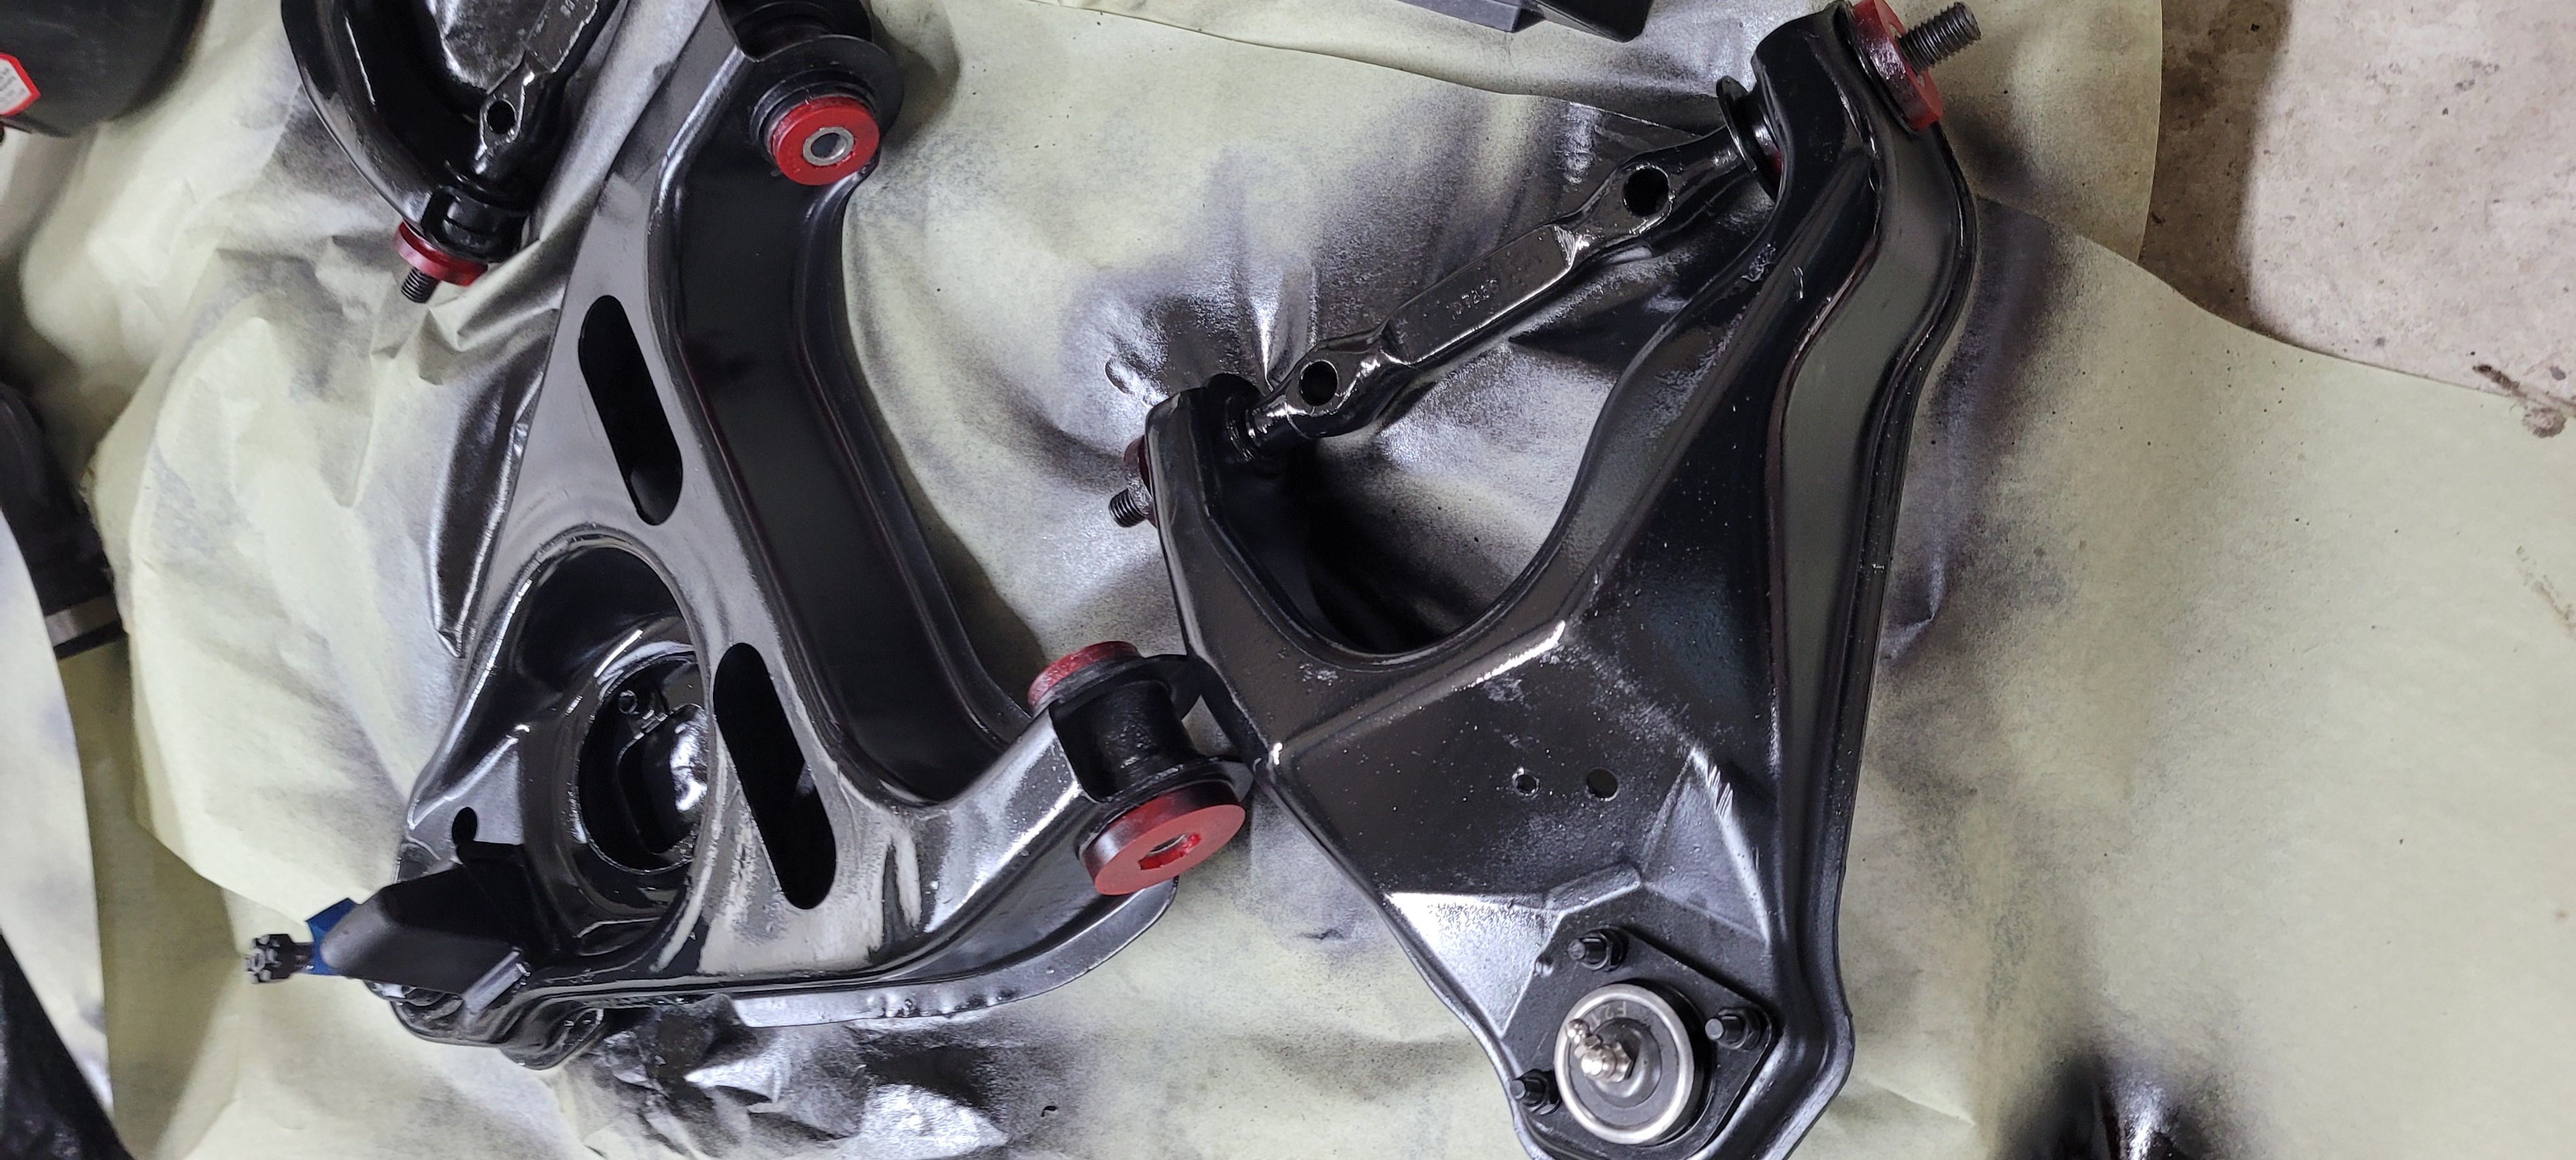
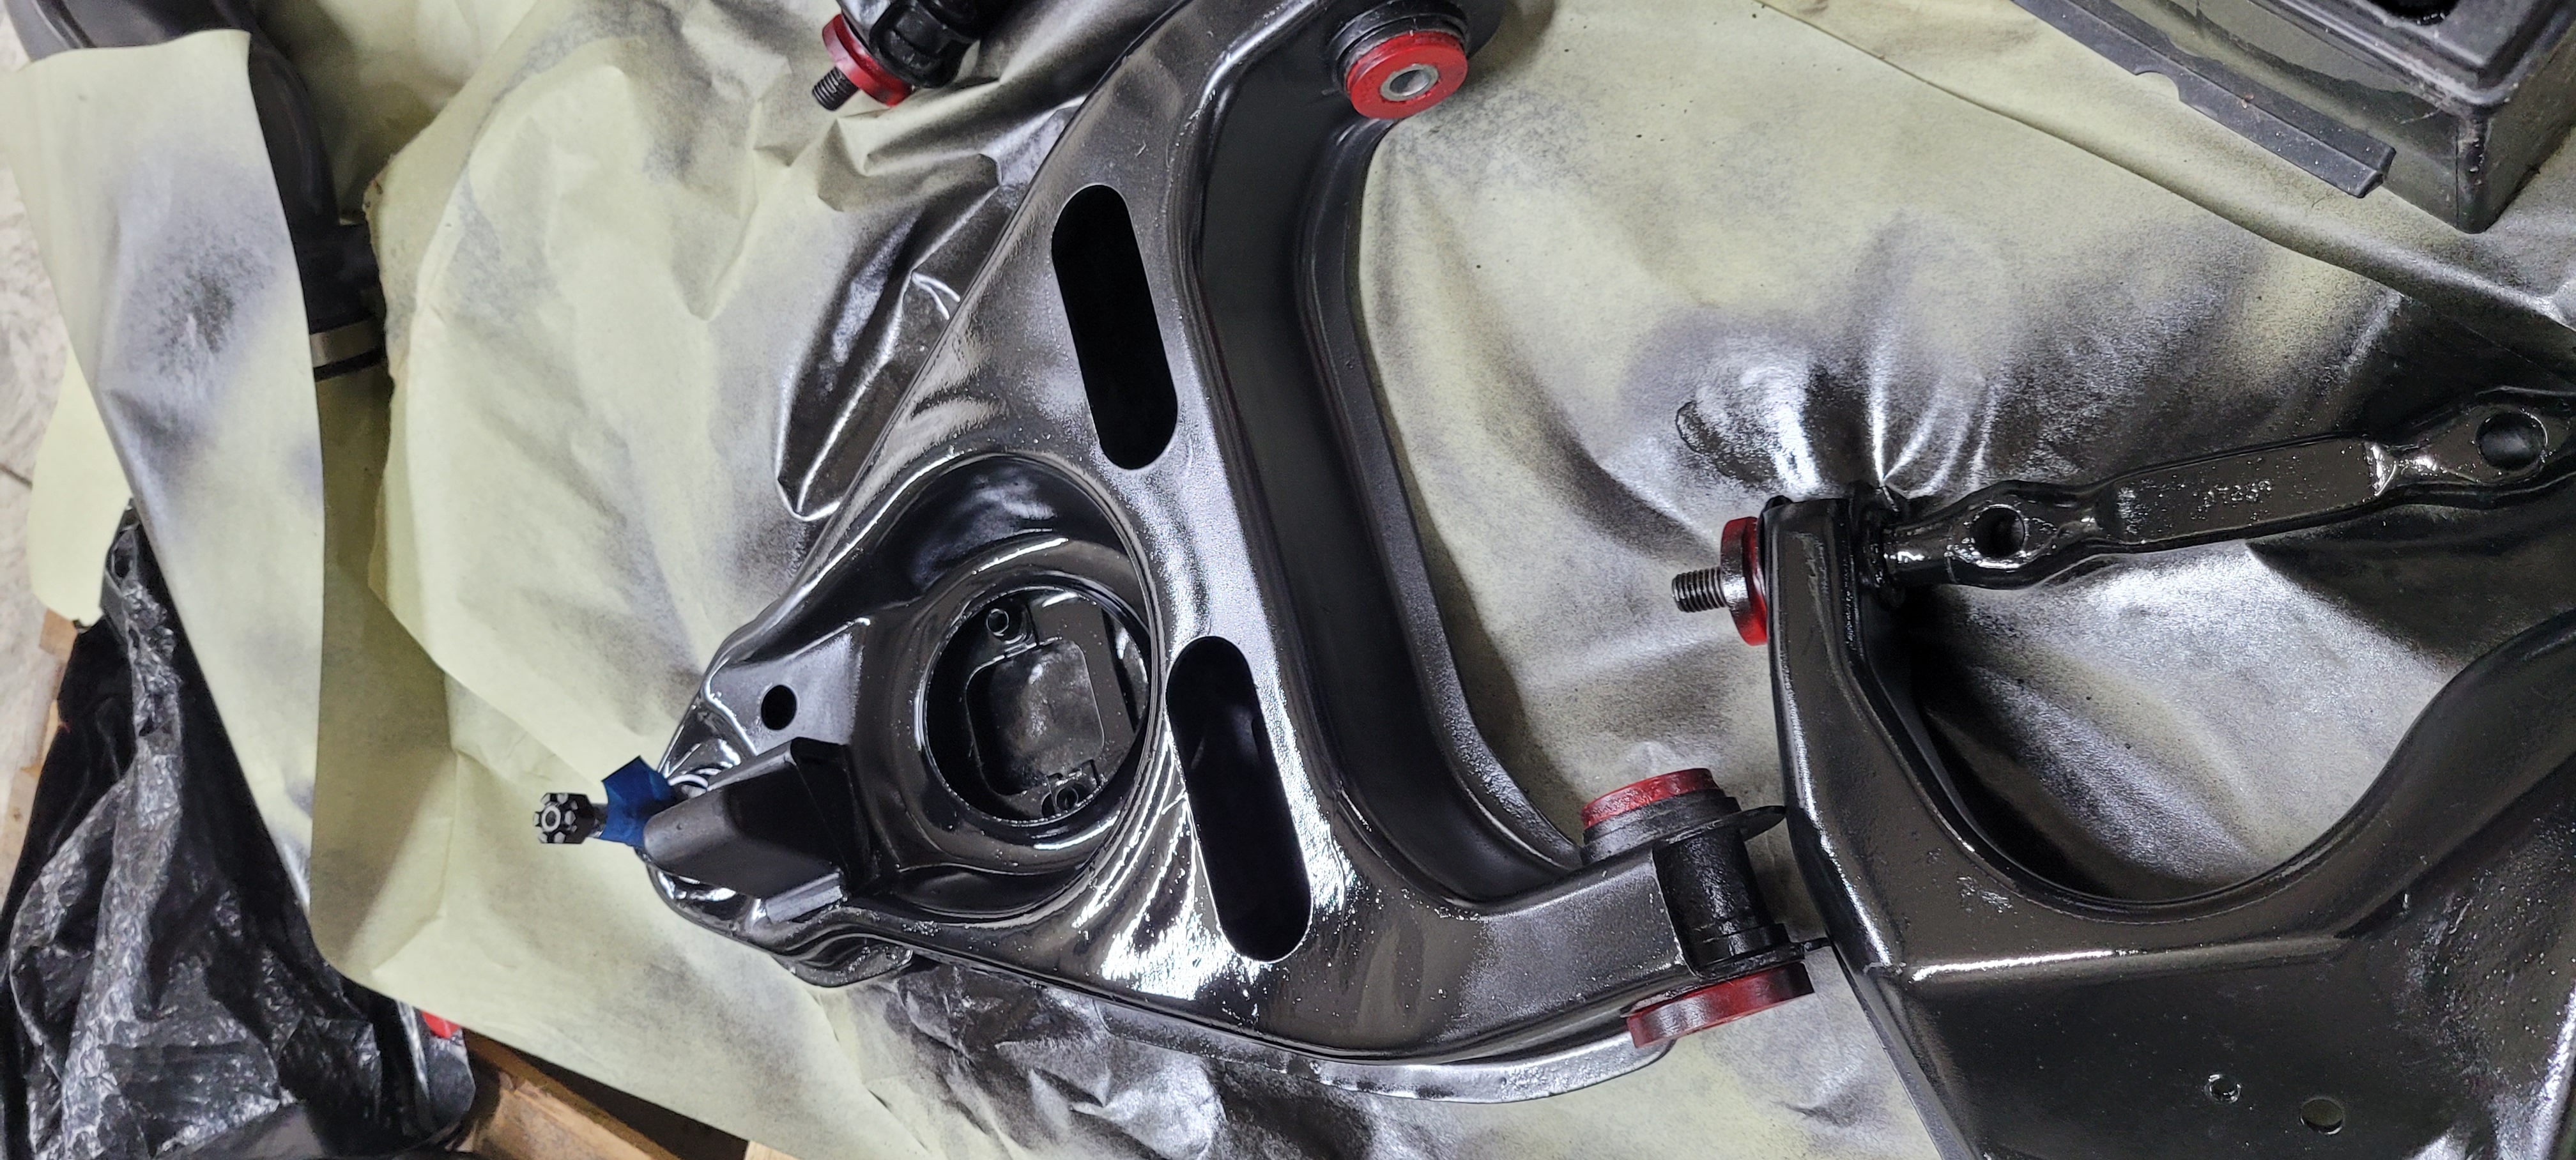
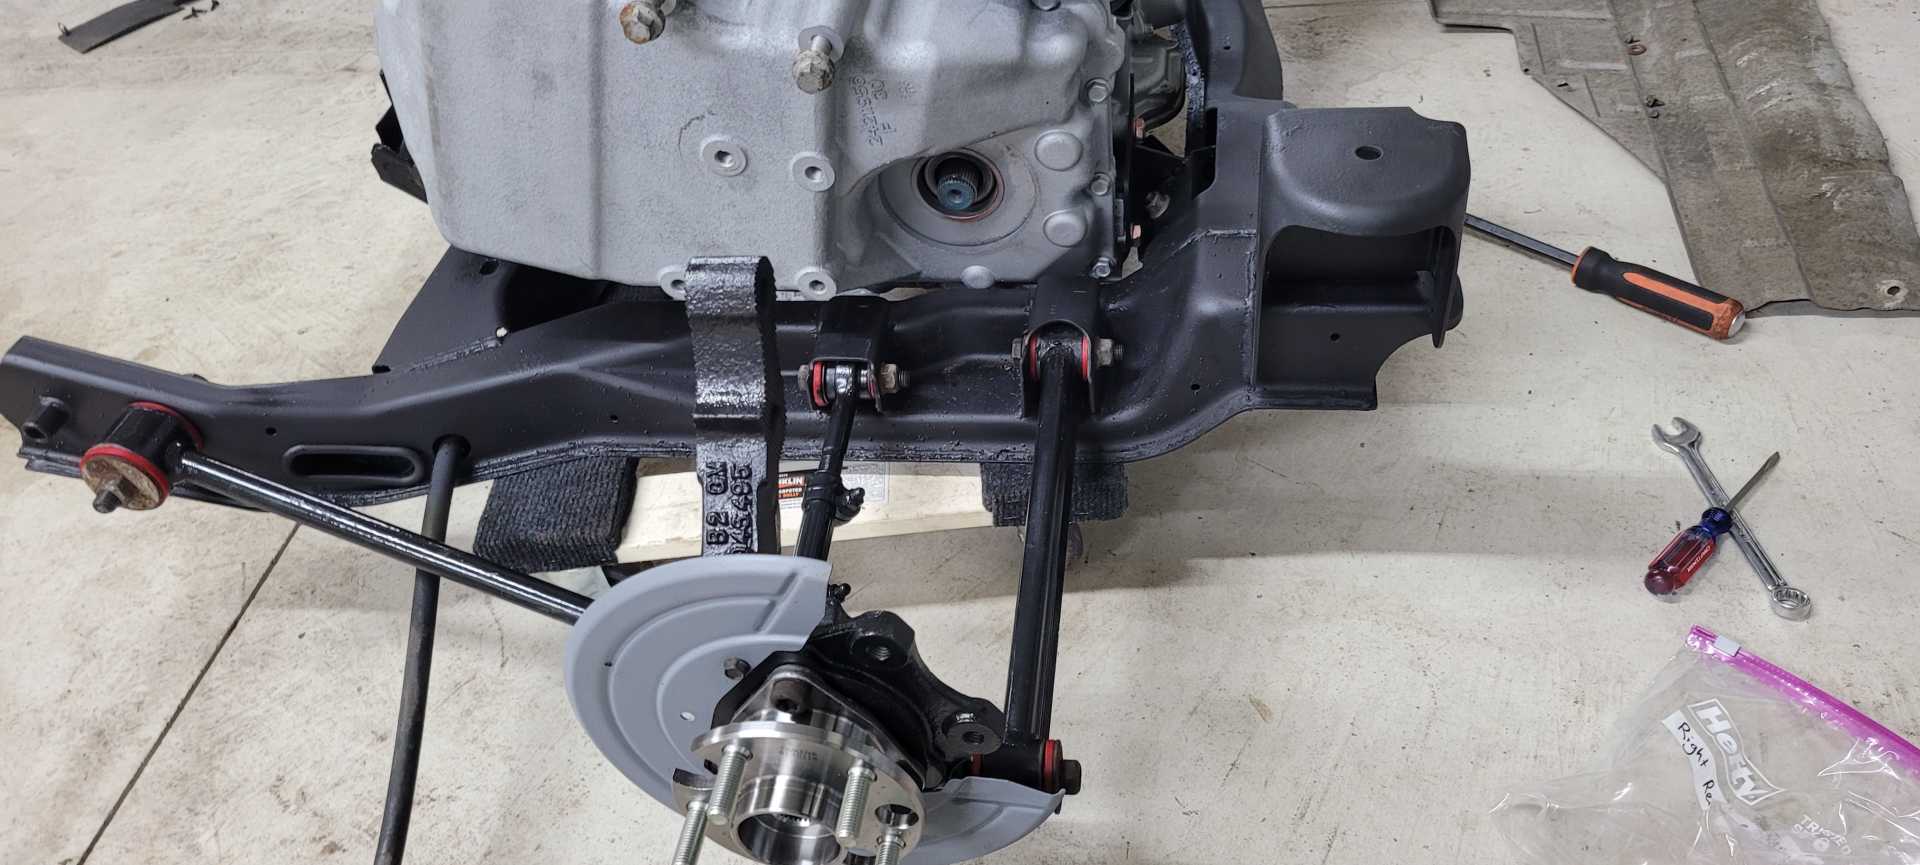
Should be picking up my transmission from Dave with Tripe Edge next weekend, looking forward to that. I spent this Labor day weekend rebuilding my front suspension. I've got all of the poly bushings from the Fiero store, the rebuildable front hubs from Rodney Dickman, and used my buddy's sandblaster to clean everything up.
The inner tie rods caused me all sorts of issues and had to buy an inner tie rod removal tool from AutoZone, it saved my butt. I think everything is looking great.
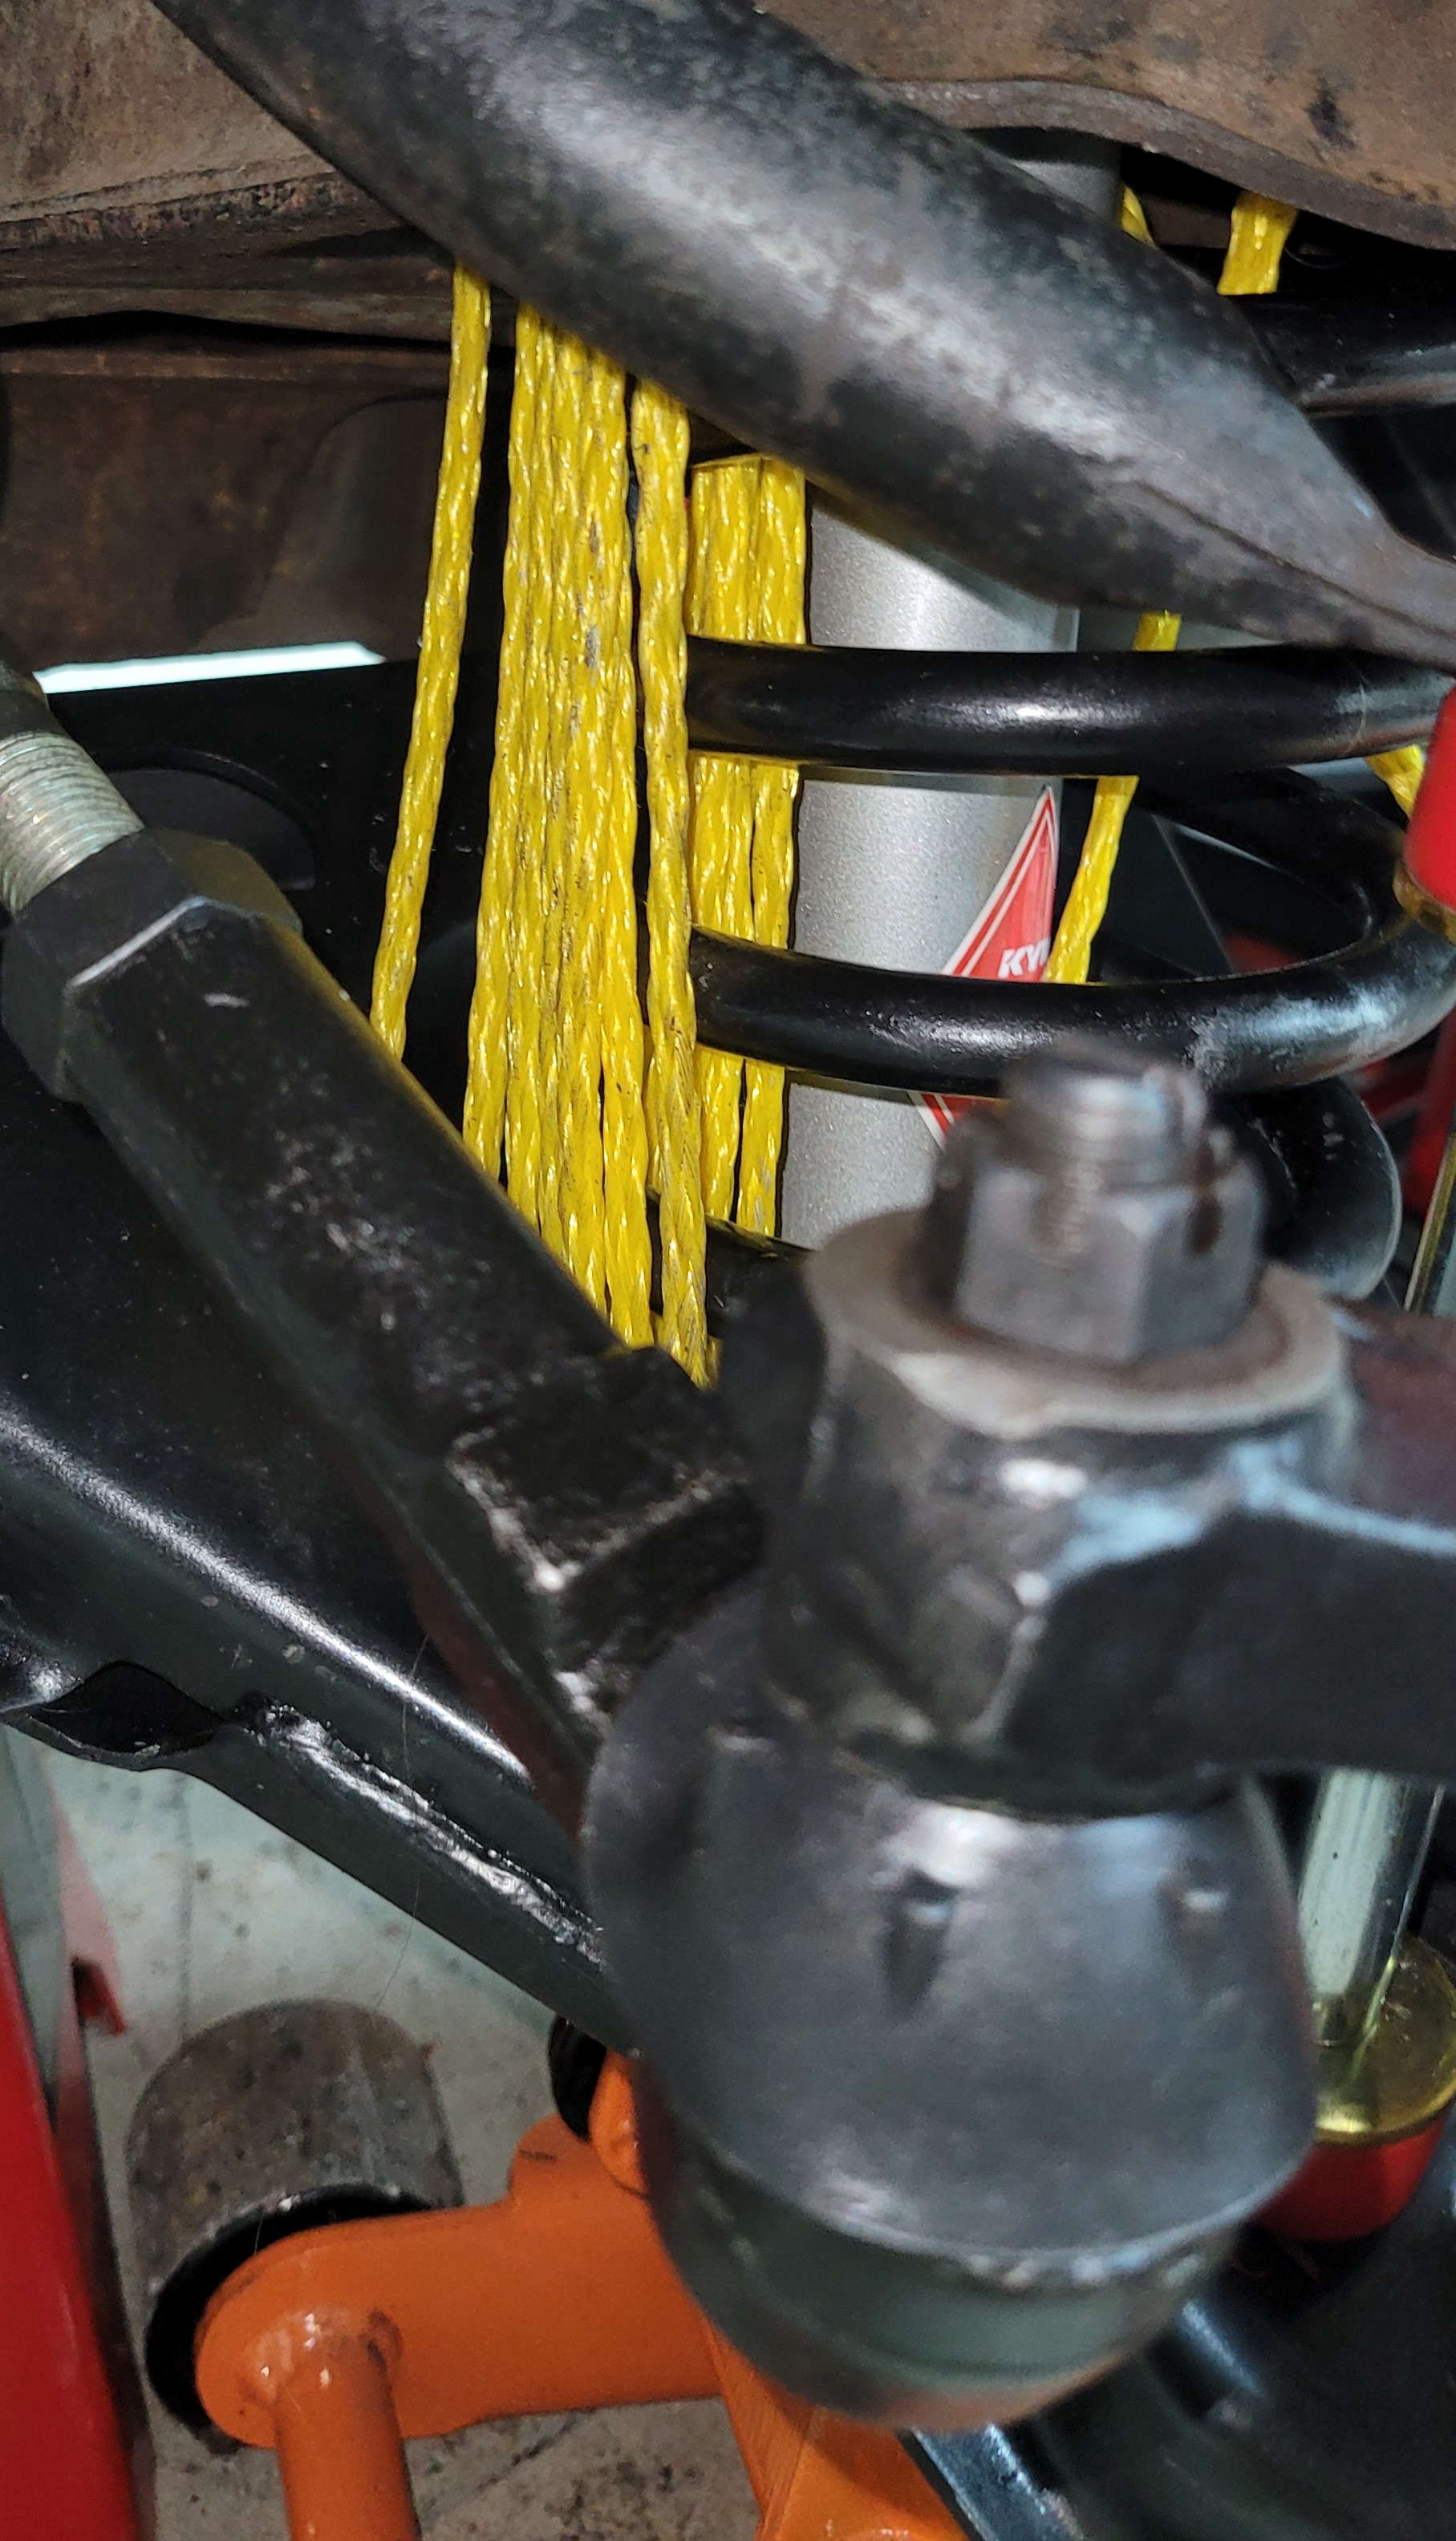
I tried something a little different to get the springs in there. I compressed them with my spring compressor tool but then held them in place with twine because it was low profile to get around all of the other components.
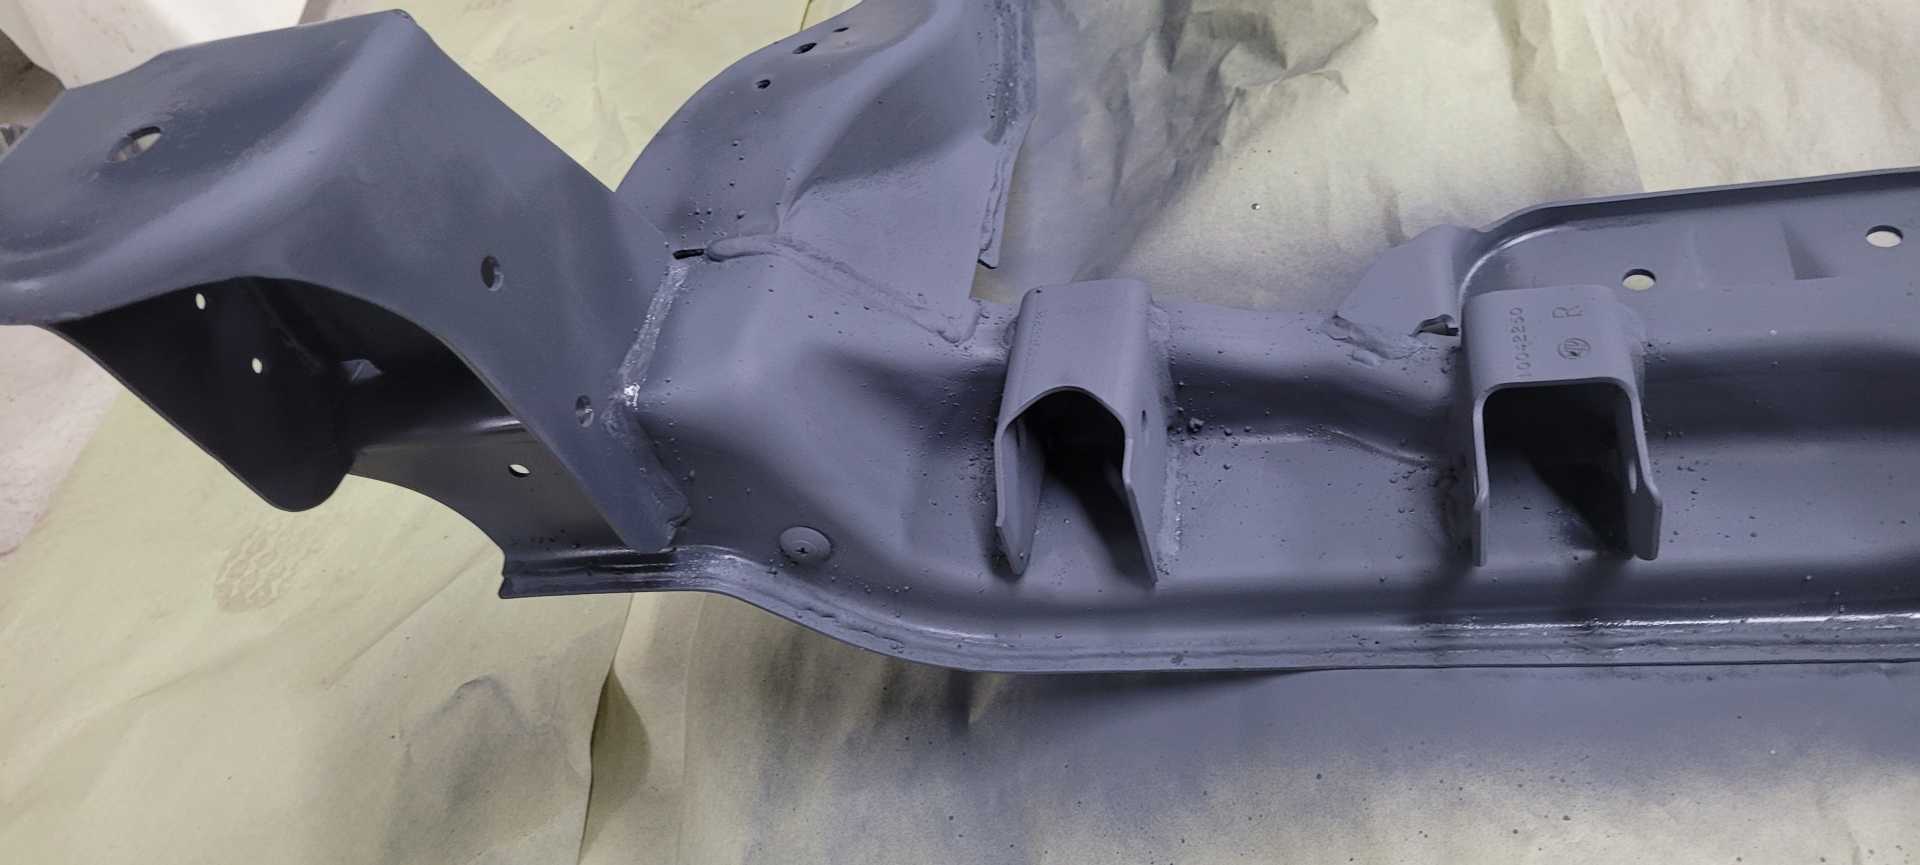
While I've been waiting on funds to purchase the other things I need to compete the swap, I've worked on the rear suspension and subframe.
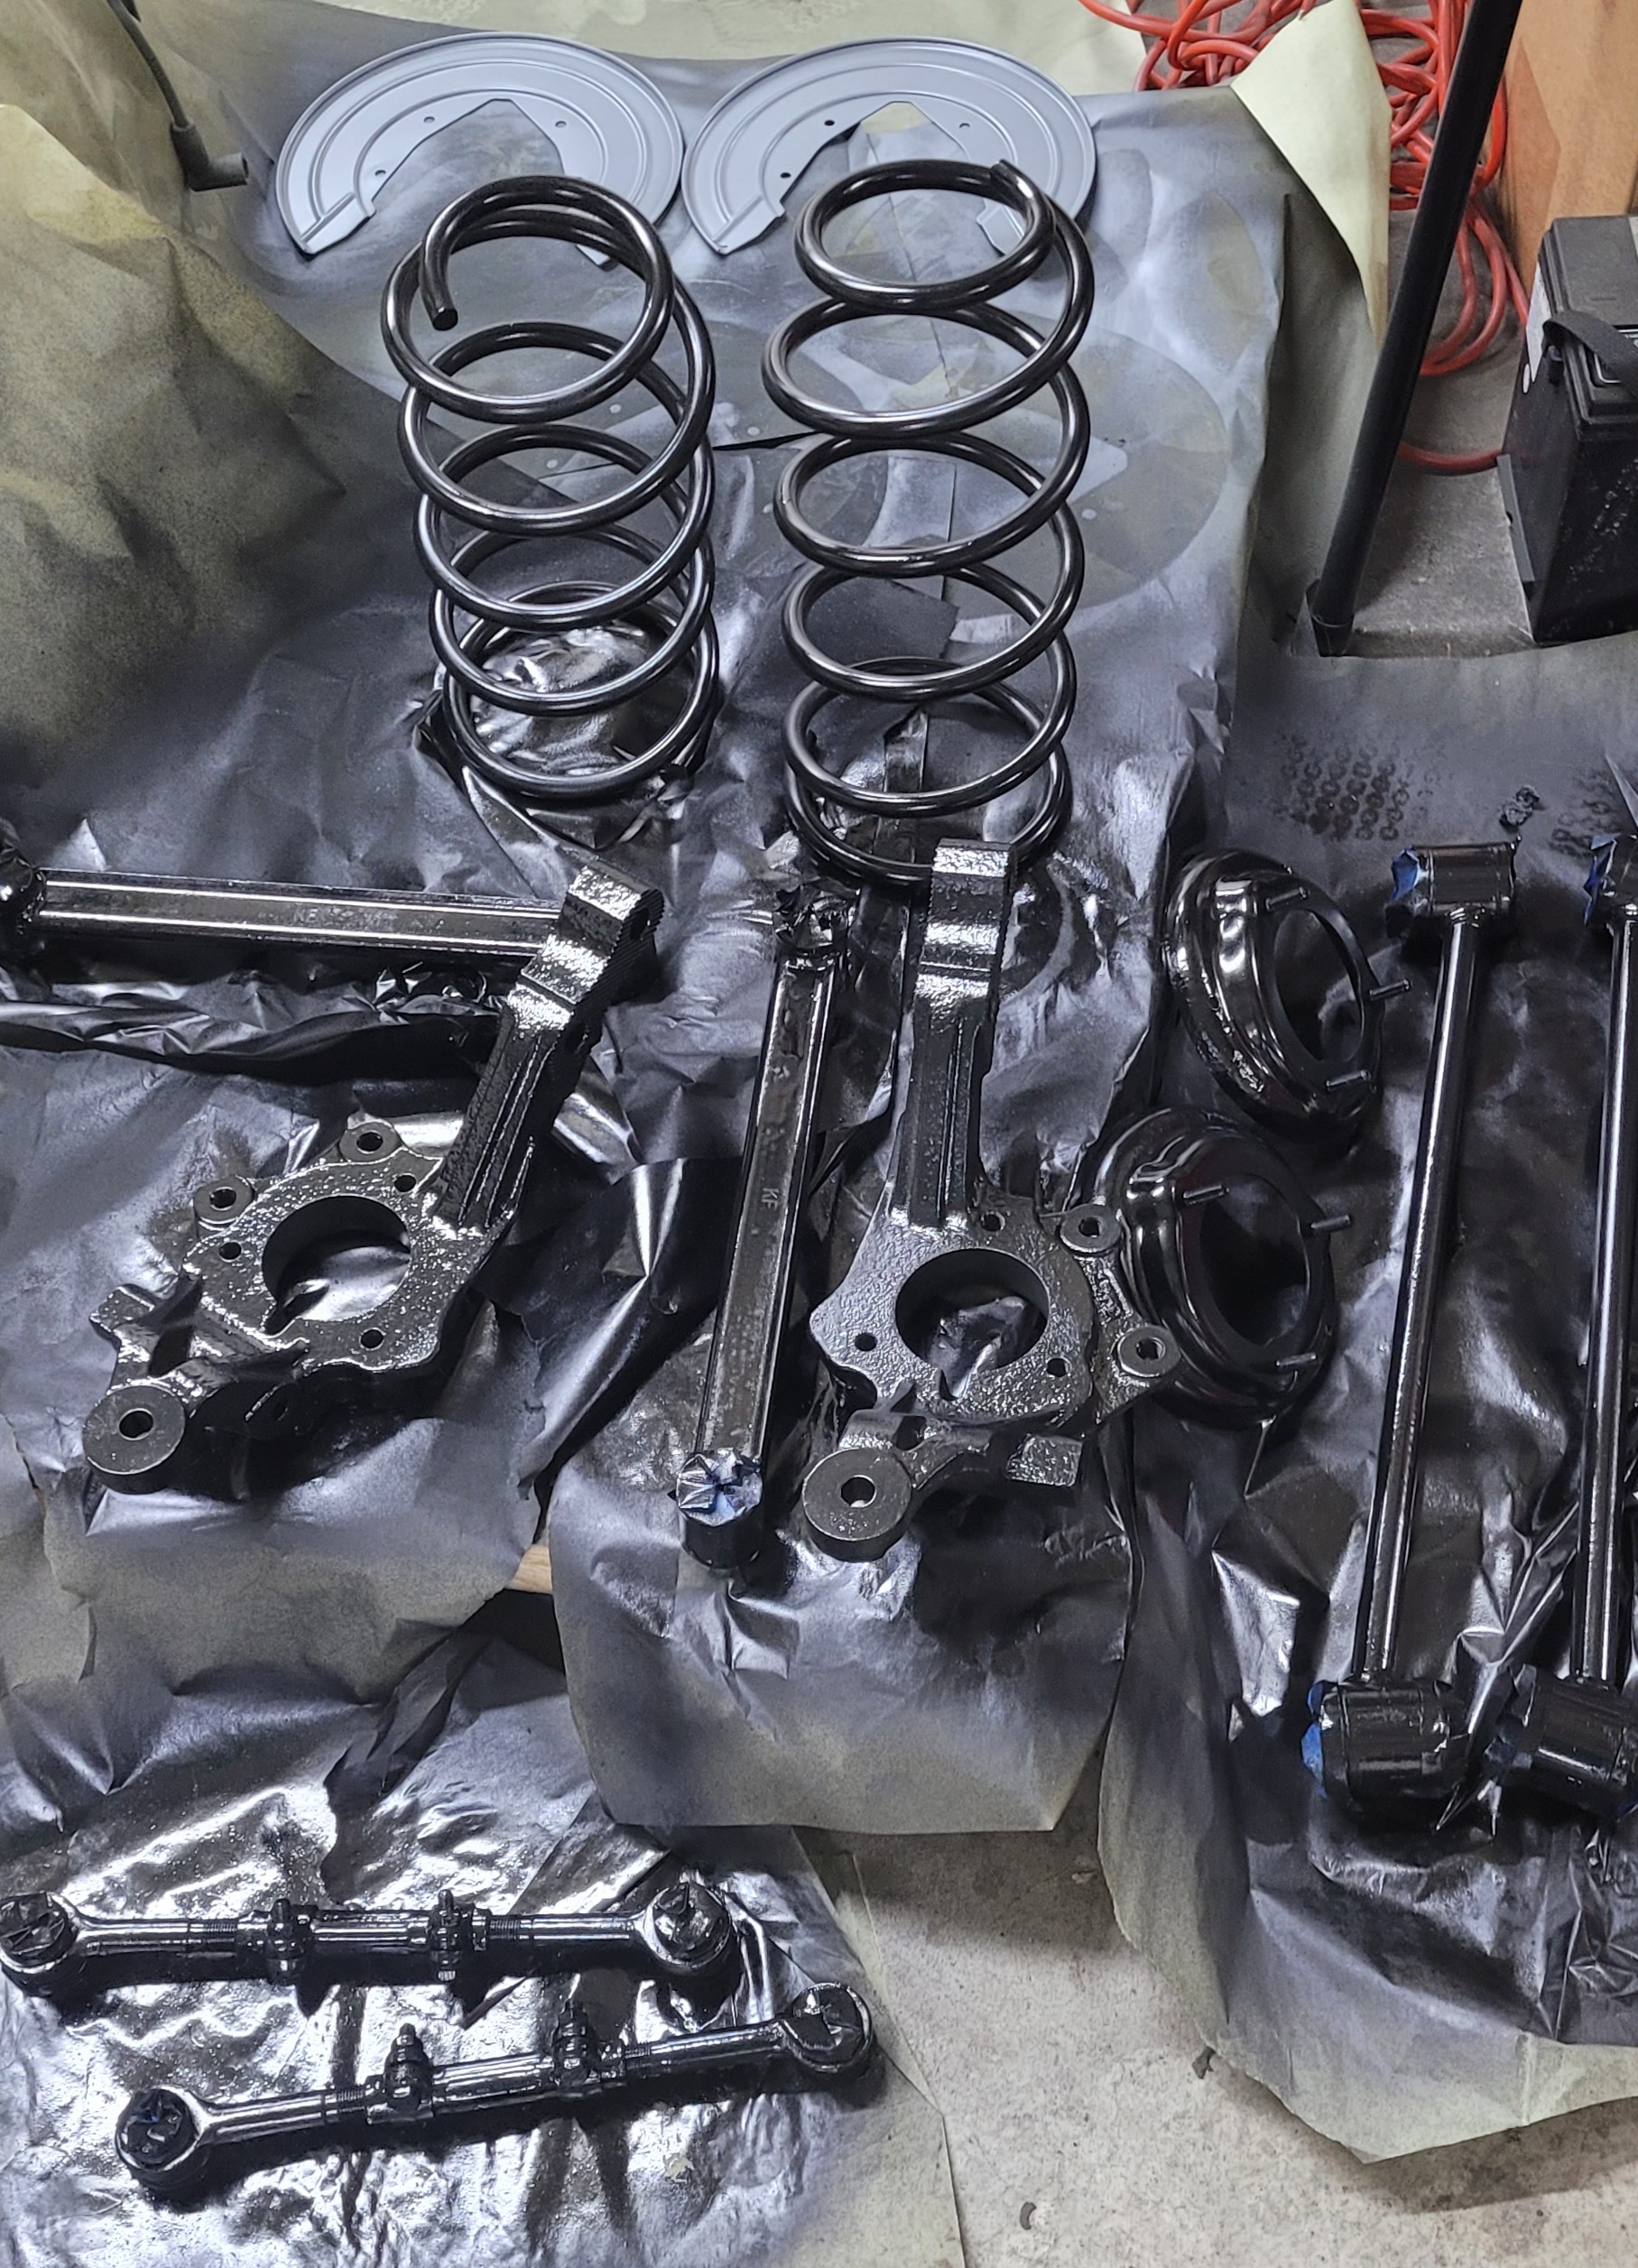
The rear suspension was much easier than the front because of the lack of ball-joints. Everything was sandblasted, primed, and painted. I also went with polyurethane bushings in the rear (as I did up front). I'll need to still do the rear stab-bar on another day.
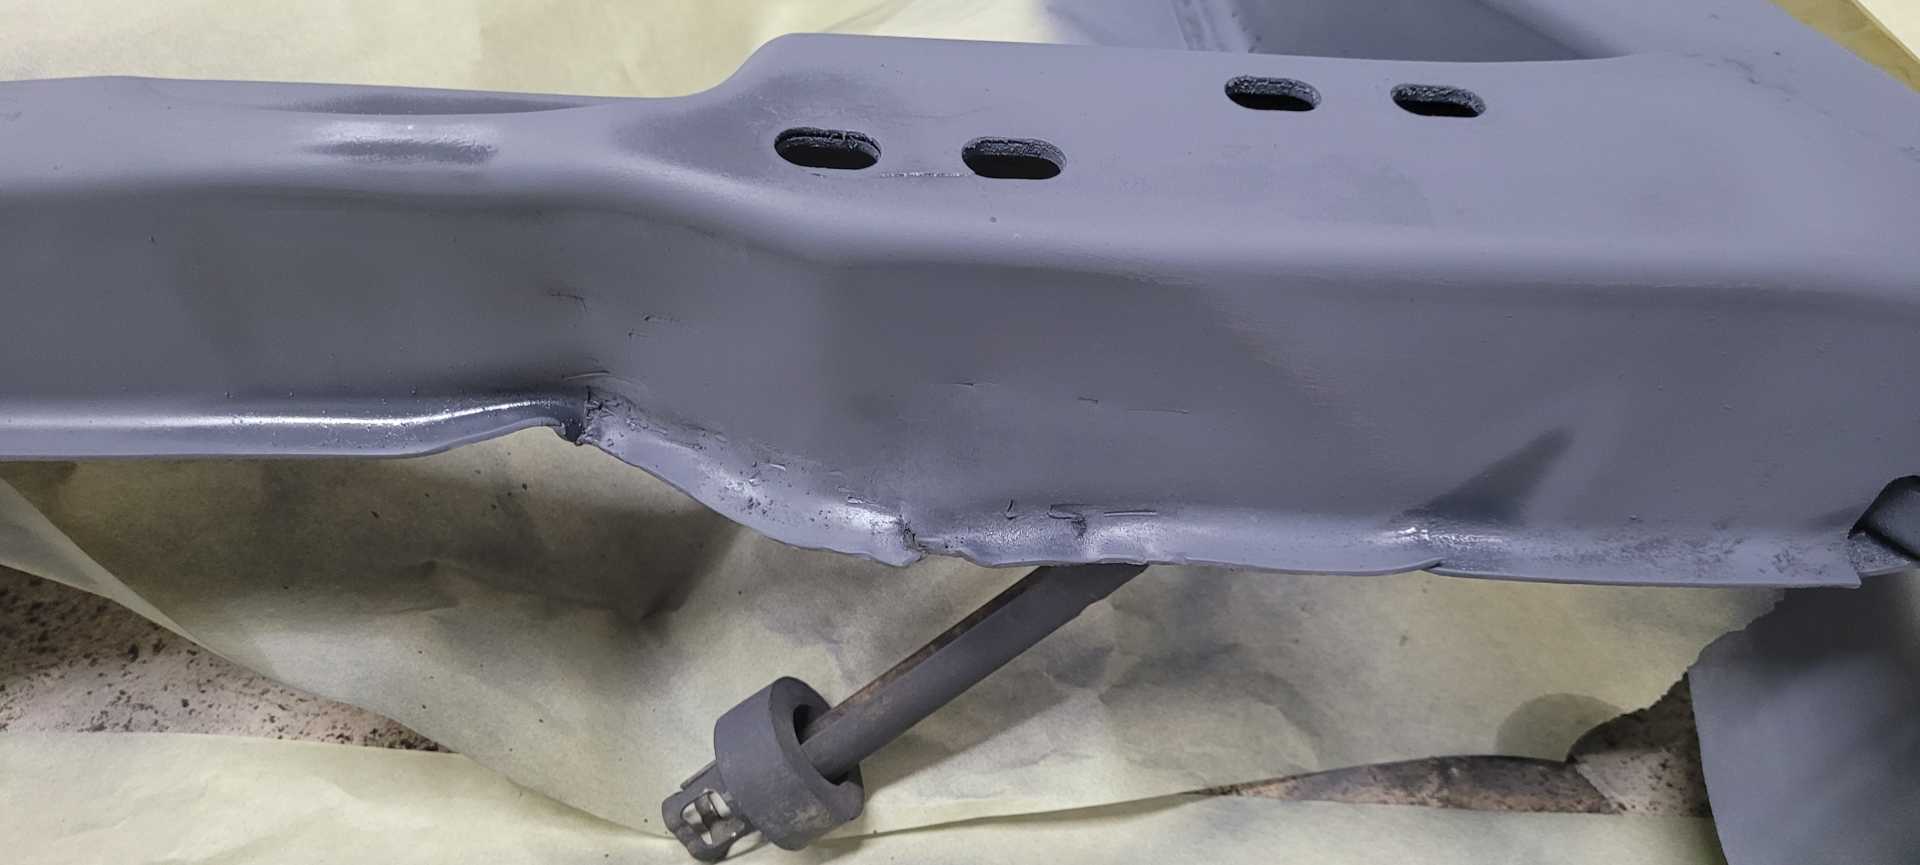
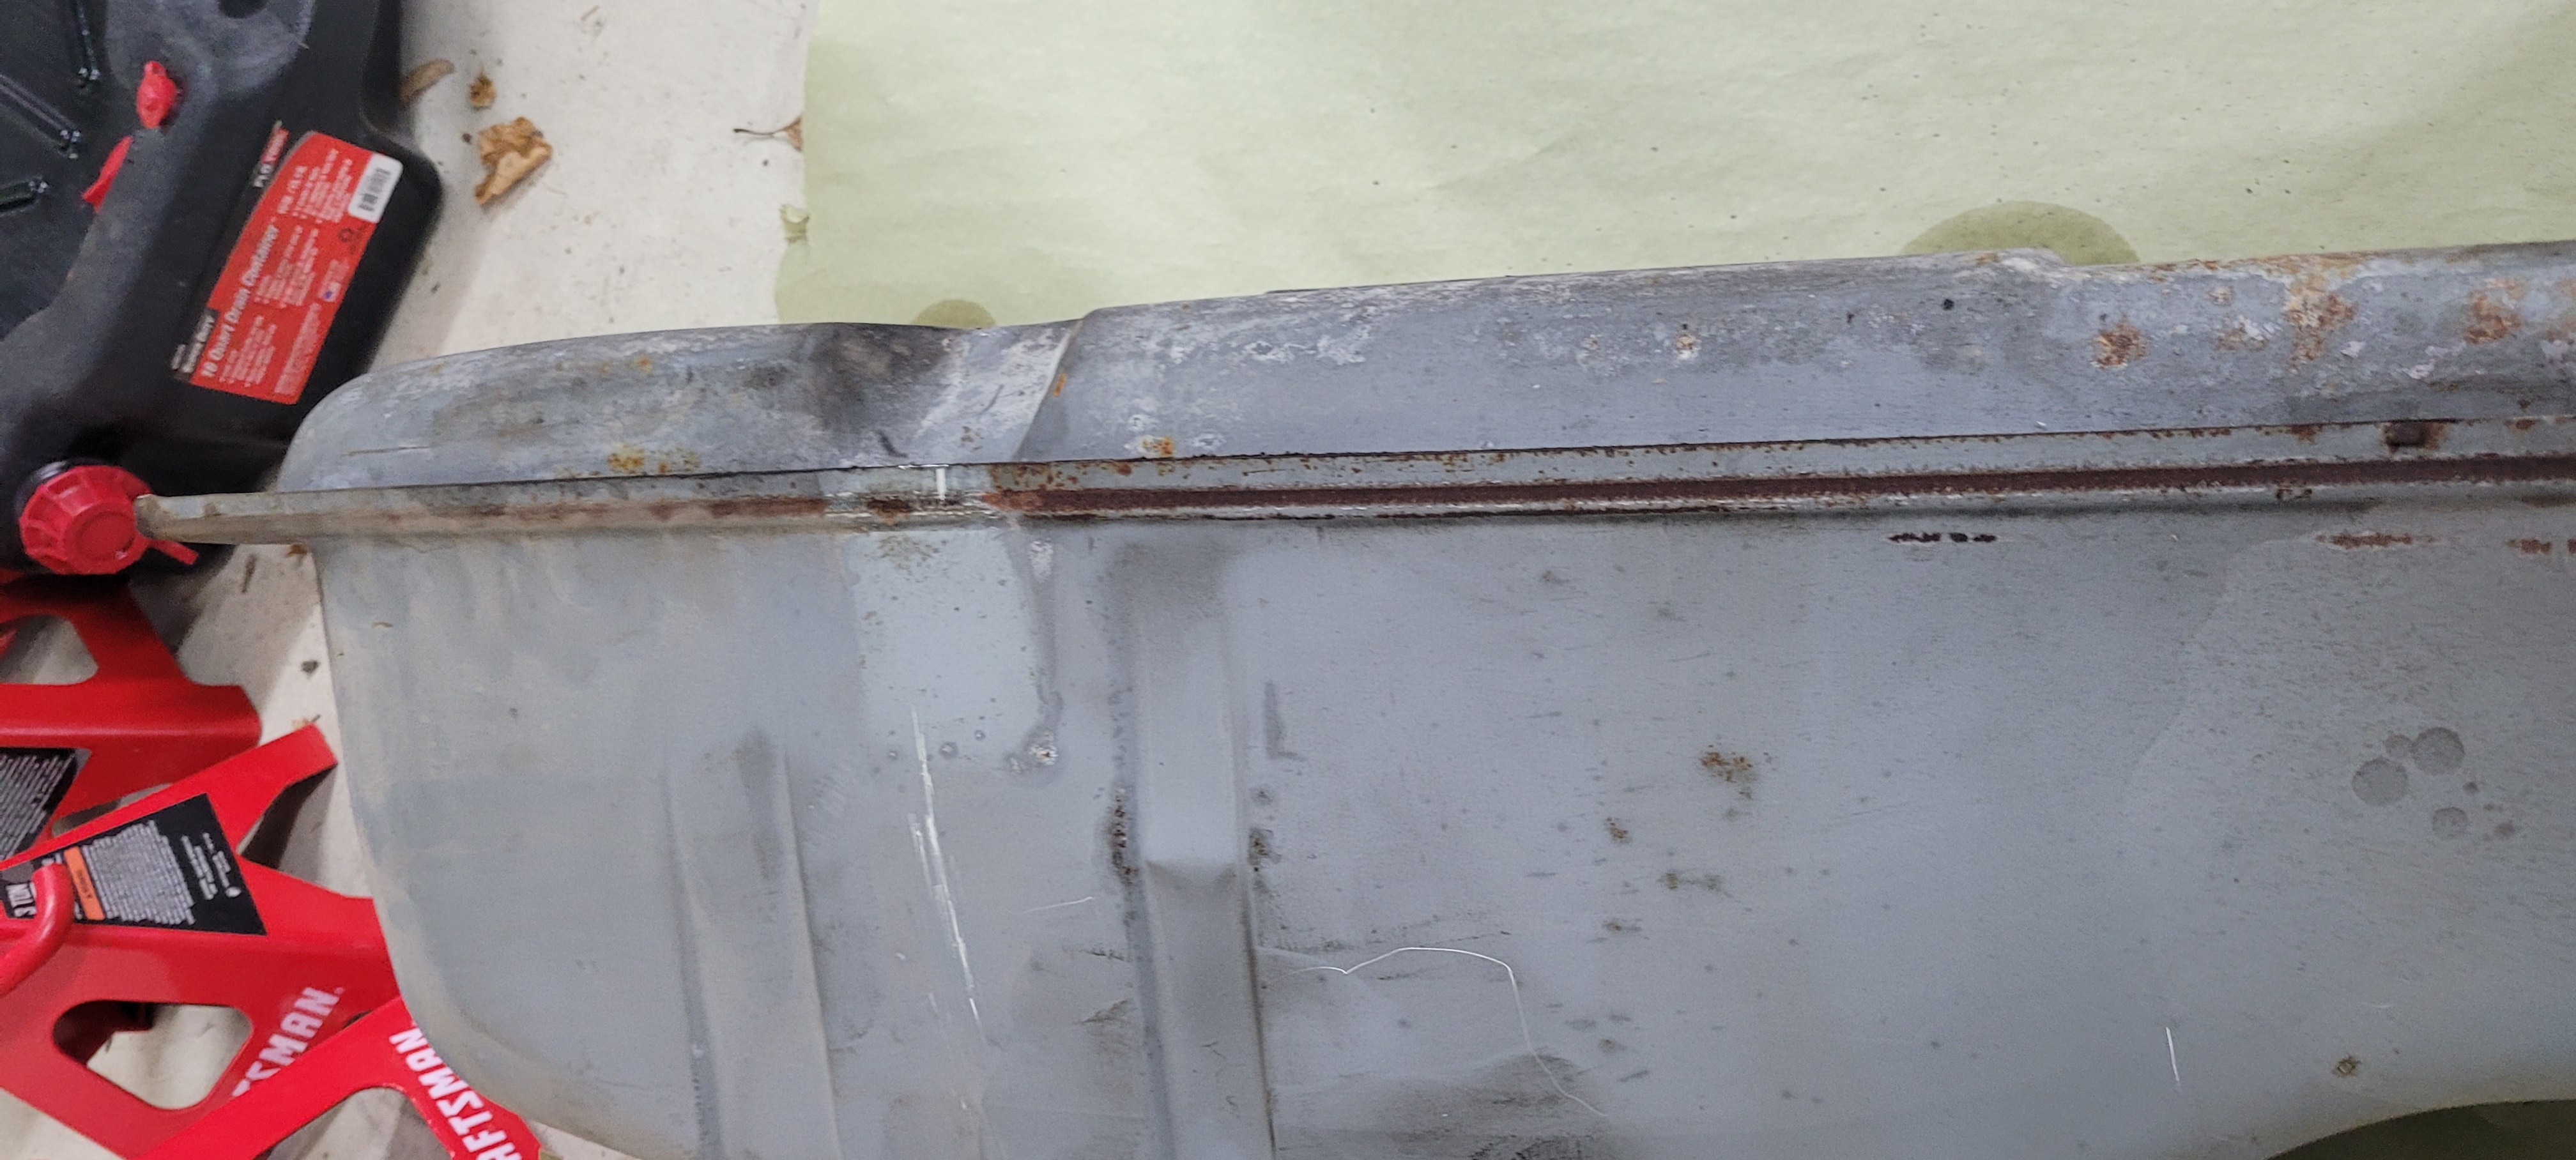
My rear subframe had some damage on the forward-most member, I assume a pothole or rock was hit at some point. It took some persuasion with a torch and a BIG crescent wrench, but it's now bent more in shape. Something I'm satisfied with for now, I could've taken it to a shop but didn't need to spend the money there. Quick before and after.
Luckily the damage wasn't effecting the fitment or anything, would've just taken away some of the fore-aft stiffness. I removed all the exhaust hanger brackets, degreased the entire thing, sanded it down, and degreased it again. The first few coats of self etching primer are now curing. I'll return to the garage and finish up the bottom side.
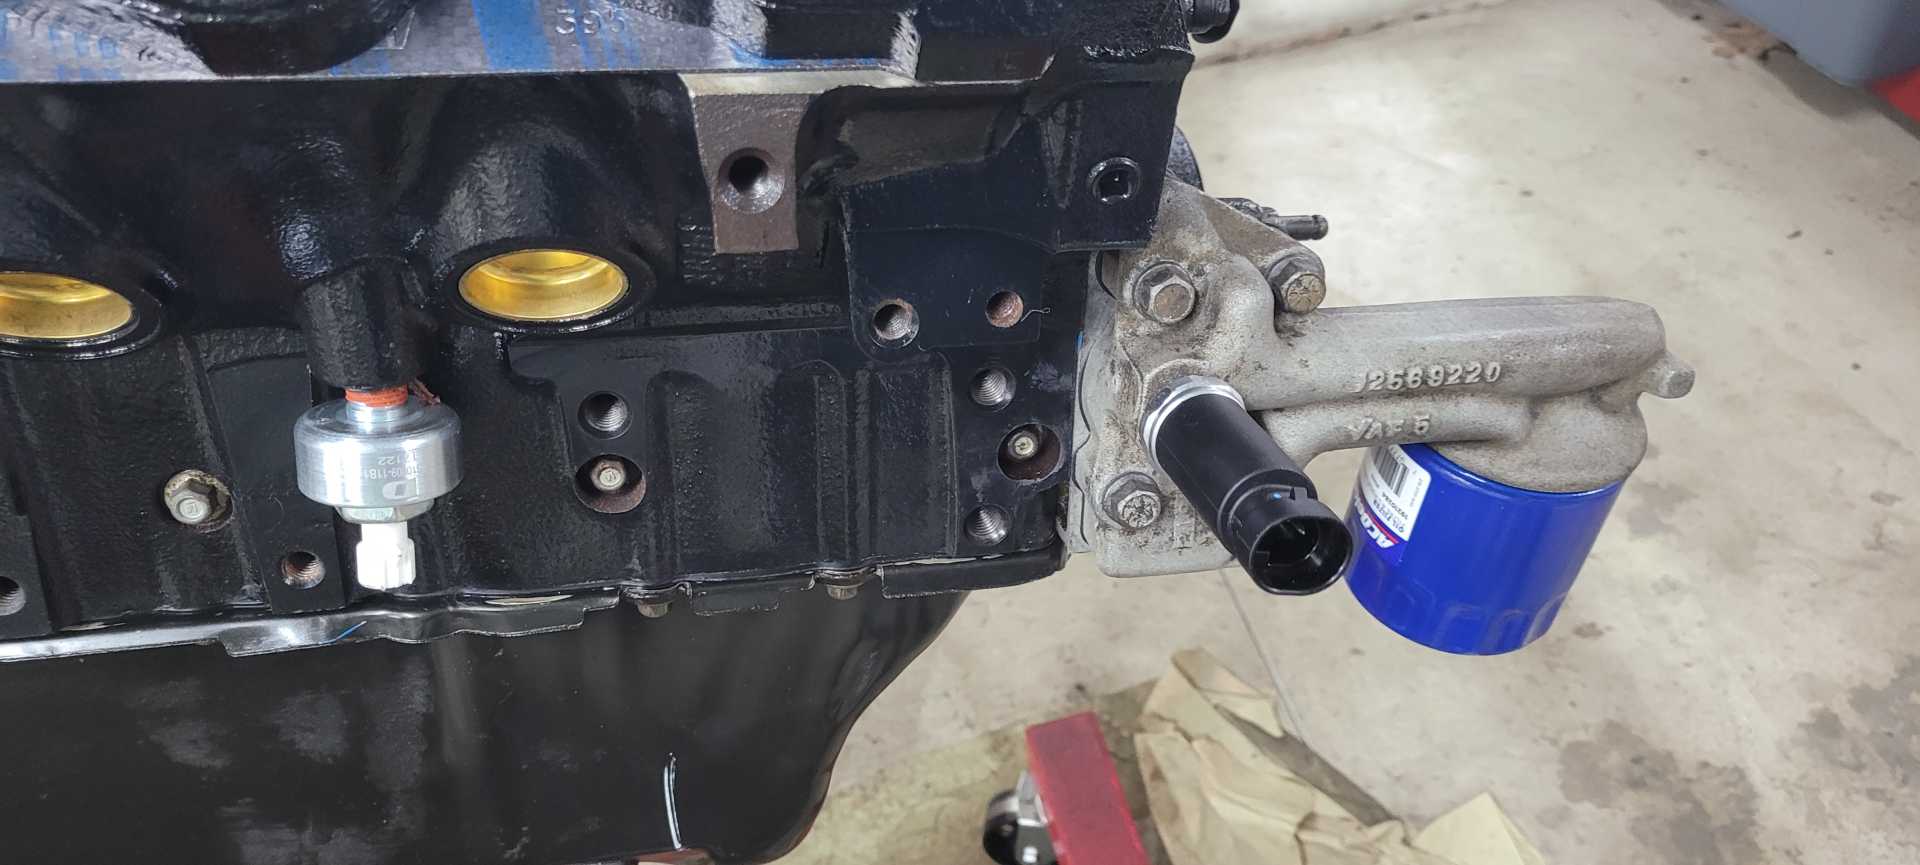
The last thing I got to today was some sensors for the engine and transmission. Knock sensors, 3 pin coolant, and 3 pin oil pressure sensors for the engine.
The transmission got a new speed sensor, shift position module, and a new dipstick & tube.
Looks like you have new front hubs. Where did you get them? The cheap chinese knock-off hubs on eBay for 88 have been sketchy.
Rodney makes rebuildables ones for 88. Hopefully you did not toss your old ones. Apparently they can be re-packed with fresh grease- I have not tried to do it yet
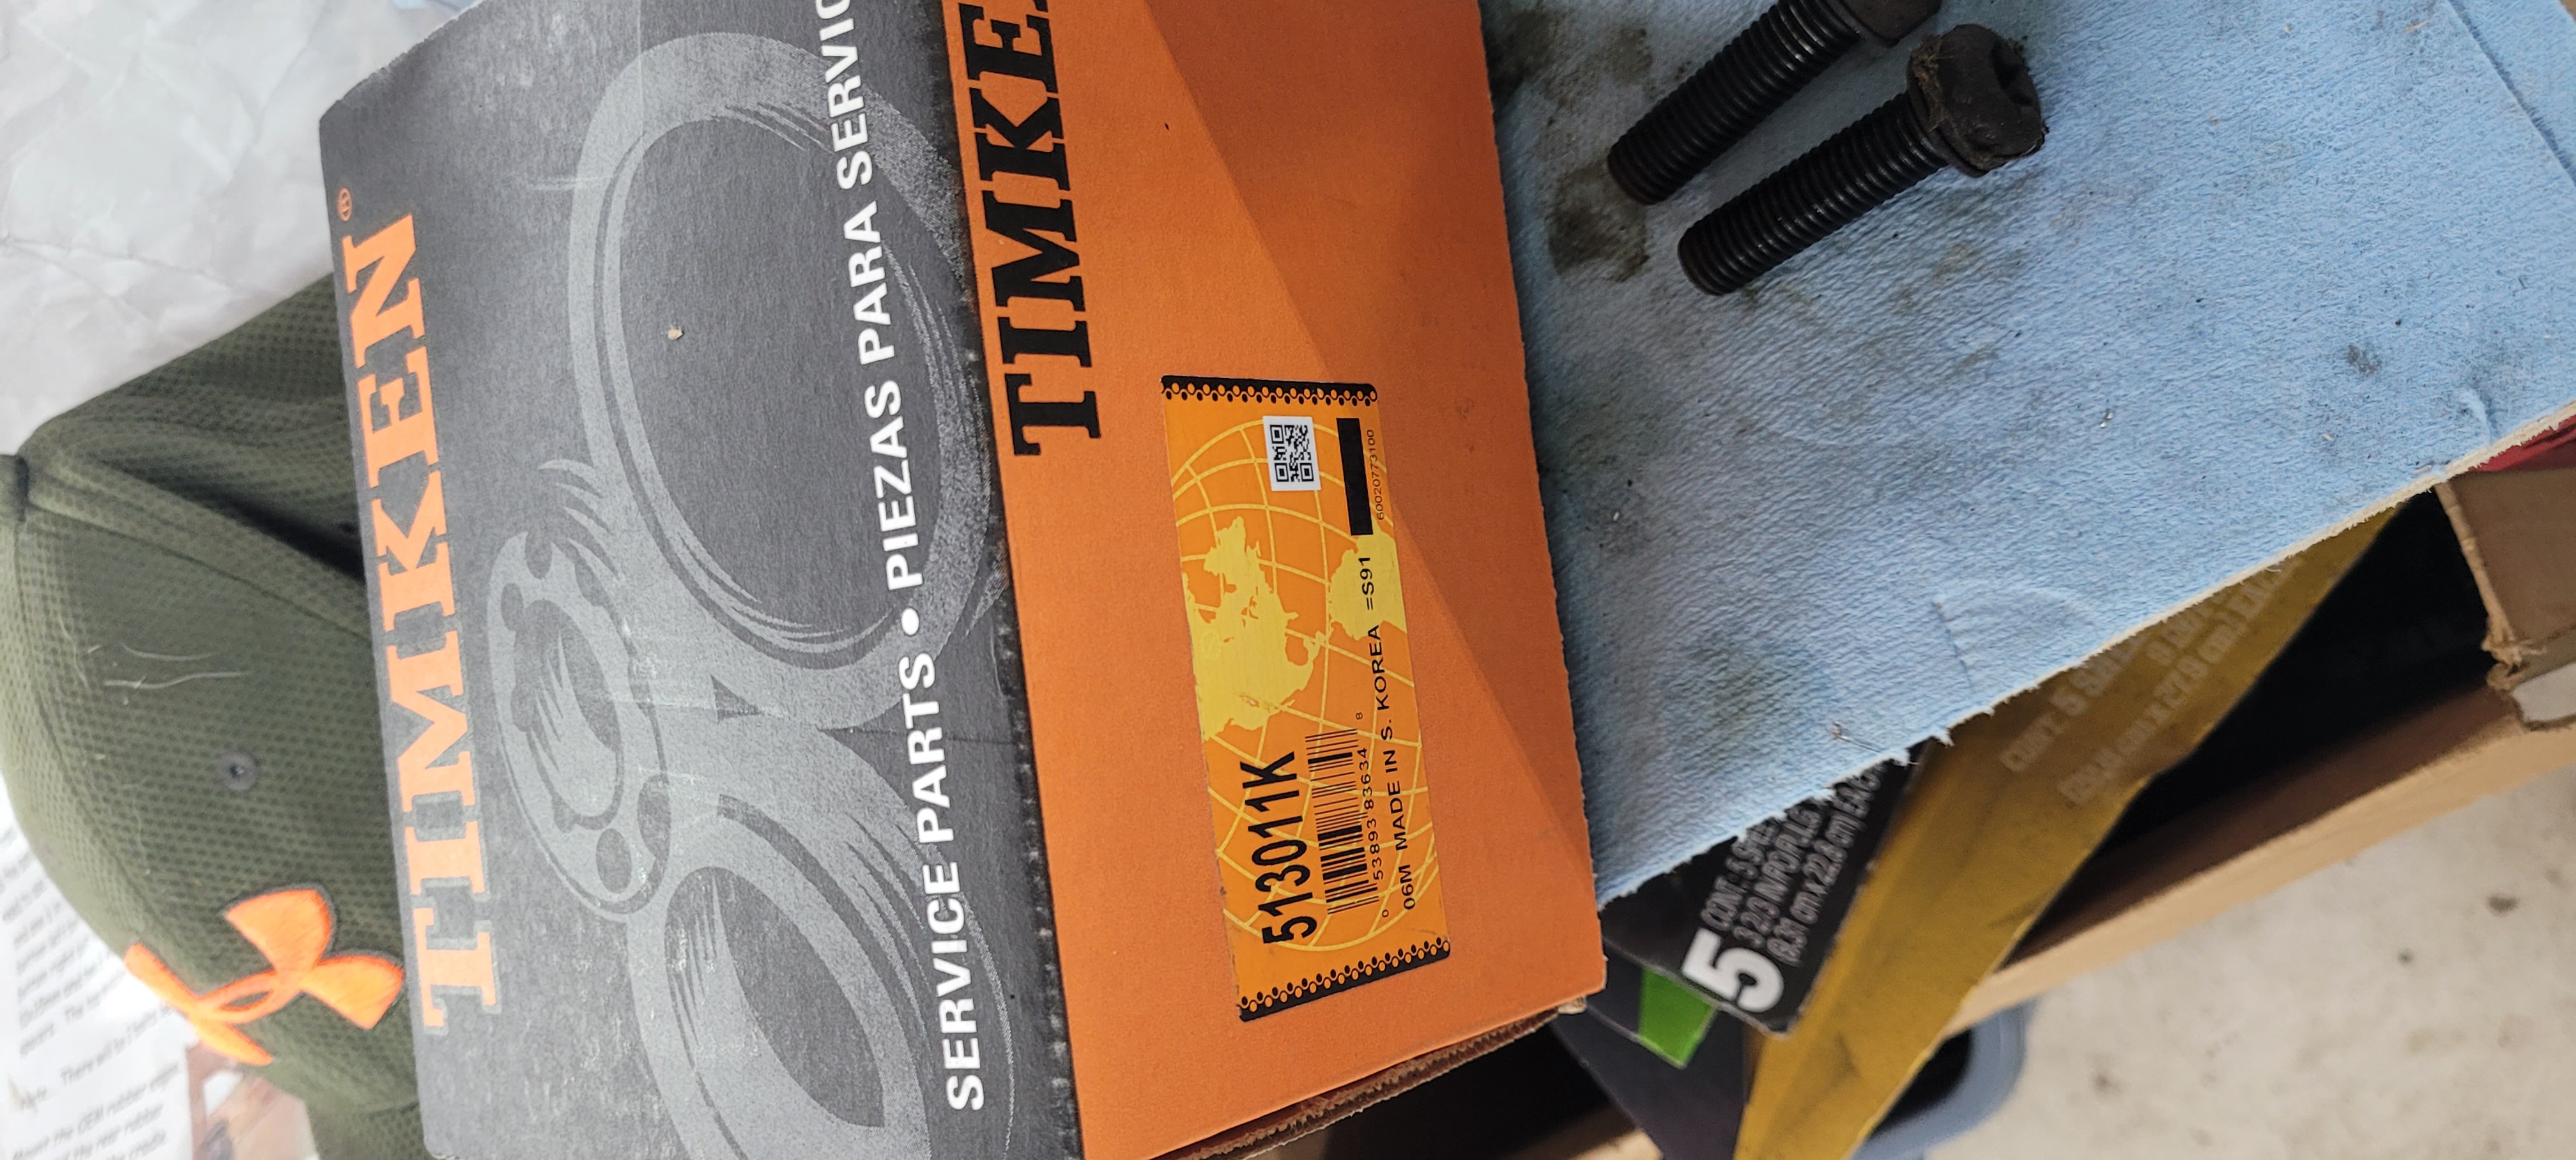
I bought Rodney's rebuildable front hubs. I do still have my old ones, but not sure what I want to do with them yet. I'm eyeing up Timken rear hubs, I've seen some threads talk about them in a good way. Any opinion on which rear hubs not to buy?
I have been making progress each weekend since my last update. I was able to get the rear subframe completely painted with some rustoleum rubberized undercoating. I was worried is would be too soft and rubbery when I first was letting it cure, but after giving it over a week to cure I'm happy with how it's turned out.
I took the opportunity since the paint was dried to put my 3 links back in place on the passenger side. It's certainly a tight fit. I will have to do the other side this coming weekend. I did end up going with the Timken wheel hub. The build quality looks excellent, You'll hear from me if I run into spline fitment or life/durability issues down the road. I did fit them to the knuckles but haven't taken a picture yet.
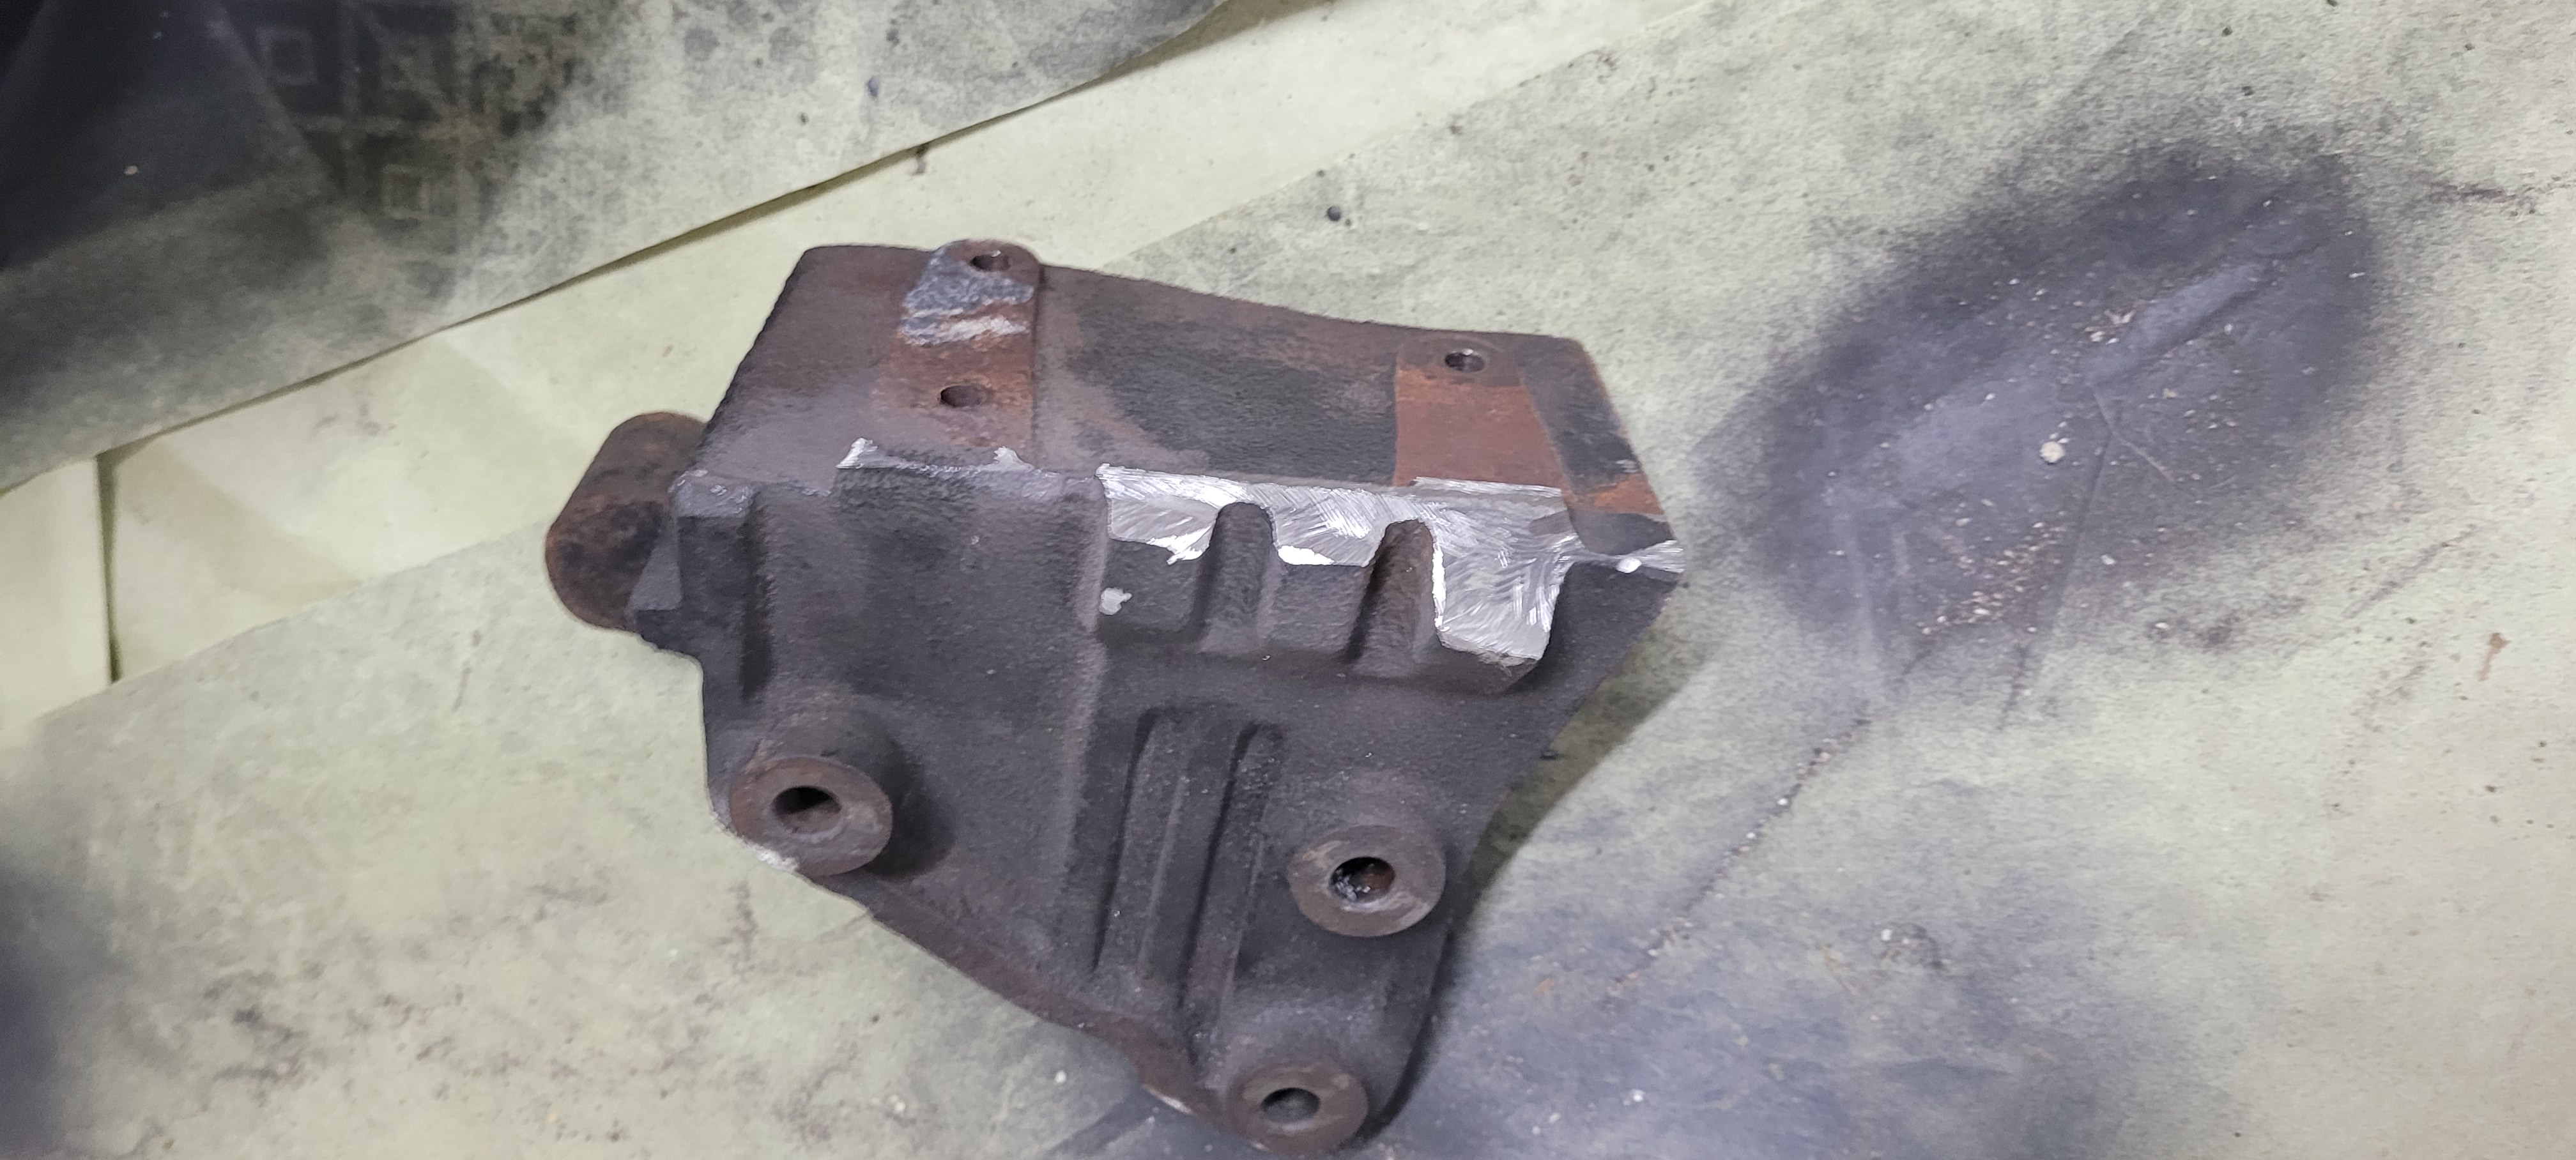
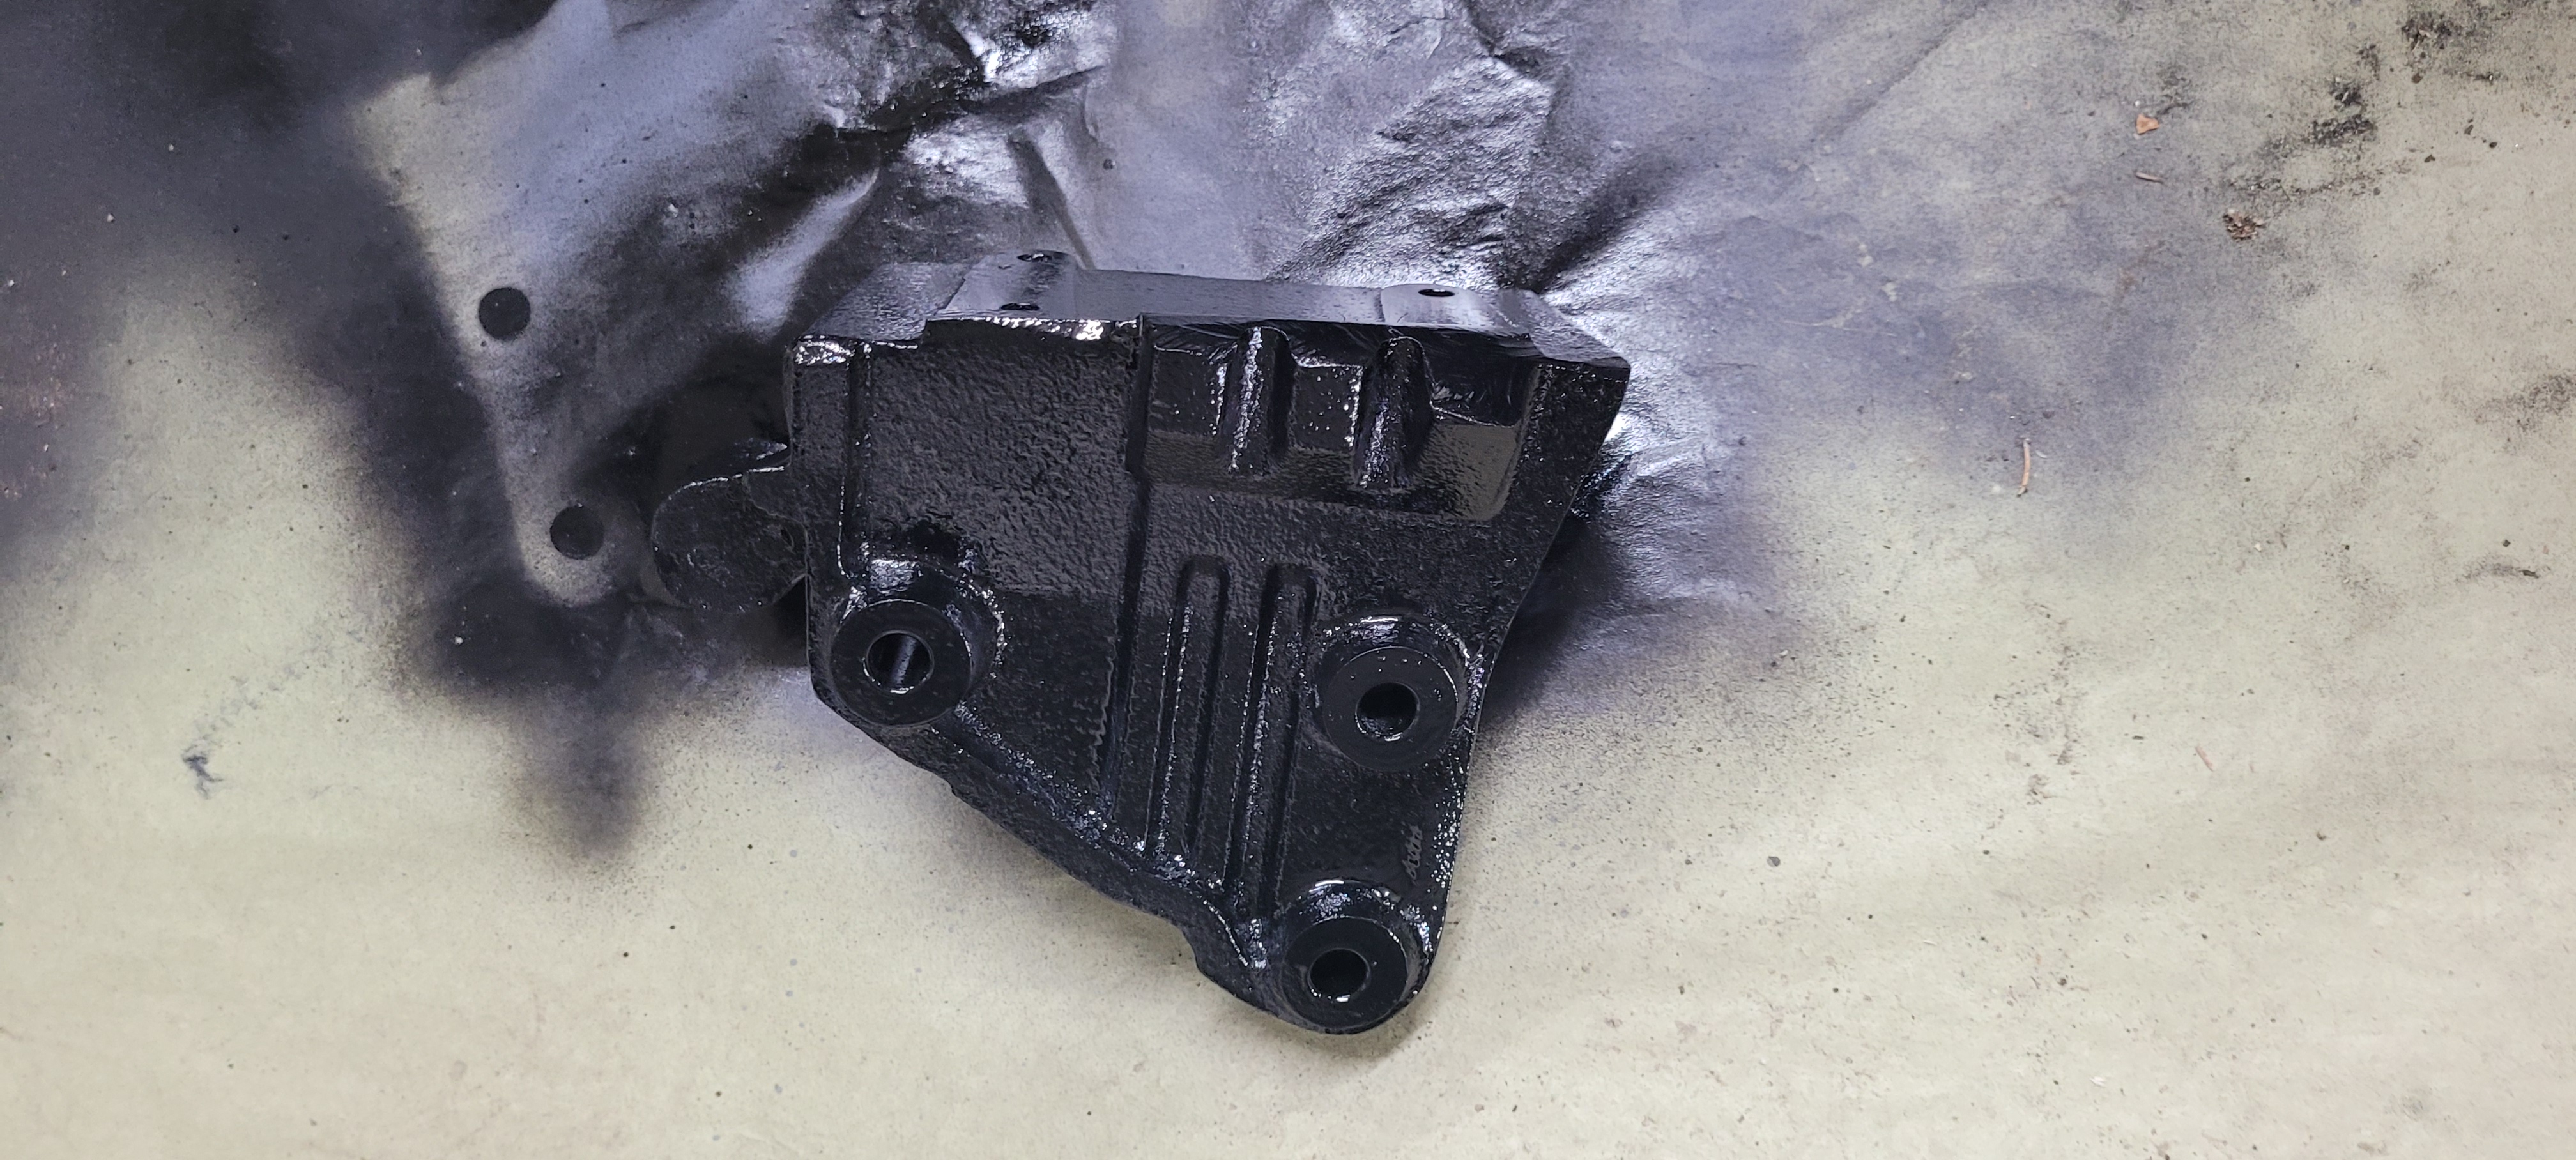
Got some use out of my new grinder and took the dogbone mount off of the coil bracket. Sanded, primed, and painted it with the same engine enamel I used on my block. It should be ready for the tensioner and idler pulley I have.
I also had to follow LostNotForgotton's tip on using a street elbow to clear FieroRog's low mount alternator bracket.
The last thing I got to was replace my fuel pump with the Walbro pump GCA758-2 from Summit. My float is completely non functional. I get 0 ohms of resistance at the contact regardless of where the float position is. What's my best option? Is there any mending to this unit or am I going to have to find a working on somewhere?
Next question I have: who is still making half-shafts for the 3800 swaps? I see West Coast Fiero does. Are there any home gamers that do it any better/cheaper?
[This message has been edited by MichiganReefer (edited 02-21-2023).]
It's been a while since my last update, a series of winter storms here in Michigan left my garage without power for 3 weekends in a row. I'm definitely in the home stretch now with all the major purchases out of the way, and only the integration and buttoning up left to do. First thing I tackled was assembling the rear suspension to the cradle, then struggling to mount the transmission to it. I initially had secured the powertrain mounts down to the cradle, but because of the taper of them couldn't drop the transmission down like I expected. To avoid the issue I pulled the rubber mounts off of the cradle and lowered the transmission with mounts attached onto the cradle which allowed me to line the studs up with the holes in the subframe without too much force.
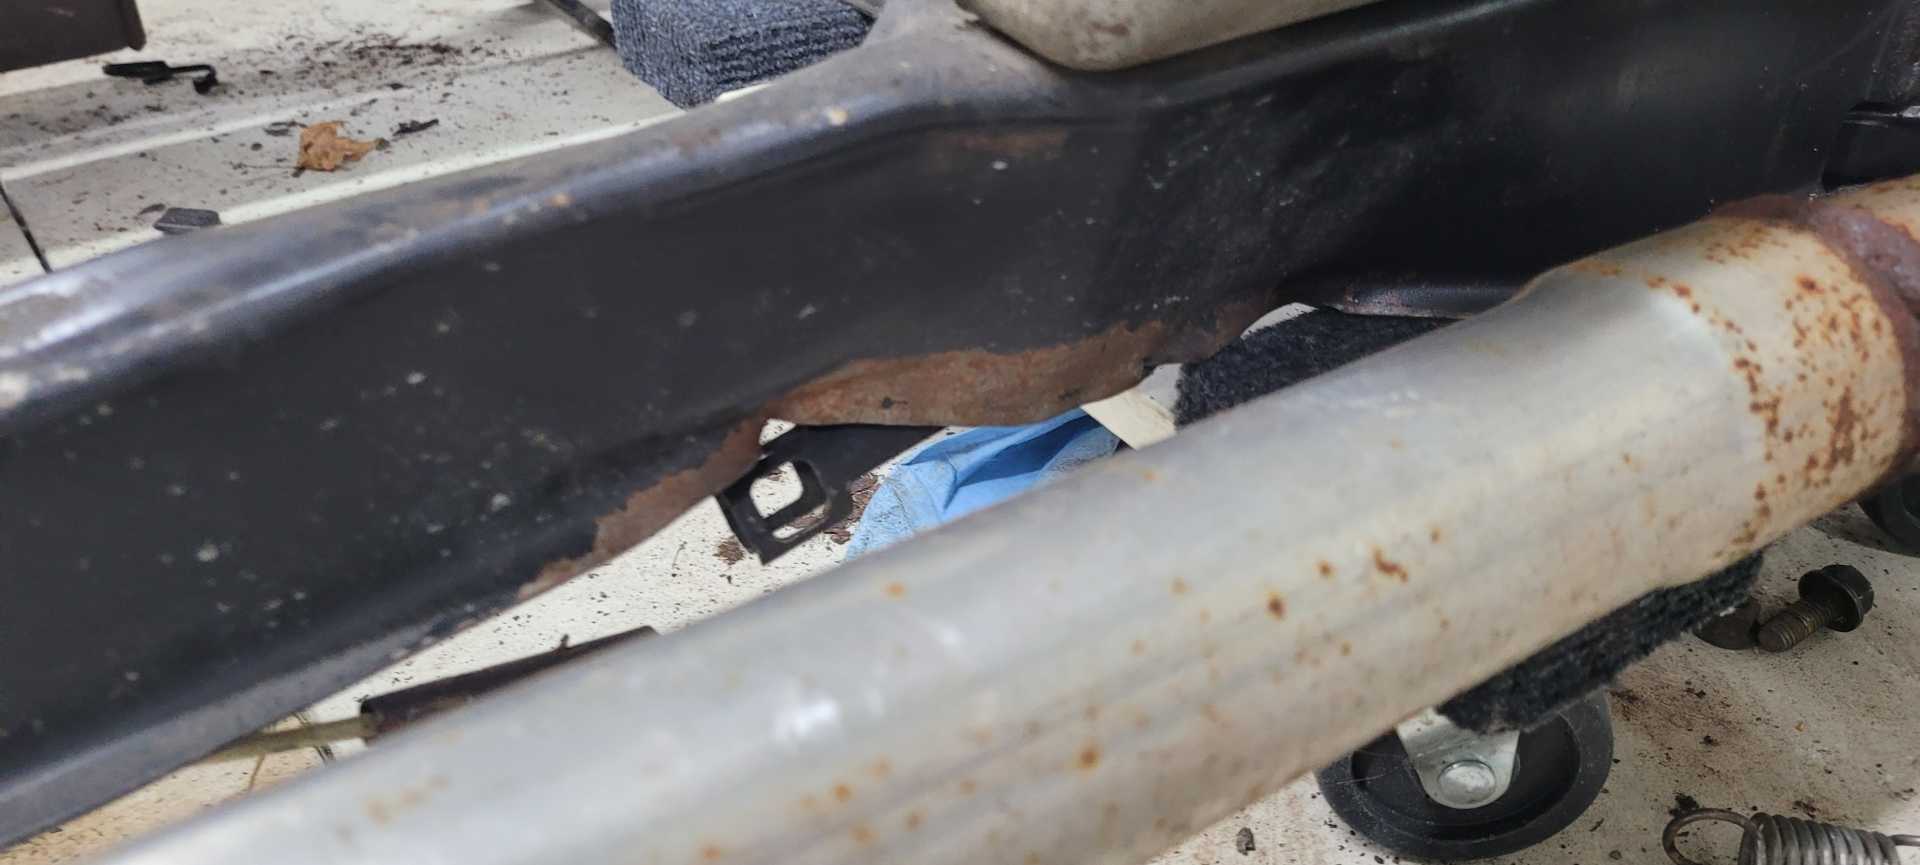
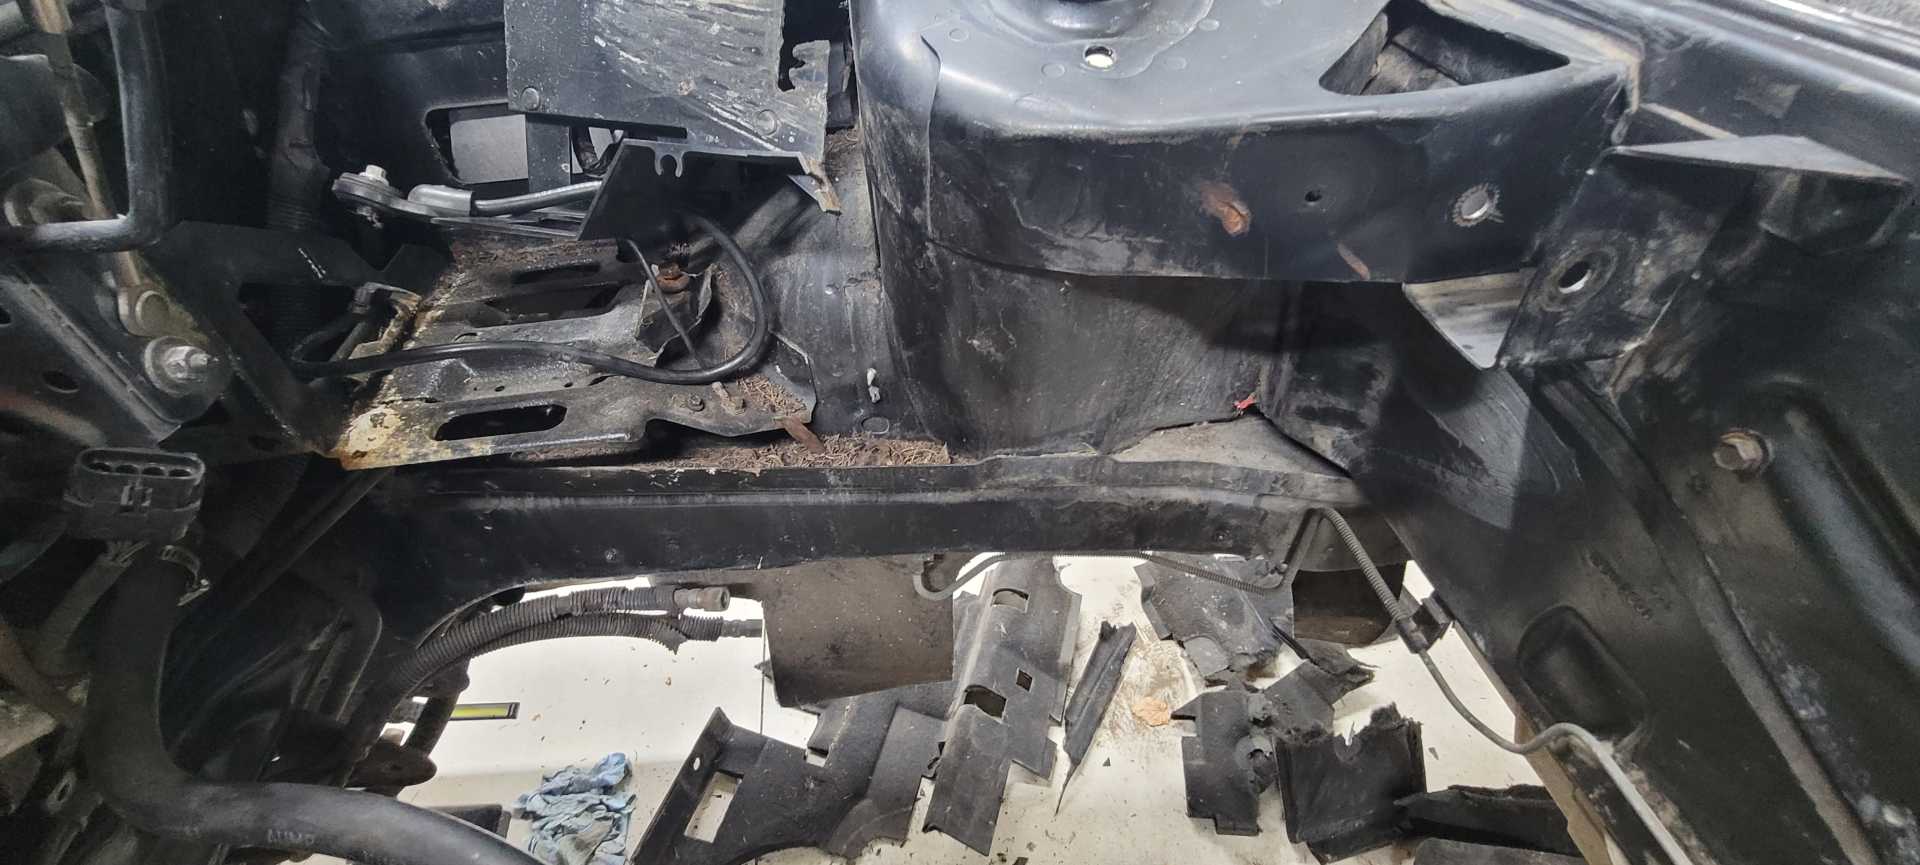
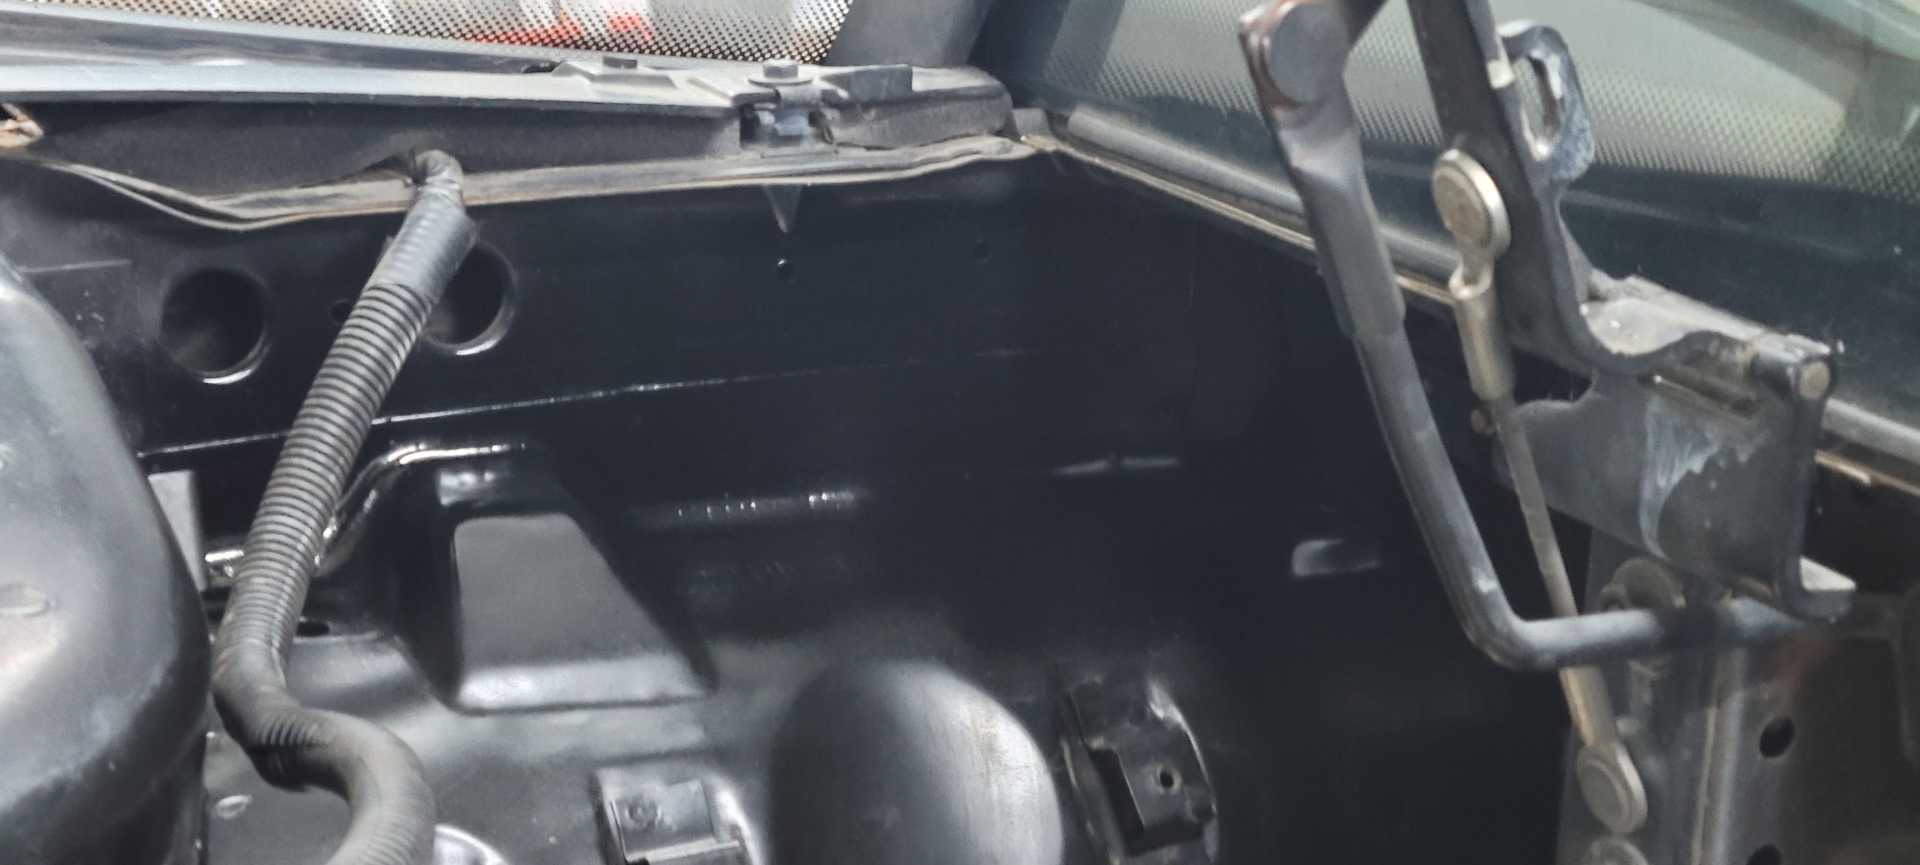
I then moved my attention over to the engine bay where I took some time to take some reference pictures and pull the engine bay insulation from the walls. I was expecting to see some rust behind it, but was pleasantly surprised that I found basically nothing (other than a scrape on the rear passenger side). I'll be shop-vacing all of the dirt up, degreasing it, and touching it up before I install the new Boom-mat insulation I ordered from Summit.
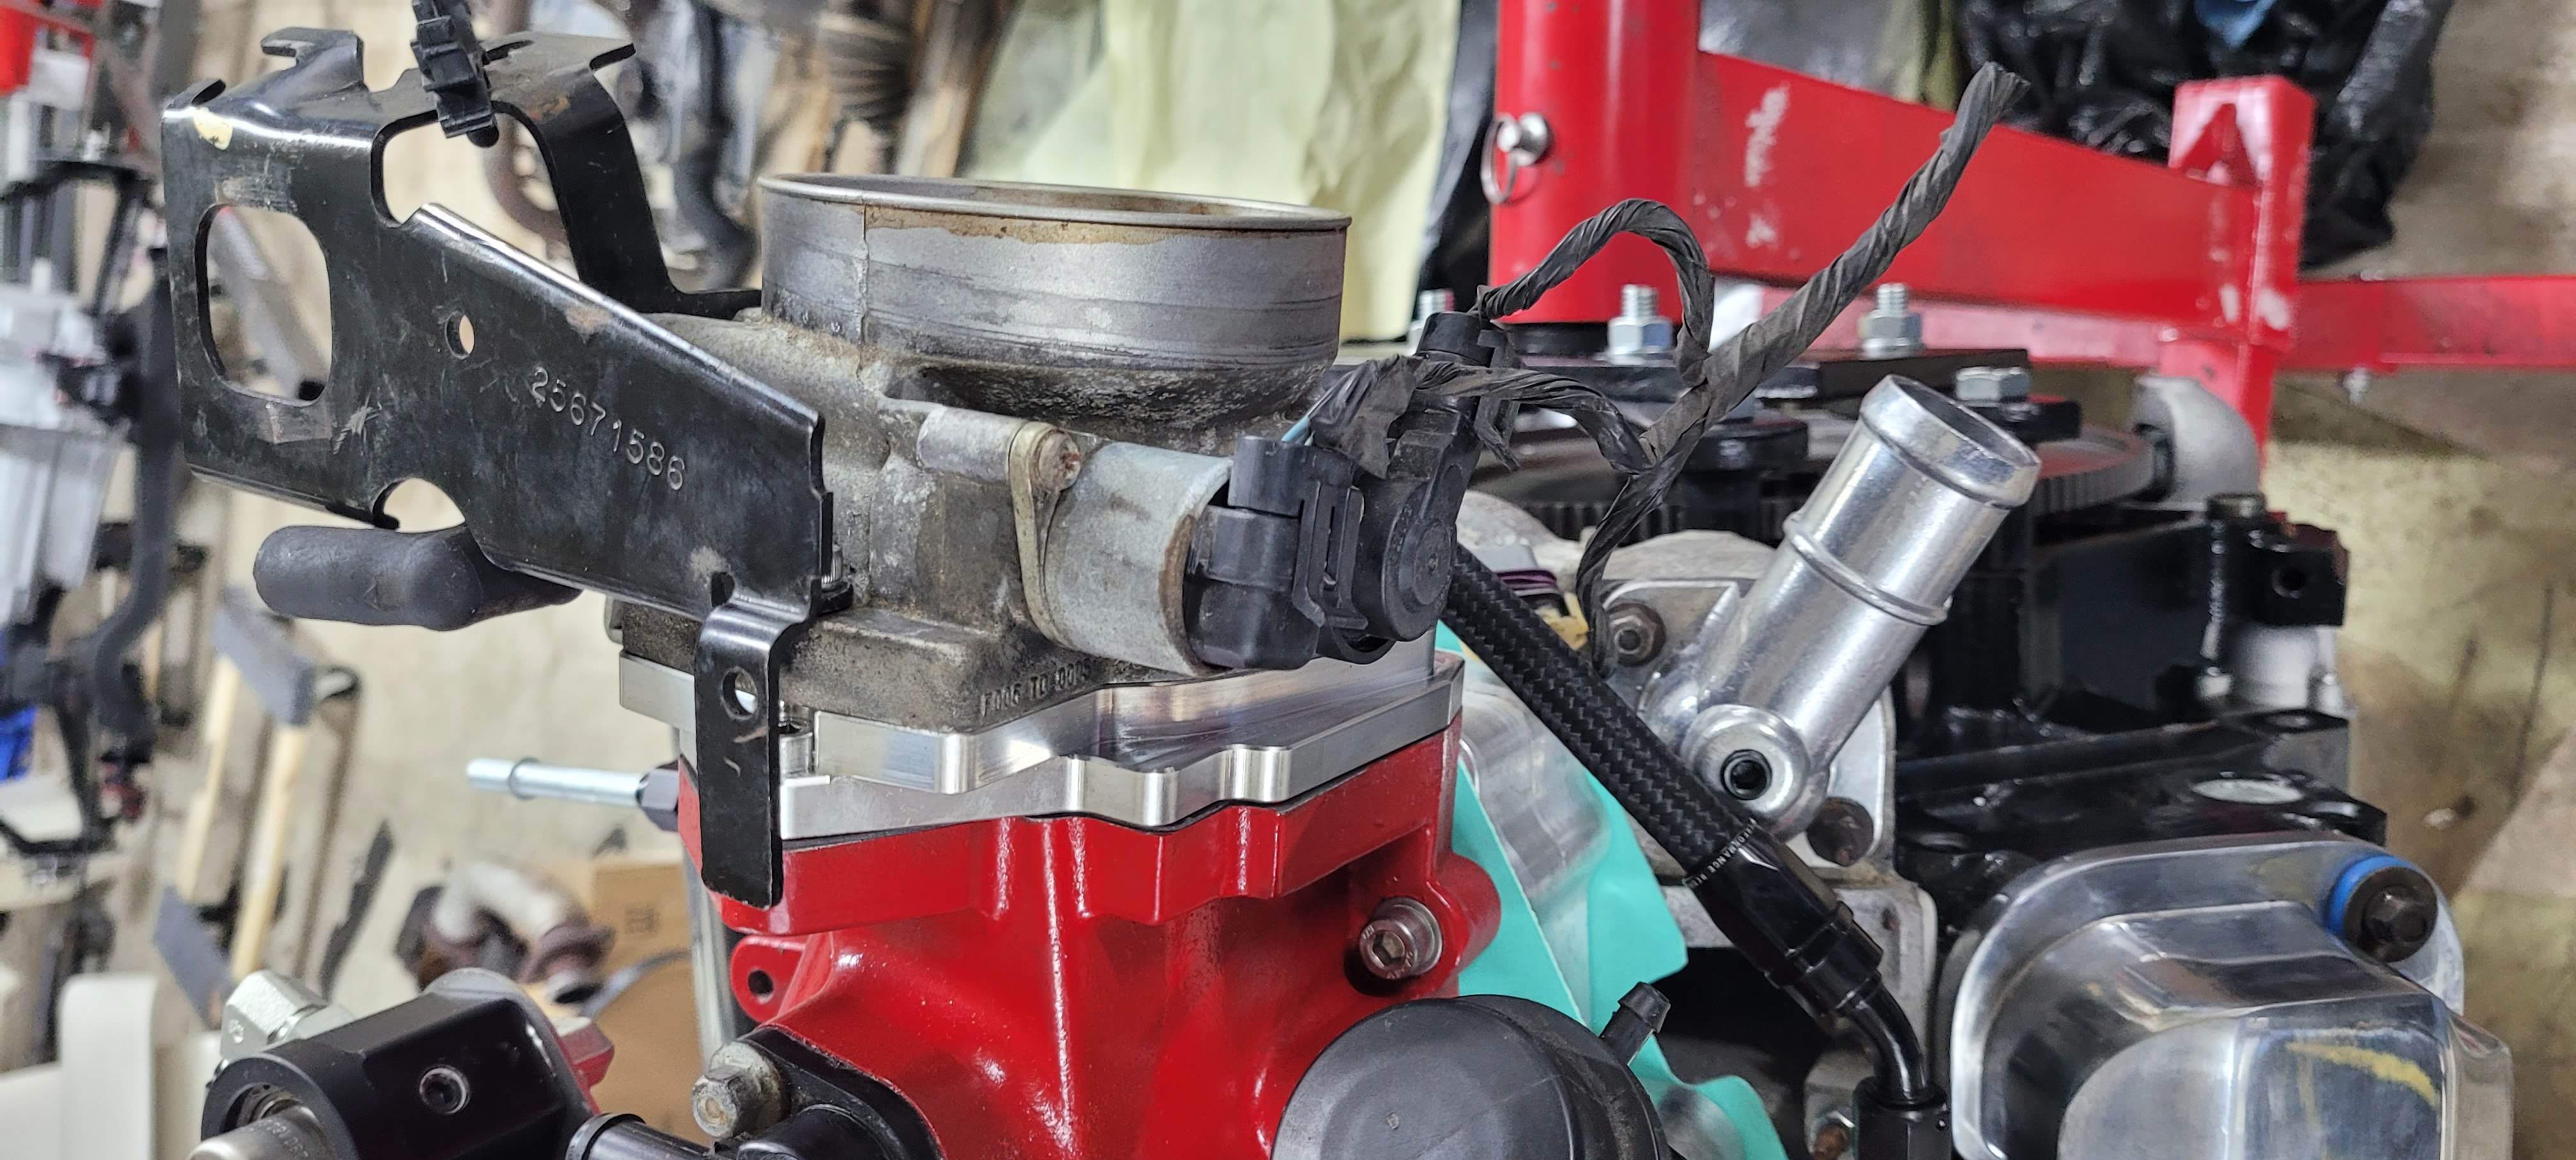
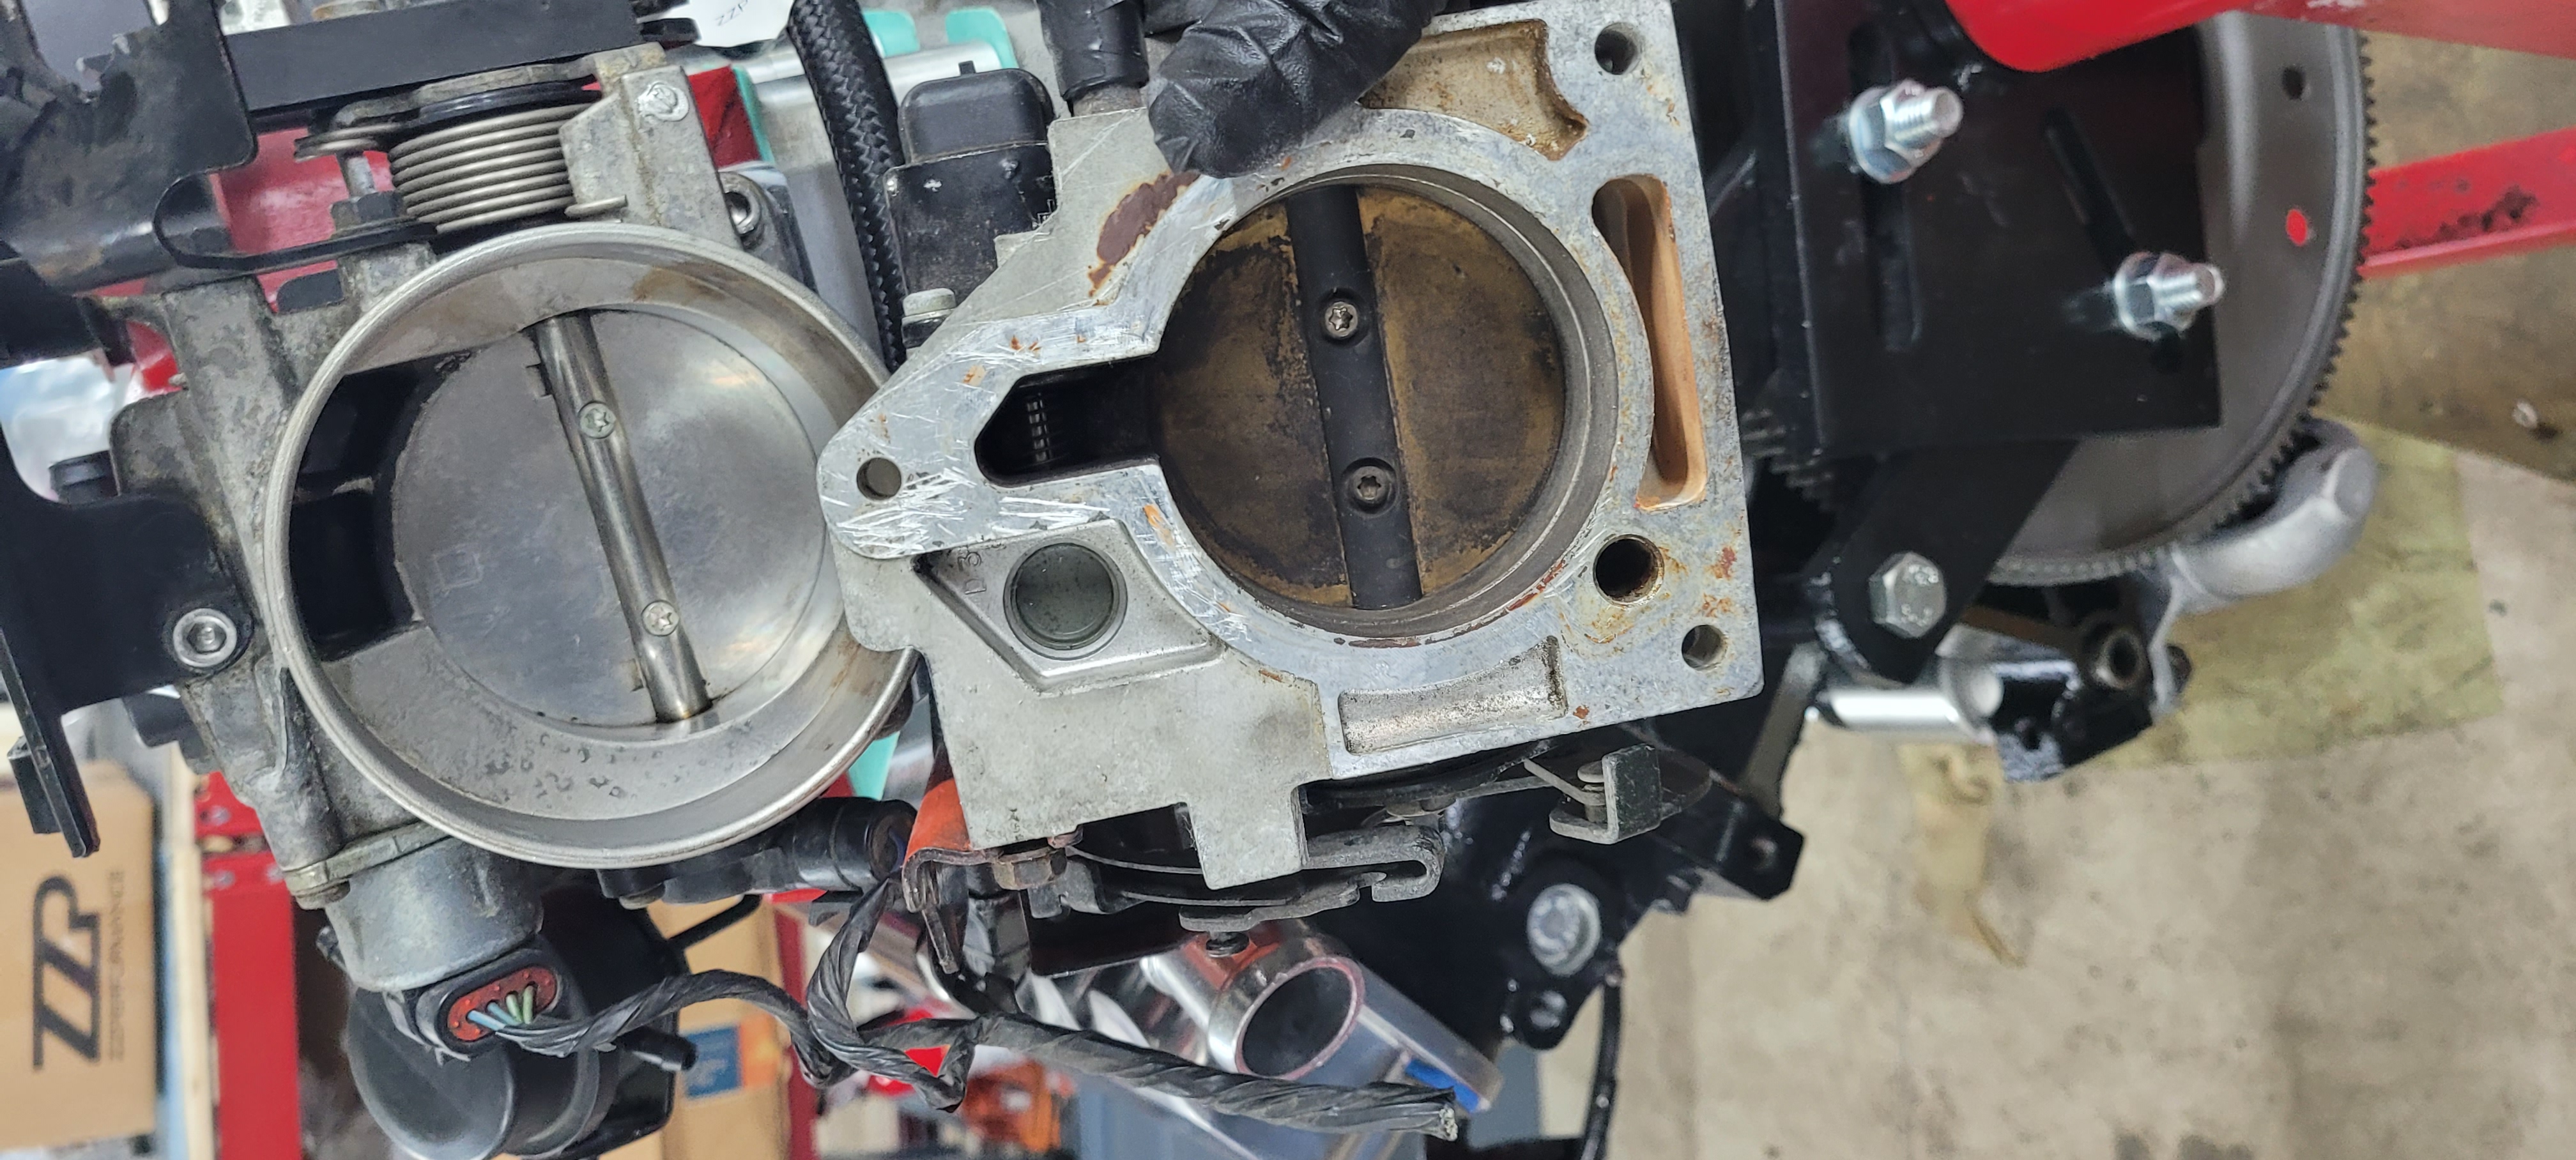
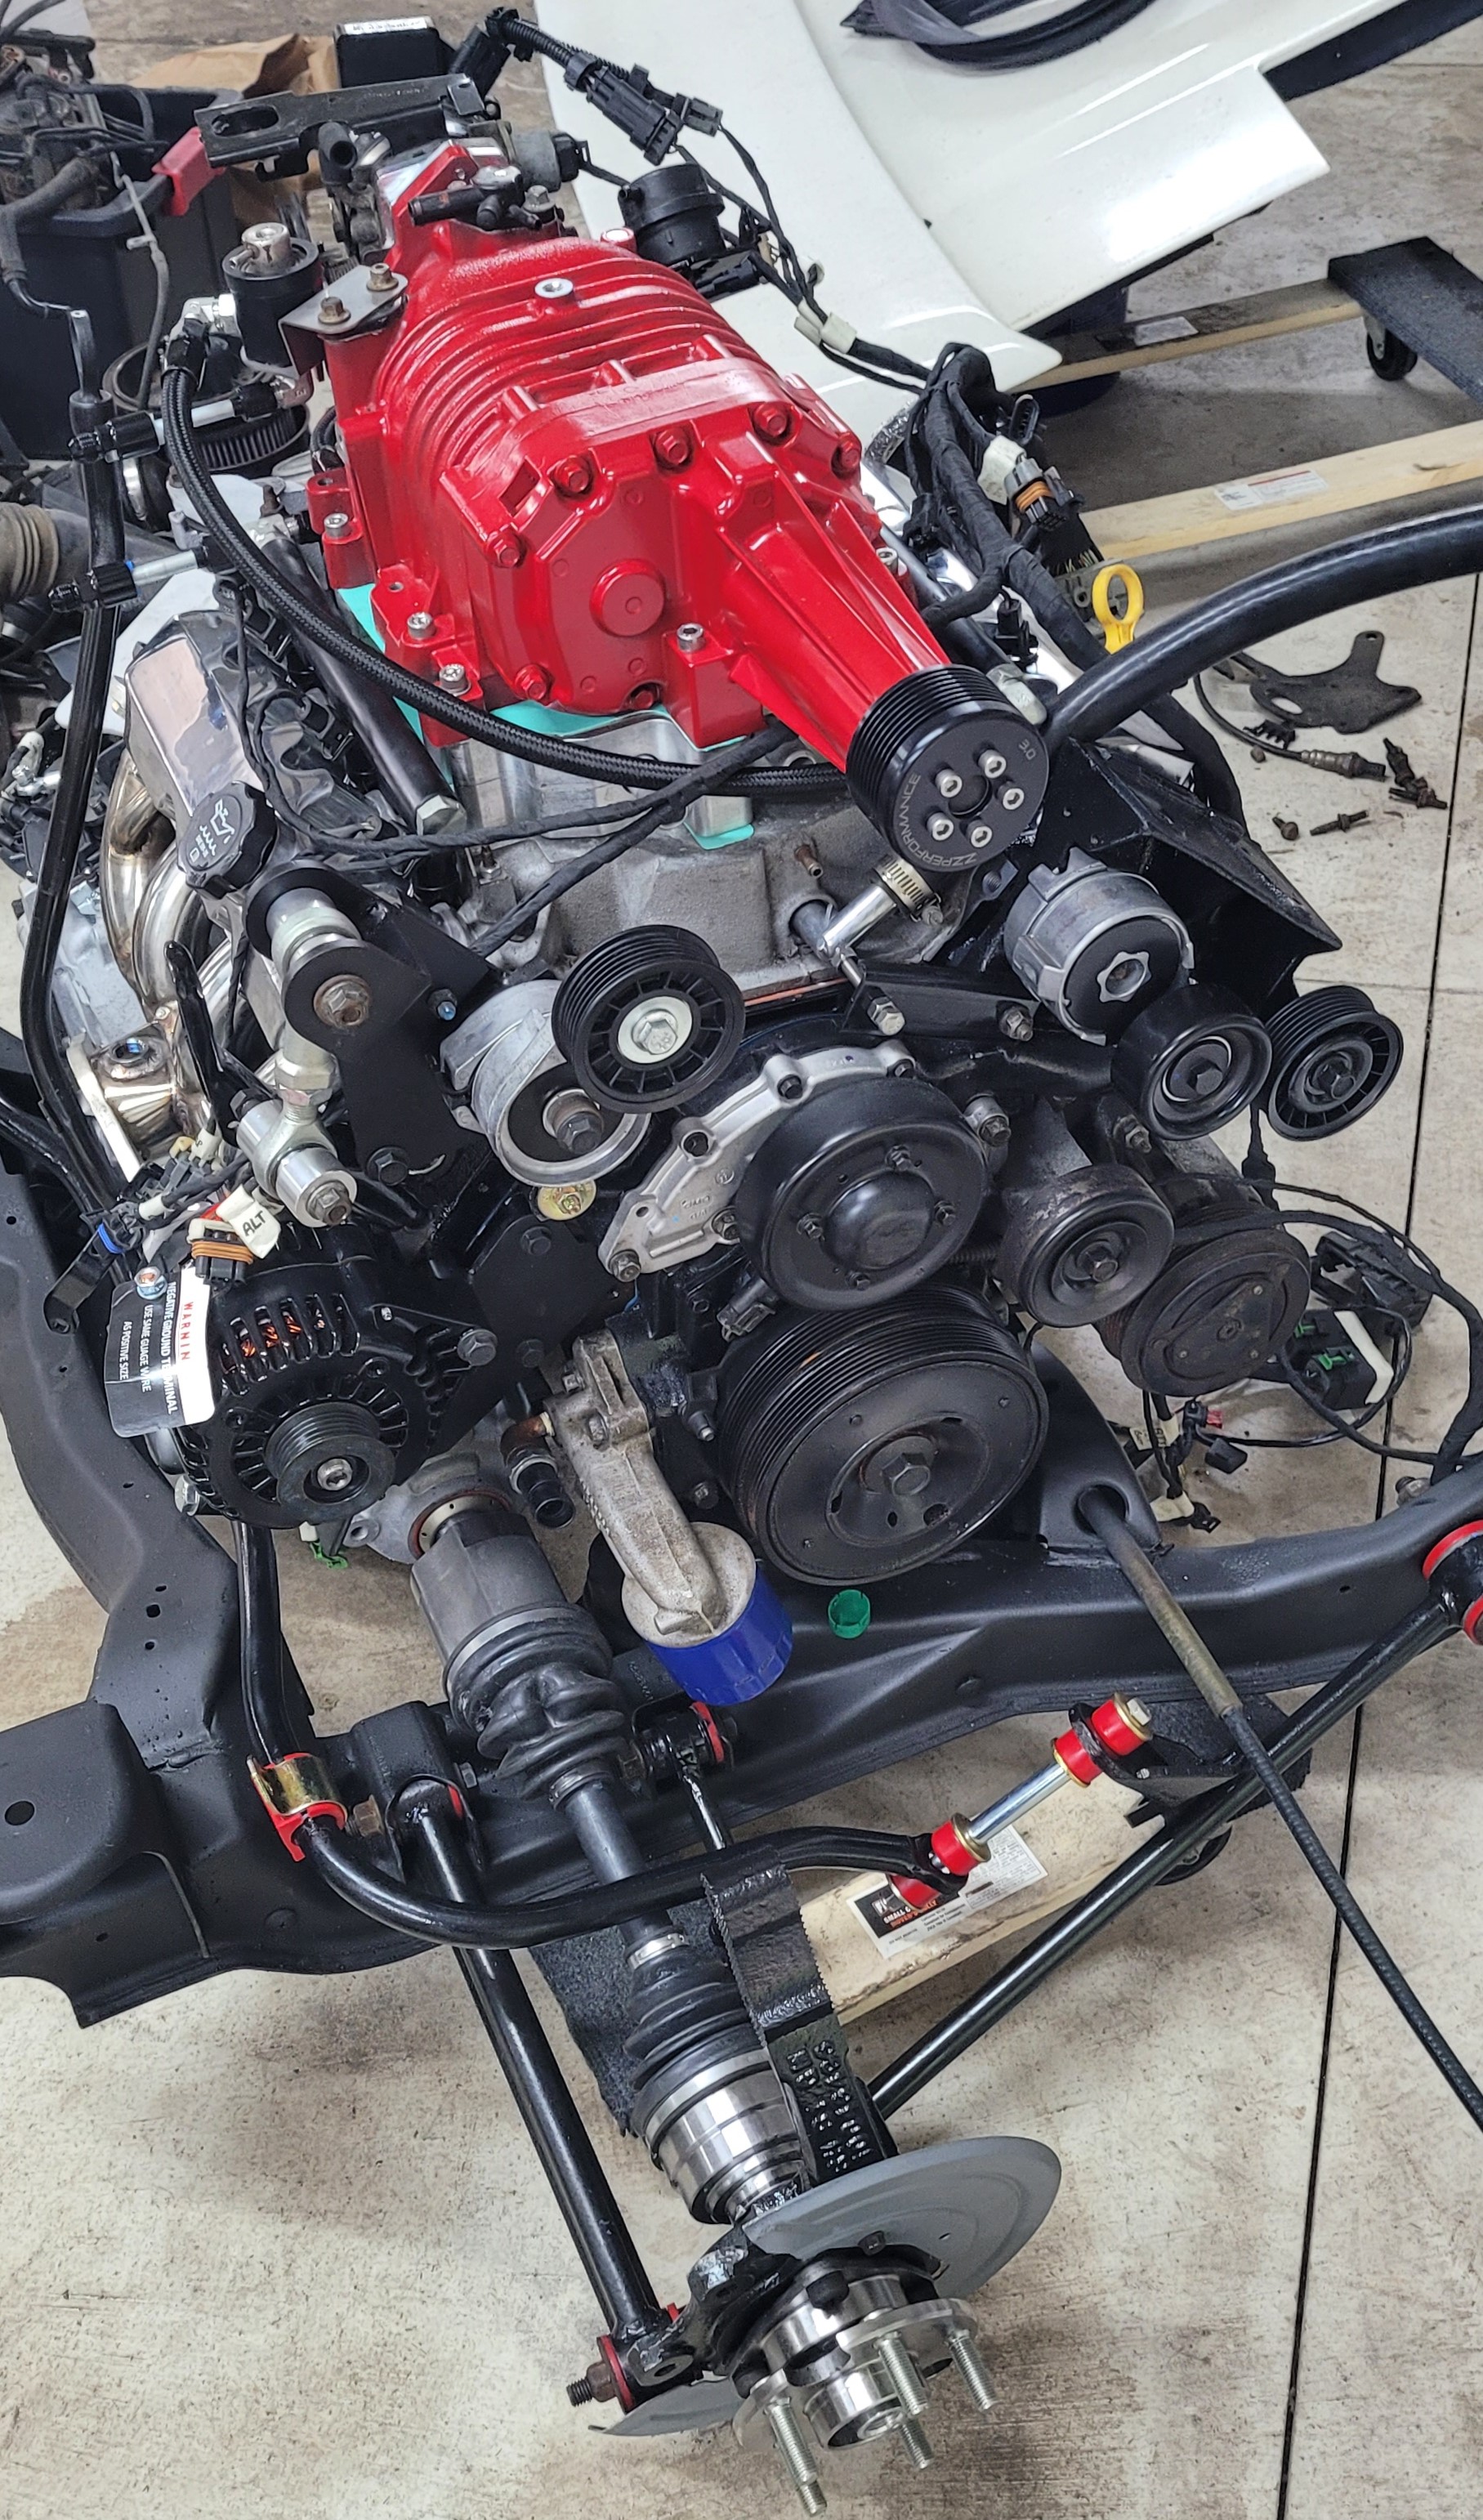
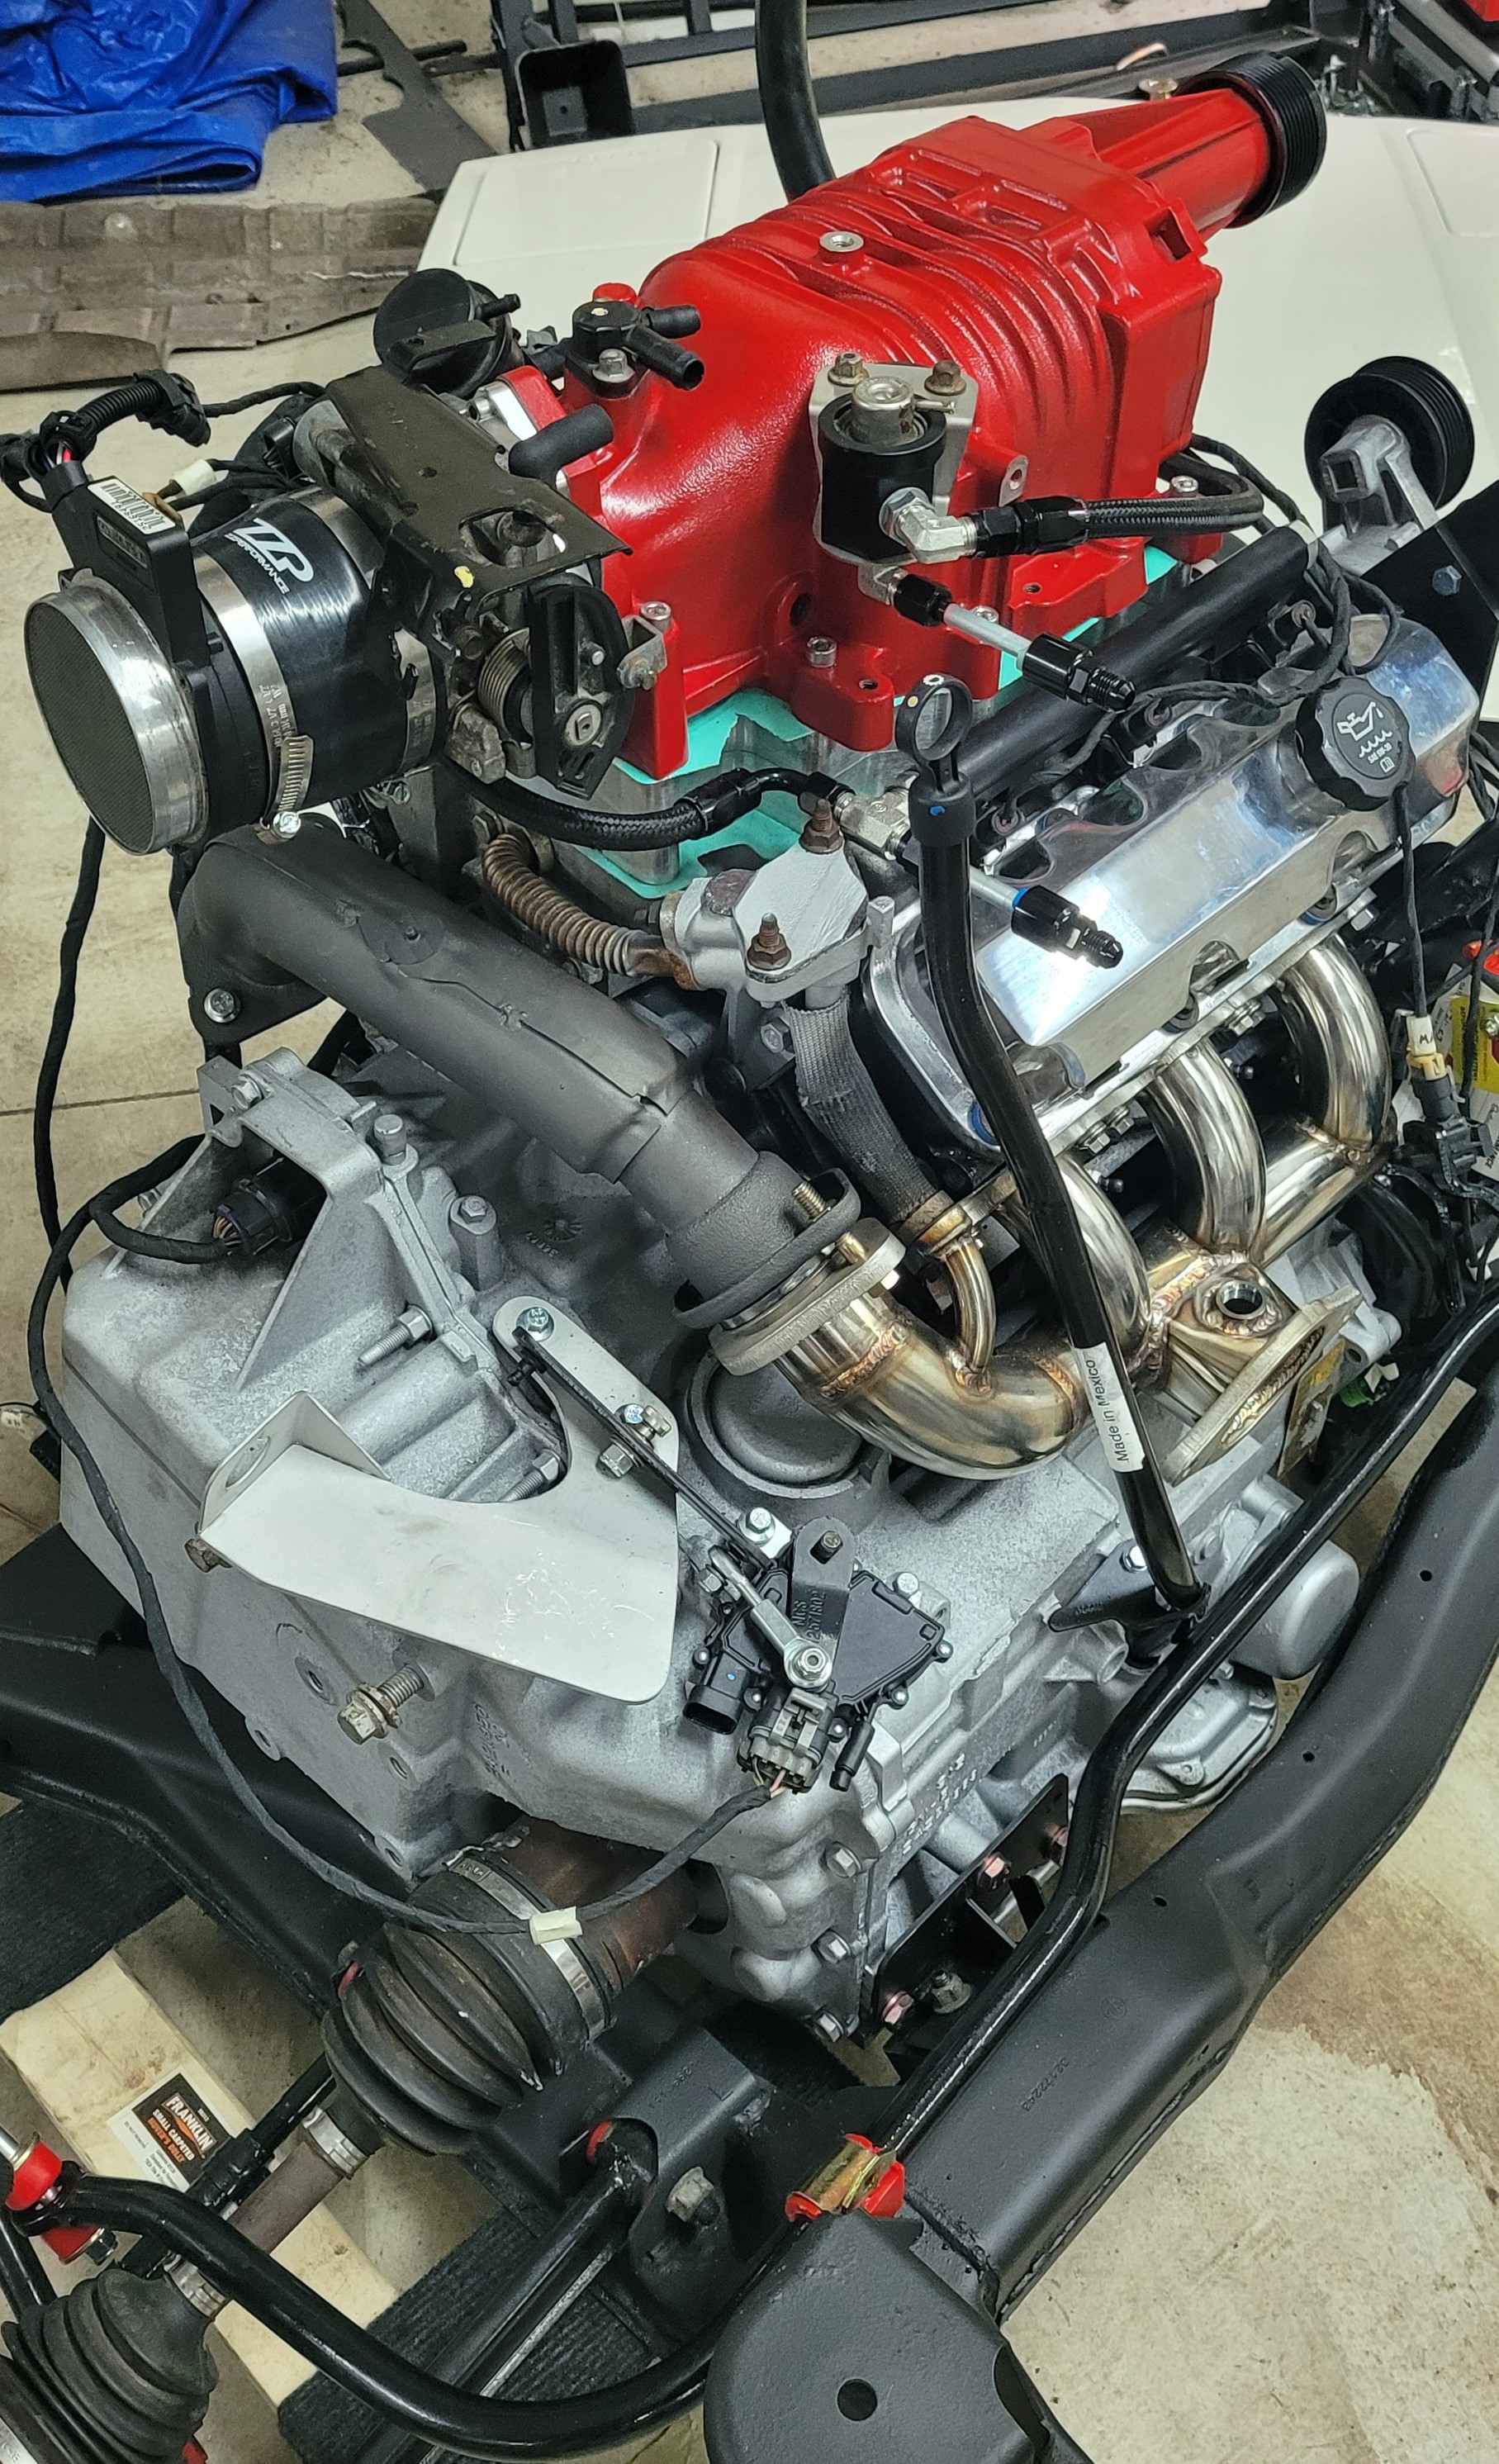
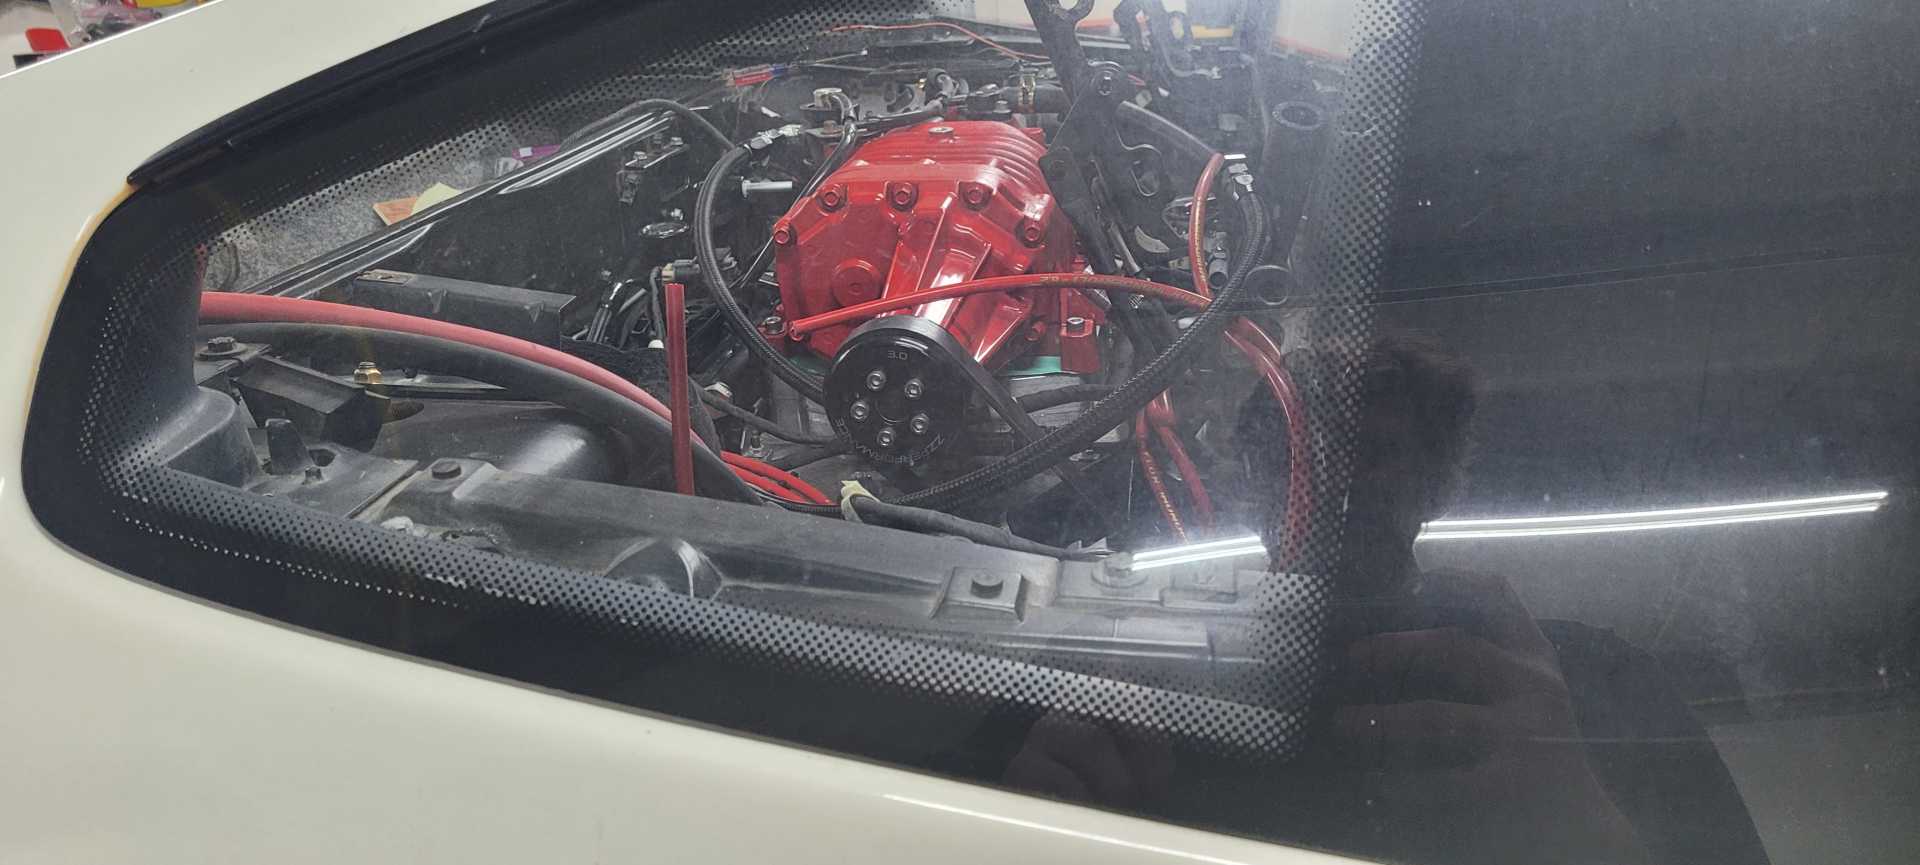
The next thing I moved to after getting tired of being cramped in the engine bay was the small things left to do on my engine. I was recommended to go with a Northstar Throttle body and 4" intake based off of all the mods I've done, so I ordered ZZP's conversion kit and picked up the MAF and TB from a junkyard. Cleaned them up and installed them.
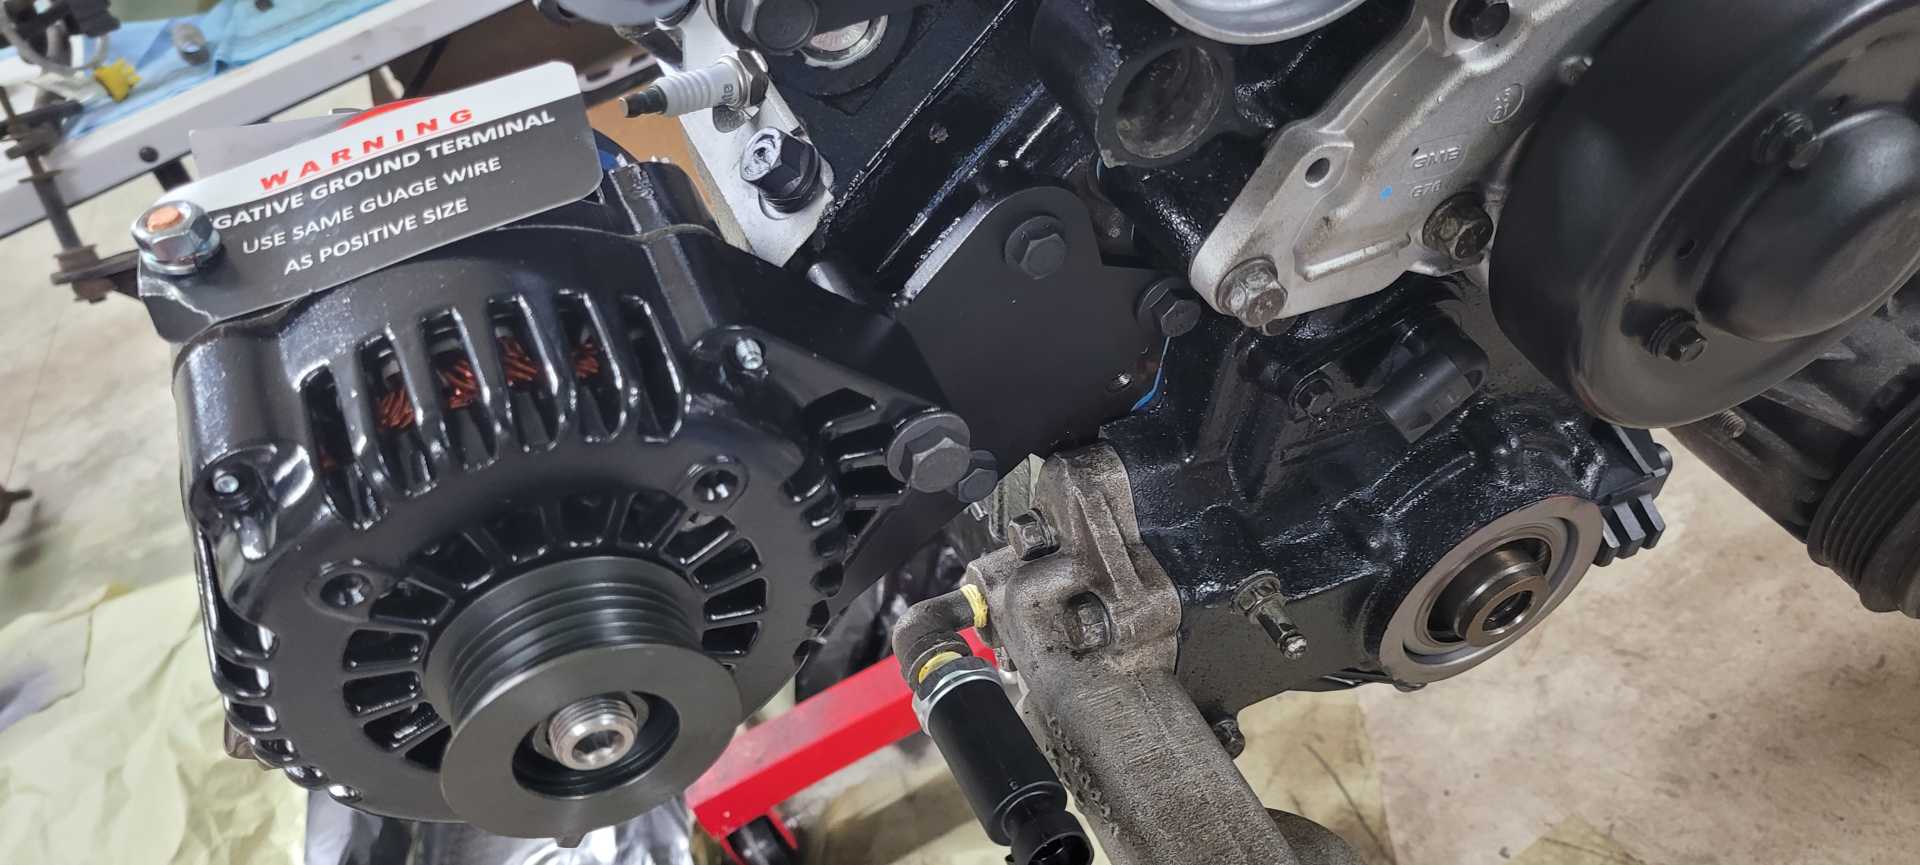
I also opted to buy a higher output alternator from Powermaster, I am very impressed with the look of it. The powder coating feels stout and I have high hopes for its durability. At the same time I installed the stock AC compressor after cleaning it up, fingers crossed it still works.
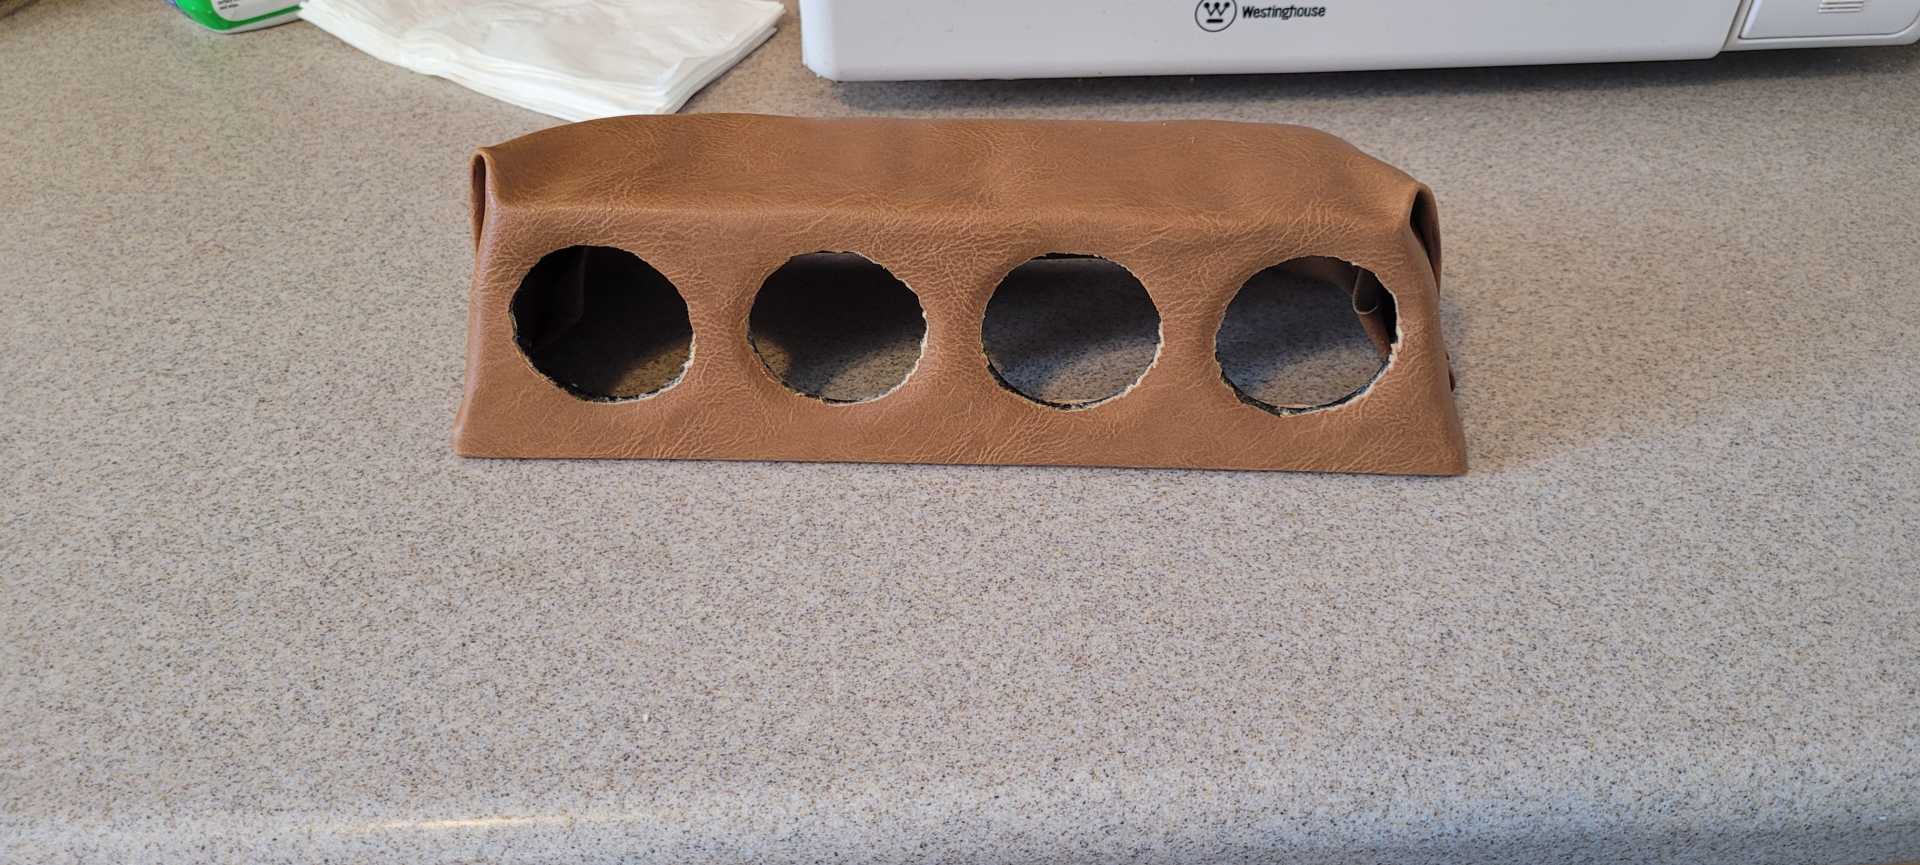
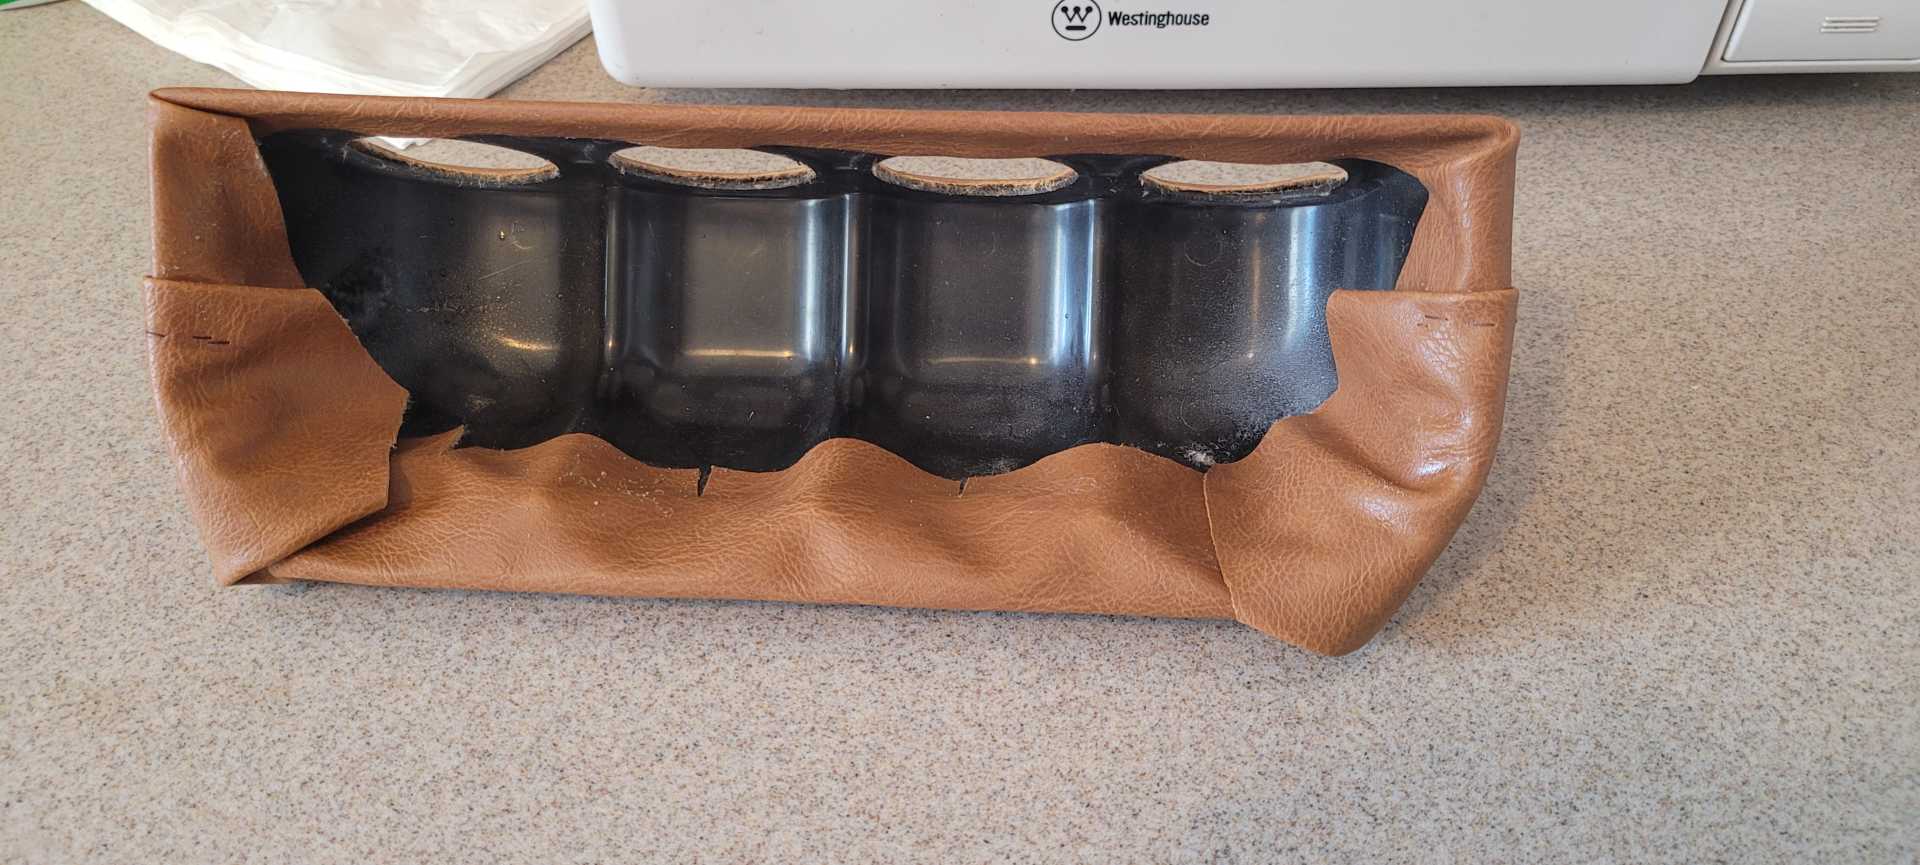
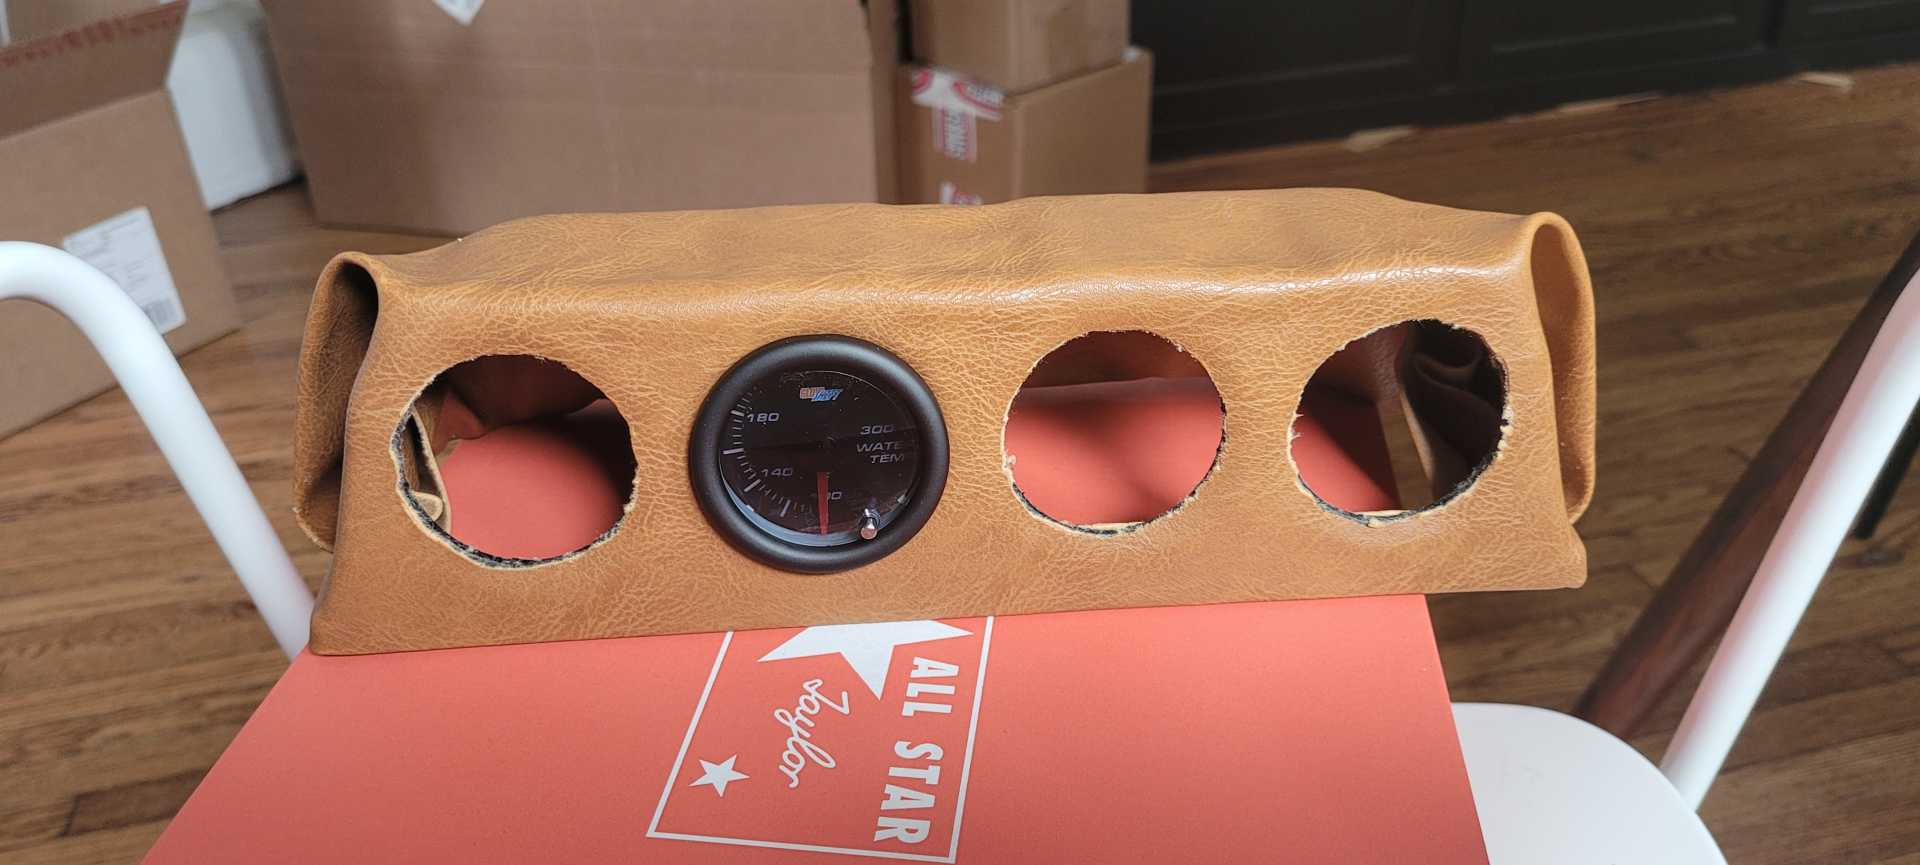
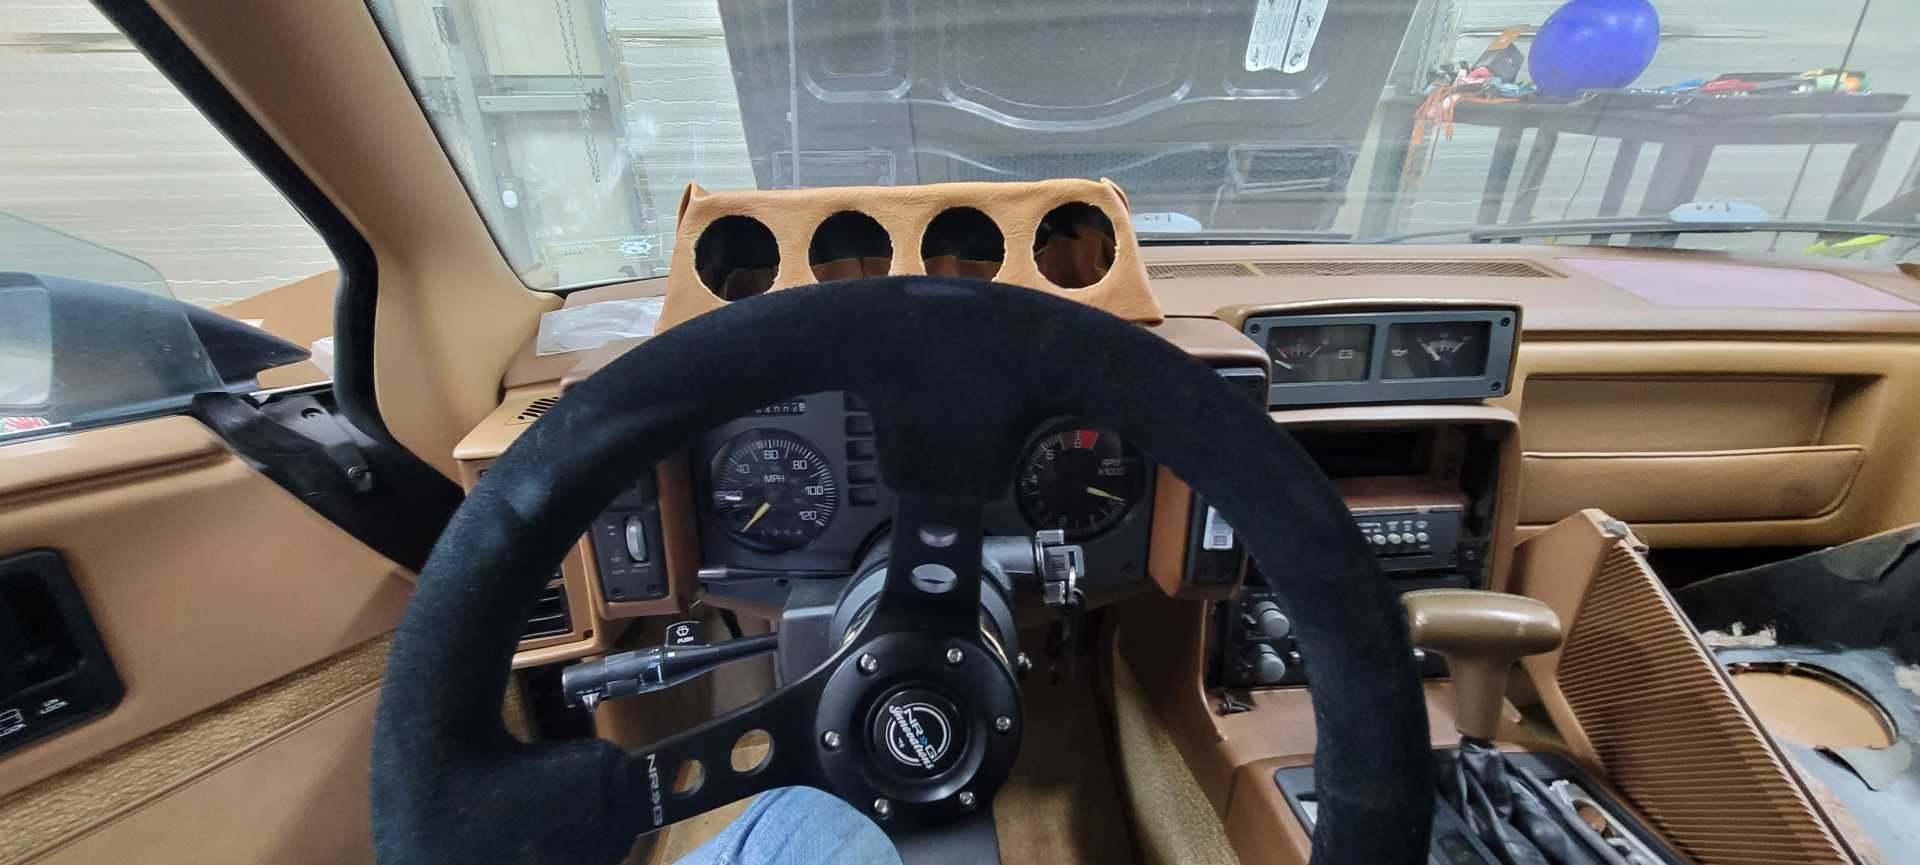
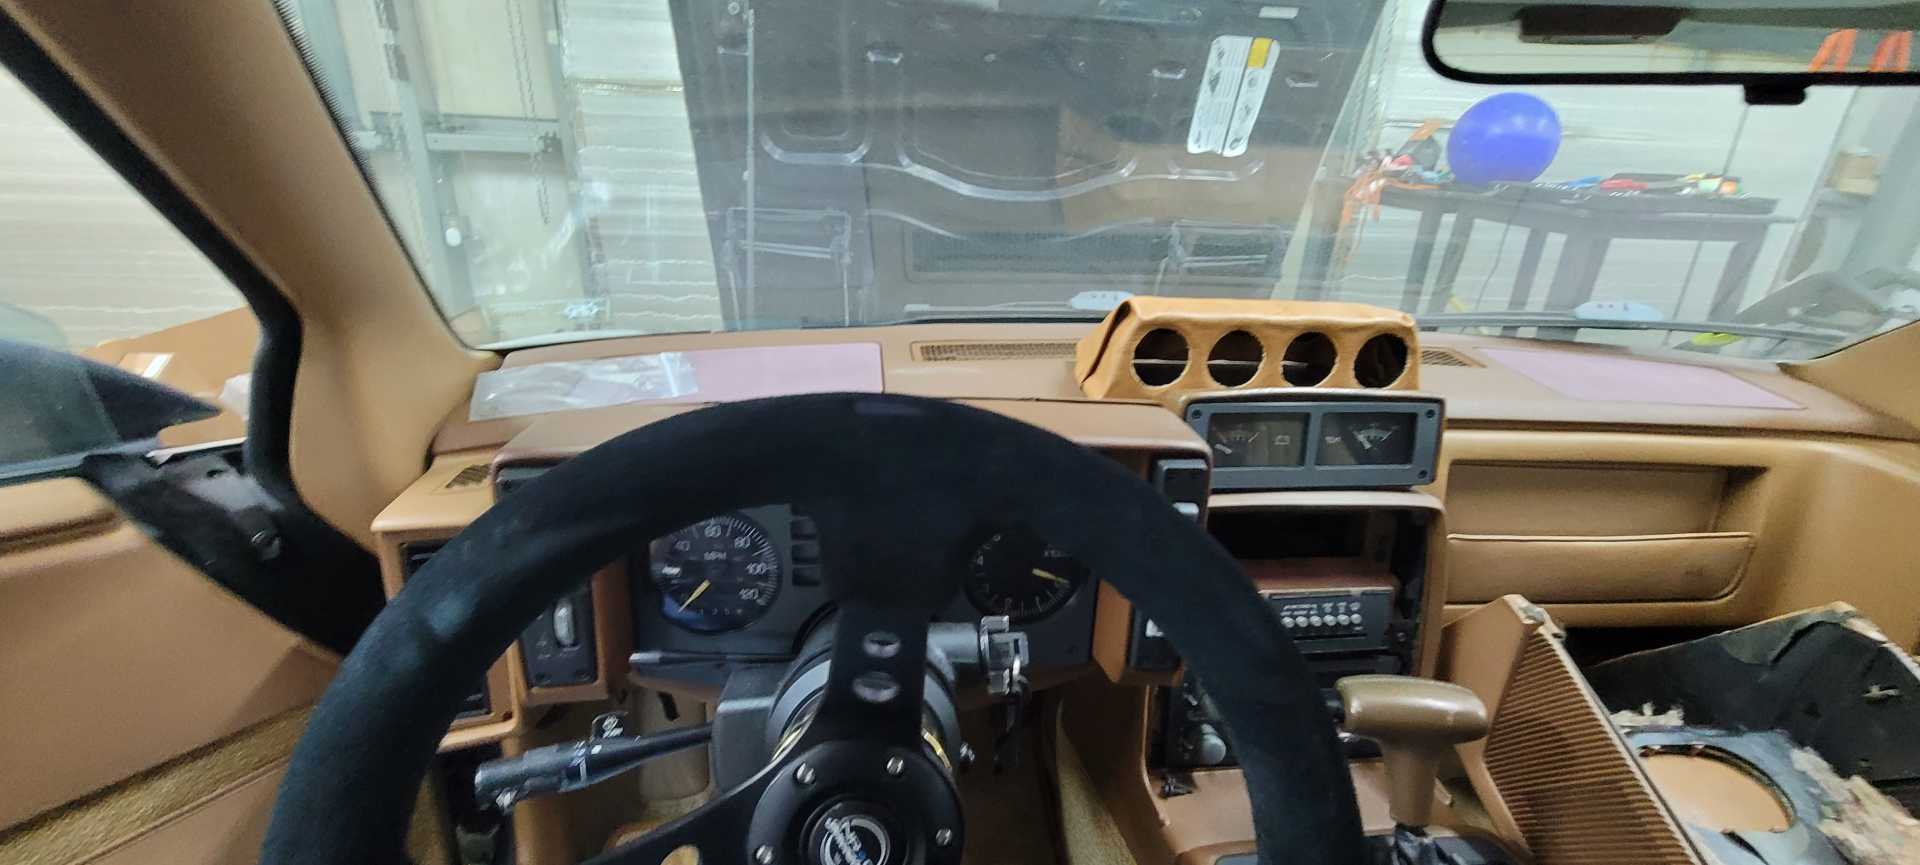
The last thing I worked on this past week was an arts and craft project. I have decided to go with Glowshift aftermarket gauges and tried to think of ideas that I could implement a gauge pod without it looking too out of place/aftermarket. I spent 30 bucks on Glowshift's 4 gauge universal pod and 15 a yard of brown pleather. I DIY'd upholstering it. I don't think it looks too bad, although I can notice all my mistakes. I used some instant adhesive and hand sewed the 'ears' down. Props to anyone who does upholstery as a trade because this took me 2 hours with 0 experience.
What's the consensus on the position? My preference is behind the OE GT gauges in the center of the dash.
Where are you putting your PCM? Mine is unfortunately in the stock Fiero position. Would have been better to leave it in the engine bay instead of heating up the center console..
Do you have any photos of your new firewall insulation?
I plan to stick my pcm in the stock location as well. I was told to NOT ground it to the frame, keep in insulated (I'll use some plastic or something).
I still have the new insulation rolled up in the boxes, but will get a picture this coming weekend as I'm working on it, but here is the link to the stuff I bought. I hope 2 sheets will be enough for me. https://www.summitracing.com/parts/DEI-050129.
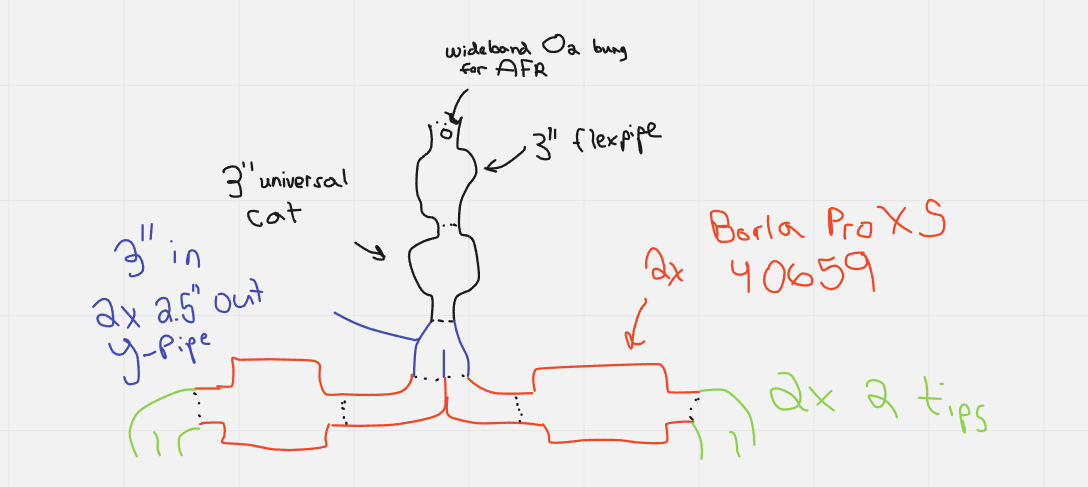
For the exhaust I've gone the slightly easy route of ordering ZZP's stainless power logs w/ the ceramic coated cross over pipe. Beyond the manifolds I still need to do it myself/have it made. Here is a very crude doodle I have for my idea. I need to still talk with an exhaust shop to see how much this would set me back if I had someone do it. I'm wanting to to 304 stainless and I hardly can weld.
Follow up question for anyone lurking in this thread- Has anyone had issues with West Coast Fiero lately? I ordered my passenger side halfshaft through them. They shipped me a box, either without the halfshaft or it busted itself out of the box in shipping. I haven't received a reply from them yet. Is there anyone still making them that I can contact not via facebook?
Originally posted by MichiganReefer: ... Is there anyone still making them that I can contact not via facebook?
There's a guy in Texas named Stephen Poe, who has done tons of 3800 swaps. He used to be on here as MstangsBware. I don't know if he'll respond to a PM or not. He hasn't been here for a while.
[This message has been edited by Raydar (edited 03-14-2023).]
To my comment from last update about WCF regarding the halfshaft- they are rectifying the issue. They had shipped the halfshaft, but UPS was not easy on the package and that is what caused them to lose it. I got a call from them today that the replacement is being shipped out now. Very happy about that.
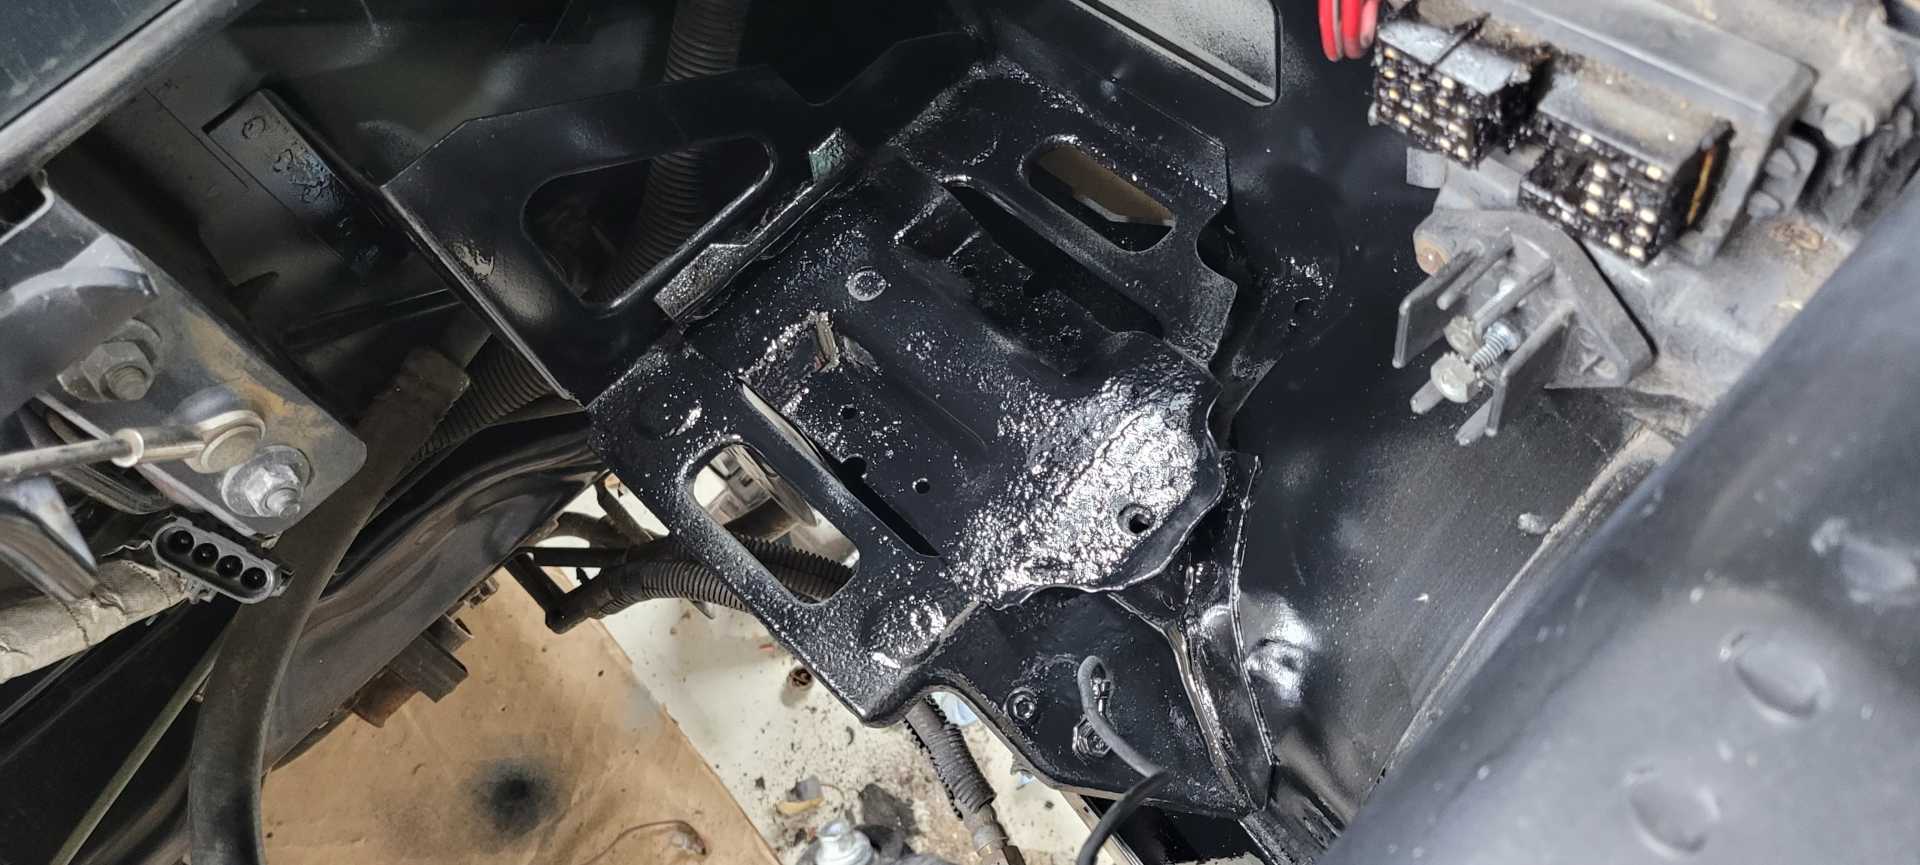
This weekend was some more painting. I first was working in the engine bay. Shop-vac'd out all of the debris from every crevice then took mean green degreaser to clean out the remaining dirt and grime. I then made it more messy by taking a wire wheel on my drill to sand down the areas that showed rust (basically the battery try area). Clean it out once again, primed, and touched up the areas with rustoleum black.
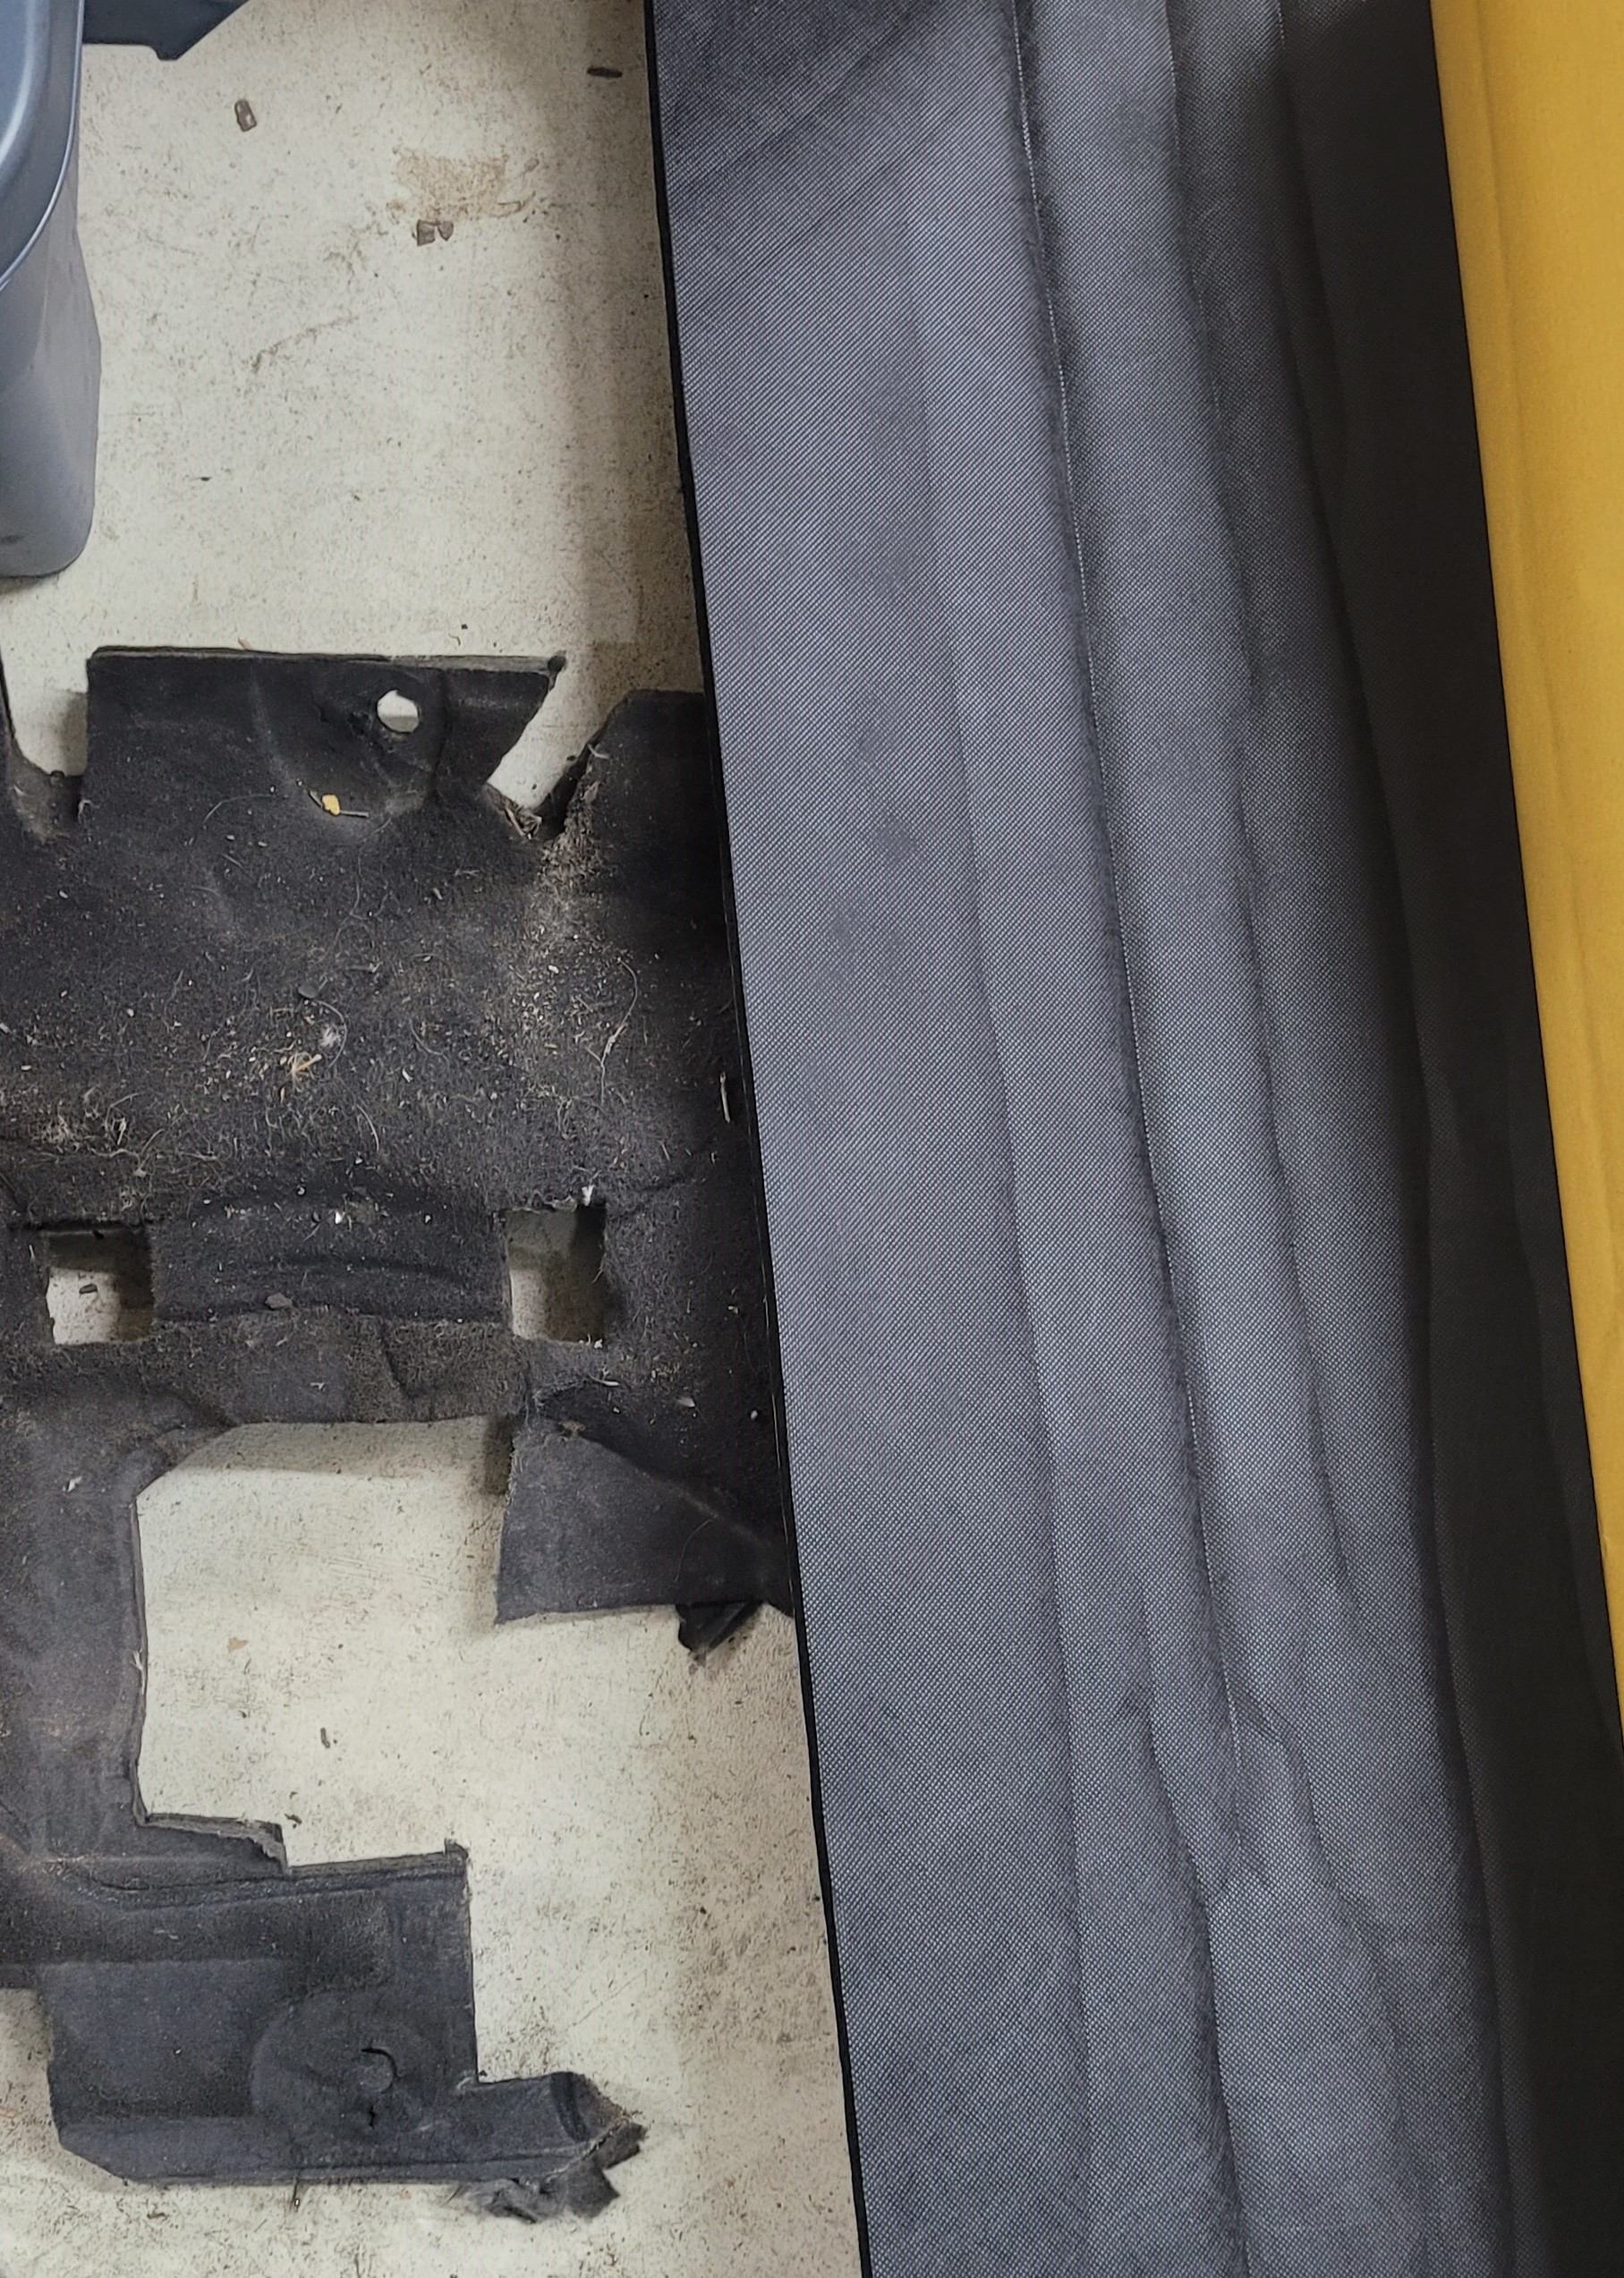
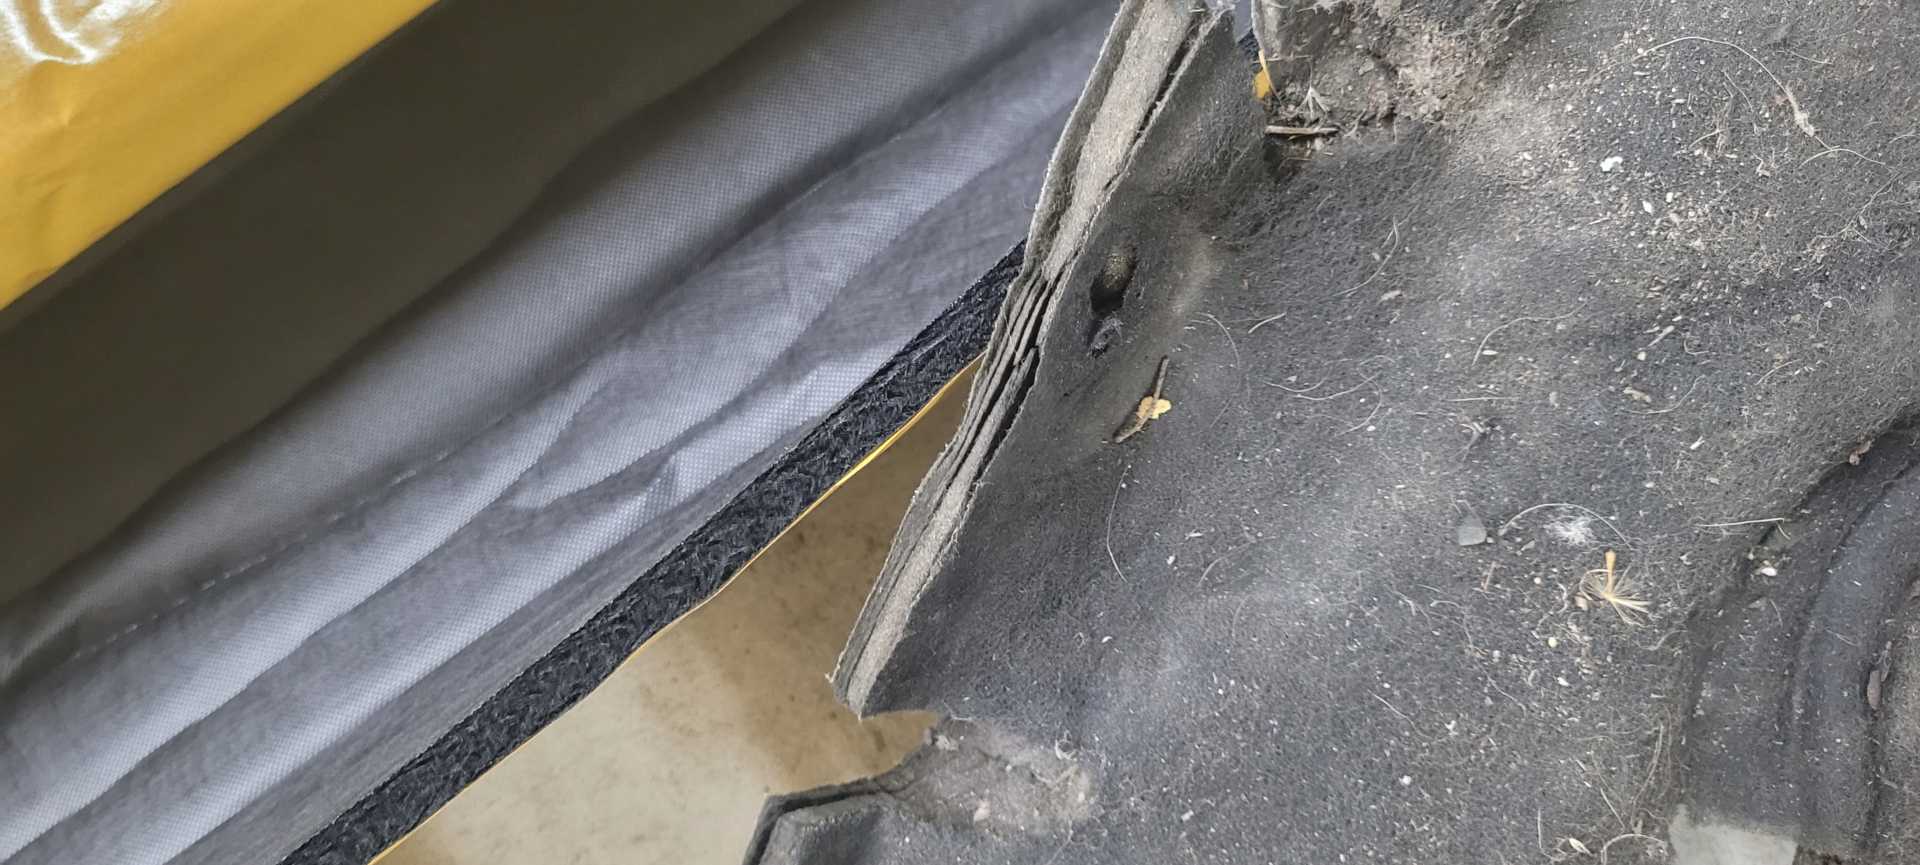
For those who wanted to see the engine bay insulation I got. Here are some pictures. The original stuff that was in there in some areas had a much greater thickness, while others that were under any sort of pressure had been compressed quite a bit. This stuff does have an adhesive back- I'll use that in conjunction with the plastic retainers the that OE insulation used.
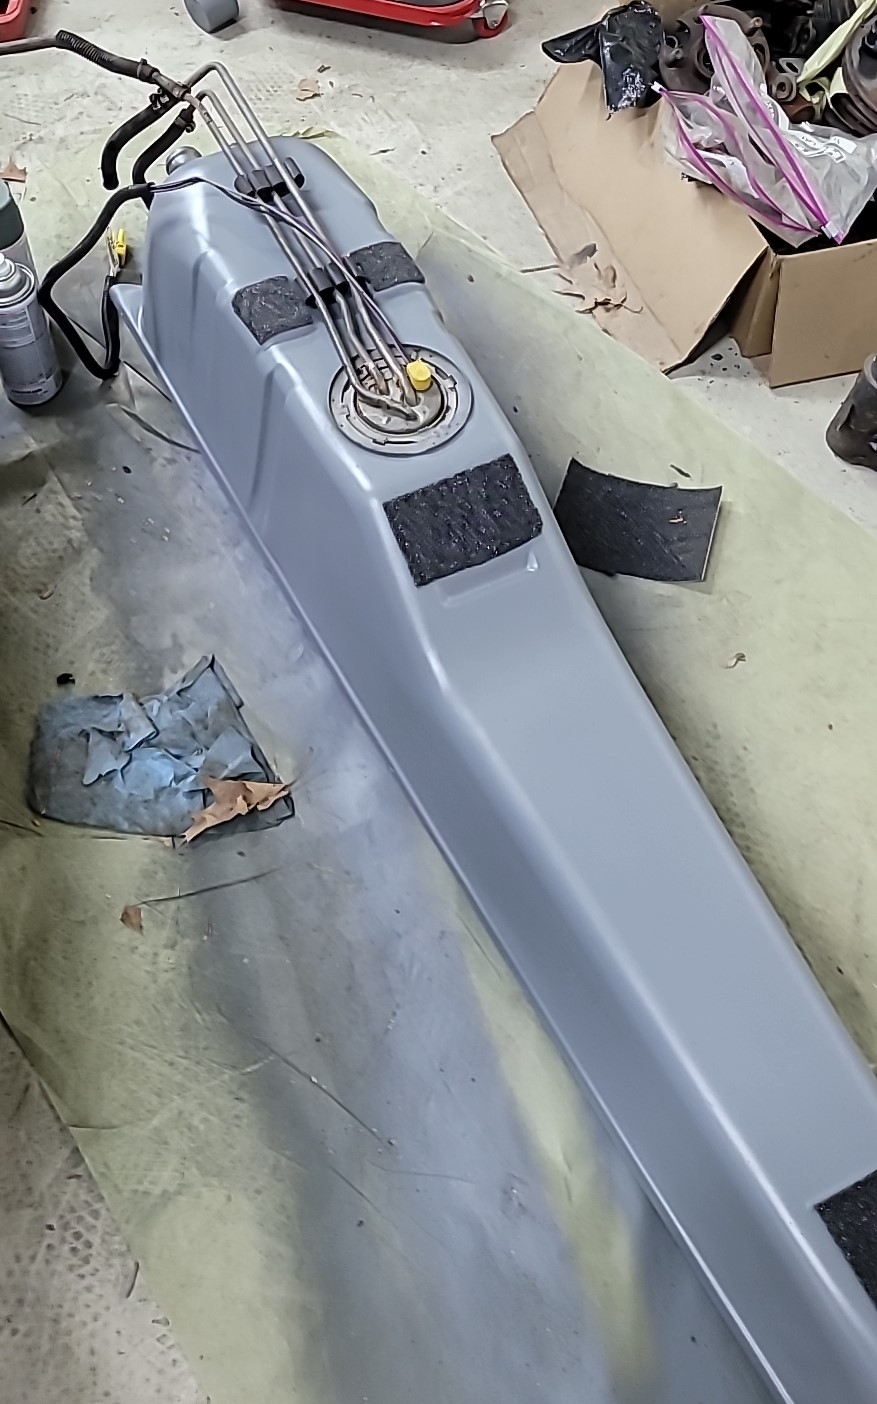
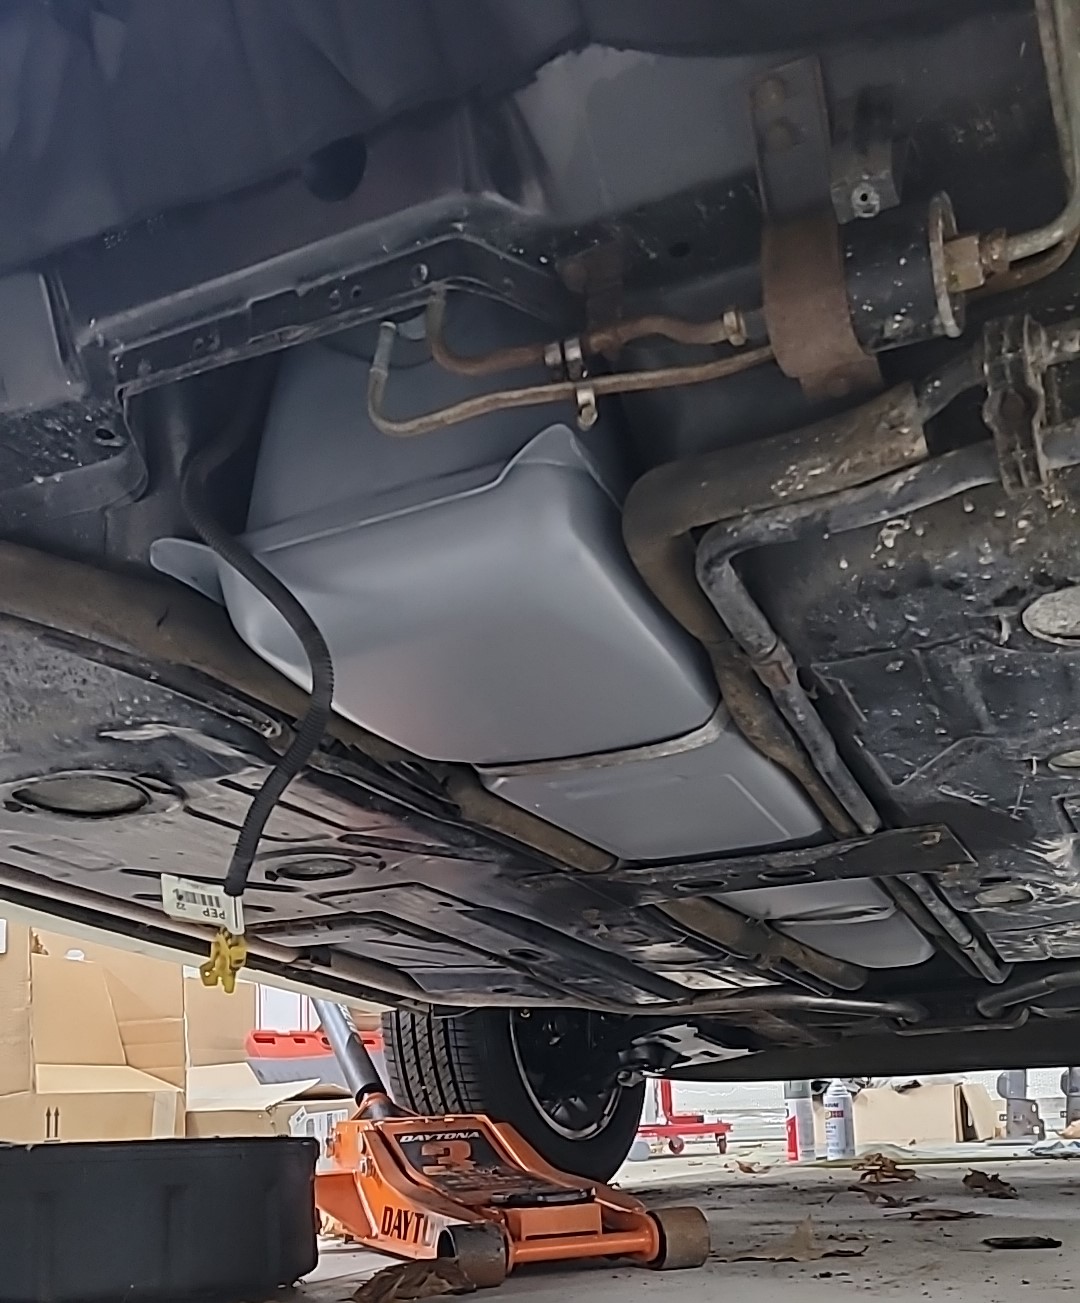
While the engine bay paint was drying, I moved my attention to my gas tank. I think this thing is in stupendous shape. The only small amount of rust is on the welds of the flange. No rot anywhere. I took a half hour wire wheeling that away, cleaned off the foam pads from the top and was able to get a few coats of self-etching primer on it. I'm super happy to see this thing come together.
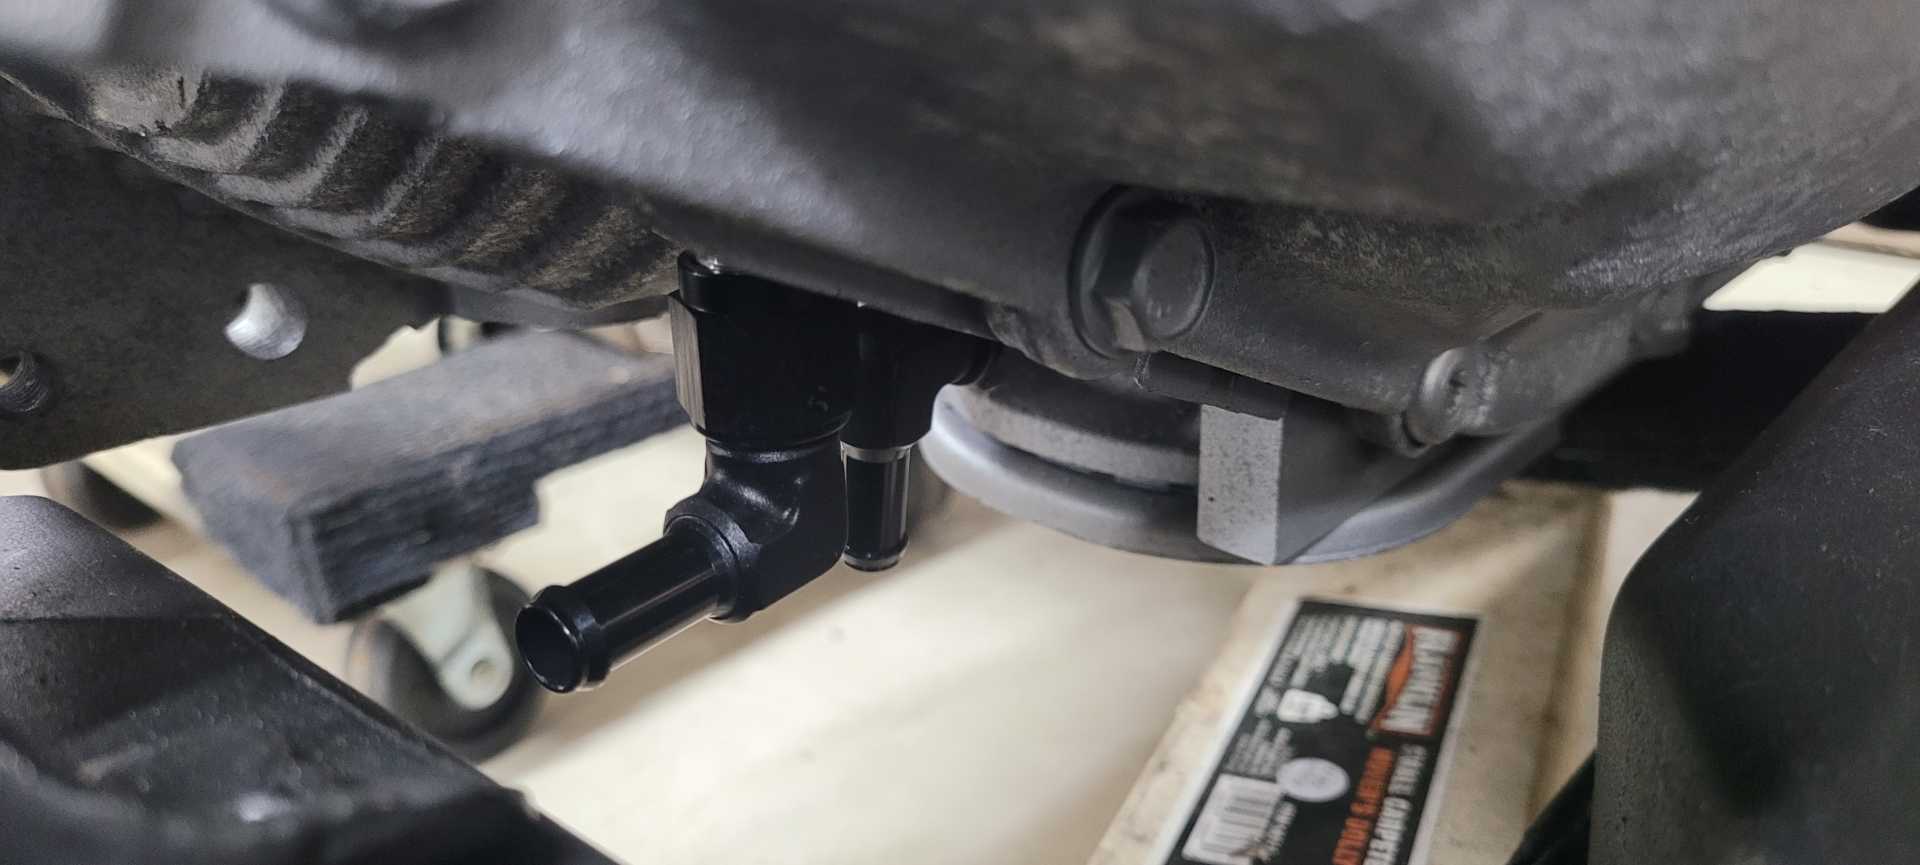
Last thing I did was quickly fit up the transmission fluid cooling loop fittings.
I ordered a universal 0-90ohm fuel level sending unit from Amazon to replace my broken OE one. We'll see how that goes and may write a seperate guide for that.
[This message has been edited by MichiganReefer (edited 03-21-2023).]
After much trouble, I finally made the universal fuel level sender work, wrapped it up and dropped it with the new walbro fuel pump (# GCA758-2) into the freshly painted gas tank. While I was under there I replaced the 2 filler hoses to the tank, and honestly it seemed to go up fully empty easier than it did to lower it with a couple gallons of fuel still in it. I did create a guide post on how I made the fuel level sensor work- for those interested.
I then did a number of things to get ready to mount the engine and transmission together- starting with the transmission. I was able to get the correct half shaft from WCF. It was such a trouble and hope others we're having as much difficulty as me. The first one they shipped broke its way out of the box during shipping. The 2nd one they sent was for a 4t65e rather than the 4t65e-hd like they intended to send. They got it right the third time with the one I needed- and I was able to send the incorrect one back with a return label they included. I was frustrated because of how long I needed to wait for it, but they called be back and made it right which I appreciate. Got the passenger half-shaft installed first then filled the torque converter with as much fluid as possible and installed that as well.
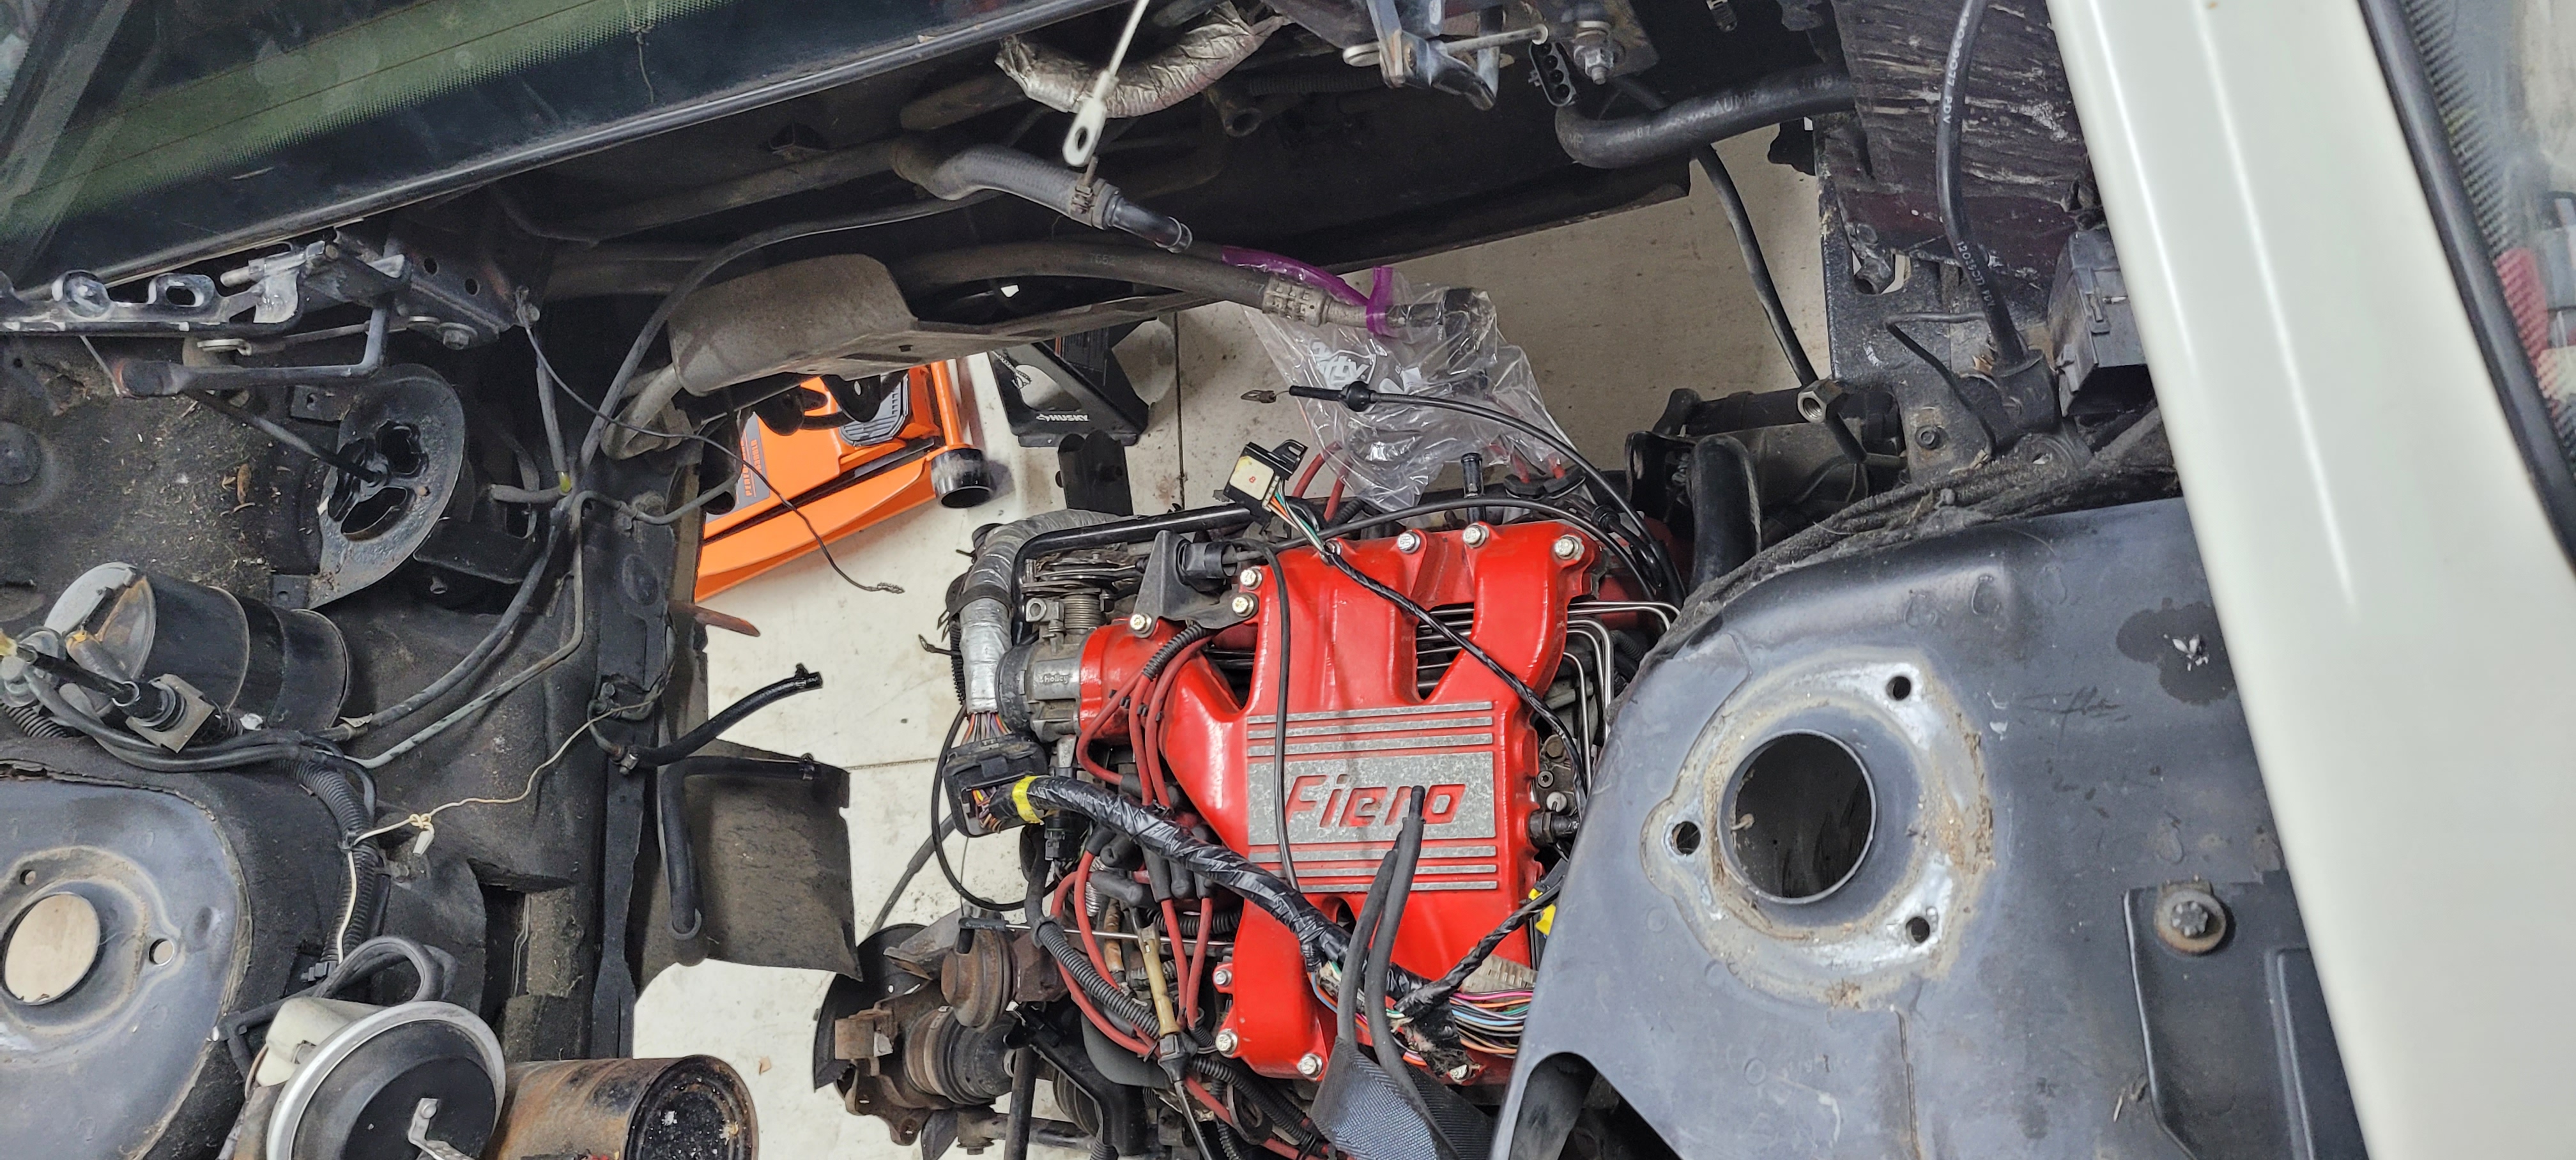
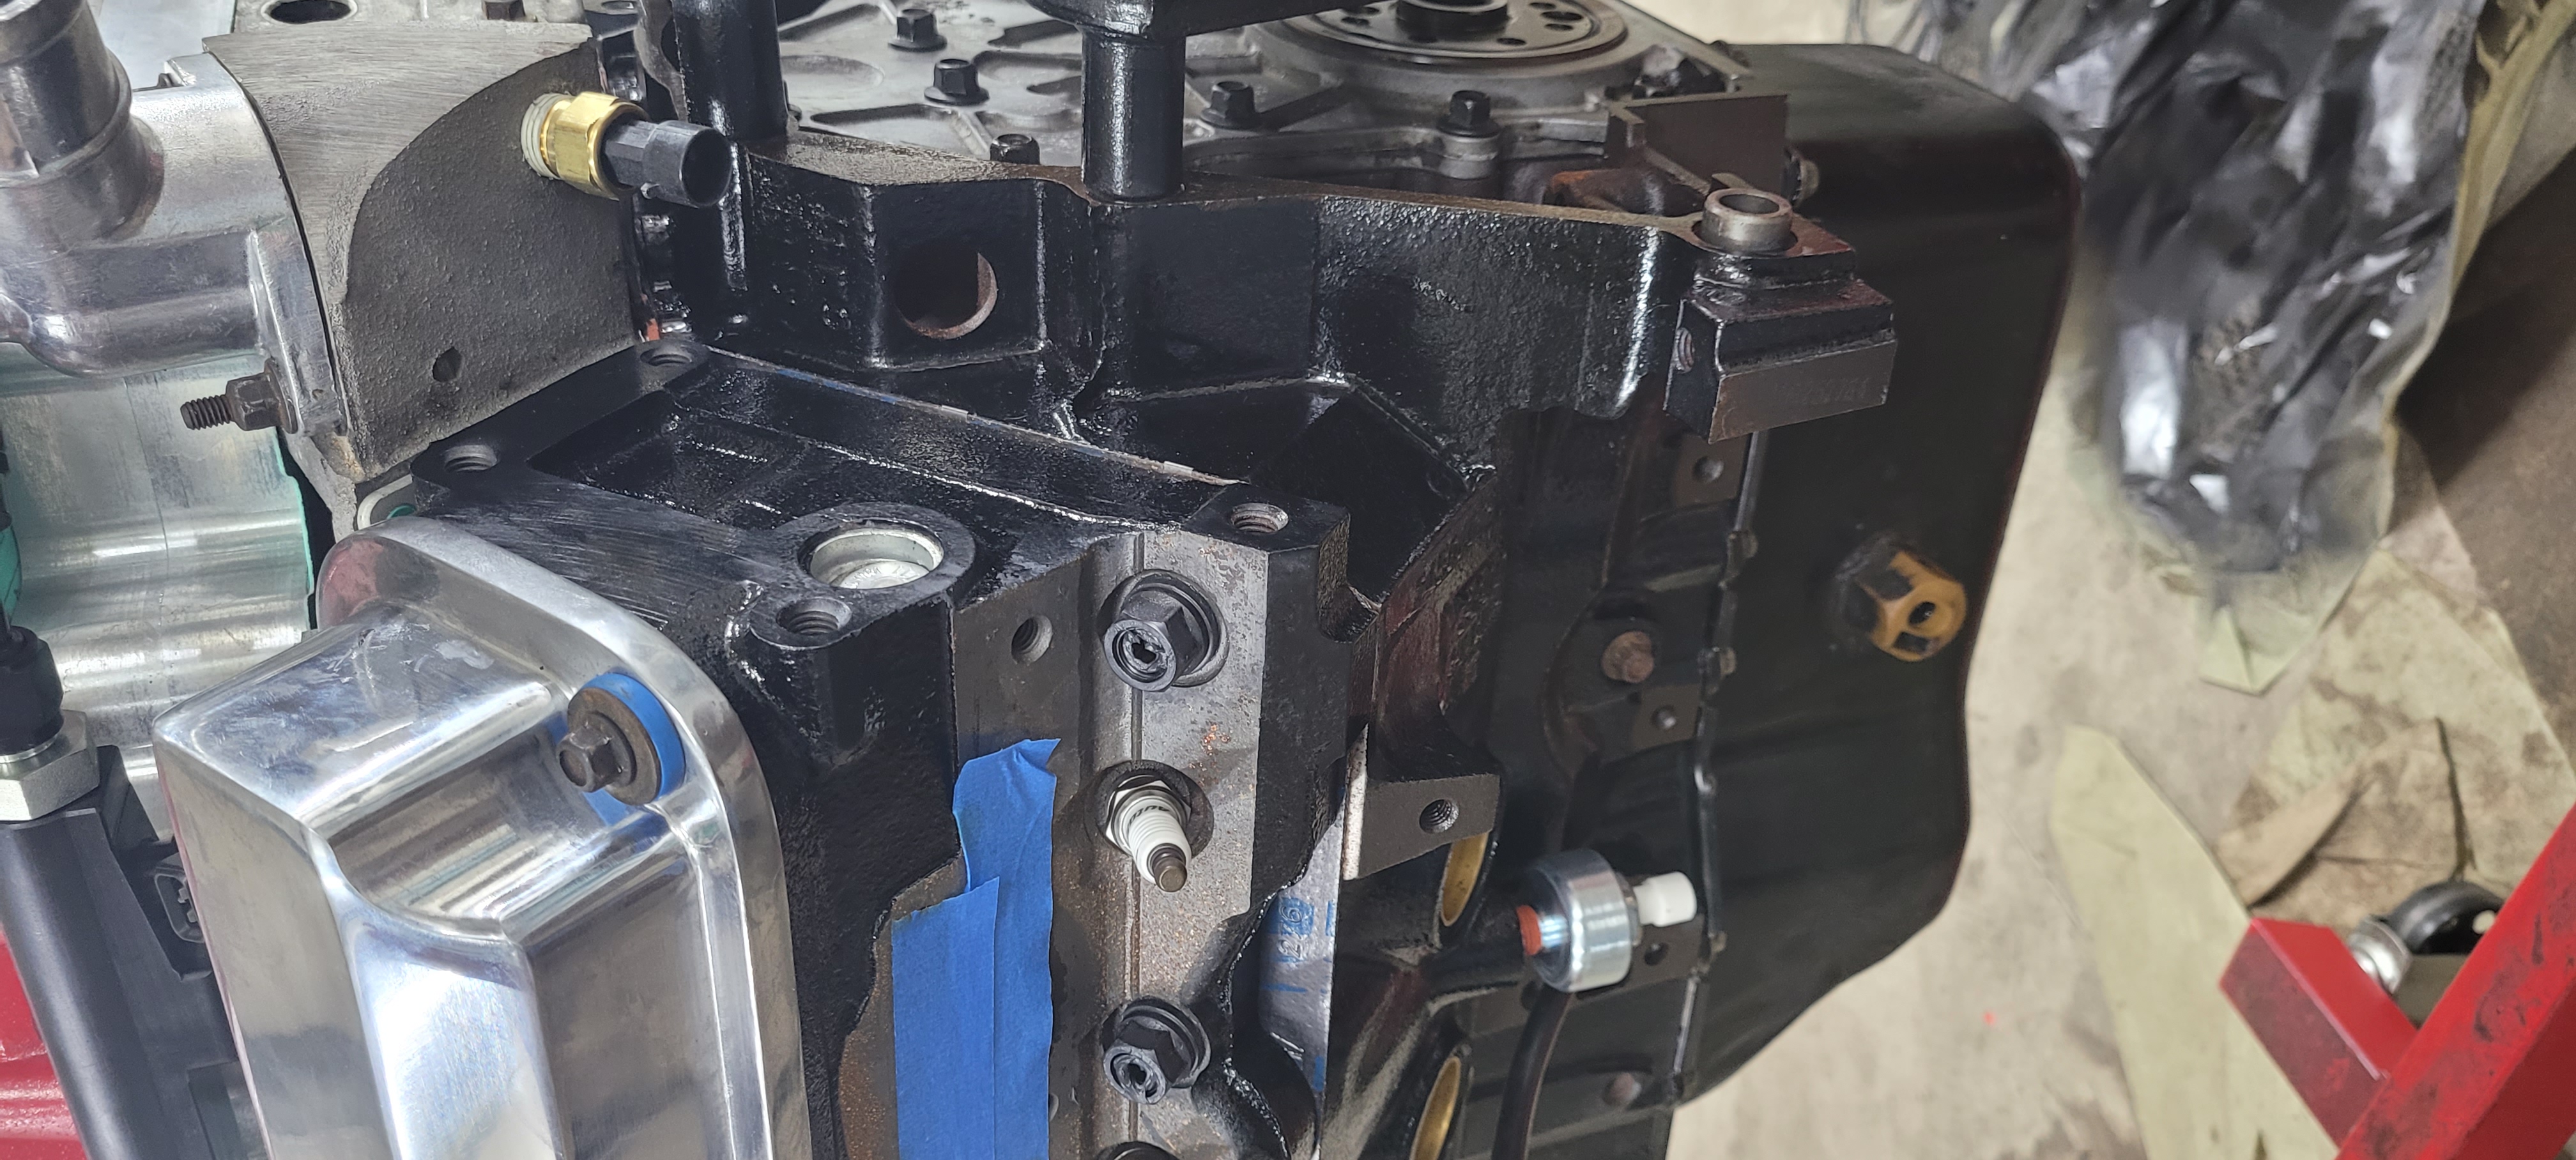
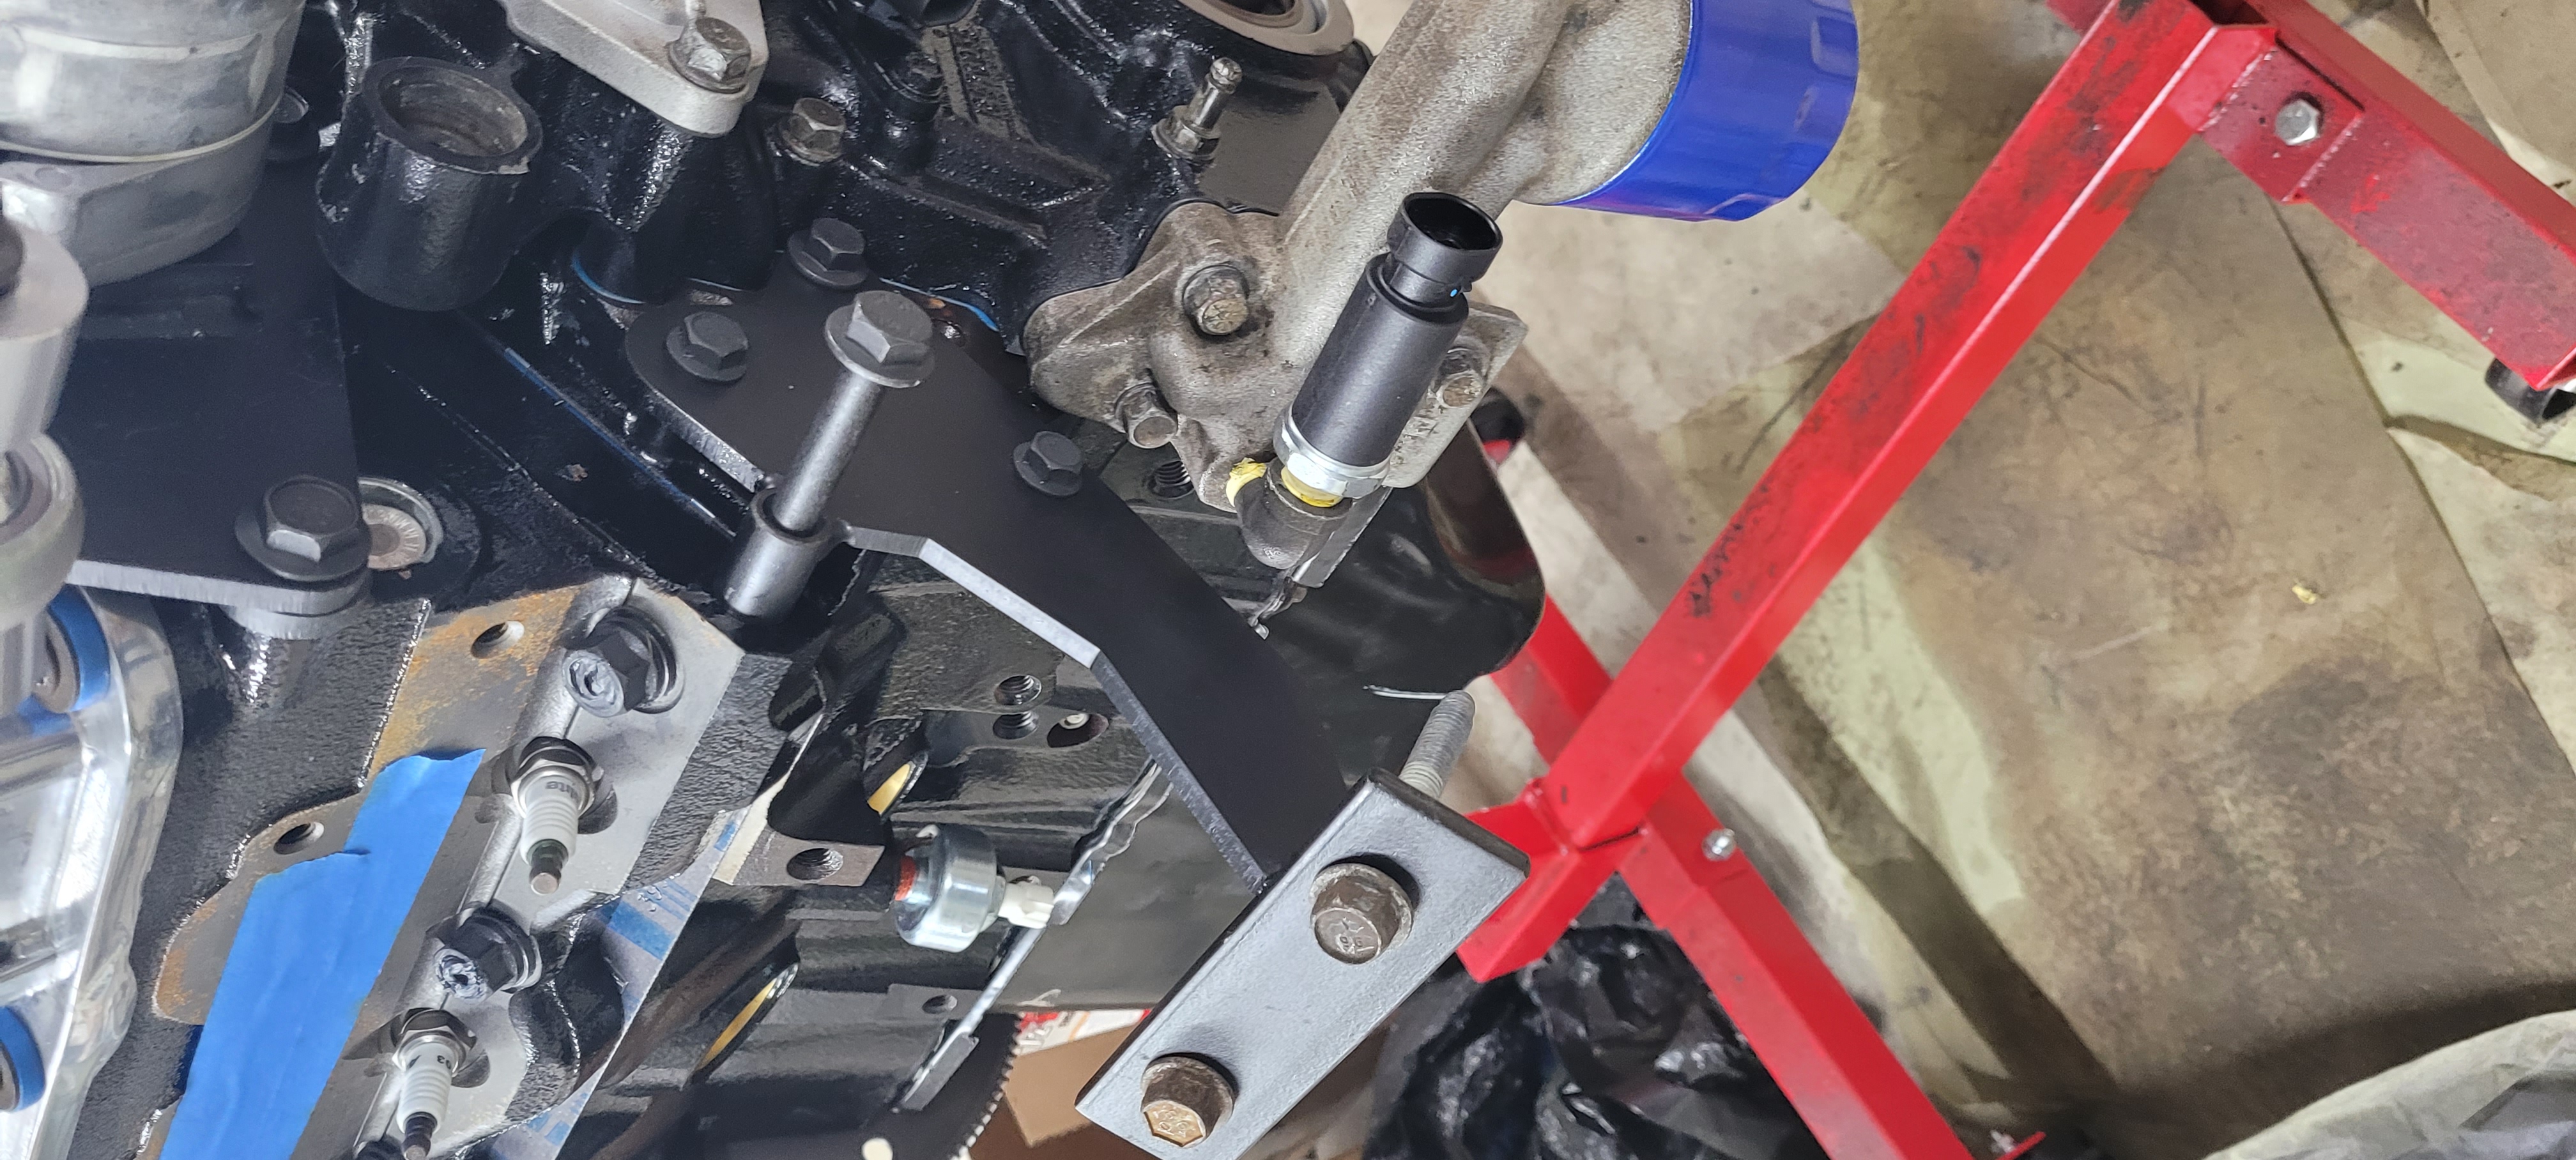
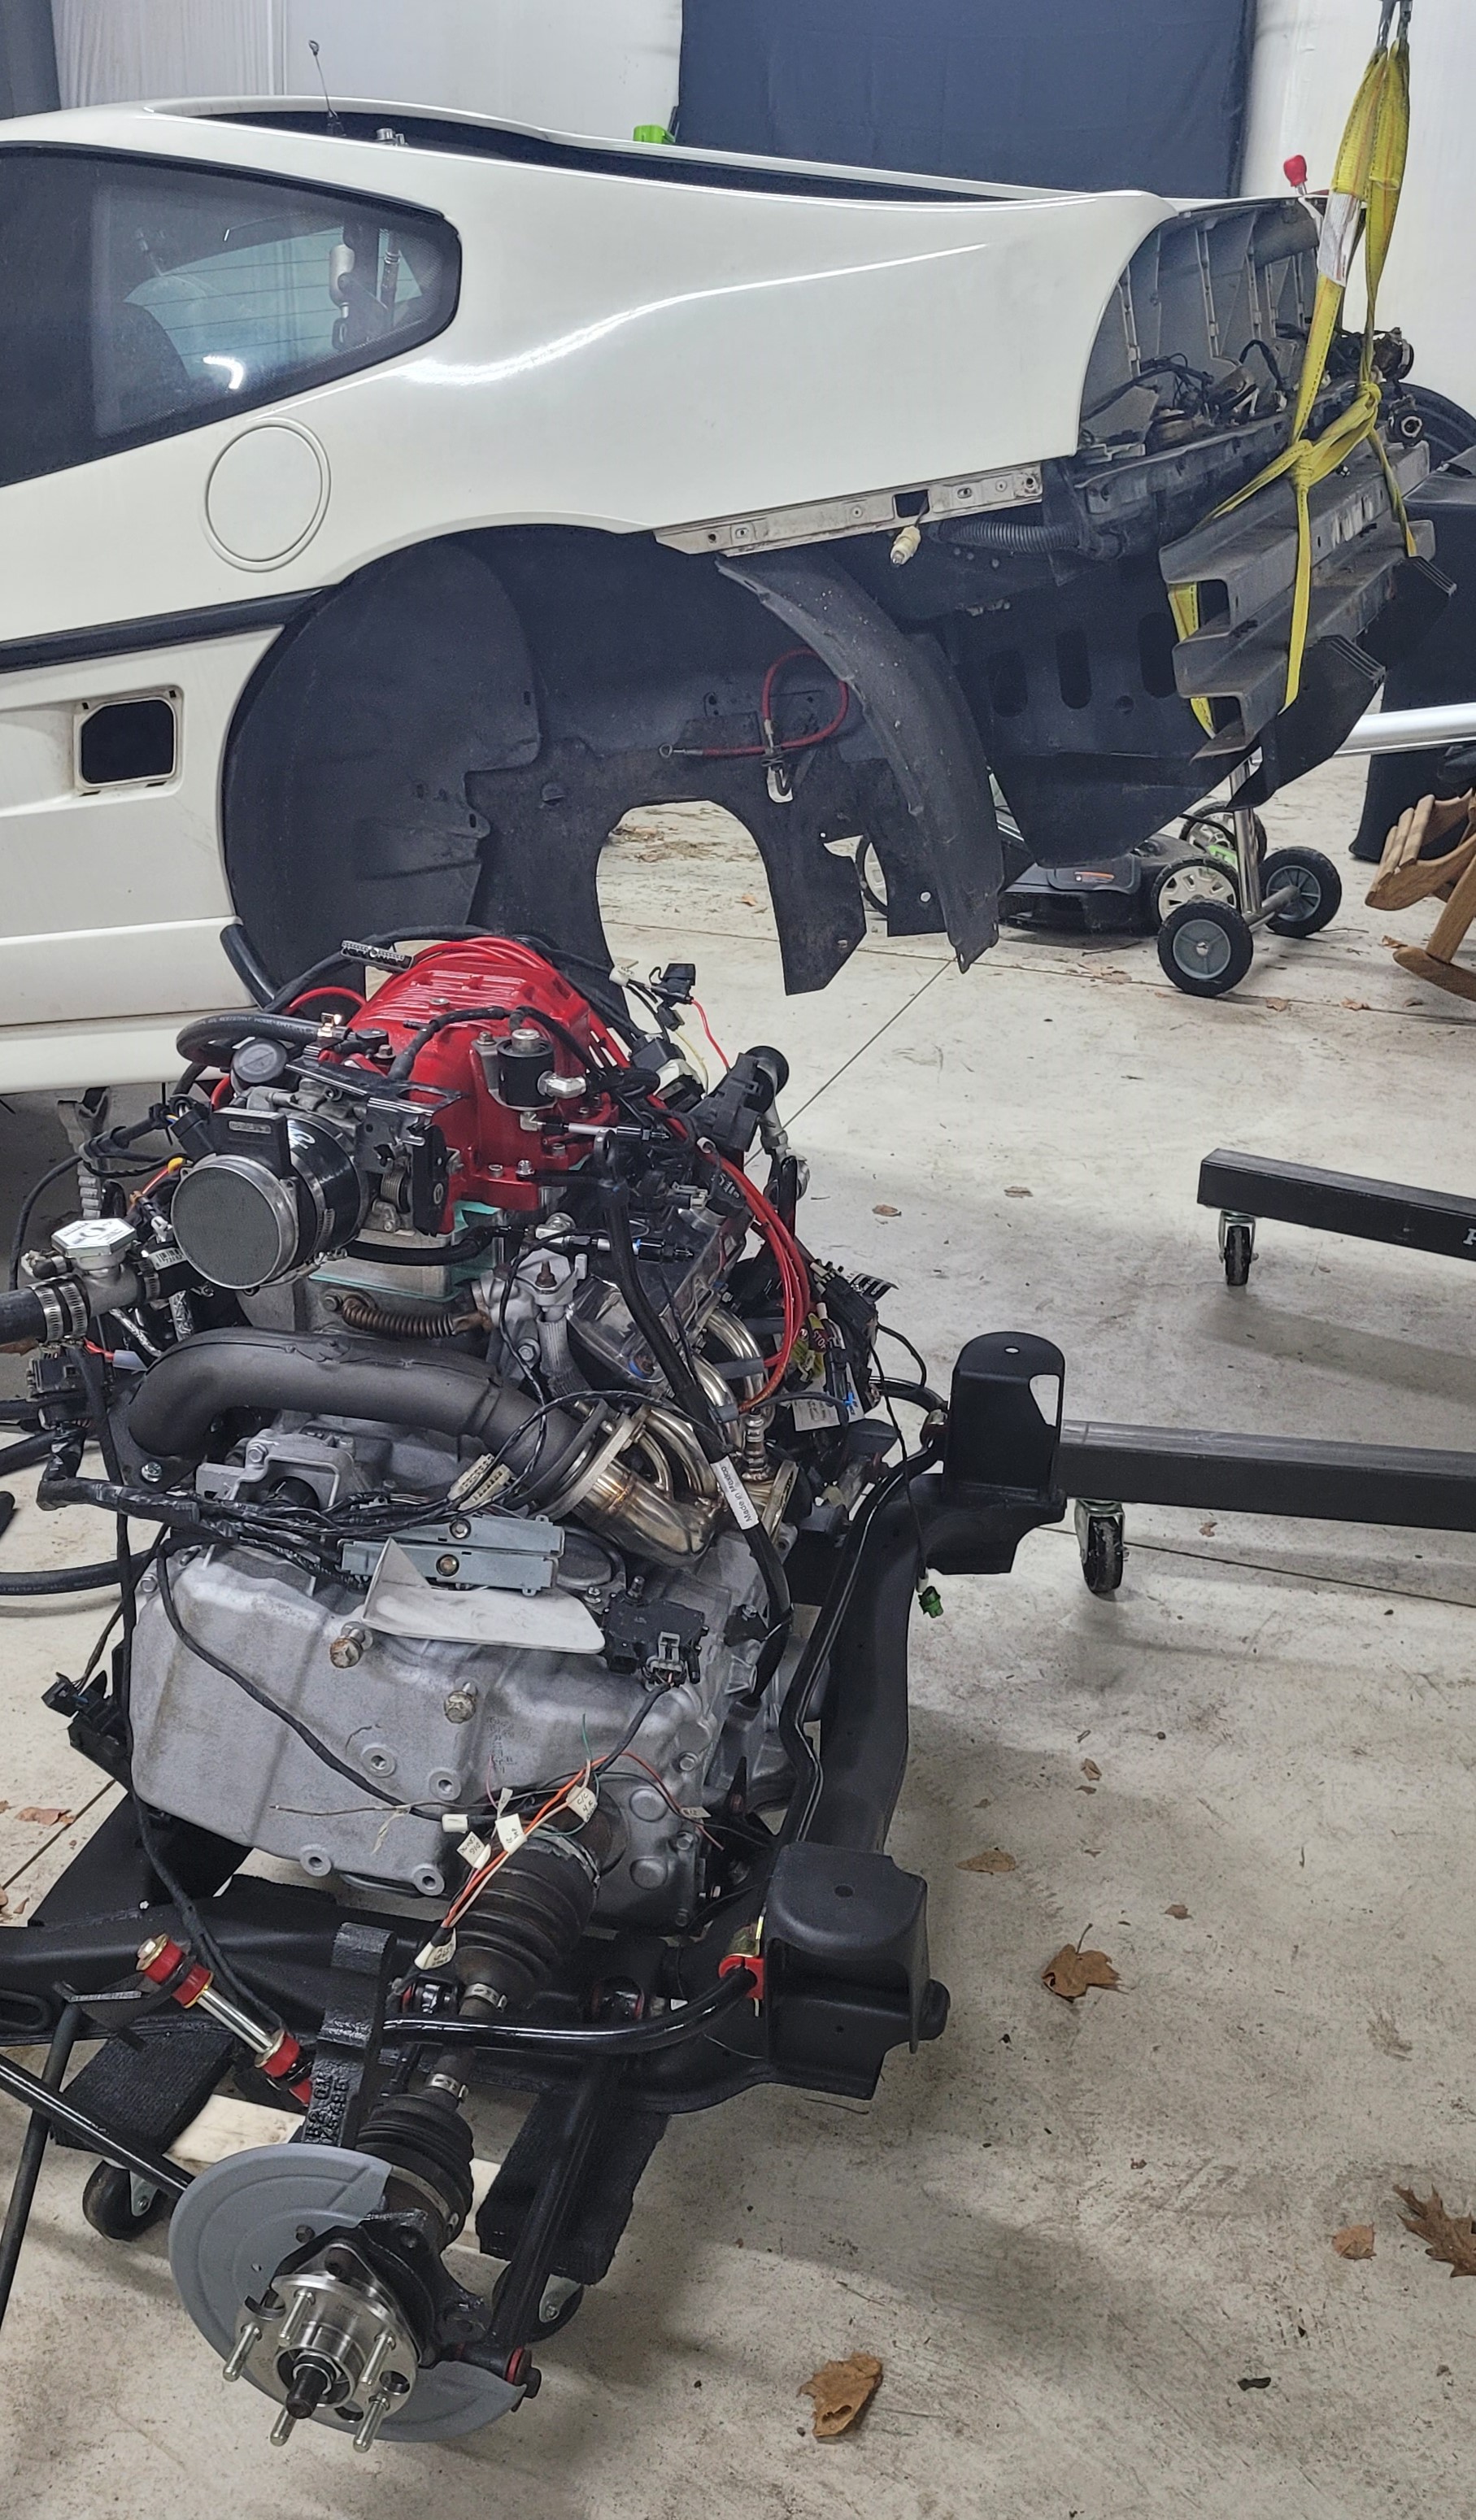
Moving to the engine, I put a few of the last remaining things on it that I needed to. Followed DarthFiero's guide on priming the oil pump, filled it up with oil and replaced the oil filter with a non-modified one. I then put the engine mount bracket on the underside of the front of the engine, fitment was good.
I installed the exhaust manifolds and ceramic crossover pipe from ZPP, that also went smoothly. I still haven't torqued it down yet until the paint on the engine lift points cures.
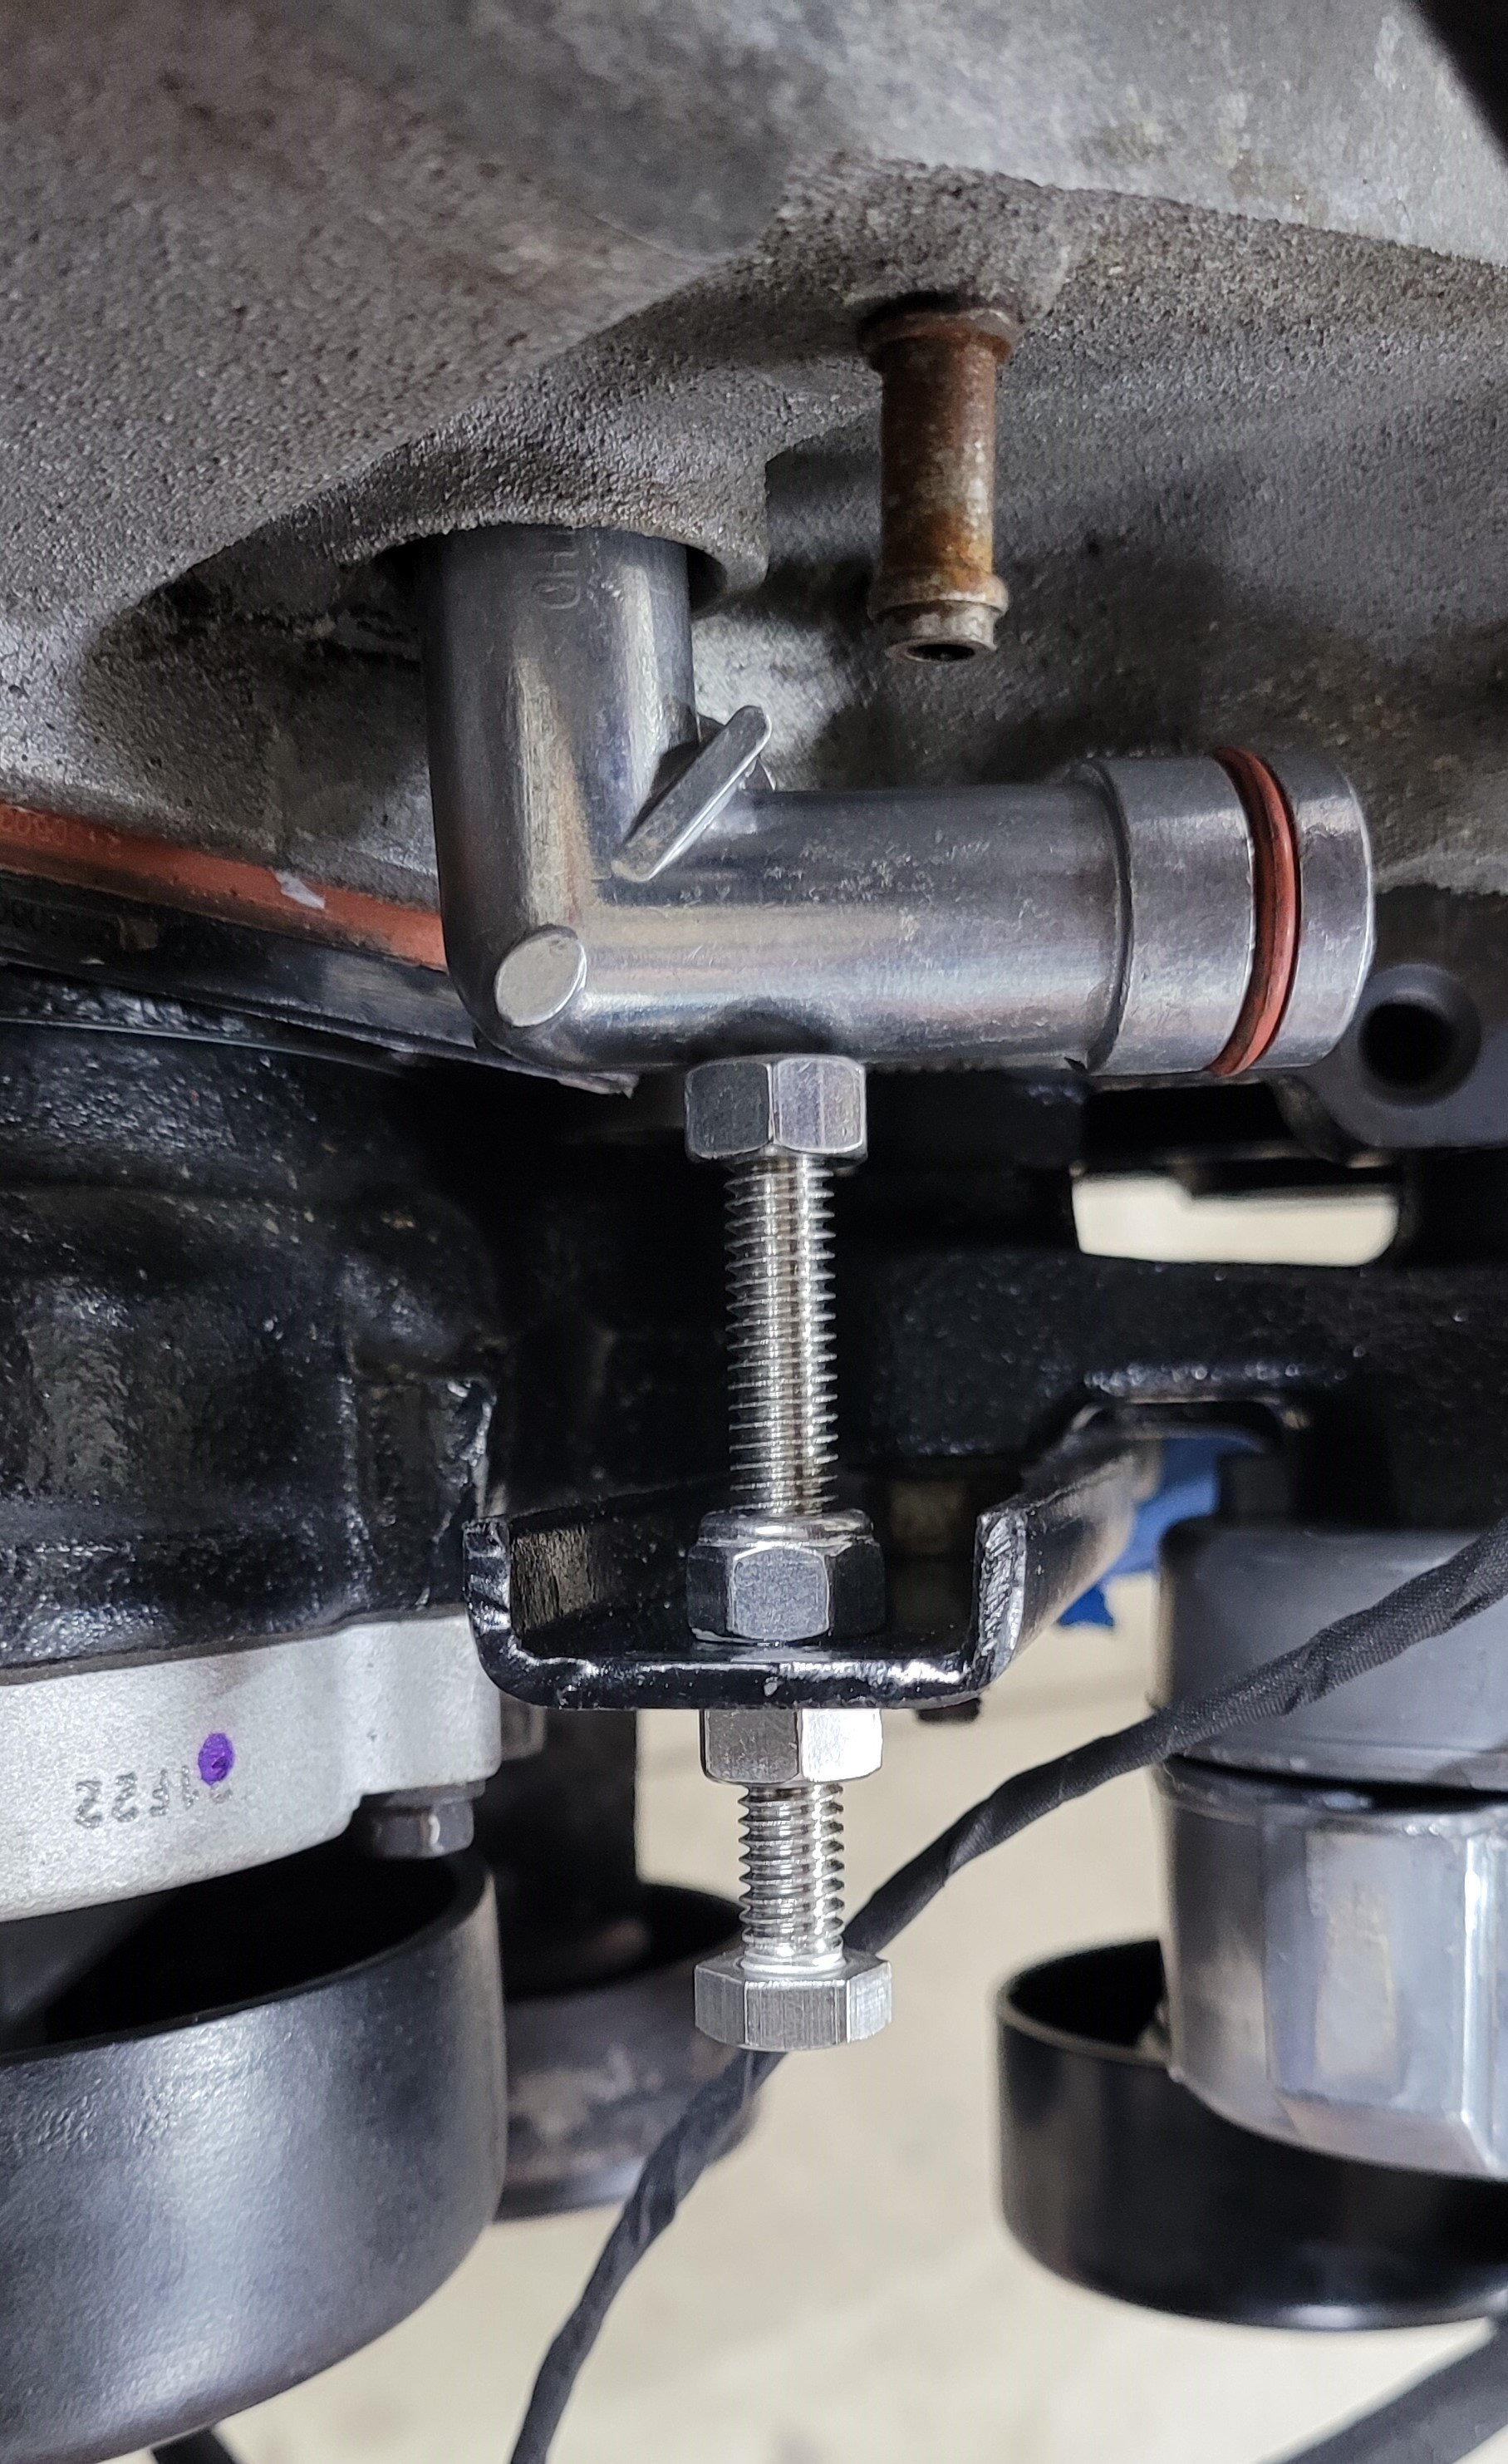
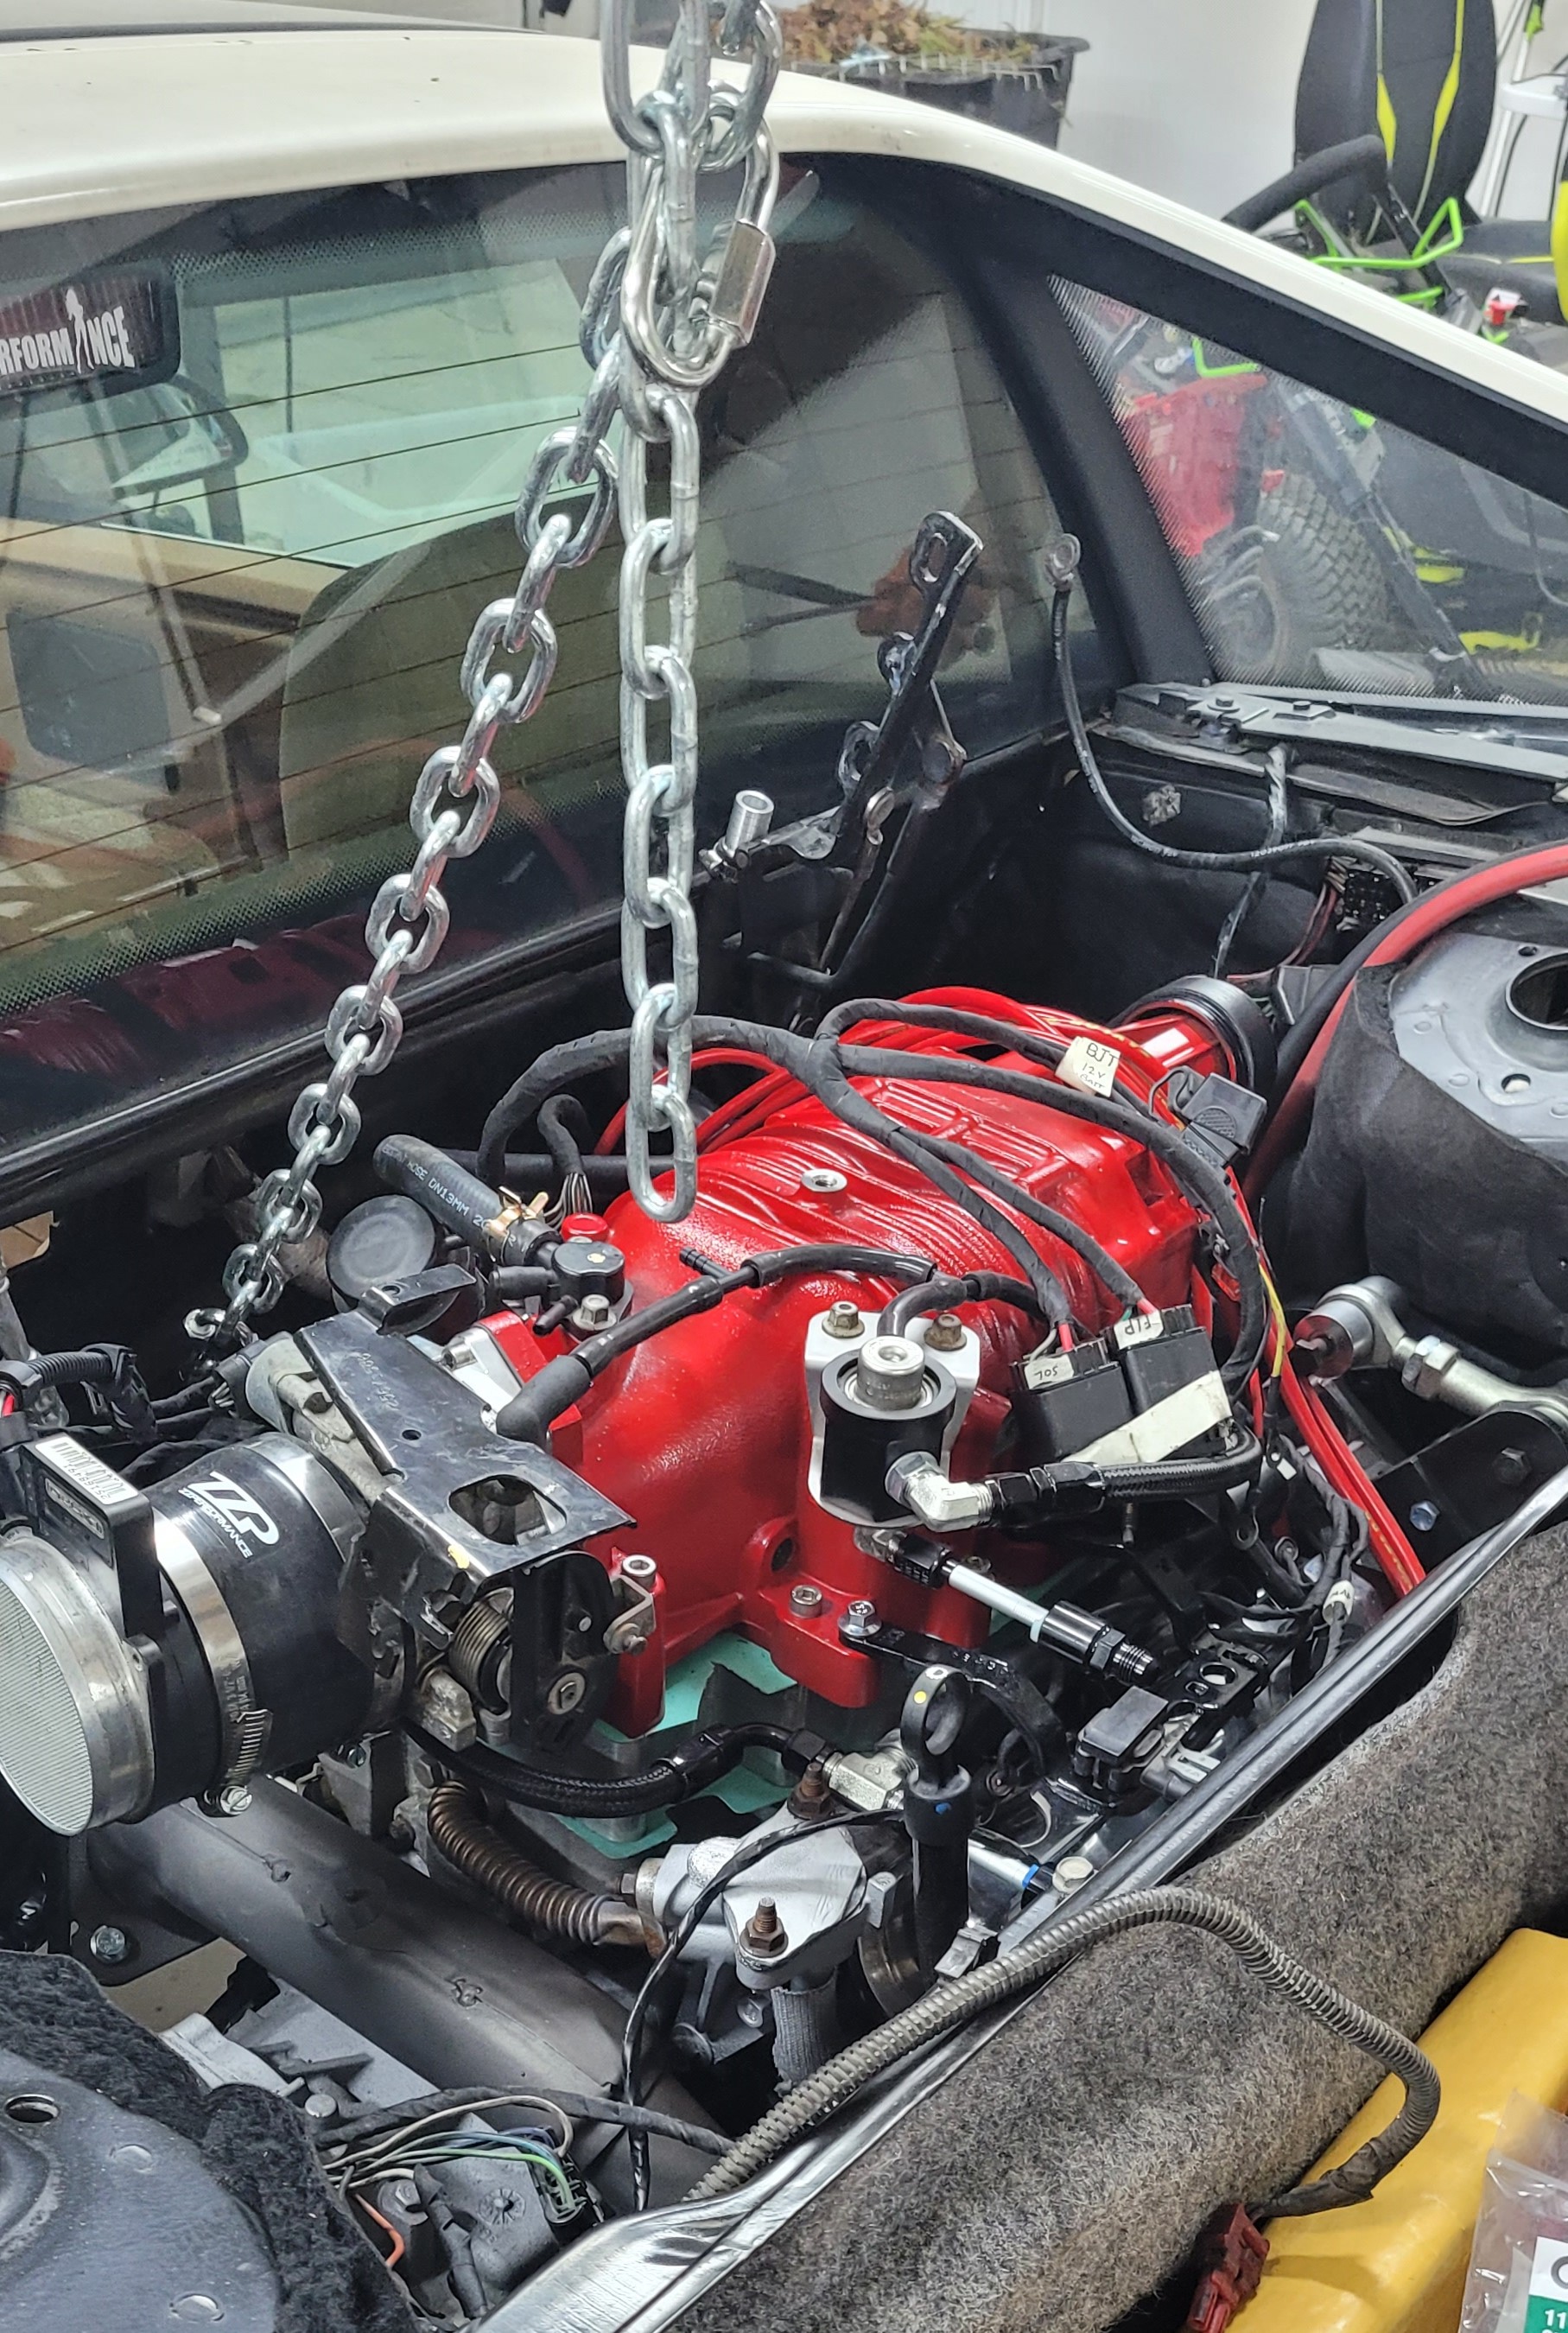
The last thing I worked on for the engine this weekend was the LIM coolant elbow for the heater core. I decided to follow a design similar to LostNotForgotton's design. I used some C channel, drilled 2 holes in it, and painted it black. I mounted it to the stud underneath the right side pulley and used a bolt with a series of jam and locking nuts to provide a small preload to prevent the elbow from pushing out of the seat under the coolant pressure. Fingers crossed this doesn't leak because I'm really not wanting to tap the hole and put a barbed fitting in it.
Might be cleaner to just make a bent metal bracket that directly presses on that fitting to retain it instead of using the bolt and nuts, both for vibration and for the ability for that bolt to deflect side to side if force is applied to it. I'd say it is probably going to be just fine, but a bent metal bracket will certainly work without issue and would be simple to make.
That motors looking great man! I was hella worried about those popping out on mine, I tapped and installed ss barbed fittings. Looks like im running a natural gas line but I dont trust the elbow to stay in w just orings. Not w my luck lol
Thank you gentlemen! I am a little worried about it, but the pressures aren't going to be too much so I'm trying to stay optimistic. I have a buddy that has a CNC I can take the LIM to IF this doesn't end up working out.
Well here we are a month past my expected completion date, and the cradle isn't yet in the car. First thing since the last update was getting the engine and transmission mated together and getting it all torqued to the rear cradle. We had to do some aligning with prybars to match the angles of the two going together, but it only took about 10 minutes to do. It went without a hitch and I'm very happy to have them together.
I did have custom AC lines made to join the 3800 compressor to the Fiero's hard lines, I worked with Auto Cooling Solutions in Flint, MI and they were really great and had it done in 5 days. I would highly recommend them, for me it cost 170 without shipping anything. I worked up in the front of the car a bit to swap in the Fiero Store's full aluminum upgraded radiator. I struggled on this for the entirety of the afternoon because it wouldn't seat properly. The stock Fiero radiator has cutouts in the bottom flange that allow it to seat over some bolts on the bottom radiator support, but this new one was completely absent of them. Rather than cut notches out of my new radiator- I cut down the excess length of the bolts that was causing the issue with my angle grinder and that allowed it to sit in there at the agle it needed to. I also cut down the height on the rubber isolators that others have done.
I have put in Archie's front battery relocation tray, couldn't watch the instructions because I don't own a DVD player- so I probably made it harder on myself than it needed to be. It really was a tight fit. I needed to cut a little more than I would've liked because it was running into the steering rack's damper bracket on the drivers side and the stainless coolant pipe on the passenger side. Was barely able to get the radiator hose and clamp on, hopefully I can get them off in the future. Because I had to cut more than I wanted to- I had to smother it with JB weld. I'll paint it all black eventually to cover my sins.
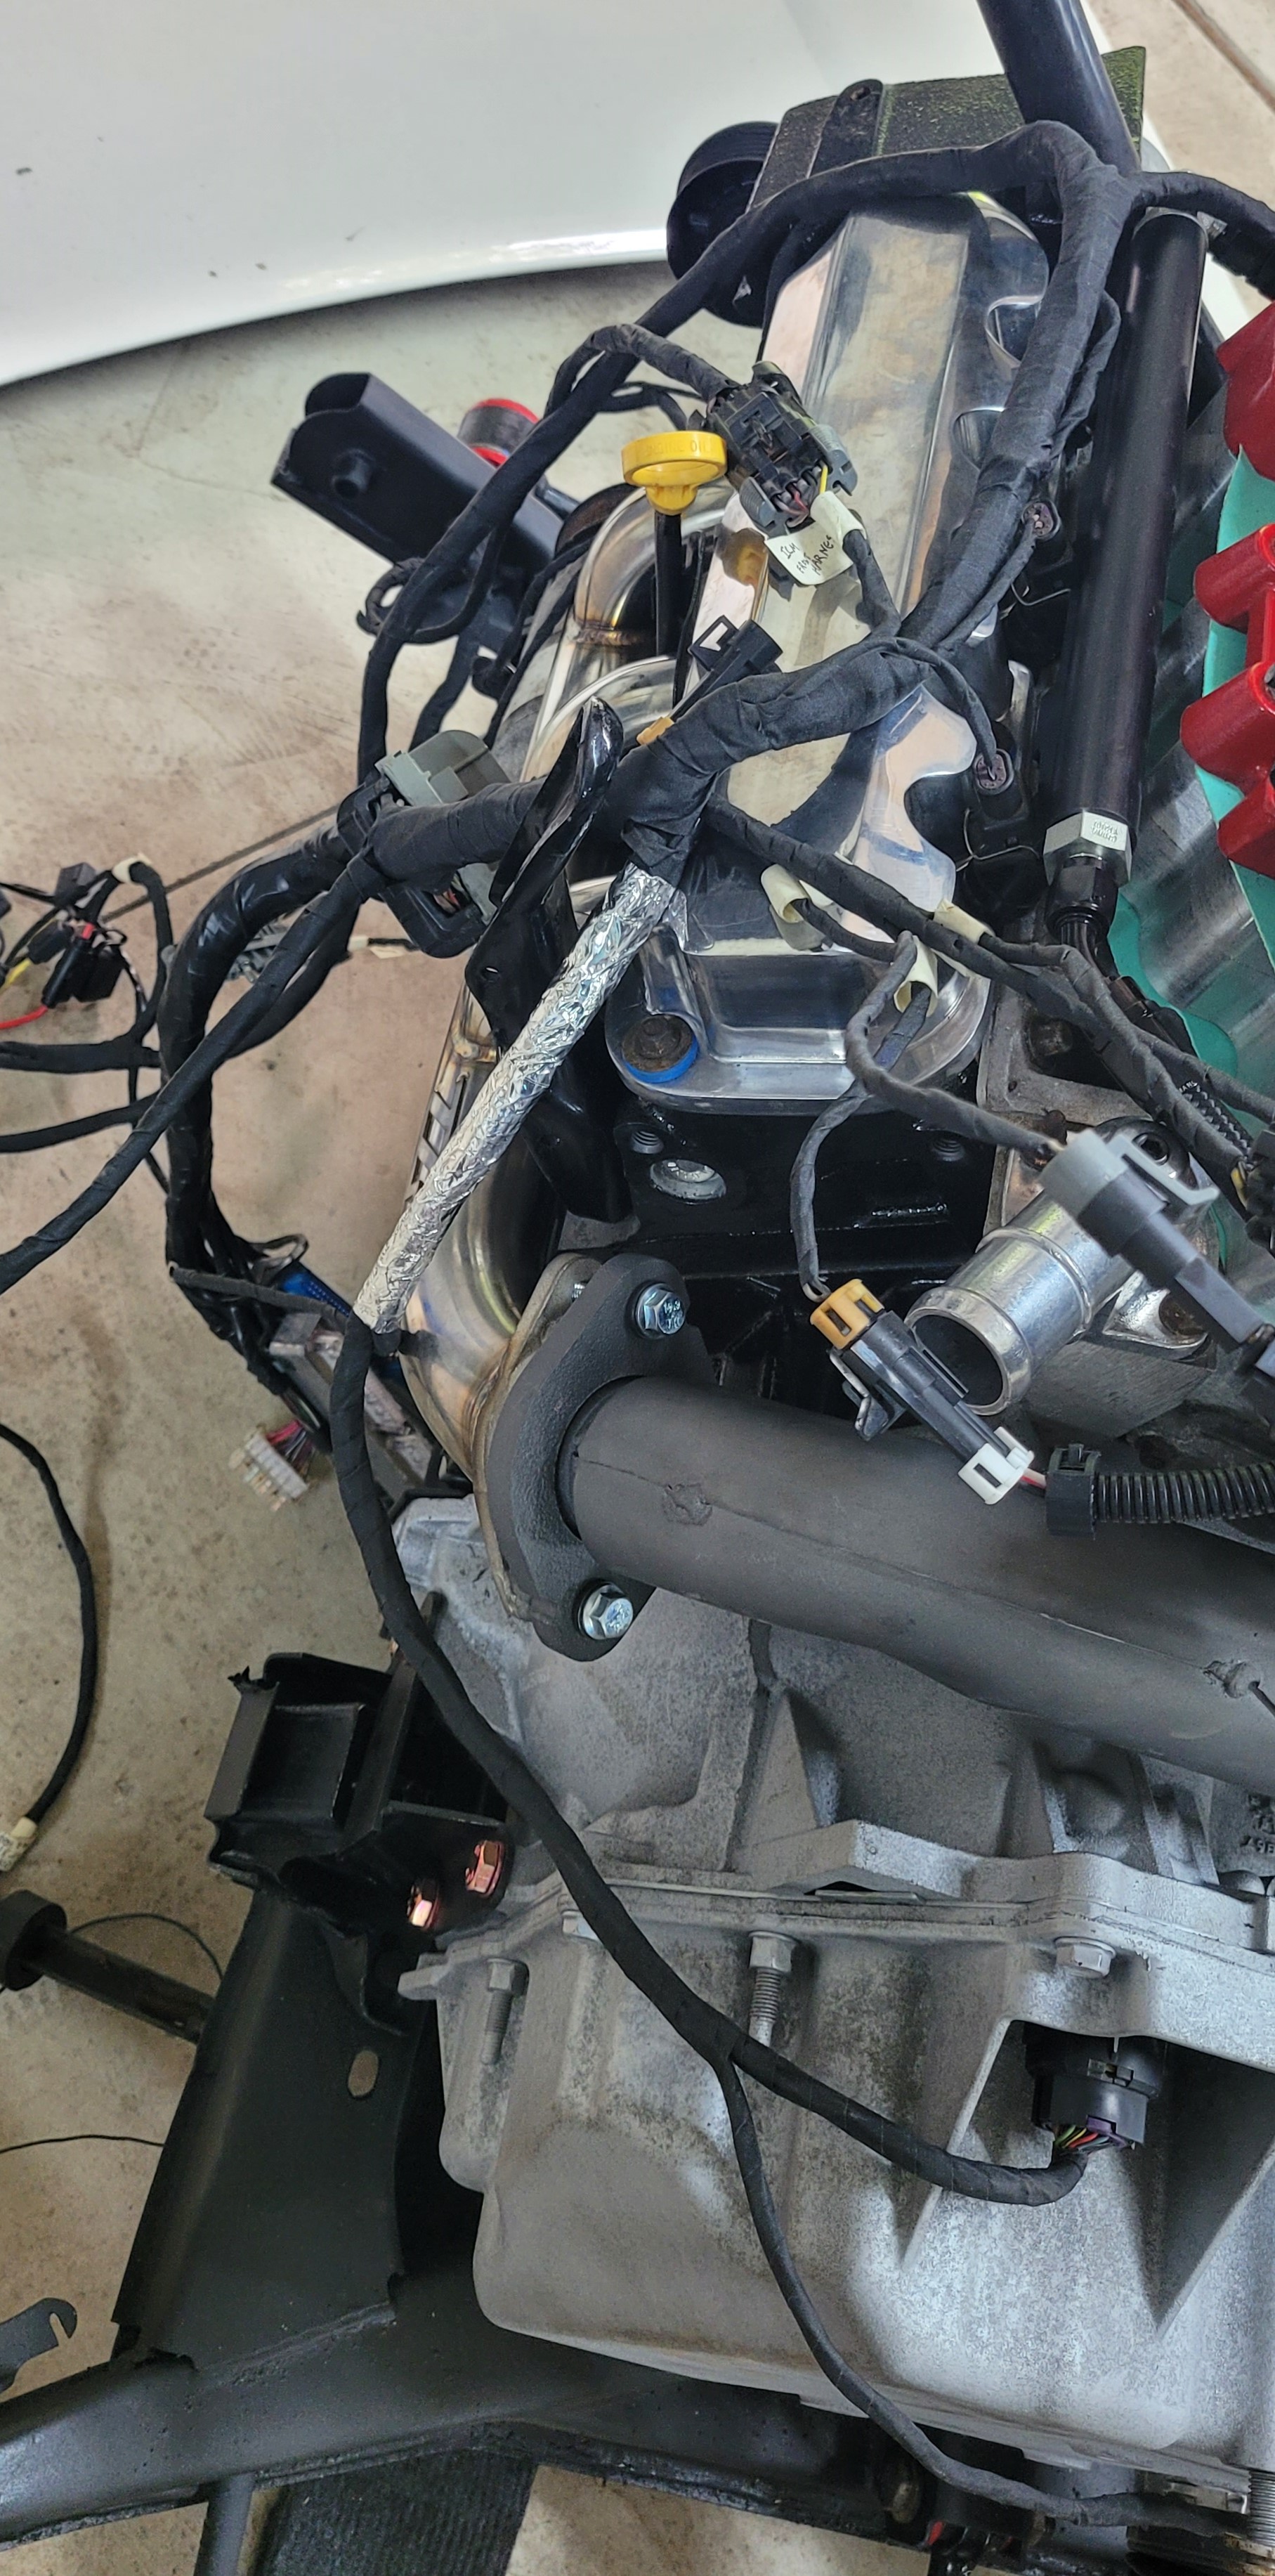
Most recently, I've been hooking up the electrical harness olejoedad made for me. It's been a little struggle figuring out the exact routing needed for each cable, but he's been amazing with the support and everything is labeled!! I've asked plenty of questions and very appreciative that he's been able to answer them all. I do have to make an extension to my alternator plug, I believe the fact that I'm using FieroRog's low mount alternator brackets and a Powermaster alternator- those both moved the plug about 3-4 inches away from where it is on the alternator. Not a huge deal- I have the two ends of the 4 pin Metri-pack 150 series on the way and I'll make a small plug in extender rather than cutting into the lines and having to seal that up well.
Also in my case, the EGR is deleted so I need to make a block off plate. I decided to use some of the angle iron I had around and cut up a plate to mount where the EGR valve sat with the gasket. Doesn't look too bad if you ask me.
Next step is to finish the electrical hookup as much as possible, put on the belts to the pulley system, get the rest of the rear suspension put on, and get this thing into the car.....
[This message has been edited by MichiganReefer (edited 05-29-2023).]
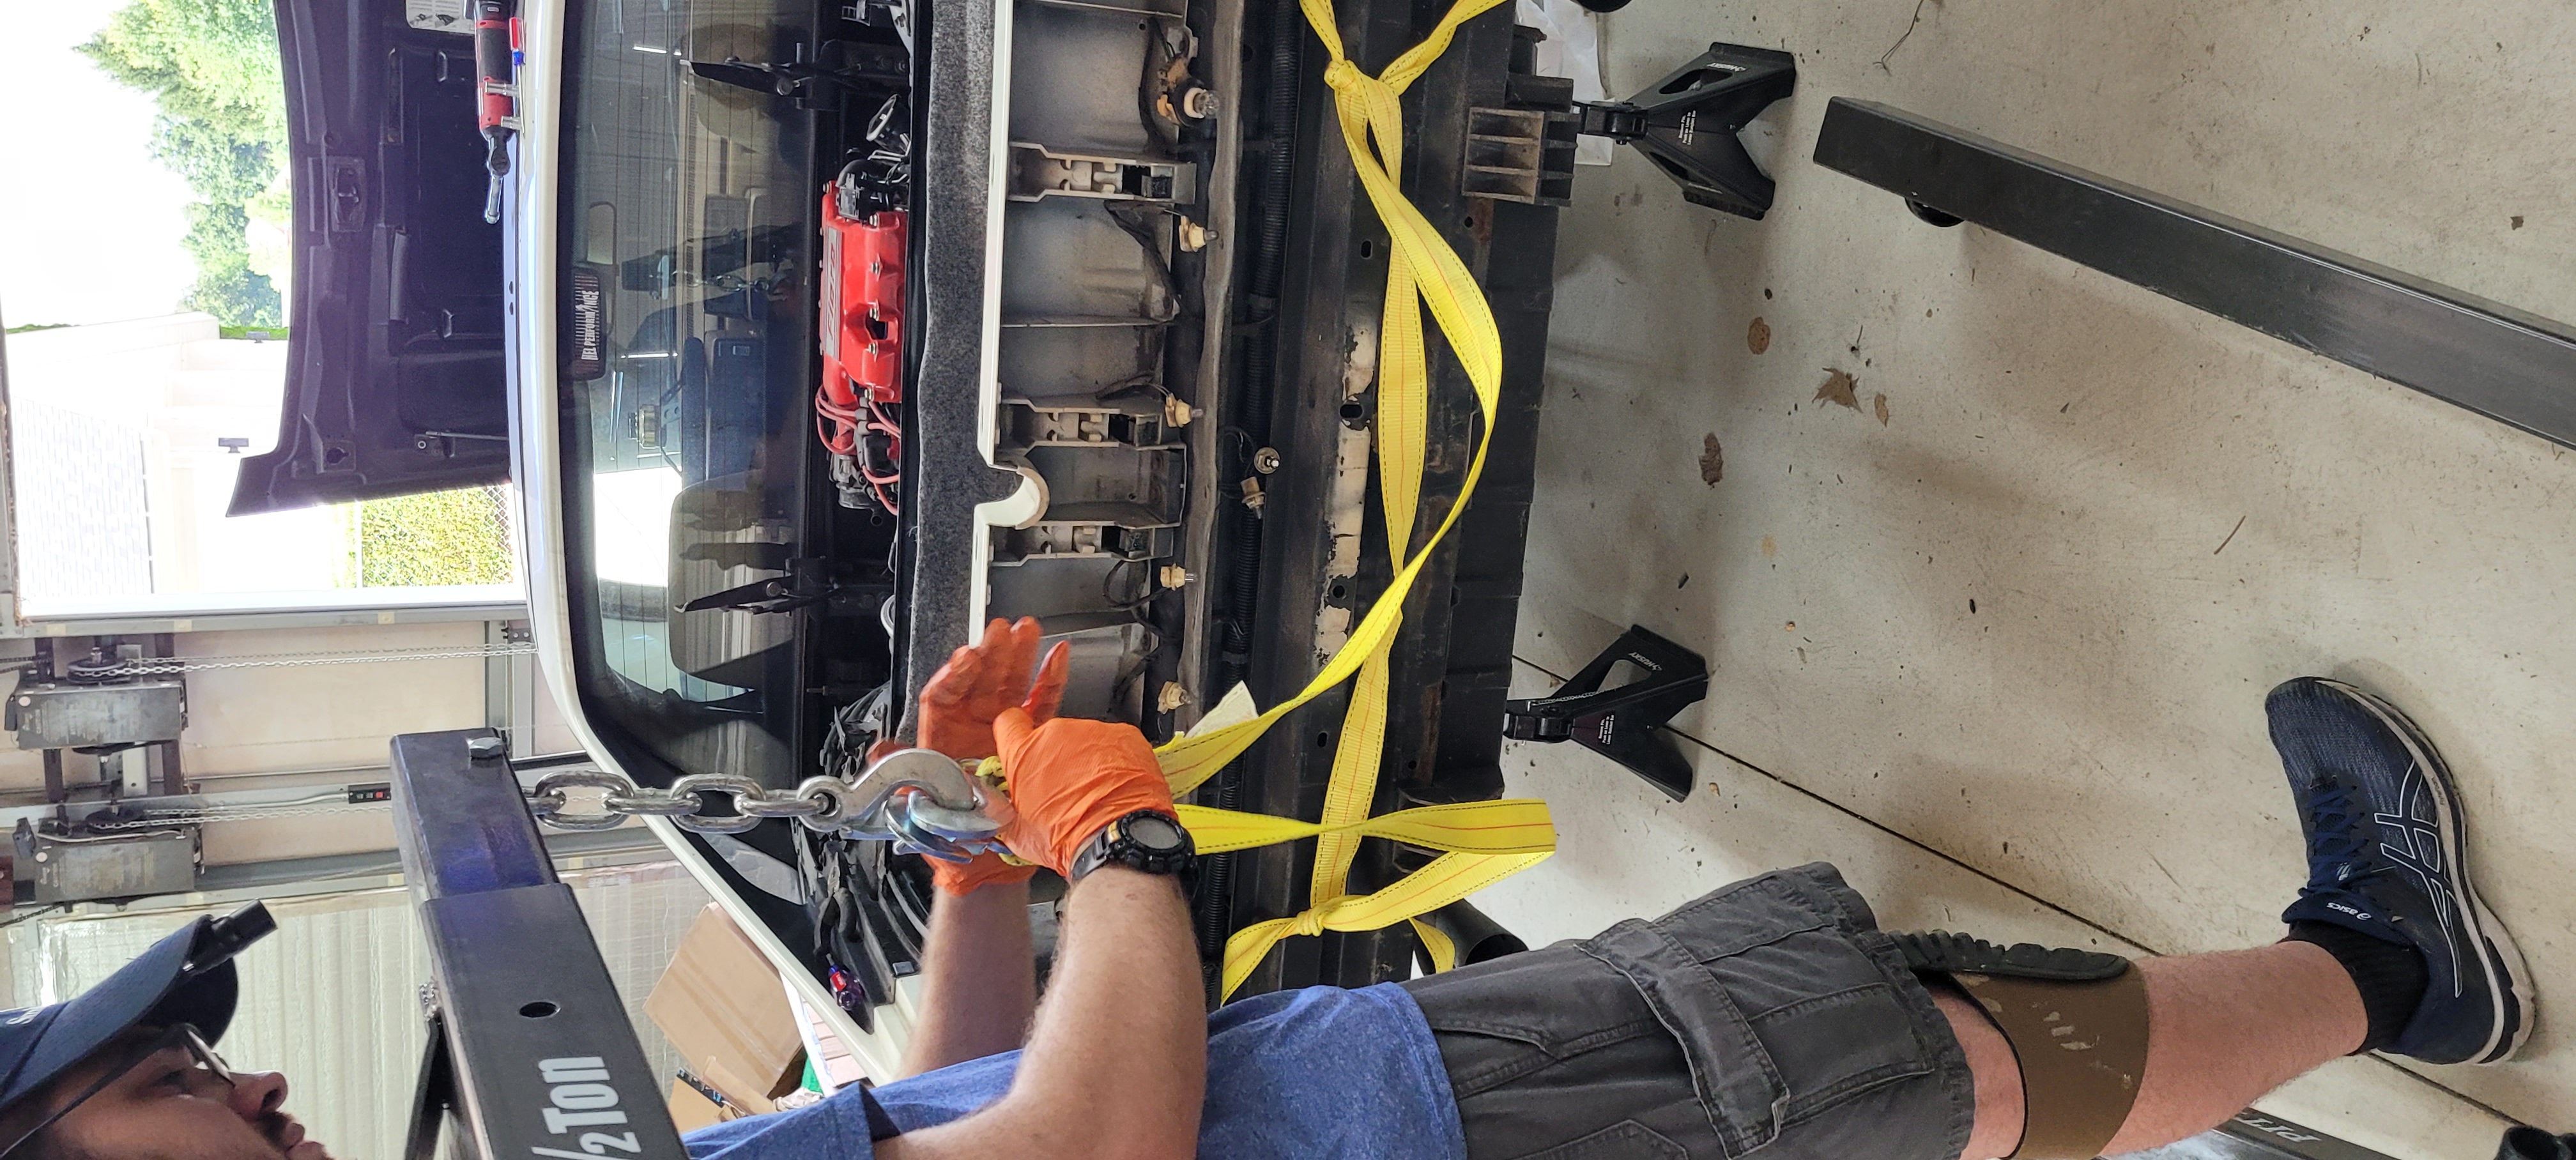
I've finally got the cradle back under the car and bolted up. Thanks to a buddy and lessons learned from removing it, it went smoothly and didn't take too long. We hoisted the car higher by picking up the rear crash member and kept the front tires from moving with my scrap part wheel chocks.
We had the cradle on two Harbor Freight furniture dollies and jacked up the sides with two floor jacks. After getting it about a foot off the ground we realized how little we were jacking up with and sent it anyway. I had to give myself about 3 ft of height to slide the cradle in from the side.
It feels amazing to have the cradle in now. I've been hooking up connections as I go. Working on the coolant lines, transmission lines, fuel lines, electrical hookups, vacuum lines. So many more connections I can't recall. I'm going to struggle with the remaining electrical, getting power distribution taken care of. We'll cross that bridge in a couple weeks. I had bought Rodney's adjustable dogbone- to make it work for this application with FieroRog's brackets I had to chop length from both ends. Around 3/4" from each.
I think it looks amazing.
Up front I have mocked up my battery position and where I want to mount my intercooler pump- I'll be hole sawing a couple holes for the hoses to reach the 'frunk' compartment.
How have people historically been able to have a decklid hood work with a full stack intercooler? Have you all been able to use a large hood scoop? I will probably bring it to a body shop for a consulation, but would like to hear/see how other people have handled the supercharger sitting so high. Are the hinges or torsion springs a problem?
[This message has been edited by MichiganReefer (edited 06-15-2023).]
Originally posted by MichiganReefer: How have people historically been able to have a decklid hood work with a full stack intercooler? Have you all been able to use a large hood scoop? I will probably bring it to a body shop for a consulation, but would like to hear/see how other people have handled the supercharger sitting so high. Are the hinges or torsion springs a problem?
I did a Full Intercooler swap for a guy back in the day, We did get it to sit under the decklid without a vent or scoop, but it required lowering the drive train a fair bit, we actually had to notch the end of the oil pan so that the exhaust didn't have to hang under it even closer to the ground ( ZZP headers and conventional exhaust layout )
I did have to slightly notch the underside decklid supporting frame and rework that hinge to clear the drive end of the supercharger.
Yes his basepan was the lowest point, but it was a tradeoff he accepted because we both agreed that Hood scoops are stupid looking on a Fiero.
[This message has been edited by jelly2m8 (edited 06-16-2023).]
Originally posted by jelly2m8: I did a Full Intercooler swap for a guy back in the day, We did get it to sit under the decklid without a vent or scoop, but it required lowering the drive train a fair bit, we actually had to notch the end of the oil pan so that the exhaust didn't have to hang under it even closer to the ground ( ZZP headers and conventional exhaust layout )
I did have to slightly notch the underside decklid supporting frame and rework that hinge to clear the drive end of the supercharger.
Yes his basepan was the lowest point, but it was a tradeoff he accepted because we both agreed that Hood scoops are stupid looking on a Fiero.
That was the procedure that I heard a while back from Dave who was one of the early guys to fit a full stack. I didn't want to go through that much trouble and used the short stack that fits with no mods. Car is running 11 psi of boost (3.4" pulley on a Gen V supercharger) , a 180* stat, a high flow fuel pump, a non restrictive exhaust and 93 octane (now 94 octane) gasoline. There are no KR's but I often wonder how far the SS intercooler will go on a heavily modified 3800.
------------------ " THE BLACK PARALYZER" -87GT 3800SC Series III engine, custom ZZP /Frozen Boost Intercooler setup, 3.4" Pulley, Northstar TB, LS1 MAF, 3" Spintech/Hedman Exhaust, P-log Manifold, Autolite 104's, MSD wires, Custom CAI, 4T65eHD w. custom axles, Champion Radiator, S10 Brake Booster, HP Tuners VCM Suite. "THE COLUSSUS" 87GT - ALL OUT 3.4L Turbocharged engine, Garrett Hybrid Turbo, MSD ign., modified TH125H " ON THE LOOSE WITHOUT THE JUICE "
That was the procedure that I heard a while back from Dave who was one of the early guys to fit a full stack. I didn't want to go through that much trouble and used the short stack that fits with no mods. Car is running 11 psi of boost (3.4" pulley on a Gen V supercharger) , a 180* stat, a high flow fuel pump, a non restrictive exhaust and 93 octane (now 94 octane) gasoline. There are no KR's but I often wonder how far the SS intercooler will go on a heavily modified 3800.
Yep bud, Dave also got it all under a decklid without a scoop
Mine sits at what looks a similar height and I had to put a notch in both sides of the decklid (TB and SC pulley side). Also had to remove a part of the hinge and the torsion springs.
quote
Originally posted by olejoedad:
Most aftermarket and OEM mounts set the drivetrain too high on the cradle.
Yeah I guess so, I was unaware of that at the time. My oilpan could be 2 inches lower without sticking out under the subframe. And I do not see a way of modifying the mounts or brackets I have.


 [img]https://ima ges.fiero.nl/userimages/MichiganReefer/20220409_200443.jpg[/img]