My first post here. I could use some help to keep my project moving forward at a steady rate...
A bit of background on the project. I've got 2 daughters who are 13 and 16. Due to Covid, the public school is shut down and they are doing 100% online learning. It sucks for all of us. They only go to school for 1/2 days and honestly aren't learning much of anything. Since August, school would end at noon and they'd sit around watching TV or playing on their phones.
I'd ask them if they'd finished their homework. "Already did it". Did you clean your room. "Already did it". Did you get some exercise. "Went for a run an hour ago". So, I'd say they needed to find something to do besides play on their phone. After 3 months of that, I had exhausted just about every activity I could think of. So...I needed to create some kind of long term activity for the kids to keep them busy an off their phone. After a bit of thought, I decided fixing a broken down car would be a good educational experience. So, I created what I'm calling "Grease Monkey 101" and am forcing the girls to do 2 hours of car repair a day.
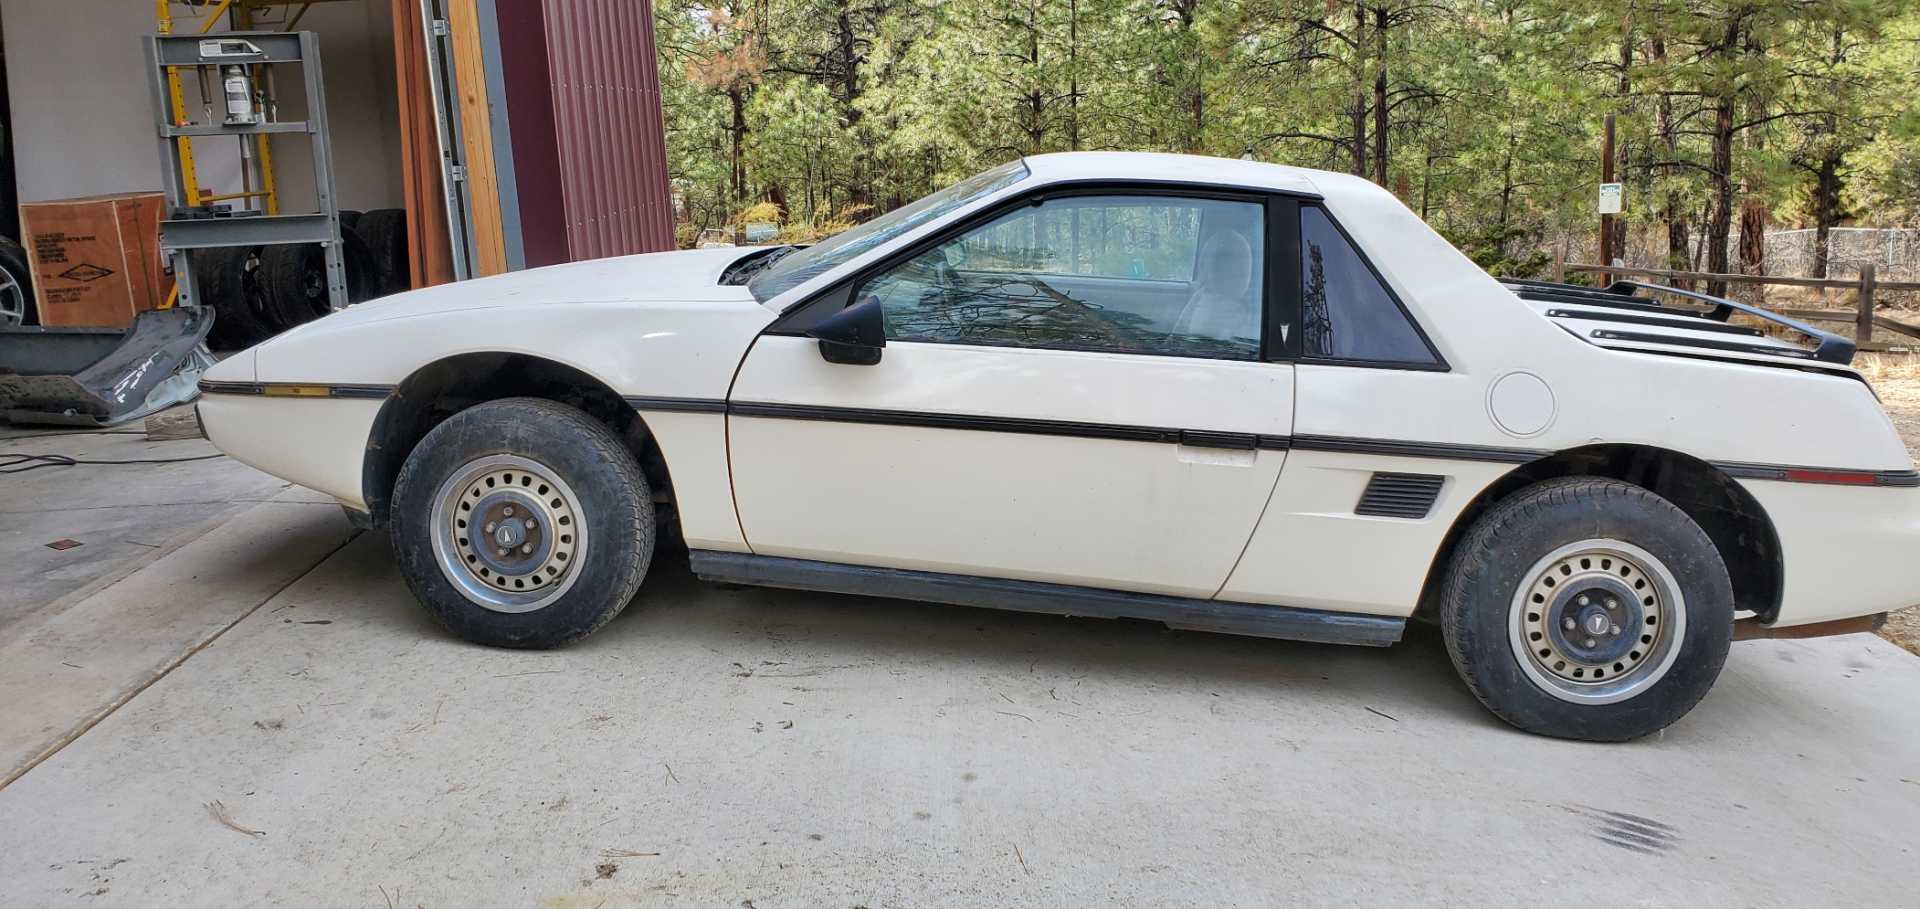
I didn't have a car that I trusted them to work on, so I started looking for a cheap car. It needed to be dirt cheap and not running. That way if they tore it up, it wouldn't be a big deal. I didn't have a particular car in mind...just cheap and something I thought would be fun to drive once it ran. Looking in Facebook marketplace, I found a '84 Fiero for $200. Sad interior, caked in dust, a few rats nest in the engine bay. Perfect!
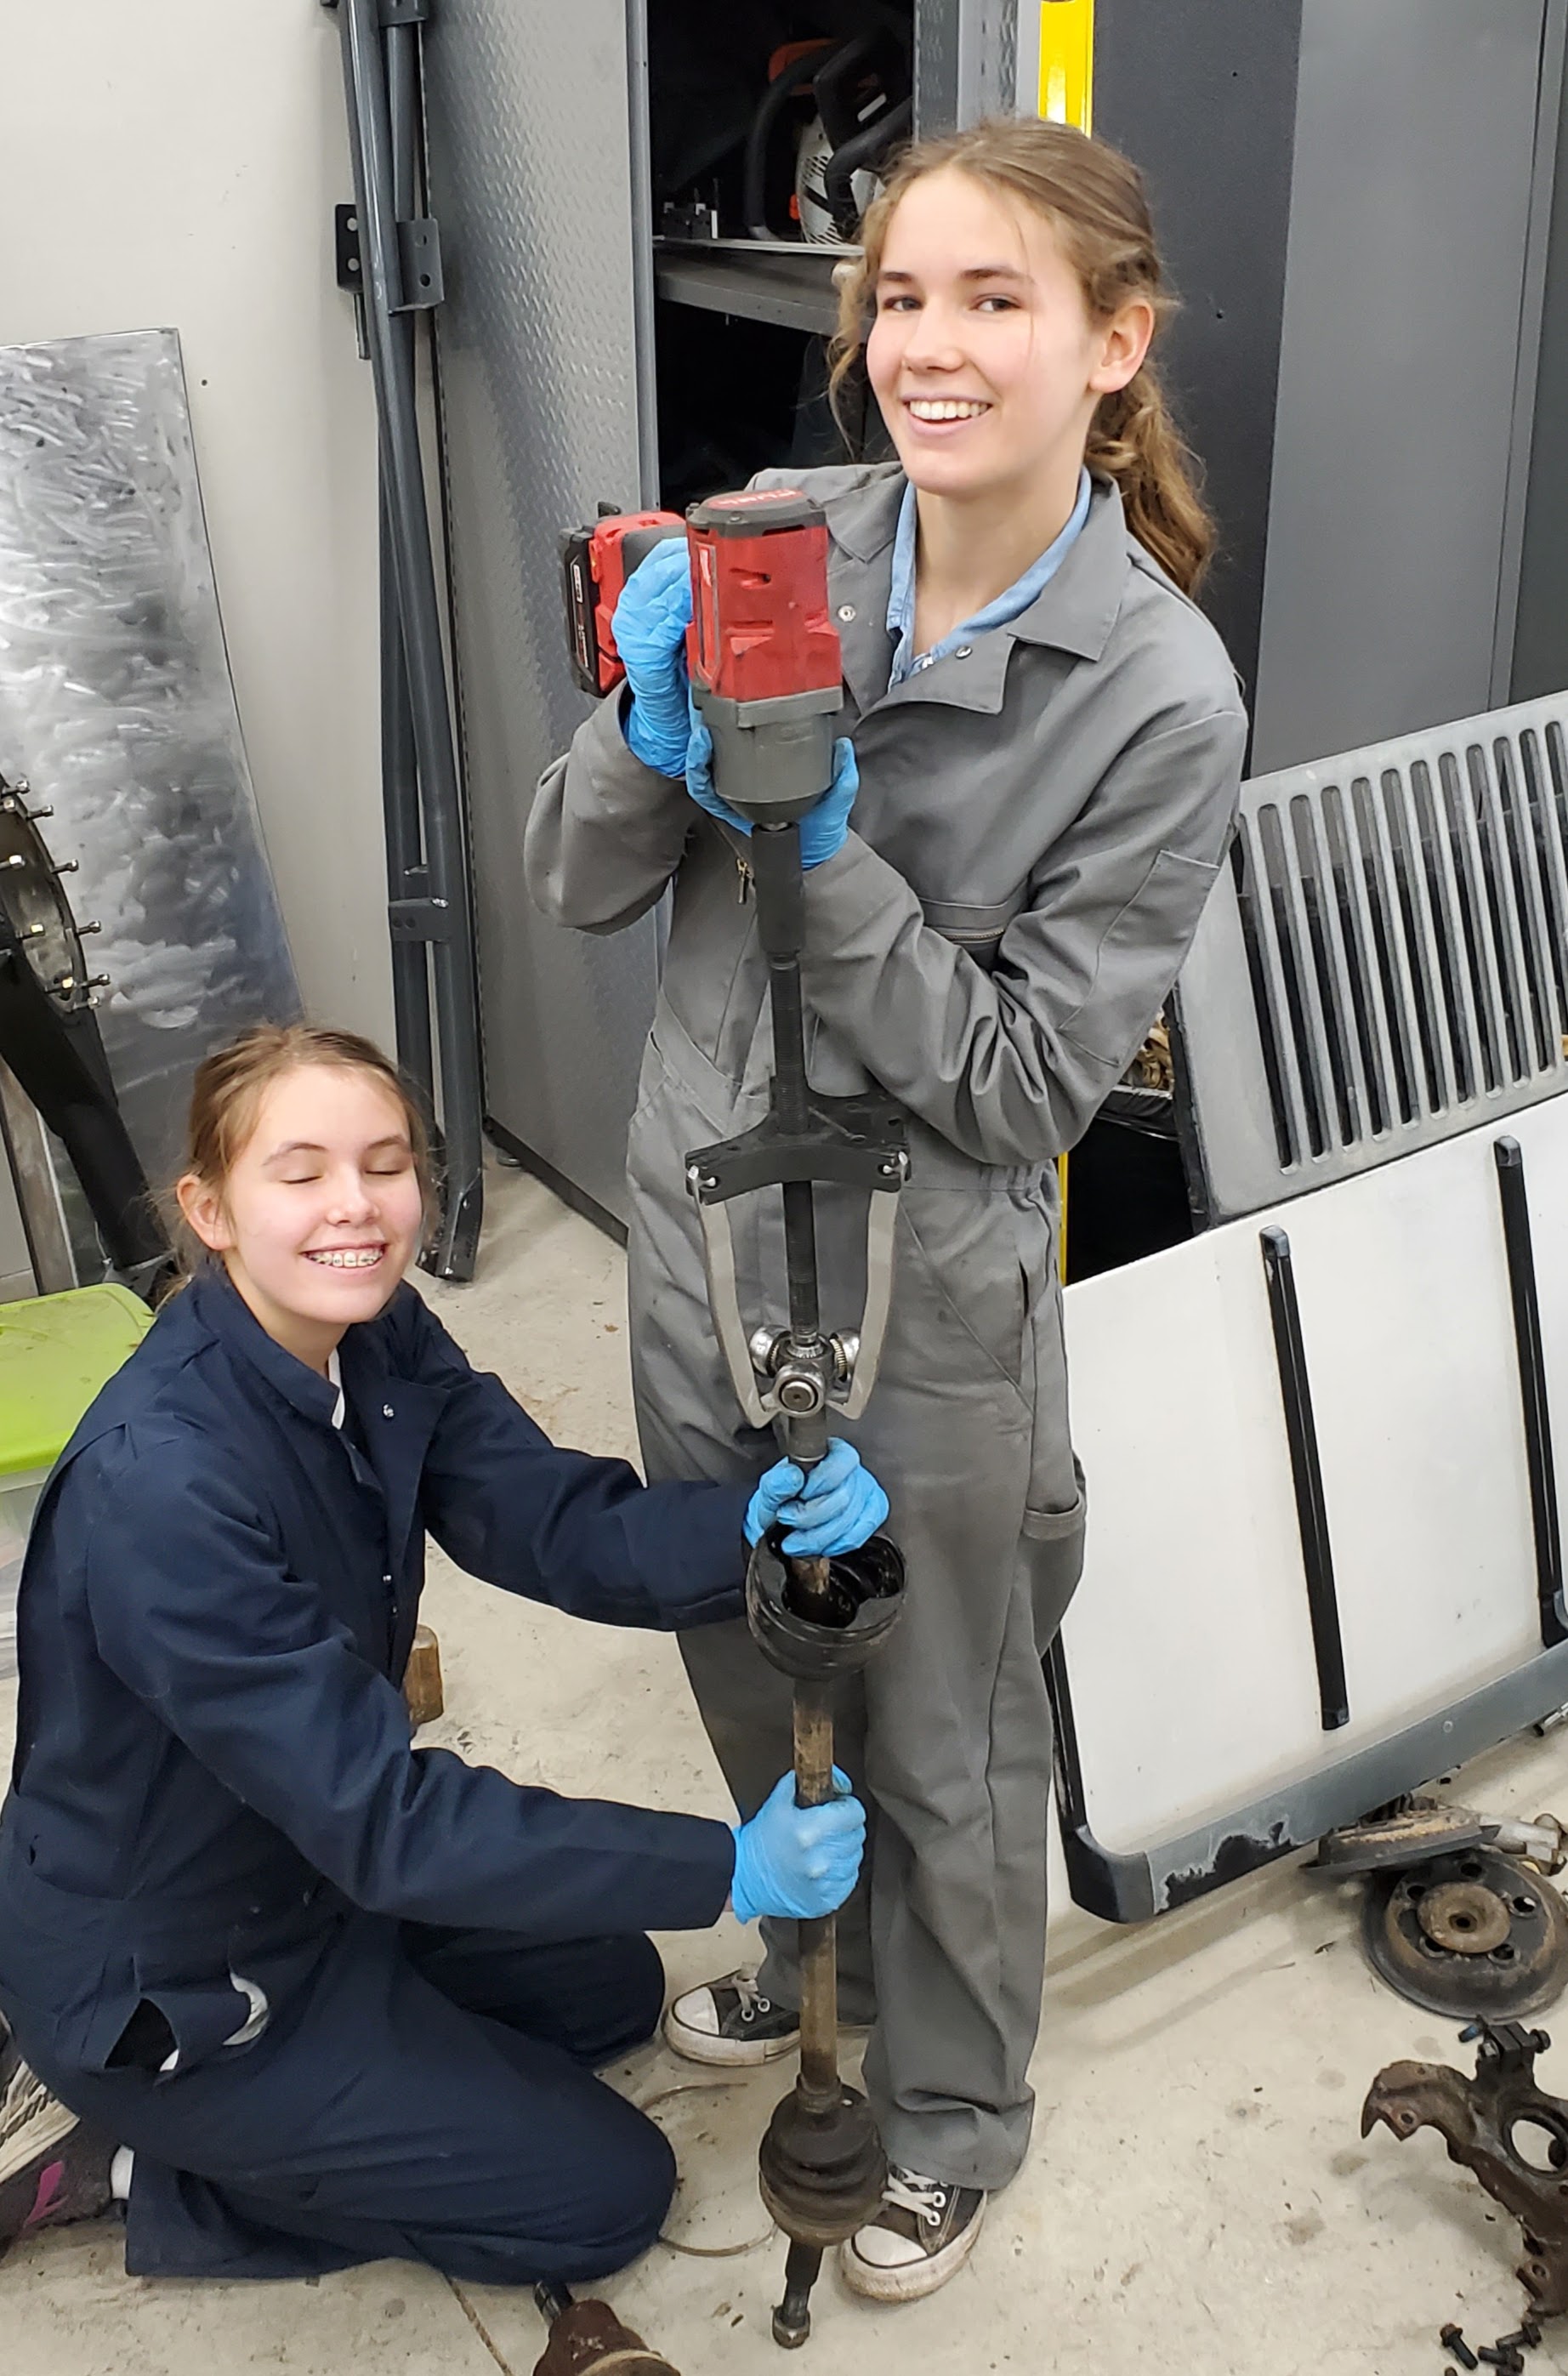
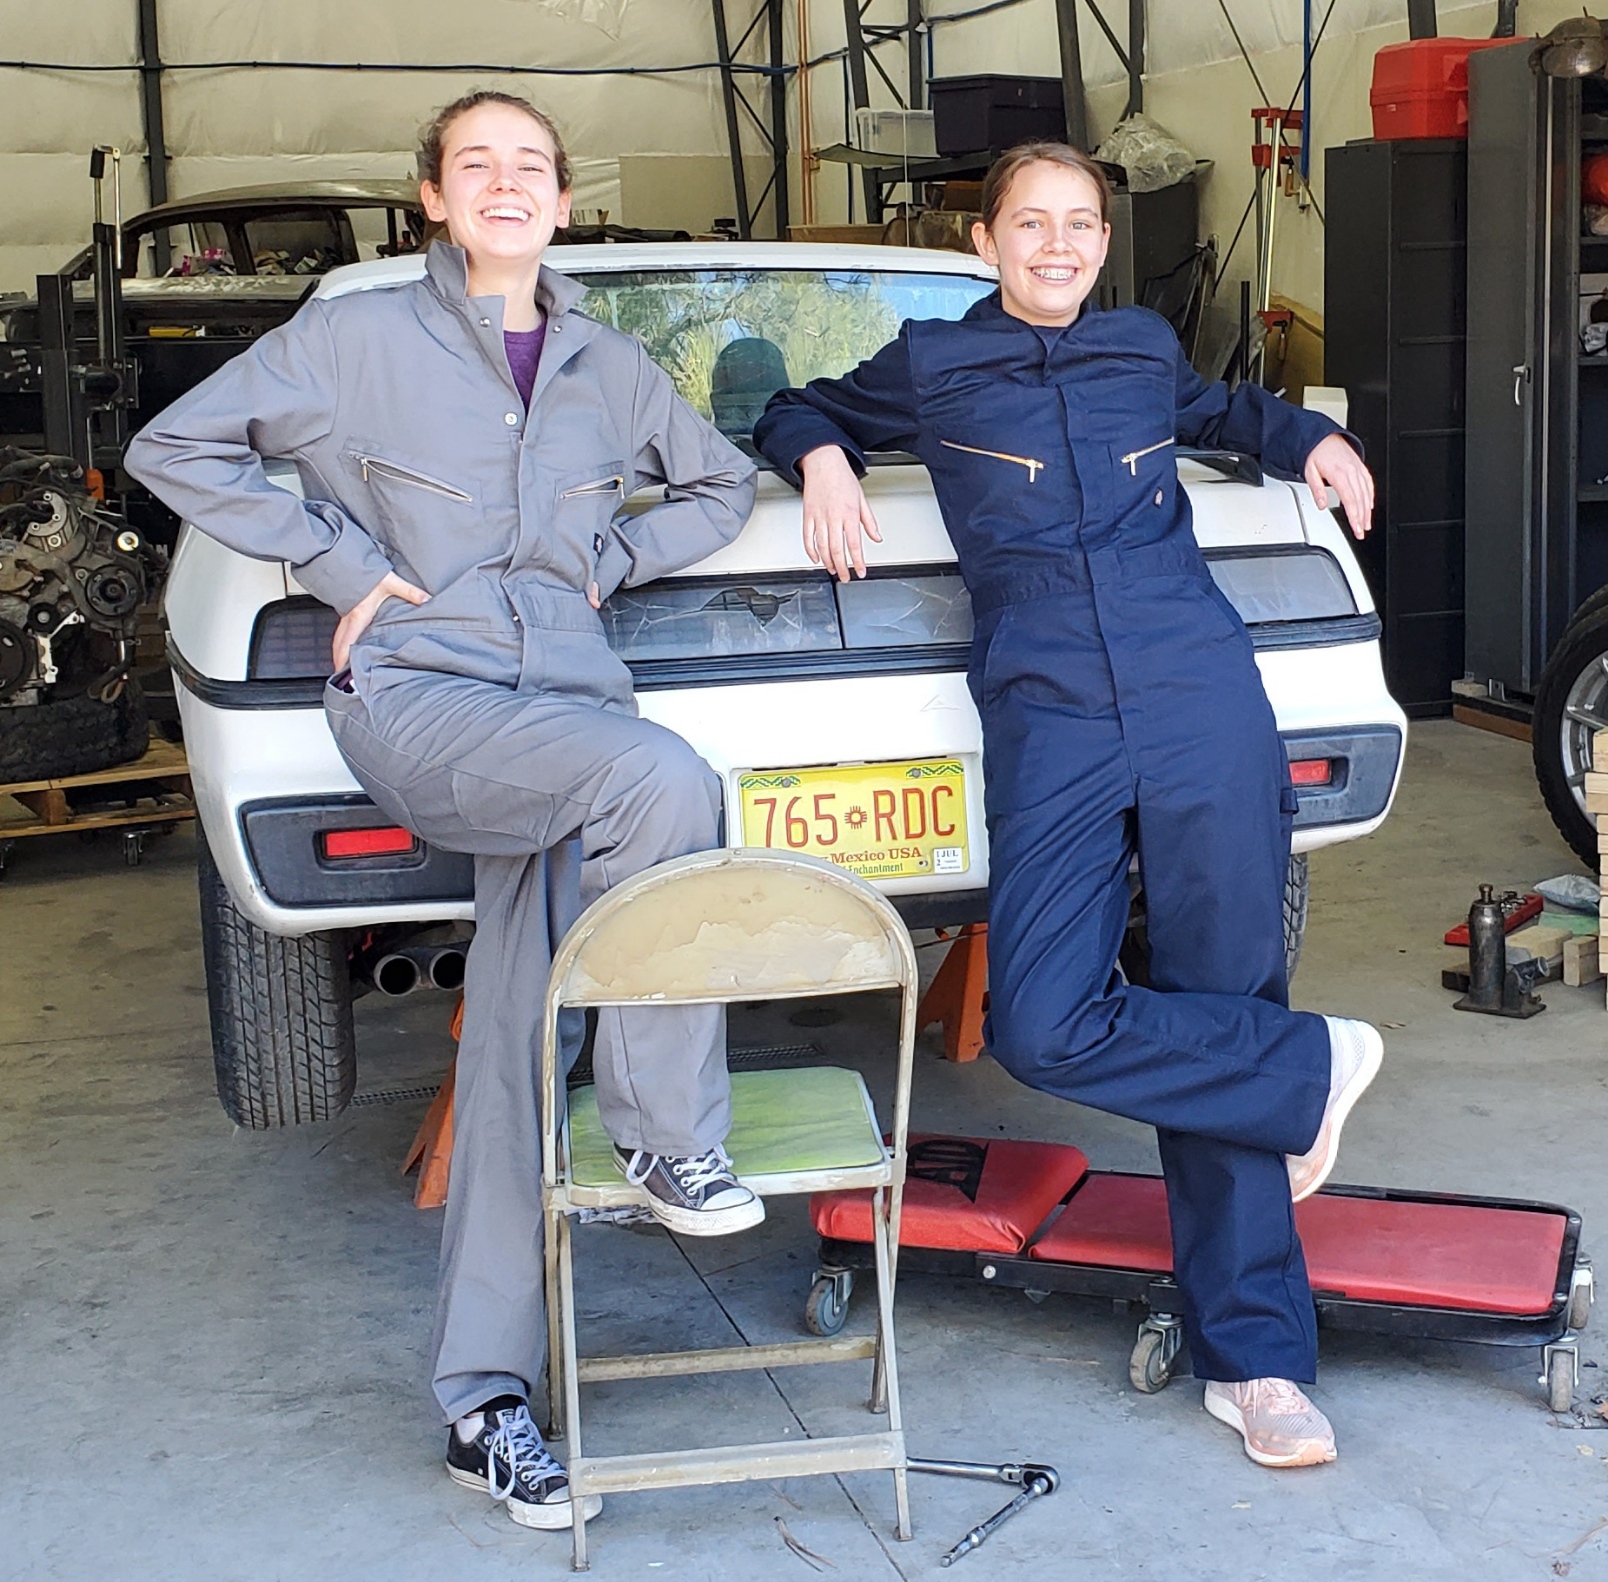
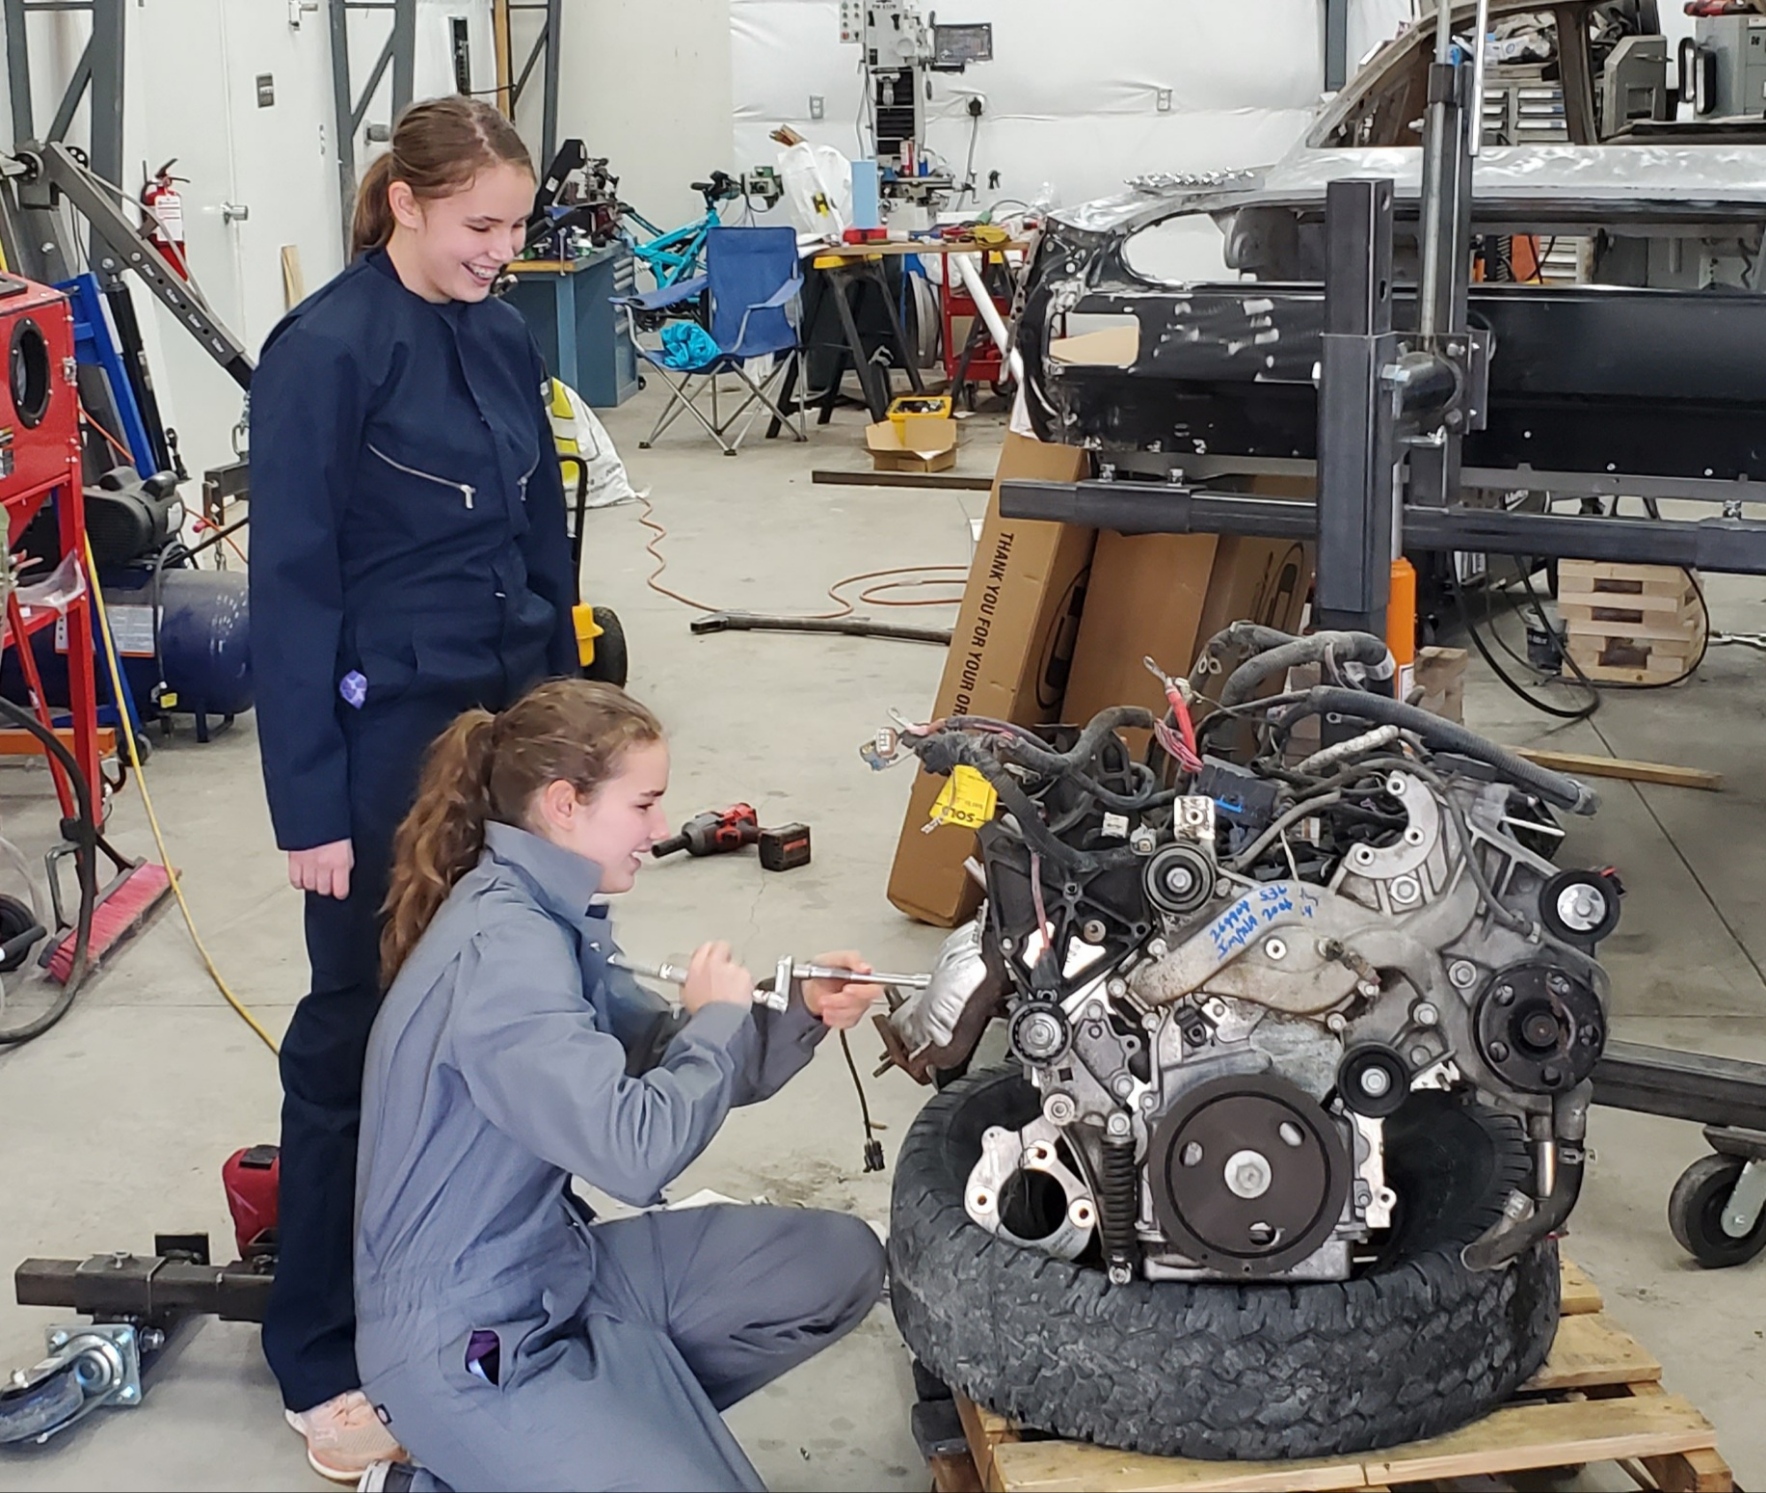
It was supposedly 'running when parked'. I knew that meant there was a high likelihood that there would be major mechanical problem, but I hoped we'd be able to get away with an engine rebuild and leave the care pretty much stock. I knew that there was a substantial amount of information on engine swaps for the Fiero and decided if the engine couldn't be used, well installing a different motor would be an educational experience for my newly enrolled Grease Monkeys. And here they are on the first day, complete in their new Carhart overalls beginning to determine what was wrong with the car
We jacked the car up, put it on jackstands and then put a socket on the crankshaft. It wouldn't budge. Well, that wasn't the best news for getting it running with minimal work. We drained the oil pan and the first 10 seconds of fluid to come out was coolant. Ooh, definately going to be more involved. We did get to discuss why having green fluid come out of the oil pan was not good...so it was still educational.
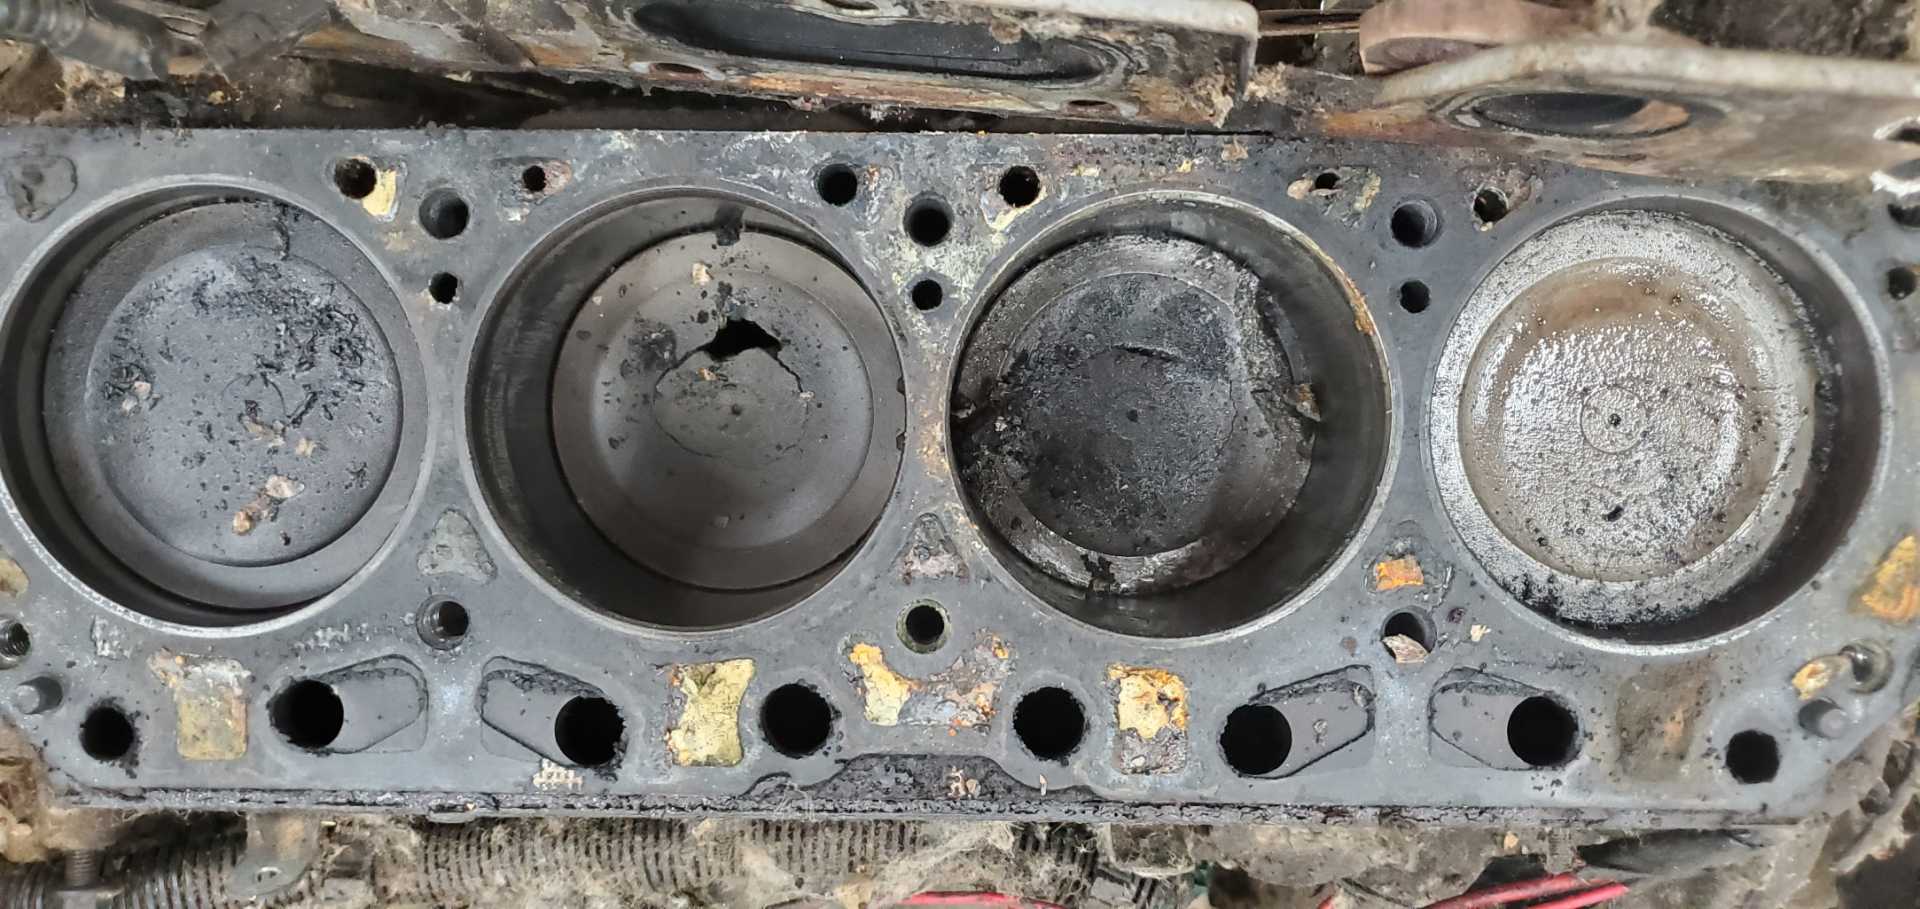
But more work was needed to figure out what was wrong. Over the course of a week, we managed to pull the exhaust manifold, the intake manifold, and then the head. Now the problem was apparent. Another educational experience for the girls. "Umm, dad, should there be holes in the middle of the pistons?". Keep in mind they didn't know what a piston was when I drug the car home...so they weren't entirely sure if those were supposed to be there. They did recognize the fractured edge probably was an issue.
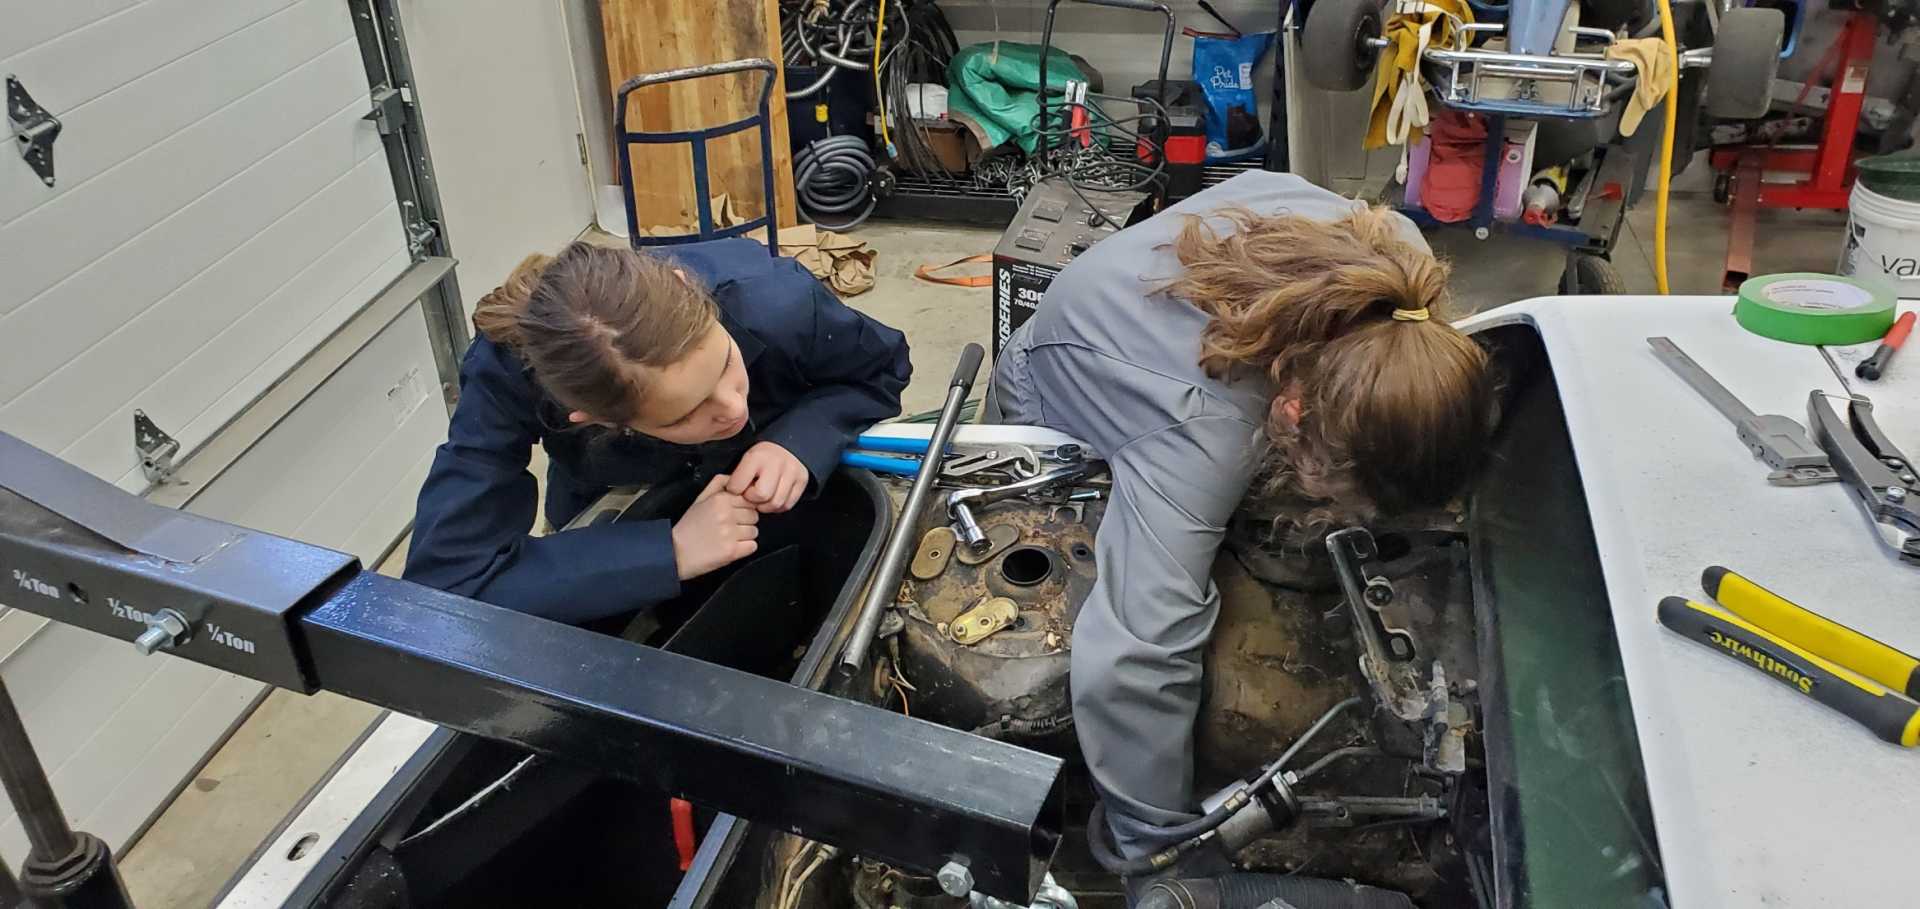
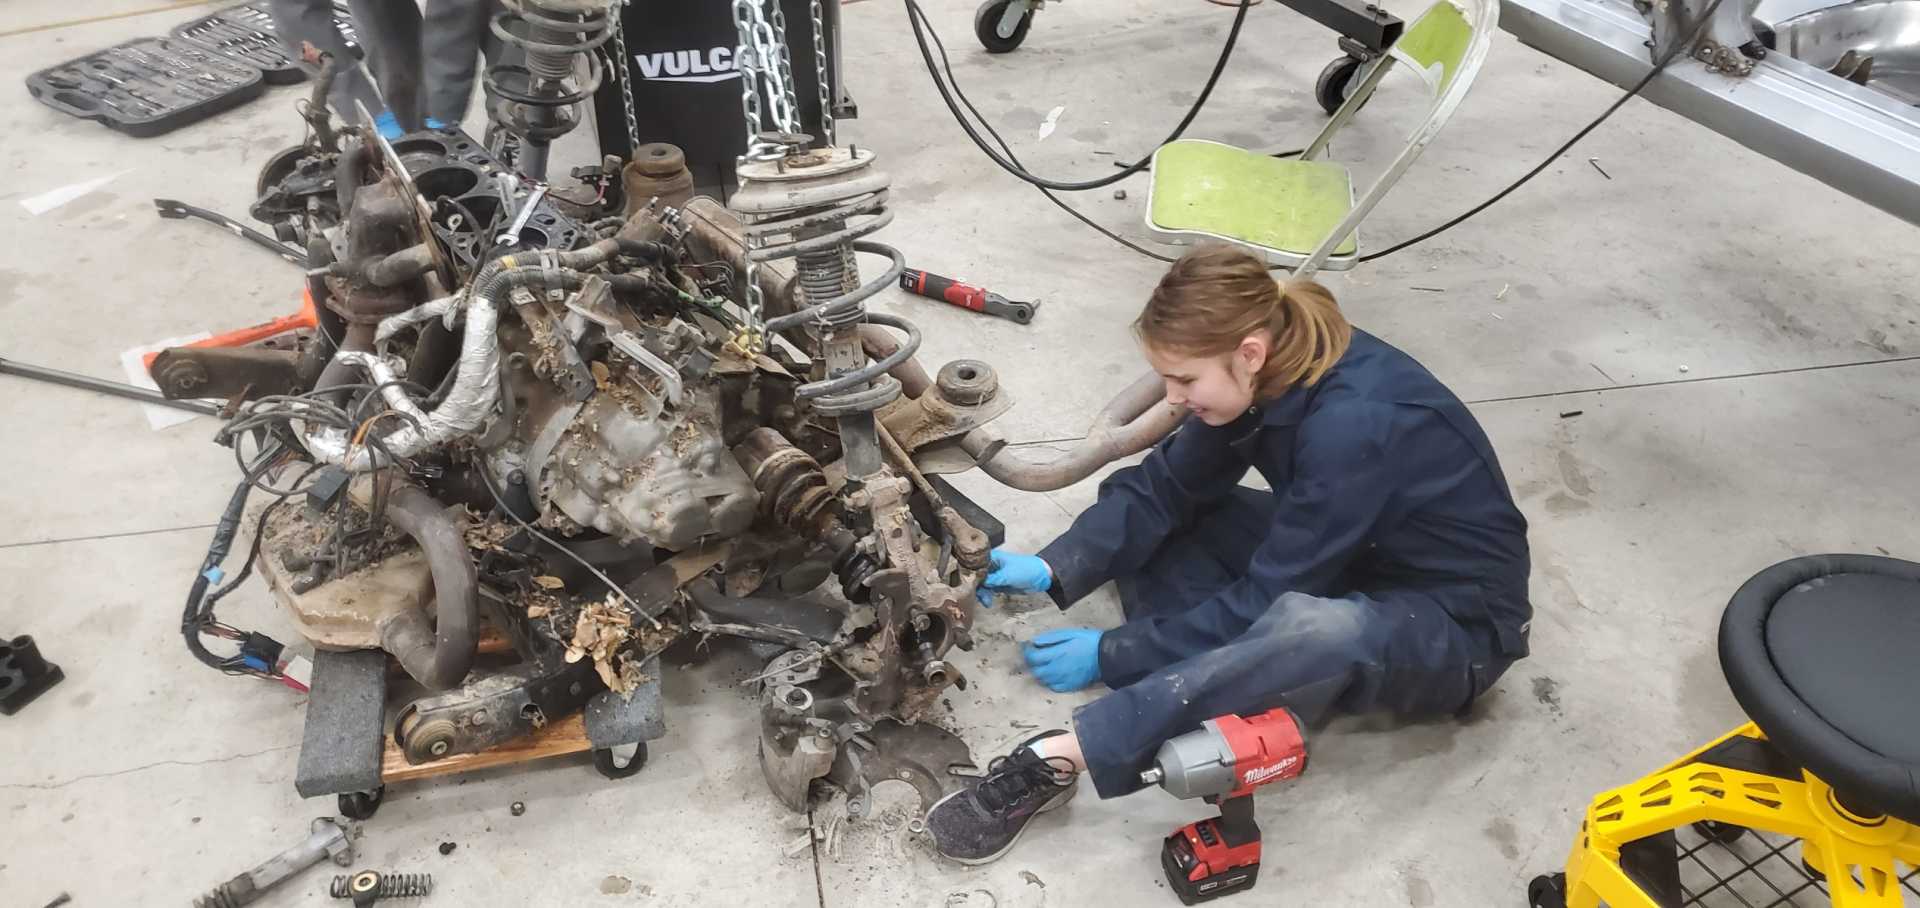
We set about pulling the motor. I made them do it all with the exception of periodically having to help loosen a particularly stuck bolt. I'm basically fetch tools and sometimes help them figure out how to reach difficult spots with suggestsions like using an extension or a crow's foot, etc.
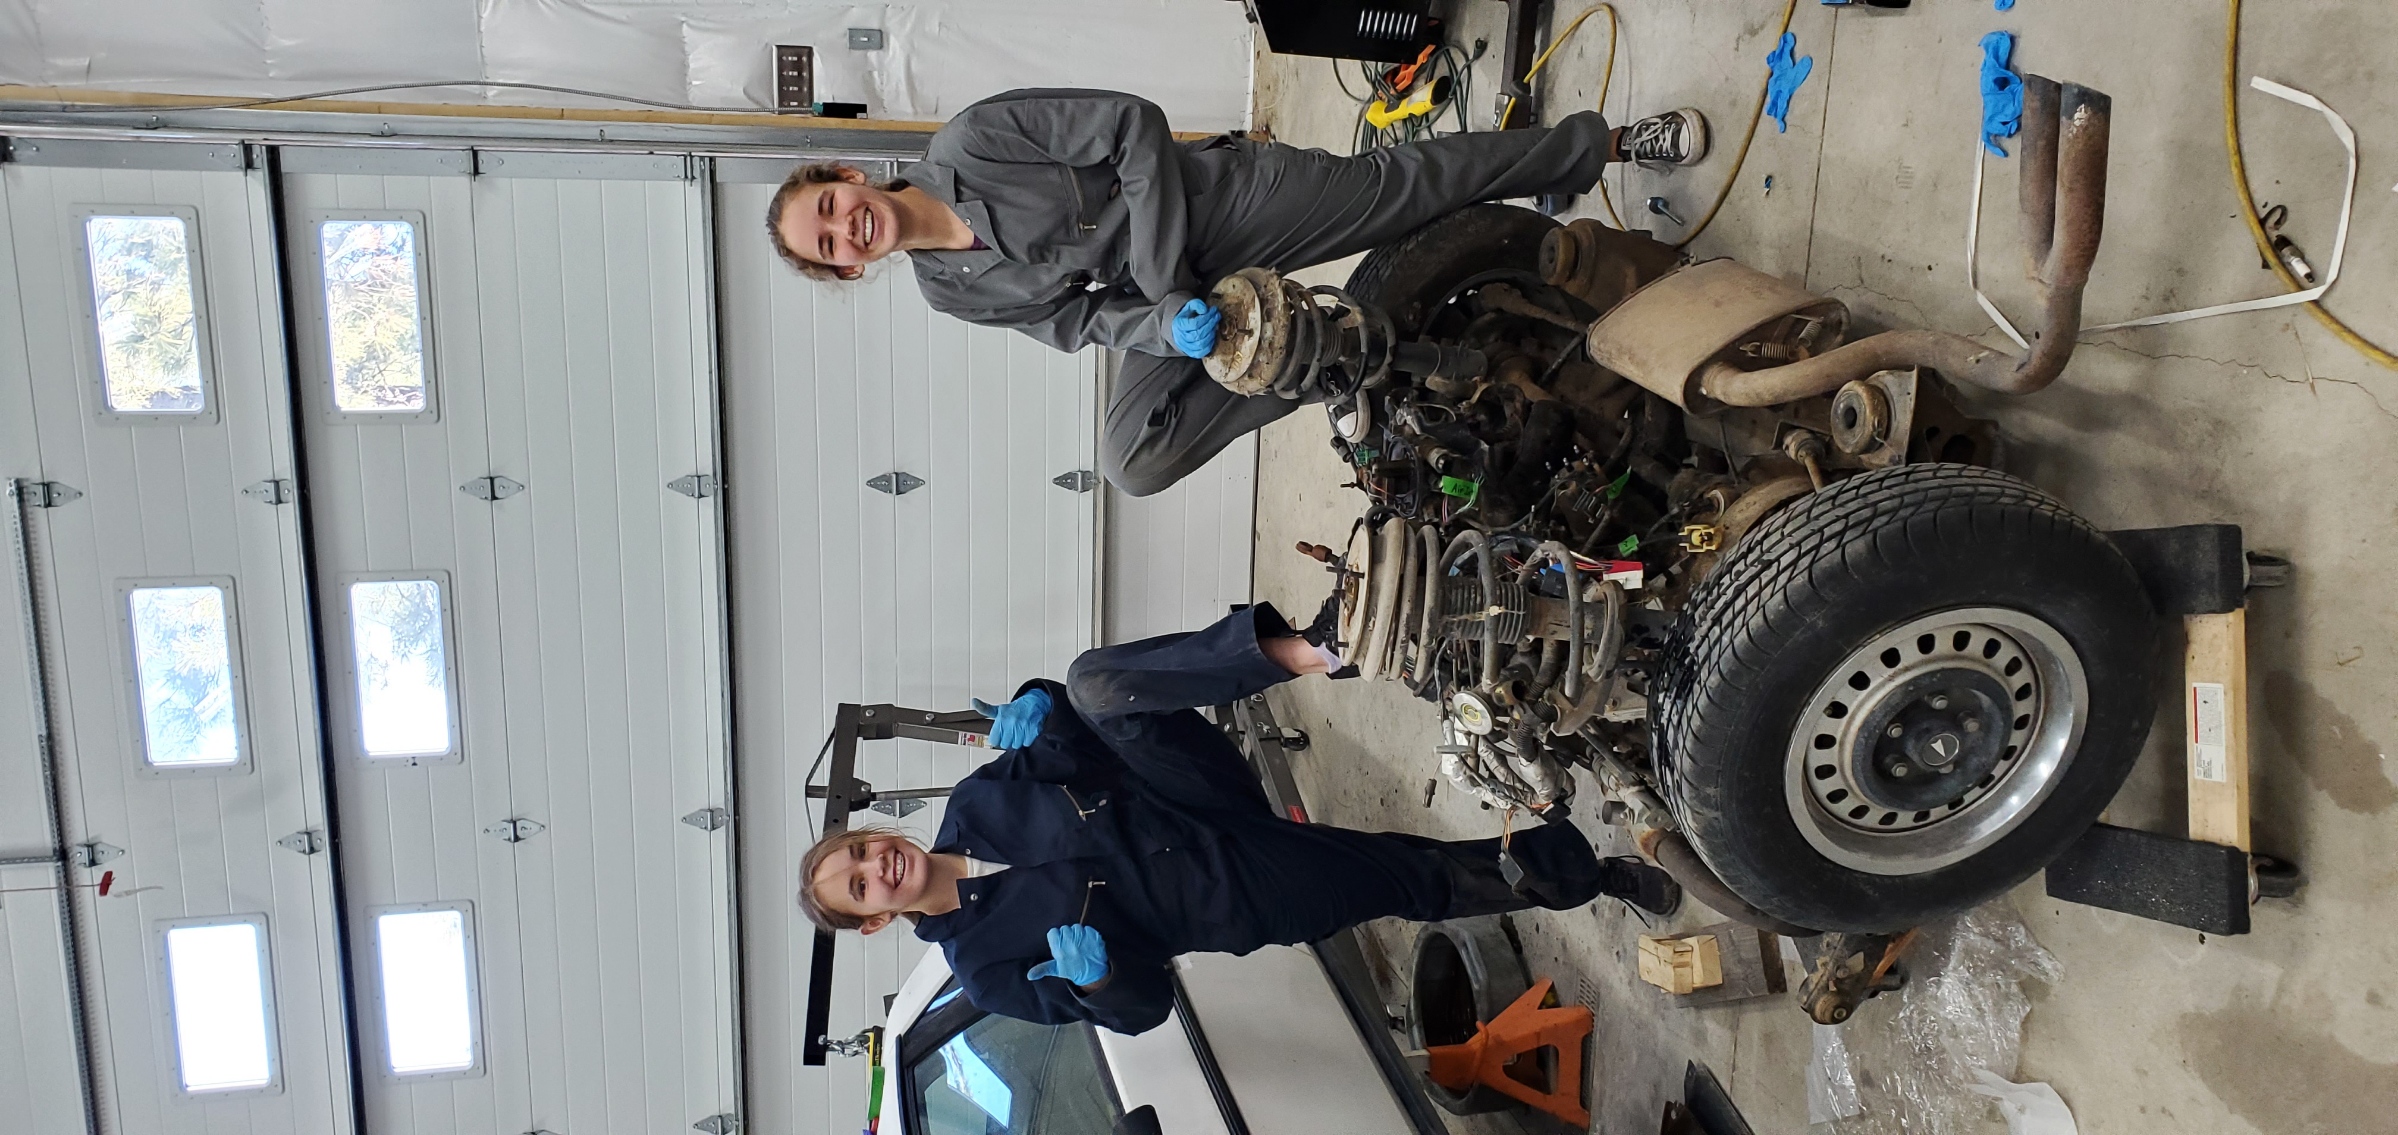
It took most of a week to get all everything off and get the motor out, but they managed to get it done.
Now, I needed to source a replacement motor and transmission. Since I have teen age girls doing the bulk of the work, there is a very high probability that this project completely fails, so I'm doing this as cheaply as possible. That way, if school starts back up and they don't want to finish the project, I'm fine with hauling it to the scrap yard. To keep it cheap, I'm getting what I can find locally at junkyards. Plus I consider it extra credit for Grease Monkey 101 when the kids spend the day at the junkyard with me pulling stuff.
I managed to find a LS4 out of a '06 Impala that was largely complete...but missing intake manifold and the computer. It was cheap (like $200) so we pulled it. It was in decent shape but had some light rust on the inside of the cylinder walls. I think I'll have the girls pull the pistons, hone the cylinders with one of those dingleberry hones and install a new set of ring, do a DoD delete. Maybe put on a LS3 manifold and timing cover. Dunno exactly...I'll figure that out if we make enough progress to warrant it.
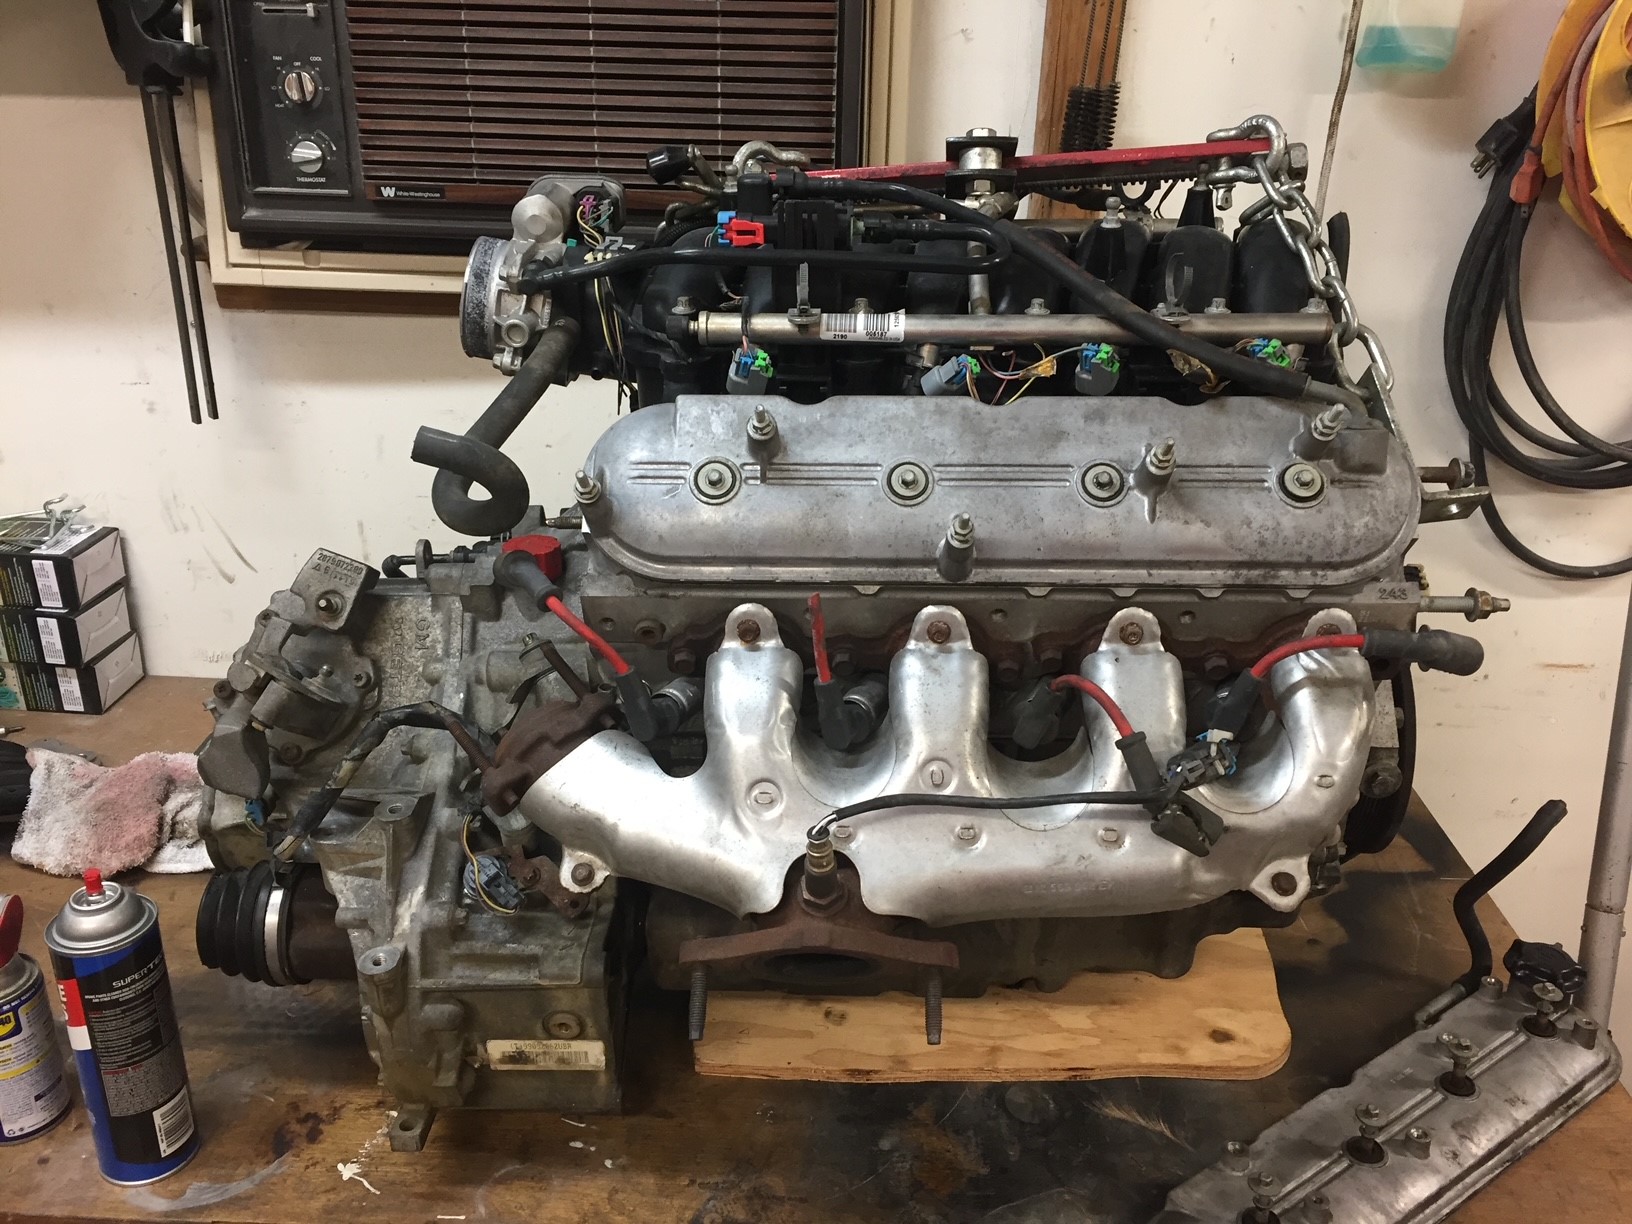
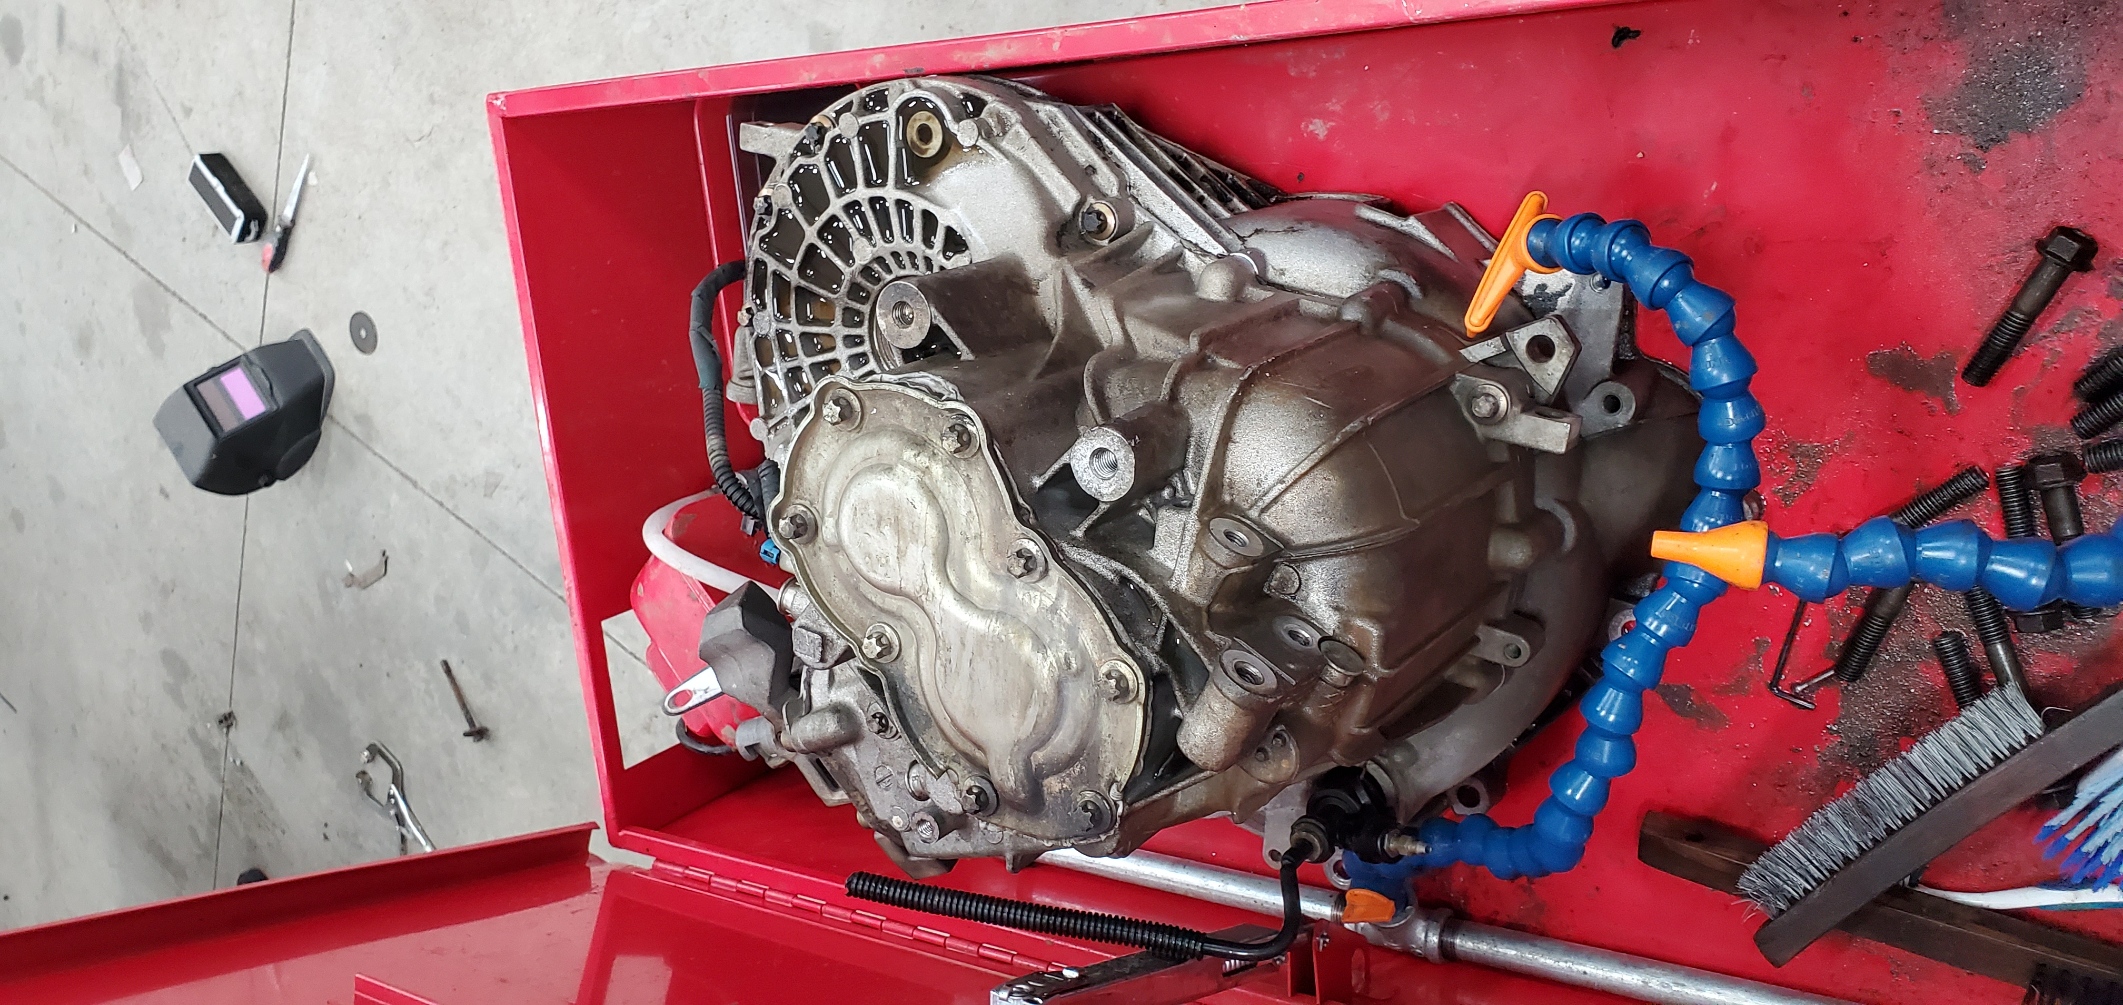
In the transmission department, I wanted to try to put in a F40...but just couldn't seem to find one in the local junkyards with the GM metric pattern. We did manage to find copious numbers of F23s. So, we yanked one from a 2002 Sunfire. We also weren't entirely sure what parts would be needed for the swap, so we also took the clutch/flywheel, axles, shift cables and shifters. I didn't think we needed that, but didn't want to come back for them if we did. The girls really don't like spending the day at the junkyard...so I try to minimize the time there. Anyway, here's the F23 sittin in the parts washer while we try to remove all the caked on gunk
At the moment, we're still getting the original 4 cylinder off the engine cradle and separated from the transmission. That'll probably keep the kids busy for the next week.
That basically brings the story to present day. I'm hoping I can use this thread and the many contributors on this board to keep the project moving along. The kids are having a lot of fun, but we haven't been bogged down by needing to figure out what we need to fab. Since this is an educational project, I plan to have them fab as much as we can. I have a lathe and a mill, plus welders, grinders and such. I figure it's better to teach them how to use these things than it is to buy ready made mounts, etc.
It's a ton of work on my part to get ready for them to do 2 hours of work on the car 5 days a week. I plan on asking loads of questions -- to keep the project moving and keep the kids engaged. I worry that if it bogs down too long, they'll lose interest.
[This message has been edited by Rotmilky (edited 12-06-2020).]
As a telecom geek, I have occasionally been tasked with the job of training new techs to do what I do. (Job security is NOT an issue. All I'm going to say about that.) It's quite the daunting task, as it's generally much easier to just do it myself, than it is to tell/show someone else how to do it.
Having said all that... I applaud your efforts to teach your young ladies to do this stuff. Even if they eventually lose interest, it's still something that they can use, later on in life, if they can retain the logic behind what they were doing.
Thanks for the reply. I've been digging through this post for the past few weeks trying to absorb all the inforrmation. I'm hoping to use your threads for a fair amount of the fab information. That said, my lathe and mill are smaller than yours...and I'm at best a hack machinist...who will be attempting to teach my teenage daughters to do the work. Lots of places for this to go wrong. But if we end up with a running car with ugly parts at the end, it'll be a success.
Welcome to the forum, glad you and your two daughters are here!
For what it's worth, an LS swap is definately not one of the more straightforward swaps to do... but the reward is definately worth the trouble! Also will be some differences in wiring since you're working with an 84.
I would reccommend reaching out to Gary Pickardt of Pickardt Performance on Facebook for any help you may need with fabbing up and sourcing parts and other stuff for your swap. He is a great guy and his work is phenominal. He's going to be doing the LS4 swap in my 88.
Good luck with the swap! We will all be around, don't hesitate to ask questions and such! 🙂
------------------ "Discord" Red 1988 GT under restoration!
Let's Go Mets!
( ͡° ͜ʖ ͡°)
[This message has been edited by Shho13 (edited 12-06-2020).]
Thanks for the words of encouragement and offers help. I'll probably need it to keep this project moving forward. I've spent a lot of time over the past week trying to plan out the swap and am running into a slight bit of confusion.
Almost all the information I find is for the LS4/F40. Since I have the F23, I'm not sure how much of the F40 information applies.
I *think* I sorted the starter. Fieroguru's bracket looks like it will work and I've seen at least one thread where it was used. So I'm going to do that.
On the clutch/flywheel, I'm not finding tons of information for the LS4/F23 specifically. One thread used a reworked Northstar combination (Grin Reaper Redux thread) because he started out with a Northstar. I've seen some info that suggests the 2002 clutch/flywheel off the Sunfire F23 that I pulled *should* work.
Anyone know what will/won't work for clutches and flywheels on the F23? Can I just assume the F40 information is largely applicable to the F23?
[This message has been edited by Rotmilky (edited 12-09-2020).]
After lots of digging, it seems like the LS4/F23 is not a common swap. Poop! Makes it harder to figure out what it takes to mate them.
quote
Originally posted by Rotmilky:
I've seen some info that suggests the 2002 clutch/flywheel off the Sunfire F23 that I pulled *should* work.
After looking a bit closer, the F23 flywheel is certainly not a bolt on solution. The LS4 and F23 both have 142 tooth ring gears and both have 6 bolts holding them to the crankshaft. However, the bolt circle diameters are different (3.1" for LS4 vs 2.35" for F23) and the center hole diameters of the flexplate/flywheel are different (1.7" for LS4 vs 1.25" for the F23) So. the flywheel off the Sunfire is not a direct bolt on and I think if I tried to enlargen the center hole of the F23, I would get it awfully close to the bolt holes.
Would it be possible to weld the F23 flywheel holes shut, redrill it for the LS4 pattern and then make the center hole 1.7" in diameter on a lathe? My local machine shop should should be able to do that, I would think and seems like it'd be pretty cheap. The outside of the F23 flywheel looks like it'd sit 0.830" off the LS4 flange. Currently the outside of the ring gear on the flex plate it 0.835". Basically the F23 flywheel would occupy the same space as the current flexplate/ring gear. A stage 2 clutch/pressure plate rated to ~300 ft/lbs for this is about $550.
If that doesn't work, I've also been looking into putting a LS1 flywheel on there. Based on a post by Fieroguru, Flywheel thickness, he mentions that the LS1 flywheel will protrude to ~0.820", which is basically where the current flexplate/ring gear sits. It'd need to be turned down to fit the 142 tooth gear, but it would have the correct bolt pattern to bolt to the flywheel. Also something my local machine shop would be able to handle. Then I assume the ring gear is interference fit onto the outside of the newly reduced flywheel. Then I suppose a couple of tack welds keep it from slipping? The downside to this approach is the cost of getting a LS flywheel at $100-130. I still haven't figured out what clutch everyone is using for this approach.
Finally, I think I can call Spec and have them just build it for me. Does anyone know the cost for that?
Once I get that sorted, is there anything I'm missing that will prevent me from assembling a functional transmission/clutch to the LS4?
[This message has been edited by Rotmilky (edited 12-09-2020).]
The LS4/F23 is definitely less common than the LS4/F40, but in theory it should be easier/cheaper swap based on price for the transmission and you "might" be able to reuse the stock Fiero axles... but you will want to check the passenger tripot clearance to the LS4 block. The Fiero tripots are fairly large in diameter and I know they won't clear the LS4 with the F40. If the factory tripods won't clear, then the F23 swap gets more complicated and more uncharted territory. You would need an intermediate shaft, later model smaller diameter tripots, and find the right axle length.
Turning down the LS flywheel to accept the 142 tooth ring gear and having it drilled for the pressure plate pattern works well. There was a time when you could get a new billet steel flywheel for about $65 as a factory second due to the pressure plate bolt pattern being wrong... but all those holes are removed with this modification. You could also start with a junkyard flywheel.
I wouldn't ask SPEC to make anything, their R&D attention to detail is atrocious.
LSC Performance makes flywheel for many Fiero engine swaps & they probably have the details for the LS crank pattern. They could likely take of the of Fiero flywheels, add the LS crank pattern to it and you would be golden. I suspect this solution would cost $300+
LSC Performance 25839 Jefferson ave. Murrieta, Ca 92562 Phone: (951) 677-8895 E-mail: Tom@Lscperformance.com
The F23 clutch/pressure plate solution is hit and miss if you try to use a Fiero based clutch (stock F23 based clutches normally work 100%, but it will need to an upgraded version). Most of the Fiero clutch pressure plates will interfere with the F23 differential bulge, but some work. The issue is most of the clutch builders mix and match parts and you can order the same clutch kit 3 times and end up with 3 different pressure plates.
[This message has been edited by fieroguru (edited 12-09-2020).]
Thanks Fieroguru for the really helpful comments. It provided some nice structure to 'grease monkey 101' where we considered how things can go sideways....
quote
Originally posted by fieroguru:
The LS4/F23 is definitely less common than the LS4/F40, but in theory it should be easier/cheaper swap based on price for the transmission and you "might" be able to reuse the stock Fiero axles... but you will want to check the passenger tripot clearance to the LS4 block. The Fiero tripots are fairly large in diameter and I know they won't clear the LS4 with the F40. If the factory tripods won't clear, then the F23 swap gets more complicated and more uncharted territory. You would need an intermediate shaft, later model smaller diameter tripots, and find the right axle length.
Oh Crapola. That's something we hadn't considered. Thanks for pointing that issue out. We dug around and found a post showing that they had to grind some material off the block at the oil pan interface to get the tripot to clear the block. They ground enough material that they started to hit the oil pan gasket. So, that didn't bode well for us using our axles directly with the F23.
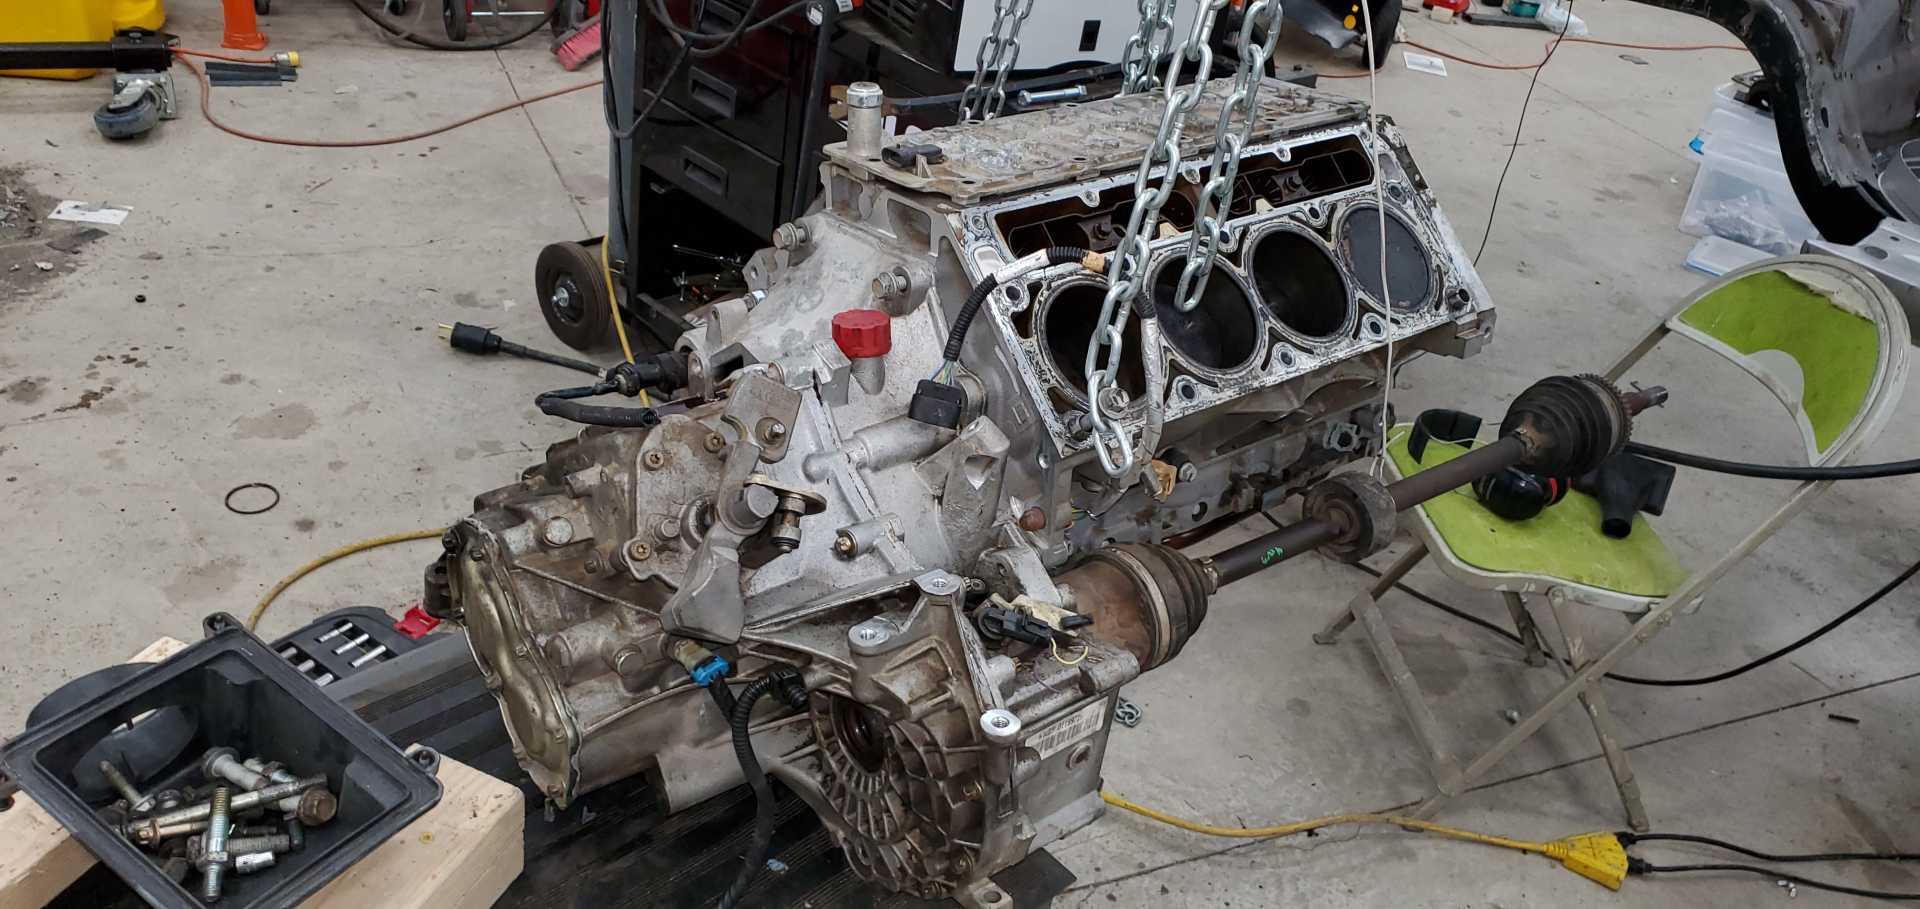
To see just how much material we needed to grind, we bolted the F23 to the LS4 and inserted the long axle into the F23.
In a bit of good fortune, we found that our axle does not currently hit the LS4. It's close...somewhere between 0.025 - 0.03" at the boss, but it clears.
As a side note, the axle I'm test fitting is actually from the 2002 Pontiac Sunfire that we took the transmission from. It looks to be identical to the Fiero axle...but I don't have a set of calipers deep enough measure the maximum diameter of the tripot.
Phew. Looks like we might have dodged a bullet.
Now to sort the clutch.
[This message has been edited by Rotmilky (edited 12-12-2020).]
Don't claim victory yet... that axle is too short. The Fiero passenger side manual transmission axle is the longest one GM ever made, and it was only used in the Fieros. You will want to keep the F23 close to the stock transmission location as there isn't room on the passenger side to move the engine w/o cutting into the frame rail.
So you will need the FIero passenger side axle, test that tripots. If you run into issues, then pull both tripots apart and see if the actual axle shafts share the same spline. If so, then you can install the Fiero long axle shaft into the guts (tri-lobe section) of the tripot. Some axle mix and match, some don't...
So you will need the FIero passenger side axle, test that tripots. If you run into issues, then pull both tripots apart and see if the actual axle shafts share the same spline. If so, then you can install the Fiero long axle shaft into the guts (tri-lobe section) of the tripot. Some axle mix and match, some don't...
Once again you prove prescient. I put the Fiero passenger axle on there and now I'm clipping that boss by about 0.1". I'll try so see if I can mix and match parts later this week to make an axle that works without grinding.
If that doesn't work, I think the easiest path forward would be to grind off part of that boss. I think I'd probably start to hit that hole in the boss, though. Any idea what it's for?
Here's a photo of the two axles side-by-side. The Fiero axle is about 40" long and the sunfire axle is about 38.5" long. The Sunfire axle is the one with the small rubber cylinder in the center. It looked like it was to protect the axle from rubbing on the frame.
Having done 3.4L, 3800SC and 4.9L swaps I rate the LS4 as a hard first swap, especially one with a manual. It is a very involved swap as you are discovering. One of the first things that you will need to do is to figure out how to mount the starter. On LS4's the starter mounts on the automatic transmission bell housing but the Getrag F23 or F40 stick transmissions do not have that. This will require some custom bracket work. You will also be swapping an engine where the ATF function will need to be disabled and if you do any mods the cam, lifter and pushrods must all be replaced. Custom motor, and trans mounts also come into play as well as fabricating a new belt routing which requires relocating the alternator. All of these have been overcome by some talented swap guys but the key comes down to your fabrication skills. Not trying to dissuade you or be negative, Just trying to explain what you will face.
------------------ " THE BLACK PARALYZER" -87GT 3800SC Series III engine, custom ZZP /Frozen Boost Intercooler setup, 3.4" Pulley, Northstar TB, LS1 MAF, 3" Spintech/Hedman Exhaust, P-log Manifold, Autolite 104's, MSD wires, Custom CAI, 4T65eHD w. custom axles, Champion Radiator, S10 Brake Booster, HP Tuners VCM Suite. "THE COLUSSUS" 87GT - ALL OUT 3.4L Turbocharged engine, Garrett Hybrid Turbo, MSD ign., modified TH125H " ON THE LOOSE WITHOUT THE JUICE "
Having done 3.4L, 3800SC and 4.9L swaps I rate the LS4 as a hard first swap, especially one with a manual. It is a very involved swap as you are discovering. One of the first things that you will need to do is to figure out how to mount the starter. On LS4's the starter mounts on the automatic transmission bell housing but the Getrag F23 or F40 stick transmissions do not have that. If Fierogurus mount fits then you are home free if not this will require some custom bracket work. You will also be swapping an engine where the ATF function will need to be disabled and if you do any upgrade mods the cam, lifter and pushrods must all be replaced. Custom motor, and trans mounts also come into play as well as fabricating a new belt routing which requires relocating the alternator. All of these have been overcome by some talented swap guys but the key comes down to your fabrication skills. Not trying to dissuade you or be negative, Just trying to explain what you will face.
------------------ " THE BLACK PARALYZER" -87GT 3800SC Series III engine, custom ZZP /Frozen Boost Intercooler setup, 3.4" Pulley, Northstar TB, LS1 MAF, 3" Spintech/Hedman Exhaust, P-log Manifold, Autolite 104's, MSD wires, Custom CAI, 4T65eHD w. custom axles, Champion Radiator, S10 Brake Booster, HP Tuners VCM Suite. "THE COLUSSUS" 87GT - ALL OUT 3.4L Turbocharged engine, Garrett Hybrid Turbo, MSD ign., modified TH125H " ON THE LOOSE WITHOUT THE JUICE "
Great thread- It is great that you were able to get the teenage ladies to get their hands dirty and learn these skills.... I can't even get my teenage daughters to make eye contact long enough to get off their phones.......
Something to consider is the final drive ratio on the F23. It is not really well suited for high torque motors- it was originally paired with a gutless 4 cyl motor that is almost as depressing as the 2.5 that came in your Fiero. Maybe consider doing the gear swap to the FY1 F23 of the 2010 Cobalt SS? There are some threads documenting this process here on PFF. Best of luck with the project, and congrats on raising "go-getter" teens! That is an achievement in itself!
After looking a bit closer, the F23 flywheel is certainly not a bolt on solution. The LS4 and F23 both have 142 tooth ring gears and both have 6 bolts holding them to the crankshaft. However, the bolt circle diameters are different (3.1" for LS4 vs 2.35" for F23) and the center hole diameters of the flexplate/flywheel are different (1.7" for LS4 vs 1.25" for the F23) So. the flywheel off the Sunfire is not a direct bolt on and I think if I tried to enlargen the center hole of the F23, I would get it awfully close to the bolt holes.
Would it be possible to weld the F23 flywheel holes shut, redrill it for the LS4 pattern and then make the center hole 1.7" in diameter on a lathe? My local machine shop should should be able to do that, I would think and seems like it'd be pretty cheap. The outside of the F23 flywheel looks like it'd sit 0.830" off the LS4 flange. Currently the outside of the ring gear on the flex plate it 0.835". Basically the F23 flywheel would occupy the same space as the current flexplate/ring gear. A stage 2 clutch/pressure plate rated to ~300 ft/lbs for this is about $550.
The F23 flywheel should be adaptable. The center bore may come close to the bolt holes, but the center bore is only for locating the flywheel on the crankshaft. Make sure the new bore is a VERY close fit. The stresses are fed into the flywheel at the crankshaft bolts, not the center bore. As long as the LS4 bolt circle and material outside of it are there, you'll be ok. Since the LS4 also uses a larger circle with the same number of bolts, you can locate the LS4 holes in between the original holes and you'll be fine.
Do check the back side of the flywheel to make sure that the machined pad that mates to the crankshaft is large enough that there is machined material outside the LS bolt holes.
IIRC the LS4 is rated at 330 ftlbs stock, so a clutch rated for 300 flbs is marginal, especially if you start "doing things" to the engine, like adding the LS2 intake I think you mentioned...
Something to consider is the final drive ratio on the F23. It is not really well suited for high torque motors- it was originally paired with a gutless 4 cyl motor that is almost as depressing as the 2.5 that came in your Fiero. Maybe consider doing the gear swap to the FY1 F23 of the 2010 Cobalt SS? There are some threads documenting this process here on PFF.
The Sunfire FD is 3.94. That'll make the car a terror in the stoplight grand prix, for sure! Changing the FD requires getting another transmission and building two out of one... maybe get the car running first and see how you like it.
I don't really get the knee-jerk reaction that says higher-torque engine = taller ratios.
In the Porsche 992 PDK, I doubt they implemented an (econobox style) overall 1st gear reduction of 14.77 (4.89x3.02) because that's what they had on hand... no, it's about starting-line FUN.
If that's actually the first day, there's a telltale in the background that you never intended to let the 4 cyl continue living in that engine bay
I had already stuck a wrench on the crankshaft and knew it wouldn't budge. If it turned out minor and fixable, my plan was to get it running and then do some LeMons races until I needed that motor in the background. At some point, we were going to need a replacement...so better safe than sorry.
I do wish we could have gotten the 4 banger going, though. Would have been fun to run it in Lemons stock.
[This message has been edited by Rotmilky (edited 12-14-2020).]
Something to consider is the final drive ratio on the F23. It is not really well suited for high torque motors- it was originally paired with a gutless 4 cyl motor that is almost as depressing as the 2.5 that came in your Fiero. Maybe consider doing the gear swap to the FY1 F23 of the 2010 Cobalt SS?
quote
Originally posted by Will:
The Sunfire FD is 3.94. That'll make the car a terror in the stoplight grand prix, for sure! Changing the FD requires getting another transmission and building two out of one... maybe get the car running first and see how you like it.
Thanks for the comments and warning. I'm keenly aware of the 'while I'm there' syndrome where mods and upgrades take so much time that nothing ever gets finished. So, we're concentrating on just getting the LS4 stuffed in there with the F23 first and foremost. If it ends up being poorly geared, I'll yank it all back out and make modifications at a later date.
If we do get it running, we're going to use it only for autocross and Lemons style races. It won't be a daily driver. For autocross, I really only run in 2nd gear and ideally I want it geared such that 2nd tops out around 60-70 mph. If I assume a rear tire of 235/65/R15, then that's a 27" tall tire. If the LS4 redlines at 6000 RPM, then my top speed is ~ 60 MPH. Looks like at least 2nd in the F23 is geared about where I need it for my particular driving style.
[This message has been edited by Rotmilky (edited 12-14-2020).]
I had an F23 in a Fiero with 3800 SC motor. Tranny is great , but first gear was useless. I can’t imagine you will get to 80-100 km/h in second gear unless the LS4 revs really high and pulls to 6-7k RPM
Comparing with PDK transmissions is really an apples to oranges comparison , since you are not pressing a clutch and shifting 3 times just to get up to 70 km/h
I never drove an LS4, so if it can rev and breathe at much higher RPM than my 3800 SC motor , then the gearing may not be an issue
Love the build, and hats off to you for getting the young ladies involved !
All of these have been overcome by some talented swap guys but the key comes down to your fabrication skills. Not trying to dissuade you or be negative, Just trying to explain what you will face.
I've got two teenage daughters. How could this possibly go wrong? .
I'm currently looking at the fab work as part of the 'Grease Monkey 101' educational coursework. Gives me a reason to teach them to weld and rull the mill. However, we're rapidly moving from introductory coursework to graduate level.
I don't really get the knee-jerk reaction that says higher-torque engine = taller ratios.
In the Porsche 992 PDK, I doubt they implemented an (econobox style) overall 1st gear reduction of 14.77 (4.89x3.02) because that's what they had on hand... no, it's about starting-line FUN.
I think that Justinbart used stock F23 ratios, and his car was pretty quick...
And 996 Turbos have 3.82 x 3.44 in first gear. BUUUUT... Corvettes & muscle cars have always had tall first gears. The standard from the ZF S6-40 in the C4 through the TR6070 in the C7 was 2.66 first with 3.42 final. Old T10 Muncies weren't far from this. They also have very small RPM drops from 1st through 4th gears.
There's a ratio curve for best possible acceleration from a dead stop to top speed. A CVT would follow this curve. Germans have been using this curve to define their gear ratios for a long time. GM has started doing the same on their 5+ speed automatics and new manual transmissions (F40, F35, F23, AY6, etc.) over the last 15-20 years.
The F23 3.58 x 3.94 = 14.1... and an LS4 will run that out very quickly. A DCT geared like this can just grab the next gear instantly. Shifting the transmission manually, especially with a large RPM drop from first to second, is much slower.
With a 4.89 first and 3.17 second, the PDK has a 0.65 "split", meaning after the shift, the engine is turning 65% of shift RPM. The F23 has a 0.585 split, so it actually drops more RPM going into second than the steeper geared PDK does.
[This message has been edited by Will (edited 12-14-2020).]
The F23 flywheel should be adaptable. The center bore may come close to the bolt holes, but the center bore is only for locating the flywheel on the crankshaft. Make sure the new bore is a VERY close fit. The stresses are fed into the flywheel at the crankshaft bolts, not the center bore. As long as the LS4 bolt circle and material outside of it are there, you'll be ok. Since the LS4 also uses a larger circle with the same number of bolts, you can locate the LS4 holes in between the original holes and you'll be fine.
Do check the back side of the flywheel to make sure that the machined pad that mates to the crankshaft is large enough that there is machined material outside the LS bolt holes.
IIRC the LS4 is rated at 330 ftlbs stock, so a clutch rated for 300 flbs is marginal, especially if you start "doing things" to the engine, like adding the LS2 intake I think you mentioned...
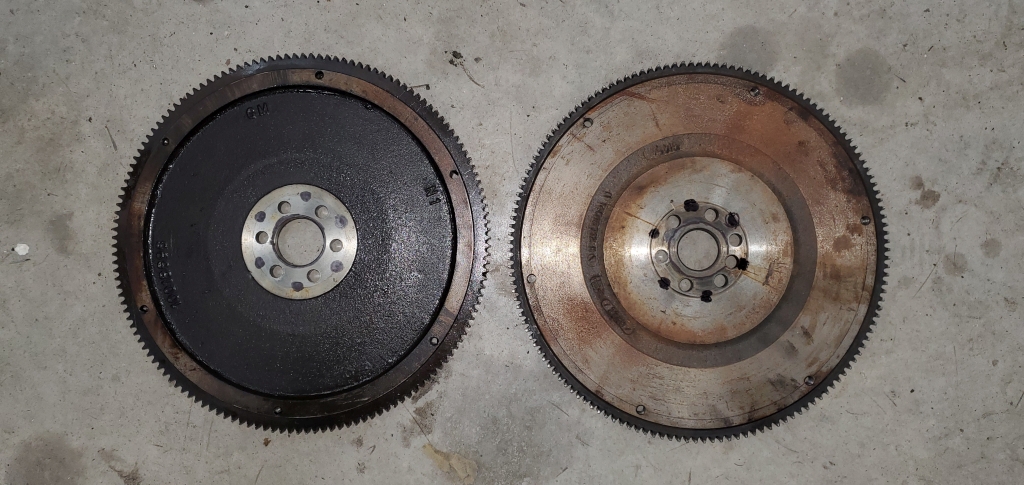
Thanks for the information...and most critically the machined pad on the backside of the flywheel. The Sunfire flywheel (which we were going to use) doesn't have enough on there. We pulled the transmission off the original Fiero to see if that was better -- and it has a larger pad. I think it's going to work. See photo below. Sunfire wheel is on top, original Fiero on bottom.
The black dots are where the new flywheel bolt holes will approximately go. Clearly the Sunfire flywheel is a bad choice to remachine. We're going to try machining the original Fiero flywheel to fit the LS4 in the next few days....
[This message has been edited by Rotmilky (edited 12-15-2020).]
Is the photo showing the friction side of the Sunfire flywheel?
If the area on the friction side of the flywheel where the bolt heads will seat is not machined, the new bolt holes will need to be spot faced as well.
Is the photo showing the friction side of the Sunfire flywheel?
If the area on the friction side of the flywheel where the bolt heads will seat is not machined, the new bolt holes will need to be spot faced as well.
No, that's the surface that attaches to the crankshaft.
You are correct about needing to spot face the friction side. The bolt holes are going to intersect the as-cast surface. I was going to remove the cast surface on the lathe, but I think I like your thought of spot facing better.
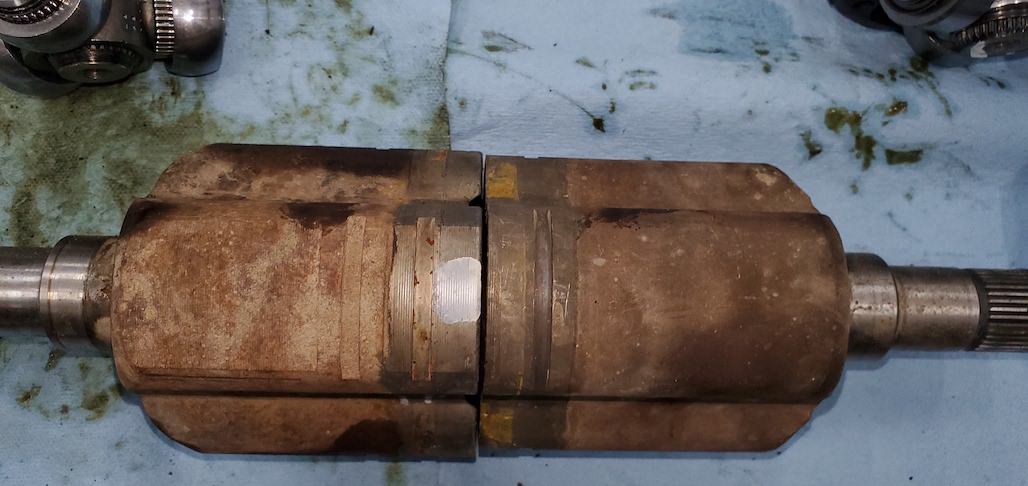
Finally got around to mixing and matching parts of the Fiero axle with parts of the Sunfire axle. The Fiero axle will not fit into the Sunfire tripot housing. The axle stubs that the beaing sits on is just slightly larger than the Sunfire housing....as you can sorta see below (Fiero housing on left):
The top of the axle is held on by splines and the diameter of the axles are the same. You can just see the splines of the Fiero axle in the upper left of the photo. So I could pull the top off of one axle and put it on the other. I do think in that case I could use the tripot of the sunfire on the Fiero axle and clear the motor boss.
Apparently, that boss is only used for initial machining of the motor :
quote
Originally posted by Will:
That's a locating hole for when GM starts to machine the raw casting. It's not necessary for anything we do with the engine.
So I might just grind it off and just use the original Fiero axle. That seems the easiest solution at the moment.
[This message has been edited by Rotmilky (edited 12-17-2020).]
No, that's the surface that attaches to the crankshaft.
You are correct about needing to spot face the friction side. The bolt holes are going to intersect the as-cast surface. I was going to remove the cast surface on the lathe, but I think I like your thought of spot facing better.
Are you going to do the machine work yourself? I'm not sure what cutters you have access to, but the inside corners of the spot faces should have a radius of at least 0.050".
Finally got around to mixing and matching parts of the Fiero axle with parts of the Sunfire axle. The Fiero axle will not fit into the Sunfire tripot housing. The axle stubs that the beaing sits on is just slightly larger than the Sunfire housing....as you can sorta see below (Fiero housing on left):
The top of the axle is held on by splines and the diameter of the axles are the same. You can just see the splines of the Fiero axle in the upper left of the photo. So I could pull the top off of one axle and put it on the other. I do think in that case I could use the tripot of the sunfire on the Fiero axle and clear the motor boss.
Apparently, that boss is only used for initial machining of the motor : So I might just grind it off and just use the original Fiero axle. That seems the easiest solution at the moment.
The tripod and tulip are a "set" in that they are designed as a product family. It would not be expected that you'd be able to use the Fiero tripod in the Sunfire tulip. However, splines are much more common. If you can install the Sunfire tripod onto the Fiero axle bar, that's the easy way to go. There's a snap-ring retainer, but the tripod should be easy to R&R from the axle bar. Get a high quality boot kit, clean the CV joint thoroughly, reassemble with new grease and it'll be good for another 100k miles.
[This message has been edited by Will (edited 12-22-2020).]
We continue to make slow and steady progress on the swap. We get maybe 1-2 hours a day and a lot of that is spent discussing what and how a specific tool works. As of late, we've discussed welding more and more. Soon enough, we'll need to weld new motor supports onto the cradle and I plan to have the girls do the welding. We've had a few practice runs and all I have to say is they're going to be professional grinders very soon. That said, I'm not sure their welds are much uglier than mine...
We've got a lot of replacement parts ordered and waiting on them to arrive. New CV boots, new piston rings, a DoD delete kit and camshaft, gaskets, etc. Hope to do that over the Christmas break. We will also machine the fly wheel over the holidays. So stuff to keep us busy for awhile. It's always a challenge to make sure that there is something to do on the car 5 days a week.
The girls finally got almost everything off the cradle and we took it to the car wash to clean the gunk off. Actually, I took it to the carwash...they wanted nothing to do with pressure washing 35 years worth is gunk off the cradle.
That brings me to this week's question : Is there a good thread on modifying the 84-87 cradle for a LS4 swap? I've seen several that modify the 88 cradle but can't find much detailing the older style. I'm hoping not to completely reinvent the wheel on the mounts, although the F23 is probably going to be something we'll have to do via trial and error anyway.
I don't know how I've missed this thread, but it looks interesting. Congrats on getting your daughters involved!
quote
Originally posted by Rotmilky:
One note on your images. To avoid having your images turning into clickable icons (as above), limit the file size to nothing above 2000 kbs. The easiest way to do this is not to post humongous images. That one above is 4032x1908 and 2676 kbs. To illustrate, I've reduced it here to 1024x485 (405 kbs). It's plenty big to see what we need. However, it's not even necessary to re-size an image... as long as its file size is no more than 2000 kbs. The forum software will automatically re-size it to fit whatever size screen it's being viewed on (while retaining the original size image on the server for download).
I started mine about 2 years ago. But I've had a lot going on, moved out of state, new house, new job, wife sick, finished another engine swap, rebuilt 1 1/2 boats and I have a 3 year old.
But I'm about the same place you are. I do have 2 LS4's, an F23 and the LS4 4t65e. I have a flywheel made by LSC. Fieroguru posted their contact info. It was about $400.
Fieroguru's starter mount works great with the f23. I spent more time thinking how to cut the notch from the trans than I did cutting.
Stock axles should work. I clearanced the block and pan. IIRC, I have about 0.160 of an inch clearance. I stopped grinding when I got to the pan gasket. I haven't messed with it since. I figured I could get more if needed but would cross that bridge when needed. The clearance was to the CV boot clamp. Not just the boot.
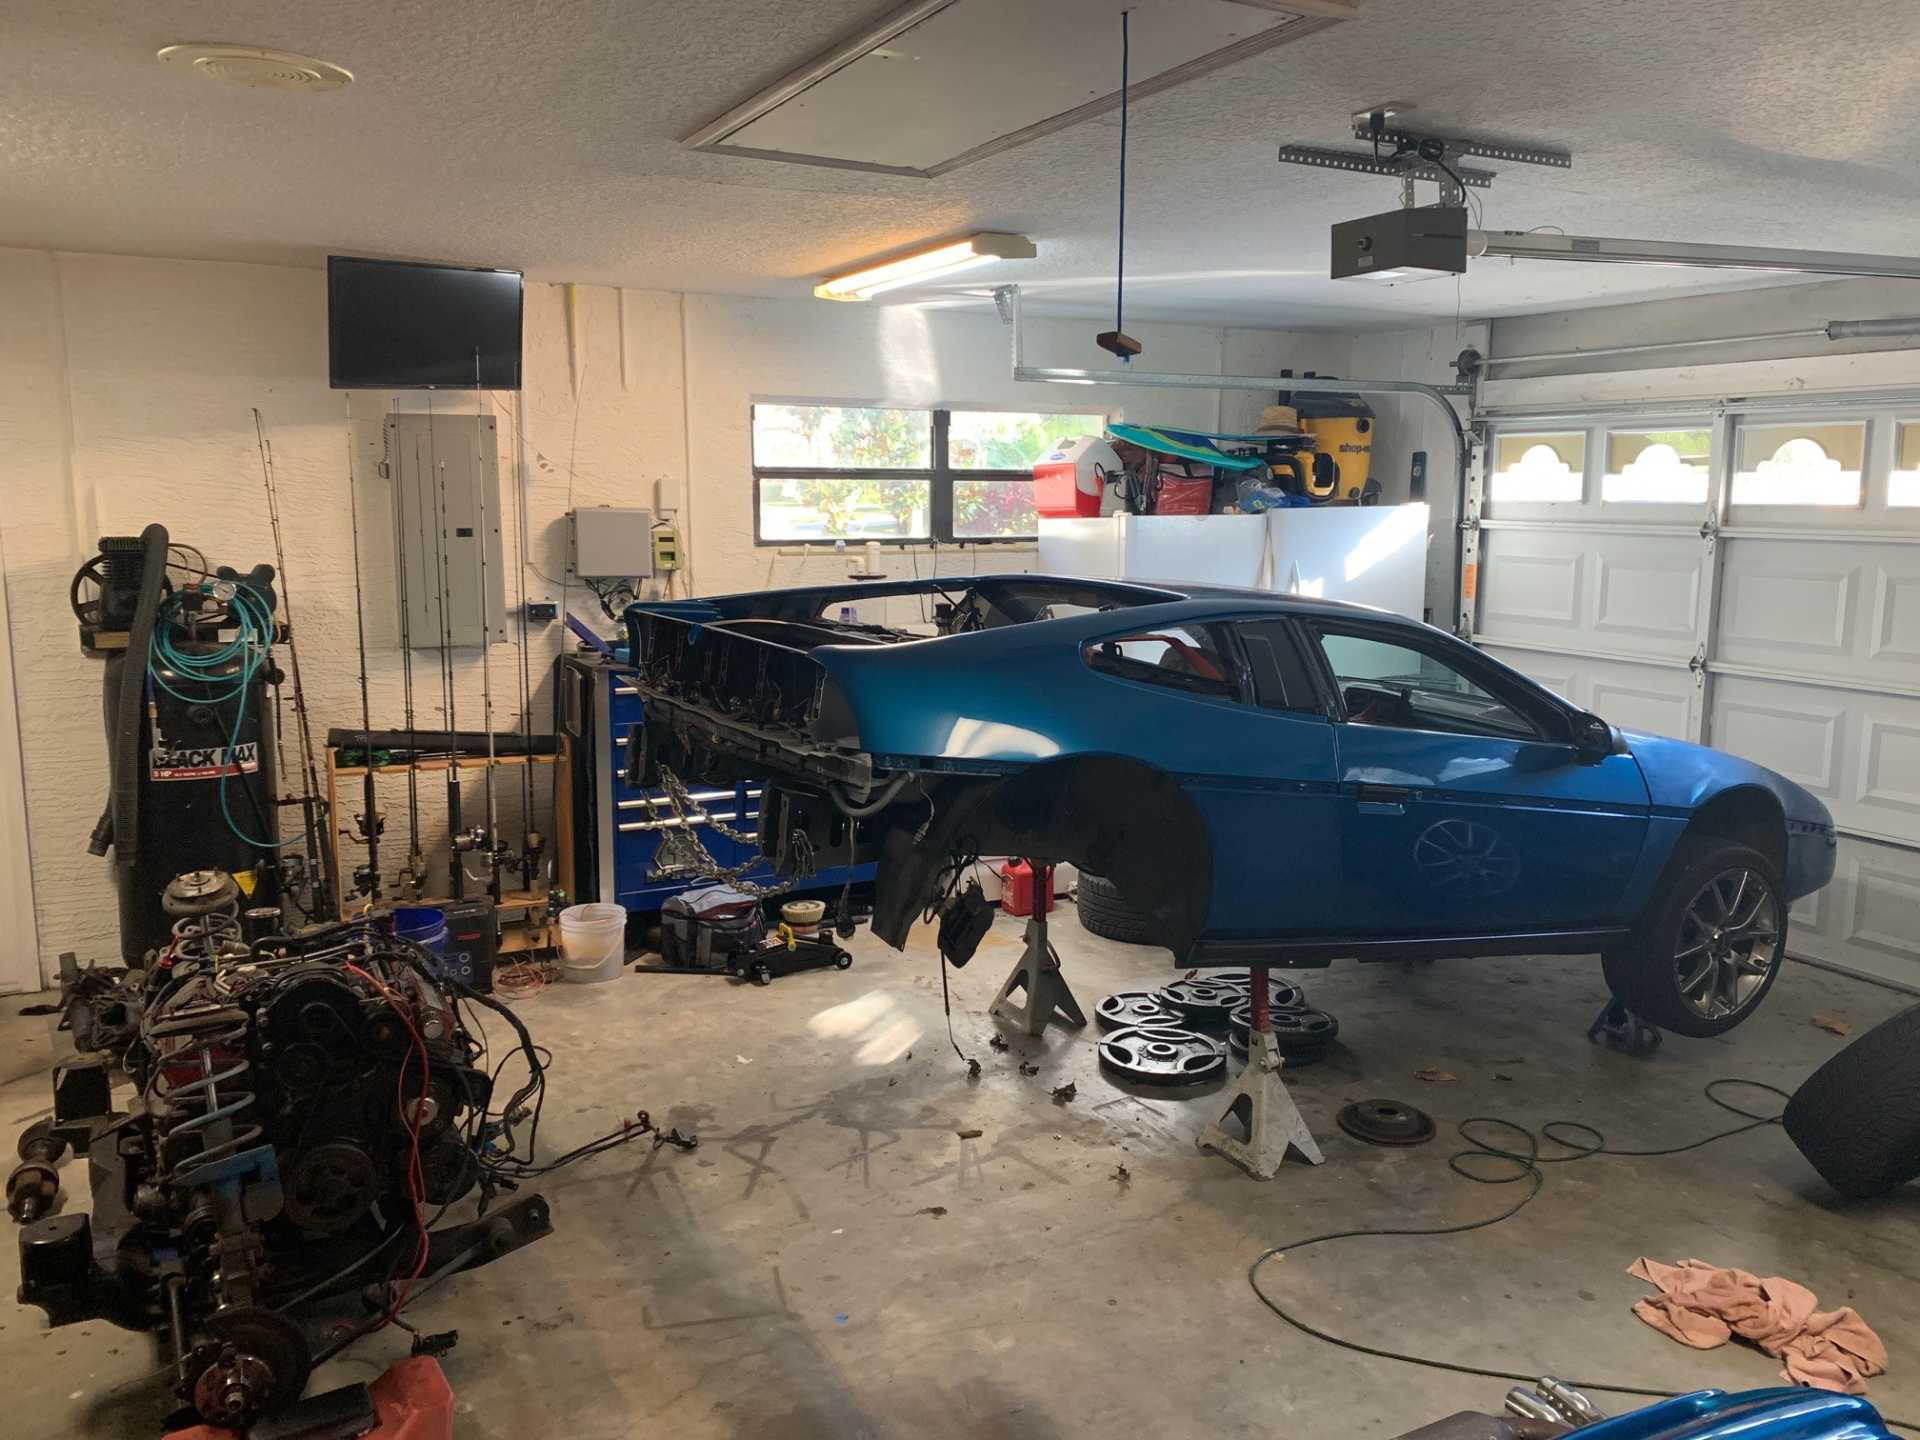
I won't get back onto this swap until early summer. I live in Florida. I'm taking advantage of the cooler weather(50-75) to work on my boat. The cooler temps make grinding fiberglass better because I can wear long sleeves to keep the itch down. Plus I get extended working time with resin when its cool. I have ac in the garage, so heat isn't a factor for the car. I do like working with fiberglass. Now I want to make stuff for the fiero.
I managed to find a LS4 out of a '06 Impala that was largely complete....... Maybe put on a LS3 manifold and timing cover. Dunno exactly...I'll figure that out if we make enough progress to warrant it.
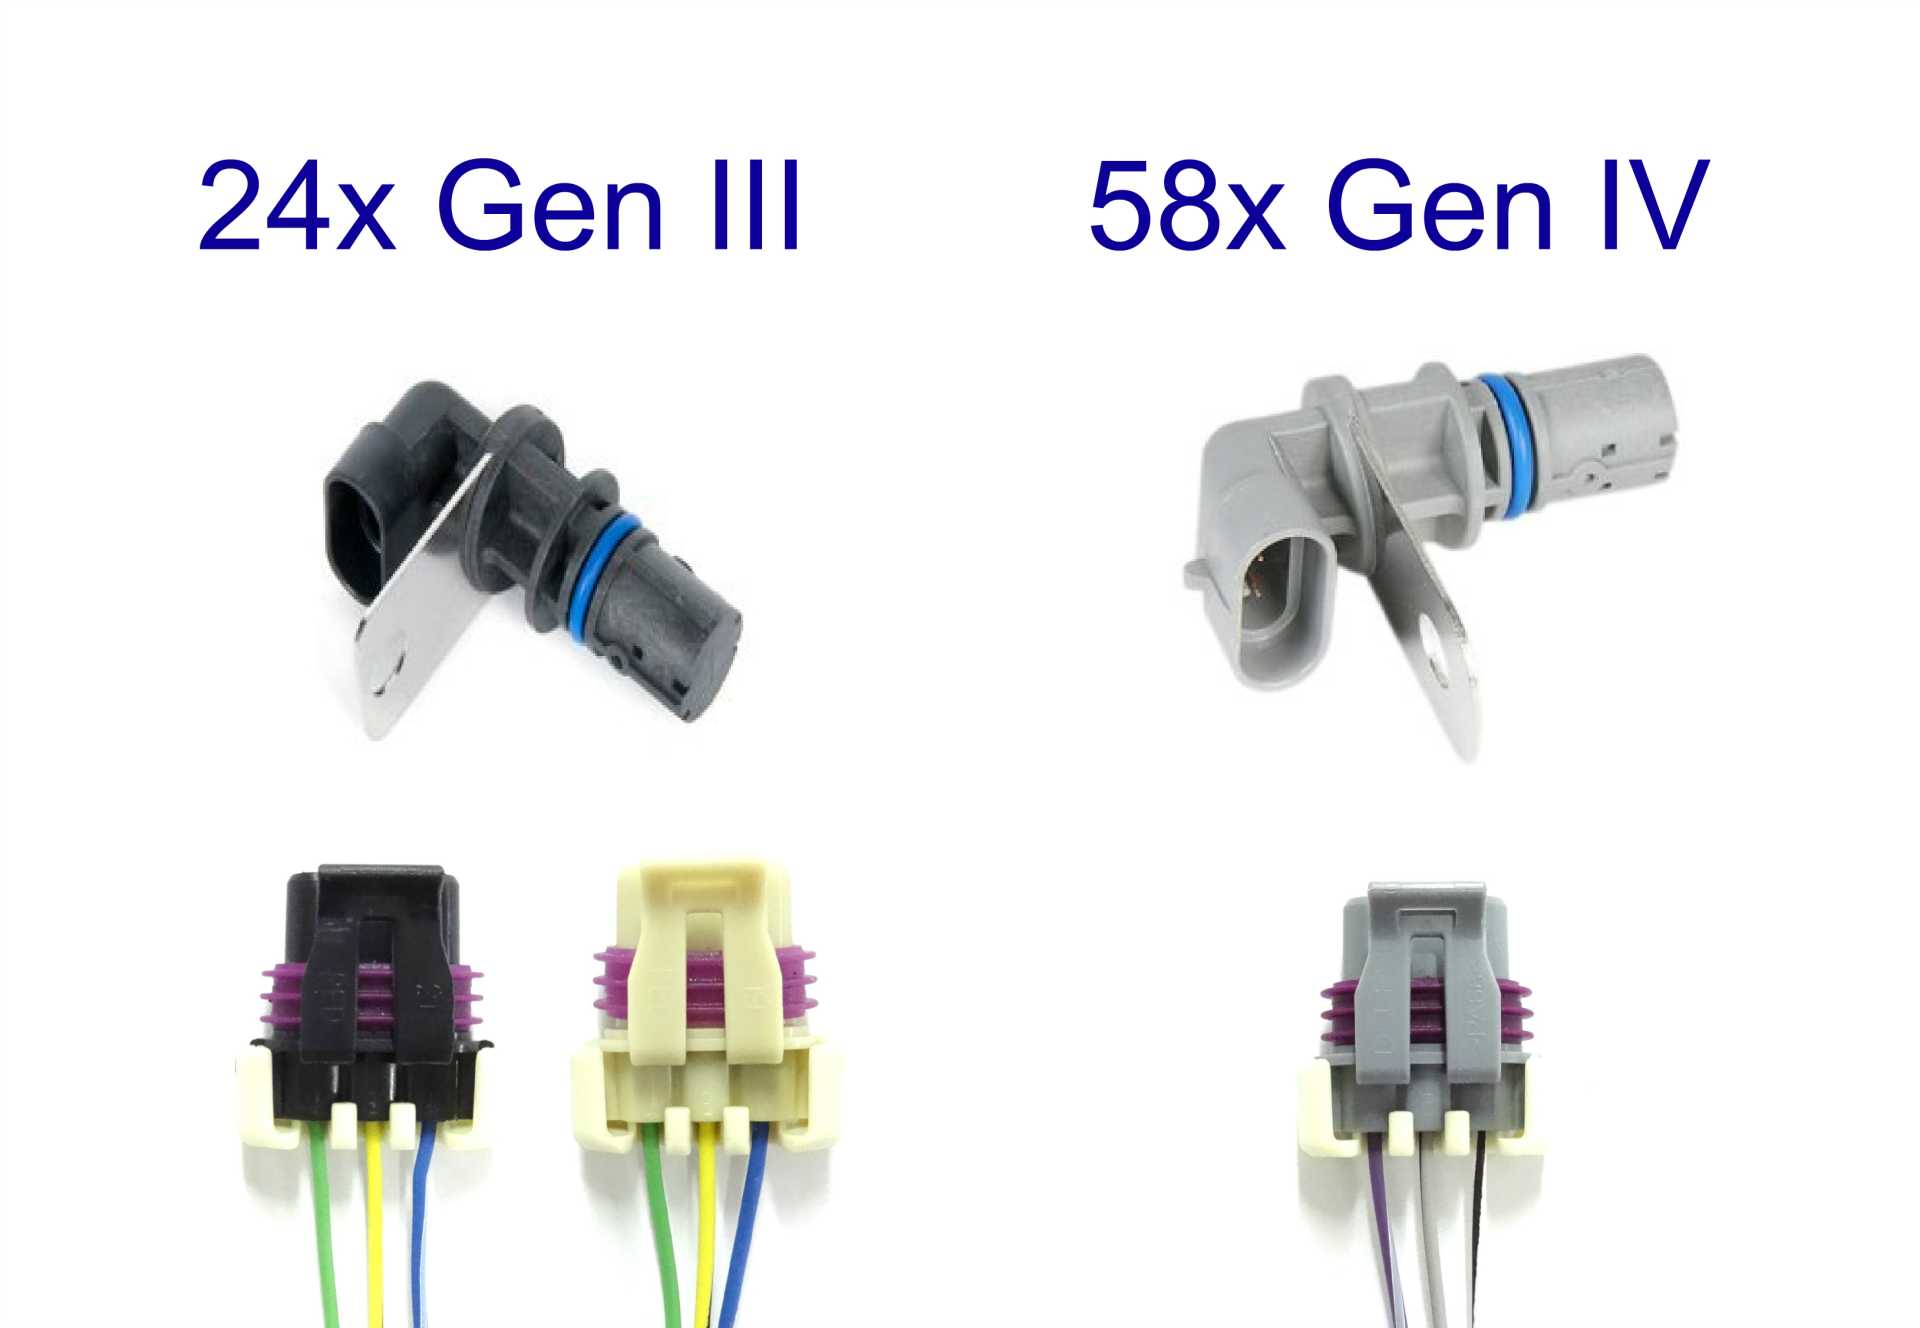
Just an FYI, And LS4 isn't much different than any other 5.3 engine from the LS family. It has the 243 casting heads. They are the cathedral port heads. So an LS3 intake will not work. It has rectangular ports. LS1/LS2/LS6 will all work. I'm running the LS6. Your engine is an '06. It will be a 24 tooth reluctor wheel. You can verify by checking that it is black(24T) or Gray(58T) This will matter because it will determine what ECM you need to use. Someone with more knowledge can verify what you'll want. being that it is mostly like any other 5.3 LS series engine, you'll have countless options for aftermarket parts.
So an LS3 intake will not work. It has rectangular ports. LS1/LS2/LS6 will all work.
Well, it's been quite a few weeks...err two months...since I checked this thread and I wish I had. As soon as you mentioned that, I realized I had screwed up. I managed to pick up a LS7 intake and didn't even register the cathedral ports. CRAP! I did manage to find some square->cathedral converters...but daaaaang they're expensive. More expensive than the junkyard intake manifold I picked up. I may have to cruise the yards again.
Thanks for the comments on your build. It's always nice to see someone else going down the same path as me.
We've been making steady progress on the Fiero for the past few months, but I've neglected updating the progess. So, the next few posts will try to bring things up to present date.
I think we were working on the fiero axle and comparing with the Sunfire axle. The sunfire cleared the motor, but the Fiero didn't. So, we disassembled the two axles and swapped the transmission end tulips around. The axle diameters and spline counts were the same, so the swap was easy. Now we have an axle that clears the motor without needing to grind anything off.
No major documentation on that part of the project. It was straightforward -- remove the retaining clips on both axles, remove the tri-bearings and swap. The Fiero roller bearings came apart and went everywhere...but we weren't going to reuse them anyway.
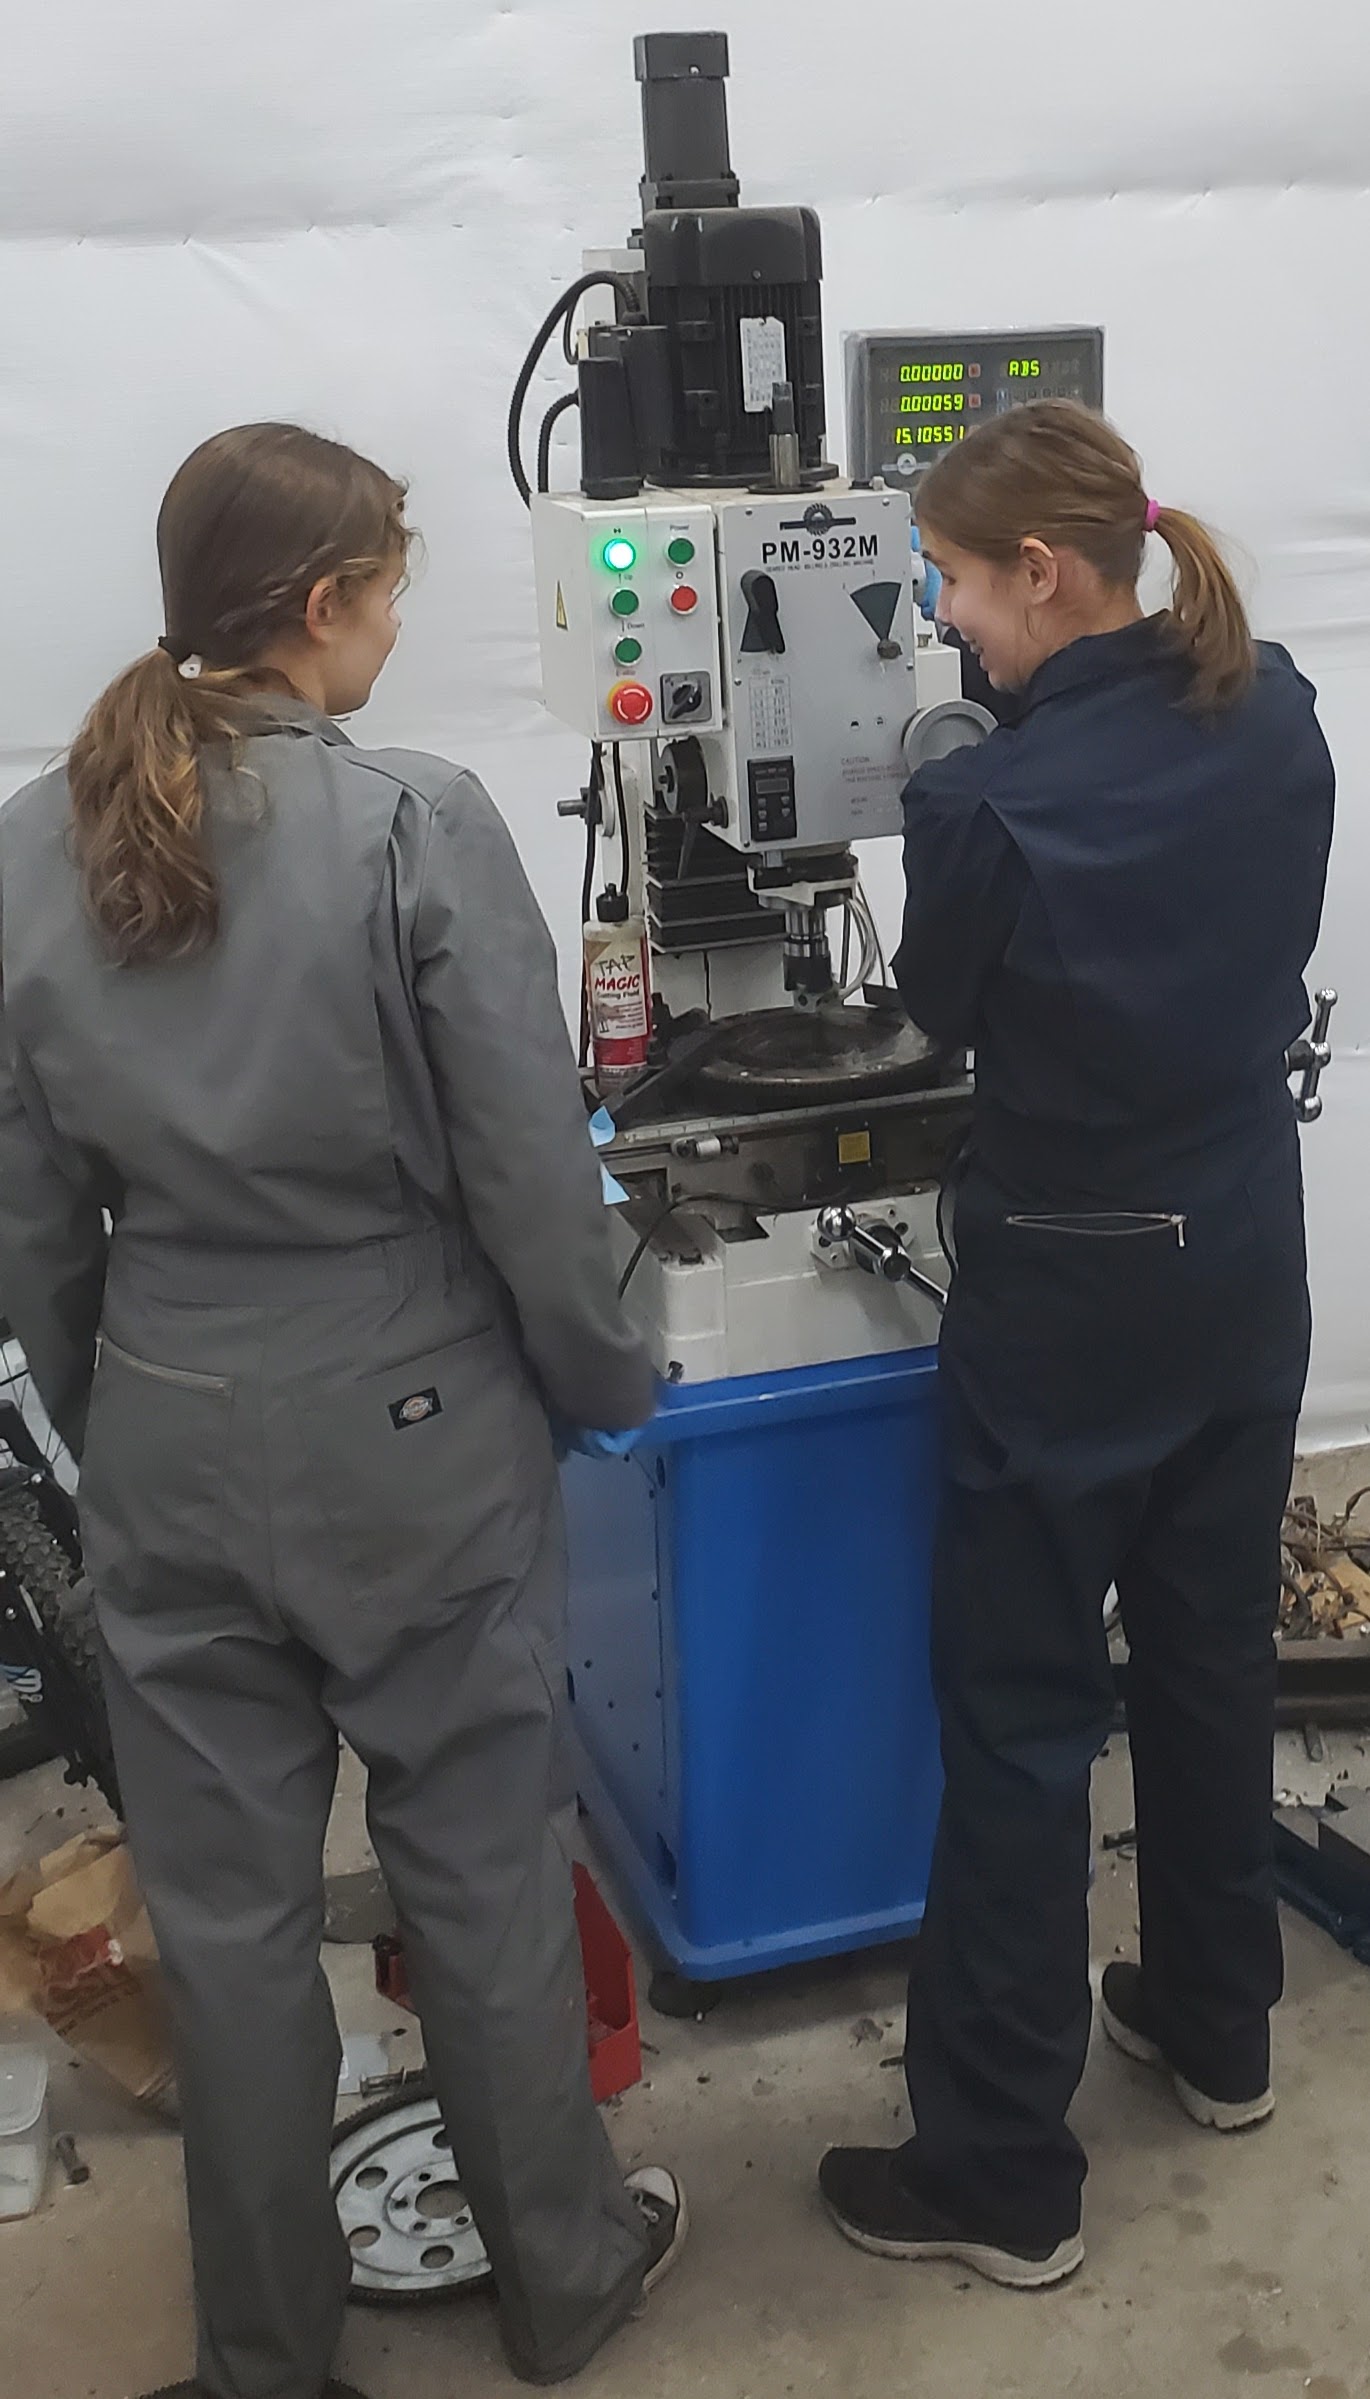
I did take one photo of the kids removing the Fiero bearing. It wasn't on all that tight and could have been driven off with a blow from a rubber mallet. But they couldn't get it, so they decided to use a bearing puller.
Replacement boots for the axles seem to be pretty poor compared to the originals. We stole the Sunfire axle boots, which were still in good shape, for the modified Fiero axles.
[This message has been edited by Rotmilky (edited 02-27-2021).]
We played around with both the Sunfire flywheel and the original Fiero flywheel for a few days to see if we could modify them to fit the LS4 crankshaft. The center of the flywheels need to be bored out in order to fit on the LS4 crankshaft.
The problem is that the flywheel bolt holes for the original flywheels are going to be intersected by the boring. Shown is the Sunfire flywheel (bottom) with the LS4 flex plate on top. Also note that machined flat spot for the flywheel holes is larger than that for the Sunfire flywheel. The Fiero flywheel has a larger machined section and wouldn't need spot facing.
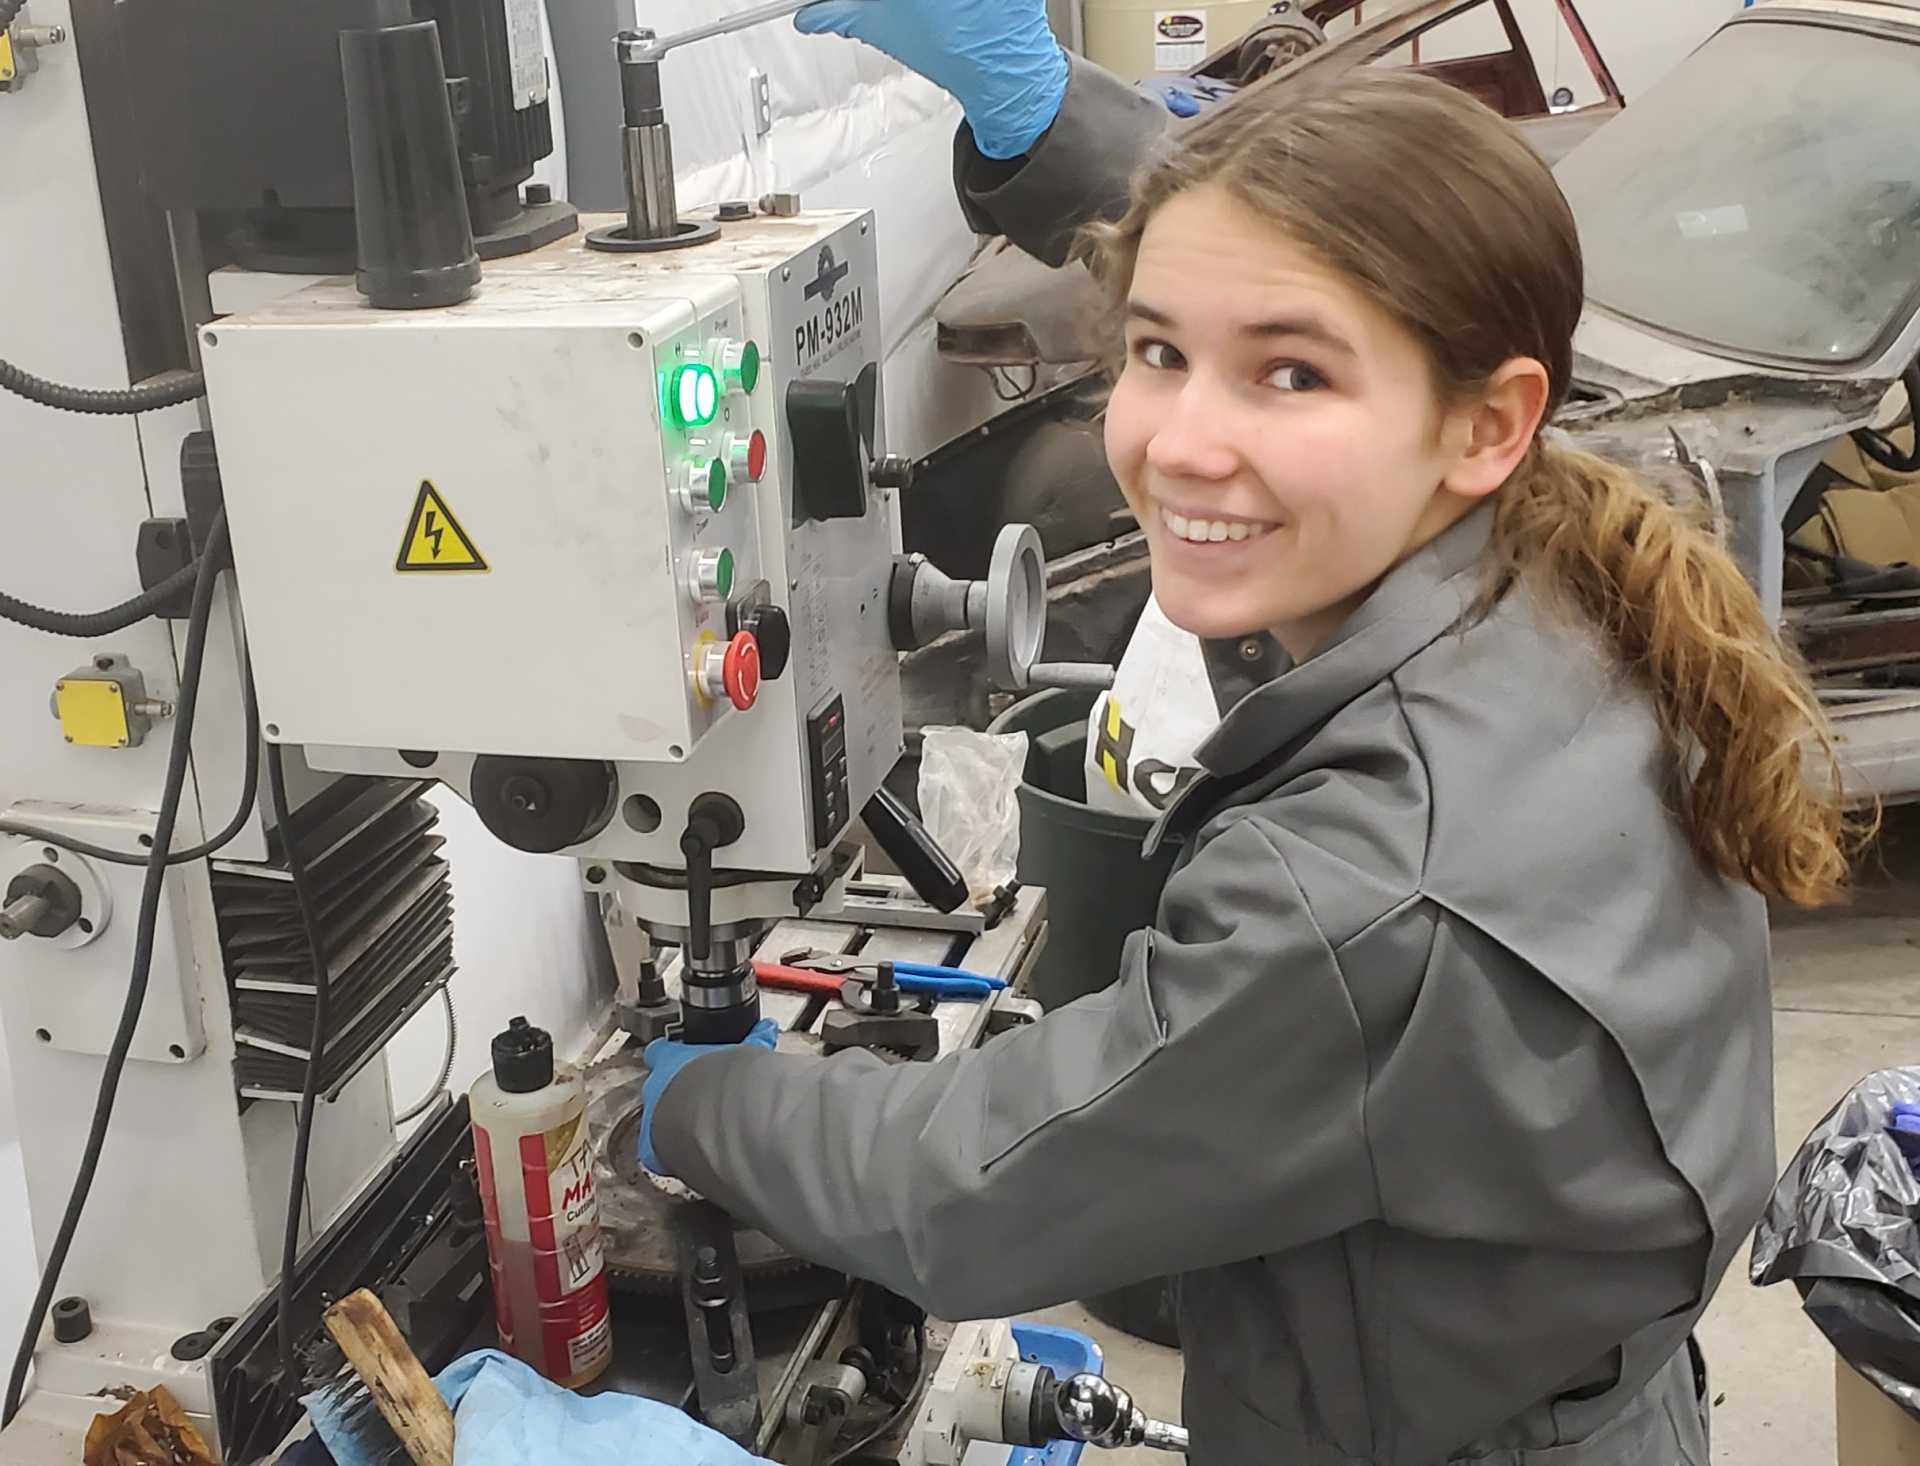
At that point, I decided I wouldn't use one of the existing flywheels and we'd either buy one or modify a LS flywheel to work. Since these were just going to metal recycling and the kids couldn't break anything useful, we should just try to bore it to fit the LS and see what happens. The flywheel was too big for my lathe, so we'd use a boring bar instead. I probably should have turned some plugs for the existing flywheel holes, but I hadn't ever tried to machine across bolt holes before...so we decided to leave them open and see what would happen. That was ultimately a bad idea -- the holes would catch the boring tool and jerk everything a bit -- my Precision Mathews probably isn't beefy enough to attempt that without plugs. But the kids had fun boring out the flywheel, so it was a good use of time.


 To illustrate, I've reduced it here to 1024x485 (405 kbs). It's plenty big to see what we need. However, it's not even necessary to re-size an image... as long as its file size is no more than 2000 kbs. The forum software will automatically re-size it to fit whatever size screen it's being viewed on (while retaining the original size image on the server for download).