Pennock's Fiero Forum
  Technical Discussion & Questions
  Another Way of Mounting Accessory Gauge (s)

Post New Topic  Post A Reply
Email This Page to Someone! | Printable Version


next newest topic | next oldest topic
Another Way of Mounting Accessory Gauge (s) by V8Steve
Started on: 06-05-2020 08:48 AM
Replies: 9 (395 views)
Last post by: V8Steve on 07-09-2020 08:07 PM
V8Steve
Member
Posts: 294
From: MA
Registered: Jun 2003


Feedback score: N/A
Leave feedback

Rate this member

Report this Post06-05-2020 08:48 AM Click Here to See the Profile for V8SteveClick Here to visit V8Steve's HomePageSend a Private Message to V8SteveEdit/Delete MessageReply w/QuoteDirect Link to This Post
I previously posted some of this in another thread and I think it's worth showing this little project in a new thread. This is how I found a way to mount an accessory gauge without putting a pod on the pillar or hanging it under the dash somewhere. I also did not want to drill any holes.

The factory temperature gauge was giving me so much trouble (in another thread) that I bought an Autometer unit and added the sensor in one of the V8 heads.

Here' show the mounting was done:

The dash cover over the cluster can be removed easily. There are three screws on the top and two on the bottom corners. Once you remove it, you'll see there are two large screws that hold the cluster. I used those two screws as an anchor point. Below is the initial sketch. It was just a sketch and the gauge was 90 degrees out of position.


An exhaust adaptor at the parts store seemed about right for something to contain the gauge and I found this one. The photos below show how it went from an adaptor to a case for containing the gage. I cut off one end at an angle and welded a cover on it. The steel rod was easy to heat and bend with a simple Bernzo-Matic torch. After a few trials it seemed to fit OK so I welded on two washers. It turned out that the washer mounting was strong enough that I could actually bend the rod by hand and get the gauge where I wanted it. The wires come out the bottom behind the rod and pass through a rubber grommet from the hardware store. Finally, electrical tape was wrapped around the gauge to build up the diameter enough to hold it inside securely. The wiring was simple. In my case I decided to power the gage from the same source that powers the electric water pump. A small notch must be cut in the cluster cover to allow the rod to pass through.

This project is finally done. Yesterday I ended up taking the cluster face off for the umpteenth time. That factory gage had been sent out for recalibration but it wouldn't cooperate. So I brought the engine up to a stable temperature of around 185F on the Autometer and removed/replaced the needle on the factory gauge to be in the same place.

This way of mounting a gage could be used for any gauge or combination of gages stacked up. In my case I was afraid I'd crack the plastic pillar cover and regret it.

Hope you enthusiasts find this helpful. The gauge ended up in just the right place for my line of sight. If I change my mind later, just bend it.


]

[This message has been edited by V8Steve (edited 06-05-2020).]

IP: Logged
PFF
System Bot
claude dalpe
Member
Posts: 137
From: montreal,quebec,canada
Registered: Feb 2009


Feedback score: (1)
Leave feedback

Rate this member

Report this Post06-05-2020 09:01 AM Click Here to See the Profile for claude dalpeSend a Private Message to claude dalpeEdit/Delete MessageReply w/QuoteDirect Link to This Post
Nicely done, I like the shape with the angle and the way to close the angle.
IP: Logged
V8Steve
Member
Posts: 294
From: MA
Registered: Jun 2003


Feedback score: N/A
Leave feedback

Rate this member

Report this Post06-05-2020 09:23 AM Click Here to See the Profile for V8SteveClick Here to visit V8Steve's HomePageSend a Private Message to V8SteveEdit/Delete MessageReply w/QuoteDirect Link to This Post
Claude,

Thank you.

I'm new at mig welding so I made a test piece first from some old but larger tubing to see if it was possible with my limited experience. It worked out OK so then I went forward with the actual gauge fabrication.

Below is the test piece. One problem with using an exhaust tubing reducer is that there are longitudinal ripples in the metal due to the forming process. I tried to fill it in with body filler and then make them disappear. There's enough rattle can paint on it now so it's barely noticeable.

IP: Logged
Archie
Member
Posts: 9436
From: Las Vegas, NV
Registered: Dec 1999


Feedback score:    (12)
Leave feedback


Total ratings: 546
Rate this member

Report this Post06-05-2020 12:26 PM Click Here to See the Profile for ArchieClick Here to visit Archie's HomePageSend a Private Message to ArchieEdit/Delete MessageReply w/QuoteDirect Link to This Post
Good Job Steve.

Very nicely done & documented.
IP: Logged
longjonsilver
Member
Posts: 1064
From: Lower Sackville, Nova Scotia
Registered: Nov 2001


Feedback score: N/A
Leave feedback

Rate this member

Report this Post06-05-2020 06:21 PM Click Here to See the Profile for longjonsilverClick Here to visit longjonsilver's HomePageSend a Private Message to longjonsilverEdit/Delete MessageReply w/QuoteDirect Link to This Post
Your gage looks real good. Nicely done!

------------------
Astronomy says we will find a coded signal from outer space. Then we'll KNOW that life exists there, for coded signals aren't by chance.

Biology says there are coded genetic signals in every cell, but we KNOW that no intelligence created life.

I'm the original owner of a white ' 84 2M4 purchased Dec 10, 1983 from Pontiac. Always garaged, no rust, 4-wheel drifts are fun!

IP: Logged
pmbrunelle
Member
Posts: 4376
From: Grand-Mère, Québec
Registered: Sep 2008


Feedback score: N/A
Leave feedback


Total ratings: 62
Rate this member

Report this Post06-05-2020 07:51 PM Click Here to See the Profile for pmbrunelleSend a Private Message to pmbrunelleEdit/Delete MessageReply w/QuoteDirect Link to This Post
Having a bunch of mass at the end of a stick, I'd wonder if the gauge pod could start vibrating with engine vibration. Have you driven much with this setup?

Can you share a bit of information regarding the type of V8 you have, and the type of engine mounts (solid, poly, rubber) you have?

[This message has been edited by pmbrunelle (edited 06-05-2020).]

IP: Logged
V8Steve
Member
Posts: 294
From: MA
Registered: Jun 2003


Feedback score: N/A
Leave feedback

Rate this member

Report this Post06-05-2020 08:57 PM Click Here to See the Profile for V8SteveClick Here to visit V8Steve's HomePageSend a Private Message to V8SteveEdit/Delete MessageReply w/QuoteDirect Link to This Post
My experience since 1999 is that the V8Archie kit is well proven, trouble free, and bullet proof.

Engine and F40 mounts are all solid.

It's been a long road to restore this car to the current generation and I'd be glad to correspond via PM or email. It's not really suitable for this thread and there are other threads with my progress on this project

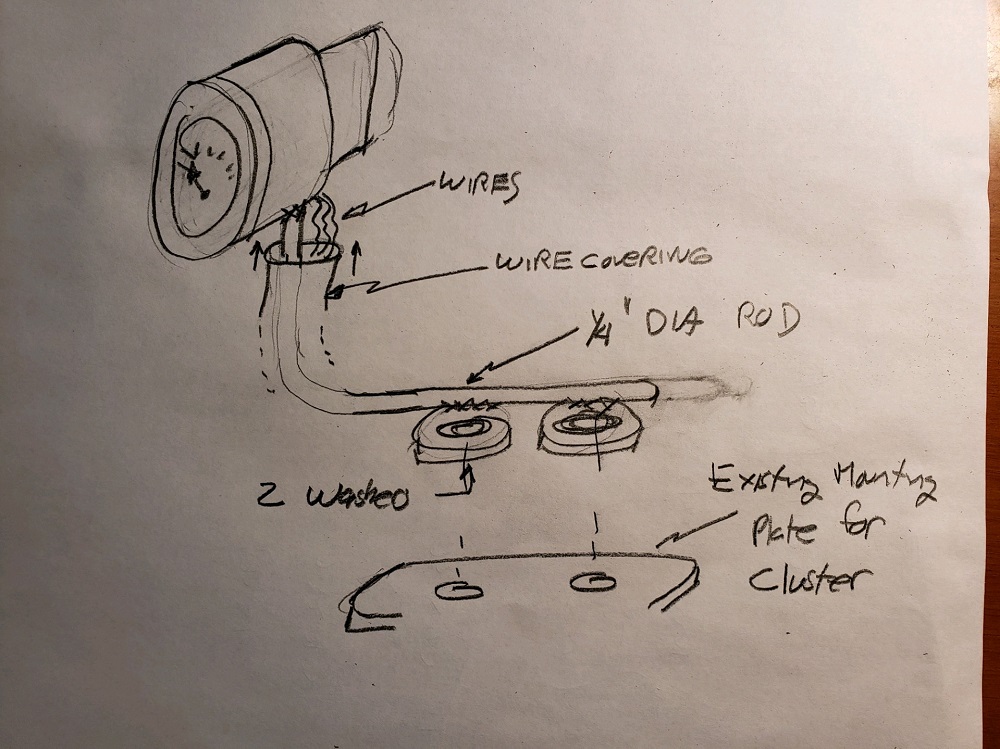
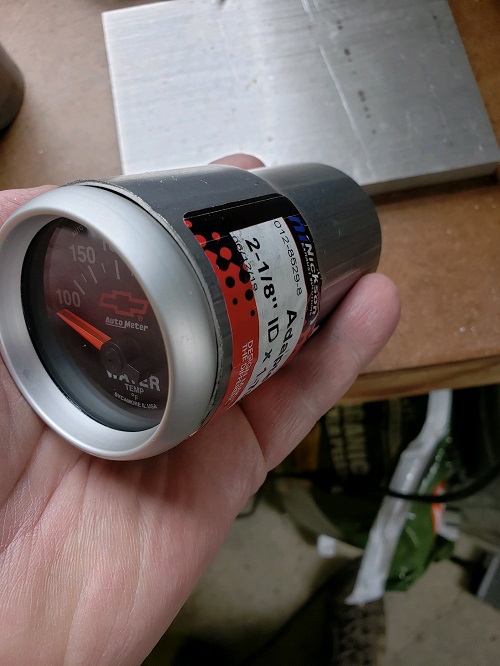
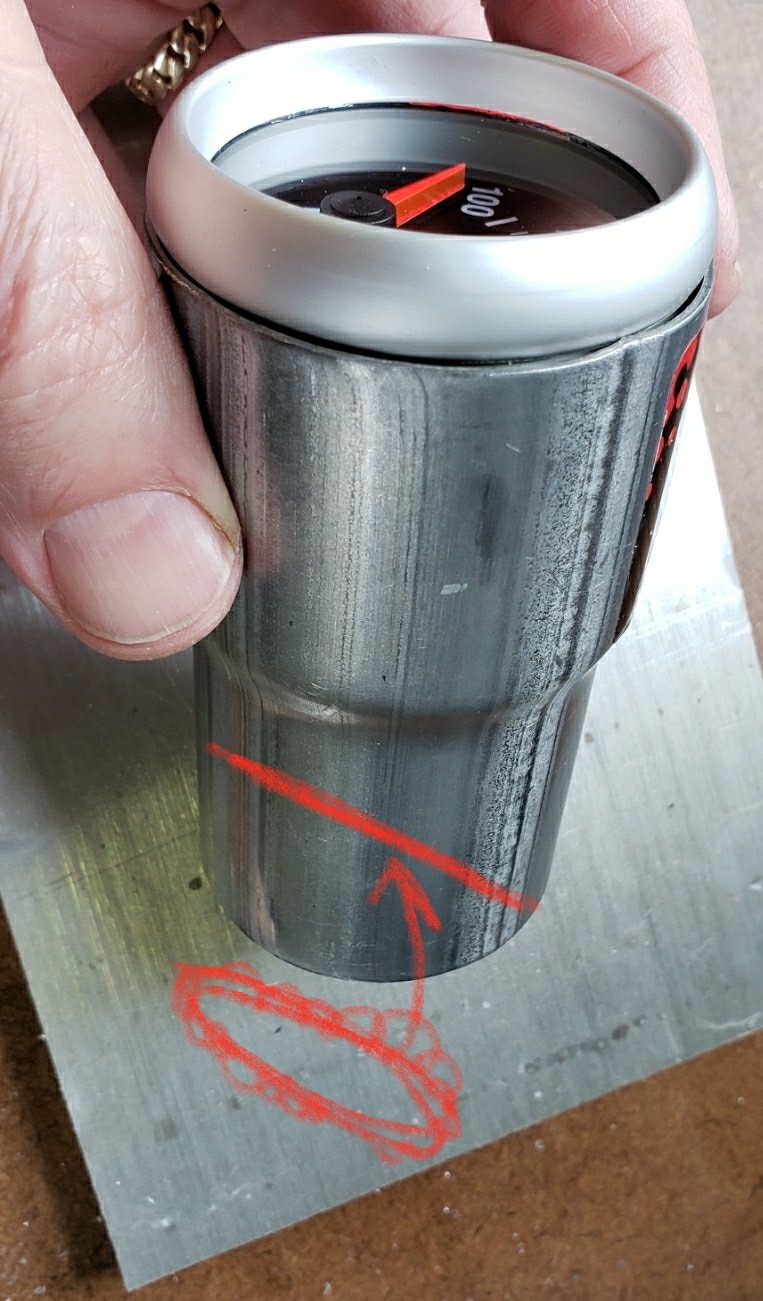
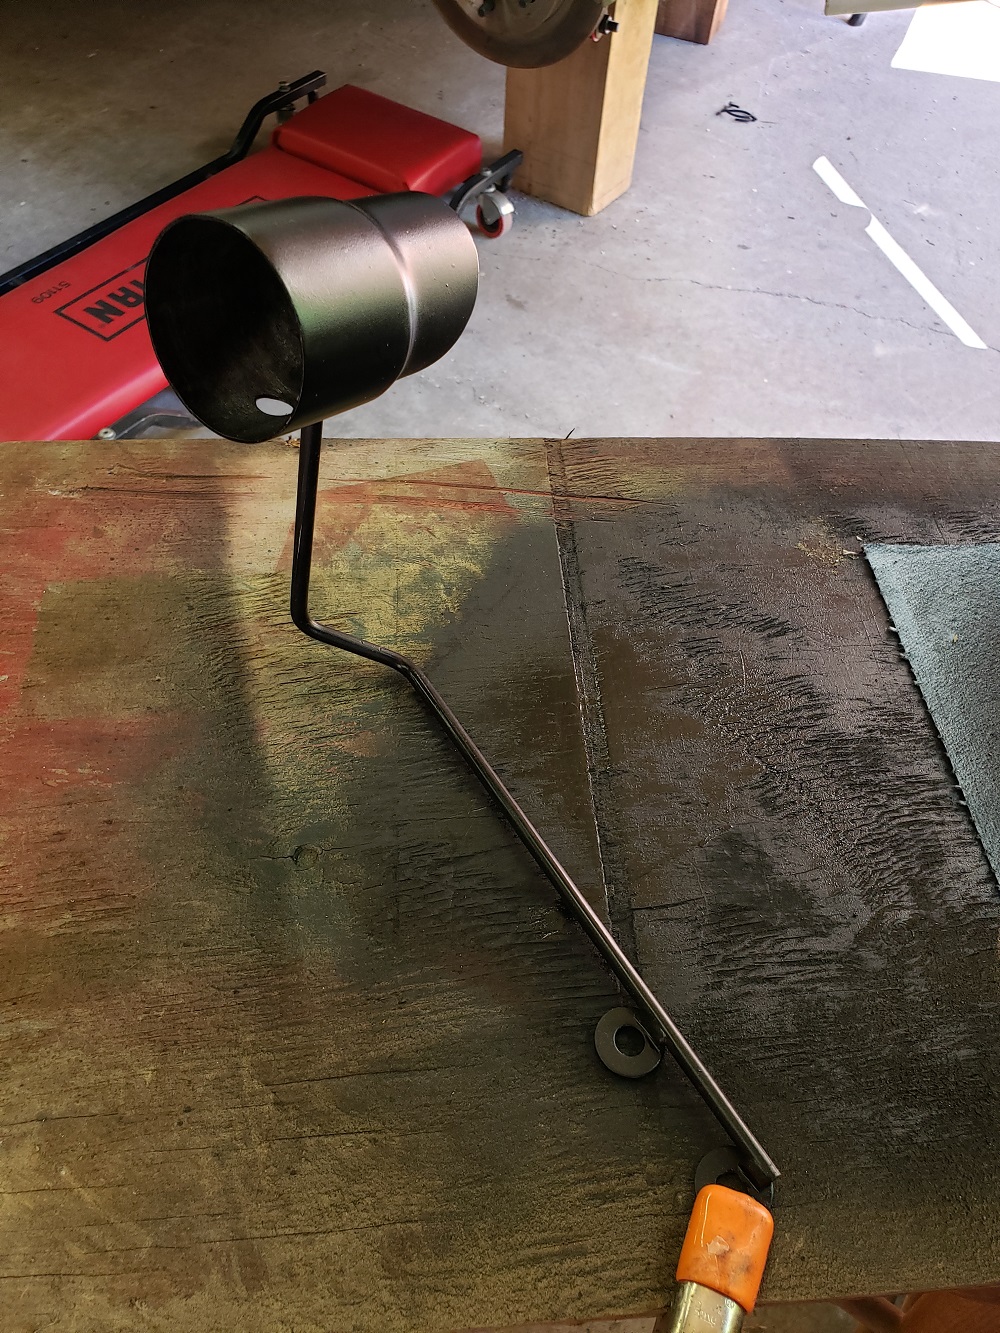
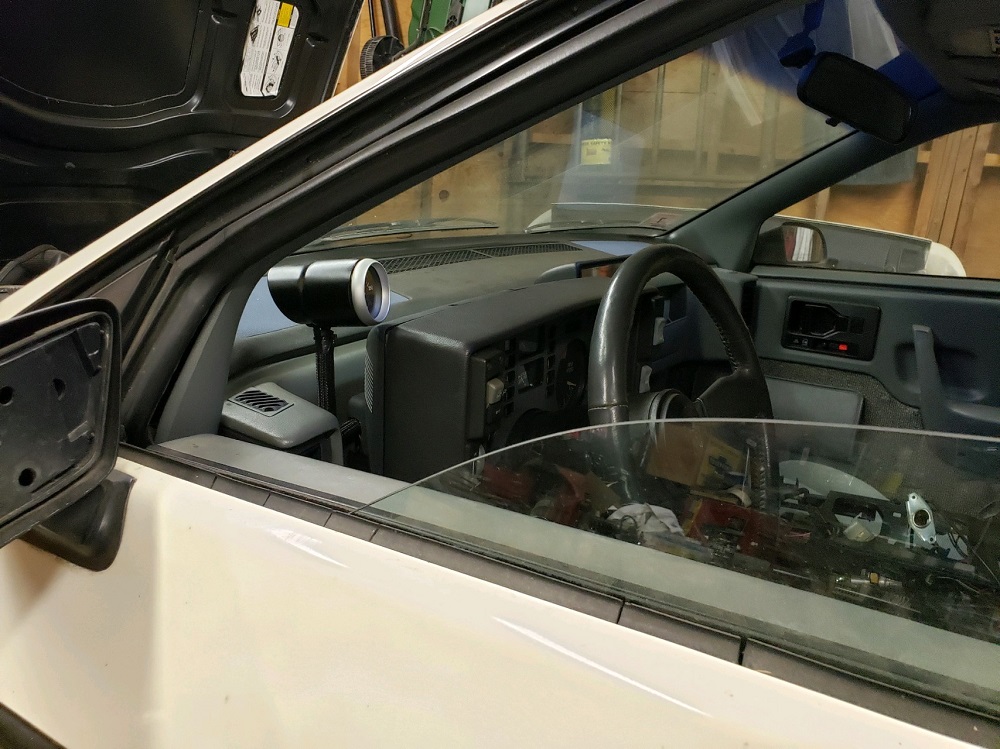
First, I've not yet driven the car and it's still up on blocks although it's been run extensively. You are astute with your question about vibration. So far, no noticeable vibration of the rod that contains the assembly. If necessary, I'll stick some sort of shim behind it. For anyone who decides to mount more than one gauge this way, if it were me, I'd use a larger diameter rod and mount them the same way. Worst case is to add a shim down where it's not noticeable.

The original V8 Archie swap by me was in 1999 and I drove it trouble free until 2007 when the OEM GM ZZ4 seized. It sat in my shop until 2015. I've worked on this for 5 years

I expect to put this car back on road in the next few weeks.

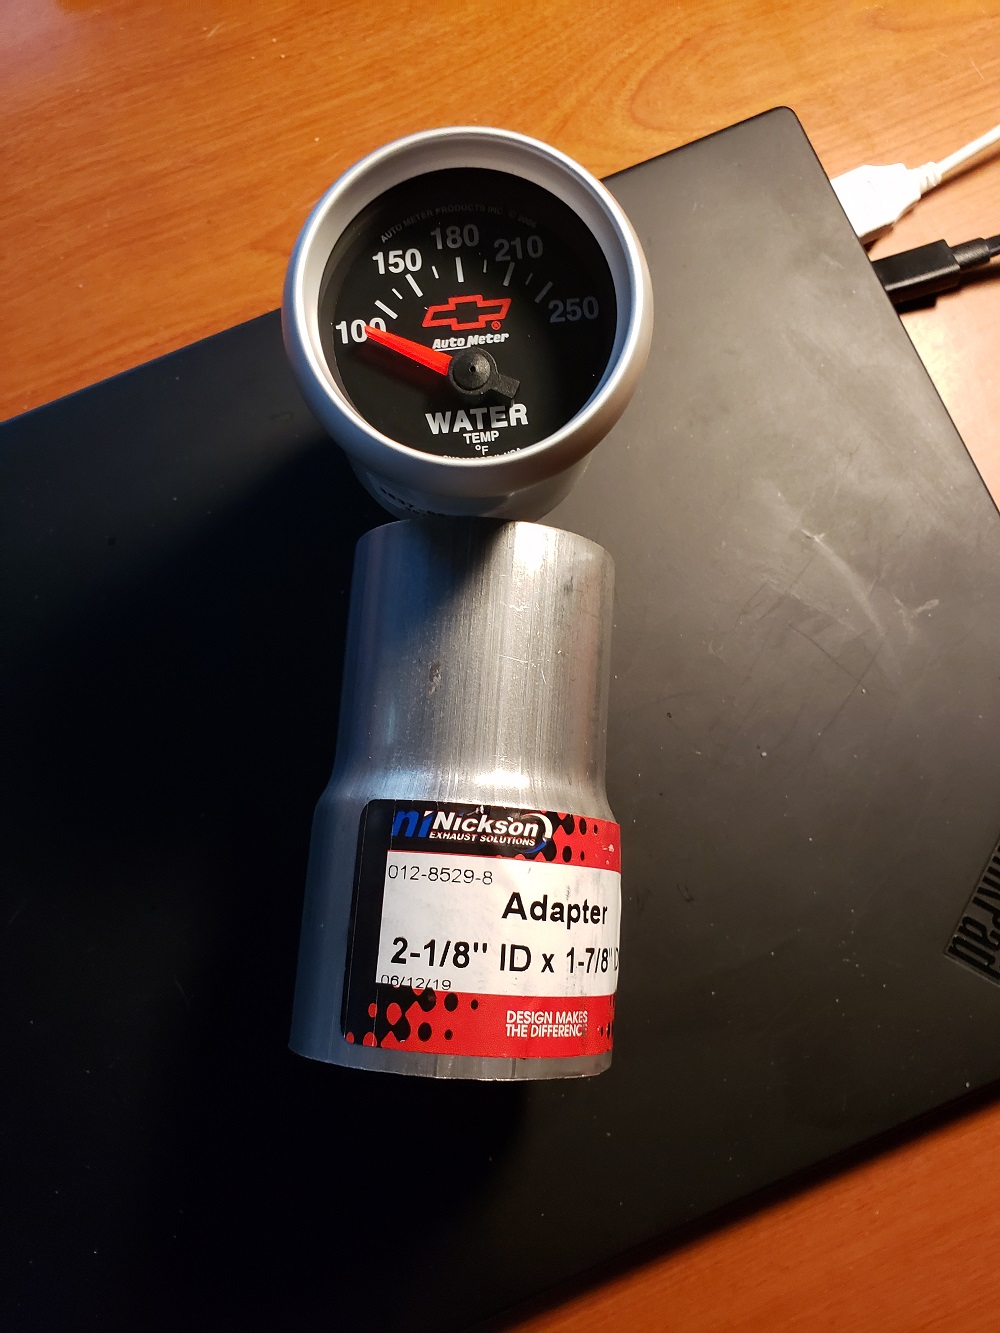
To answer your question, it's a custom build 355 cube SBC with AFR milled heads, Holley Multiport Sequential EFI, 427 Dyno HP, F40 Archie kit, etc. This motor has custom baffles in the sump to control oil wash during launch with a cross mounted motor. Oil lines and remote filter are Canton Racing. You can search on the Forum on the details or PM me.

------------------
88GT 355 CI Sequential Holley Multiport , AFR milled 180, Dyno'd at 427 HP, 320 WHP
anderson@gdsconsulting.com

[This message has been edited by V8Steve (edited 06-05-2020).]

IP: Logged
pmbrunelle
Member
Posts: 4376
From: Grand-Mère, Québec
Registered: Sep 2008


Feedback score: N/A
Leave feedback


Total ratings: 62
Rate this member

Report this Post06-07-2020 12:20 AM Click Here to See the Profile for pmbrunelleSend a Private Message to pmbrunelleEdit/Delete MessageReply w/QuoteDirect Link to This Post
The idea wasn't to go off on a tangent about the powertrain, but knowing what it is and how it's mounted gives thread viewers an idea of the vibration transmitted to the chassis.

Then, people could know (pending test driving) that this gauge mounting method is known to work with vibrations from a solid-mounted 355 V8 with a manual trans.
IP: Logged
Dennis LaGrua
Member
Posts: 15145
From: Hillsborough, NJ U.S.A.
Registered: May 2000


Feedback score:    (13)
Leave feedback


Total ratings: 328
Rate this member

Report this Post06-07-2020 02:54 AM Click Here to See the Profile for Dennis LaGruaSend a Private Message to Dennis LaGruaEdit/Delete MessageReply w/QuoteDirect Link to This Post
Very nice job and a good location for a gauge. Your budget gauge cup is also impressive

------------------
" THE BLACK PARALYZER" -87GT 3800SC Series III engine, custom ZZP /Frozen Boost Intercooler setup, 3.4" Pulley, Northstar TB, LS1 MAF, 3" Spintech/Hedman Exhaust, P-log Manifold, Autolite 104's, MSD wires, Custom CAI, 4T65eHD w. custom axles, Champion Radiator, S10 Brake Booster, HP Tuners VCM Suite.
"THE COLUSSUS"
87GT - ALL OUT 3.4L Turbocharged engine, Garrett Hybrid Turbo, MSD ign., modified TH125H
" ON THE LOOSE WITHOUT THE JUICE "

IP: Logged
V8Steve
Member
Posts: 294
From: MA
Registered: Jun 2003


Feedback score: N/A
Leave feedback

Rate this member

Report this Post07-09-2020 08:07 PM Click Here to See the Profile for V8SteveClick Here to visit V8Steve's HomePageSend a Private Message to V8SteveEdit/Delete MessageReply w/QuoteDirect Link to This Post
 
quote
Originally posted by pmbrunelle:

Having a bunch of mass at the end of a stick, I'd wonder if the gauge pod could start vibrating with engine vibration. Have you driven much with this setup?

Can you share a bit of information regarding the type of V8 you have, and the type of engine mounts (solid, poly, rubber) you have?


PMBrunelle is correct. I finally got the car on the road and the gauge vibrates more than what I am willing to accept. A spare rubber exhaust hanger piece wedged in place solved the problem.
IP: Logged

next newest topic | next oldest topic

All times are ET (US)

Post New Topic  Post A Reply
Hop to:

Contact Us | Back To Main Page

Advertizing on PFF | Fiero Parts Vendors
PFF Merchandise | Fiero Gallery | Ogre's Cave
Real-Time Chat | Fiero Related Auctions on eBay


Copyright (c) 1999, C. Pennock