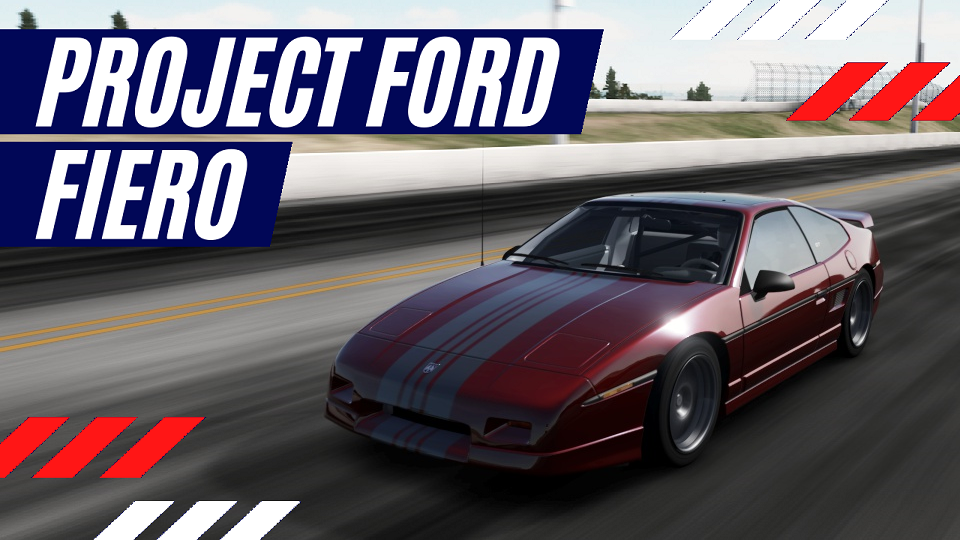
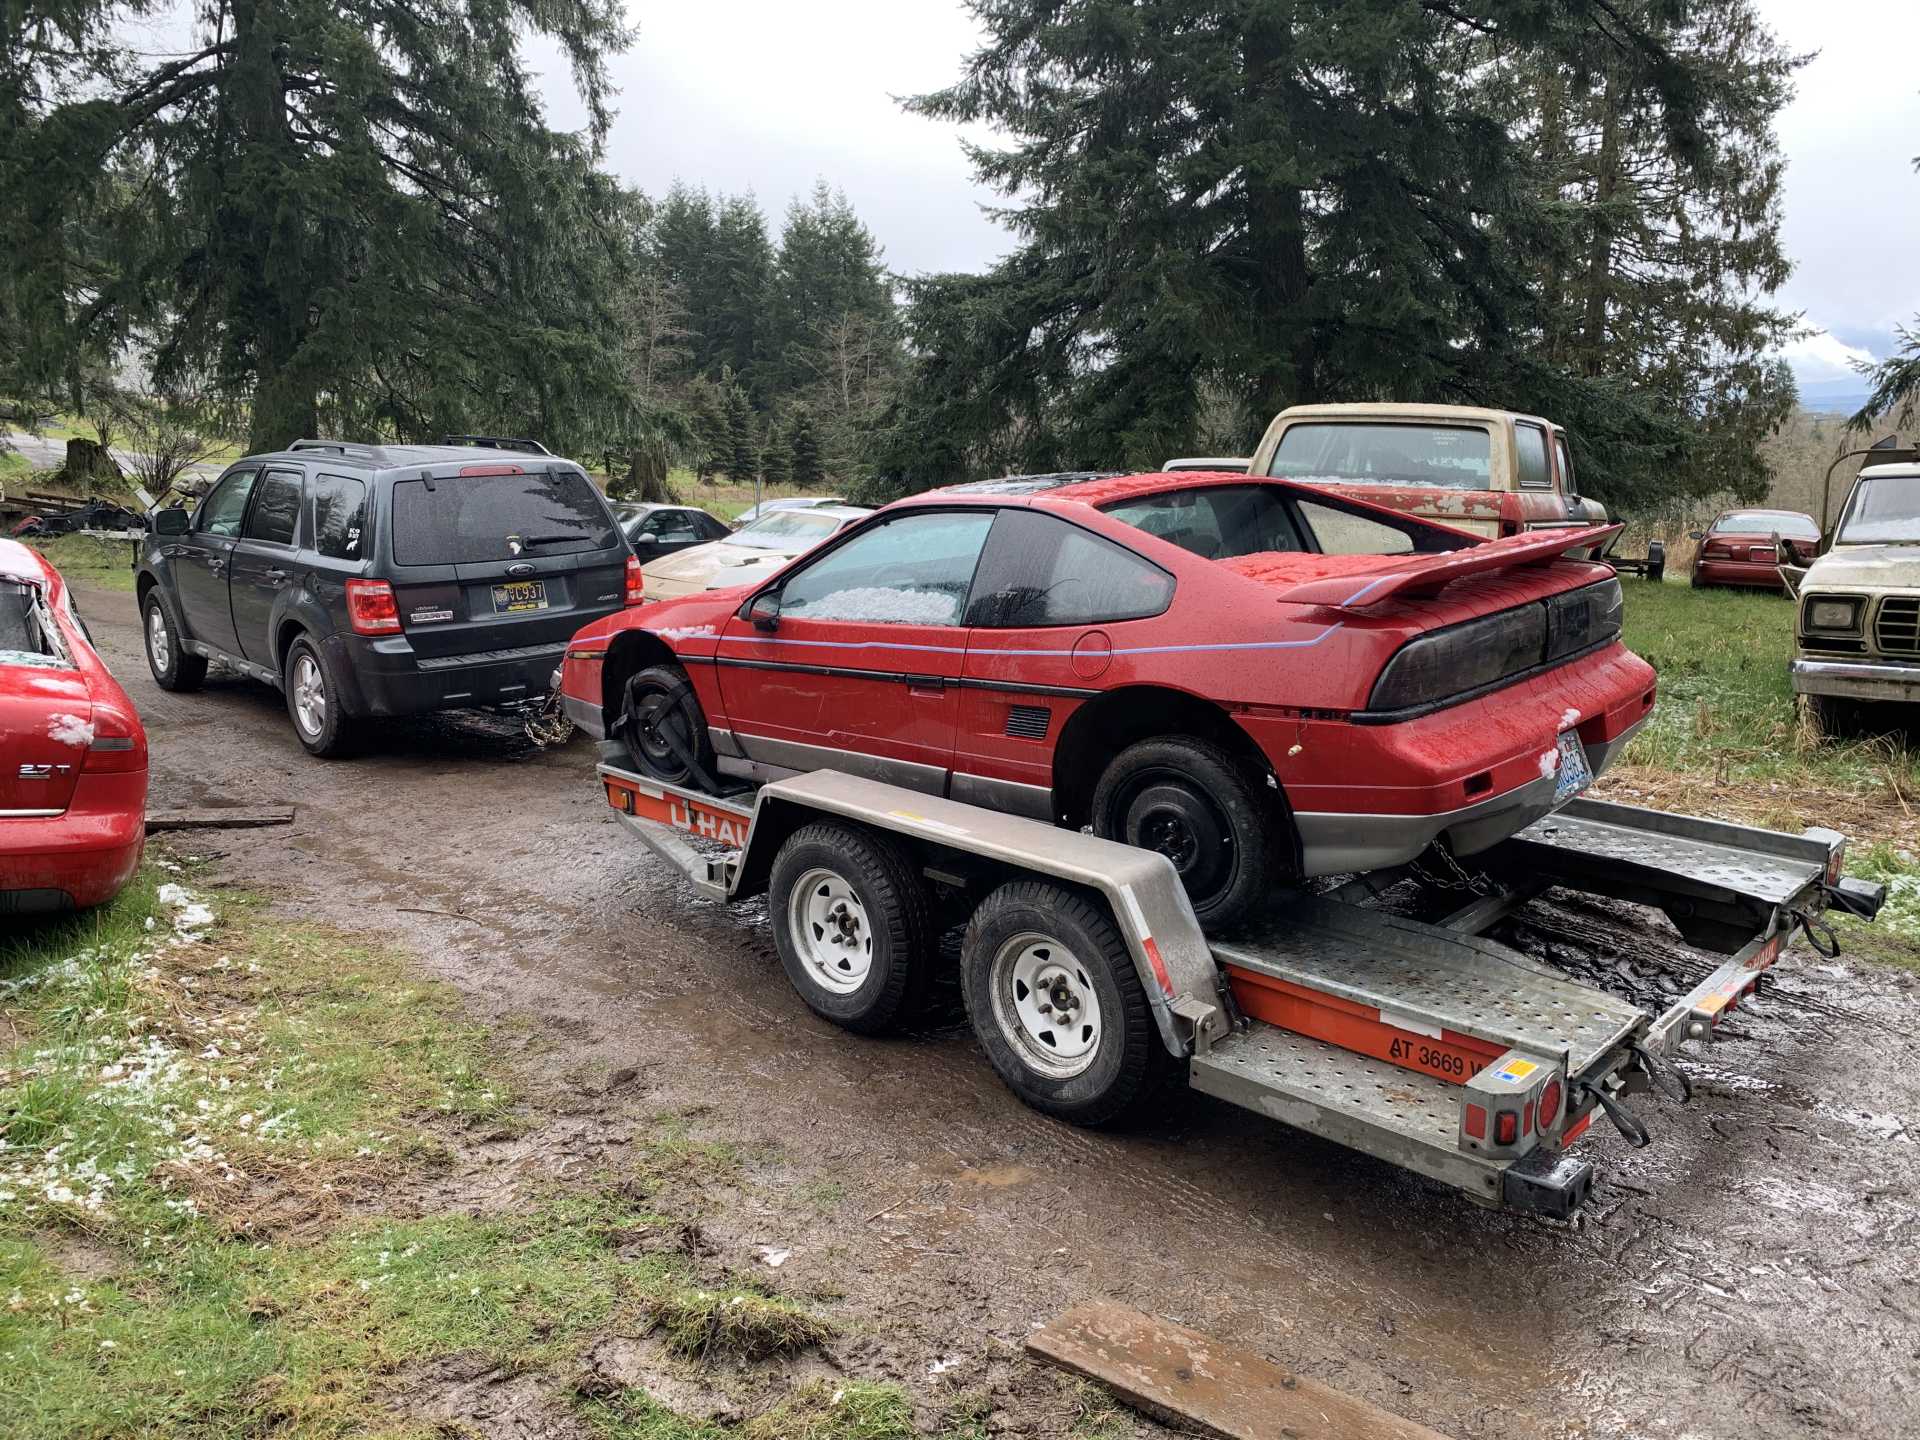
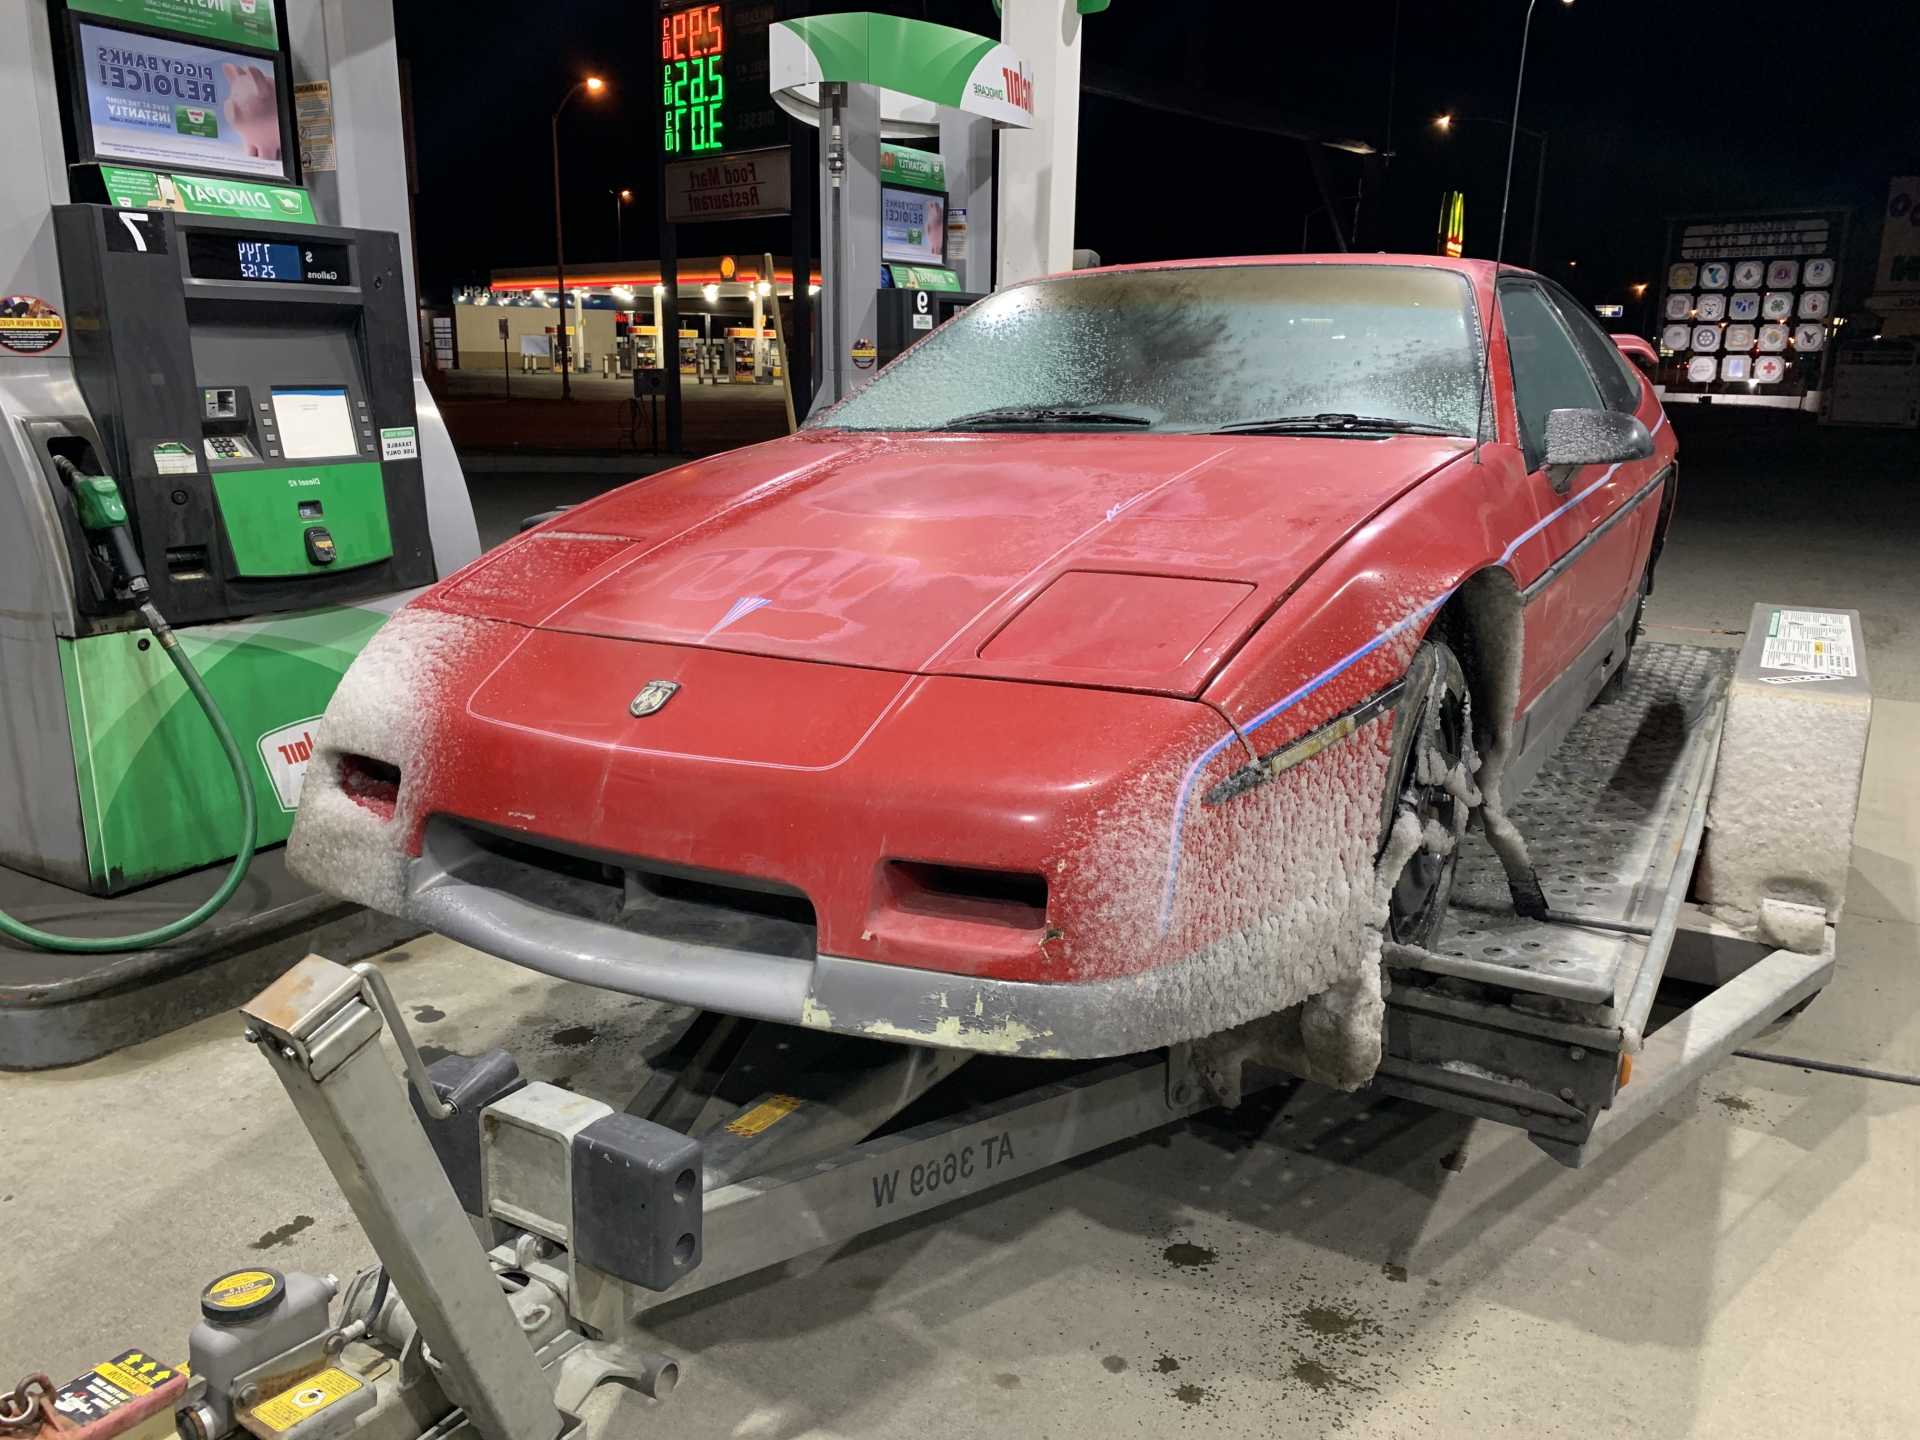
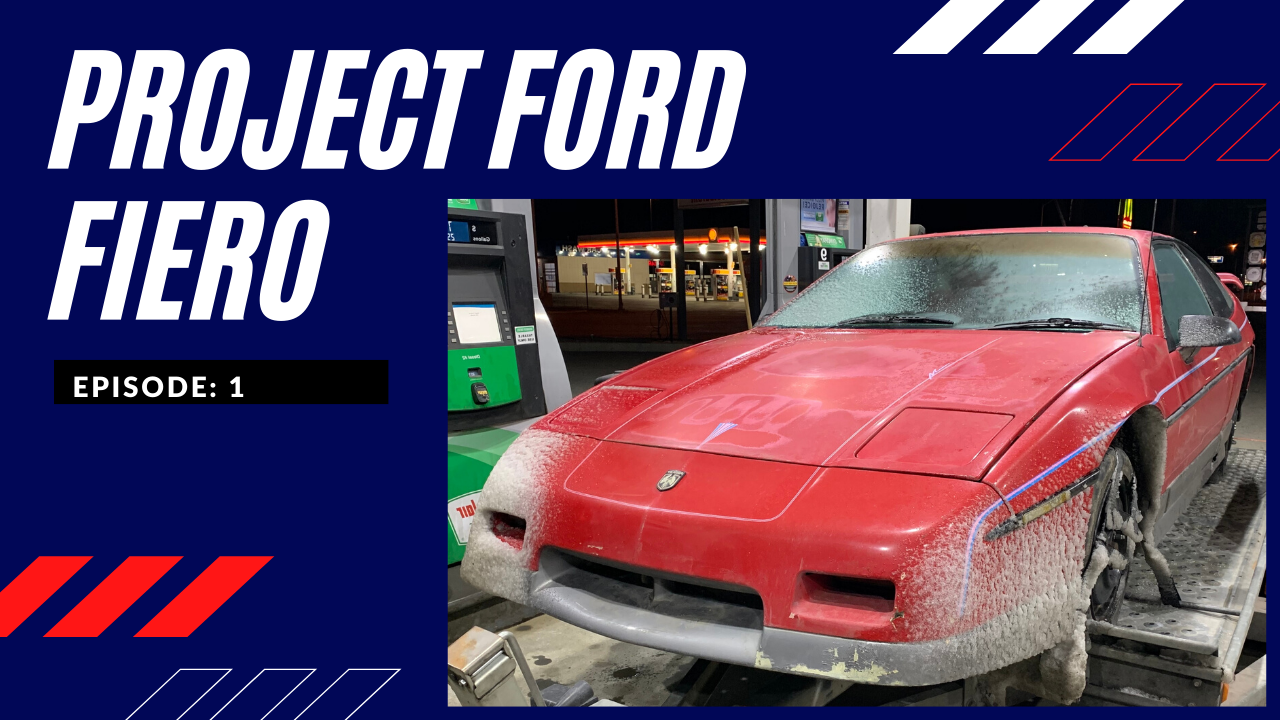
Whats up everyone, Sorry for the neglect here but Im starting up a new project now with a tentative 5 year goal for completion, though with how motivated my oldest son is I might be finishing this a head of schedule. lol Huge shoutout to Alex and Adam from LightspeedFieros for hooking me up with this car!
Timeline for the Project in years.
Strip to bare Chassis.
Frame modifications, Engine/Tranny setup and Wire management.
Suspension modifications.
Start body modifications.
Finish body mods and Final painting!
The plan is to take, in this case, an '86 GT, and modernize it inside and out with Ford parts and a 3.5L Eco Boost with the 6 speed Manumatic from a '18+ Ford Flex. Why Ford some may ask? Well, I don't particularly care for GM/Chevy parts and like Ford better. Everything Im wanting to do as far as the electrical modernization and engine/tranny swap sound extremely hard, but I plan to simplify it by reusing as much from a ford donor as possible, to include the body harness to keep everything simple. I have no issues with electrical work either as this will be as simple as lengthening or shortening sections of the old harness to fit in the fiero.
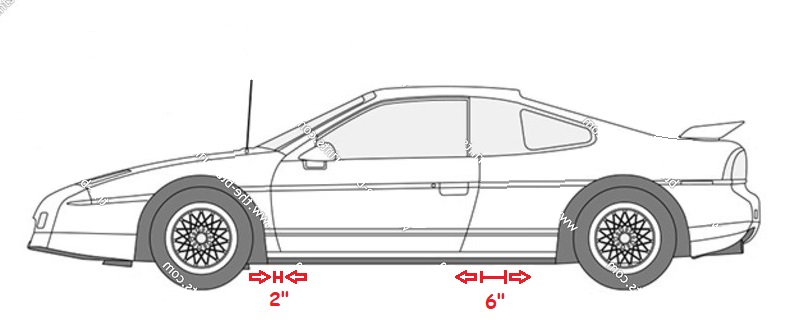
As far as the Body goes I will be stretching the engine bay to fit the DOHC 3.5l v6 but as to how much I am unsure of right now, but I don't plan to exceed a 6in stretch. Hopefully just a 2-4in stretch will be all that's needed. As well, I am wanting to move the front suspension back 2in max, but this is idea is not set in stone yet due to the complexity. Click to show
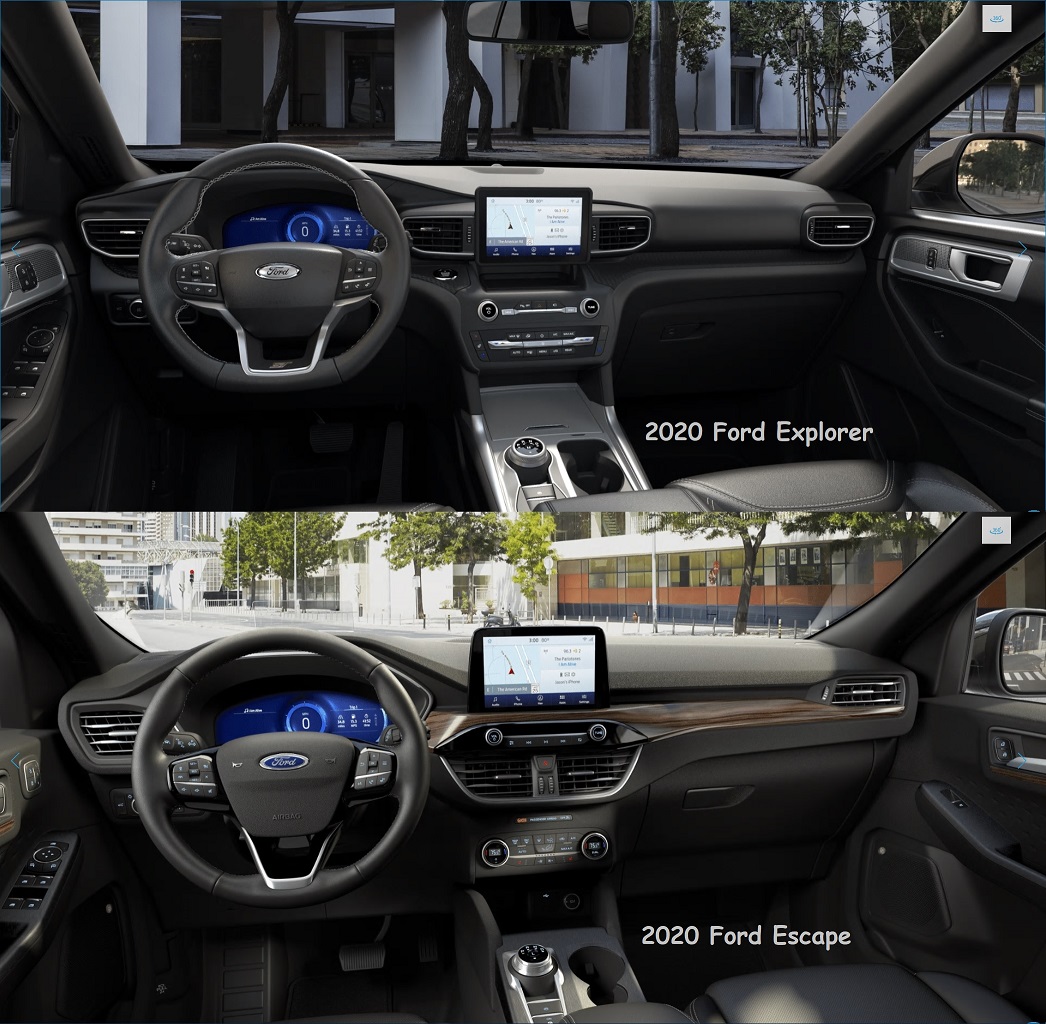
Interior wise Im looking into either custom fab'ing or modifying the '20+ Ford Explorer or Escape dash layout. Though Im leaning more towards the Explorer at the moment. Click to show
To Do List:
Strip down to the bare Frame.
Stretch Engine bay no more than 6in for Eco Boost and Tranny.
1-2in Choptop, not to exceed.
Modify Front and Rear suspension.
ect, Will add to the list as I remember or think of new things... XD
If anyone is in the Albuquerque area and want to lend a hand, shoot me a message and I would love the extra help. Especially in a few months when its time to start modding the frame! Looking forward to the discussion with everyone!
And to everyone reading, In regards to the prior Tombstoned projects, I am well aware of some of them with one of them being my old 86 SE. Let refrain from the negativity and lets keep it positive here! I suffer enough from depression and lack of motivation and don't need the constant reminders... Thanks I do appreciate the well wishes though!
I'll have the next post be the running list of YouTube vids as I post them.
------------------ Proud Owner of a 1986 Fiero GT
[This message has been edited by Halcyon25 (edited 03-21-2020).]
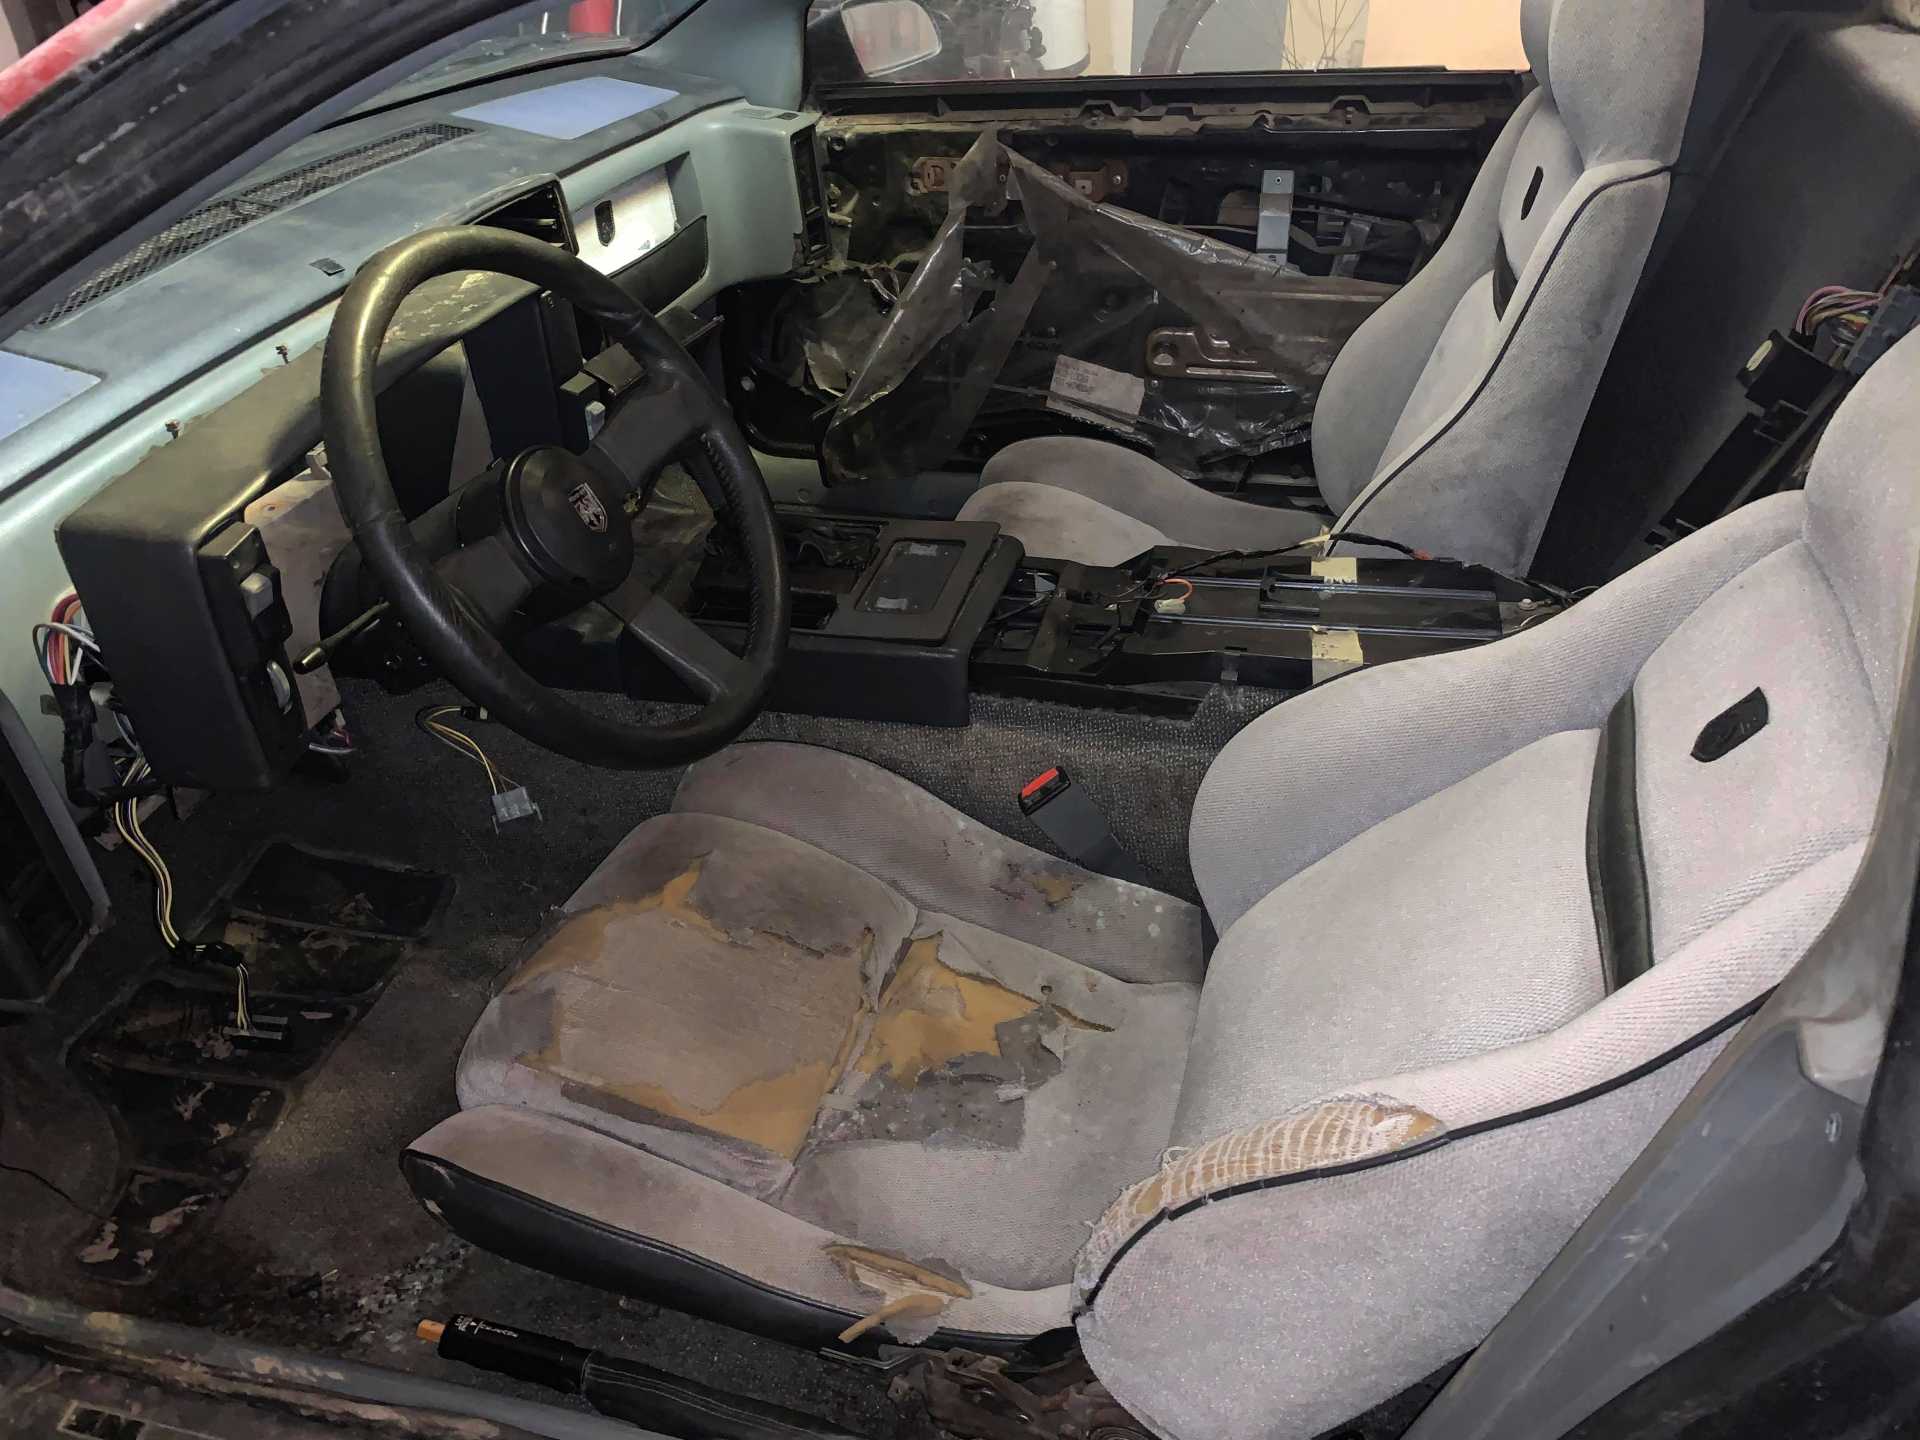
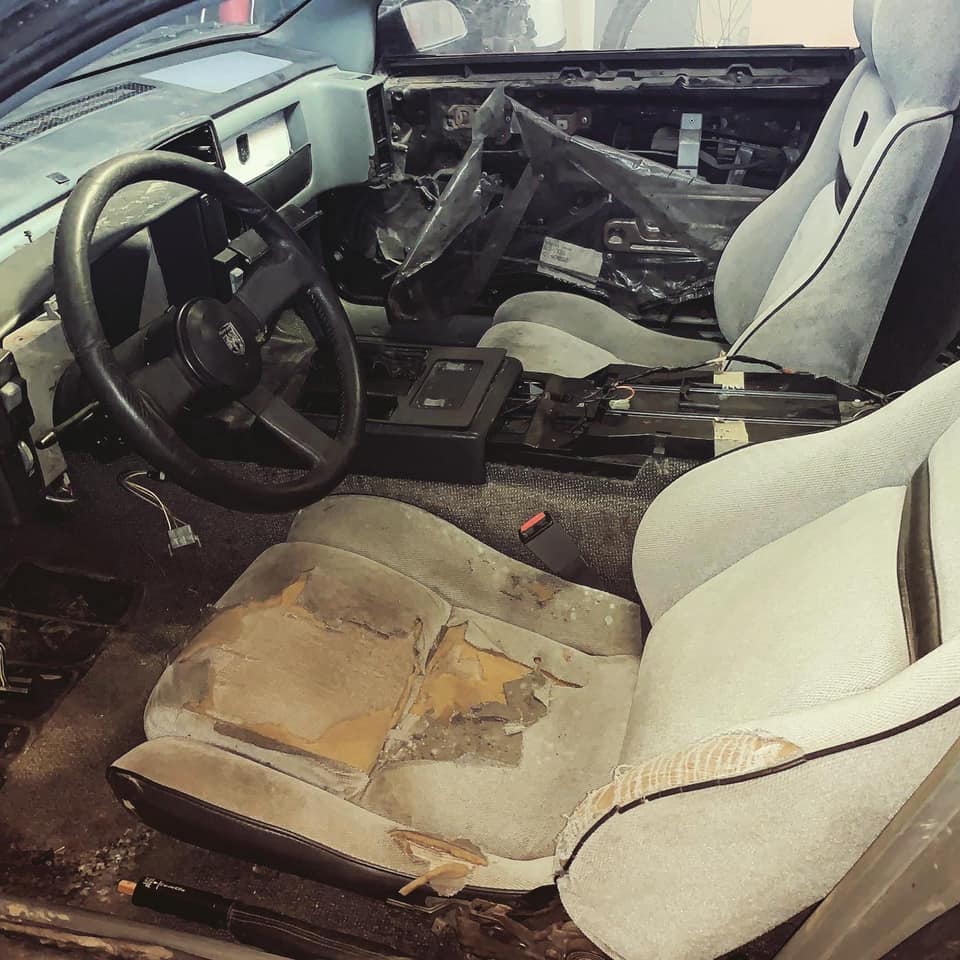
Started tearing apart the Interior today and called it quites for the day after we got the dash, trim and carpet out...Any suggestions on how to remove the Steering Column?
I like the 1-2 chop. I think the original roof line is to high. But why the engine bay and front suspension? Isn't the Flex a front wheel drive? Why move the front suspension back? If I were to move it, I would go forward an inch or so. This would give me more leg room.
I like the 1-2 chop. I think the original roof line is to high. But why the engine bay and front suspension? Isn't the Flex a front wheel drive? Why move the front suspension back? If I were to move it, I would go forward an inch or so. This would give me more leg room.
Agreed, always felt it seemed high as well and didn't think a short chop would detract from the original look much.
Engine bay stretch is to make room for the dohc 3.5l twin turbo'ed v6... Moving the front rearward though mostly has to do with personal preference, I don't like how far forward everything is and want to move them rearward to reflect the more exotic apperances. Also, Im 5'9" and in my previous 86 SE I had a lot of trouble finding a spot for the seat were I was comfortable with. Either the pedals were perfect but the wheel was in my chest (or it felt like at least), or the wheel was perfect and I had to reach for the pedals and I hated life... Love the car, just trying to make it more comfortable. I am also not worried about loosing the 2 inches as many of my taller 6+ft friends had more than enough leg room.
The Flex is AWD actually but yes its a fwd transverse setup.
A very ambitious project. As far as your time line goes, I'd be more inclined to say that when (if ever) it gets done, your son will be collecting social security.
Check out all the Construction Zone builds here that have failed to see the light of day, that were nowhere near as complicated as what you are proposing.
That being said, I do hope I am wrong and that you are successful. Good luck with the project!
Make sure you change the water pump on the ford 3.5 ecoboost, as I believe they put the water pump at the top of the V behind the timing cover so when the pulley bearing goes, driven by the timing chain, it dumps coolant into your oil system
Putting a gm twin turbo in myself which is about the same size and you should be able to fit the ecoboost without much bay modifications, even reroute the charge pipes..
I would recommend getting the electronics sorted, engine in and running before any serious frame mods begin. One phase at a time, keep the car drivable as much as possible..
As others have said, the list of tombstoned fiero projects is a bit disheartening...
Originally posted by msweldon: Make sure you change the water pump on the ford 3.5 ecoboost, as I believe they put the water pump at the top of the V behind the timing cover so when the pulley bearing goes, driven by the timing chain, it dumps coolant into your oil system Putting a gm twin turbo in myself which is about the same size and you should be able to fit the ecoboost without much bay modifications, even reroute the charge pipes.. I would recommend getting the electronics sorted, engine in and running before any serious frame mods begin. One phase at a time, keep the car drivable as much as possible.. As others have said, the list of tombstoned fiero projects is a bit disheartening...
Thanks for the tip, I'll definitely need reminded of this after I get the engine, probably sometime closer to winter hopefully... I would be ok if the engine fits fine with zero frame modding, but from what I've been glimpsing, I may need to do at least a 2in stretch, and if Im going to need to stretch it. I might as well stretch it to a comfortable length for everything, again though not to exceed 6in... Electronics setup is, on paper at least, already sorted and any modifying to them is dependent on the changes to the frame I make. But you're right, one step at a time... First step right now is gutting and cleaning. next up is getting the engine and making any mods to the frame that are needed. In the Short term I plane to reuse the current fiero suspension so I can roll it around places but They will all get modified later in favor of a better setup and performance as well as custom knuckles for modern hub bearings...
And to everyone reading, In regards to the prior Tombstoned projects, I am well aware of some of them with one of them being my old 86 SE. Lets refrain from the negativity and lets keep it positive here! I suffer enough from depression and lack of motivation and don't need the constant reminders... Thanks I do appreciate the well wishes though!
[This message has been edited by Halcyon25 (edited 03-21-2020).]
I did an LS4 in an 88, I used the entire wire harness from bumper to bumper. Doing this saved me some issues but created others. I used all of the electronics from the donor car like the gauges, radio. HVAC, and window/headlight switches. This mentioned that I installed the need computers to run the added systems. I also installed electronic adjustable pedals that made driving long distance easier. I even have remote engine start, anti-theft system remote door locks and trunk release. Along with all of the new stuff that comes with the modern car, I now have automatic headlights, one touch windows, entry lights and the headlights stay on for a few seconds after I get out of the car so I have light as I walk away from the car at night. It is all super cool, but add more challenges to the build. Like the new automatic HVAC system, it tune on and cools the car as I am walking up to the car and is set by temperature and maintained by computer. This mentioned that a lotry of fab work went in rather than wire and computer converting. It is a tradeoff.
Sounds like an awesome project, but as Rickady88GT says the plan to swap everything from the Ford vehicle to the Fiero chassis is a lot of work well beyond just shortening and extending the wires. His build thread is full of information: https://www.fiero.nl/forum/Forum3/HTML/000114.html
Having all the new car features would be cool to some and over the years several people have added in the BCM and other sub systems to install some of these newer features. Only a small handful have gone to the extent that Rickady88GT went and you are planning to go.
You likely can install the engine into the Fiero w/o all the electrical complexities and have the car running much sooner. Then you could add the other electrical features after you have started to enjoy the car.
You are not "to" far from me! If I am ever in that area I will try and reach out. Will be watching your build.
Sounds great Spades! Im always down for meeting up with fellow hobbyists!
quote
Originally posted by Rickady88GT:
I did an LS4 in an 88, I used the entire wire harness from bumper to bumper. Doing this saved me some issues but created others. I used all of the electronics from the donor car like the gauges, radio. HVAC, and window/headlight switches. This mentioned that I installed the need computers to run the added systems. I also installed electronic adjustable pedals that made driving long distance easier. I even have remote engine start, anti-theft system remote door locks and trunk release. Along with all of the new stuff that comes with the modern car, I now have automatic headlights, one touch windows, entry lights and the headlights stay on for a few seconds after I get out of the car so I have light as I walk away from the car at night. It is all super cool, but add more challenges to the build. Like the new automatic HVAC system, it tune on and cools the car as I am walking up to the car and is set by temperature and maintained by computer. This mentioned that a lotry of fab work went in rather than wire and computer converting. It is a tradeoff.
Hey Rickady! Love your build and have been following it for the last 10 or so years now. That's the plan here too, everything electrical and the full harness is coming out and going into my GT, minus the airbags if I can. Im looking forward to the challenge though, the small fab work for new brackets sounds fun and relatively easy in the grand scheme of the project. Versus the modification of the wire harness which Im not looking forward to and will be extremely tedious for me.
quote
Originally posted by fieroguru:
Sounds like an awesome project, but as Rickady88GT says the plan to swap everything from the Ford vehicle to the Fiero chassis is a lot of work well beyond just shortening and extending the wires. His build thread is full of information: https://www.fiero.nl/forum/Forum3/HTML/000114.html
Having all the new car features would be cool to some and over the years several people have added in the BCM and other sub systems to install some of these newer features. Only a small handful have gone to the extent that Rickady88GT went and you are planning to go.
You likely can install the engine into the Fiero w/o all the electrical complexities and have the car running much sooner. Then you could add the other electrical features after you have started to enjoy the car.
Yep, That's the plan. Unfortunately with Ford, they require everything or nothing, unlike GM/Chevy were you could get away with just the engine/tranny swaps with minimal effort. Everything is routed through a CamBus system and everything talks with each other to an extent. So its generally easier to swap something into a ford than it is to swap the ford into something else unless everything is coming over.
Cool, I will be watching. BTW I highly recommend that you get the entire donor car for a project like this. That way all the electronic parts are already compatible. This would have saved me some time on my project.
As amussing as it looks RichLo1, I can only promise that they'll be there until I start working on the suspension.
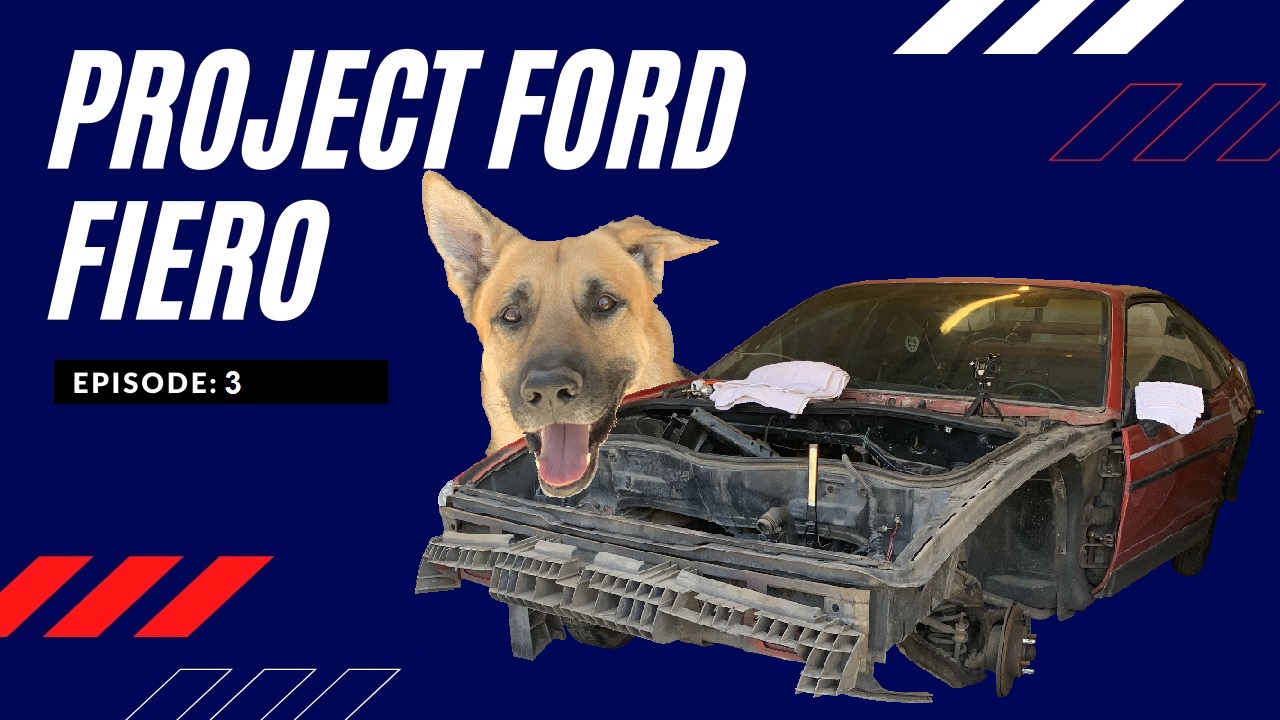
Update on the build, finally...
Continuing work on my '86 GT... Todays episode focuses on stripping the larger panels from the Interior! Sorry for the delay, I had planned to post this two weeks ago but at that time all the schools decided to close for Covid-19 and it took awhile to fall into a normal routine.
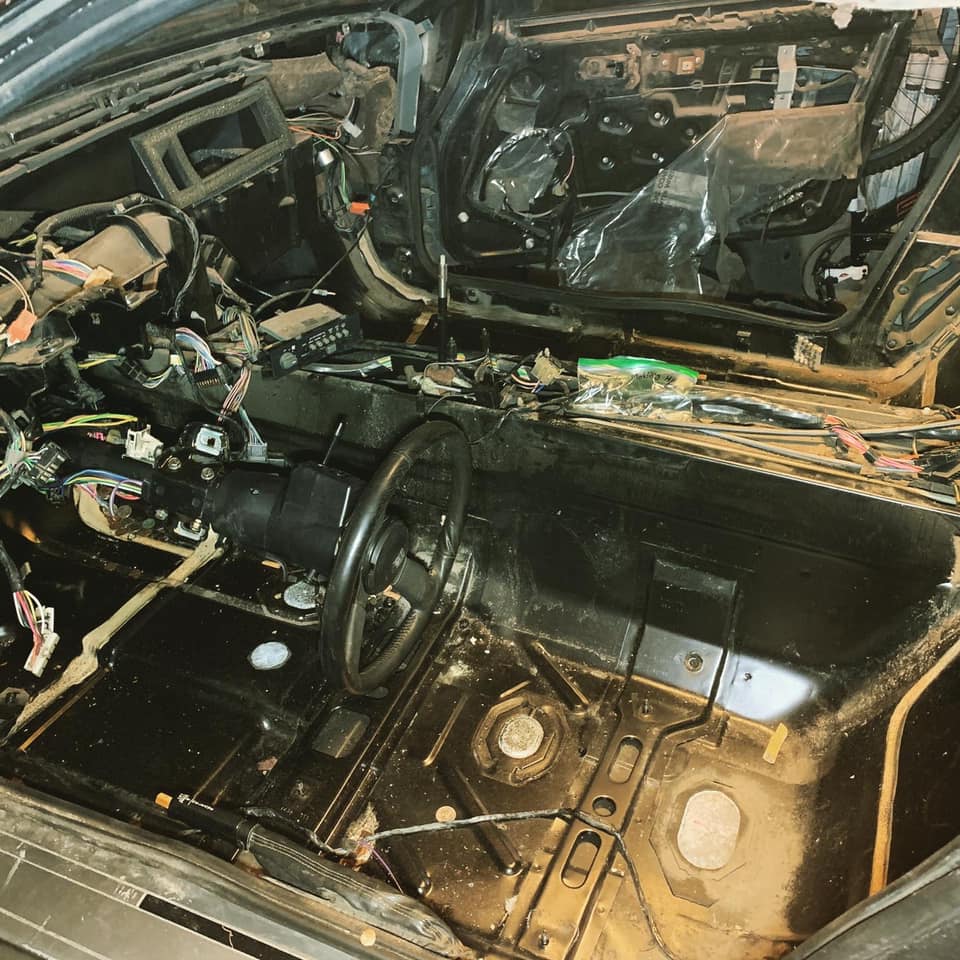
Also as I tear stuff out of the car, if there's anything you guys see that you want/need, hit me up and we'll work out a deal. A lot of the stuff coming out is in great condition and just isn't needed. like the interior trim, dash, Center console, any wiring harness, carpets, etc...
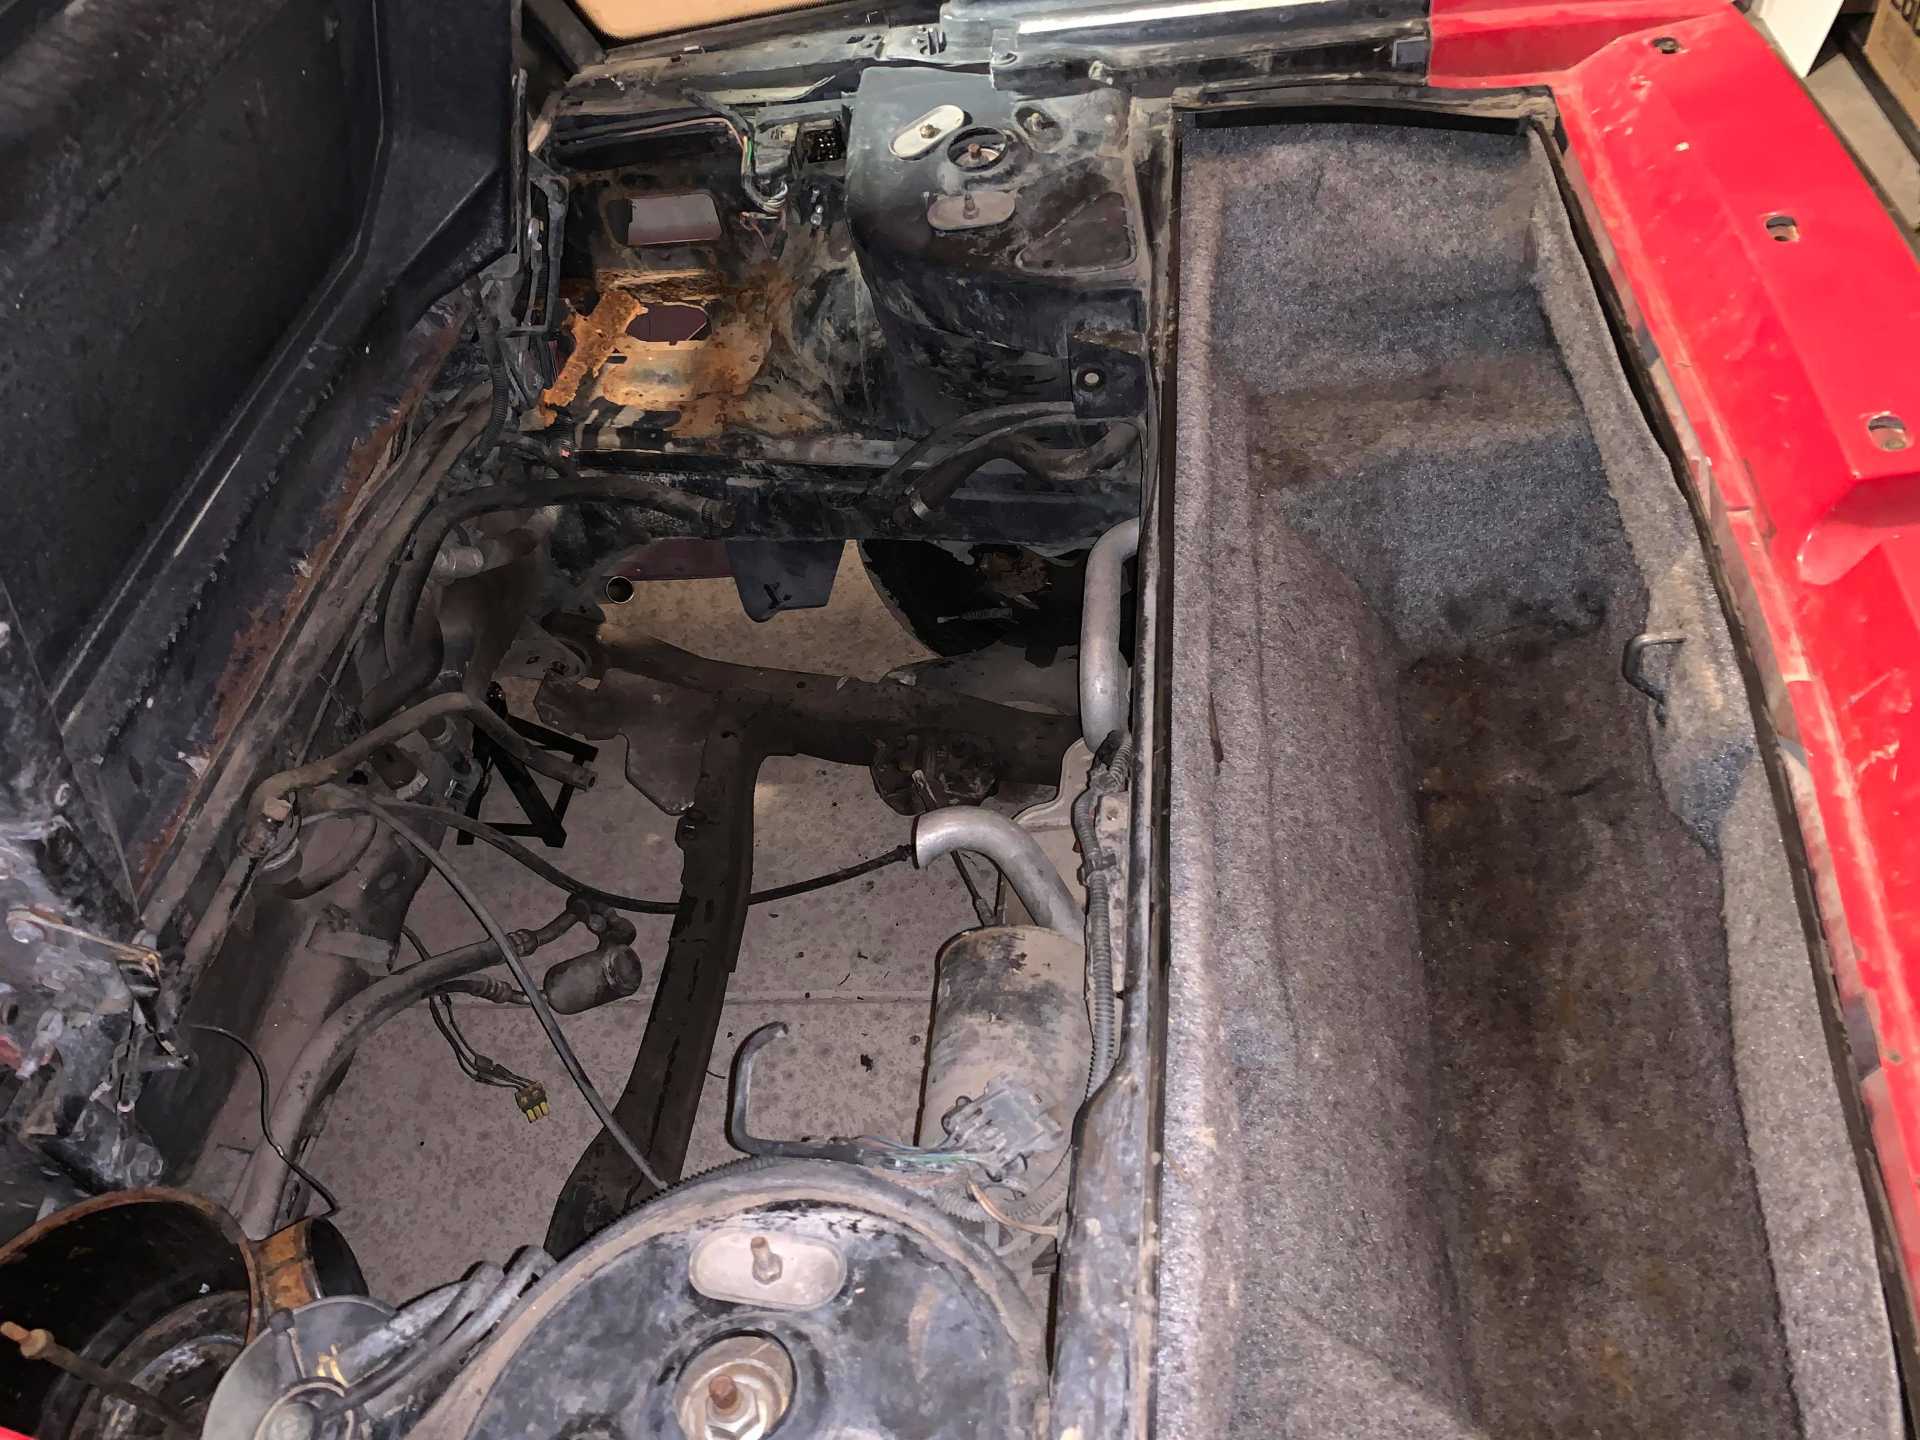
Small progress update... Got the brake booster and cylinder out as well as the spare tire tub out.
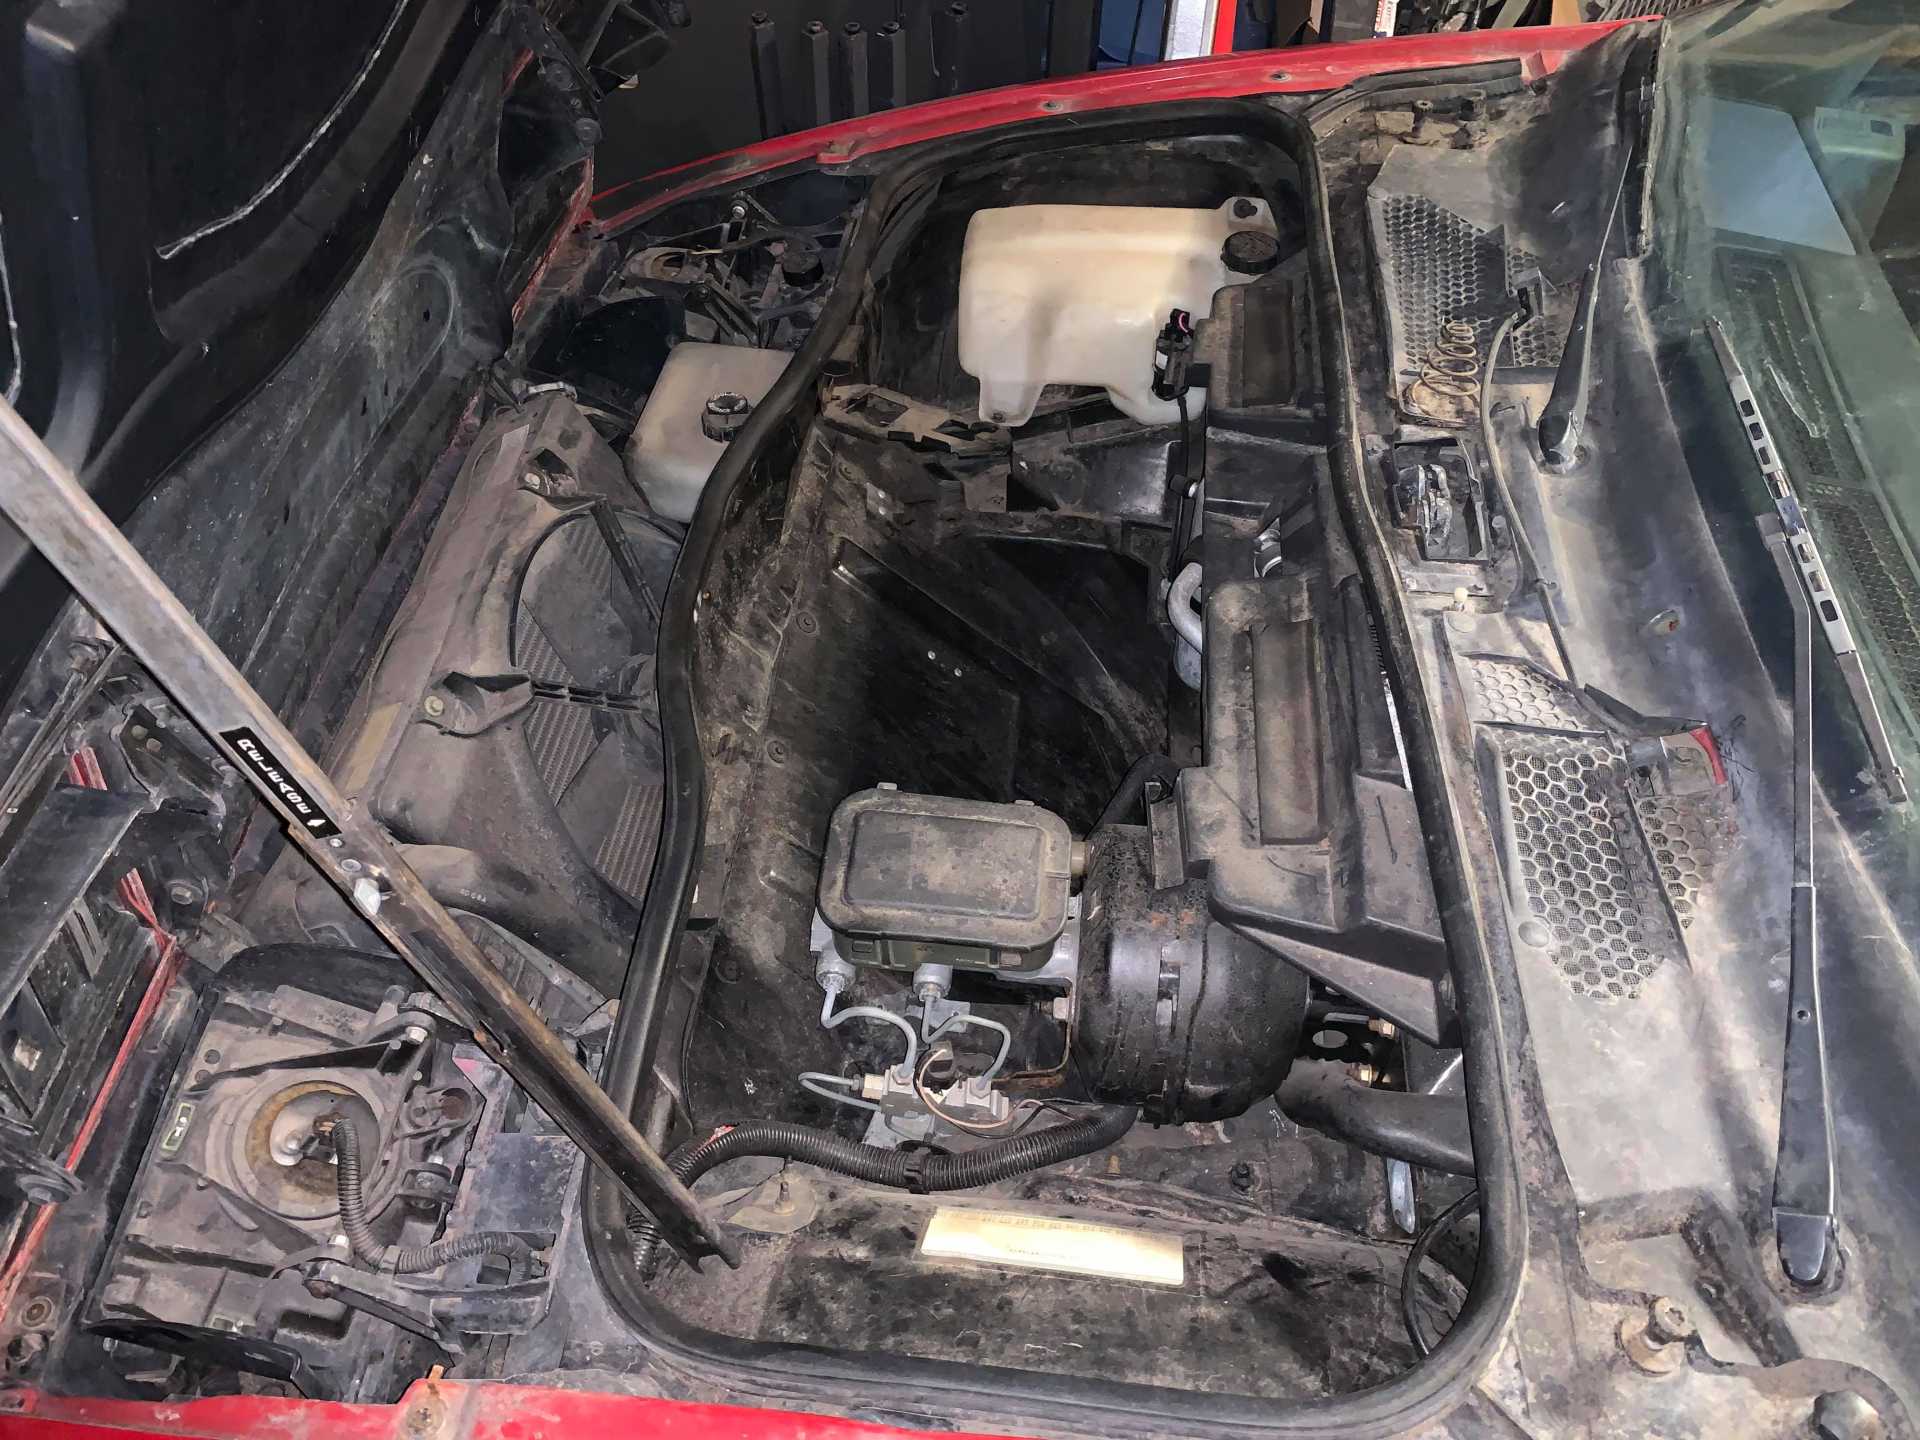
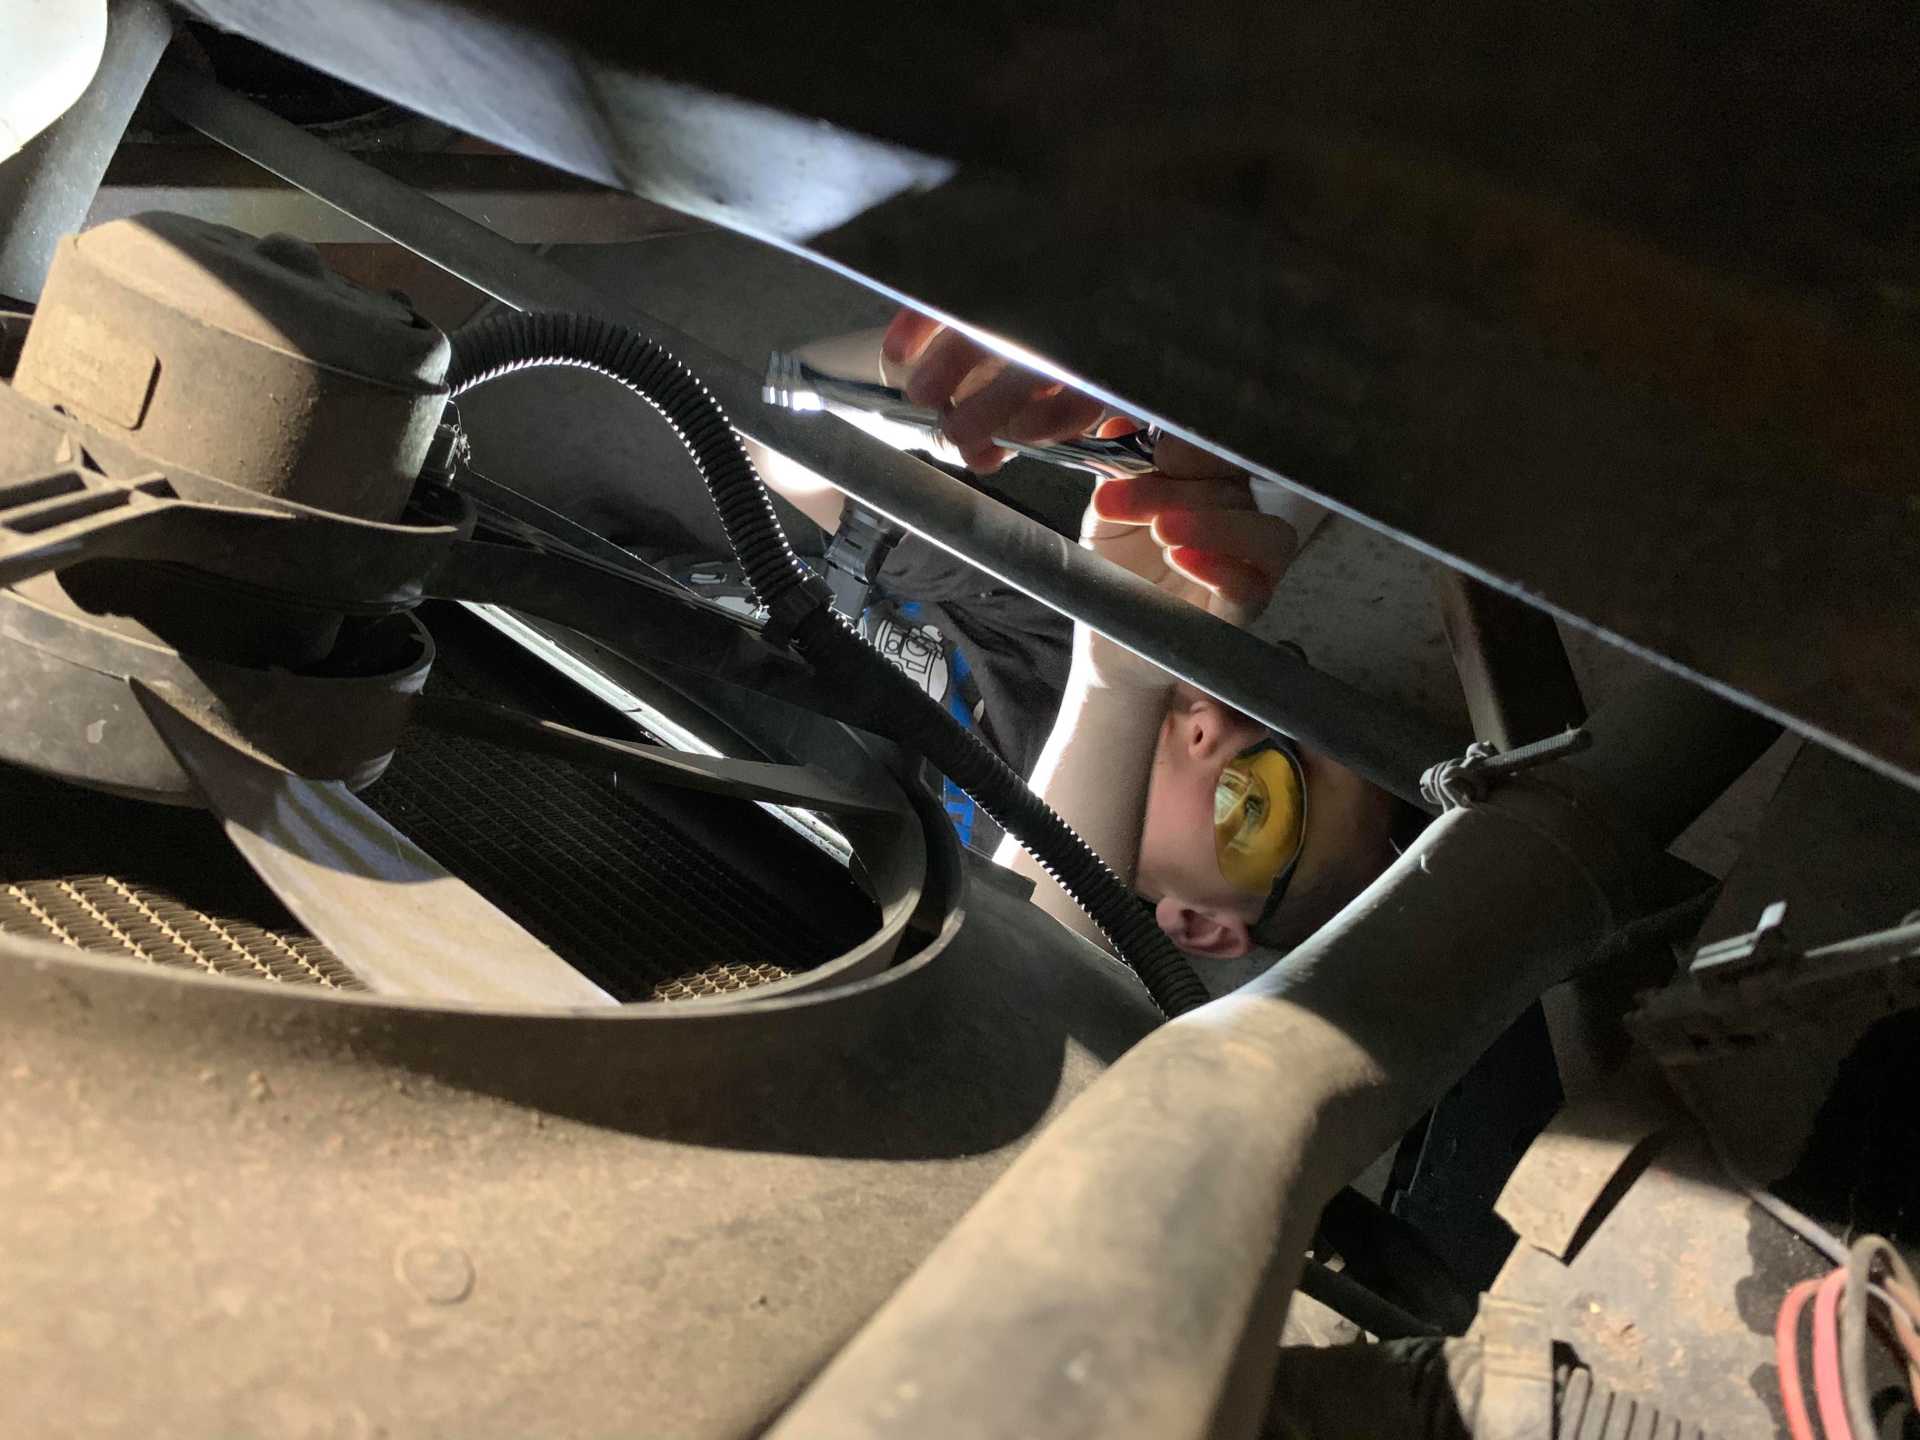
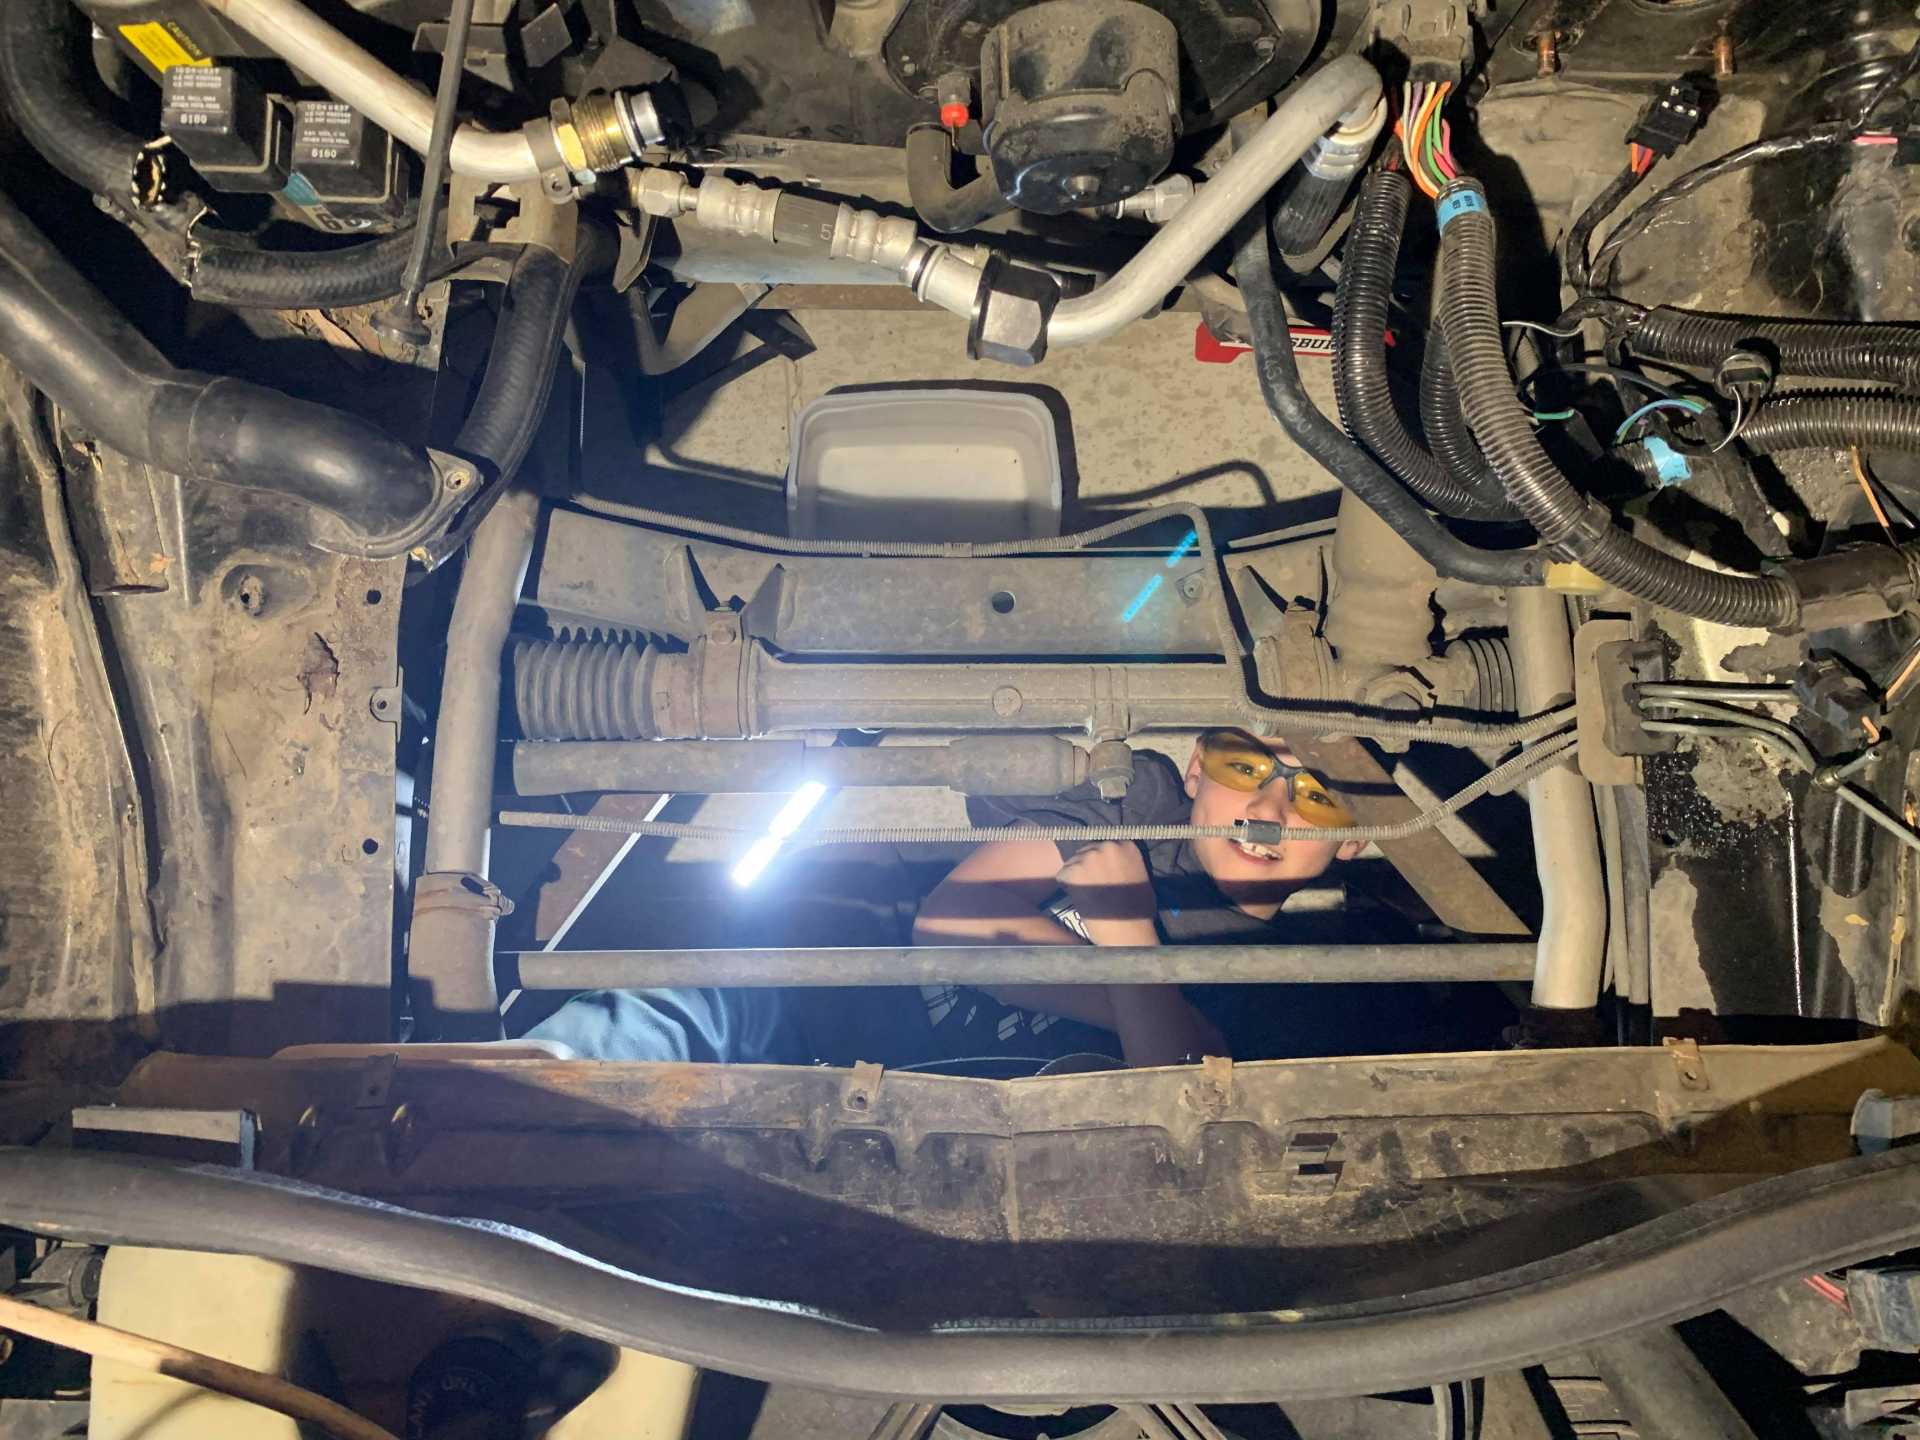
Really struggling to remove the entire air ducting unit. I have all the bolts removed from the frunk side and its loose, but it wont move past an inch and Im not seeing anything in its way... Any advice?
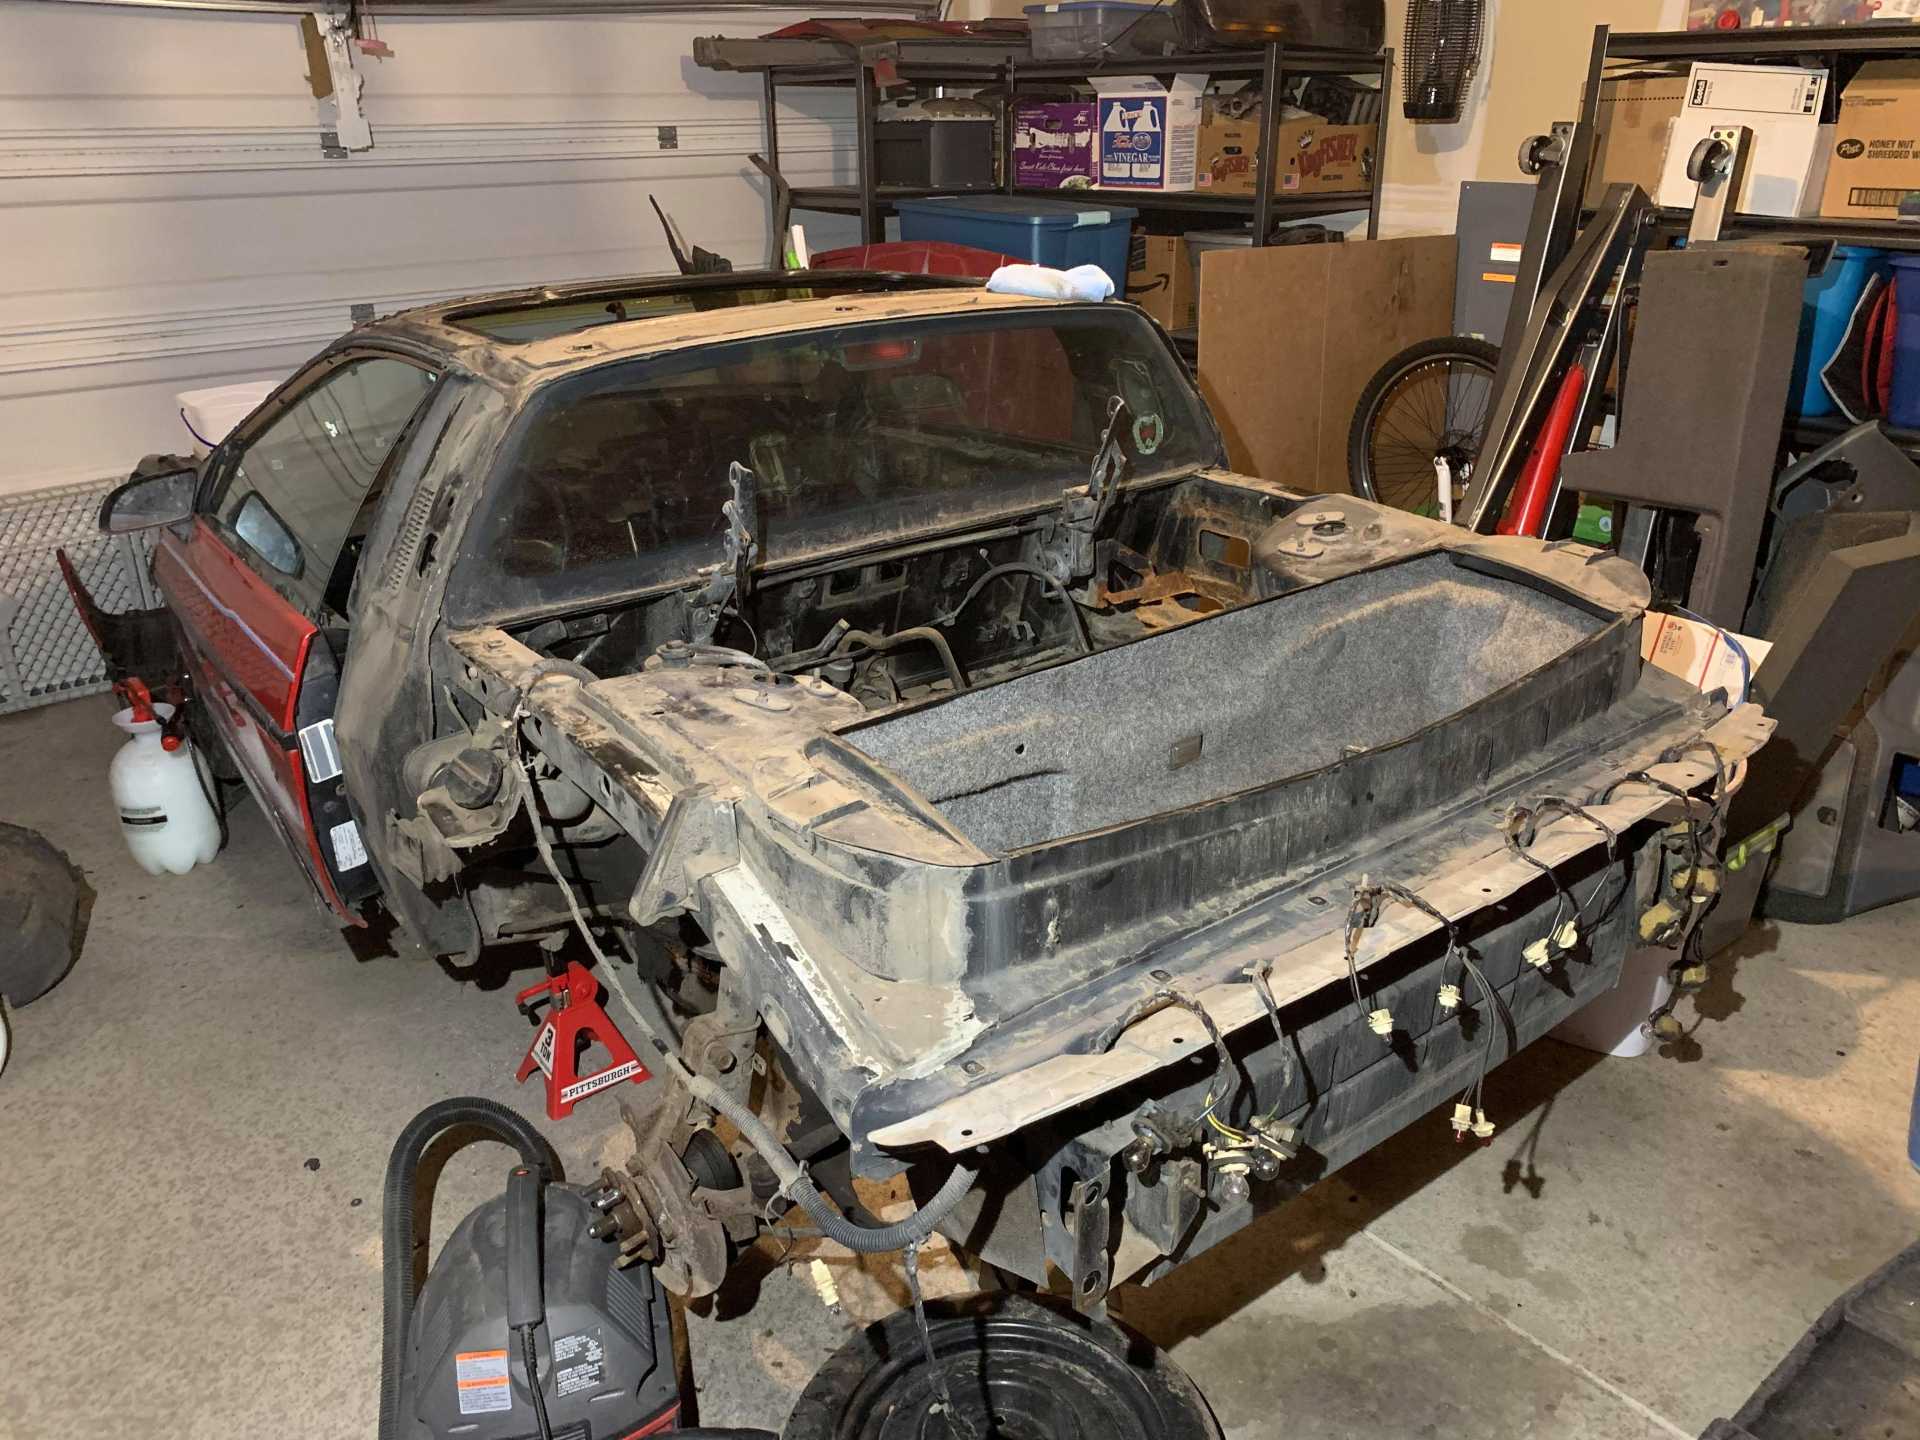
So this topic doesn't look like I up and quit on this, Heres an update photo while I work towords the next video! Managed to remove all of the forward body panels and most of the supporting brackets.
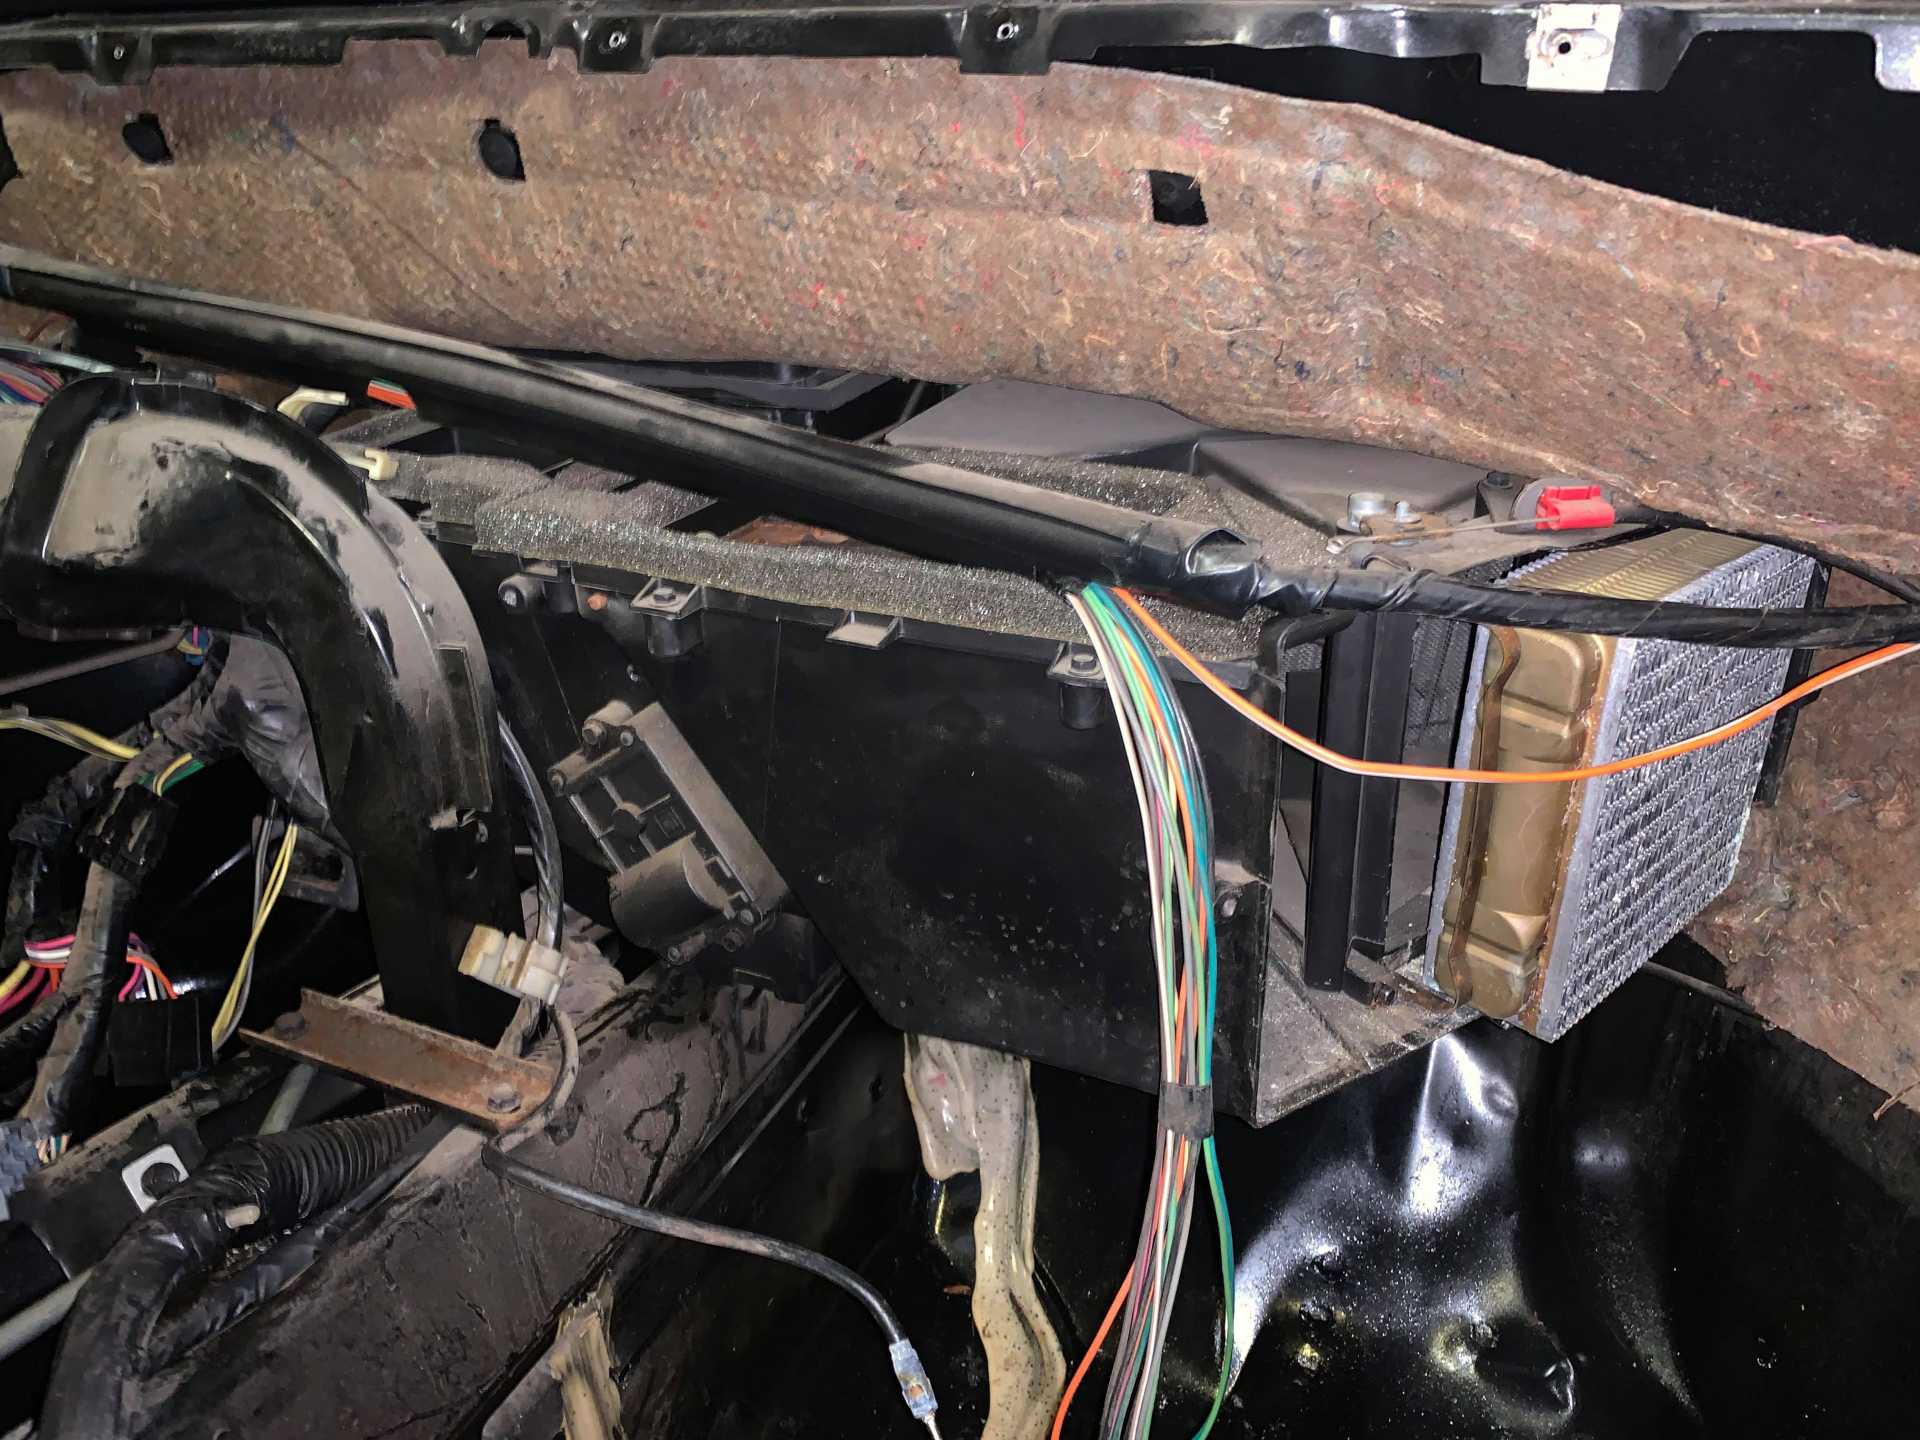
I guess I forgot to give an update on the air ducting too... I managed to get it out. For some strange and stupid reason, it was easier to remove with the blower and AC removed then it was as a full unit... but whatever, its gone now for awhile... lol
[This message has been edited by Halcyon25 (edited 05-06-2020).]
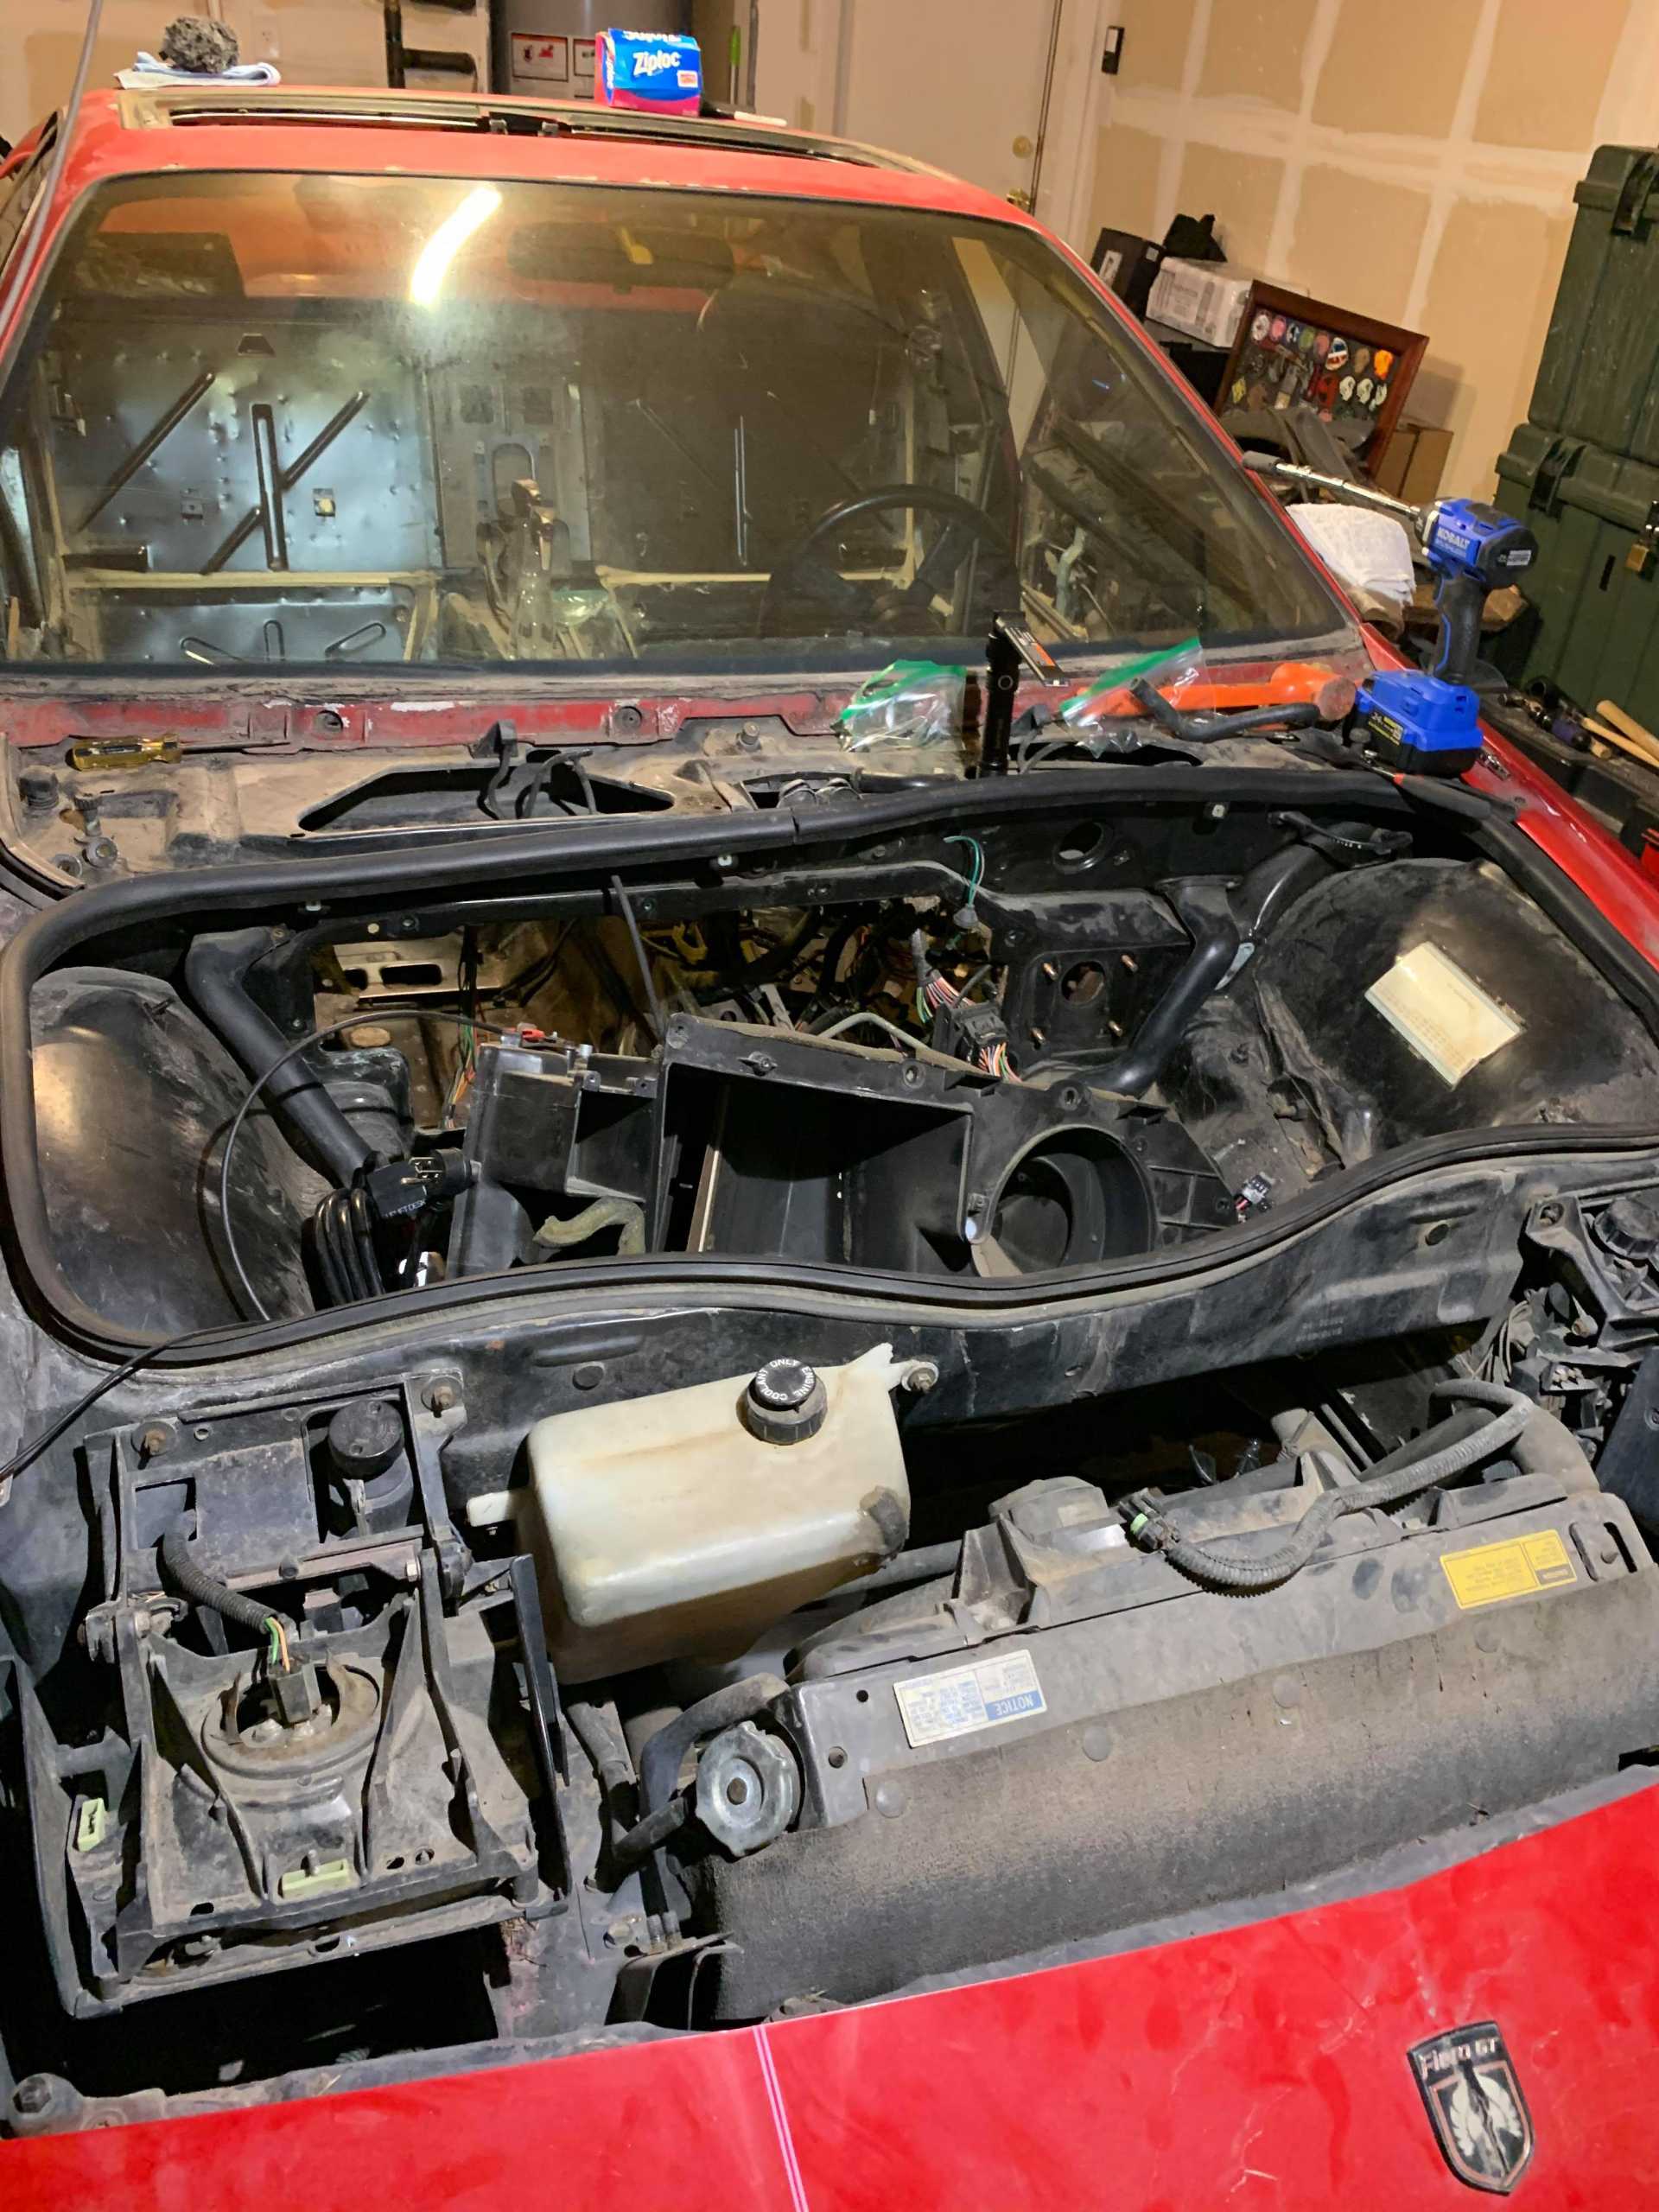
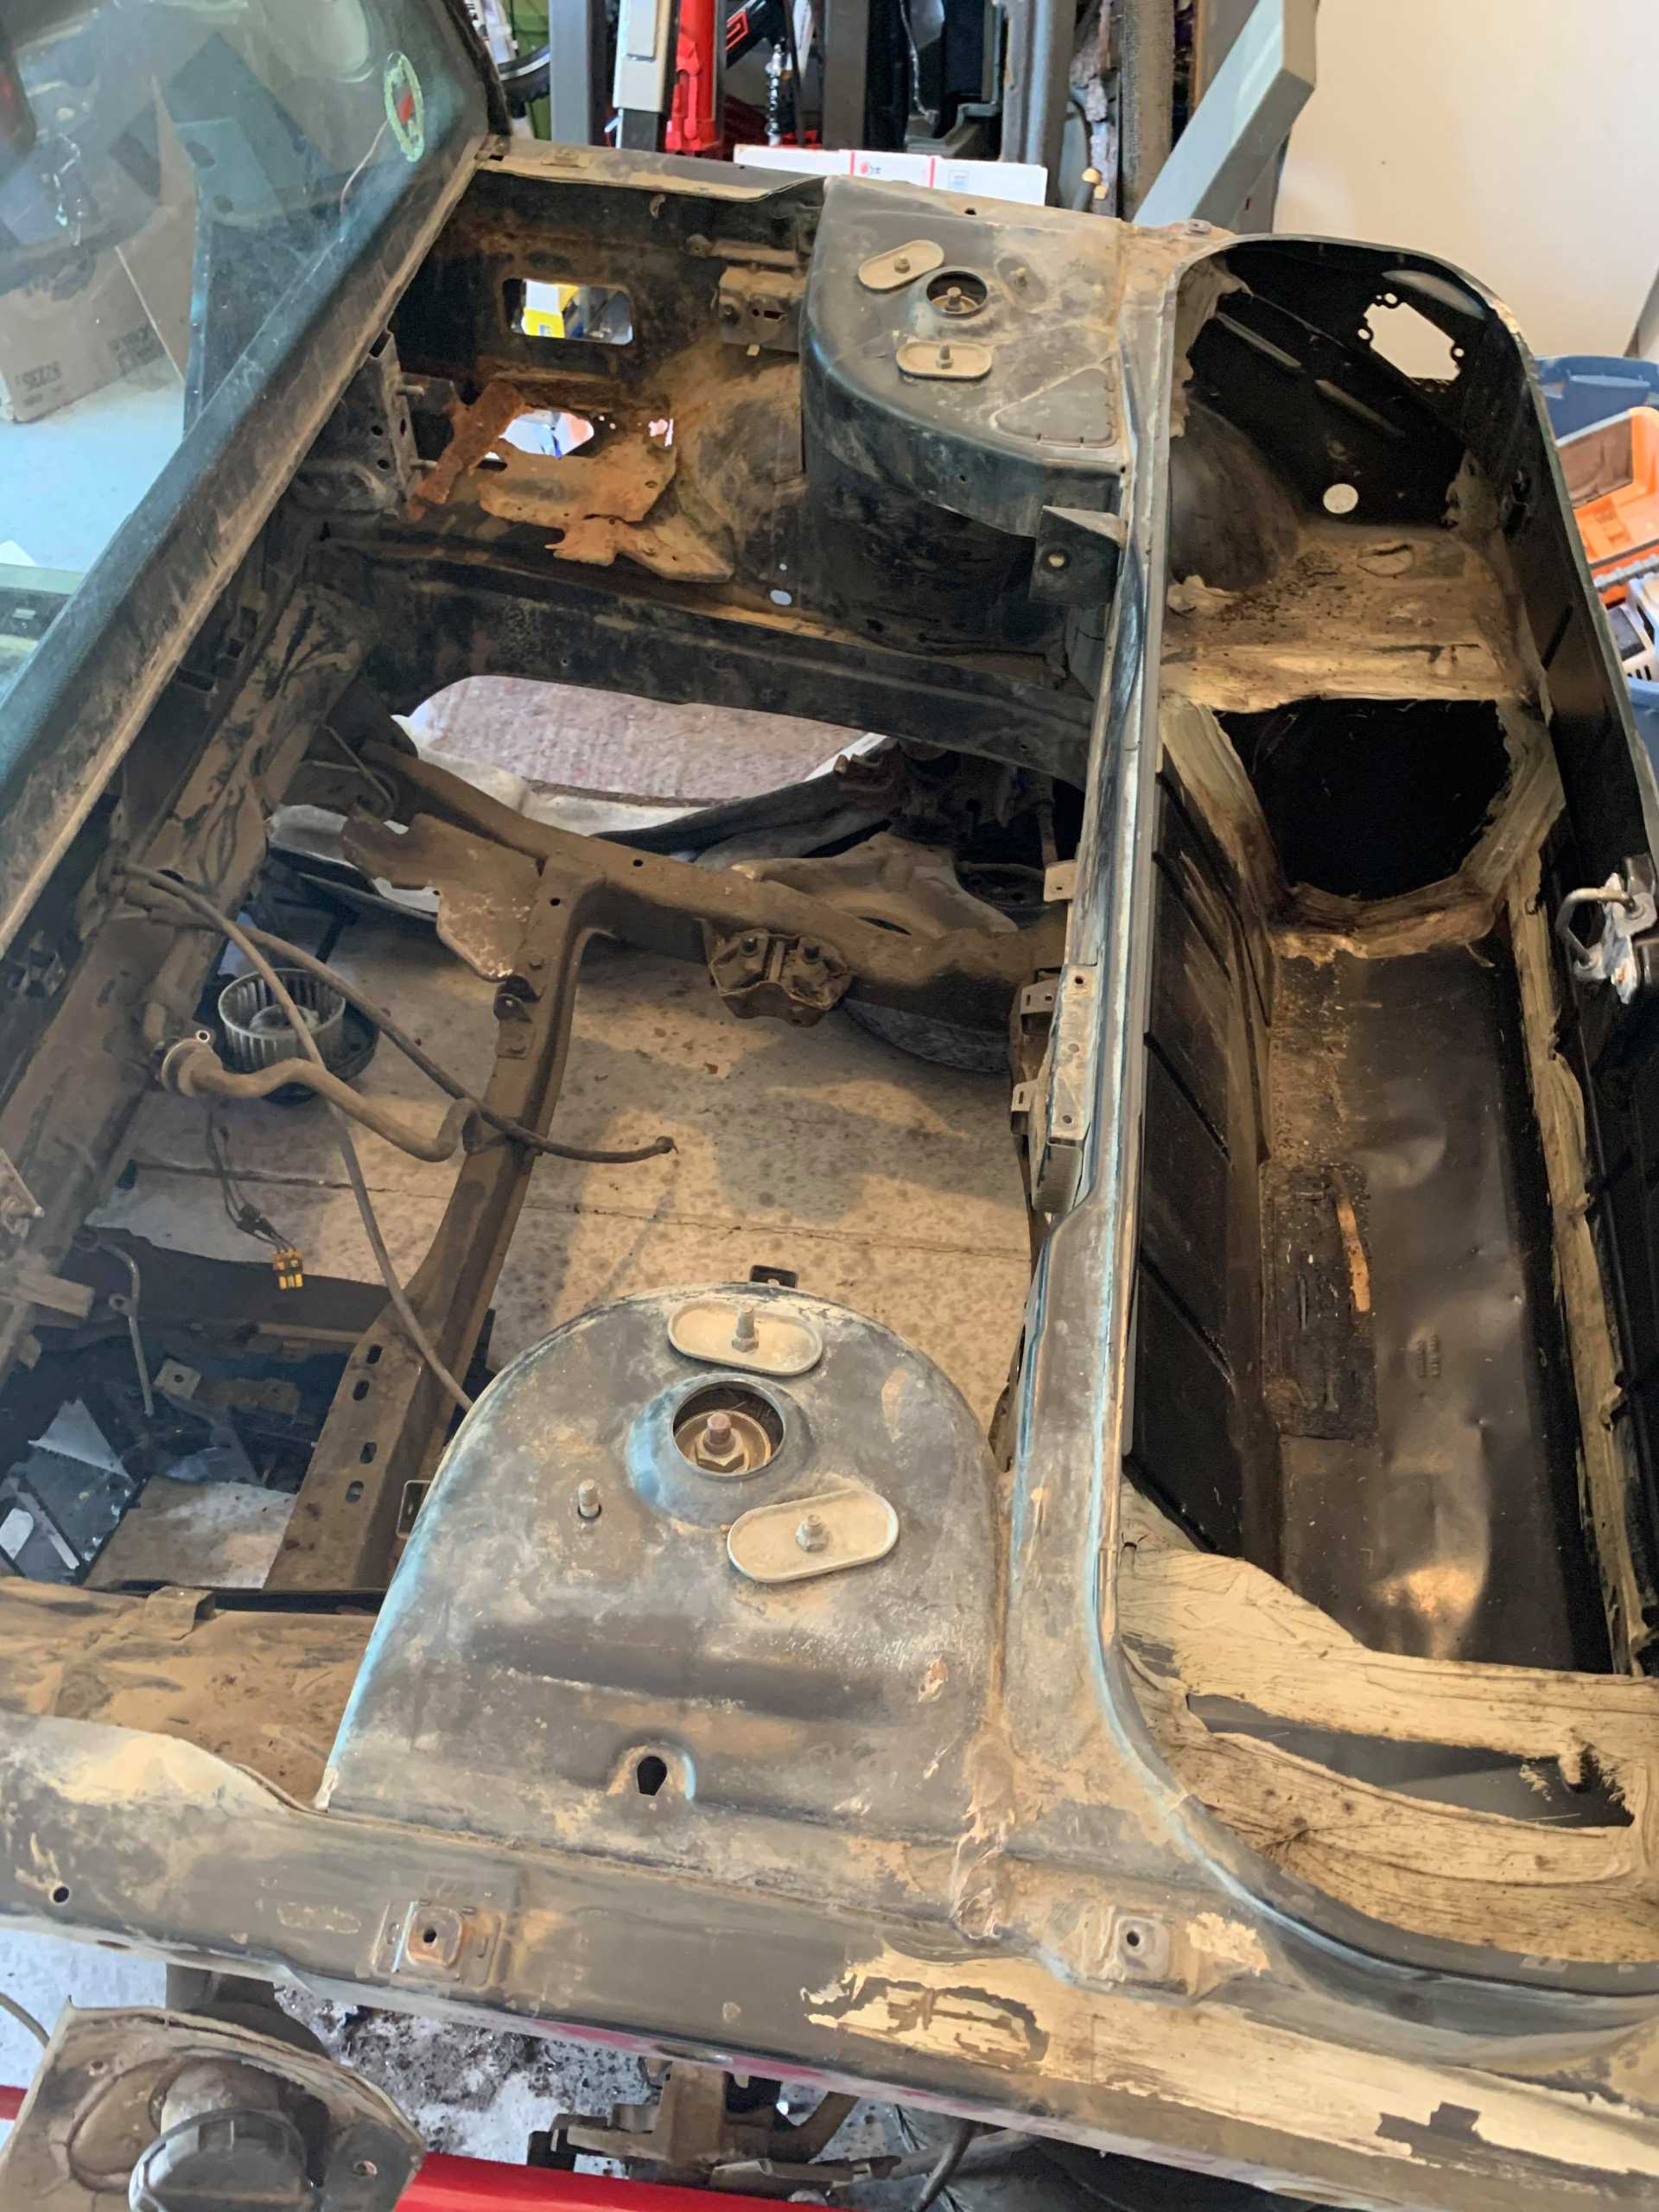
Making some considerable progress on the disassembly stage. Just finished up stripping everything in front of the forward firewall and will have the update video posted tomorrow!
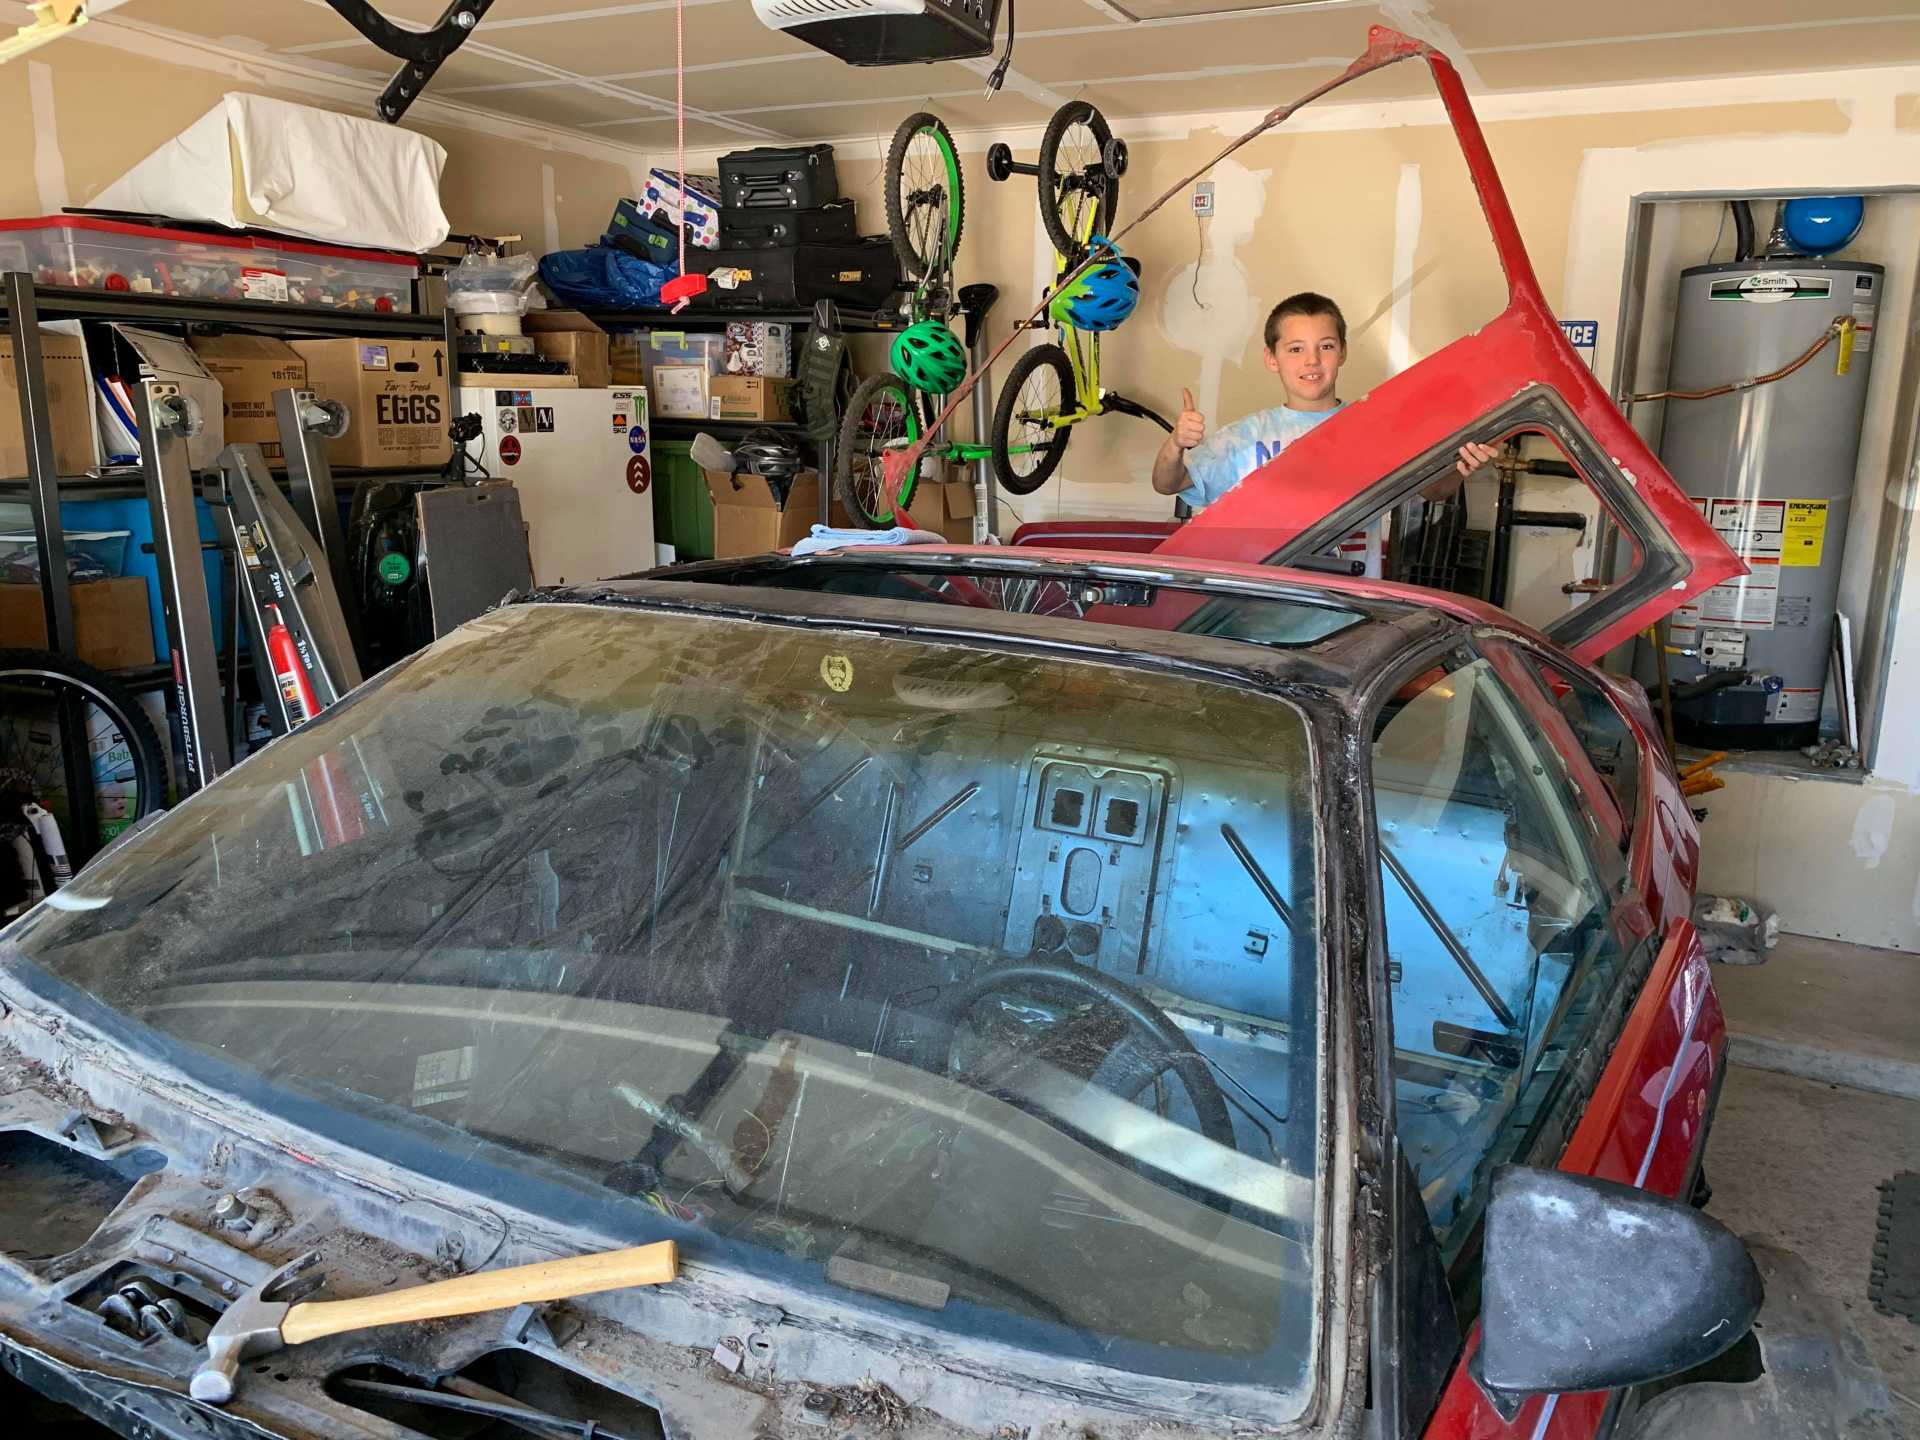
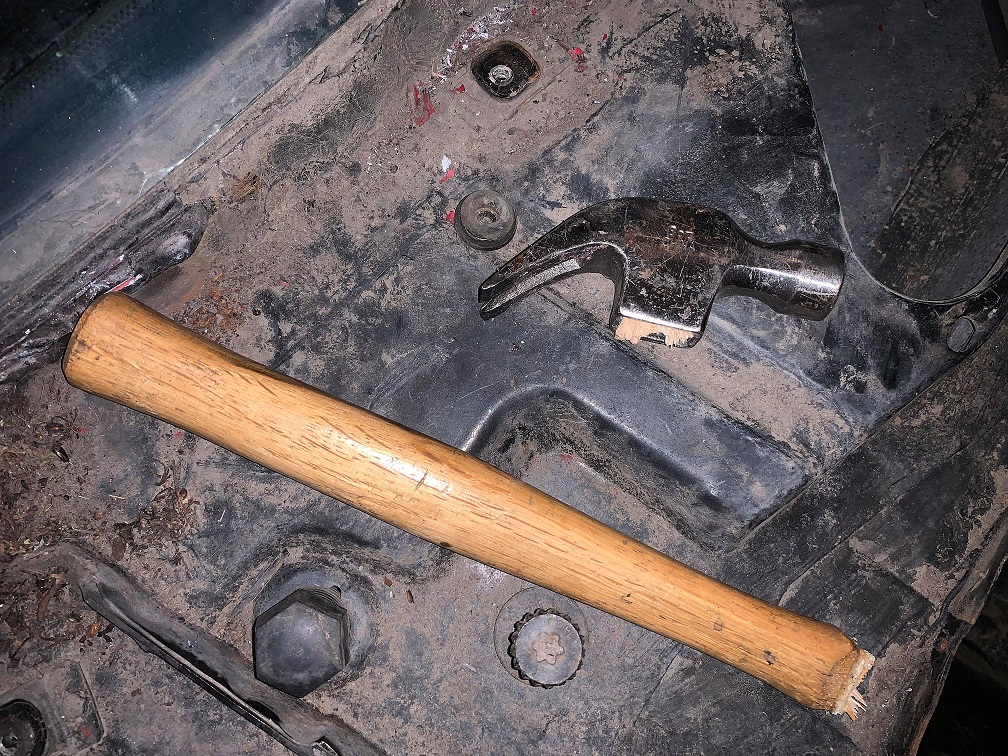
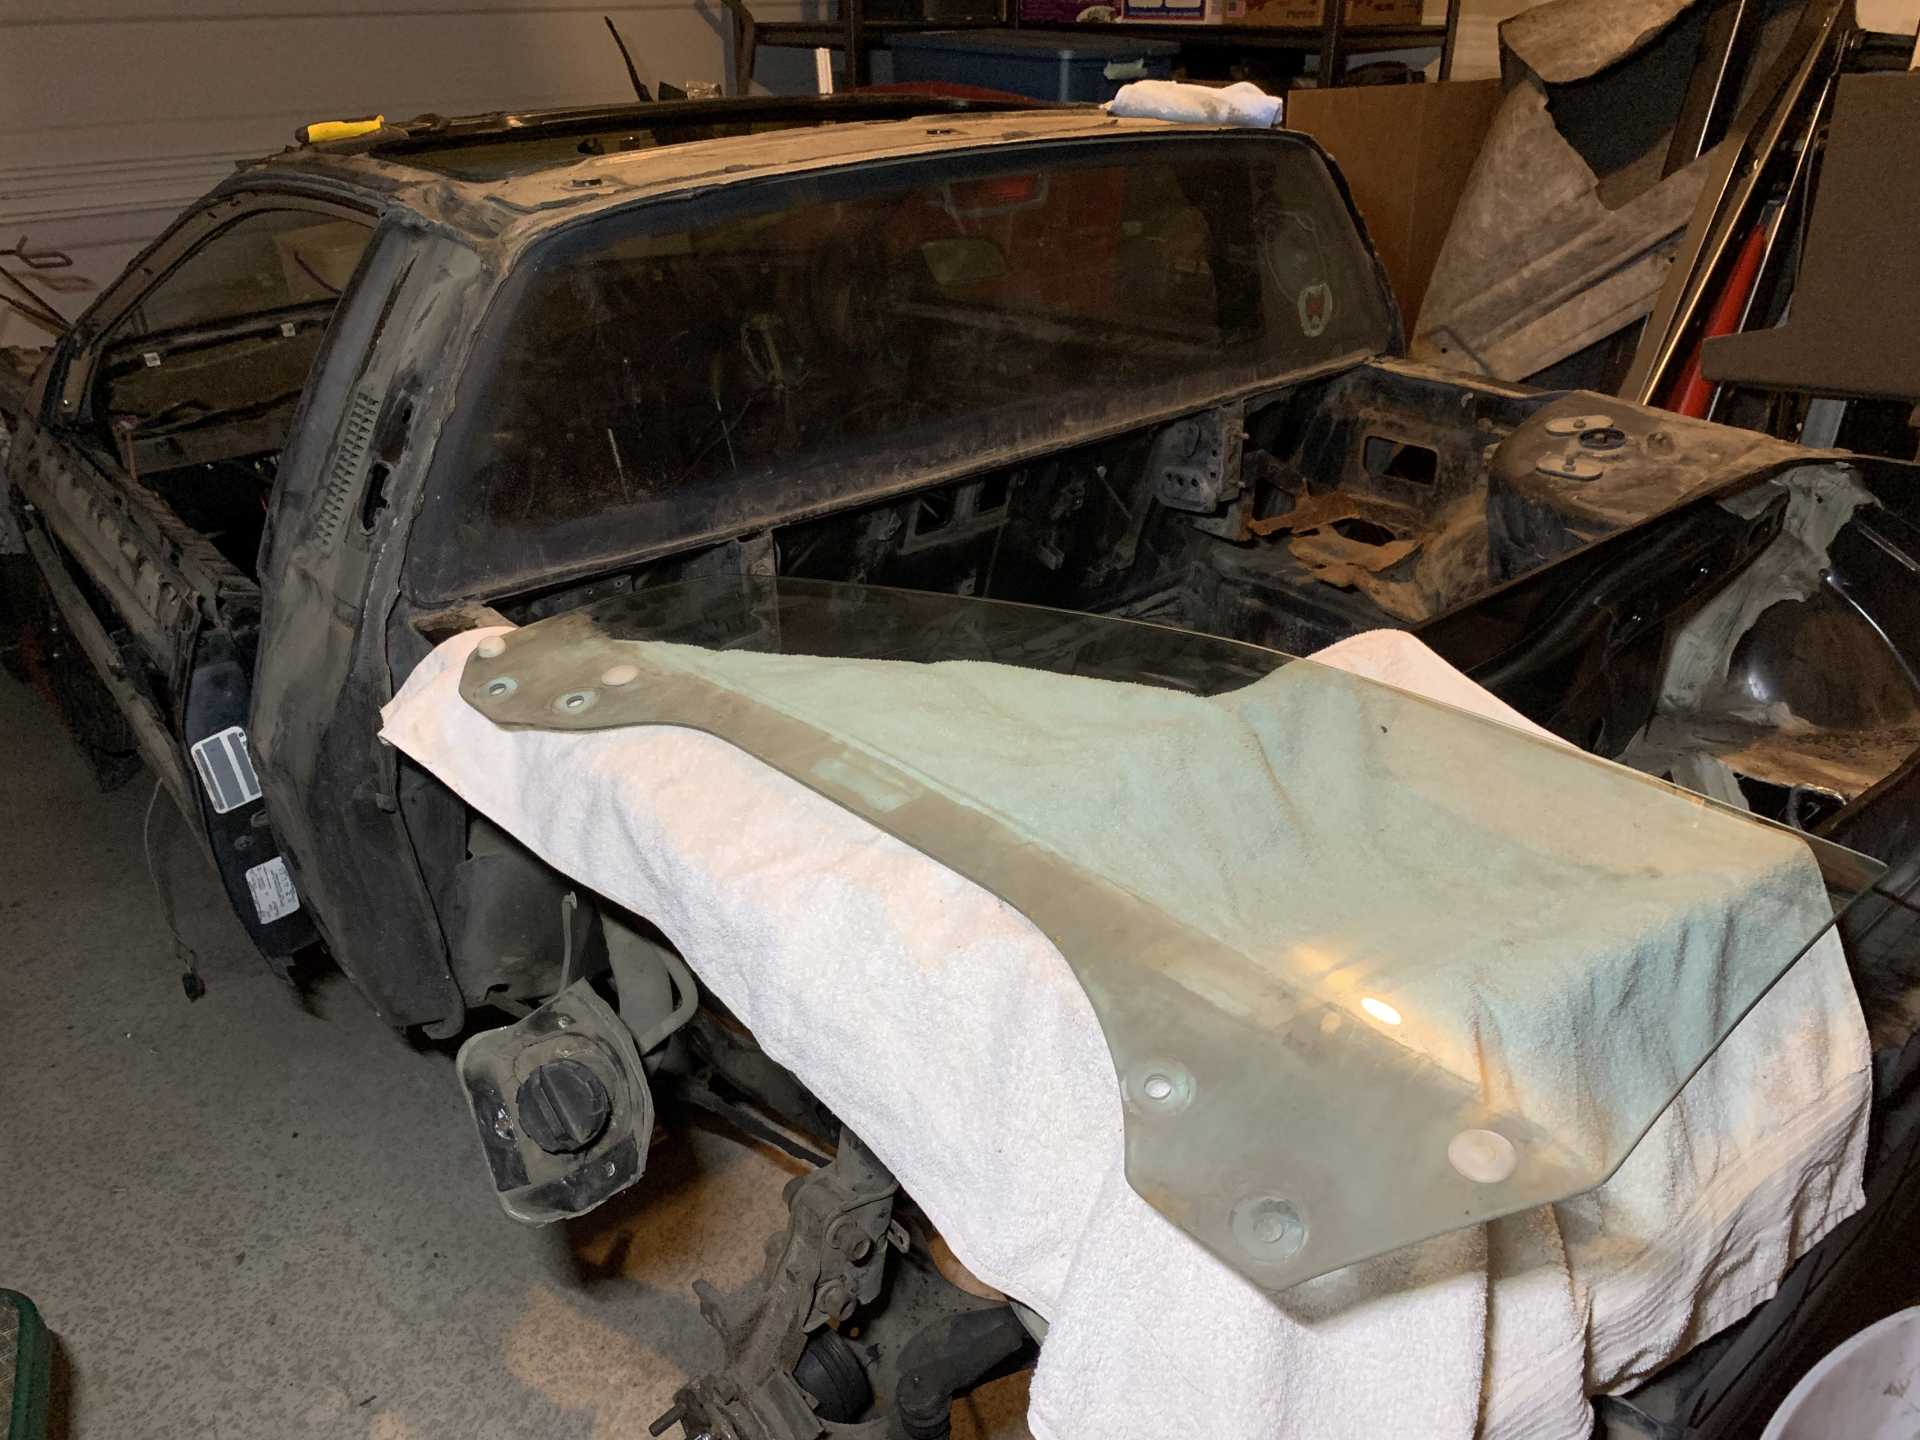
Bit of an update... Managed to remove the Roof panel off first try without breaking any part of it... Only had to sacrifice one of my hammers in the process... XD Also got the Fastback panel off as well.
Not to worry, I haven't given up or abandoned her just yet... XD Just havent been working on her as often with how hot its been getting lately so mostly just putsing on the easy stuff until it starts to cool off. Just about everything from the engine bay is out except for the shifter and accelerator cables and E-brake lines...
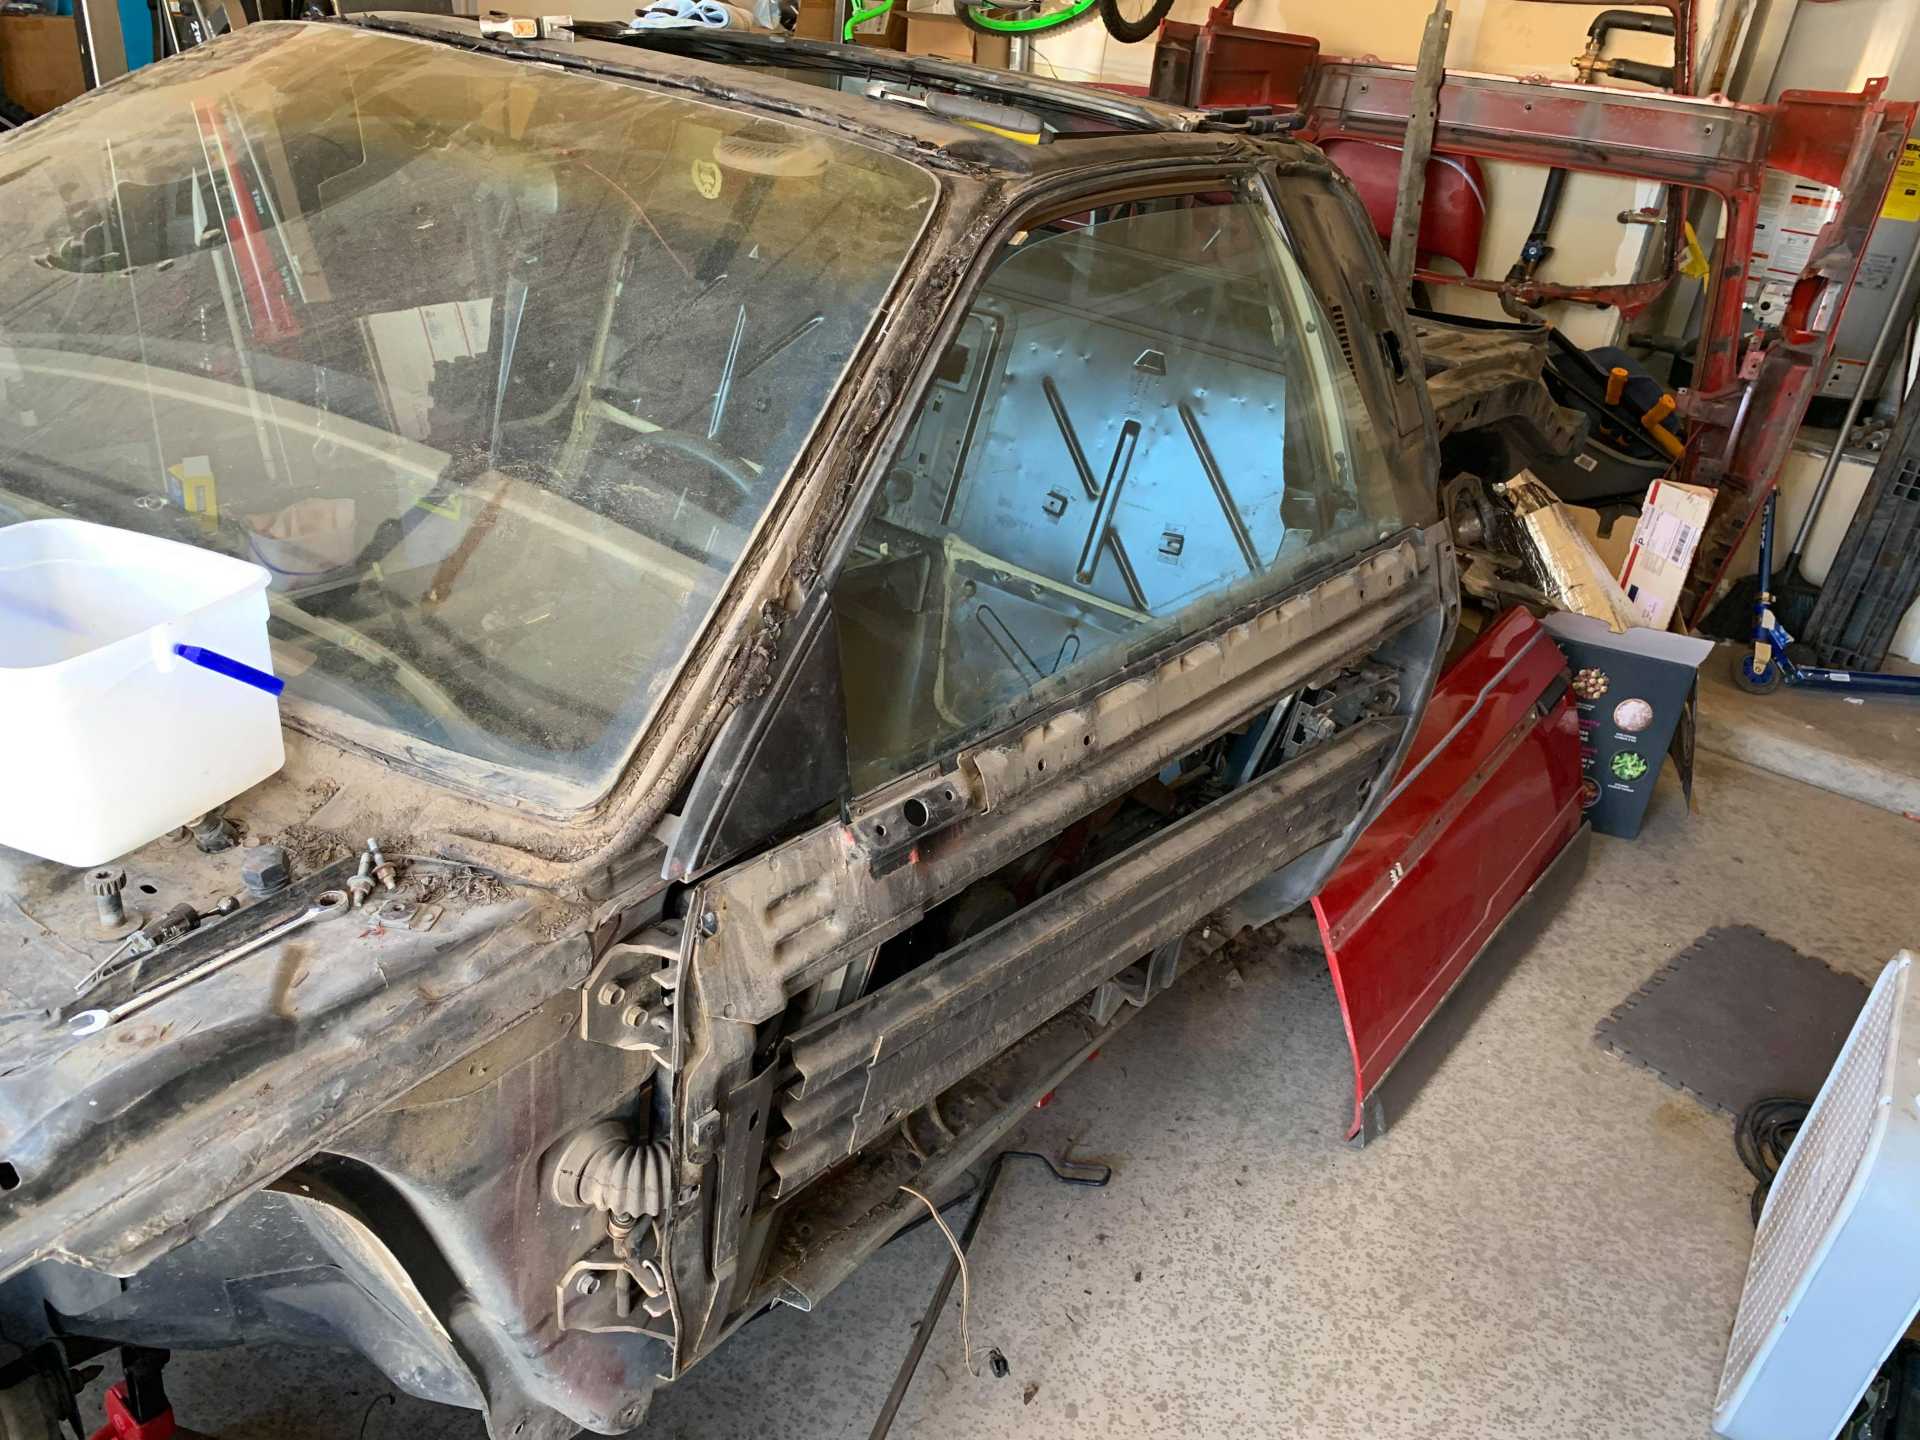
Started on the Doors a few days ago but just taking my time with everything.
It is not a Ford to the extent of your proposed Fiero/Ford project, but a Ford part has been used on selected Fiero vehicles since 1987. All of the Meras use a Ford Escort station wagon backup light. The lens actually has Fordembossed on it. I could give you the part number but this is just a funny/strange take on the existing Ford/Fiero relationship.
You certainly have my interest and curiosity... Im not sure if I will go that route though as Im trying to basically do a modernization build, but Im not against inspiration and ideas!
Not to worry, I havent abandoned this project... Just trying to avoid Hell's Oven until it started to cool down some.
The past few mornings I've been out tinkering on things and puttsing on others. Managed to get the driver side window out. Had to take it slowly with a Dremel cause GM in their infinite wisdom thought it was a great idea use stupid rivets for everything in the damn door... ugh... Not looking forward to the passenger side. lol... All things considered though it went pretty smoothly and now that thats out of the way, I can work on the rest of the stuff in the door...
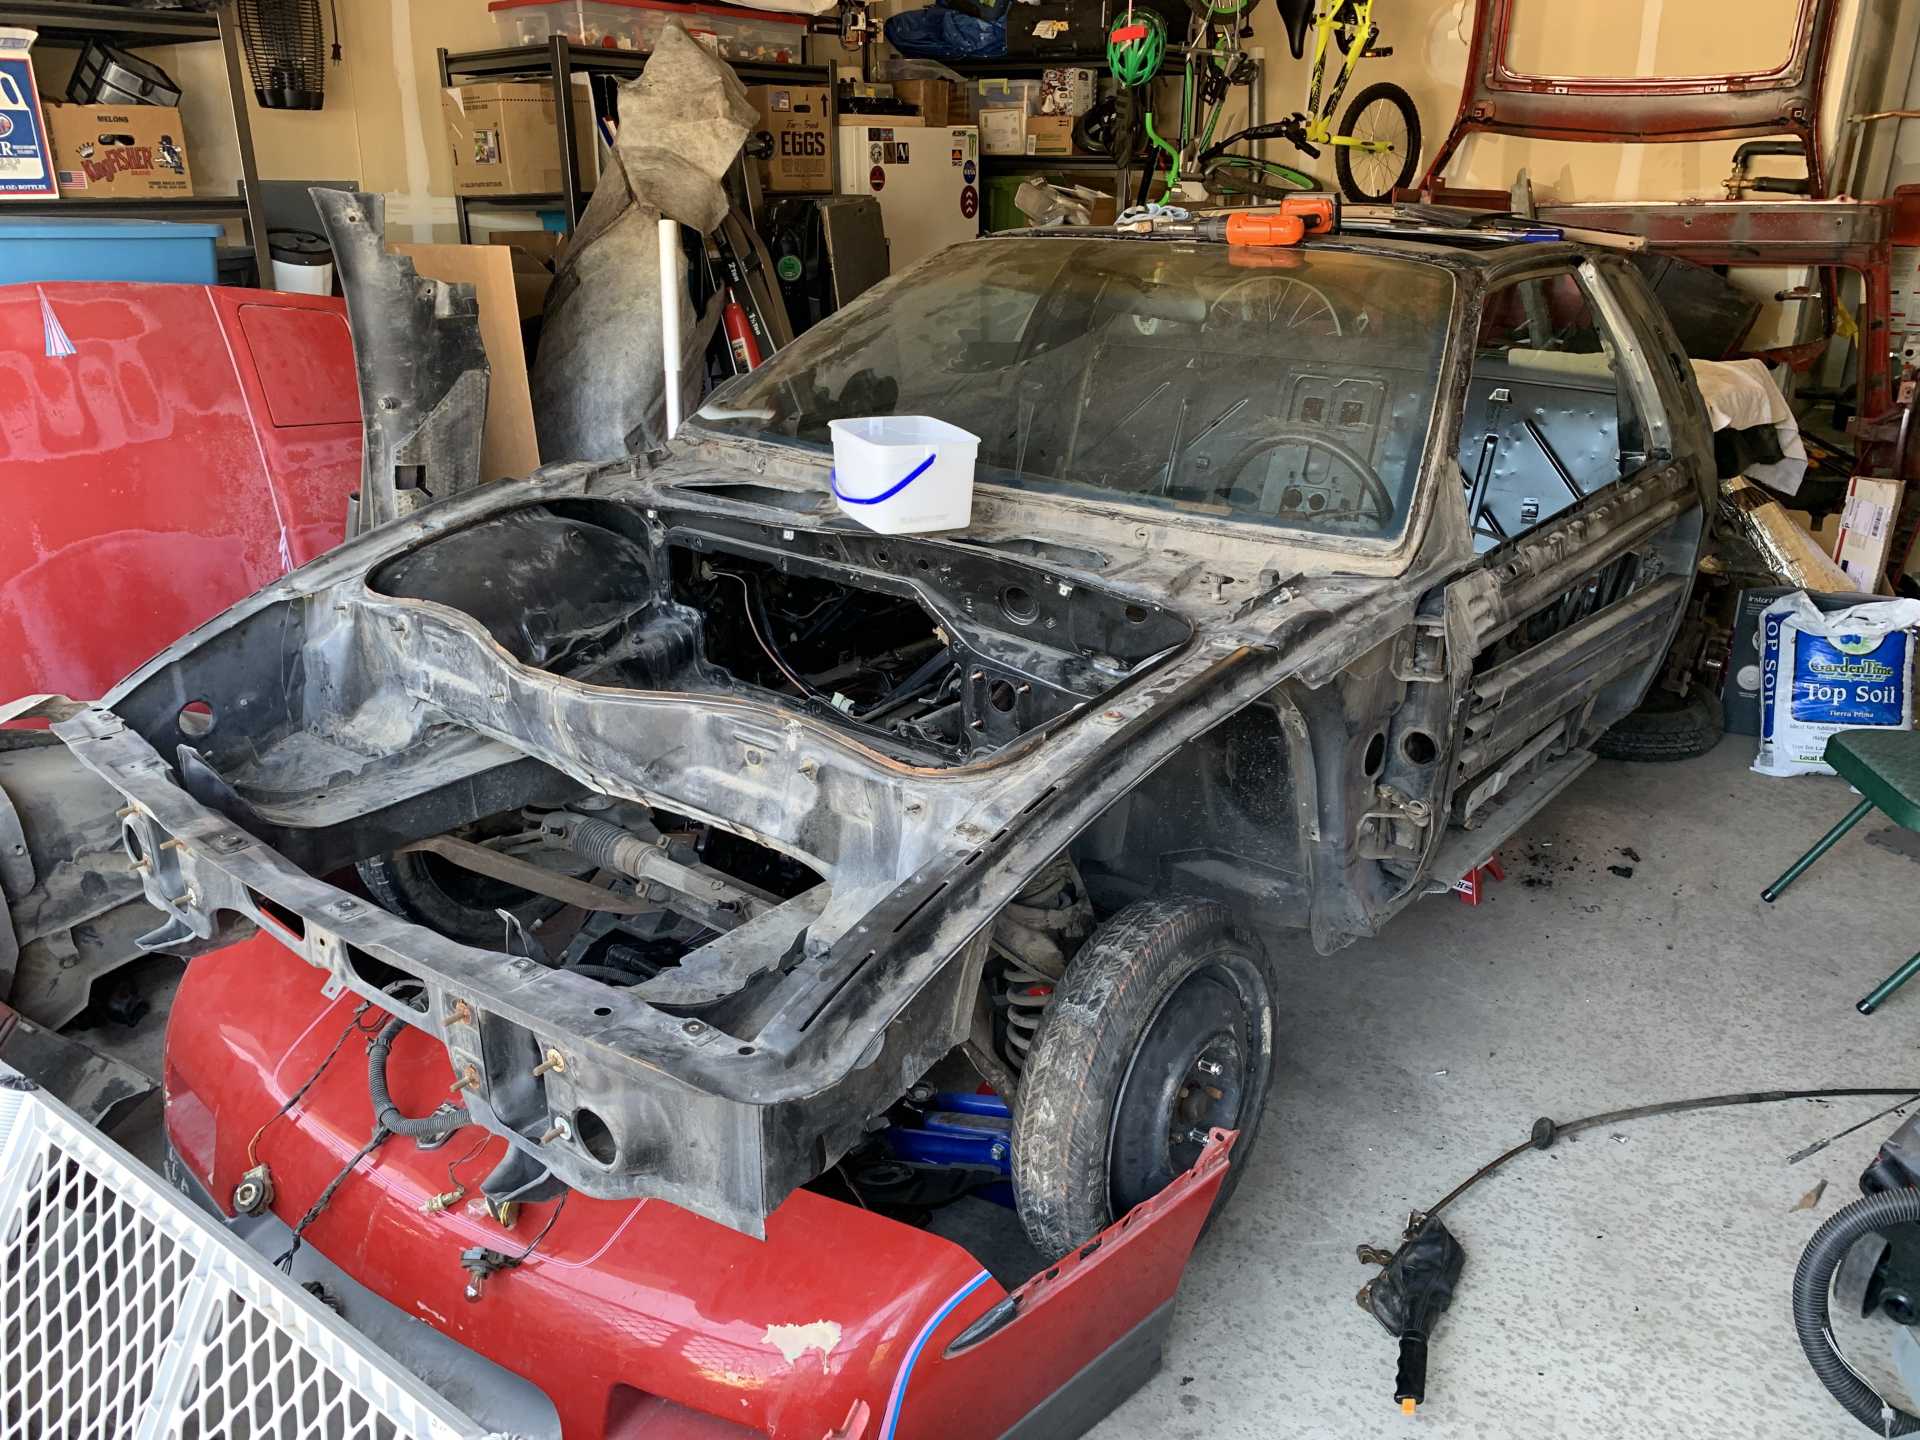
Its official now! We are 2/3rds complete on the teardown!
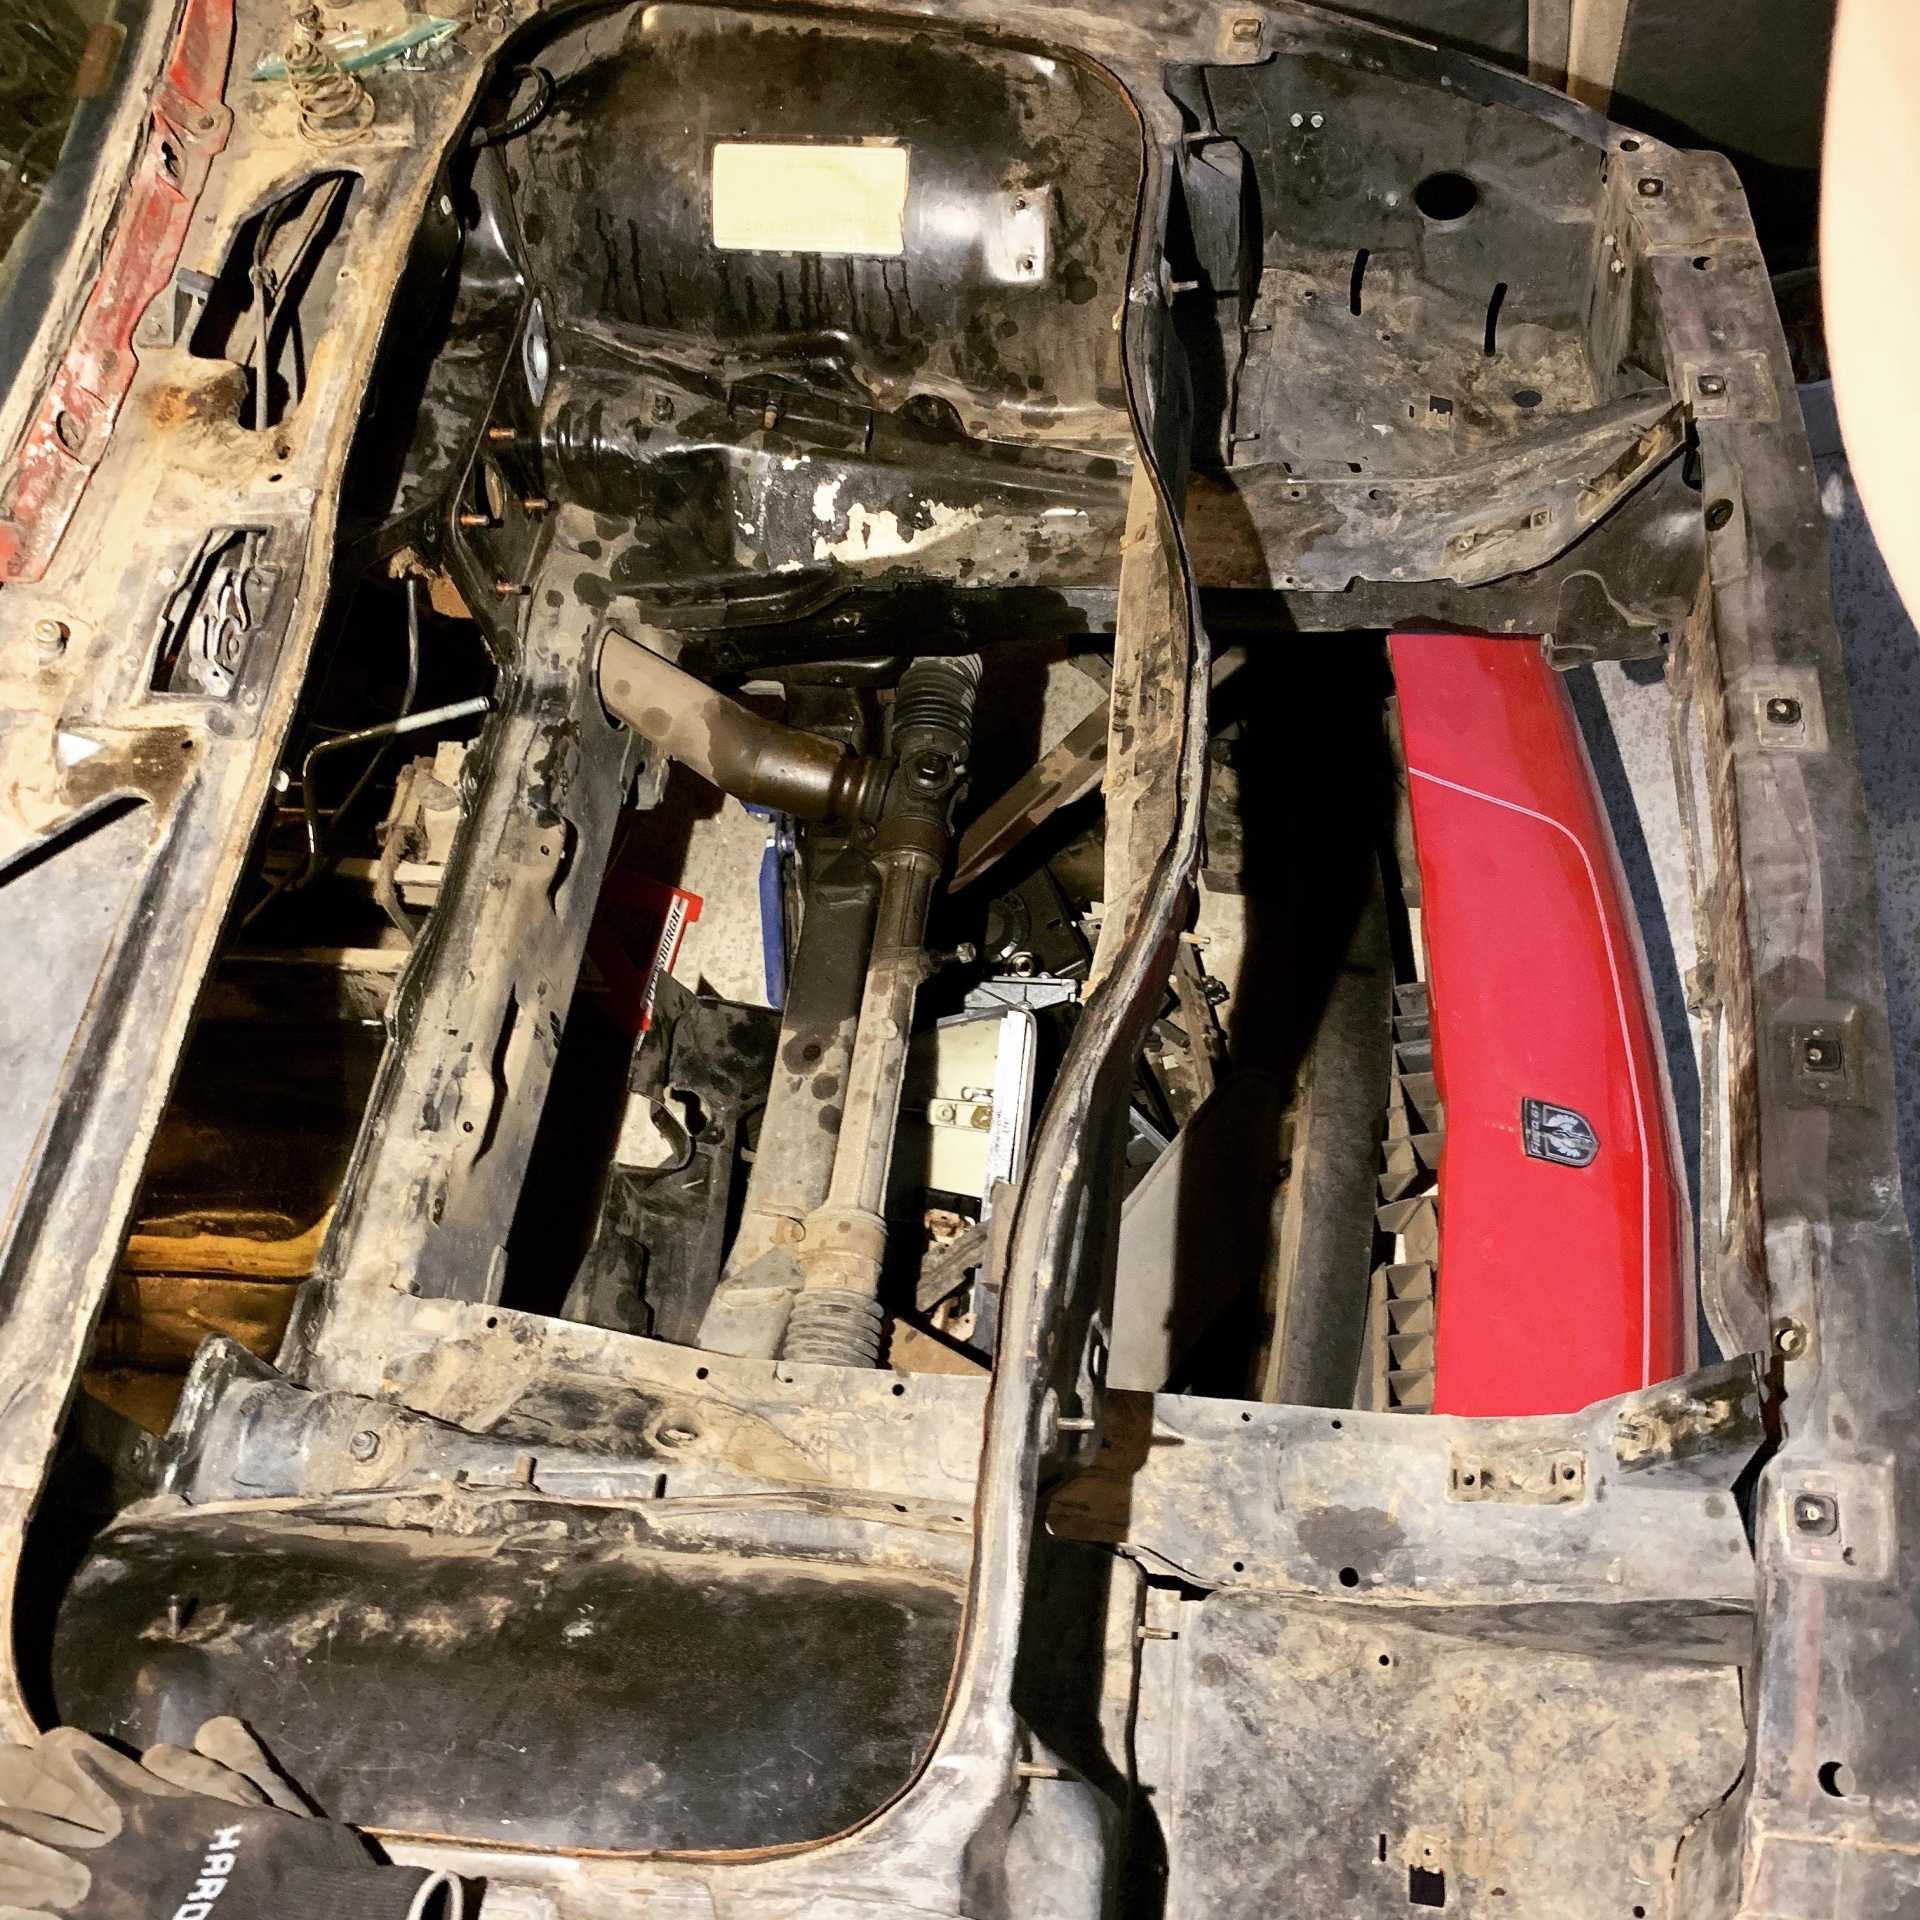
Aside from the suspension and steering, I have everything removed from the front and rear of the chassis... All thats left now is just the crap in the cab and doors left to remove...
The end of the Stripping is in sight, and still 5 months ahead of schedule!
[This message has been edited by Halcyon25 (edited 09-24-2020).]
Weeeeee! Fuel tanks out and drained the 3'ish gallons still on board, after we ghetto’ed the pump to work on an Airsoft LiPo... Its still in great shape internally so if theres anyone out there is in need of one hit me up, I plan to get a custom aluminum tank to ease the difficulties of the engine swap Im doing...
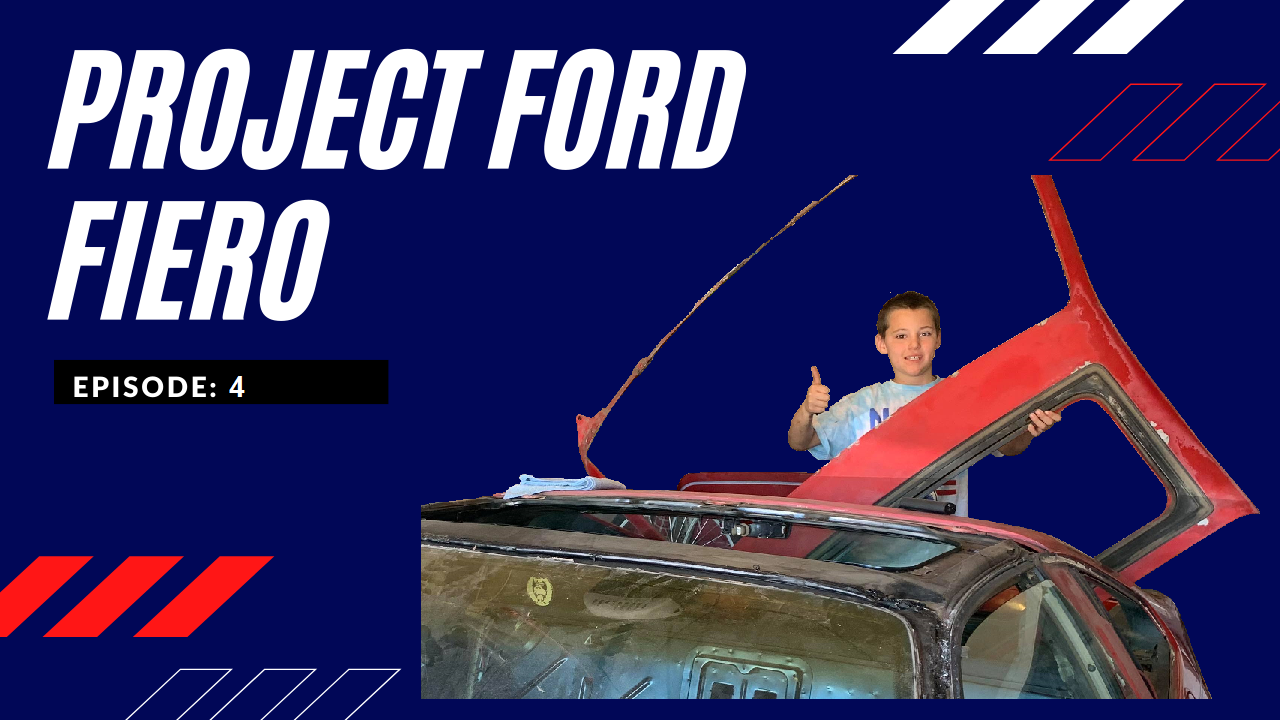
Oops Im a few days late here but Episode 4 is public now if you haven't seen it yet! Project Ford Fiero Ep4
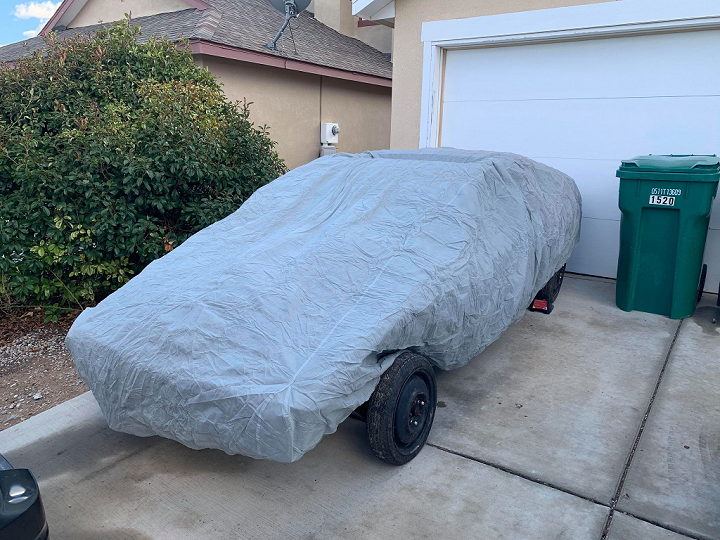
Hmm... ... I could have sworn I had a car here last week... Oh well, I guess I'll take this time to reorganize and clean the garage while its gone... Many thanks to Carver1 for hooking me up on a sweet deal for a complete '88 front and rear suspension set!
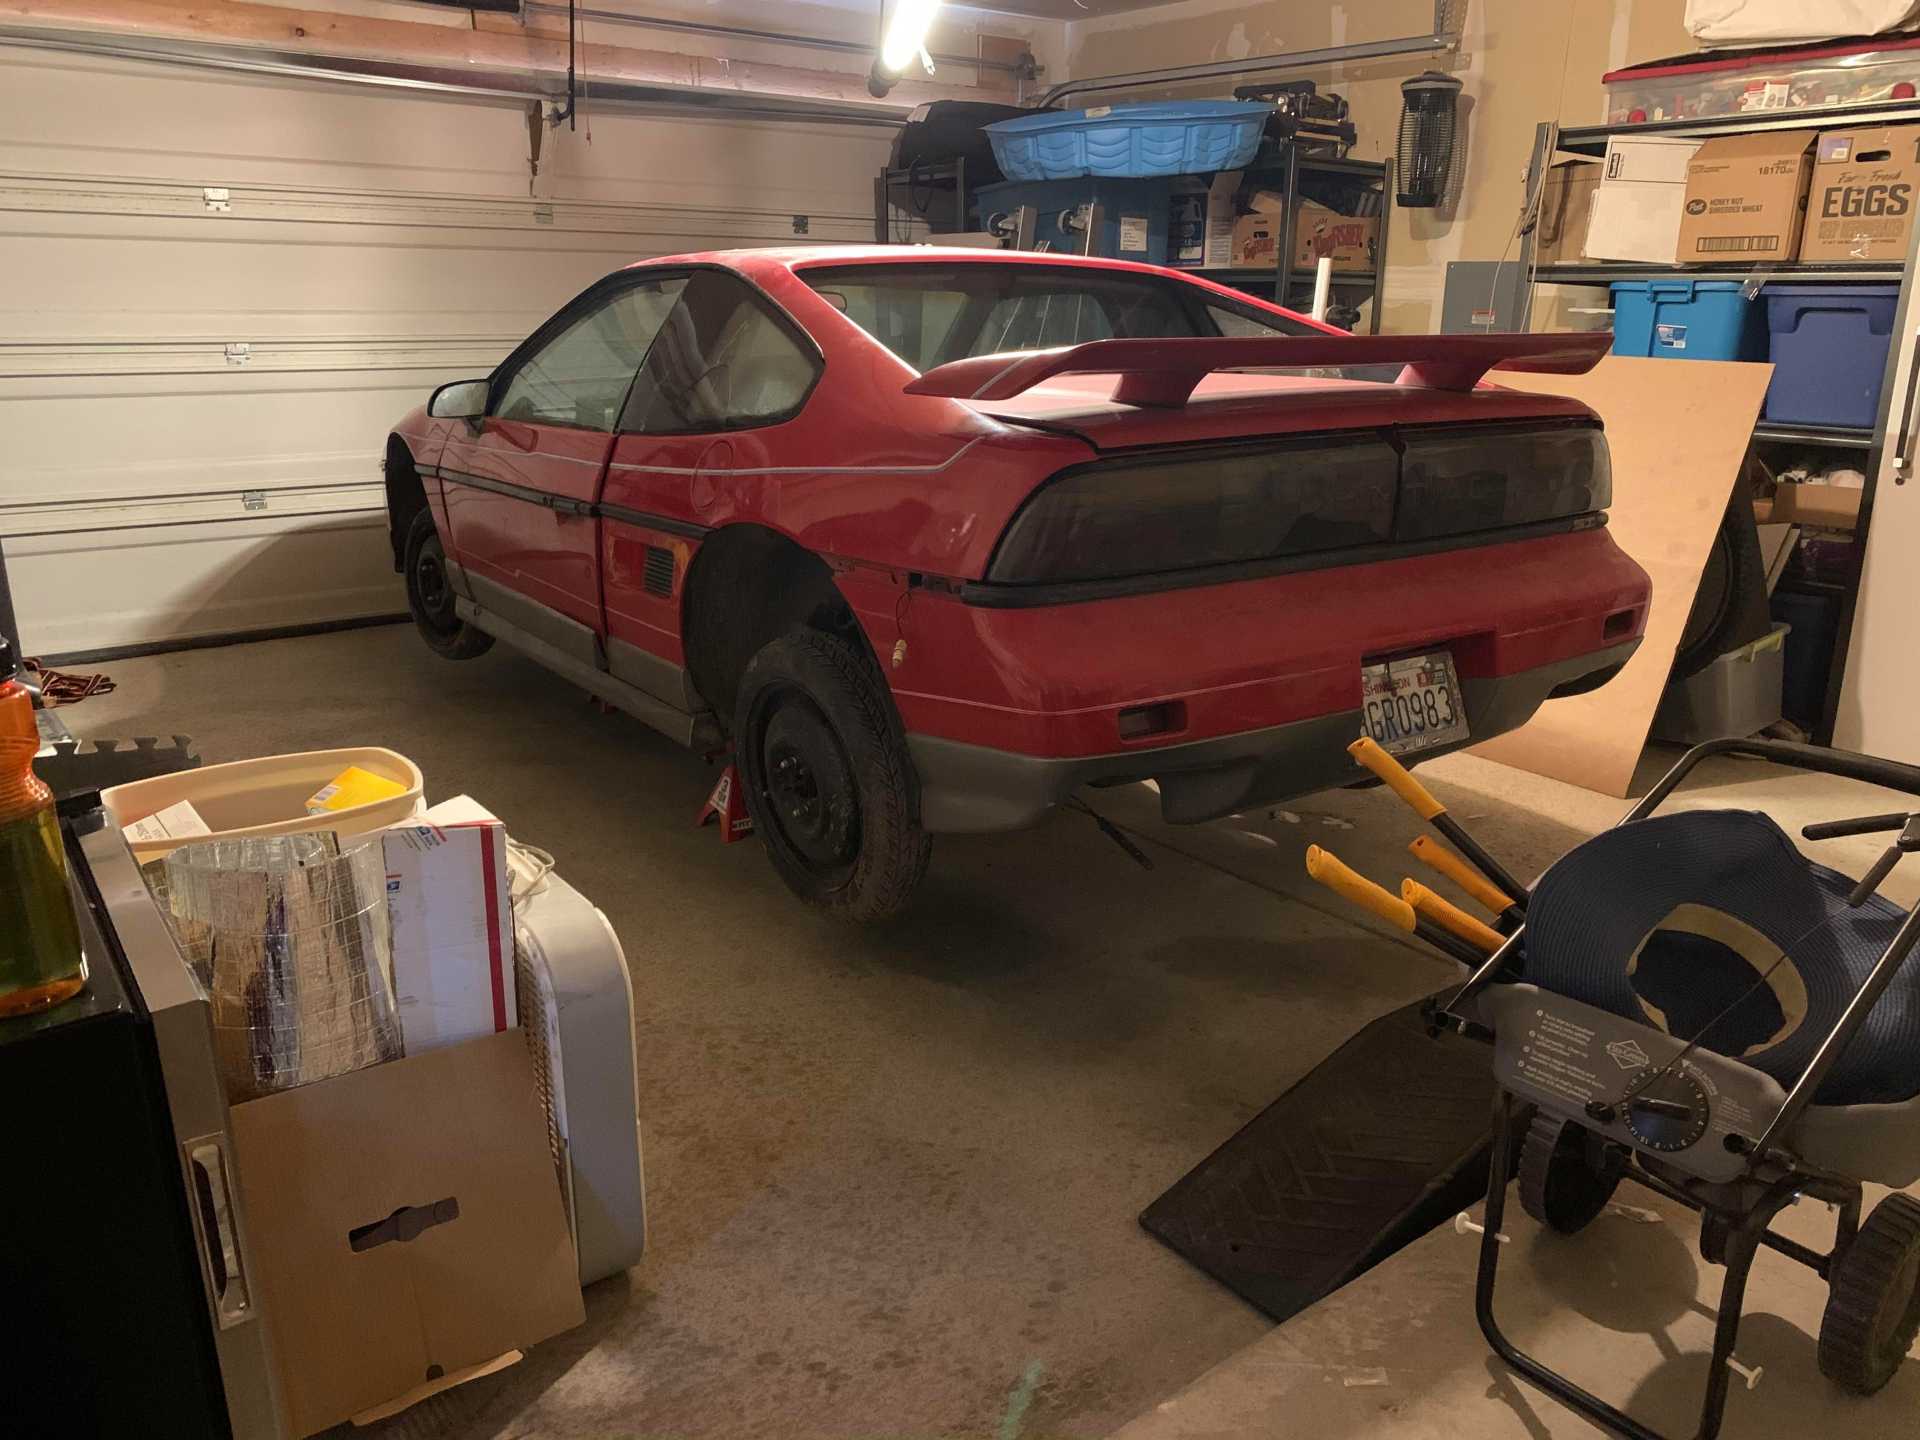
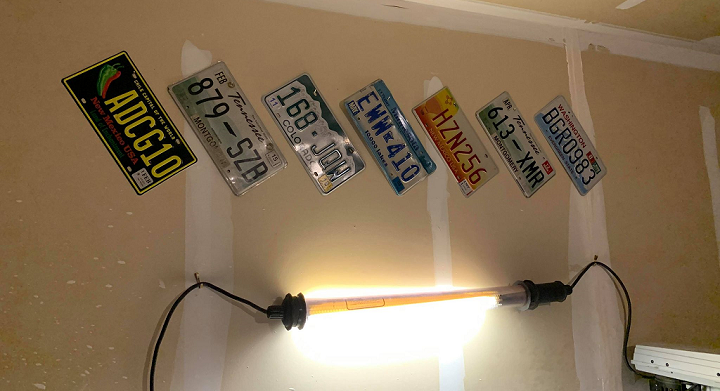
Man... The life some of these plates lived. MN EWW-410, NM HZN256 and TN 613-XMR were all on my old 86 SE... The WA BGR0983 was the old plate for this current 86 GT project...
Many thanks to Carver1 for hooking me up on a sweet deal for a complete '88 front and rear suspension set!
Nice to have another local to swap parts with!
------------------ Currently looking for another Fiero build... 11 CTS-V Coupe 19 Silverado Z71 14 Silverado 2500HD 86 Turbo GT 5 speed 88 Formula 5 Speed 87 SE auto
Whatever cleaner you used- I think it was a little TOO potent......Luckily you didn't spray any on the suspension....
Classic joke Cvxjet, Love it!!! XD
quote
Originally posted by Carver1:
Nice to have another local to swap parts with!
Indeed Carver! Its so great to have a fellow Fiero buddy locally. I couldn't tell you how much I wish I had someone locally back when I was in Tennessee, I'd still have Renae (86se) and that 3.4 swap I sold you... XD
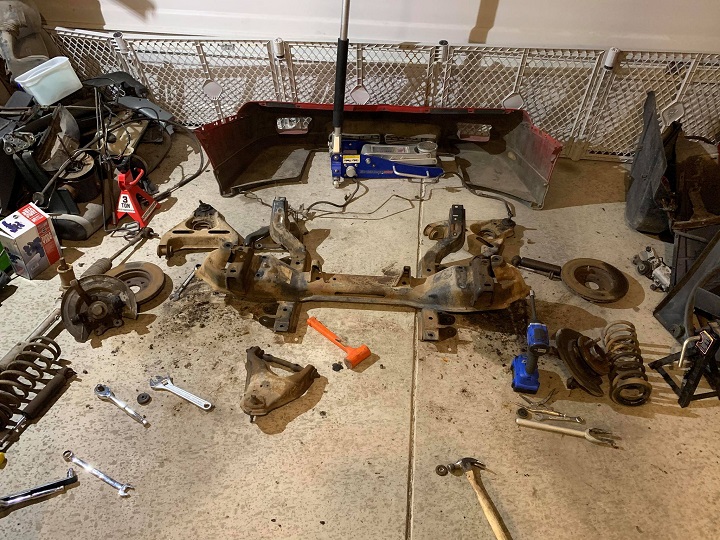
Got everything removed from the Front Subframe now, just a few little things left to tear down for cleaning like the A-arm bushings and ball joints as well as the knuckles, and then its onto the Rear Subframe... Sadly I sacrificed my long arm 3/8's breaker bar attempting to get the top A-arm bolts loose so hopefully I don't keep breaking all my needed tools... lol... But I should not be to surprised that my Harbor Freight tools aren't lasting. XD
[This message has been edited by Halcyon25 (edited 12-16-2020).]


 ... I could have sworn I had a car here last week... Oh well, I guess I'll take this time to reorganize and clean the garage while its gone...
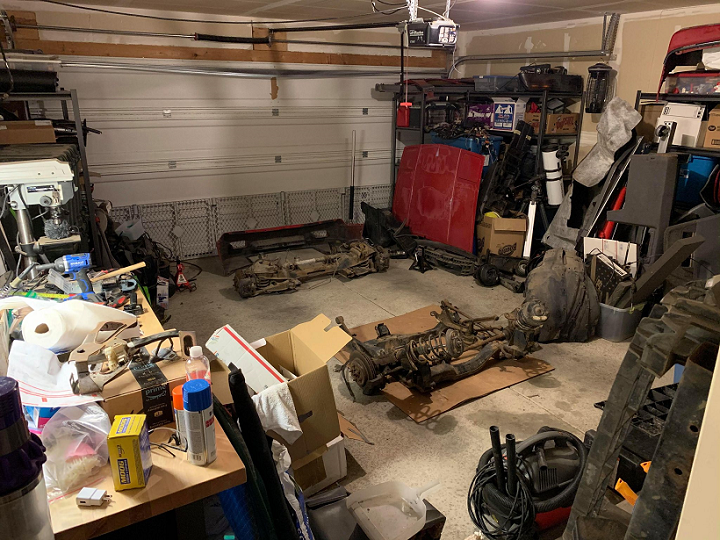


 Classic joke Cvxjet, Love it!!! XD