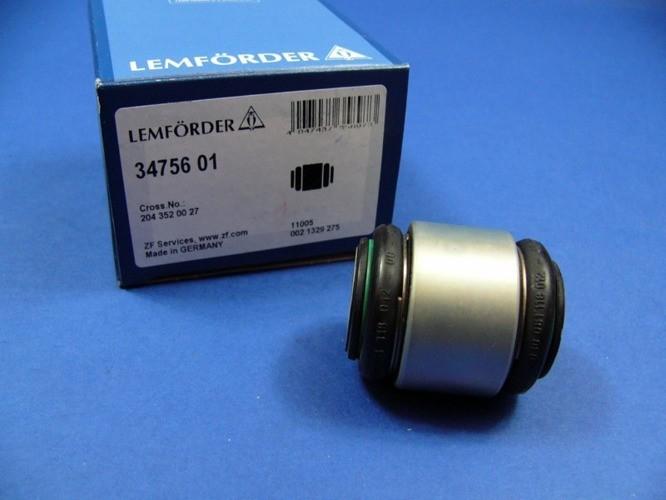
I took the advice of several people here and bought 4 Lemforder 3475601 bushings to update my rear control arms.
I took the rubber bushings out and measured the sleeves and machined the od of the Lemforder bushings down a bit to fit. The bushing od is 1.575" and the sleeves are actually two different sizes: 1.520" and 1.535", one each per control arm, both with a larger step of 1.540" on the outer portion of the sleeve. I left a margin of about 0.170" (machined to 1.540") for the bushing to seat against that step and machined the remainder accordingly. Took about half an hour to machine all four so shouldn't be too expensive if done by a machine shop.
I drilled a hole in each sleeve for a plug weld to secure the bushing after installation, which went quite well. I used my little arbour press to push the bushings into place and will finish the installation tomorrow. With the 0.170" margin, the bushings seat nicely against the step. I'll have to fab some spacers as the Lemforders are a bit shorter than the stock bushings. 9/16" bolts fit so tightly that I had to trial fit the bolts and take the ones that slid into the bushings. I'm quite pleased with the result.
Next is to fab a couple of bumpsteer thingies for the spindles as seen elsewhere on this forum and get rid of that nasty self-steering.. Thanks, guys!
They're originally for several Mercedes-Benz applications, basically a sealed and lubed monoball (steel on steel) bushing that eliminates compliance. I race my Fiero so need very precise control of the rear alignment, plus I also raised the front pivot point location to add anti-squat so the axes of the bushing bolts no longer line up. That would cause binding with poly bushings.
If you are using yours just for the street, the Prothane bushings are more than adequate.
[This message has been edited by mender (edited 10-21-2017).]
They're originally for several Mercedes-Benz applications, basically a sealed and lubed monoball (steel on steel) bushing that eliminates compliance. I race my Fiero so need very precise control of the rear alignment, plus I also raised the front pivot point location to add anti-squat so the axes of the bushing bolts no longer line up. That would cause binding with poly bushings.
If you are using yours just for the street, the Prothane bushings are more than adequate.
What are thoughts about moog rubber bushings? I'm looking for more comfort on the road.
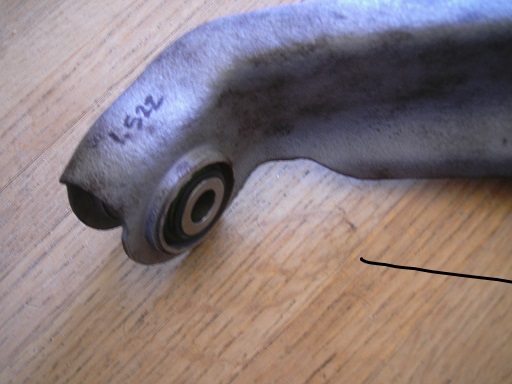
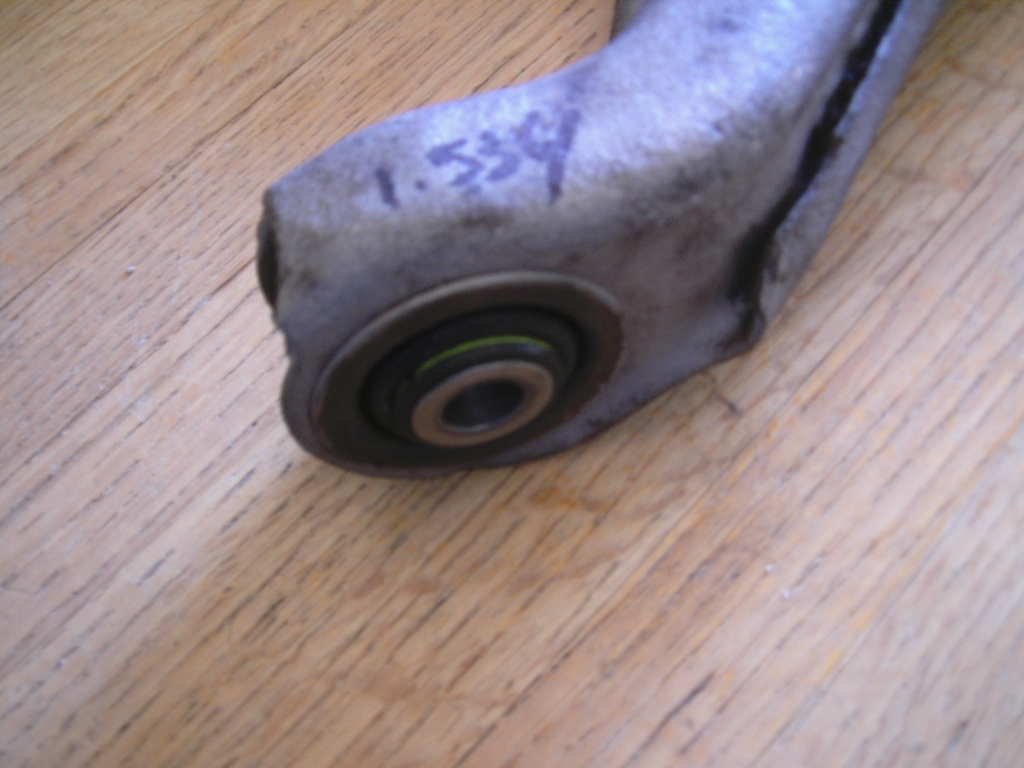
Do you have pics of the bushing sitting in the arm ? I am thinking of using Global West suspension Del-A-Lum bushings on my rear lower control arms but maybe these would be an option too.
Do you have pics of the bushing sitting in the arm ? I am thinking of using Global West suspension Del-A-Lum bushings on my rear lower control arms but maybe these would be an option too.
I'll see if I can get some.
These bushings are a little shorter than the stock ones so spacers or shims will be needed, and the id is larger so a sleeve would be needed to use with the stock bolts. That plus the machining on the bushing itself means it's not a direct bolt-in. If that's not a deterrent, I feel this is a better solution in the long run.
I'm doing it because I race and also because I can.
[This message has been edited by mender (edited 10-22-2017).]
There is a fairly new Camaro factory track day car that doesn't use rubber or poly. Instead it uses solid aluminum bushings machined to fit in place of the stock rubber bushings. No give at all. The model is the ZL1 1LE . If you can machine them up yourself, maybe a cheaper option for you.
Good idea to tighten the rear for racing with the Lemforder bushings. They sure appear to be more trouble to install over the press and play rubber or polly. Great post.
Though the post is not about OEM replacements for street use. As for the question about the Moog bushings. The Moog rubber bushings work nice as a OEM replacement for street/stock apps. However there are many good brands out there that work as well. Urethane bushings also do well, but do firm the ride over stock replacements. I’ve installed a two complete sets (front & rear) of the Moog bushings with no regrets, street and spirited road course use only.
[This message has been edited by Kevin87FieroGT (edited 10-22-2017).]
There is a fairly new Camaro factory track day car that doesn't use rubber or poly. Instead it uses solid aluminum bushings machined to fit in place of the stock rubber bushings. No give at all. The model is the ZL1 1LE . If you can machine them up yourself, maybe a cheaper option for you.
Good idea to tighten the rear for racing with the Lemforder bushings. They sure appear to be more trouble to install over the press and play rubber or polly. Great post.
The rules in the series that I race in are still evolving (endurance racing) and have opened up a bit lately so these replaced the handmade bushings that I made from these:
And scrap pieces of appropriate sized tubing. Not properly sealed so after four years and about 80 hours on the track the monoballs were getting worn and loose. The Lemforder bushings are essentially the same construction but are lubed and sealed so I expect that they'll give quite a bit longer service life than the previous set.
30 dollars each is a deal. I paid 48 apiece for some rod ends the other day. And then the design I had in mind for them did not work out so they are sitting in my garage doing nothing.
I installed the control arms using wheel alignment shims as spacers. I had to clearance the bolt holes in the cradle to fit the 9/16" bolts that I used and to do that I used my die grinder with a 1/2" ball carbide. Didn't take very long and I'm very happy with how tight the control arms are now!
[This message has been edited by mender (edited 10-23-2017).]
Thanks for the pics. I am going to look in to getting 4 of these for my front lower control arms. After putting Del-A-Lum bushings on the upper arms and noticing a big improvement I think these bushings would be a good match on the lower arms. I don't want to use Del-A-Lum on the lower arms because the mis alignment of the arms would cause too much binding.
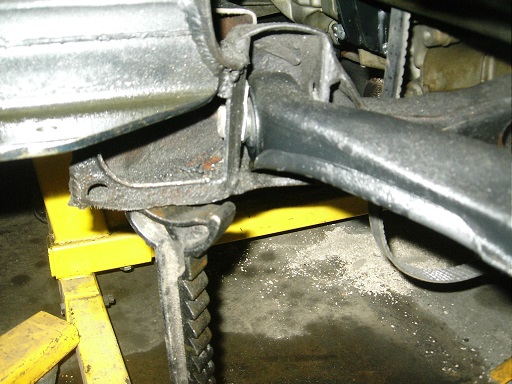
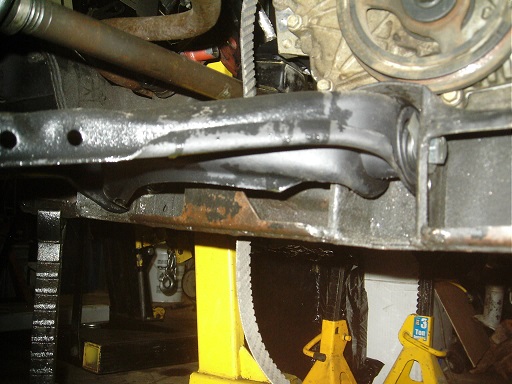
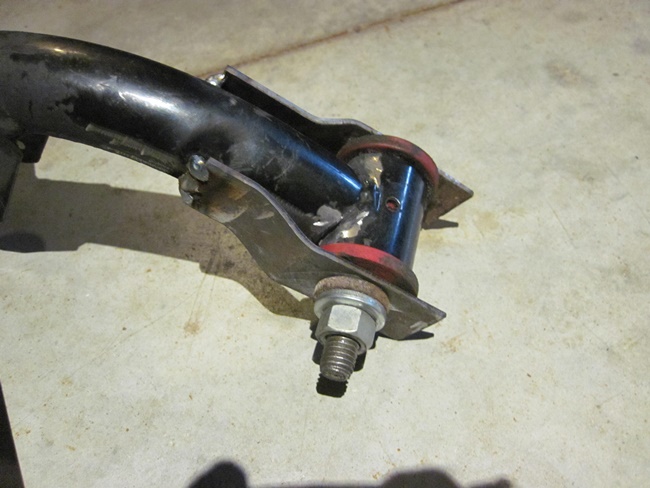
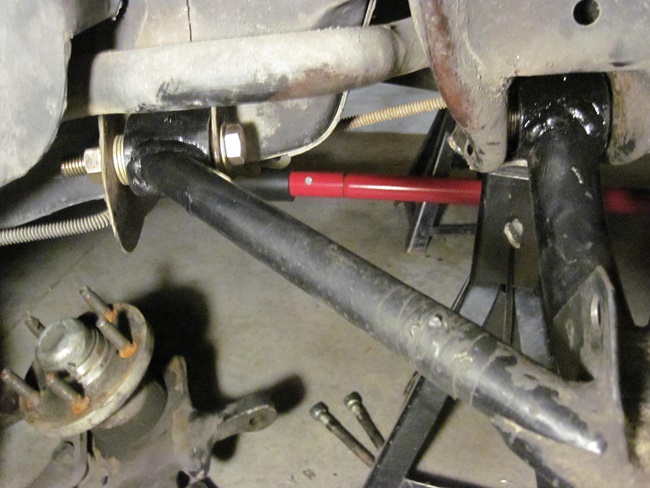
Pictures of the modded pivot points on my '87 cradle:
These are of the right side of the cradle. The first picture is an overall view. The second is of the rear mount with the arm pivot mounted in the lower of the two holes. The third one is the front with the front pivot of the arm mounted in the upper hole. You can also see the tilt of the lower control arm; higher at the front than the rear. That's to get some anti-squat.
If you look closely beside the bushings, you can see the alignment shims that I used to take up the clearance between the Lemforder bushings and the cradle mounts.
[This message has been edited by mender (edited 11-15-2017).]
I have never had a problem with rear squat. I do not know wether it is because my car is lowered quite a bit or because of my much lighter than stock ecotec engine. But your mod looks great and probably did not cost much to do. Great job.
[This message has been edited by wftb (edited 11-14-2017).]
I put in some anti-squat because I like it for racing. Seems to work very well, I can drive hard off the corners.
I'll have to measure things up and see if I managed to counter the factory pro-squat. I moved the toe links for minimum bumpsteer after putting in the anti-squat but I think I'll play with the rear geometry a bit this season to see what the car likes. Along with the extra mount holes, I raised the cradle and tilted the struts inward at the top to improve the camber gain and presently have a curve that looks good to me, i.e., negative camber gain in roll so I need less static camber.
My rear suspension is an SLA setup that I built myself. Probably would not pass Chump or Lemons tech inspection because of the cost of it. I can add anti squat to the top arm by putting a spacer in to angle it. But when I had it on the track this year I did not get any squat so I left it the way it was. I just ordered 4 of the cheaper bushings from the link you posted. Shipping and US dollar conversion should put them in at about 100.00 CDN. And I found another site that gave all the specs for the lemforders. Should be the same as the cheaper ones- outer diam 40 mm, inner diam 14 mm and width of 48 mm.
[This message has been edited by wftb (edited 11-14-2017).]
The lower controls arms were made by RCC, no longer in business. I just deleted the picture link because I thought it did not come up. I will get a link to the thread on my rear suspension build, has all the pics and details. //www.fiero.nl/forum/Forum2/HTML/134732.html
[This message has been edited by wftb (edited 11-14-2017).]
Anti-squat is more of a suspension reaction than a visible movement, testing shows whether it's working for the car or not.
When I was doing the NCATS stuff we would put in as much anti-squat as we could to help the drive off the corner. We knew when it was too much because the rear started to brake hop. Broke a diff at Trois Rivieres when we had a touch too much anti-squat and the driver got a little excited into turn 1.
I just read the linked thread, I was thinking of doing the longer link directly to the control arm bolt like you ended up with so that my spare control arms would work without the extra bracket. Nice!
Any camber curves, roll centre plots, etc, of your finished suspension?
[This message has been edited by mender (edited 11-14-2017).]
The only thing I have ever done is lock a rotor in place, clamp on a lazer level pointed at the floor on it and jack it up and down with the coil overs removed and plot points on the floor to check for bumpsteer and to see if the wheel and tire are moving up and down properly in relation to the frame.I use a magnetic protractor to measure camber gain. I am pretty much seat of the pants. The geometry is close to stock because the RCC lower control arm is just a tube arm that mimics a stock arm. But with an upper control arm I have negative camber gain under compression and getting rid of the strut for the QA-1 coilovers gives me the adjustability I was after.
So if you wanted to improve on the RCC set-up, what would be on the list? I'm going to making some for myself. If there's any interest, I might make a few extra.
I posted a reply on the other thread. But one thing I just thought of is that if you compare the RCC arms to other aftermarket arms, I think they are lighter. If you want I can get diameter of tubes and some close up pics in the next couple of weeks. Busy trying to get all of the summer stuff put away now.
So, you moved the front pivot up about one inch, and the rear pivot down one inch?
How much did you move the pivots when you had the brake hopping issues?
Front one is about an inch higher, rear one is stock location. I wanted the option of raising both pivots to get the camber gain. Split the difference to get anti-squat as well.
That was a NASCAR Canadian Tire Series (NCATS) tube frame stock car. No wheel hop issues with the Fiero.
[This message has been edited by mender (edited 11-14-2017).]
Just received the cheaper bushings, they are the same so I'm pretty happy about that.
Also did some preliminary measuring, looks like the anti-squat mod I did resulted in 27% anti-squat, about as much as an IRS can use. Camber gain is good with about -0.8 degrees per inch travel in compression. Bumpsteer on the right side is decent, 0.004 toe-in for the first inch of compression and 0.010 for the second. Droop adds toe-out and it is quick with 0.055 for one inch and 0.150 by the second.
The left side inner toe link mount got ripped off the cross member at Laguna and I welded it back as close as I could get it to finish out the weekend. Obviously it wasn't quite in the right place as the bumpsteer in compression is 0.080 and 0.225, with 0.140 and 0.290 toe-out in droop. One of my drivers said he liked it better that way!
I might have to play with bumpsteer curves to see what the car actually likes, maybe zero bump isn't always the ideal!
[This message has been edited by mender (edited 11-24-2017).]
I received my cheaper (Febest) bushings yesterday and right now I have the front passenger side suspension pulled apart to see how I am going to make them work. My first idea was to get some DOM tubing made up for a press fit and cut the old poly mounting tubes off of the control arms and then weld the new tubes to the arms. I don't really know if I can get the new tubes in exactly the same place as the old ones though. Keep in mind I have the Arraut sport front suspension. The ID of the bushing mounts that are on the Arraut arms is about 32 mm . That is way too much material to cut the new bushings down to. I have a few ideas how to make this work. One thing I noticed is the poly inner bushings that came with the kit are for 1/2" bolts. Since you reuse the factory bolts there might have been a bit of slop there. It was the same on the upper arm, I corrected that problem last year but I did not check the lowers at the time.
I received my cheaper (Febest) bushings yesterday and right now I have the front passenger side suspension pulled apart to see how I am going to make them work. My first idea was to get some DOM tubing made up for a press fit and cut the old poly mounting tubes off of the control arms and then weld the new tubes to the arms. I don't really know if I can get the new tubes in exactly the same place as the old ones though. Keep in mind I have the Arraut sport front suspension. The ID of the bushing mounts that are on the Arraut arms is about 32 mm . That is way too much material to cut the new bushings down to. I have a few ideas how to make this work. One thing I noticed is the poly inner bushings that came with the kit are for 1/2" bolts. Since you reuse the factory bolts there might have been a bit of slop there. It was the same on the upper arm, I corrected that problem last year but I did not check the lowers at the time.
If you make a jig you can either put the new bushings in the same place or space them out a bit to lengthen the arm for more camber. You could also change the lengths to move the lower ball joint forward for more caster if needed.
You can either try to roll some sheet material and slide that into the bushings to reduce the hole size to the factory size or use 9/16 bolts and open up the holes in the factory tabs to suit.
[This message has been edited by mender (edited 11-26-2017).]
I came up with a solution to locate the new bushing holder on the arm. I just welded a couple of bent flatbar arms on to the arm itself like this: The bushing holder has already been cut off where it is covered by the jig. All I have to do to get it out is cut the rest of it away and pull the bolt out.If I decide to use 9/16 bolts I will just drill the 1/2" holes of the jig out to 9/16. Since the old bushings are 1/2 holes then I wont be able to reuse them if I drill them out. I have lots of 12mm flanged chassis bolts laying around so I might make up some sleaves. But it looks like there is not much room for a drill to make the frame holes bigger to fit the 9/16 bolts so I have not made my mind up about that yet. Moving the location of the bushings will cause bumpsteer so I am sticking with the stock locations.
Good solution for the jig! Are you putting in more caster as well? Wouldn't be hard to do by using spacers in your jig to move the bushings rearward and shouldn't make much difference in bumpsteer, about 0.010" per inch of ball joint location change by my calculations. One inch would result in about 6 degrees more caster so you could decide how much of that you can or want to do.
I used a 1/2" ball carbide in my die grinder to open up the frame tab holes to 9/16" in my cradle, worked very well and didn't take very much time. I put anti-dive in at the front by slotting the old holes and will tweak that once I get all my measurements.
I have room on my upper arms to change the caster if I want but yes since I am going to have to make spacers for the new lower bushings I could add more caster there if needed. I am sitting at 3.7 degrees now and it works well as it is. Right now I am trying to avoid a round trip of 200 miles to London and back for more tubing. Hopefully I have enough stuff laying around to make up what I need.
[This message has been edited by wftb (edited 11-27-2017).]
I weighed the front control arm after I got the front holder welded on. It is 5.4lbs including the ball joint but without bushings. There will be up to 1/2" of fore and aft adjustment available after it is done. I hope to get the other holder welded on tomorrow. The only problem I had with my jig was having to use my die grinder to carve up the tube. No room to get the grinder in there, so pretty slow going. But it is definitely in the same place as the old bushing.
I weighed a stock '84 front lower control arm at 7.4 lbs.
I have a 2001 WS6 power rack on my Fiero so I'm going to try a high caster set-up to see if I can reduce the static camber for better braking. Going to the WS6 rack was one of the best mods I did for racing, quick ratio so easy to catch a slide and the feel is great plus no wrestling the steering wheel.
[This message has been edited by mender (edited 11-29-2017).]
I have one side done with the Febest bushings in. Dont know how I did it but the rear holder did not come out centred in the frame tabs. So I didnt get the amount of fore and aft adjustment I thought I could get. They move up and down smoothly with no binding at all. I think they will be a big improvement.
I took the advice of several people here and bought 4 Lemforder 3475601 bushings to update my rear control arms.
I took the rubber bushings out and measured the sleeves and machined the od of the Lemforder bushings down a bit to fit. The bushing od is 1.575" and the sleeves are actually two different sizes: 1.520" and 1.535", one each per control arm, both with a larger step of 1.540" on the outer portion of the sleeve. I left a margin of about 0.170" (machined to 1.540") for the bushing to seat against that step and machined the remainder accordingly. Took about half an hour to machine all four so shouldn't be too expensive if done by a machine shop.
I drilled a hole in each sleeve for a plug weld to secure the bushing after installation, which went quite well. I used my little arbour press to push the bushings into place and will finish the installation tomorrow. With the 0.170" margin, the bushings seat nicely against the step. I'll have to fab some spacers as the Lemforders are a bit shorter than the stock bushings. 9/16" bolts fit so tightly that I had to trial fit the bolts and take the ones that slid into the bushings. I'm quite pleased with the result.
Next is to fab a couple of bumpsteer thingies for the spindles as seen elsewhere on this forum and get rid of that nasty self-steering.. Thanks, guys!
quote
Originally posted by mender:
I installed the control arms using wheel alignment shims as spacers. I had to clearance the bolt holes in the cradle to fit the 9/16" bolts that I used and to do that I used my die grinder with a 1/2" ball carbide. Didn't take very long and I'm very happy with how tight the control arms are now!
I will use these when I build suspension components from scratch, but the OD was too large for the Fiero application. I'm not going to modify a consumable like you did, so I went a different direction. You turned the Mercedes ball joints down until they pressed into the original outer sleeves? Those outer sleeves are pretty thin. They survive as rubber bushings because the rubber distributes the load, unlike ball joints. I suspect the sleeves will get pounded out and lose their press on the ball joints after not a lot of racing miles.
quote
Originally posted by mender:
The rules in the series that I race in are still evolving (endurance racing) and have opened up a bit lately so these replaced the handmade bushings that I made from these:
And scrap pieces of appropriate sized tubing. Not properly sealed so after four years and about 80 hours on the track the monoballs were getting worn and loose. The Lemforder bushings are essentially the same construction but are lubed and sealed so I expect that they'll give quite a bit longer service life than the previous set.
The sealed ball joints are a great product for a street car, but for a race car... why didn't you just replace your spherical bearings?
I'm developing weld-in sleeves to replace the stock bushing sleeves. The weld-in sleeves accept spherical bearings and also have shaft seals on the spacers to keep crap out. When the spherical bearings eventually wear out... just knock the old ones out and install new ones.
[This message has been edited by Will (edited 12-02-2017).]