Pennock's Fiero Forum
  Technical Discussion & Questions
  Intake manifold questions, starting re-assembly of my 2.8.

Post New Topic  Post A Reply
Email This Page to Someone! | Printable Version


next newest topic | next oldest topic
Intake manifold questions, starting re-assembly of my 2.8. by gtemplet
Started on: 08-07-2013 06:43 PM
Replies: 13 (806 views)
Last post by: gtemplet on 08-10-2013 09:54 PM
gtemplet
Member
Posts: 31
From: IL
Registered: Aug 2013


Feedback score: N/A
Leave feedback

Rate this member

Report this Post08-07-2013 06:43 PM Click Here to See the Profile for gtempletSend a Private Message to gtempletEdit/Delete MessageReply w/QuoteDirect Link to This Post
Long time lurker first time poster. First this is by far the best forum Ive lurked on. Tons of knowledge and lots of helpful people. This is my first rebuild of any kind. I'm currently reassembling my 2.8. All machine work and parts are bought so to late for a swap. First question, There are 4 studs (and 6 bolts) that hold the lower intake manifold down. When I removed the intake the studs came out with the nut so I didn't notice there was a difference, 2 long (6 point star end) and 2 short (round end) studs. What corner of the intake manifold do they go in? I laid the intake in place and there seems to be a large gap between the top of the block and the bottom of the intake. Is this normal? Gap is about .075in (3mm). Gap is equal at both ends (timing cover end and distributor end). Intake does sit flush between both heads. Service manual says apply 2-3mm wide and 3-3.5mm thick continuous bead on both surfaces. So that would fill the gap, but it just seems to be a large gap to me. Thanks for looking and appreciate and response.
IP: Logged
PFF
System Bot
DaytonTD
Member
Posts: 175
From: Edmonton, Alberta, Canada
Registered: Dec 2012


Feedback score: N/A
Leave feedback

Rate this member

Report this Post08-07-2013 07:04 PM Click Here to See the Profile for DaytonTDSend a Private Message to DaytonTDEdit/Delete MessageReply w/QuoteDirect Link to This Post
According to the Fiero Store they should all be the same length. If memory serves me correctly then two parts of the manifold are lower than the other two parts. Not sure which ones, maybe just put the shorter ones in the lower sections if that is the case.

As for the gap that is normal, once you torque it down in sequence it goes to about an 1/8" gap with the gaskets in place. You need to put a 1/4" bead of RTV (I used black) along the ridge, run it up the slant about a 1/4" too. Before you do this however make sure you peen the lower intake and block surfaces where you put the RTV. To do this you just tap a small punch in the center of the ridge about 1/8" apart along the whole ridge. This gives the RTV something to sink into so it does not get sucked into the oil gallery or pushed out.

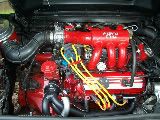
EDIT: here is a picture I made

[This message has been edited by DaytonTD (edited 08-07-2013).]

IP: Logged
Raydar
Member
Posts: 40728
From: Carrollton GA. Out in the... country.
Registered: Oct 1999


Feedback score:    (13)
Leave feedback


Total ratings: 460
Rate this member

Report this Post08-07-2013 07:06 PM Click Here to See the Profile for RaydarSend a Private Message to RaydarEdit/Delete MessageReply w/QuoteDirect Link to This Post
Yeah. That gap looks huge, but it's perfectly normal.

I forget what I did to determine which studs went where.
I think I set the manifold into place, and then just plugged the studs into the holes. Once they're sitting in the holes, it should become apparent which ones go where. They should all have about the same amount sticking out above the manifold.
I'm sure that someone else has a more scientific method, or just knows.
IP: Logged
gtemplet
Member
Posts: 31
From: IL
Registered: Aug 2013


Feedback score: N/A
Leave feedback

Rate this member

Report this Post08-07-2013 07:20 PM Click Here to See the Profile for gtempletSend a Private Message to gtempletEdit/Delete MessageReply w/QuoteDirect Link to This Post
Thanks guys for the quick response. I laid the intake in place to see if I could figure the studs out that's when I discovered the gap. First thought was holy crap what did the machine shop do this cant be right. I feel a lot better now. Do I bottom the studs out?
Thanks Dayton. I like that idea with the punch, help the RTV stay in place.

[This message has been edited by gtemplet (edited 08-07-2013).]

IP: Logged
DaytonTD
Member
Posts: 175
From: Edmonton, Alberta, Canada
Registered: Dec 2012


Feedback score: N/A
Leave feedback

Rate this member

Report this Post08-07-2013 07:58 PM Click Here to See the Profile for DaytonTDSend a Private Message to DaytonTDEdit/Delete MessageReply w/QuoteDirect Link to This Post
If you look here it looks like they should bottom out at 3/4". If you have a continuous thread then I would say go down about 3/4".
IP: Logged
trotterlg
Member
Posts: 1378
From: WA
Registered: Aug 2011


Feedback score: (2)
Leave feedback

Rate this member

Report this Post08-07-2013 08:35 PM Click Here to See the Profile for trotterlgSend a Private Message to trotterlgEdit/Delete MessageReply w/QuoteDirect Link to This Post
Wooooo Crap, $5.00 a stud? really proud of them aren't they? Larry
IP: Logged
hobbywrench
Member
Posts: 350
From: WA usa
Registered: Feb 2013


Feedback score: N/A
Leave feedback

Rate this member

Report this Post08-08-2013 11:44 AM Click Here to See the Profile for hobbywrenchSend a Private Message to hobbywrenchEdit/Delete MessageReply w/QuoteDirect Link to This Post
gt, Clean the mating surface. Brake cleaner and white rag, repeat, repeat, repeat til no mor residue.
IP: Logged
Francis T
Member
Posts: 6620
From: spotsylvania va. usa
Registered: Oct 2003


Feedback score: (1)
Leave feedback


Total ratings: 119
Rate this member

Report this Post08-09-2013 12:14 PM Click Here to See the Profile for Francis TClick Here to visit Francis T's HomePageSend a Private Message to Francis TEdit/Delete MessageReply w/QuoteDirect Link to This Post
Just lil tip, with a stock intake don't forget to put your valve covers on before you install the upper intake, else you'll have to pull it again.

------------------

trueleo.com
RSpiderII@aol.com

IP: Logged
carbon
Member
Posts: 4767
From: Eagan, MN
Registered: Apr 2004


Feedback score: (2)
Leave feedback


Total ratings: 132
Rate this member

Report this Post08-09-2013 12:31 PM Click Here to See the Profile for carbonSend a Private Message to carbonEdit/Delete MessageReply w/QuoteDirect Link to This Post
 
quote
Originally posted by Francis T:

Just lil tip, with a stock intake don't forget to put your valve covers on before you install the upper intake, else you'll have to pull it again.


I would recommend that you do so before the mid intake...
IP: Logged
Bloozberry
Member
Posts: 7760
From:
Registered: Jan 2009


Feedback score: N/A
Leave feedback


Total ratings: 311
Rate this member

Report this Post08-09-2013 01:41 PM Click Here to See the Profile for BloozberrySend a Private Message to BloozberryEdit/Delete MessageReply w/QuoteDirect Link to This Post
 
quote
Originally posted by gtemplet:

There are 4 studs (and 6 bolts) that hold the lower intake manifold down. When I removed the intake the studs came out with the nut so I didn't notice there was a difference, 2 long (6 point star end) and 2 short (round end) studs. What corner of the intake manifold do they go in?


Just wanted to confirm what others were saying about the location of the four studs... here are two pics showing they go at the four corners.


I also looked up the studs in the P22 (parts manual) to see if it showed where the two shorter ones might go but there wasn't enough detailed info. As long as your 4 studs bottom out in the block and stick out enough at each corner to get the nuts on with a couple threads still showing, it won't matter which ones go where.
IP: Logged
zkhennings
Member
Posts: 1922
From: Massachusetts, USA
Registered: Oct 2010


Feedback score: (3)
Leave feedback

Rate this member

Report this Post08-09-2013 02:46 PM Click Here to See the Profile for zkhenningsSend a Private Message to zkhenningsEdit/Delete MessageReply w/QuoteDirect Link to This Post
Great recommendation on the peening, I recommend taking a dremel with a rotary stone and carving a groove in both the lower intake manifold and block mating surface. My newly built 2.8 has ~3500 miles on it and it has started to weep oil above the timing cover from the rtv seal. This is very common for these engines, and especially with the heads settling after being run in it creates some slop in the lower intake manifold. I have seen it recommended to retorque the lower intake manifold after the engine has been broken in for a couple thousand miles.
IP: Logged
PFF
System Bot
Francis T
Member
Posts: 6620
From: spotsylvania va. usa
Registered: Oct 2003


Feedback score: (1)
Leave feedback


Total ratings: 119
Rate this member

Report this Post08-09-2013 04:57 PM Click Here to See the Profile for Francis TClick Here to visit Francis T's HomePageSend a Private Message to Francis TEdit/Delete MessageReply w/QuoteDirect Link to This Post
 
quote
Originally posted by carbon:


I would recommend that you do so before the mid intake...

Ops you're right! I've been installing ours and not the stock intakes so long - no valve cover clearance problem- I forget that, good poimt.
IP: Logged
Indiana_resto_guy
Member
Posts: 7158
From: Shelbyville, IN USA
Registered: Jul 2000


Feedback score:    (15)
Leave feedback


Total ratings: 163
Rate this member

Report this Post08-09-2013 09:30 PM Click Here to See the Profile for Indiana_resto_guySend a Private Message to Indiana_resto_guyEdit/Delete MessageReply w/QuoteDirect Link to This Post
Longer stud goes on the sensor corner at the front of the engine for the ground wire to battery as well as chassis.
Longer stud goes on the opposite corner at the rear for coil mounting plate as I recall.
Remaining stud goes to the rear but I can't recall for what..second chassis ground maybe?
I'm not looking at one other than in my mind (I'm old so . . . ) the last statment might be in error as I have a bracket pictured in my mind as well. . . It is the dogbone bracket so it may go on the front corner remaining.
IP: Logged
gtemplet
Member
Posts: 31
From: IL
Registered: Aug 2013


Feedback score: N/A
Leave feedback

Rate this member

Report this Post08-10-2013 09:54 PM Click Here to See the Profile for gtempletSend a Private Message to gtempletEdit/Delete MessageReply w/QuoteDirect Link to This Post
Bloozberry: Beautiful intake, makes me wish I would have polished mine now. I painted mine aluminum which I thought looked good until I saw yours. Now its only
Indiana: Thanks, I guessed right that is how I put them in.
After a closer look at Bloozberry's intake all his studs are round on top. I have 2 that are male torx (6 point star)ended and 2 round.
IP: Logged

next newest topic | next oldest topic

All times are ET (US)

Post New Topic  Post A Reply
Hop to:

Contact Us | Back To Main Page

Advertizing on PFF | Fiero Parts Vendors
PFF Merchandise | Fiero Gallery | Ogre's Cave
Real-Time Chat | Fiero Related Auctions on eBay


Copyright (c) 1999, C. Pennock