Pennock's Fiero Forum
  Technical Discussion & Questions
  Original speaker repair (foaming)

Post New Topic  Post A Reply
Email This Page to Someone! | Printable Version


next newest topic | next oldest topic
Original speaker repair (foaming) by DougKraft
Started on: 04-30-2012 10:56 PM
Replies: 23 (1228 views)
Last post by: PhatMax on 01-13-2021 12:43 PM
DougKraft
Member
Posts: 753
From: Ohio
Registered: Dec 2001


Feedback score:    (6)
Leave feedback

Rate this member

Report this Post04-30-2012 10:56 PM Click Here to See the Profile for DougKraftSend a Private Message to DougKraftEdit/Delete MessageReply w/QuoteDirect Link to This Post
Does anyone know who repairs the original fiero dash speakers and subwoofers? I am looking to have them refoamed.

Thanks
IP: Logged
PFF
System Bot
fierosound
Member
Posts: 15141
From: Calgary, Canada
Registered: Nov 1999


Feedback score: N/A
Leave feedback


Total ratings: 286
Rate this member

Report this Post05-01-2012 01:45 AM Click Here to See the Profile for fierosoundClick Here to visit fierosound's HomePageSend a Private Message to fierosoundEdit/Delete MessageReply w/QuoteDirect Link to This Post
Modernized "factory" replacements (with neodymium magnets) would perform better http://www.turnswitch.com/speakers.htm

------------------
My World of Wheels Winners (Click on links below)

3.4L Supercharged 87 GT and Super Duty 4 Indy #163

[This message has been edited by fierosound (edited 05-03-2012).]

IP: Logged
weloveour86se
Member
Posts: 4289
From: maine
Registered: Feb 2011


Feedback score:    (115)
Leave feedback


Total ratings: 75
Rate this member

Report this Post05-01-2012 12:05 PM Click Here to See the Profile for weloveour86seSend a Private Message to weloveour86seEdit/Delete MessageReply w/QuoteDirect Link to This Post
I bought half of a refoaming kit for the factory sub from another PFF'er last summer. I was just orginizing some reciepts when i came across the paperwork that cam with it. The original purchase was from midwestspeaker dot com

Item # is 160418363095 JBL Pro 3 Control 1-5" Woofer Refoam Kit Speaker Foam.

Email them repair@midwestspeaker.com
Phone them 651-645-7385
Write them a letter? 2812 Fairview Ave. N.
Roseville, MN 55113

Origial purchaser paid $19.95 for the kit to do 2 subs. Possible split the cost of one with someone else here? Or use what you need and sell the other half for half of purchase costs?
IP: Logged
E.Furgal
Member
Posts: 11708
From: LAND OF CONFUSION
Registered: Mar 2012


Feedback score:    (23)
Leave feedback


Total ratings: 278
User Banned

Report this Post05-01-2012 03:24 PM Click Here to See the Profile for E.FurgalSend a Private Message to E.FurgalEdit/Delete MessageReply w/QuoteDirect Link to This Post
I'd not bother , the cone is 25 years old and paper..
the 98 up tahoe and burb, use 2 way 4-10's in the rear of the truck, I'd grab them from a junkyard before I'd recone the factory fiero ones..
or install 5.25" rounds, with the adapter,
IP: Logged
FieroScott
Member
Posts: 76
From: Menasha, WI
Registered: Jul 2007


Feedback score: (1)
Leave feedback

Rate this member

Report this Post05-02-2012 08:00 PM Click Here to See the Profile for FieroScottSend a Private Message to FieroScottEdit/Delete MessageReply w/QuoteDirect Link to This Post
I had a couple of Sub Speakers re-coned at;

Van L. Speakerworks
5704 N. Weastern Avenue
Chicago, IL 60659
(773)769-0773

It's been a few years, but maybe there still there.
I think it was about $50 each.

------------------
88 Red GT 5sp T-Top CJB #1139
88 Yellow Formula 5sp
87 Black GT 5sp
87 Med. Red SE Auto T-Top
86 Black GT 4sp T-Top (Black Knight)
84 IRM (Prototype) Turbo Fastback T-Top
Dr Pepper Go Kart

[This message has been edited by FieroScott (edited 05-02-2012).]

IP: Logged
masospaghetti
Member
Posts: 2477
From: Charlotte, NC USA
Registered: Dec 2009


Feedback score:    (10)
Leave feedback

Rate this member

Report this Post05-04-2012 09:54 AM Click Here to See the Profile for masospaghettiSend a Private Message to masospaghettiEdit/Delete MessageReply w/QuoteDirect Link to This Post
I bought a refoam kit for the subwoofer and did it myself from Speakerworks. Cost was $9.75 plus shipping. Although the surround wasn't specifically meant for a subwoofer, the finished product sounds good and has held up well, so far. They also offer repair services if you send them your speaker but I have not personally tried it.

[This message has been edited by masospaghetti (edited 05-04-2012).]

IP: Logged
Ry86GT
Member
Posts: 227
From: Ontario, Canada
Registered: Sep 2012


Feedback score: (2)
Leave feedback

Rate this member

Report this Post10-15-2012 11:32 AM Click Here to See the Profile for Ry86GTSend a Private Message to Ry86GTEdit/Delete MessageReply w/QuoteDirect Link to This Post
masospaghetti, there are a few different kits at speakerworks. I want to do this myself, can you let me know which kit you ordered? Or do you happen to have the other half of the kit left that you want to get rid of?
IP: Logged
Stainless1911
Member
Posts: 981
From: Davisburg Michigan
Registered: Apr 2012


Feedback score: (2)
Leave feedback

Rate this member

Report this Post10-15-2012 12:22 PM Click Here to See the Profile for Stainless1911Send a Private Message to Stainless1911Edit/Delete MessageReply w/QuoteDirect Link to This Post
Factory speakers are generally 5-10 years behind everyone else to begin with. That said, why would you want to replace the factory speakers in a 25 year old car? You could just install a record player, you might get better sound lol. I would plan on replacing the speakers in any brand new car I bought before I even got the car home.
IP: Logged
Ry86GT
Member
Posts: 227
From: Ontario, Canada
Registered: Sep 2012


Feedback score: (2)
Leave feedback

Rate this member

Report this Post10-15-2012 12:49 PM Click Here to See the Profile for Ry86GTSend a Private Message to Ry86GTEdit/Delete MessageReply w/QuoteDirect Link to This Post
 
quote
Originally posted by Stainless1911:

Factory speakers are generally 5-10 years behind everyone else to begin with. That said, why would you want to replace the factory speakers in a 25 year old car? You could just install a record player, you might get better sound lol. I would plan on replacing the speakers in any brand new car I bought before I even got the car home.


Because I've never refoamed a speaker before and this is the perfect chance to do something I've never done before, because it's cheaper, but mainly because this is what I want to do to solve my problem. Other than the broken foam the OEM speaker I have is just fine, in fact it looks brand new other than the grille cloth that I cut off of it.

Other than maybe installing a Delco CD player I have no intentions of modifying the OEM stereo system at all. Even that is a big, big maybe.

Thank you for your input.

[This message has been edited by Ry86GT (edited 10-15-2012).]

IP: Logged
Bruce
Member
Posts: 2189
From: Ventura, California, USA
Registered: May 99


Feedback score: (2)
Leave feedback

Rate this member

Report this Post10-15-2012 05:44 PM Click Here to See the Profile for BruceSend a Private Message to BruceEdit/Delete MessageReply w/QuoteDirect Link to This Post
I refoamed my Bose 901s (that's 18 individual speakers), and the drivers were 35 years old. The foam was a mess, but the cones were still intact. No reason to think the GM speakers can't be refoamed in the same way.
Incidentally, the refoam kit, which I purchased from "Speaker City" in CA., had great directions. The whole job took me about an hour, at the most.
IP: Logged
Tuna Helper
Member
Posts: 458
From: Ft Wayne, IN, USA, Earth
Registered: Aug 2010


Feedback score: N/A
Leave feedback

Rate this member

Report this Post10-15-2012 07:07 PM Click Here to See the Profile for Tuna HelperSend a Private Message to Tuna HelperEdit/Delete MessageReply w/QuoteDirect Link to This Post
You can google for refoam kits, or you can look here http://www.recone.com/home.htm for someone near you to do it. I recently had my sub refoamed at
Speaker Workshop
1707 N Harrison St
Fort Wayne IN 46808

260-426-8742

It was just under $50
IP: Logged
PFF
System Bot
Stainless1911
Member
Posts: 981
From: Davisburg Michigan
Registered: Apr 2012


Feedback score: (2)
Leave feedback

Rate this member

Report this Post10-16-2012 01:27 AM Click Here to See the Profile for Stainless1911Send a Private Message to Stainless1911Edit/Delete MessageReply w/QuoteDirect Link to This Post
 
quote
Originally posted by Ry86GT:


Because I've never refoamed a speaker before and this is the perfect chance to do something I've never done before, because it's cheaper, but mainly because this is what I want to do to solve my problem. Other than the broken foam the OEM speaker I have is just fine, in fact it looks brand new other than the grille cloth that I cut off of it.

Other than maybe installing a Delco CD player I have no intentions of modifying the OEM stereo system at all. Even that is a big, big maybe.

Thank you for your input.


Now that was an awesome post. I love your point of view. Kudos to you.

IP: Logged
Ry86GT
Member
Posts: 227
From: Ontario, Canada
Registered: Sep 2012


Feedback score: (2)
Leave feedback

Rate this member

Report this Post10-16-2012 09:07 AM Click Here to See the Profile for Ry86GTSend a Private Message to Ry86GTEdit/Delete MessageReply w/QuoteDirect Link to This Post
I thought I would follow up for anyone looking into this in the future. I PM'd "masospaghetti" to ask him which kit he used from speakerworks. He responded with the following kit number.

"5" Speaker Repair Kit Angled or Flat Attach with 1 Foam Surround - SWK5"

Here's a link to it:
http://www.speakerworks.com...epair_kit_p/swk5.htm

I was just about to order when something distracted me and I never completed the order. Then I remembered a local electronics distributor warehouse type of place on my way home from work and decided to stop in when the road was blocked by a train crossing anyways.

To my surprise I found this on the shelf:


I measured it with a ruler in the store and it was somewhat close to the stock speaker so I decided to take a chance on it. When I got home and compared the dimensions to the speakerworks kit the dimensions were identical. Woo Hoo! I can't tell you if there would be a quality difference or not, but this seems like it may work. At least it was cheap enough to try, my out the door cost was just shy of $4.

So now I have find out which glue is the right one to use, buy a bit of it, then try to install this thing. Will follow up later.
IP: Logged
masospaghetti
Member
Posts: 2477
From: Charlotte, NC USA
Registered: Dec 2009


Feedback score:    (10)
Leave feedback

Rate this member

Report this Post10-16-2012 01:35 PM Click Here to See the Profile for masospaghettiSend a Private Message to masospaghettiEdit/Delete MessageReply w/QuoteDirect Link to This Post
That looks just like the kit I got...great find!

FWIW the original speaker was made in Japan and appears to be a high quality piece - I don't agree that OEM speakers are inferior to aftermarket by default - the fact that its 25 years old and still works is a good testament to it's build quality.

The glue that came with the kit "looks" like Elmer's, I imagine any kind of contact cement or even RTV would work, anything that remains ductile after it dries.
IP: Logged
ZaraSpOOk
Member
Posts: 256
From: Rosemount, MN
Registered: Sep 2010


Feedback score: N/A
Leave feedback

Rate this member

Report this Post10-17-2012 12:58 AM Click Here to See the Profile for ZaraSpOOkSend a Private Message to ZaraSpOOkEdit/Delete MessageReply w/QuoteDirect Link to This Post
in the early 80's I worked for a company that was supplying cassette decks to Ford, I can tell you that for the most part, especially American cars, sound systems are cheap junk, my Fiero is 100% OEM except for one thing, the speakers!
the speakers I bought weren't expensive but they sure improved the sound

but knock yourself out, just one thing though, if one speaker is bad the other will need fixing shortly too, so you may as well have bought a pair rather than just one
IP: Logged
Khw
Member
Posts: 11139
From: South Weber, UT. U.S.A.
Registered: Jun 2008


Feedback score: (1)
Leave feedback


Total ratings: 134
Rate this member

Report this Post10-17-2012 01:05 AM Click Here to See the Profile for KhwSend a Private Message to KhwEdit/Delete MessageReply w/QuoteDirect Link to This Post
 
quote
Originally posted by ZaraSpOOk:

in the early 80's I worked for a company that was supplying cassette decks to Ford, I can tell you that for the most part, especially American cars, sound systems are cheap junk, my Fiero is 100% OEM except for one thing, the speakers!
the speakers I bought weren't expensive but they sure improved the sound

but knock yourself out, just one thing though, if one speaker is bad the other will need fixing shortly too, so you may as well have bought a pair rather than just one


The stock sub only uses one driver.
IP: Logged
Ry86GT
Member
Posts: 227
From: Ontario, Canada
Registered: Sep 2012


Feedback score: (2)
Leave feedback

Rate this member

Report this Post10-18-2012 09:32 AM Click Here to See the Profile for Ry86GTSend a Private Message to Ry86GTEdit/Delete MessageReply w/QuoteDirect Link to This Post
I had some time last night so I decided to start at her. I'm glad I did some googling first, probably saved myself some frustration. And it's not nearly as difficult (at least at this point) as I imagined.

Last night I got the old foam off, the metal frame cleaned up and the new foam glued to the speaker. I decided to glue onto the front of the speaker. Originally the foam is glued to the back of it but trying to clean the foam off of the back and trying to securely re-glue the new foam there seemed risky to me. After a couple of hours drying time it looked great but I'm giving it a day between each drying step to make sure it doesn't move around on me.

I plan to do a full how-to when I'm all finished up and I have confirmed that what I've done works.

If you're interested, here's a teaser:


FWIW I agree with masospaghetti in that for what it is, this appears to be a well built speaker. I used to sell and install mobile/home audio and it's still a hobby of mine. I've seen a lot less solid looking pieces than these before, both OEM and aftermarket.
IP: Logged
johnyrottin
Member
Posts: 5453
From: Northwest Florida
Registered: Oct 2007


Feedback score:    (8)
Leave feedback


Total ratings: 85
Rate this member

Report this Post10-18-2012 09:54 AM Click Here to See the Profile for johnyrottinSend a Private Message to johnyrottinEdit/Delete MessageReply w/QuoteDirect Link to This Post
I love the fact that you are trying because you have never tried before! If it fails you can always get them from Turnswitch.com. Good luck! I'm watching your thread for sure.
IP: Logged
Ry86GT
Member
Posts: 227
From: Ontario, Canada
Registered: Sep 2012


Feedback score: (2)
Leave feedback

Rate this member

Report this Post10-22-2012 12:07 PM Click Here to See the Profile for Ry86GTSend a Private Message to Ry86GTEdit/Delete MessageReply w/QuoteDirect Link to This Post
I am pleased to report that I have experienced complete and utter success in my efforts (Woot!!)

Here's a how-to (how I did it) for anyone looking to try this in the future. It's pretty straight forward when you get into it but the key is to be patient and take your time to allow full glue curing between steps when necessary.

Typical disclaimer:
I am showing what I did for the general benifet of others. What you do do or need to do may very well be different that what I've shown here. This is a simple guideline. As usual your mileage may vary and follow it at your own risk Now with that out of the way...

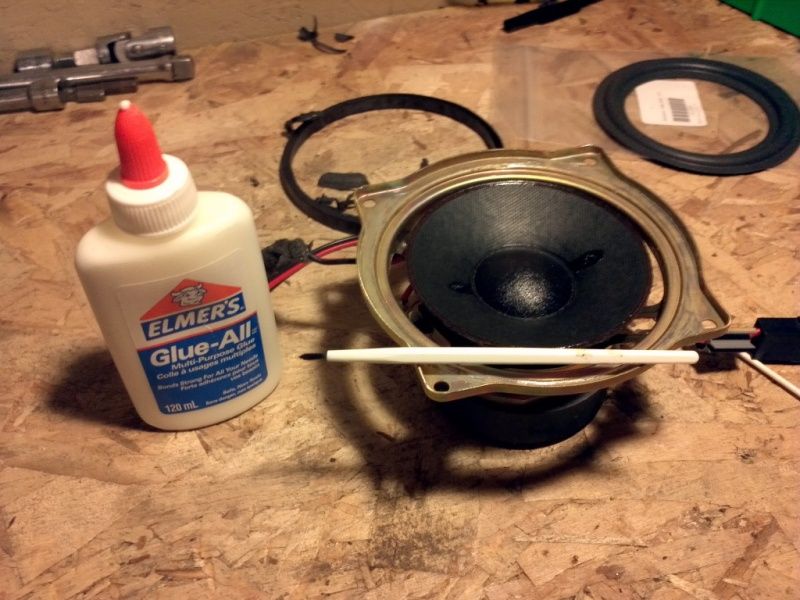
Prep: Remove the sub from the enclosure. There are write-ups on this so I didn't take photos of every step here. Basically you need nothing except for the driver itself on your work bench.

Step 1:
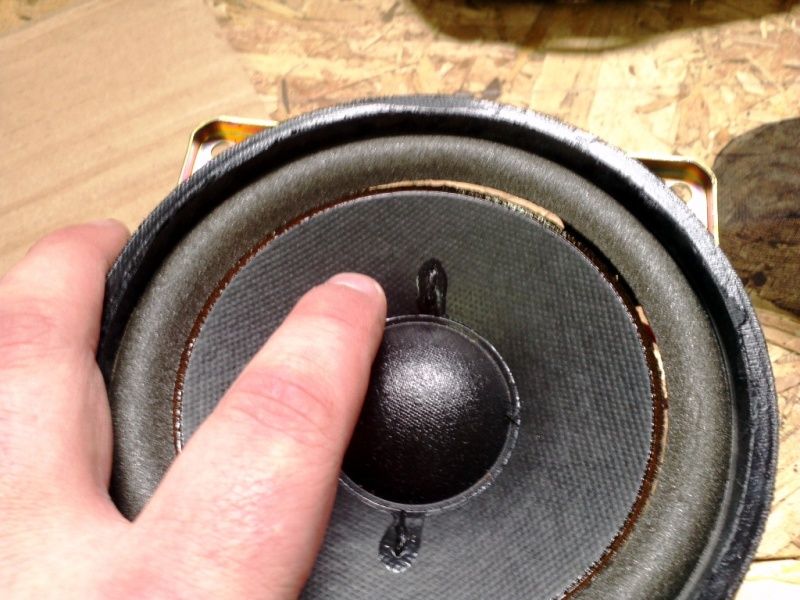
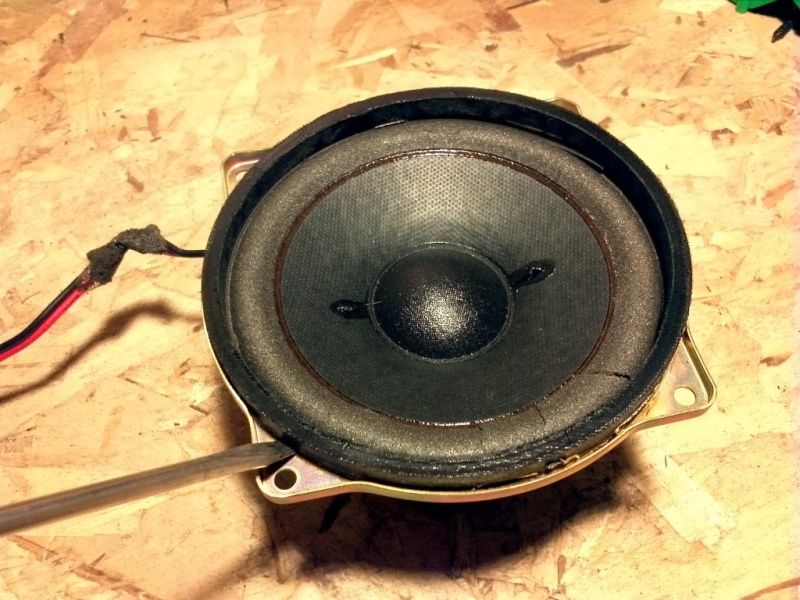
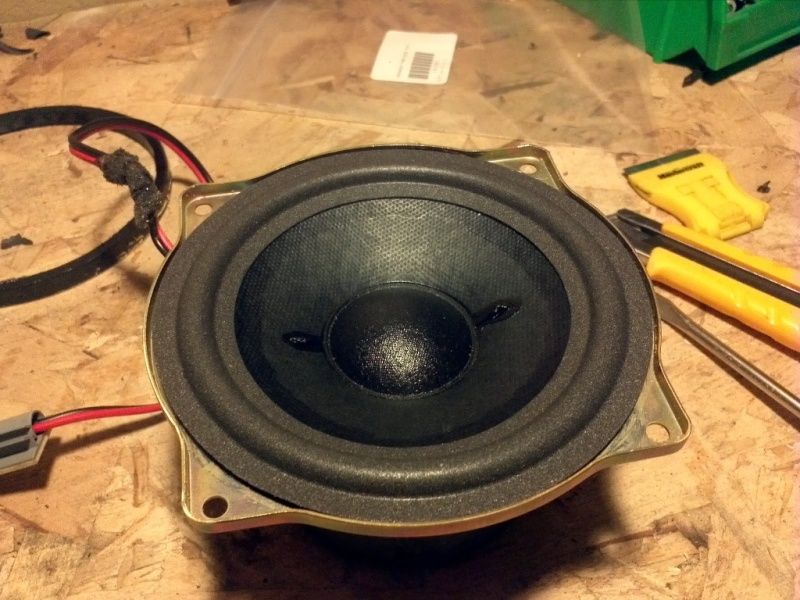
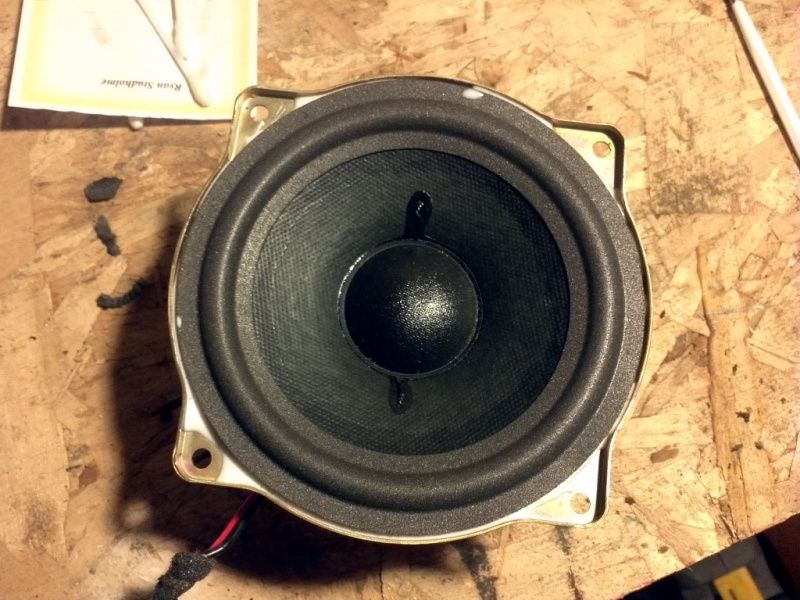
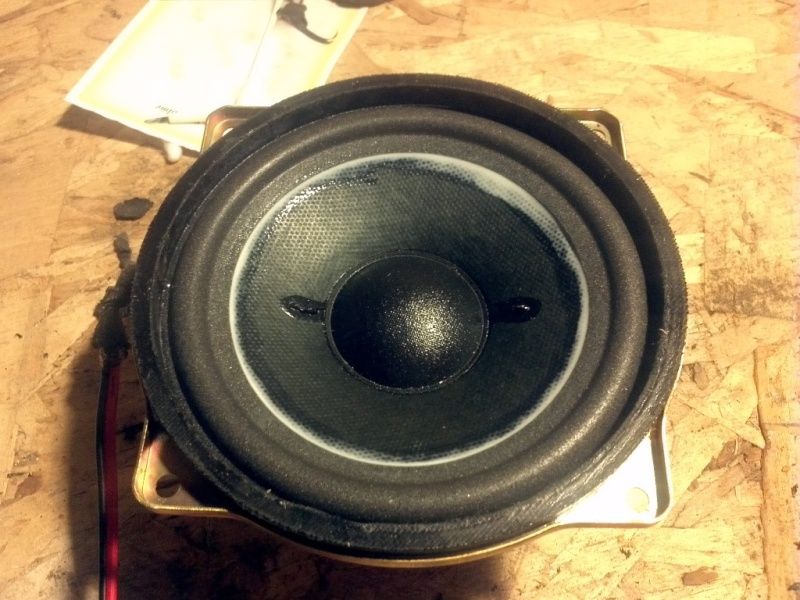
Confirm that it's only the foam surround that's damaged. Carefully inspect the spider, tinsel leads and cone for wear, tear and cracks. If you find any other damage you may need other repairs, or replacement may be a better option. Also evenly push on the cone, gently but firmly, to exercise the speaker. If you feel any friction, grinding or hear any scraping the cone is out of alignment or the coil is damaged. It could be possible to re-align the cone, but a damaged coil will pretty much mean its time for a new speaker. I had no friction or sounds at all, so I did not have to go through the alignment process.

This is the extend of my speaker's damage. I used 3 fingers evenly on the cone to move it and all was well, so onward I went.


Step 2:
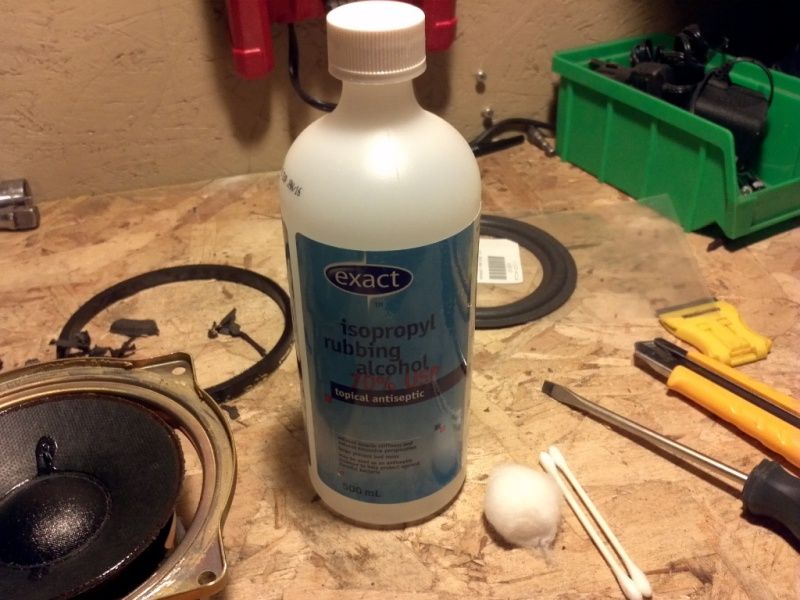
Gather your materials and tools. I used the following at various points of the repair: flat screwdriver, utility knife (with sharp blade), small/cheap paint brush, Elmer's white glue, rubbing alcohol, a cotton swab, a couple of q-tips, and the new foam surround.


Step 3:
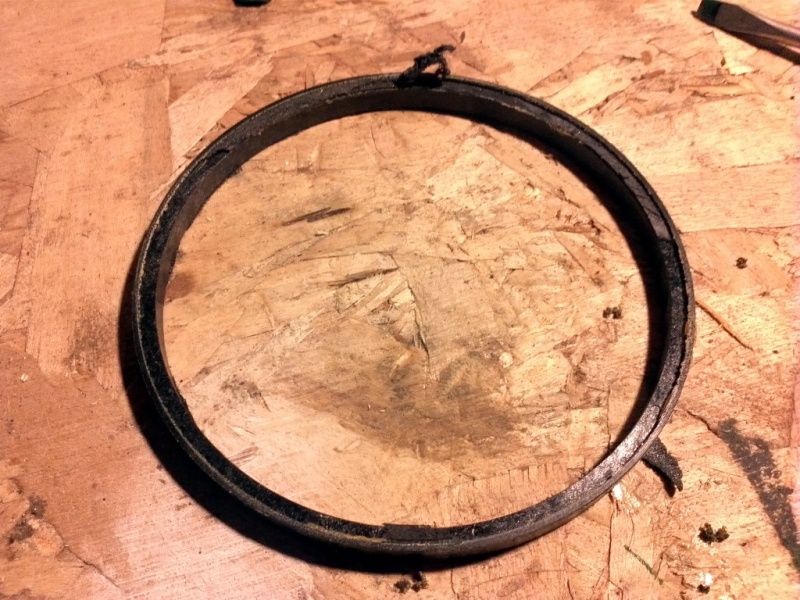
I had cut off the OEM cloth grill over the speaker to inspect the foam. There is no way to re-use this if you do so, but it is not super critical anyways. If there is any part of the surround still attached to the speaker cone carefully and precisely cut it as close to the cone as possible with your sharp knife. Next is to carefully remove the plastic ring on the top of the speaker frame. Go slow, the ring is glued on top of the foam surround and it will likely tear some foam with it, this is why you want to cut the foam away from the cone first. I started in one corner with the least amount of visible glue and pried up with a flat screwdriver. Once it starts to come up work your way around until you have the whole thing loose and set it aside. Don't break this piece, it is critical to re-use it.


Step 4:
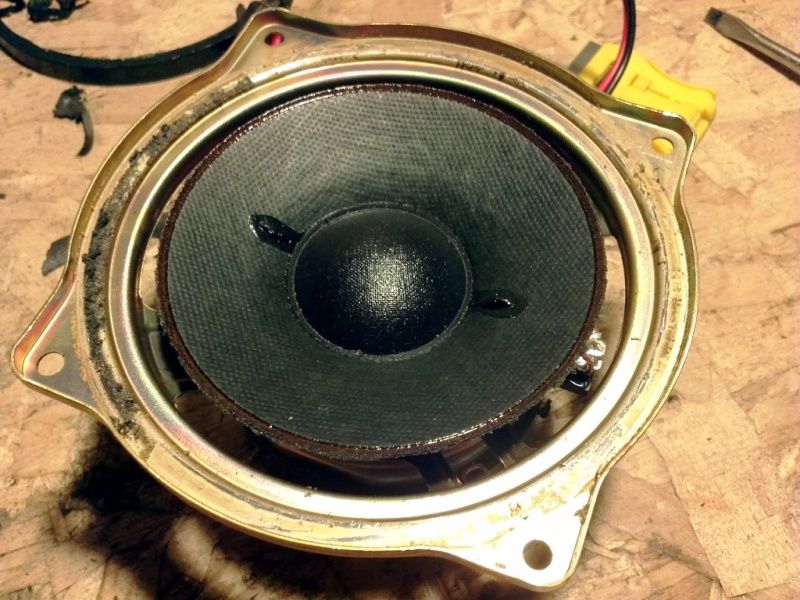
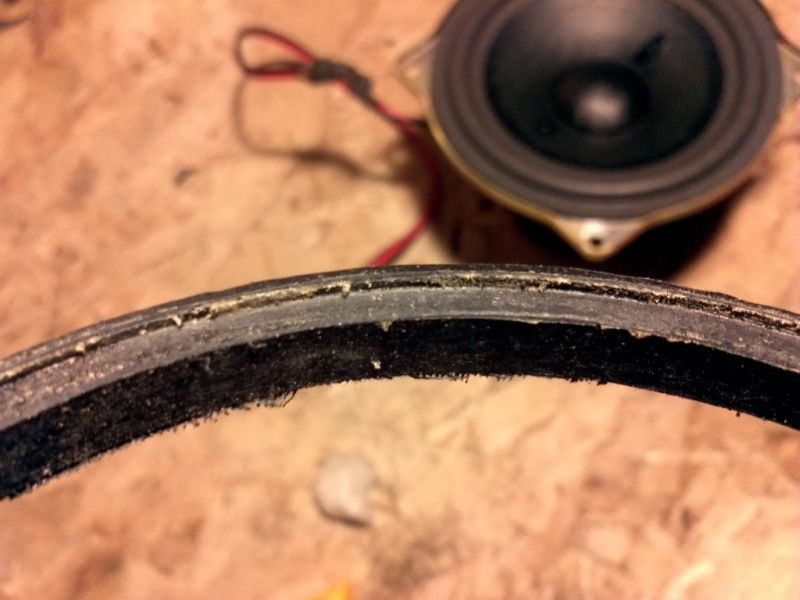
Clean the speaker frame of all residual foam surround bits. Having a little glue left behind is ok, but you need all of that old foam off of there. I used the flat screwdriver again, and scraped the outside frame in a clockwise direction. I'm right handed and this was the most comfortable for me, it also kept the pressure of the screwdriver to the outside of the frame so if it did happen to slip it went away from the speaker instead of into the cone.

This photo show 3/4 of the frame scraped, and a bit of the old stuff left to try and show what you need to remove.


Step 5:
Bust out that rubbing alcohol and cotton swab. With the frame fully scraped wipe it down with a bit of alcohol. This will help remove some of that old glue, and really clean it for a good mating surface between the new surround and existing frame.


All cleaned up with the old foam off:


Step 6:
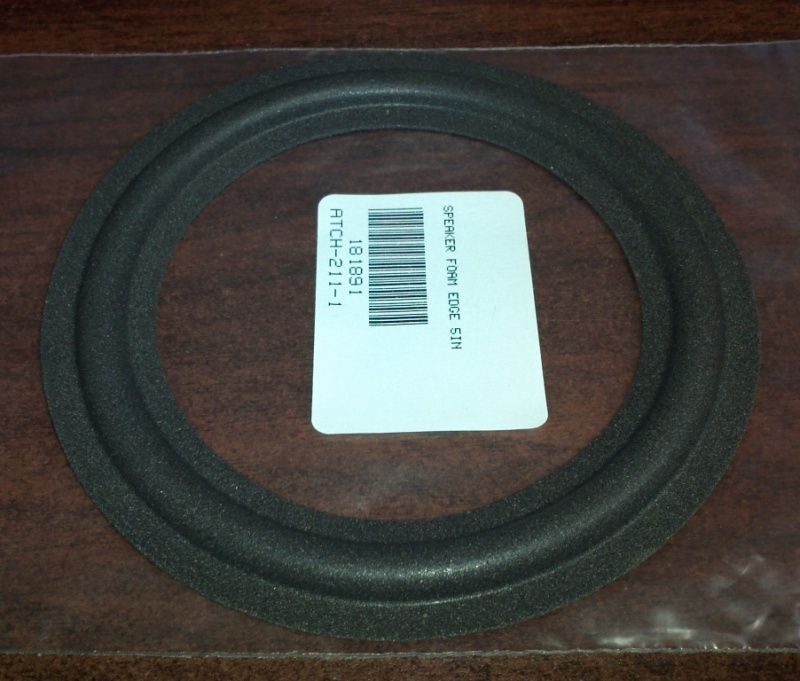
Test fit the new srround dry! If it doesn't fit right now is the time to trim/modify it or find another one that fits better. The one I had found locally happened to be a near perfect fit and required no modifications at all.


Step 7:
When you're happy with how things are looking, glue that baby down to the cone. Here a little more glue is better than too little. I found out after I used way too much, but that was ok, it cleans up easy and dries clear. I put a blob of glue on a clen piece of paper and painted it on evenly with the paint brush. You really want this to be a nice, even coat of glue. If you're using regular white glue let it sit for a couple of minutes after putting it on so it gets a bit tacky, then place the surround on, centre it and flatten the edge of the foam on the speaker with your finger. Make sure to apply light pressure everywhere around the inner edge of the surround to eliminate any air bubbles and to make sure it is fully bonded.


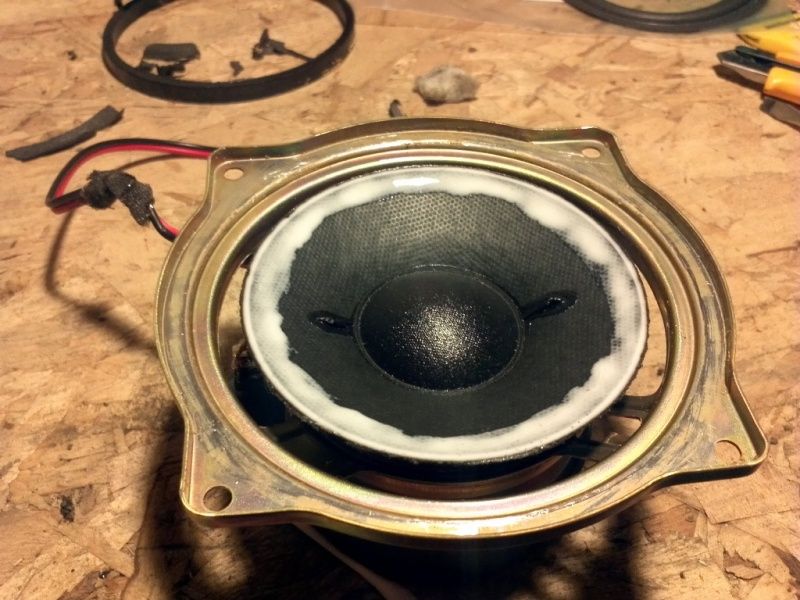
When you're happy with where it is and how it's bonding wipe away the excess glue. I used the paint brush again to scoop up the extra. Excercise the speaker again to make sure it's still moving perfectly smoothly. If it isn't you've got to fix that or it isn't going to work. It should look something like this.


Step 8:
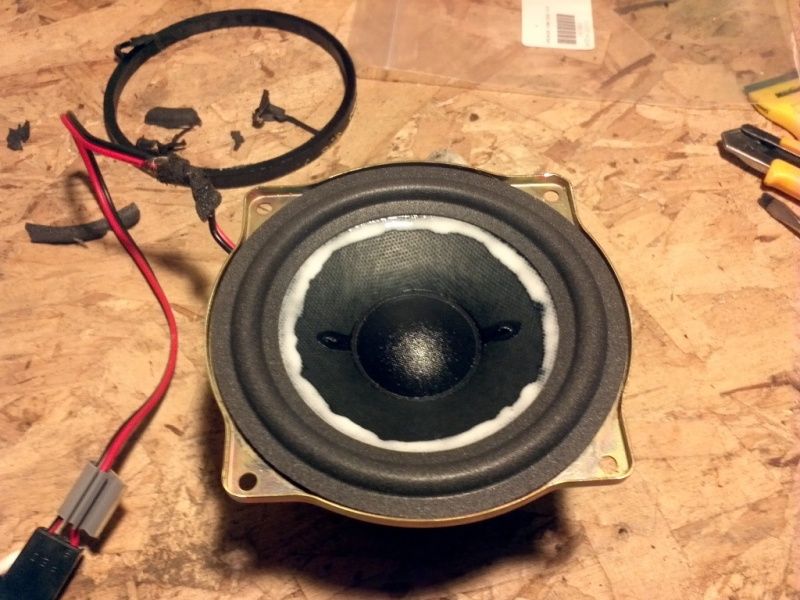
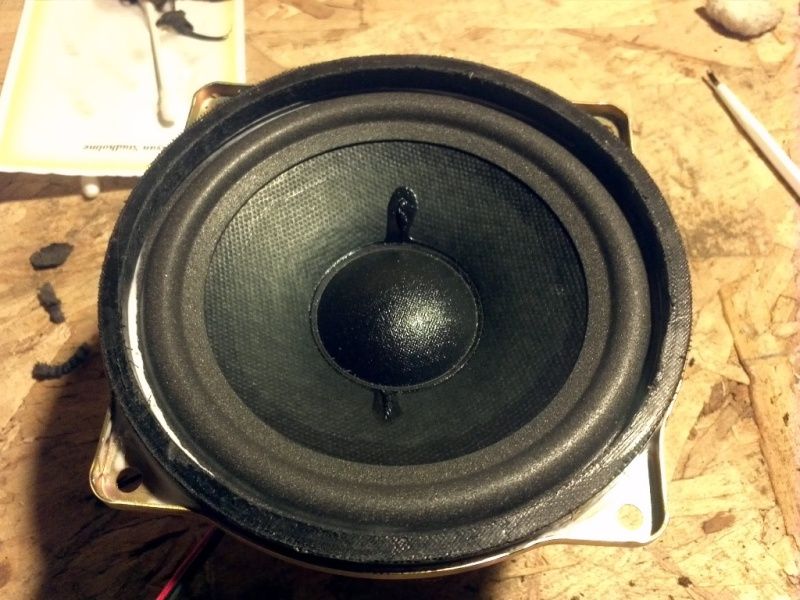
Do nothing until the glue adhering the foam to the cone is fully cured. I let it dry for a full 24 hours. You do not want this bond to shift or break loose when you glue the outside. After fully curing it should look something like this:


Notice how the extra glue dried clear.

Step 9:
With the cone fully cured it's time to work on the foam to frame bond. First you have to clean the plastic ring that sits on top of the frame similar to how you cleaned the frame itself. I again used my sharp knife here and wiped it with alcohol after. Again, you need to get that old speaker foam off. I also had to get some of the old glue off of it so that it would fit back in the frame smoothly. Removing old foam from the frame:


This is clean enough


Step 10:
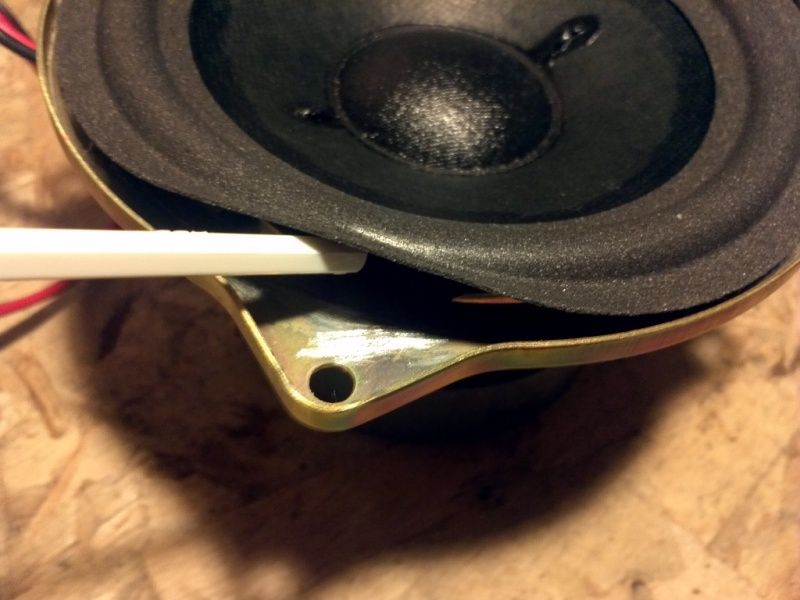
Glue that foam to the frame. You need to carefully lift the edge of the foam and work some glue under it onto the frame. I used my finger to do this, while applying the glue with my paint brush again. This photo is using the end of the brush to lift up the foam so my big finger wasn't blocking the view for a pic.


Again, let the glue set up for a few minutes and start working the outside edge down like you did on the inside. The trick here is to excercise the speaker while you're setting this to keep the cone and voice coil centred. If you feel any friction, or hear any scraping while excercising the speaker try to eliminate it by shift the cone with tiny amounts of pressure. Any time you adjust the surround you have to check and make sure that the speaker is moving smoothly here. If it isn't at this point it won't when it's dry!


At this point due to the "springyness" of my new foam surround I had to clamp it down. It's not ideal but I had to glue down the plastic ring at the same time as gluing the foam to the frame. When installing the frame make absolute sure that you're putting it in with the lip edge down. The top of the plastic ring needs to be the smooth side to seal it properly in the enclosure. I had the speaker moving perfectly smoothly, but when I put this on I felt some light friction/scraping. Don't freakout, I was able to work thos out with very minor pressure to move the foam and ring and got it moving perfectly smooth again.


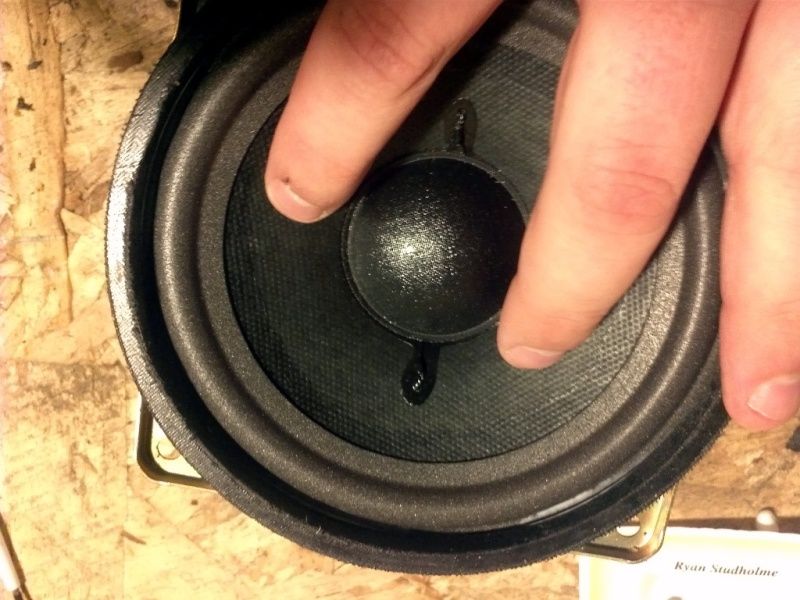
As the glue is setting stay with it and test the speaker with your fingers once in a while to make sure it stays moving freely. After my previous adjustment I was ok, but checked a few more times every few minutes to make sure it didn't pull itself back out of alignment. Here's me testing it, don't push too har or you'll go right through the speaker, and spread the pressure our so you don't compromise the cone. All I'm saying is don't jab your thumb through it on one side of the speaker.


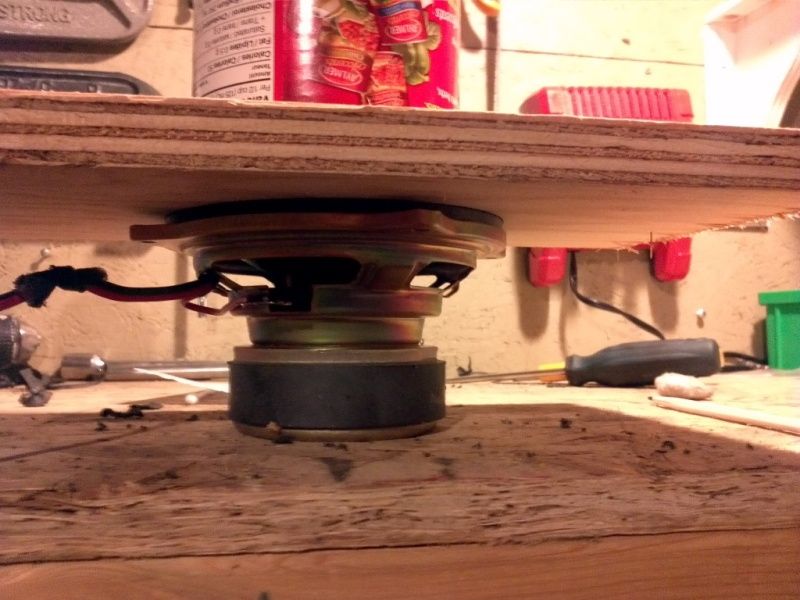
When I was happy with how it was setting up, and was comfortable that it was aligned properly I clamped it down for good. to do this I grabbed a small flat piece of wood and a can of diced tomotoes out of the pantry. Put the wood onto the speaker without shifting the plastic at all, do the same with the can of tomatoes. You can use anything that will provide even pressure onto the speaker, you don't want it tilted or anything. Also put this weight on it somewhere that you can leave it completely un-touched until the glue is dried. If you try to move it with the weight on it you will likely slide the surround (and cone) out of alignment.


Step 11:
Check your work. If everything looks good and you can excercise the speaker without any friction or noises you've done a good job. Essentialy at this point your speaker is repaired! If you're feeling friction or hearing scraping when pushing on the cone now you will have to start over right from the beginning. This shouldn't happen if you take your time and avoid rushing.

At this point I read a tip online about re-inforcing the edges of the new foam with some more glue. I figured it couldn't hurt so I did it. apply a very small amount of glue to the edges of where the new foam meets the existing cone. This should help to stop the surround from peeling away in the future. It will also make another re-foaming job more difficult lol. With that said, if you've done it right the speaker should be good for another 20 years if you don't abuse it.

I used my finger, and rubbed some glue against the edge of the foam at the cone.


Then I used a q-tip and applied some tot he under side where the foam met the cone. This may have been a bit over-kill, but oh well.


Notice I didn't remove the old foam from the bottom of the speaker. I didn't because I didn't think I could do it without damaging it, so I didn't risk it. Let this glue dry another 24 hours and the speaker is ready to go back in the car.

Step 12:
Re-assemble the sub into the enclosure exactly how you removed it. Make sure to re-use or replace all of the seals for the enclosure or it won't sound very good. Test the sub at low volume levels to make sure it's working and not making any weird sounds. When it's all good turn it up a bit to make sure it's still good. I would encourage a "break in period" before turning it up to moderate levels to let the foam loosen up a bit.

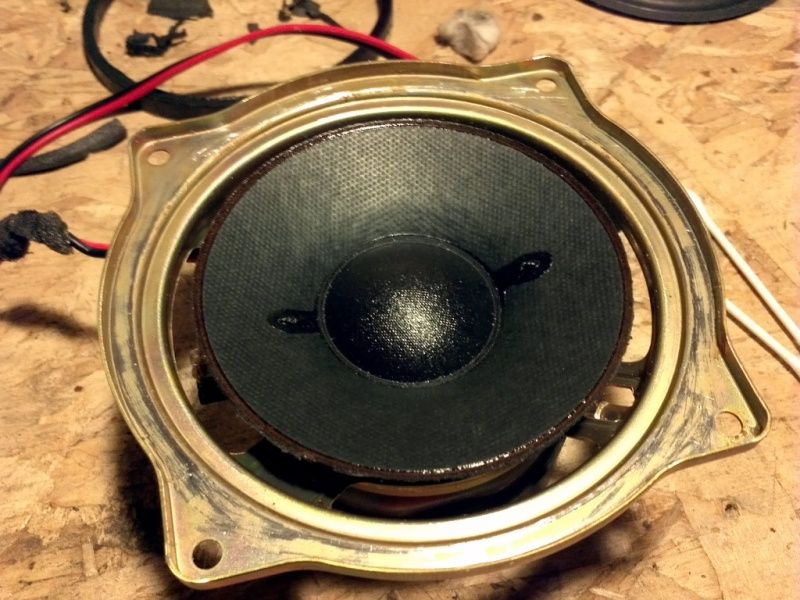
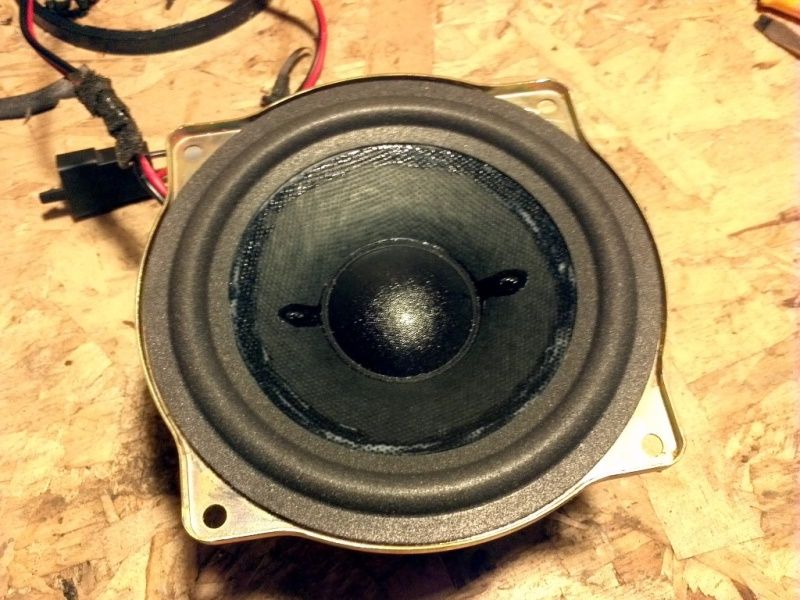
The sub with the new srround re-installed in the factory enclosure just the same as OEM with the exception of the missing grill coth.


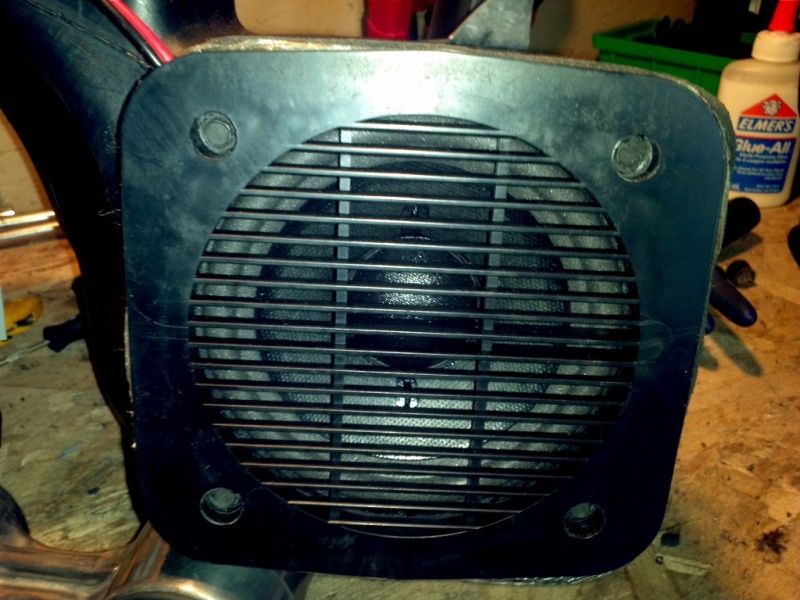
I'll tell ya it was nice to have a fully functioning stereo again, especially knowing that I fixed it myself and for what it cost me to boot. The sound is great, just like it was before it blew. Hopefully you will have as much success as I had with this repair.

Step 13:
Enjoy!


IP: Logged
Indydreamcar
Member
Posts: 30
From: Gastonia, NC
Registered: Jan 2007


Feedback score: (1)
Leave feedback

Rate this member

Report this Post07-29-2015 08:14 PM Click Here to See the Profile for IndydreamcarSend a Private Message to IndydreamcarEdit/Delete MessageReply w/QuoteDirect Link to This Post
Thanks for this incredibly helpfup write up!! I too wanted to fix it myself and not throw-away an otherwise perfectly good speaker. I ordered the new foam and the glue on my sub speaker is drying as I type this!!
IP: Logged
annasanders12
Junior Member
Posts: 2
From: Elkhart, IN 46514
Registered: Aug 2019


Feedback score: N/A
Leave feedback

Rate this member

Report this Post12-18-2020 06:42 AM Click Here to See the Profile for annasanders12Send a Private Message to annasanders12Edit/Delete MessageReply w/QuoteDirect Link to This Post
Hi, I had my Vintage Radio refurbished and customized here : https://www.vintagecarradio.com/vintage-radio. You may ask for their advice if you any concerns about your car.
IP: Logged
PFF
System Bot
Raydar
Member
Posts: 40685
From: Carrollton GA. Out in the... country.
Registered: Oct 1999


Feedback score:    (13)
Leave feedback


Total ratings: 460
Rate this member

Report this Post12-18-2020 05:10 PM Click Here to See the Profile for RaydarSend a Private Message to RaydarEdit/Delete MessageReply w/QuoteDirect Link to This Post
Just saw this. Very cool!
I do, however, question the use of white glue. I suppose that it really doesn't matter, except that everything I've ever seen associated with speaker construction used solvent based adhesives, as opposed to water based. Just gave me a WTH moment.
But if it works...
IP: Logged
ZaraSpOOk
Member
Posts: 256
From: Rosemount, MN
Registered: Sep 2010


Feedback score: N/A
Leave feedback

Rate this member

Report this Post01-12-2021 07:52 PM Click Here to See the Profile for ZaraSpOOkSend a Private Message to ZaraSpOOkEdit/Delete MessageReply w/QuoteDirect Link to This Post
 
quote
Originally posted by Raydar:

Just saw this. Very cool!
I do, however, question the use of white glue. I suppose that it really doesn't matter, except that everything I've ever seen associated with speaker construction used solvent based adhesives, as opposed to water based. Just gave me a WTH moment.
But if it works...


I just refoamed 4 8" woofers, they gave me white water based glue, I'd say it works well since if you get any on yourself you can just wash it off.
On a car it *could* be a problem, but for home if they get wet you have bigger problems than your speakers.
BTW, this is not Elmers, although it looks like it, that stuff is too brittle, the stuff I used is more flexible.

I would say however not to use too much, I only needed half of what they gave me, it is one of those Goldiloks things, use enough to do the job, but not too much
also I do not think cutting out the dust cover and shimming is necessary if the covers are in good shape, if not yeah, but your mileage may vary.
This is easy, the main thing is to get off the remaining foam and adhesive, I used a toothbrush to scrub it off the cone.
here is a pic of the completed job

I saved $125 by doing it myself, and I did as good if not better than the "pro" I paid to do it before who did a kind of messy job

[This message has been edited by ZaraSpOOk (edited 01-12-2021).]

IP: Logged
PhatMax
Member
Posts: 541
From: Peotone, IL. USA
Registered: Apr 2006


Feedback score: N/A
Leave feedback

Rate this member

Report this Post01-13-2021 12:43 PM Click Here to See the Profile for PhatMaxSend a Private Message to PhatMaxEdit/Delete MessageReply w/QuoteDirect Link to This Post
To be sure the voice coil never scrapes you should remove the dust cap and shim the VC. Then glue the surround. When it’s all dry I then water down a bit of glue and yes it to “paint” the entire surround. It provides a bit of dampening and seals the gap at the surround gasket. It will smooth out the sound of the sub.
IP: Logged

next newest topic | next oldest topic

All times are ET (US)

Post New Topic  Post A Reply
Hop to:

Contact Us | Back To Main Page

Advertizing on PFF | Fiero Parts Vendors
PFF Merchandise | Fiero Gallery | Ogre's Cave
Real-Time Chat | Fiero Related Auctions on eBay


Copyright (c) 1999, C. Pennock