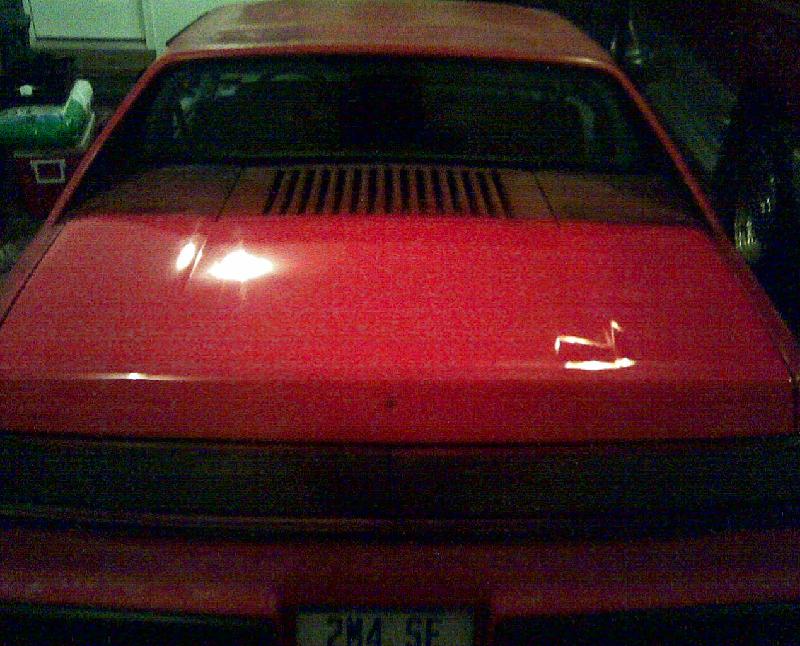
Finally sick of looking at the ugly luggage rack with it's chipping paint, on my sandpaper-textured decklid. At this point I really can't make the decklid look any worse, so I decided to finally do something about it. The following is the result of about 2 hours of work, including waiting for the filler and primer to dry.
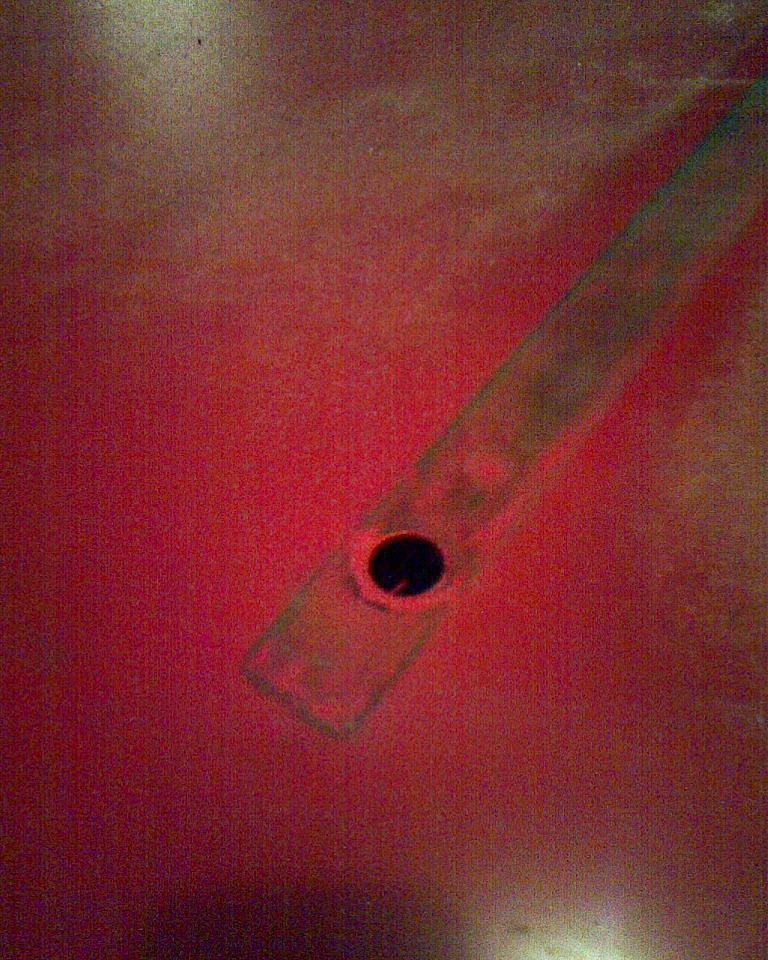
First, remove the luggage rack, leaving 11 dime-sized holes and a couple the size of a pencil eraser
Next, I cleaned the area under the gaskets, and washed the decklid.
Now, I used this drill attachment to make the holeslarger and sort of V-shaped, but more of a wide, elongated V, with a nice rough texture to give the filler something to hold onto
Repeat for the other holes
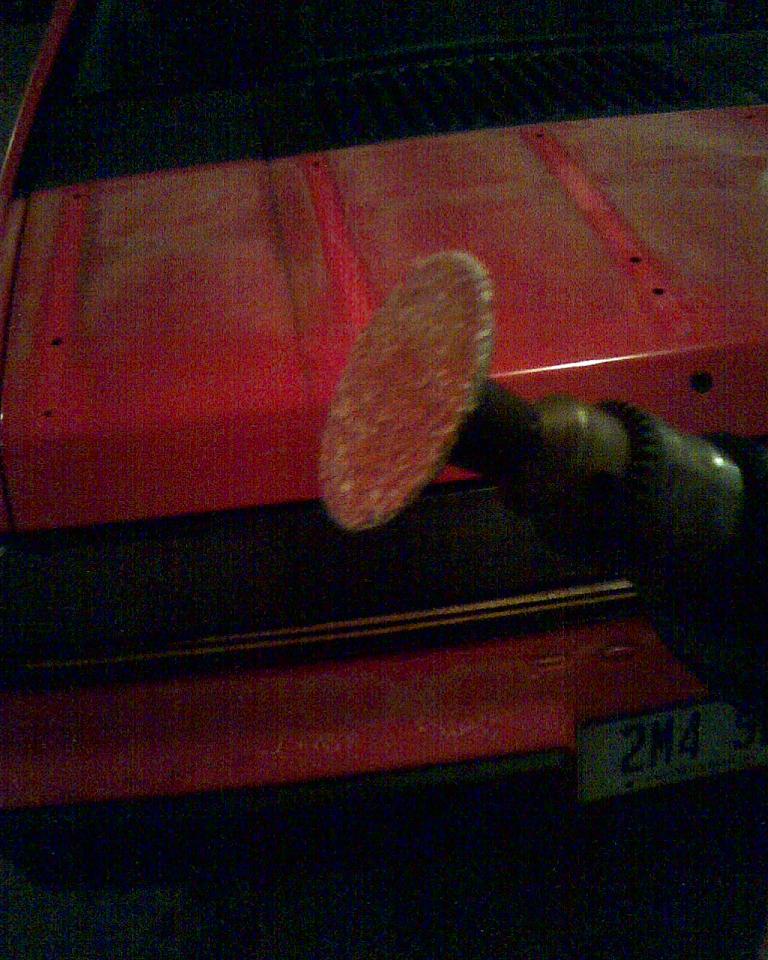
Placed duct tape on the back of the holes that went through to the other side. The others (I believe there were 5) I just dribbled the filler into the hole and smoothed it over as the filler started to get fairly thick, since it sets up so quickly.
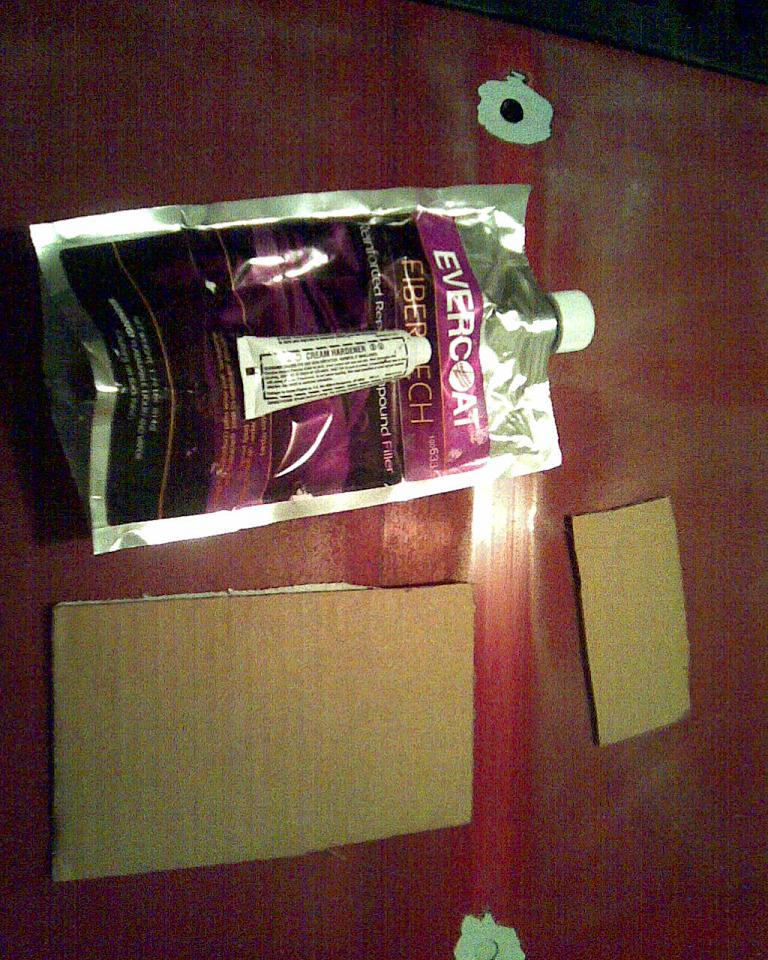
I used Evercoat Fibertech, since it's made specifically for repairing SMC panels.
Here it is mixed, ready to be applied. It goes from violet goop and blue hardener to a bluish purple ooze.
Attempted to apply evenly, with quite a bit of overlap
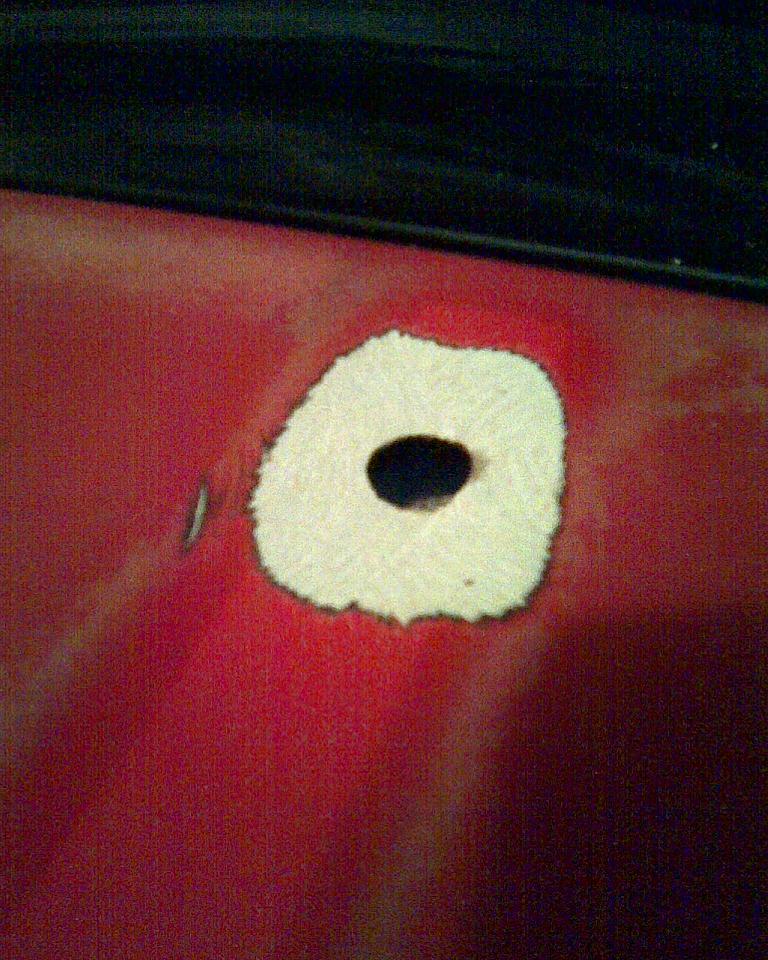
Next I sanded it down slowly using a Dewalt random orbit sander with 80 grit sandpaper. I then wiped away to dust and felt the surface, nice and smooth. However, this was probably a mistake, as I can still feel all the supid little fiberglass shards itching in my hands, and they're driving me nuts!
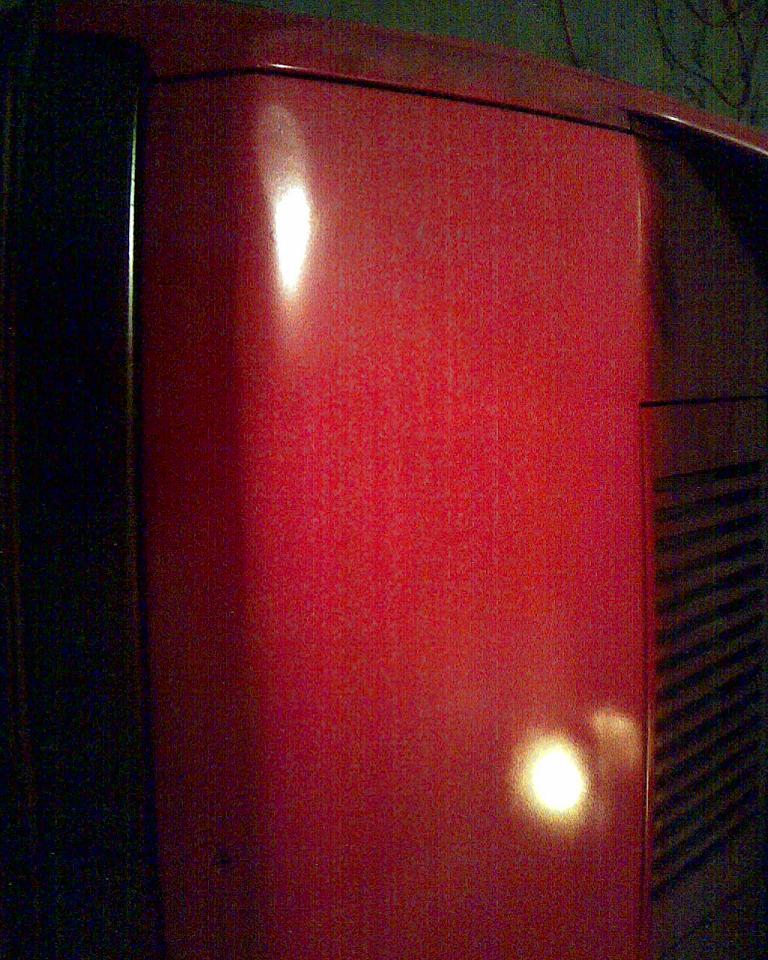
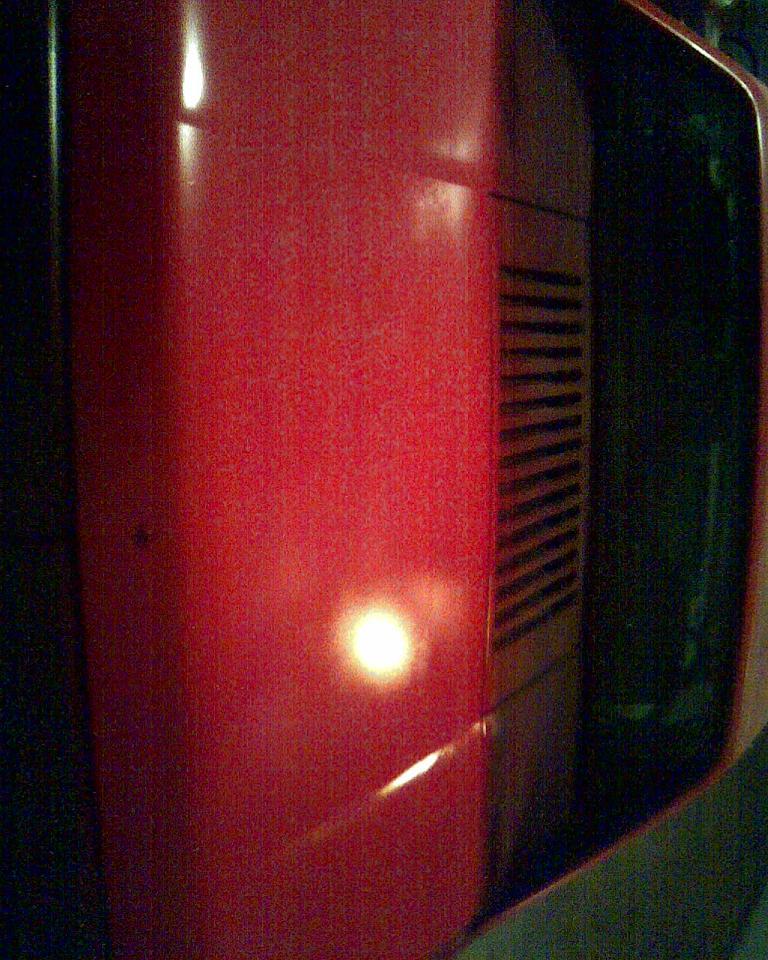
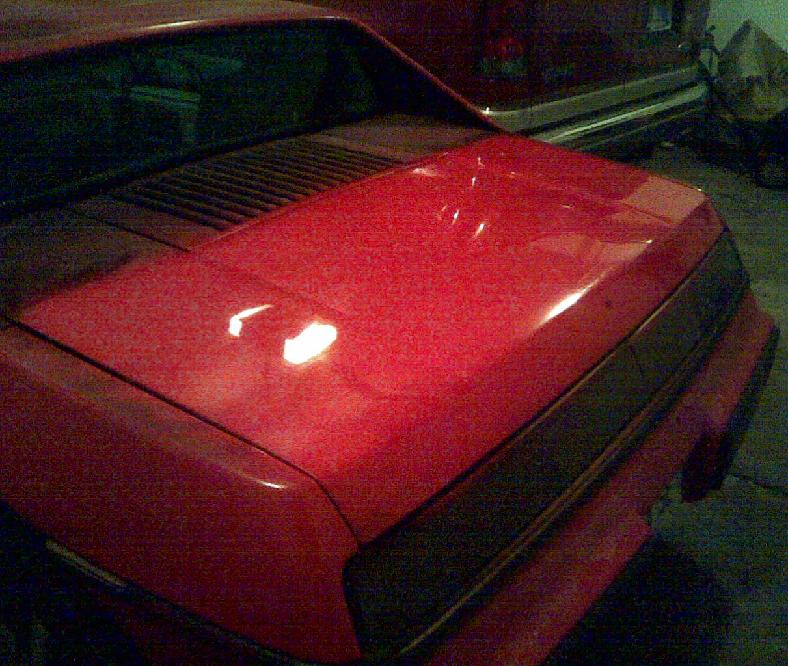
And finally, the surface primered. No more holes!
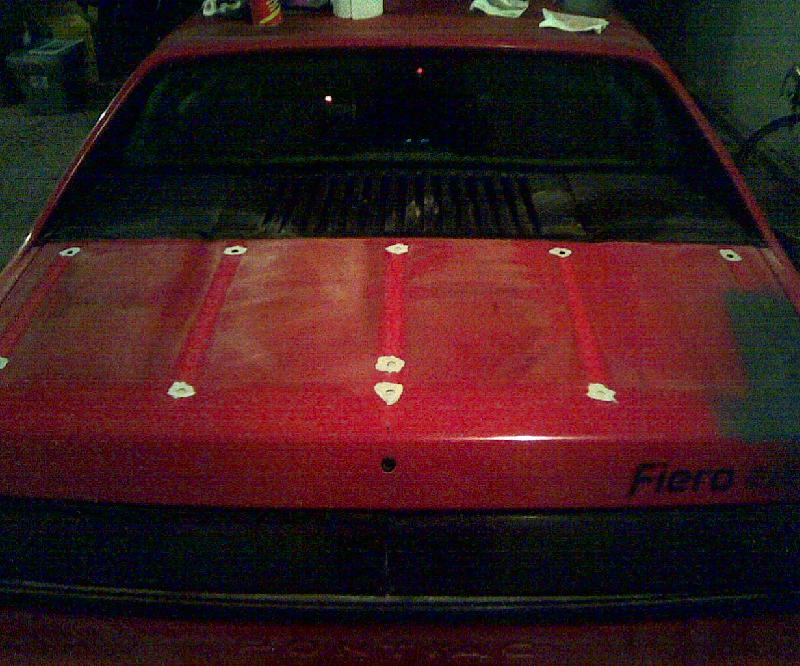
Two down, 11 to go. Then sanding the entire decklid smooth, apply primer and paint, and polishing. At that point I'm going to decide weather or not to add the 82 Firebird spoiler I picked up and painted semi-gloss black. Right now I'm leaning towards having the spoiler...
Great job! Definitely inspires me to do similar work on mine. I really can't stand the luggage rack on the back. I really can't see me ever using it for that purpose...
I'm looking for a luggage rack to completely strip and restore. Are you selling the one you took off?
Unfortunately I damaged it during removal, since I figured I'd be throwing it out. The rubber strips have screwdriver indentations, and the rubberized ends have marks on them, too. Shipping that heavy wing part would be expensive, too.
Made more progress last night, all the holes are filled and sanded (and filled again on a few). Pics to follow later.
I just did kinda the opposite. I made a GT deck lid with a luggage rack. So I could swap out my deck lid to haul stuff and go back to my deck lid with the wing when I am done. Had to cut the luggage rack wing down to fit the GT though.
Cool I just did the same thing only I used fiberglass on the back and bondo on the top. Just about to put on the last coat of paint tonight. It looks better than with the rack IMO.
------------------ 84 Duke, Holley TBI, Manual Trans 4.10, CompuCam, White
Nice, Do you think that the Evercoat Fibertech can be used on the front fender panel to fill-in the hole left by the antenna
I believe the front fender would need a different repair material since it's a flexible material, the Fibertech is just as stiff as the SMC.
I painted it last night, and well, it's better than it was. A lot better than it was, but far from perfect. Basically, I got lazy, and wanted to see results sooner rather than later, so I didn't sand as much as I should have. Apparently I also should have gone down to bare SMC instead of trying to keep the original primer, since the lines/scratches/etc went down into it. And to make matters worse, when I started spraying the clear coat, the can started spitting globs at the car, and I didn't notice until the second pass, so I stopped using that can and continued on anyway, hoping maybe I could sand out the runs later.
Since the cell phone camera is so low quality, you can't see the flaws in the paint, but I'll post them here anyway. Compared to the earlier pics I posted with the original hazy clearcoat, it's a heck of an improvement, and I can use what I learned here on the other panels, and probably redo this one later.
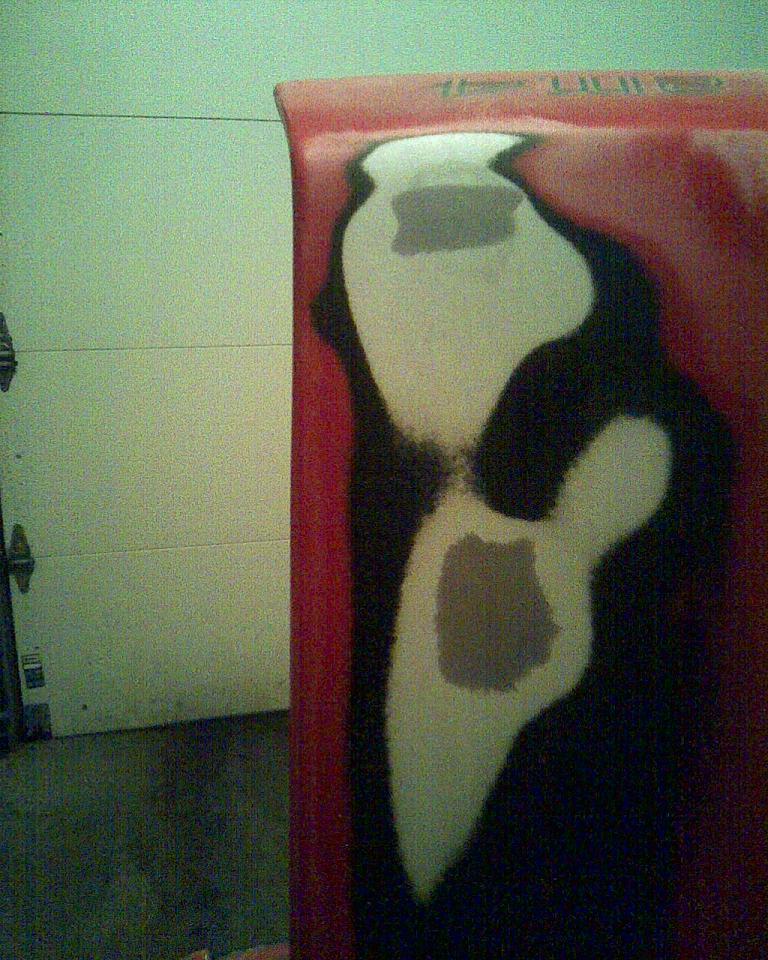
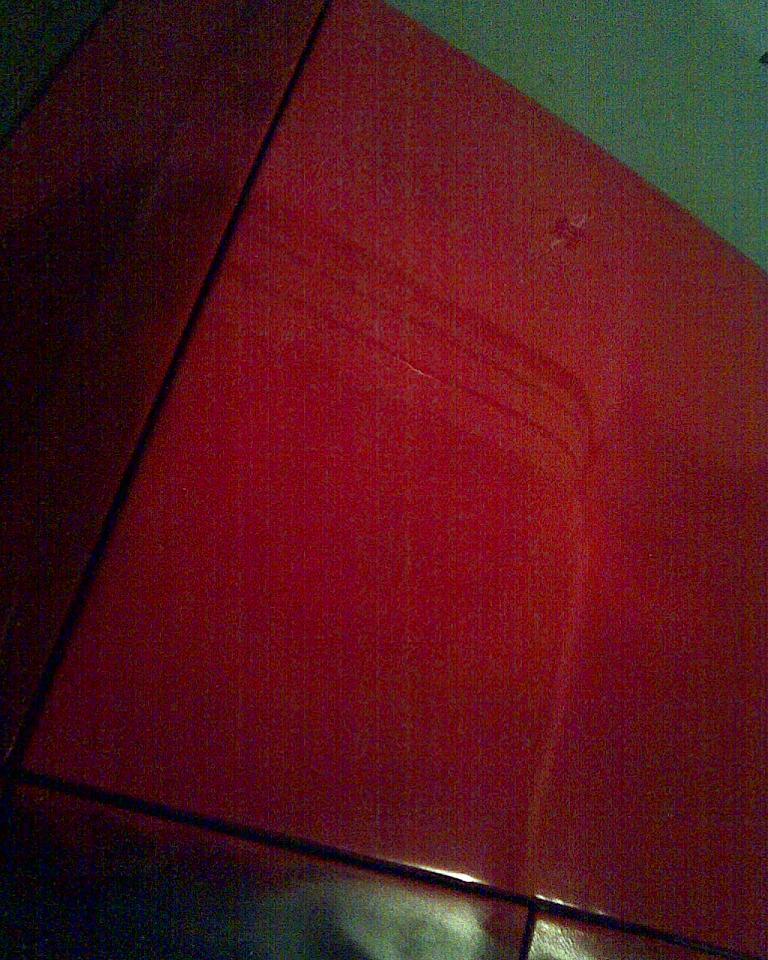
In primer two nights ago. After this was taken, I sanded the red area down to the original primer, and primed the whole decklid.
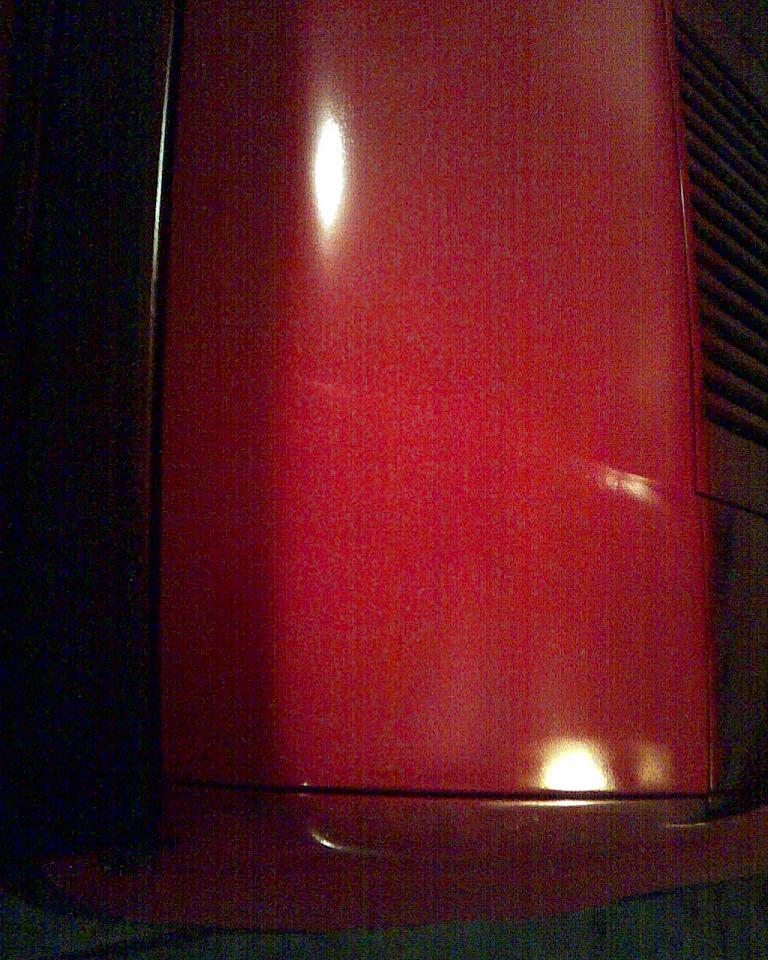
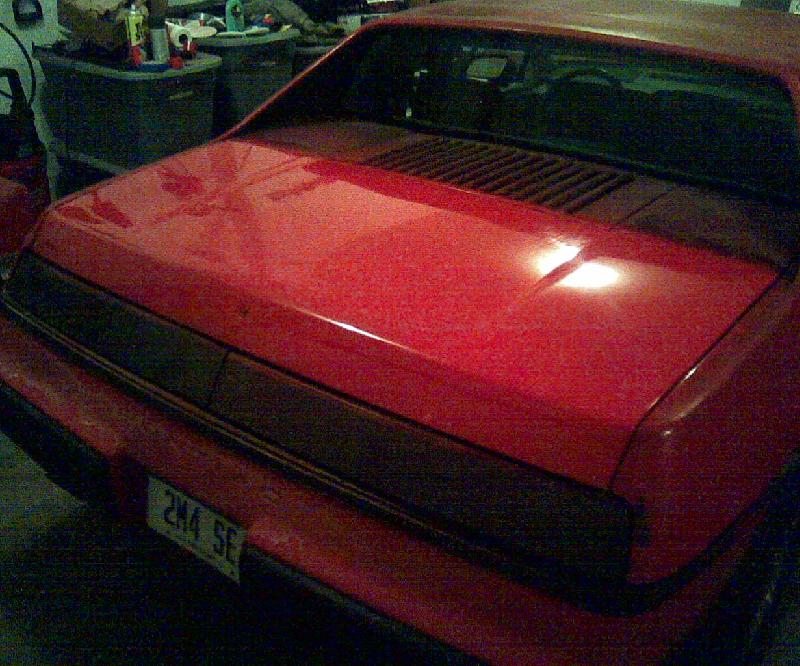
After painting and curing for 24 hours:
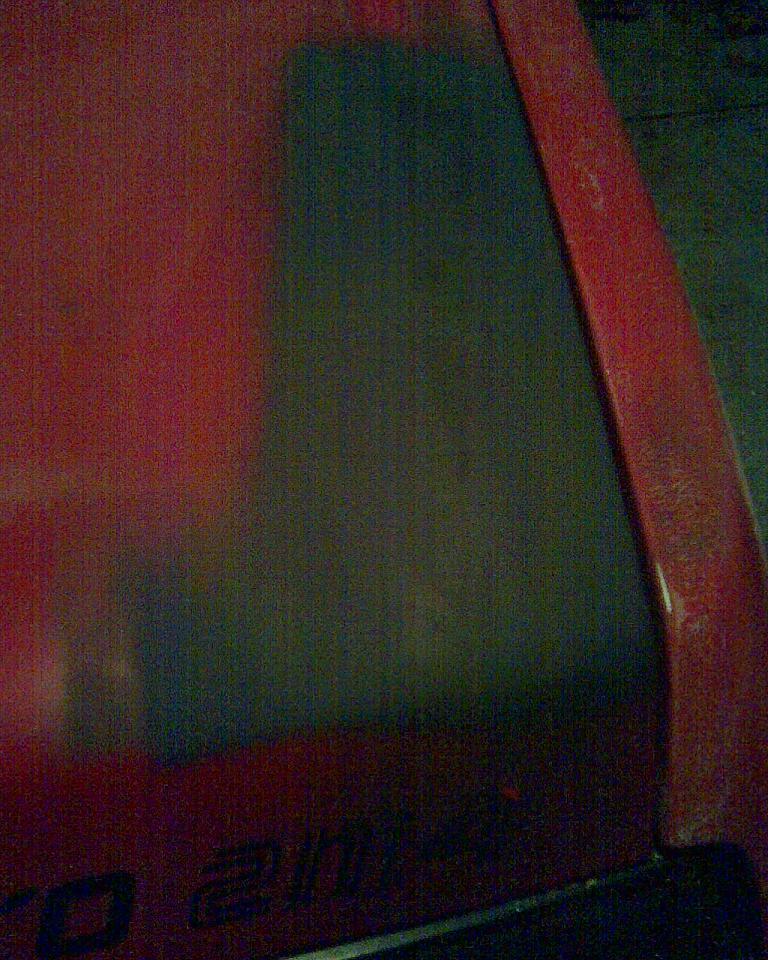
Here, I polished this section of the decklid below the battery access panel, starting with 1000 grit, then 1500, 2000, Meguire's polish, and finally Zymol Wax.The only way you can tell it's been polished in the pic is ou can see the garage door's reflection in the paint.
wow, I am just about do this as well. I have the luggage rack removed, but, am still working on the repairing the nose damage from rear-ending someone. I am removing the luggage rack, and adding a Dodge Shadow wing/spoiler. I will also be filling the gaps on the Shadow Wing, so it will be more of a "Whale Tail" than a wing.
and, sspeedstreet - if intrested - mine came of complete. I did spray it with matt black 3 years ago.
I removed my wing and considered installing the rack but changed my mind. It just looks so clean with nothing. For the time being I have vinyl plugs held in place with sealant.
How did you paint your deck lid? Rattle cans or gun?
I am ill equipped to become a paint shop painter and wondering if I have half a chance in Afghanistan of getting even an acceptable finish with rattle cans.
Nice, Do you think that the Evercoat Fibertech can be used on the front fender panel to fill-in the hole left by the antenna
SEM 39708 Flexible SEM-Weld. Available at your local autobody/paint supplier. Grind any area you use it with 24 grit discs - SLOWLY so as not to heat up & melt the material. Heating it will cause the pores to close & nothing will stick. Back up the hole first with the same product, & chop up some fiberglass mat with scissors to mix in it. Then "V" out the top of the hole & fill it with the same method. ~ Paul aka "Tha Driver"
I removed my wing and considered installing the rack but changed my mind. It just looks so clean with nothing. For the time being I have vinyl plugs held in place with sealant.
How did you paint your deck lid? Rattle cans or gun?
I am ill equipped to become a paint shop painter and wondering if I have half a chance in Afghanistan of getting even an acceptable finish with rattle cans.
I used Duplicolor spray paint. So far, less than 2 cans of sandable primer, 4 small cans of red (DSGM398, which is the same as 88 Fiero red), and less than two large cans of clear coat. $40ish in paint so far as opposed to spending $1500 on spray equipment, or $5000 everyone around here wants to repaint the car professionally. The finish isn't as good as the $5k paintjob, but it's fine for me, it isn't a show car, just a daily driver. Hopefully it will hold up better than Rustoleum roll-on jobs I've seen, time will tell.
[This message has been edited by RWDPLZ (edited 09-02-2009).]
Finished the sanding/polishing/waxing tonight. Turned out better than I thought it would. But now I have a couple new blisters that hurt like hell. Oh well.
When the blisters heal enough to do more sanding, I think I'll try repairing and painting the rear bumper next. It has some cracks and holes, the clearcoat is flaking off badly, and there's the pitted yellow areas on the black parts...
Looking good, Now all you have to do is paint the rest of the car to match
quote
Originally posted by Tha Driver:
SEM 39708 Flexible SEM-Weld. Available at your local autobody/paint supplier. Grind any area you use it with 24 grit discs - SLOWLY so as not to heat up & melt the material. Heating it will cause the pores to close & nothing will stick. Back up the hole first with the same product, & chop up some fiberglass mat with scissors to mix in it. Then "V" out the top of the hole & fill it with the same method. ~ Paul aka "Tha Driver"
Thank you for the info, Paul
[This message has been edited by BMTFIERO (edited 09-03-2009).]
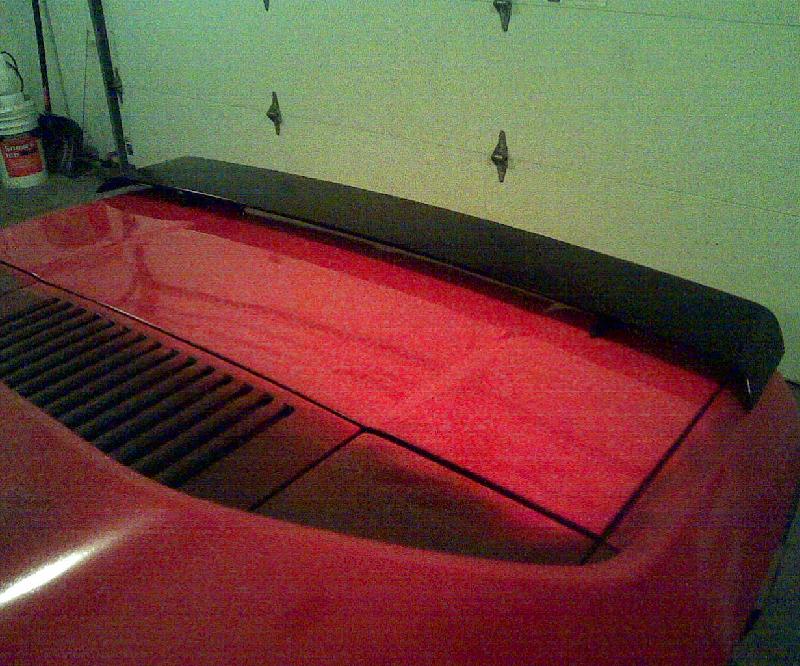
It was always in the plan to add a Firebird spoiler, although the look of the plain decklid was growing on me. After drilling the first two holes for the spoiler, I thought 'maybe this was a mistake' but after I got the spoiler mounted and bolted down, I knew I made the right decision. I LOVE the way it looks on the car!
I painted it semigloss black, which is what I'm also going to use on the mirrors, bumperpads, and decklid vents.
Originally posted by RWDPLZ: I used Duplicolor spray paint. So far, less than 2 cans of sandable primer, 4 small cans of red (DSGM398, which is the same as 88 Fiero red), and less than two large cans of clear coat. $40ish in paint so far as opposed to spending $1500 on spray equipment, or $5000 everyone around here wants to repaint the car professionally. The finish isn't as good as the $5k paintjob, but it's fine for me, it isn't a show car, just a daily driver. Hopefully it will hold up better than Rustoleum roll-on jobs I've seen, time will tell.
how did you find the Duplicolor color code? I plan on rattle canning mine as well. when I did my hood vent, I use duplicolor as well, but missed the color slightly....
I looked it up years and years ago when I was building model cars, one of the local auto parts stores had a Duplicolor catalog that went back to the late 80's in the paint section, it had the OEM color code, and the equivelent Duplicolor paint code. The catalogs I've seen now only go back about 10 years, and the Duplicolor site for finding the correct color match has been down for months.
Just responding to this because you linked to it in another thread.
I've seen and also owned a Fiero that someone had installed a black Firebird spoiler onto it... and I too really liked the look. It's a bit more subtle than the Fiero spoiler, but still looks really really cool!
It was always in the plan to add a Firebird spoiler, although the look of the plain decklid was growing on me. After drilling the first two holes for the spoiler, I thought 'maybe this was a mistake' but after I got the spoiler mounted and bolted down, I knew I made the right decision. I LOVE the way it looks on the car!
I painted it semigloss black, which is what I'm also going to use on the mirrors, bumperpads, and decklid vents.
I was going to ask in the thread about my trip to the Pick-nPull till I saw this was bumped. One of the reasons I went to the pick-npull was for a rear deck lid. It has the luggage rack and I need to fill the holes. So, I'm wondering how your fill holds up under hot weather? My understanding is there can be a problem when it's hot out with the repair showing through! Then I hear it dissappears again when it cools. Living in Florida this concerns me greatly and was wondering what your experience has been? Thanks Ray
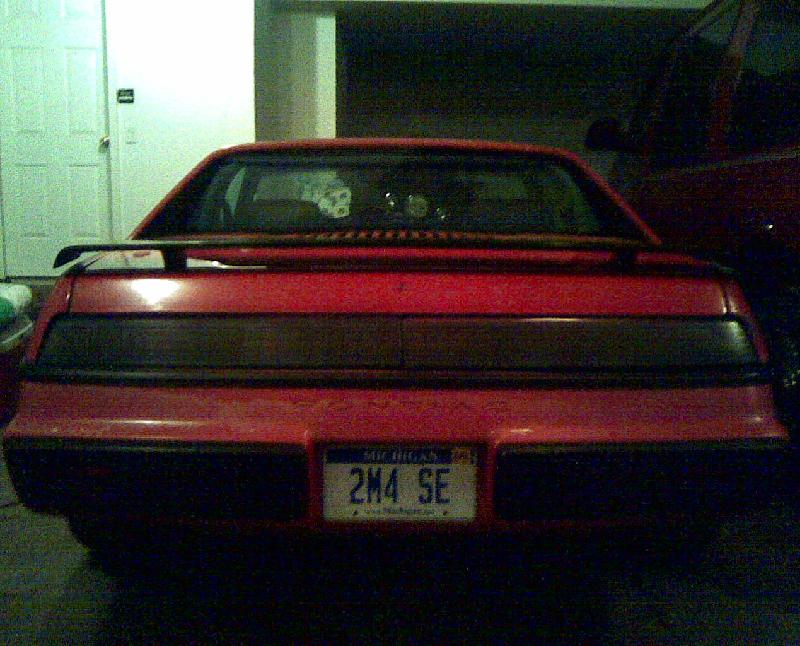
No sign of the holes reappearing yet. Here's a more recent picture at Michigan International Speedway this summer:
I can specifically look while it's hot outside, but you'll have to wait until ~ July
quote
I've seen and also owned a Fiero that someone had installed a black Firebird spoiler onto it... and I too really liked the look. It's a bit more subtle than the Fiero spoiler, but still looks really really cool!
Exactly! It also looks like a period-correct modification.
RWDPLZ, after that work you did on the decklid, you should take some black to your moldings bumperpads and decklid keylock. Also redoing the black edge of the tailights can do wonders.
RWDPLZ, after that work you did on the decklid, you should take some black to your moldings bumperpads and decklid keylock. Also redoing the black edge of the tailights can do wonders.
And the roof, and the hood, and the front bumper, the front fenders, the rear clip...
Just for future reference, ANY kind of filler you put on a repair MUST have all the paint and primer removed down to raw material to stick well...whether its SMC, fiberglass or bondo. It can also leave a ring around the repair where the edge was in the paint after a week or two drying. The ONLY EXCEPTION is 'icing' or flowable sanding filler. It can be put over paint IF its sanded with first with 180 grit or rougher. You dont use it to fill holes or cracks though, its for a final finish over bondo or to fill slight flaws in a panel. Its excellent for things like door dings and hail dings. Its too soft to fix larger damage areas.
How are the holes filled in doing now? I am curious on the spray-can paint if it has held up and what kind did you actually use? Was it duplicolor too?