Pennock's Fiero Forum
  General Fiero Chat
  Repairing broken headliner

Post New Topic  Post A Reply
Email This Page to Someone! | Printable Version


next newest topic | next oldest topic
Repairing broken headliner by liv4God
Started on: 10-31-2017 04:15 AM
Replies: 16 (1645 views)
Last post by: hnthomps on 11-05-2017 07:12 PM
liv4God
Member
Posts: 733
From: CA
Registered: Feb 2011


Feedback score:    (6)
Leave feedback

Rate this member

Report this Post10-31-2017 04:15 AM Click Here to See the Profile for liv4GodSend a Private Message to liv4GodEdit/Delete MessageReply w/QuoteDirect Link to This Post
Over the years I have redone the headliners in all of my Fieros, and I found that more than half of the time the headliner was broken, especially if it was a sunroof car. After a while I started fixing them in favor of replacing them. It has been successful for me now on several cars. There may be other ways to repair the headliner, and probably better ways too, but this is what I have done with success. So if you want to fix your broken headliner and don't know another way, this can help.

Without further ado, pictures and instructions:

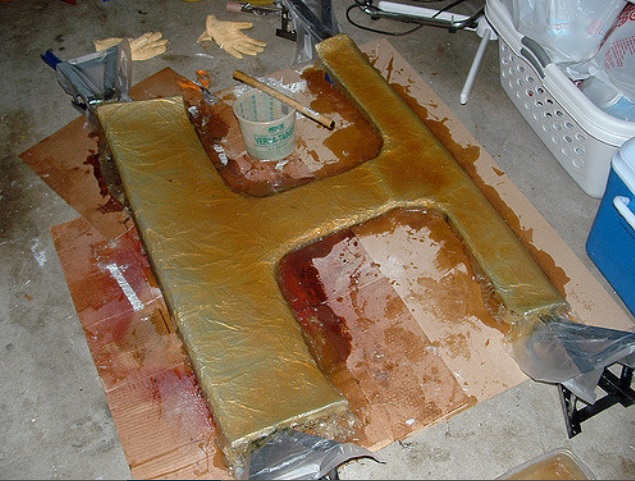
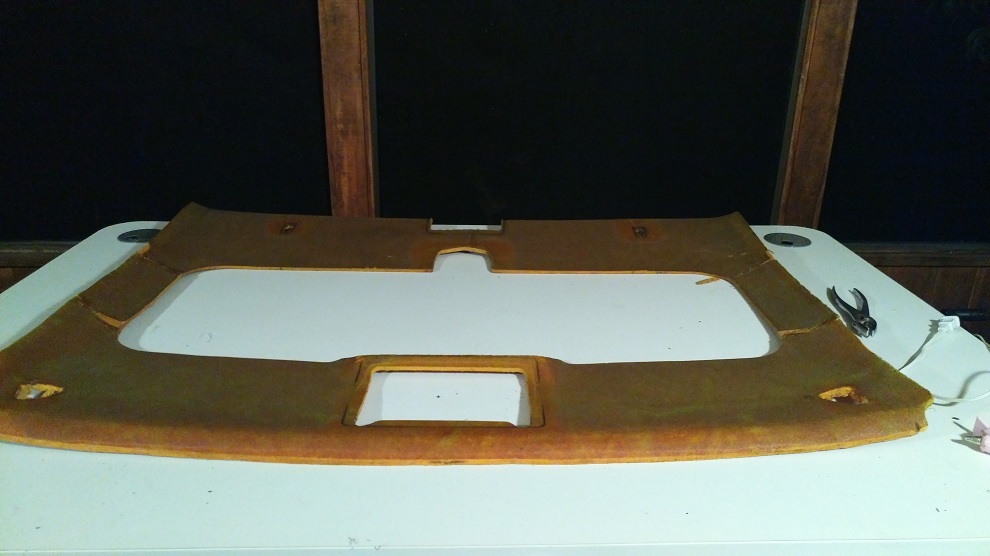
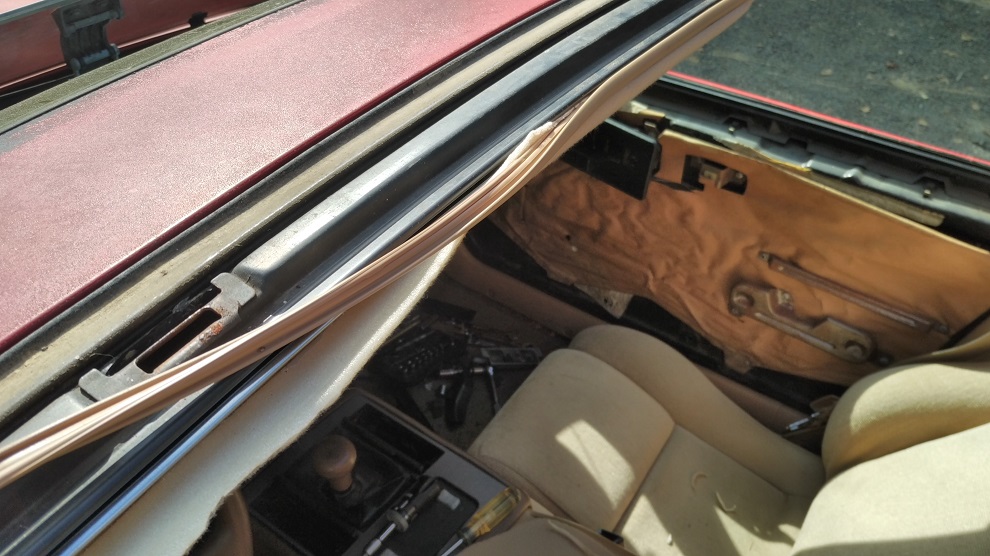
The original headliner, broken, sagging and faded.


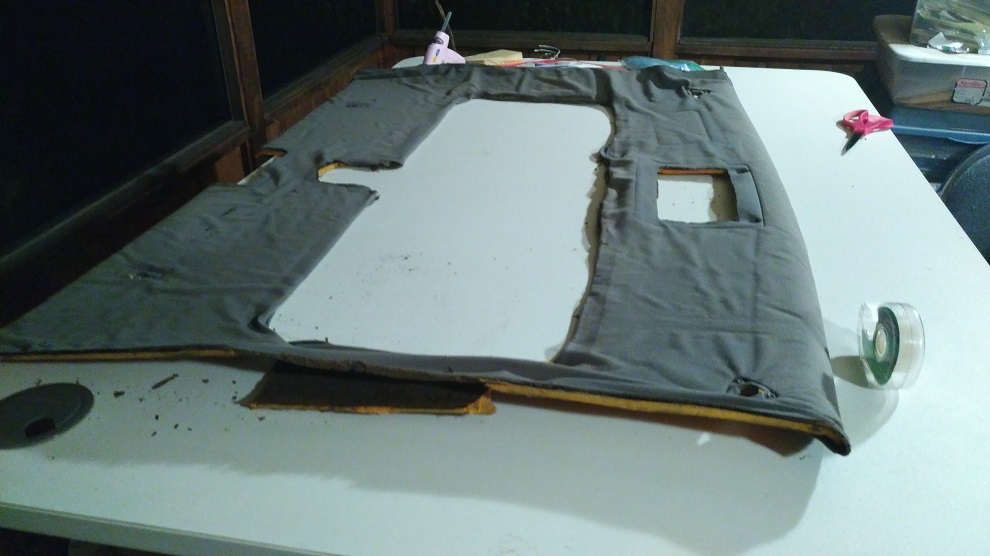
After pulling off the old fabric. We can see the headliner is broken in 5 pieces. It also has a big crack ready to break in another spot.


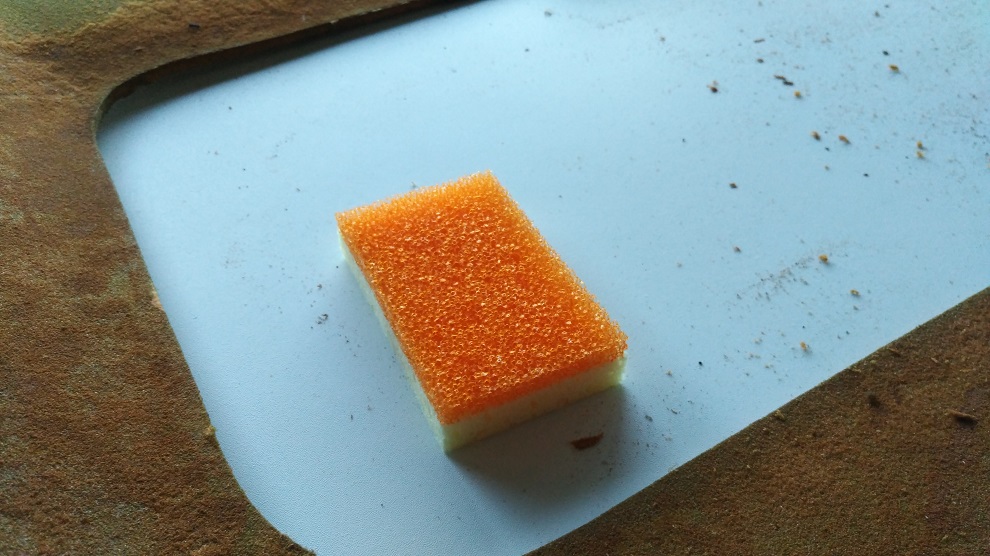
To get rid off all the old remains of what was once foam backing and glue I use a dish sponge. The rough side is rough enough to remove the old gunk, yet soft enough not to tear the headliner. If the sponge doesn't get it off, its probably not going to come off without ripping something. Then the soft side is really good for brushing off the finer dust.


You can see in this shot how well the sponge works. Compare the right to the left. Notice the final condition remains as a gritty texture. That is fine, but there should be nothing loose or soft left.


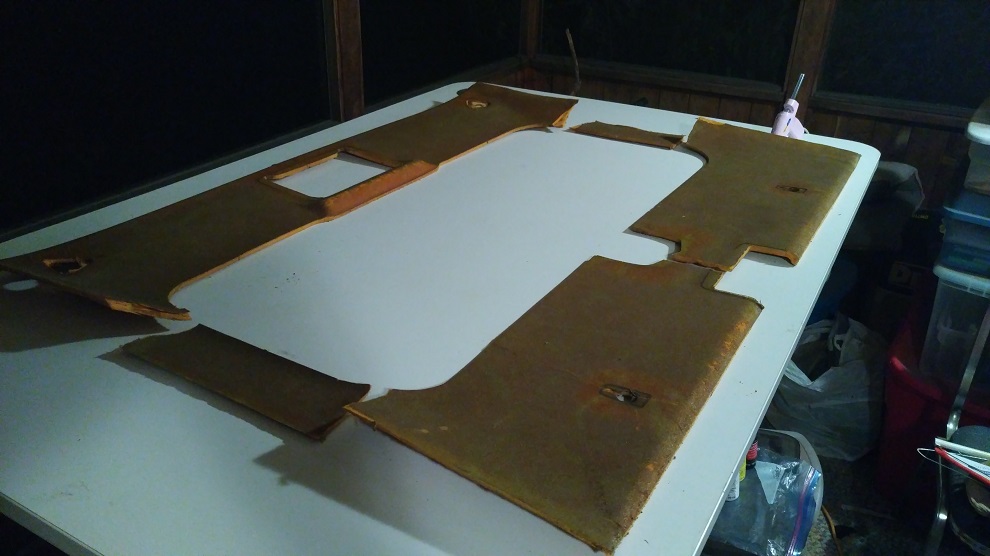
After completing the cleaning process, here are the 5 parts ready for repair.


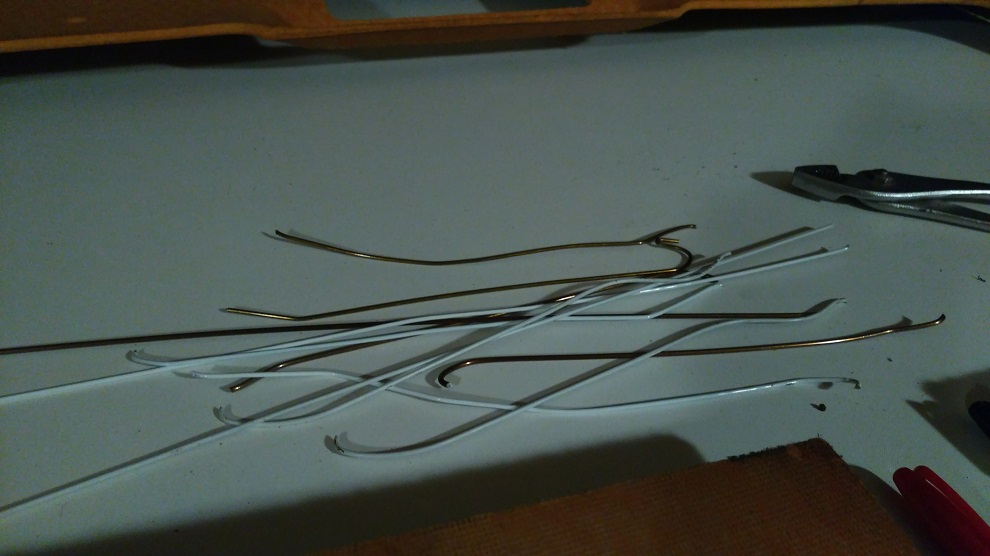
To do the repair work I use old metal clothes hangers cut into pieces, hot glue gun, and card stock or construction paper.


First put glue on both sides of the broken edge and stick together as it is supposed to be. Then use the wire hanger pieces for strength.


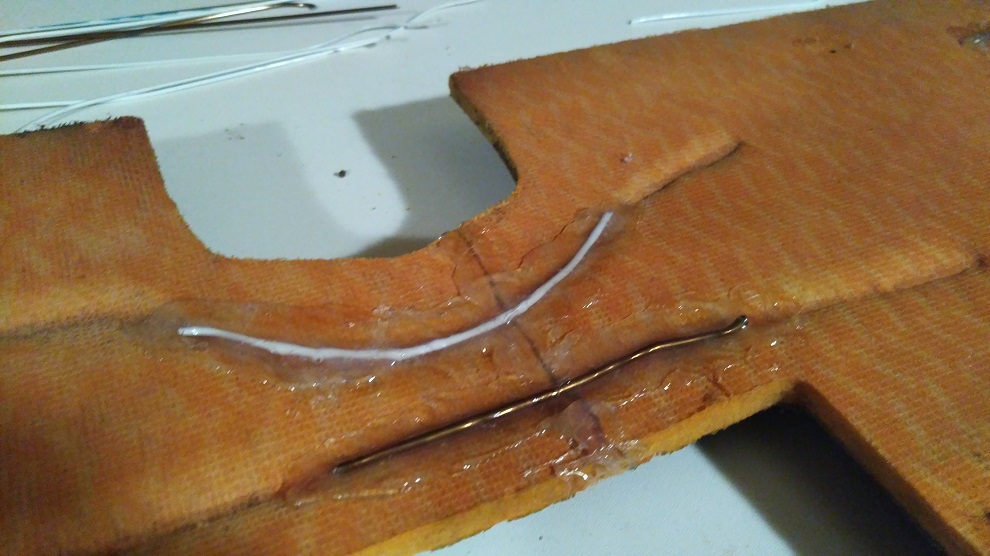
I find gluing in a circular motion increases the strength. Also don't be shy with the glue.


I put two pieces of the metal for each break. More couldn't hurt though.
Here is the headliner with all of the breaks fixed and the crack strengthened.


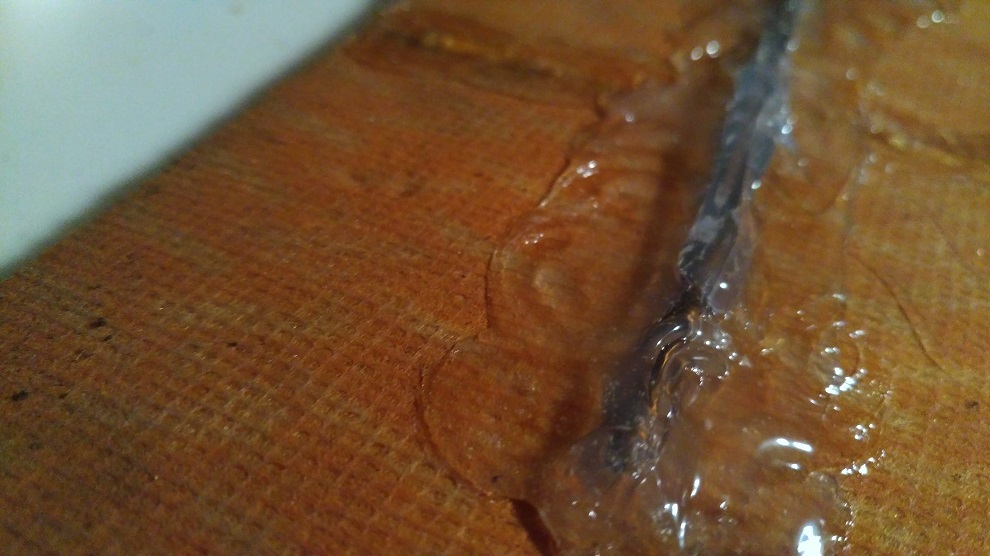
Flipping over the headliner reveals some uneven or inconsistent surfaces at the break points. I try to fill in any gaps with hot glue. Try to make it as smooth as possible. Doesn't have to be perfect, but you don't want mountains or peaks that jut out.


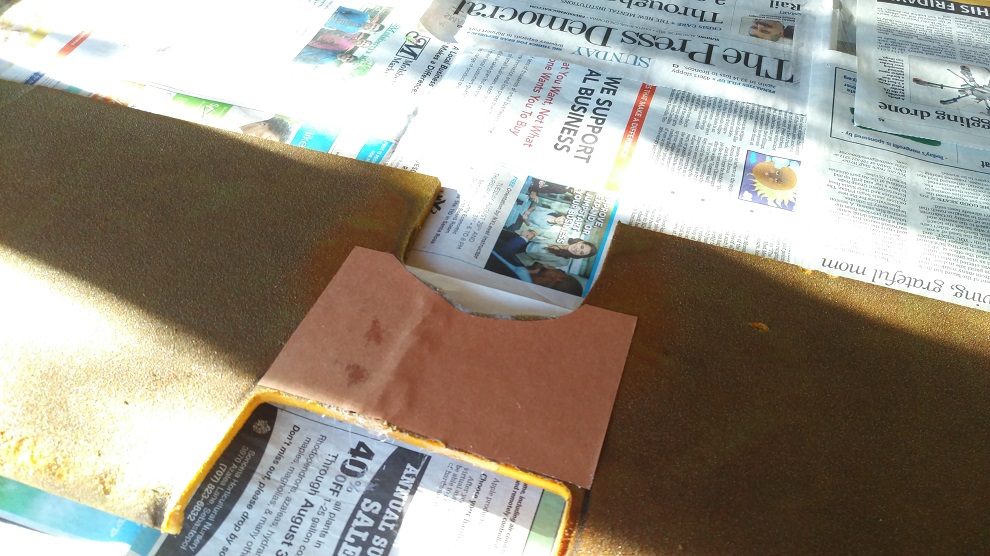
Then take your spray glue (which ever type you will use to secure your new fabric) and spray some over the break spots. Cut the card stock and spray some glue on it too.


Then put them together. This smooths out the inconsistencies and can add addition strength. You can still notice a slight bump at the crack. It will not be noticeable if you are using foam backed fabric. If you use thinner fabric, then I would suggest using a thin cardboard, like the back of a pad of paper. Then sand the edges (before attaching to headliner) to taper its width down.


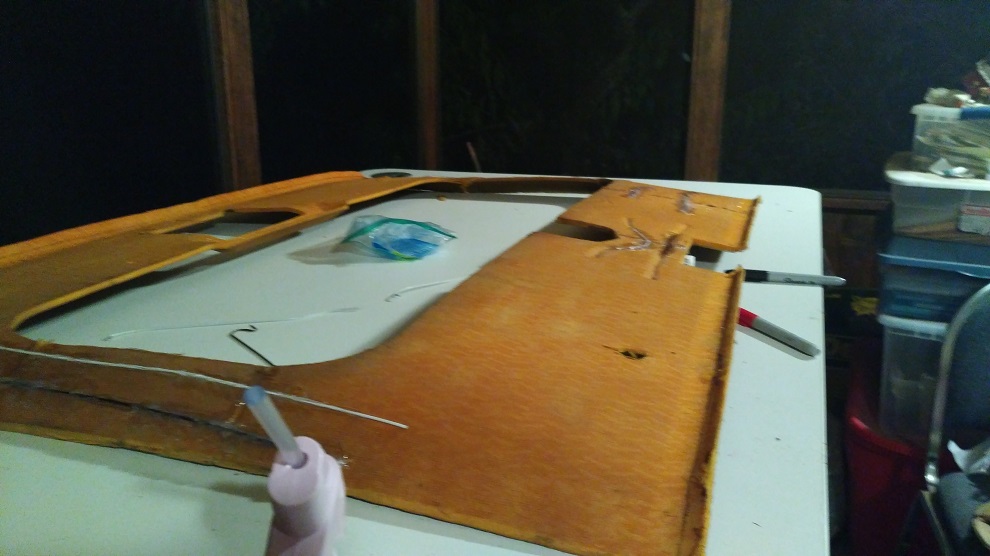
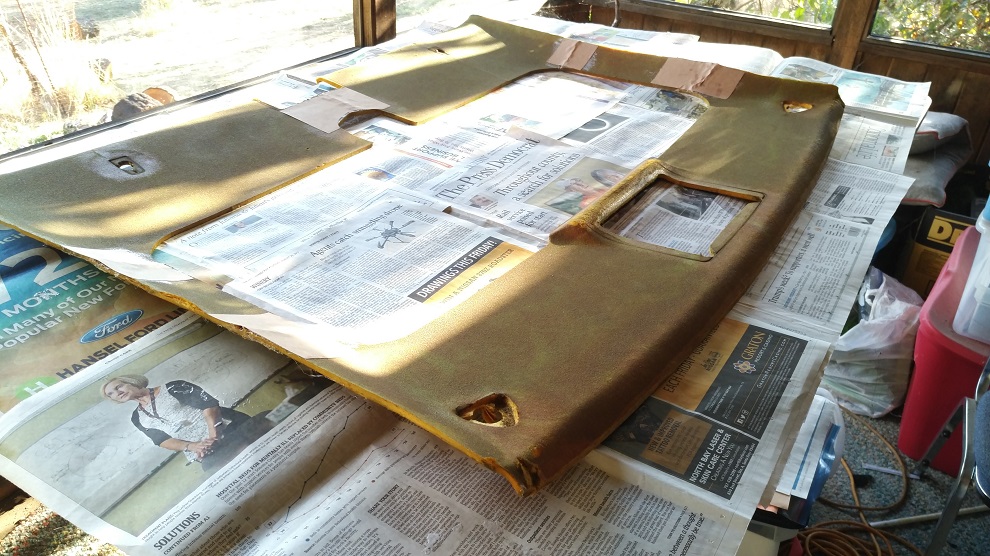
And now the repaired headliner ready for fabric!

If you want my method of applying the fabric, then continue reading.

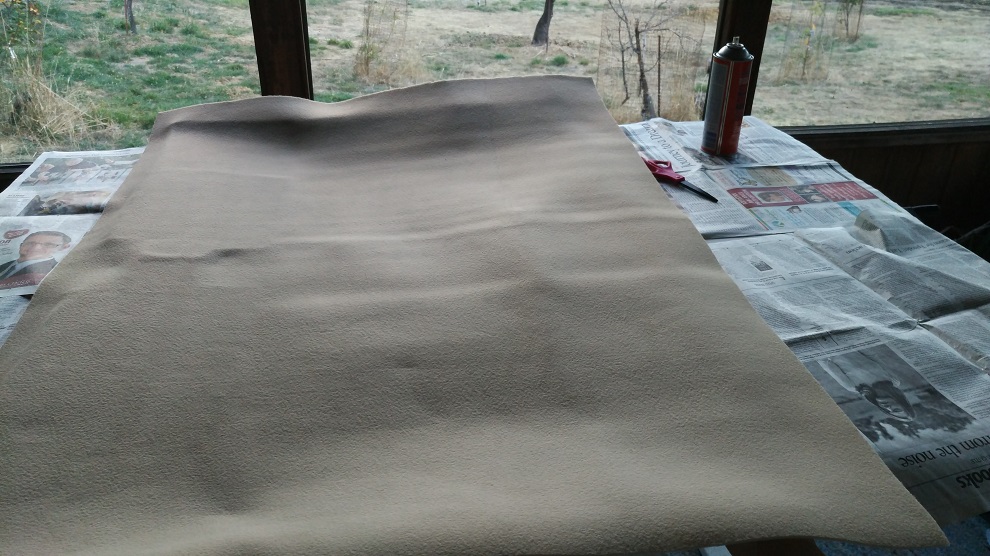
I use the Permatex headliner and carpet glue. It is very strong and durable. It does not leave much room for error though. Once it sticks, it will hold. Headliner will tear before the glue pulls and fabric will rip before the glue gives. So don't mess up haha! 3M has a more foregiving glue, but I found its durability over the years was shorter. So I take my chance.
The Permatex is available in most auto stores, you can't miss its bright can.


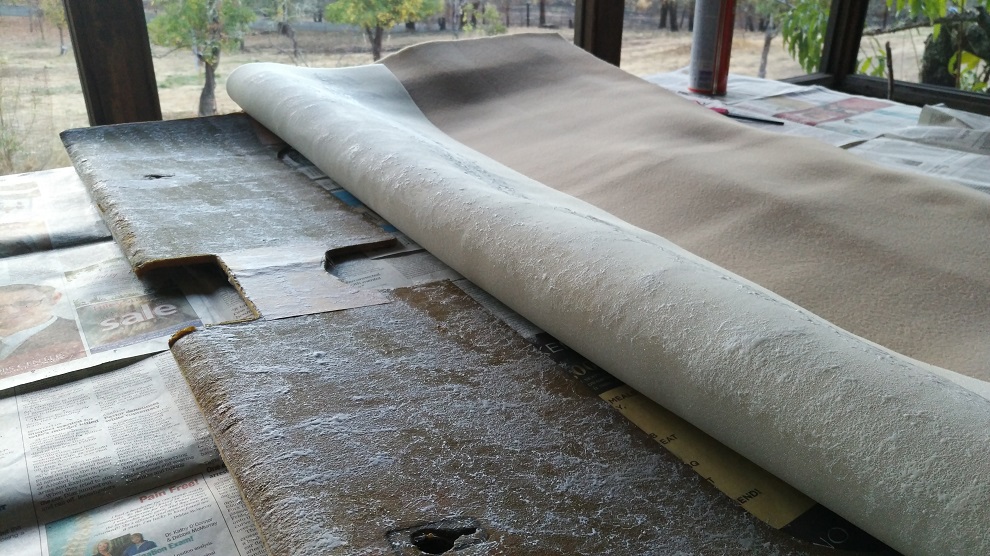
First I lay the material over the headliner and cut it to a closer dimension. I usually order a yard and a half. Its enough to do the headliner and sun visors.


Then pull back a section, spray glue on the headliner and the fabric, wait a few minutes for it to get tacky and press together. I find starting from the back easiest since its nice and flat. I like to work from the middle out to the edges. This is especially useful on headliners without sunroof. Work along the middle hump, then go into the dips one at a time working outward. Sunroof headliners are much easier to apply the fabric. Haven't done a t-top yet.


Continuing on down the headliner from back to front.


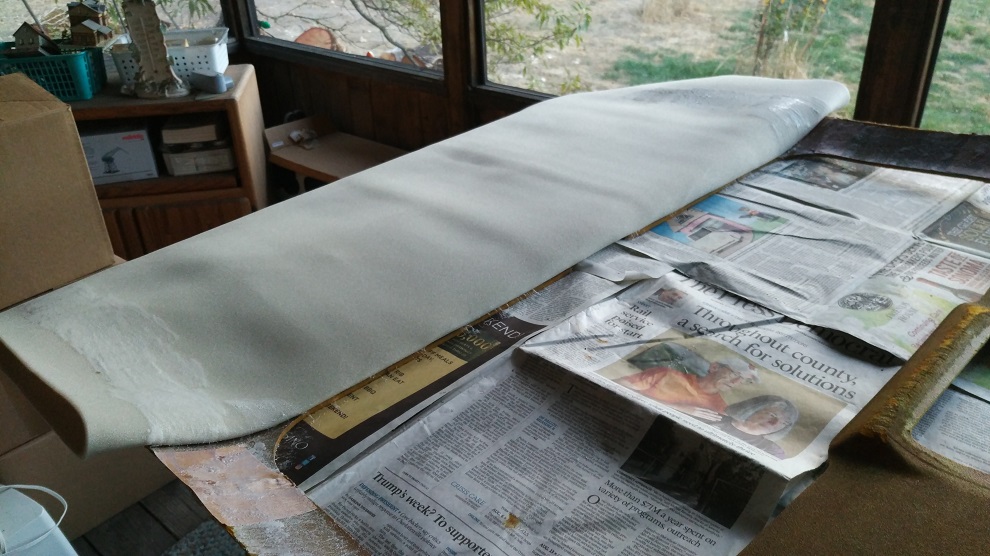
Once all gluing is done, I flip it over, cut the openings and glue the edges over the back. I forgot to get a picture of the back. You want about an inch of fabric folded around the back of the headliner and glue it down. This makes all the edges nice and strong and look good too.


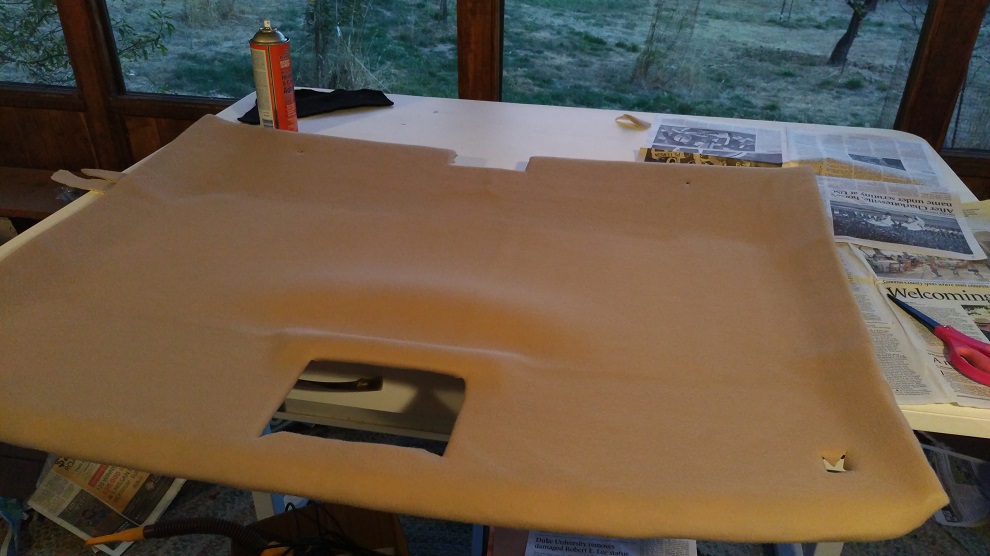
Next, on to installation. sunroof less cars are done at installation. The hard work off fabric application pays off haha.
Since this one is a sunroof I will continue. Here it is installed. I don't cut the middle until after putting it in. it can be cut ahead of time as well I would assume.


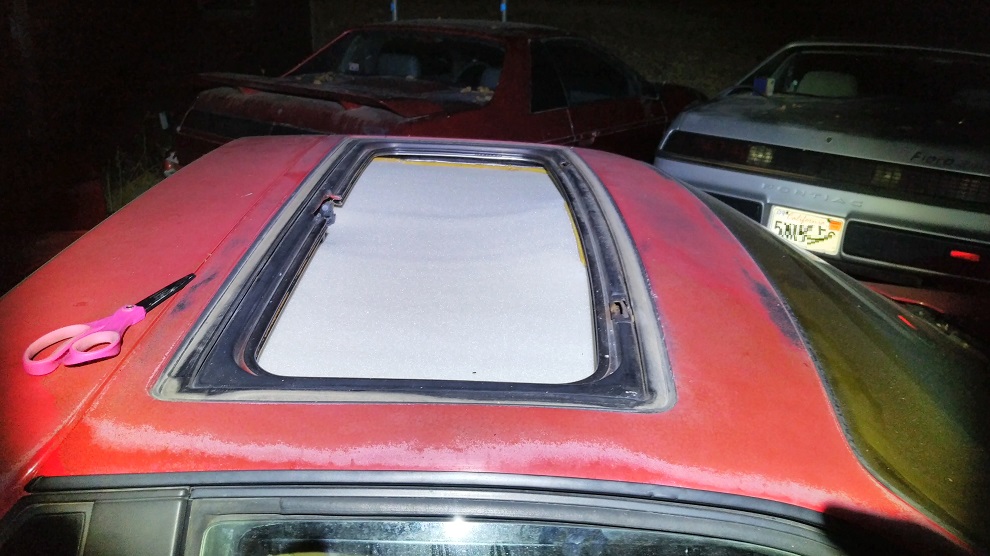
Then cut around the edge about 2 inches. I then stick the rubber on, not worrying about the extra fabric. I let it pop out the top of the rubber. This is just for test fitting. The rubber surround does a nice job marking the line to cut along for a perfect fit. It makes 2 lines. One shows the bottom side where it enters the cavity. The other shows the top where it exits. If you cut along the top line it will result in a nice fit with no excess. You can see the inner line here since I just cat along the outer line.


Once sized, I reapply the rubber surround, by pulling the headliner fabric above the rubber and then pushing the rubber in the cavity. It will pull the fabric in and give a nice tight finish.


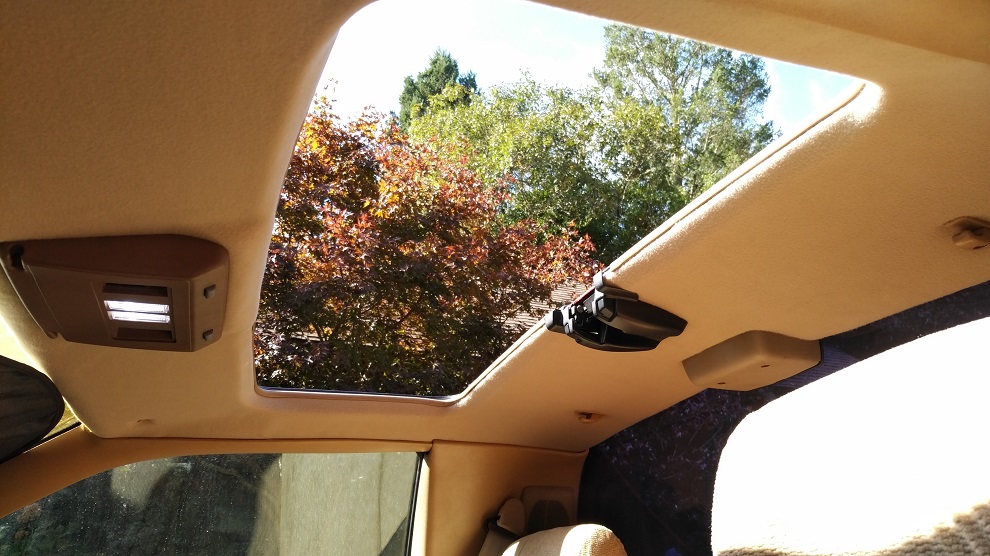
The rubber now all in place, looking fro the top.


And the finished product from the inside


And that's it!!
From broken old headliner to nice strong fuzzy new one!

------------------
All things work together for good to those who love the Lord. -Romans 8:28

IP: Logged
PFF
System Bot
Lunatic
Member
Posts: 313
From: Canada, Where the maple syrup is.
Registered: Sep 2013


Feedback score: N/A
Leave feedback

Rate this member

Report this Post10-31-2017 06:29 AM Click Here to See the Profile for LunaticSend a Private Message to LunaticEdit/Delete MessageReply w/QuoteDirect Link to This Post
Great write-up!

I'm sure many forum members will now be able to do their own headliner repairs and recovering.

Keep up the good work.
IP: Logged
hnthomps
Member
Posts: 5728
From: Columbia, SC
Registered: Jul 2003


Feedback score:    (18)
Leave feedback


Total ratings: 51
Rate this member

Report this Post10-31-2017 06:44 AM Click Here to See the Profile for hnthompsSend a Private Message to hnthompsEdit/Delete MessageReply w/QuoteDirect Link to This Post
Nice detailed repair process description with illustrations.

The alternate repair method uses fiberglass resin instead of your hot glue and metallic reinforcing methodology. A few coats of the resin applied to the cleaned headliner results in a one piece unit ready for covering as indicated in your write up. I am not certain if one process is better than the other but both work to repair a broken headliner.

BTW, the fiberglass repair methodology can also be used to fix broken console skeletons.

Nelson

[This message has been edited by hnthomps (edited 10-31-2017).]

IP: Logged
css9450
Member
Posts: 5413
From: Glen Ellyn, Illinois, USA
Registered: Nov 2002


Feedback score: (2)
Leave feedback


Total ratings: 85
Rate this member

Report this Post10-31-2017 06:56 AM Click Here to See the Profile for css9450Send a Private Message to css9450Edit/Delete MessageReply w/QuoteDirect Link to This Post
 
quote
Originally posted by liv4God:

You can still notice a slight bump at the crack. It will not be noticeable if you are using foam backed fabric.


The first time I re-did a headliner, this was my biggest disappointment. I could see every bump, crack or seam through the new fabric. Maybe I stretched it tighter than I should have? In my naivety I had assumed the foam-backed fabric would hide any imperfections.

I watched the junkyards for a year before finding another hardtop headliner without any damage, and I took it home and refinished it instead, making sure any minor imperfections were carefully smoothed. Much better!

IP: Logged
Fiero Vice
Member
Posts: 732
From: Pennsylvania
Registered: Jun 2015


Feedback score:    (6)
Leave feedback

User Banned

Report this Post10-31-2017 02:17 PM Click Here to See the Profile for Fiero ViceSend a Private Message to Fiero ViceEdit/Delete MessageReply w/QuoteDirect Link to This Post
 
quote
Originally posted by hnthomps:
The alternate repair method uses fiberglass resin instead of your hot glue and metallic reinforcing methodology. A few coats of the resin applied to the cleaned headliner results in a one piece unit ready for covering as indicated in your write up. I am not certain if one process is better than the other but both work to repair a broken headliner.

BTW, the fiberglass repair methodology can also be used to fix broken console skeletons.


Liv4God, thanks for providing pictures & instructions. Good tip on Permatex headliner and carpet glue. I'll have to try that when it's time.

Nelson, I've read about using fiberglass resin and I'm curious to see how it's being gone. Did anyone did a write up on that?
IP: Logged
hnthomps
Member
Posts: 5728
From: Columbia, SC
Registered: Jul 2003


Feedback score:    (18)
Leave feedback


Total ratings: 51
Rate this member

Report this Post10-31-2017 02:33 PM Click Here to See the Profile for hnthompsSend a Private Message to hnthompsEdit/Delete MessageReply w/QuoteDirect Link to This Post
 
quote
Originally posted by Fiero Vice:


Liv4God, thanks for providing pictures & instructions. Good tip on Permatex headliner and carpet glue. I'll have to try that when it's time.

Nelson, I've read about using fiberglass resin and I'm curious to see how it's being gone. Did anyone did a write up on that?


I used it on a t-top headliner several years ago but did not make a thread or take photos. First thoroughly clean the liner and let it dry. I think that I used three or four coats of fiberglass resin to hold the pieces together and stiffen the headliner. Use relatively thin coats and keep the surface uniform to avoid unsightly bumps showing through the headliner.

I just rebuilt a console skeleton using fiberglass resin and everything stayed intact through painting. It was in three parts with some more broken sections when I started. Note that since this part is not visible, I did not take a lot of time with the final finish coat prior to painting. I am not certain why I even painted it but I did have a can of black gloss paint in the basement. I recommend semi-flat to make it look more original.

Nelson
IP: Logged
robert1234
Member
Posts: 461
From: Knoxville TN
Registered: Oct 2015


Feedback score: (1)
Leave feedback

Rate this member

Report this Post10-31-2017 04:04 PM Click Here to See the Profile for robert1234Send a Private Message to robert1234Edit/Delete MessageReply w/QuoteDirect Link to This Post
Where are you getting the headliner material ?

[This message has been edited by robert1234 (edited 10-31-2017).]

IP: Logged
liv4God
Member
Posts: 733
From: CA
Registered: Feb 2011


Feedback score:    (6)
Leave feedback

Rate this member

Report this Post11-01-2017 02:37 AM Click Here to See the Profile for liv4GodSend a Private Message to liv4GodEdit/Delete MessageReply w/QuoteDirect Link to This Post
Thanks for the encouragement guys!

Nelson, the fiberglass resin does sound like another good way to do it. I'll have to look into it.

css9450, I don't hardly stretch the liner at all. But you are right, imperfections can show, so definitely want it to be as smooth as you can. I usually use a thicker paper, which smooths out the bumps better, but I didn't have any on hand this time.

robert1234, I got the tan at Joanne's. I've gotten swede, vinyl and other useful materials there as well. There are also a lot of online places you can get headliner, which probably have greater selection of colors. I've done it before, but don't remember where I ordered it from. I believe the Fiero Store sells it in the correct colors.
IP: Logged
Australian
Member
Posts: 4701
From: Sydney Australia
Registered: Sep 2004


Feedback score: (3)
Leave feedback

Rate this member

Report this Post11-01-2017 02:43 AM Click Here to See the Profile for AustralianClick Here to visit Australian's HomePageSend a Private Message to AustralianEdit/Delete MessageReply w/QuoteDirect Link to This Post
I did my headliner too but i also made a mistake around the sunroof with clueing it which I will have to repair one day to be perfect. Great job btw.
IP: Logged
Fiero Vice
Member
Posts: 732
From: Pennsylvania
Registered: Jun 2015


Feedback score:    (6)
Leave feedback

User Banned

Report this Post11-01-2017 06:32 AM Click Here to See the Profile for Fiero ViceSend a Private Message to Fiero ViceEdit/Delete MessageReply w/QuoteDirect Link to This Post
 
quote
Originally posted by hnthomps:
I used it on a t-top headliner several years ago but did not make a thread or take photos. First thoroughly clean the liner and let it dry. I think that I used three or four coats of fiberglass resin to hold the pieces together and stiffen the headliner. Use relatively thin coats and keep the surface uniform to avoid unsightly bumps showing through the headliner.

I just rebuilt a console skeleton using fiberglass resin and everything stayed intact through painting. It was in three parts with some more broken sections when I started. Note that since this part is not visible, I did not take a lot of time with the final finish coat prior to painting. I am not certain why I even painted it but I did have a can of black gloss paint in the basement. I recommend semi-flat to make it look more original.
Nelson


Thanks for the instructions, Nelson. I found a picture where someone actually covered the whole headliner with fiberglass resin. I don't know if that's a good idea. I'll share the pic here. It looks like the person use some kind of cover on the headliner before using fiberglass resin creating all those winkles. Maybe use mesh tape normally used for drywall & tiling on the headliner would be a better idea to hold the whole piece together.

As for console skeleton, mine is broken too. I was trying to figure out what I could do. At first, I thought about making a copy in aluminum, but that would require a lot of work. Thanks to your suggestion, I will have to try fiberglass resin with mine. My console skeleton was broken across where the screw holes were. I think I will have to cover up those holes with fiberglass resin & make new holes again. That would be better strength wise than to try & line up the holes right.

[This message has been edited by Fiero Vice (edited 11-01-2017).]

IP: Logged
hnthomps
Member
Posts: 5728
From: Columbia, SC
Registered: Jul 2003


Feedback score:    (18)
Leave feedback


Total ratings: 51
Rate this member

Report this Post11-01-2017 09:25 AM Click Here to See the Profile for hnthompsSend a Private Message to hnthompsEdit/Delete MessageReply w/QuoteDirect Link to This Post
 
quote
Originally posted by Fiero Vice:


Thanks for the instructions, Nelson. I found a picture where someone actually covered the whole headliner with fiberglass resin. I don't know if that's a good idea. I'll share the pic here. It looks like the person use some kind of cover on the headliner before using fiberglass resin creating all those winkles. Maybe use mesh tape normally used for drywall & tiling on the headliner would be a better idea to hold the whole piece together.

As for console skeleton, mine is broken too. I was trying to figure out what I could do. At first, I thought about making a copy in aluminum, but that would require a lot of work. Thanks to your suggestion, I will have to try fiberglass resin with mine. My console skeleton was broken across where the screw holes were. I think I will have to cover up those holes with fiberglass resin & make new holes again. That would be better strength wise than to try & line up the holes right.


This looks as if someone has used fiberglass resin over the headliner and then covered everything with a sheet of plastic. Maybe they wanted to keep debris out of the resin prior to drying but I would not recommend this approach. The resin dries enough to sand in a couple of hours so I see little reason to cover it and the possibility of the plastic contacting and sticking to the headliner is high IMO.

WRT the skeleton, I lined up my broken parts (several through a screw hole) and stuck it back together. If there is a question about a screw hole, I filled it with the appropriate
J B Weld compound and redrilled it to the correct diameter prior to the last coat of fiberglass resin. It could be done later but I preferred to have the repaired hole covered with more resin for some additional strength.

Nelson
IP: Logged
PFF
System Bot
liv4God
Member
Posts: 733
From: CA
Registered: Feb 2011


Feedback score:    (6)
Leave feedback

Rate this member

Report this Post11-02-2017 02:51 AM Click Here to See the Profile for liv4GodSend a Private Message to liv4GodEdit/Delete MessageReply w/QuoteDirect Link to This Post
Where do you purchase fiberglass resin?
IP: Logged
hnthomps
Member
Posts: 5728
From: Columbia, SC
Registered: Jul 2003


Feedback score:    (18)
Leave feedback


Total ratings: 51
Rate this member

Report this Post11-02-2017 07:12 AM Click Here to See the Profile for hnthompsSend a Private Message to hnthompsEdit/Delete MessageReply w/QuoteDirect Link to This Post
 
quote
Originally posted by liv4God:

Where do you purchase fiberglass resin?


Most car parts locations, Walmart, Lowes, Home Depot, on line, maybe some paint stores, etc.

Nelson

IP: Logged
wgpierce
Member
Posts: 376
From: Australia
Registered: Aug 2016


Feedback score: N/A
Leave feedback

Rate this member

Report this Post11-03-2017 07:22 PM Click Here to See the Profile for wgpierceSend a Private Message to wgpierceEdit/Delete MessageReply w/QuoteDirect Link to This Post
I don't have any pictures of it, but another spot that could use attention is where the sun visors attach.

I didn't have any breaks as significant as what you show here, but I did have a few areas where stress "fractures" were starting to show up.

What I did as I wanted the headliner to still be a little flexible anywhere I reinforced it was to take an old plastic flyswatter (yeah thats right ) and cemented it to the areas I wanted to reinforce on the roof side with contact cement. Cut out a few more pieces to go around the sun visor holes too and that worked great. That material is strong and flexible, but also very light. Maybe there's sheet plastic mesh you can buy but I used what I had

Also I don't like spray glue. I use a fine roller to roll on thin contact cement to the board to get full coverage. I know you can only lay it down once and it stays but I can do it This ensures it will not come back down for another 30 years

[This message has been edited by wgpierce (edited 11-03-2017).]

IP: Logged
Fiero Vice
Member
Posts: 732
From: Pennsylvania
Registered: Jun 2015


Feedback score:    (6)
Leave feedback

User Banned

Report this Post11-05-2017 01:22 PM Click Here to See the Profile for Fiero ViceSend a Private Message to Fiero ViceEdit/Delete MessageReply w/QuoteDirect Link to This Post
 
quote
Originally posted by hnthomps:
This looks as if someone has used fiberglass resin over the headliner and then covered everything with a sheet of plastic. Maybe they wanted to keep debris out of the resin prior to drying but I would not recommend this approach. The resin dries enough to sand in a couple of hours so I see little reason to cover it and the possibility of the plastic contacting and sticking to the headliner is high IMO.

WRT the skeleton, I lined up my broken parts (several through a screw hole) and stuck it back together. If there is a question about a screw hole, I filled it with the appropriate
J B Weld compound and redrilled it to the correct diameter prior to the last coat of fiberglass resin. It could be done later but I preferred to have the repaired hole covered with more resin for some additional strength.
Nelson


Yeah, it doesn’t make any sense using a sheet of plastic to cover it up. For broken pieces, would you recommend using mesh tape across the lines & use fiberglass rein over it? Would you also recommend using fiberglass rein on both sides of the headliner for strength?

Thanks for the advice in regards to the screw hole issue.

IP: Logged
IMSA GT
Member
Posts: 10251
From: California
Registered: Aug 2007


Feedback score:    (8)
Leave feedback


Total ratings: 252
Rate this member

Report this Post11-05-2017 02:05 PM Click Here to See the Profile for IMSA GTSend a Private Message to IMSA GTEdit/Delete MessageReply w/QuoteDirect Link to This Post
I'll just put this out there since it was discussed. When you make carbon fiber parts, you lay your fabric and resin and then use a vacuum bag system to remove excess resin and give the part a very smooth finish. For those on a tight budget, the same can be done on a flat surface by pouring the resin and then covering it with mylar or a material similar to window tint. You then gently squeegee out the air bubbles. When the resin dries, you simply remove the mylar, which comes right off, and your part is smooth as glass. I assume the person above was trying to get a glasslike finish but he used the wrong type of plastic.

[This message has been edited by IMSA GT (edited 11-05-2017).]

IP: Logged
hnthomps
Member
Posts: 5728
From: Columbia, SC
Registered: Jul 2003


Feedback score:    (18)
Leave feedback


Total ratings: 51
Rate this member

Report this Post11-05-2017 07:12 PM Click Here to See the Profile for hnthompsSend a Private Message to hnthompsEdit/Delete MessageReply w/QuoteDirect Link to This Post
 
quote
Originally posted by Fiero Vice:

For broken pieces, would you recommend using mesh tape across the lines & use fiberglass rein over it? Would you also recommend using fiberglass rein on both sides of the headliner for strength?

Thanks for the advice in regards to the screw hole issue.


I did not use any tape prior to fiberglassing the broken parts of the headliner together. However, it likely would not hurt and might make it easier to keep parts aligned in the correct orientation during the process. If you want to use tape, I would suggest using only a very thin layer of tape to avoid potential headliner bulges. If the headliner was badly broken I likely would use the resin on both sides. Since mine was not too bad, I only used the resin on one side.

WRT a console skeleton, I used no tape but did place three to four layers of resin on each side prior to some minor sanding and paint application.

Nelson
IP: Logged

next newest topic | next oldest topic

All times are ET (US)

Post New Topic  Post A Reply
Hop to:

Contact Us | Back To Main Page

Advertizing on PFF | Fiero Parts Vendors
PFF Merchandise | Fiero Gallery | Ogre's Cave
Real-Time Chat | Fiero Related Auctions on eBay


Copyright (c) 1999, C. Pennock