This is my second thread due to the original having a misleading title. I was not able to edit the title so...I made a new one. I want to make it easier for people searching to find this build.
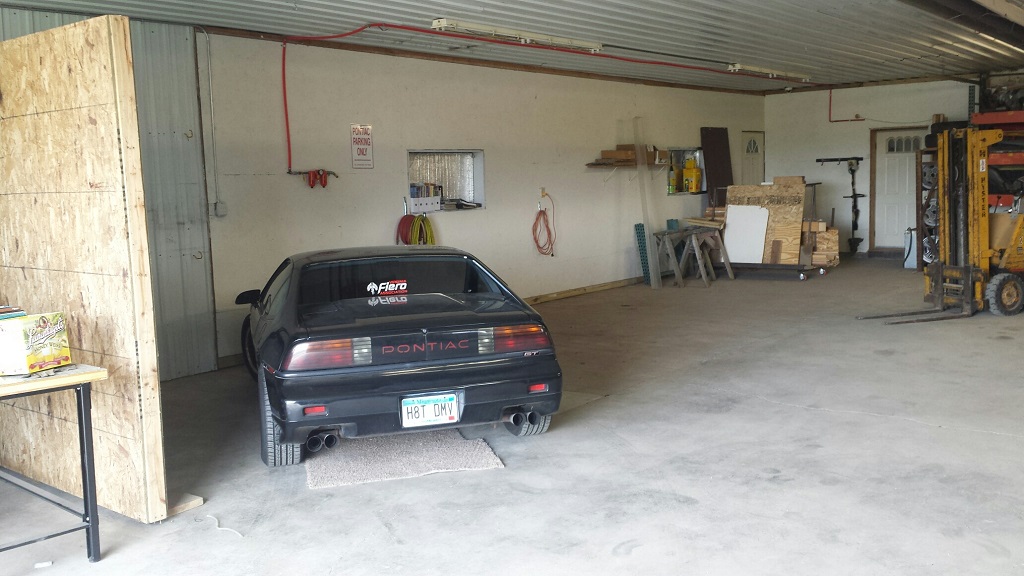
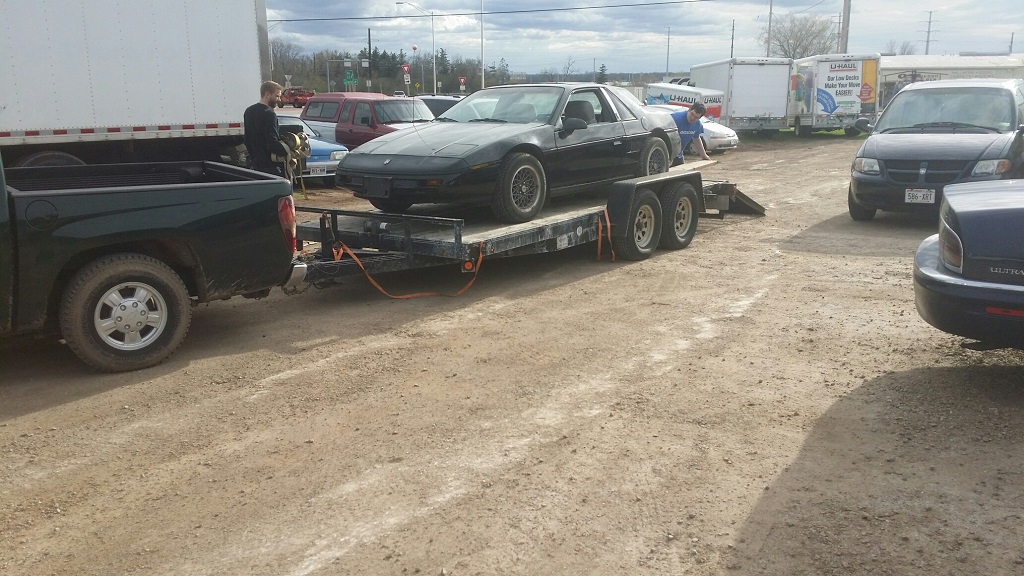
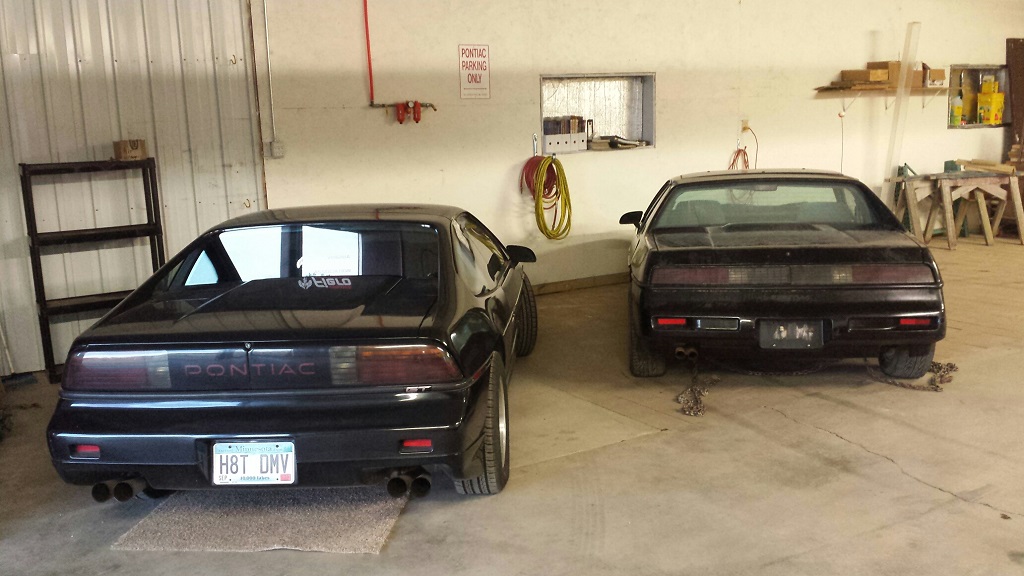
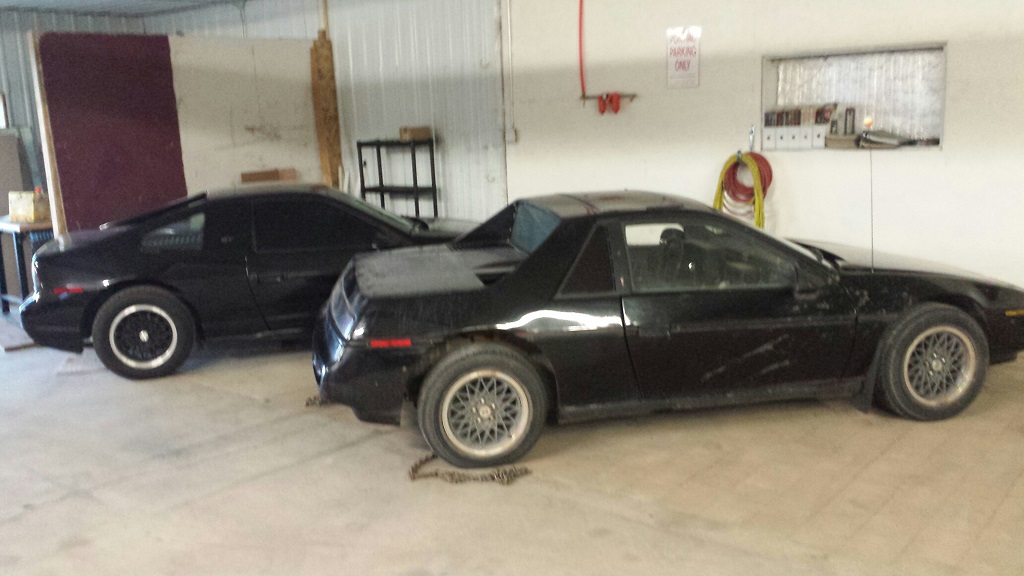
Well I took a few pics of what is going on at the shop. Currently we have an mostly original 88 GT Manual
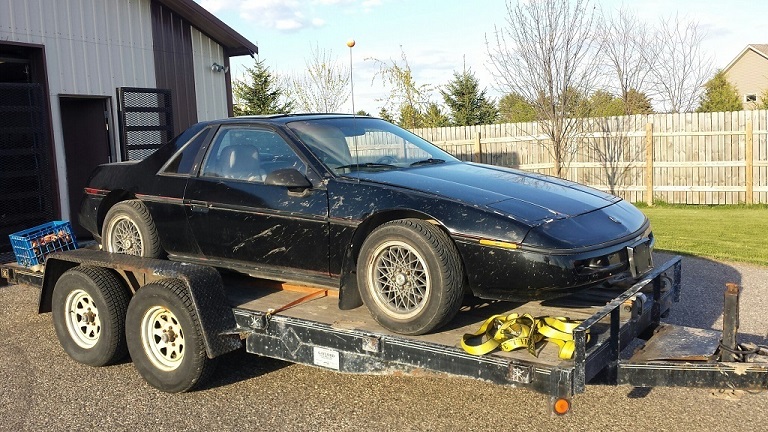
It was looking a little lonely so I went on the hunt for a companion. I found a nice 88 4 cyl 5 spd with a locked engine. I had to drive 4.5 hrs to get it in eastern WI.
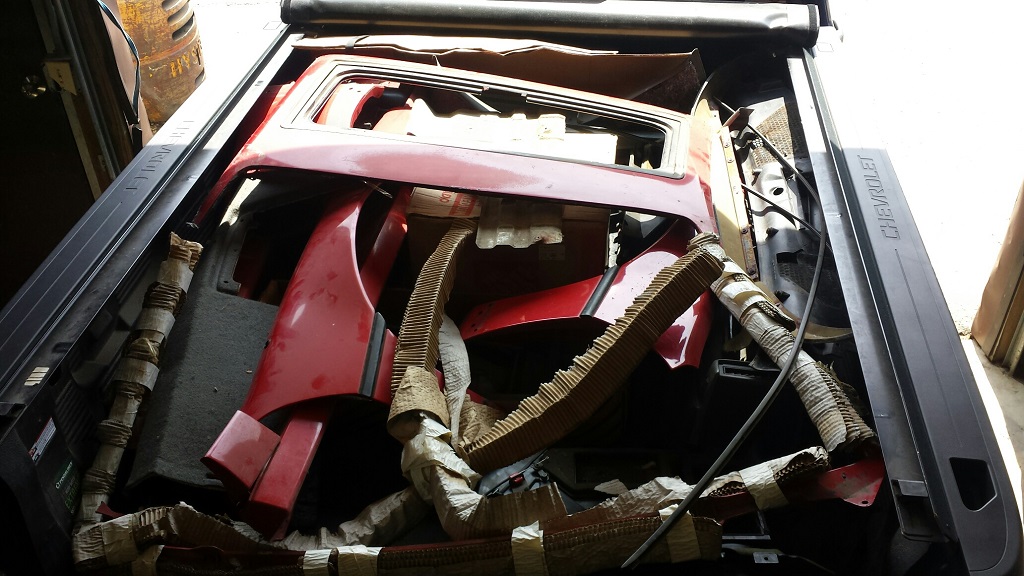
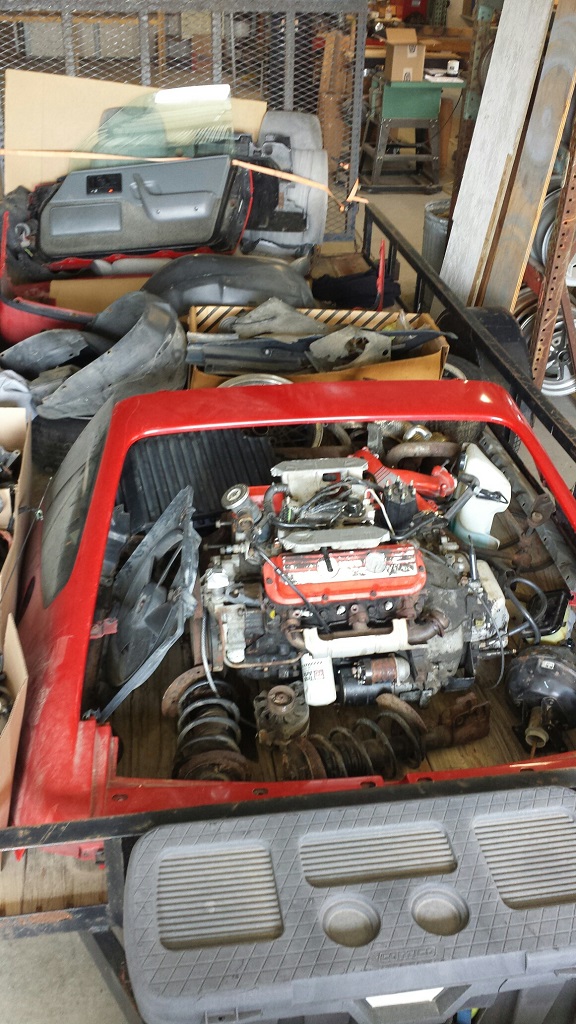
Looks like it was originally a red car.
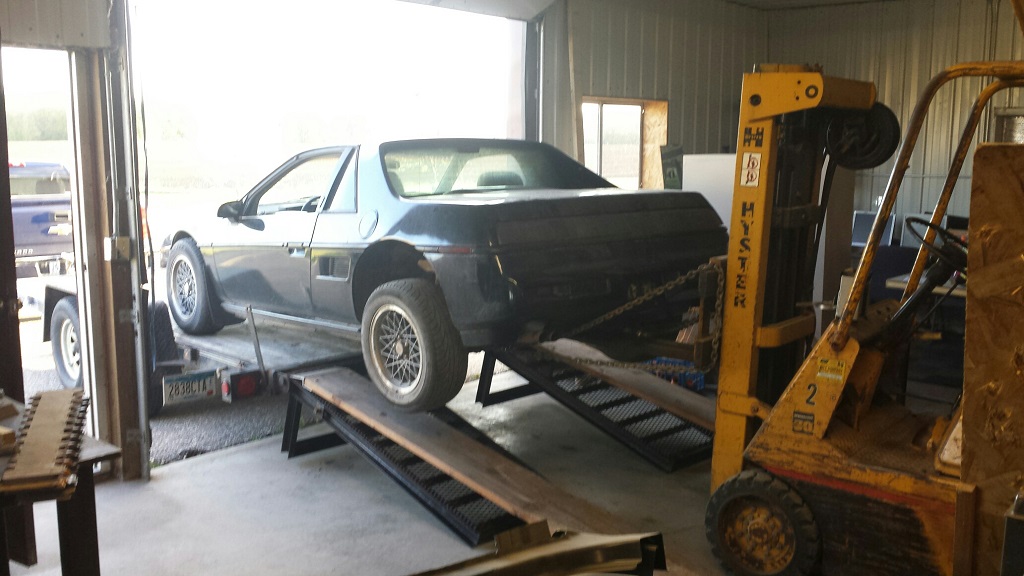
So now thats all done I think i like the GT look ... hmmmm well I found a guy with a fully parted 88 GT.
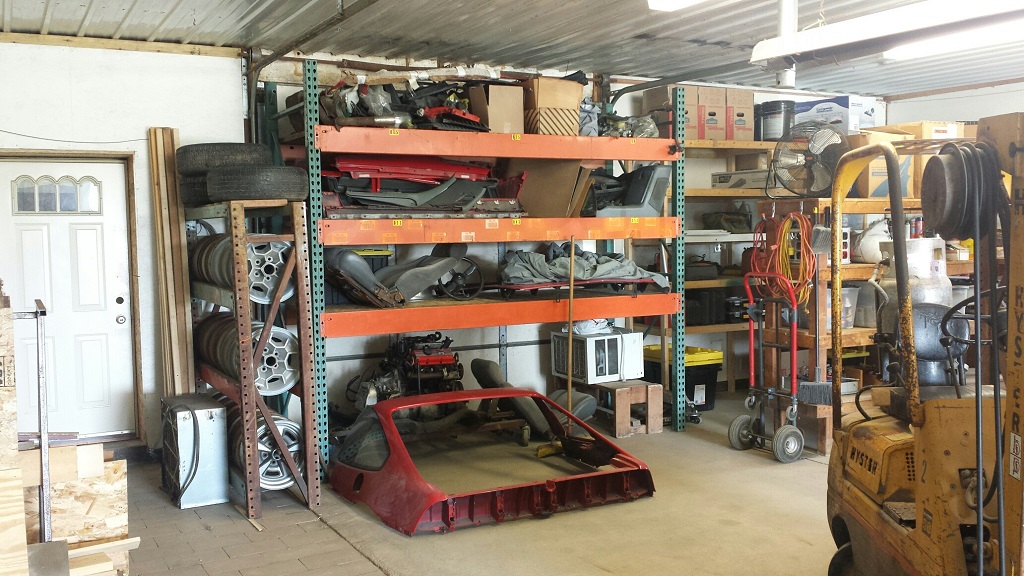
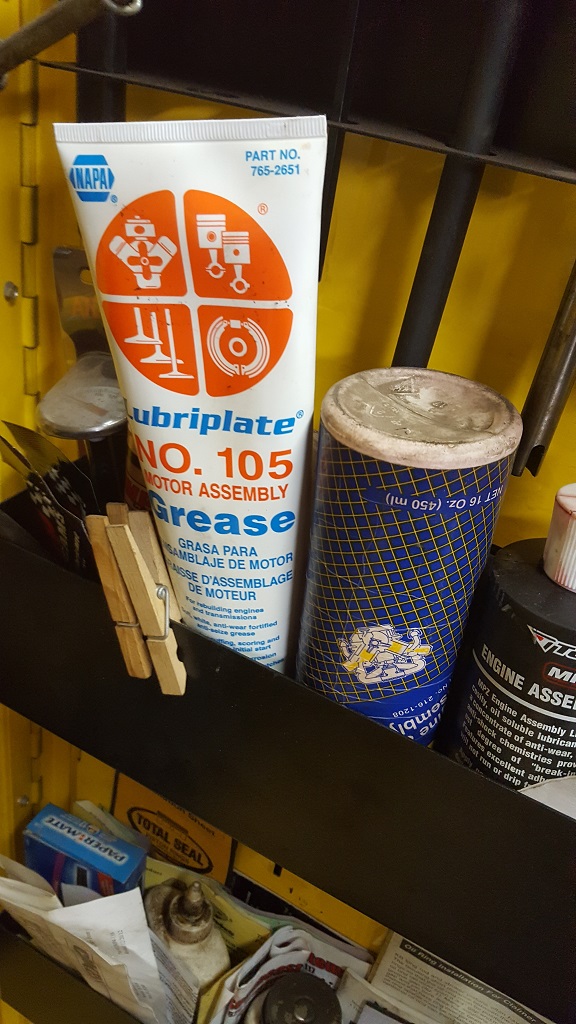
Look its a Fiero on a shelf!
So the plan so far is to get a series II 3800SC out of a 99-00 GTP. Then I need to find an F40 F23. I heard that the 07 G6 are better (noise reasons) then the 06. But I have found contradicting info about the bell housing. car-part shows that they are interchangeable (06-07). I have seen some people say that 07 needs an adapter plate? any thoughts? Well this build isn't going to start until this fall due to me moving. That doesnt stop me from collecting parts.
I also am working on a custom 88 cradle. I am going to make 10ish if people are interested. It wont be a bunch of straight pieces welded together.... that looks cheap. I plan on using a pipe bender and weld the joints. I hope that description helps. The reason for this is 1) The cradles need to be modified to fit the engine/trans anyway. Some people cant/ dont have the ability to weld. 2) The stock cradle seems a little wimpy. This also will be a project that will start this fall/winter.
[This message has been edited by paulsobj (edited 12-04-2023).]
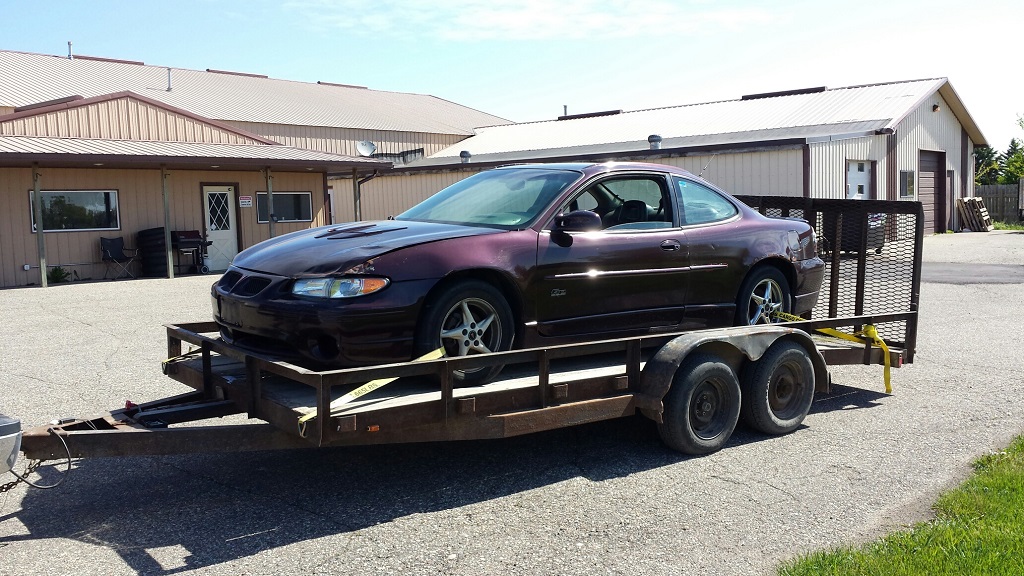
Today I bought a 2002 40th anniversary GTP with no title and needs valve cover gasket, LIM gasket, HP PS hose that doesn't matter because i'm deleting PS. How much? Get ready....$200! I will post more info when I get the car to the shop.
I also changed transmissions. I am getting a 02 Cavalier 2.2L vin 4 F23 (00-02 works also) and swapping the gears with a 2010 Cobalt SS F23 3.63 opt FY1 Gears.
Well as promised here are a few pictures of the 3800 I bought. Has 160K on the engine. I think I can make a little money parting out the Grand Prix. It will help offset the cost of driving to Oshkosh to pick up the Fiero.
[This message has been edited by paulsobj (edited 12-04-2023).]
I hope to see you detail the gear swap in the F23- as that is the one thing I really don't like about my F23.. the stock gearing. Curious to see how much of a difference it makes
cam-a-lot I will try to document it as best I can. I am trying to decide if i NEED to buy the kit do do the swap. It looks like it will make life a lot easier to say the least.
Solotwo- Thanks, I need it to feed the addiction haha.
[This message has been edited by paulsobj (edited 05-15-2016).]
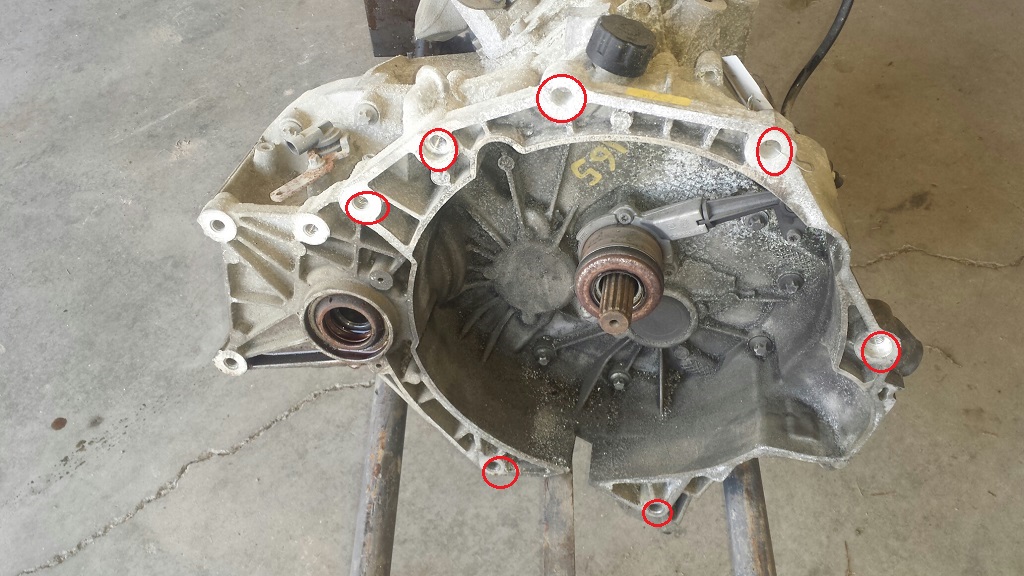
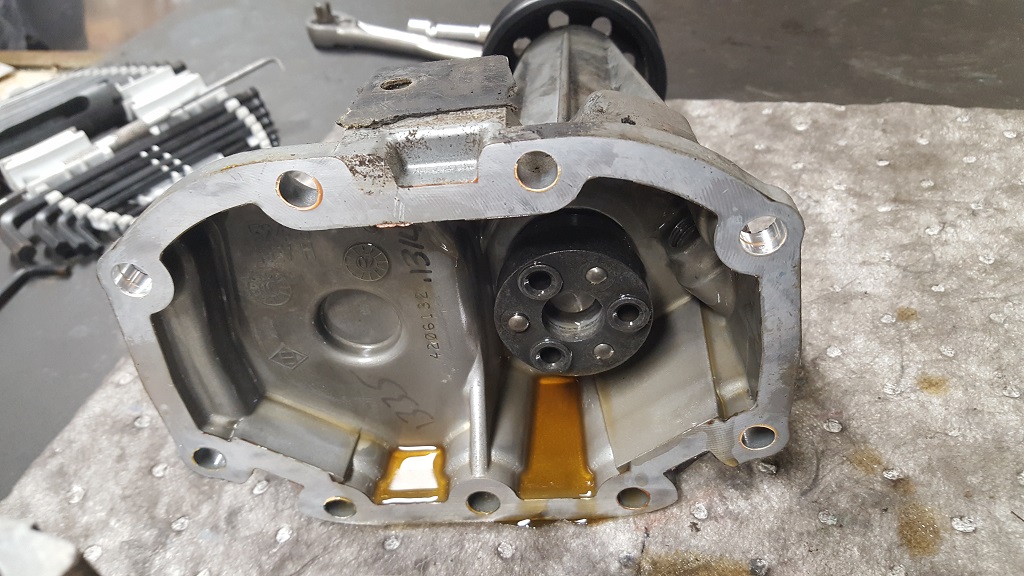
We picked up the F23 today. This is from a 2010 Cobalt 2.2L, 3.63 FY1 option with 59,000 miles for $175. This will be used for the gears only. The Case that will be used I will get from a 00-02 Cavalier 2.2L 8th digit VIN 4 (NOT 2.4L OR VIN F). Note in the picture for those not aware the bolt pattern highlighted will NOT bolt up to the 3800. The Cavalier has 3.93 Gears that are not ideal at all for the 3800 engine. One thing that will have to be addressed is the input shaft is a little too long. I will try to find a few options to address this. One I have seen is a simple grinder.
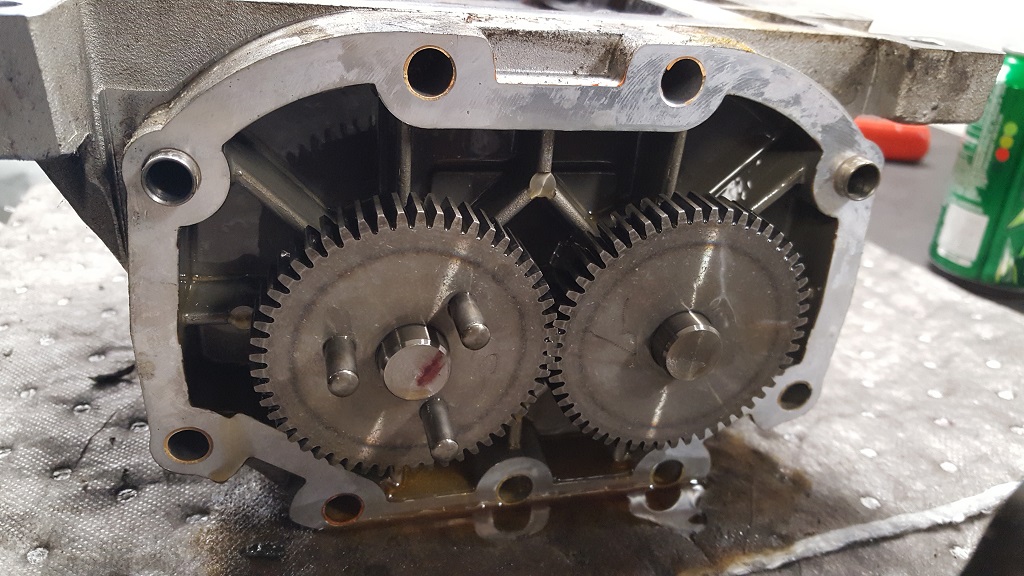
Some more pictures if anyone was interested in the 3.63 differences
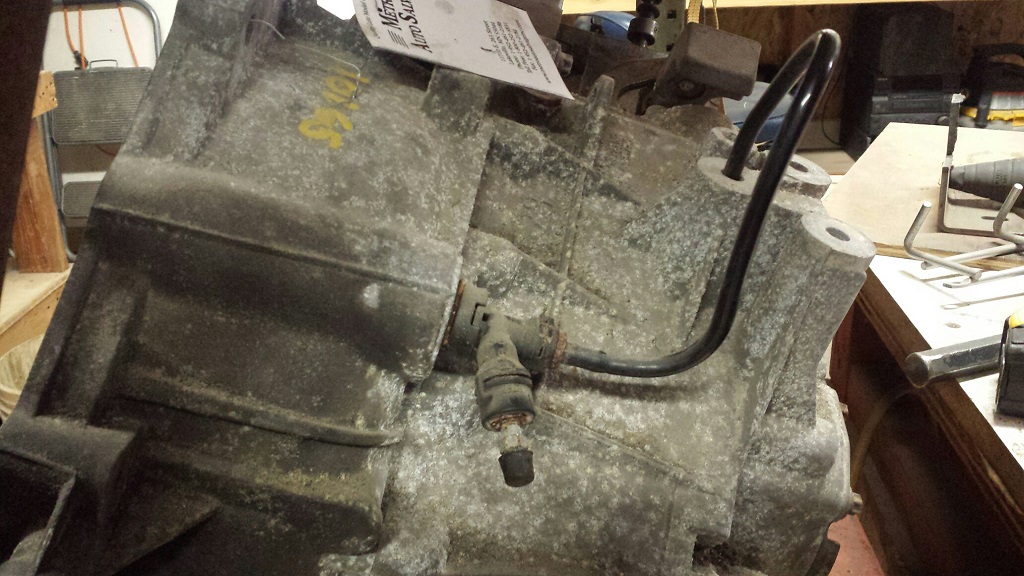
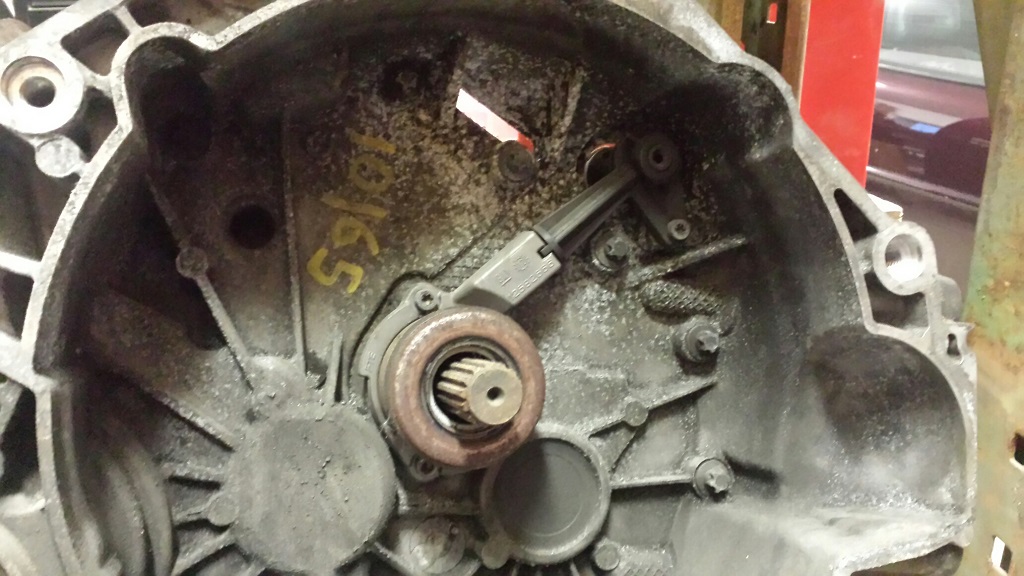
the HTOB line.
HTOB
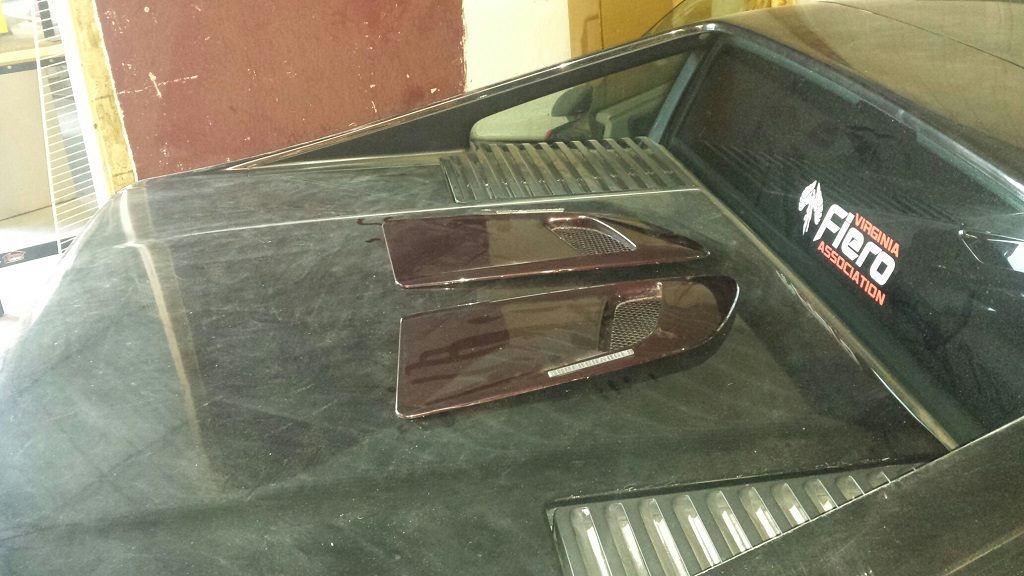
Just for fun my dad put the GTP vents on the Fiero
So the next step is to pick up the Cavalier F23 and swap the Gears out. I would like to know from anyone that has done this swap or even rebuilt the F23 without the tool kit? I would like to skip the tool kit but if it is necessary then I will get one. Also I am looking for someone to do the harness. Sent out two PM's a few days ago. I might do it myself if I cant afford to get a plug-n-play.
[This message has been edited by paulsobj (edited 12-04-2023).]
Well a small update I have today. I hope that my research has done me well and all the parts are correct.
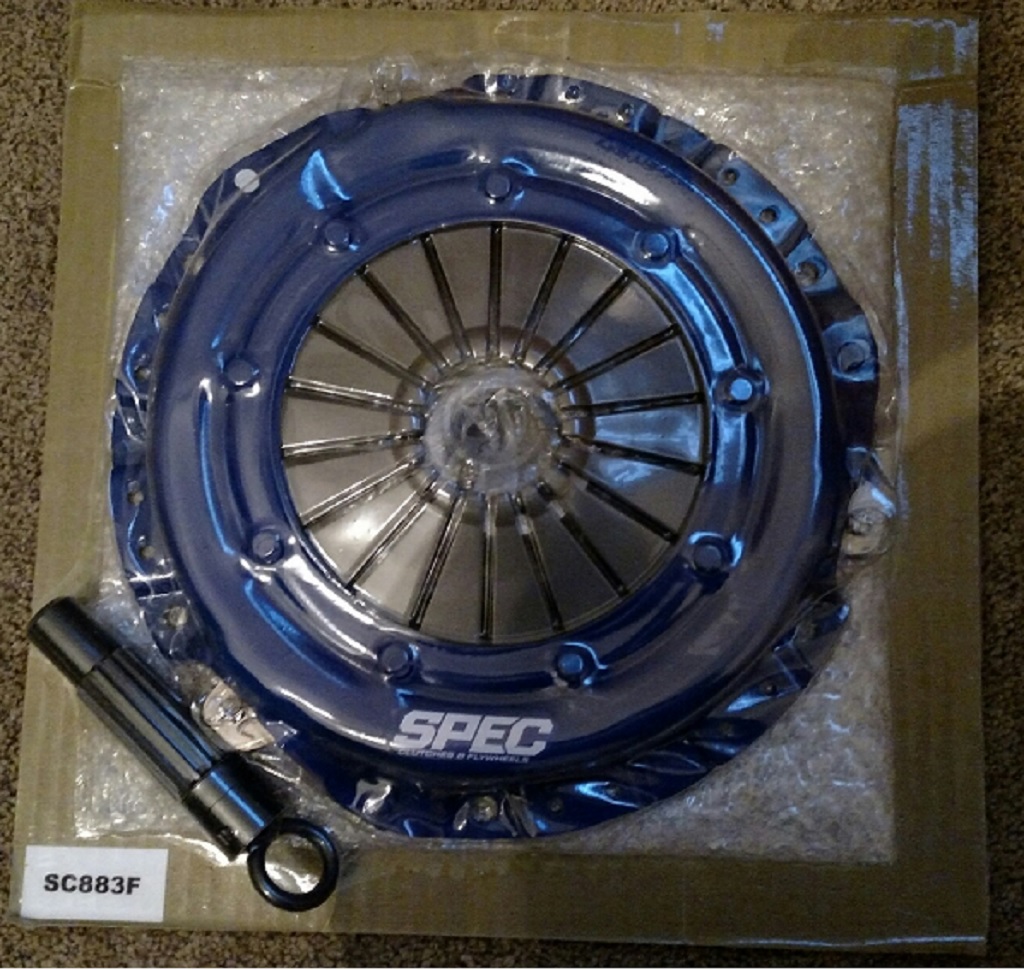
SPEC 3+ Clutch SC883F w/Clamp load $500 + Clamp load $100 + S&H Fuel Pump GM #25163473 $80 + $20 S&H Water Pump NAPA #TFW 42097 $40 Clutch Bolts GM #24571667 11 lb/ft + 50° (use a bit of red thread lock on the bolts) $32 Flywheel Bolts GM #24505092 15 lb/ft + 45° (use a bit of red thread lock on the bolts) $26 IAT NAPA #MPE TS5100SB $17 Fuel Filter NAPA #FIL 3481 $16 Thermostat NAPA #THM 531080 180* $10 PCV NAPA #CRB 29307 $5
On a personal note So Tuesday my wife and son (2mo old) are taking a nap when at least one possibly two people try to burglarize our house. The day before our neighbors front door was picked and they did get burglarized. Then today we go to the beach, we pull up to a guy stealing stuff from a car. Broke the window, alarm going and all. Long story short he almost hits my car with his.. (wait it was a stolen truck so it wasn't his) someones truck, tries breaking my window and telling me hes going to kill me. I wont go into details but It was very eye opening. I was thinking of getting a CAC permit when I move....now thats a for sure.... I might have been more confrontational but I thought that might put my wife and son in more danger.
haha I knew someone would ask. I am stationed in Hawaii currently. I am moving back to MN soon. So when I say in my build "I" went to ...it was my dad or a friend. We do have a 85lb German Shepard/Lab that is the reason they didn't break in. I don't think they ever saw my wife. She said the dog (Bowser) woke her up trying to break the glass door to get outside where the guy was.
[This message has been edited by paulsobj (edited 12-04-2023).]
I have just a small update today. The clutch came in from SPEC. I ordered the SCS883F which should be the part number for the 3+ with extra clamp load. SPEC sent me an invoice for $100 less then what I anticipated and with no clamp load added. I emailed them with no response. So i am going to see if the regular 3+ part #SC883F will fit. If not I will have a chat with them. I wont find out until the fall when I actually start the build. Believe it or not, this should be the most expensive part on the whole build $500 + $30 s&h.
EDIT next time order through LMPerformance It would have been $450 + free s&h. Looks like I should have read another page of FieroGuru's build.
[This message has been edited by paulsobj (edited 12-04-2023).]
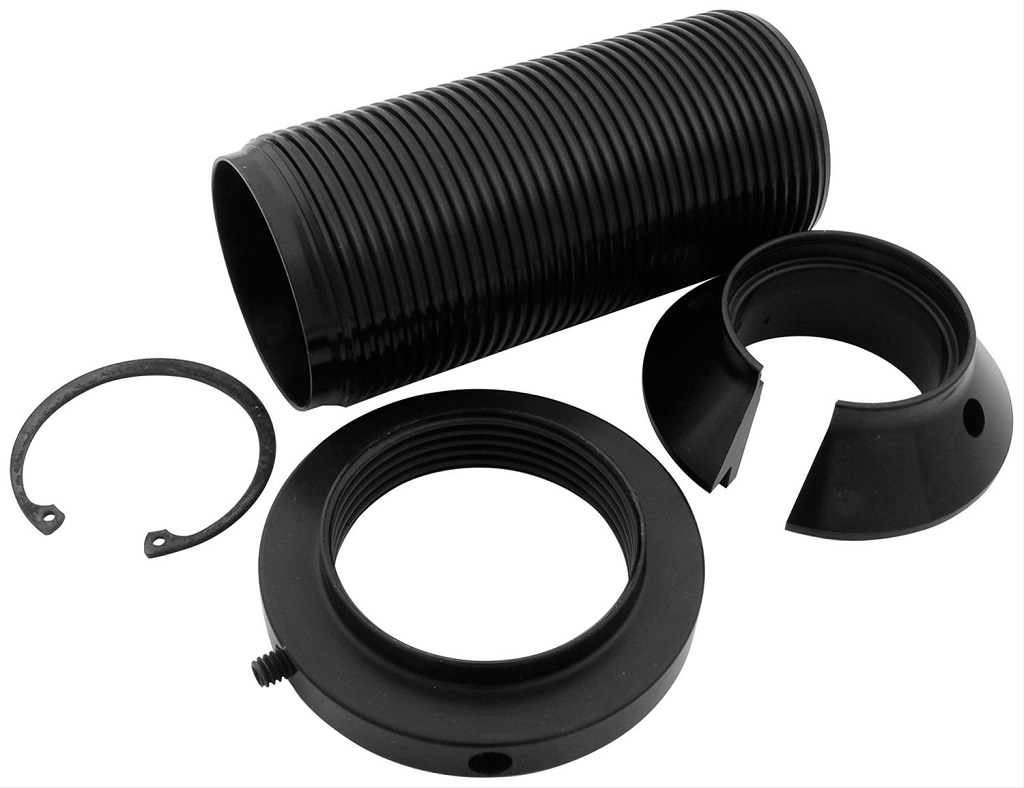
I got a few more parts ordered. I have been doing some research on what I want to do with the suspension since my last update.
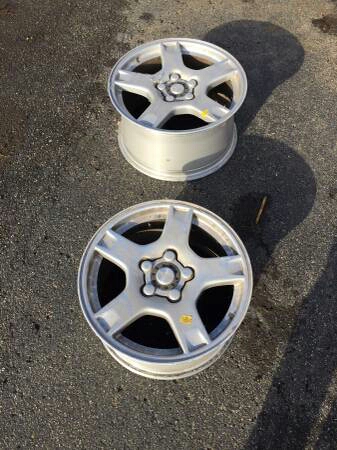
I have decided to try to get some stock C5 "Wagon Wheel" rims in it. They seem to be the redheaded child to most vette owners. That means readily available and cheap. I found one front and one rear for $50 and the guy delivered them. So now I can test fit before I commit. The rims are 17x8.5 58mm offset and 18x9.5 65mm offset. Not sure how hard it is going to be to fit them in the car.
I know I need to make adjustments to the rear suspension. I ordered an adjustable rod end lateral links from summit $150. I hope that the 7" and 8" swaged tubes were the correct size. If I need to get a 6" it will only cost me $26 + S&H
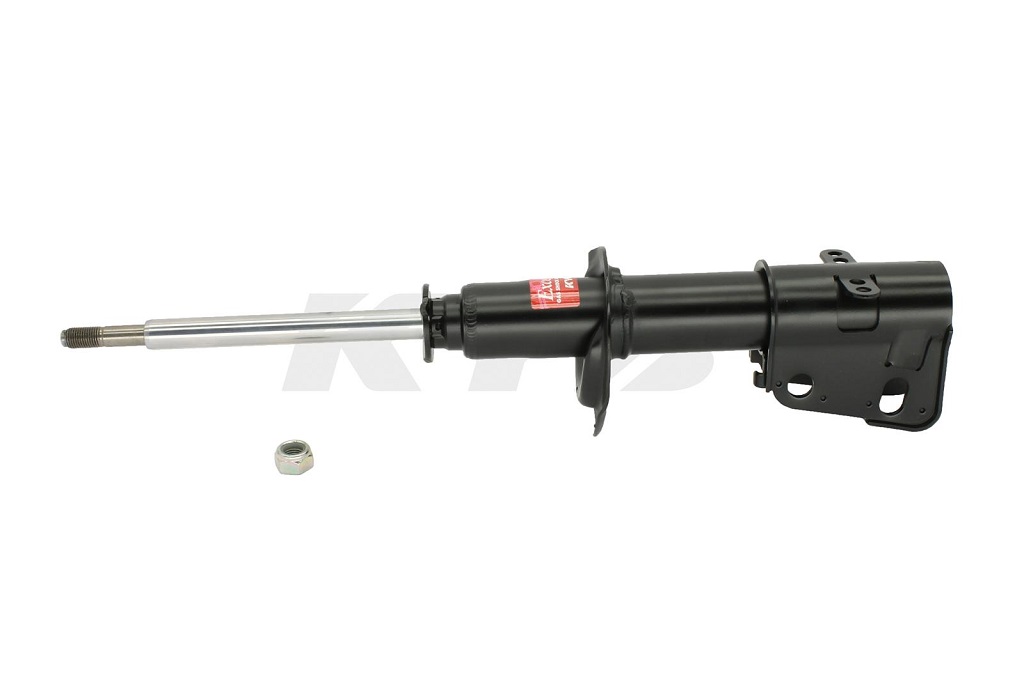
I haven't pulled the trigger on the coil-overs yet. I plan on getting KYB GR-2 234005 Struts $49 ea and modifying them for 10" 300# QA1 Coil-overs part # QA1-10HT300 $47 ea.
I also need the sleeves #AAF-ALL64146 $37 ea. I know I have heard of better deals on the sleeves but most links are dead or I can't find the part. If anyone knows of affordable sleeves let me know. I don't want el cheapo ones though.
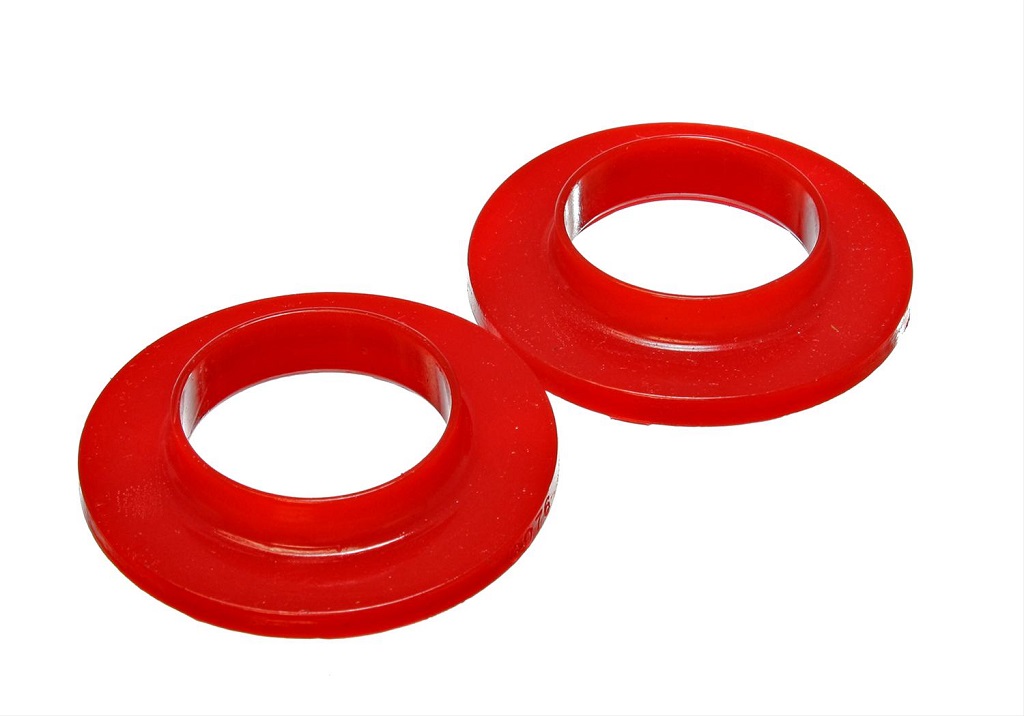
Spring isolators # ENS-9-6118R $9 pr.
I plan on relocating the tops of the struts inboard as needed. Based off Fierogurus information of handling improvements I am going to change the lateral links. I am going to make lateral link relocation brackets to drop the outboard and raise the inboard a little. I am going to order Fierogurus 13" Brake kit $640 for the slotted/drilled.
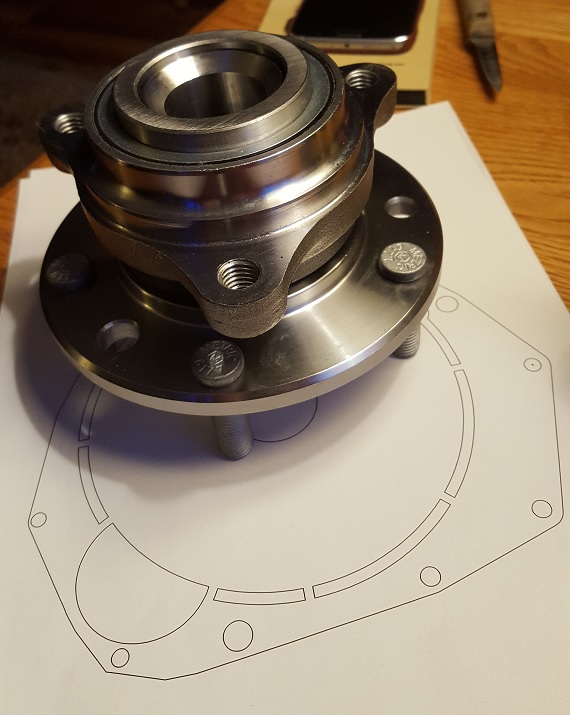
One thing that I need to address is the bolt pattern. The Fiero has a 5x100 and the C5 has 5x120.7 (4.75"). I can get an adapter but that will push the rim outboard .75-1.5" depending on the adapter I get. I also can try to do the S10 hub with new outer CV shaft ends because of different spline counts. This option requires lots of time machining and more money in parts. I have heard that an 88 Boni is easier and same spline count. I am not sure I will make this decision until I see how the rims fit and what room I have to play with.
Brian you are moving stuff around a lot and what else does that affect? Well I will also most likely have to get shorter CV shafts. I have done zero research on this part. But it can't be that hard...we will find out later in this thread in a few months.
PS My dad might bring my other Fiero to the MFF summer sizzle. It will be the only one with a Virginia Fiero Association sticker on the back.
[This message has been edited by paulsobj (edited 12-04-2023).]
Brian - It was cool meeting your dad last week when he picked up the gauge, you guys have a lot of cool projects! I look forward to meeting you as well when you get back.
Your coil-over plans look good to me, I'm running the exact same setup.
-Blake
[This message has been edited by 85sliverGT (edited 06-07-2016).]
Well I have been silent for awhile. I just finished moving from Hawaii to Minnesota. Then I had a few months to get a lot of work done at my shop before winter hit. I was lucky that fall here was the best I have ever had.
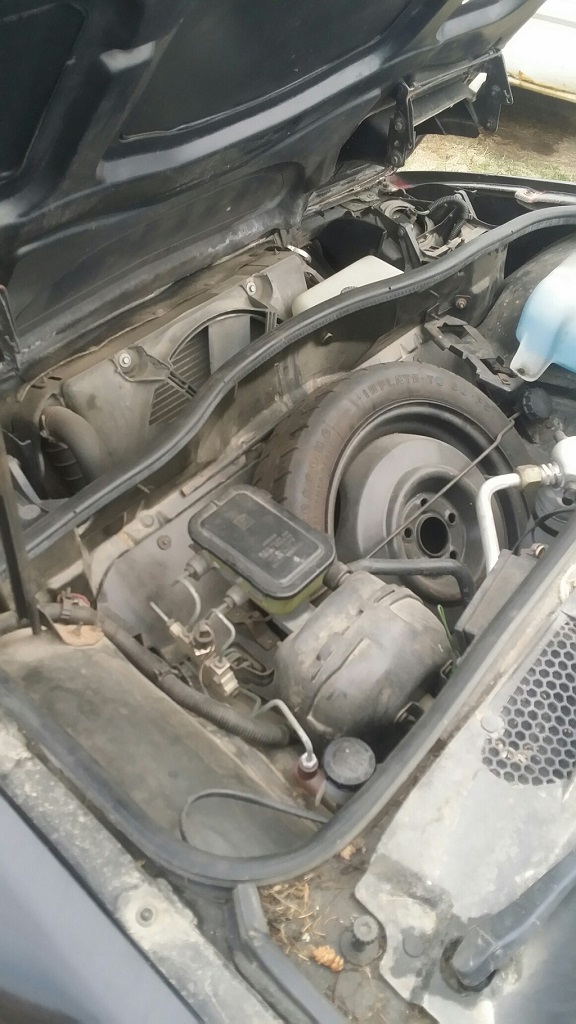
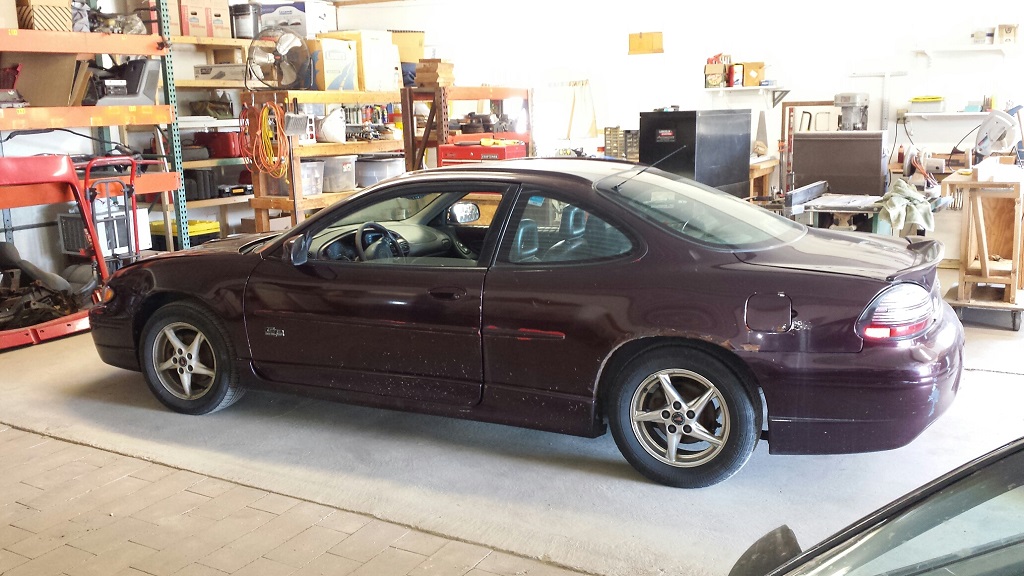
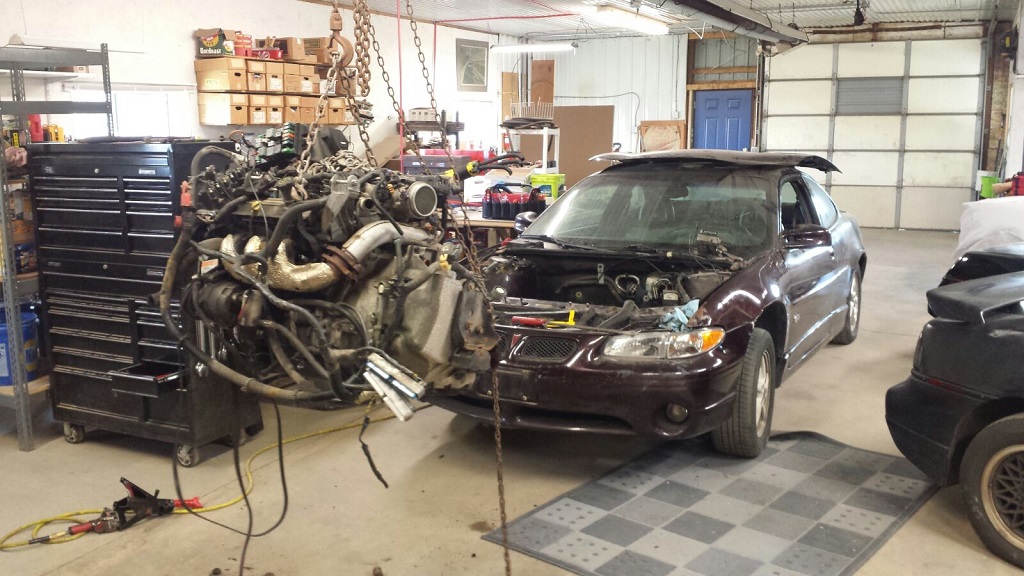
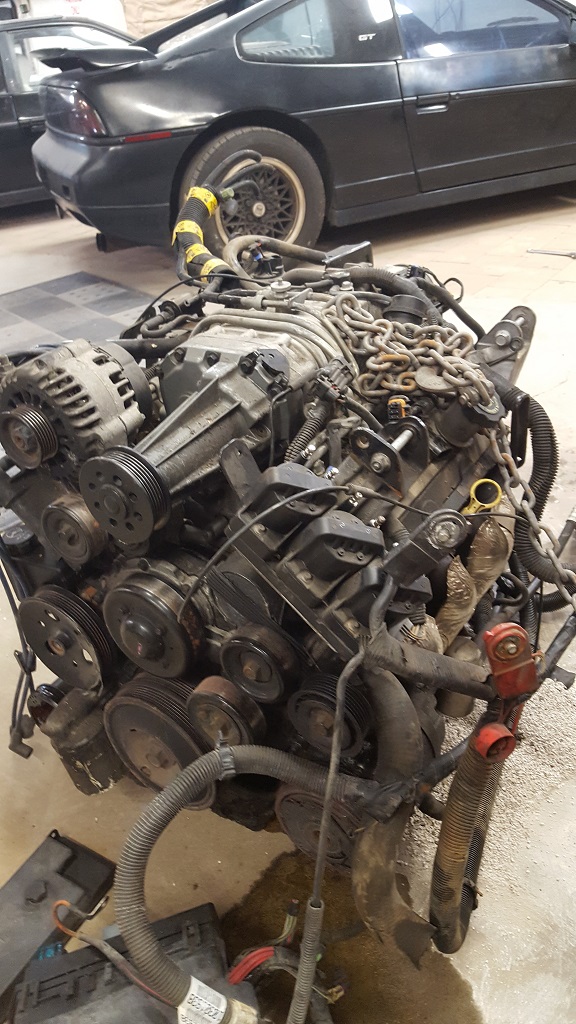
Since my last post I bought two gauges out of early 90's Sunbird turbo's. I will look for a picture to post later. I then started to pull the engine out of the Grand Prix a few days ago.
It was very easy to get out actually. I am going to get it on an engine stand and then I think I will sell the GP as a parts car. It has a lot of hard(ish) to find 40th anniversary badges and interior. I am keeping the Engine and all accessories, PCM, Exhaust flange, engine wiring harness. I am wondering if anyone has taken the heads up display and how hard it is to transfer to a Fiero? I will end up throwing away the PS, AC and emissions.
[This message has been edited by paulsobj (edited 12-04-2023).]
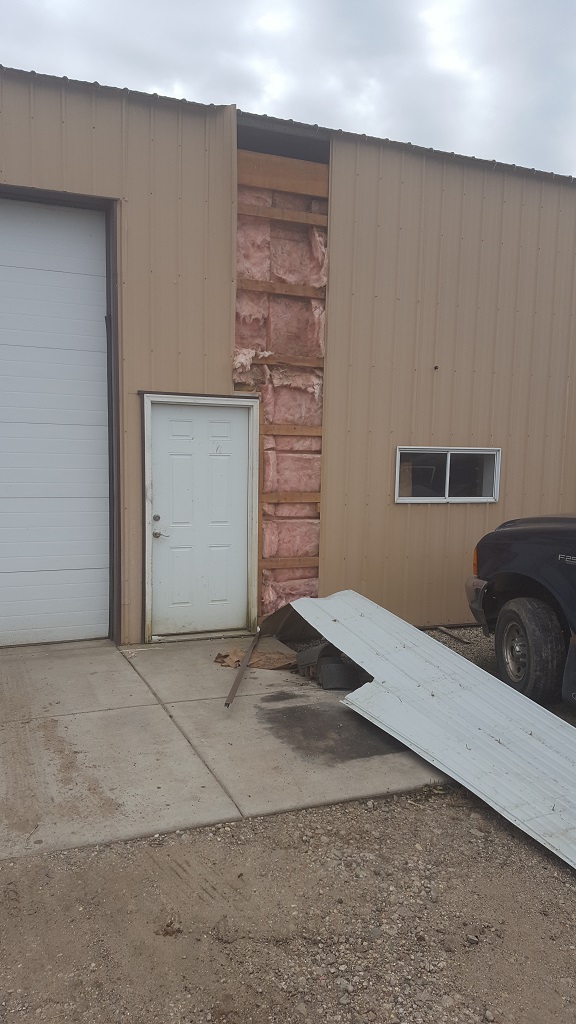
I got a few more things done this weekend. Even with some wicked wind that took out a section on my building.
I noticed that the SC pulley looks like a ZZP. I'm not sure of the size or how to measure it. I planned on a 3.5 pulley for the build.
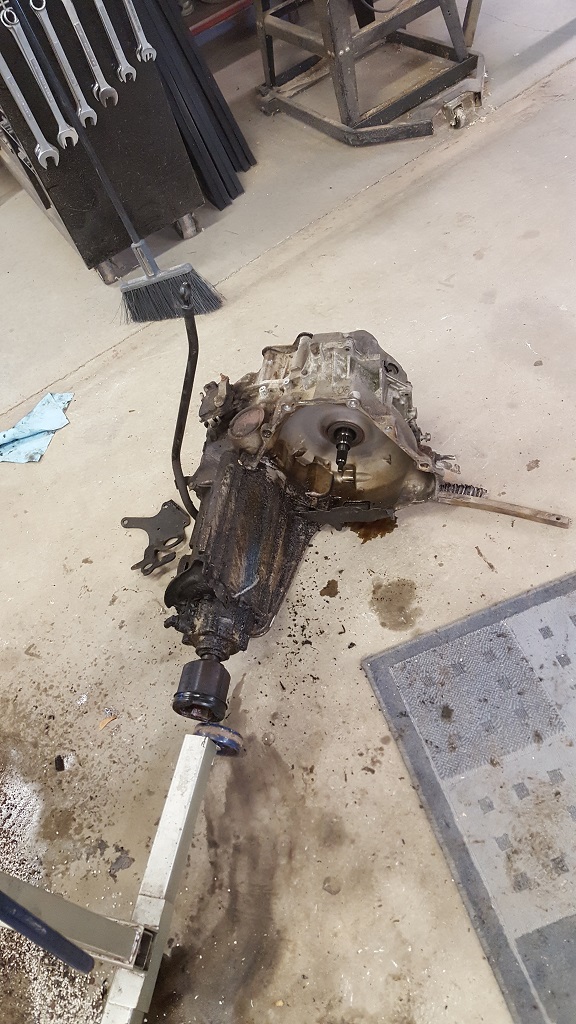
I am going to sell the trans 160K IIRC
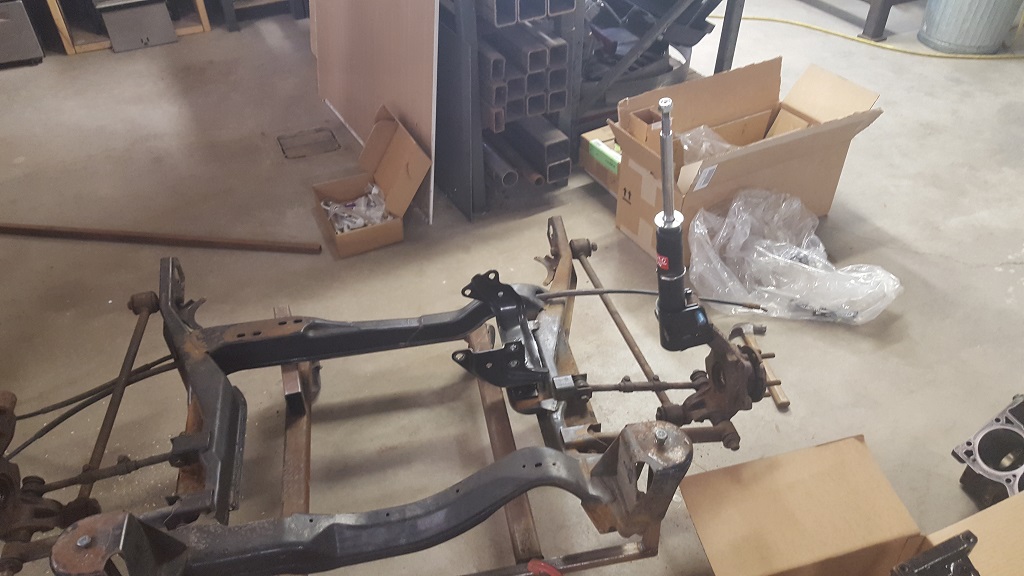
I had an extra cradle from the red 88 GT that my dad started to clean and he is contimplaiting a few ideas on how to mount it. We might do a tubular frame still. That might have to wait until next winter or summer.
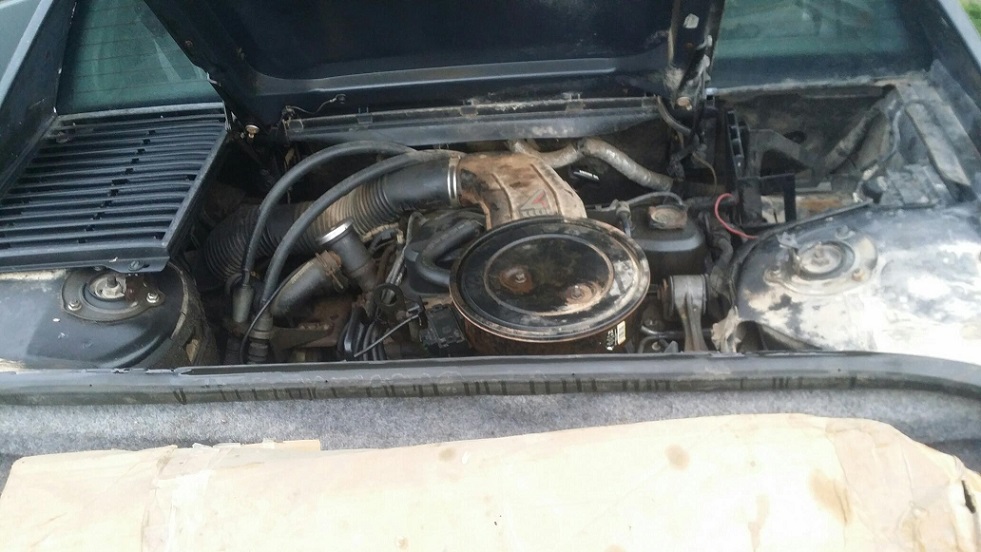
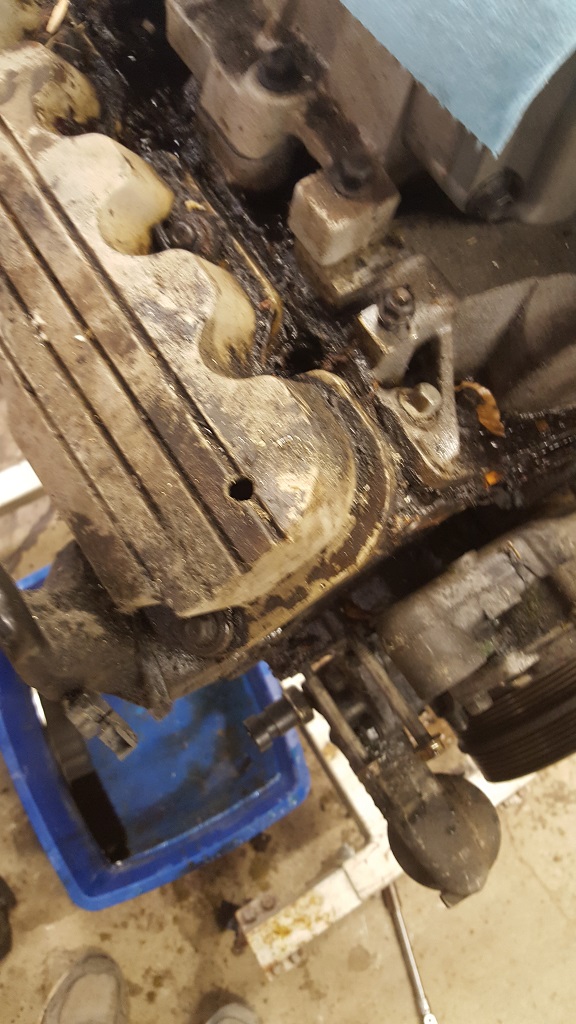
The previous owner decided to mix up the alternator bolts and used a LONG one and punched a hole in the valve cover.
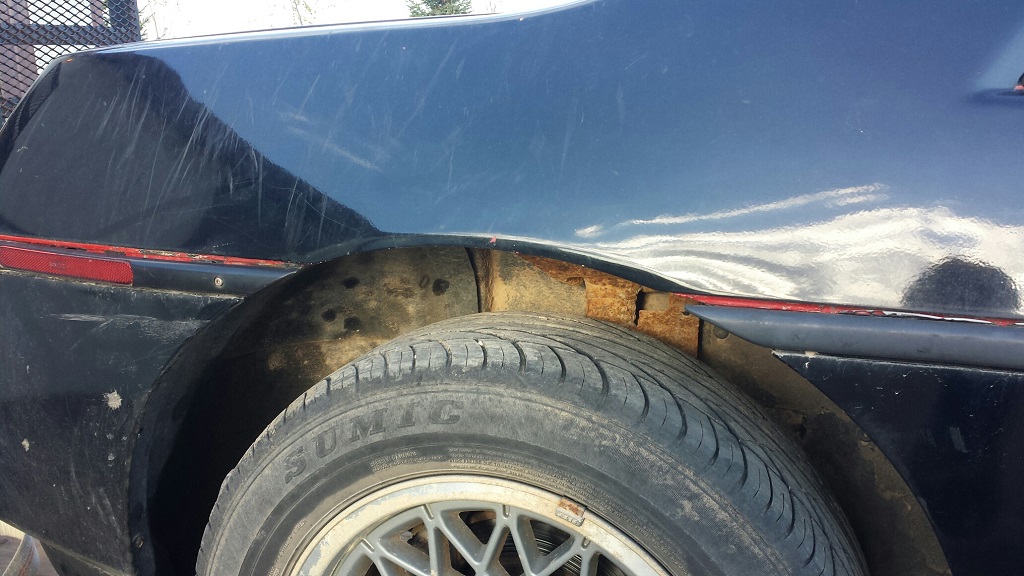
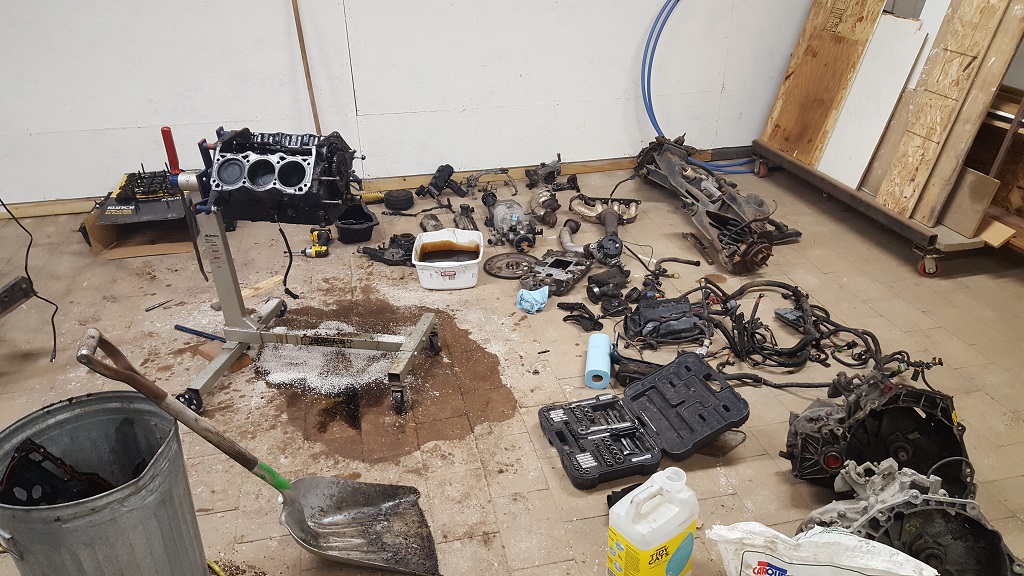
Until next weekend this is how it sits. I am thinking of tearing it down pretty far. The massive amount clues I found led me to believe the car has a case of neglect.
[This message has been edited by paulsobj (edited 12-04-2023).]
Yes it is! I got that at my first meeting with the club. I kept it on the car as it is great quality and looks awesome. You might remember that car it was 00355 VIN and had some 87 GT parts on it from the factory.
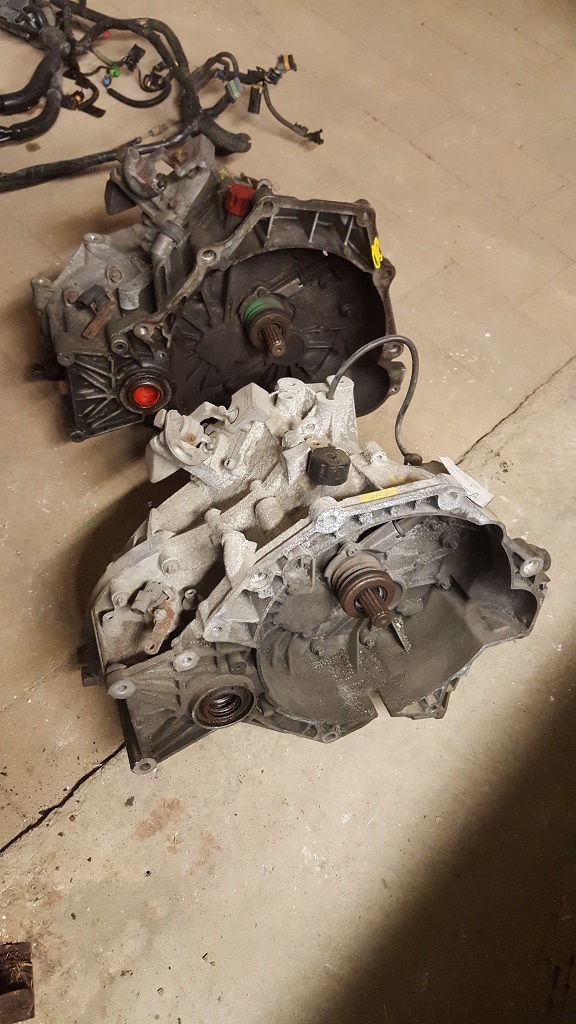
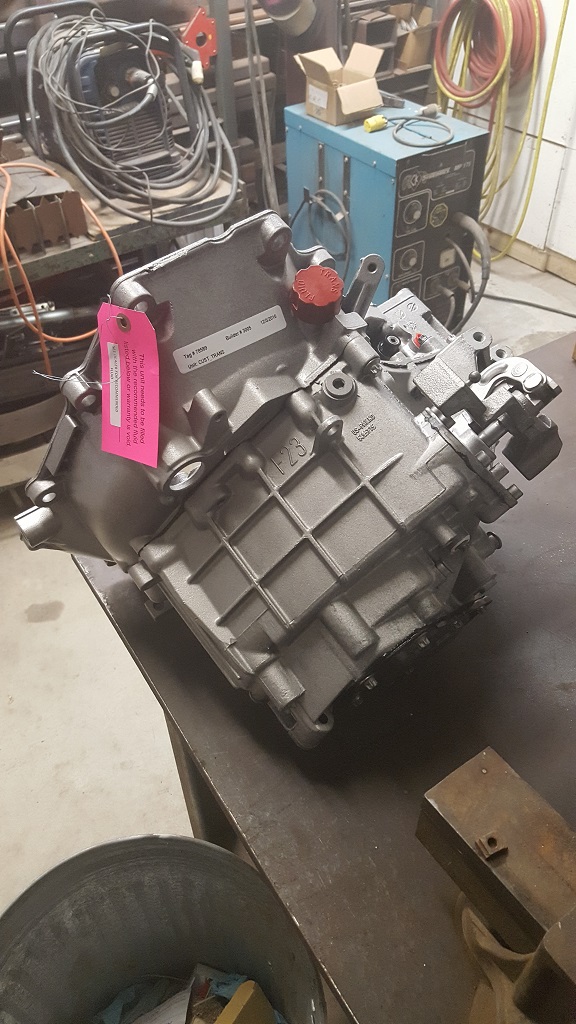
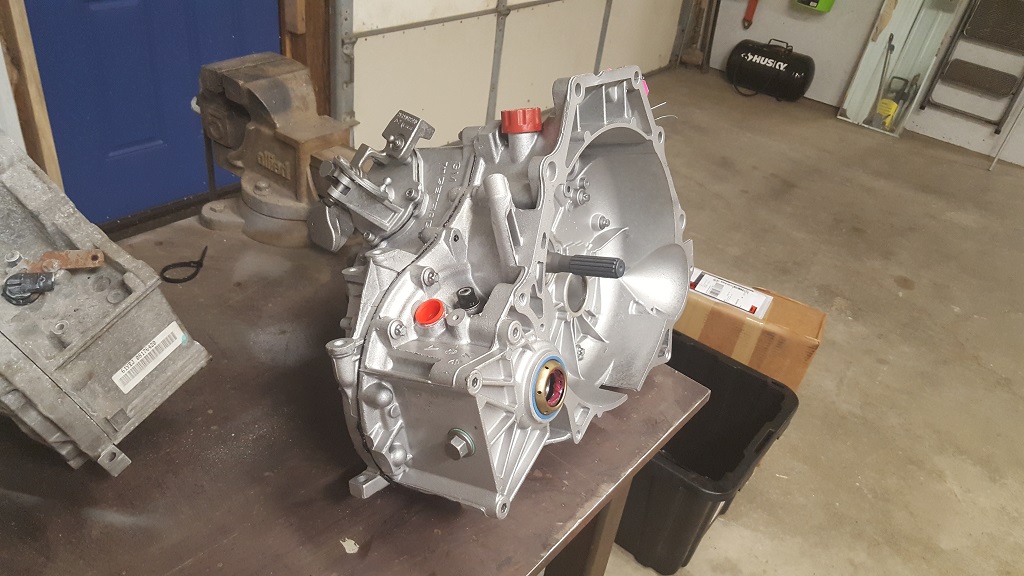
I picked up a F23 (Sunfire) trans today. The Sunfire has the correct bolt pattern for the 3800 but not the best gearing. You can see the differences sitting next to the Cobalt trans. If you read this build you know I am taking the gears from the Cobalt and putting them in the case of the Sunfire trans. I am going to check with a trans shop to see the cost for them to do it. I am limited on time otherwise I would do it. But depending on cost and if they will even do it, I might end up changing the case myself. I will document accordingly, I know a few people are interested in doing it too.
[This message has been edited by paulsobj (edited 12-04-2023).]
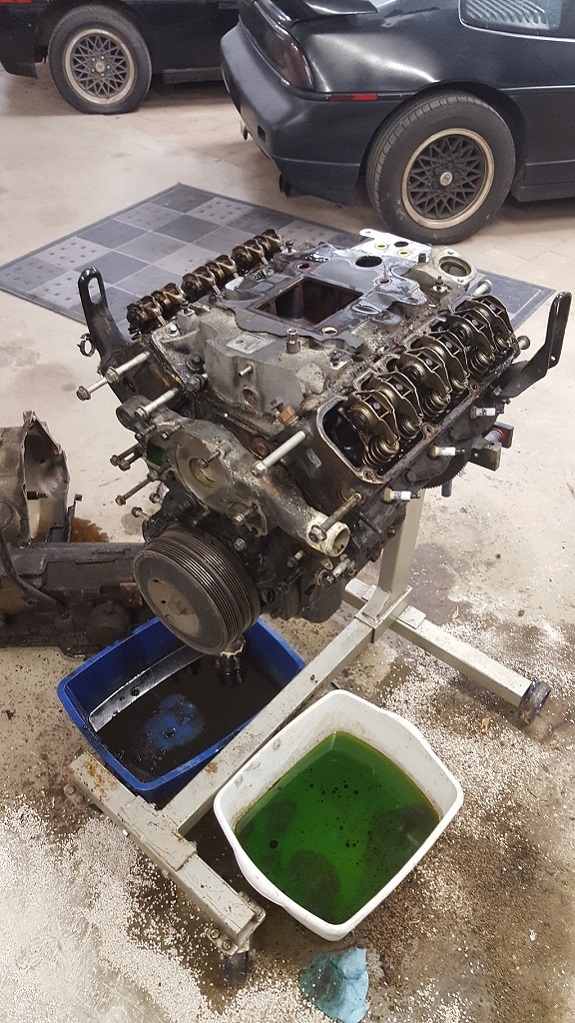
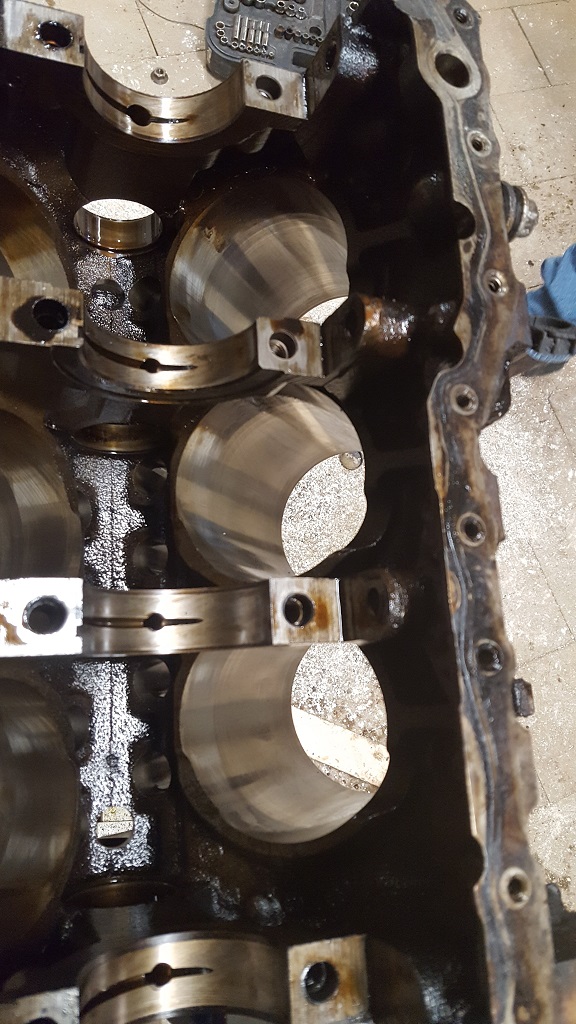
I was able to tear down the block some more today. I ran out of time and didn't want to start the short block unless I was able to finish. I will get the short block marked and dismantled Friday. I also made a mess when my oil catch fell off the engine stand cross bar.
[This message has been edited by paulsobj (edited 12-04-2023).]
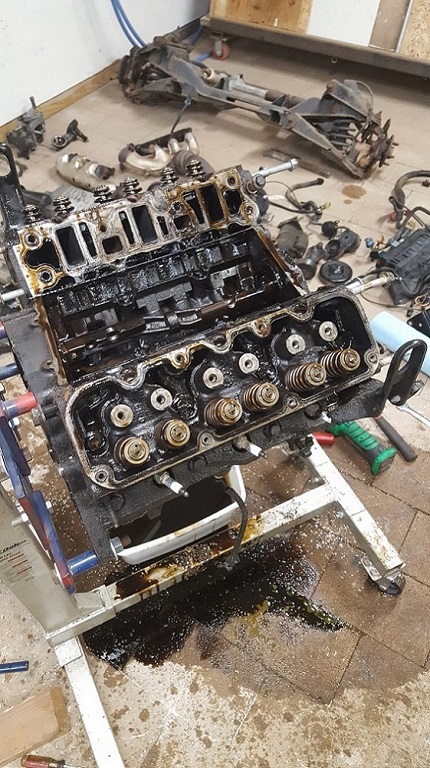
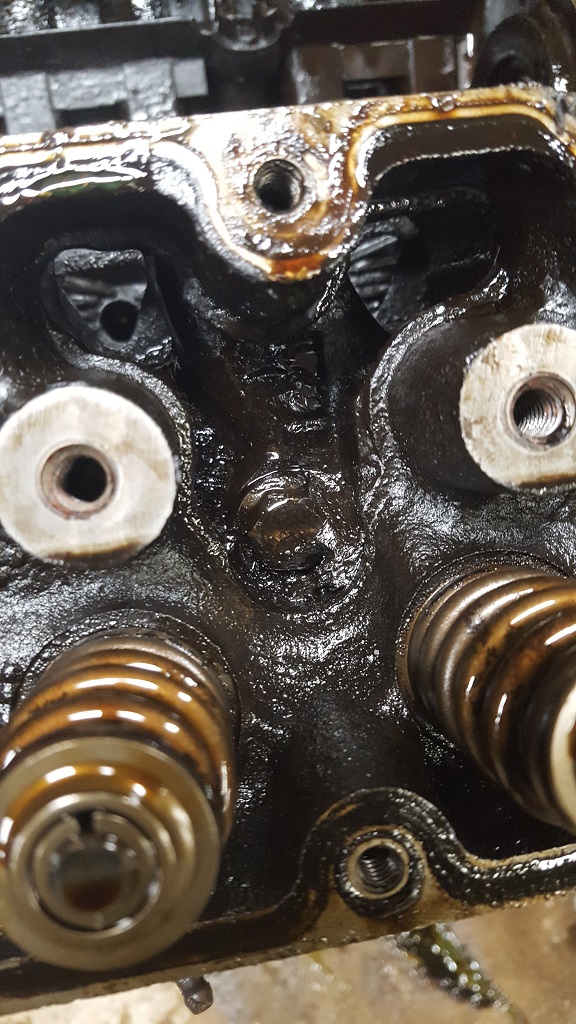
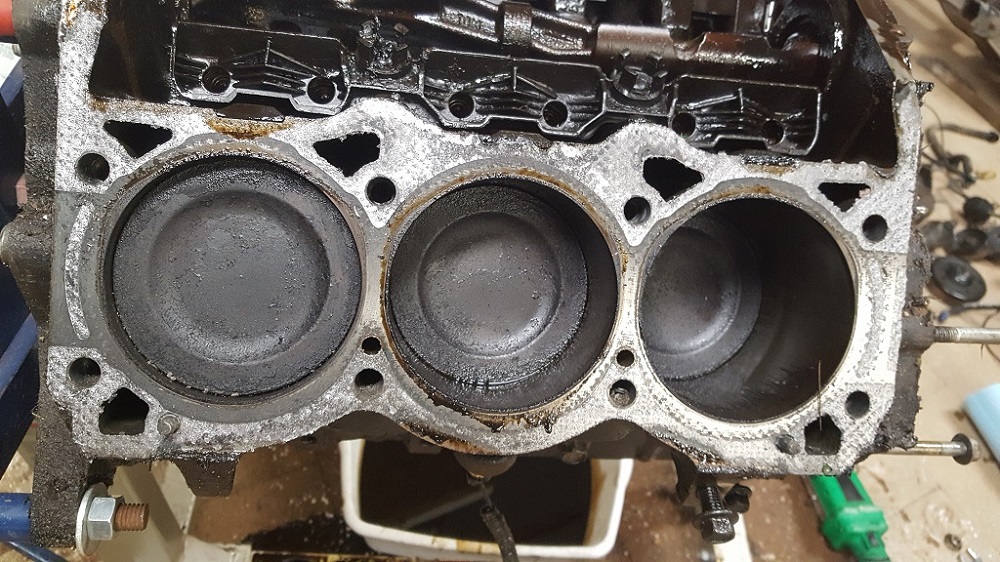
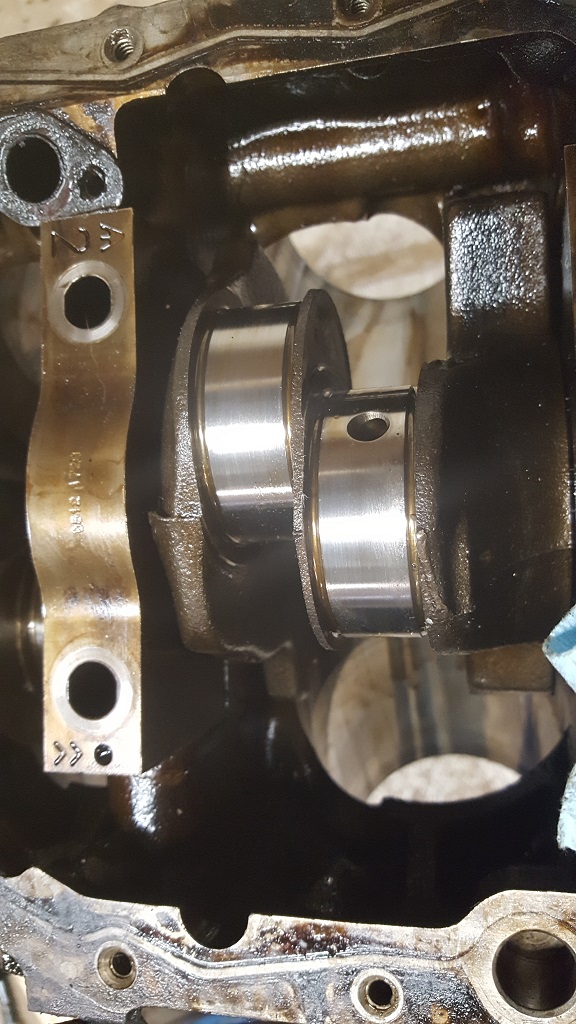
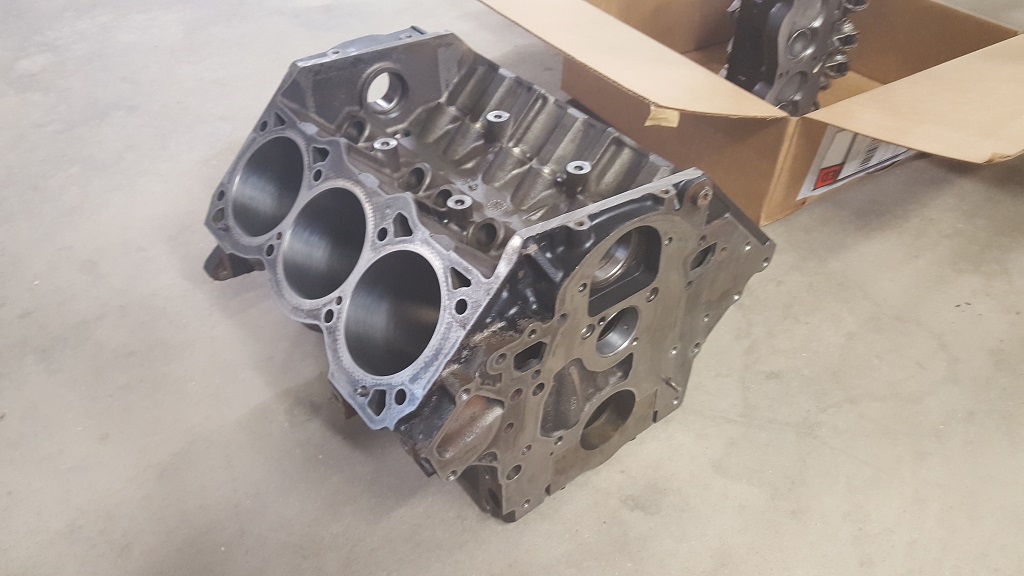
I pulled the block apart and sent the heads and block to get boiled and cam bearings installed at a place in Kilkenny, MN. The Cylinder walls looked much better then I figured. After the sludge I found earlier....
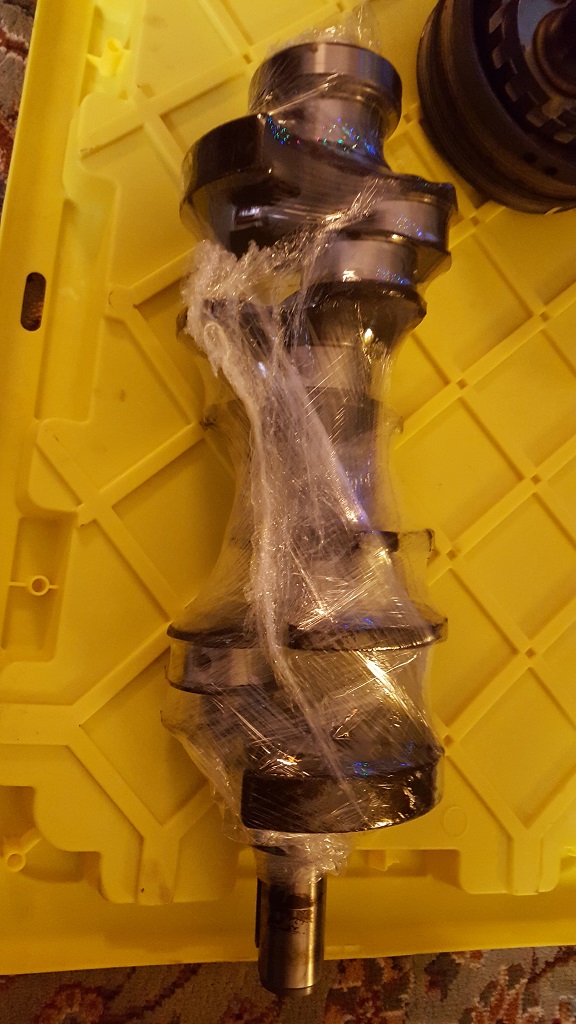
The cam and crank were also in excellent condition.
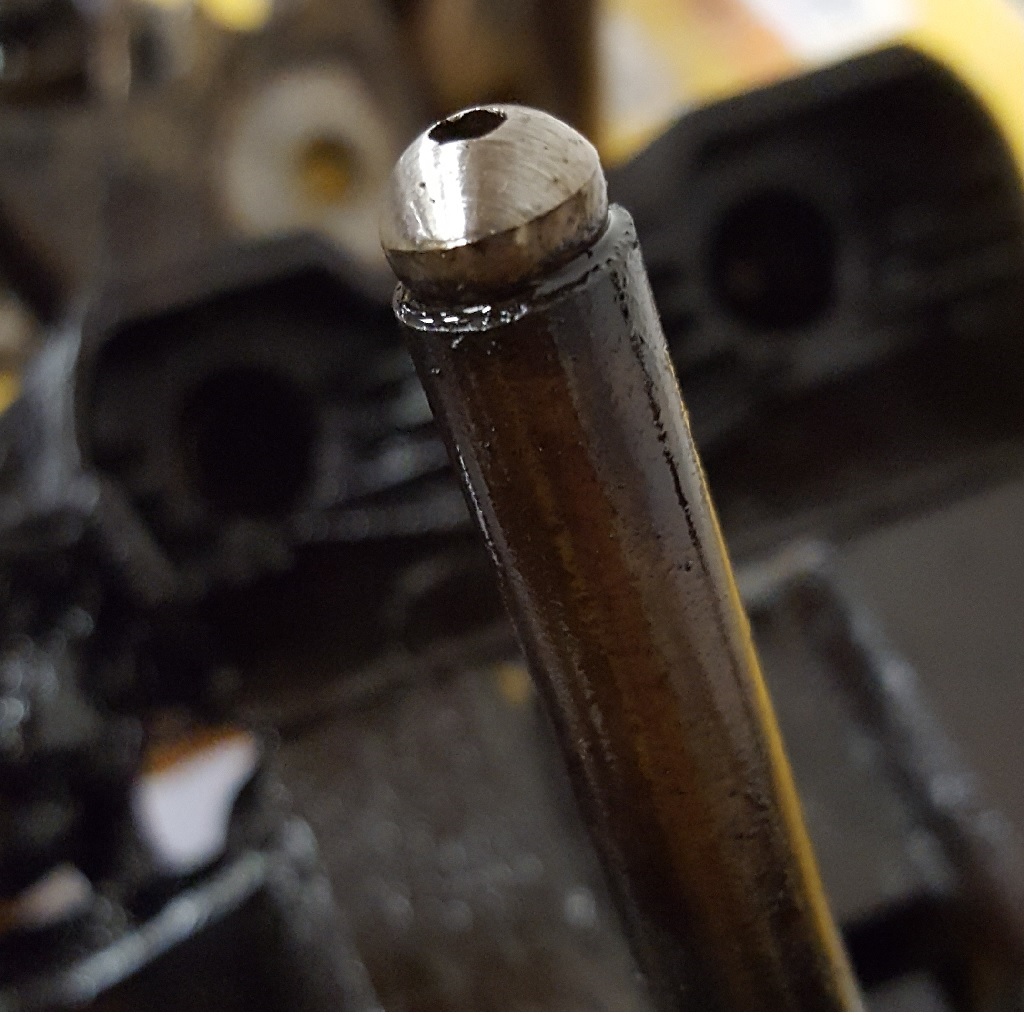
But the pushrods... ohhhh the pushrods....
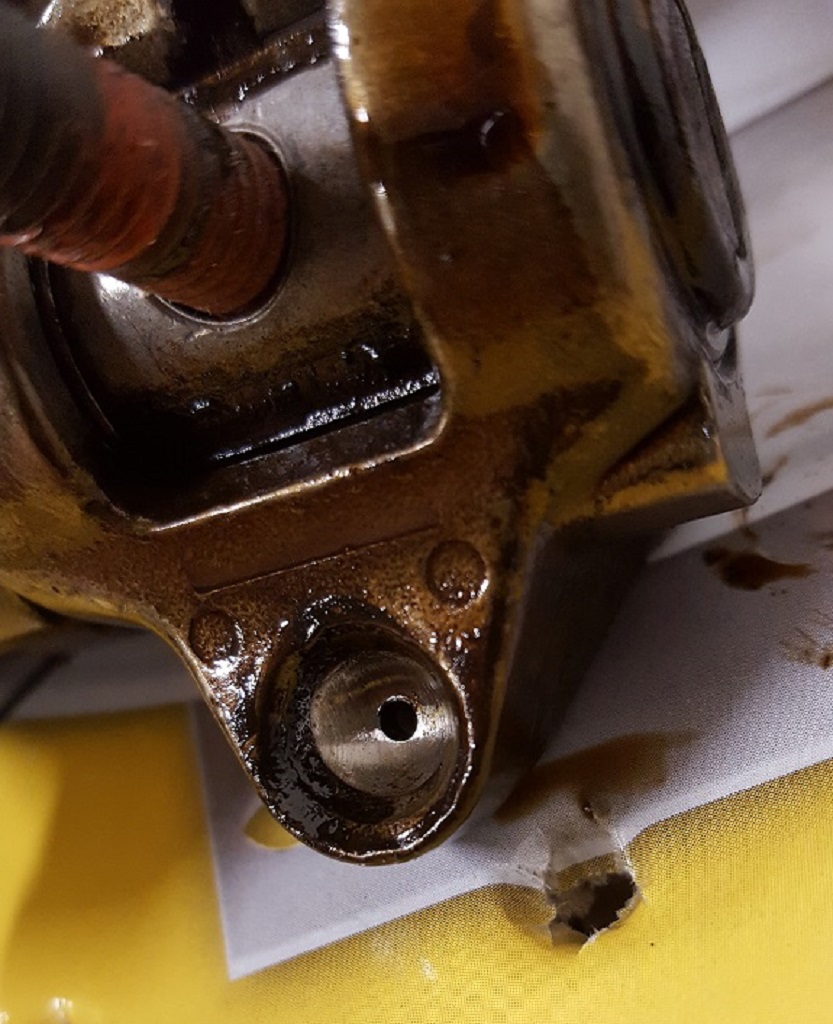
And the rockers...
So it looks like I will be getting new rockers and pushrods. I will have to do some research as to reusing the lifters. I haven't worked with roller lifters before. I am taking some of the engine parts like timing chain cover, LIM, and pistons to get glass bead blasted. I know the pistons are coated and I will tell my blaster to test a small spot to see if it takes the coating off. Some may disagree with blasting and materials used to blast. My dad did own a company called Blast Master... Specializing in automotive restorations.
When I get the pistons, engine and heads back I will bring all the moving parts to Engelke Maching, Inc in Lester Prairie to balance the crank and flywheel (from mid 90's F-Body). I still need to buy a flywheel and I heard that it's best to get it from a yard over parts stores. The "new" ones are much lower quality and have been known to have voids in the flywheel. That will pose a problem when I have to get it machined significantly down.
[This message has been edited by paulsobj (edited 12-04-2023).]
You can use the input shaft from the 3.93 trans, as it is shorter.
I will try to get ahold of the shop and see if they have already swapped the bellhousing.
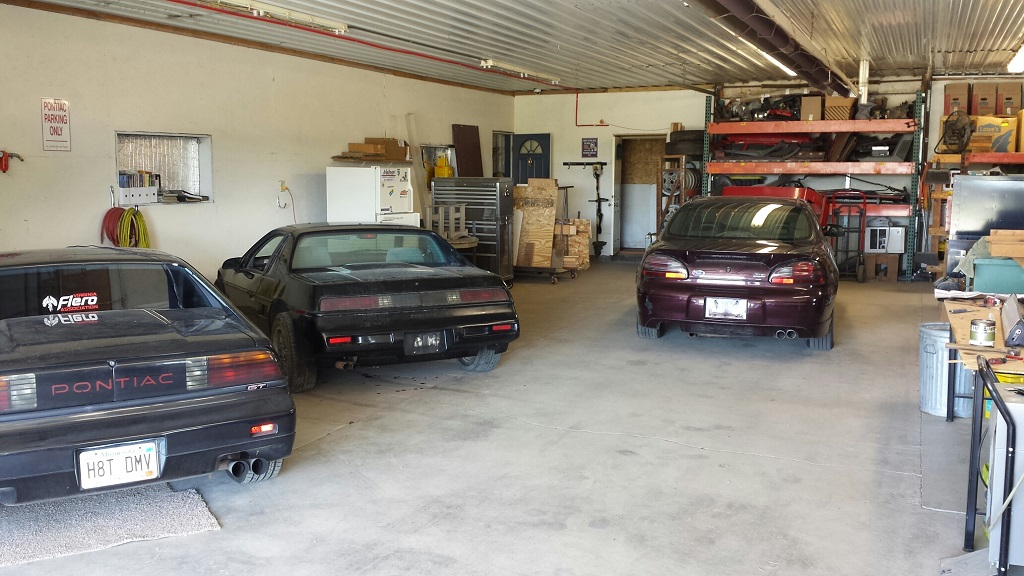
85sliverGT stopped out and got a tour of the shop and see most of my projects. It was great to finally meet another Fiero nut!
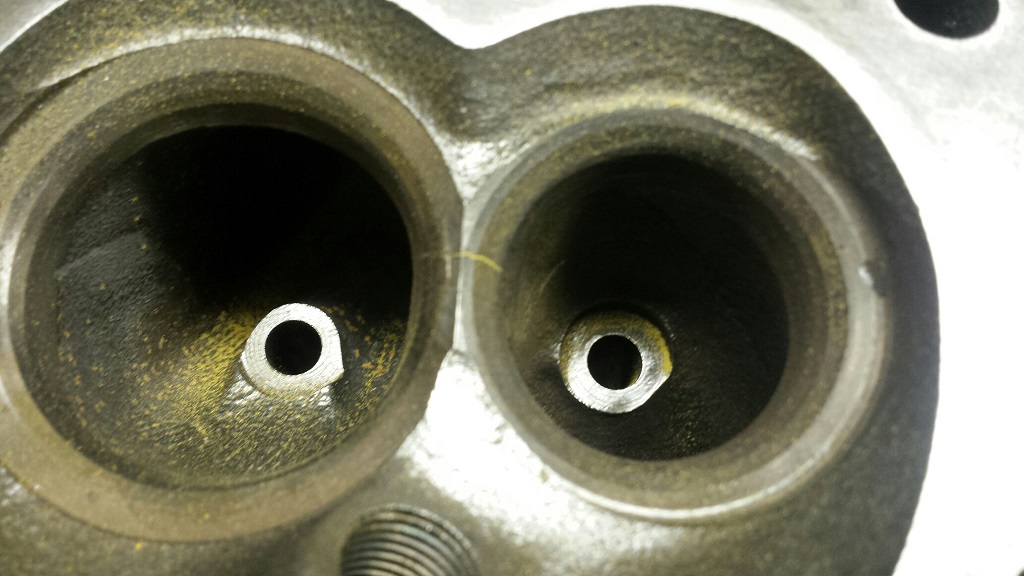
I got a call from the machinist and the heads were cracked between the valves (very common in 3800). I bought a set off a 00 Boni and those were less cracked... So the yard has two more from two Buicks (one R and L on each car). I will pick them up today and I hope to have at least ONE good head. On another note we will check out the rocker arms from the Boni to see if they are good so I don't have to buy a set. Note: the machinist, trans shop, and balance shop are all 1 hr drives....
I picked up the gasket set from my machinist and it came with the plastic LIM gasket that is the midgrade plastic not the best option metal. Some people go buy the metal one individually but I think I will use the plastic one as the reason it fails is the Dex-Cool eats the plastic. I think I can change the system to ethylene glycol (green stuff) and it shouldn't eat the plastic. If I wanted to keep the Dex-Cool I would have to do more work cleaning out the doner cars radiator and coolant lines as they have ethylene glycol. If you mix the two IIRC it makes an acid that really eats gaskets fast.
I bought a flywheel from French lake auto for $40 + $20 shipping.
I also bought some stuff to help get the pistons cleaned and the machinist recommended not blasting so that's called off. I ordered some stuff called piston kleen for $20/Gal. I will let you know how it works.
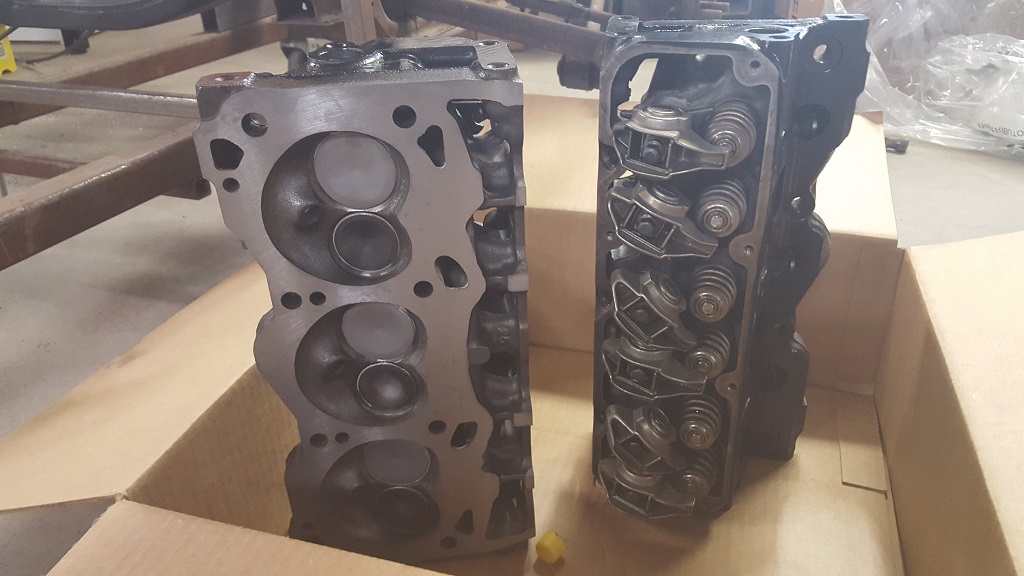
I picked up the now third set of heads. We did a quick preliminary magnaflux and NO signs of cracking between the valves. He will tear them down and check them thoroughly tomorrow. Something to note.... I had bad rocker arms on the 1st set. The second set seems to have good rocker arms, springs and valves. They were going to sell me the valve covers for $25 ea but I passed. So when I went back to exchange the old heads that were bare, the new one (3rd set) had rockers, valves, springs, and Valve covers! I should have plenty of spare parts for the heads.
I packed up the Crank, Pistons, Piston Rings, Connecting Rods, and Flywheel and will head out to get them balanced and checked out. I didn't order bearings yet just incase the shop needs to machine the crank. Once I know for sure that standard size is what we need I will order Main and Rod bearings. After the bearings arrive they can balance everything.
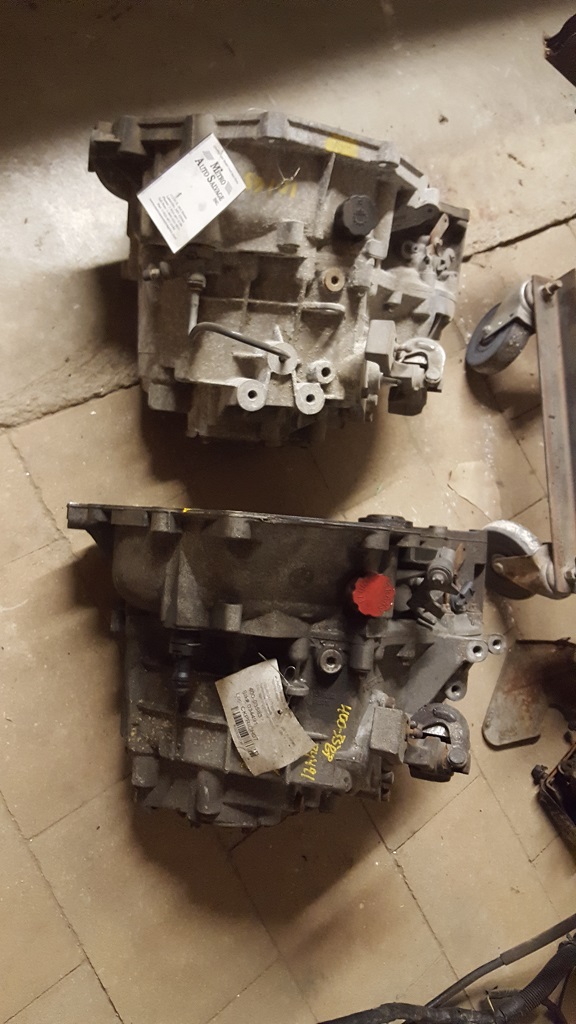
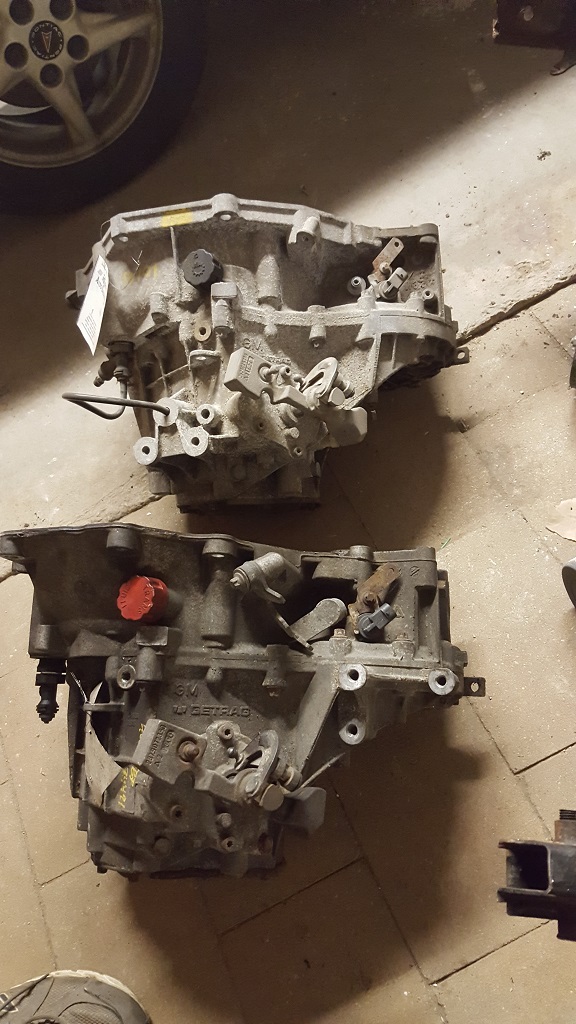
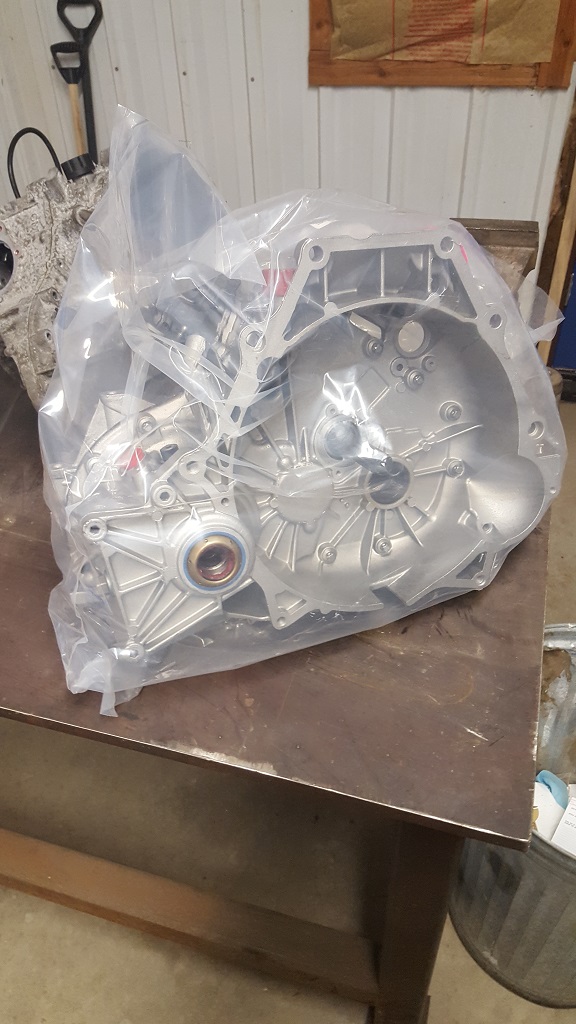
I picked up the F23 today. I have to say I was impressed. $427 and they swapped all the gears, a few new bearings and new seals. They also painted it for me. Here are a few pics. They had the input shaft already swapped.
all ready to unwrap an early xmas present
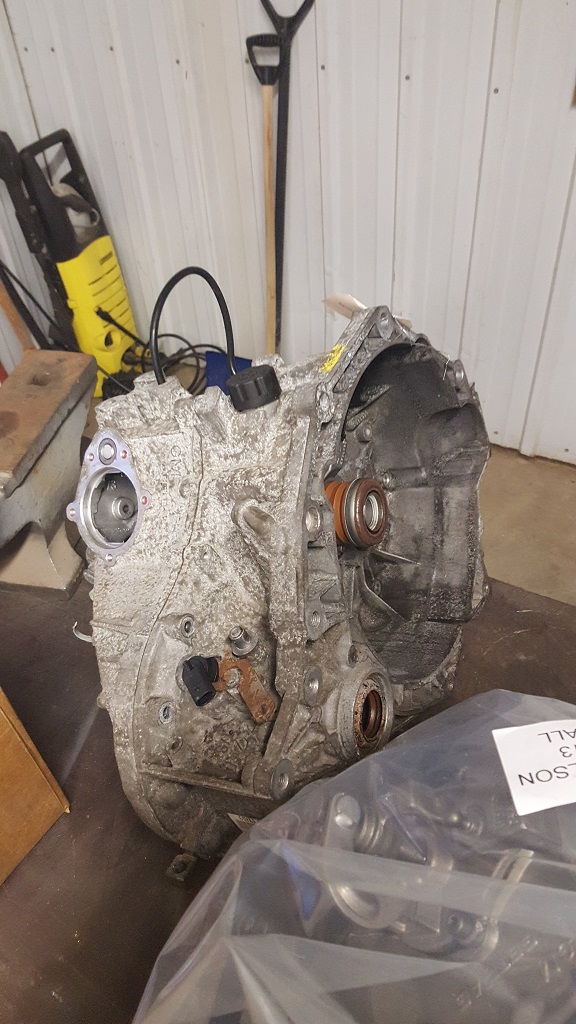
Here is the old case with the gears in a box.
I am going to mock up the whole assembly (block, flywheel, Clutch, Trans, cradle etc) and make a few decisions. I want to see CV axle clearances with the stock spindle locations vs bringing the whole assembly in about 1". I also want to look at not machining the flywheel down 1/4" to .840 thick and making a spacer for the trans. That may solve the Flywheel machining and the input shaft on the F23 is too long according to others that have done the FY1 gear swap. I need to look into the HTOB clearances with and without the spacer mod.
[This message has been edited by paulsobj (edited 12-04-2023).]
I picked up the F23 today. I have to say I was impressed. $427 and they swapped all the gears, a few new bearings and new seals. They also painted it for me. Here are a few pics. They had the input shaft already swapped.
all ready to unwrap an early xmas present
That is impressive as most shops just don't do a decent job. I'd gladly pay for that service.
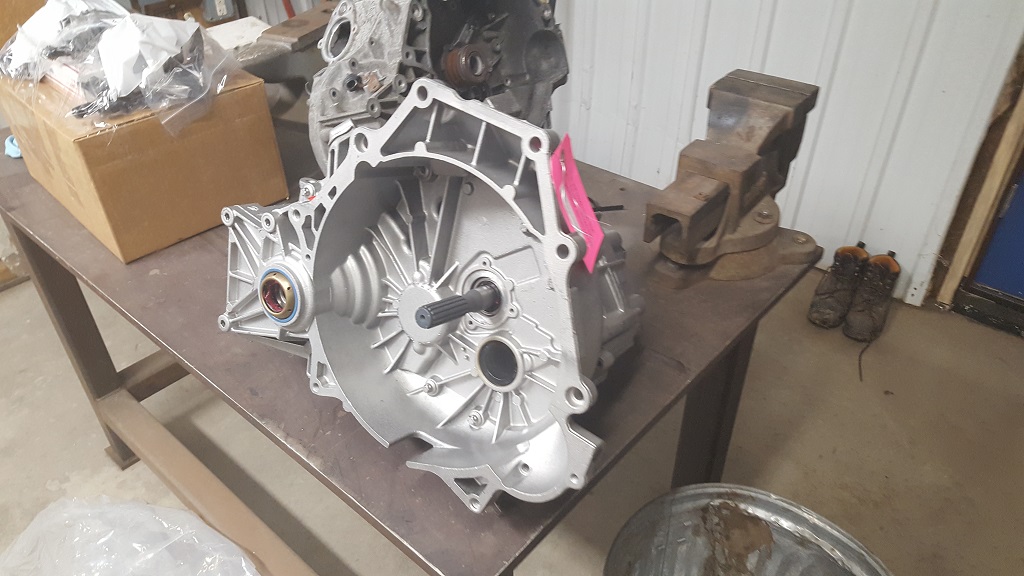
This shows a little better the color they painted the F23.
This is a shot of set one of heads that were cracked. The second set was not nearly as bad, just a hairline crack.
I also received news that the machinist is done. Head bolt set, engine gasket set, cam bearings, piston rings, grind valves, wash block and heads, hone block, Mag heads. Total $750 Lots of advice = priceless
[This message has been edited by paulsobj (edited 12-04-2023).]
Yes it is! I got that at my first meeting with the club. I kept it on the car as it is great quality and looks awesome. You might remember that car it was 00355 VIN and had some 87 GT parts on it from the factory.
Yes I remember. Lowest number 88 I have ever seen. Glad to find this thread, i'll be watchin it. Good luck.
Well I didn't get much done today. I had a friend come over to buy 6 Honeycombs I had sitting around.
I did go pick up the block and heads. It was roughly $400 for gasket set, head bolts, cam bearings, Piston Rings. $350 for machining work to include cleaning and mag heads x3, valve job, shim valve springs, wash block, hone block, install cam bearings.
Here is the block all cleaned and honed.
Here are the 3rd set of heads. They were not cracked! He said they were a little wavy and had to take a little off the underside. He even painted them for me gloss black. When you do a valve job you should shim the springs to compensate. Another note he tried to smooth the bridge between the valves. It had a small ridge made during the casting process. It could be contributing to those heads cracking in that spot.
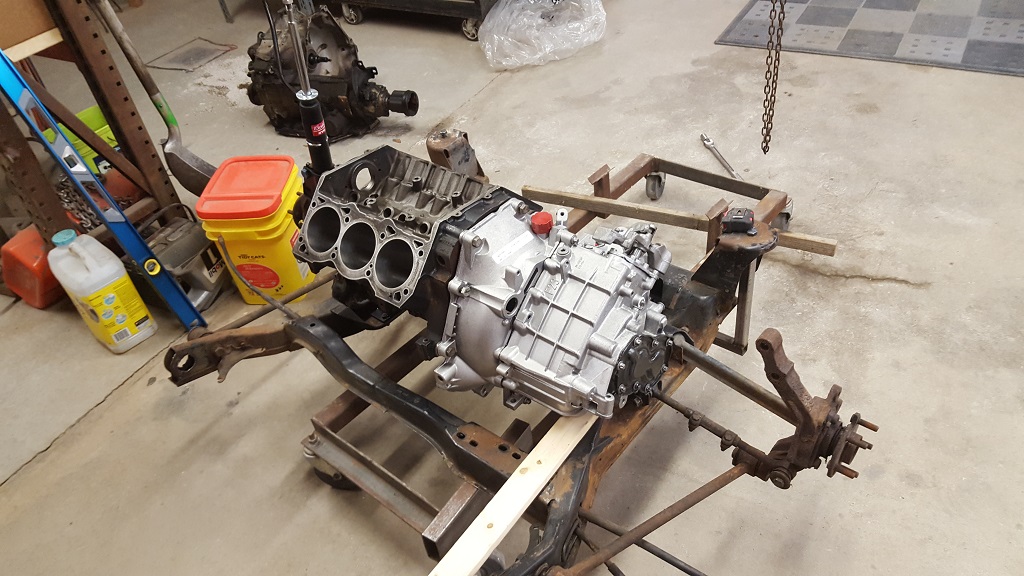
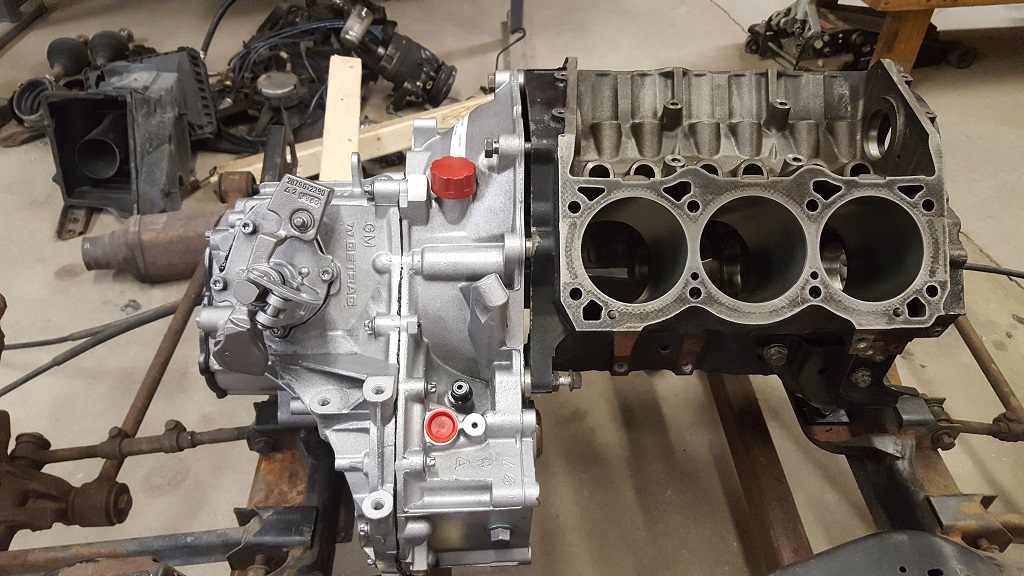
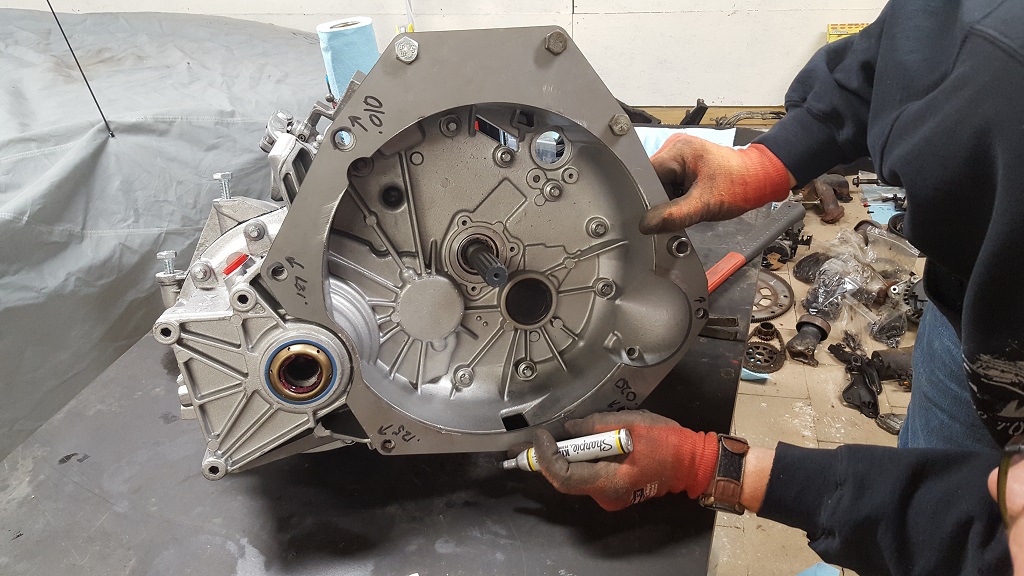
We started to mock up the cradle with original lateral links and then start to play with different options. As of now we are thinking of cutting a 1/4" spacer between the F23 and the engine and brining in the uprights around 1"
Here is the reason we didnt get any work done haha. It was a good day of car talk and hanging out.
[This message has been edited by paulsobj (edited 12-04-2023).]
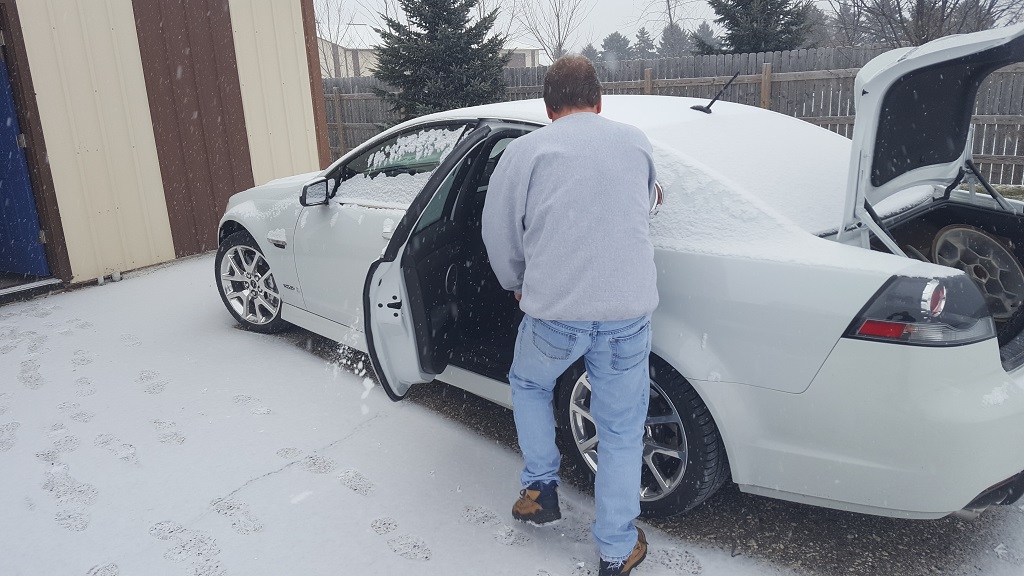
We got out to the shop today with almost a foot of snow!
The pistons have sat since Saturday in a bath of "piston kleen" and looks like the stuff works. This is immediately after pulling it out and not wiping it down or a little extra scrubbing with a tooth brush.
Here is the set.
We then started to mock up the block and trans to see how and where to mount it.
You can see the small gap we are thinking of doing. One thing we will have to do is make the pilot longer to bridge the gap. One was missing so we will have to make one anyway.
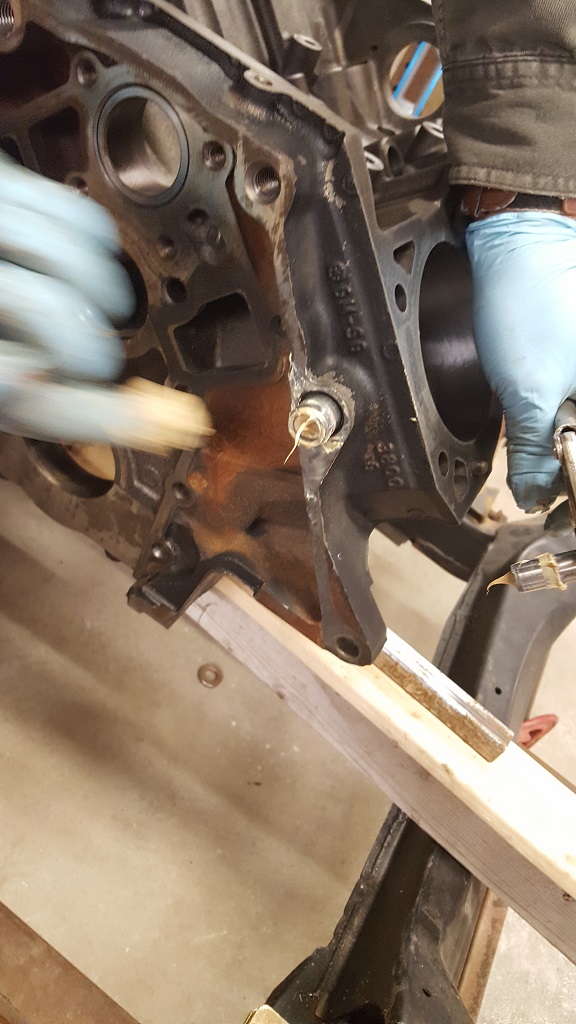
We had to get out the old pilot and they can be in tight. So you can try to get it out with a few tools by grabbing it and pulling it out. Or you can push it out.... With hydraulics. Put some grease in the hole and find a PERFECT fit piece of steel to press in.
Then once you get it started about 1/8" by gently tapping it in (this is delicate as the clearance it so tight). Once started tap/hit it with a hammer. We needed one hit with a 4Lb and the rest with a regular one. The grease will force out the pilot from the back side.
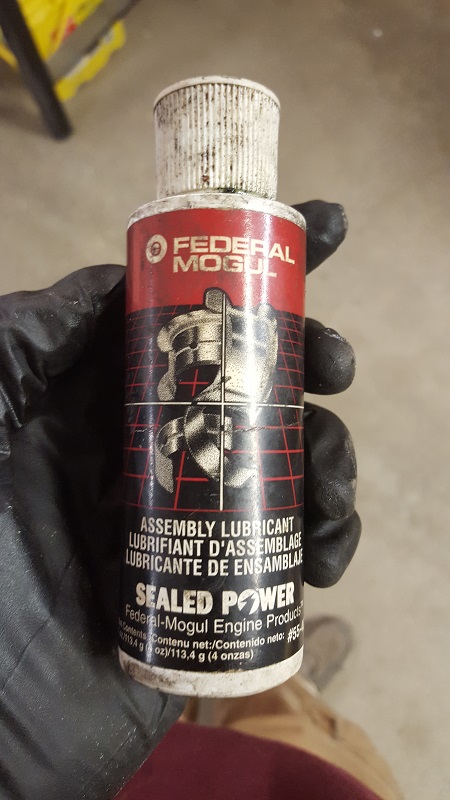
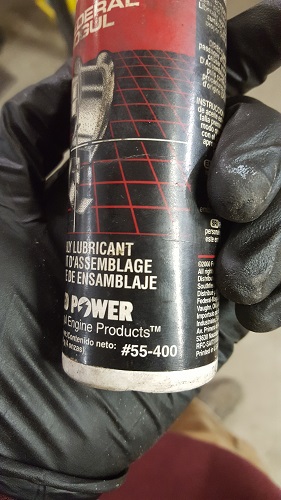
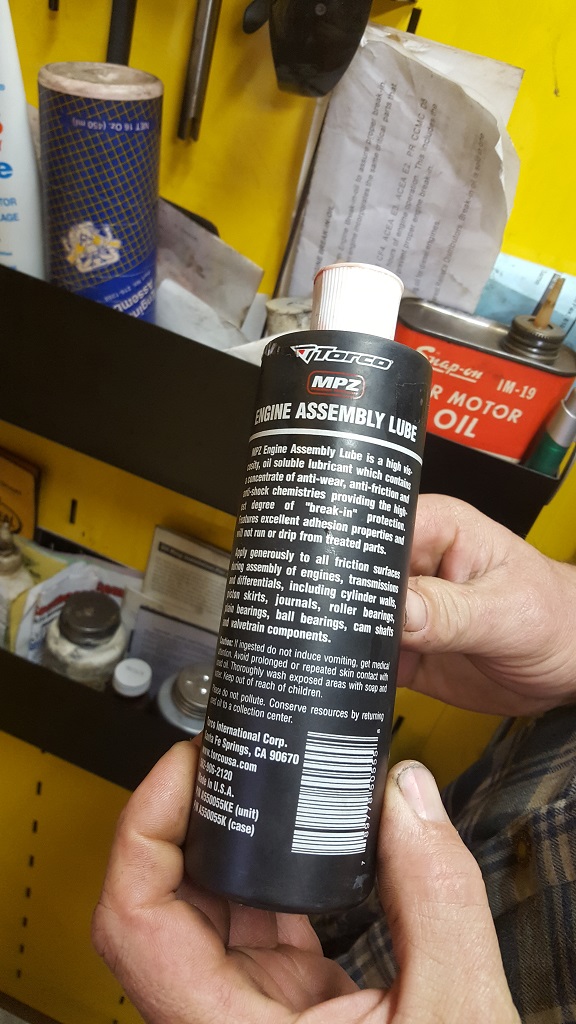
Some bearing lube the machinist gave me for free. He said this should be used for the CAM lobes.
For the rest of the engine he uses a 1/1 mix of these two.
And a few parts for reference
[This message has been edited by paulsobj (edited 12-04-2023).]
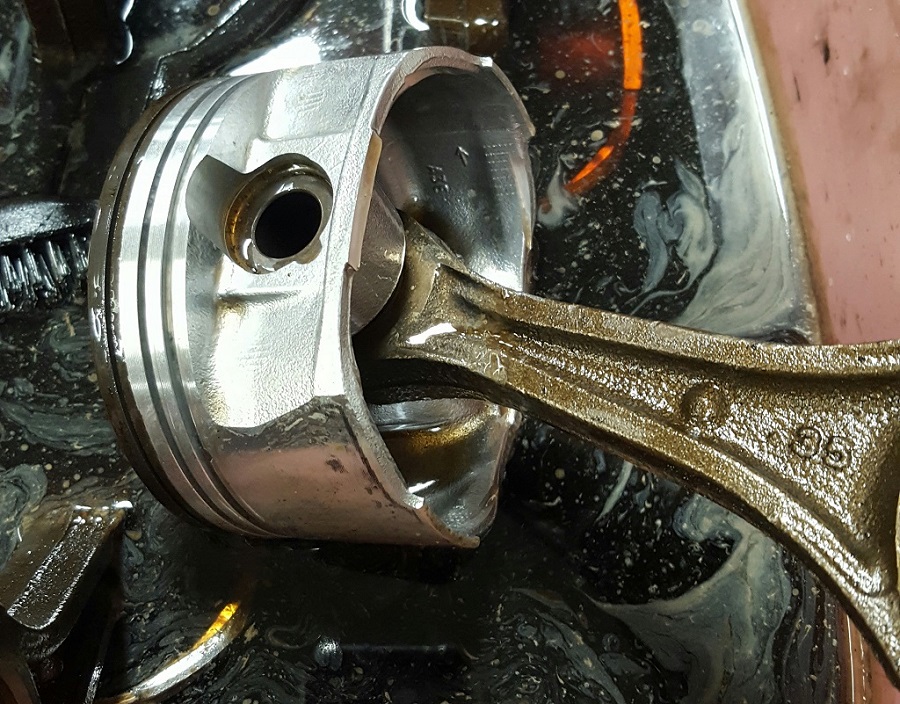
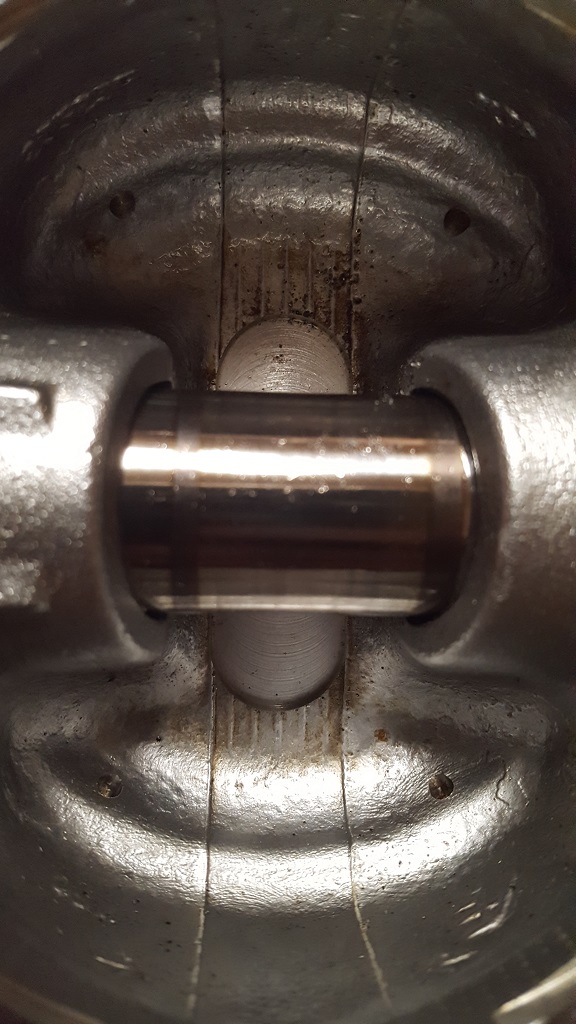
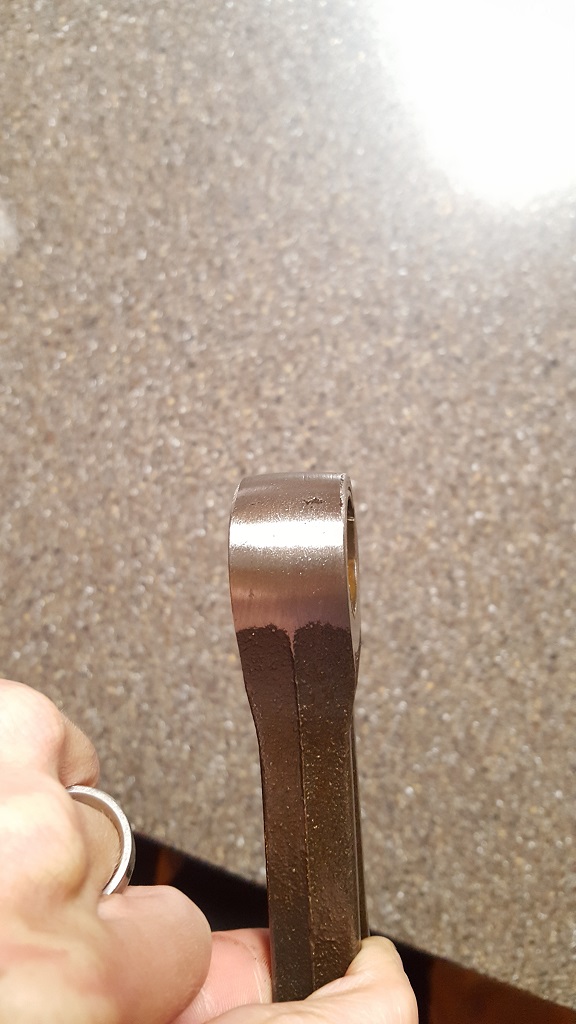
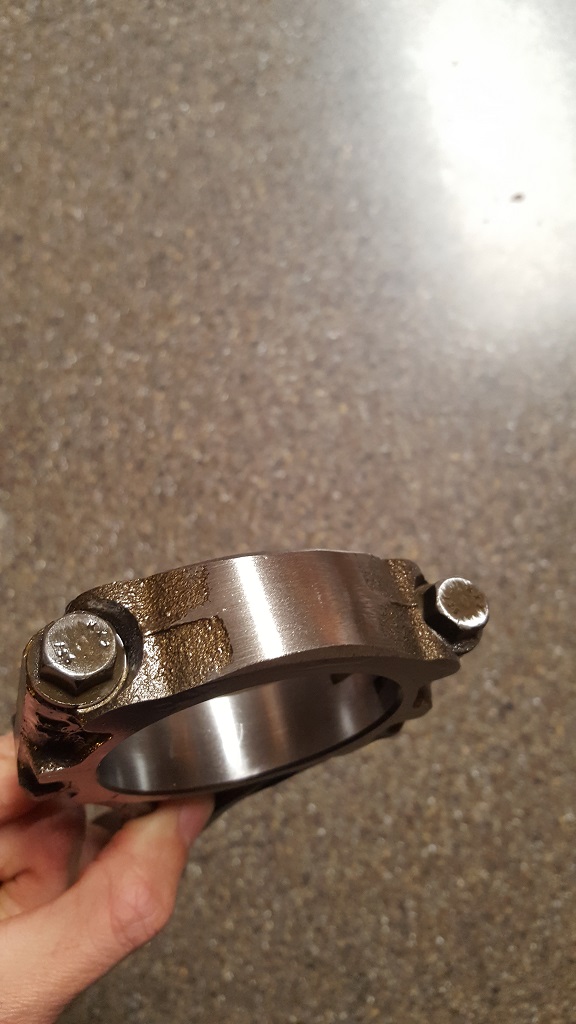
I picked up my rotating assembly today. It was $335 to balance everything, polish the crank, resurface the flywheel, and recondition? the connecting rods. Not sure the terms for the connecting rod machining. They were slightly oval. They cut the rod cap and to make it shorter and machine the center again to make it stock again. That way you don't have to buy over sized bearings.
Here is the Crank that was in spec and just needed to be polished.
They weigh the pistons and machine the set to the lightest one. The lightest one was 418.5 grams. You can see where they took out some aluminum.
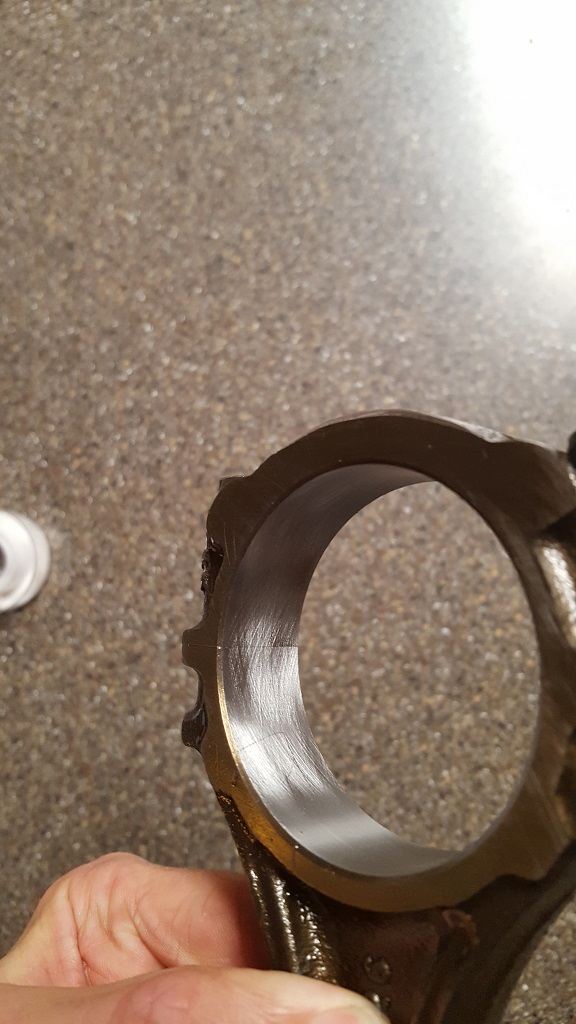
They weigh each end of the connecting rod and make the set all match to the lightest one. You can see where they ground off on the rods.
Here is where they machined the hole to make it true again.
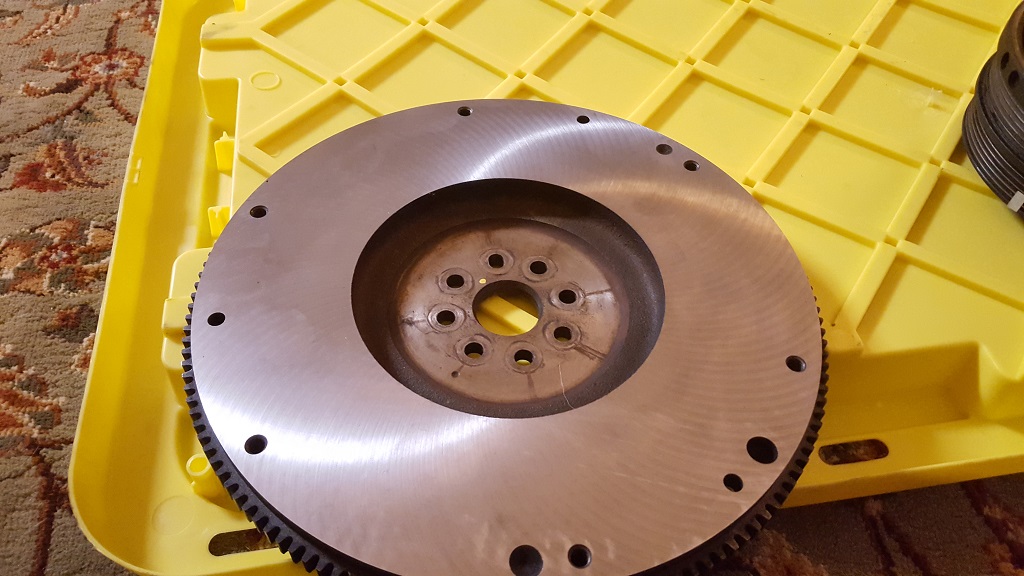
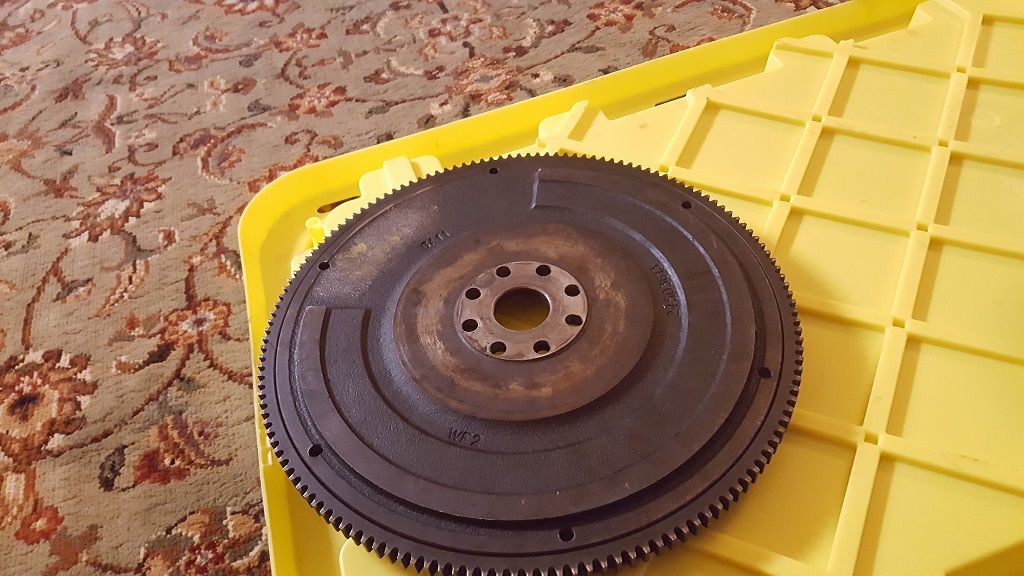
I see most guys talk about balancing the flywheel and there are a few things to note. I am not machining it down almost 1/4" to .840". I am spacing the case out 1/4" to make room. I also see that some say to machine the back side so if you need to resurface it later it wont lose its balance. I think that may be your option if you don't balance your rotating assembly. They take the flex plate and flip it 180 degrees and zero balance from there IIRC. My machinist said that the Camaro flywheel is externally balanced and balanced the crank to it. The reason for that is if I need to replace the flywheel the stock balance should be close. It was actually very close and he only had to weld in a small amount on the rear of the crank and take off a small amount on the front. Make sure to resurface the flywheel prior to balancing. Mine was very slightly warped, another reason that making it thinner is a bad idea...
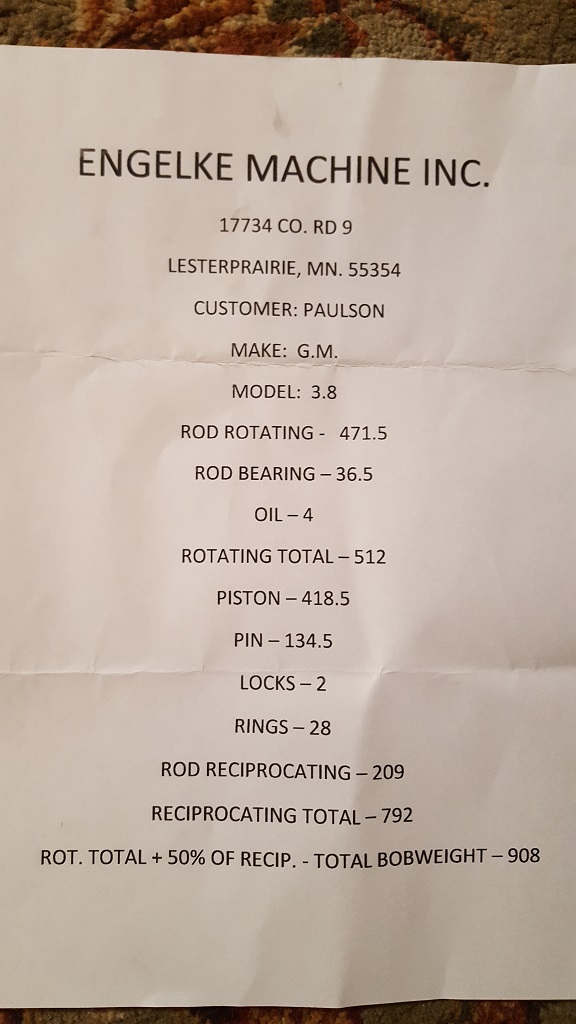
Almost forgot here is the spec sheet so I can replace parts without rebalancing.
[This message has been edited by paulsobj (edited 12-04-2023).]
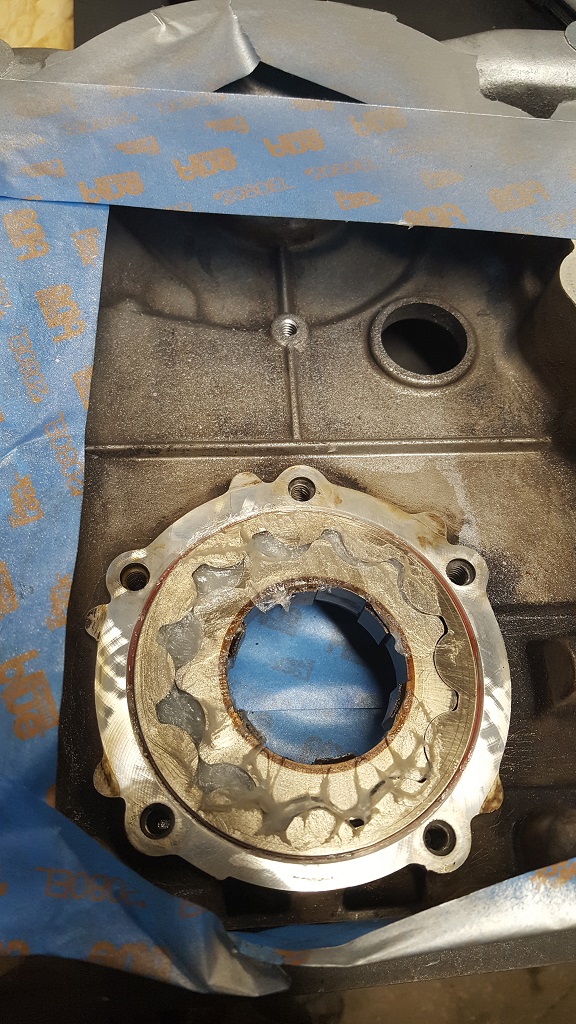
I was able to get out to the shop yesterday. I received the correct bearing that I ordered from Amazon....
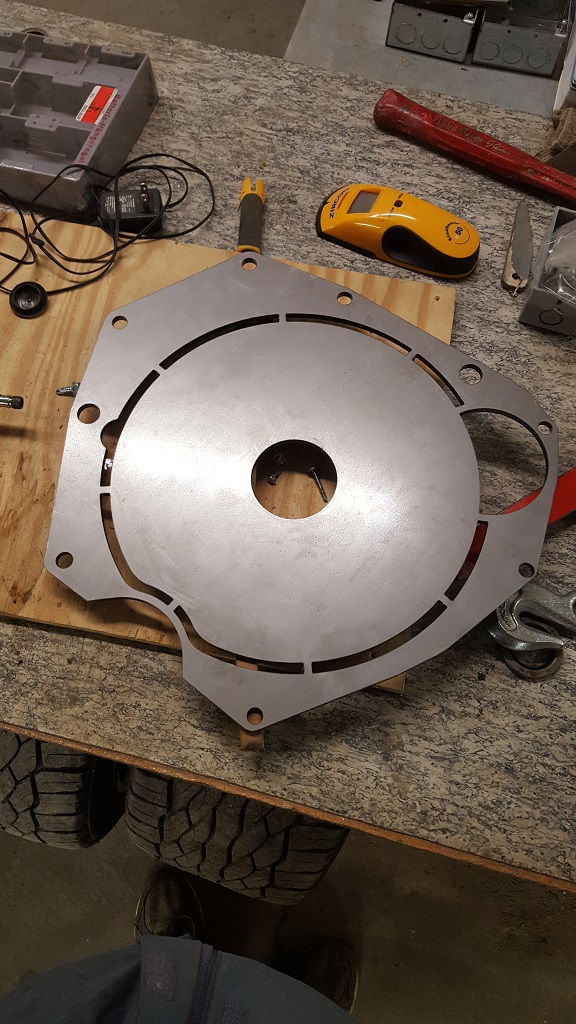
My dad traced the F23 and cut out a construction paper template. He then brought it to work to get scanned by a machine that traces 2D objects and creates CAD files. He then had it cut on 1/4" steel. We brought it to the shop and it was actually very close. We had to move a few holes slightly and only one was noticeably off. We are going to adjust the CAD file and if anyone would like a copy let me know... I can also make more spacers for a yet to be determined price.
[This message has been edited by paulsobj (edited 12-04-2023).]
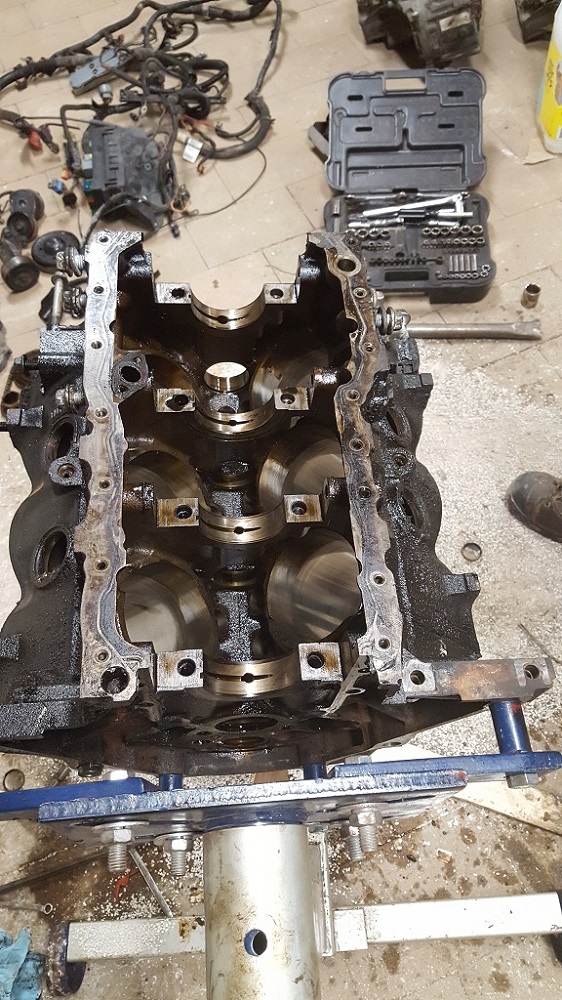
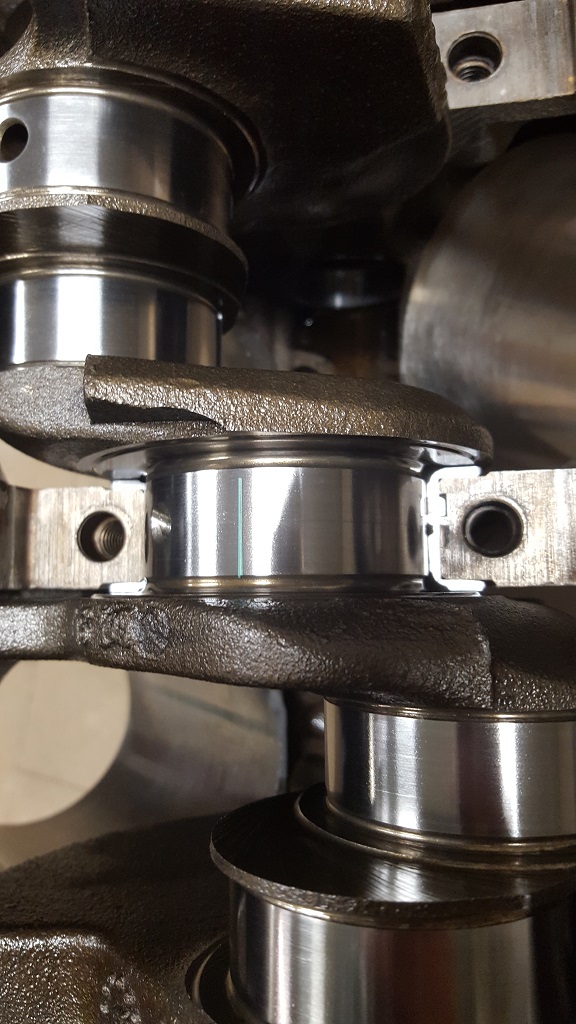
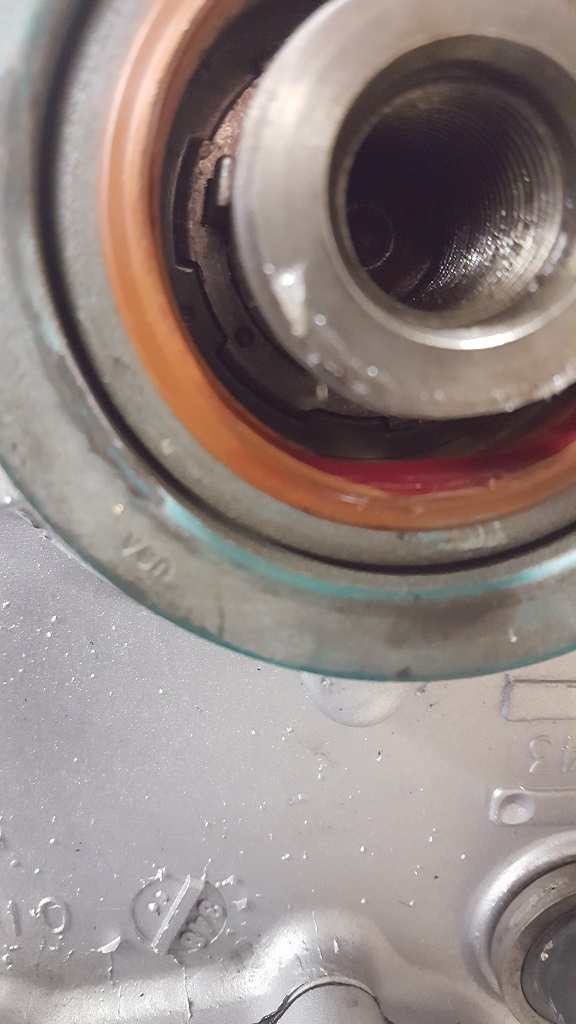
I finally got the main bearings after a long wait. I started to get the crank ready to install and washed it (get off the machining particles) then sprayed it with WD40 (stop rust from the water I used to wash it) then wiped it down and blew it with compressed air. I found one bearing had a scratch in it that was large enough to concern me. I used some emery cloth to smooth it down very ever so slightly. Then I placed the crank in dry and plastigaged the mains. The hard part was getting the main caps out without messing up the plastigage. If you look closely at the picture you can see the plastigage.
After I checked the clearance
Main Bearing to Journal Clearance 1 0.0178-0.0406 mm 0.0007-0.0016 in
Main Bearing to Journal Clearance 2, 3 and 4 0.0229-0.0457 mm 0.0009-0.0018 in
I lubed up the bearings and torqued the caps to spec it is a two step: 30FtLbs + 110°
I have had the question what is with the temperature? Well first of all if you have to ask then I think you may be out of your league... take the engine to a shop asap....But for those who are just curious 90° is an additional 1/4 turn and 180° is an additional 1/2 turn etc.
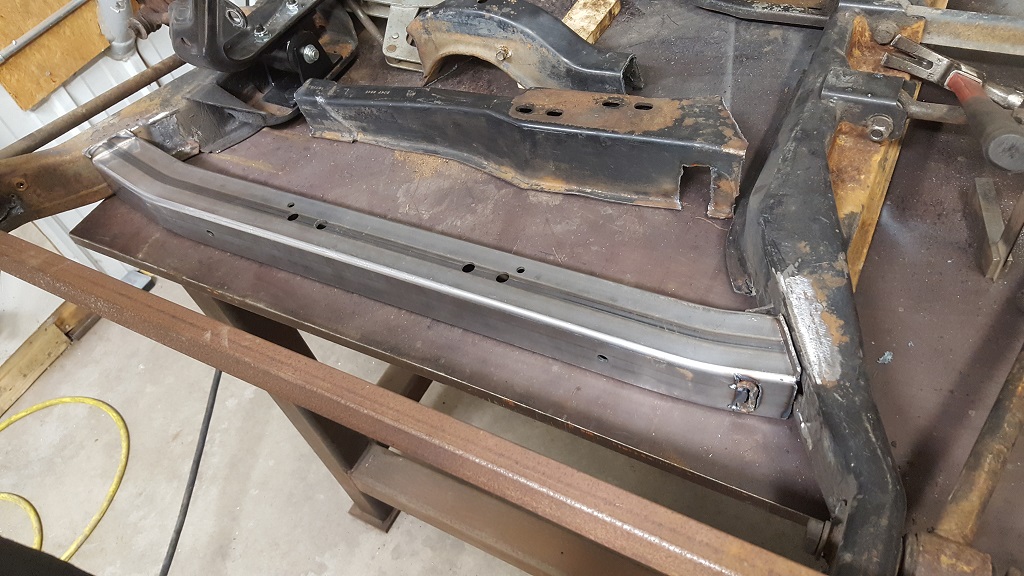
My dad started cutting the cradle up and fabricating the tube he pulled from the scrap bin.
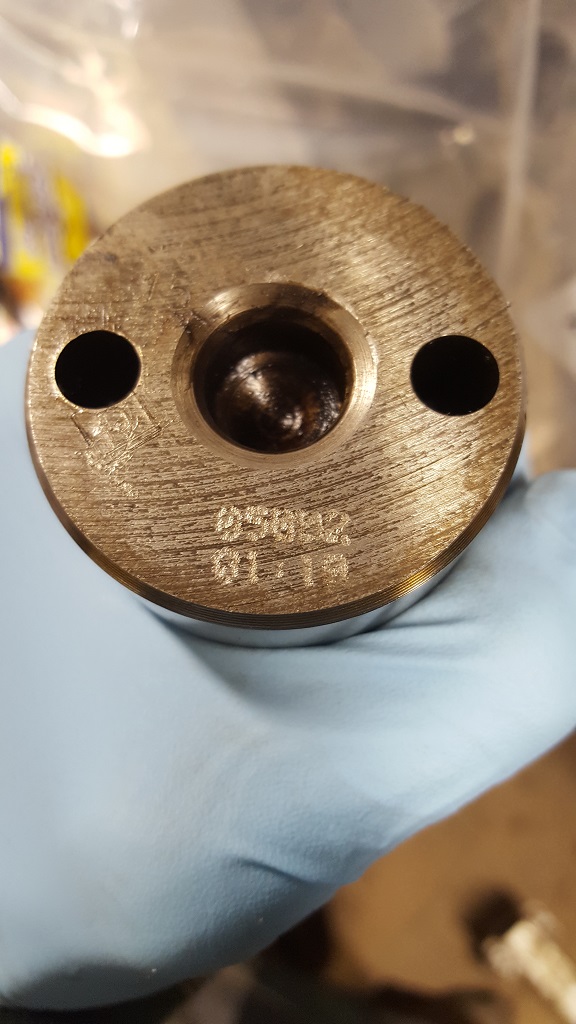
Here is some part numbers stamped in the cam. Not sure if it is after market or stock. I assume it is stock as the only thing I found modified was the pulley.
[This message has been edited by paulsobj (edited 12-04-2023).]
Hi there!. I had to chime in for a couple of reasons. 1.) One of my current daily drivers is a 40th anniversary Gprix and it has about 145k on it. I've had it for 10 years now and am just waiting for the salty roads of New Hampshire to finally eat the body before I retire it and put the engine into another Fiero. So I will be bookmarking and watching your write up! 2) I noticed that you are in Shakopee. I was born many moons ago in Shakopee at St. Francis Hospital (not sure if it is still open or not) and still have some family out there. I had to mention it as most people from Shakopee say they are from Minneapolis because no one recognizes the smaller suburb . It has been a very long time since I have been to the Land of 10,000 lakes, and I was very young when I was there so I do not remember much other then it was really flat and could be really cold in the winter.
Good luck with your build! Looks like you have the perfect work space to hunker down and get some stuff done during a Minnesota winter!
Yes St. Francis is there and they are much bigger then when you were here. Shakopee is also grown to about 40,000. I would always say I was from Minneapolis when I was in the NAVY. Glad you are following my build!
I had a strange turn of events. I do contractor work and the contract was not renewed on accident so I get 1-2 weeks paid vacation... impeccable timing.
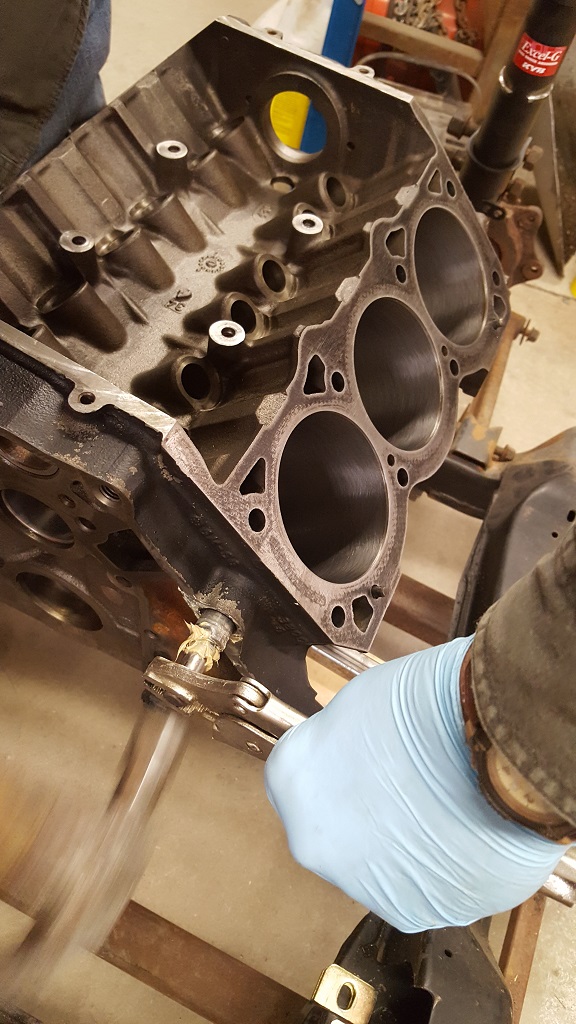
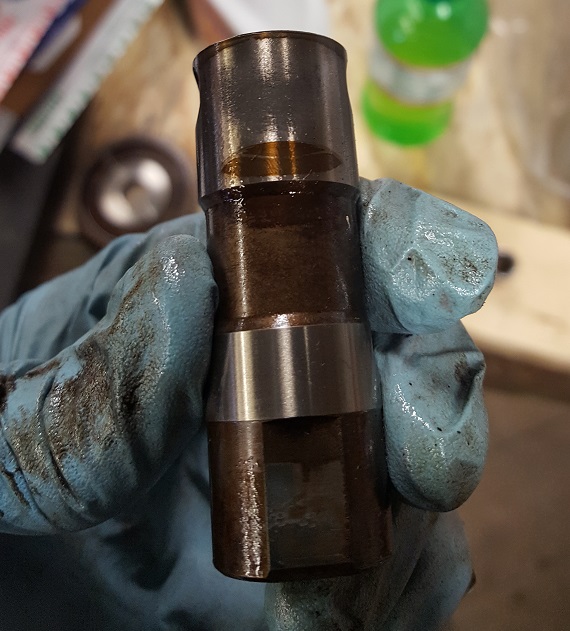
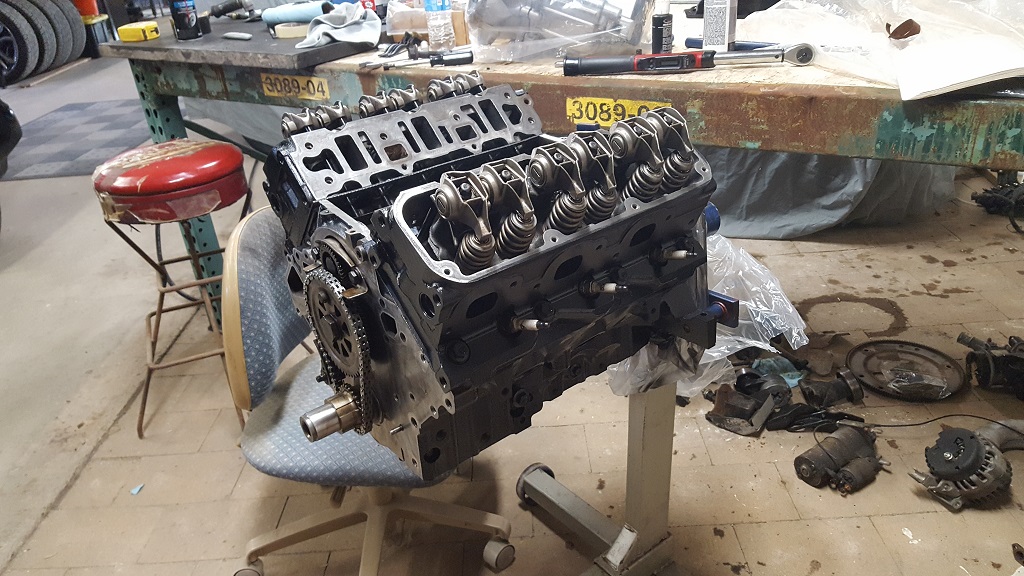
I started installing the lifters. I put them in the same place they came out. They can go in two ways. If you want to get them back in the same orientation look at this picture. You will notice a stain in the lifter.
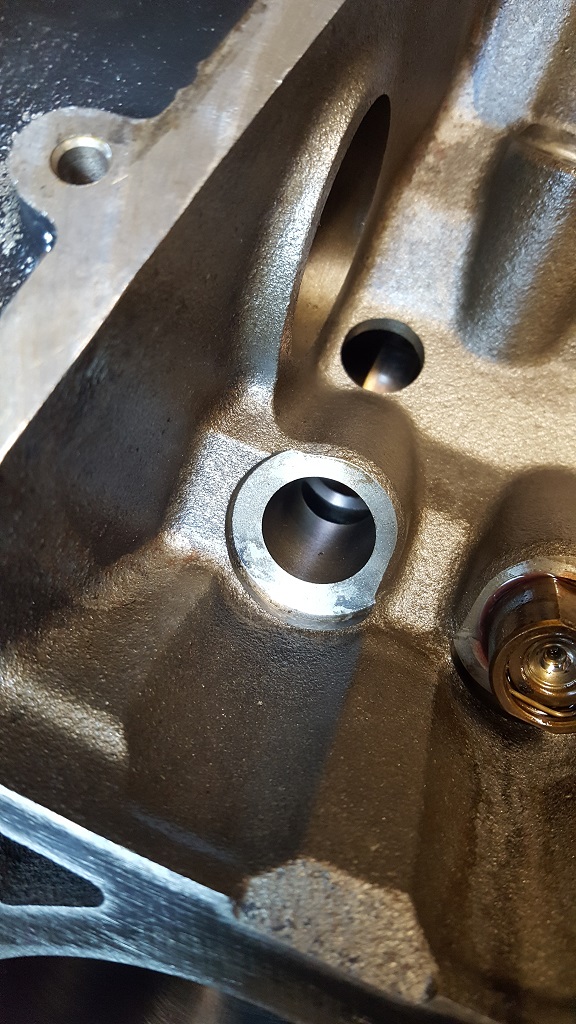
If you look into the block you will see that the bottom side has a void that allowed the oil to stain the lifter. So place the lifter stain toward the floor.
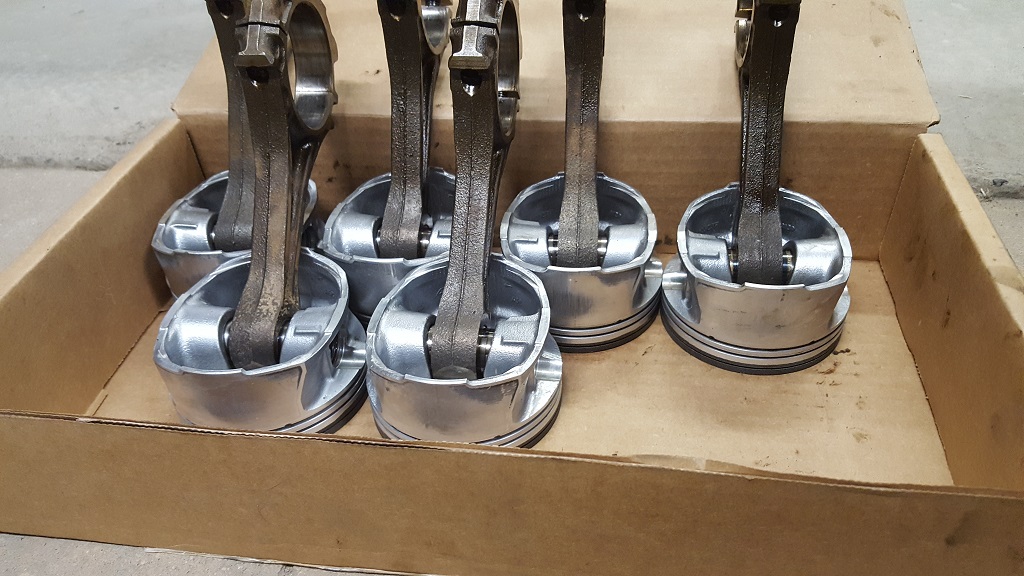
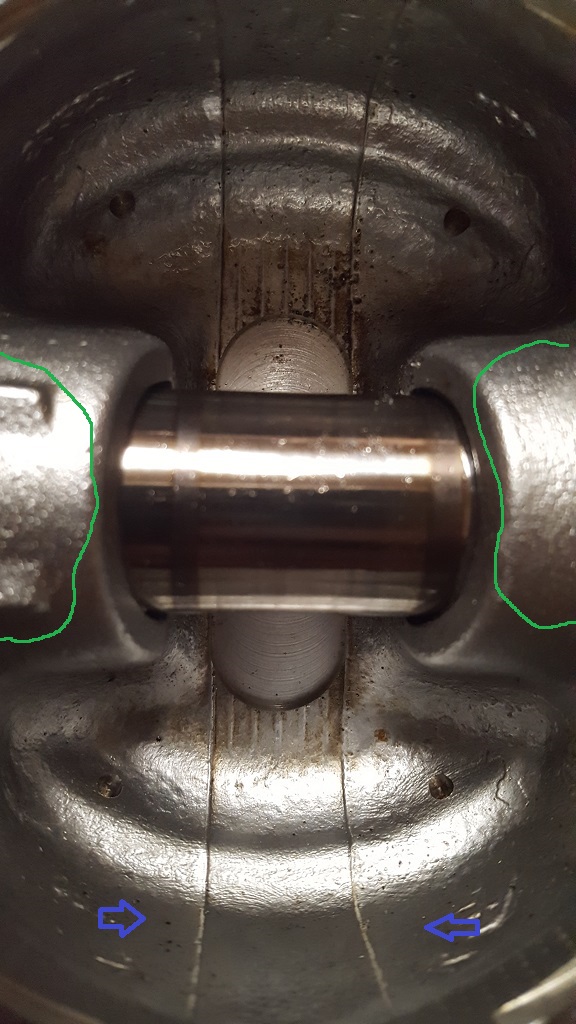
I checked the ring gap and installed the ring and assembled the pistons. I put them in the same way I took them out. I noticed that they didn't have and obvious markings for the direction. I did see that they were not symmetrical. You can see the green area and I also found two arrows. The pistons did not come out with all arrows pointing up as I would have suspected.
I decided to install them the way they came out.
Here is a picture of all the pistons in. I did one at a time and plastigaged each as I went.
Rod Bearing Clearance 0.0127-0.0660 mm 0.0005-0.0026 in
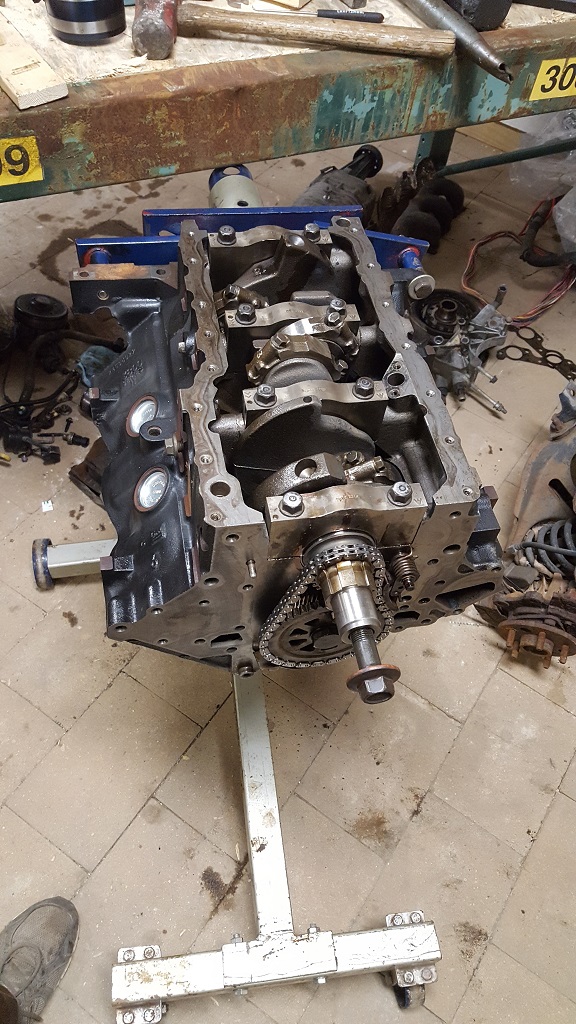
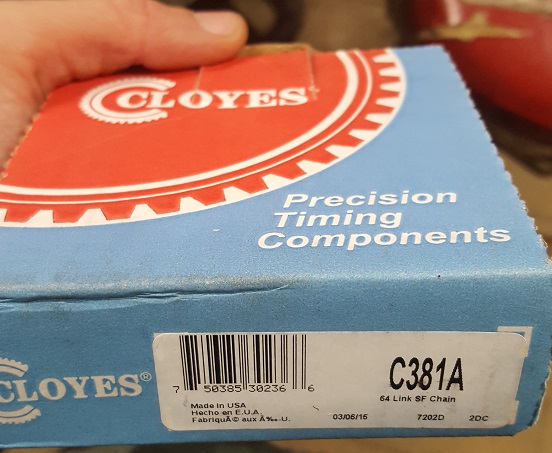
Timing chain
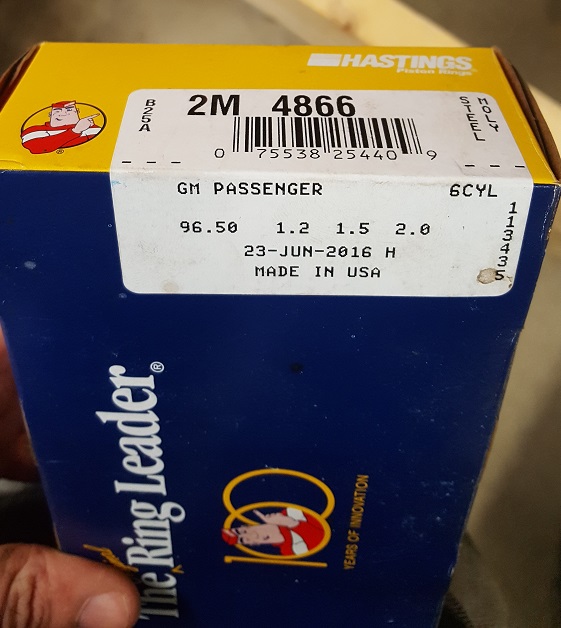
Rings
I painted the Oil filter extension thing and rear main housing. Note DO NOT use haynes manuals as a reference! I use multiple sources for torque specs, clearances and techniques. I just use it as another source, If one source if different then I stop and investigate. I dont want people to think I am some haynes manual jockey... haha
Here is where I stopped for the day. Also got it taped off and painted.
I skipped some parts of today but its not too hard. I doubt you will forget to put on head gaskets and torque the heads...I will try to get the part number for pushrods. Here is one source for torque specs that I use. Torque Specifications for GM 3.8L-231ci-V6
[This message has been edited by paulsobj (edited 12-04-2023).]
I build race engines for a living, so I'm not a fan of plastigauge but it can work if you're careful. If you have any indication that the clearances are under 0.0020" for the rods and 0.0024" for the mains, stop and get it verified/corrected.
Nice adapter and subframe mods, I also do fab work and appreciate quality pieces!
[This message has been edited by mender (edited 01-04-2017).]
I build race engines for a living, so I'm not a fan of plastigauge but it can work if you're careful. If you have any indication that the clearances are under 0.0020" for the rods and 0.0024" for the mains, stop and get it verified/corrected.
Nice adapter and subframe mods, I also do fab work and appreciate quality pieces!
I hope to not be rebuilding this anytime soon (hopefully) but I will look into that lube when I do.
I didnt know there was anything other than plastigage? what do you use?
If the Rod clearance tolerance was 0.0005-0.0026" wouldn't that mean that the factory had it on the tight end and as time passed they would get looser and have larger gaps? I know race guys like to make them loose for less friction (less HP loss) but you lose oil pressure. I had them around .0014-17 IIRC.
I will post some pics as the frame get closer to completion. I want a look like it could have come from a factory or at least less home made.
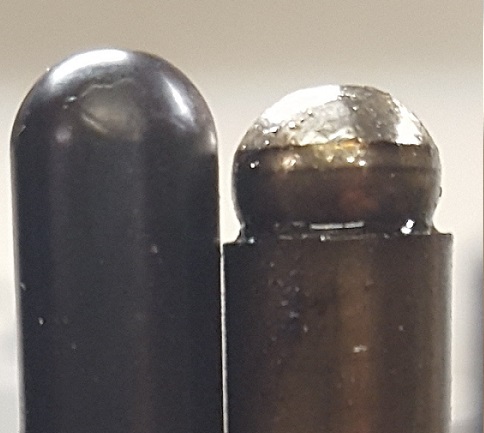
Well I seem to be moving right along. Before I forget here is a comparison of the old pushrods and new. Remember that the old were scored and so were the rockers.
I wonder how much that affected performance. I bet the rocker had just as much missing material.
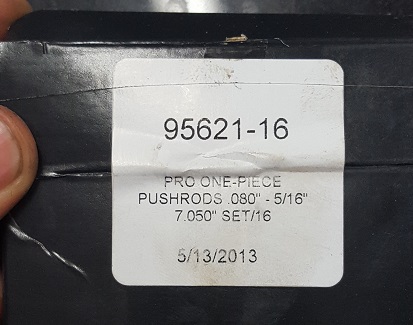
Here is the part number for the pushrods.
When I was torquing the head bolts I was a little nervous. The last time I was doing this I stripped out my 2.8 in Hawaii and had to pull the engine and rebuild it with my shop and tools in MN.... So when the first bolt was near spec POP... OH NO! I checked the socket and bolt and thought I stripped it out again. Nope it was the socket after all. I was so happy.
Here is the oil pump I filled with Vaseline. This step many people never heard of but it is recommended in most factory service manuals. It helps the gears get suction and pull the oil efficiently on first start up.
I had a question and yes I googled it. I found this timing mark in the oil pump gear. I found no references to how it is to be aligned. I did find many say they had found it different ways with no rhyme or reason. I decided to place it as close to the crank timing mark as I could.
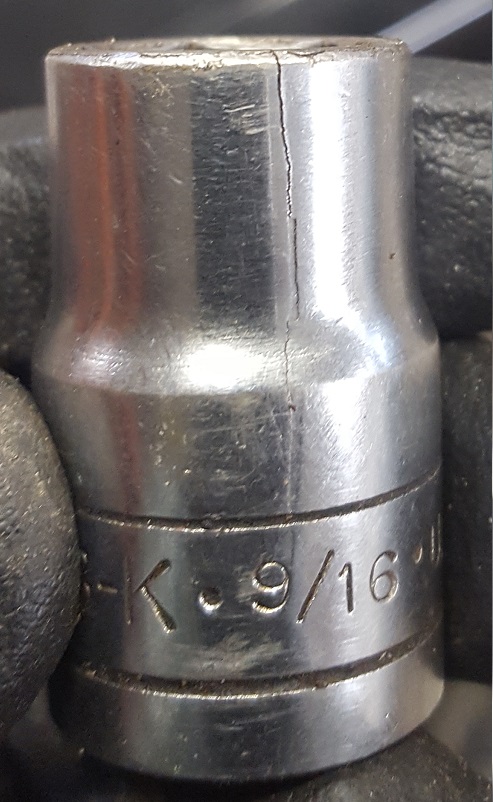
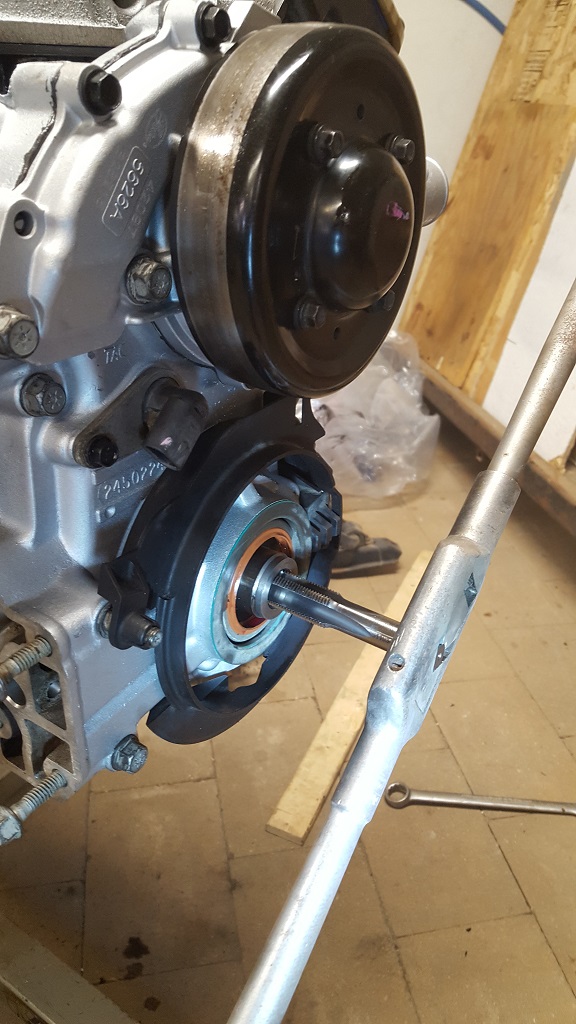
My first regress, I put on the Harmonic Balancer before the plastic part. When I pulled off the Ballancer the puller messed up the first 2-3 threads on the crank. So off to Fastenal... $35 and a huge 3/4 fine thread tap later.
I cracked open the SC and inspected it. I used the red Permatex® Anaerobic Gasket Maker 51813 to seal it back up. GM SC oil #12345982 you need two 4oz bottles.
[This message has been edited by paulsobj (edited 12-04-2023).]
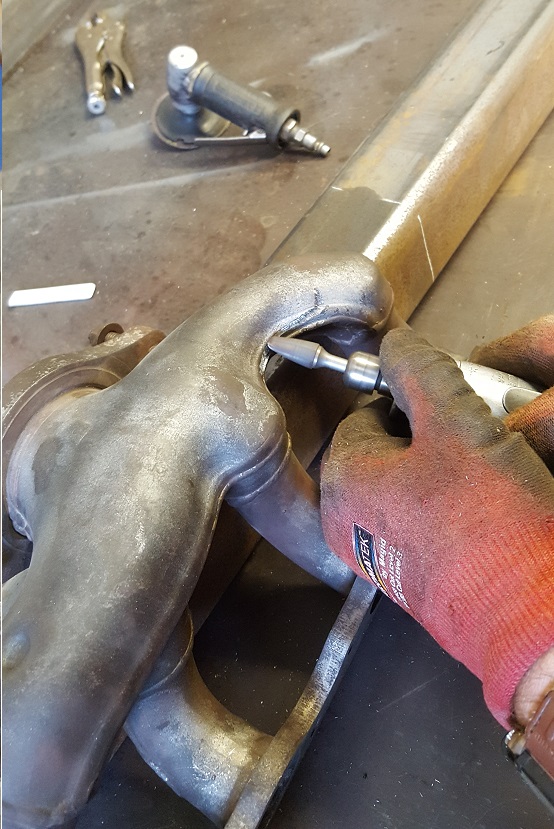
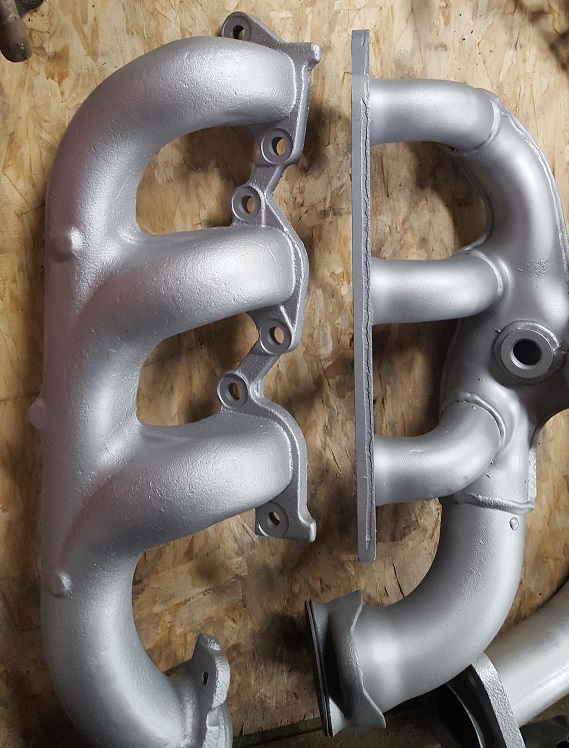
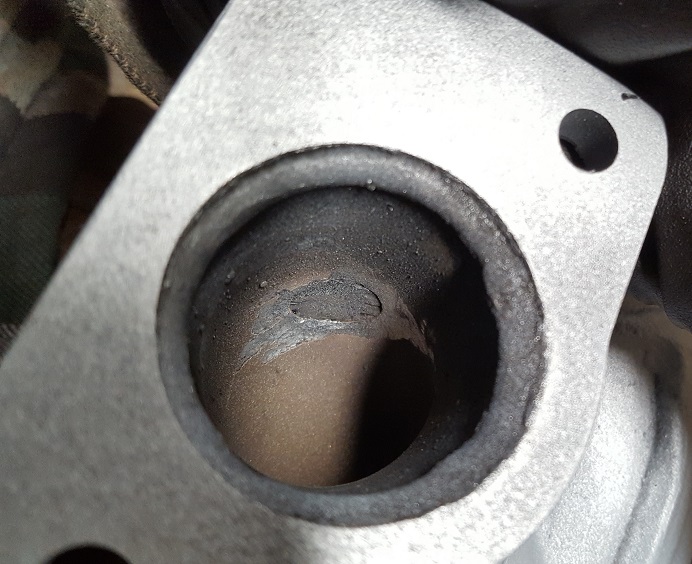
I found a crack on the trunk side exhaust manifold. We were able to get it welded up.
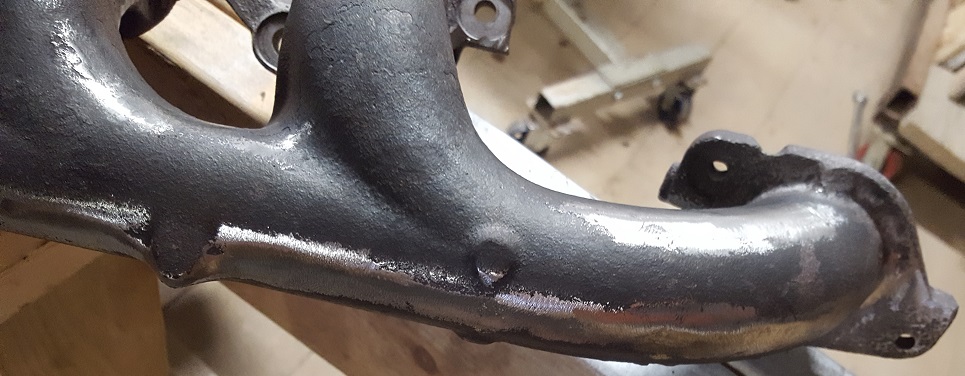
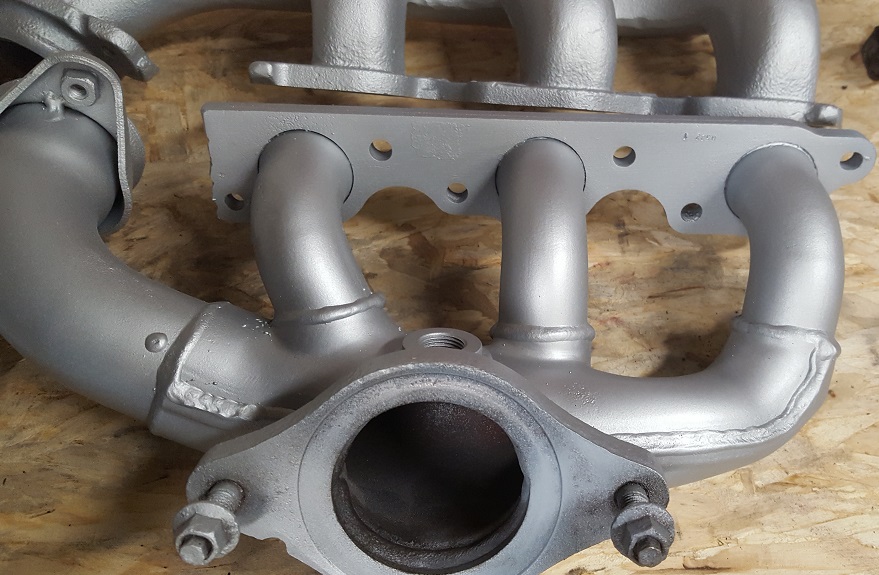
I ground off all the casting marks to clean up the firewall side manifold
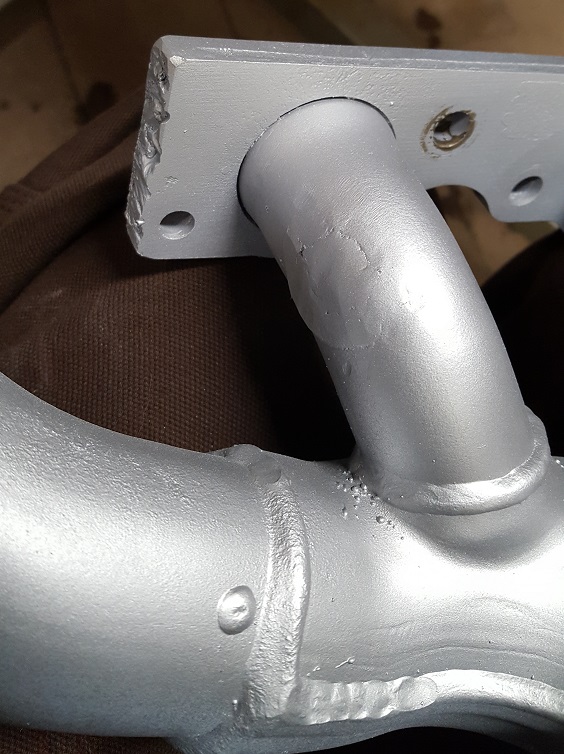
I cut off the EGR tube and welded up the hole.
From the outside after paint.
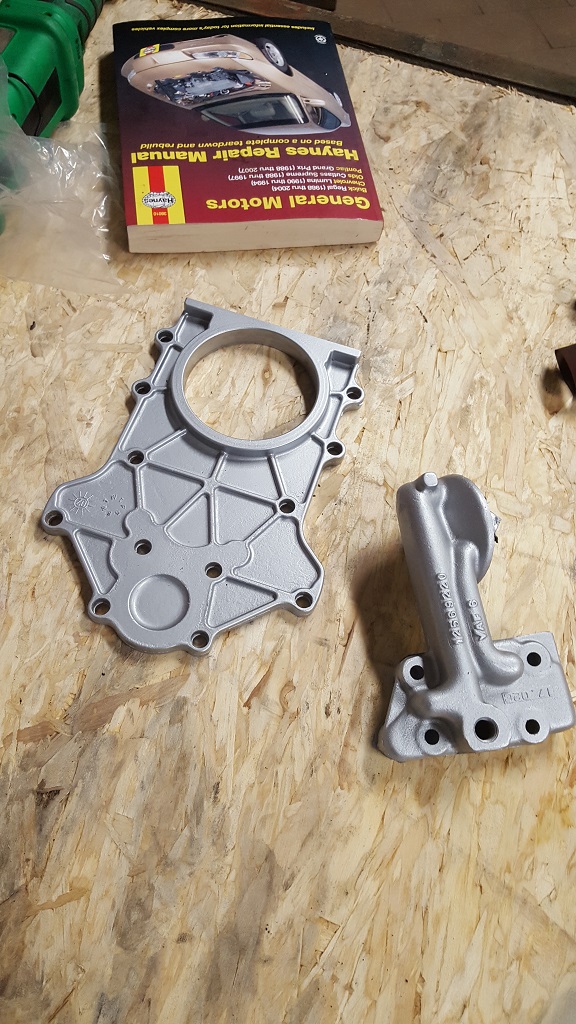
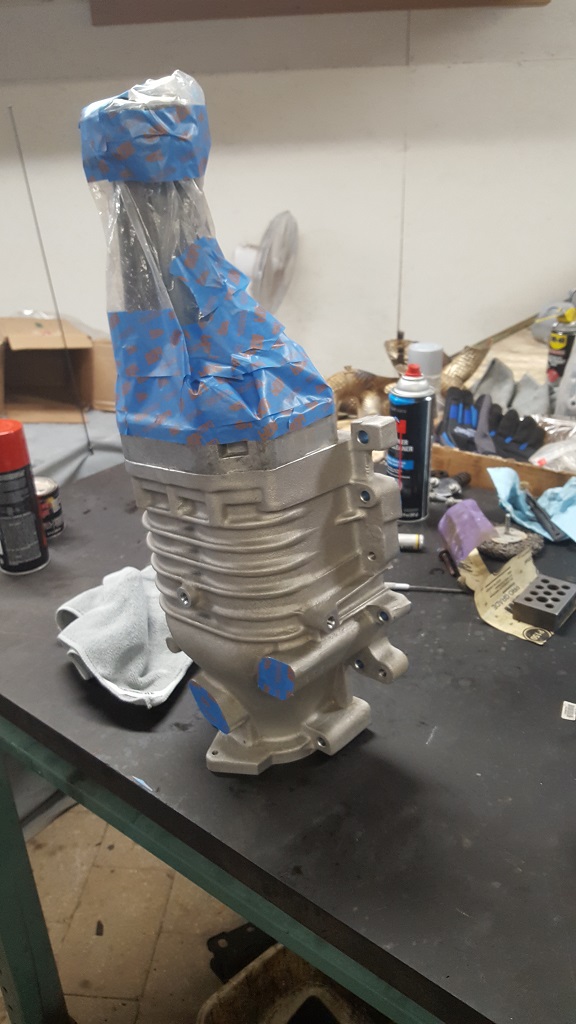
Cleaned up the SC and prepped for paint
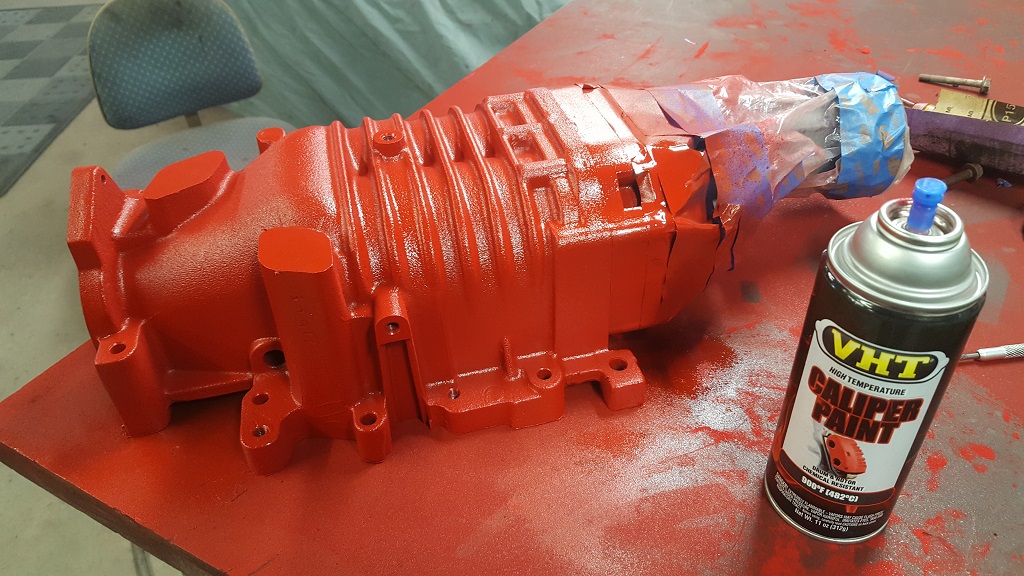
Post paint
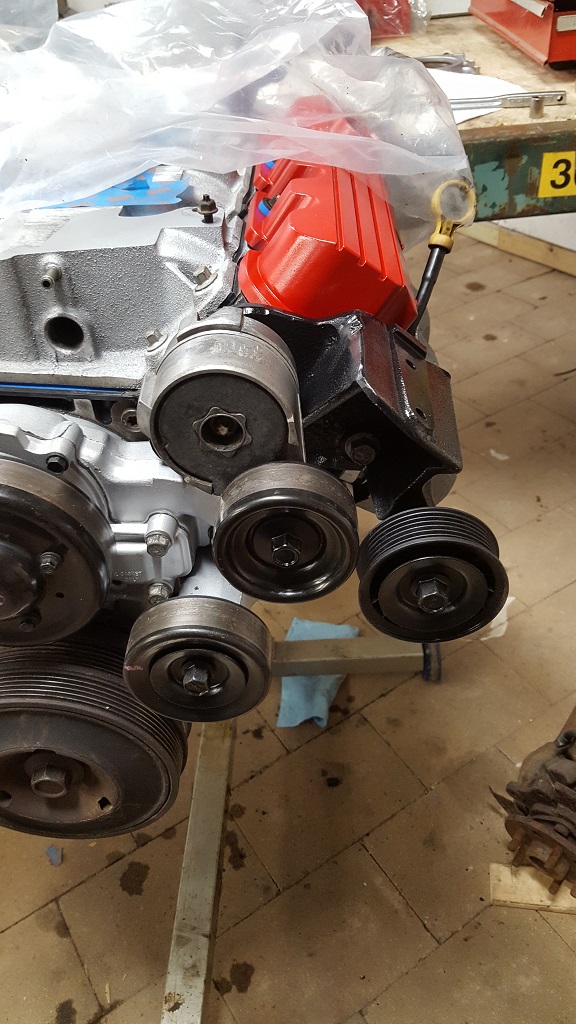
Cut the cast dog bone/tensioner/idler/coil pack assembly and painted it.
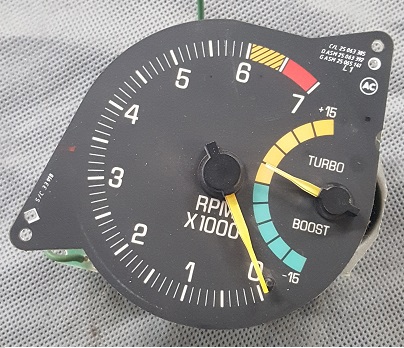
I am sending the harness to Dan and I am also installing this Tach. I talked about it awhile ago and just got around to getting a picture.
As some can see I am trying to make the swap appear to be a stock set up. Or at least to the untrained non Fiero owner's eye. I don't want things to look too homemade.
My dad picked up this new toy this week.
[This message has been edited by paulsobj (edited 12-04-2023).]