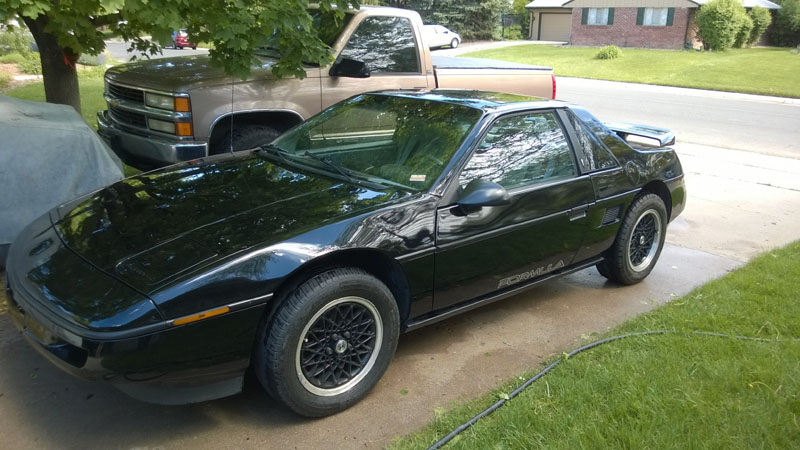
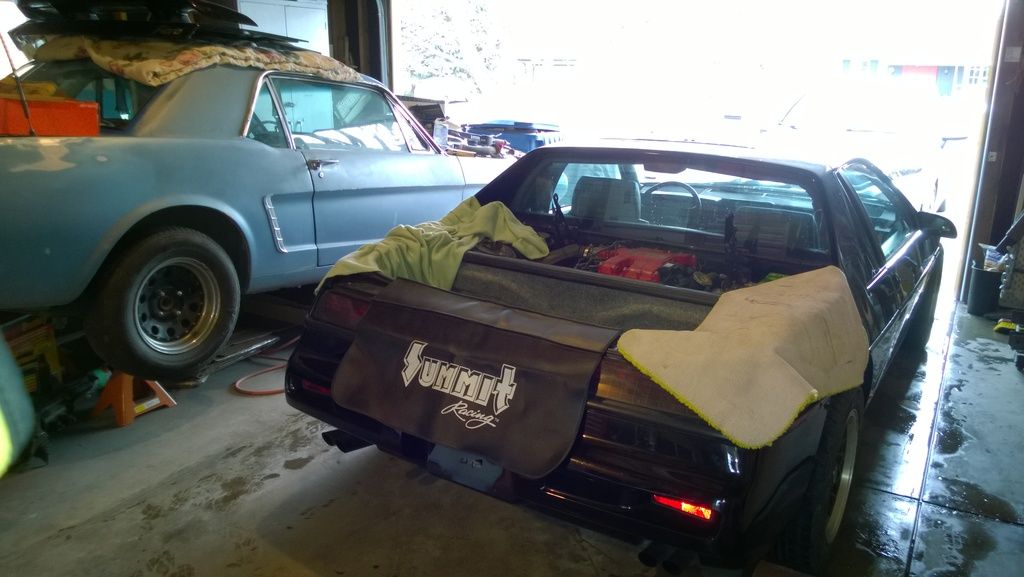
Finally got the Formula turned around and pushed into the garage. When I get the chance, I'll post a detailed step by step process of my clutch replacement. I googled around, and found some articles and videos, but nothing was really well illustrated. Hopefully if anyone ever needs to change their clutch, the details will help. I'm sure most of these steps are old news for the regular folks around Pennocks, but I figure it is pretty easy for them to ignore my posts. I'm going to do some other stuff along the way too, like the oil pan gaskets, rear main seal, shocks, and maybe some port work too. We'll see how impatient I get to get the car on the road again!
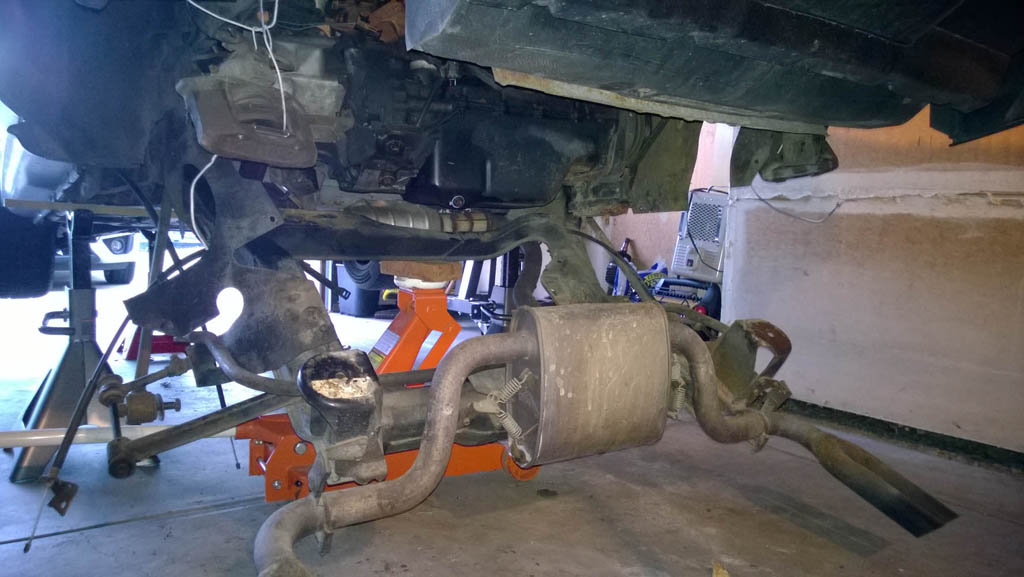
Here's, hopefully novice friendly, step by step details of how I removed the cradle on my 1988 Formula Fiero. There are some steps that can be skipped here, but most of them are pretty easy. While you can always drop the cradle with the engine still attached, this saves you the trouble of disconnecting coolant, electrical and some emissions stuff. And you still have access to the engine and transmissions for lots of possible tasks. Changing transmission, replacing clutch, replacing oil pan, rear main seal, belts and plenty more can be accessed easily when the cradle is out of the way. Lots of suspension work can be done at this time as well.
Here we go: 1. Remove deck lid. Be sure to only remove the 2 bolts on each side that attach to the deck lid. Don't remove the bolt for the torsion bar. Also, it isn't a bad idea to put something in front of your rear window in case the torsion bar strap breaks. Good idea to cover your surfaces at this point unless your paint isn't worth the effort.
2. Disconnect Battery - pretty straight forward. Might be a good time to clean up the battery tray.
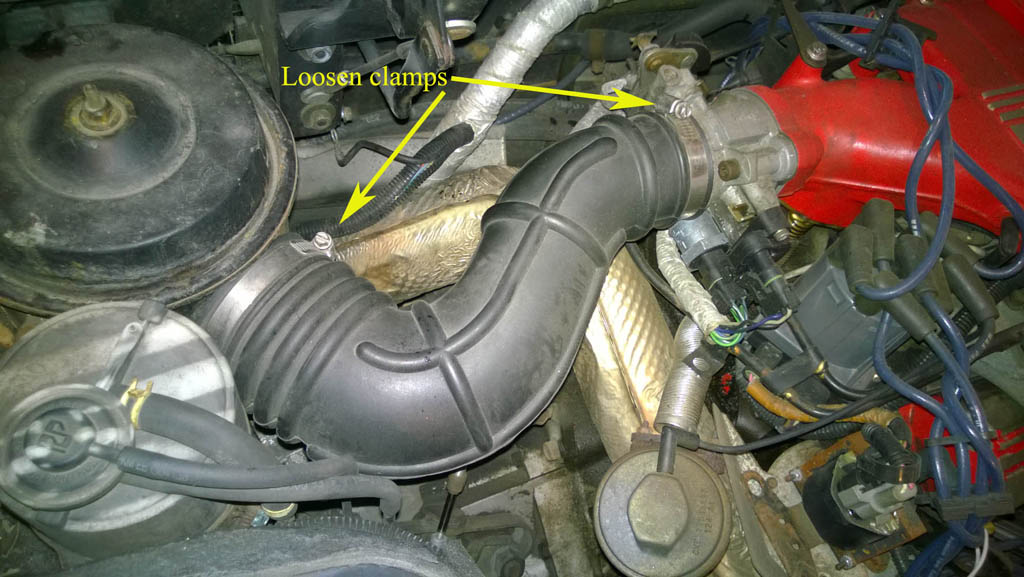
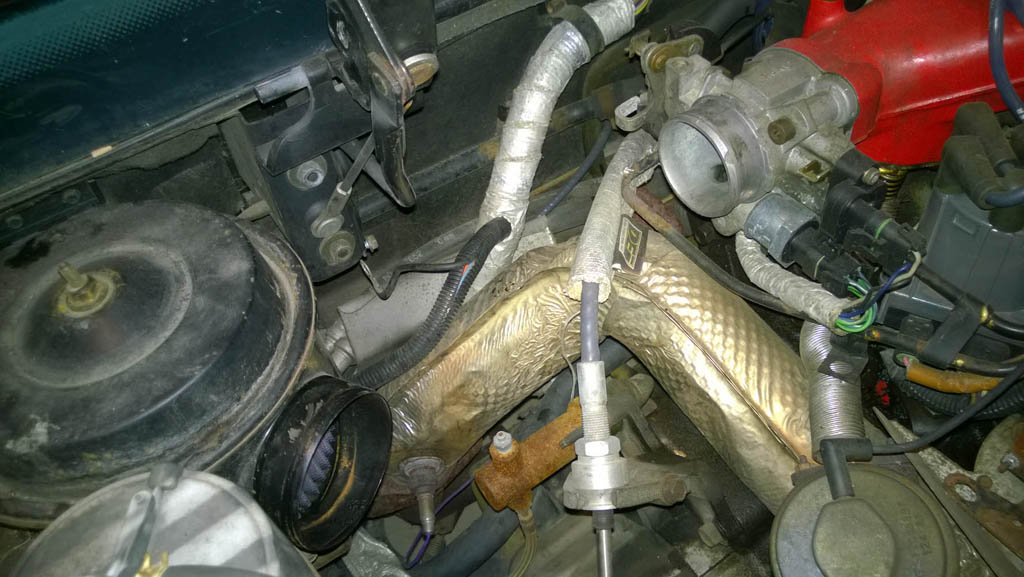
3. Remove "S" air inlet tube - a regular screwdriver is all that is needed to remove the two screw clamps.
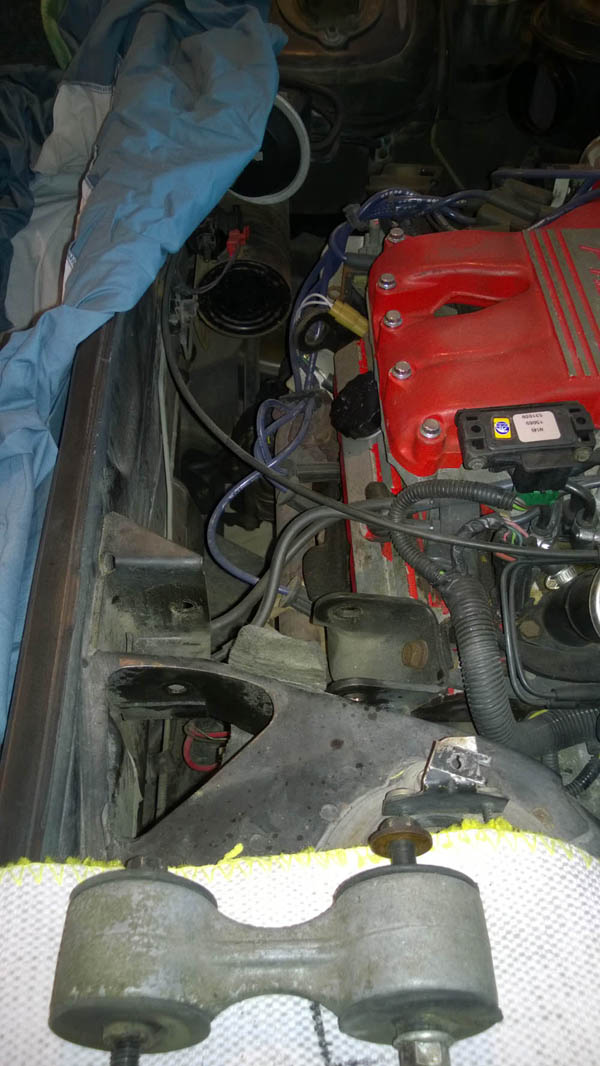
4. Detach upper engine "dog bone" strut - Two bolts here, sometimes need to pry the engine a bit to take some pressure off the bolts. You can leave the strut in place and just remove one bolt, but I like to remove the whole thing. Good time to clean it up.
Removed:
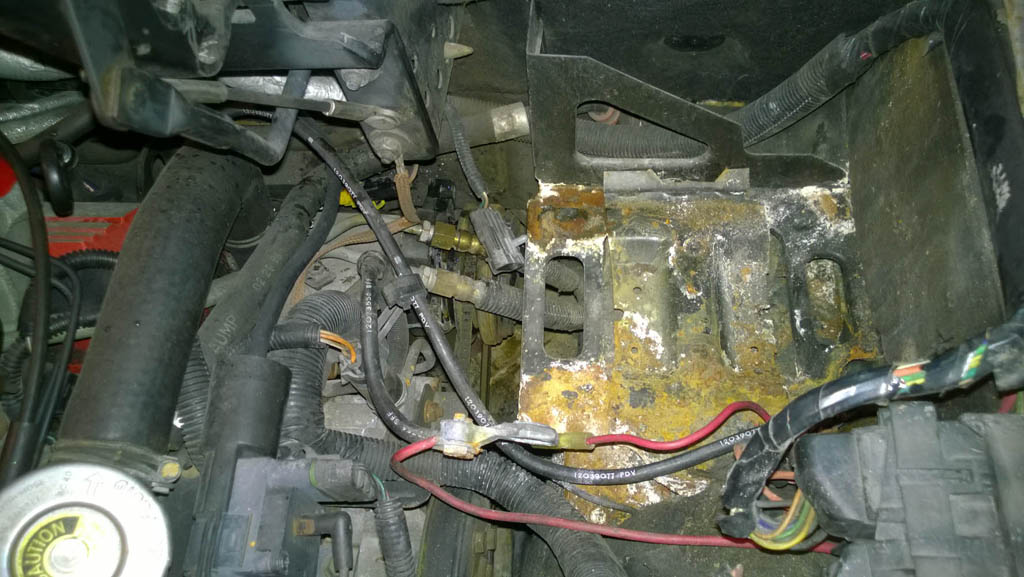
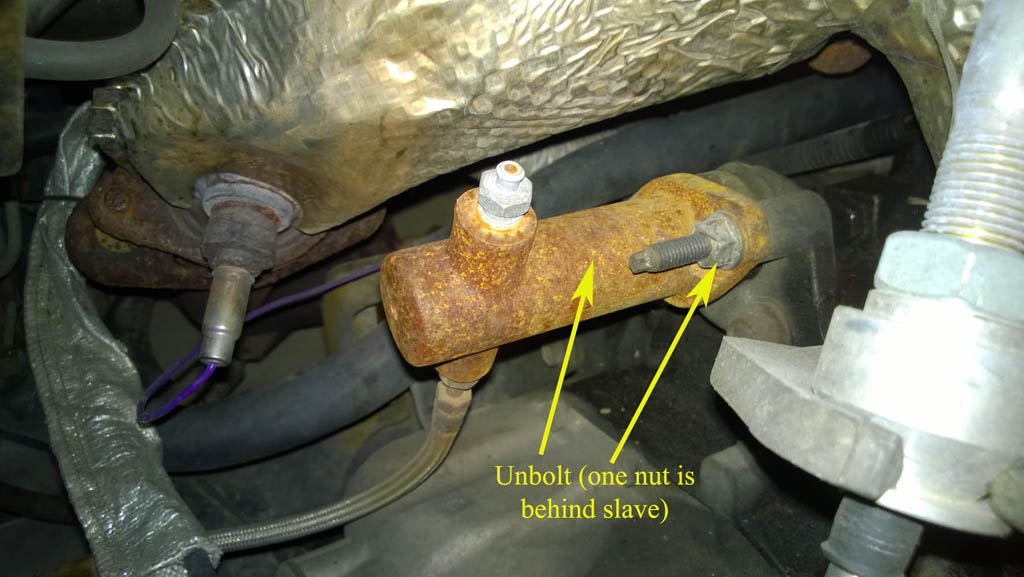
5. Remove slave - This is easy enough with two nuts being removed from threaded studs. Do not press the clutch pedal once the slave is removed.
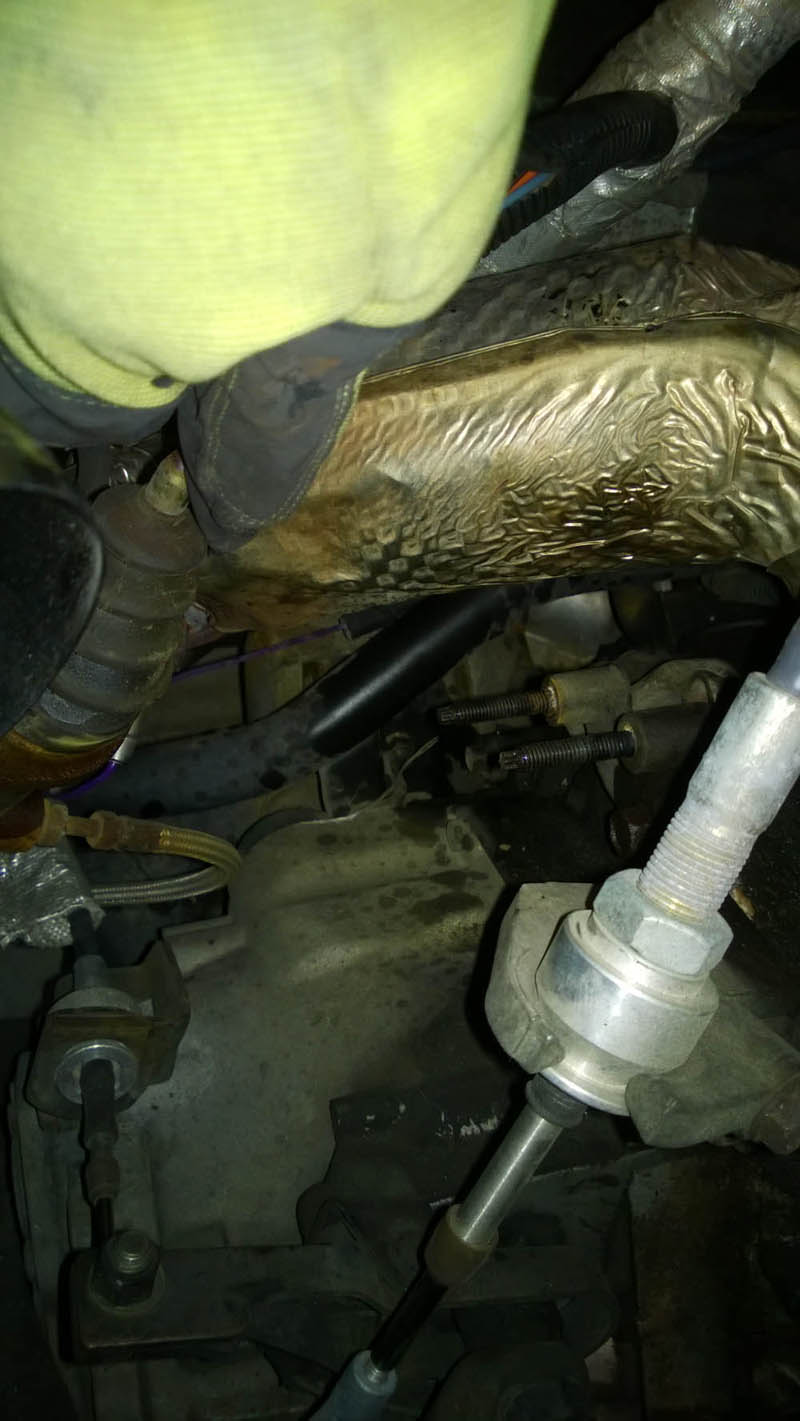
Slave removed and held off to the side (left side of picture)
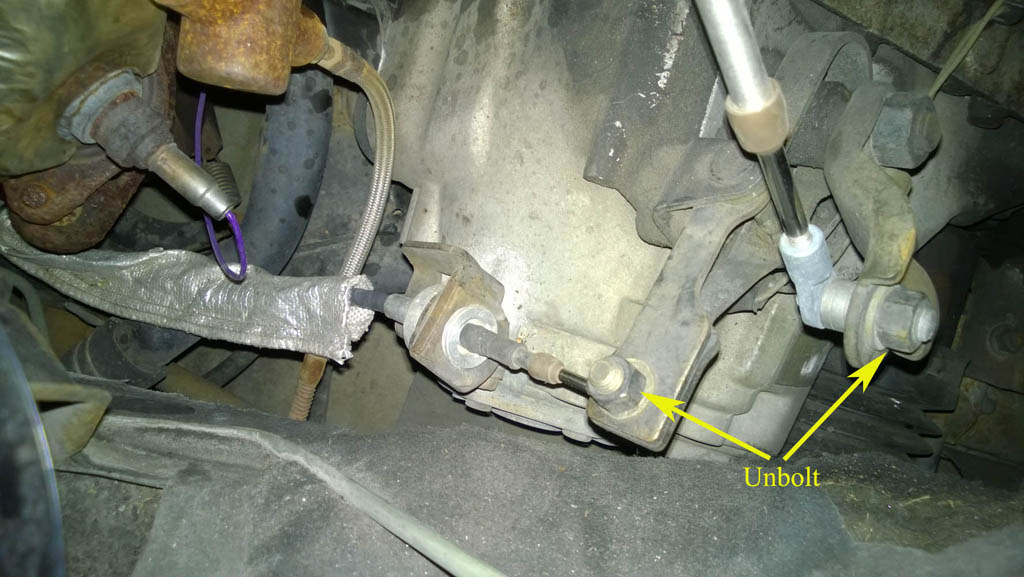
6. Disconnect shift cables. Remove the bolt and push the connector through the eyelet to disconnect it. These can then be placed out of the way. The one cable fits nicely behind the deck lid hinge.
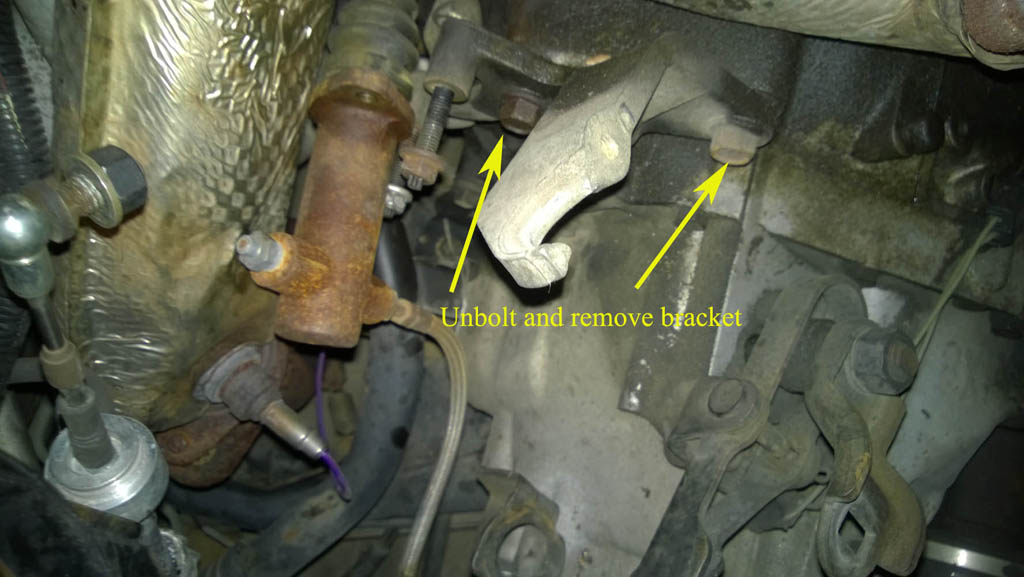
7. Remove shift cable bracket - could be left, but it is easy to remove and is one less thing in your way.
With bracket removed, and shiftcables out of the way
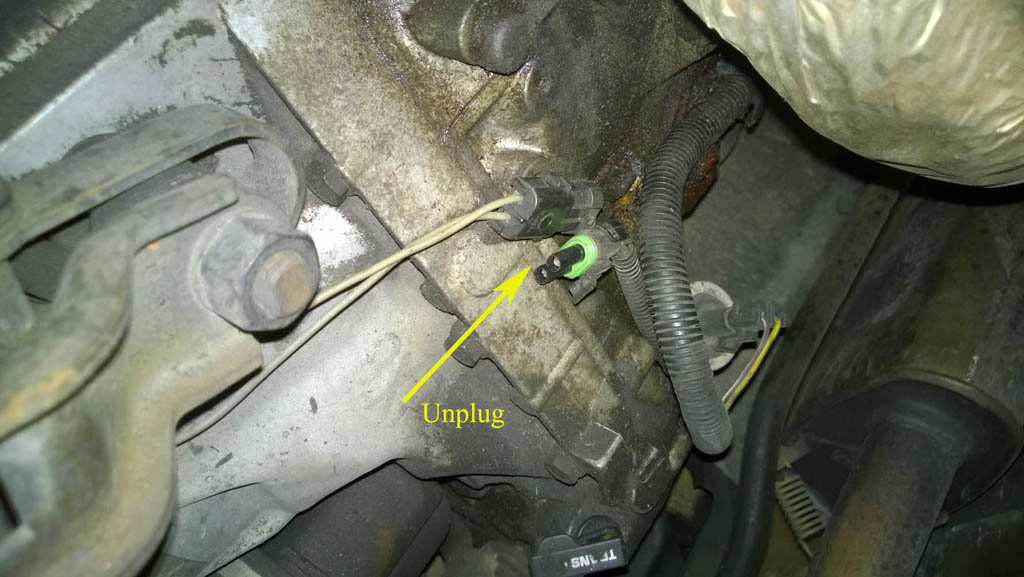
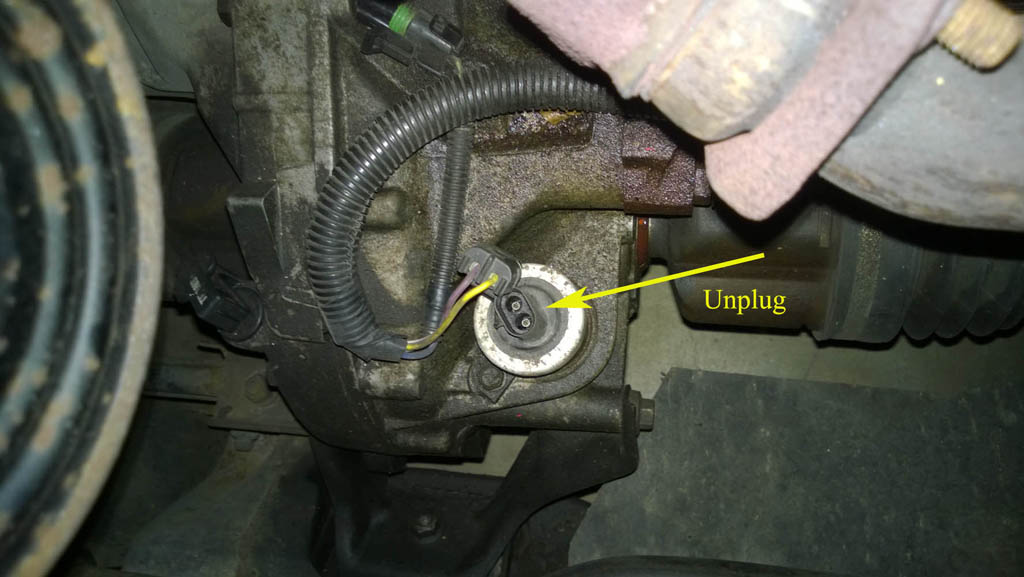
8. Unplug VSS/speedo sensor and backup light - just unplug
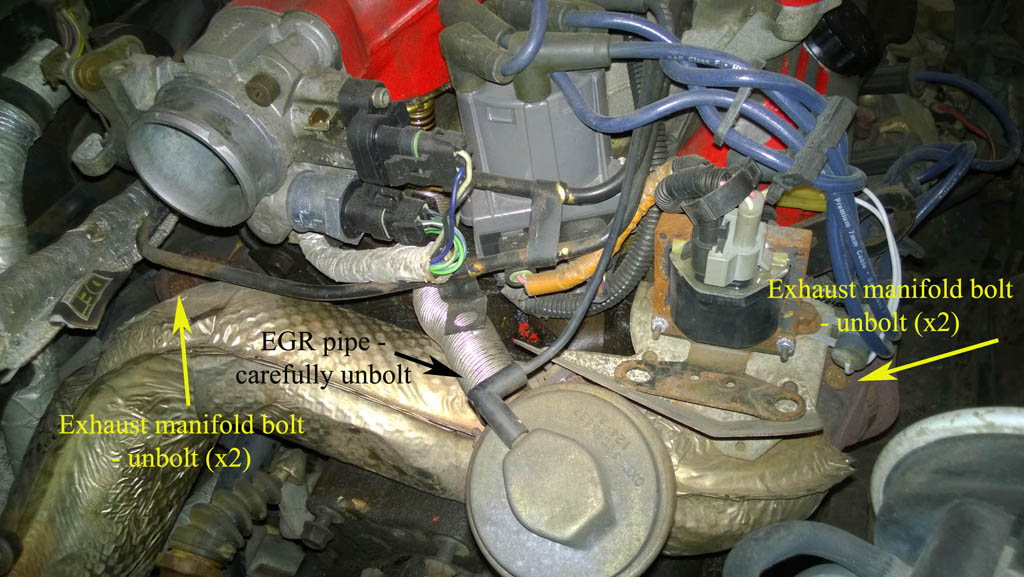
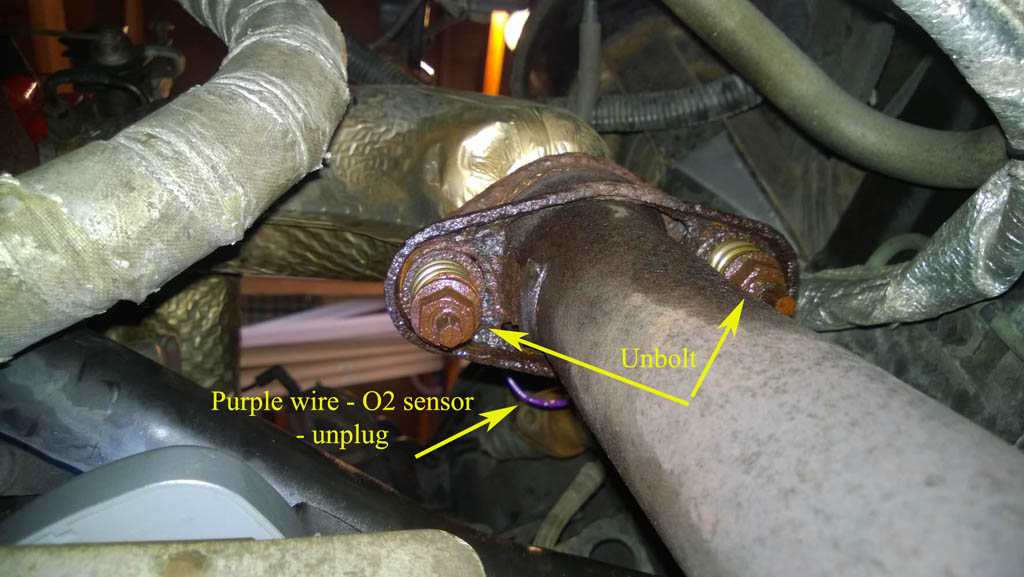
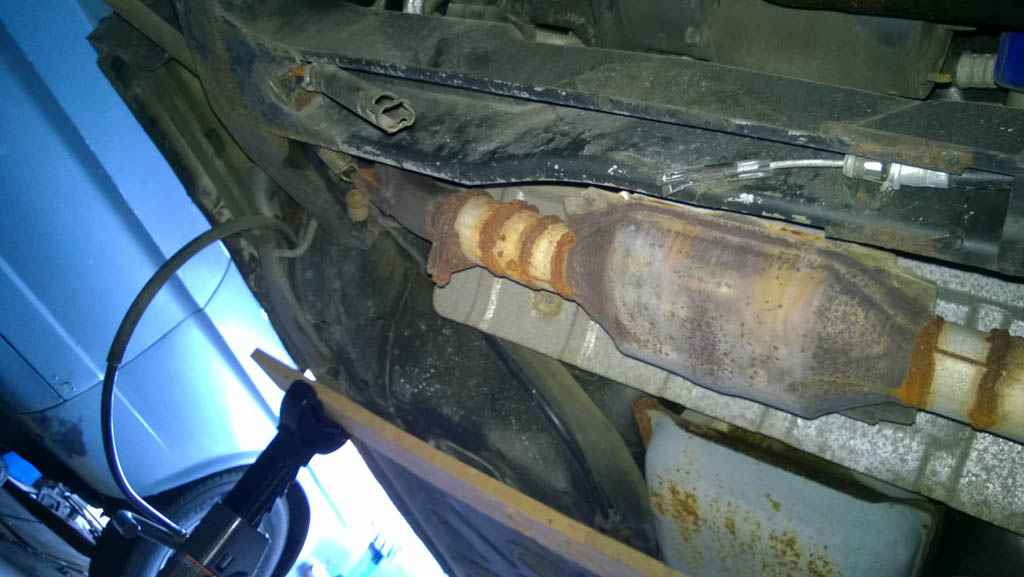
9. Disconnect crossover pipe from exhaust manifolds & EGR pipe. This can be a tricky one. The exhaust manifold bolts are usually pretty rusty so a breaker bar and some penetrating oil will be helpful. The nuts are welded to the flange, but I had one break off. Thankfully it was the top rear nut and was easy enough to get a wrench on both sides. Also be very careful with the EGR pipe. It may take a little wiggling to get it lose, but don't push it hard since it can break fairly easily.
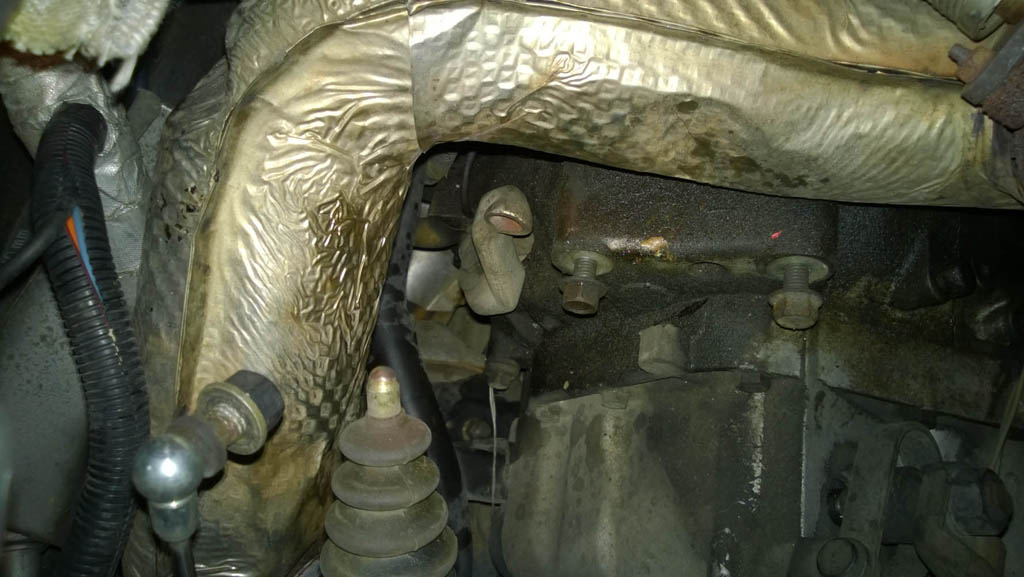
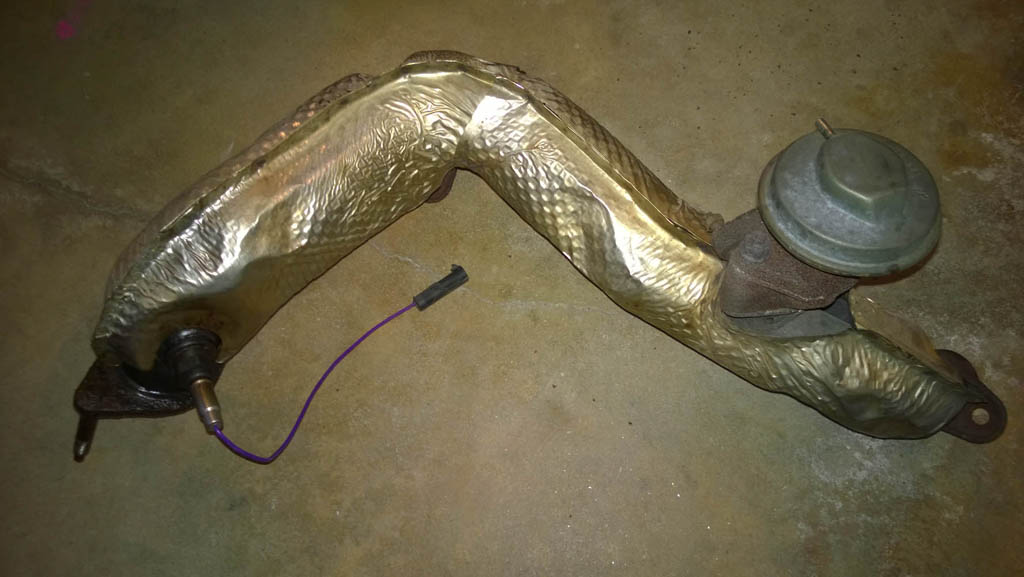
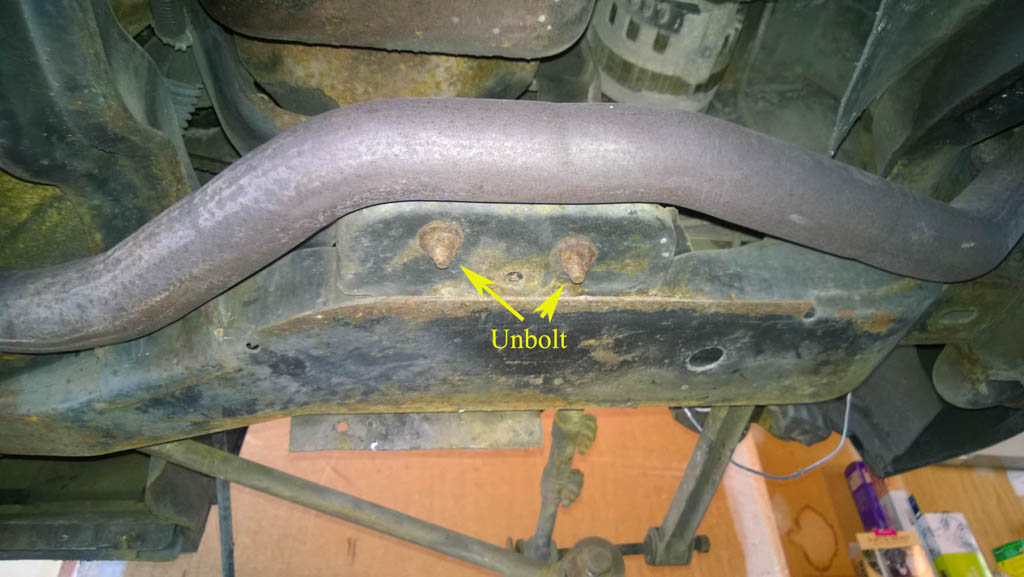
10. Remove crossover pipe from exhaust. For a quick clutch change, this step can be skipped, but even then, things are easier with the crossover pipe out of the way. For anything more than transmission access, you'll want to remove it. There are two bolts that can be accessed from under the car. Again, penetrating oil and a breaker bar are the order of the day. Lift the car, remove the bolts (be sure not to lose the springs) and then lower the car again. From the top, unplug the O2 sensor (can be seen in earlier pictures better) and then lift the crossover pipe out of the engine compartment.
11. Secure engine. There are multiple way to do this. Some build a jig from metal, some wood, some use the GM tool if they can find one. I built a ladder shaped support from scrap 2x4's in my garage. One 'leg' rests on the hinge supports, and the other on the strut mounts. I then threaded a chain through both engine hoist points on the engine. One is forward and to the right, the other is rearward and to the left.
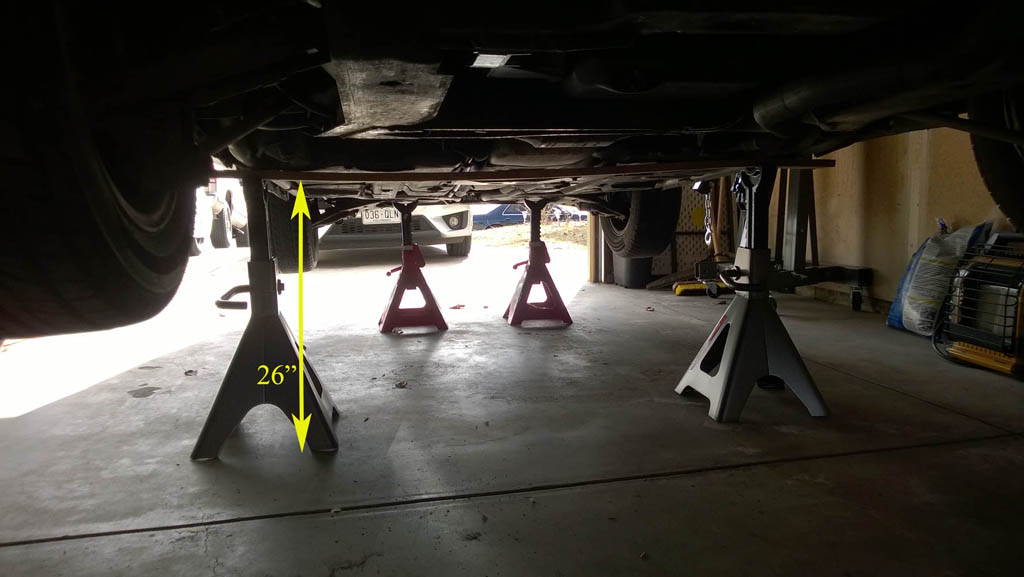
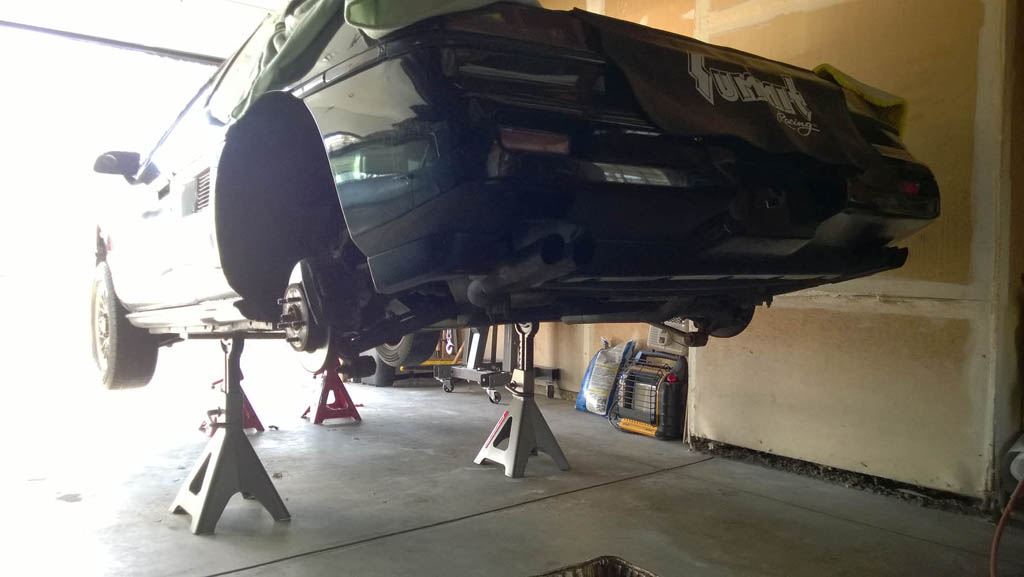
12. Jack up front and then rear of car as high as possible. You can also use an engine hoist to lift the car of course, but I used jacks just because I was too lazy to unfold the hoist. My front jacks are 6 ton and the rear are 12 ton. The 12 ton jacks go pretty high. I managed to get them up to about 26" which mean the back of the car was three feet off the ground. Plenty of room to work under the car. Also, I've read it is good to put a piece of lumber across the rear jack stands, and that lumber should be just foward of the cradle. There are a couple reinforced areas that protect the coolant tubes that made a good spot for the lumber to go. I used a 1x4, but a 2x4 would be fine too of course. Finally, because the jacks are near the center of balance for the car, throw some weight up front. I put a couple 40# bags of cat litter on the front tires.
13. Remove rear wheels
14. Drain engine and transmission fluid. Don't miss this step! If so, you'll have a mess when you pull the axles out. Also, if you want to drain the coolant this is a good time to do so, but not required.
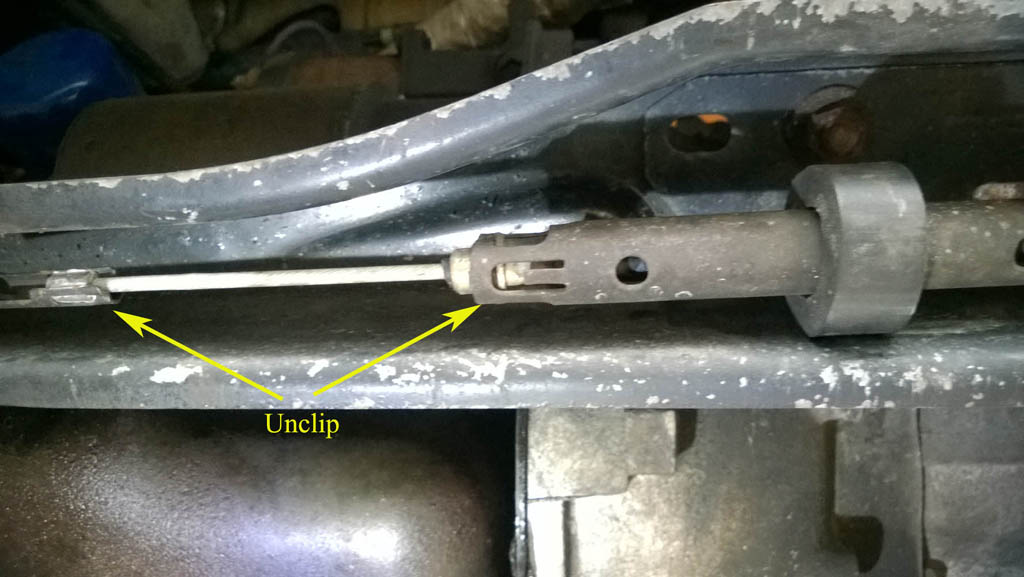
15. Remove E-brake from cradle. This is a bit tricky. You need to remove the end of the cable AND remove the cable coming from the front of the car to the equalizer bar. I used needle nose vice-grips to hold the cable clip in place and then a flat screwdriver to bend the metal enough to remove the cable end. The equalizer part is a bit easier, but it also requires bending the metal tang a bit. Once the front cable is free, pull/push it out of the cradle and secure it out of the way.
Removed:
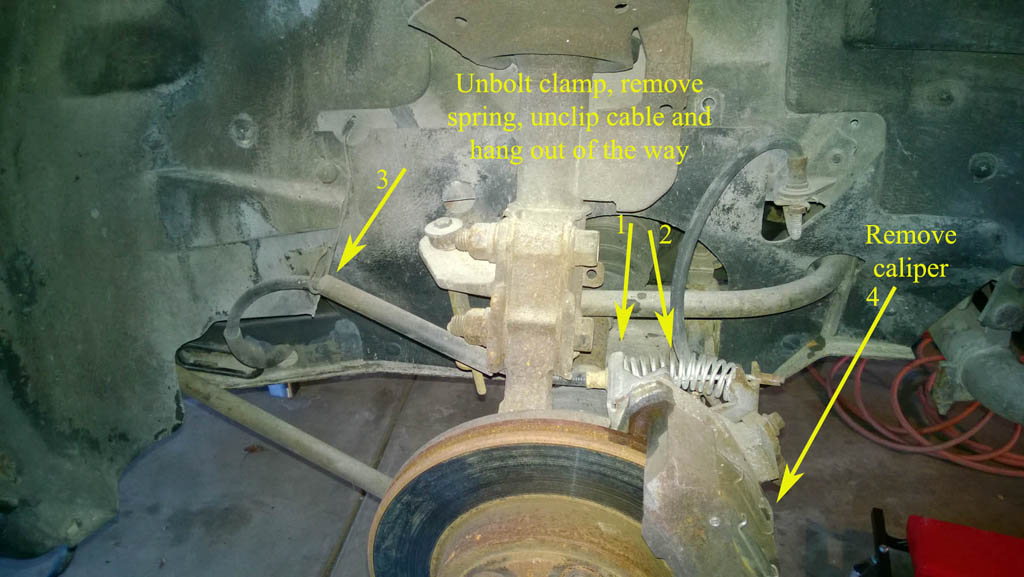
16. Remove E-brake from caliper. There is a bracket attached to a bridge bolt on the caliper. Once removed, the parking break cable and spring can easily be removed. Be sure to unclip the cable from the hanging clip in the fender well also, since this cable will be coming with the cradle. Replace the bridge botl without the ebrake bracket. Remove the caliper with the two T-55 torx bolts. I hang my calipers with some coat hanger so the weight of them is not on the rubber break line. This is a good time to change brake pads if you are so inclined.
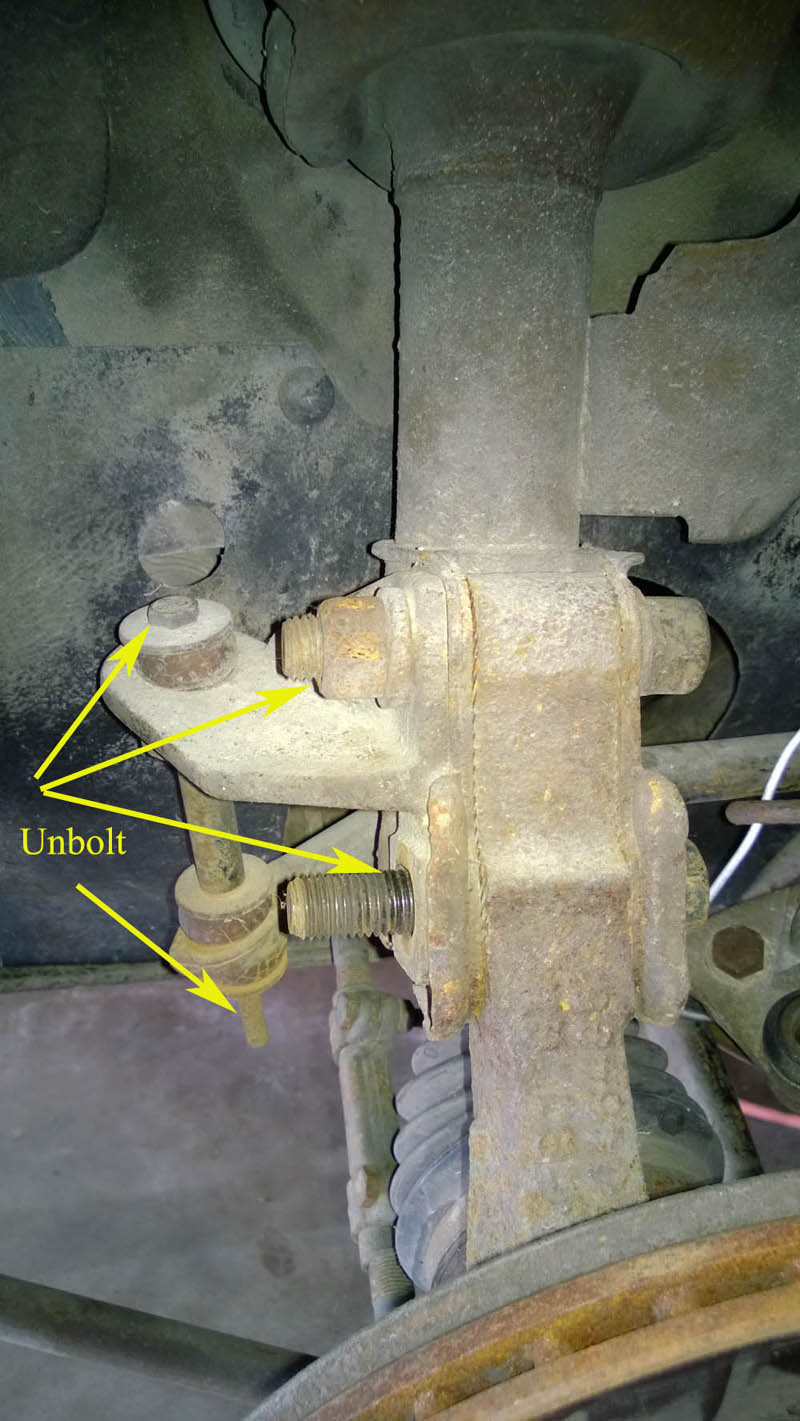
17. Remove strut bolts and sway bar bolt. These can be stubborn, but there is a lot of room to work on them. I used my impact wrench and that made short work of them. Remove the nuts from the two strut bolts, but leave the bolts in place until you are ready to remove the hub and axle assembly. The sway bar bolt is small and easy to break lose, but getting all the washers to slide off can be tricky if it is rusty.
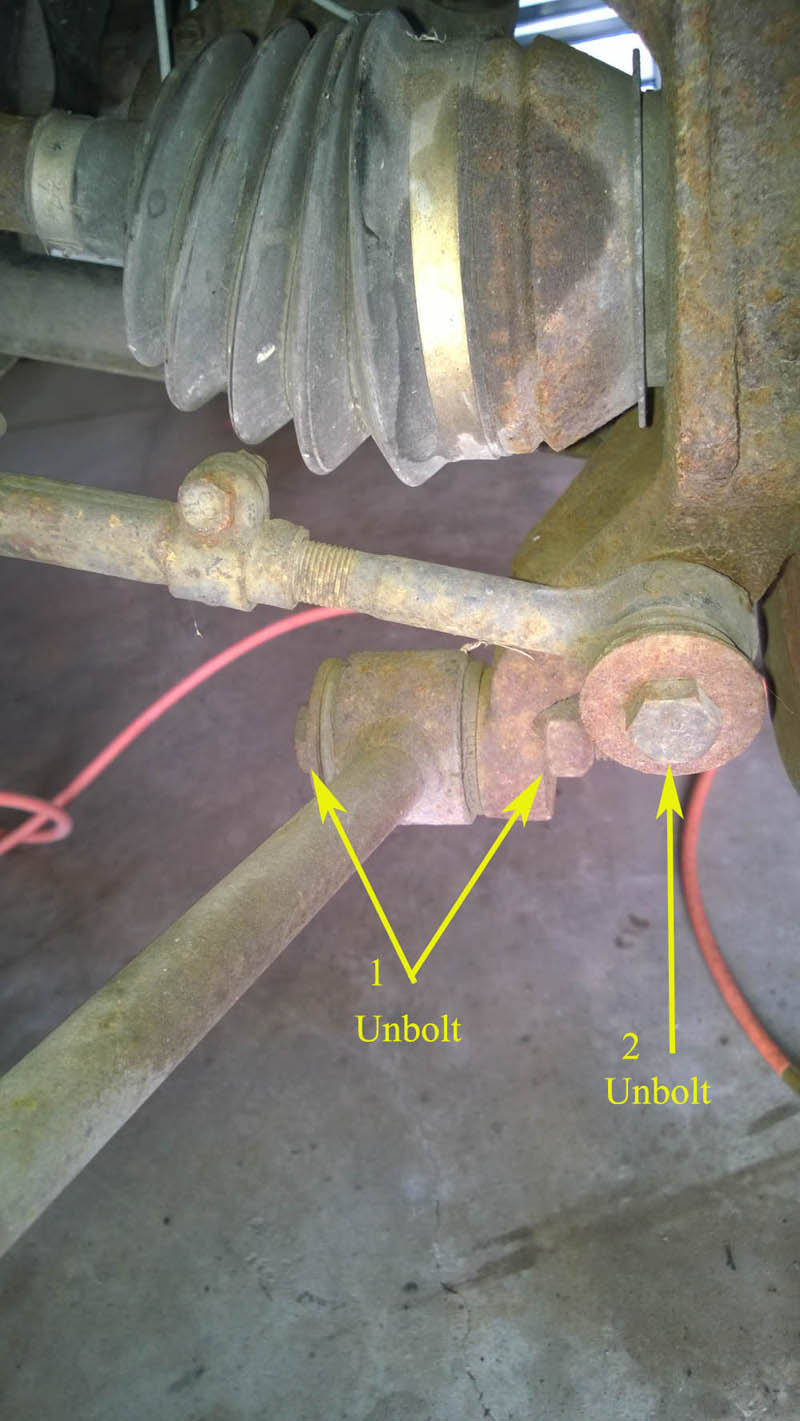
18. Remove toe link and trailing arm bolts. Hopefully I have those terms correct. Again, an impact wrench makes short work of these. Once removed, the hub assembly will be hanging from the strut bolts.
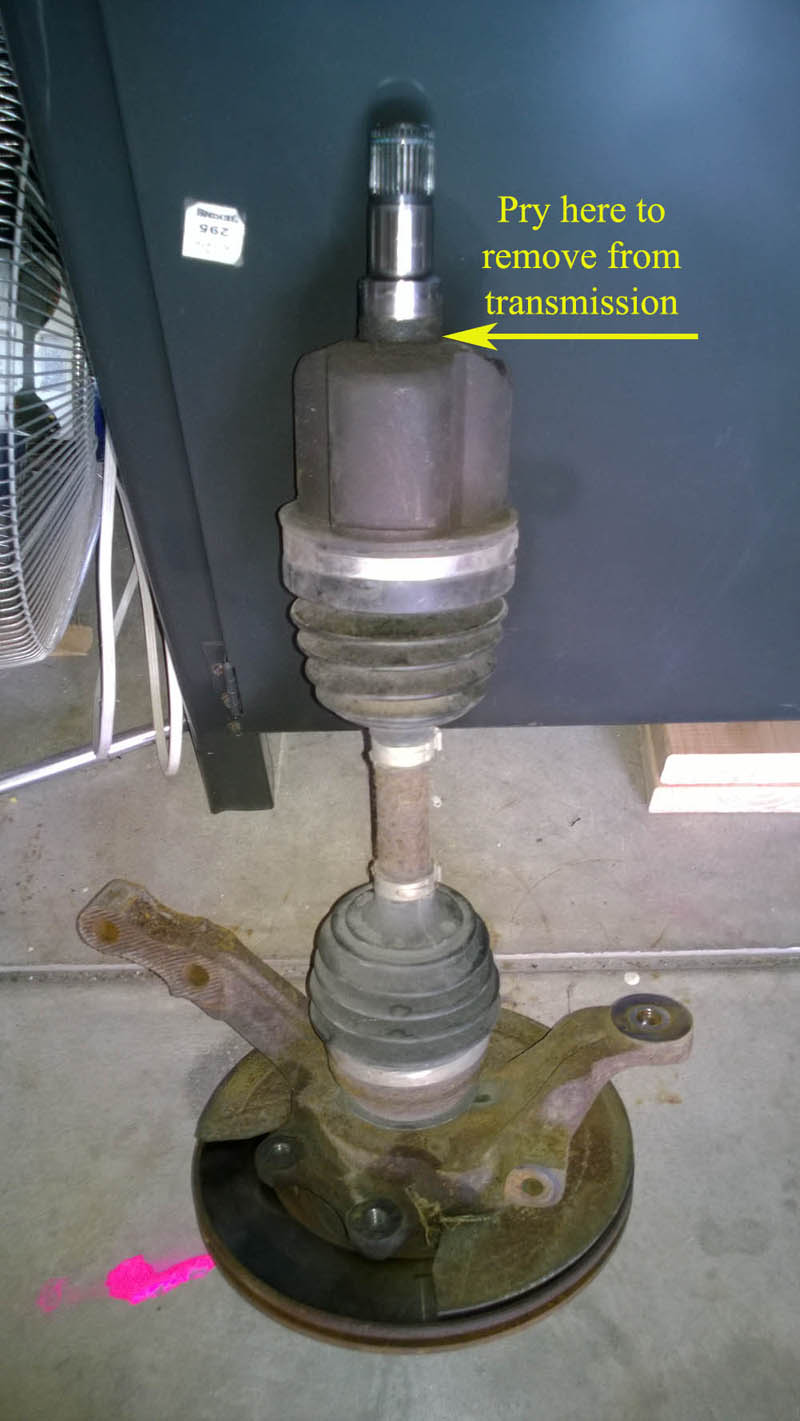
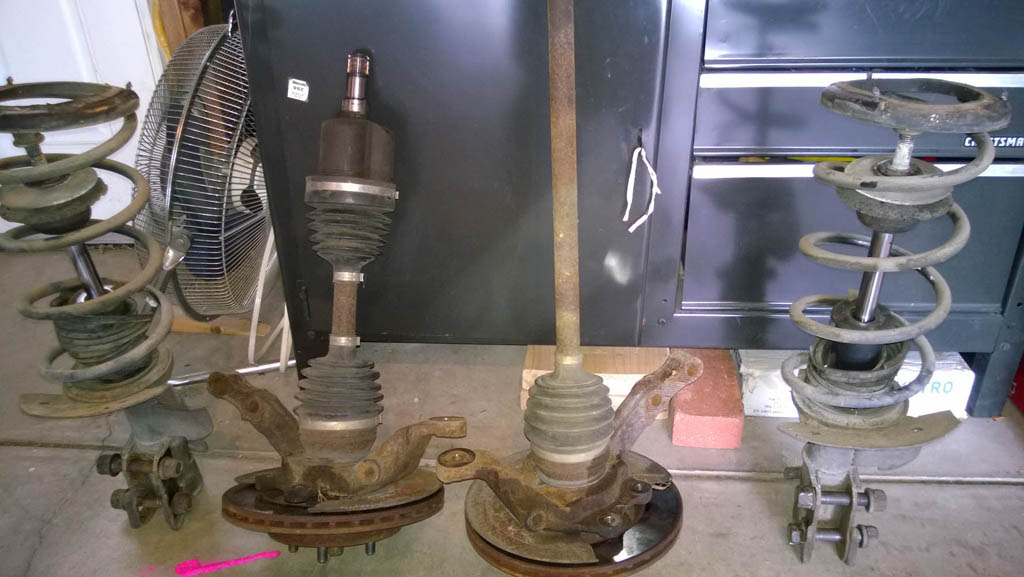
19. Remove hub and axle assembly. Using a special GM tool, or pry bar, pop out the axle. Then, remove the two strut bolts and carefully pull the hub assembly and axle out. Be sure to support the axle so that it won't fall down and become over extended.
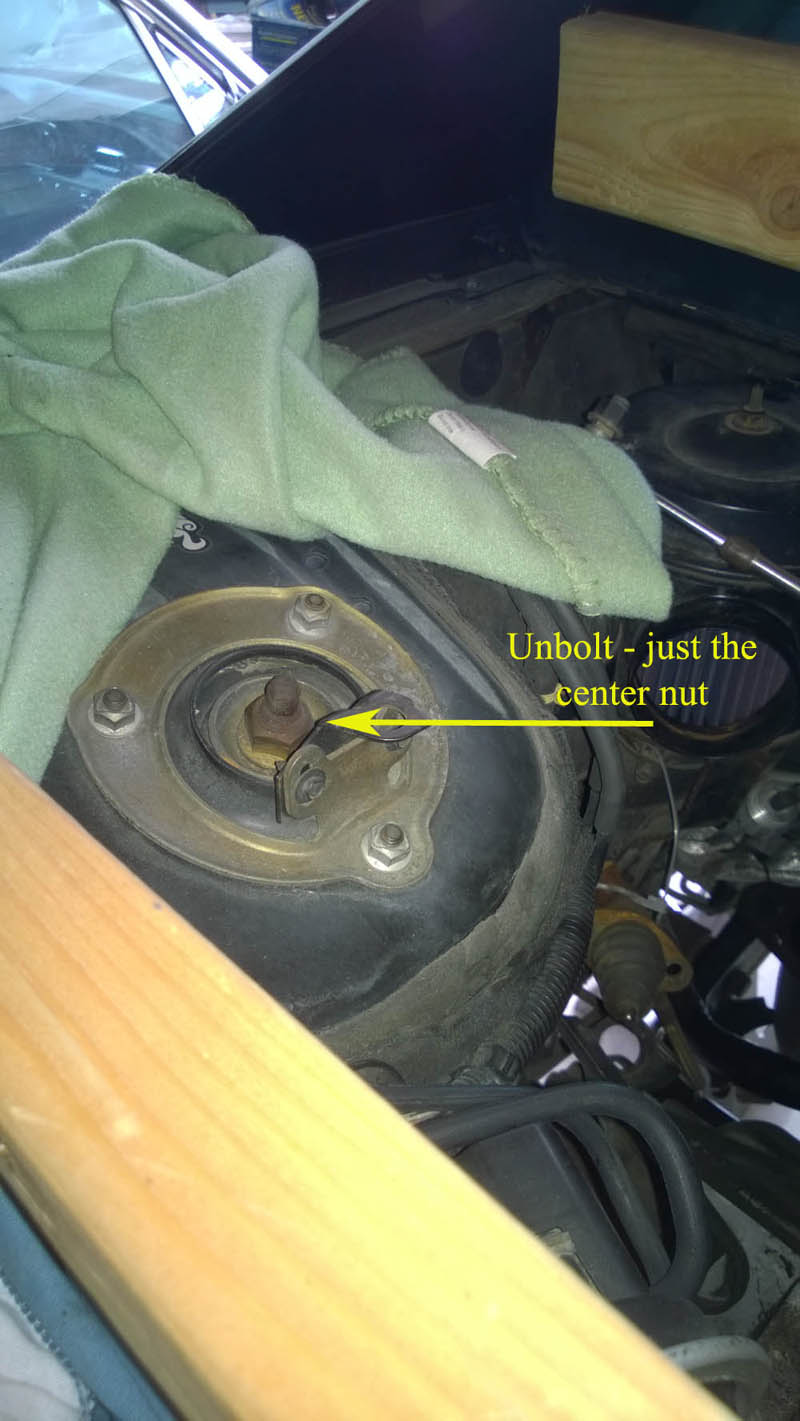
20. Remove strut. From above, unbolt the center bolt that attached to the strut. Have a helper hold the strut, or just make sure nothing is under it and let it fall. The other bolts of the strut housing can be removed if you want to clean up those parts.
21. Repeat the brake and suspension disassemly steps for the other side.
22. Detach lower portion of splash shield. This will be either screw in or pop in plastic trim pieces. Remove them as appropriate. There are two or three on each side. If you want to do more extensive cleaning, you can remove the entire inner fender and splash shield.
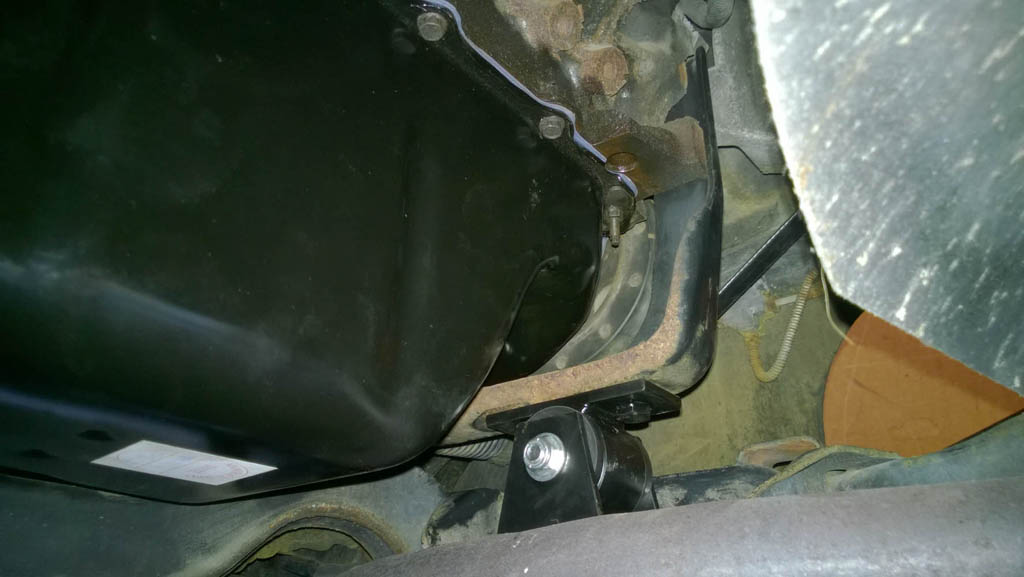
23. Remove engine and transaxle mount bolt. There are three of these mounts. The front transaxle mount bolts are above the e-brake equalizer. The rear transaxle mount is actually one nut and one bolt. The bolt is slightly higher than the nut. The engine mount is two nuts. Unbolt all of them.
Front trans mount:
Rear trans mount:
Engine mount:
24. Lower rear cradle. First, place a jack on the rear cradle so that it is holding the weight of it. I'd say lift the car slightly off the jack stands so that you know the weight of the cradle is being lifted. Then remove the two cradle bolts. Sorry, but I neglected to get pictures of these. They may be hiding behind the splash guards. They are vertical bolts, but they are big and easy to find. Unbolt those, then slowly lower the jack. The entire cradle should come down. Check as it is coming down to make sure nothing is hung up. If yours acts like mine, after a few inches of drop, the cradle will get stuck. It took me a while, but I figured out it gets hung up on the rear transaxle mount. You could remove the entire mount, but I found it was easier to just use a tire iron or other large pry bar to push the transaxle forward a bit. As you do so, the cradle will continue to drop. I'd suggest keeping your jack tightened with maybe an inch of space under the cradle. Push the transaxle forward and the cradle down. Then lower the jack a little more and repeat until the transaxle mount is totally clear. It is kind of tough to see in the picture, but it will make sense when you see it in person.
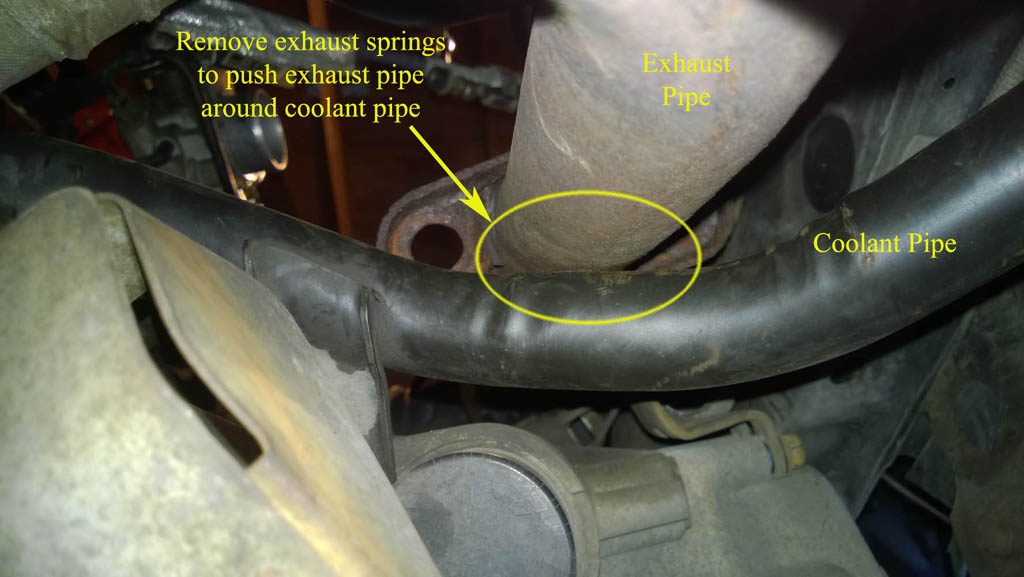
The other main item to watch is the exhause pipe. It will want to get hung up on the coolant pipe. I unhooked the springs on the exhaust and used that play to push the exhaust pipe forward and down past the coolant pipe and then things were fine.
Rear of cradle down
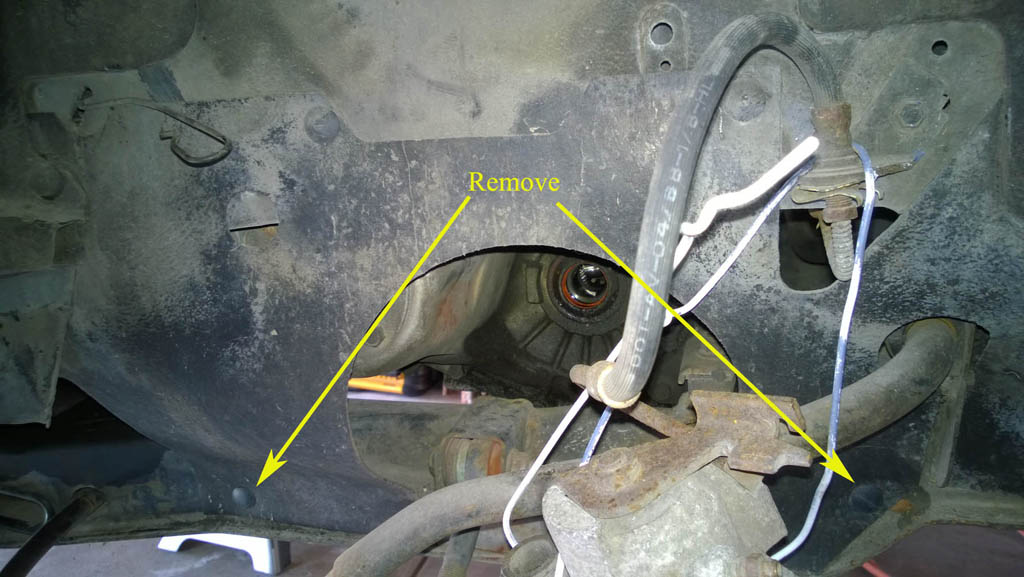
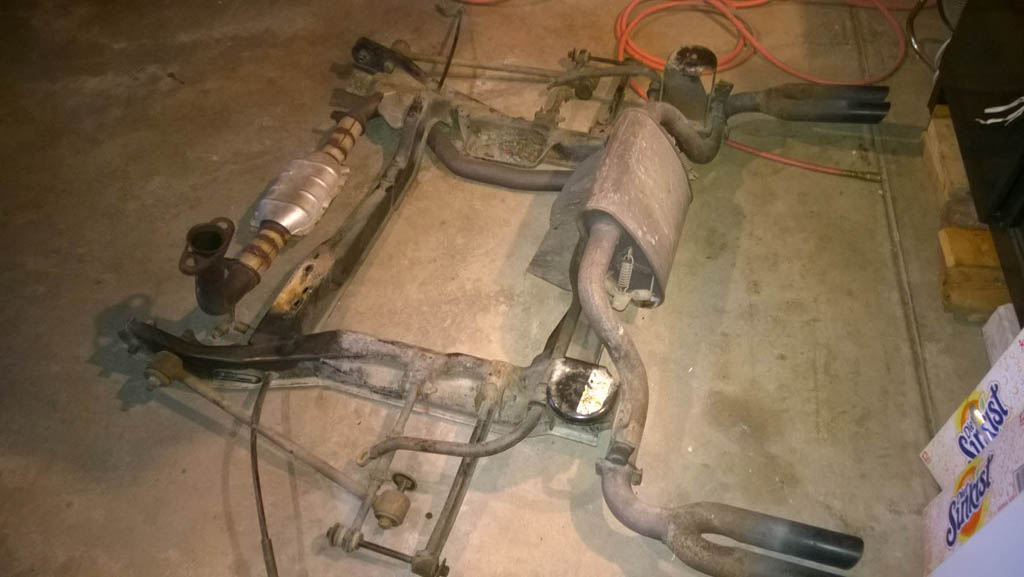
25. Lower front of cradle. Put jack on the front of the cradle and then remove the front cradle bolts. I used two jacks for this. It is a bit tight, but you can get an impact wrench in to undo the nut on the cradle bolt. Once that is done, use a pry bar to lever out the bolt. You may need to experiment with one jack on the front of the cradle and one on the rear to take the pressure off the cradle bolts. Took me a couple tries, but eventually the bolts slid right out. Then you will slowly lower the jack the front of the cradle. Viola! Cradle is down and you have easy access to both it, and the engine bay. The cradle is actually pretty easy to move around without the engine on it.
Great stuff! There is a video from lostnotforgotten that shows the steps, but this write up is great. I will definitely be using this when I swap my engine out.
Thanks! I believe the video you mentioned is to drop the cradle with the engine still attached, although I haven't watched everything on his channel so I might be mistaken. In any case - glad you liked it.
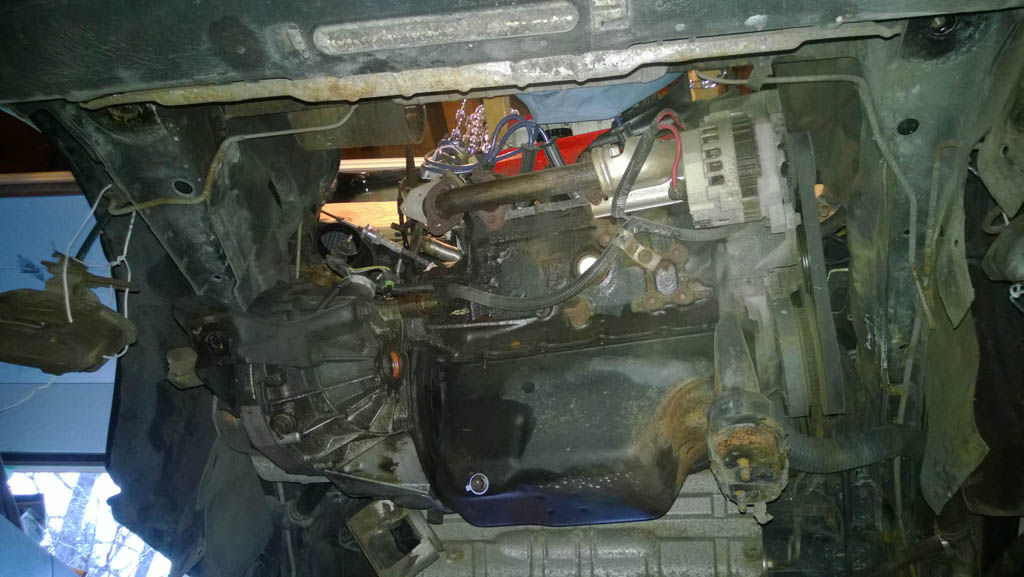
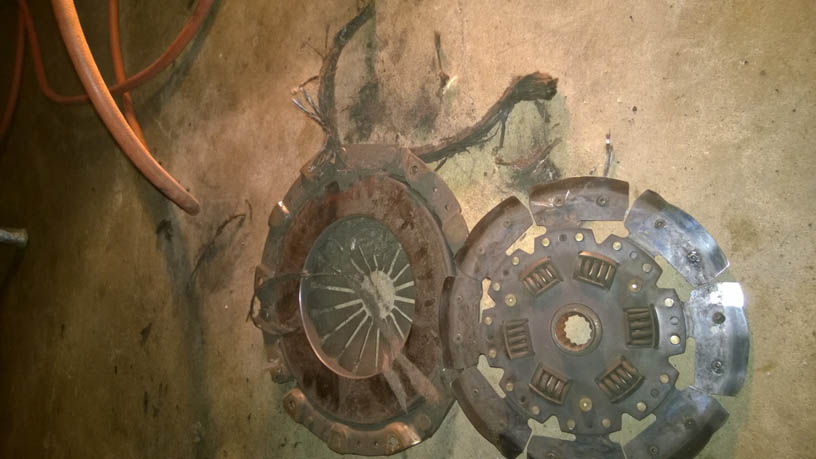
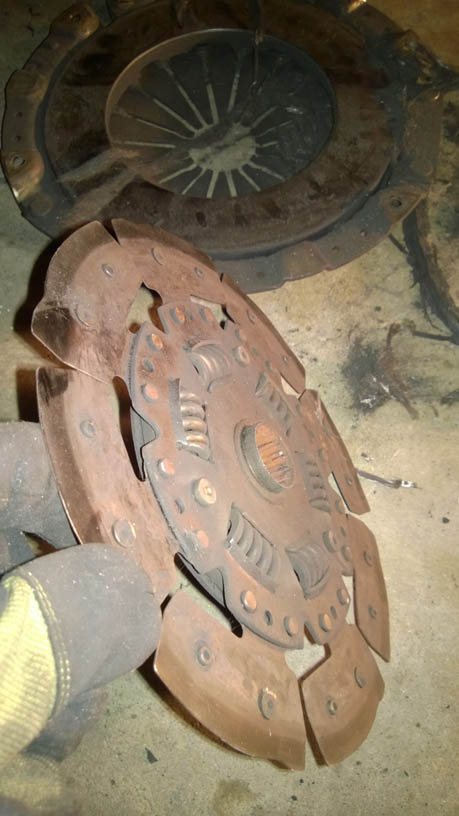
Took the day off to fix the heater core in my truck. Got that done and still had some time, so I got the transmission out of the car. The clutch isn't just 'worn' - it is completely devoid of friction material.
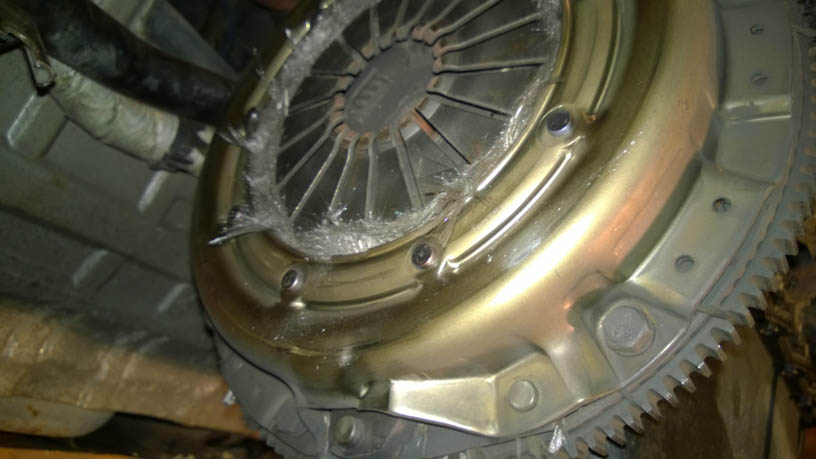
At first I thought maybe a rat had died in the bellhousing:
But wait - maybe the rat is hiding in the pressure plate?
Nope - no rats. Just a thoroughly cleaned clutch. I guess the material just fell apart and spun itself right off the clutch.
Wow, can't believe almost three months have gone by! Guess I better get caught up here.
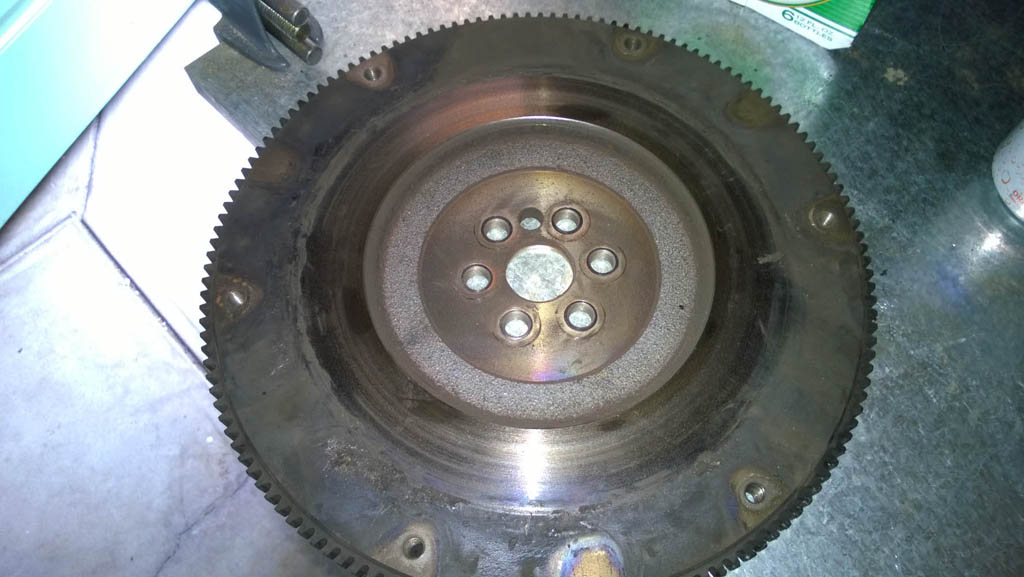
2/27/16 - Removed the flywheel and took it in to a machine shop in Littleton to get it turned down. Here's a picture before hand. You'd think I'd take a picture of it when it was all nice and clean, but you'd be wrong. Great guy at the machine shop - very affordable too. G&S Auto Parts and Machine Shop for anyone in the Denver metro looking for an old school shop.
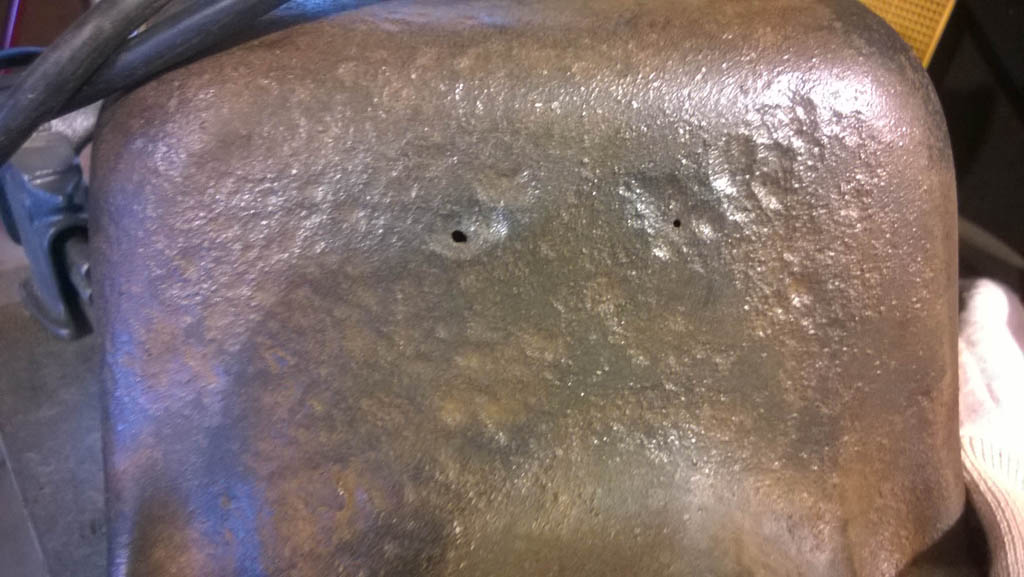
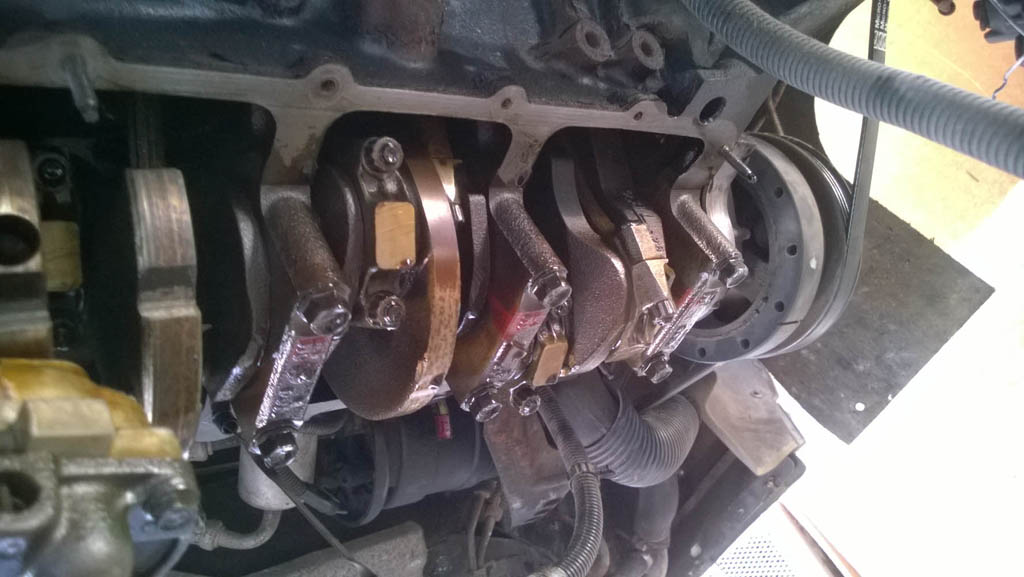
While I was at it, I removed the oil pan to clean it up. Well, as I was brushing away the rust, I went right through the pan. I guess it didn't have any metal left in spots. So I ordered up a new one from Rock Auto.
I think it is neat looking at the inside of an engine. When working on these older cars I find it amazing to think I might be the first person to have seen this view in almost 30 years.
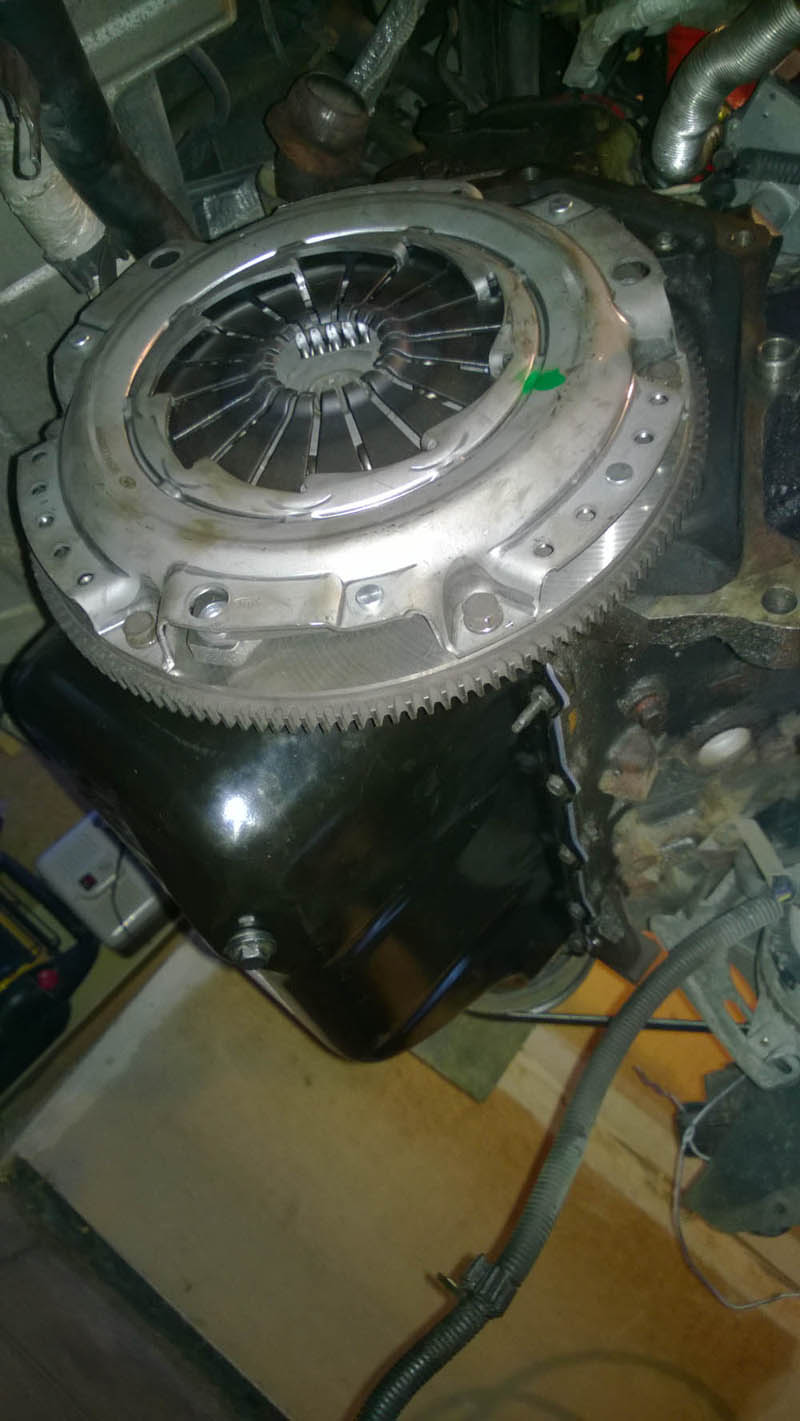
3/5/2016 - The next weekend I took the new clutch and pressure plate, and the turned flywheel and put all that back together. Was a piece a cake to install.
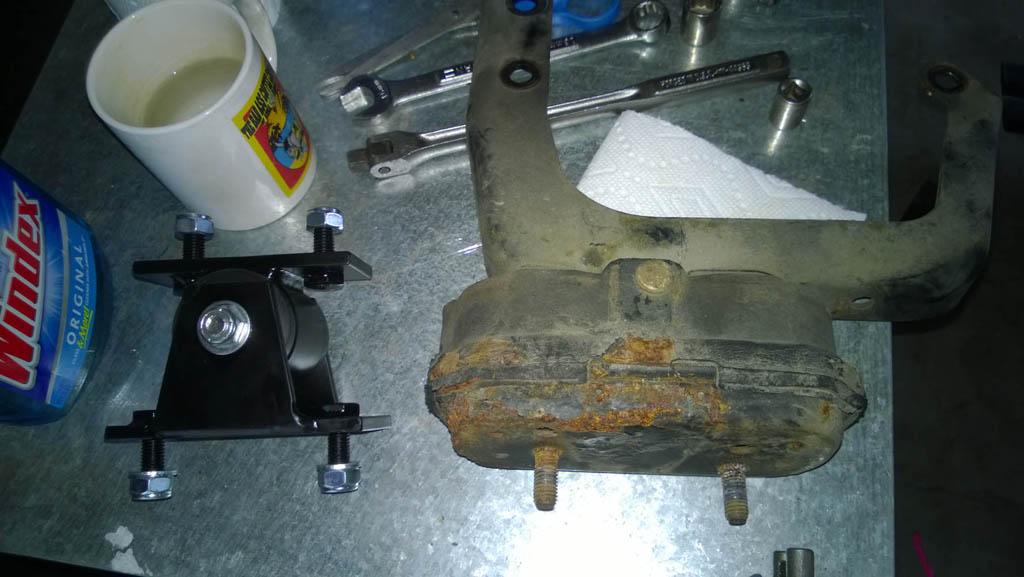
3/6/2016 - With the engine hanging in the air, it was also very easy to remove the motor mount so I can replace it with a much nicer looking, and more solid, poly mount.
3/13/2016 - Put on the new rear main seal and oil pan. I have read that sometimes oil can leak onto the clutch. Normally, that oil burns off on a daily driver, but a car that sits a long time can have oil soak into the clutch material and cause it to break down. Perhaps that's what happened to my clutch. So I figure I will change most of the gaskets that typically leak and the rear main is of course an important one.
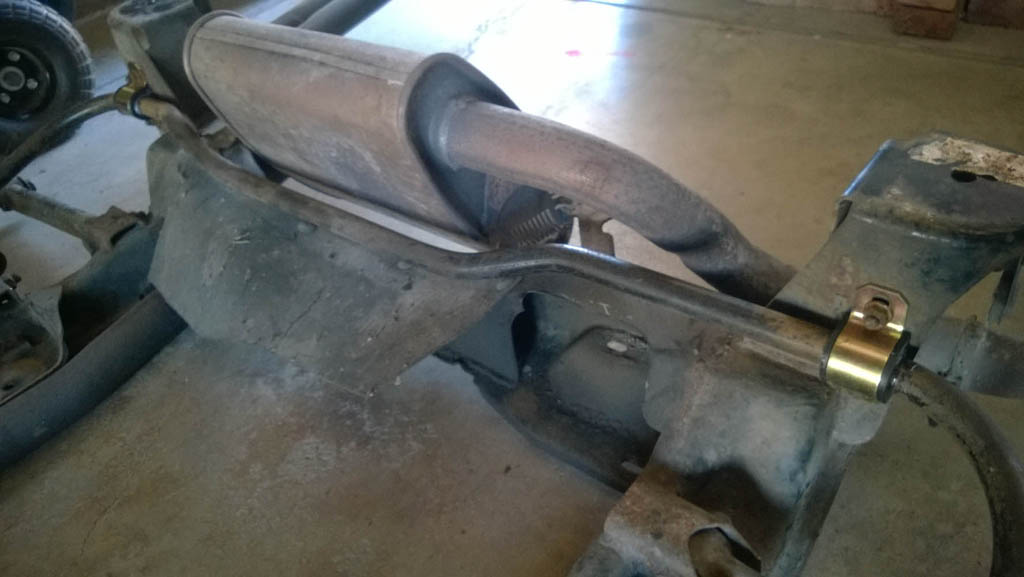
3/20/16 - I put new poly mounts on the anti-sway bar as well.
3/21/2016 - After a fun day of shoving, lifting, twisting and pushing - and lots of cursing too - I managed to get the cradle back under the engine and transmission. The transmission mounts weren't too bad, but it was tricky getting the two bolts of the motor mount to land in the cradle holes just right. In any case, it is done now and the cradle and engine are back where they belong - in the car!
Motor mount and new oil pan:
Front transmission mount:
Rear transmission mount:
[This message has been edited by Bob2112 (edited 08-28-2017).]
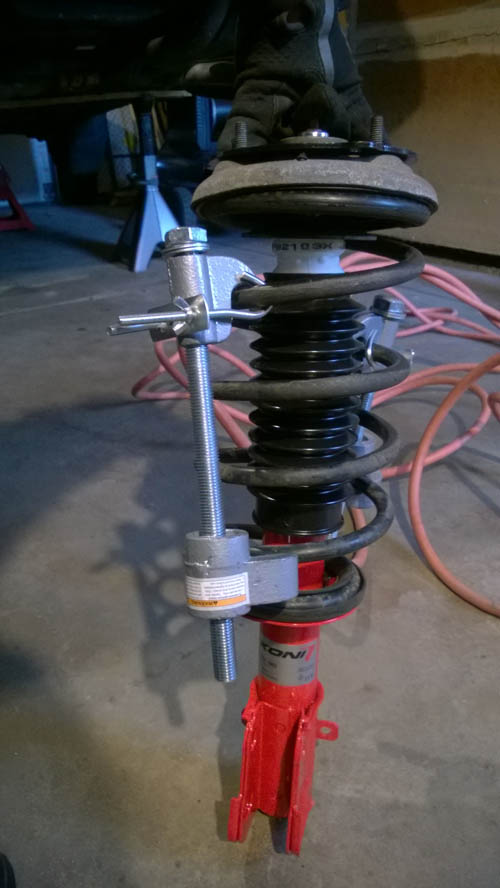
3/26/16 - Once I had bought the new strut tower pieces and parts (boots, bump, mounting plate, etc) I compressed the spring and put the whole assembly together and then installed it on the car.
All ready to install:
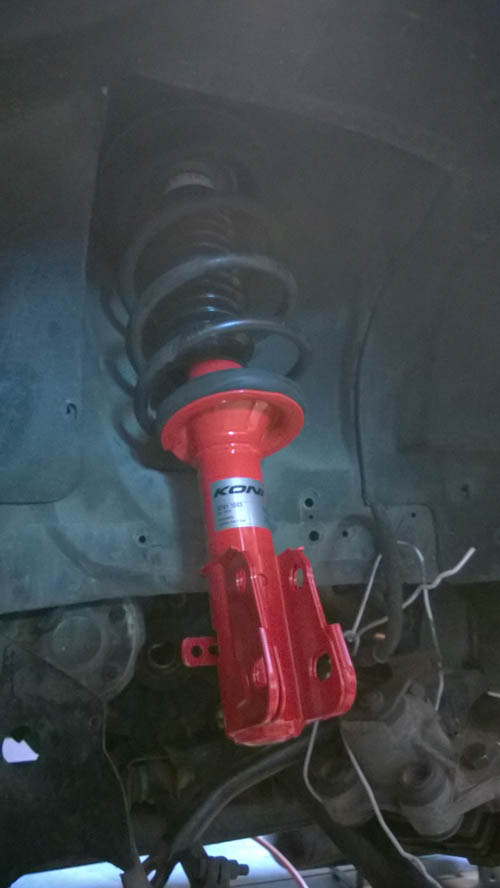
On the car:
The strut went on fairly easily, although the passenger side top bolt doesn't move as freely as I think it should. I suspect this might cause problems when I adjust the camber, but we shall see.
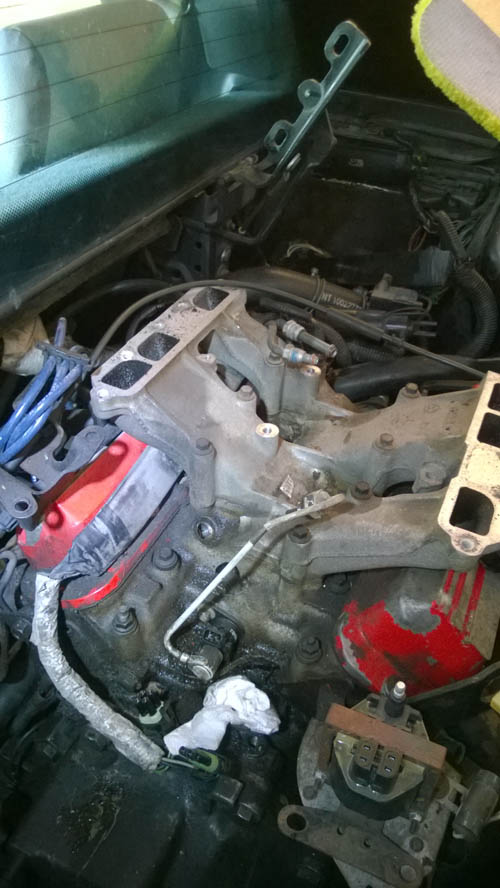
4/24/16 - Started taking apart the top part of the engine. I took a ton of pictures, so if you need to see where a given hose or component goes, I probably have a picture of it.
Plenum removed:
Fuel rail removed:
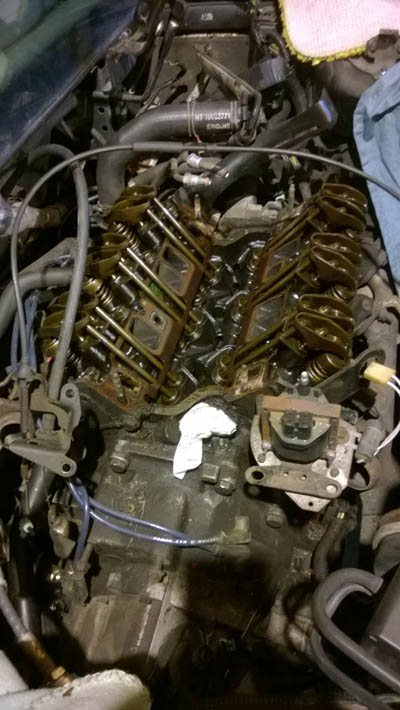
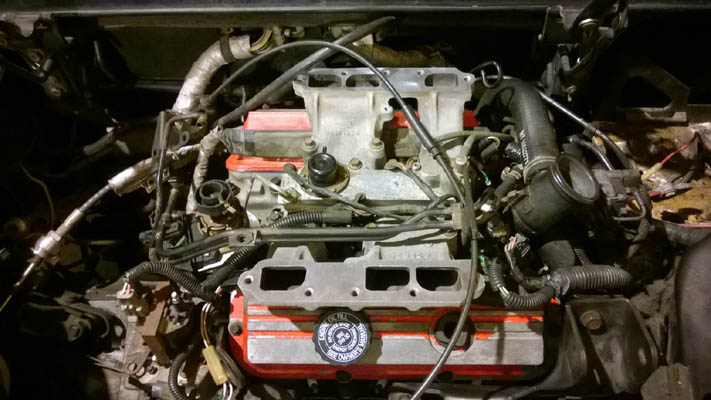
4/27/16 - With the bottom manifold removed, I started cleaning parts and getting ready to put it all back together. The top of the head assembly looked very clean. Probably by virtue of the relatively low miles of the car.
Ready to reassemble.
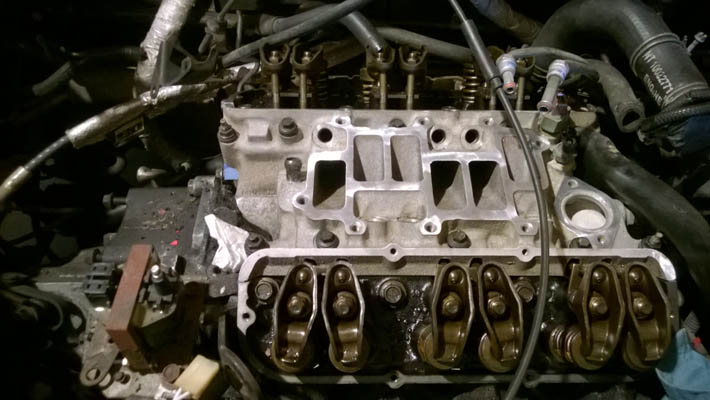
4/30/16 - Lower manifold back on.
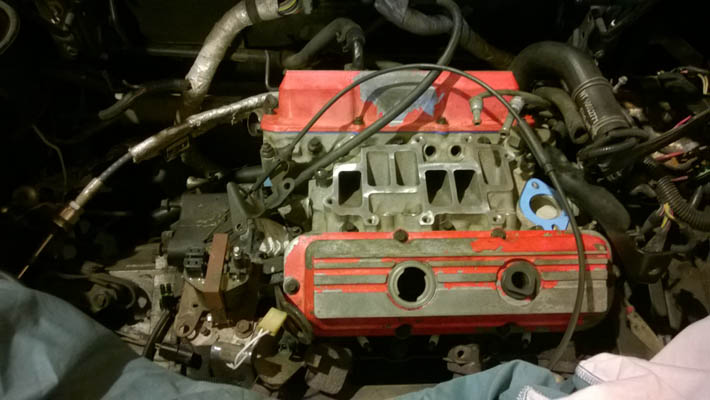
5/2/16 - Valve covers back on.
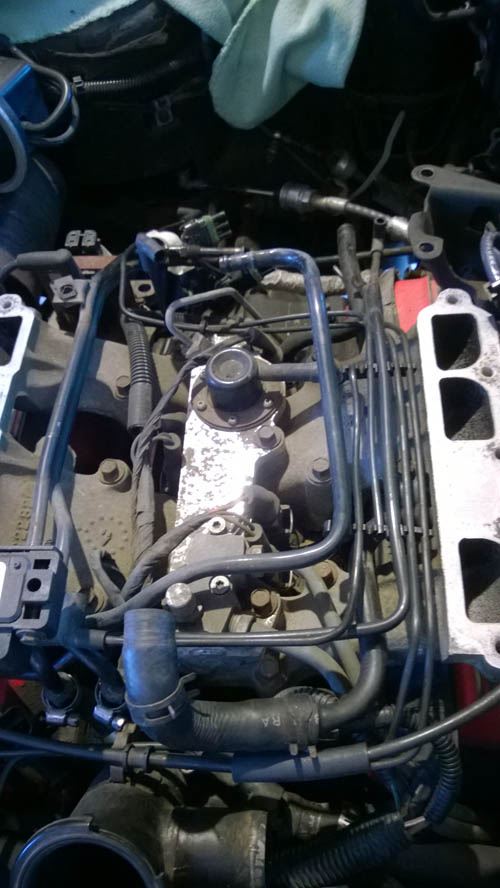
5/8/16 - Middle manifold back on.
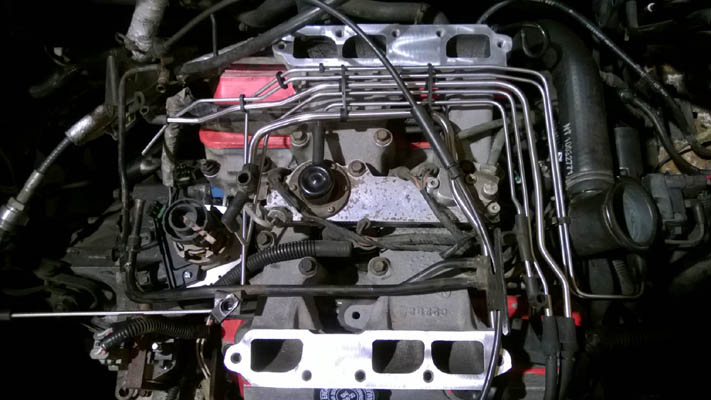
Also, on the same day, I installed Rodney's stainless steel vacuum lines. They look pretty cool in my opinion.
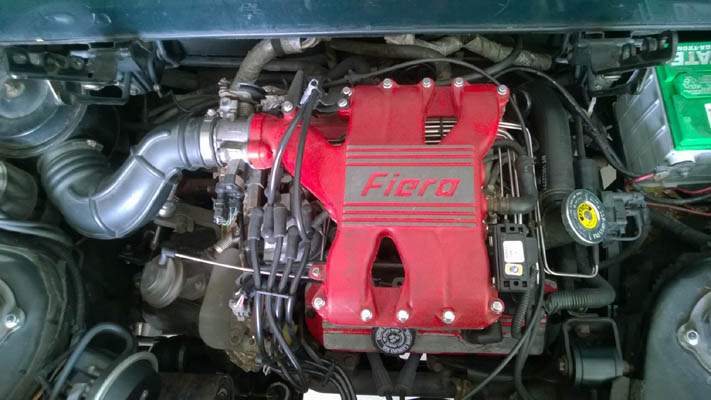
5/15/16 - Finally all put back together and ready to drive!
After so much disassembly I always assume something won't work when I get things back together. But the car started up fine and was only about 3 or 4 degree away from proper timing. I got the timing dialed in and then took the car for a deck-less cruise around the neighborhood. It worked! The clutch engaged without a problem and the Syncromesh fluid seemed to make it easier to shift into gear. I did have a clunk once or twice, but that might have just been the cradle and/or new strut components settling in. If it occurs again I'll try to track it down. The exhaust is still kind of rattly, might be that I need a new muffler, or could be a loose heat shield. I'll need to investigate further.
I didn't see any oil leaks which is great, and the transmission worked fine which is also great. The thermostat housing to manifold connection leaks very slowly. I managed to get about 3 or 4 drops of fluid under the car in about 20-30 minutes, so I went ahead and tightened the bolts a bit more. Not getting anything under the car now, but it is still damp after the car runs so it is still leaking. The forward bolt didn't seem right. It didn't seem cross threaded but maybe it was. I might just deal with the leak until I feel like tearing down the manifold again and then I can replace or tap the thermostat housing bolt hole. For now it was good enough to put the deck lid back on and park the car in the driveway again. My wife was happy to have her garage spot back.
I also used a camber gauge to adjust the rear wheels. I'll probably do this a couple more times after the car has been driven a bit. It wasn't too far off of spec. The passenger side that is tighter than it should be was a challenge. I had to have my wife tighten the bolts while I put all my weight into pushing the strut in. It is still 1/4 degree beyond the spec (-1.75 compared to -1 +/- .5) but it could be worse I suppose. I probably need to take the strut off and just reassemble it or something. Another mini--project for later. I have a gauge to measure the toe as well but I haven't got to that yet.
So far so good. Haven't driven it long enough to really detect other problems. I am going to go get the temp tags this week hopefully and then drive to work a couple days before I take it to the emissions station.
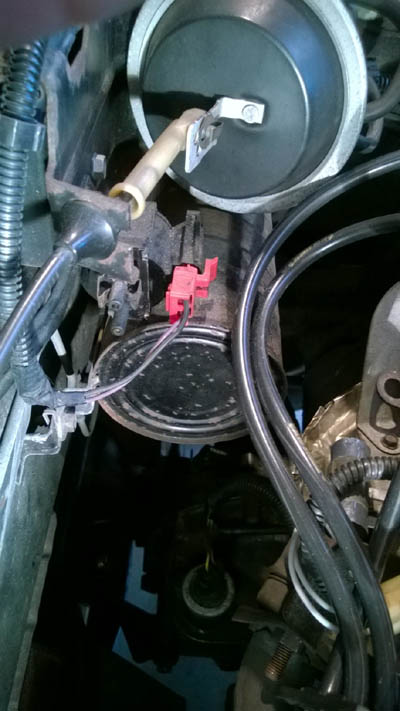
Also - I noticed on this coffee can there are what look like vacuum hose connections, but I don't see any unattached hoses anywhere. What is this can even for?
Got my temp tag last week and I have been driving the Fiero to work all week. Sure is nice to drive a Fiero after so many years away from them. Transmission is easy to put into all the gears and the clutch feels just fine. No fluid leaks that I can see yet other than the moisture around the thermostat housing. Last Saturday I washed the car and it really does have nice paint on it. Today I took it out on the interstate for a few miles to makes sure 5th gear was working and to see if there were any high speed shakes. Up to 60mph all was good! Too much traffic to go any faster, but so far so good.
I just need to put the front shocks on and the hood struts I bought, and then everything I've purchased thus far will be on the car and I can start thinking about the next mod. Probably headlights or LED tail lights....
Bob...is that a 64 1/2 or a 65 Mustang in the back? My 1st car was a 64 1/2 in Wimbledon white, palomino interior, rally pack (clock & tach on the steering column) & 3 speed Hurst shifter.
Nice car! Thanks for going into great detail and with the pics to boot. This will be a lot of help when the time comes to drop my engine. Also helps to know what parts to have on hand to do the job right.
TXOPIE - It is a 65 with a long, slow restoration story. If you are interested there is a link in my signature. I'm guessing your 64 1/2 had the old generator on it then. Sounds like a classic, I'm guessing you didn't keep it? I still have my first car, which was also the car I grew up in - a 1977 Chevy Impala station Wagon. My dad got it when I was about 2 or 3 years old and I still have it today.
Hi Davy! Thanks and glad it is helpful. If you are removing the engine entirely there are a few more steps like disconnecting the cooling lines and electricals, but not much more. Lostnotforgotten has a nice video on youtube for pulling the cradle and engine together. But for some work you don't really need to remove the engine anyway, and I couldn't find a well documented process with pictures for cradle dropping without removing the engine.
A Sunday Fiero update. I had hoped to go to a poker run yesterday, but the week before last I was driving home and my oil filter came off. I then left to do some house hunting in TN and so while the fix was easy, I wasn't ready to push my luck on a drive some distance from home. Seems fine though, so hopefully I'll make it to a show soon.
This weekend was a Fiero weekend. Did a number of little things.
1. Took off my steering wheel and then realized I didn't have an installation kit for the new one. I'll have to wait until next weekend for that.
2. Installed the metal dog bone cover that Rodney sells. I only bought it since I was already ordering a new tach filter.
3. My tach reads about 300 rpm too high, so I figured I'd at least rule out the tach filter. Installed a new one with no change, so back to the drawing board. I suppose I'll need to adjust the needle or install a potentiometer in the circuit. I can live with it for now.
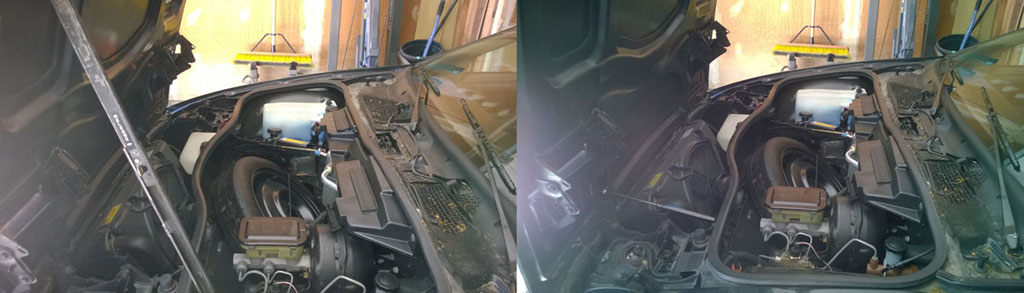
4. Not wanting my Fiero to become the latest news story, I pulled the heater fan resistor bundle and did some digging and shop vacuuming to get the bulk of the crap in the heater box out of there. The fan certainly blows better now.
5. While my A/C has worked since i got the car, it always cycled faster than I felt comfortable with. Although it is an R-12 system, it has the R-134 coupler on the line so I figure it is possble someone put 134 in the system. I don't like running all 134 on an older compressor so I bought some R-12a. I evaced the system and put the r-12a in. The cycling went down to a rate I would expect and the air blows even colder than it did before.
6. Finally (unless I'm forgetting something) I removed my ugly hood prop and replaced it with a gas strut that I bought from someone on this forum. I bought the duel kit, but hte single was pretty darn strong so I might just leave it like that. If I decide to add the other one, it was a pretty easy job. Before and after pic below:
That's all for now - steering wheel and maybe front shocks next weekend.
That is a good question. My oil pressure is a little bit higher than what I would expect, but not anything crazy like a pegged needle at 80. I'm going to chalk this one up to a faulty oil filter. From cruising the internet, it seems it isn't unheard of. Certainly a first for me. If it happens again though, I'll need to examine the oil system in more detail and see if there is something amiss, whether simple like worn threads on the oil filter 'stud' or a complex like a pump that is pushing too much oil.
I'm going to chalk this one up to a faulty oil filter. From cruising the internet, it seems it isn't unheard of.
Was there any indication that oil pressure was dropping as the filter was possibly loose, leaking and unscrewing itself... or did the filter just suddenly blow off?
There weren't any indications it was working loose. No drop in pressure, no leaking oil. I just was driving home from work one day and it popped right off.
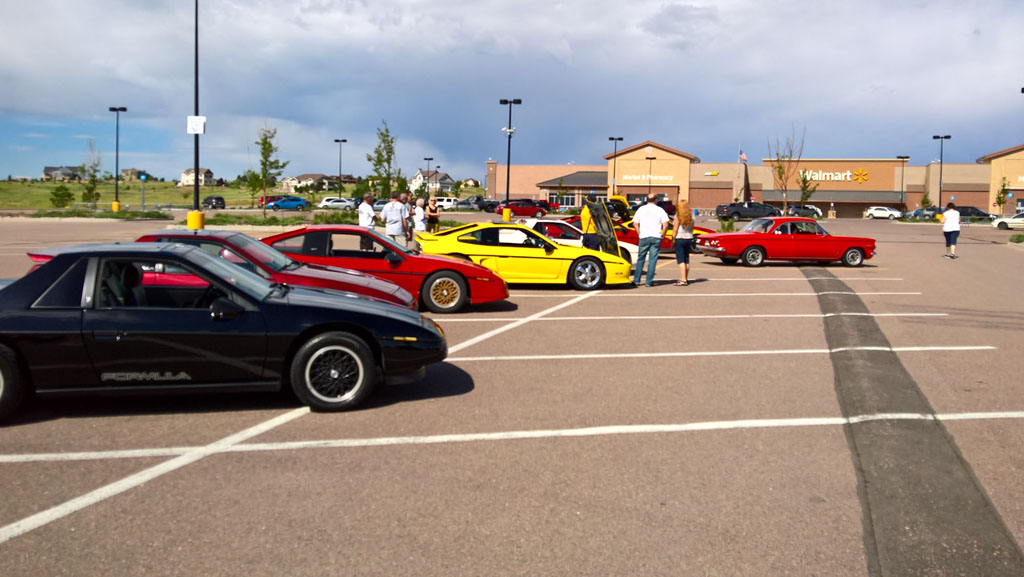
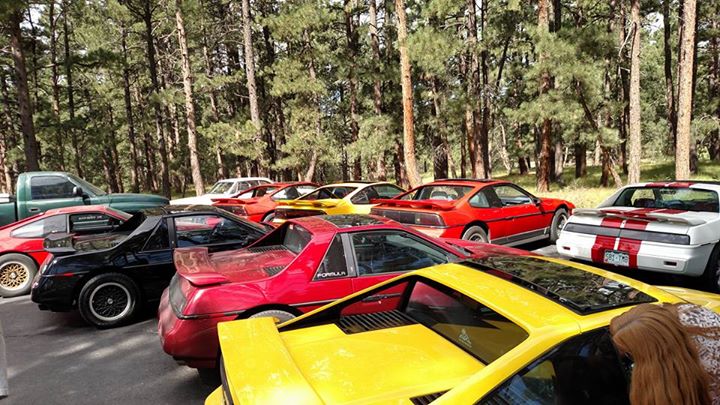
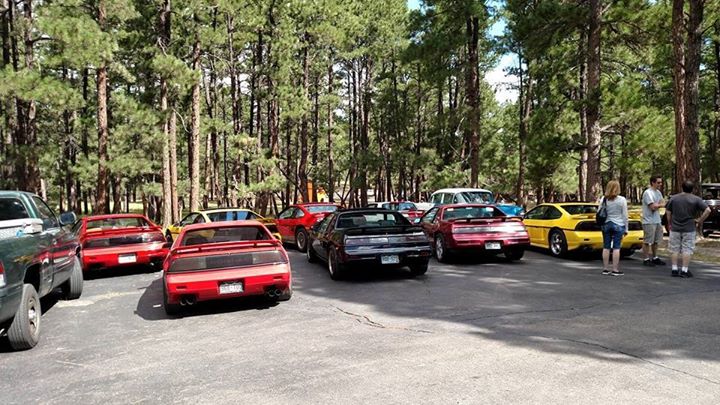
Been working on the Mustang lately and driving the Fiero daily. Had a nice Sunday meet up this week with the Mile High Fiero Club. We went to a large car collection called Rambler Ranch here in Colorado. Nine Fieros made it out to the event along with one Fiero owner whose Fiero wasn't quite up for the trip. Was nice chatting with some other folks who appreciate our awesome little cars. Plus it was a good test for mine since this was the most I drove it in a day. It did fine for the most part, 80 miles, with the A/C on and heat and oil were just fine. The only issue I had was I couldn't restart the car without wiggling the negative battery lead. Once I got home for the day, and upon further investigation, turns out the wire-to-terminal connection was pretty dirty and old so I wire brushed the connection and wires and that seemed to fix things for now. I went ahead and replaced the battery while I was at it. I'll add "new battery wires" to the list....
I've moved to a new house in middle Tennessee (near Spring Hill) and spent most of the winter months doing some last remodeling work on my Denver home before selling it. I'm still in Denver each month for work, but all things automotive have moved to middle TN. My new place has a 30x40 pole barn that I've been slowly working on to make into my dream garage. I put in a solid concrete floor for hydralic lift support and now I'm slowly working on getting the ceiling and walls insulated. Along with the shop work, I've ripped out a bunch of bushes and in the next couple weeks I'm having a 22' x 40' concrete pad poured adjacent to the shop that I'll put a car port over so I have some extra parking outside the shop for things like my trailer, tractor and parts cars.
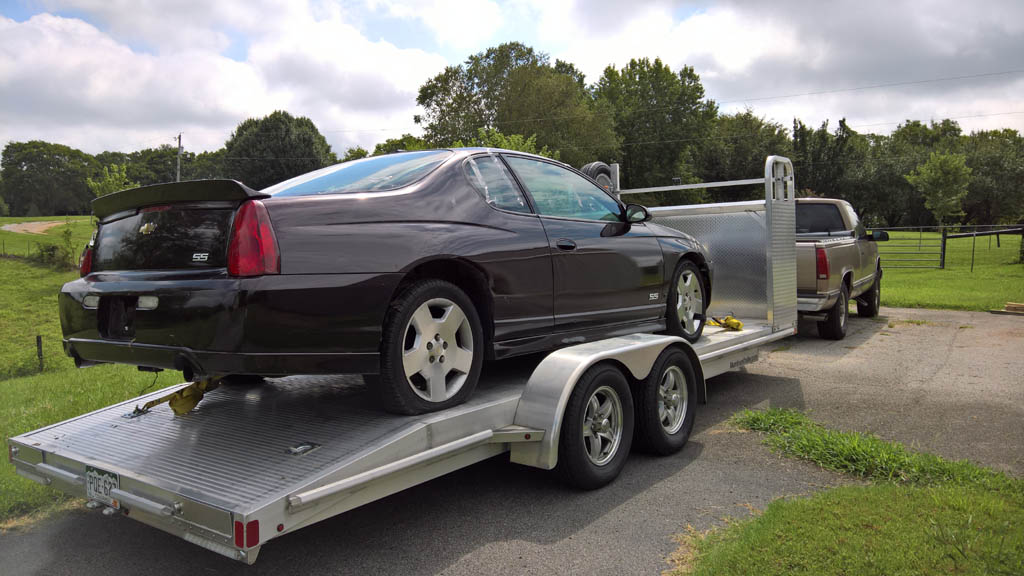
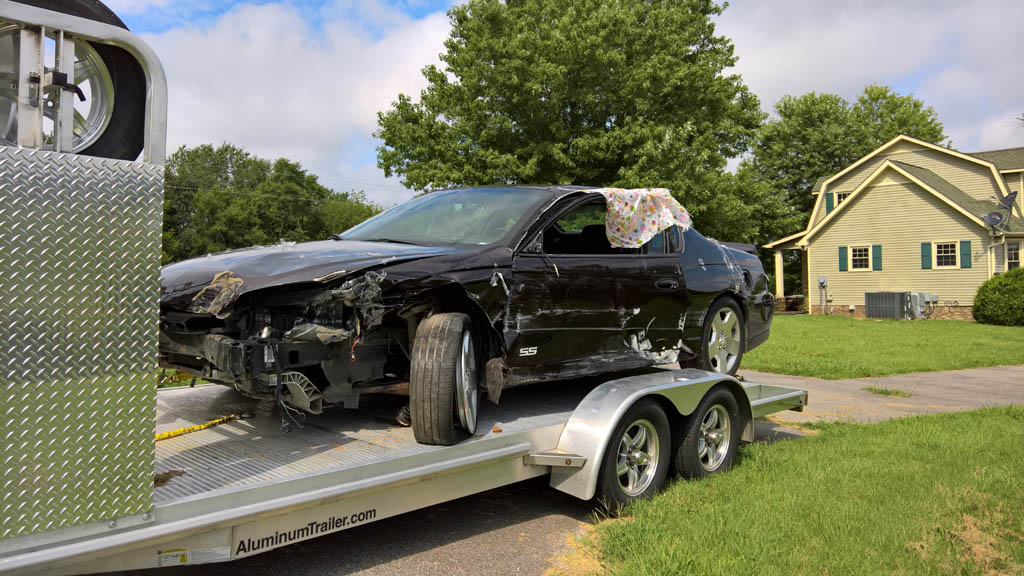
Speaking of parts cars, I picked up a 2006 Monte Carlo SS the other day that was wrecked but has a running LS4 in it. It wasn't far from home, about an hour drive up in Clarksville. I had some fun getting it on the trailer, but we managed. Now I just need to find an F40 transmission. If any Monte Carlo owners out there need parts, just let me know.
It's nice seeing some LS4 swaps with a manual happen. Here's mine mated to an F23. This is also a test to see if amazon photos allows 3rd party viewing.
I just had to edit all these posts and move my pictures to Pennock's Image Hosting. Works great, wish I had used it in the first place. On my Mustang forum and garage journal forum I am using Postimage to host my pics. I never trusted photobucket completely so I always kept copied of my pics on my harddrive so it hasn't been too terribly difficult to rehost them elsewhere. I try to knock out a a few posts a night.
As to the swap, I agree - manual LS4's are cool. I'm going with the F40 though. Depending on how it works out for fieroguru I may even try to do the 3.09 final drive hybrid F40.
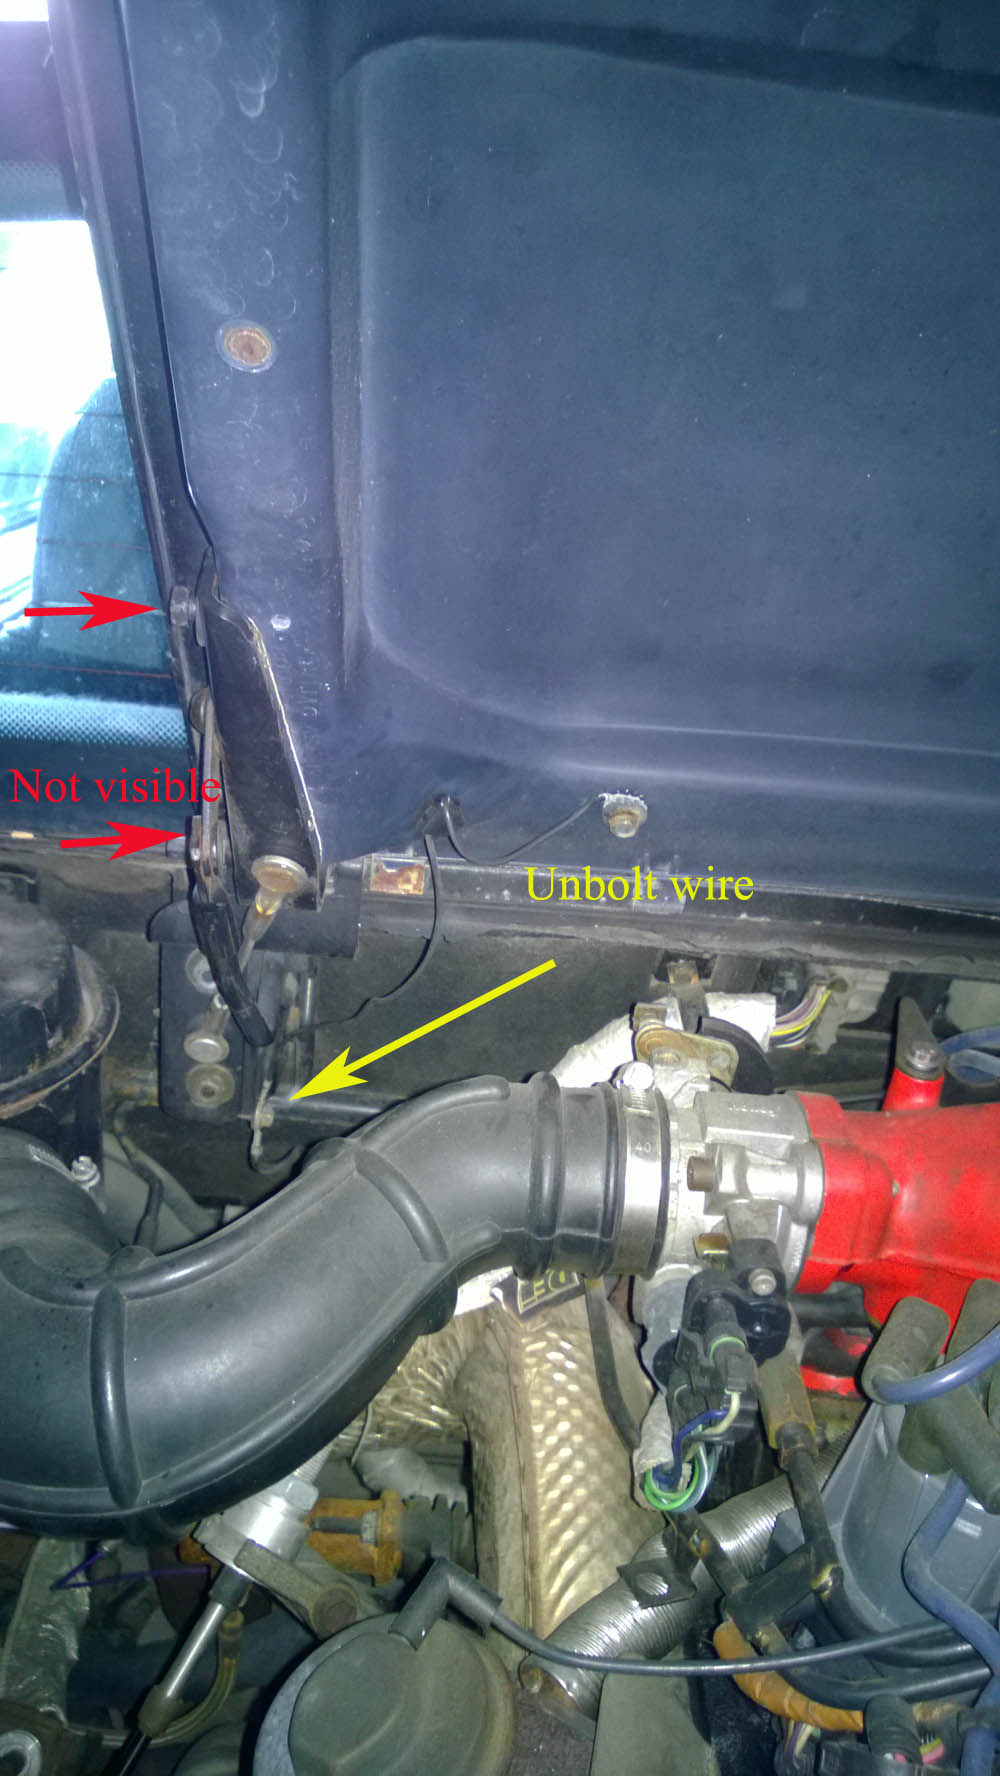
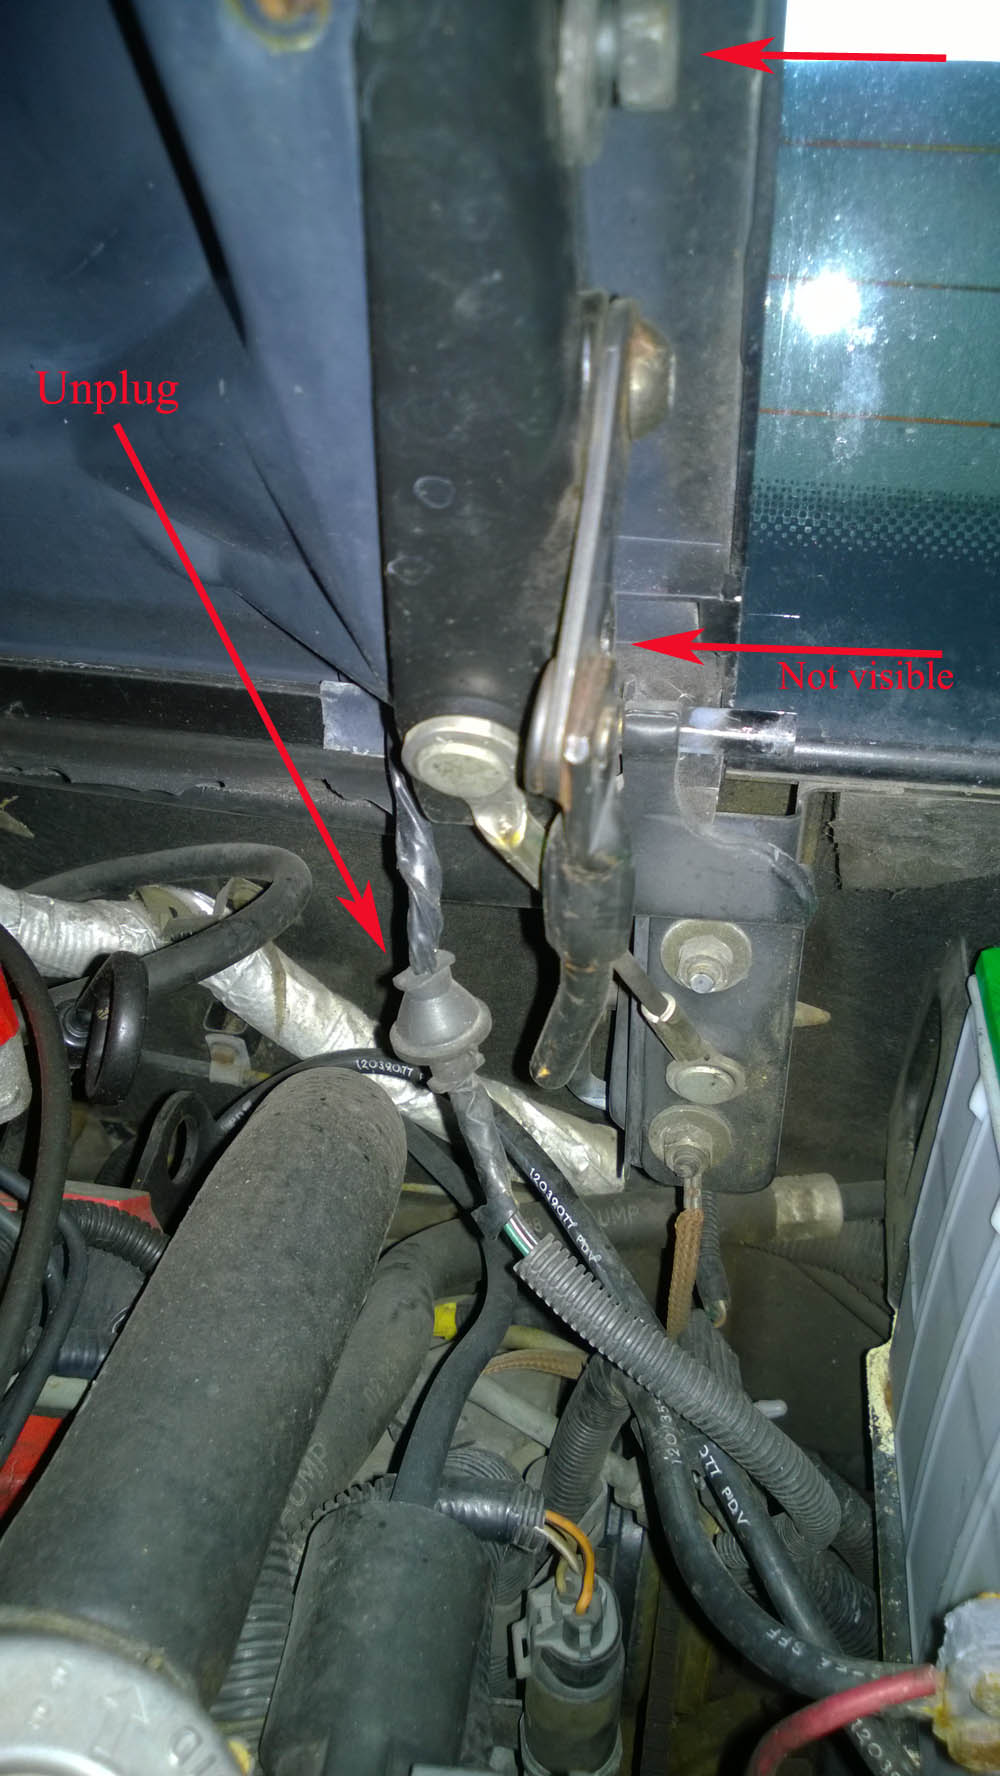
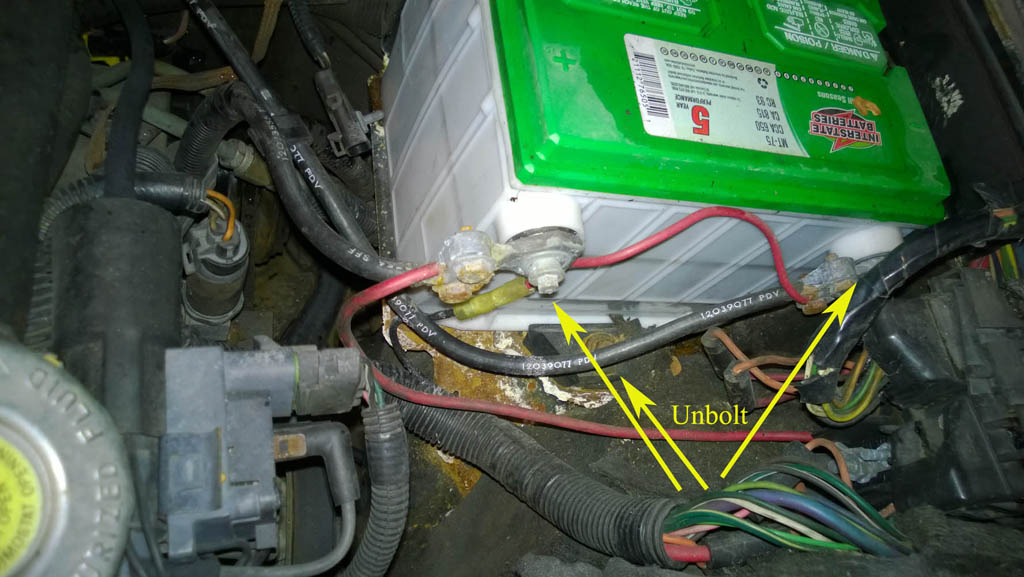
A minor update - I have successfully removed the LS4 from the donor car. I have some other projects that need wrapped up, but at least I can get the donor car off to the scrap metal place. I've sold quite few parts off of it, so I'm nearly to the point where the engine was free (not counting my time spent on disassembly of course).


 What brand was the oil filter, just so we can avoid it.