Pennock's Fiero Forum
  General Fiero Chat
  New carpet and Corvette seat upgrade

Post New Topic  Post A Reply
Email This Page to Someone! | Printable Version


next newest topic | next oldest topic
New carpet and Corvette seat upgrade by Jims88
Started on: 05-25-2015 09:27 PM
Replies: 10 (1356 views)
Last post by: Jims88 on 05-31-2015 12:30 PM
Jims88
Member
Posts: 268
From: Kalamazoo MI
Registered: Jul 2011


Feedback score: (1)
Leave feedback

Rate this member

Report this Post05-25-2015 09:27 PM Click Here to See the Profile for Jims88Send a Private Message to Jims88Edit/Delete MessageReply w/QuoteDirect Link to This Post
I purchased carpet from ACC and thought I would post how I went about installing it and sharing some of the challenges I ran into along the way. After doing a search on carpet install/upgrades, I ended up combining different ideas and experiences from other members. Thank you all for your posts.

Here is a picture of the cutpile carpet and the OEM Fiero carpet.


I spent the extra $$ for the "Mass Backing" and I'm glad I did because it more closely resembles the OEM backing.
The Mass Backing measured with a micrometer was slightly thinner than the OEM carpet.
Here is picture showing the new carpet on the left with the extra backing and the extra carpet I purchased for the door panels, far right, with no mass backing.


Some tools I ended up using and the 5/8" hole saw not shown.


I sharpened a 5/8" steel tube to cut around the seat studs.


I carefully pealed off the OEM foam rubber backing and reinstalled it on the floor pan with a couple tacks of spray adhesive.
The green arrows, are pointing to what did NOT come with the new carpet, I was a little disappointed about that.


I used the old carpet as a template to mark out hole locations for reference only, to help remind me where to look for cut outs,
using a white grease pencil/china crayon to mark with.


Reinstalled the carpet and marked around the parameter for the second cut, the mass backing had clumps of flashing that needed to be trimmed at various places, in order for it to lay flat.


I ground a sharp point on some screws to punch through the carpet where needed, then marked the locations with a paint marker to be drilled out latter with the hole saw. I did the same thing to locate the seat belt hole.


This is the vertical trim piece behind the seat which covers the seat belts, the plastic tab is very close to the edge of the trim and I almost notched the carpet back to far on my first attempt.


I just cut a slit for the one on the other side.


Here is another spot that required a little more trimming to get this gray panel to sit flat.


The carpet has 1/2" chute on the bottom for extra sound deadening, I had to remove some of it around the E-Brake area, in order for the plastic trim to align and set correctly. Also about half of the trim screws were stripped out. I was able to go up 1 screw size to get them to hold, but on this one I had to use a tinnerman spring nut to repair the oversized hole.


Cutting around the seat bolt studs. I had to lay on the seats, in order to get the seat studs to poke through far enough to start the nuts on the studs. Because of the extra 1/2" of chute on the bottom side of the carpet. The tube I sharpened didn't work as well as I had hoped, it helped to define the location of the studs but I ended up removing the drill from the hole saw and using it to cut the holes.


One thing leads to another, in this case my center counsel had to be repaired where the vinyl started to shrink and pull away from the plastic framing. I used Loctite Vinyl,Fabric&Plastic glue to repair it. Other members seem to have good luck using Gorilla Glue.


I cut back some of the foam rubber as other members suggested before gluing and it worked well, I think it may also provide a little more space, if the vinyl continues to shrink.


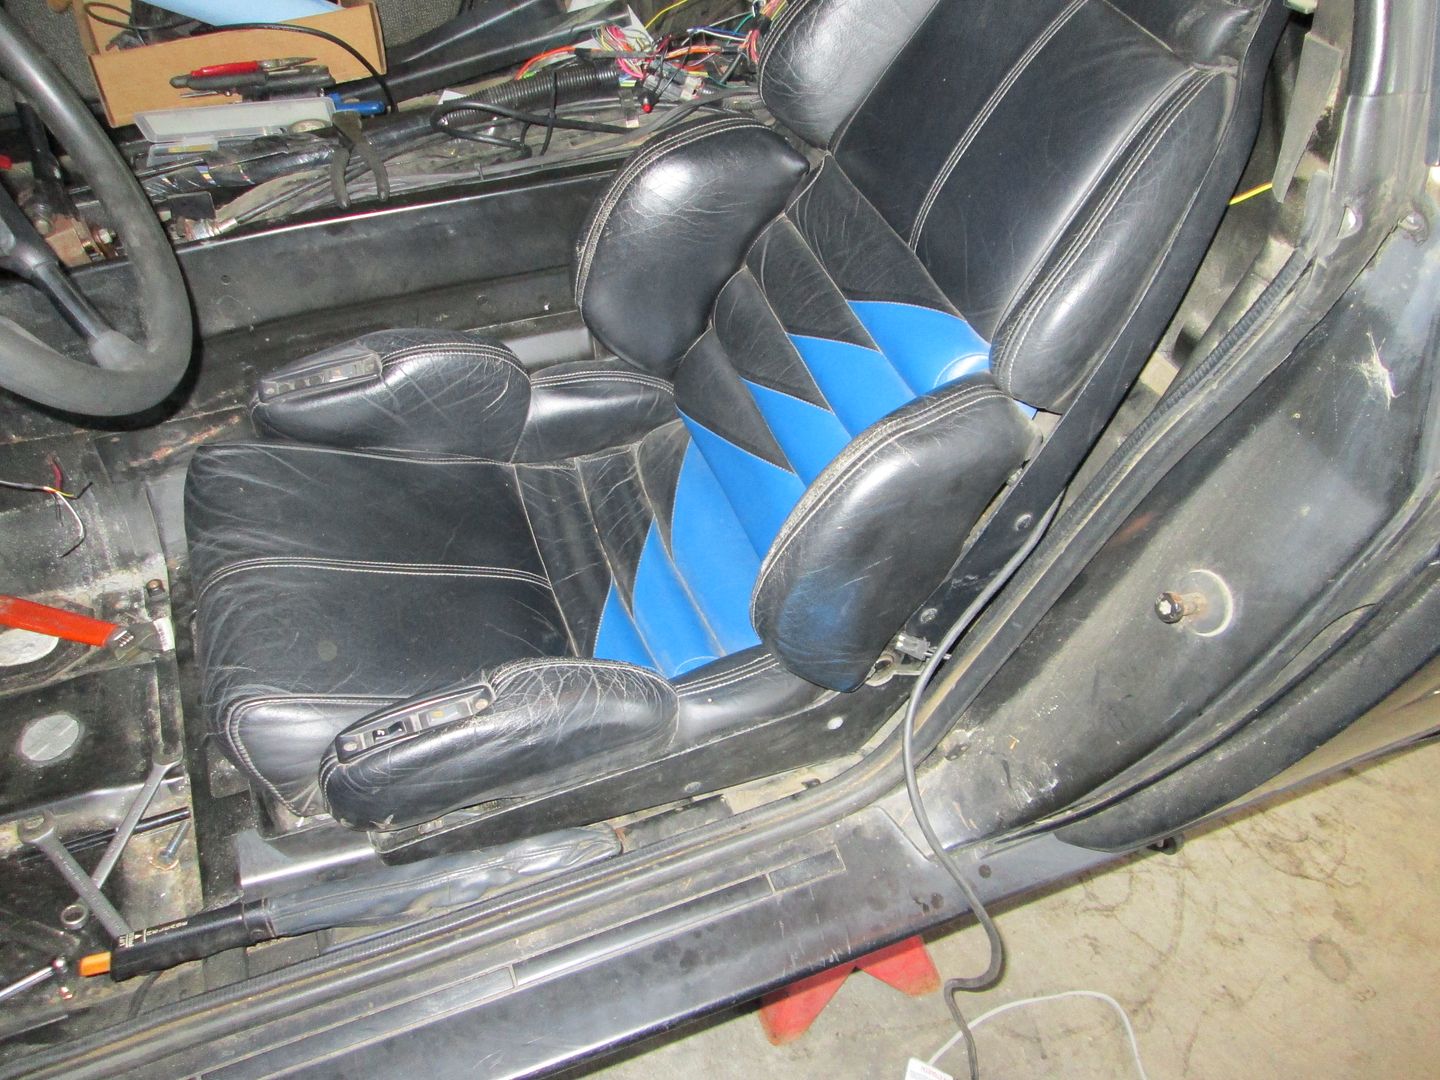
The Corvette seats were set next to the Fiero seats to see if there would be any major problems installing them, other members have installed these seats so I know they will fit.


I laid a piece of particle board over the seat studs and used a dead blow hammer to mark the stud locations, drilled
then bolted the board to the Fiero seats rails before unbolting them.


I couldn't use the C4 seat rails because the were just to high compared to the Fieros.


The bottom of the C4 seats had a rectangular flare that had to be trimmed off, in order for the aluminum adaptor plates to sit flat.
The glass fibers from cutting on these was irritating to my skin, so I used some latex gloves.


I had to install a flat head Allen screw in this location for the pneumatic pump, to clear the aluminum adaptor plate.


For the adaptor plates I purchased a 6'x2-1/2"x 1/4" aluminum plate and cut two pieces 16-3/4" long.
I used flat head 5/16" alen bolts to secure them to the fiero rails. I set the C4 seat on the adaptoe plates and used my framing square to get the 1/2" offset away from the tunnel, then marked the C4 seat bolt hole locations and drilled.


The front bolt for the C4 seat is 1-3/8" forward of the Fiero front seat bolt location.


I drilled and tapped 1/2" fine thread bolts for the back set of C4 mounting holes, then I ground down the bolts to provide clearance for the Fiero seat rail rollers.
In hind site it would have been easier to make studs from flat head allen bolts.


I tapped into this large red wire and installed a 15 amp fuse at each seat.


I wanted the like new passengers seat for the drivers side, so I mounted the passengers seat on the drivers side.

[This message has been edited by Jims88 (edited 03-01-2018).]

IP: Logged
PFF
System Bot
Monkeyman
Member
Posts: 15810
From: N. Wilkesboro, NC, USA
Registered: Nov 1999


Feedback score: (5)
Leave feedback


Total ratings: 182
Rate this member

Report this Post05-25-2015 10:26 PM Click Here to See the Profile for MonkeymanSend a Private Message to MonkeymanEdit/Delete MessageReply w/QuoteDirect Link to This Post
Way too much fabrication than I'm capable of but nice job. What's the advantage to using C4 seats? Since you can't use the 'Vette seat adjusters/frames, what electronics do you get to keep? Heat? Lumbar? Bolster adjustments? Can you still flip the seat back forward? Or is all that work just for "show"? (They ARE nice looking seats.)
IP: Logged
FieroMaster88
Member
Posts: 7680
From: Mattawan, MI
Registered: Nov 2000


Feedback score:    (43)
Leave feedback


Total ratings: 168
Rate this member

Report this Post05-25-2015 10:32 PM Click Here to See the Profile for FieroMaster88Send a Private Message to FieroMaster88Edit/Delete MessageReply w/QuoteDirect Link to This Post
Great work! Those seats look like they will have good support in the corners.

------------------

88 Coupe: 2.0L Turbo 4 Cylinder, W2A, T25 Turbo, water/meth injection
84 Indy #64: Restoration Project
01 BMW 525i: daily driver

IP: Logged
Shho13
Member
Posts: 916
From: Jersey
Registered: Feb 2014


Feedback score: (5)
Leave feedback

Rate this member

Report this Post05-25-2015 10:37 PM Click Here to See the Profile for Shho13Send a Private Message to Shho13Edit/Delete MessageReply w/QuoteDirect Link to This Post
Wow man, nice work! Looks fantastic!!! I actually have a similar carpet that showed up earlier this week waiting to be installed!

Auto Custom Carpets is the brand I went with, is the one you installed in your car the same brand?

Those Vette seats look great in there too!

------------------
"Discord"
Red 1988 GT under restoration!

( ͡° ͜ʖ ͡°)

IP: Logged
fieroguru
Member
Posts: 12128
From: Champaign, IL
Registered: Aug 2003


Feedback score:    (45)
Leave feedback


Total ratings: 258
Rate this member

Report this Post05-25-2015 11:39 PM Click Here to See the Profile for fieroguruSend a Private Message to fieroguruEdit/Delete MessageReply w/QuoteDirect Link to This Post
I have had these C4 seats in a Fiero since 2005. First car they were in, I cheated and mounted them with stands through the floor and cut all the stock seat mounting studs off. For their install in the LS4/F40 car, I cheated again and just bent up some 16ga "C" sections. 4 holes to bolt them to the floor using the factory studs, 4 holes to mount the seats (remove the cushion to install the seat mounting bolts). No adjustment for other drivers, but didn't require any mods to the seat either.

Even without the tracks you can still have the power recline, lumbar and side bladders functional. My rear barely fits with them deflated, so I "lightened" my seats and removed all that extra stuff. The seats have a latch on the rear headrest to tilt the seat forward.

They are very supportive and hold you in place in the corners. Depending on mounting method, they also can end up being lower than the stock seats for more head room or to better accommodate a chop.


Here are some pics from my fire extinguisher install for LS Fest:

[This message has been edited by fieroguru (edited 05-25-2015).]

IP: Logged
IanT720
Member
Posts: 1703
From: Whitmore Lake, MI
Registered: Sep 2010


Feedback score:    (9)
Leave feedback

Rate this member

Report this Post05-26-2015 12:53 PM Click Here to See the Profile for IanT720Send a Private Message to IanT720Edit/Delete MessageReply w/QuoteDirect Link to This Post
Looks like you did a very good job! But why not use the opertunity to add sound deadening? I just finished getting my interior back together, after ripping it apart to add a bunch of sound proofing. All I can say is wow!! The doors shut like a Cadillac, more like a vault door actually. It's so quiet, it's almost weird. Like being in a sound proof chamber. My new stereo sounds amazing now too.

Used my own mix of lizard skin and sprayed the whole interior
Used some peel n stick rolls that add mass to the thin metal and cancel vibrations
Used 80lbs worth of MLV Vinyl, it has foam backing to "de-couple" the metal from the interior, and sound proof thick vinyl.
I also stuffed the dashboard and b pillars with poly fill, and this increased the sound quality 10x and gave great bass too, since the speakers now act like they are in a box, not free air.

------------------
1987 Fiero GTX 3800 Turbo... My Build, ST3 Cam, Lowered, Wheels, and pics enjoy!//www.fiero.nl/forum/Forum1/HTML/089483.html

IP: Logged
Jims88
Member
Posts: 268
From: Kalamazoo MI
Registered: Jul 2011


Feedback score: (1)
Leave feedback

Rate this member

Report this Post05-26-2015 10:59 PM Click Here to See the Profile for Jims88Send a Private Message to Jims88Edit/Delete MessageReply w/QuoteDirect Link to This Post
Thank you for the compliments guys

 
quote
Originally posted by Monkeyman:

Way too much fabrication than I'm capable of but nice job. What's the advantage to using C4 seats? Since you can't use the 'Vette seat adjusters/frames, what electronics do you get to keep? Heat? Lumbar? Bolster adjustments? Can you still flip the seat back forward? Or is all that work just for "show"? (They ARE nice looking seats.)


The Fiero has sporty looks and the C4 seats help to carry on the sporty theme to the interior. So yes for some show too and maybe it will add some value to the car.
The pneumatic lumbar and electric side bolsters are functional, but I had to repair both pumps to get them operating. These seats didn't have the heat option and the seats can flip forward.

 
quote
Originally posted by Shho13:

Wow man, nice work! Looks fantastic!!! I actually have a similar carpet that showed up earlier this week waiting to be installed!

Auto Custom Carpets is the brand I went with, is the one you installed in your car the same brand?

Those Vette seats look great in there too!.)


Yes I used Auto Custom Carpets too, with the extra backing I noticed the mold line is pretty accurate when I did the first trial fit.
Since I was learning as I go, it took me a couple of days to complete.


IP: Logged
trivet
Member
Posts: 783
From: Bay City, MI
Registered: Apr 2012


Feedback score:    (7)
Leave feedback

Rate this member

Report this Post05-28-2015 01:42 PM Click Here to See the Profile for trivetSend a Private Message to trivetEdit/Delete MessageReply w/QuoteDirect Link to This Post
I looks like you had a LOT better luck with the carpet from Auto Custom Carpet than I did. I ordered a set from them over a year ago, and finally got the time this spring to do the install. When I pulled it out of the box, I was shocked at the poor quality of the material and the fact that the “custom fit” was far from it.
There were “burn” marks in the carpet in several places, (looks like it was melted through) and it took hours for me to cut and trim it to fit. Still unhappy with it.
Since I sat on it for over a year it’s too late for me to return it or even complain to the manufacturer (my fault), but I wanted to make sure anyone who ordered from them thoroughly inspect the carpet RIGHT AWAY so they don’t get screwed over like I did.

------------------
Tim
'87 GT
Med Red Metallic
81K miles
Bay City, MI

IP: Logged
Dennis LaGrua
Member
Posts: 15144
From: Hillsborough, NJ U.S.A.
Registered: May 2000


Feedback score:    (13)
Leave feedback


Total ratings: 328
Rate this member

Report this Post05-28-2015 07:59 PM Click Here to See the Profile for Dennis LaGruaSend a Private Message to Dennis LaGruaEdit/Delete MessageReply w/QuoteDirect Link to This Post
Nice write up and great job. Thanks for sharing . Carpet replacement is becoming more common. I'll be doing one shortly and will note the tips. .

------------------
" THE BLACK PARALYZER" -87GT 3800SC Series III engine, custom ZZP /Frozen Boost Intercooler setup, 3.4" Pulley, Northstar TB, LS1 MAF, 3" Flotech Afterburner Exhaust, Autolite 104's, MSD wires, Custom CAI, 4T65eHD w. custom axles, HP Tuners VCM Suite.
"THE COLUSSUS"
87GT - ALL OUT 3.4L Turbocharged engine, Garrett Hybrid Turbo, MSD ign., modified TH125H
" ON THE LOOSE WITHOUT THE JUICE "

IP: Logged
solotwo
Member
Posts: 5374
From: Grand Rapids, MI. USA
Registered: Jun 2002


Feedback score:    (9)
Leave feedback


Total ratings: 62
Rate this member

Report this Post05-28-2015 10:46 PM Click Here to See the Profile for solotwoSend a Private Message to solotwoEdit/Delete MessageReply w/QuoteDirect Link to This Post
Nice write up and it looks great.
IP: Logged
Jims88
Member
Posts: 268
From: Kalamazoo MI
Registered: Jul 2011


Feedback score: (1)
Leave feedback

Rate this member

Report this Post05-31-2015 12:30 PM Click Here to See the Profile for Jims88Send a Private Message to Jims88Edit/Delete MessageReply w/QuoteDirect Link to This Post
Sorry to hear about the poor quality of your carpet, when you pay hard earned money for something, the last thing you expect to receive is crap
Good advice to make sure to inspect it on arrival, especially if its going to be stored for awhile.


quote
Originally posted by trivet:

I looks like you had a LOT better luck with the carpet from Auto Custom Carpet than I did. I ordered a set from them over a year ago, and finally got the time this spring to do the install. When I pulled it out of the box, I was shocked at the poor quality of the material and the fact that the “custom fit” was far from it.
There were “burn” marks in the carpet in several places, (looks like it was melted through) and it took hours for me to cut and trim it to fit. Still unhappy with it.
Since I sat on it for over a year it’s too late for me to return it or even complain to the manufacturer (my fault), but I wanted to make sure anyone who ordered from them thoroughly inspect the carpet RIGHT AWAY so they don’t get screwed over like I did.


IP: Logged
PFF
System Bot

next newest topic | next oldest topic

All times are ET (US)

Post New Topic  Post A Reply
Hop to:

Contact Us | Back To Main Page

Advertizing on PFF | Fiero Parts Vendors
PFF Merchandise | Fiero Gallery | Ogre's Cave
Real-Time Chat | Fiero Related Auctions on eBay


Copyright (c) 1999, C. Pennock