It's been a busy couple weeks , I put the dash HVAC aside to work on getting all the car wiring cleaned up and getting the new electrical wiring run at the same time. #### I hate wiring !!!! I've decided I needed to install a sub panel up front in the trunk area for all the additional relays and fuses associated with the additional lights on the grill . Also needed to run wiring for the switches in the centre consul, and the new pushbutton shifter and paddle shifter . At the same time I decided I wanted to install a push button start , boy did I ever open up a can of worms, but its done and everything works great. Pictures to come soon.
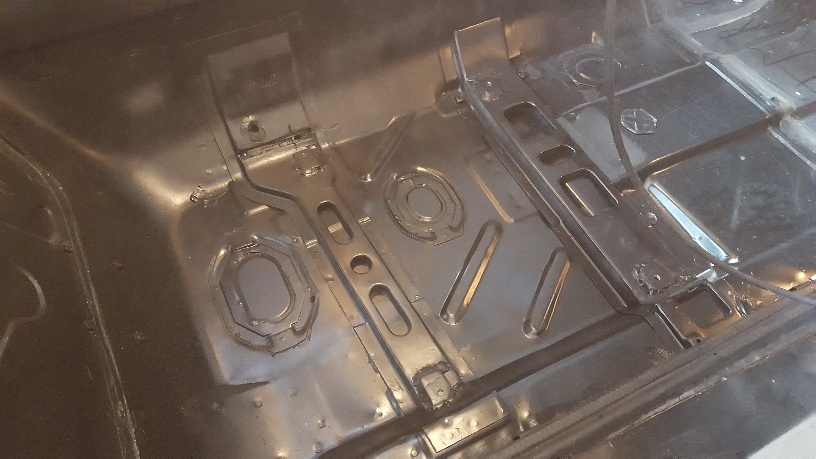
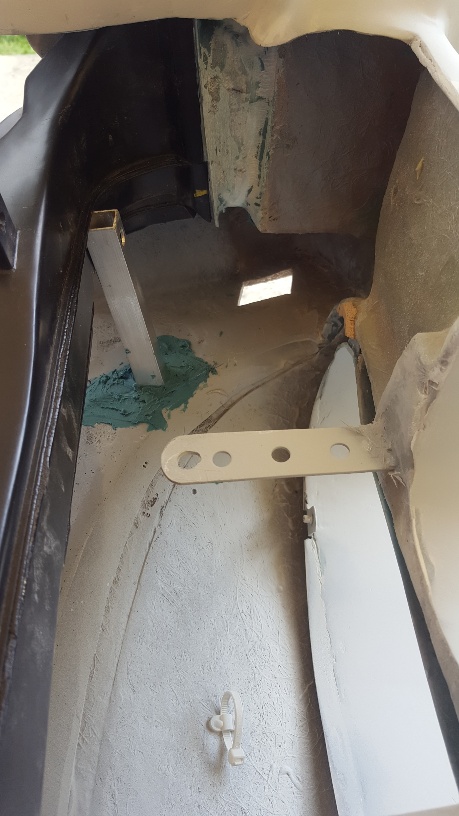
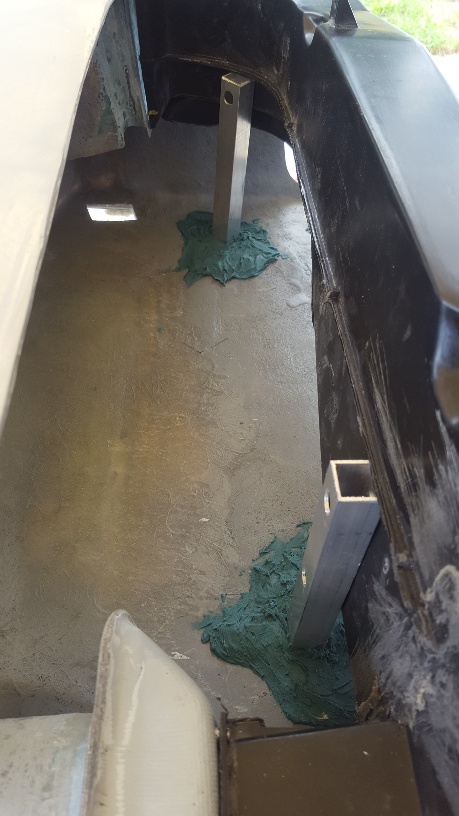
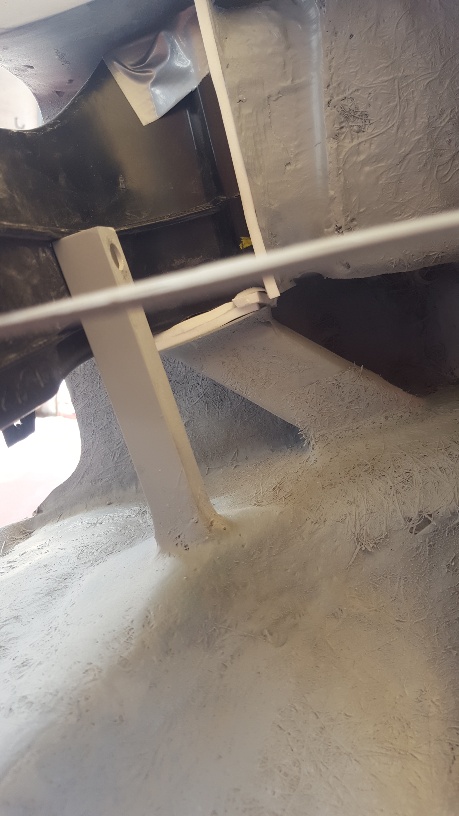
So the next step was to get the seat mounting points finalized and finish welding them hard points, that completed I cleaned it all up ]
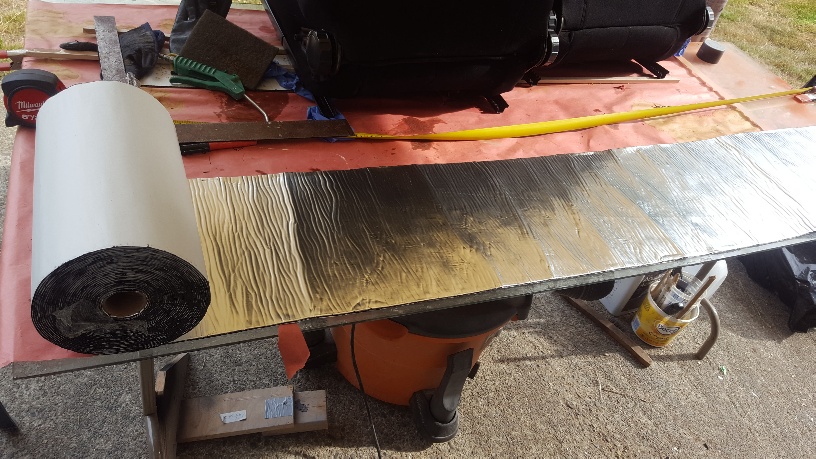
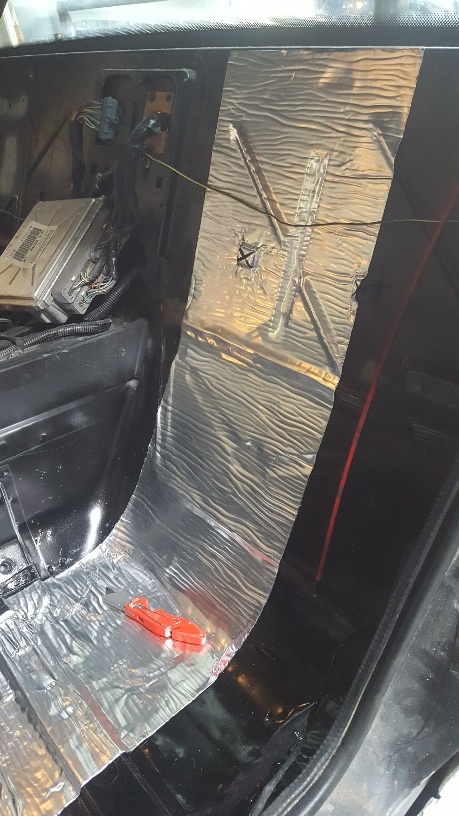
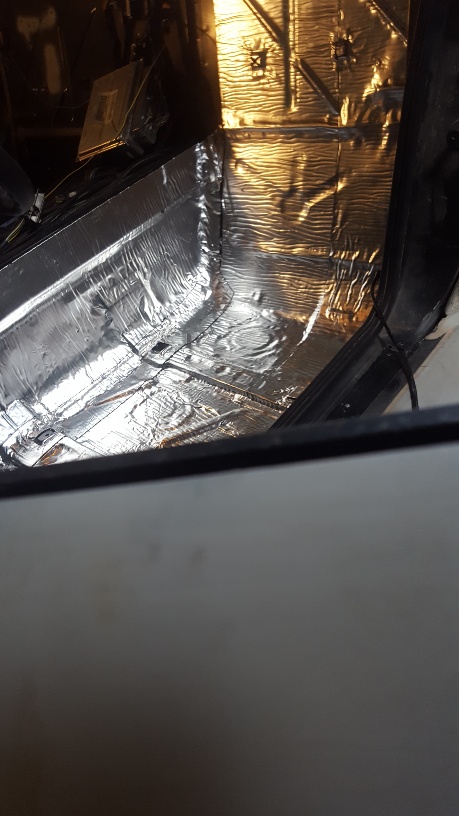
once that was done I am covering all the interior with Butyl sound deadening , in me 88 3800SC my wife hated how loud it was and always complained so seeing this one also has the 3800SC I'm hoping this will quite it down bit. I'm also going to put a quieter exhaust in in a couple months.
I did have a chance to do a carbon fibre Aux panel and instrument panel , They came out pretty good still need to wet sand to get the finish I want. Then need to cut out the hole for all the gauges. Again I'll post pics soon. It seems the more I get done the more I need to do.
Wayne
[This message has been edited by dobie1 (edited 07-24-2019).]
Here are a few pics from the build on the Carbon Fibre instrument panel, its still needs another coat of expo resin and then a polish but I'm quite happy with the layout.
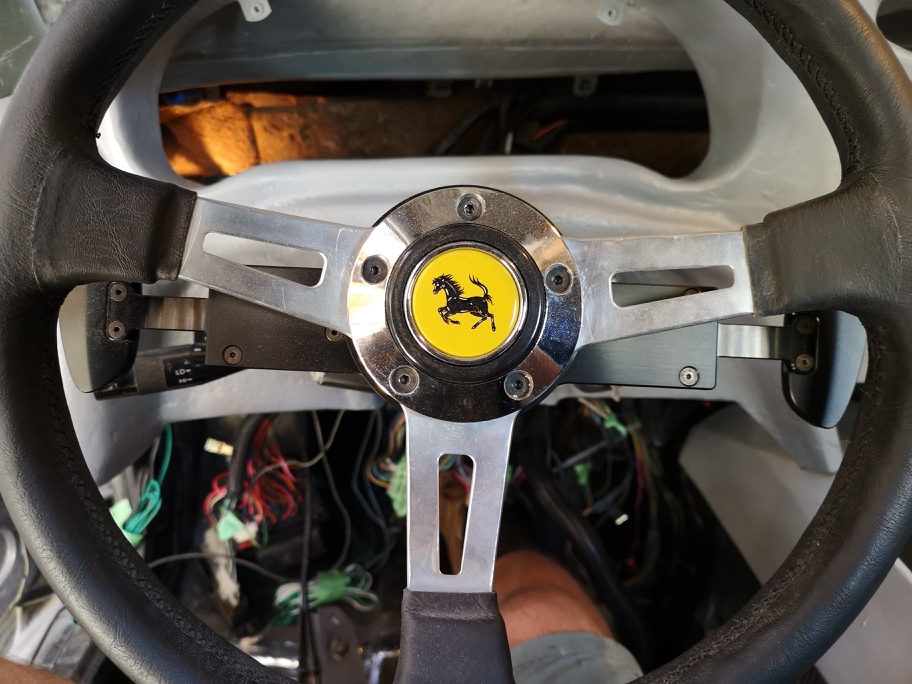
I also got the Paddle Shifter installed works amazing ,I can hardly wait to get the car on the road!!!
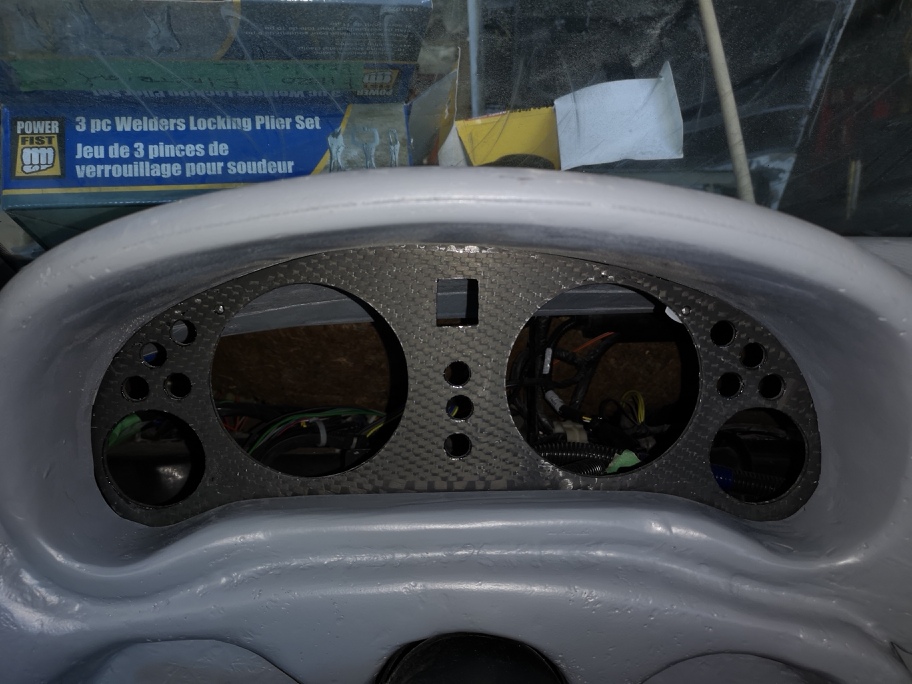
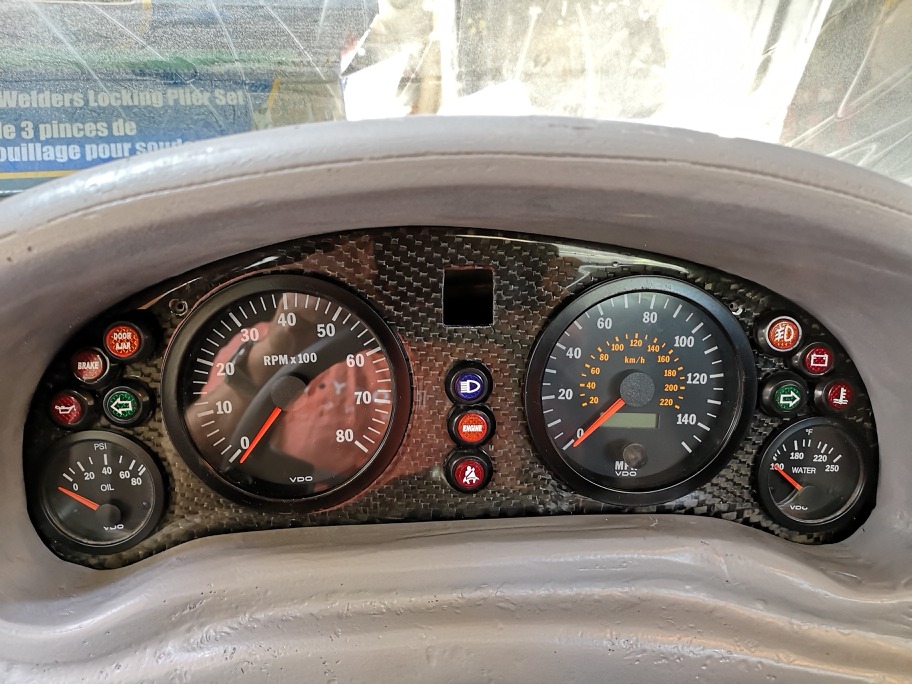
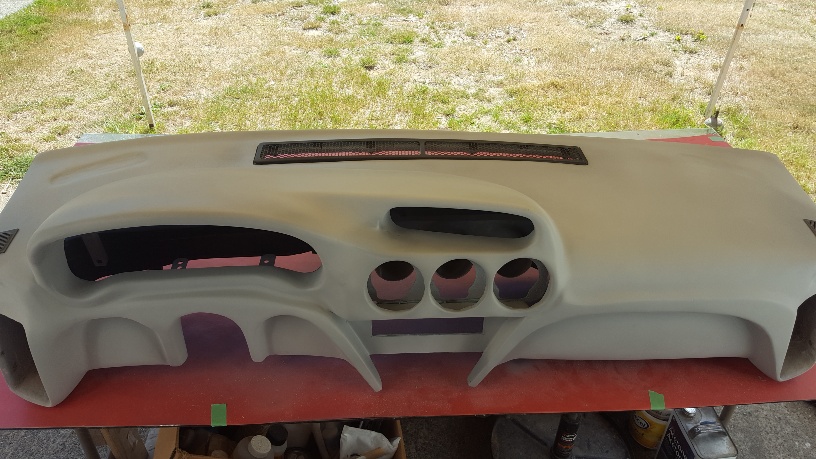
Had my son and his new wife home for a week so not too much was completed during his visit. I did get a chance to wet sand and polish the dash today, I mounted all the gauges and advisory lights in the dash , getting the wiring bundles ready for the multi pin plugs. The square hole in the middle is where the gear indicator gauge will mount .
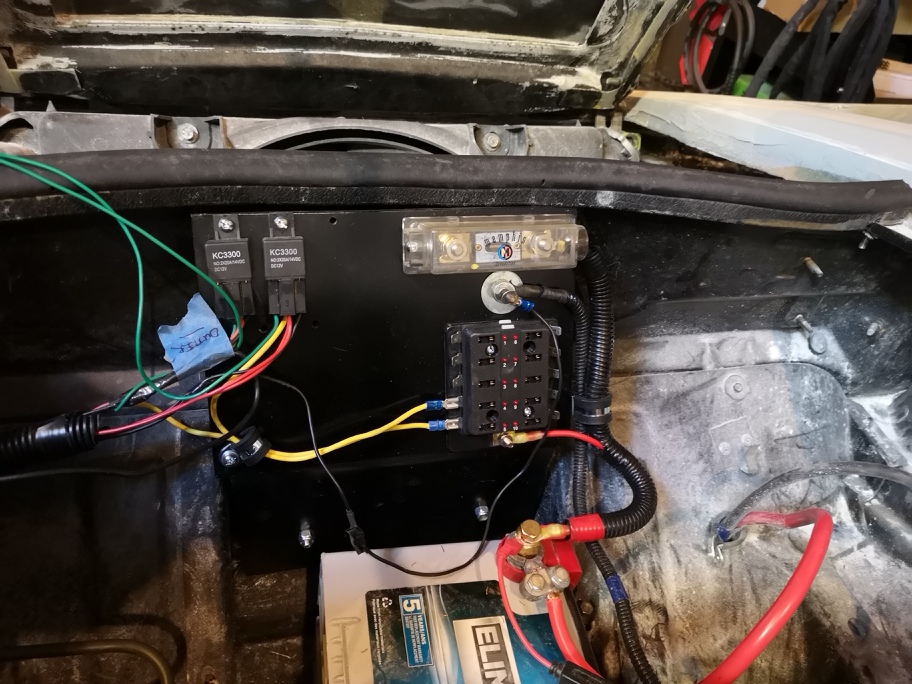
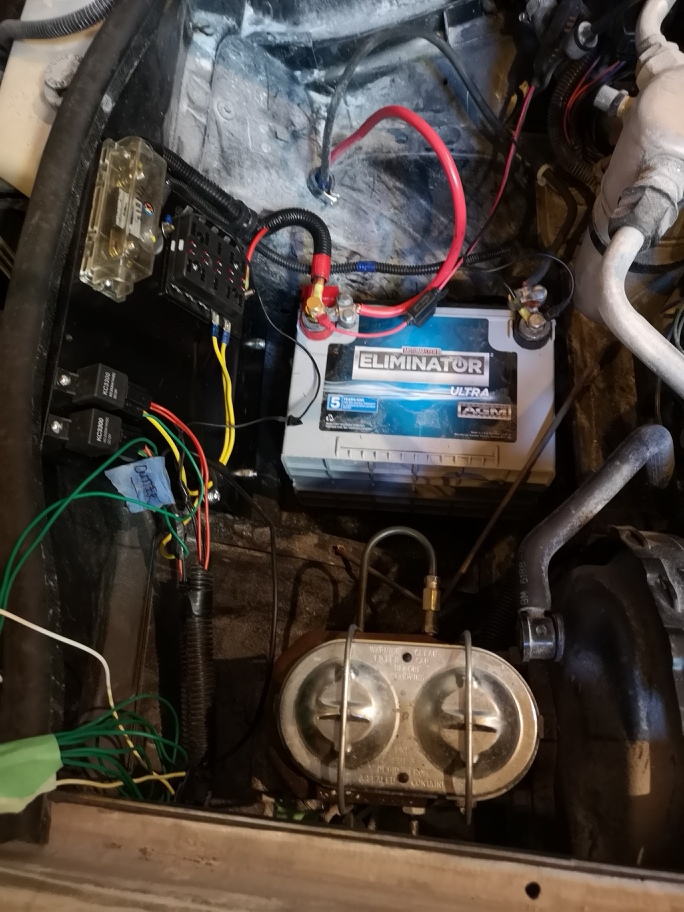
I got the new electrical panel completed and mounted upfront happily it turned out great.
Wayne
[This message has been edited by dobie1 (edited 08-05-2019).]
Had my son and his new wife home for a week so not too much was completed during his visit. I did get a chance to wet sand and polish the dash today, I mounted all the gauges and advisory lights in the dash , getting the wiring bundles ready for the multi pin plugs. The square hole in the middle is where the gear indicator gauge will mount .
I got the new electrical panel completed and mounted upfront happily it turned out great.
Wayne
Isn't it fun wiring in all the new VDO instrumentation! It took quite a while for me to do so when I installed the F355 interior and new instrumentation. I wish you well on this project.
Thanks Patrick Yes I love the carbon fiber look , I’m hoping the center console turns out the same way . I’m planning on starting the layup soon. Wayne.
Thanks Nelson I really wasn’t sure I was going with the VDO gauges, I actually have a full set of Ferrari 550 gauges that I was planning to use but I couldn’t find any information on the drive / sending units weather they are square wave , triangle or what ever for them . So decided to go the VDO route. They are nice and pretty straight forward. Did you connect directly to the Fiero wiring or run separate wires.
Thanks Nelson I really wasn’t sure I was going with the VDO gauges, I actually have a full set of Ferrari 550 gauges that I was planning to use but I couldn’t find any information on the drive / sending units weather they are square wave , triangle or what ever for them . So decided to go the VDO route. They are nice and pretty straight forward. Did you connect directly to the Fiero wiring or run separate wires.
Wayne
I used a Pisa wiring harness for the gauges and then tapped the harness into the Fiero wiring. A bit less messy this way. BTW, I have forgotten which engine you are using on this build but you should note that if it is a 3800 SC Series III, There were a few tricks necessary to get the tach functional.
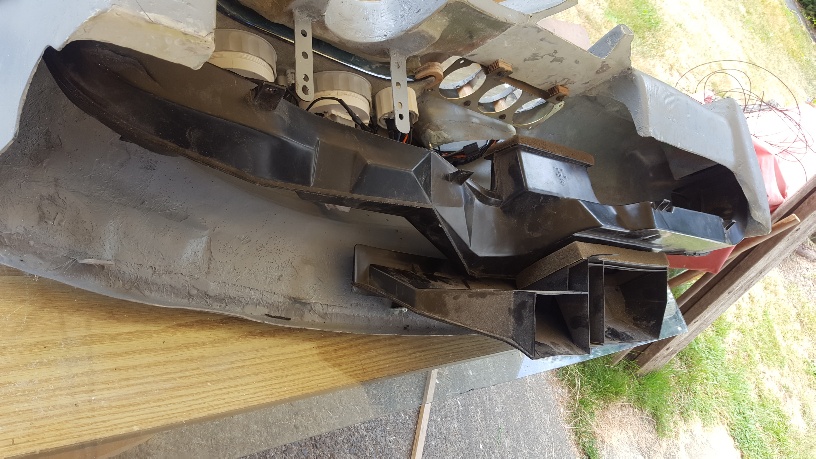
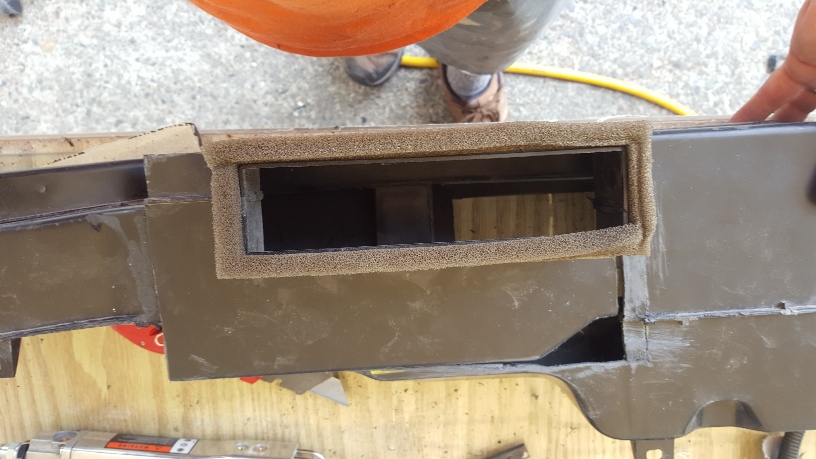
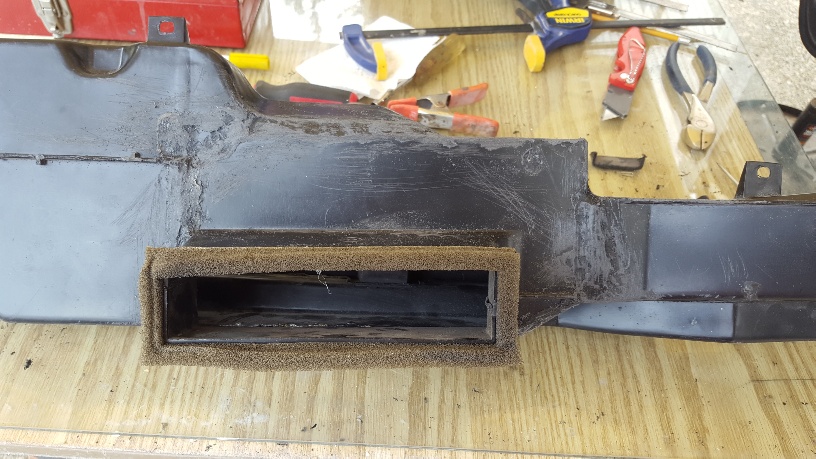
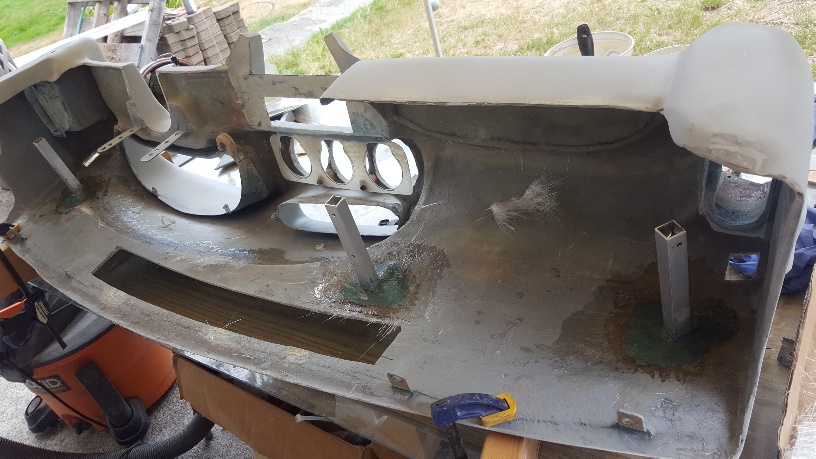
I made more progress on the dash today working on the HVAC build, I finally have narrowed the design down to using the stock Fiero ducting and redesigning as needed to work with the vents I used in the build. Which will make fitment to the blowers unit much easier.
I trial fit everything to come up with the changes on the centre vents then found that it needed to drop down about 3'' to allow for where the stereo will need to go. I cut that section from the ducking and flipped it around to the bottom and then plastic welded it back together came out exactly where I needed it. Next I'll need to build a adapter with 3 tubes to connect everything.
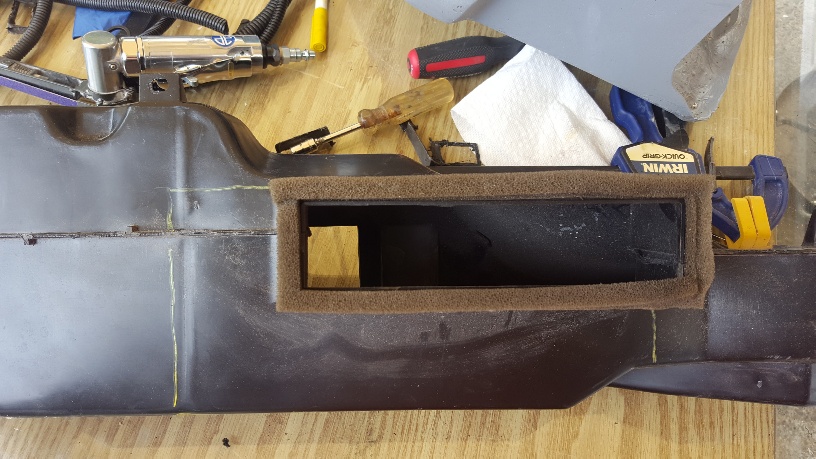
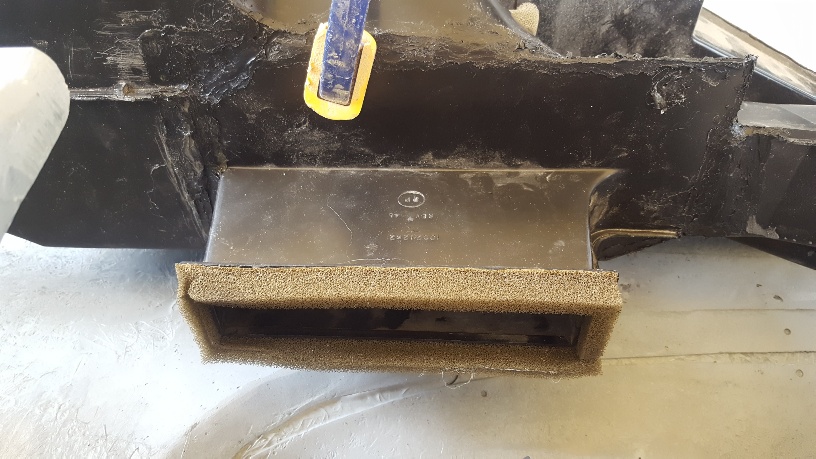
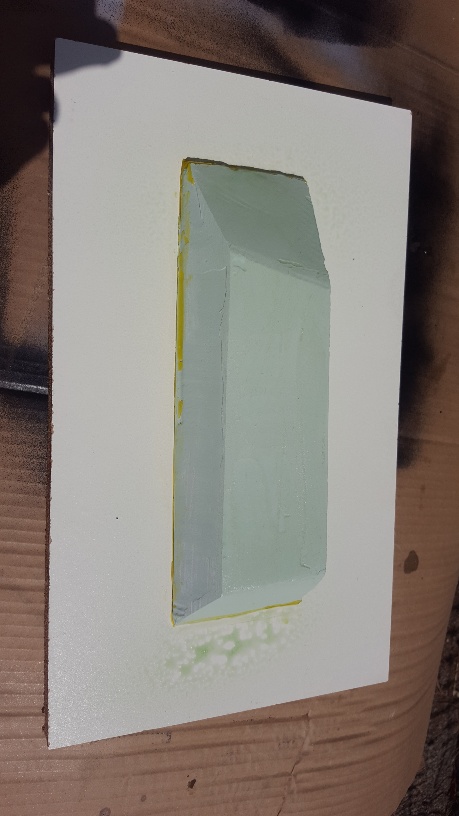
I marked in yellow the area to be cut out.
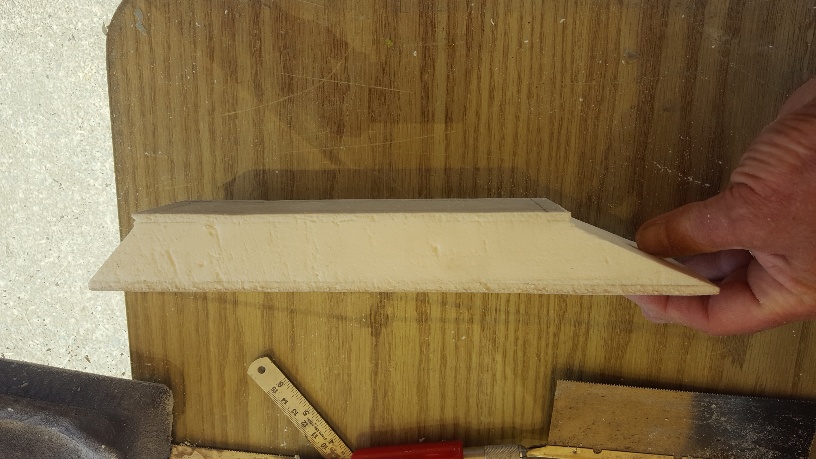
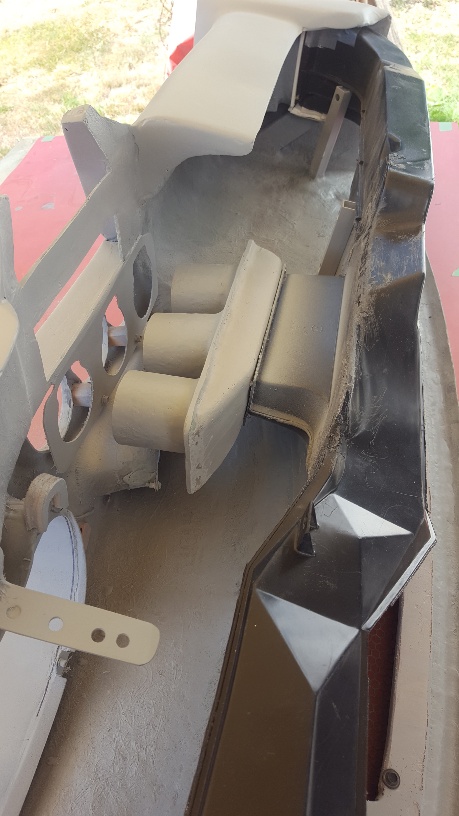
I test fit all the pieces to make sure it will work
tomorrow I'll start working on the side vents and windscreen vents.
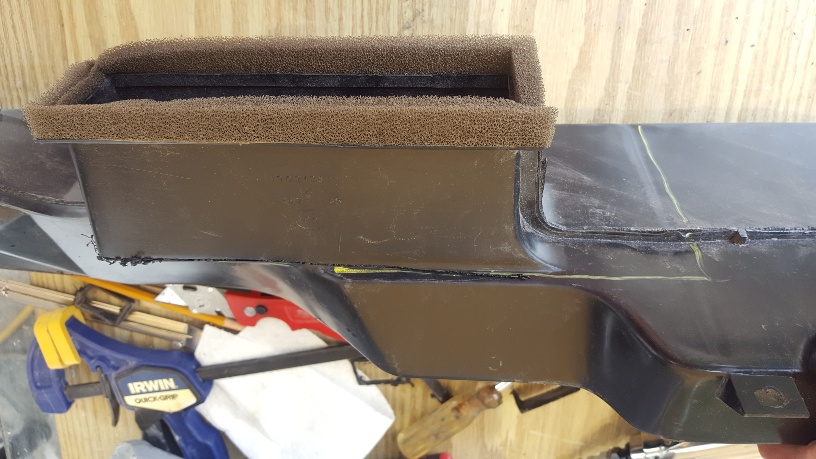
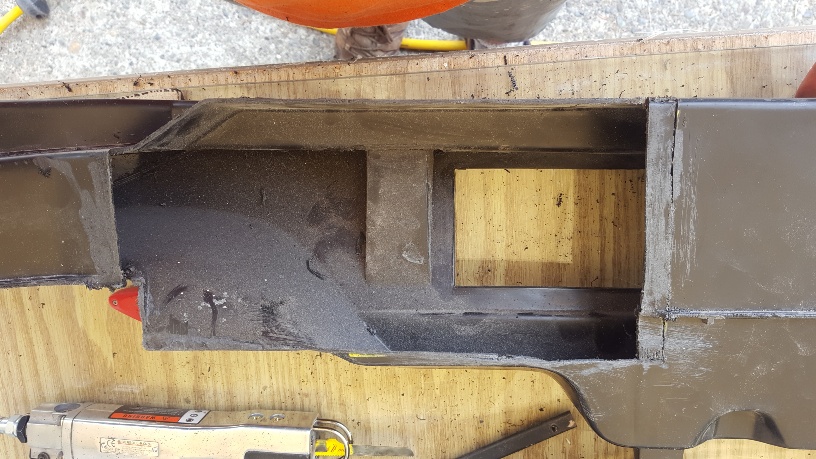
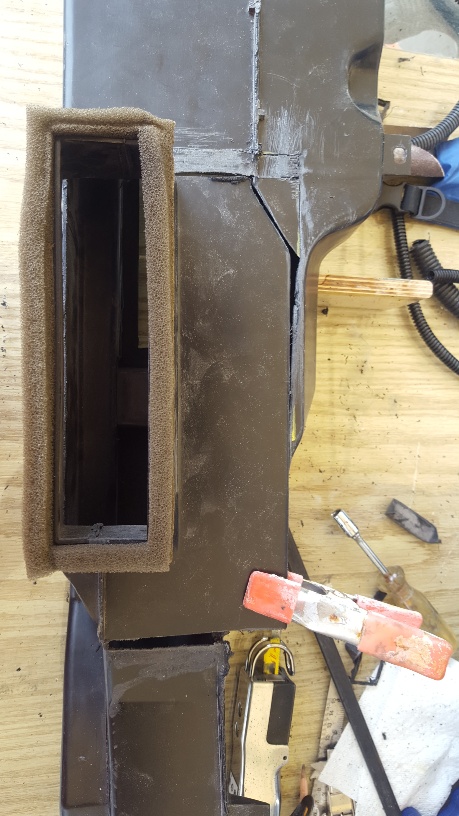
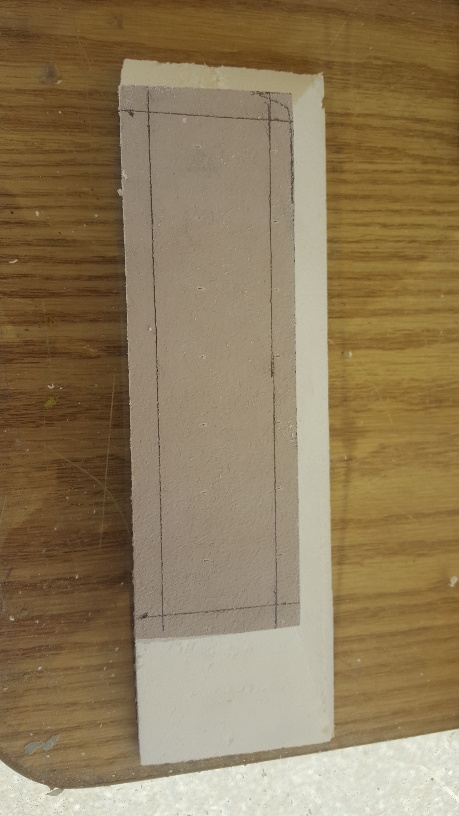
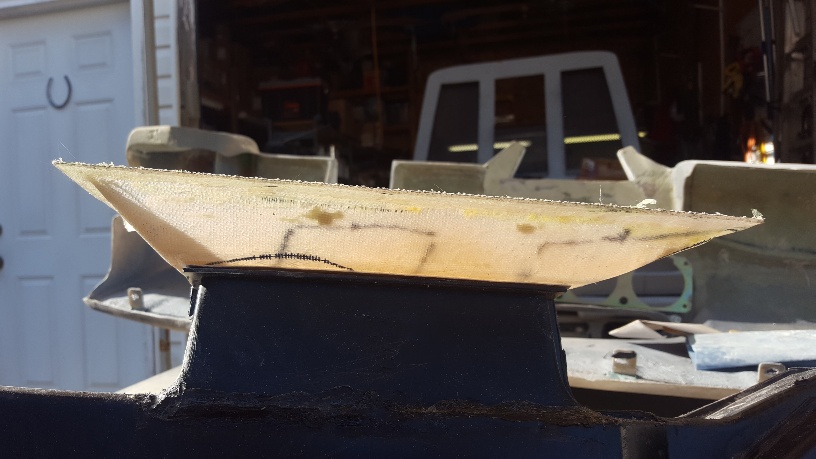
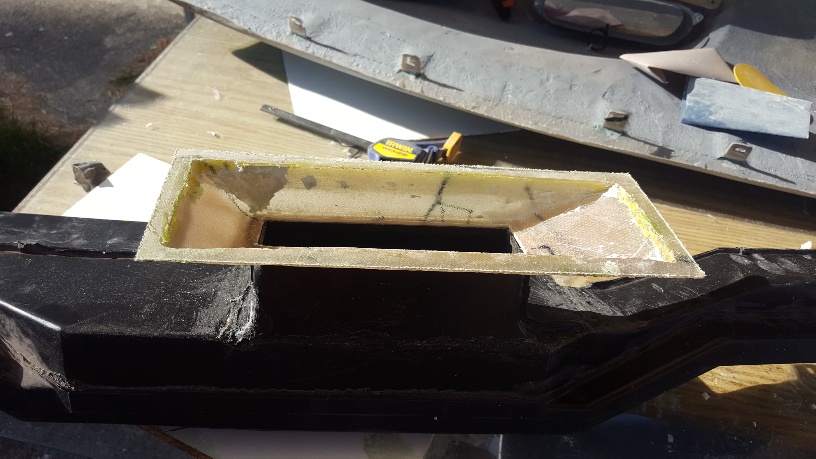
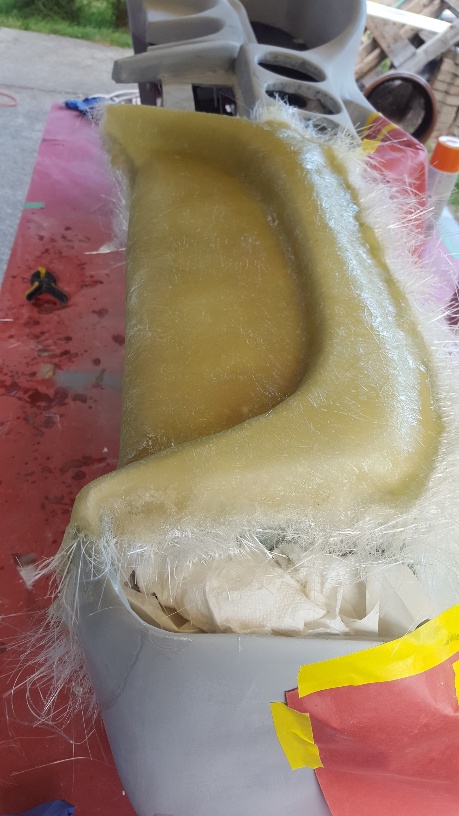
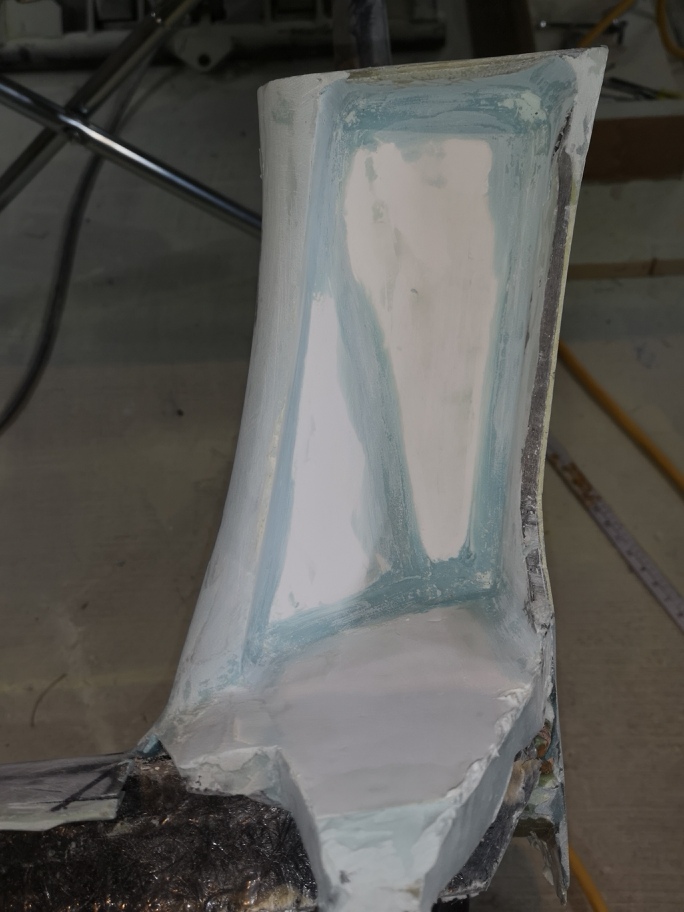
So while working on the flanges for the side vents I decided I also need one for the centre vent. Dimensions going from 1 1/2" by 7" single centre Fiero vent to the 3 1/2 by 11 5/8' triple vent. I scratched my head for a bit I grabbed some foam and came out with the flange that will make the transition work. I finished the foam with bondo and fibreglassed it. I still need to build a triple plate for the vent hoses to attach to, that plate will mount to the flange opening, the other end will be riveted to the Fiero vent opening.
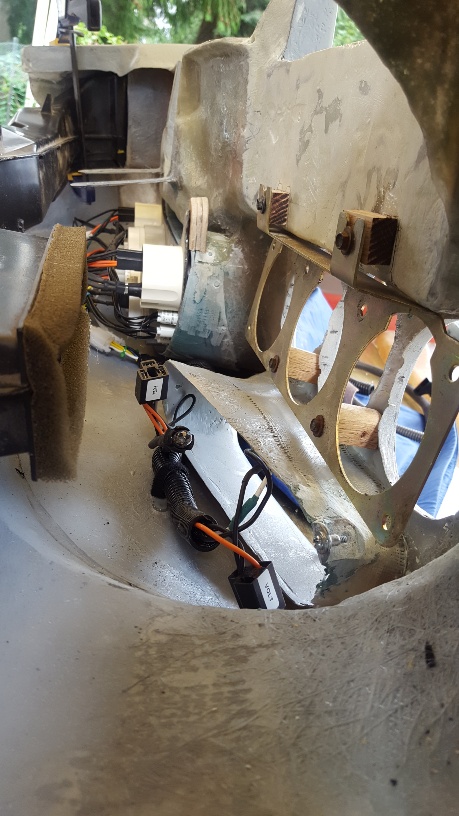
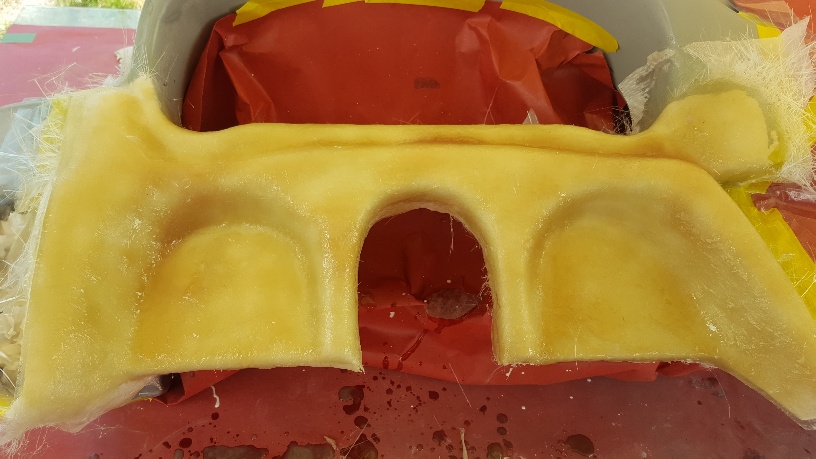
I have been busy finishing the dash construction , it was a lot of work but have everything finished and am now ready to start the upholstering and Carbon Fibre caps. I used the Fiero OEM windscreen and dash defrosters, I had to make ducting to direct the air from the stock outlets to the new exit points, flanges allow for closed cell gaskets.
I have started making the two molds that I will use to produce the Carbon Fibre caps.
Sourmash thanks for the comments, I was fortunate to have had a really good mentor “Don O.” helping me through this build when I had questions. The least I can do is to pass on what I’ve learned along the way.
Ted “Sage” it is unfortunate that PB did that now I guess unless I go through the entire thread and replace all the pics all most will see is the finishing of the build. The vacuum equipment is something I’ve been acquiring for a couple years now , I knew If I could learn the techniques you can produce some nice finished pieces. When I do the molds of the car ,my plan is to build them so I can vacuum bag all the body panels. And Hopefully produce a carbon fibre body for myself. I’m really going full time at this build right now trying to get it completed in a year, I turn 68 his month and I want to be able to enjoy driving my dream.
Thanks everyone for the comments, and visiting the build.
The weather she is a changing, having to move indoors due to the rain we have been getting lately. It is Slowing down the curing time on the layups. Don O stopped by today and I had him give me some feedback on doing the molds for the car as well as a second opinion on the dash finishing. From Don’s visit today more changes coming to the build ,some changes to the centre console. Due to the fact that RiceBurner is no longer building the HVAC controller for the 355 interior it kinda left me in a bit of a quandary. So I'm now moving to a electronic LED screen to control all the HVAC and switches. More to come as I build it out.
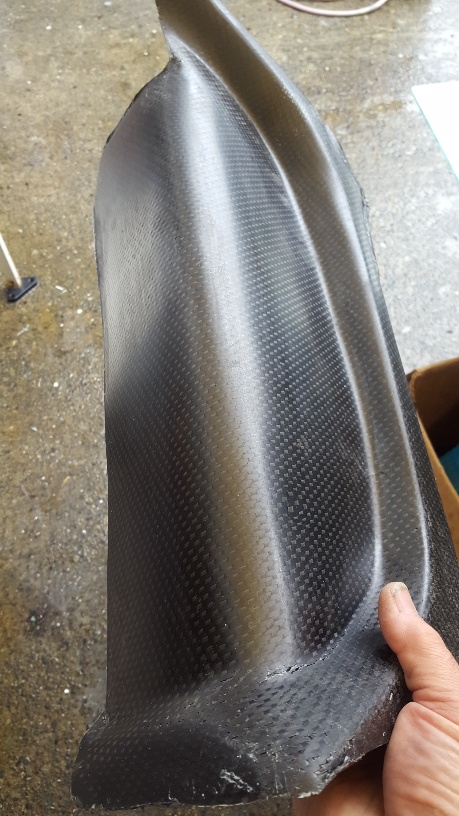
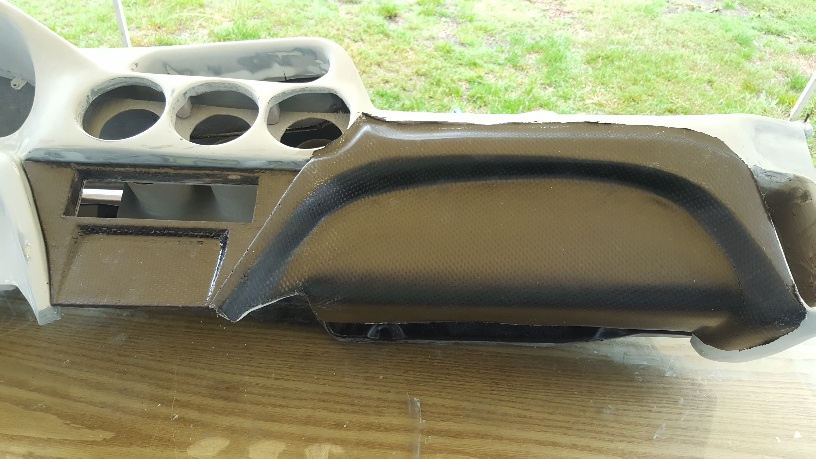
For this update I produced the first Carbon Fibre Cap for the dash still needs lots of work but proof of concept is complete. I also did a test fit for the stereo plate and location of the future LED screen is built but needs finishing as well.
enjoy Wayne
[This message has been edited by dobie1 (edited 09-23-2019).]
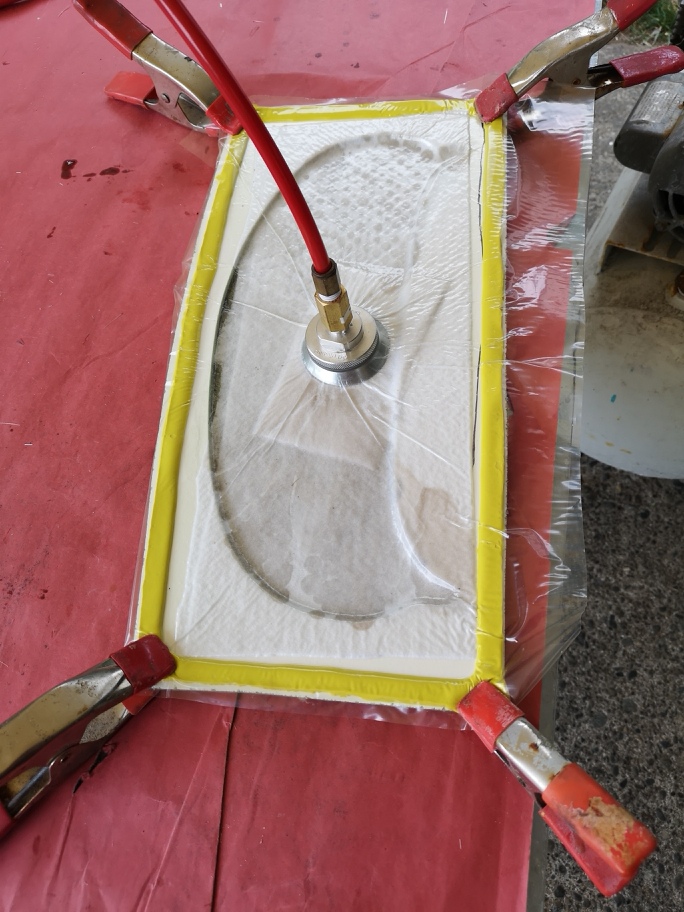
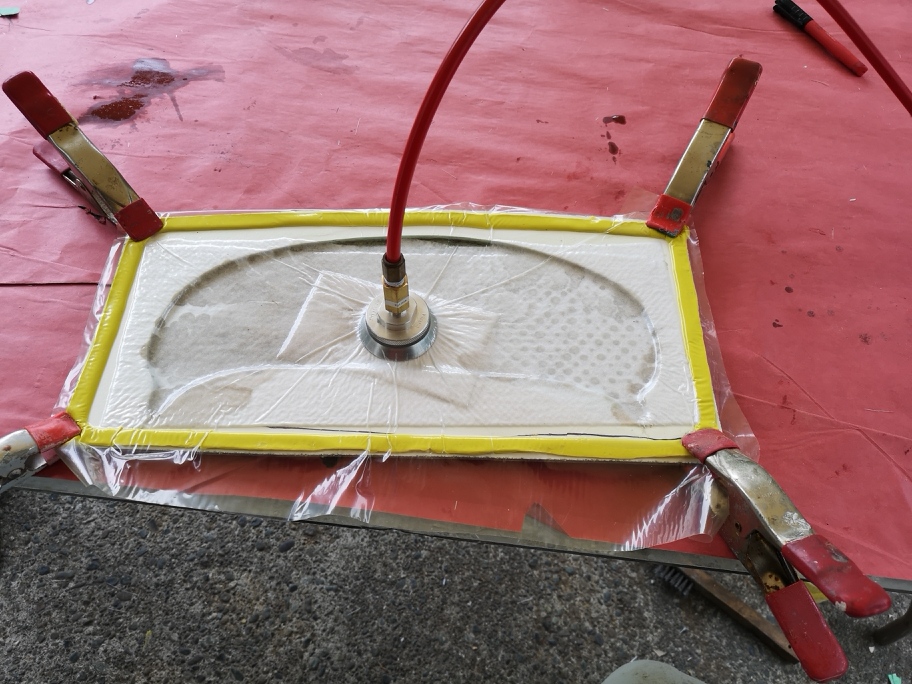
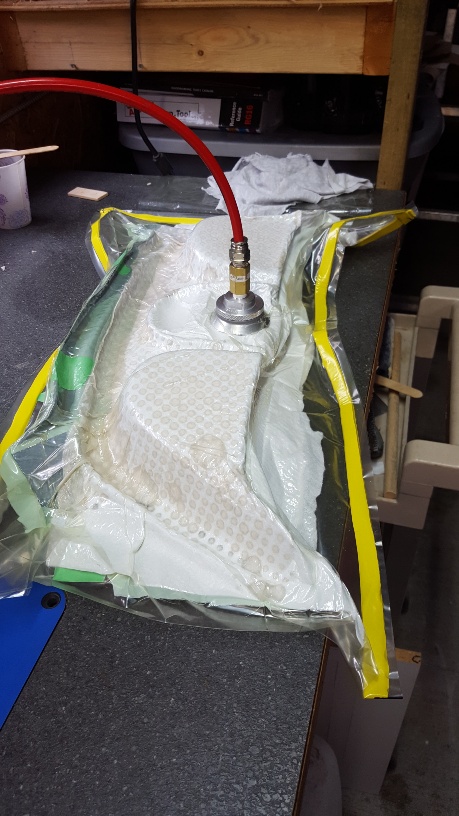
I took a couple shots today of the last Carbon Fibre dash cap for the drivers side. This is the vacuum bagging operation , it will stay under vacuum for 24 hours for the full cure. I though some of you might be interested.
First let me say thanks for the comments LEEEZARD and Toddster. Always appreciated.
I have been busy working on the interior trim pieces, I did a carbon fibre wrapped on the overhead roof light console, this for me was a proof of concept in wrapping all the A & B pillar trim pieces it is a lot of work getting to a 600 grit Finnish, I now know it works....The main problem is the temps have dropped below recommenced gel and catalyst setting temps for epoxy resin, so I'm on hold till spring with finishing those pieces. I did come up with the final centre console carbon fibre switch panel design, I produced the mold and built the part i'm happy with the clean look and how it will flow into the dash. I'm working on the electronic transmission pad placement as well as window switches, Power mirrors, fog lamp switch and USB ports. Don O. has been working on the HVAC LED controller, writing the language between the panel and a Arduino which will use the existing wiring to control the vent doors and fan as well as AC. with out Don graciously volunteering I would have been stuck possibly having to use the OEM Fiero controller and reworking the dash to accommodate. So I'm setting aside finishing the interior other than finishing the dash as time permits.
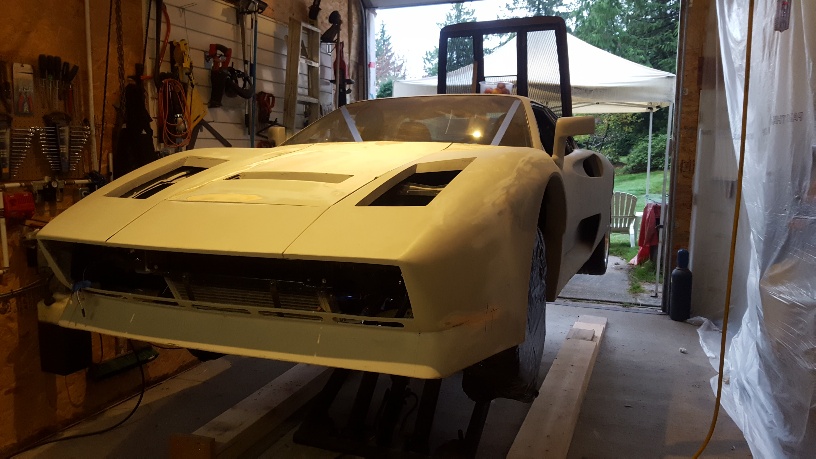
I've moved on to finishing the body getting it ready to build the body molds. Im hoping to have it in paint by the end of January weather permitting i'll post some pics later.
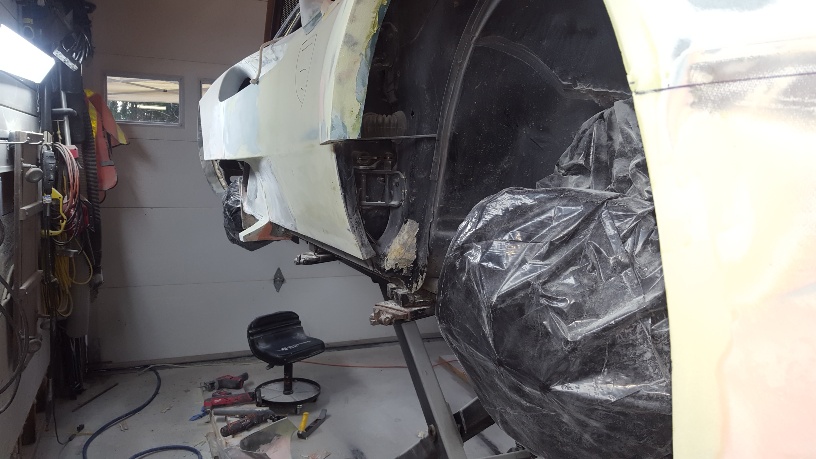
I hung plastic sheeting along the one side of the shop to help to keep all the dust contained in the one area as much as possible. I know this is going to be messy!!!! Having the car lift sure is making working on the body much easier.
The picture of the carbon fibre switch panel is to large right now i'll post one later. Im still working on the placement of the switches etc.
[This message has been edited by dobie1 (edited 11-04-2019).]
Such a bummer that PB messed up all your earlier pics...this is such a great build!
quote
Originally posted by dobie1:
Ted “Sage” it is unfortunate that PB did that now I guess unless I go through the entire thread and replace all the pics all most will see is the finishing of the build.
As far as I can determine, all the Photobucket hosted images are still in place. For anyone having a problem seeing any of those images, perhaps have a look at this thread... Photobucket Fix It works wonders!
Wayne, your work is beautiful ...but it puzzles me a little why you're not posting the maximum width images allowed so that we can fully appreciate your craftmanship. Is this being done on purpose, or are you having an issue with image compression/file size?
quote
Originally posted by Patrick:
PIP requirements/restrictions are... Maximum width - 1024 pixels. Maximum file size - 300 kb.
[This message has been edited by Patrick (edited 11-06-2019).]
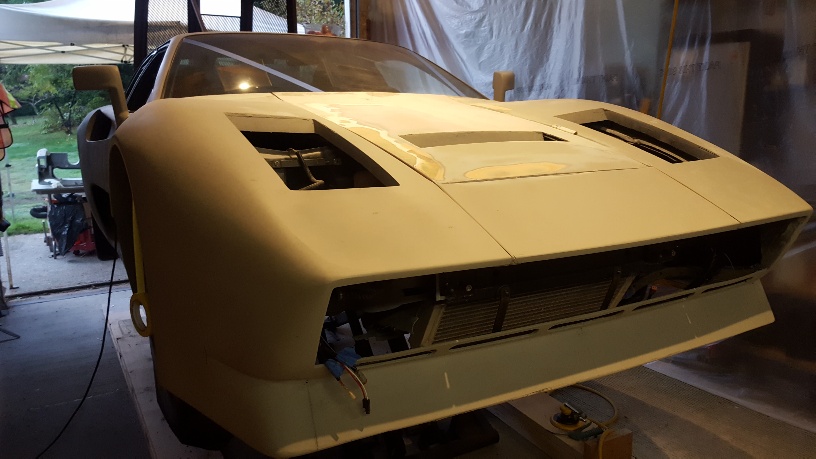
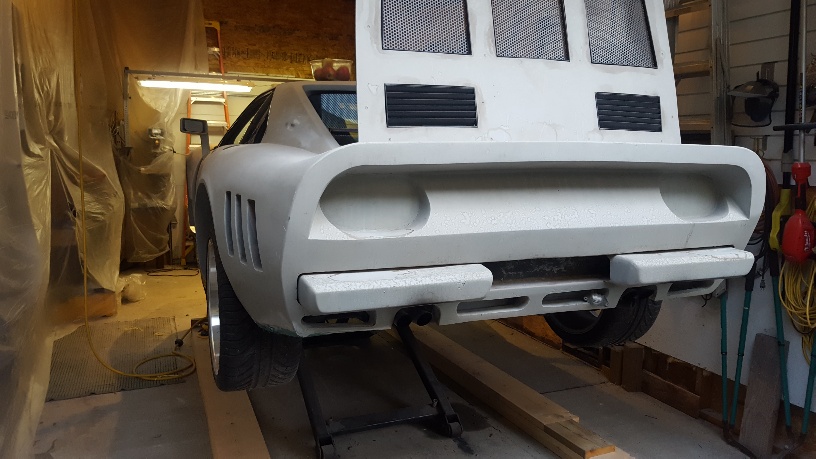
Well it has been awhile since I last posted a update, I have been very busy on the build. I have been doing a lot of body work getting the gaps for all the body panels to 3/16" and finding fixing mistakes made during the original construction of the body . Making corrections to give symmetry between the left and right sides. lots of use of the laser level to get everything level. At the time I started the project I was just wanted to get it built , but now that I am going to been making molds of the body I have to correct all the things that at the time ether didn't fit as well or needed to be done better.
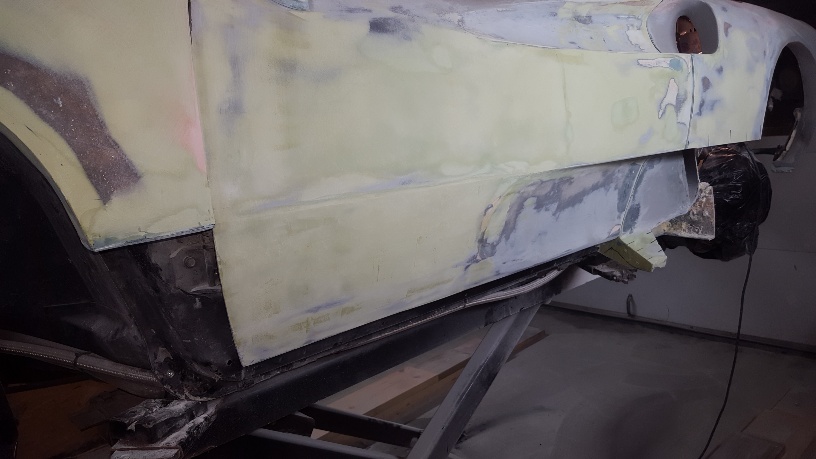
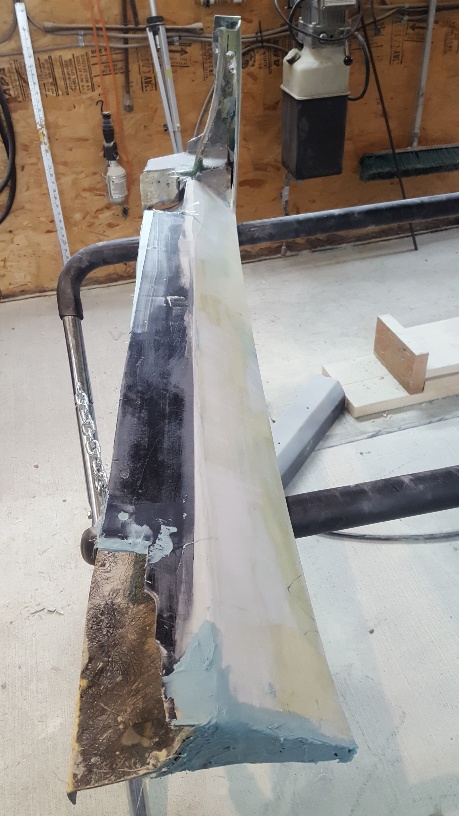
In this shot you can see the line draw down the length of the body from the rear wheel arch along the top of the lower scoop to the front fender as there is no actual body line. This shot doesn’t show it but I have cut the front wheel Arches down to 2” and cleaned them all up
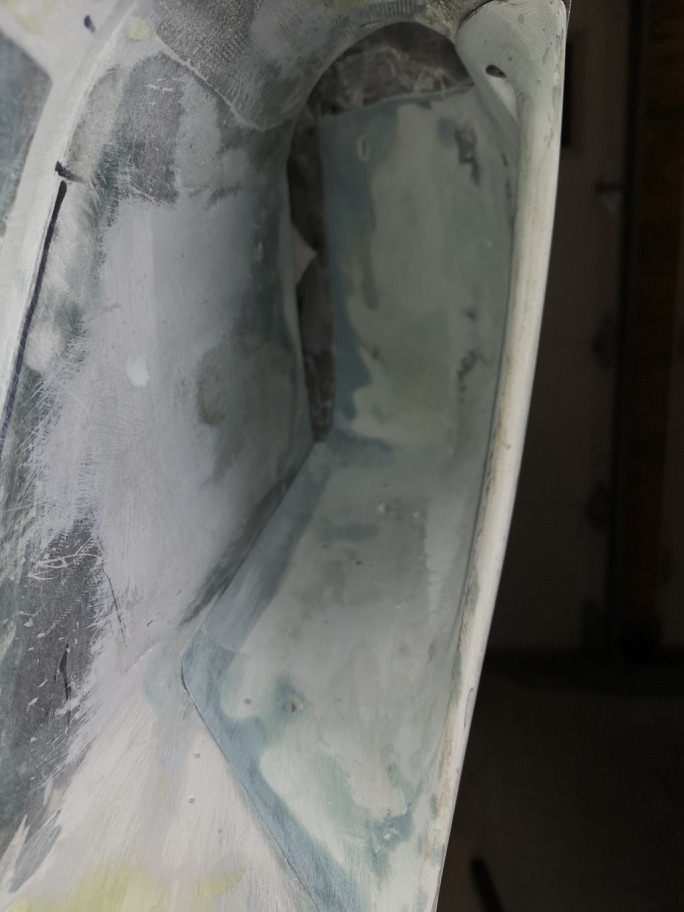
I’m a bit concerned on the Molding of the lower scoops and am now looking at cutting and building a removable panel Of the whole lower scoop giving direct access To the inner scoop for Molding as well as installing possible grills .
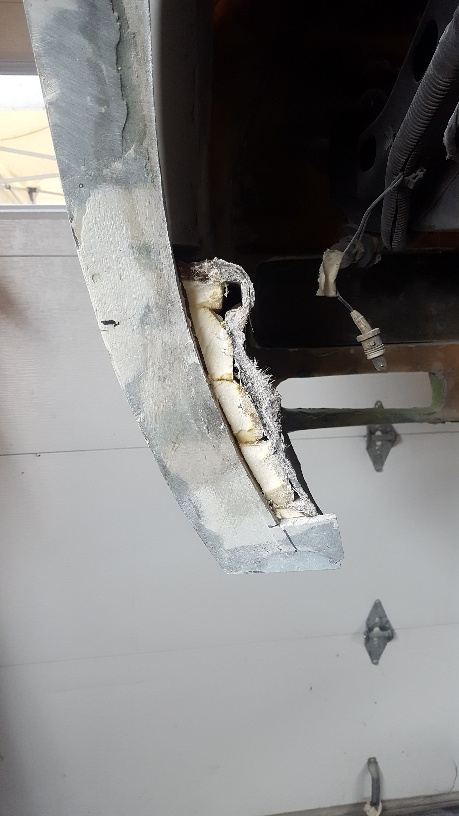
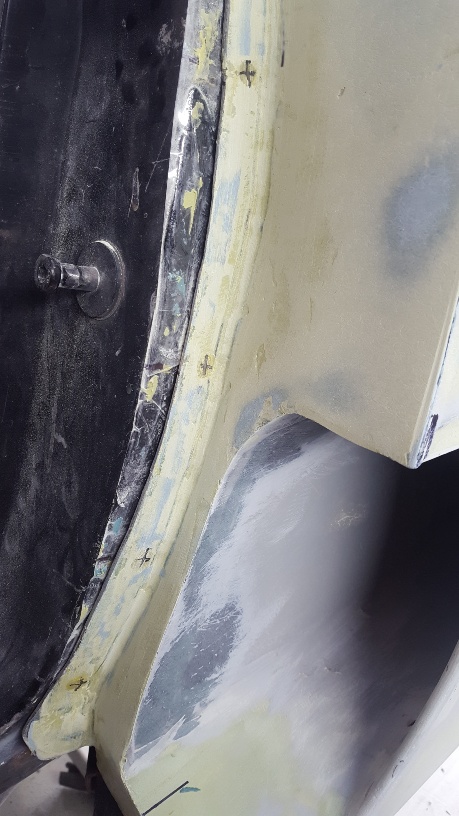
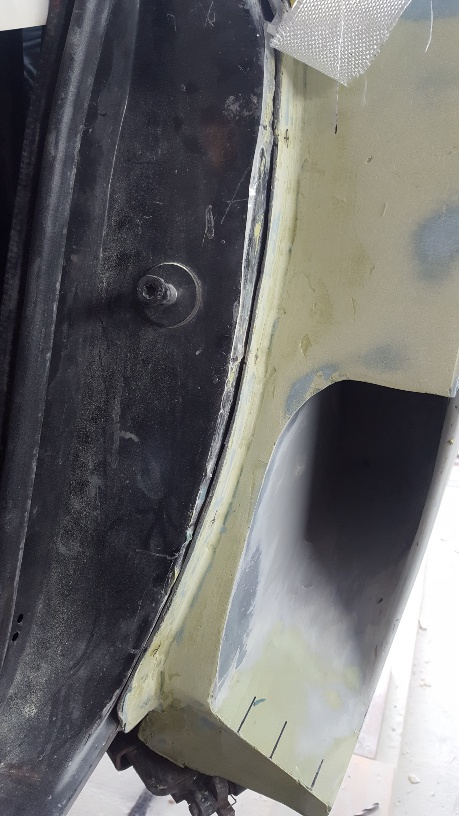
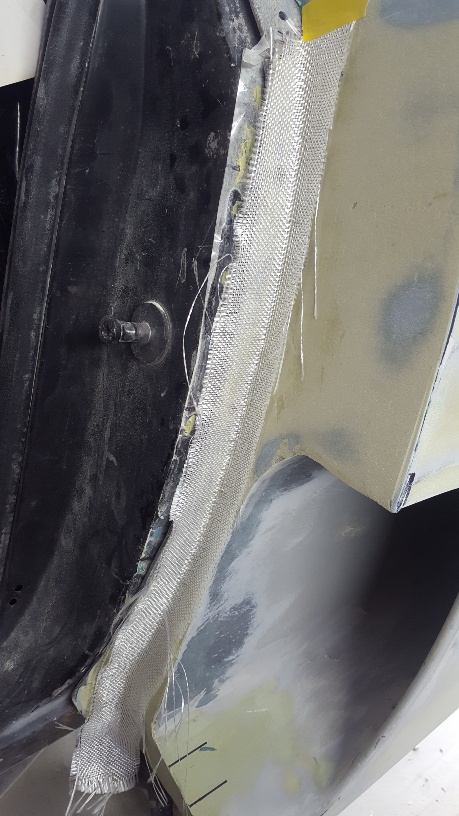
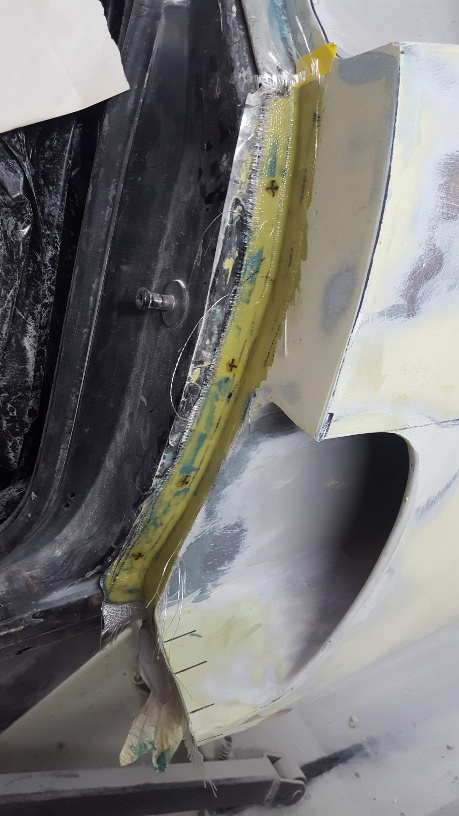
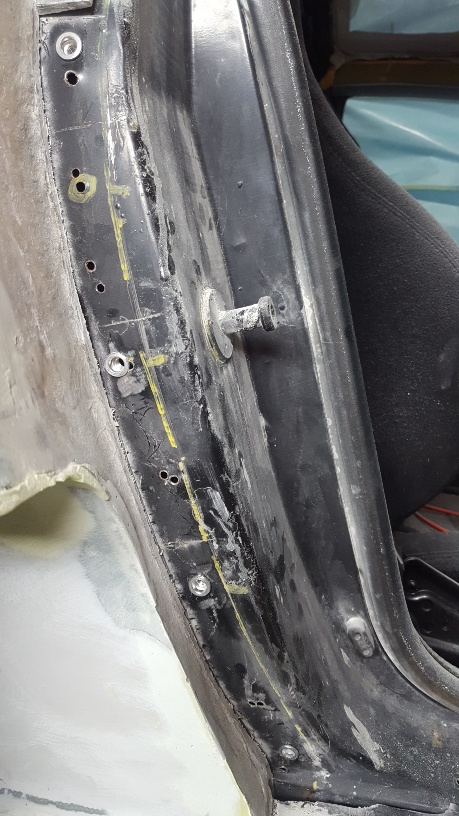
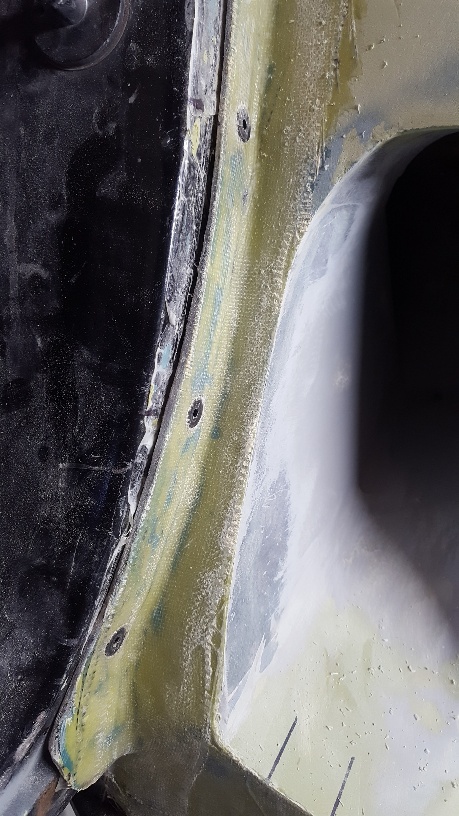
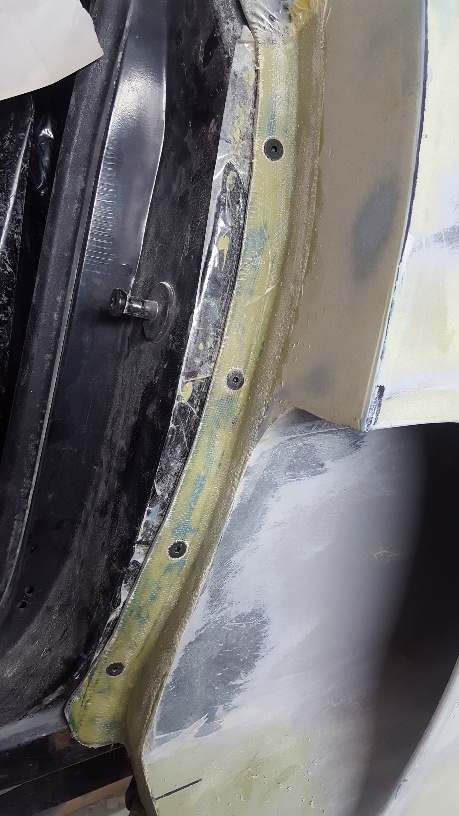
This shows a shot of the passenger side flange cut off so it can be cleaned up and re attached as shown in the other pics. I also am making permeant mounting points where it attaches to the fiero steel using Nut certs and 1/4-20 beveled flat head bolts so they will be flush with the panels and under the rubber door seal will be flat. Once I remove the rear body to Mold I’ll Tig weld all the screw holes and repaint the steel. unfortunatly At the time in was building the body I didn’t think of this. Once the flanges are all cleaned up I reattached them and refiberglass the seam with two layers of bi-axial S-cloth and then a scim of bondo to finish and sand.
all the body work is completed up to the back of the doors on both sides , I plan on having the rear completed hopefully in the next couple weeks then do a complete spray of high build primer to get ready for final sanding to 600 grit then paint for Molding. I've decided that the front end will be 5 separate pieces which results in 5 molds two fenders , spoiler , hood and fill between the fenders infront of the hood. The lower rockers are separate and the rear will be a two possibly three separate molds. Having the separate panel parts means I have to construct mounting flanges between parts, as well as standoffs and brackets. lots to do ,thanks for stopping by.
Wayne
[This message has been edited by dobie1 (edited 12-06-2019).]
I put in another full day on the car, I finished the drivers side lower rocker installation, fabricating attachment plates between the front fender and lower rocker. I installed riv-nuts for Permanent attachment points. I made the final decision add cut the lower scoop out , was easier than i thought it would be . Lots to clean uo to do but in the end I think this will be the way to go. here are a few pics, enjoy
Hi Wayne, Youo're really going at it. Nice progress.
quote
Originally posted by dobie1:
I hung plastic sheeting along the one side of the shop to help to keep all the dust contained in the one area as much as possible. I know this is going to be messy!!!! Having the car lift sure is making working on the body much easier.
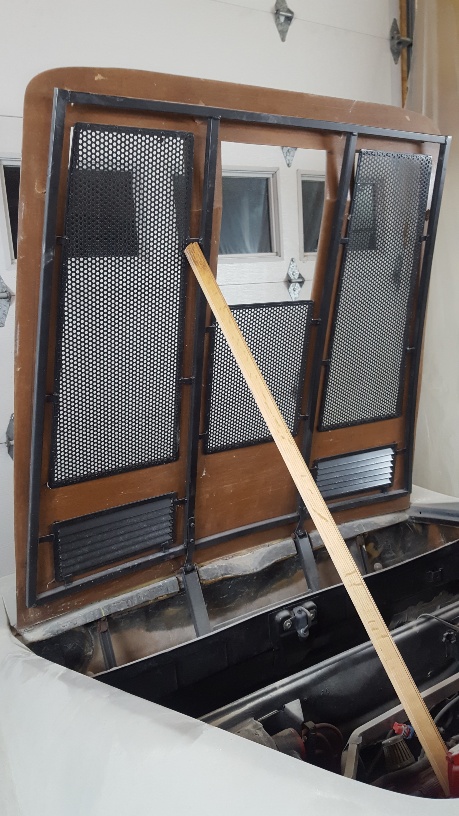
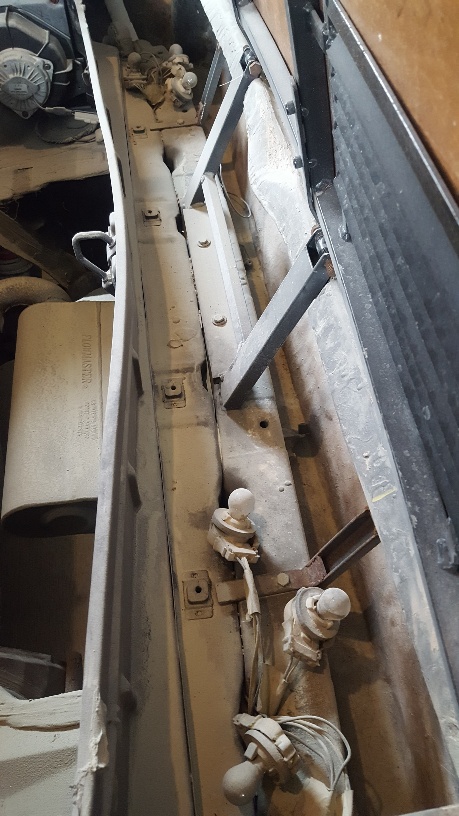
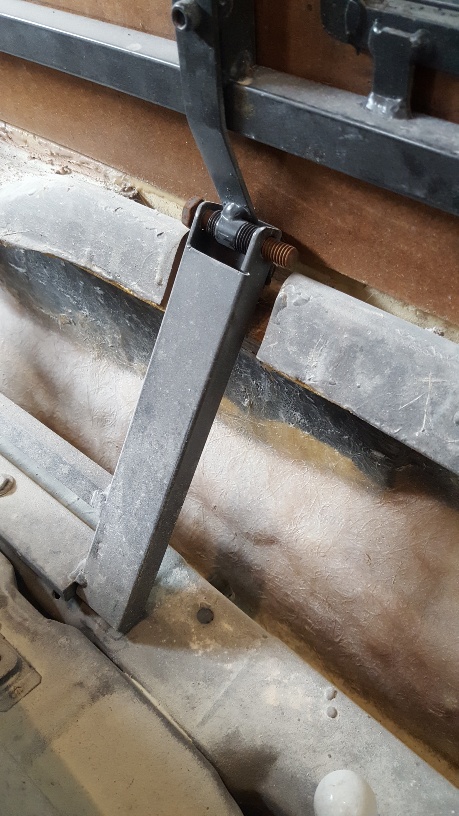
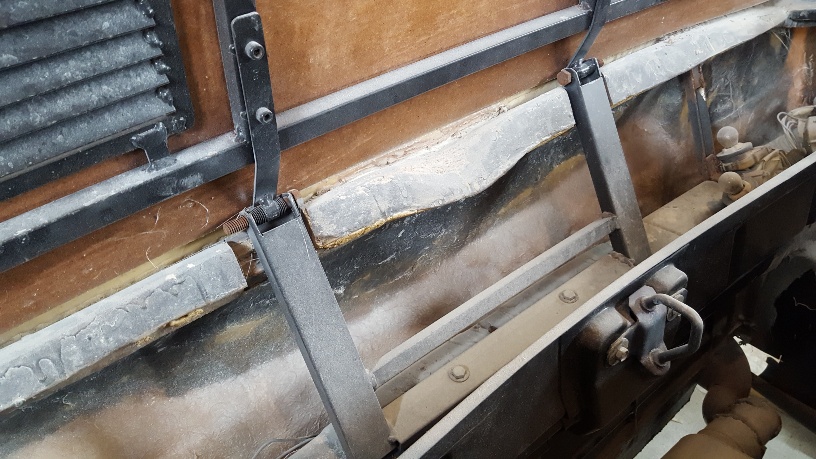
I don't know if I had a brain fart or what, but I didn't recall you having the rear decklid open rearward. How did you do your hinges??
Hi Bob Yes it has been that way for awhile now , Bob. Here a few shots of the mounting and frame. I need to redo the actual deck before I mold it. I may actually remove the steel frame and produce one out of foam incapsulated in a carbon fiber layup trying to reduce the weight but have the rigidity.
I hope life is getting back to normal for you and your family and you'll be able to get back to work on your project soon. All the best of the season to you Bob. wayne
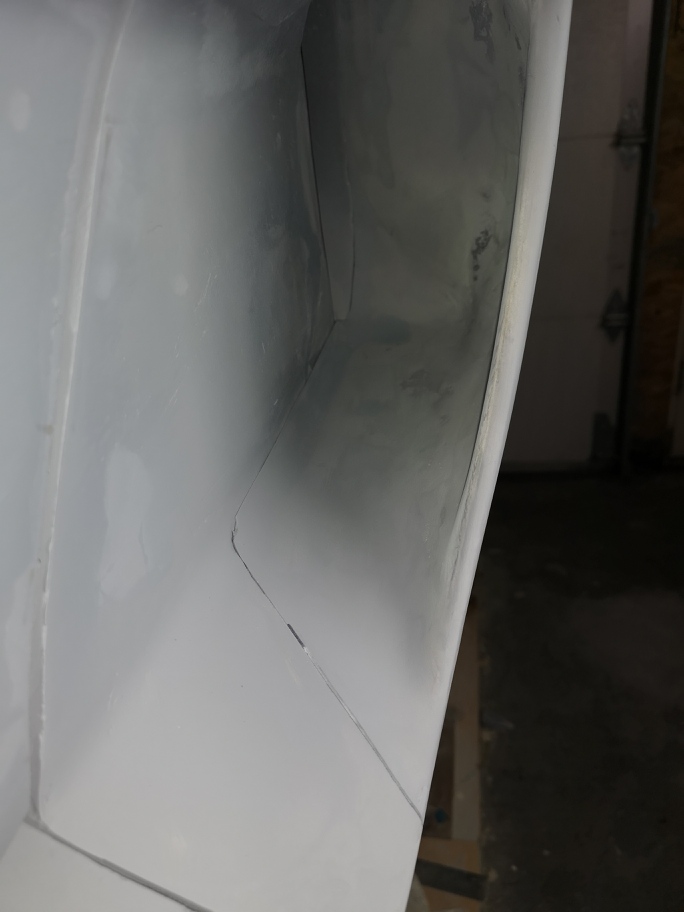
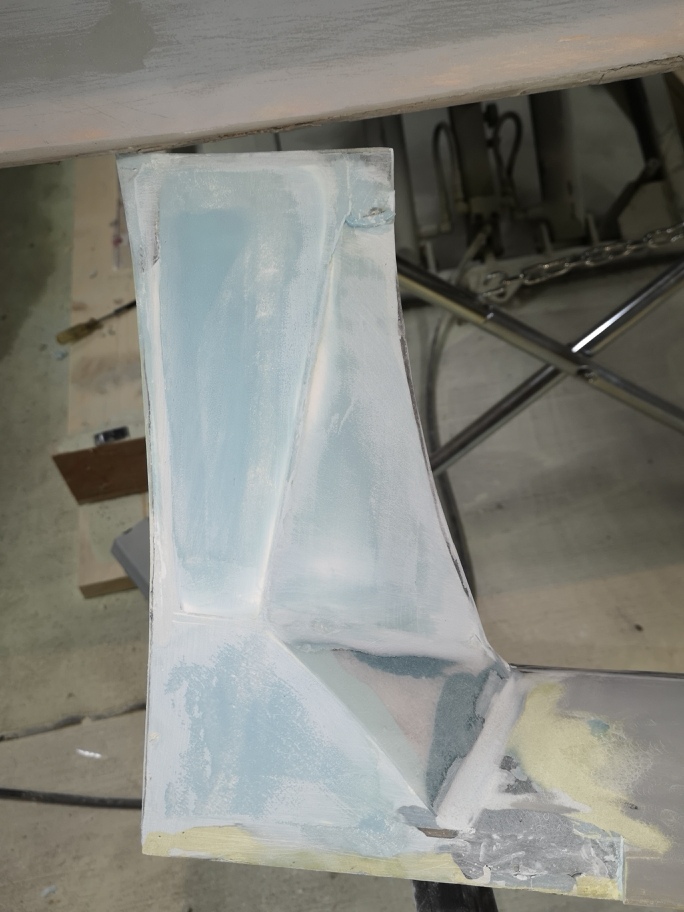
I finally have completed the drivers side lower rocker as well as the removable lower intake. The parting seams on the intake came out great, nice and tight . Moving onto the passenger side in the New Year , here are a few pics.
well this will be my final post for the year, company coming for Xmas so putting the tools down. Wayne
Well done man its looking better and better! Looking over your pics brings back memories of mine. Amazing how tough it is to sand in some areas. Ive made sanding tools outta all kindsa stuff. lol I havent touched my hooptie for ages! Merry Christmas and happy new year!
First off thanks Shem, Ive been wondering what you've been unto. I hope everyone had a great Xmas and looking forward to the New Year, my goal for 2020 is to have the car finished this year.
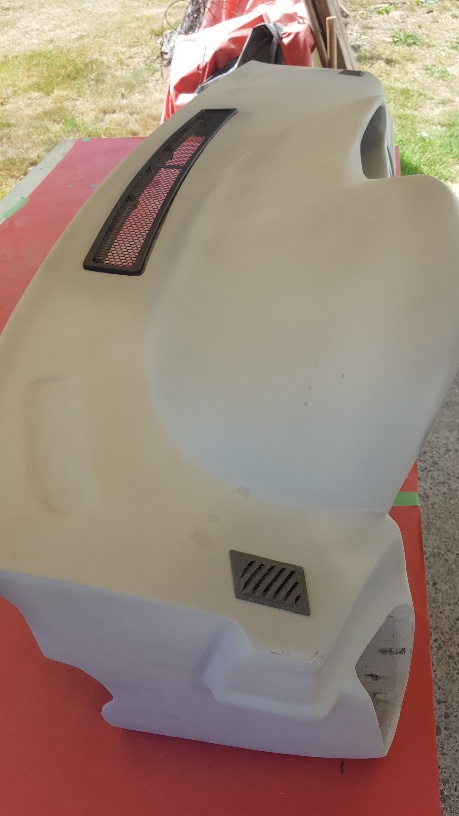
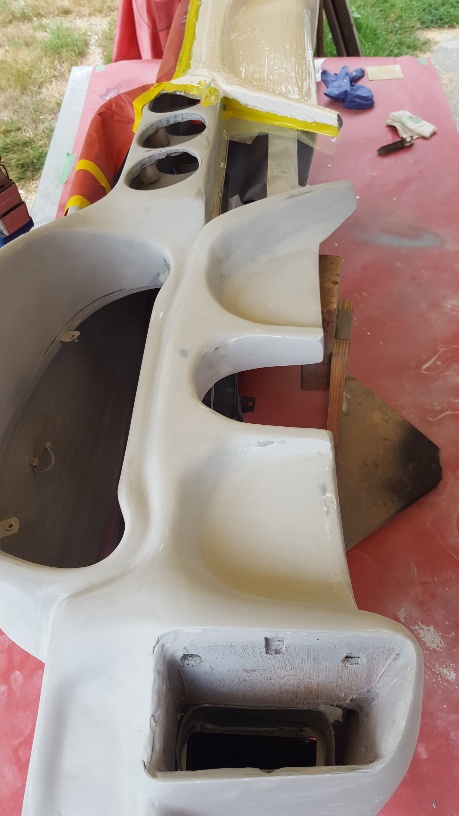
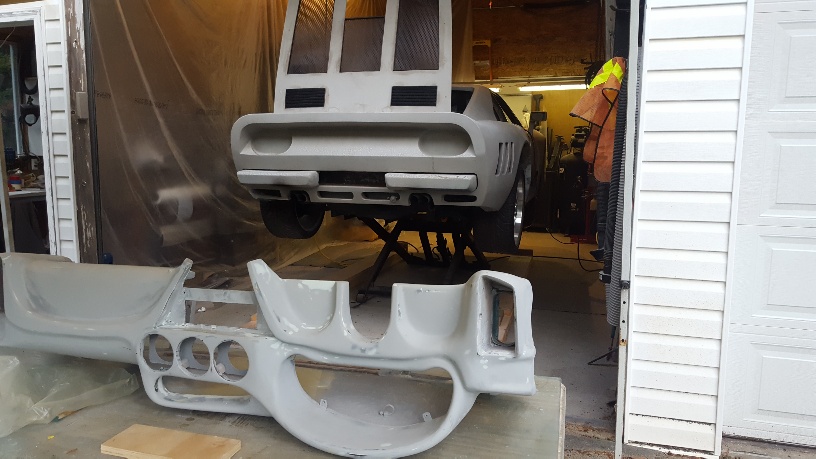
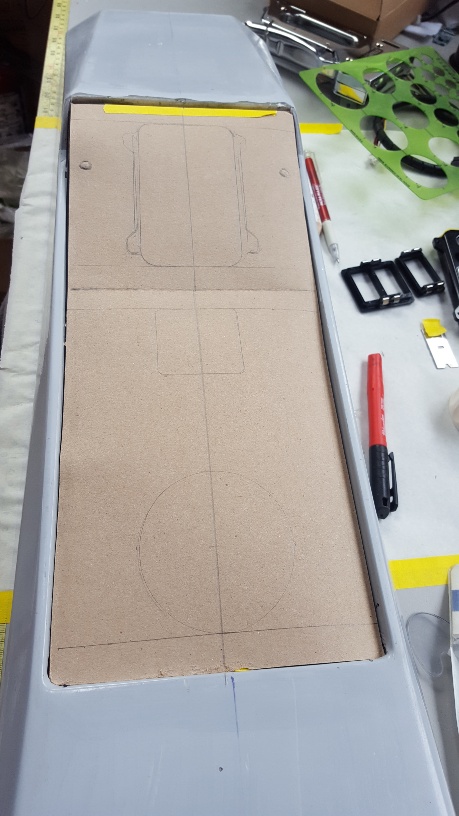
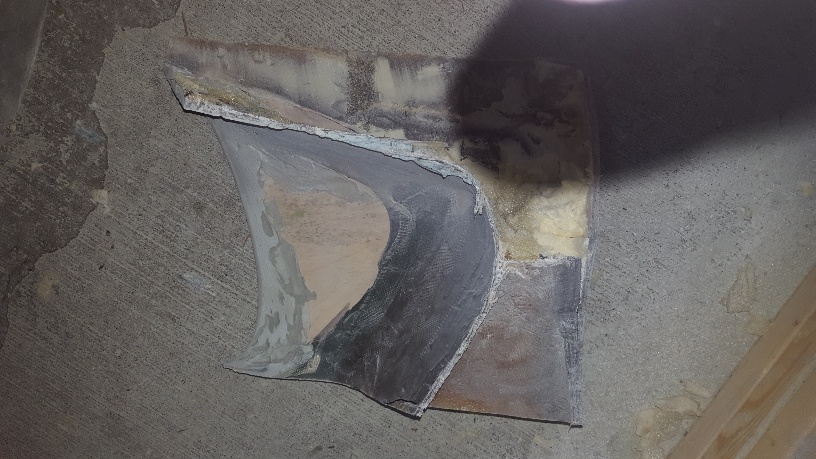
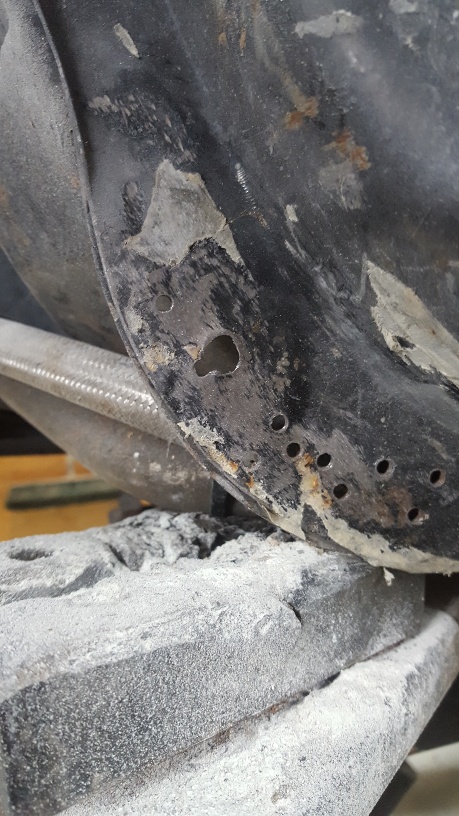
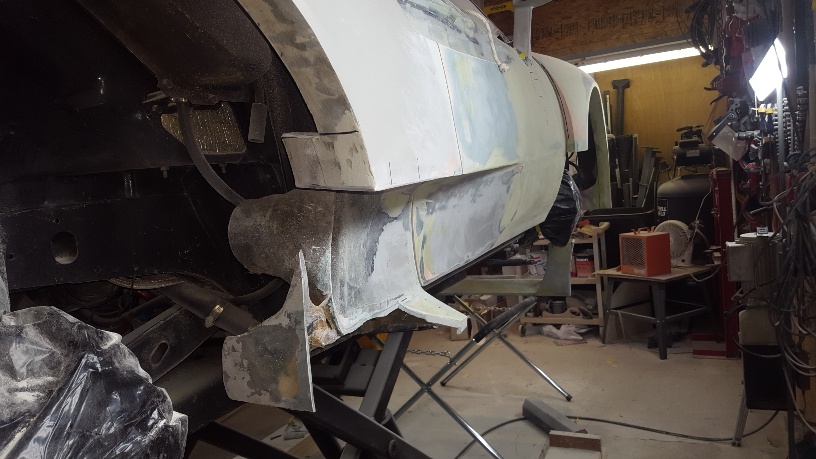
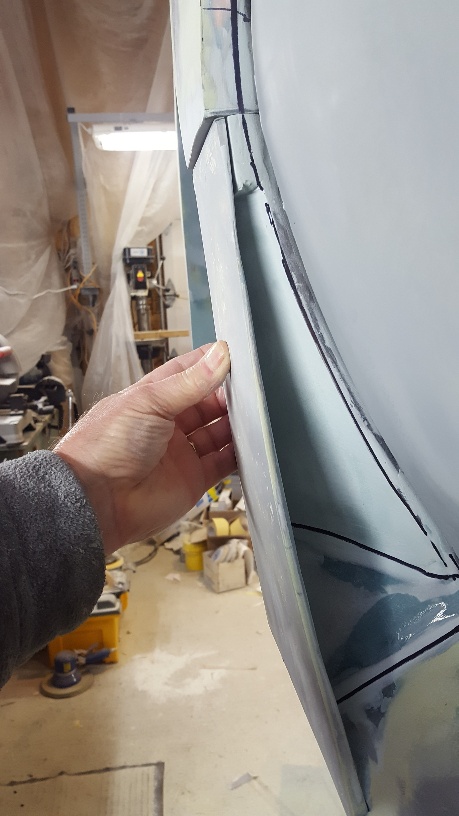
Having the drivers side mainly complete , I took all the building technics learned and put them to work on the Passenger side I started on the lower scoop and running board , I cut everything off.
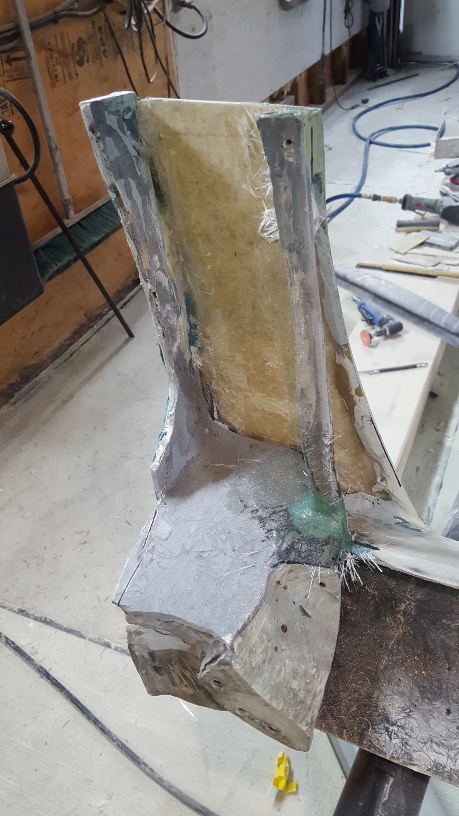
The lower running board and front fender vent is a great Idea but the reality of trying to mold it to duplicate it is almost impossible
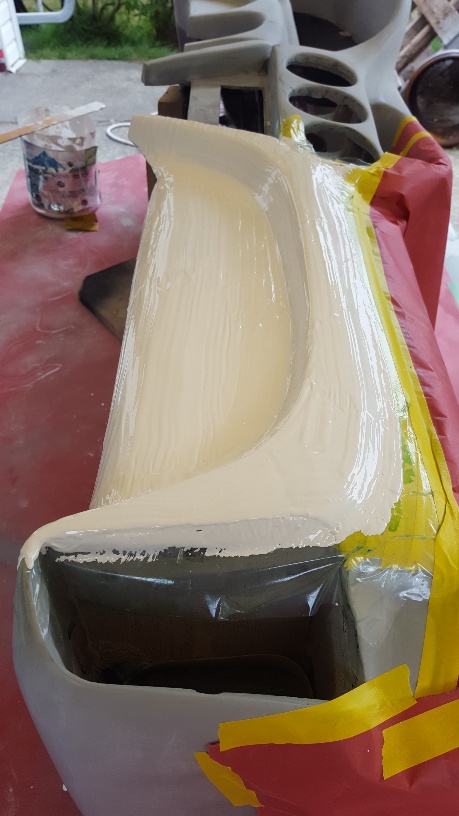
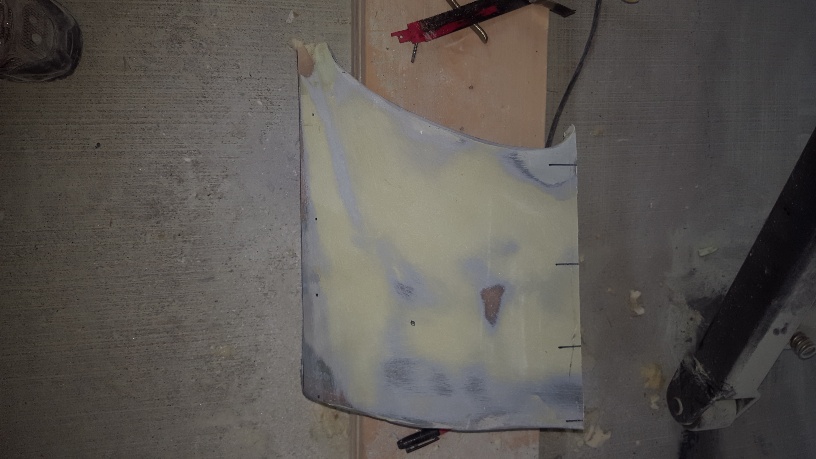
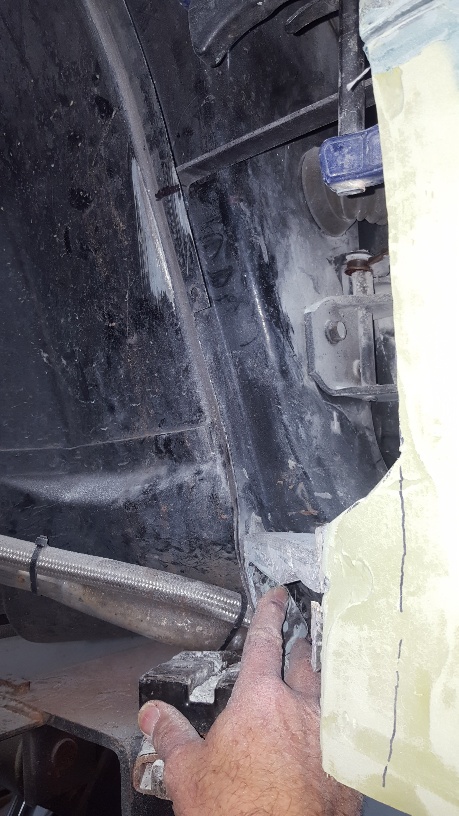
So this required deconstructing it and adding temp fillers , once the mold is completed and the part is completed I'll cut out the vent opening and install a metal mesh, then reattach the out side , the photo shows me holding it on.
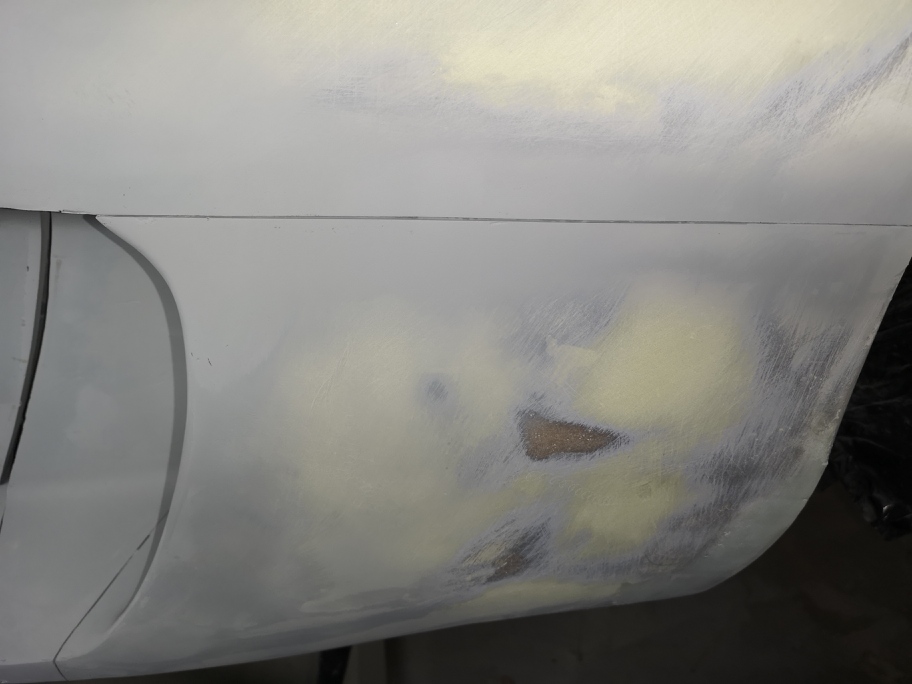
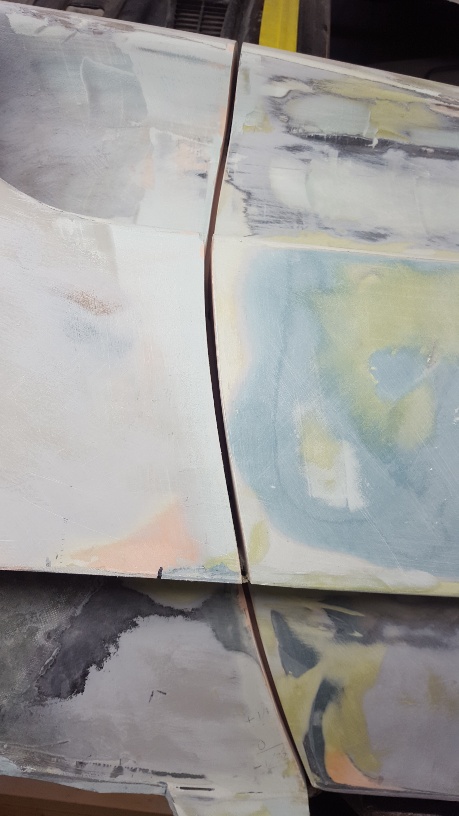
I got the 3/16 inch door seam completed ,sure makes a difference .
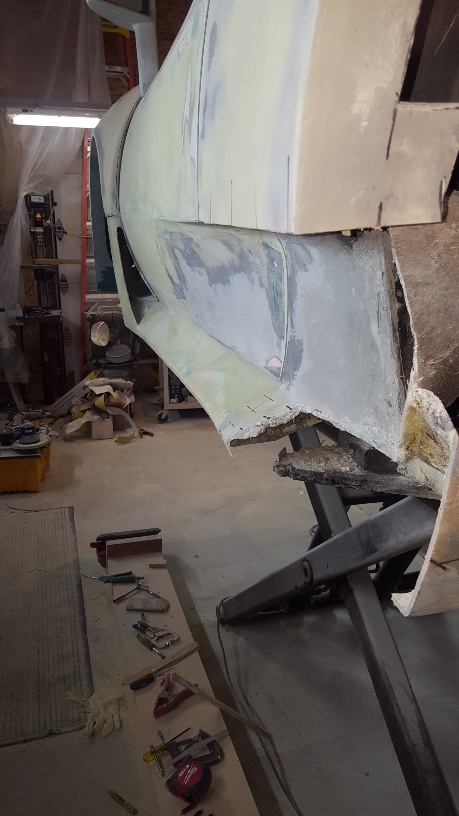
everything is reattached , but I still need to finish all the seams [img][/img]
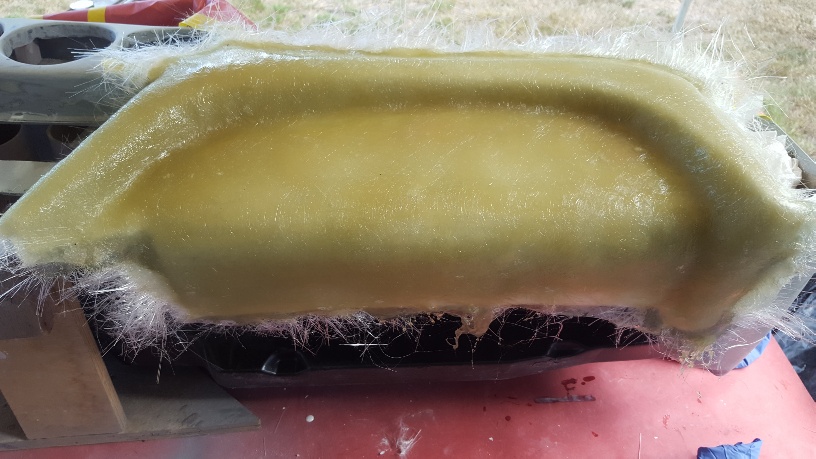
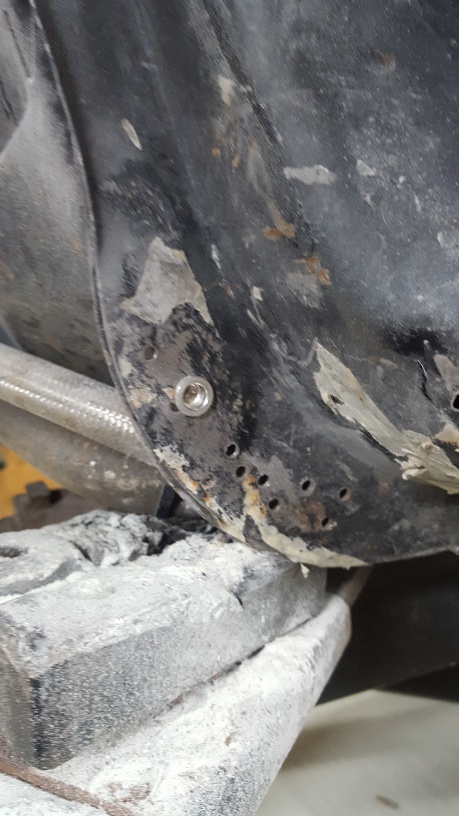
This is a interesting shot if you look at the rear wheel arch lower portion you can see the original body with the foam I attached to it to increase the overall body by 3-4"


 Topic Closed


 ...but it puzzles me a little why you're not posting the maximum width images allowed so that we can fully appreciate your craftmanship. Is this being done on purpose, or are you having an issue with image compression/file size?


 [/img]