Ok so I've had a couple people PM me about this And I figured Id do a how to for it (less typing) Now In doing this your are creating a sealed taillight assembly that unless you are Very good with a dermal It cannot be separated again so make sure you get done all the cleaning you need to do inside the rear housing before putting it back together,
What you are going to need is the following
A dermal with a good buff wheel and cutting wheel if you want a clean take off of the old lens
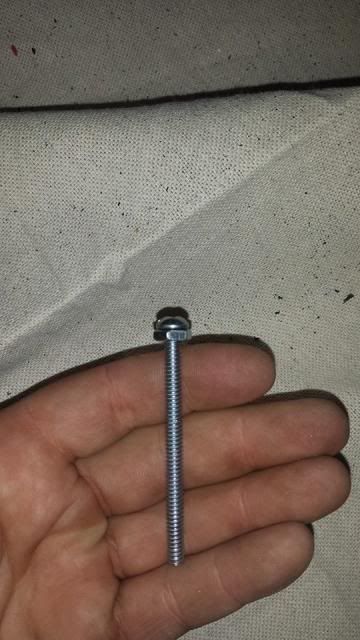
X3 nuts and screw's Per light (Phillip's with the domed heads are what I used but cannot recall the size)
JB weld
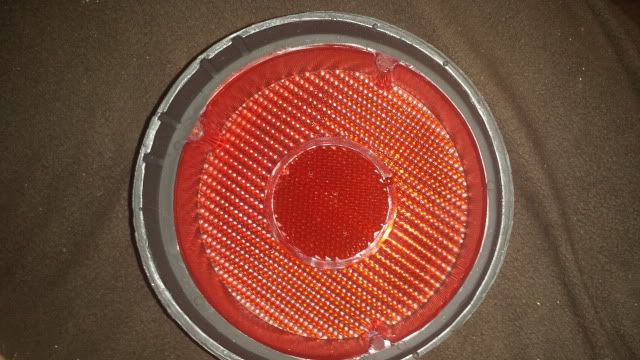
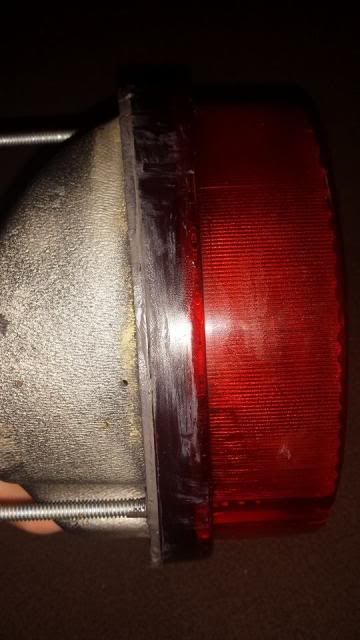
this Was my broken Mera taillight came broken with the car and needed to be replaced to pass PA inspection. Now I have been told by some people that these lights were never really glued to the housing and that the studs that screwed into the lenses held the backing plate to the car, Well that was not my case as these were glued down to the back housing and pretty tight as well. Seeing as how the lens was already trash I just broke it off in pieces and took it down to the back-housing,
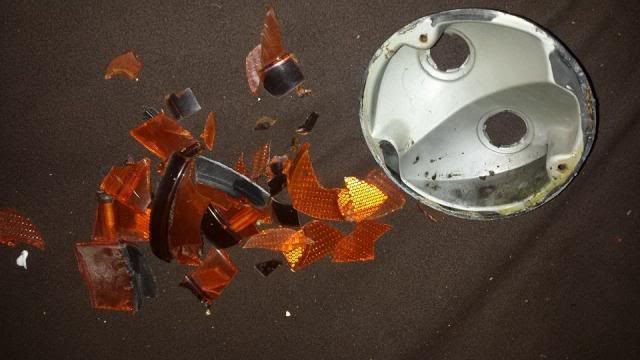
This would be about the time you would want to do a good cleaning of the inside of the lens as you wont get another chance to after this is done, (I found a small beehive in mine)
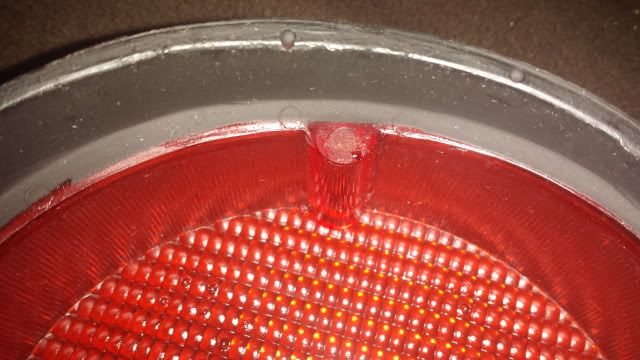
In order to get a good seal for the JB weld you are going to need to rough up the rim of the back-housing to the lens, this cleans off any of the dirt grime or if you're lucky like me Glue used to hold the previous lens in place.
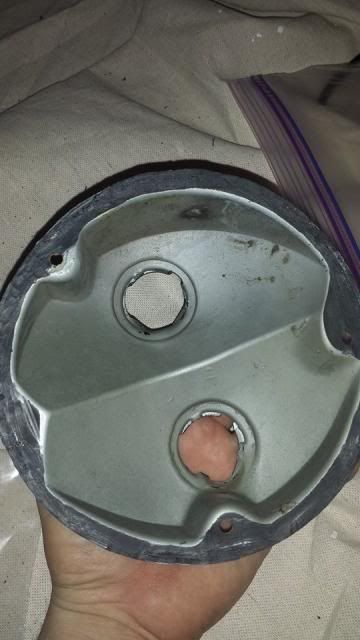
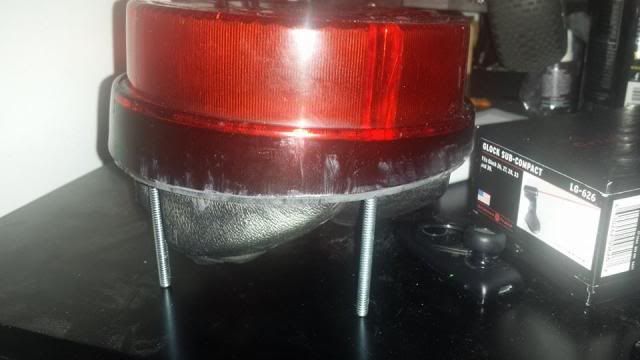
Next you're going to need to find 3 screw's and bolt's that fit snuggly into the back-housing of the taillight I used 2" screws that are a little long behind the taillight panel you can most likely get away with 1"-1 1/2" but that's your call, As a small idea I had (you will be JB welding these to the back-housing) I decided to buy extra bolts and run one up to the head of the screw so there is a bit more grab for the JB weld, As you can see I used a Philips dome headed screw, What you want to use is on you but this worked out very well for me. Next you need to insert them through the holes in the back-housing through the lighting area, Make sure the fit snug, they should be able to just screw in there but also be pushed into there.
3 Of these is what I used
After this you are going to mix you're JB weld and be very libral with it on the screw's to get a good hold, Next Its about time to call it a day on these as it took mine about a day to dry under indoor room temp conditions, Get something like an old check box or other thin box and sit the light upright with the threads to the screw's facing down (put a paper towel under the box just to make sure the JB weld dose not drip (the JB weld Is going to leak seep through the holes onto the threads, This is fine as when its put into the housing The portion of the threads will not get or just barely get hit by the bolt when reinstalling it onto the car And If it dose get hit by the bolt it will hold the bolt in there better.
(when doing this be very careful as to how much you get on the outer edge of the back-housing as this could cause a problem mounting the lens when it comes time)
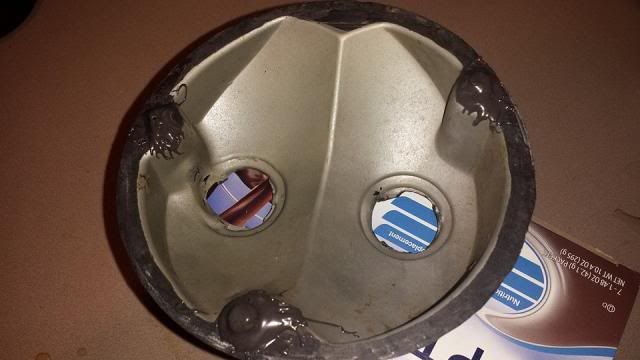
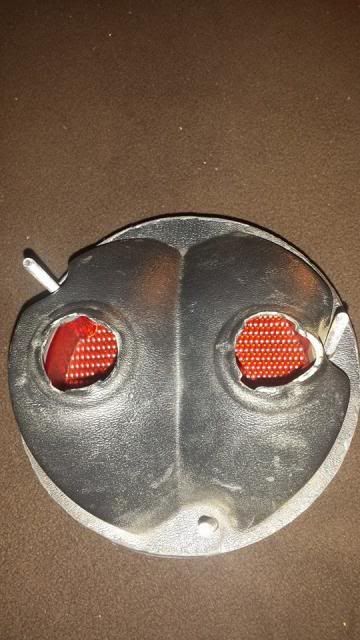
After the JB weld has dried we're ready to mate the lens to the back housing what you now need to do is spread the JB weld all around the outer edge of the back housing as well as the outer edge of the Lens (I did not take a pic of this step) (VERY IMPORTANT. the lenses and the back-housing need to meet up in a very precise way, I'm sure by now you have noticed that the rim around the taillight is a tad bit different and to some could be a bit confusing as to how it goes back on, We'll its actually Very easy, Inside of the lens you are going to see 3 3/4 cylinder like tabs inside, (pictured below on a spare lens) On the original Mera lens These had studs drilled into them that went through the now JB welded holes in the back-housing. All you need to do is line these tabs up to where your JB welded screw's are and press it down firmly together, give it a little time to make a bond and than thoroughly clean off any excess JB weld around the edge of the taillight lens (as this will be a pain to do later)
these are the tabs that original have studs drilled into them on the original lens
Now let the JB weld Sit for a day (again on a small box just to ensure the screws set right incase they still have some give, And the next morning you should find yourself with something like this
(all the JB weld residue has been cleaned up)
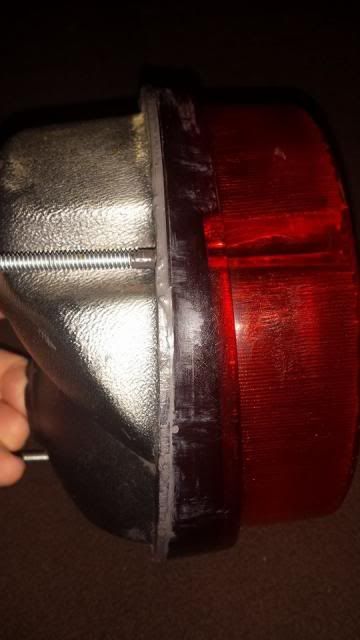
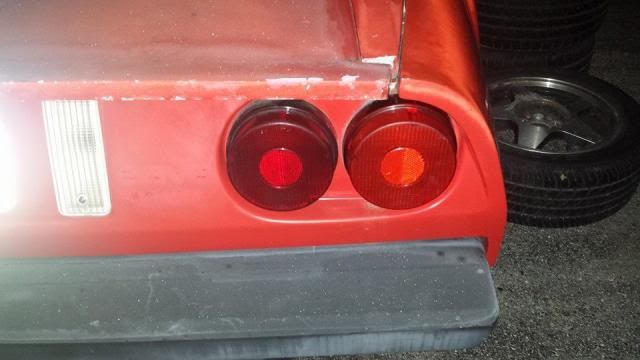
This is after it was installed onto the car (when installing it back into your car remember the screw's are JB welded so do not gung-ho them down. I would employ a washer and lock washer to ensure stability and firmness on the install, Just simply slip a small deep socket if you're chosen size down around the nut and give it a firm finger tightening than put a socket wrench over it and just give it a simple flick to hold it
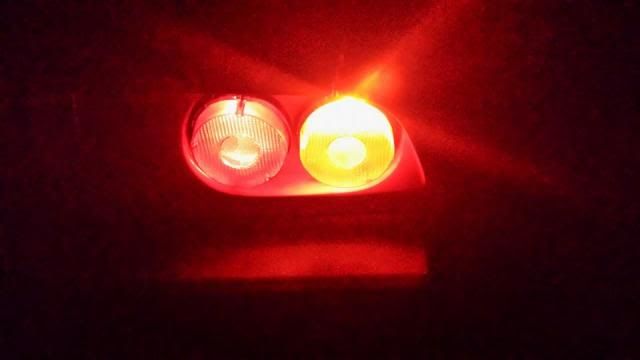
My reasoning behind doing this was a couple reasons, One I did not want to risk drilling out the tabs to restud the lens, they are quite fragile and VERY expensive to replace if you mess up, Also by sealing it to the back-housing You have a weather proof seal that thus far (these past few snow and rain storms) it has kept water out like a champ, This is also another good option to go with if you did try to restud Rob's taillights and were unsuccessful with them. Its a pretty easy process and in my mind at least is a small improvement over the stock setup.


