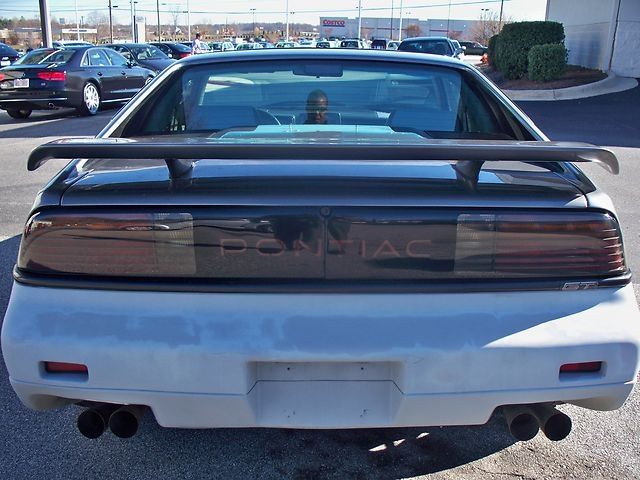
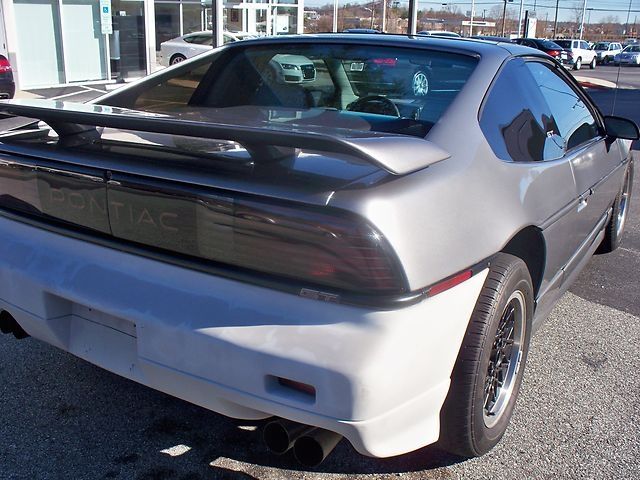
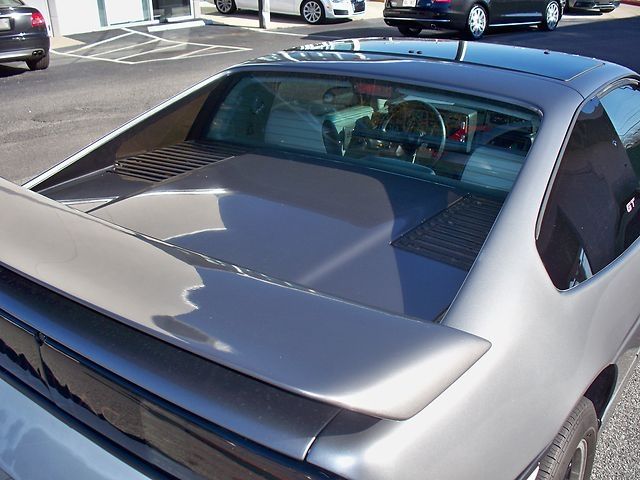
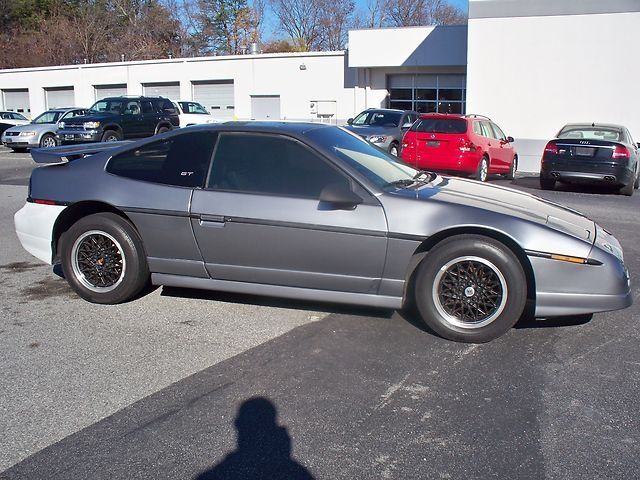
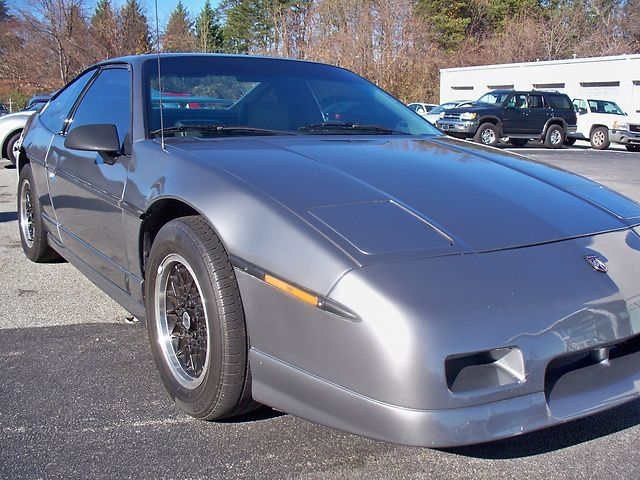
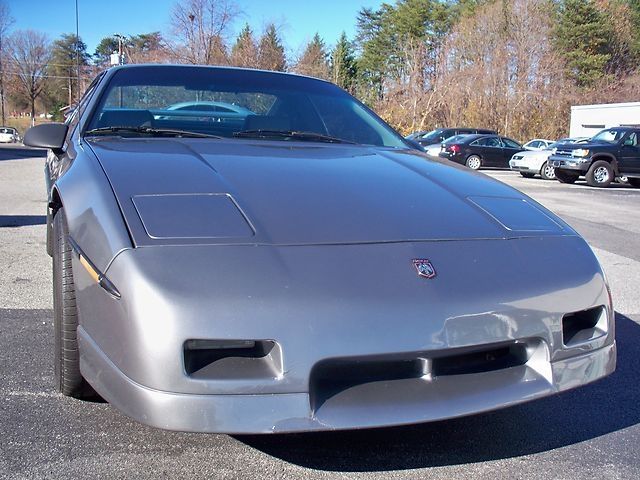
My 86 GT has had to go many directions over the years.
This car was going to get a MERA body from EVM_Rob, but decided to go a different direction.
This thread will document everything that has been done to BluDrm thus far and what is left to do over the next few weeks:

OK Everyone...You are going t have to bear with me. I have been meaning to do this for over a year or so...so I am going to puke a bunch of stuff and then start organizing.
This is my start for tonight...will add more and plenty of pictures to go with as I fill in the details...thanks for stopping by.
Thanks! TXOPIE
THE STORY___________
First off my love of Fiero start back in 1986 when my spoiled ass best-friend, Brent, got one for his first car. I myself was driving and had spent the past 18 months restoring my first car...a true 1964 1/2 Mustang GT hardtop...Hurst 3 speed on the floor...Wimbledon white exterior...palomino interior...can't forget the rally pack and embossed running horses on the seats! Can you tell that you never truly fall out of love with the first!
Anyway back to Fieros. I appreciated the car far more than he ever did...well at least at the time. He traded it in on another car about 20 months later. When I spoke to him about 7 years later, he wished he had put that car in storage... unfortunately it was only as an investment...he never got what this car was all about...but I sure did and what can I saw 28 years later...I still do and Brent where ever you are..THANKS!

I have purchased and sold a few over the past 17 years with the intention of doing it up right, but life, father & husband responsibilities took precedence...till about 18 months ago when the youngest & last of three left home to stand on her own! Proud Father
!!!
So I went on the hunt for another Fiero GT and at the time the nicest one I could find for $3000.00 or less was at dealership called:
 http://www.flowmotorsgreensboro.com/
Flow Motors of Greensboro in Greensboro, NC - Worked with a great salesman over the phone by the name of Rick Morgan.
I flew from Dallas on the early flight to Greensboro, where Rick picked me up and brought me back to the dealership by 11am Greensboro time.
The dealership has the car washed, waxed, gassed up and even threw in for free, a complete set of 4 new tires on her.
It was pulled upfront waiting on me when I got there.
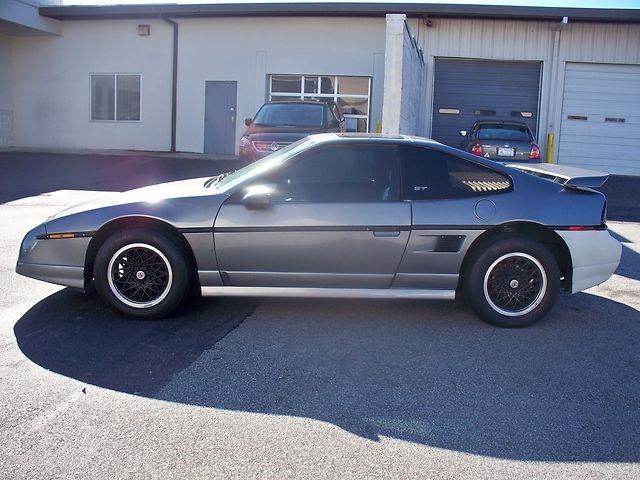

I dropped my bag at Rick's desk and took her out for a test drive. Lets say it was worth the flight!
I went back to the dealership and finished up the paperwork and paid for the car and was on the road back to Dallas by 15 minutes past noon.
The trip was uneventful (well except that dang false positive ERG issue that trips engine light when you maintain a steady speed for so long (can always test by throwing the car in neutral, killing the engine & restarting the engine...if light goes away...97% of the time that is the issue as most of you already know...which is a good thing when deciding to drive a vehicle in this scenario from Greensboro back to Dallas.
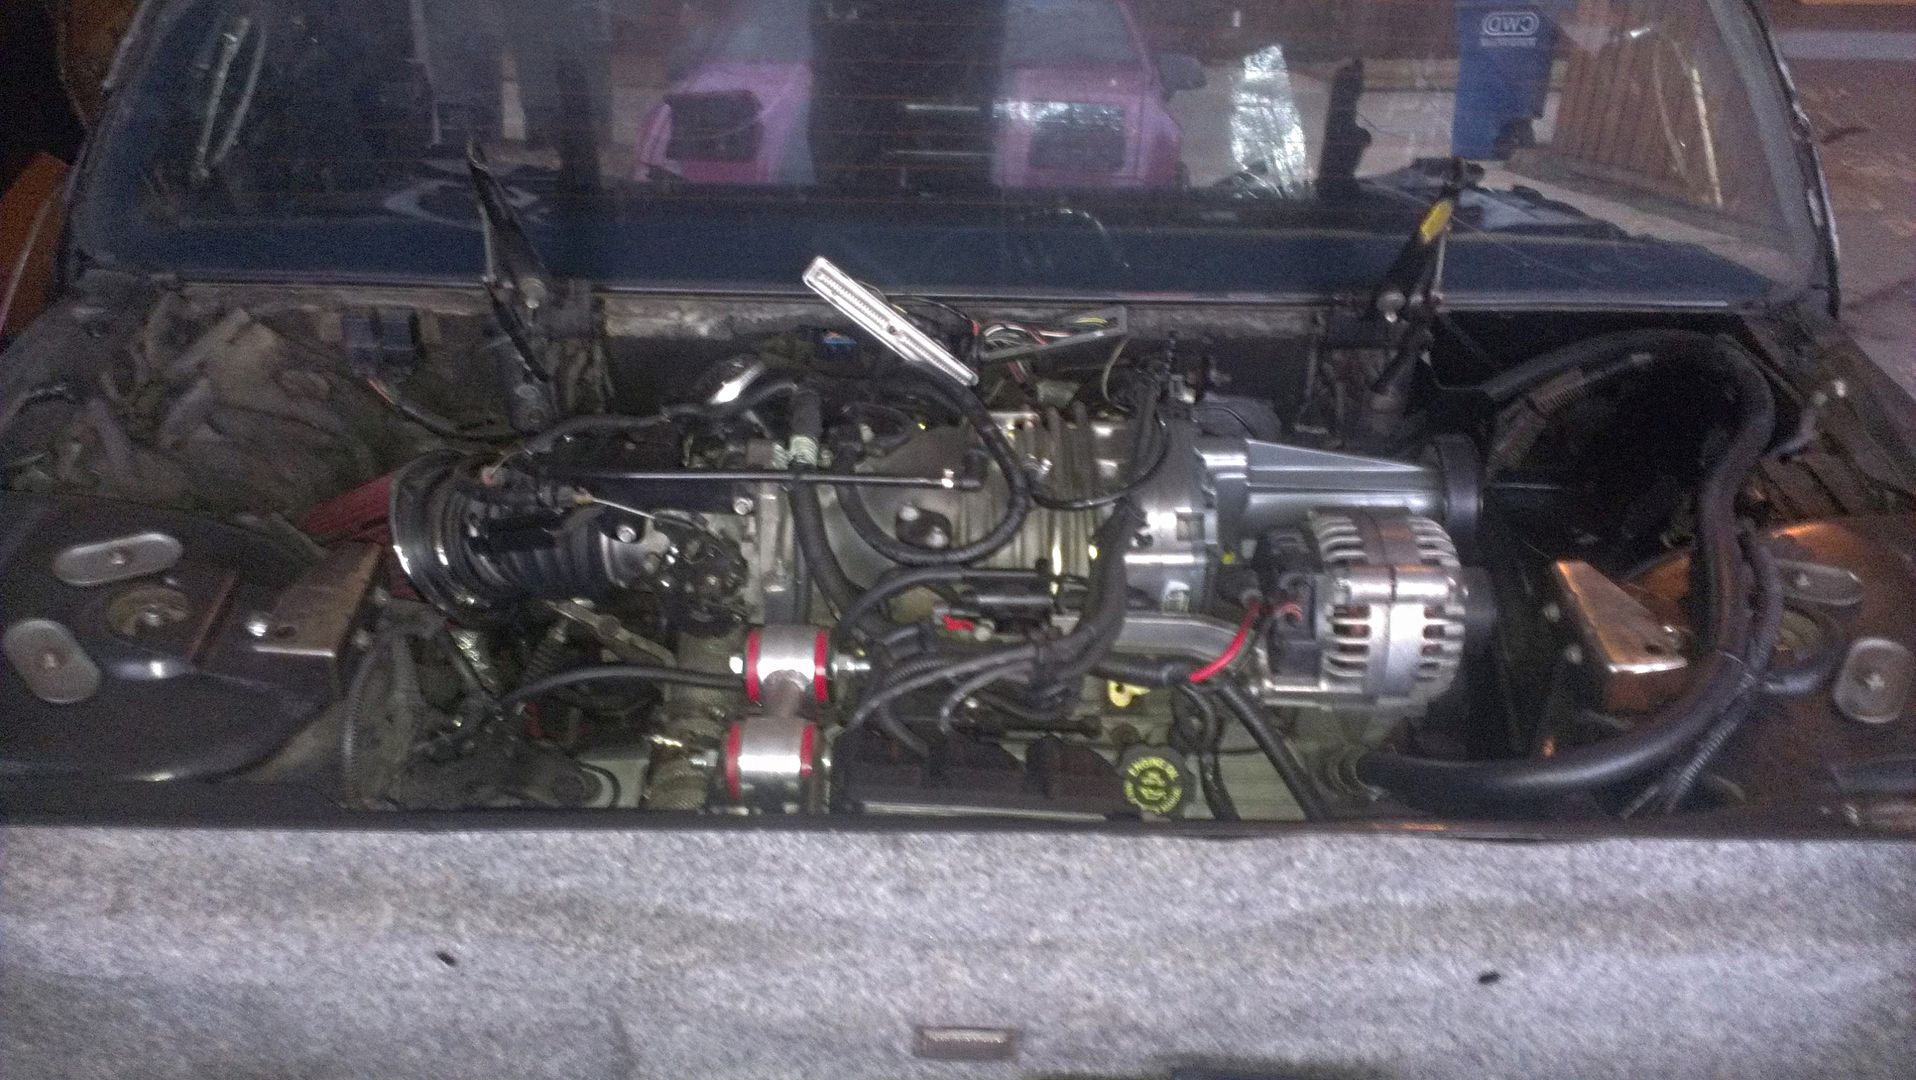
I then brought it home, got a tune up and oil change and drove it for 6 months without issue. Then one day, she starting bleeding oil like a stuck hog. It was time to rebuild her engine...which in my head meant replace it with what I thought would be a solid match, like a lot of other people, and went hunting for a 3800SC.
I knew I had three choice, find a un-cracked (opened) factory 3800SC with very low miles (needle in the haystack), a crated, or a rebuilt.
I am an optimist and said lets dig in the virtual hay-stack and see what sticks you...WOW! low and behold...look what I found online:

Since I didn't need the transmission, I called them directly and asked if they would sell me just the engine and for how much...lets say it was a fair price that included shipping directly to the mechanic's shop that was going to do the swap.
The engine was purchased from Morad Auto Parts out of Ohio...great place to buy parts and they really stand behind their stuff!
There is where we hit 7 months of Drama. But O! What is one to do with no available Fiero to drive...well Hell, buy another.
This is where another member of this wonderful forum, Tom Slick of NTFC introduced me to the sweetest older lady that had a passion for Fieros and has shames most of us...she has been driving one the entire time after buying her daughter one for her in high school. As i understand her first was an 86GT, but traded it in for an 88GT when they were released and has driven and maintained the car in near perfect condition the entire time. To give you just an idea of this lady is...the after market rims that she has on the car...well I got a box of 6 complete sets of the plastic center caps that cover the lug nuts...she told me that plastic was bound to break over the years...so when she purchased the rims, she also purchase 10 addittional sets of the plastic center caps from the manufacture. So in 20 some odd years of use...she went through 4 sets for one reason or another...not bad granny! Think how much better off if we thought like she did...SMART!
We call her
ROCKER BARBIEBUT she is going to get her own thread...wouldn't be fair not to.
The entire time in the background I have been emailing Rob in regards in a Gallardo inspired Fiero interior:________________________________________________________________________________________
fiero interior
[Gmail]/Fiero
x
robert.kusakabe@comcast.net
12/15/11
to me
Jim,
Thank you for your inquiry. Yes, I do build the Fi40 & Fi355 interiors which are Fiero based. I also do Fiero exterior panels.
A good place to see my work would be on my build thread on Pennock's Fiero forum. There are various interior builds throughout the thread:
https://www.fiero.nl/forum/F.../HTML/000091-33.html
Are you looking for anything in particular.
Thank you,
Rob
Fierovation
______________________________________________________________________________________________
Jim McHale <tx.opie@gmail.com>
12/24/11
to robert.kusakabe
Rob,
Would you consider doing a Lamborghini Gallardo interior like the one below...if


I have decided to go with the following body kit:
http://fierofiberglass.com/...20Pages/Lizardo.html
I love the exterior, but I want you level of quality on the interior as well. It wouldn't have to be an identical match as the Gallardo interior exactly, but basically the same feel...the kit is not a exact replica...just a rebody inspired by.
The biggest issue I am having with the 355 interior is that I need a dual din for the radio. I am putting an android driven stereo unit in and they only come in dual din. The Gallardo interior has the dual din build into the design already.
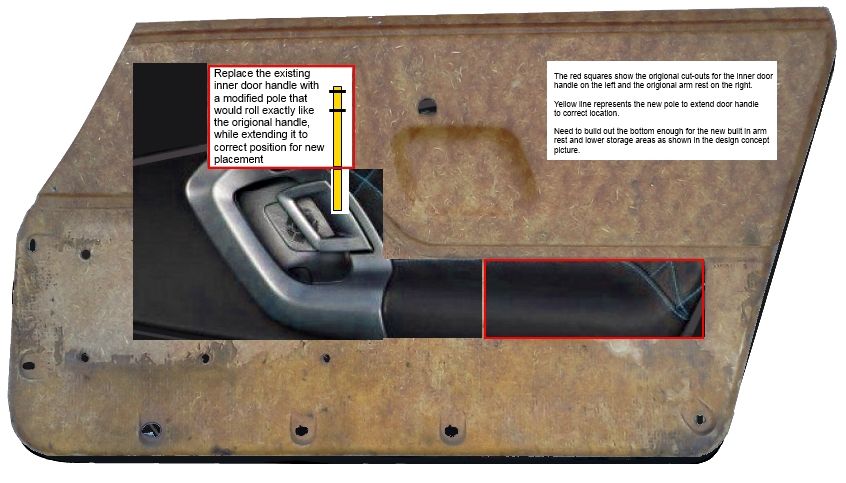
Rob...if you look closely at the pictures after clicking on the link above...you will see a picture of the body in yellow with the door open...look at how the external door skin from the driver's side interior window...You see all the extra external door skin through the window. I was thinking the interior door skin could have padding to match the height of the eternal door skin.
Please let me know your thoughts...I think you could sell these to complement Lizardo's external body kit..
_______________________________________________________________________________________________________________________________
Jim McHale <tx.opie@gmail.com>
12/26/11
to robert.kusakabe
Rob,
If not an entire interior...how about an add-on piece i mocked up in a drawing. It would just be an add-on piece to the existing 355 interior. This piece would be attached to the center piece above the row of switches before it is leather wrapped. Then it would plug into the hole where the insert goes for the single din and 3 gauge cluster after it has been leather wrapped and then fastened from the backside of the dash. Giving the interior a more unified and **** pit wrap around feel to the dash. while enabling me to setup a dual din touch screen without sacrificing an interior of your quality.
Remember this is going in a Fiero with a Lizardo's rebody kit, which is inspired by the Lamborghini Gallardo ...I want an interior that has a high end Italian exotic modern feel, but one that no one can put
their finger on...if that makes sense.
Thanks for your time in advance,
Jim
___________________________________________________________________________________________________________________________________________
robert.kusakabe@comcast.net
12/28/11
to me
Images are not displayed. Display images below - Always display images from robert.kusakabe@comcast.net
Hi Jim,
Yes, the door panel will need to be extended up to the bodyline. I don't think I got your drawing, but I think I see what you mean about flowing the dash into the console. I can have a look at it to see what can be done to look more Gallardo like.
How much can you budget for you interior? I suppose that will determine what can/cannot be done.
Below is the parts/price info on the standard Fi355 interior set, modifications may be additional.
FIERO INTERIOR CONVERSION DETAILED ITEMS LISTING
This is a finished interior set ready for upholstery. All parts are trimmed, prepped & pre-fitted for a
stock/un-modified Fiero cabin. Final fitting in your car should be performed before upholstery if your
interior cabin is modified. All panels attach to stock Fiero mounting points.
Other items needed are:
1) VDO guages 3 3/8" & 2 1/16" & VDO senders.
2) OEM Ferrari air vents (must check with dealership for latest price/availability)
Or, try Ebay for a used set.
3) Euro shifter arm from Rodney Dickman.
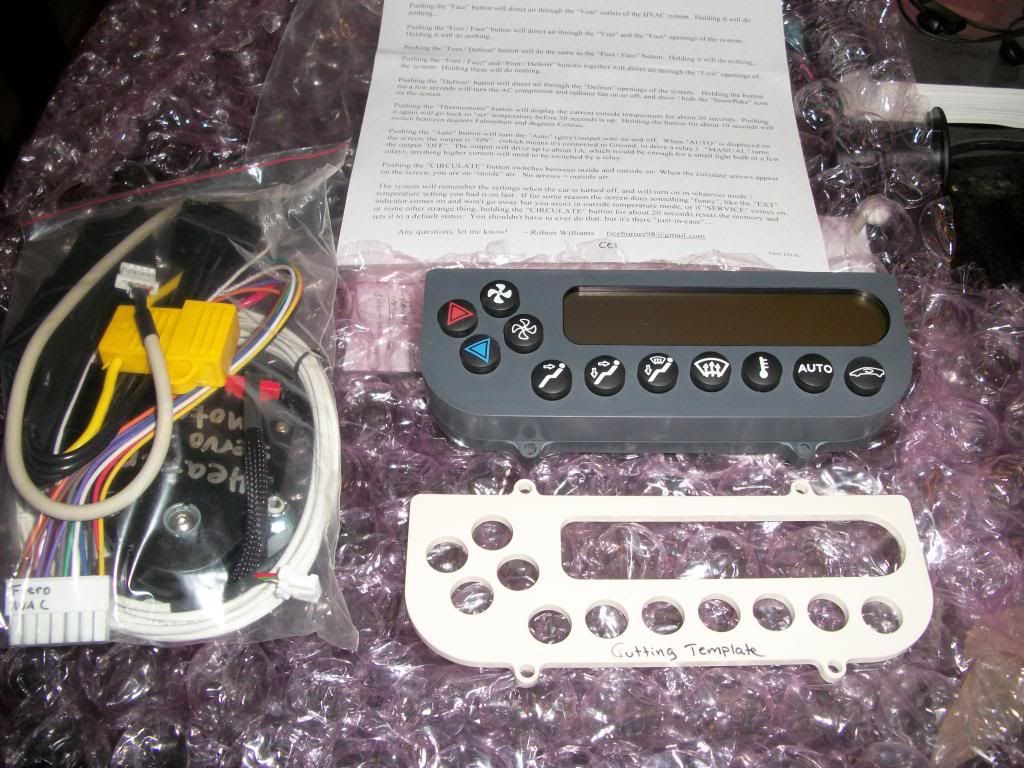
4) Optional HVAC controller from 'Riceburner98', about $350.
5) Your own wiring.
6) Plug/connector for power mirror switch from mid 90's to late model GM
b-body, truck/suv (GM part# 12101762) I can supply for $75usd.
7) Upholstery. Optional upholstery available before shipping.
You will also be re-using your original dash & console screws, and the original upper door
handle brackets and screws. All other needed hardware is included. An installation guide is included.
Included items:
Dash 1 Upper dash body
1 Lower Dash body
2 Defrost vent covers
1 Custom moulded main A/C airbox
2 air vent hoses
1 “Glove box” lid with axle & bushings
1 magnetic touch latch
1 Center gauge/stereo panel
1 headlight/dimmer switch panel
1 Upper steering column shell
1 Lower sterring column shell
Main Instrument pod assembly
1 Main gauge pod shell with brackets
1 Custom gauge panel with graphics- preassembled
1 Flat black acrylic/urethane panel
1 Dark acrylic tinted indicator lens
4 Indicator light sub-panels
12 Light bulbs & sockets
12 color Instrument graphics
Door Panels
2 Main door panels
2 Upper door-pull housings
2 Armrests
2 Lower door pocket panels
4 End caps
2 Felt lined weather strips
2 Double foil fiber insulation
2 Custom powder coated steel release paddles
2 Custom release mechanisms
easily mounts to doorframe
smooth bearing operation
automatic spring return
1/8" steel levers
2 Urethane/steel pistol grips
2 Insert covers for stock Fiero lock sliders
3 Illuminated power window switches w/ bezels
1 wire harness w/ matching terminal sockets
Console 1 Console body
1 Computer cover
1 6 speed aluminum gate
1 Forward deck/switch panel - preassembled
1 Urethane deck panel
1 Illuminated switch cover w/ graphics
2 door lock toggle switches
3 accessory toggle switches
5 Toggle finger caps
4 pushbutton switches w/ graphics
1 Rear deck/switch panel - preassembled
1 Urethane deck panel
1 Sliding "ashtray" cover
1 Urethane coin cup (in place of ashtray)
1 support underpanel
1 Illuminated power mirror switch
Hardware
Pricing:
(S&H extra)
Full interior set (no upholstery). Fully prepped & pre-assembled with all fabrication completed, pre-trimmed &
pre-fitted: $3995usd (w/o vents) Send your 355 vents to me for pre-fit.
Add $395usd for optional console storage compartment.
Upholstery (optional USA & Canada only)
Full interior upholstery in leatherette (simulated leather) with foam padding and french stitching.
Single color, or two tone: $1795 - $1995usd.
Full interior upholstery in genuine leather single color, or two tone with foam padding & french
stitching: $2295-$2795usd (pricing varies depending on color choice & availability).
Contact Robert.Kusakabe@comcast.net for more info.
Thank you.
Rob
Fiero Interior Conversions
_____________________________________________________________________________________________________________________________________________
rev 04/11
From: "Jim McHale" <tx.opie@gmail.com>
To: "robert kusakabe" <robert.kusakabe@comcast.net>
Sent: Monday, December 26, 2011 5:25:44 PM
Subject: Re: fiero interior
Rob,
Jim McHale <tx.opie@gmail.com>
12/28/11
to robert.kusakabe
Hello Rob,
I attached picture with the extra piece I would want fabed the would fit into the 2 existing pieces...sorry its only freehand and not CAD. I would want you to do the upolstry, you do an amazing job at it.
[img]https://mail.google.com/mail/ca/u/0/?ui=2&ik=8599d441c7&view=att&th=13486a445d1cc1ac&attid=0.1&disp=thd&realattid=f_gwqr41a50&zw[/img]
robert.kusakabe@comcast.net
1/1/12
_________________________________________________________________________________________________________________________________________________________________________
to me
Images are not displayed. Display images below - Always display images from robert.kusakabe@comcast.net
Jim,
Your idea in the drawing is completely doable, a re-designed console stack & stereo/gauge bezel will be needed. It will likely need to be a separate piece to help make the upholstery easier. The thing about the 355 dash is that it's designed around 355 airvents. If that's cool with you, then it's cool with me.
My Fi40 dash could also be a suitable donor. To get the Gallardo look It will need some reshaping to round-out the surface, and new airvents...maybe from the Pontiac G6. A console stack will work on this dash as well. This will be alot more work than your idea with the Fi355 dash because it'll be a whole new dash design, but will be more Gallardo-like.
It's up to you and your budget. I can draw up a dash plan & estimate if you'd like.
HappyNewYear!
Rob
Fierovation
__________________________________________________________________________________________________________________________________________________________________________________
THE ENGINE SWAP[/________________
b]I had a friend that is VERY well connected with all the dealerships in DFW. I know he had a few custom rods built and asked who he would recommend for swap, since a certain someone from Dallas decided to go sideways before I got mine turn...hey but I got taken for my own ride!
Anyway my friend (still to this day) recommend a shop. So I spoke with the owner several times and went and checked out his really nice facility. He worked on a large range of custom and real high end vehicles. A real 355 was in the bay next to mine, then a Maserati, and so on.
So after several discussions, he had a solid understanding of what I was asking for and armed him with alot of documentation and information that I had gather over the years from here and several other forums.
We agreed on a price and he quoted me a 19-25 day time-line for competition. I dropped off my car and had Morad ship the engine directly to his shop.
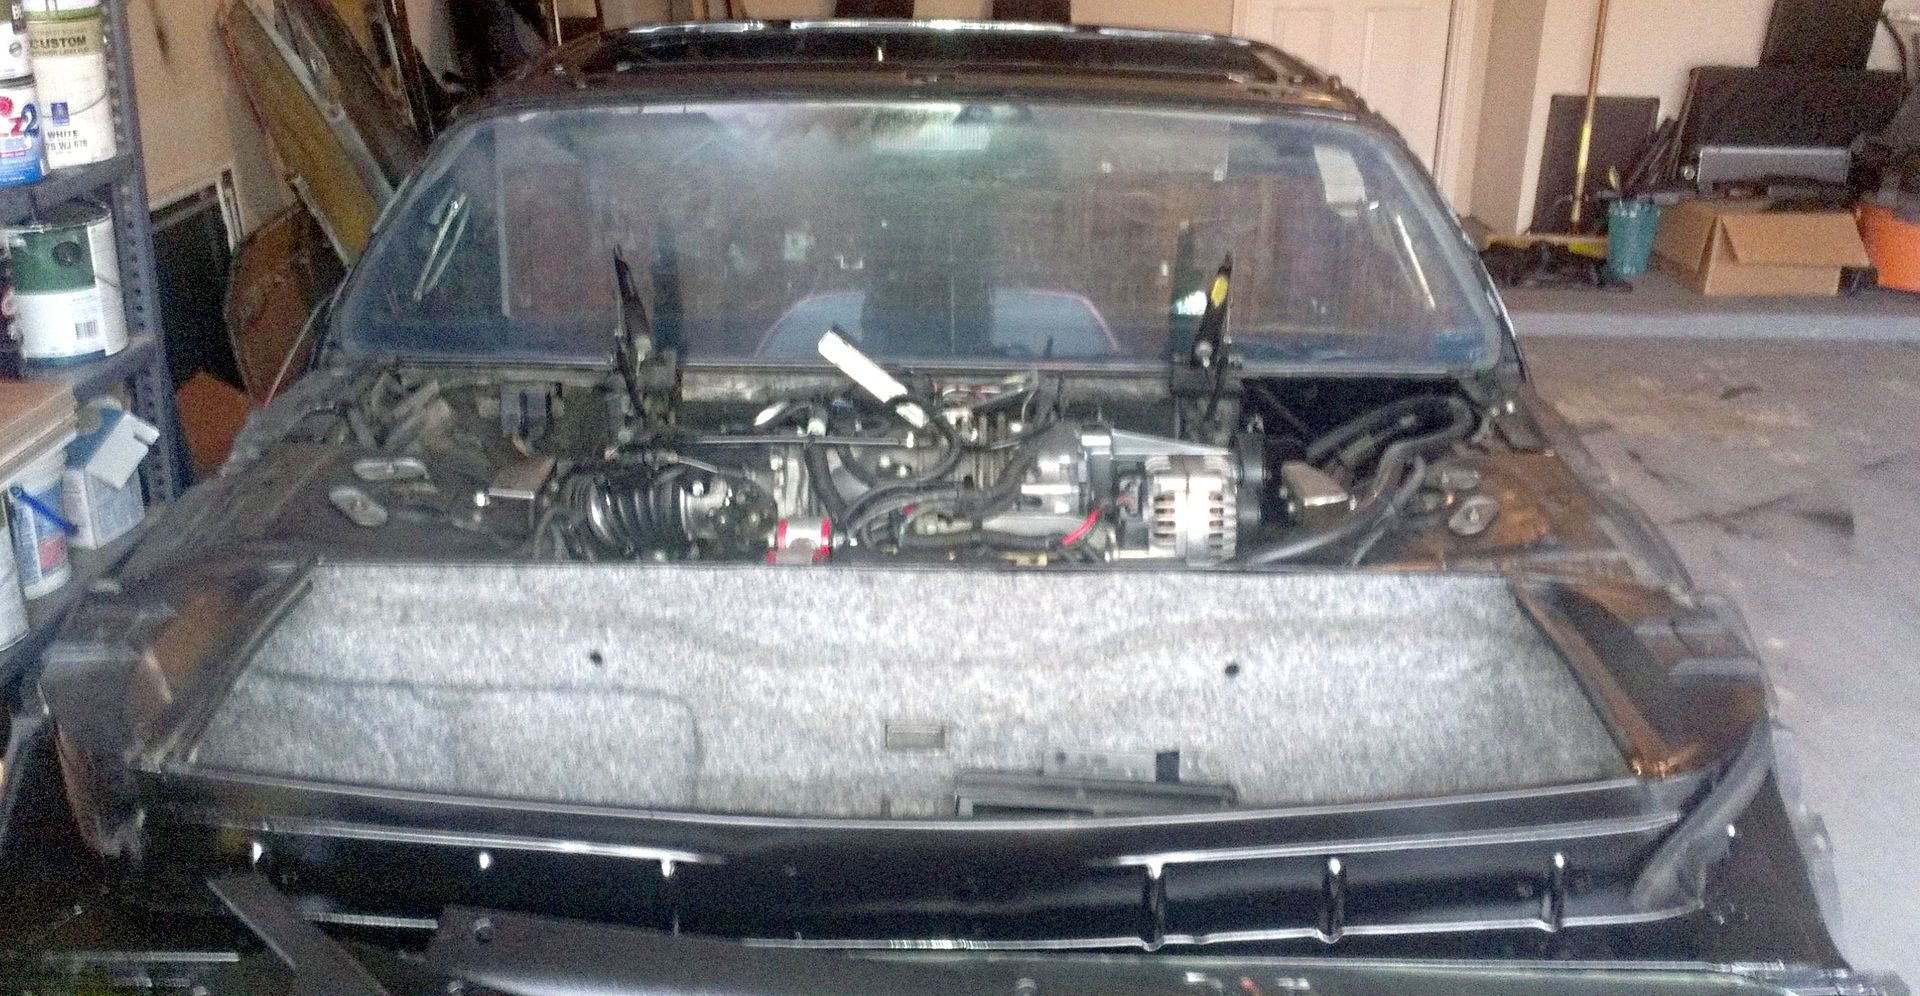
Well I could go through all the hell and heartache, but sufficed to say...19 days turned into 7 months.
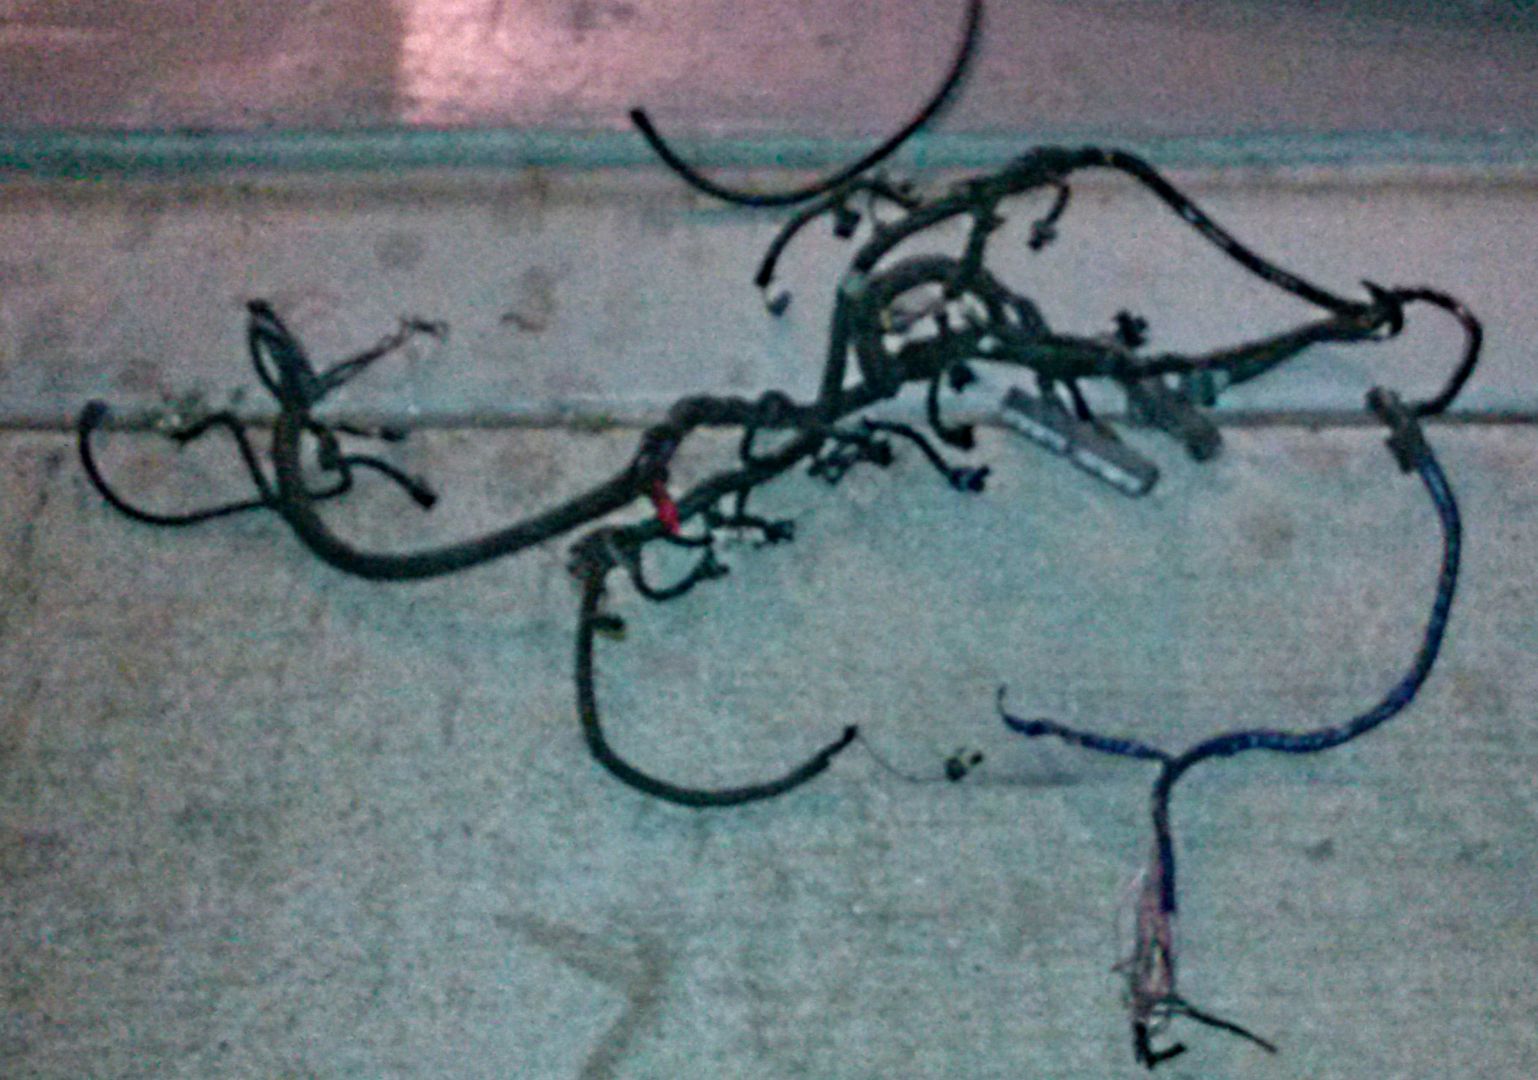
Then when I got her back, the wiring harness has a mysterious short in it that if you leave the battery connected...will be dead by morning.
The put holes in my dash, cracked a rear speaker cover, million little etch marks on rear wind shield, did body damage, messed up and nicked the paint in several places, leaky fuel lines, scrapped up my stock perfect rims, lost a center cap and several of the plastic lug nut overs...I could go on, but I won't...Let that go already.
So to say the least he trashed the car and did a lot of damage as well.
After getting her back, I did the smartest thing I could have. I reached out for help from a member of this forum that is local to DFW...Steven Poe (MstangsBware). I had him take a solid look at the work and he gave me a punch list of things that needed to be addressed.
Links to the Nightmare posting:
https://www.fiero.nl/forum/F...1/HTML/089322-3.html___________________________________________________________________________________________________________________________________________________________
[b]
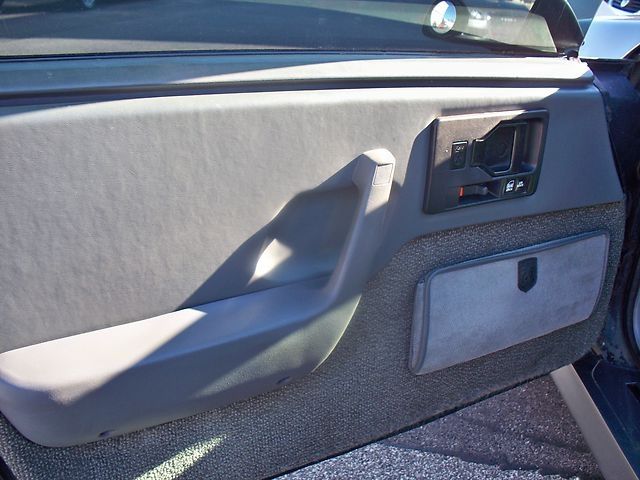
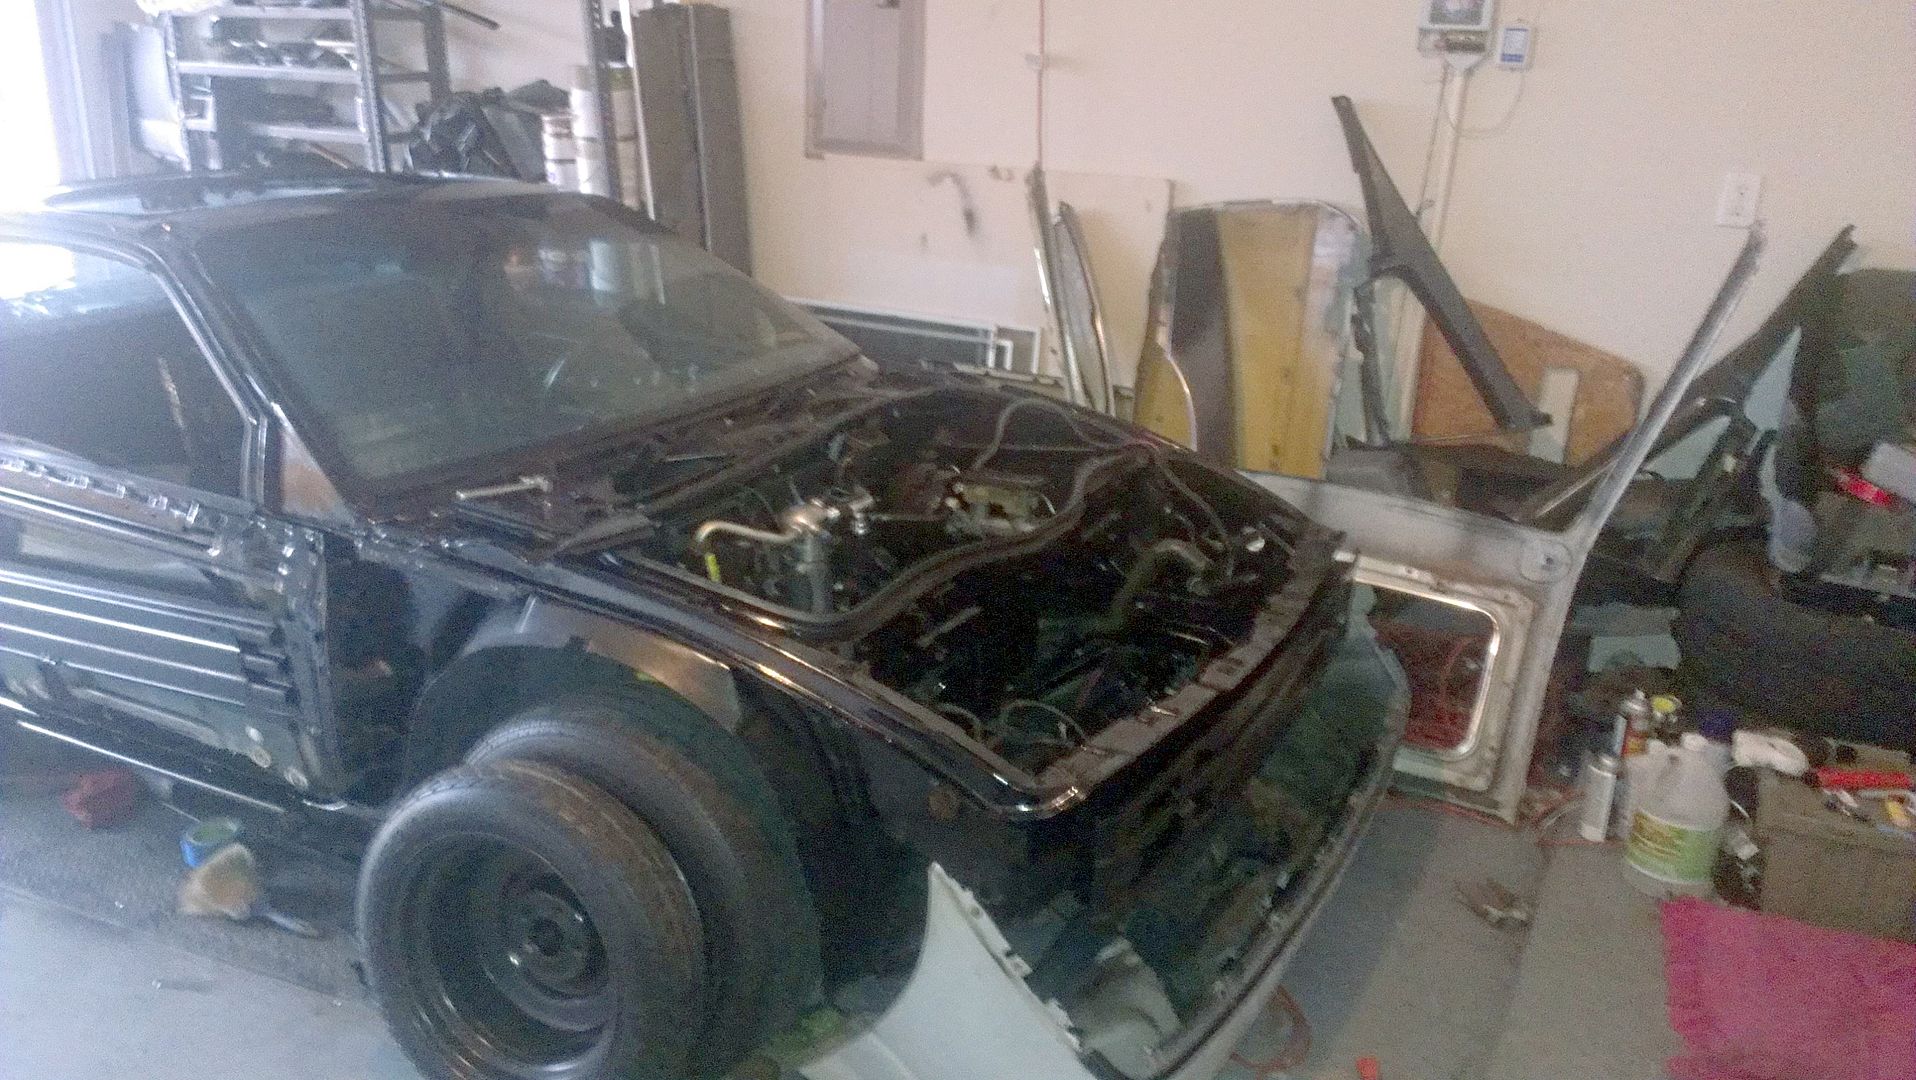
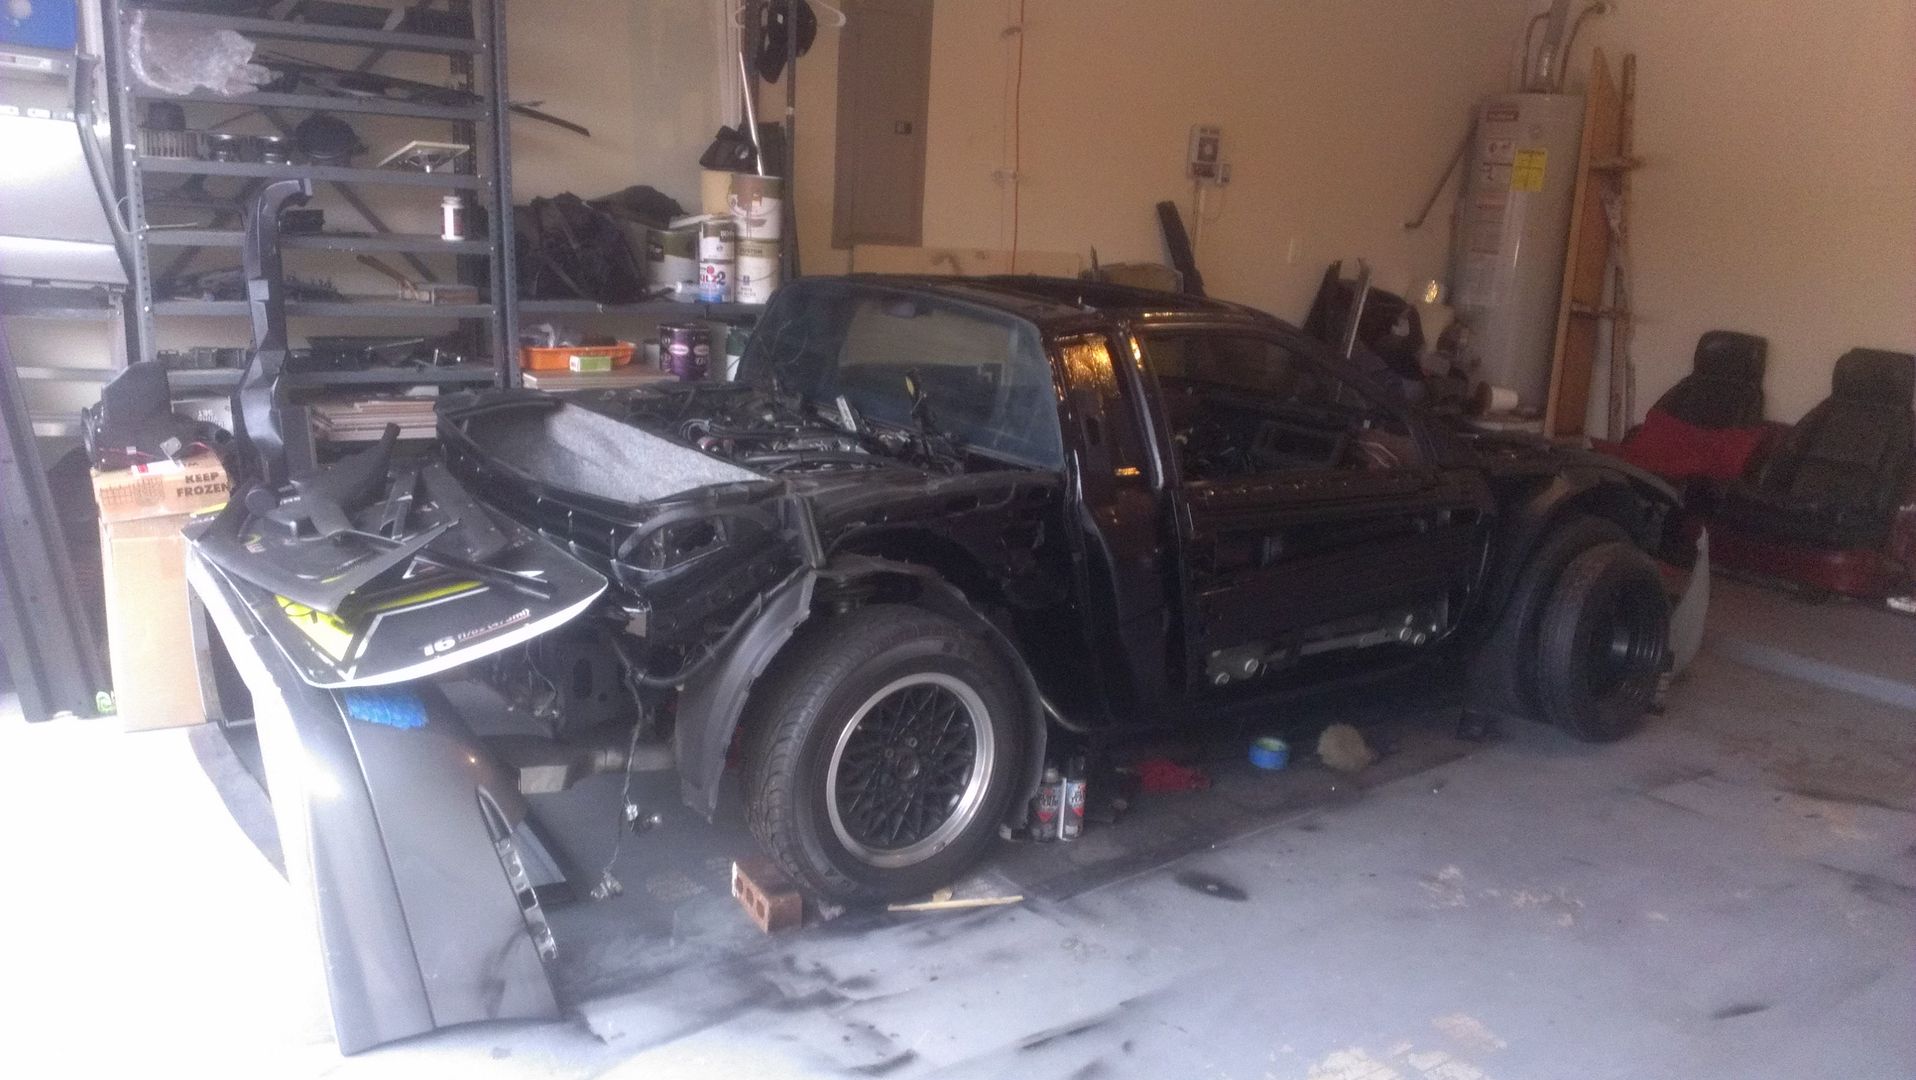
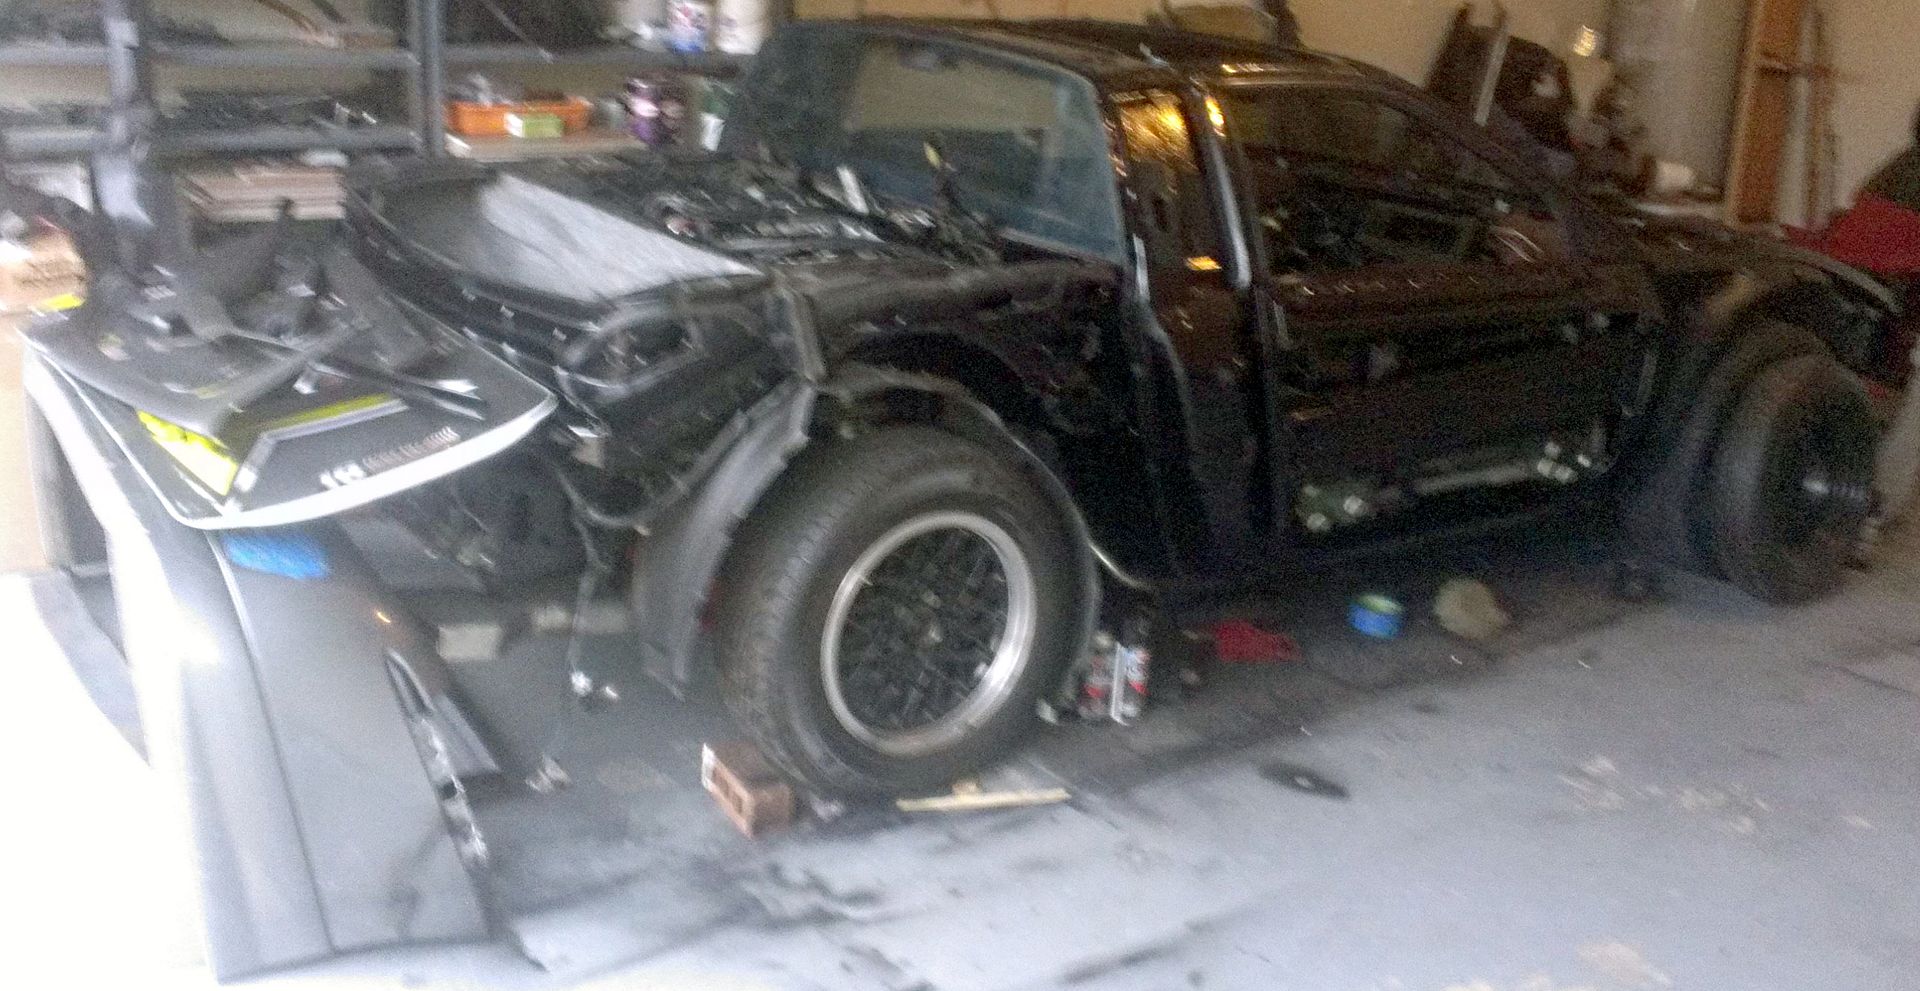
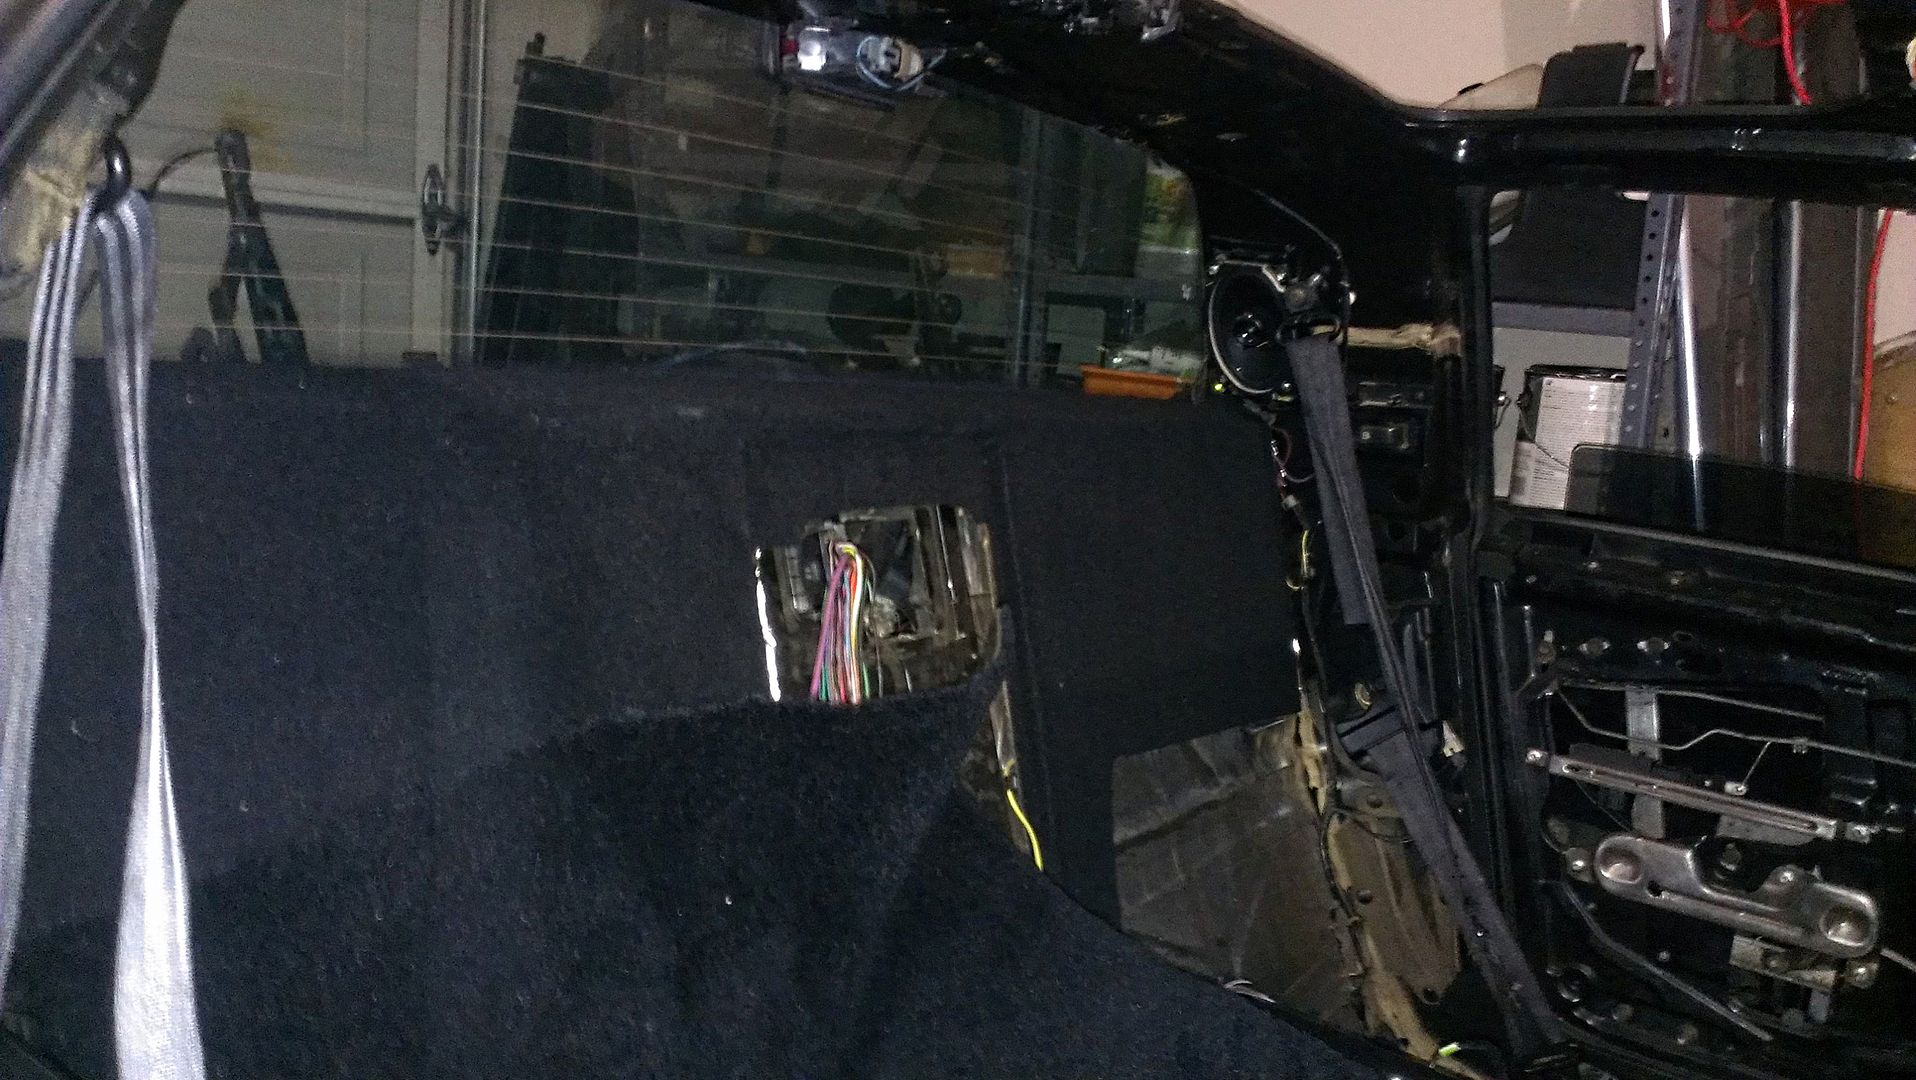
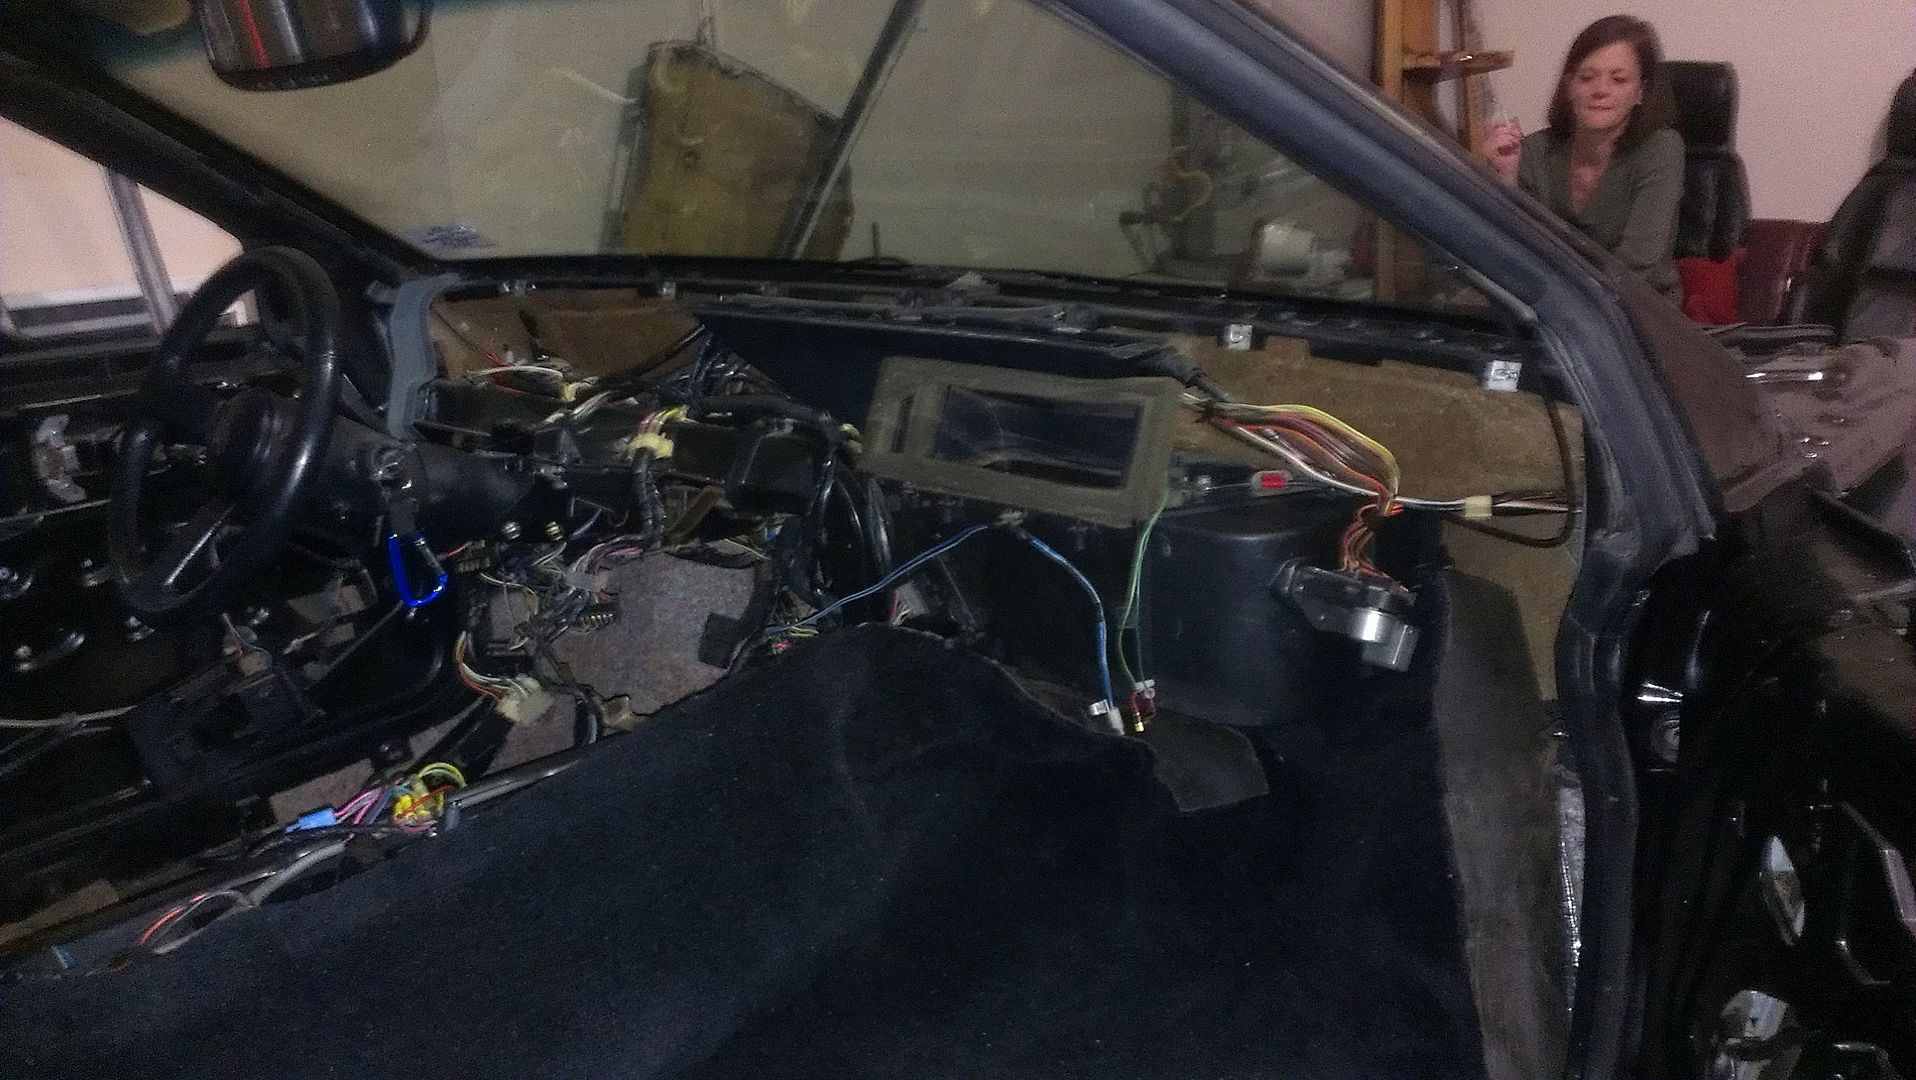
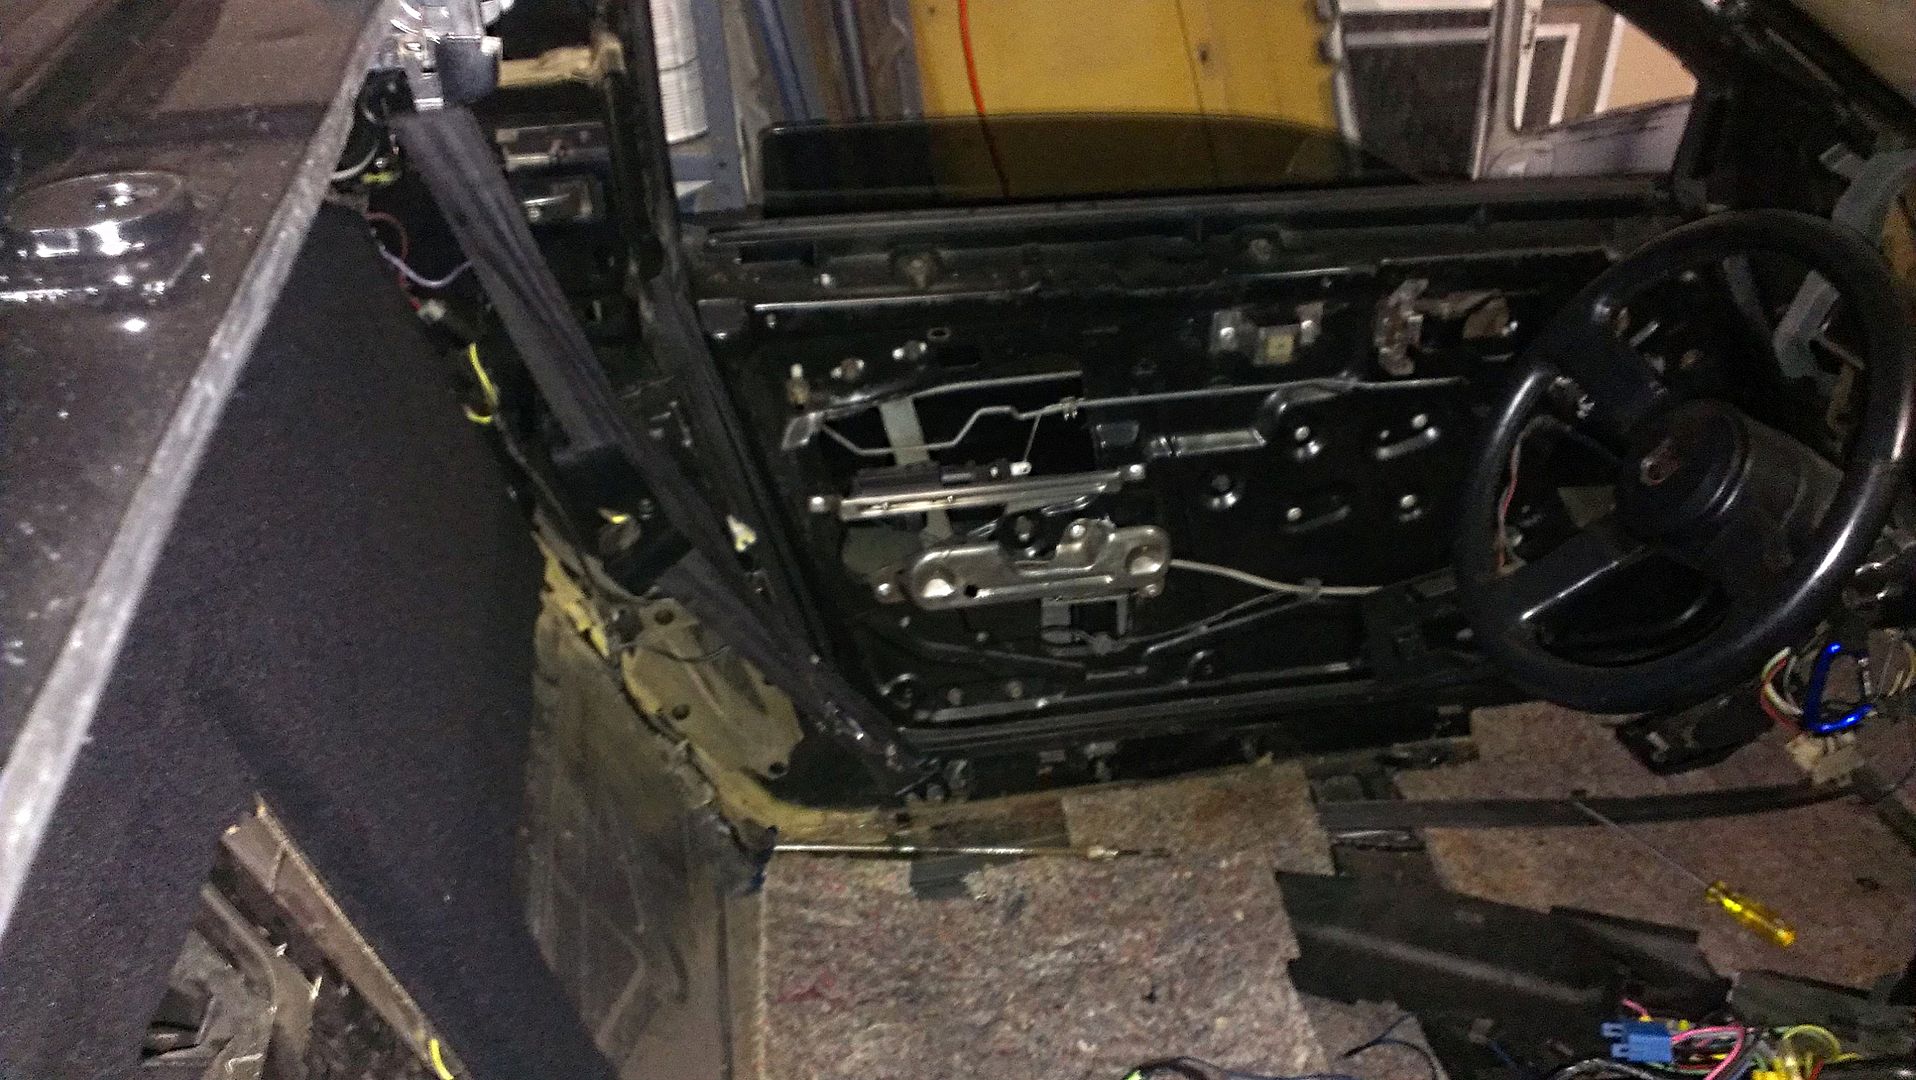
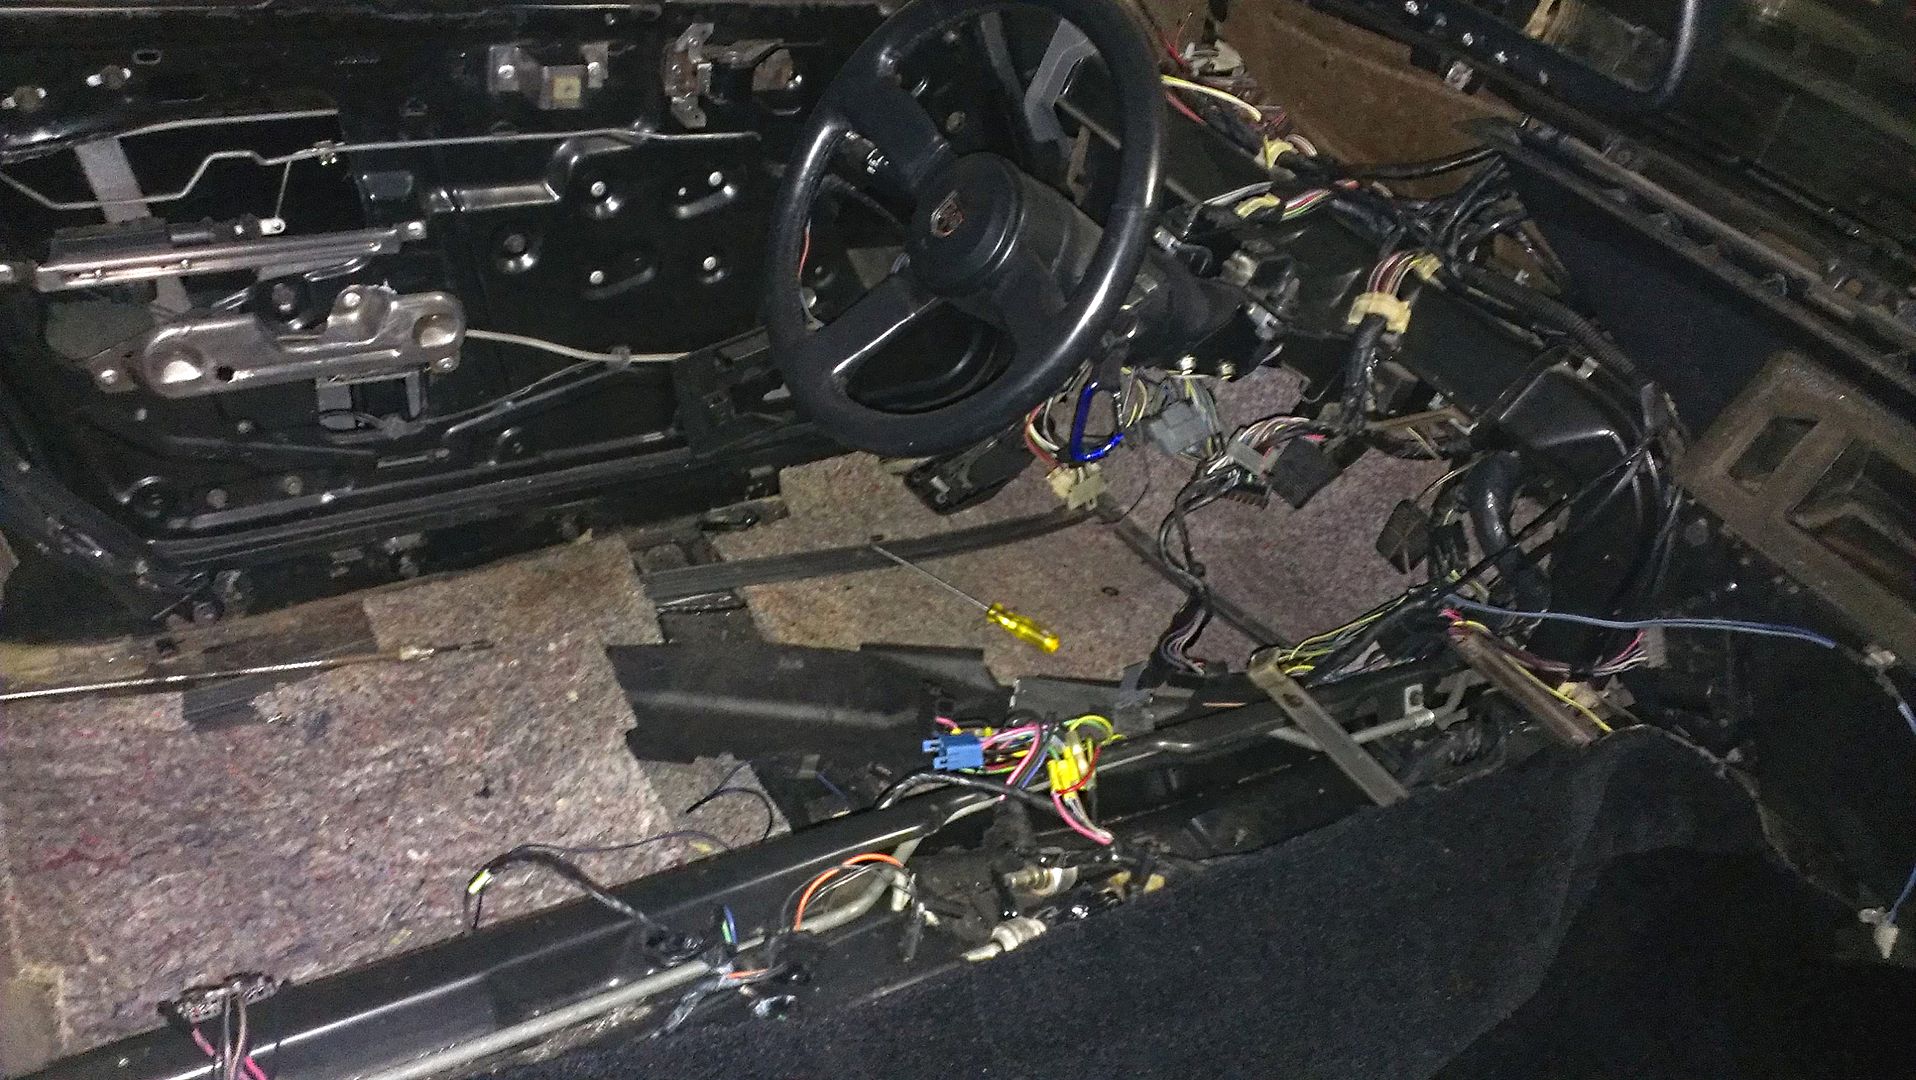
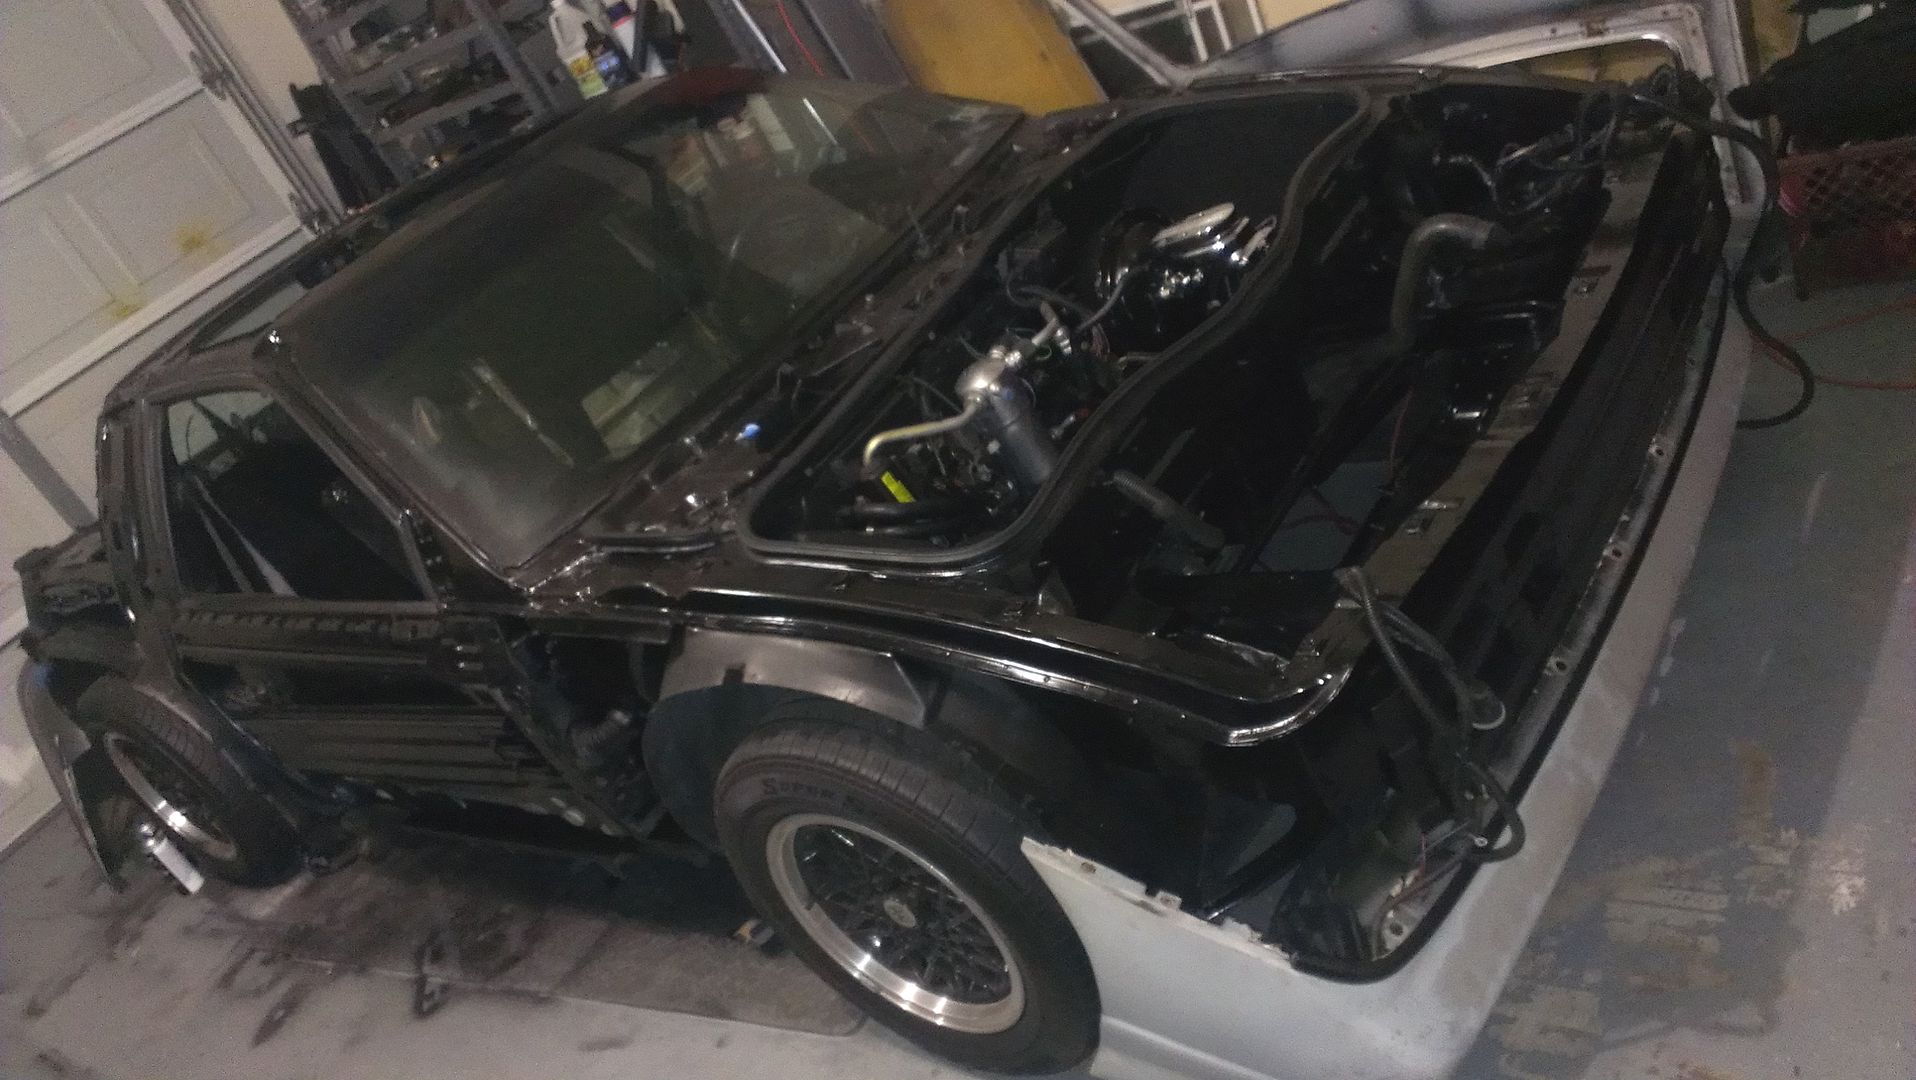
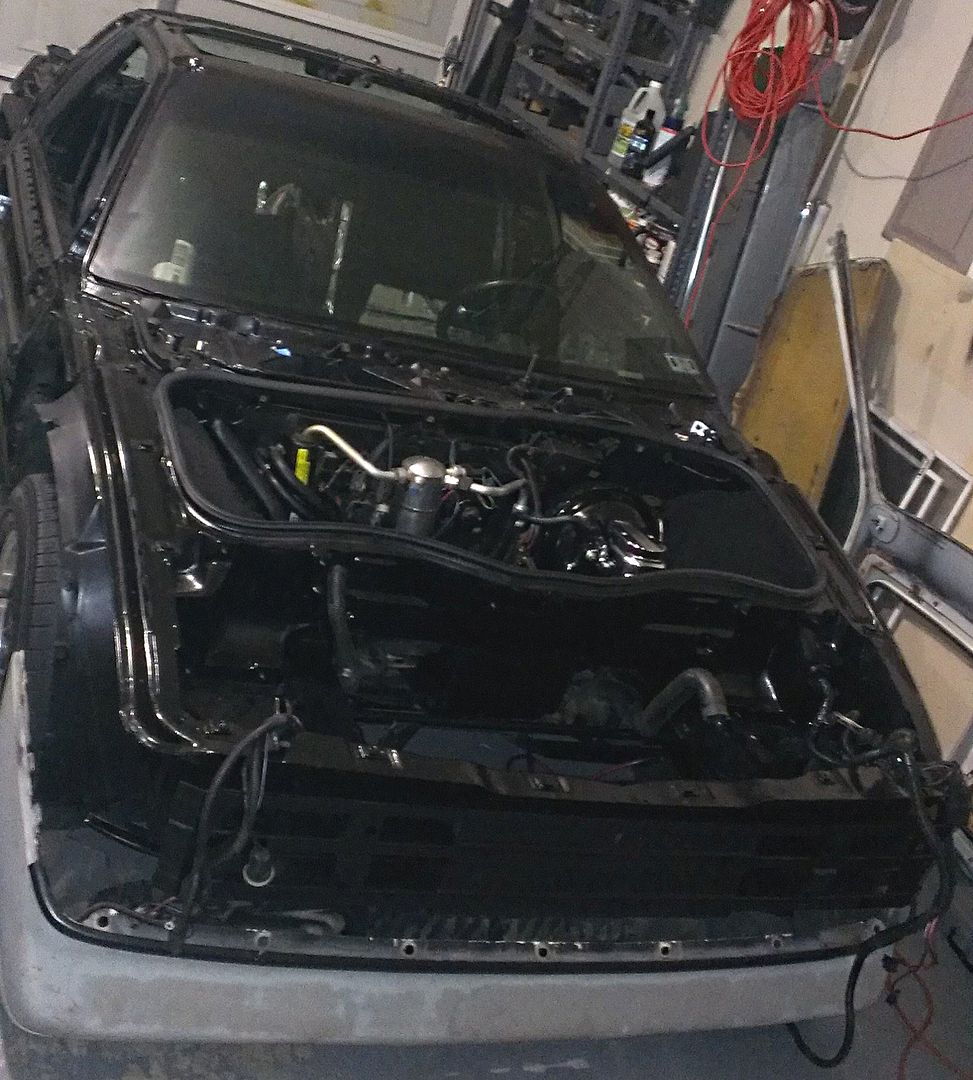
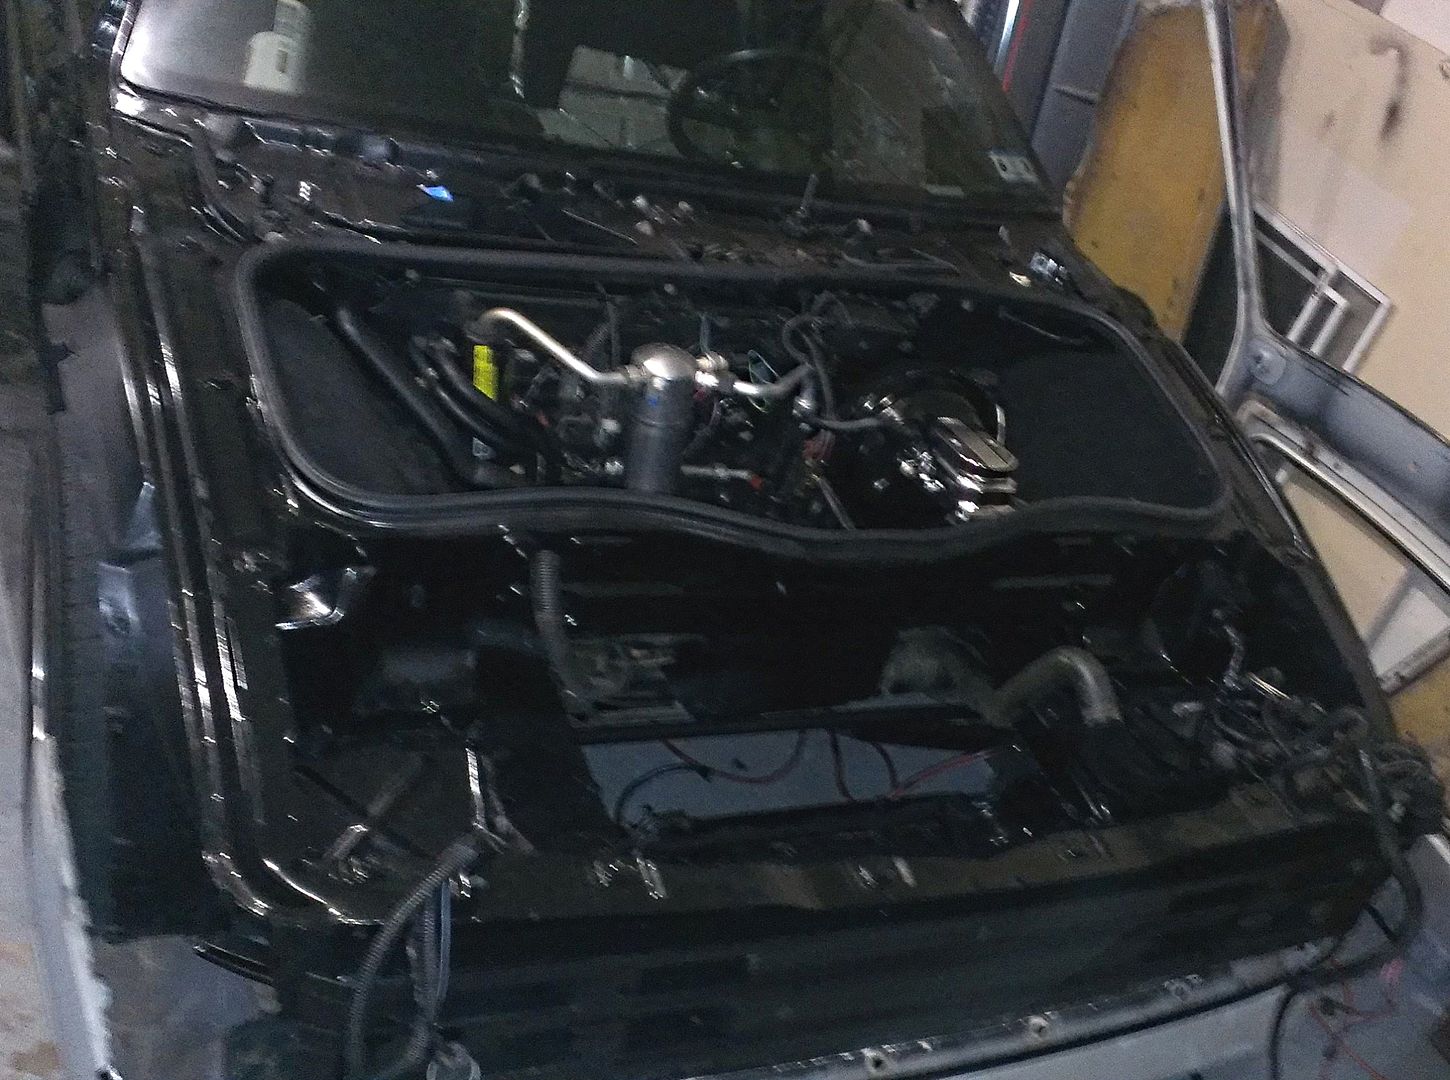
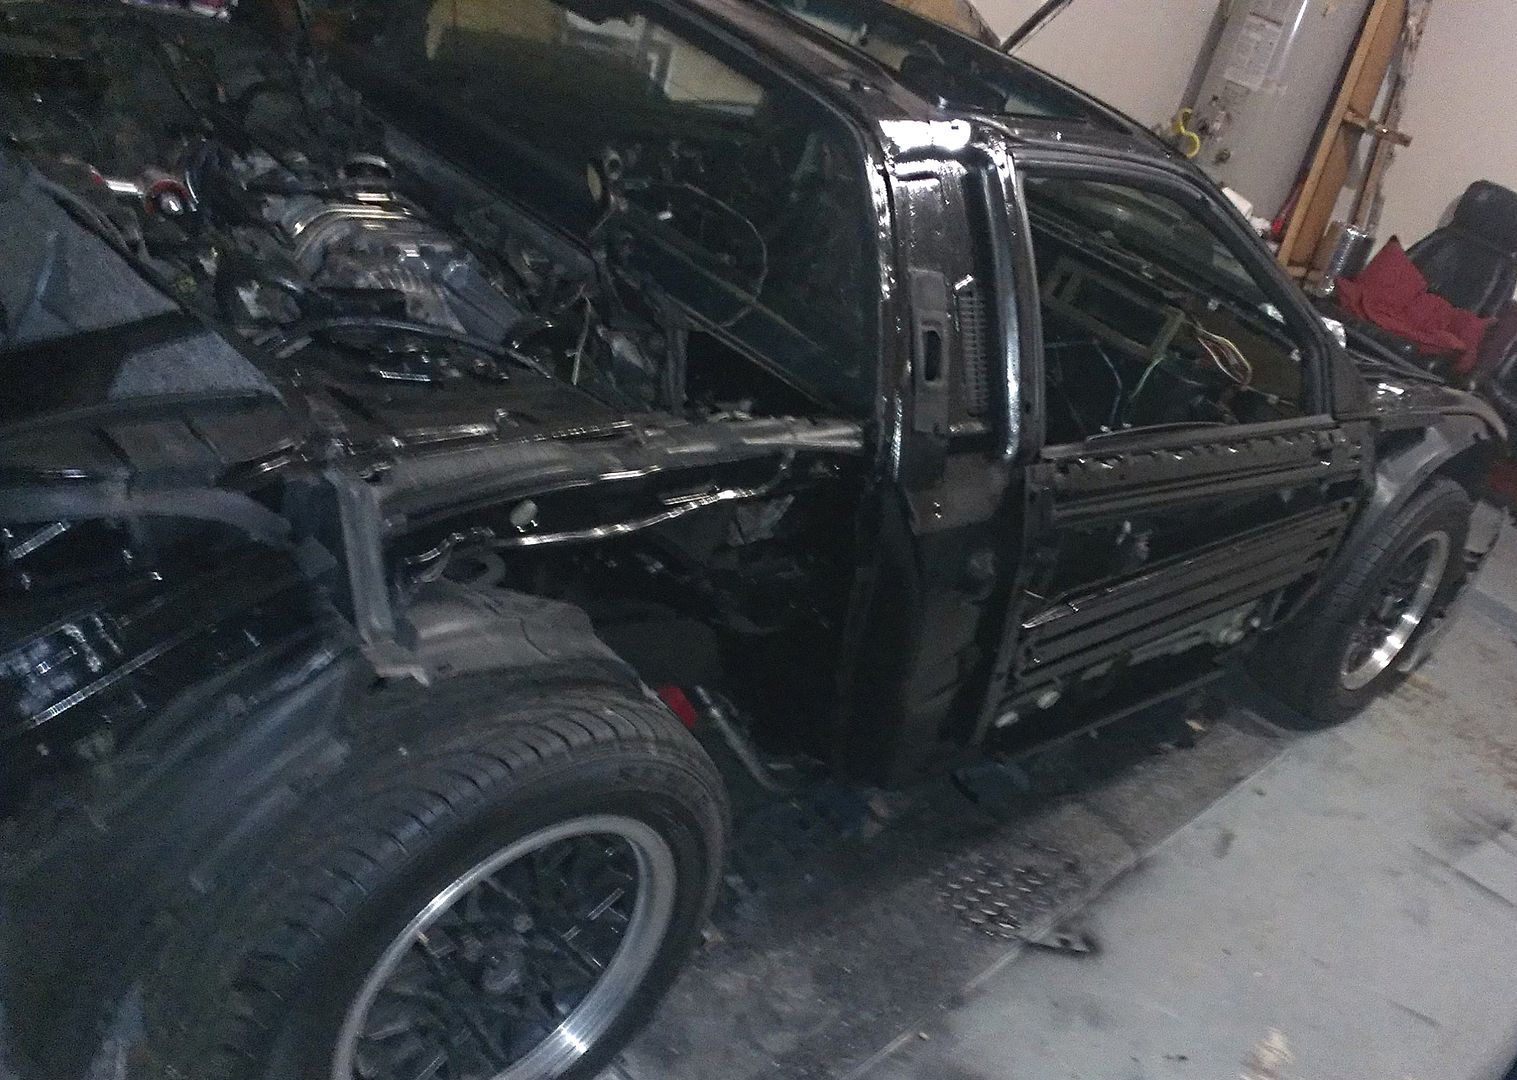
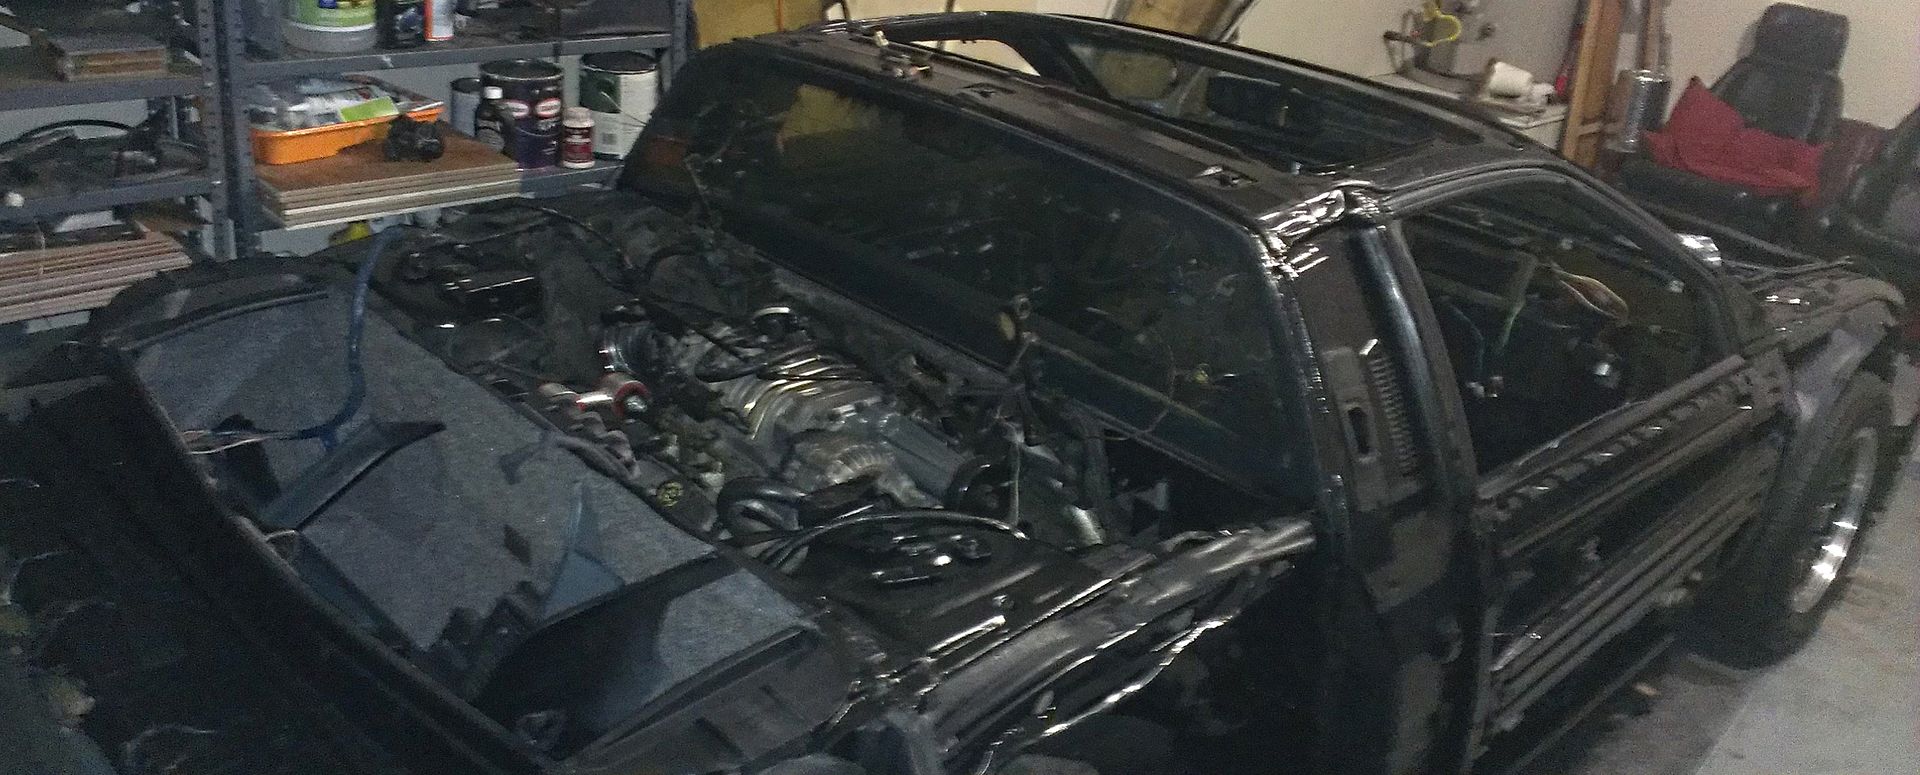
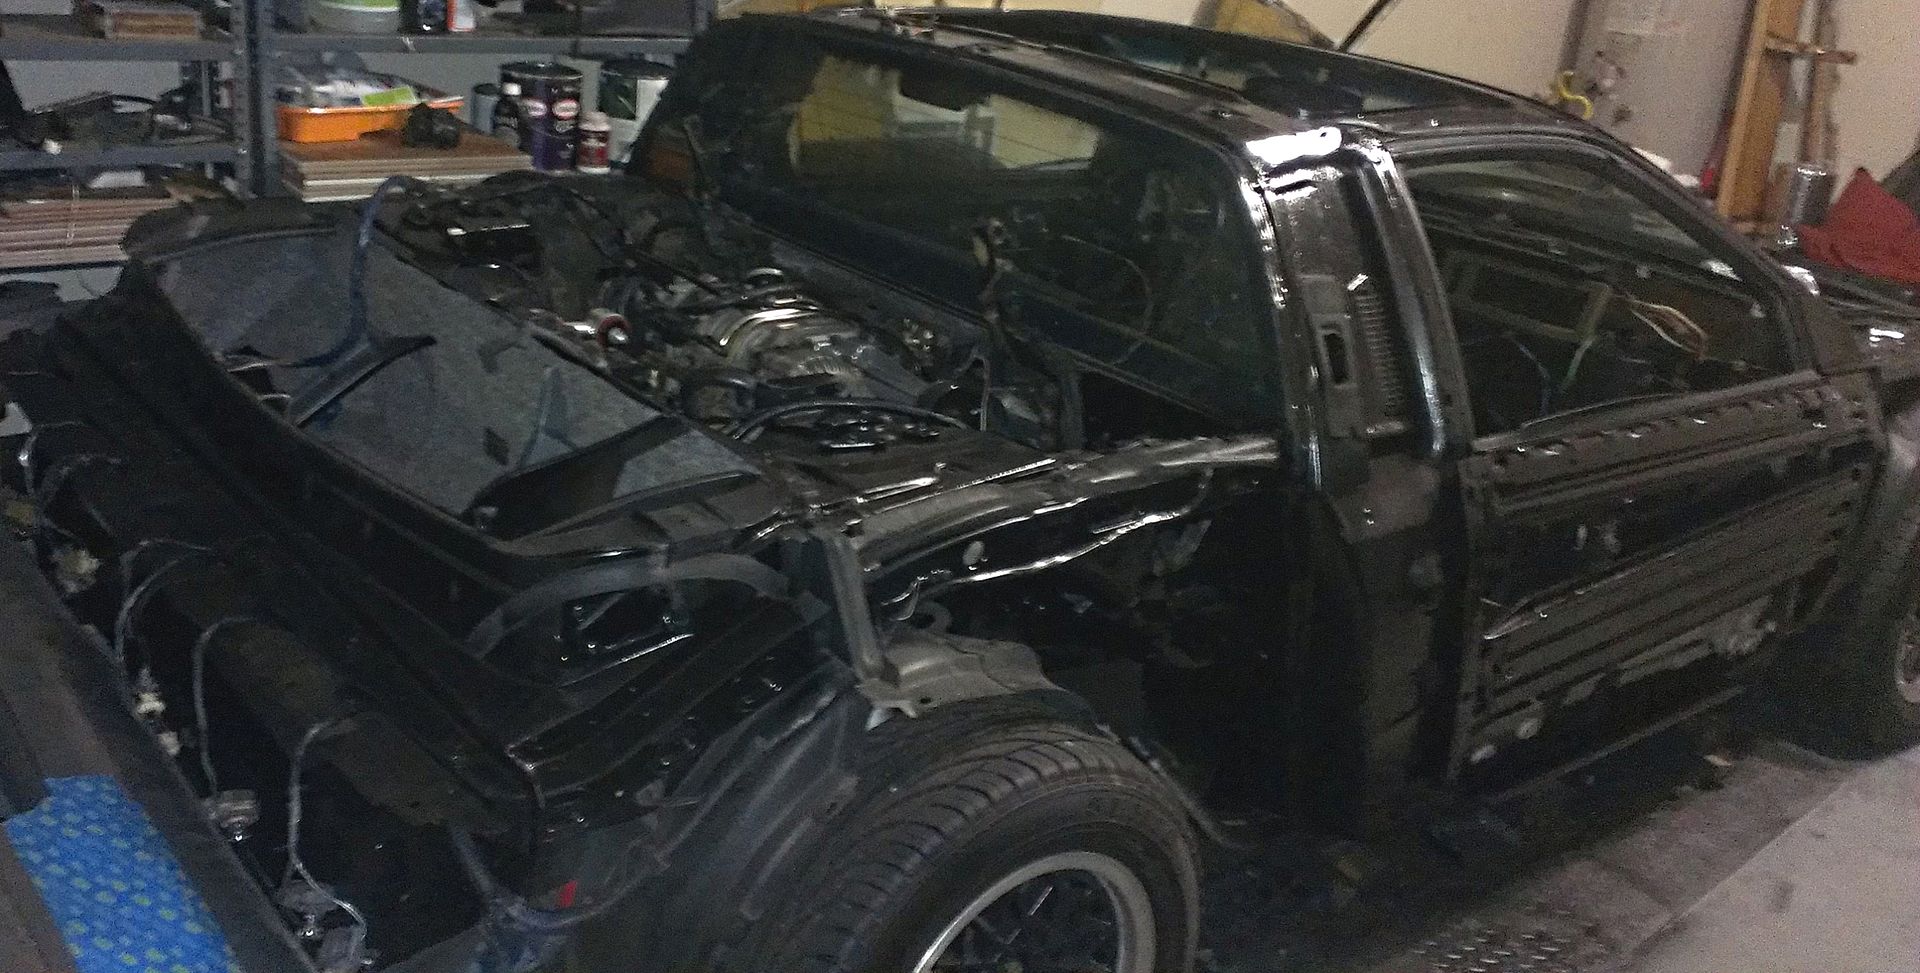
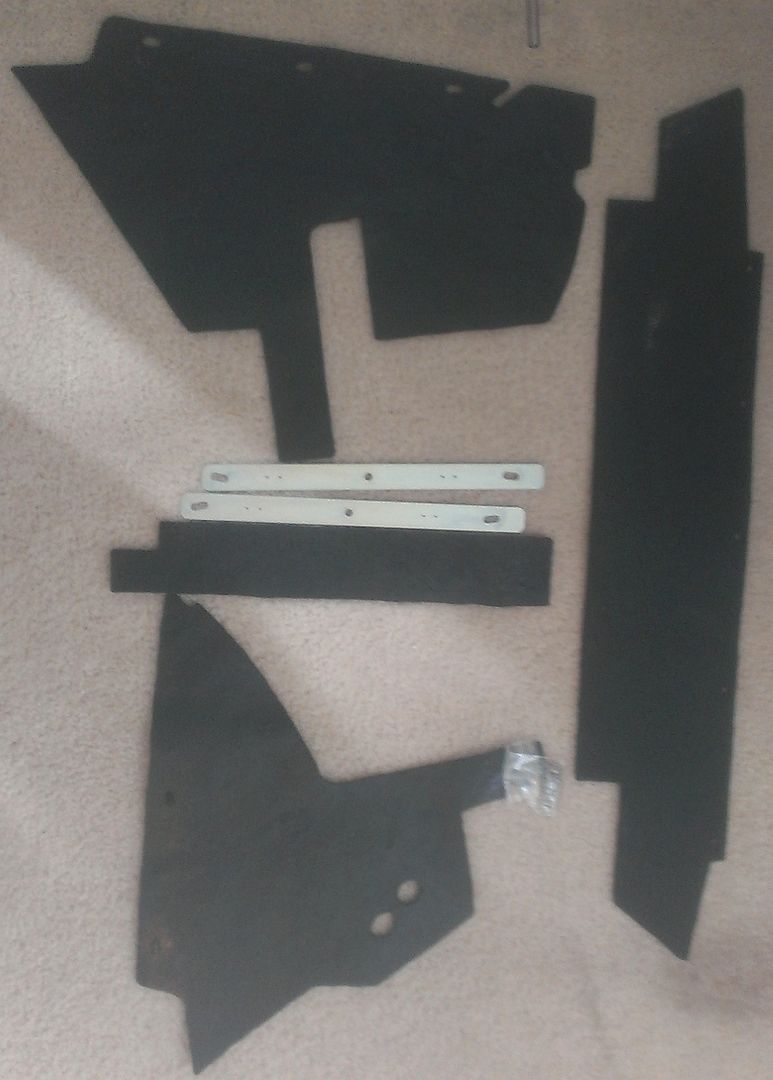
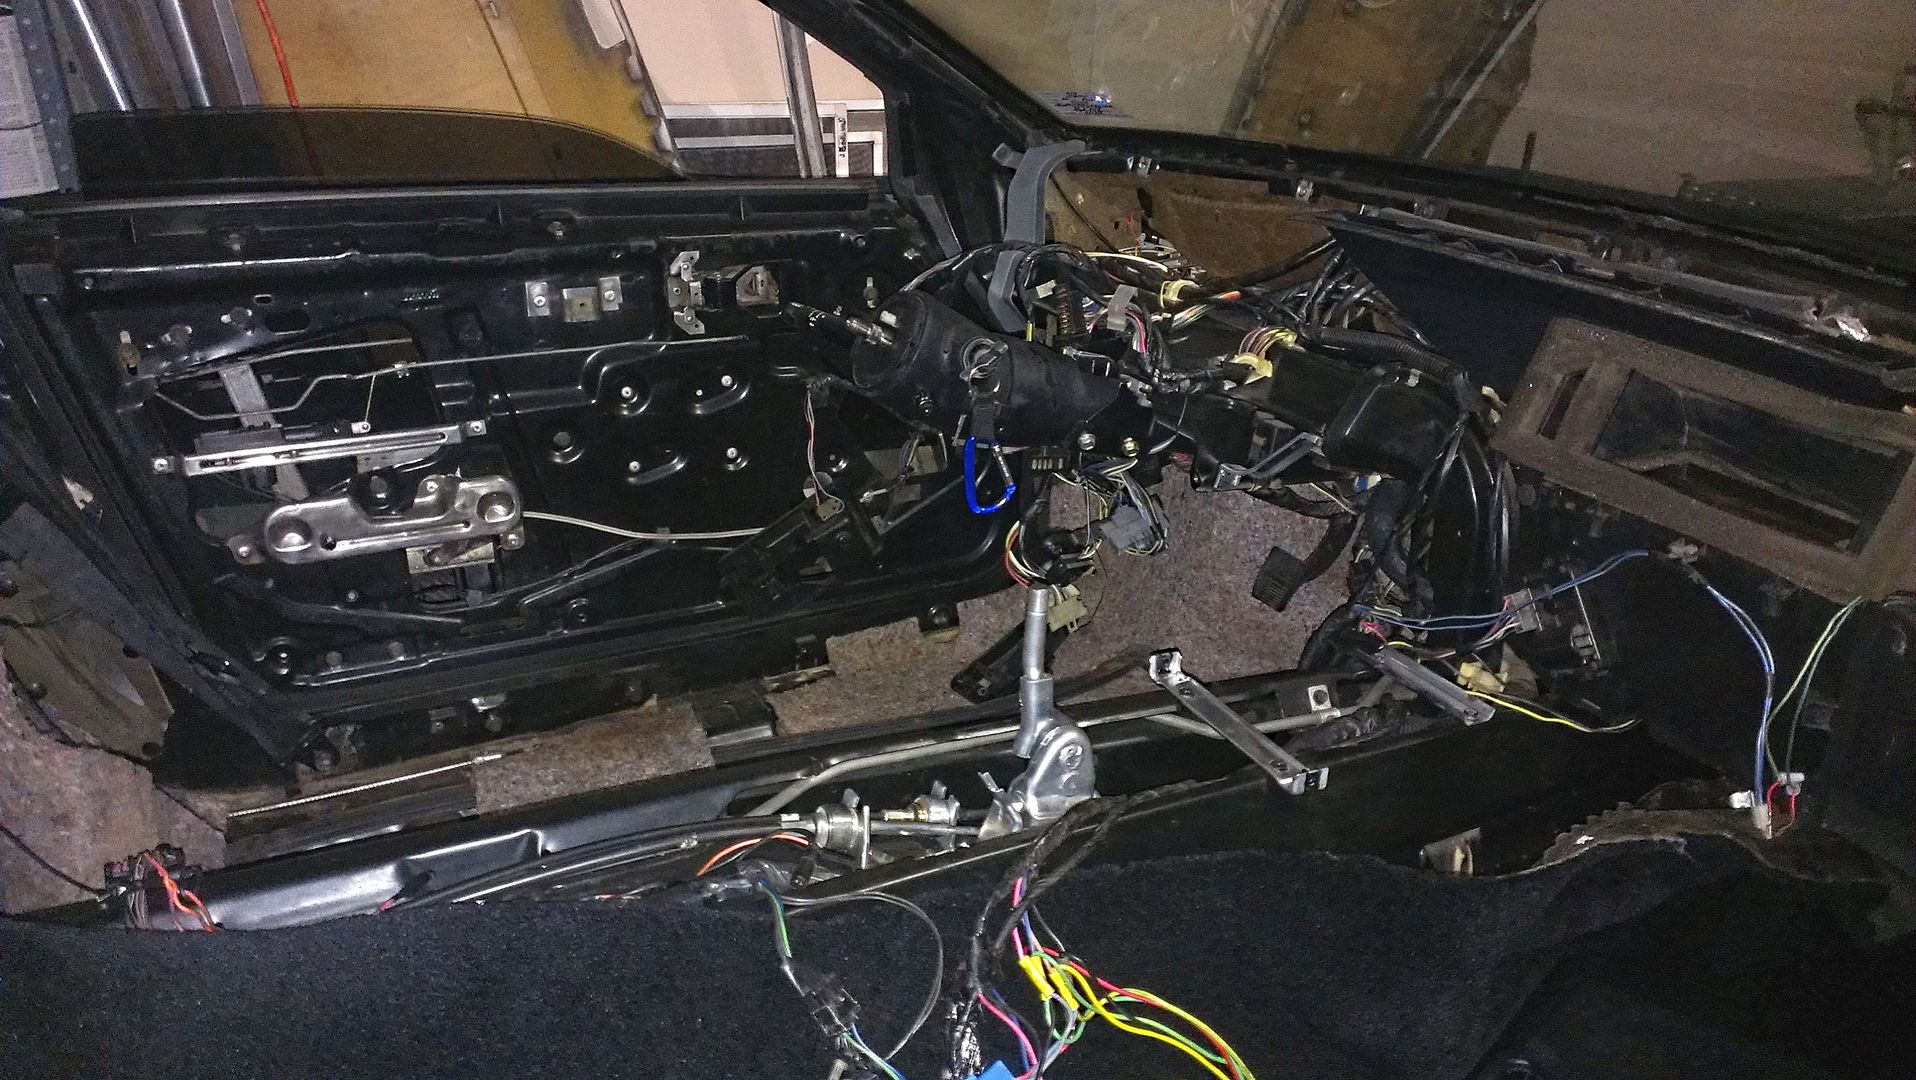
LIFE GOT BUSY FOR AWHILE & my liquidity was tied up in other projects...so I made the best use of the time and Stripped out the old interior. Cleaned, scrubbed, sanded, primed the interior. I mean every part. There is not a spec of rust anywhere in the cabin.
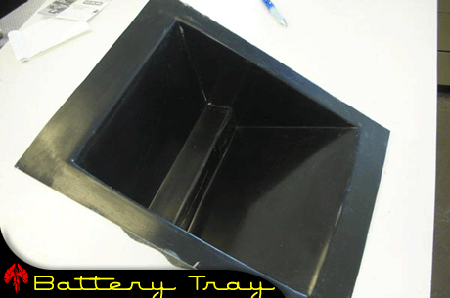
I then stripped off all the exterior body panels. Cleaned, scrubbed, de-greased, sanded primed, and good solid coat of black rustoleum paint. Again rust free exterior sub...the only part that needed a little spot welding was under where the old OM battery tray sat...a battery must have leaked at some point.
______________________________________________________________________________________________________________________________________
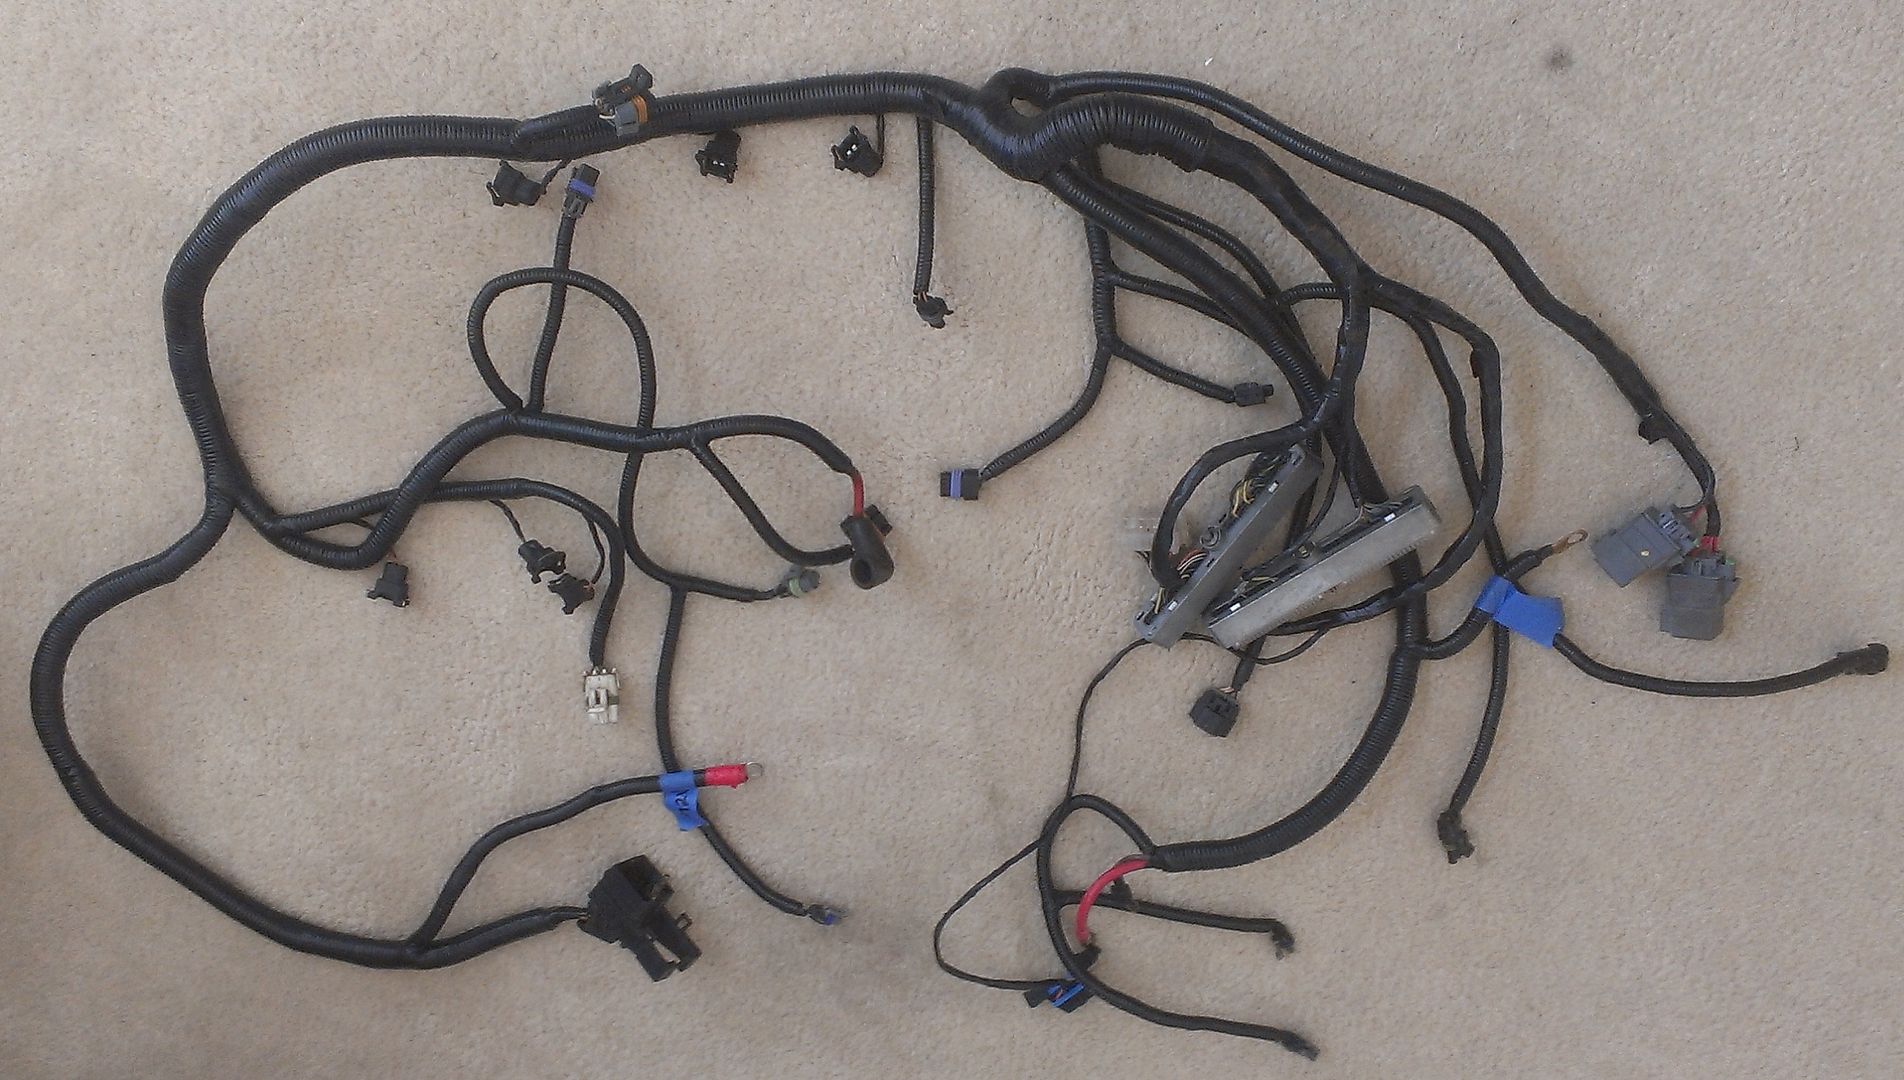
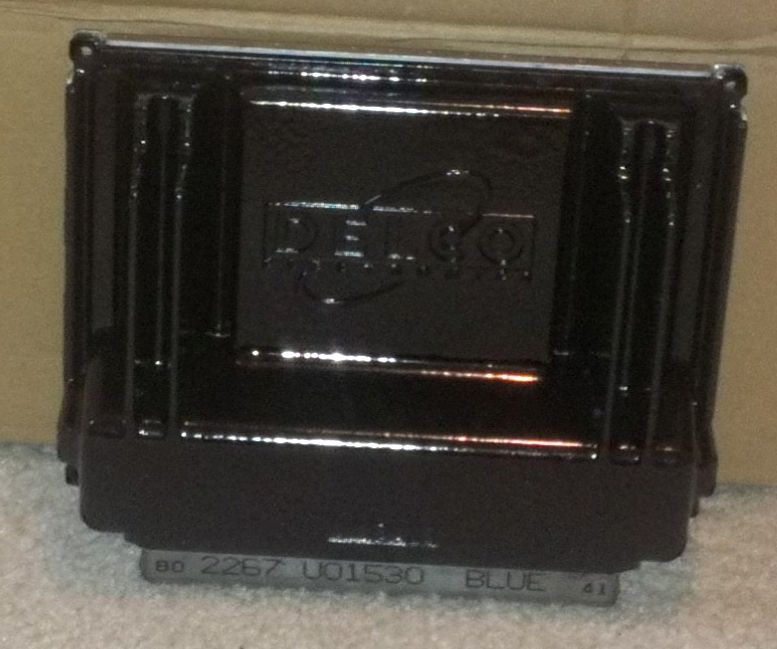
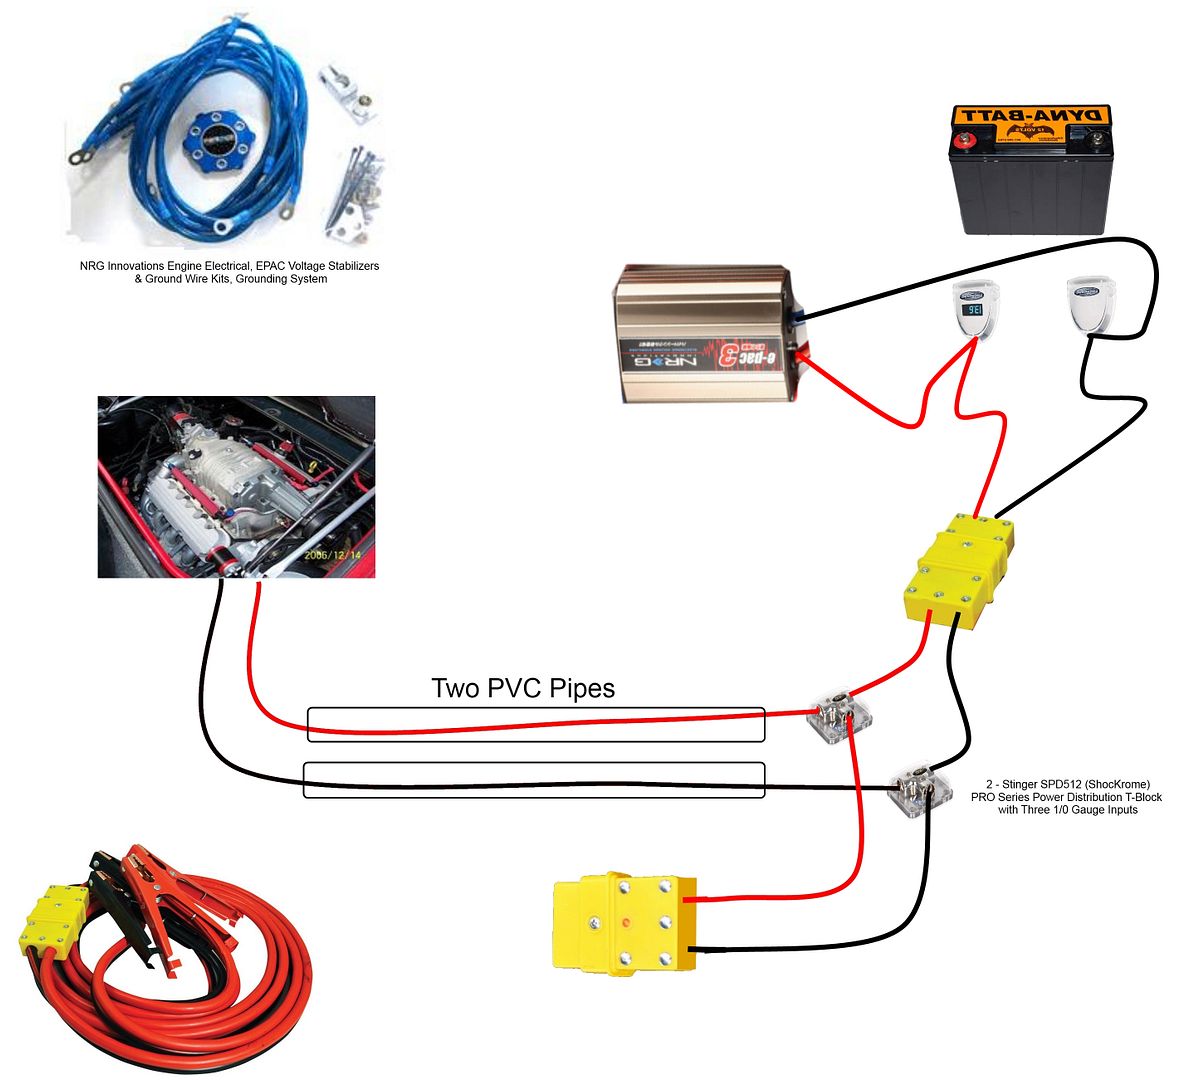
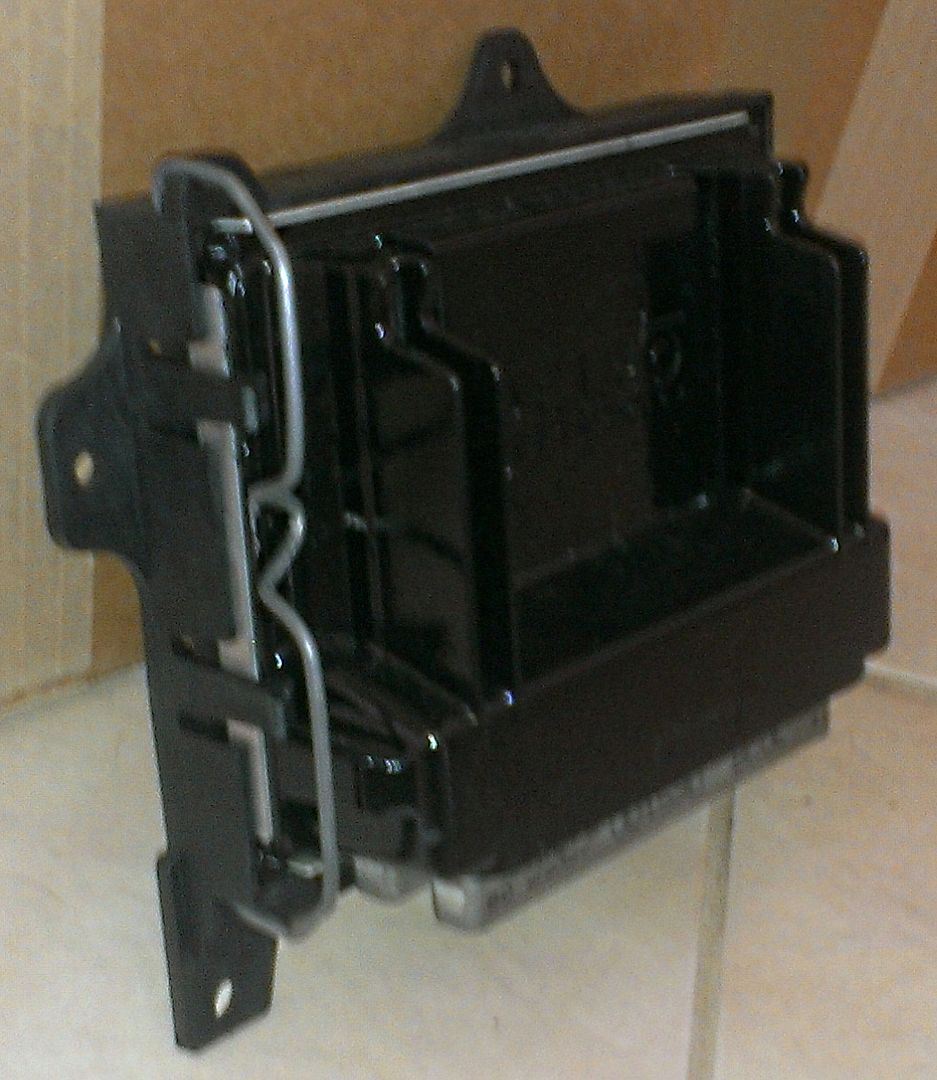
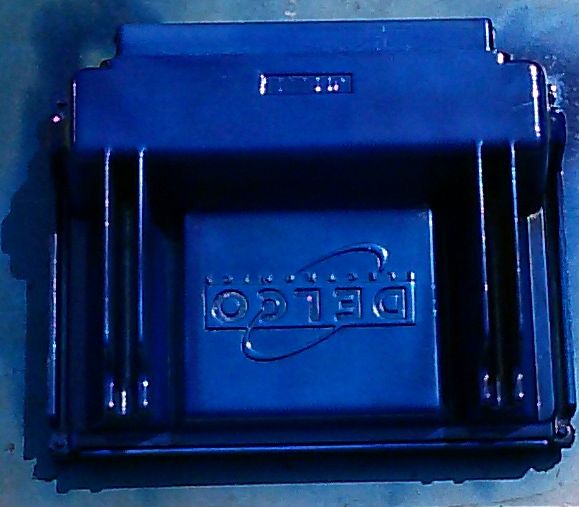
ELECTRICAL / MECHANICALReplacement Wiring Harness & PCM showed up yesterday from member InTheLead...he had an extra PCM & harness from FIEROFLYER:
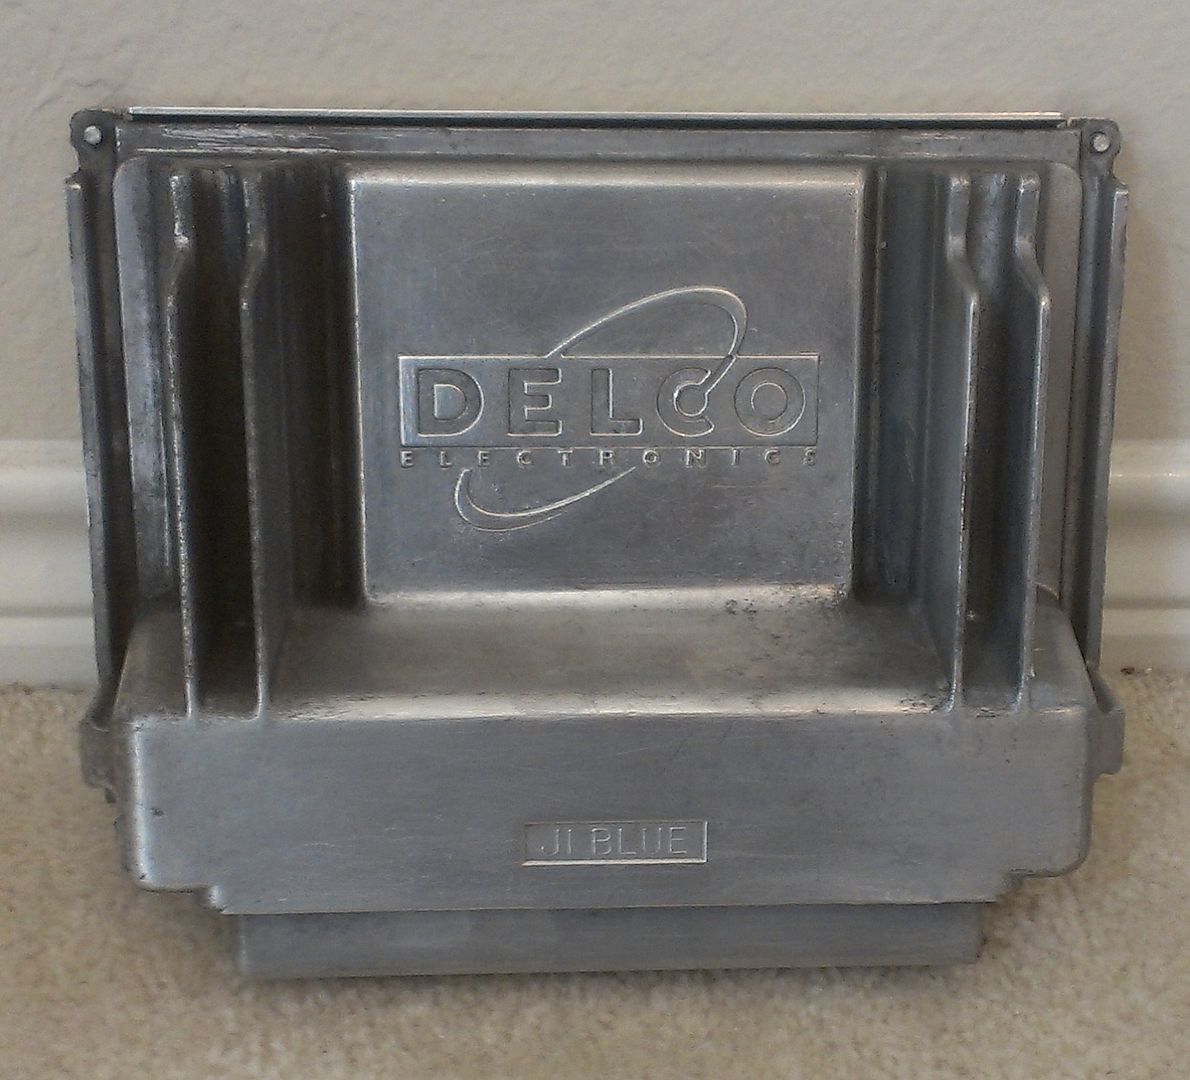
The PCM was completely oxidize when I recieved it yesterday, so I have spent a few hours cleaning up...at this point I think I am going to bring the entire PCM to nice clean polish.
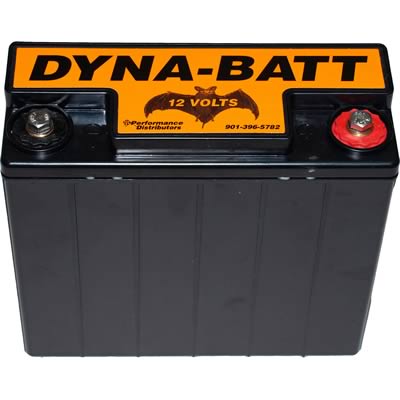
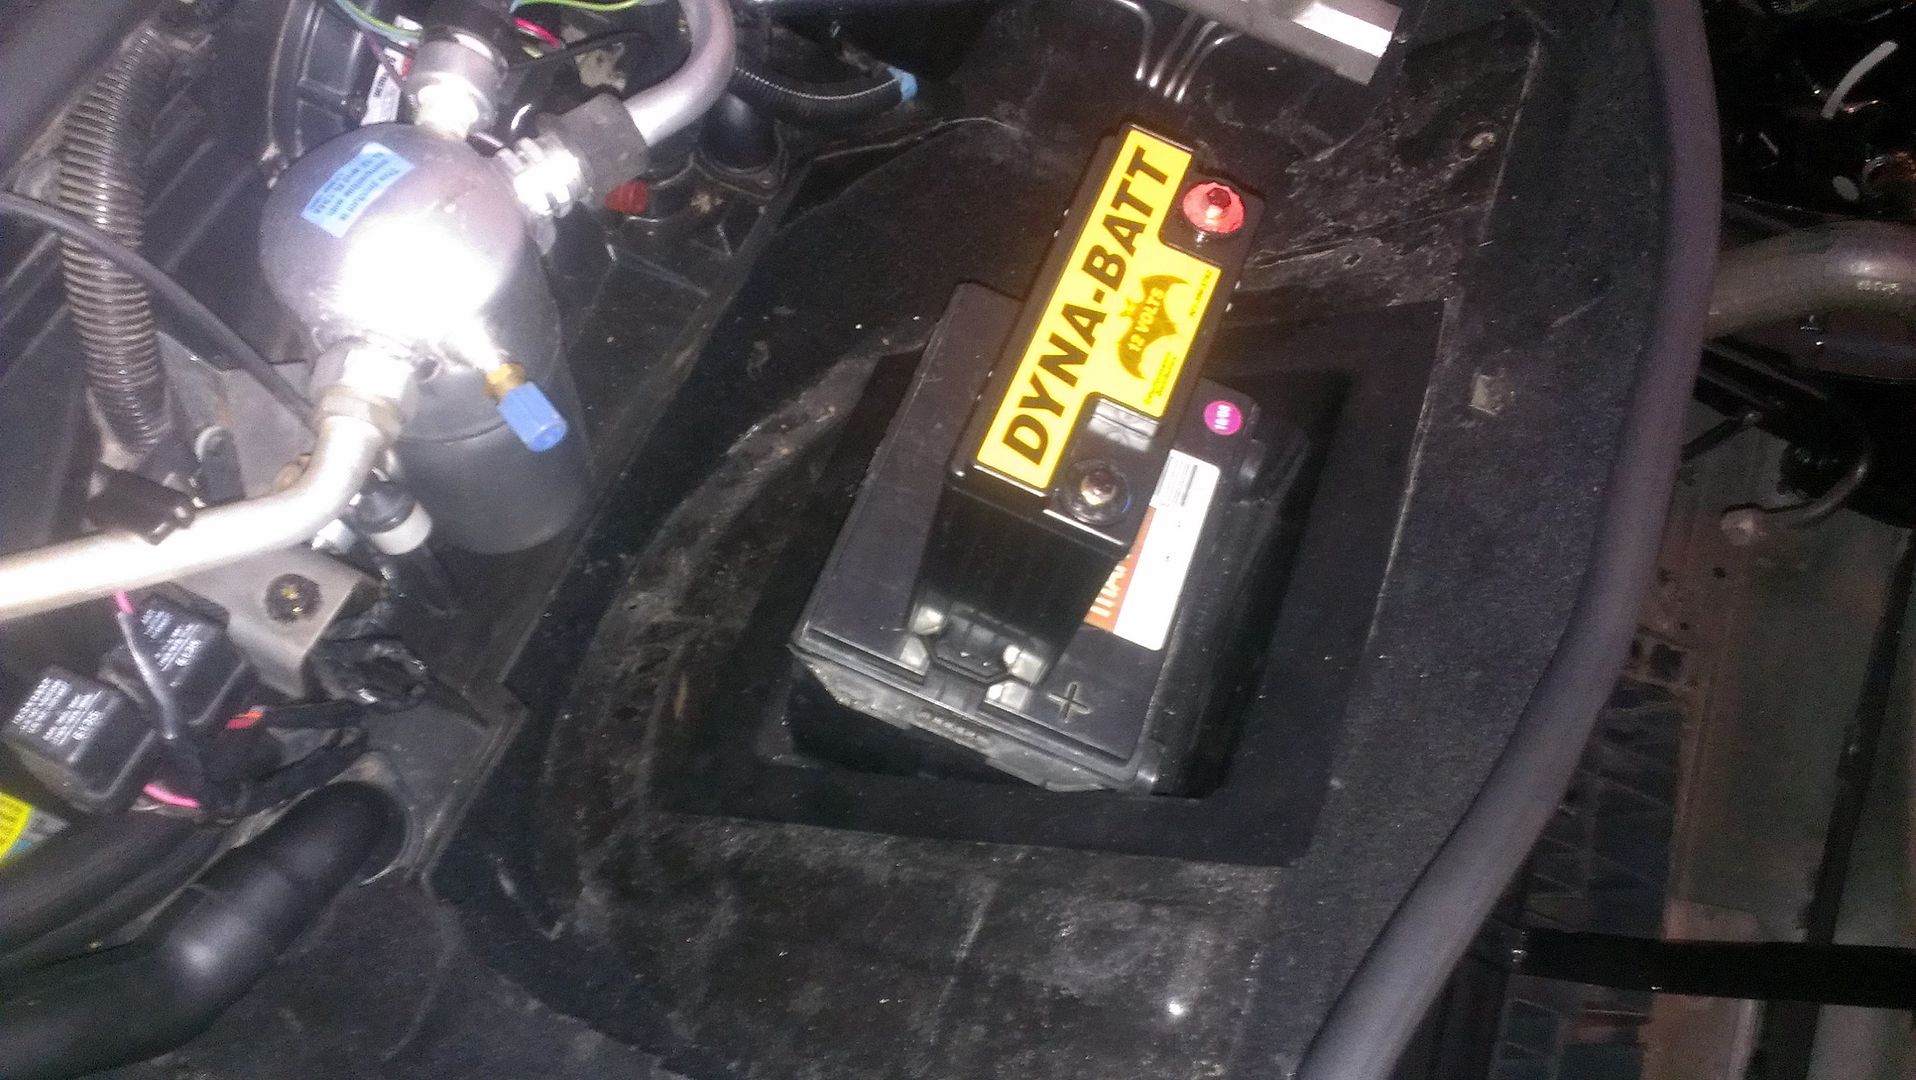
Davis Unified Ignition Dyna-Batt Batteries 5575C:
NEW POWERMASTER ALTERNATOR,CHROME,12SI,140AMP:

Adding a setup I had in one of my old mustang years ago:
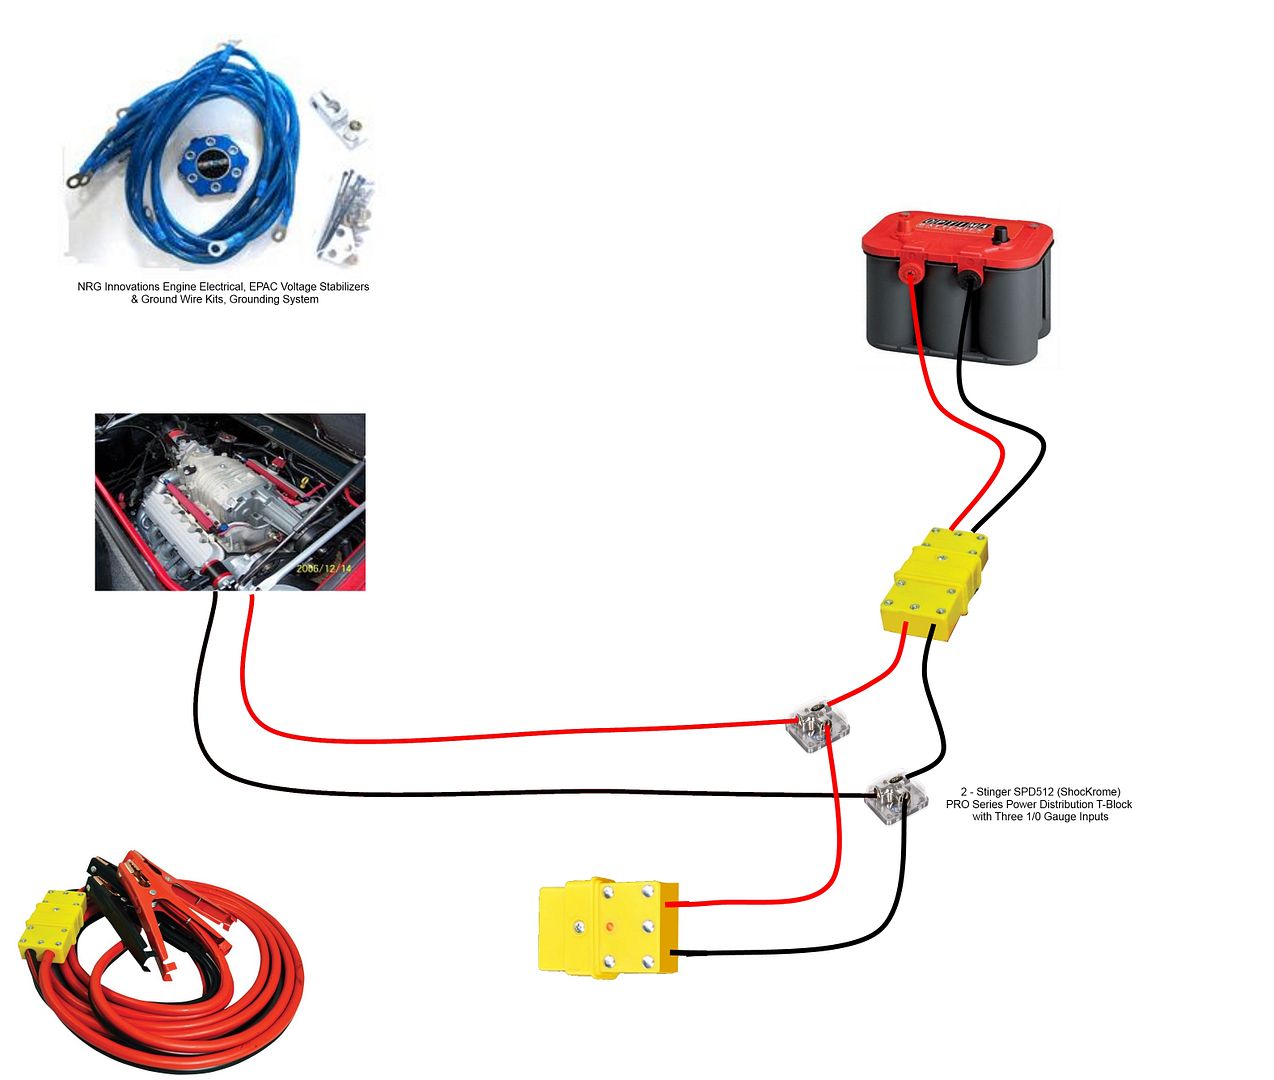
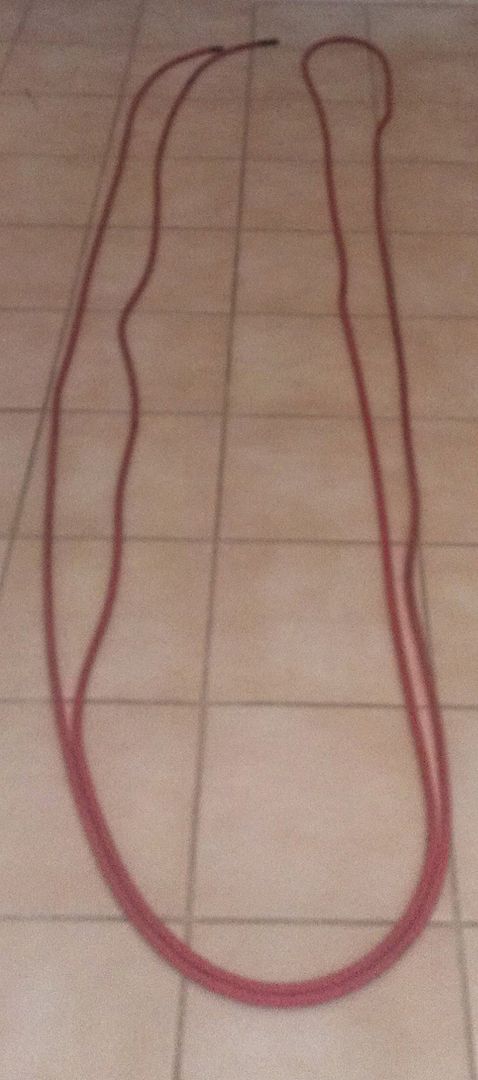
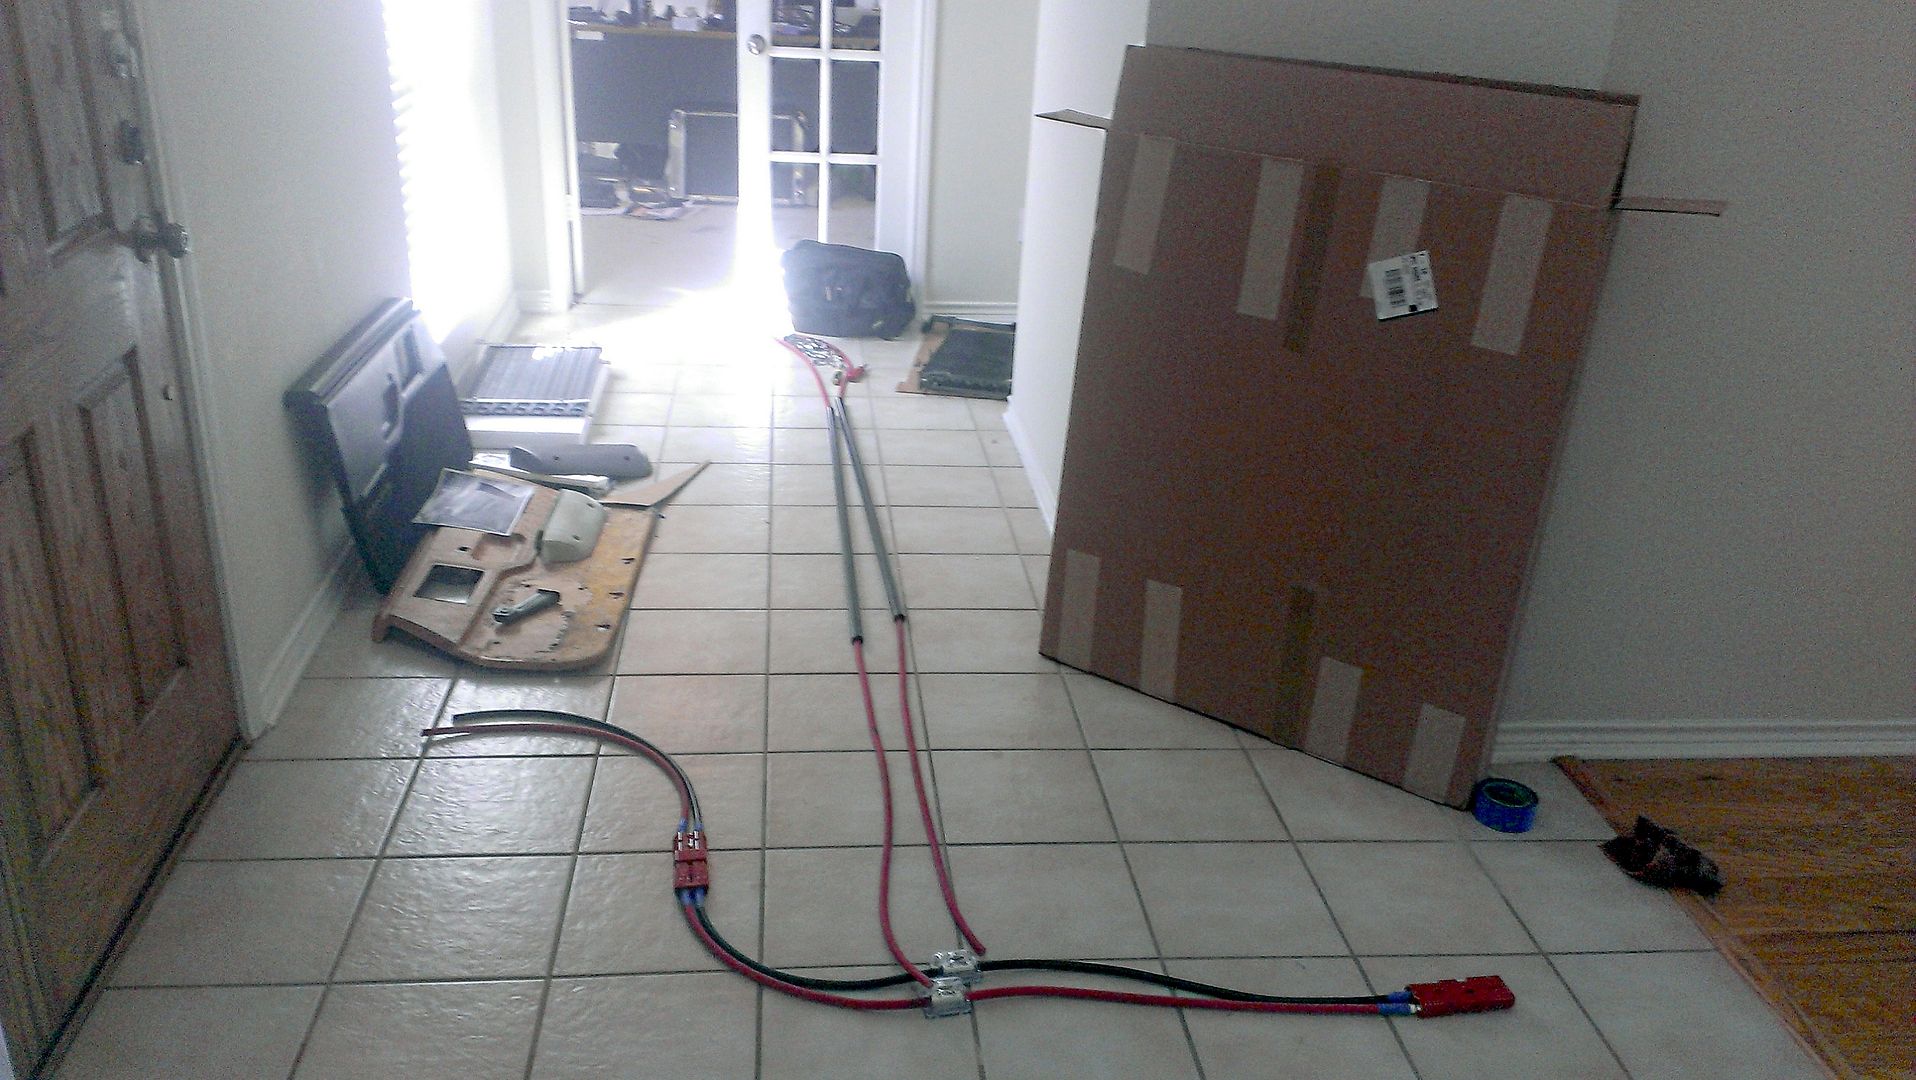
I will be utilizing 1/0 gauge welding wiring:

and the plugs are industrial rated Goodall brand as well.
I am going to get Russ88TTop to see if he can make me a spare tire cover with an embroidered upper zipper pouch to hold the jumper cable portion when not in use.
Battery Tray from Archie's:
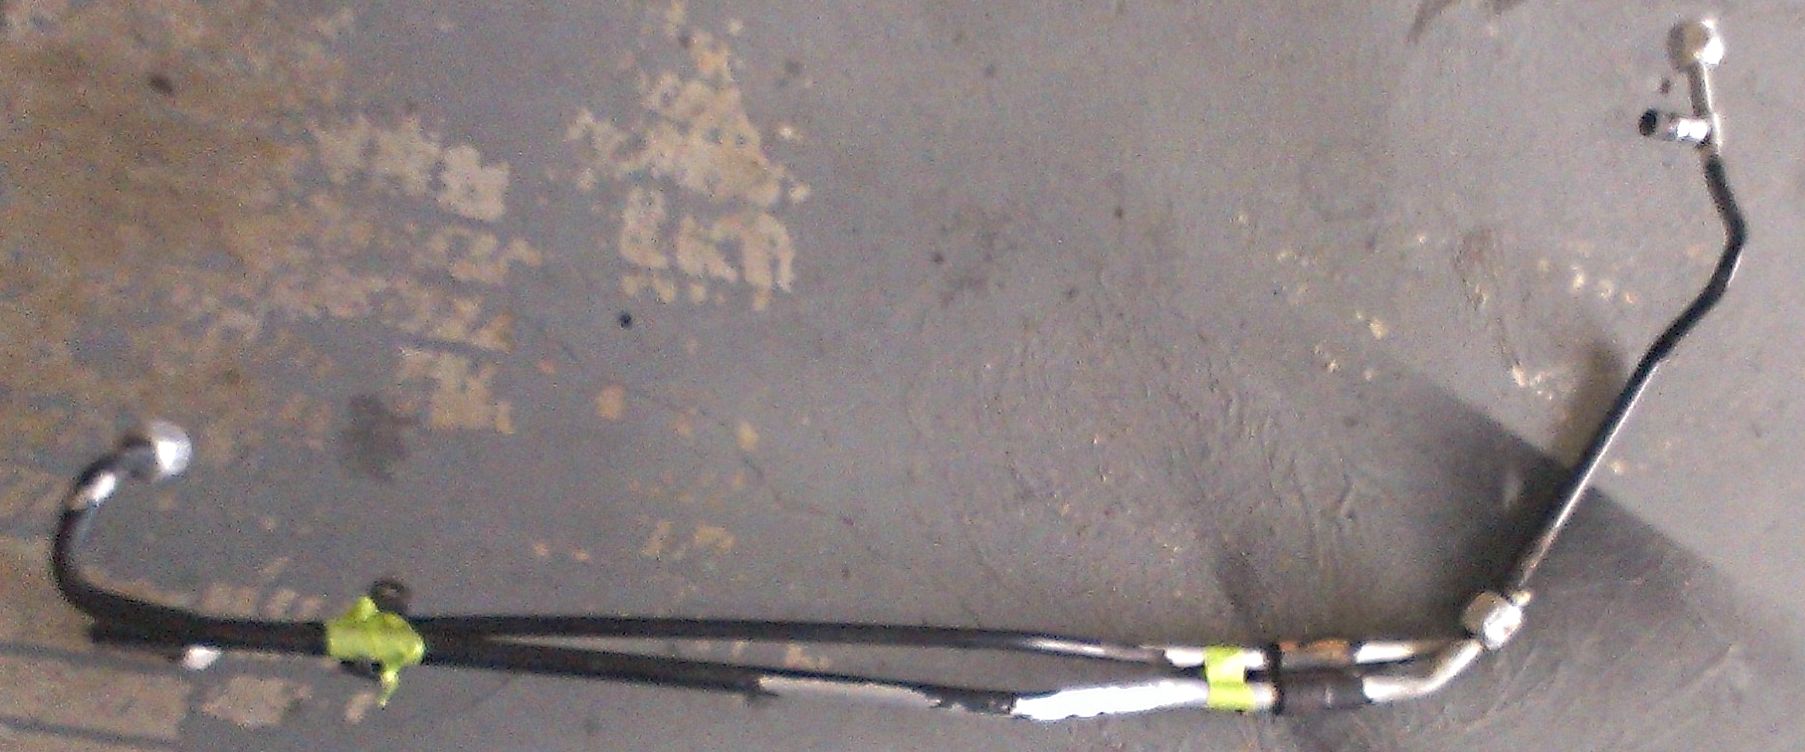
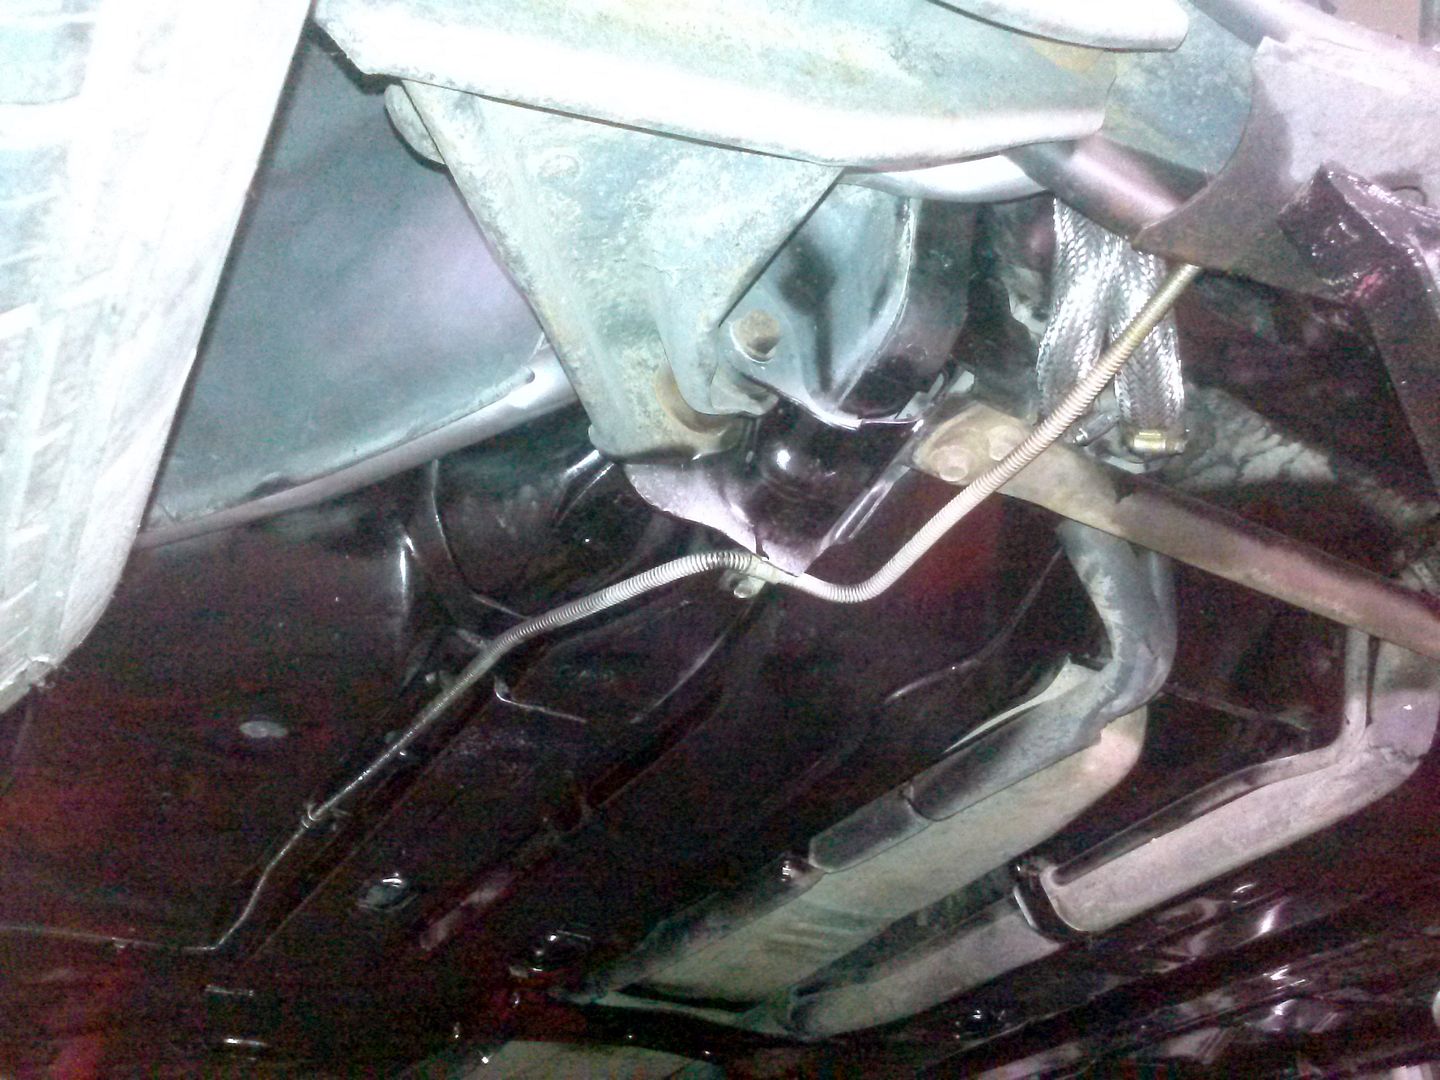
Steel Braided Fuel Lines:

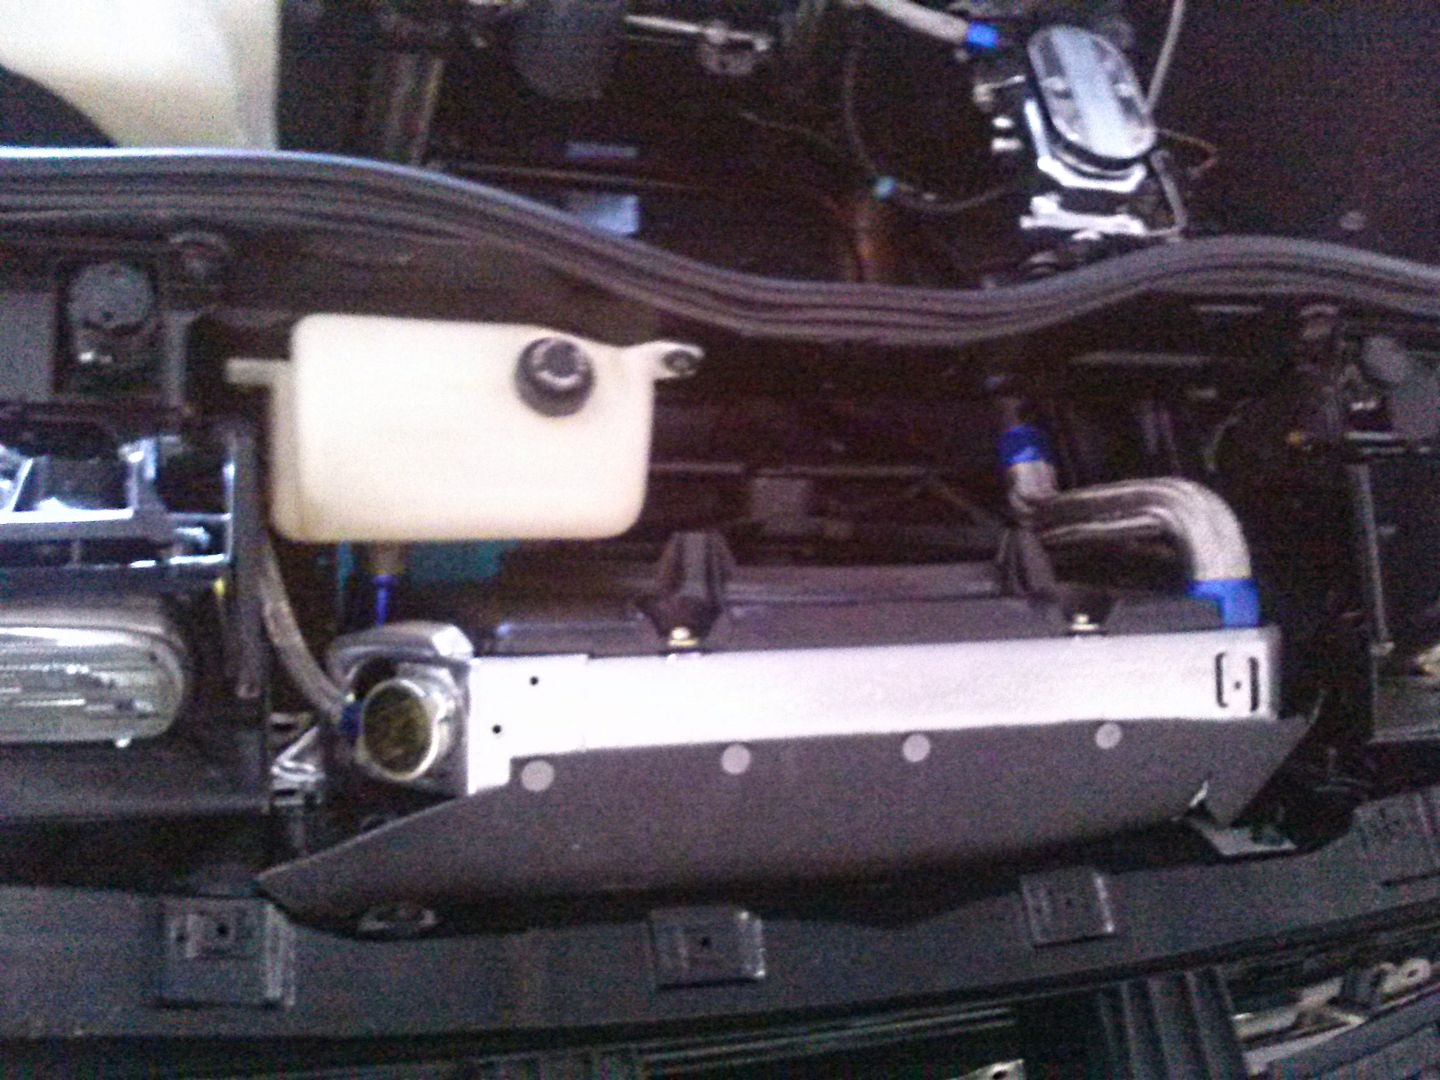
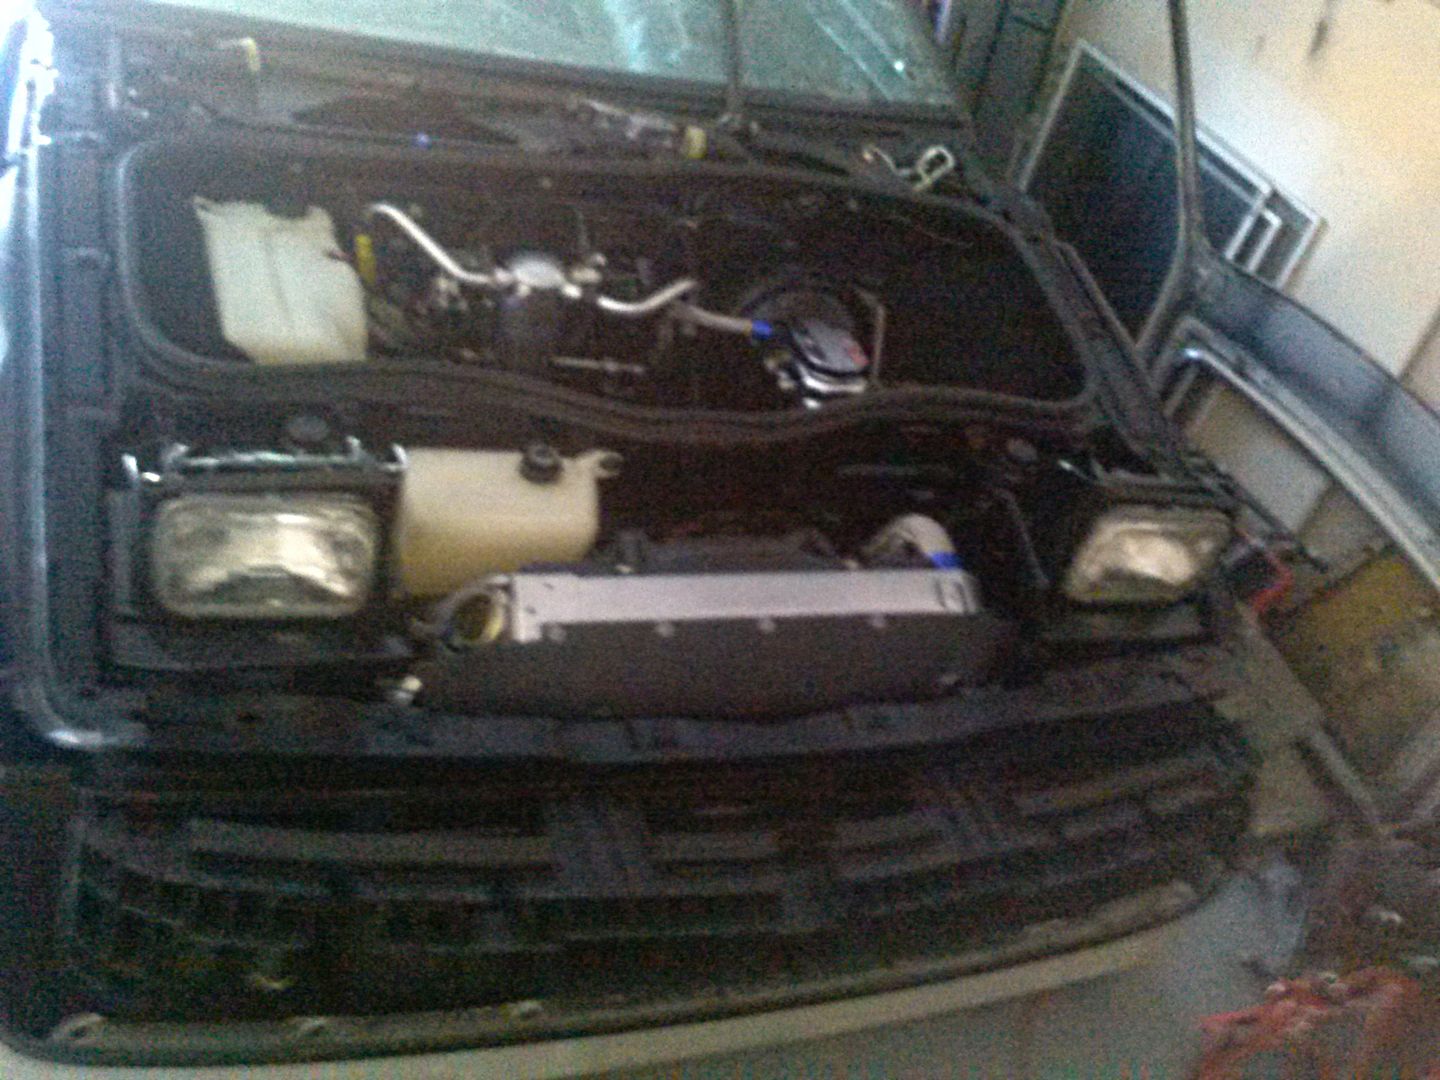
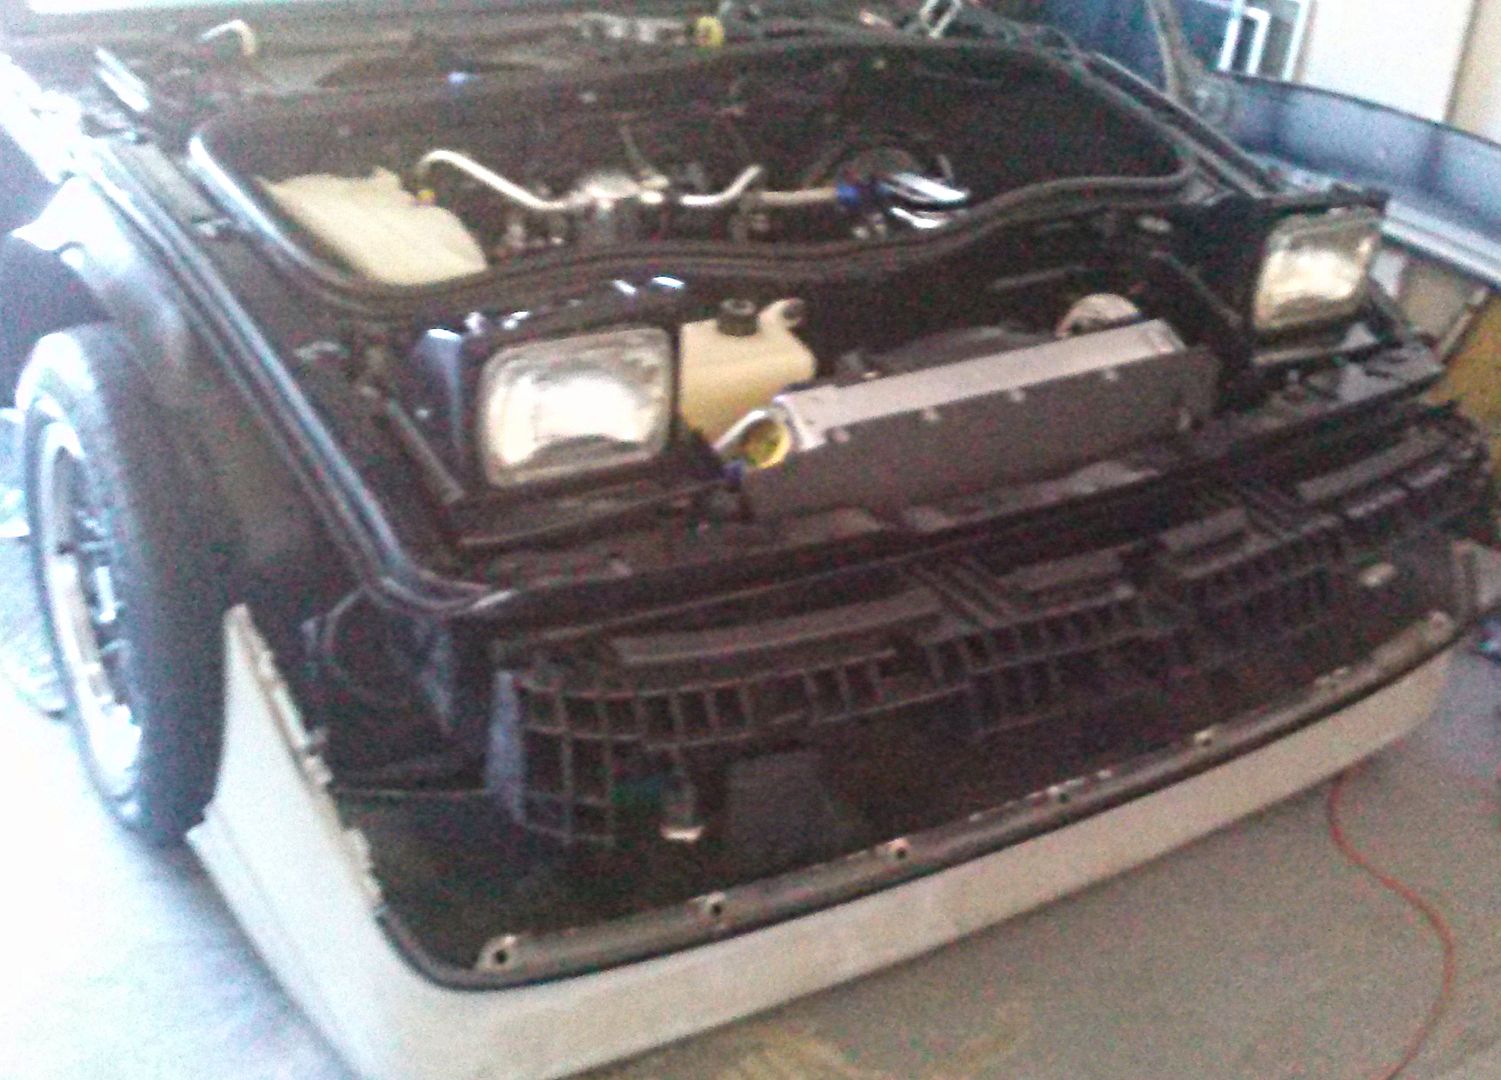
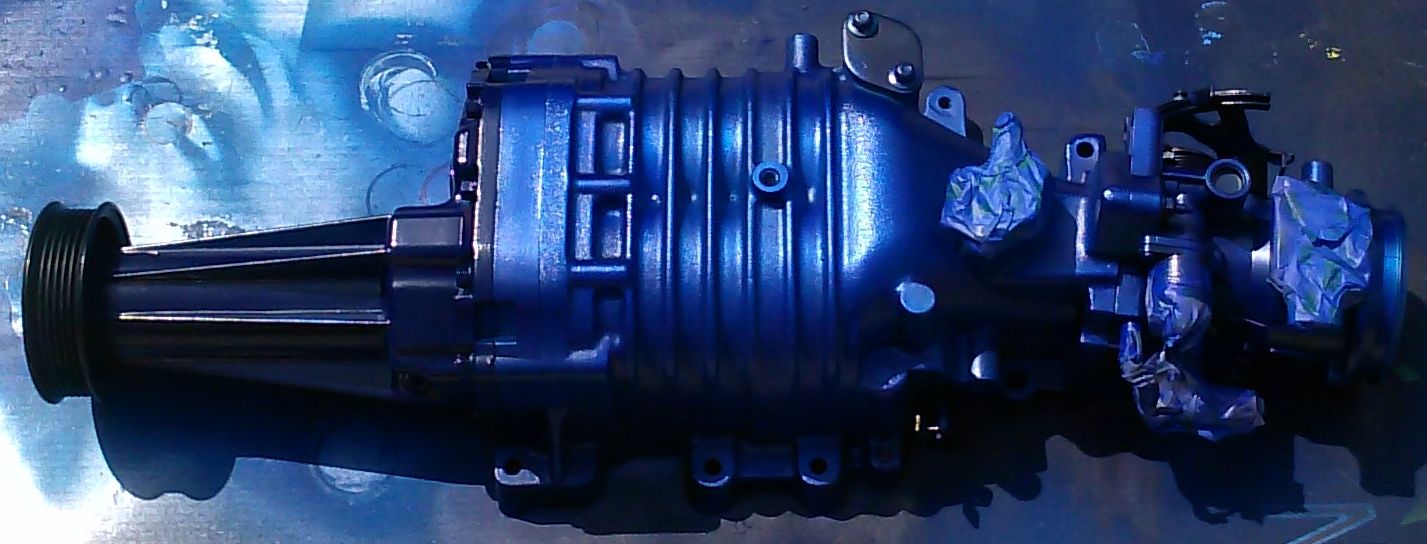
3800 Series II supercharged Fiero cold air intake system from Chris at WestCoast:

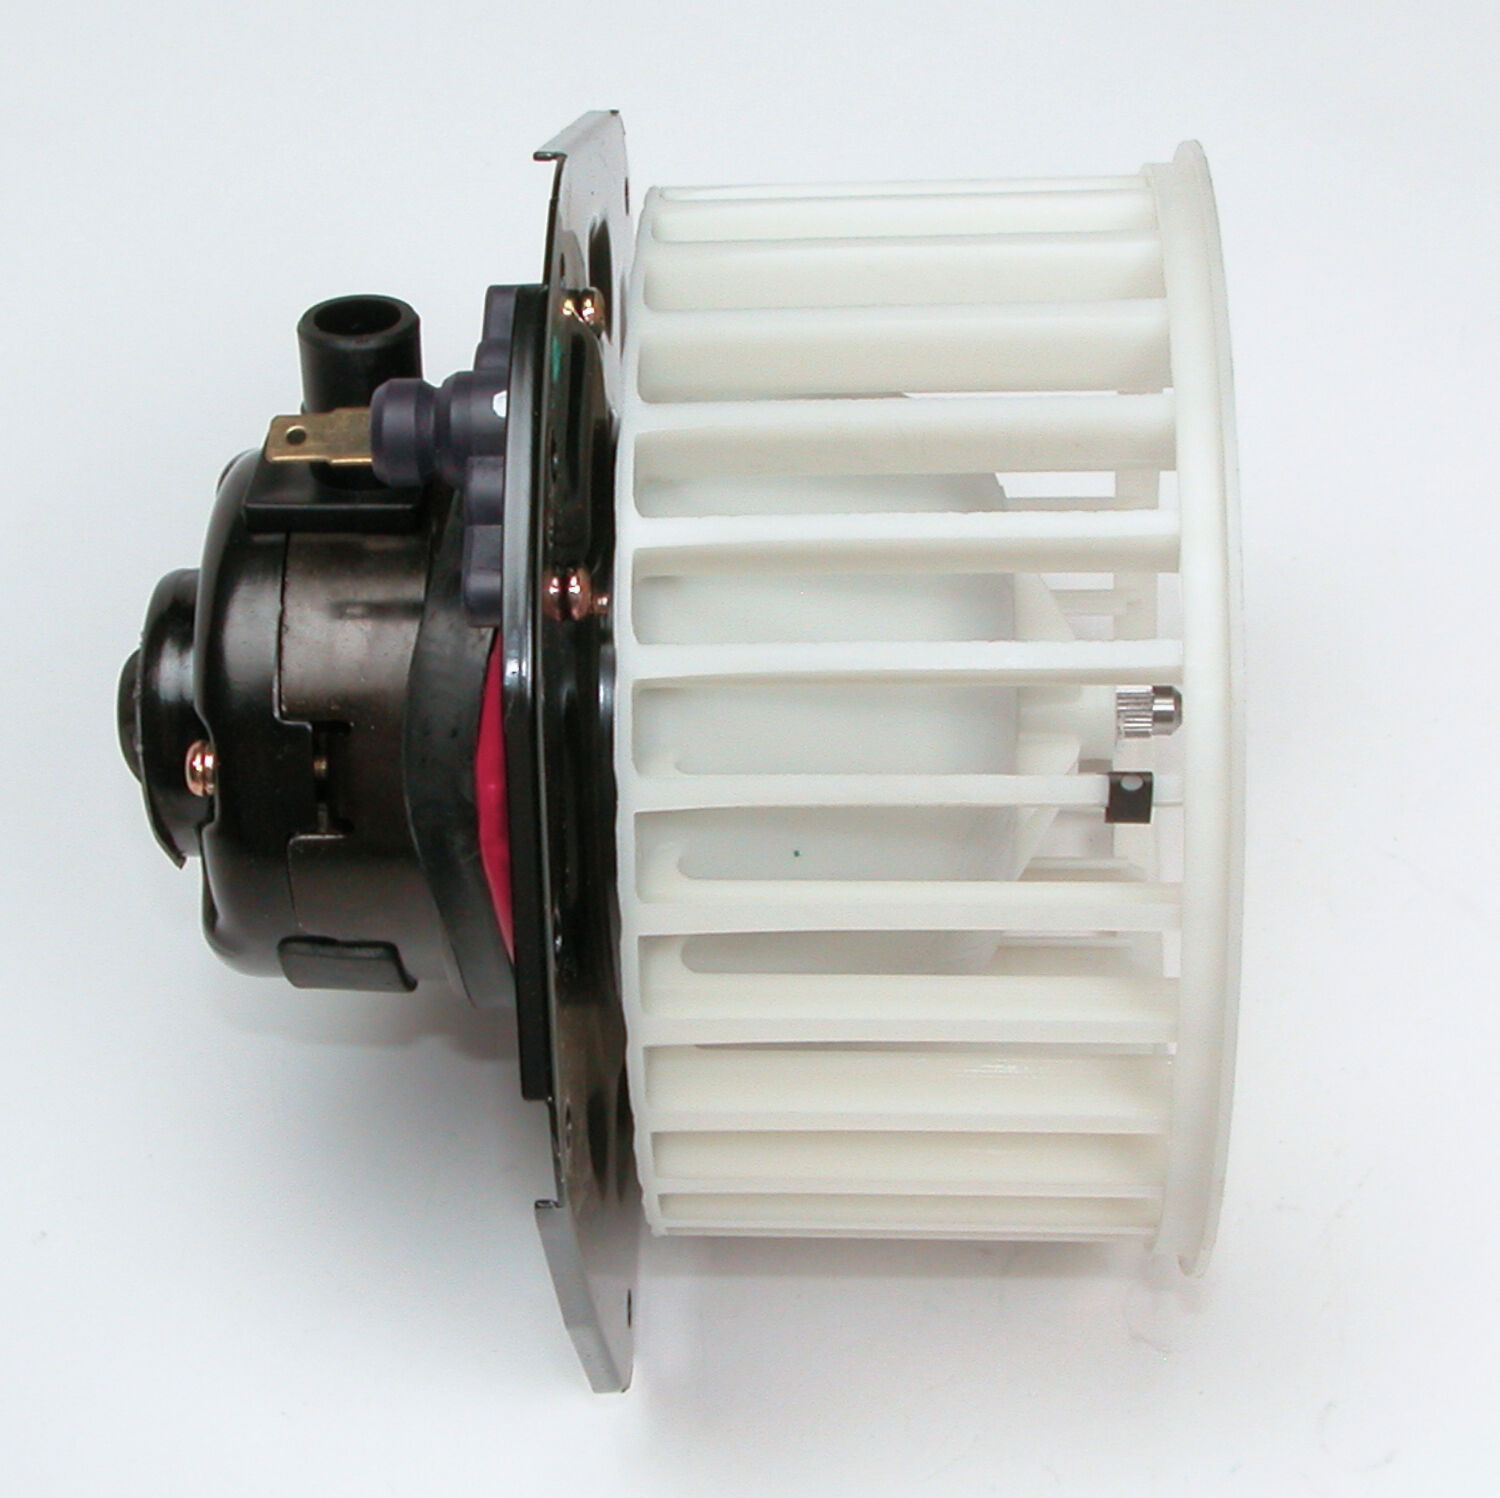
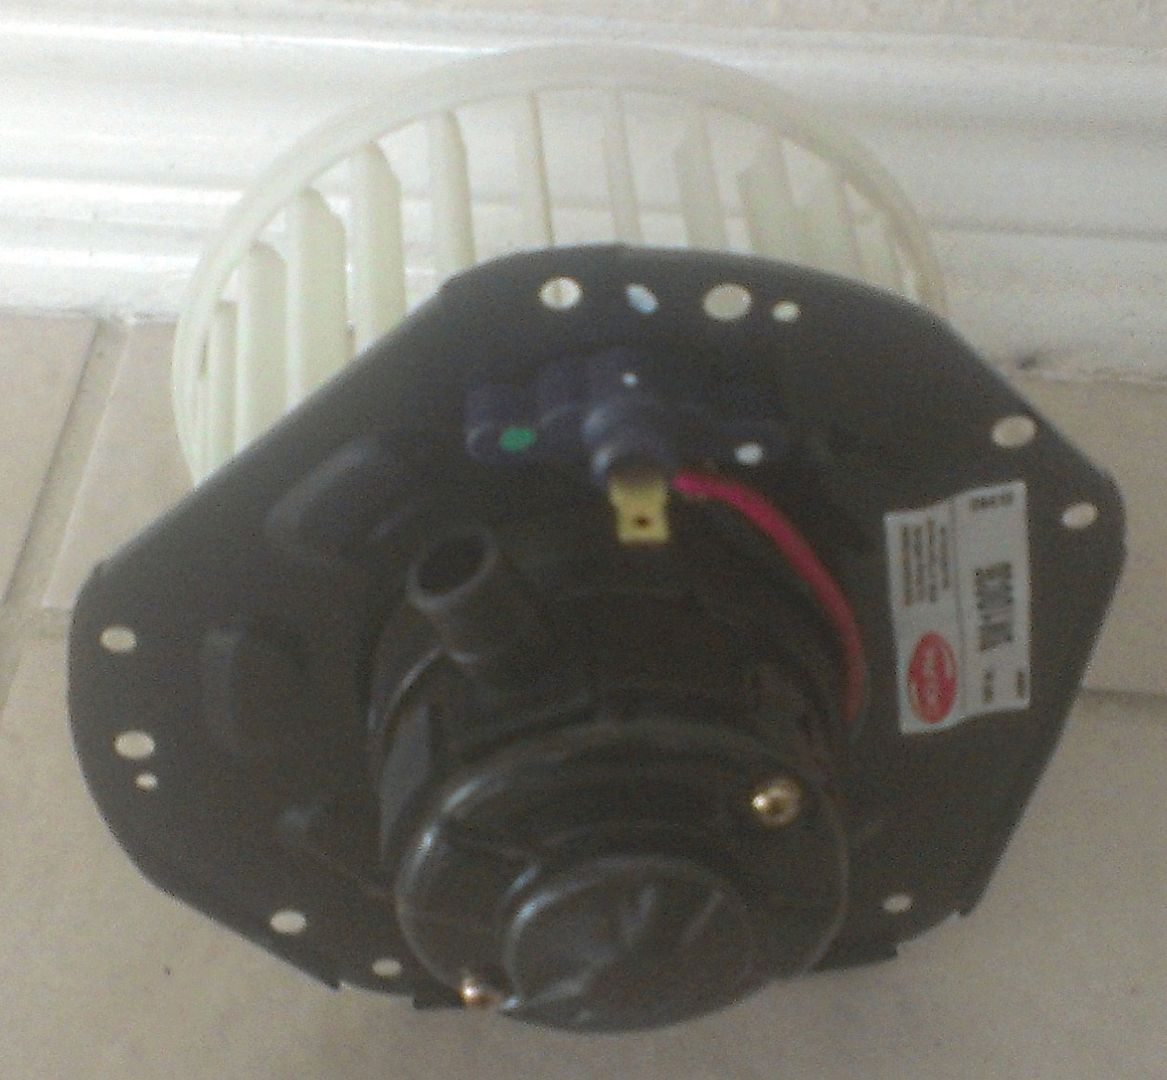
New DELPHI BM10036 Blower Motor:
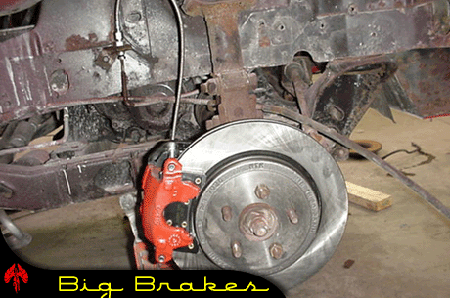
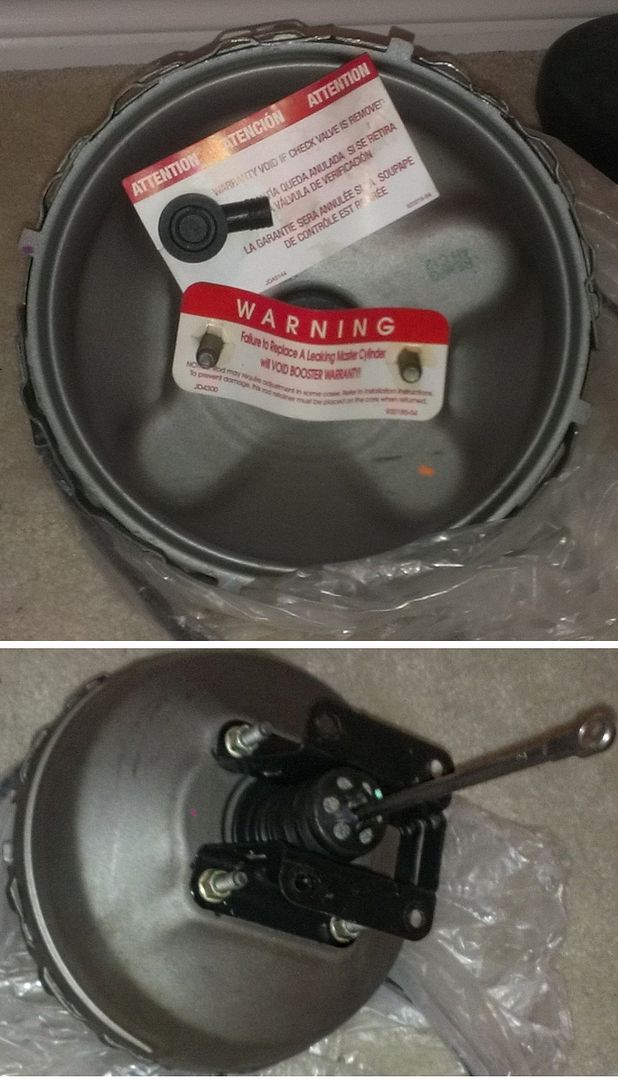
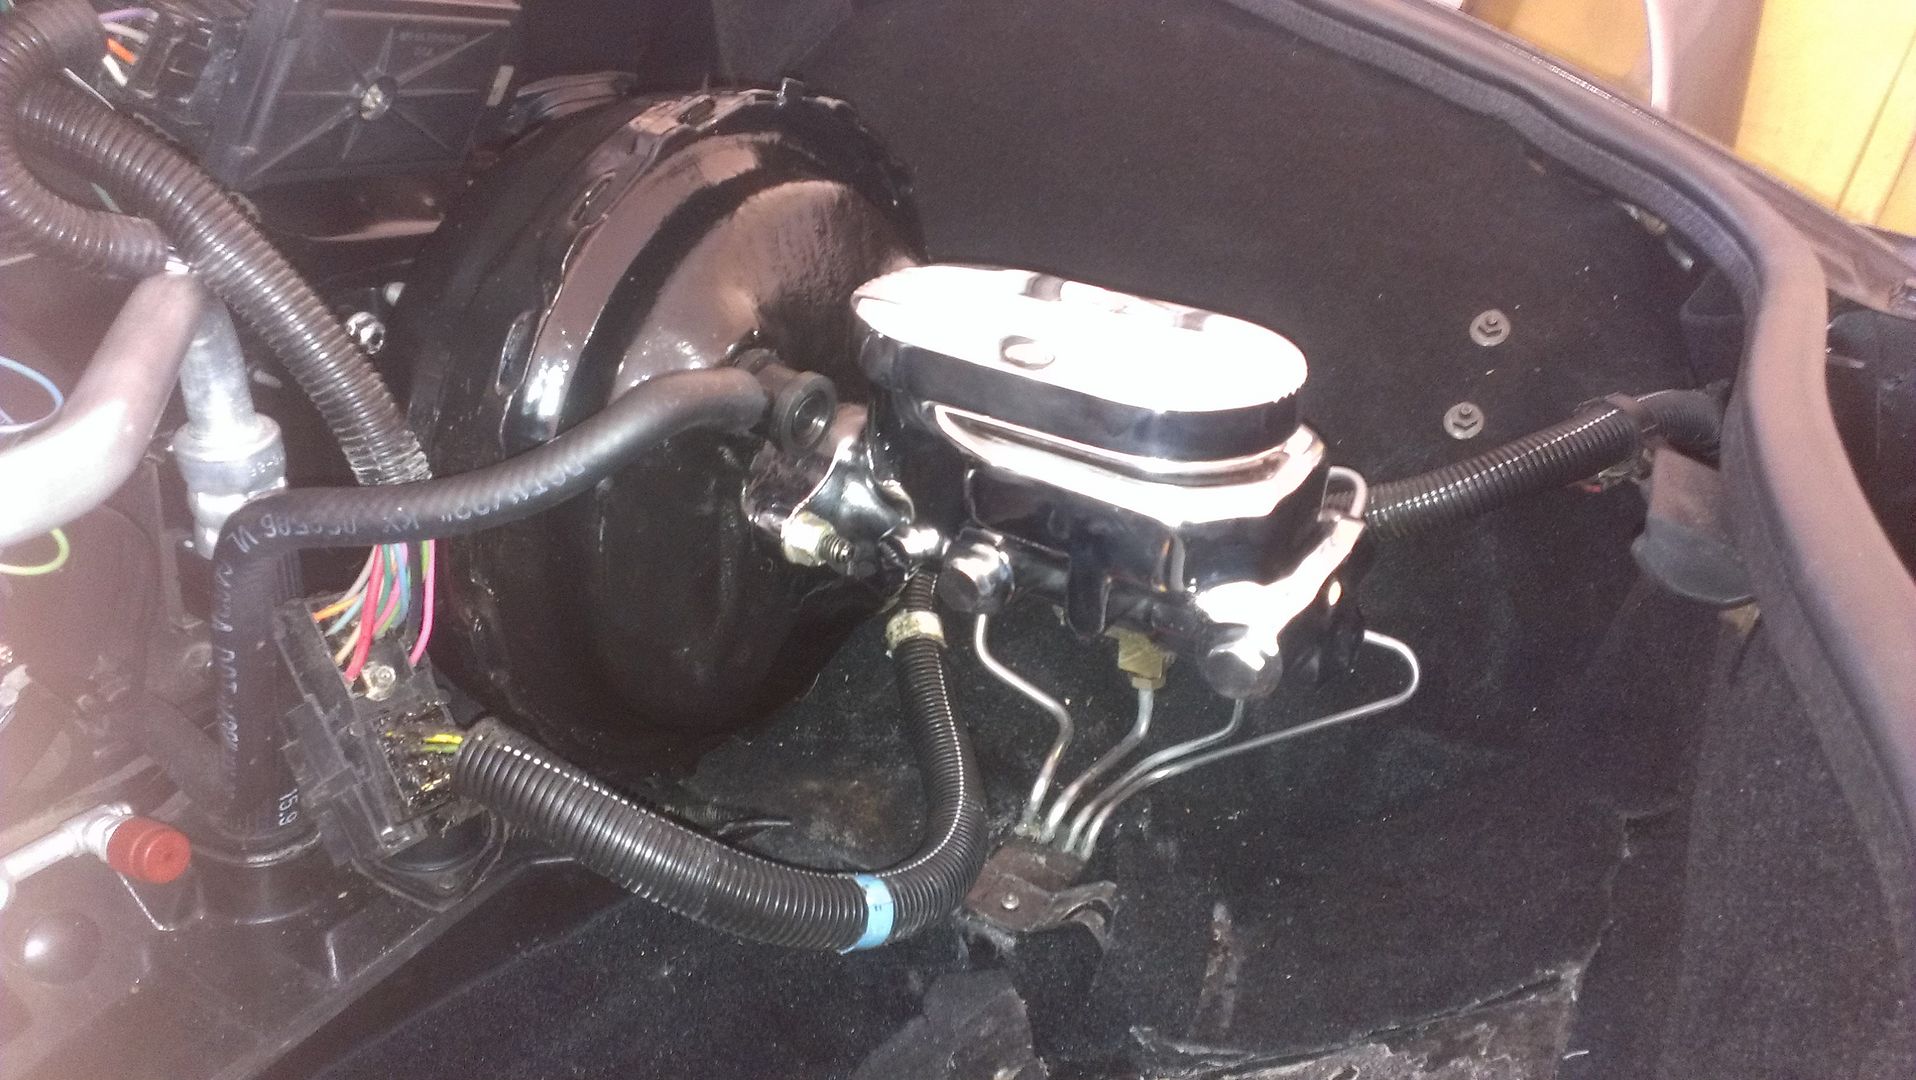
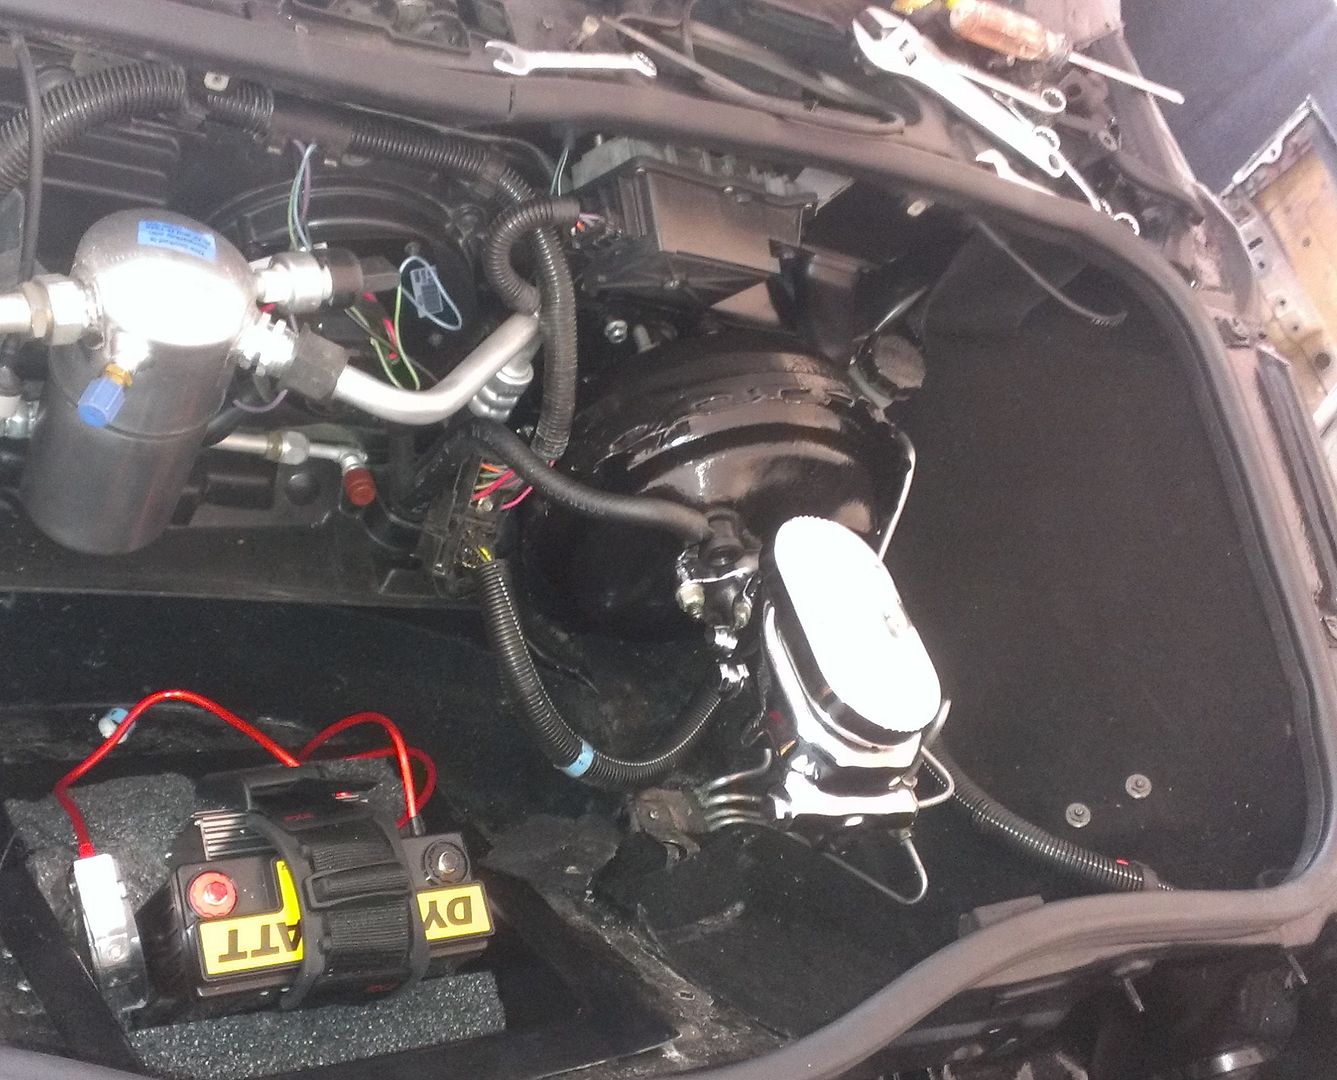
Bigger Brake Booster from member sardonyx247:

NOS ac condenser New Air:

New 3-core aluminum radiator:

New Heater Core:

Have been working on a complete LCD rear tail light setup:

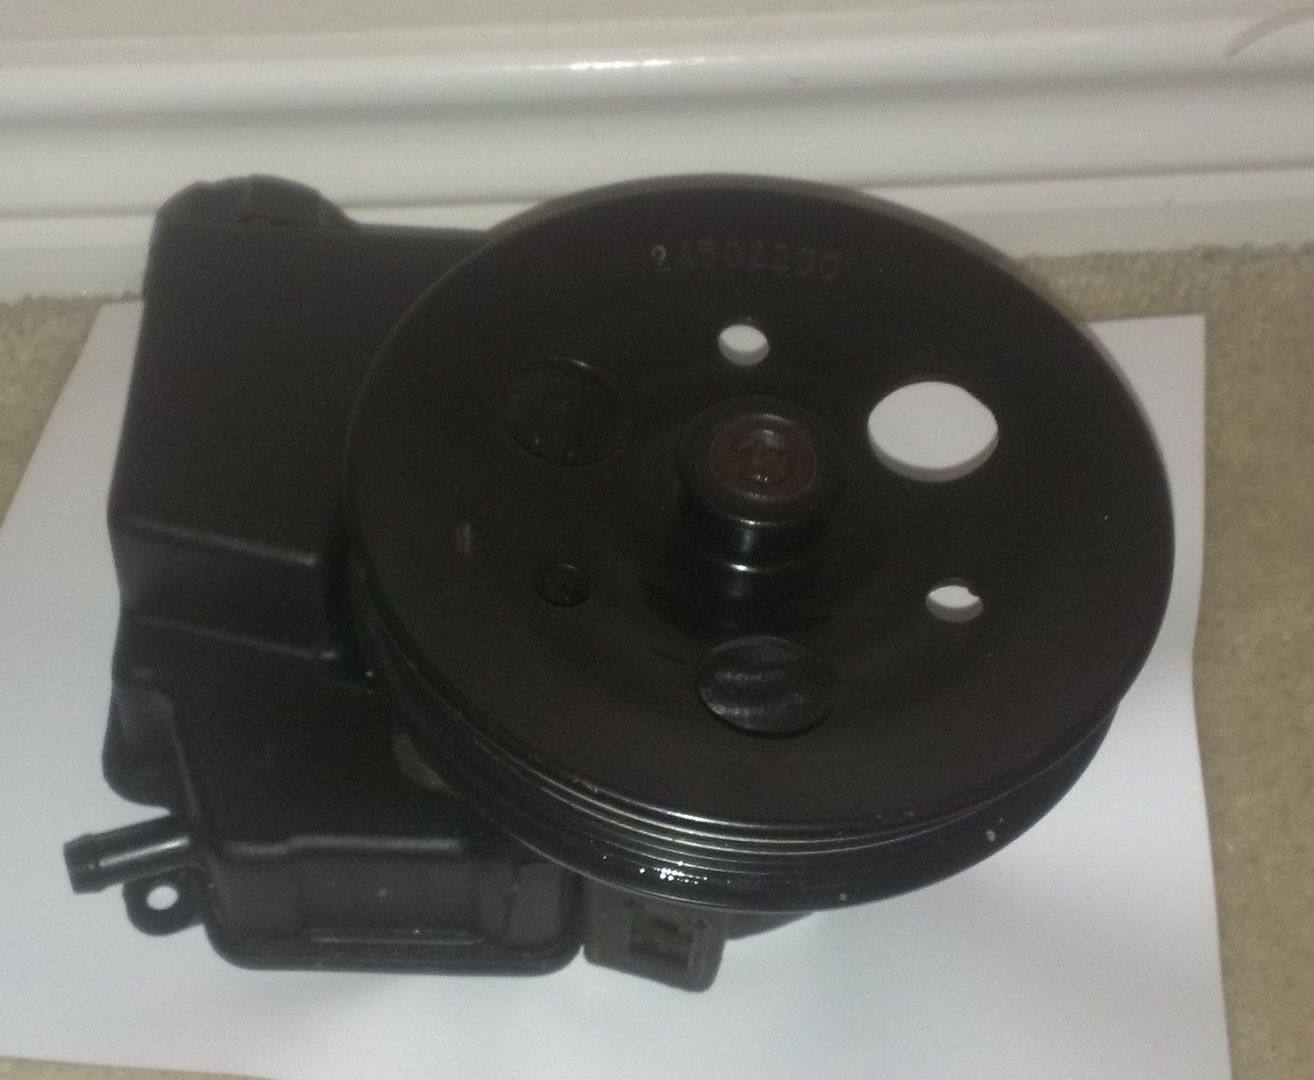
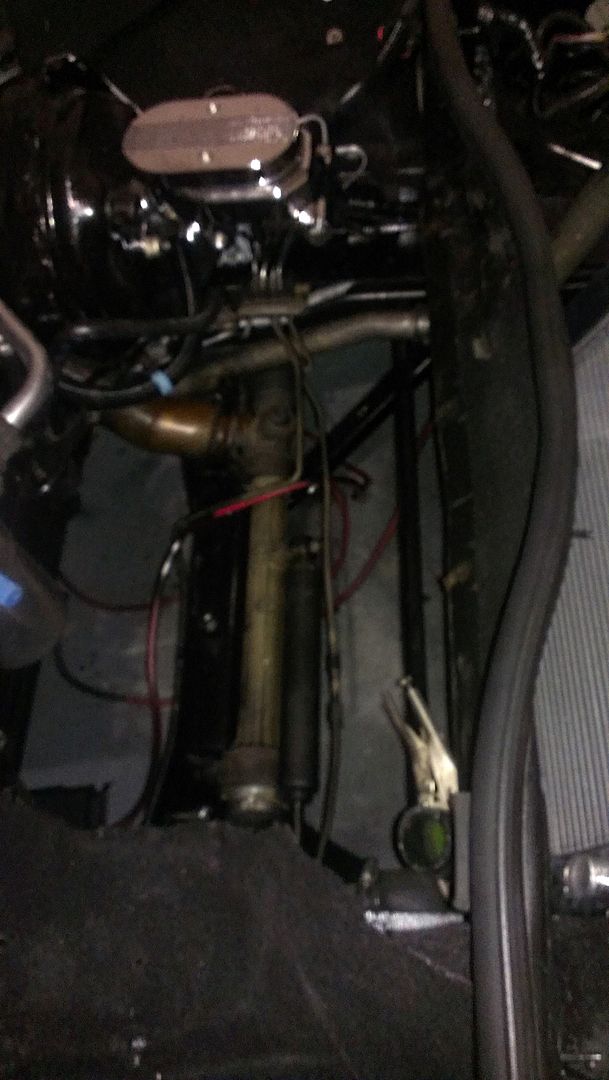
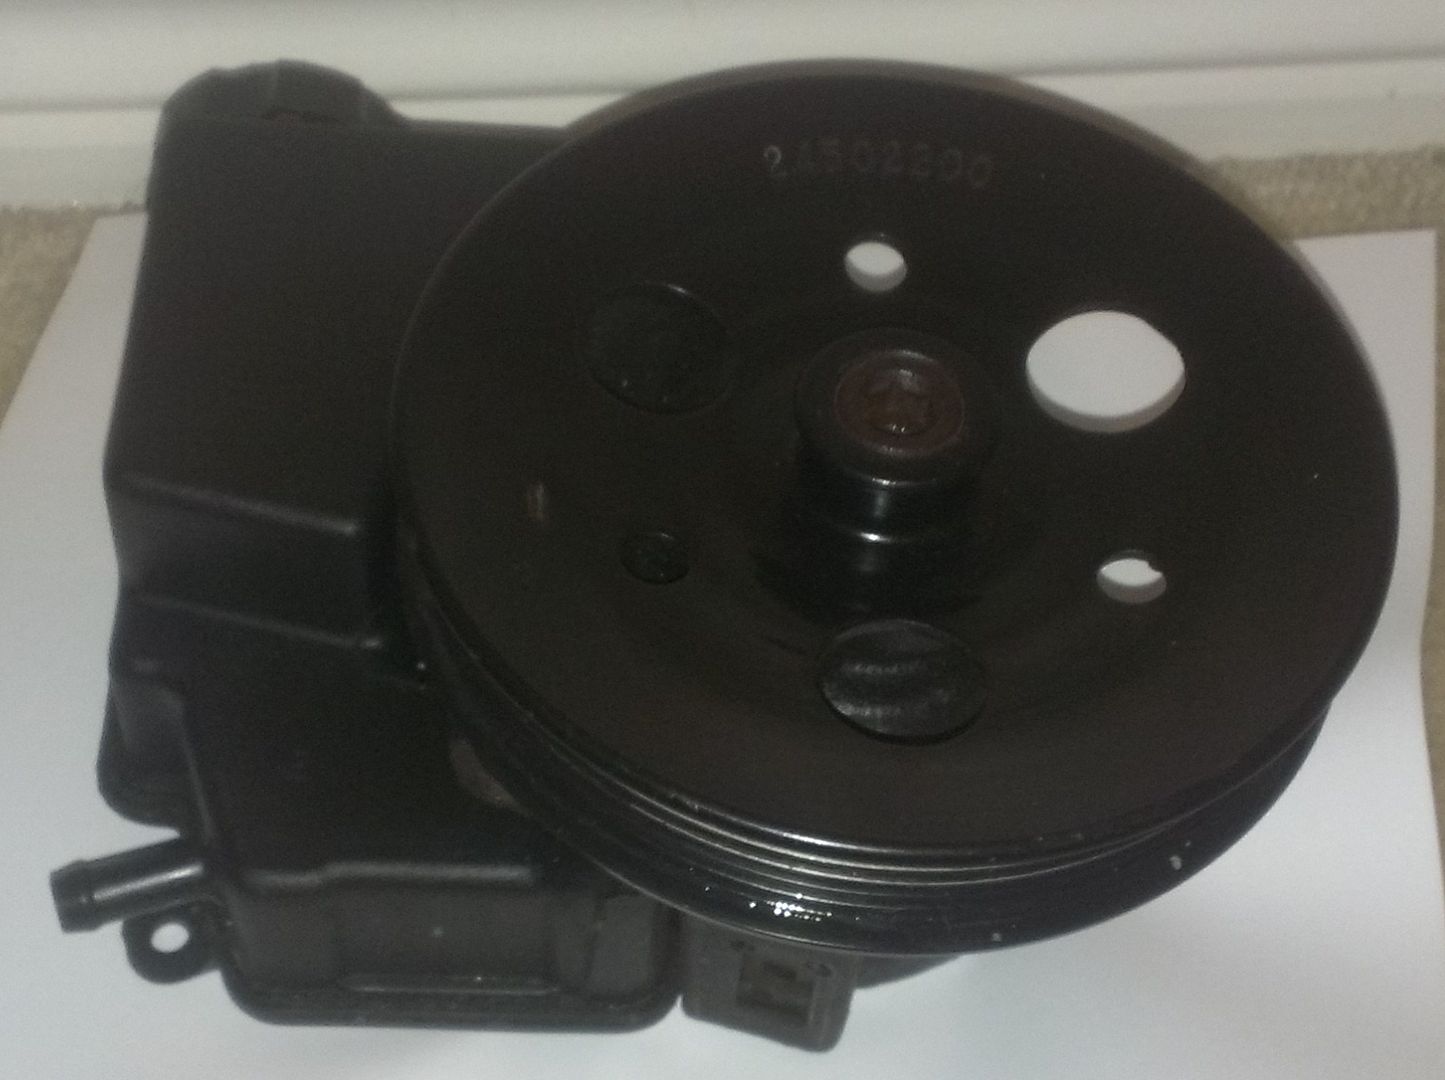
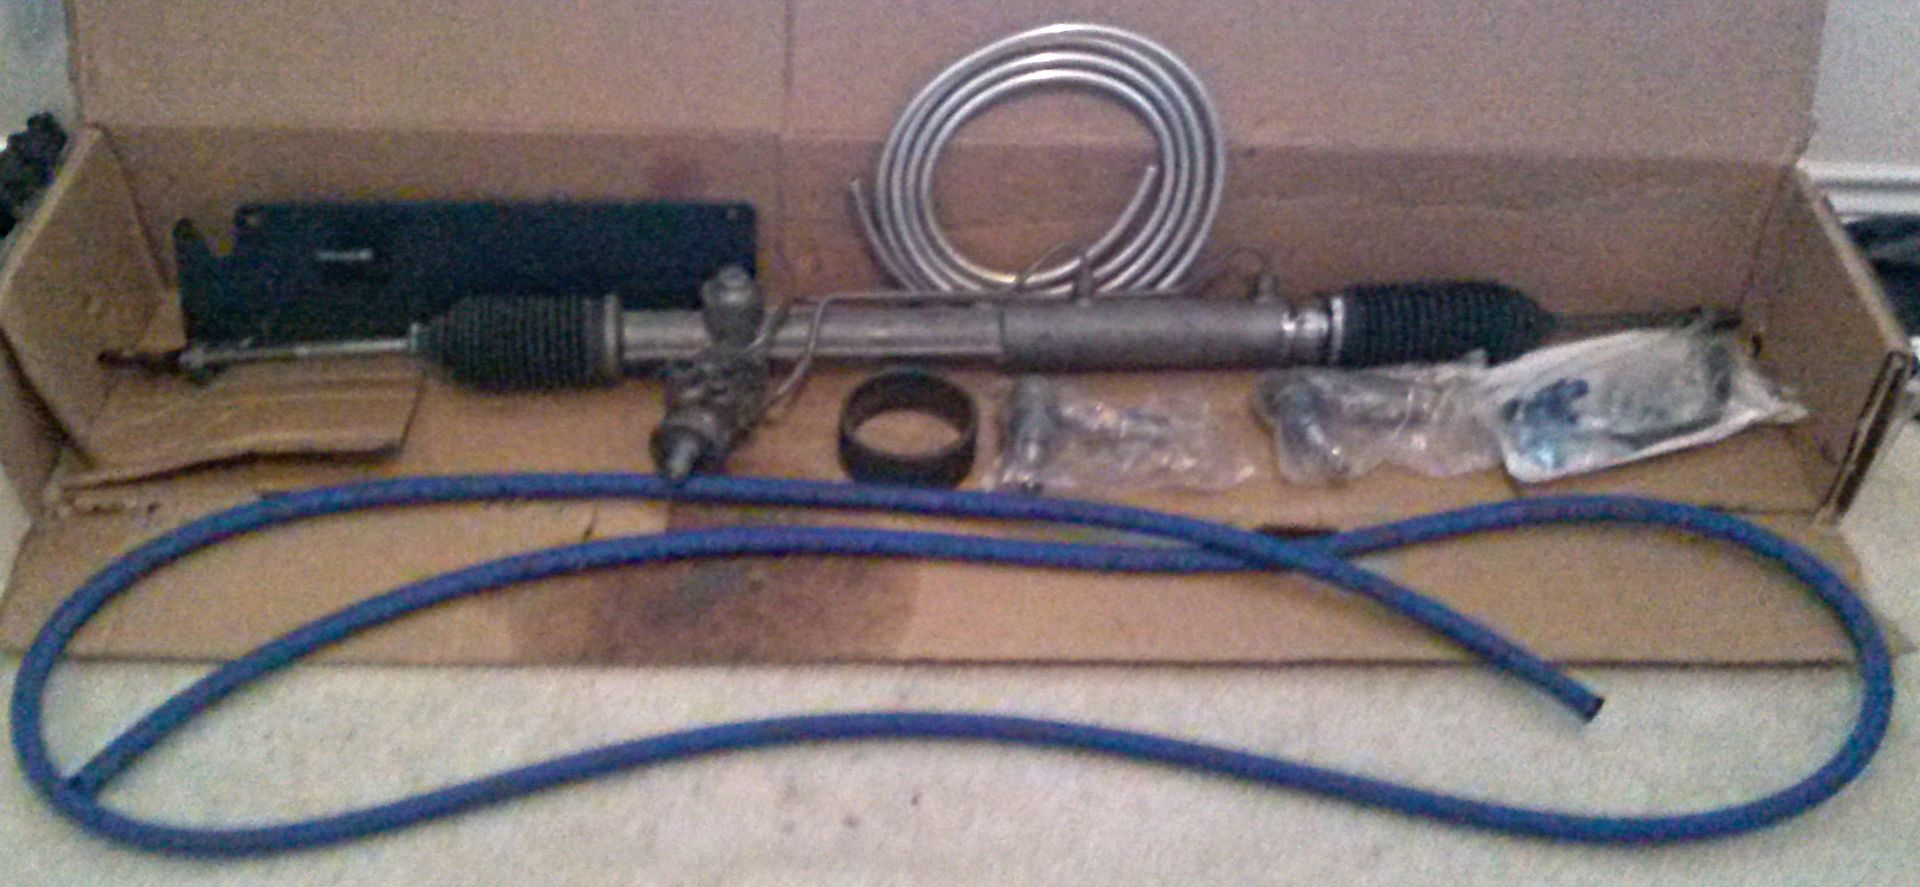
Power steering Upgrade from Chris at WestCoast:

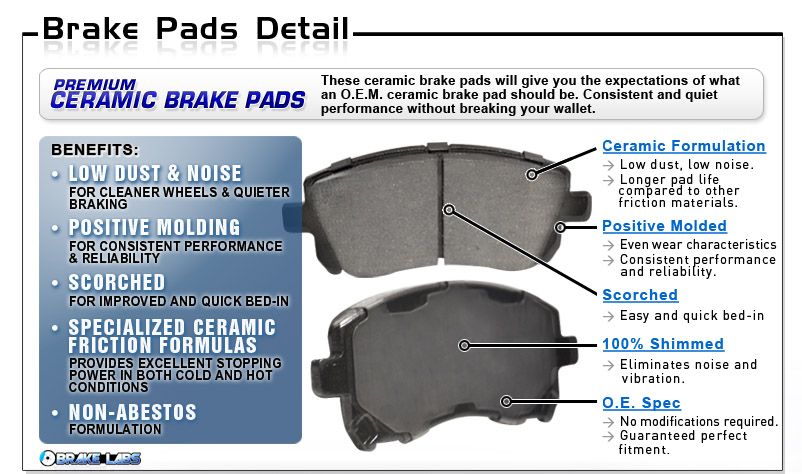
Brake upgrade from Archie:
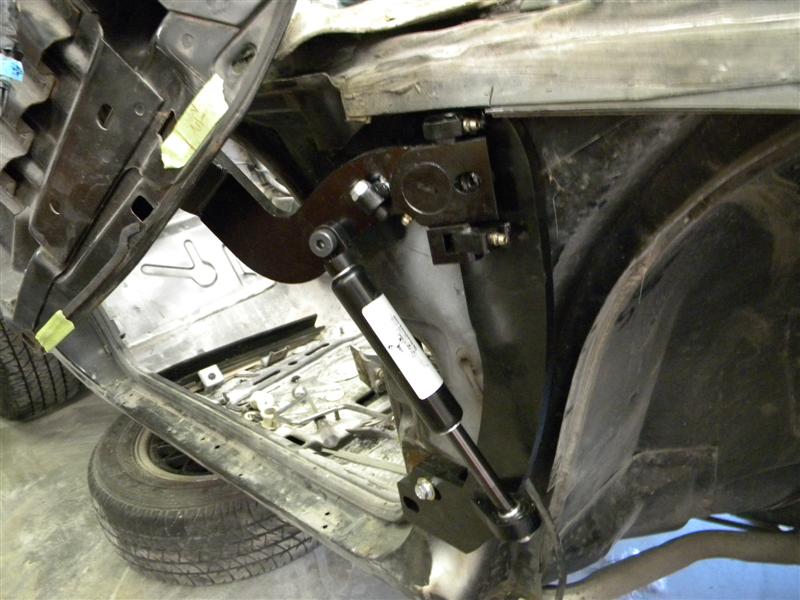
The Fiero Rear Bump-Steer Kit from now from AMS:

Sport Front Suspension from AMS:

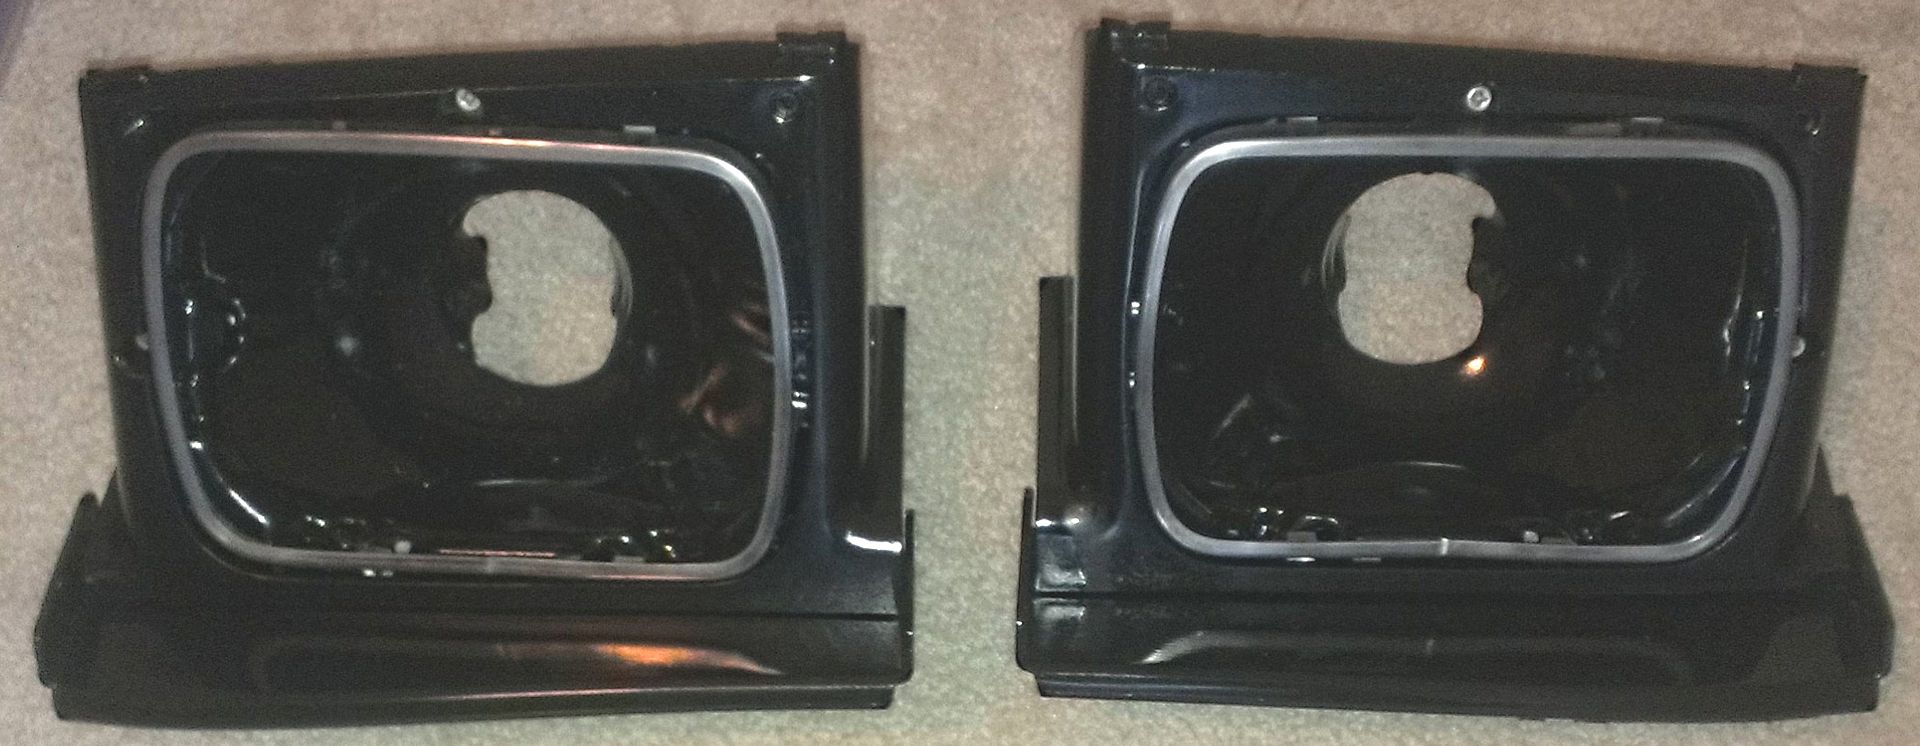
Still trying to decide between two options on the head lights...but I believe I am leaning toward the upgrade flip up smalle projection headlights. I like the look of the front with the new fascia with the headlights down.
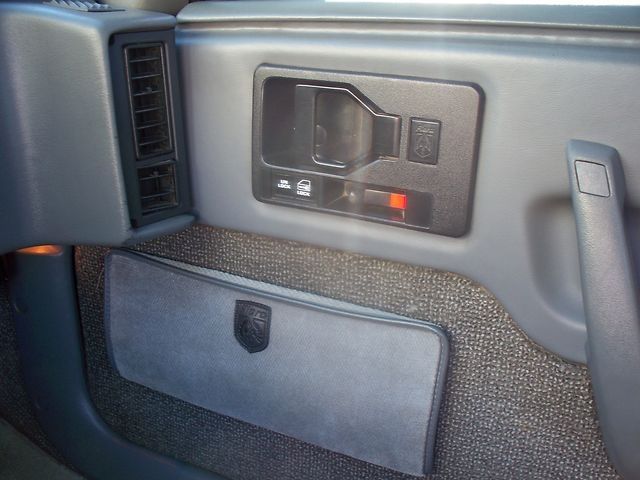
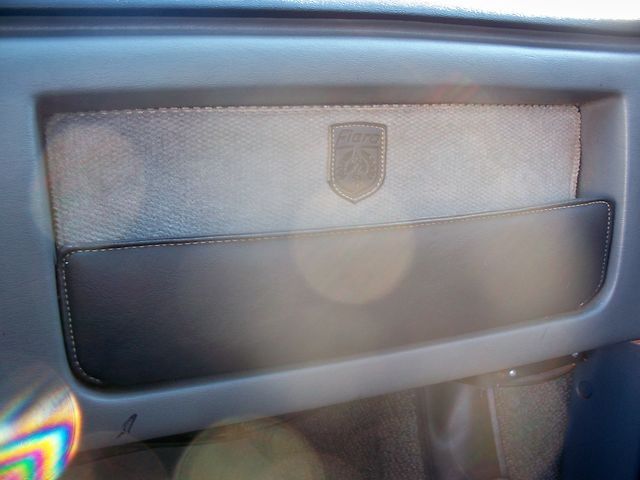
THE INTERIORWHICH IN TURN...lead to Rob's G1 Dash and hopefully matching requested door skins which I have mocked up in PS to scale


________________________________________________________________________________

__________________________________________________________________________________________________________________________________________________________________________________
Preparing for Rob's G1 interior:
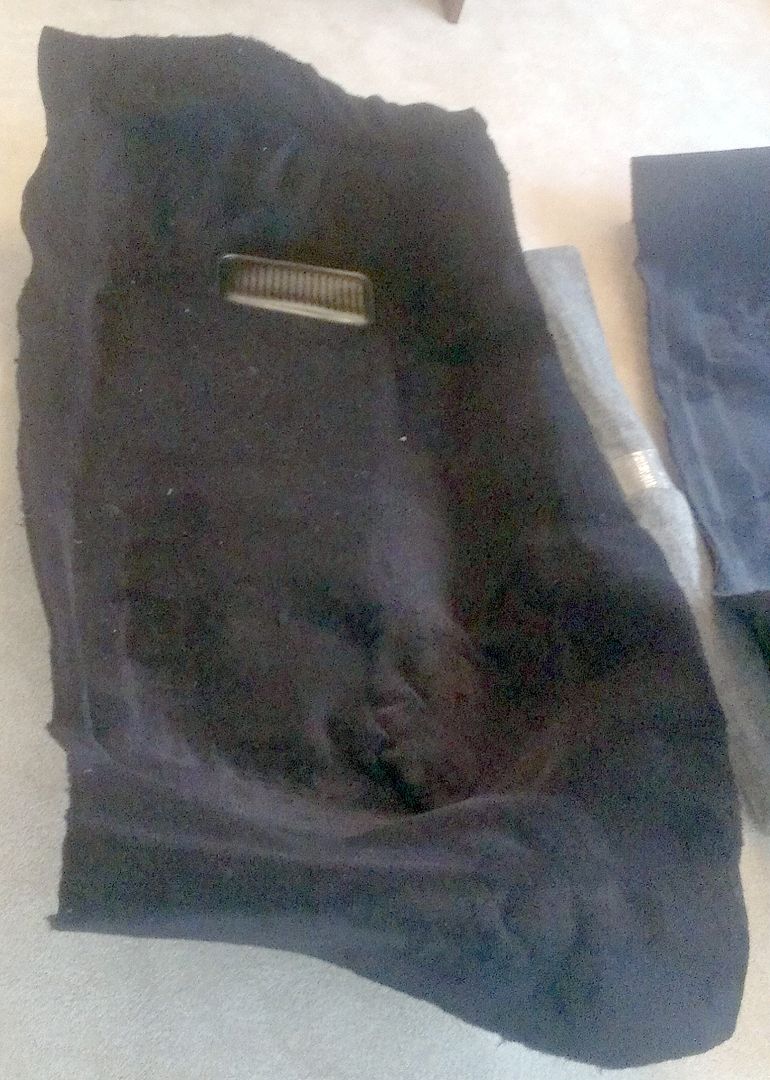
New black speaker mesh fabric showed up today...time to recover those white speaker grills...will post photo later tonight of finish panels with new black mesh.

Remaining interior trim panels have all now successfully painted black:
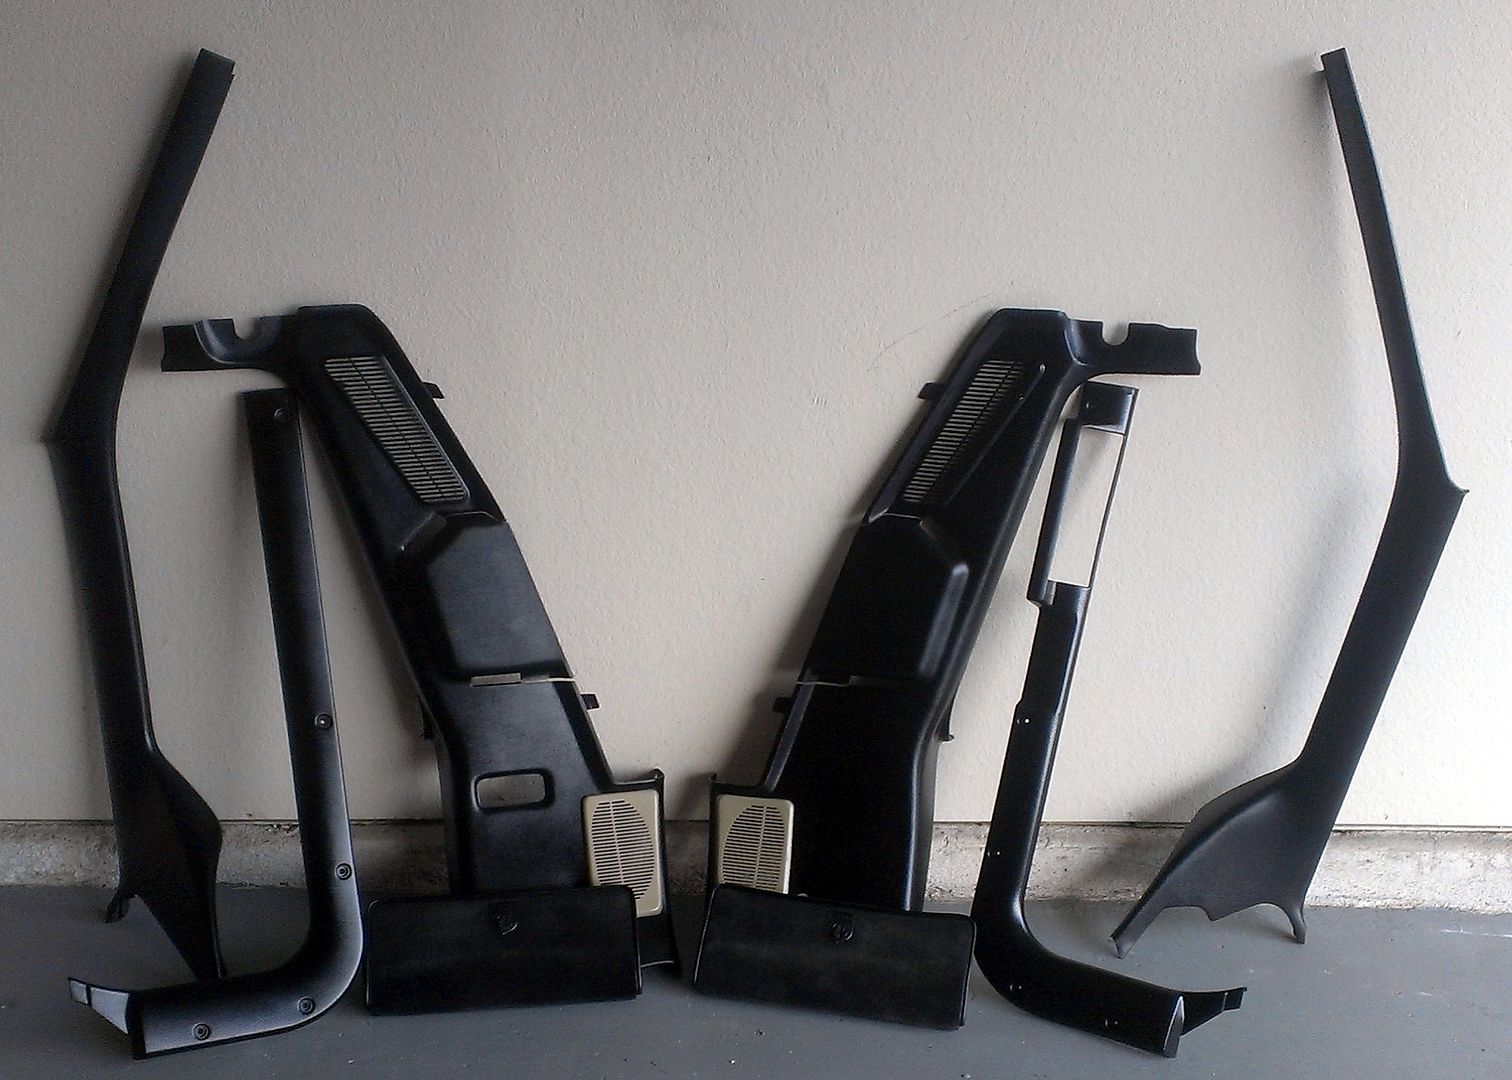
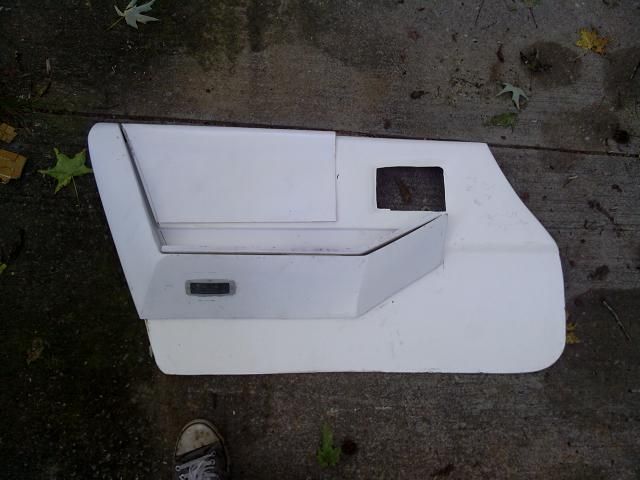
to recover rear speaker covers...they are the white covers that standout in the picture above.
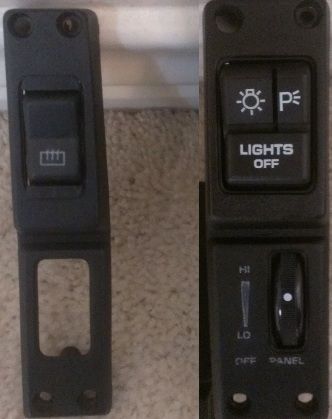
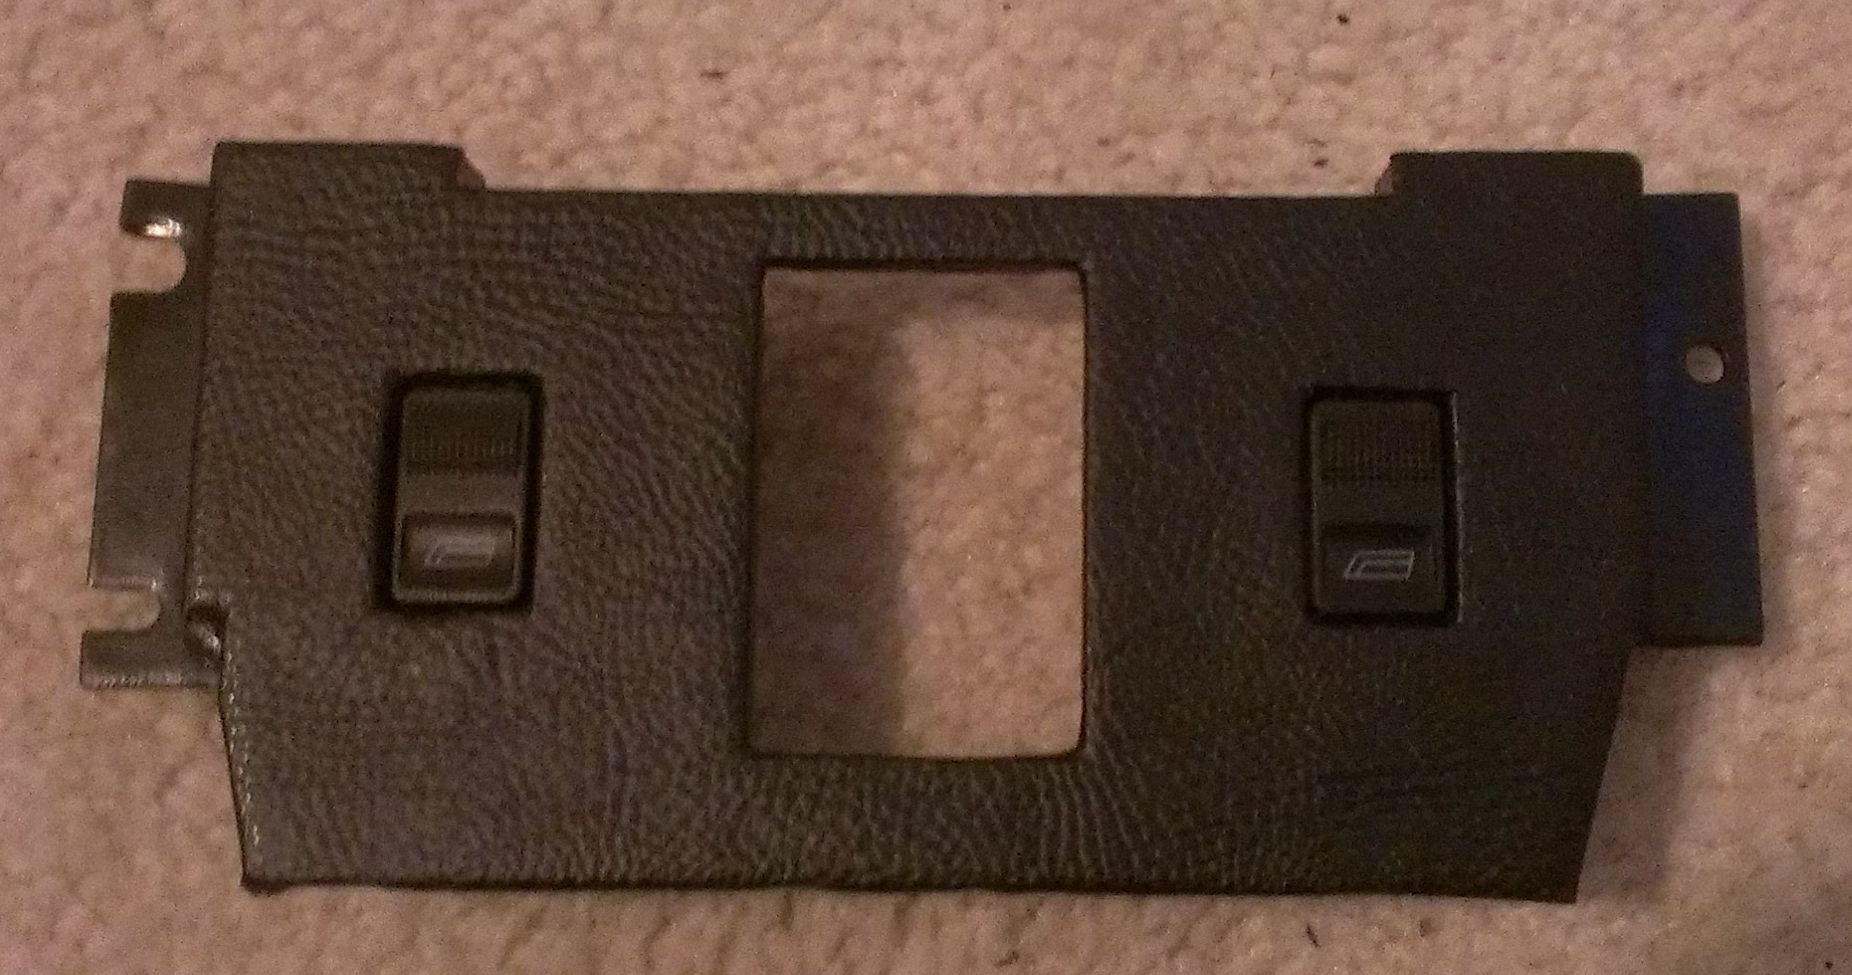
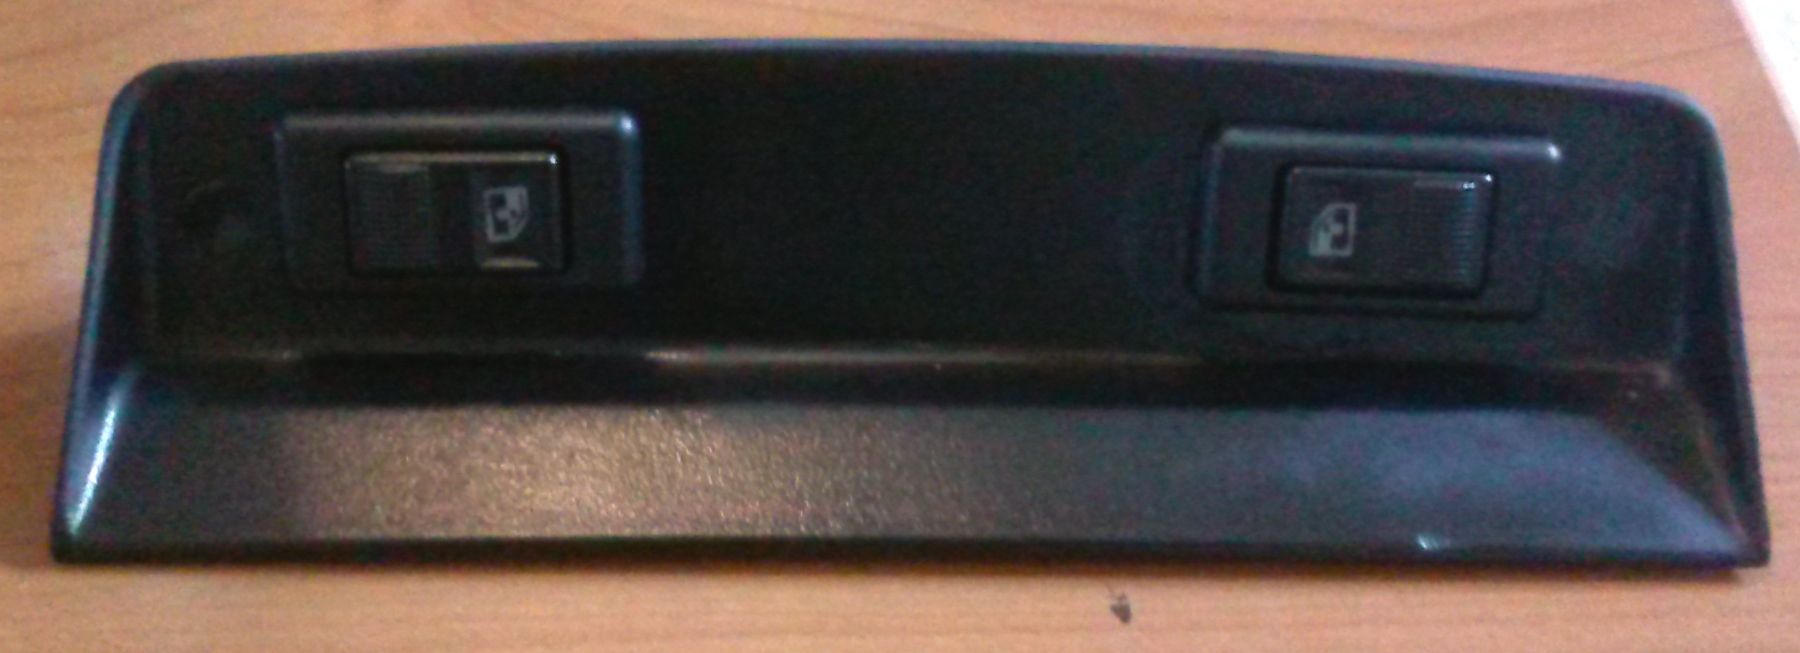
Working on collecting all the correct switches in black:
Power Mirror Switch

FOUND A Warehouse that has the last of the GM NOS Power Mirror Switch (BLACK)
http://usautospares.com/pro...php/products_id/2827Which will fit nicely into the VW window switches I am decided on utilizing once I get the plastic mounting piece wrapped in carbon fiber wrap:
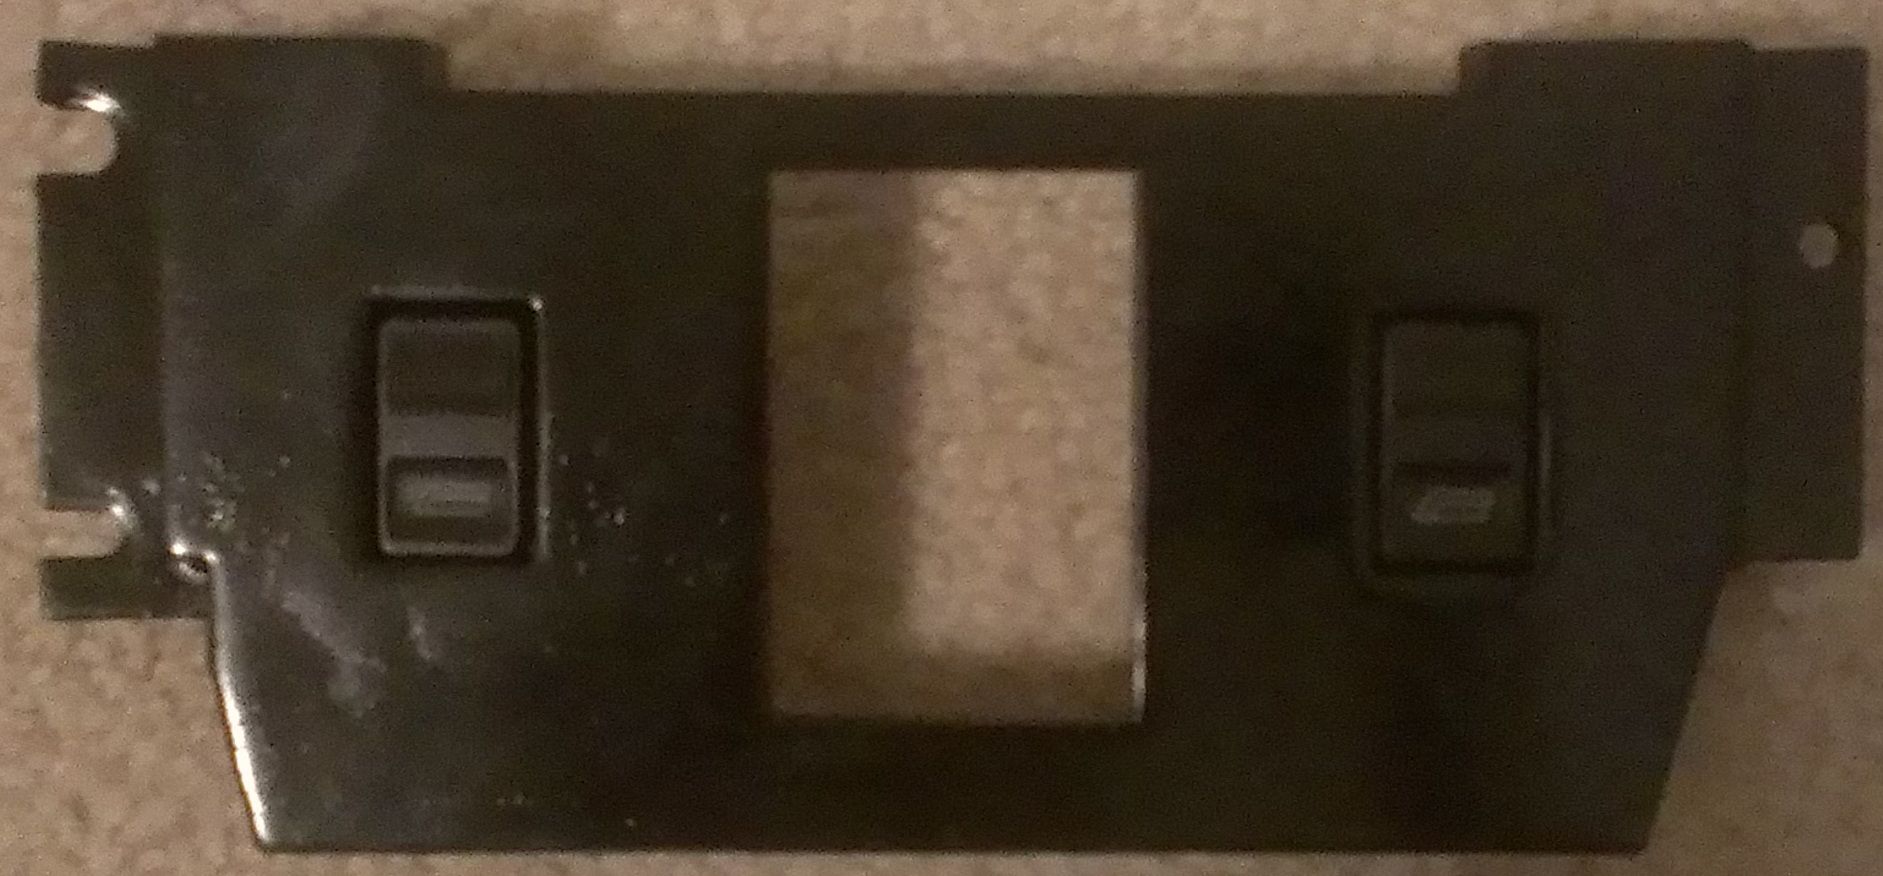
Black VW/Audi window siwthces...nice flush mount:

Black VW/Audi Seat warmer switches:

also found this great after-market multi-function turn signal lever that fits the Fiero, but is a little short than the stock and has a rubberized soft coat...and they are new:

I also found & ordered, what I think looks the best (has that new car texture instead of the smooth 80's plastic) for Headlight switch replacement:

Also the dimmer switch from 80's Astrovan...look familiar, but in black?:
(GM pt#15954529)

I ended up going with this switch for my rear defrost:

Have this on the way in the mail for a rear trunk release switch:

test fitting in old dash pieces:
HP MIMOD system for entertainment, internet, communications, GPS, backup camera, & security:
 http://www.mimodhp.com/
Once I have had it installed for a few months...I plan on eventually swapping out of gauges in the cluster for monitors.
Picked up these for a steal on e-bay:

They will glow a nice blue at night to go along with my Tom's Digital Aux Gauges over the center console (Volt and Oil Pres)...in blue of course

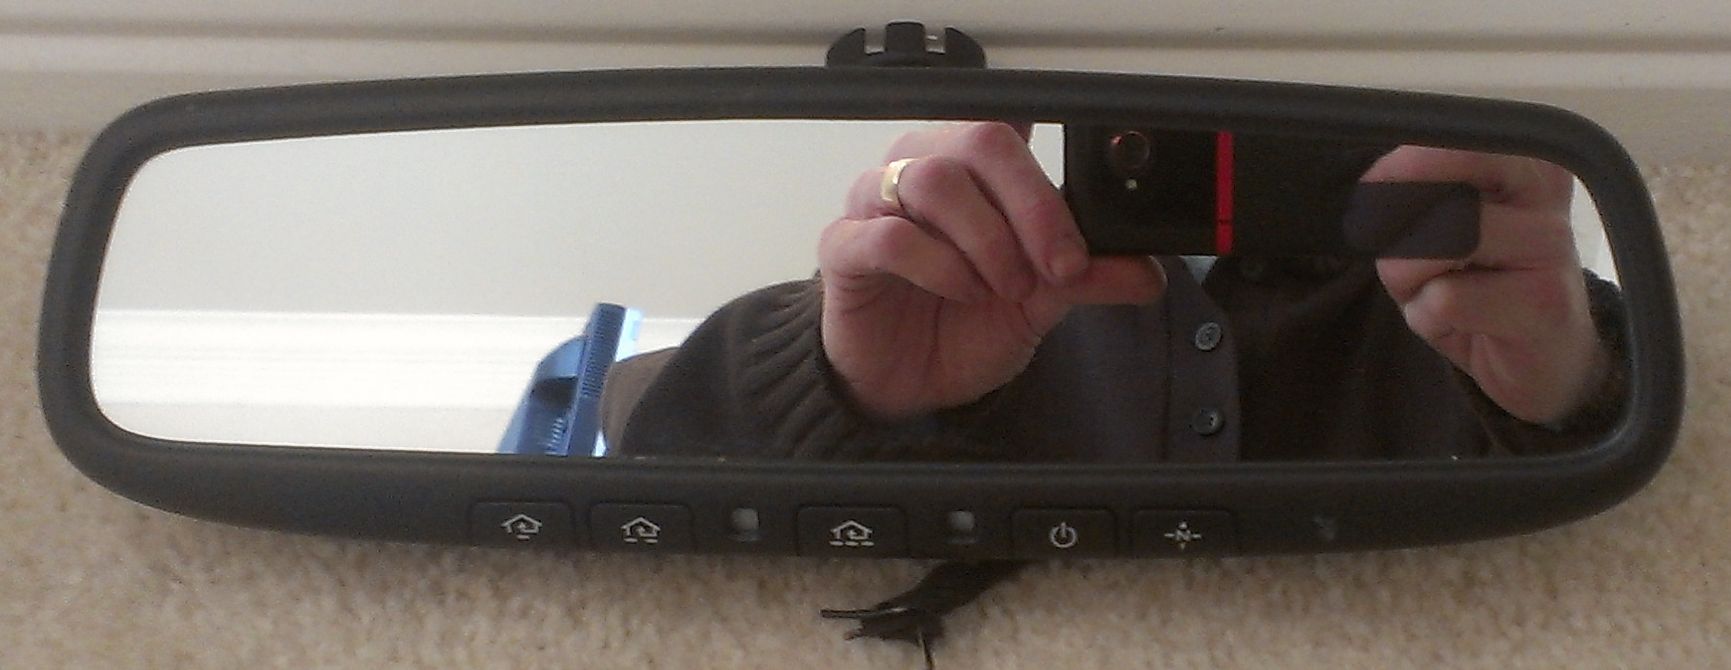
New updated rear mirror...one that has home-link, Auto dimming, and digital compass all built-in:
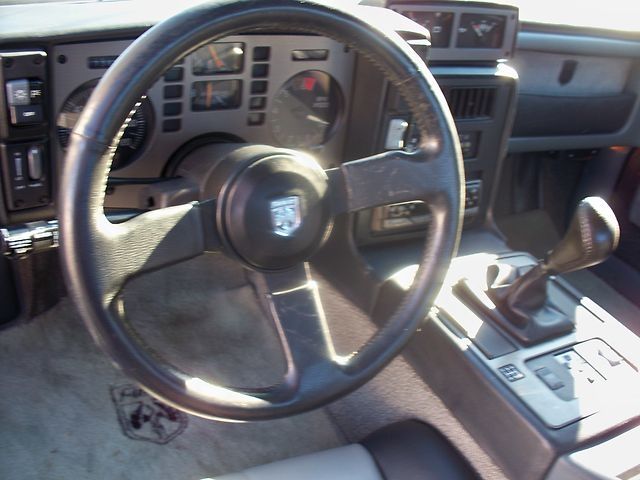
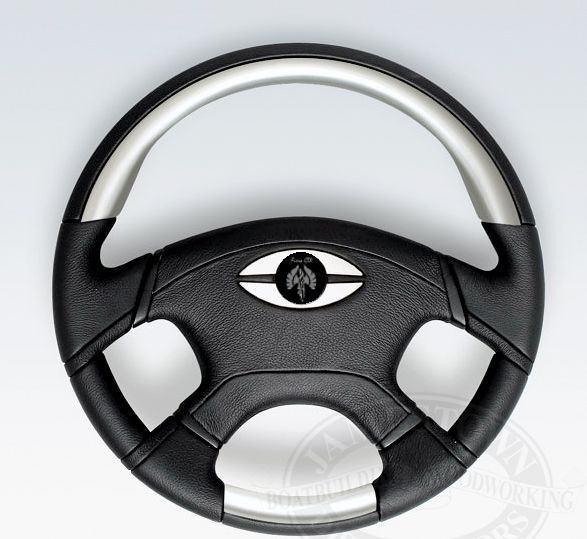
Here is the new steering wheel:
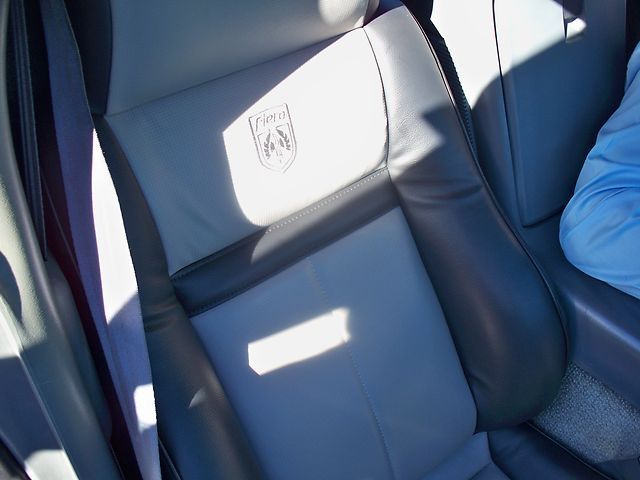
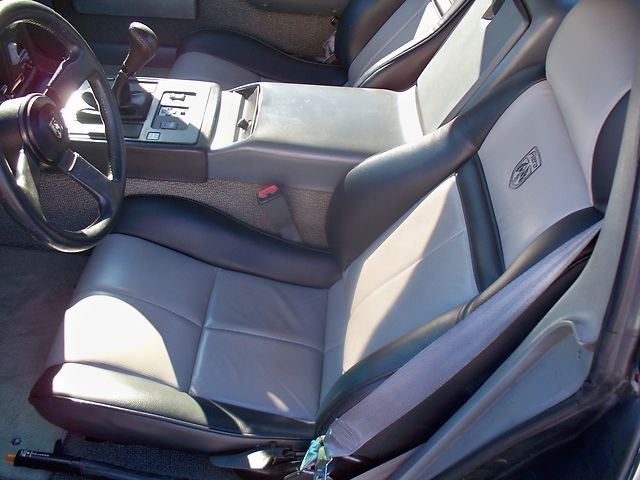
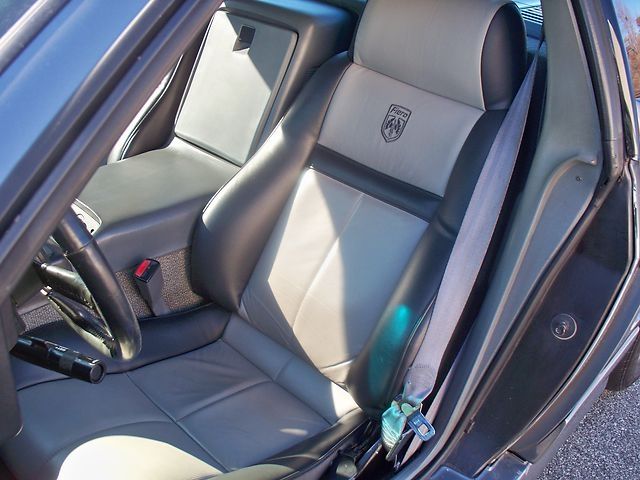
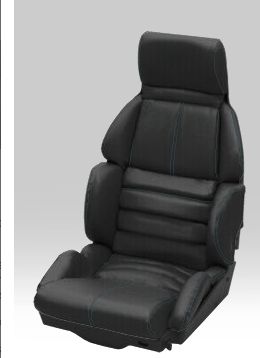
New Seats for the Fiero...I choose to utilzed te Corvetter C4 Sport Seats and found a set locally for only $20 off Craigslist.org...the shells and hardware were perfect...the foam and leather had seen better days

.
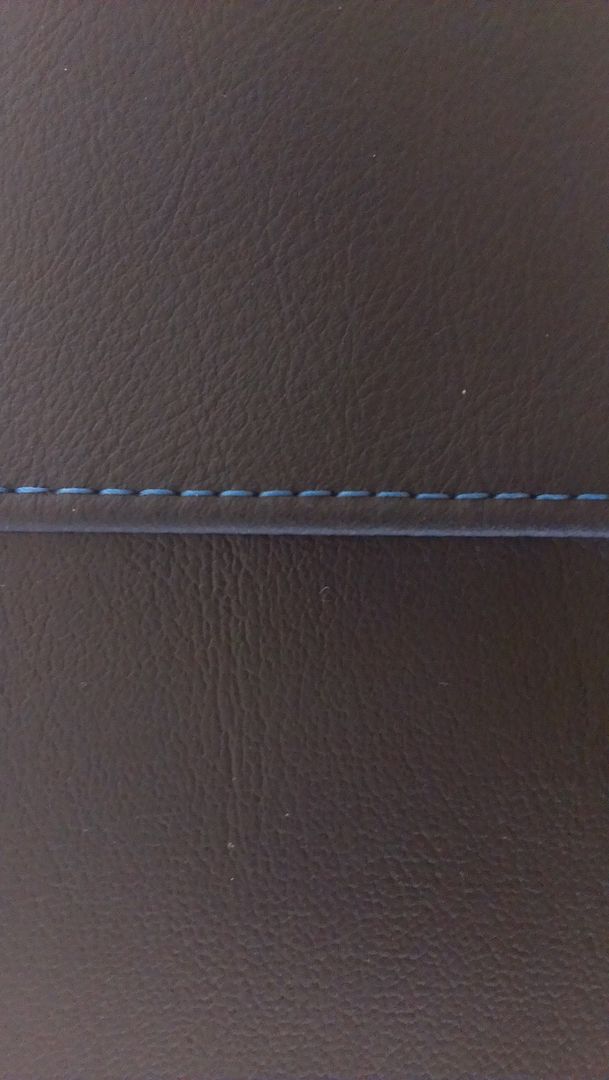
But there are places online to order new foam and skins...mine are black leather with blue stiching:
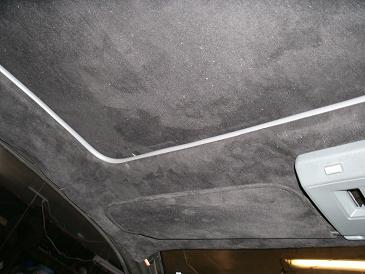
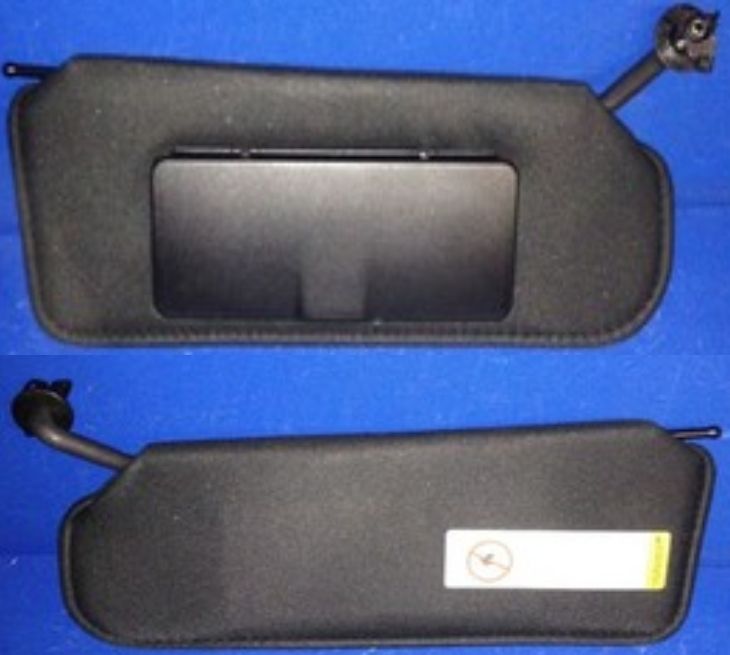
I will getting new headliner & sun visors just like the one below from member Russ88TTop:
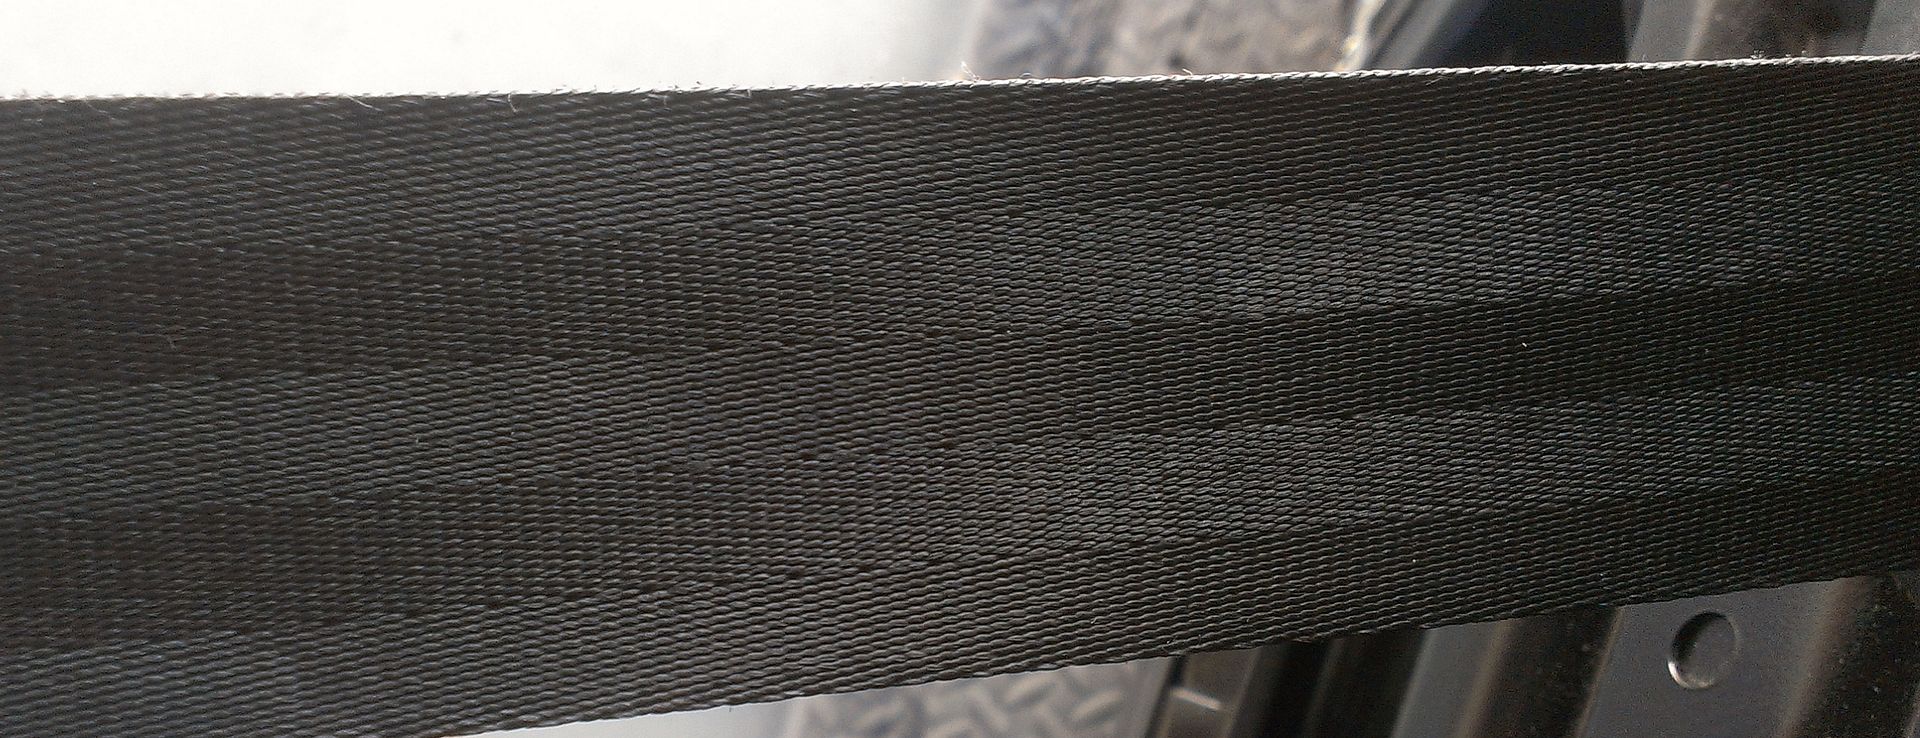
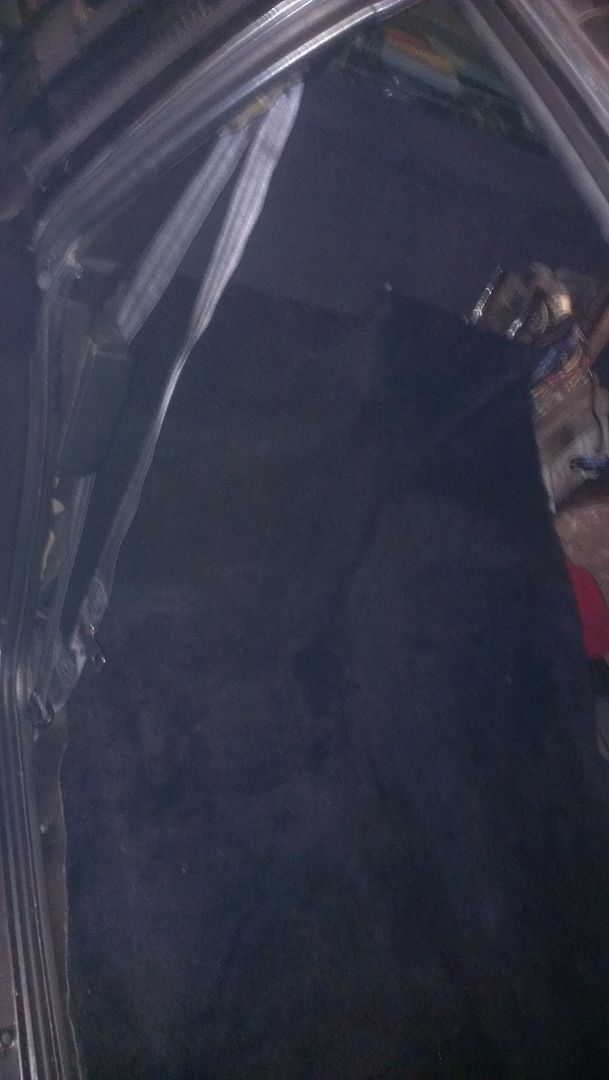
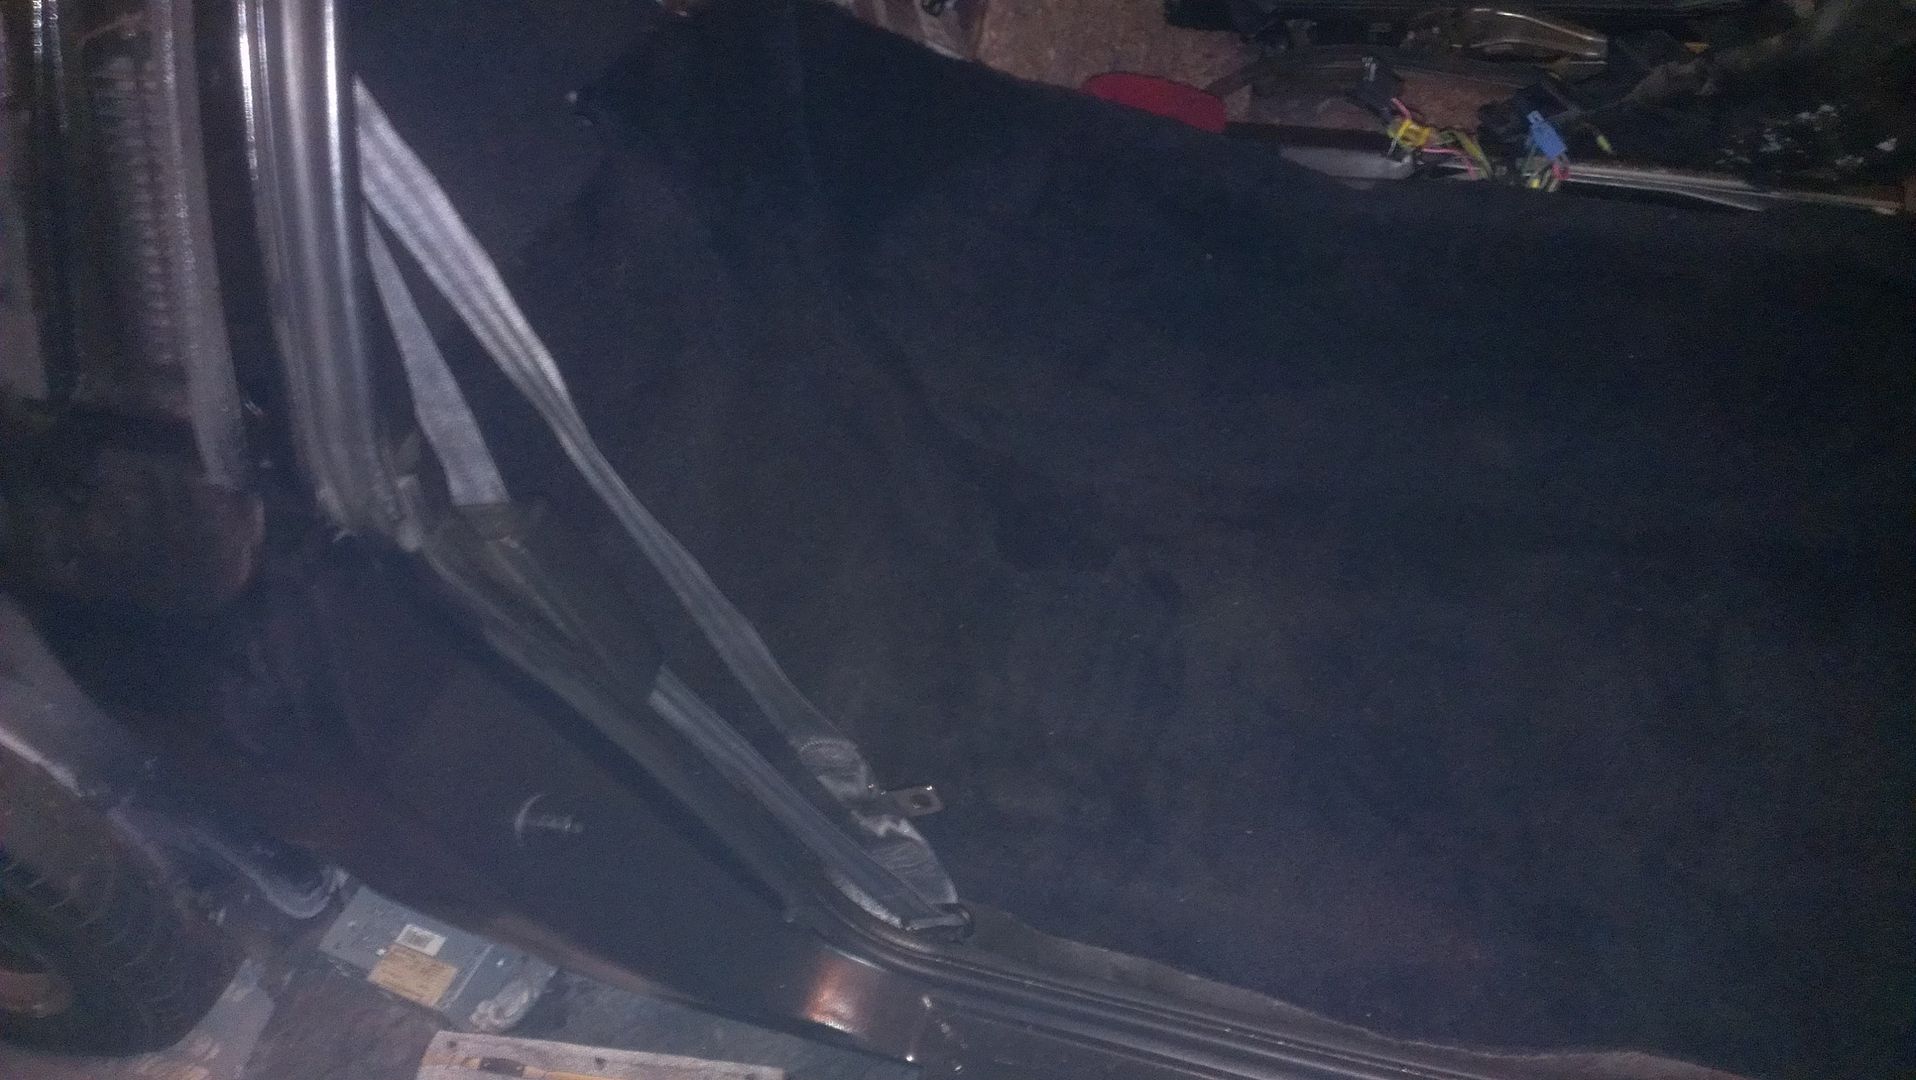
Successfully turned my old grey seat-belts to black as well:
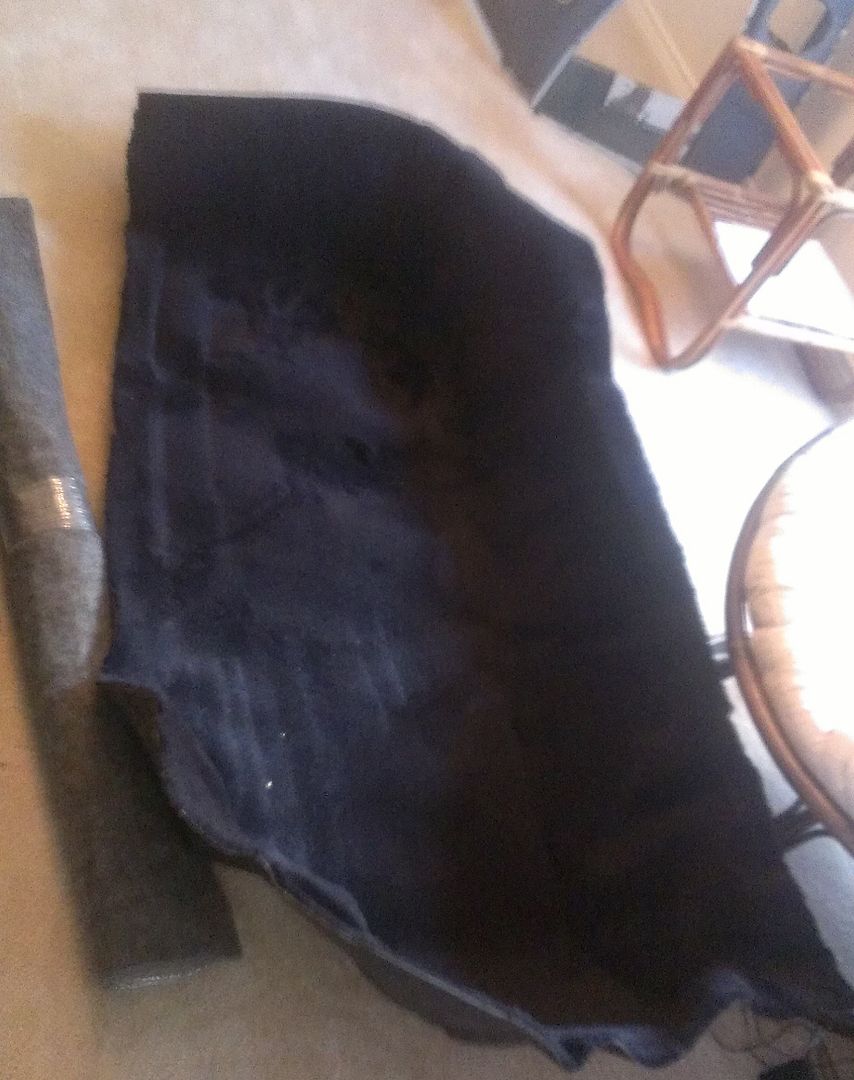
Re-carpeted the stock waterfall from grey to new black carpet:
__________________________________________________________________________________________________________________________________________________________________________________
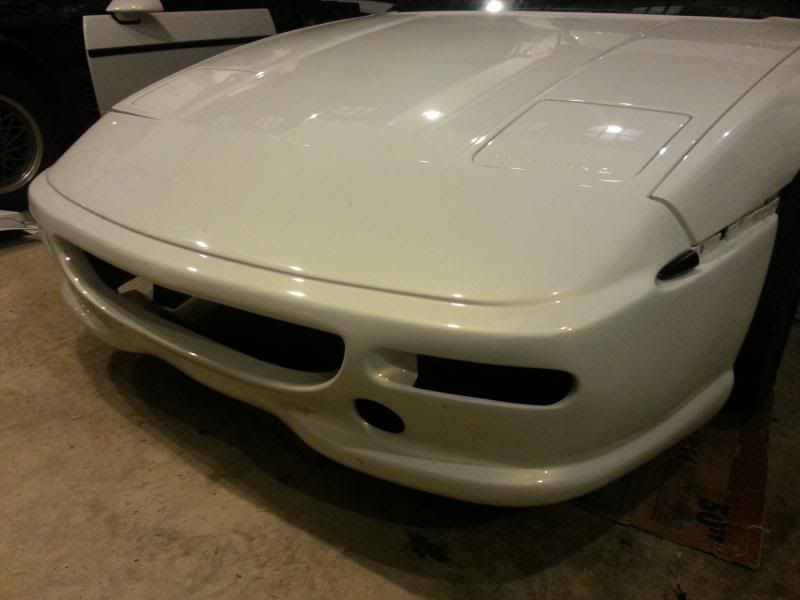
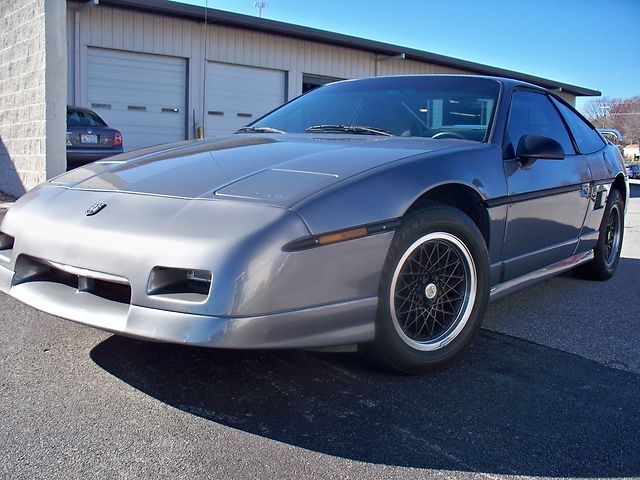
THE BODYOriginally I was think that I was going to do the Lizardo, but during the 7 months the mechanic had my vehicle, it gave me time to think and play with some more ideas.
What really made me change my mind was the new front bumper fascia i designed in PS:

So at that point I decided I was going to get someone to create my new front fascia and build the rest from other parts:
I am going to utilize Archie's Wide-body kit with some with some tweaking:

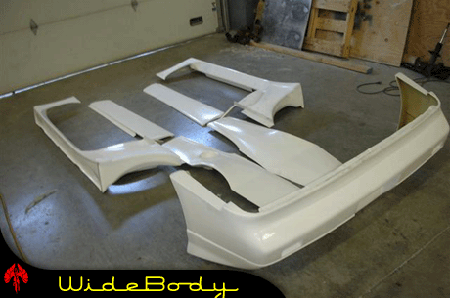
Here is the PS of the way I am going to tweak Archie's Wide-body rear bumper fascia:

A already have a set of RX8 mirrors.

I also took apart the RX8 mirrors and wired in behind the mirror LED turning signal arrow indicator light:
http://i.ebayimg.com/t/36-B...P34pnRq8!~~60_12.JPGArchie is going to do me a set of brackets...since it maybe a while before Dean ships me mine.
A set of lambo doors via Archie's hookup:
Kenson Electronics Shark Fin Amplified AM/FM Antenna Universal Style:

RIMS is one other thing I am still playing with...will update a few of my thoughts on options soon.
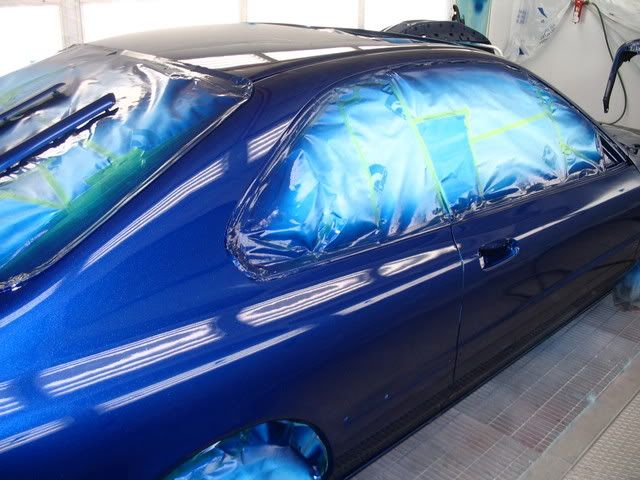
Once it is completed she will be wrapped in Alsa's blue chrome wrap & touches of carbon fiber with 6-7 coats of clear-coat on top of it... similar to this Ferrari that is wrapped in Alsa's same wrap.

Finished up the Speaker covers...turn out great:


Also just ordered my new black plush carpet from:
http://www.stockinteriors.com
OK...I have been busy today... received a few more parts in the mail:
My 0/1 AWG connectors for my electrical setup:

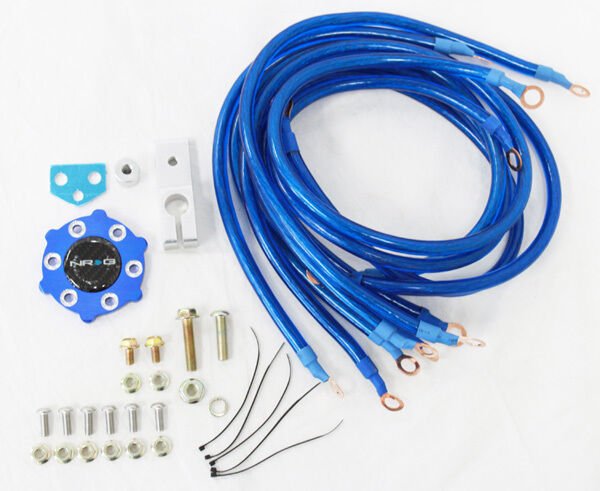
I have also decided to add a NRG E-PAC 3 Battery Voltage Stabilizer (Regulator) System:

...to go with my NRG GROUND WIRE SYSTEM CIRCLE EARTH GROUNDING KIT
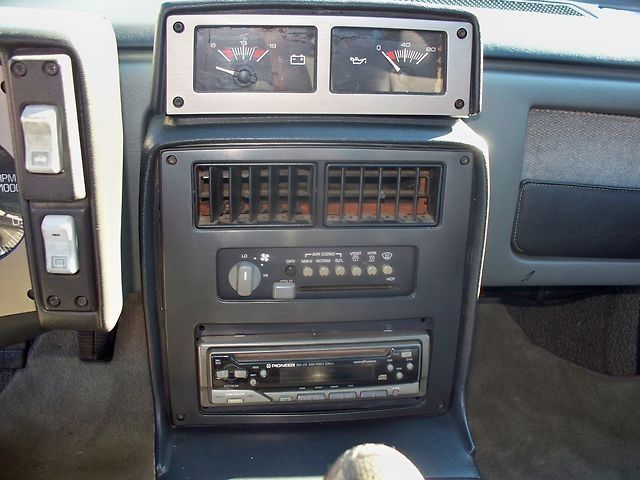
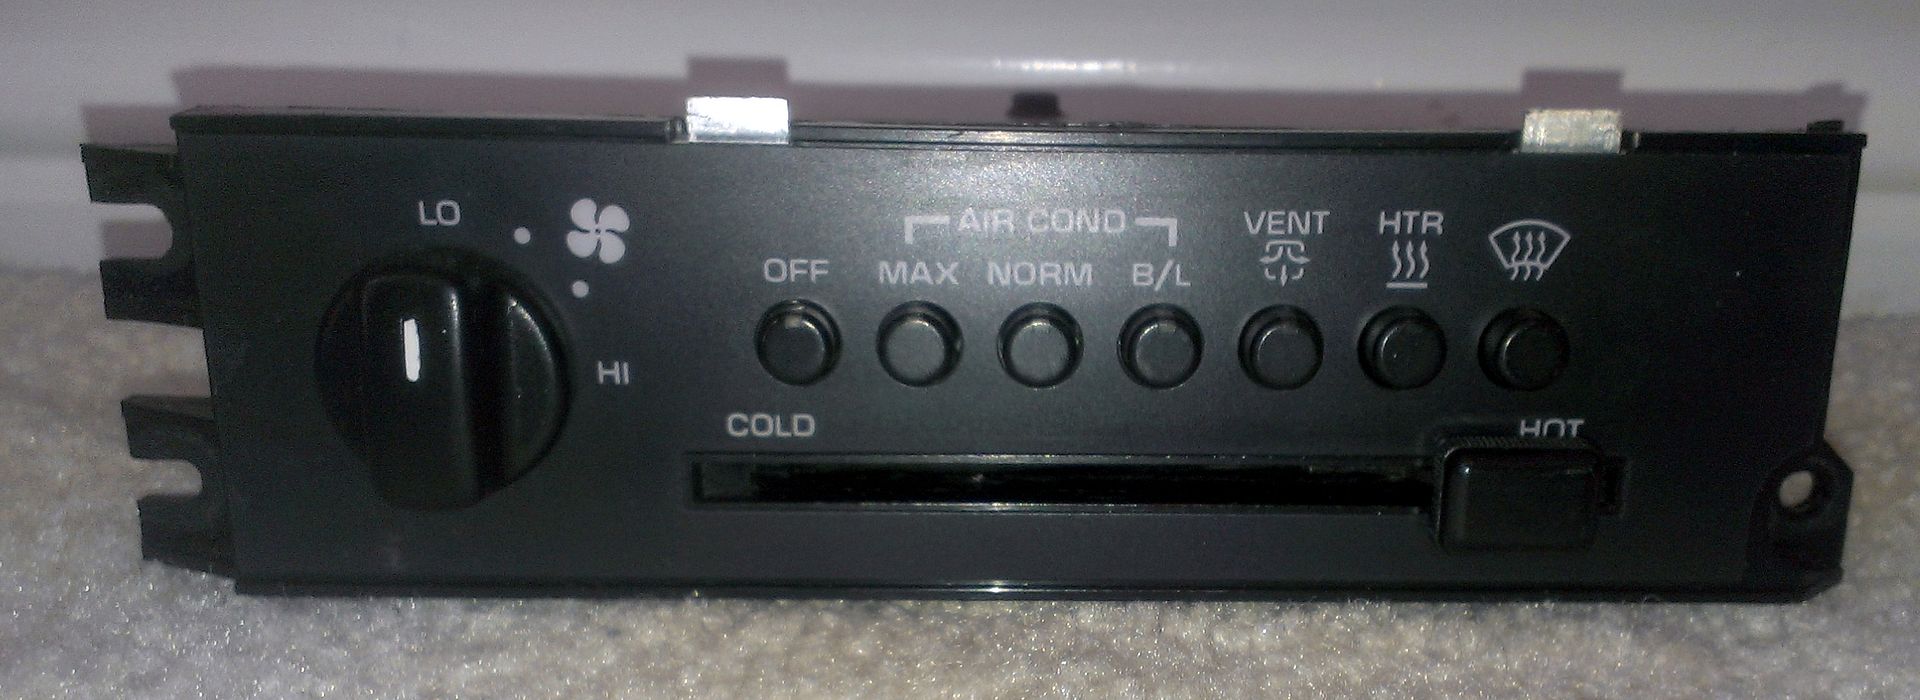
Also received the 84 Climate control that I need to salvage the need black buttons, slider gem & black knob to give my climate control and refurbished back to new look to it:..also re-greased..slides like new again as well!

...it wasn't until I took and posted the picture that I notice the few plastic shavings in the area where the temp slide-bar travels...little exacto knife and it is now gone
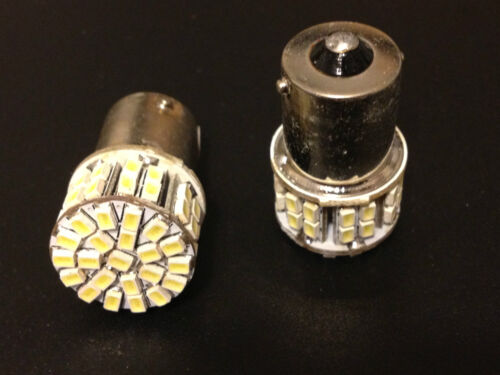
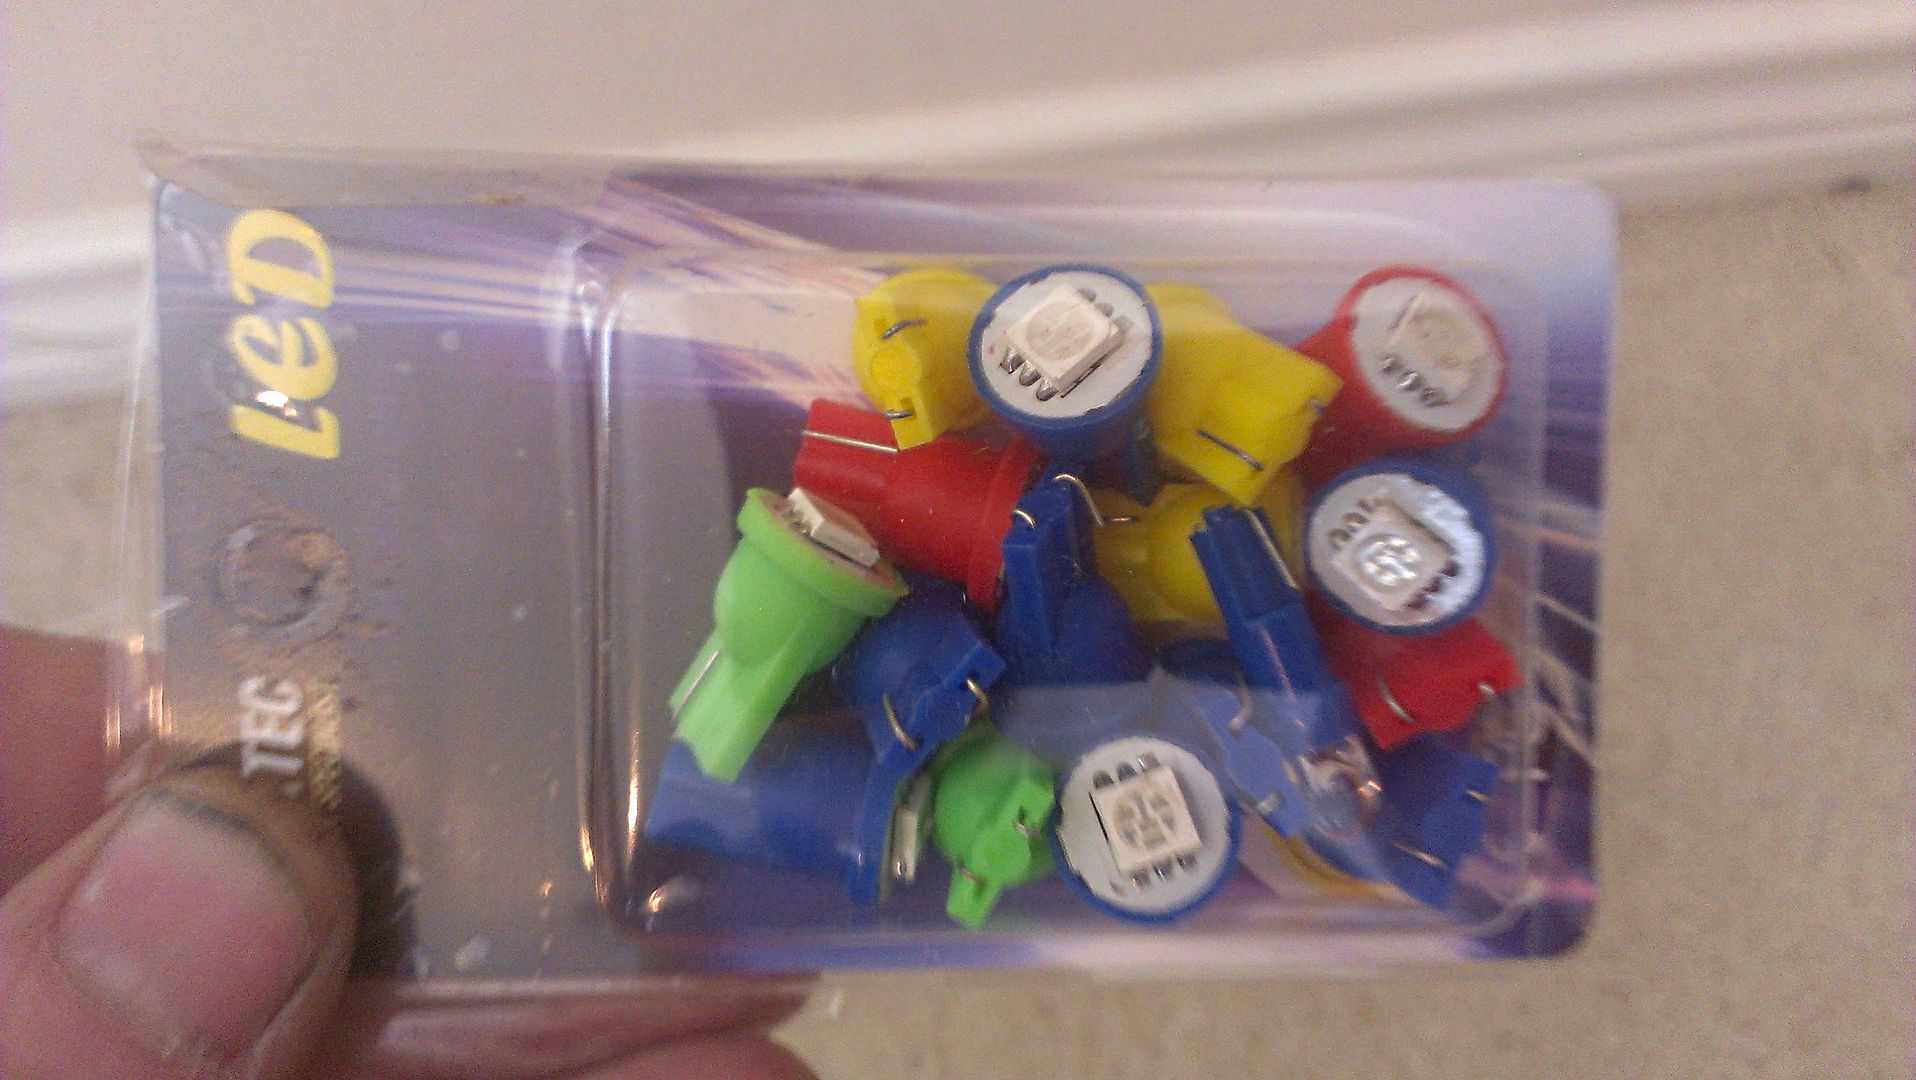
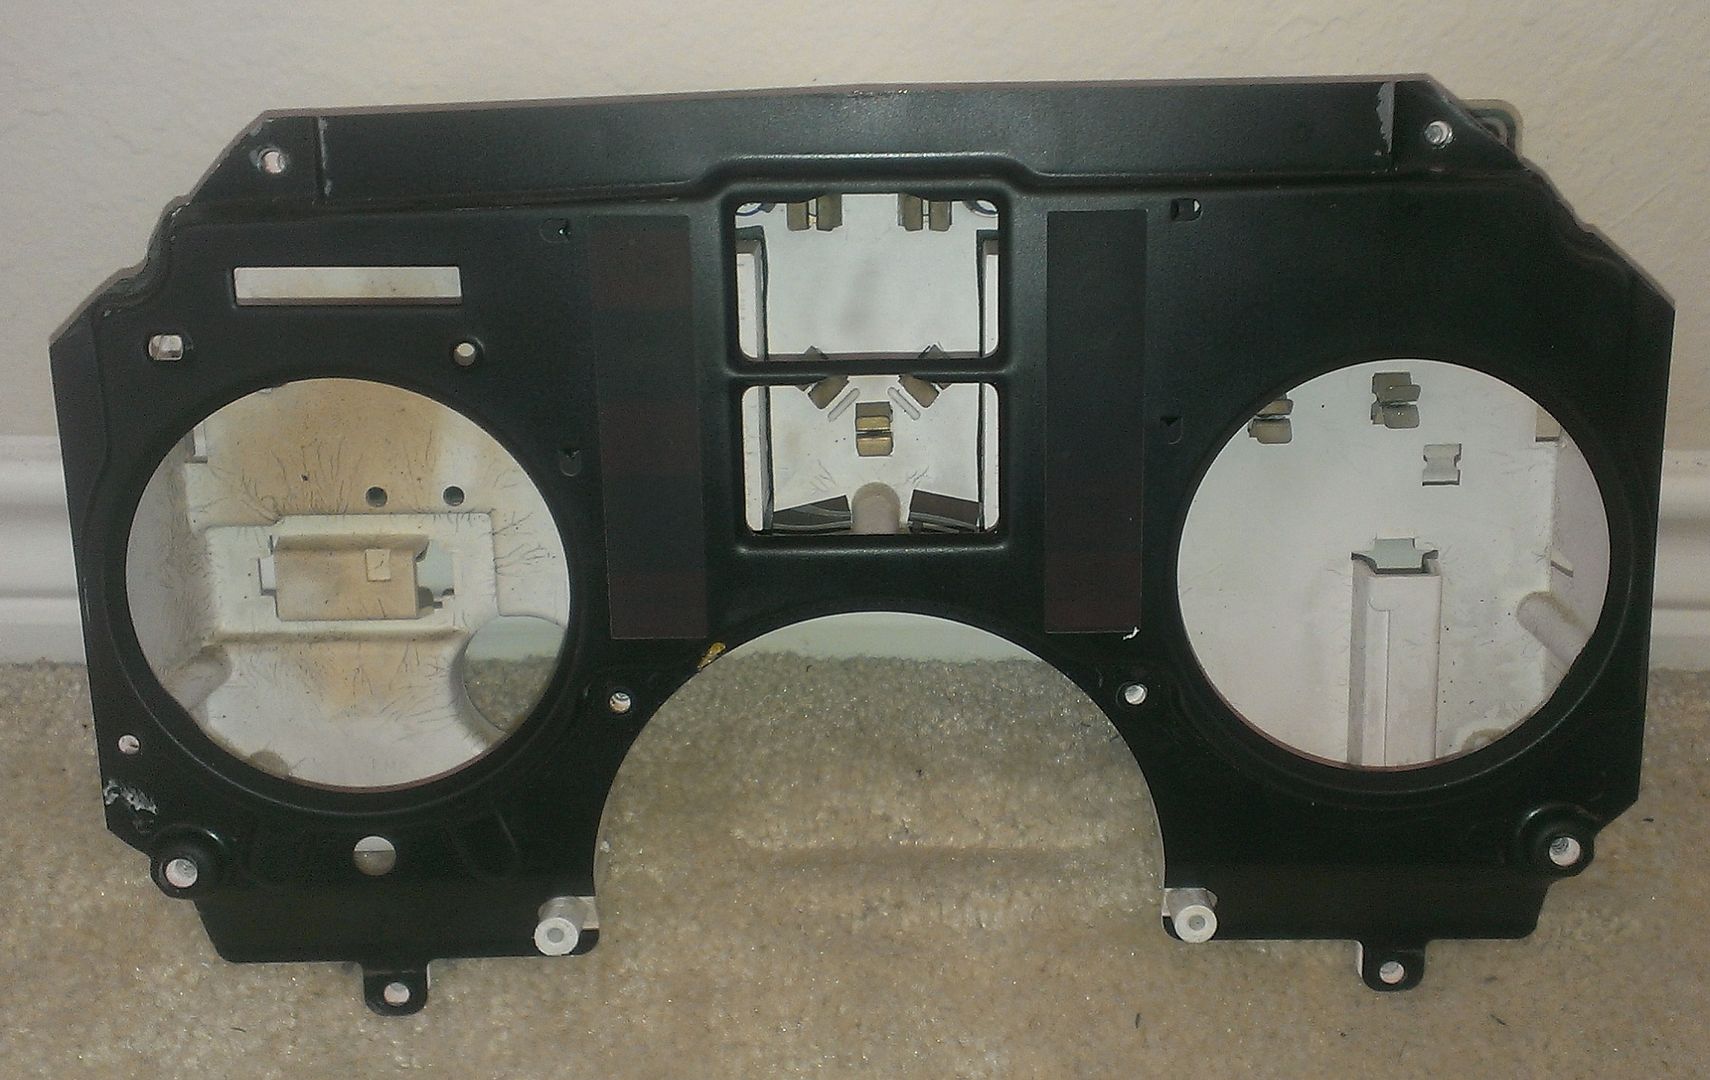
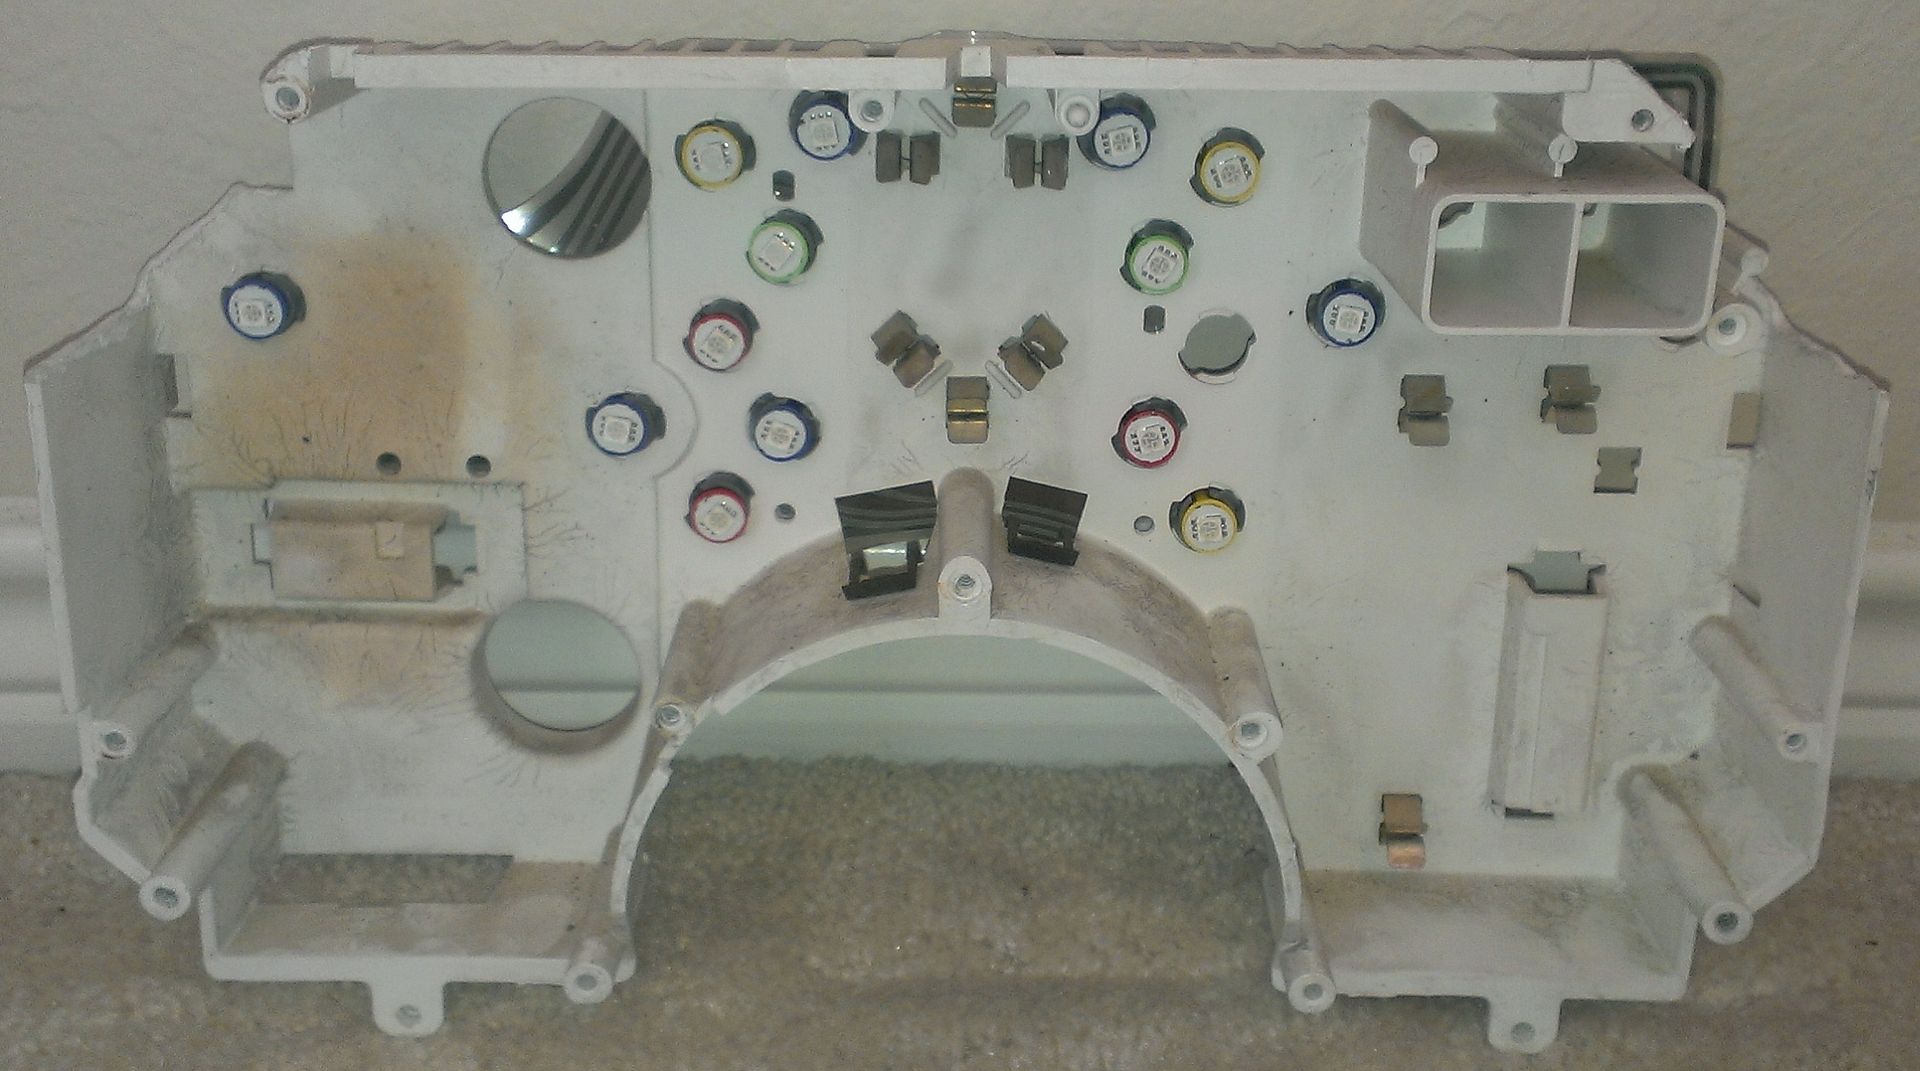
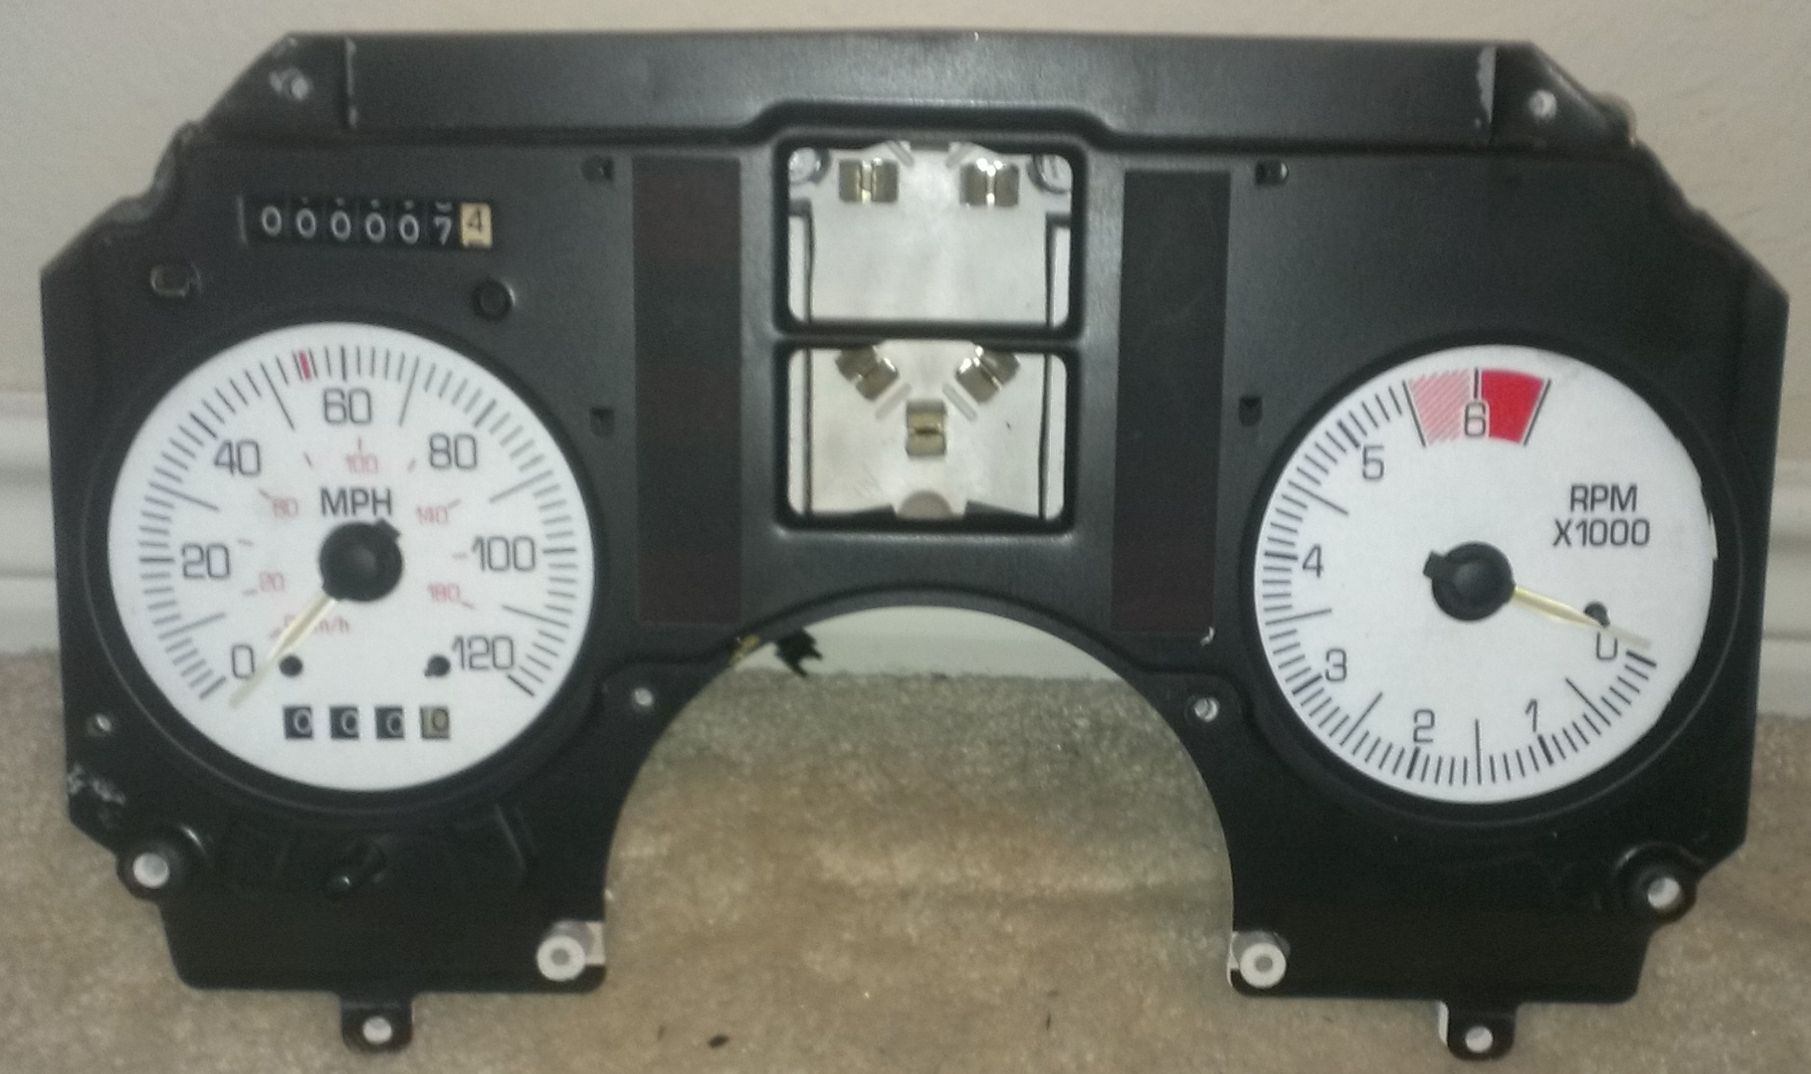
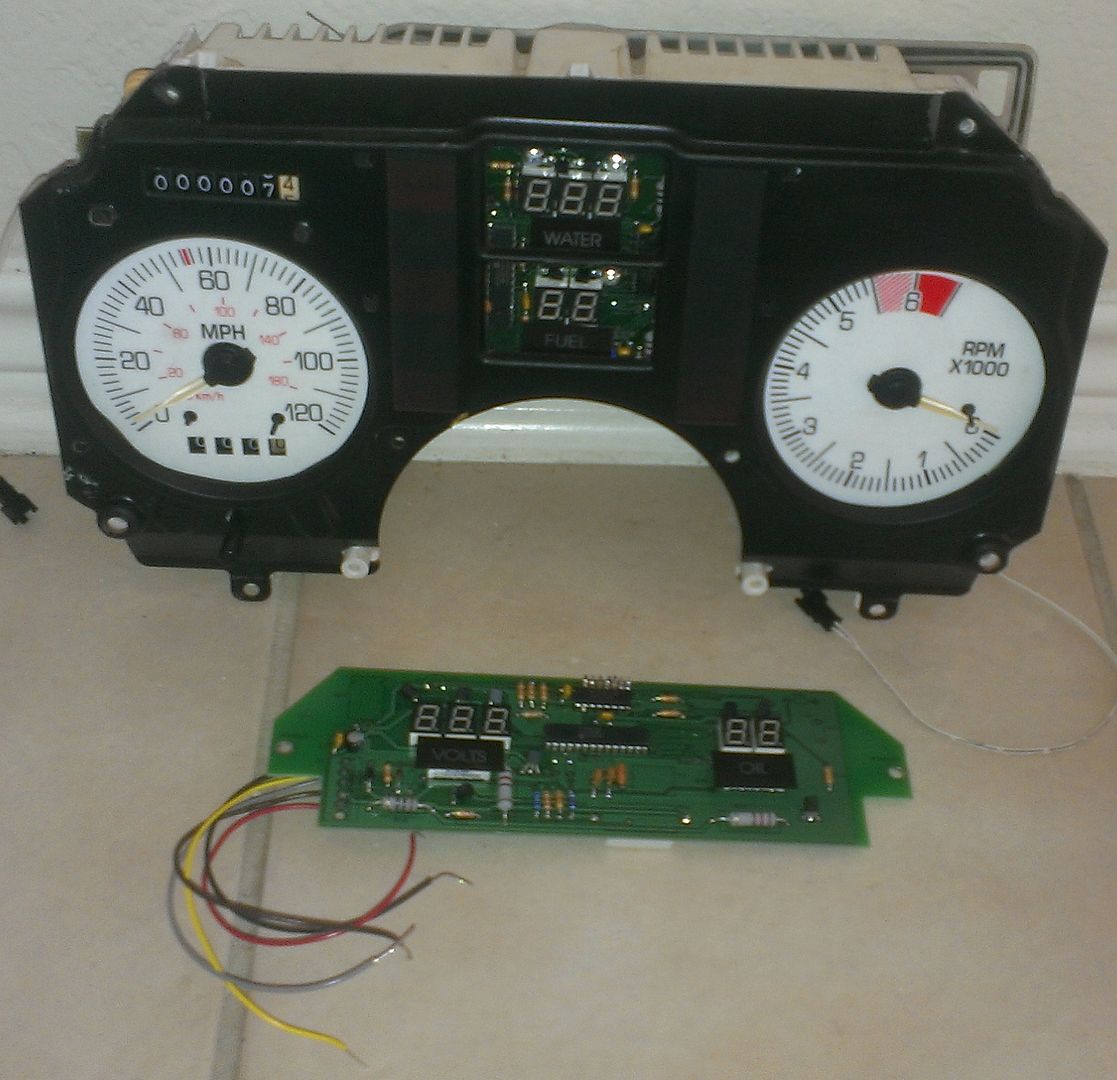
I also ordered these today for my new G1 gauge cluster:
One of these for my climate control light:

These for the indicator lights in the POD:


0E9s37E2miBQR-dnGd4!~~60_3.JPG)
UPDATE:
My white glow gauge covers showed up yesterday:
MAIL started showing up today...its been like X-Mas around here for me:
New 3-core Aluminum Radiator arrived...fits perfect...no cutting or changes needed!
Also received my new ultra plush black carpet:
UPS just now dropped off my new heating core as well:
just tested the fan shroud for the radiator and zero issues!
Started installing the passenger side of the new carpet:
First Package of the day arrive...a nice brand new Delphi BM10036 HVAC Blower Motor:
Another Package arrived...not exciting, but needed!:

Well just swapped out the old leaking heater core. What a mess...it took me an hour to sand down the surface rust off the vent swing doors that I saw when I removed the old core and the amount of dirt..no rust, sprayed with rust-o-luem, and cleaned. Then I finally installed the new core...which took a whole 5-7 minutes:
and the old dead core:
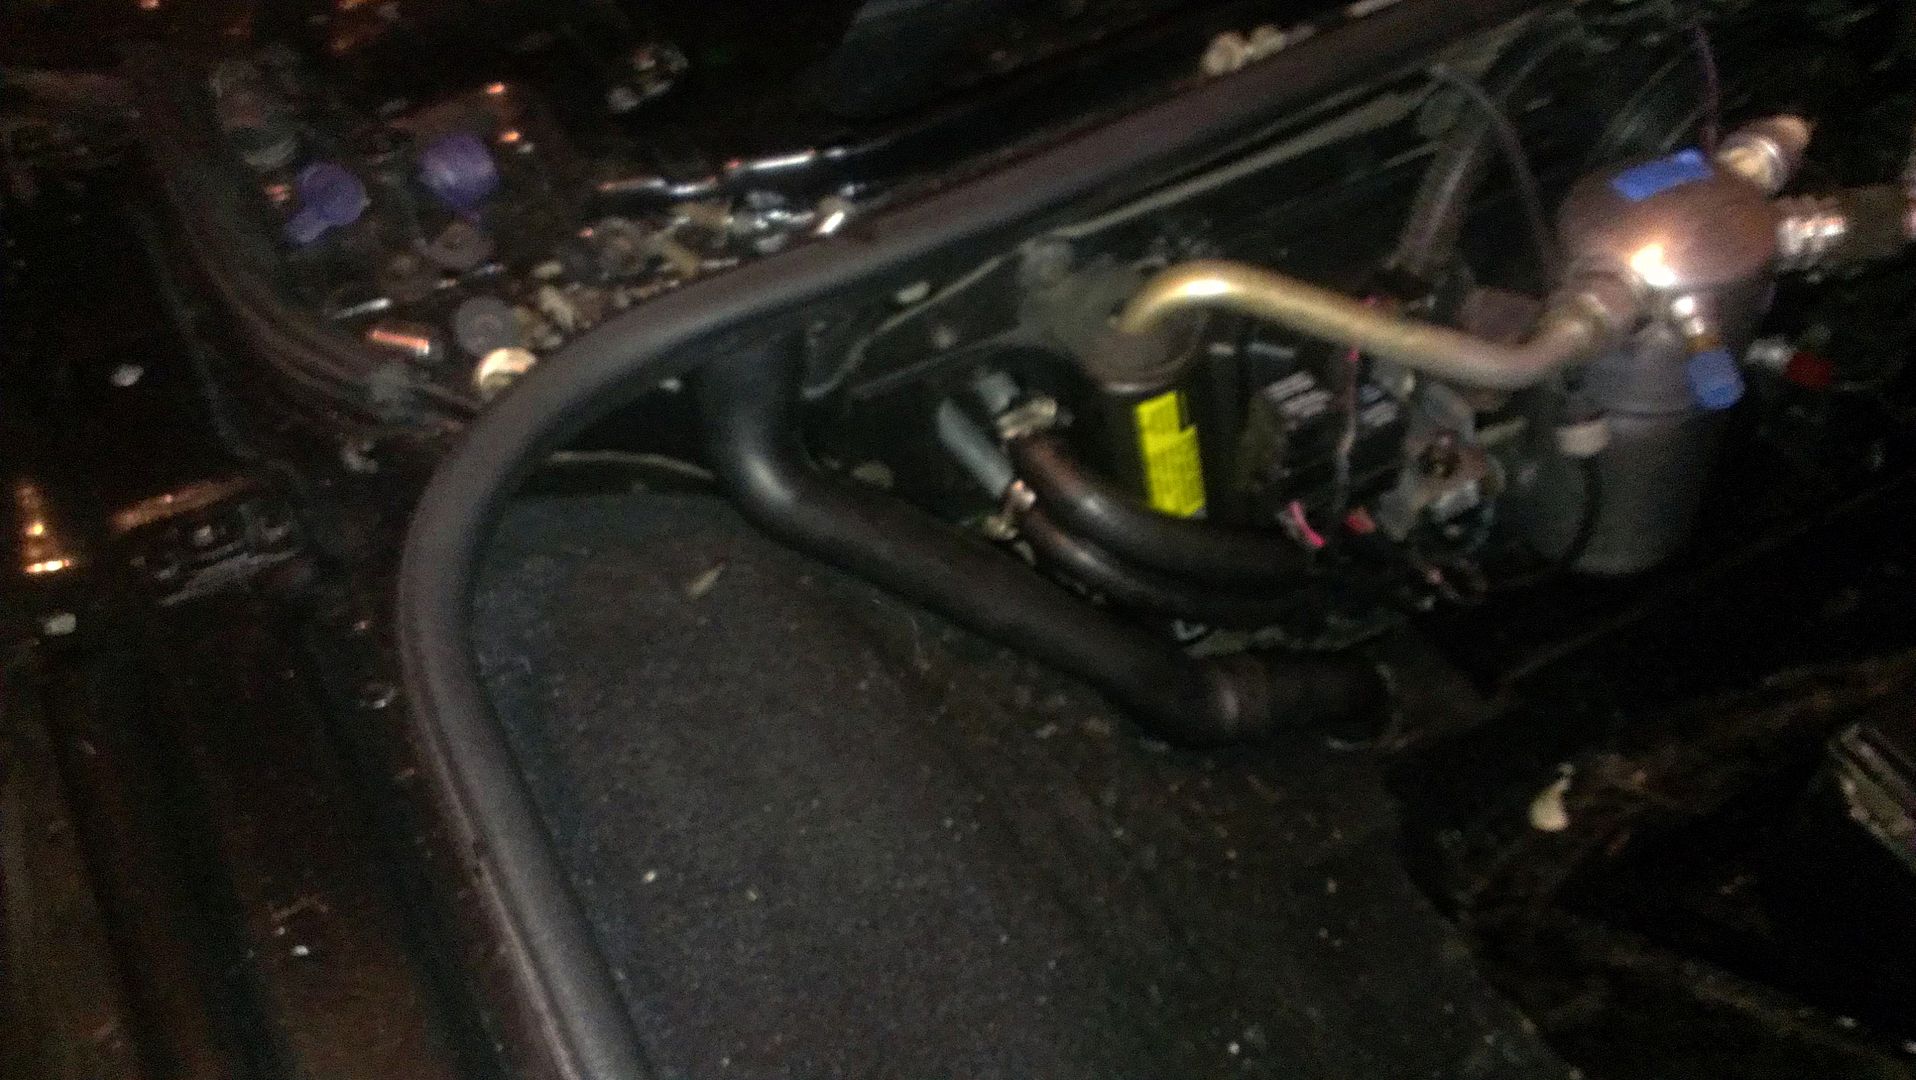
Tomorrow's game plan is to decompress the AC lines. Need the room to swap out the new HVAC blower motor...was going to have to do it next week anyway when the new AC condenser arrived.
What is the easiest way to decompress the AC charge without causing a mess?
Her body will have the following exterior body modifications when completed:
OK...restless tonight...so I went and installed the new Delphi HVAC 2 minutes to install, but 40 minutes to clean out the area where the blower mounts into...tons of leafs and garbage...almost 1/3 filled..all clean now
Here is the older blower that was dying and making noise:
and here is the new blower installed:
Need to still clean and paint the lower support bracket that holds the AC & radiator with black rust-o-luem paint.
Need to decompress the AC and swap out the condenser.
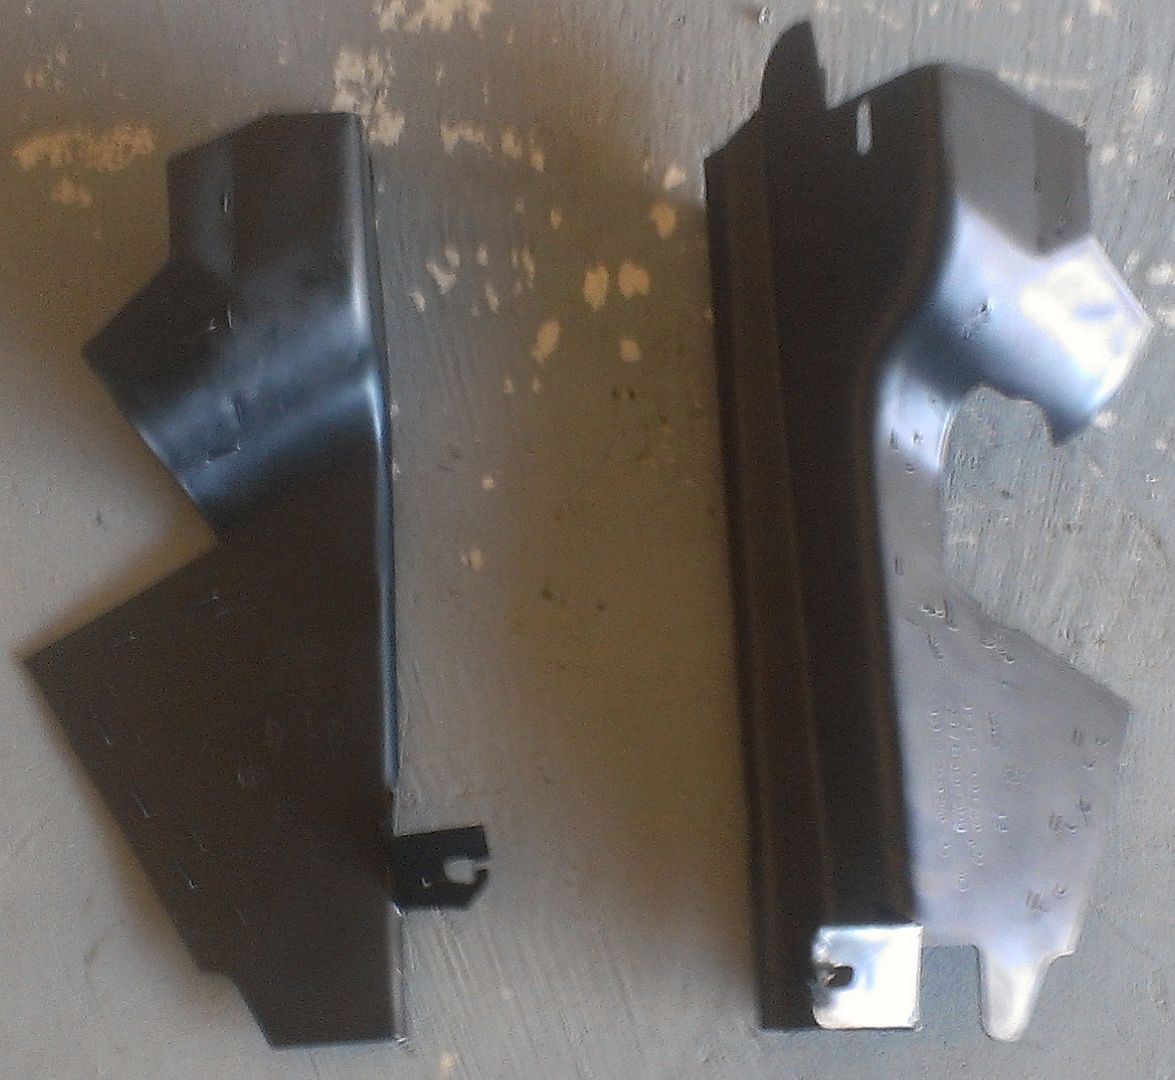
Also looking for the plastic shroud that goes around the AC condenser that guides the air flow...this is what I found left of mine...it seems that it should have two main plastic pieces that go on each side of the condenser and then a metal bar that attaches the tar like paper to help guide air flow
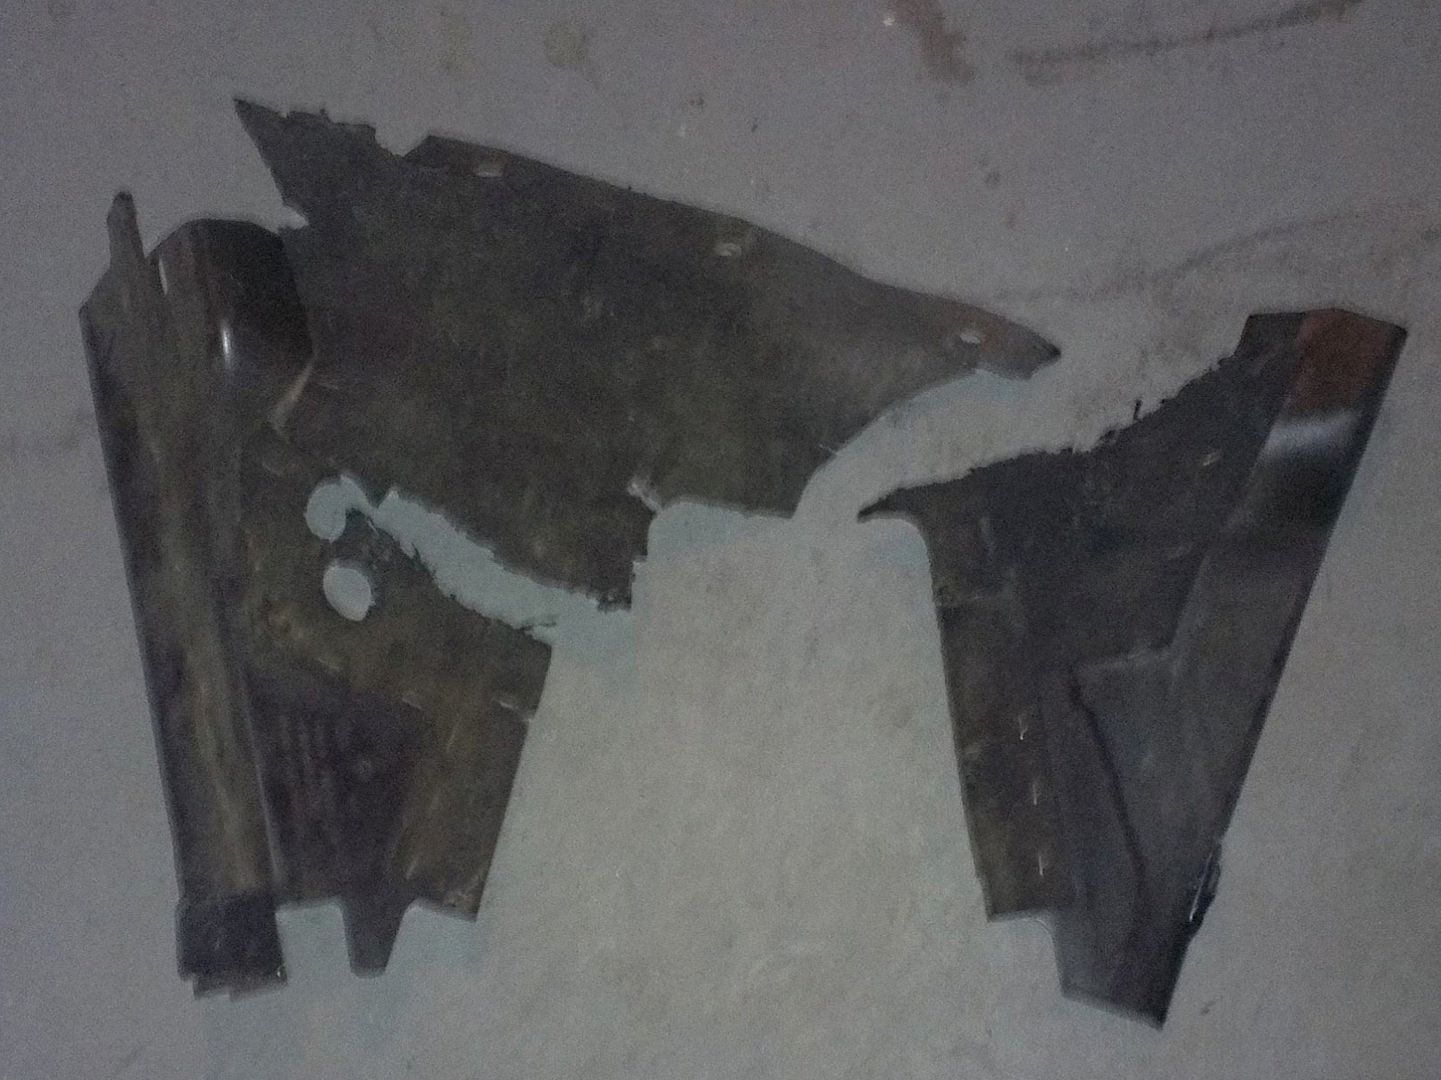
:
Next two weeks punch list:
Lights:


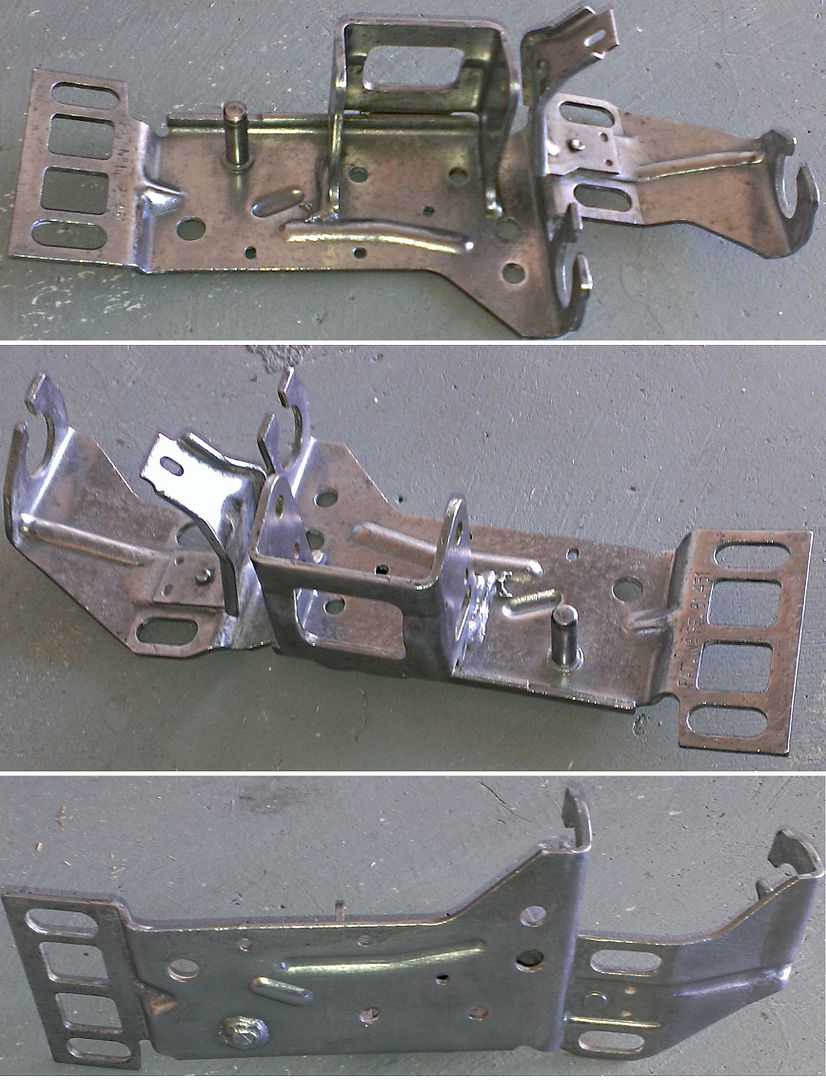
PCM Mounting hardware:

C5 Corvette Sun visors with vanity mirrors:

Prothane 7-2034 Total Kit Pontiac Fiero 84-87
Q~~60_35.JPG)
NRG E-PAC 3 Compact Battery Voltage Stabilizer (Regulator)
NRG GROUND WIRE SYSTEM CIRCLE EARTH GROUNDING KIT

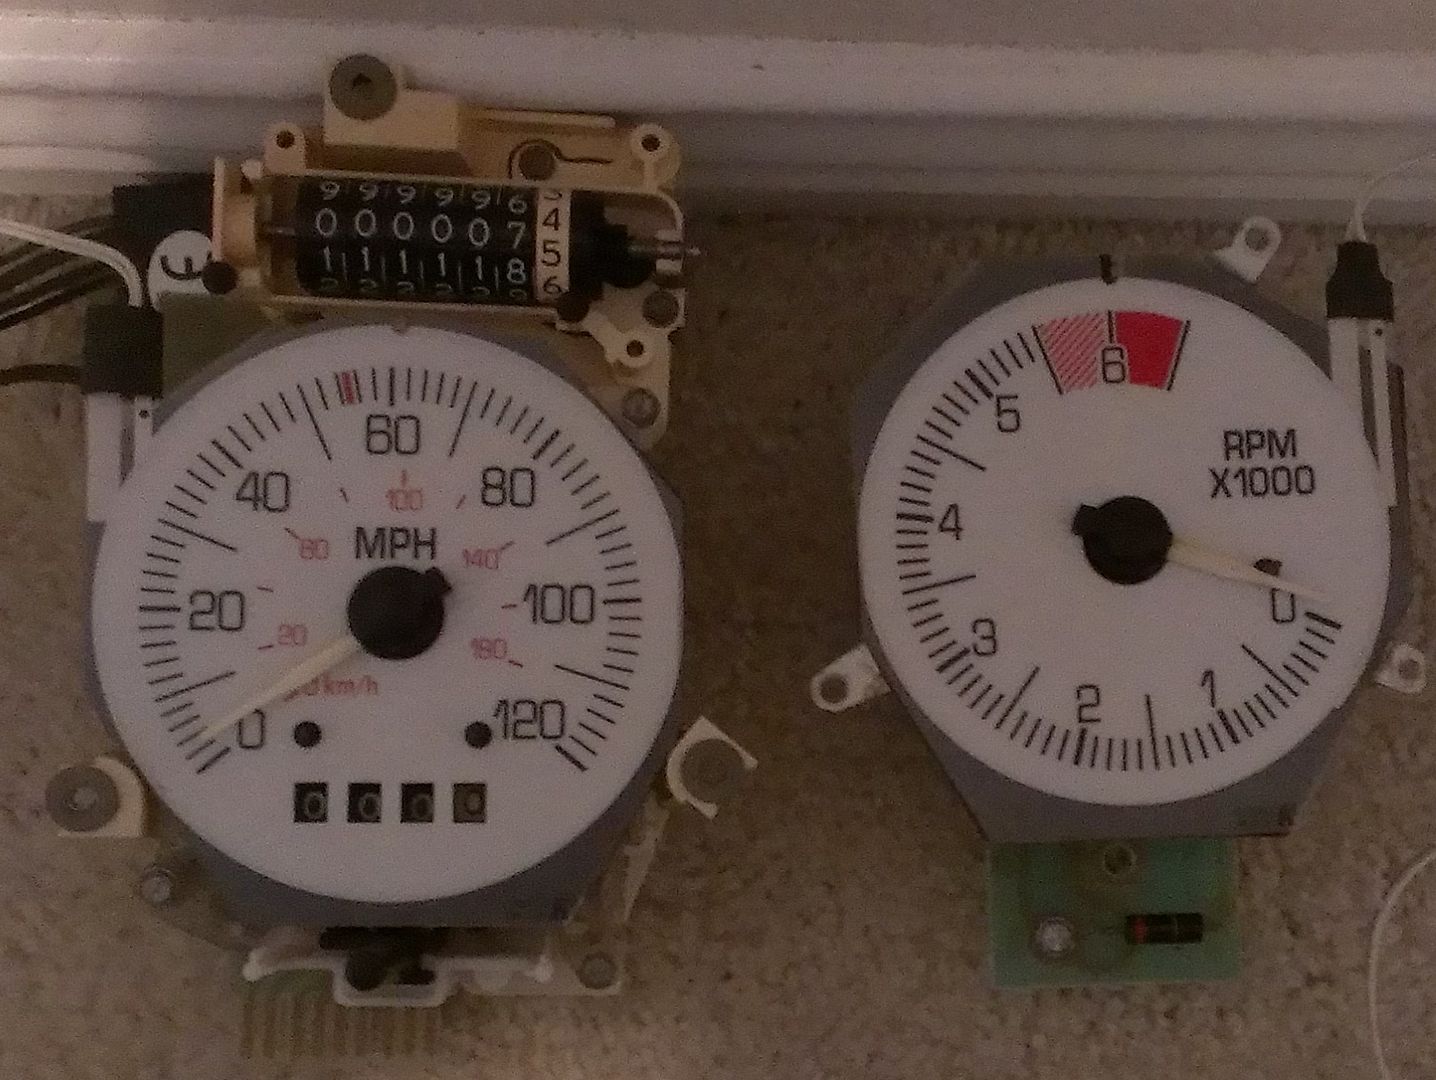
Tom's digital guages for all aux guages...mine will all be in blue...pictures below show one set i blue and the other in red::
BOoZeztu3Q~~60_12.JPG)

I figured if there is going to be an air vent on both the driver and passenger sides...already utilizing the driver's side for my air filter...so might as well utilize the passenger side for...ALUMINUM ENGINE OIL COOLER

Plans for a nice IC as well, but that is on next winter's agenda!
PaulJK,
Well thank you for the compliment! Yes I do think it should be enough, but I am also planning on utilizing an oil cooler and next year adding an IC as well.
As far as the steering wheel...I let you in on an untapped area for some very cool steering wheels...the boating industry! I also am into motor & sailboats.
The steering wheel is made by UFLEX.
NOW a better option as pointed out by another member and I would have to agree is:
Rodney's aluminum clutch master cylinders

Was busy updating my VM Ware certifications this past weekend, so I did not get a lot completed on the car.
I was able to work on the PCM a little bit:
UPDATES: Pictures for the archives...since we are about to re-assemble the interior and exterior.
UPDATE...just received the plastic AC condenser shroud pieces that I was missing from member "Rick Vanderpool"...thanks
:
Now I need to go and order the tar-paper replacement pieces from Rodney:

and if I am ordering that one, I might as well order this one as well:

UPDATE:
UPS just dropped a package from Archie:
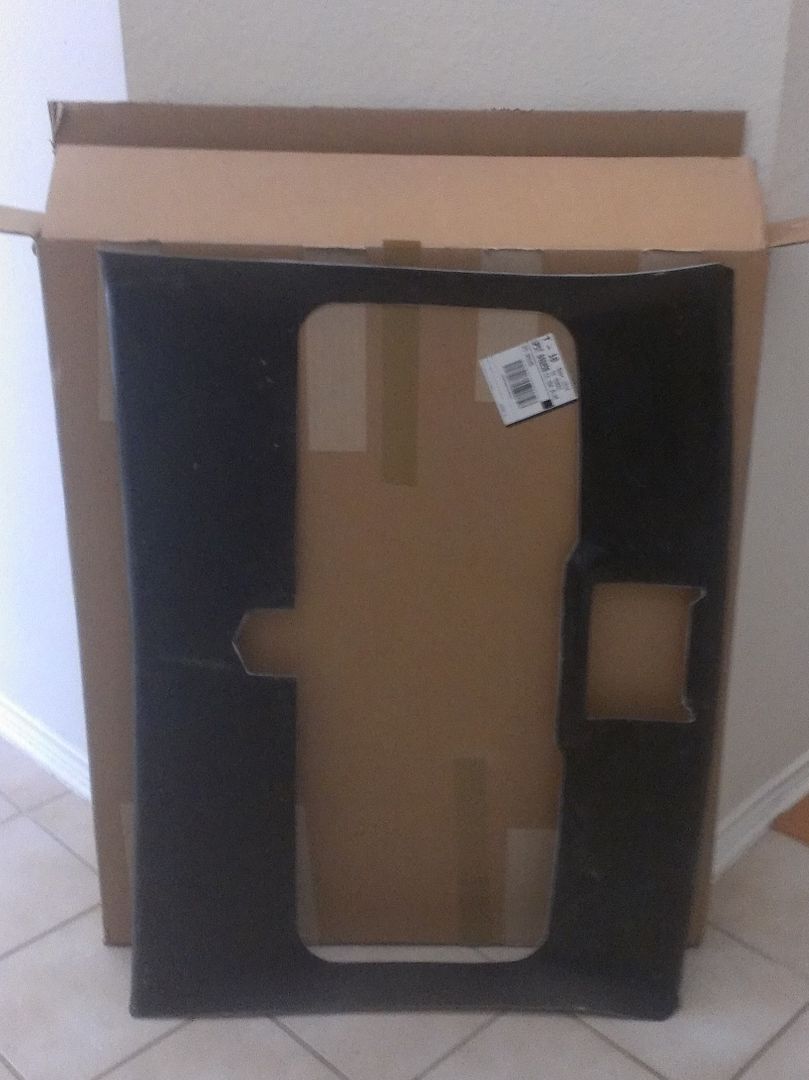
It's a new fiberglass headliner!
Thanks Archie!
UPDATE:
Dash LED lights just showed up...thanks UPS Man!
Boy things sure seem a lot larger online!
NOSRAC,
Actually its not that I am not mechanically inclined...it was that I sold off all my tools 20 years ago. I restored my first ground up restoration on my first car a true 1964 1/2 Ford Mustang GT...3 speed Hurst shifter on the floor paired with a 289 Hi-Pro. I have restored several classics in my early years and did a complete SR20 (redtop) swap into a 91 240sx before there were any kits available around 1998. The SR20 would have been the last car project I have had my hands on...so its more been like 15 years, not 20.
There were several reasons I brought my car to Todd originally...no tools, no room to work on her, and there was welding involved...I can't weld
...still on my list to learn and master...maybe when I retire?
But once Todd royally screwed things up and me...I decided the only way to get things the way that I want them is to do it myself. Since I was going to do it myself (at least mostly) I was going to go through her with a fine tooth comb.
I only wanted to have to restore her once in the next 20 years...don't plan on selling her!
So I have slowly been rebuilding my collection of tools as needed and just working on sections at a time.
I basically stripped everything off of her internally and externally. Sanded, scrubbed, removed any visual signs of rust any where in or on the car (even the swinging doors inside the HVAC units)...chemically treated any areas that
had been exposed to rust...let that sit for about a month while working on other parts. Once I was sure all rust had successfully been killed...I put several nice coats of black rust-o-luem on the entire thing to lock in and protect the metal from the elements...even the little metal doors inside the HVAC unit.
Have new AC Condenser in route and should be here by Wednesday.
With that I will be installing the new condenser, radiator, restored plastic shrouds with new splash guards from Rodeny.

I also have one of the newer bigger brake booster in route that should be here early this week as well. I am going to upgrade the master brake cylinder at the same time.
Last night I order 40' of 1/0 welding cable. to finish up re-doing the remote battery correctly.

I will be running two pieces of PVC a couple on feet on both sides of the gas tank above the gas tank support rails to run the wires through.
I also am adding a NRG voltage stabilizer and ground distribution block at the same time.
I also finally order my new Battery: DYNA-BATT last night as well!
Will be utilizing the following screw down posts:

And these for to connect that 1/0 AWG welding cable to the battery:
 TSUNAMI
* BLUE DIGITAL VOLTAGE DISPLAY
* Bright Nickel Plated (chrome look)
* Positive & negative battery terminal pair
* 1ea 1/0 AWG, 1ea 4 AWG and 2ea 8AWG
* INCLUDES CLEAR PLASTIC COVER
Preparig the power steering pump to be re-installed:
Getting so Excited about the new G1 dash from Rob:

Preparing to ship Rob the need parts for my G1 dash
:
Just got the OK and $ for also wrapping the center armrest piece in the same material with blue stitching...so I need to box this up and ship as well:

UPDATE: Battery Cabling showed up via FEDEX:
1/0 cable:
UPDATE:
This project is about to be pushed into Overdrive! I had member "MstangsBware" / Steven give me a shout-out on my phone last night.
He has agreed to help me finish up all the mechanical work.
Two sets of hands are always better than one set!
And it sure won't hurt to have an expert like Steven that has more hours logged than most of us.
This weekend's Projects:
Install Bigger Brake booster & new master cylinder
Install black painted PVC pipes under the car on each side of the tank for the 1/0 AWG battery wire to run in for the remote battery.
Install new DYNA-BATT and run new 1/0 AWG battery wiring setup.
Install new AC condenser & 3 core aluminum radiator & all shrouds & splash guards.
Then Re-install the radiator fan.
So by the middle of march if all goes to plan...I should have the following completed:
Relocate Air filter to quarter panel area.
New wiring harness & PCM replacement installed.
SS Fuel Lines installed.
Rob / Amida new G1 Dash installed.
Corvettee C4 Sport Seats with new black leather & blue stitching
New interior headliner & trim pieces installed.
Power-steering Pump re-installed with a new West Coast Fiero's full-time power steering kit.
Then by mid-April I will have the following completed:
New HUB BEARING ASSEMBLIES (Will do Barbie's at the same time in prep for the drive to Indy...don't want a 25 year old hub locking up on my wife on that trip!)
New 12" Brake UPGRADE
New Sport Front Suspension from AMS
New Rear Bump-Steer Kit now from AMS
UPDATE: UPS man just dropped off my new DYNA-BATT
WOW!!! what a size difference!
UPDATE: FINALLY Cut-up the Gauge Pod for new G1 dash:
Also replaced knob on HVAC controls:
Just waiting on all 4 of Tom's blue digital aux gauges...gonna look sweet!
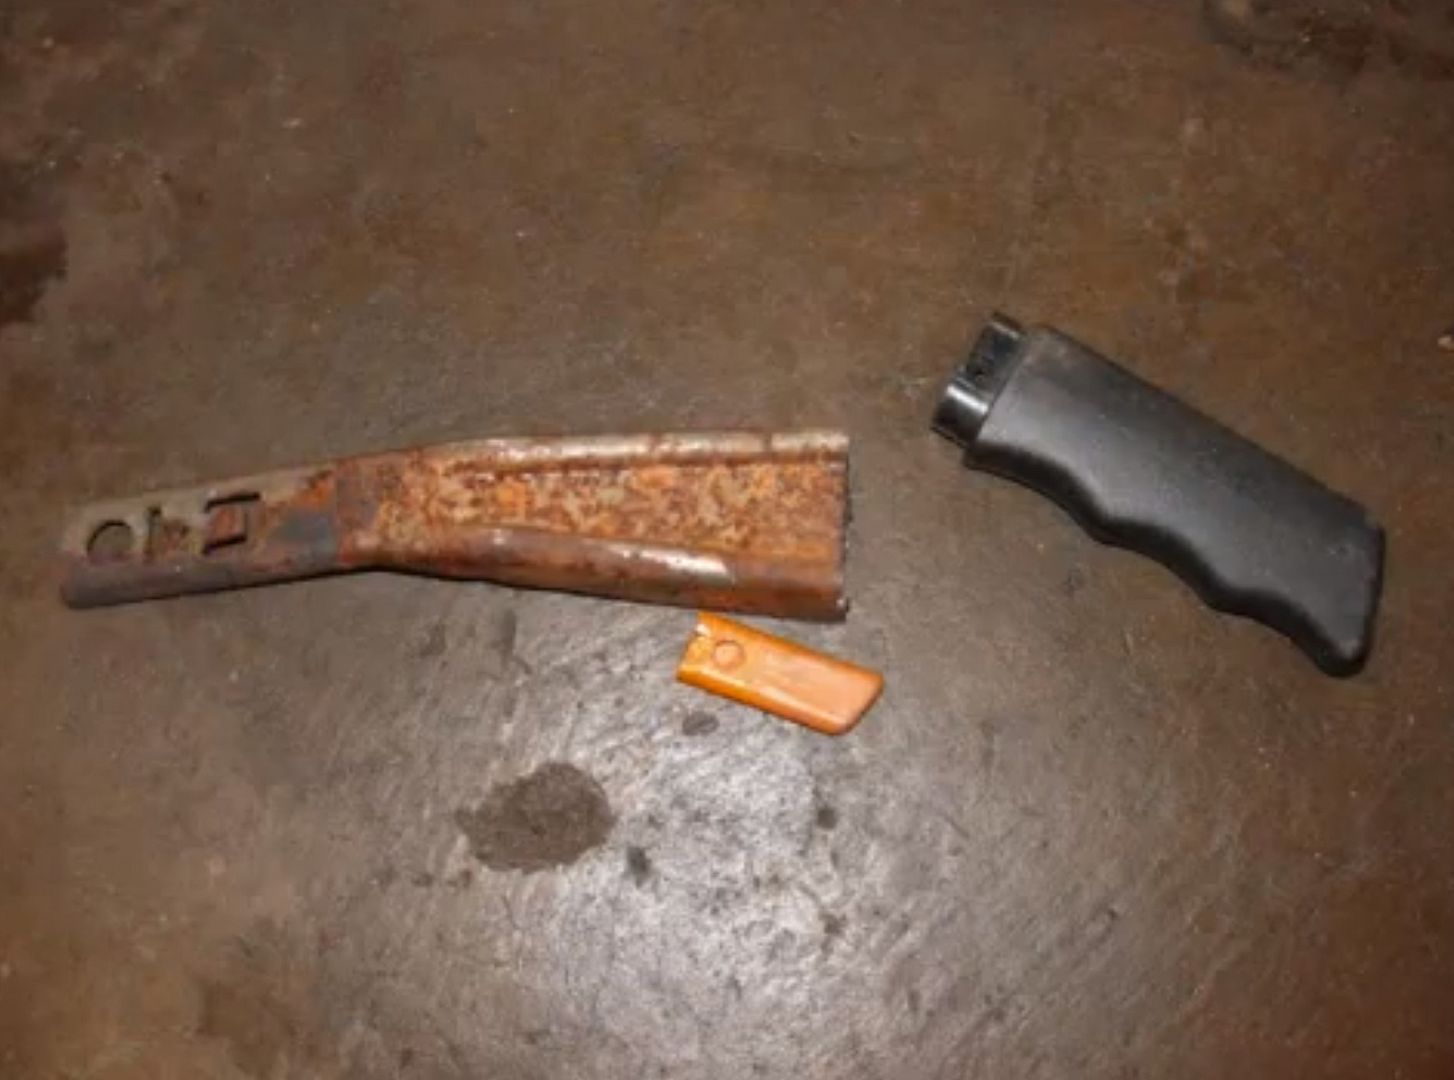
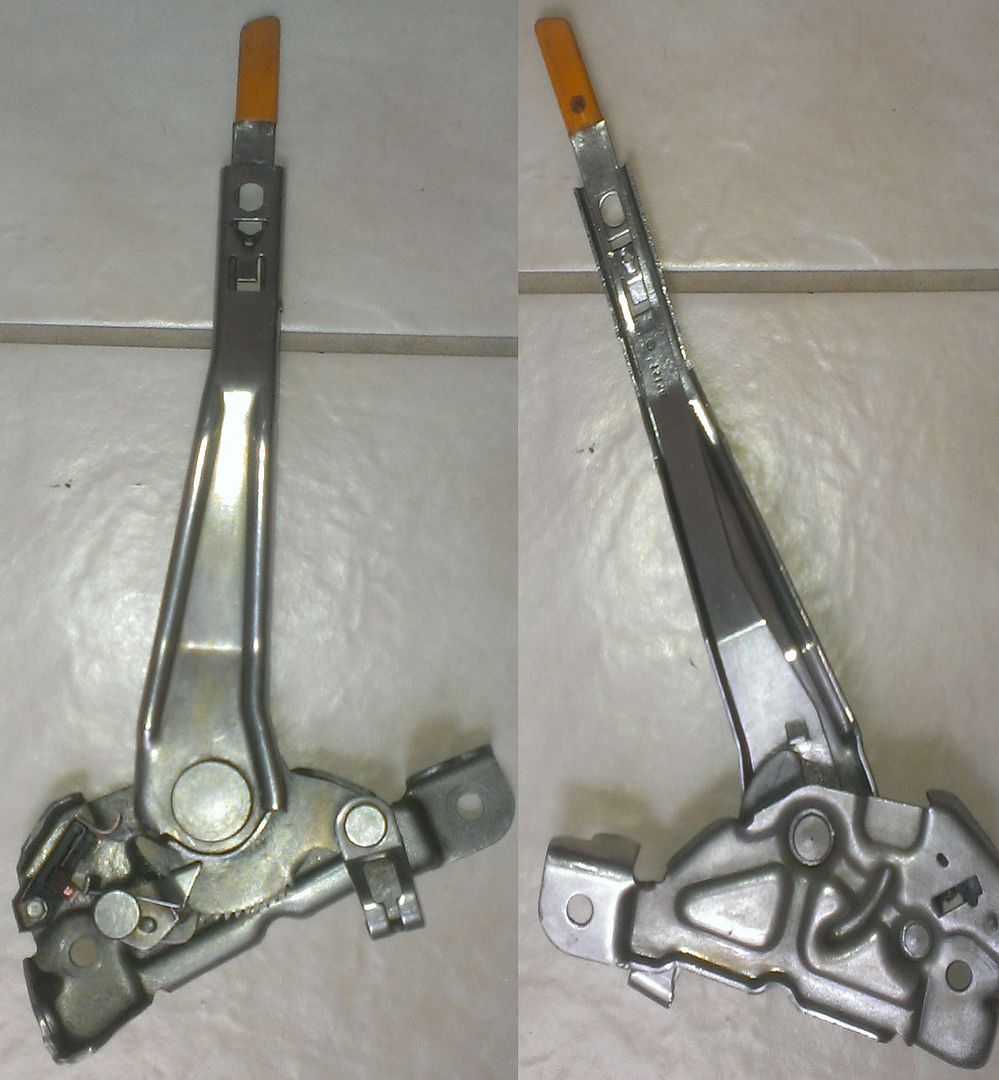
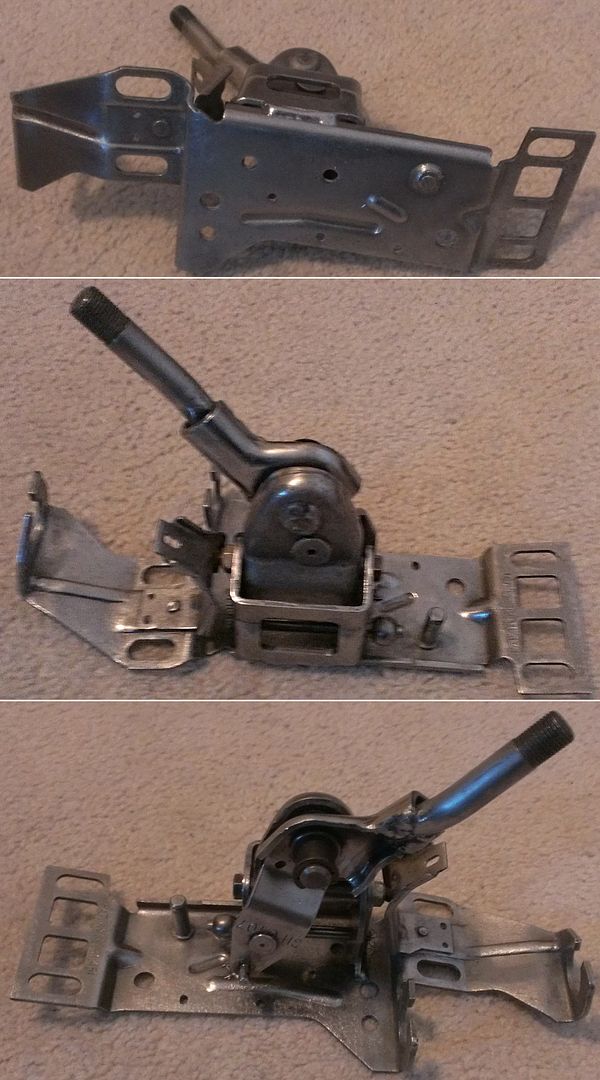
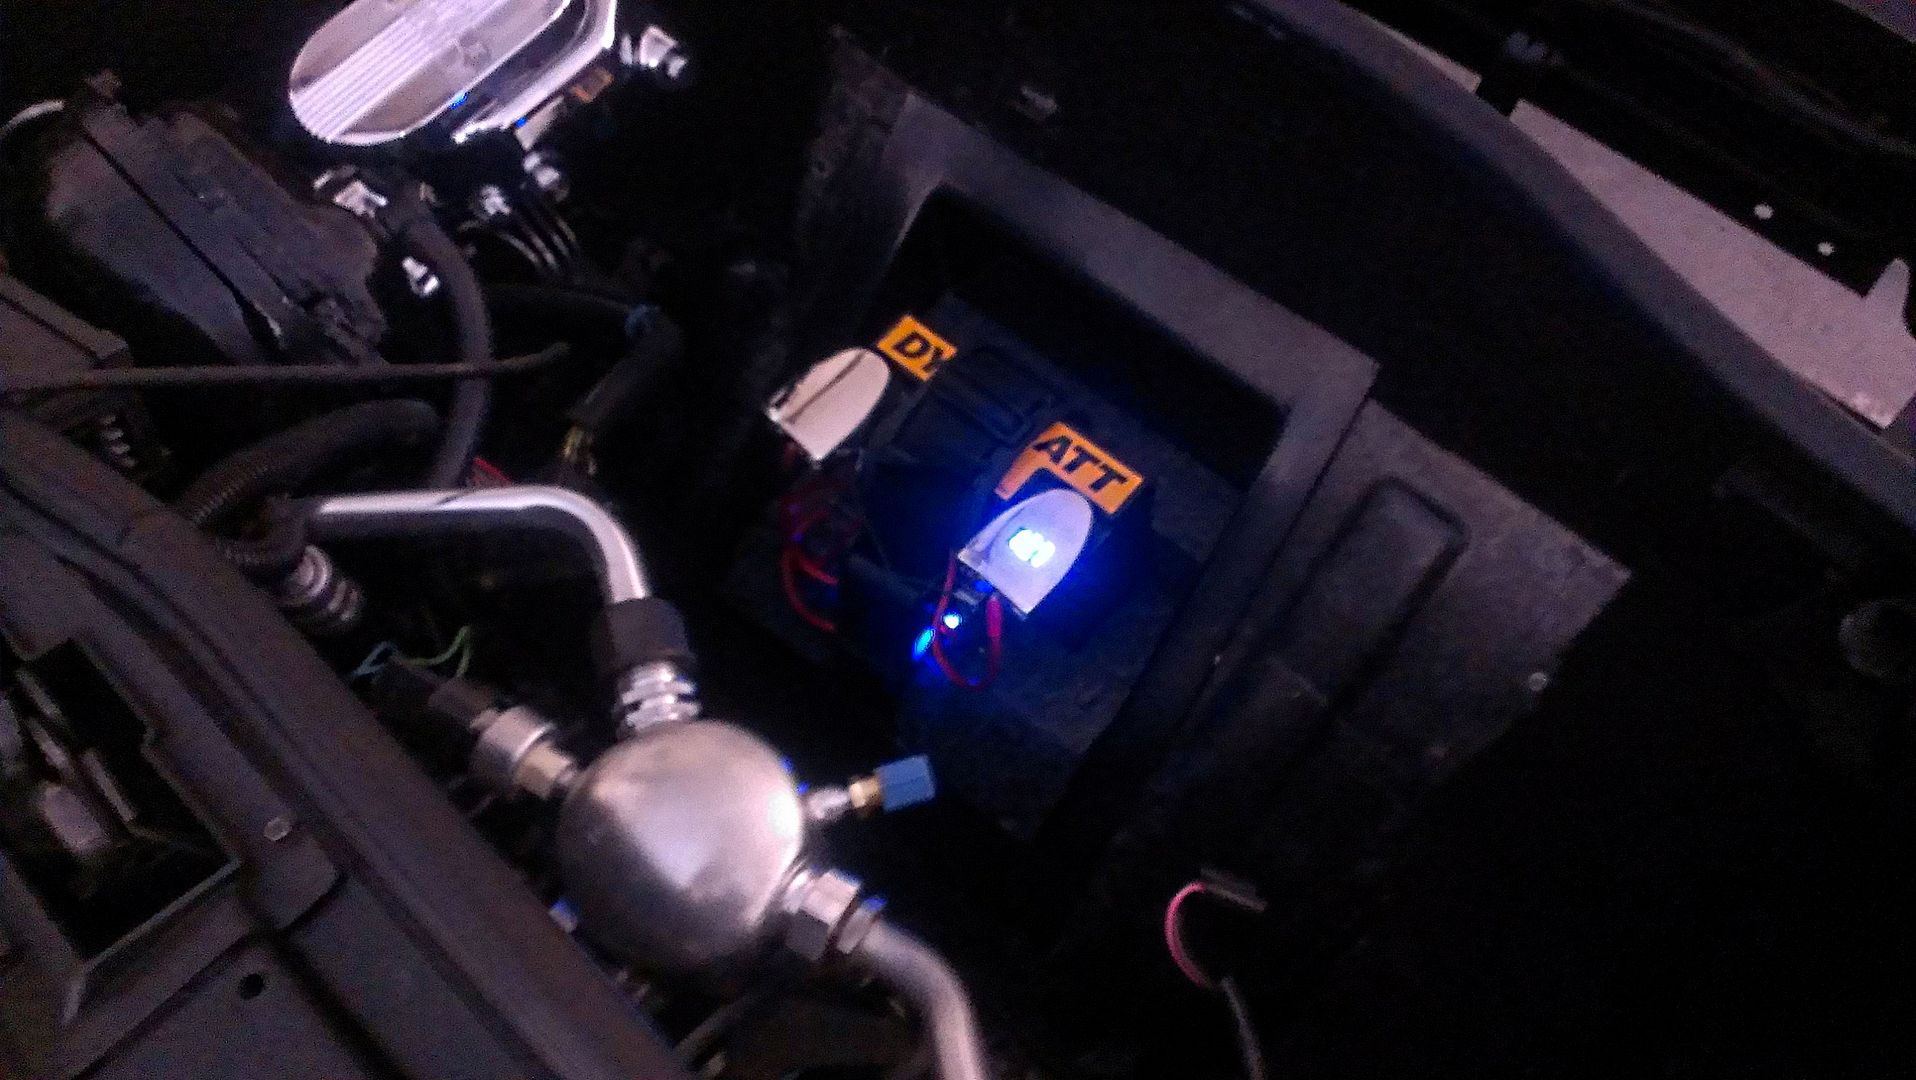
UPDATE: Let me share what I think is going to be a unique feature that will catch on like wildfire:
My Updated e-brake..never going to have to deal with that flimsy plastic handle again!

International Parking Brake Lever Assy #1675871C91 Navistar
You say TXOPIE has gone MAD...maybe so...like a genius!
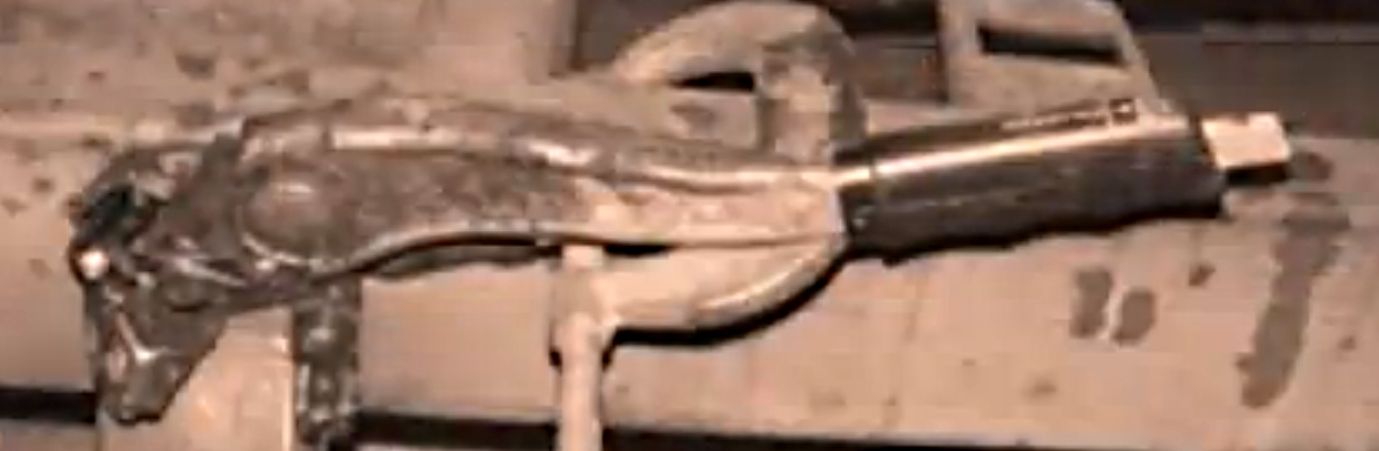
LETS MAKE A FEW CUTS TO THE OLD E-BRAKE:
NOW LETS TAKE APART THE BOX TRUCK LEVER AS WELL:
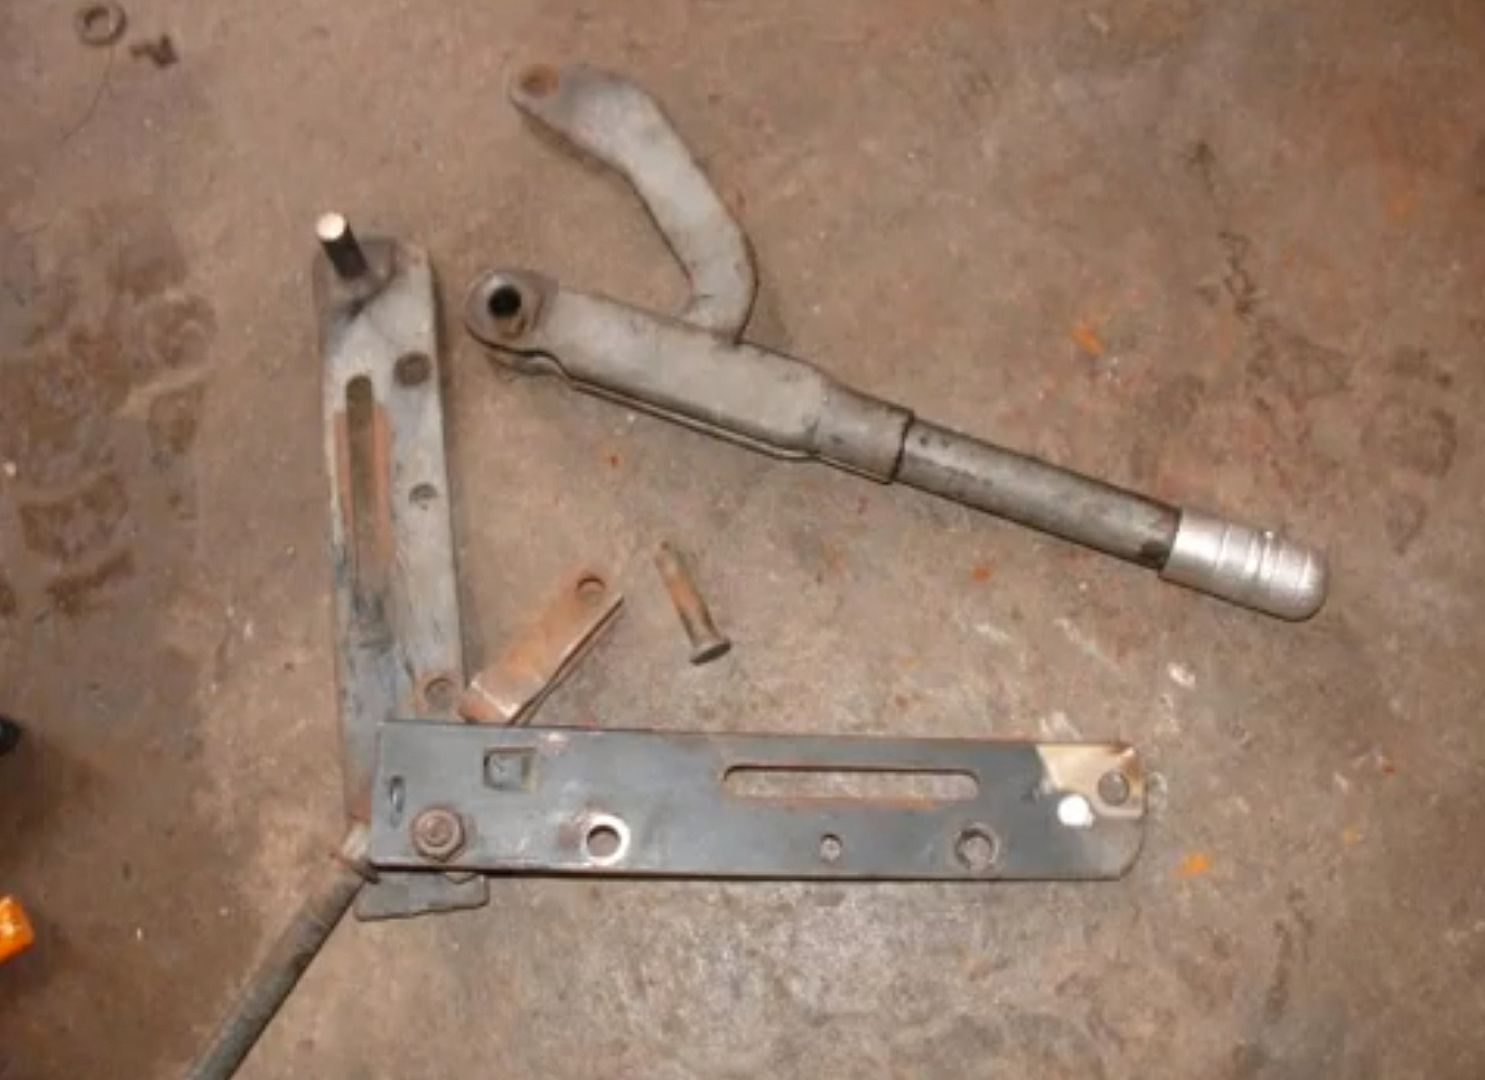
NOW A LITTLE WELDING AND CLEAN UP AND WALA!
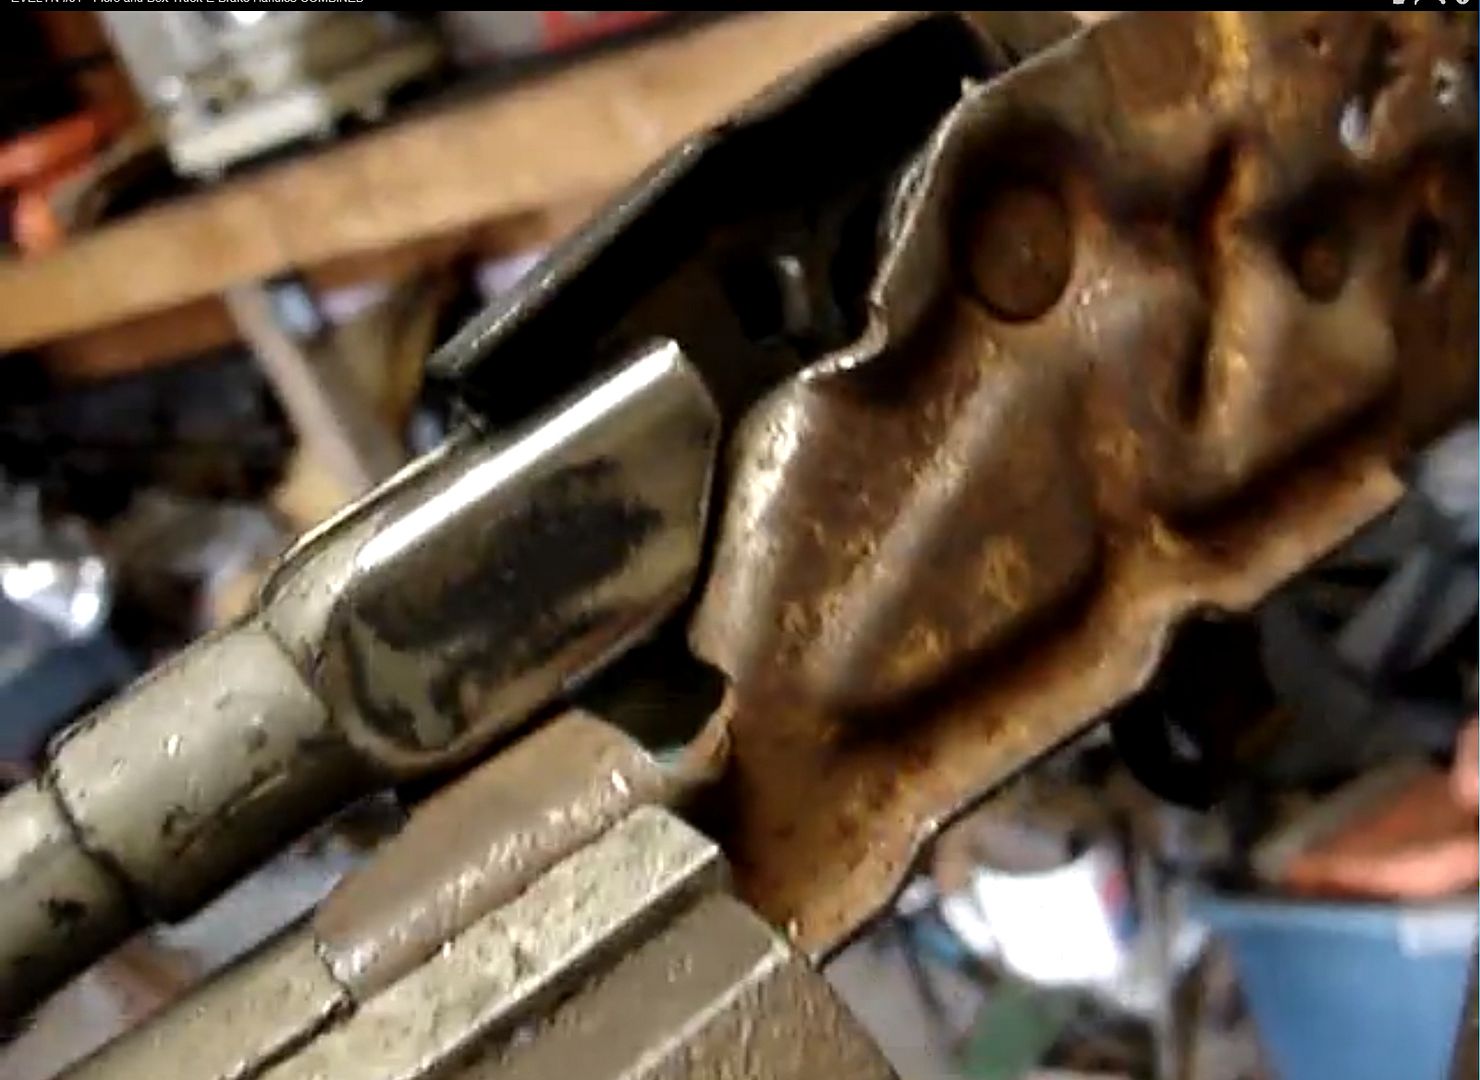
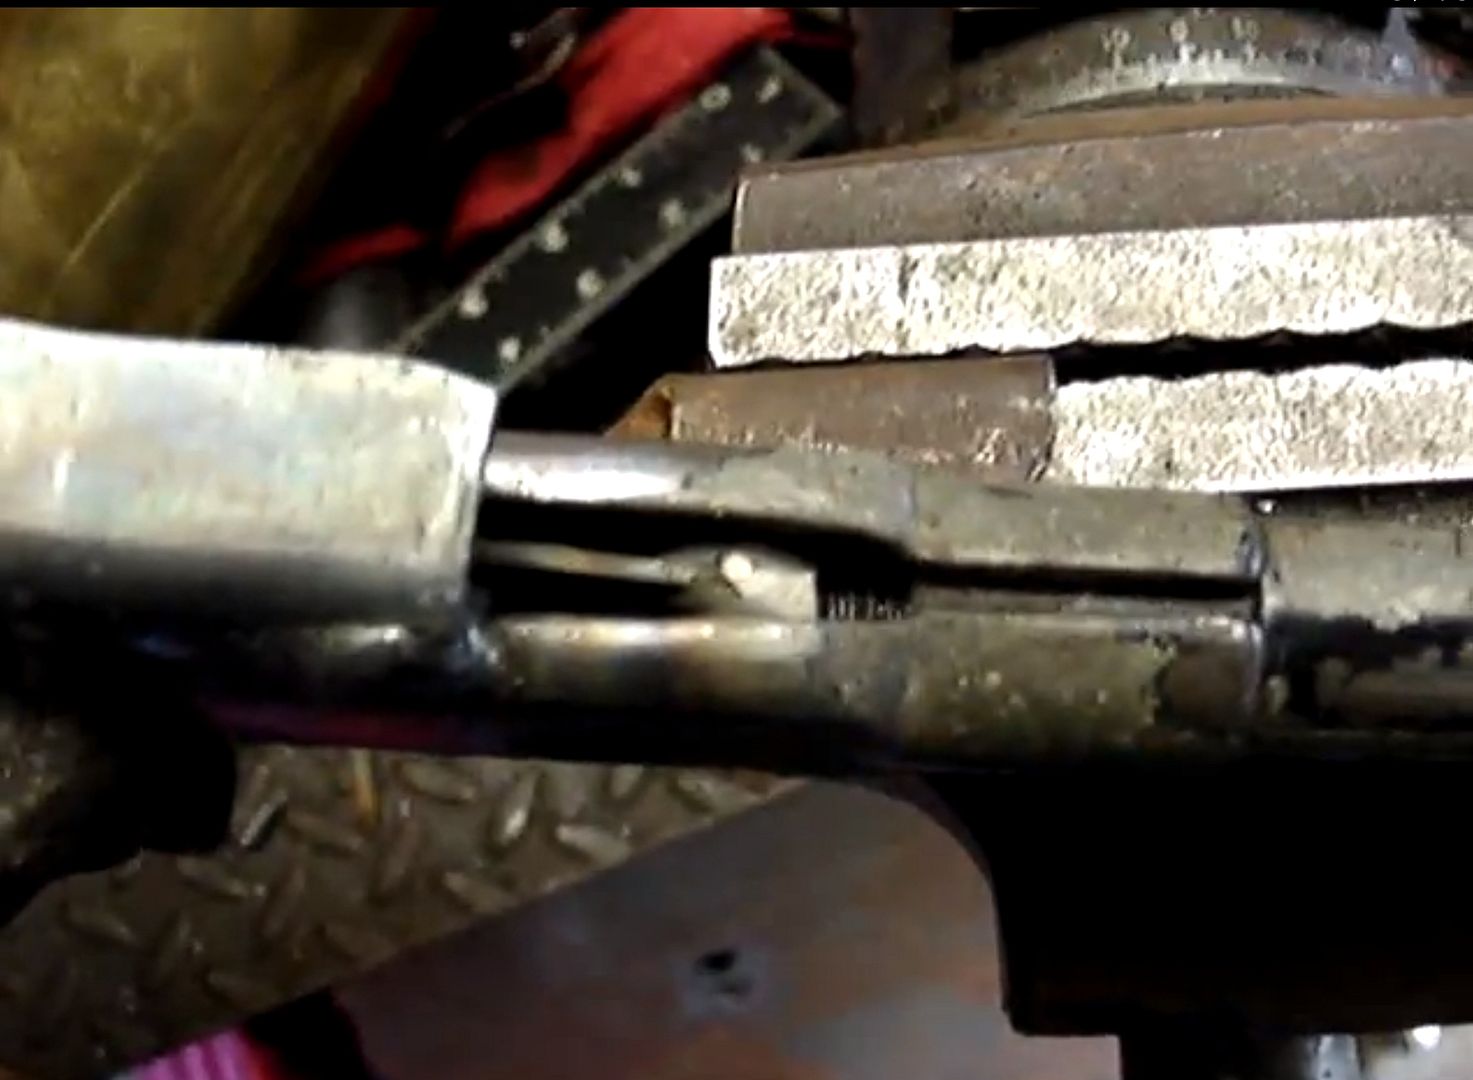
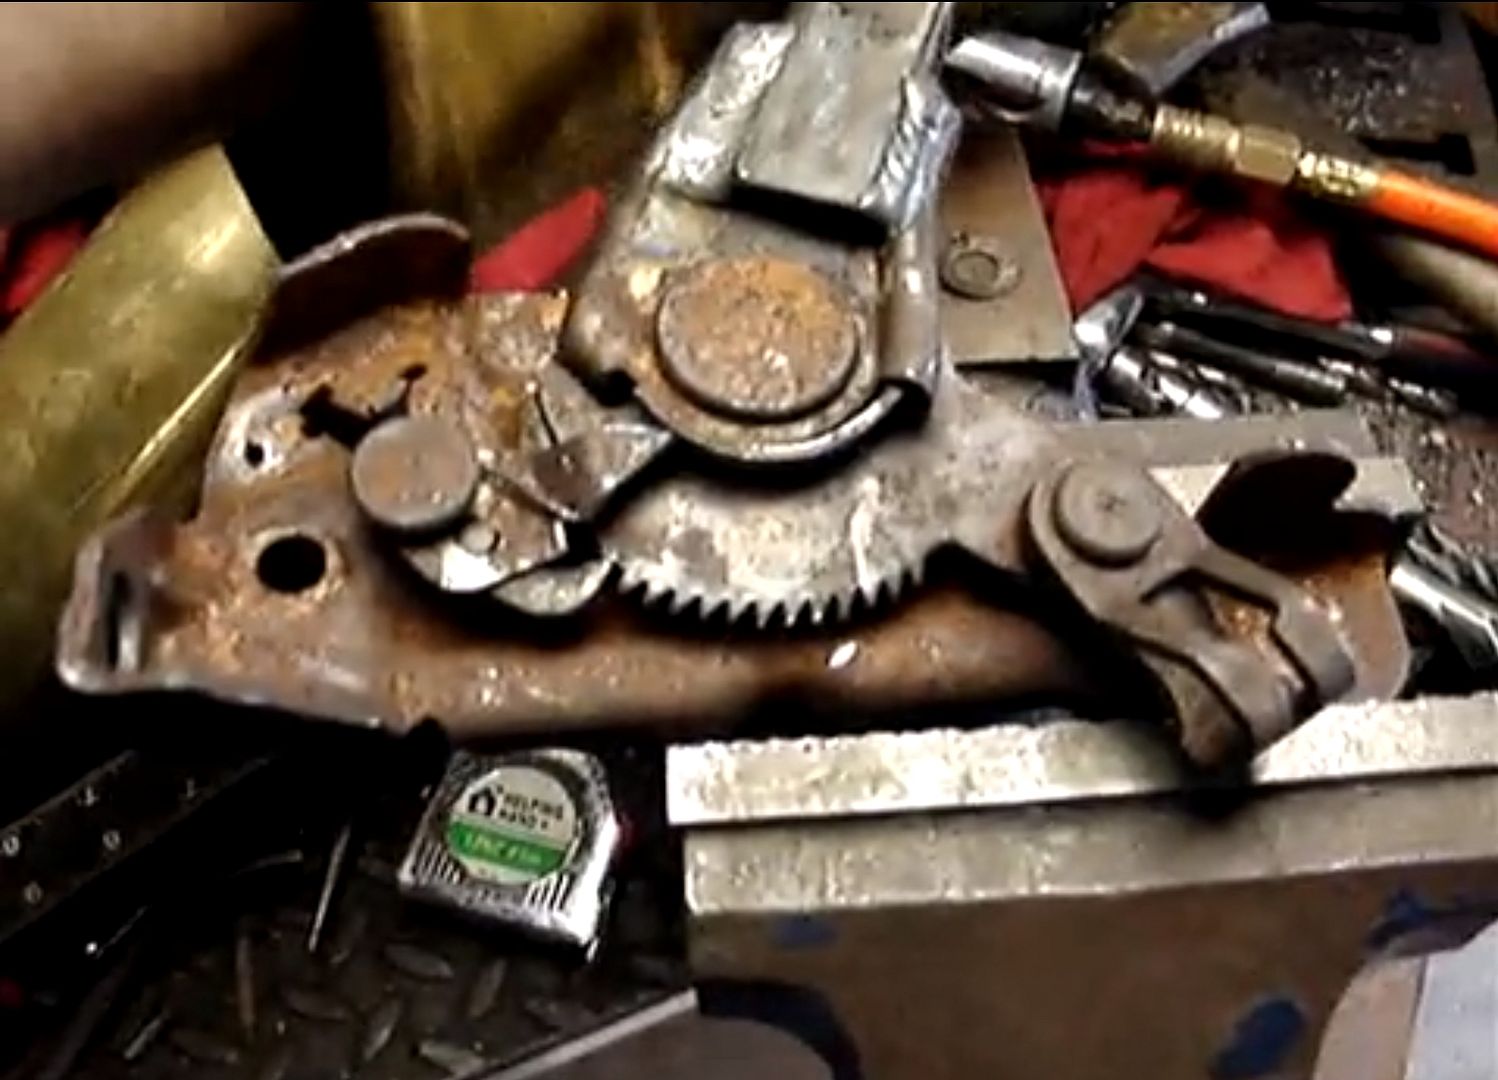
I will shine up the button and put a nice black leather boot with blue stitching!
What do Y'all Think?
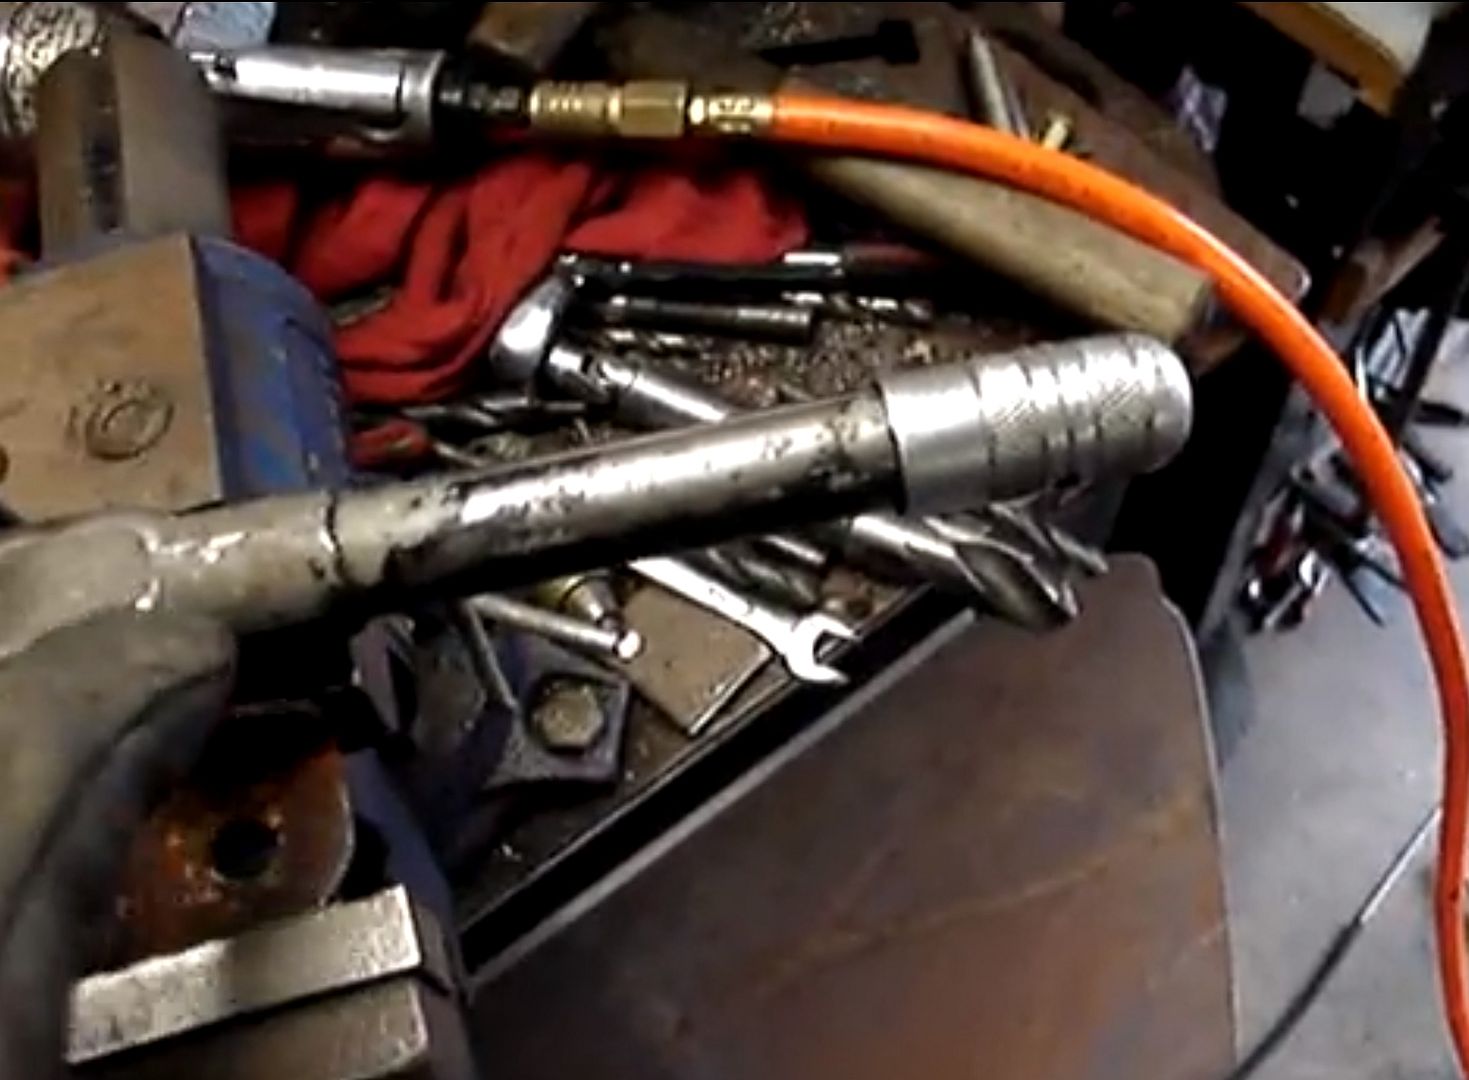
Here is the one I am going to do next weekend...waiting for another box truck e-brake...its in the mail:
UPDATE: Recieved my short shifter from member "gtxbullet"
Look at that...what quality work!
UPDATE: My Bigger brake booster produced by member "sardonyx247" arrived in the mail today:
UPDATE: Trying to raise the dead...lets see if another member, "riceburner98" will come through for me:

Everyone keep their fingers crossed...lol
Just grabbed my set of C5 Corvette sun visors from e-bay....going to be sending them to RW for recovering:
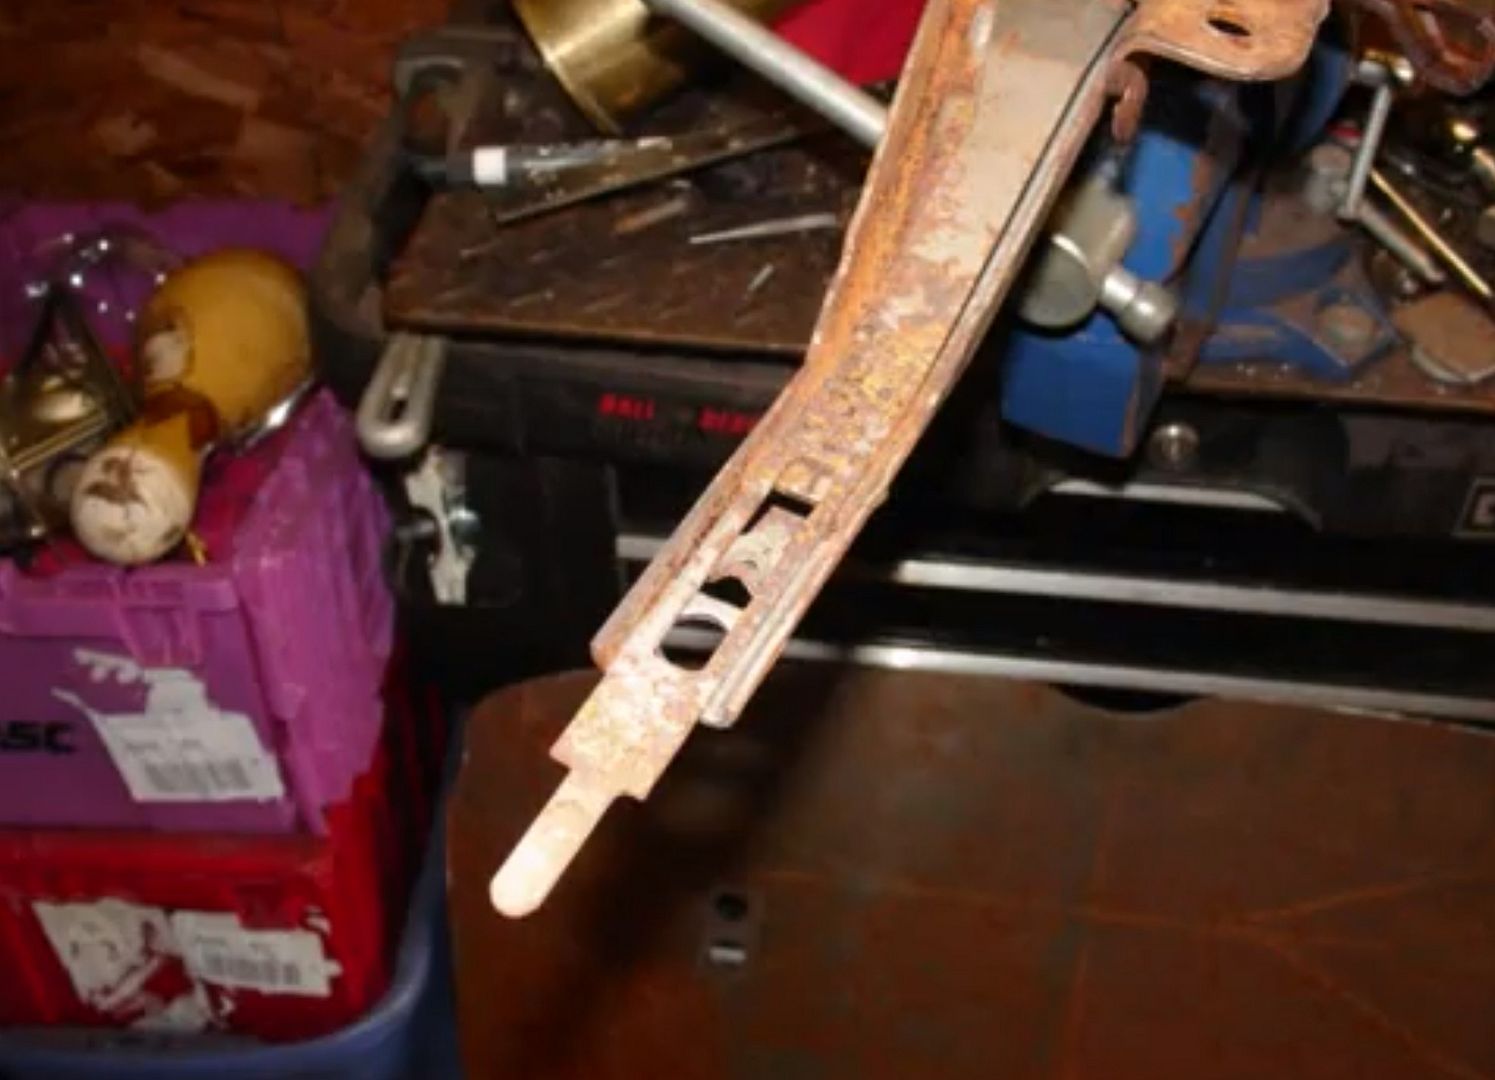
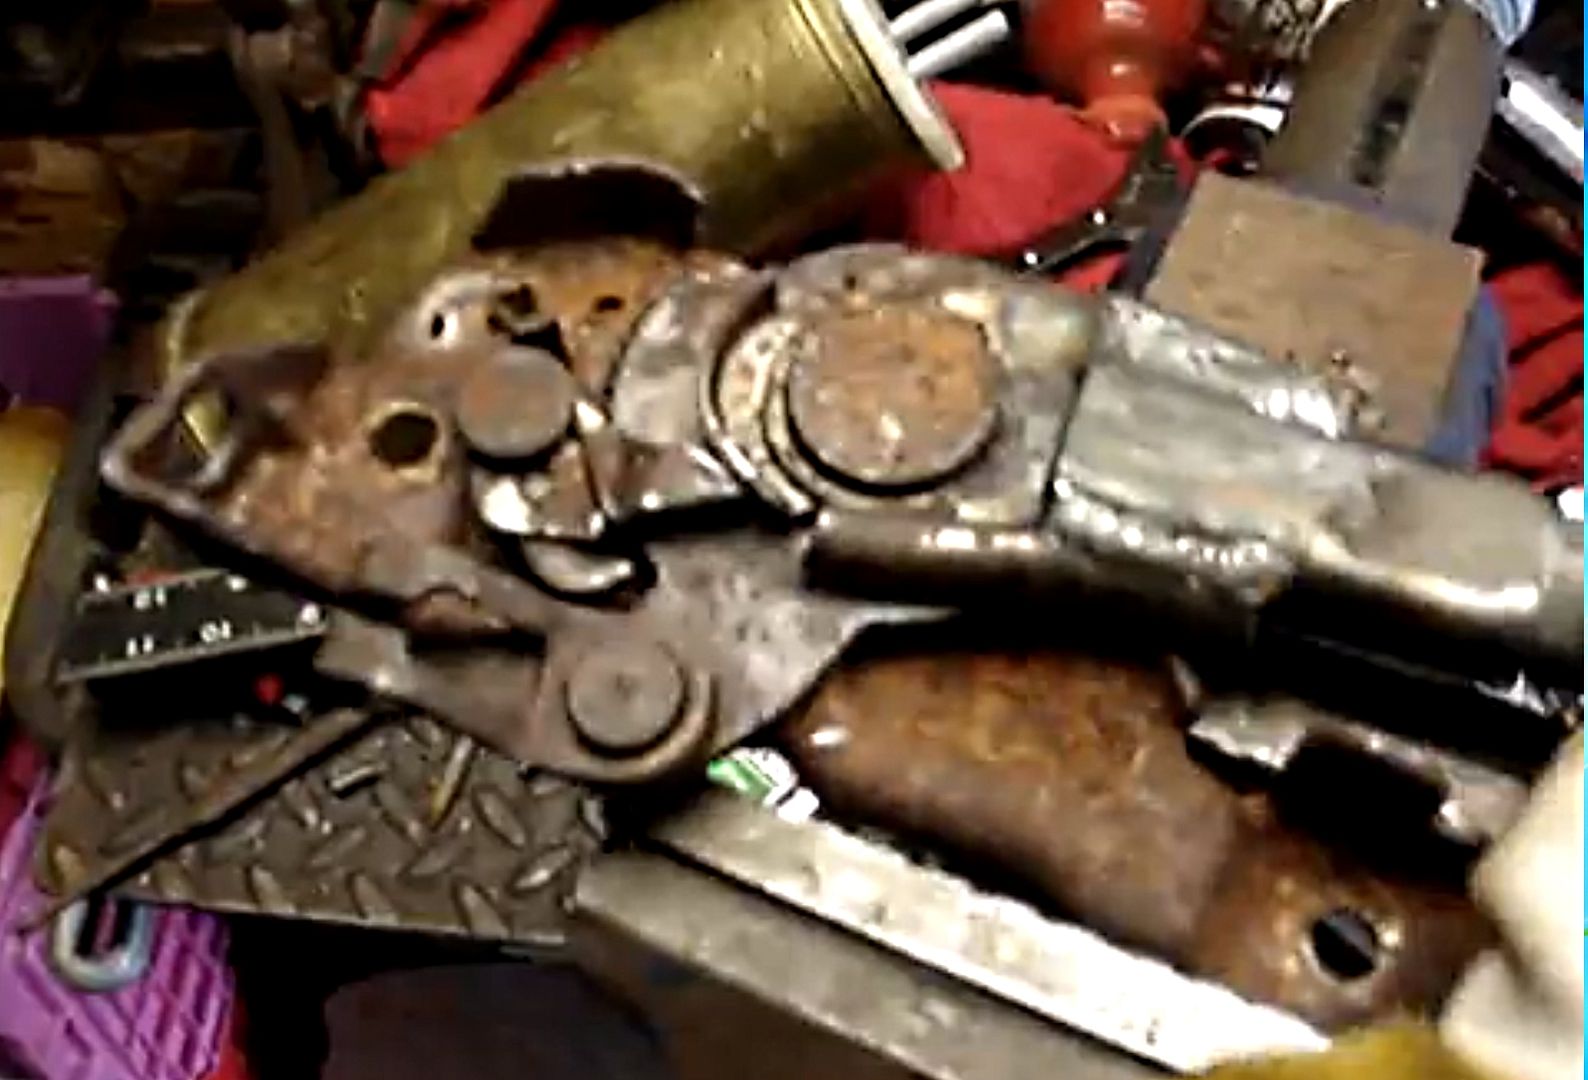
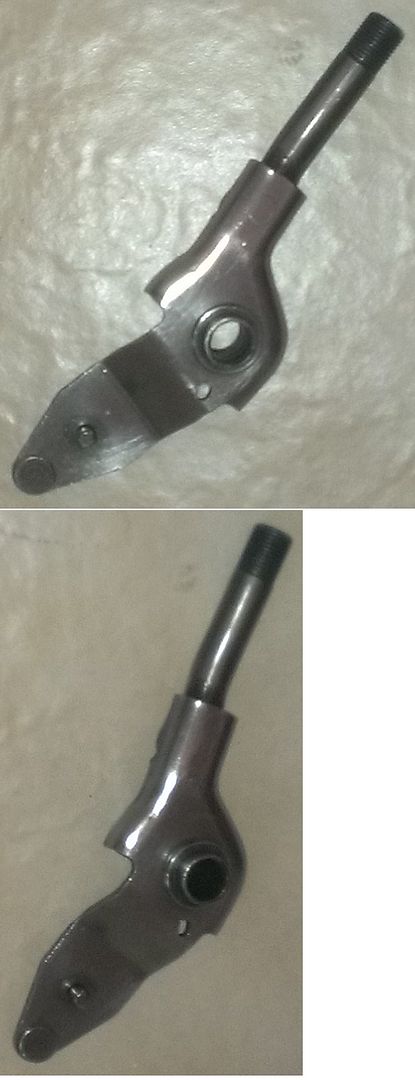
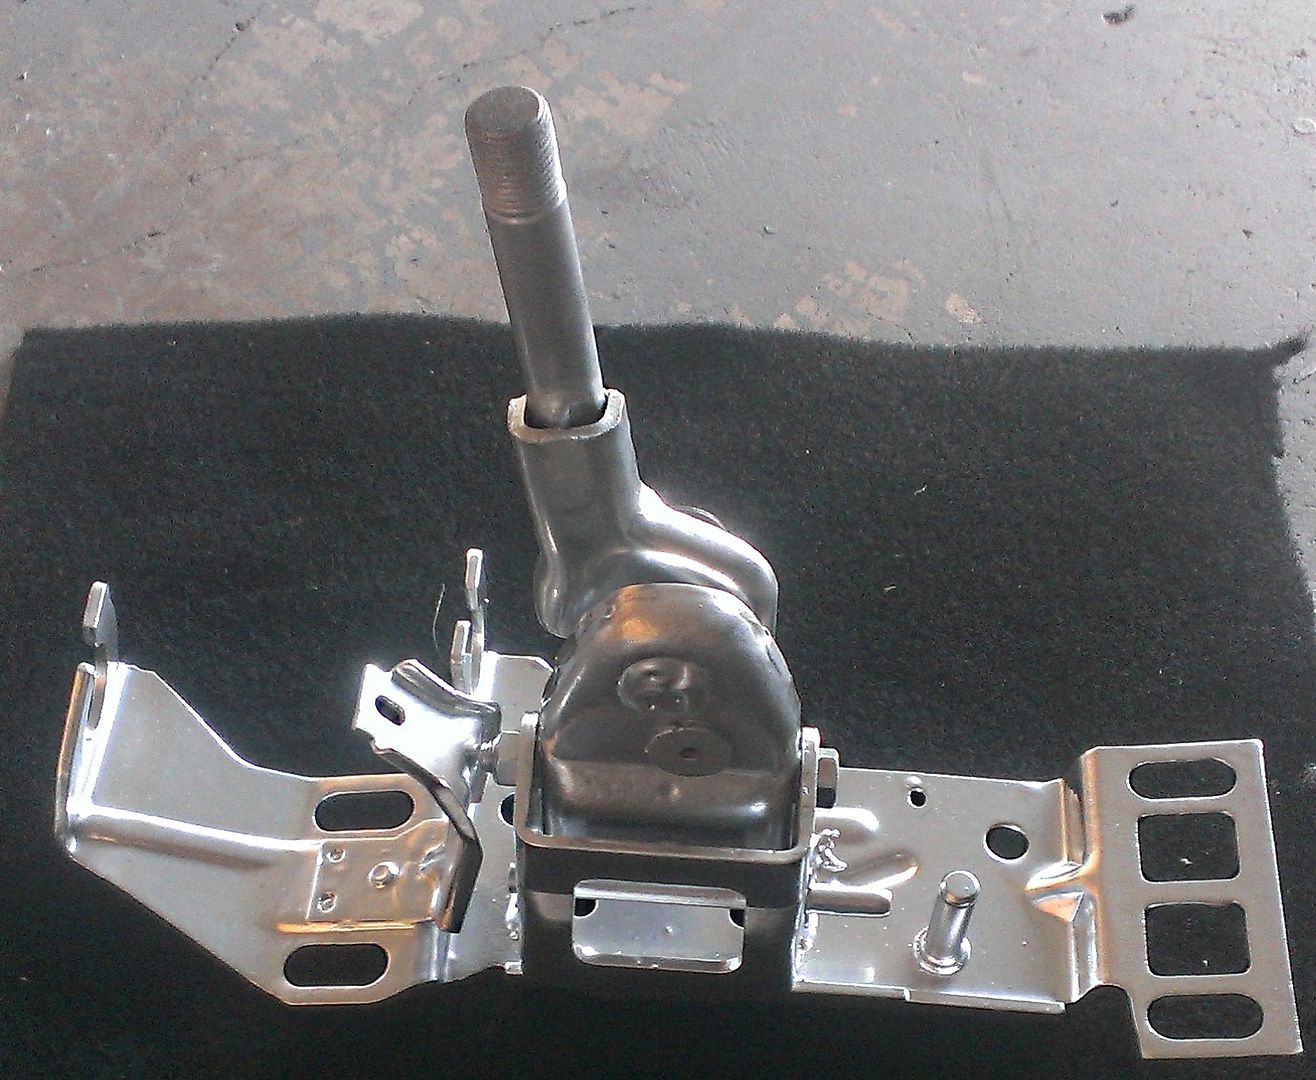
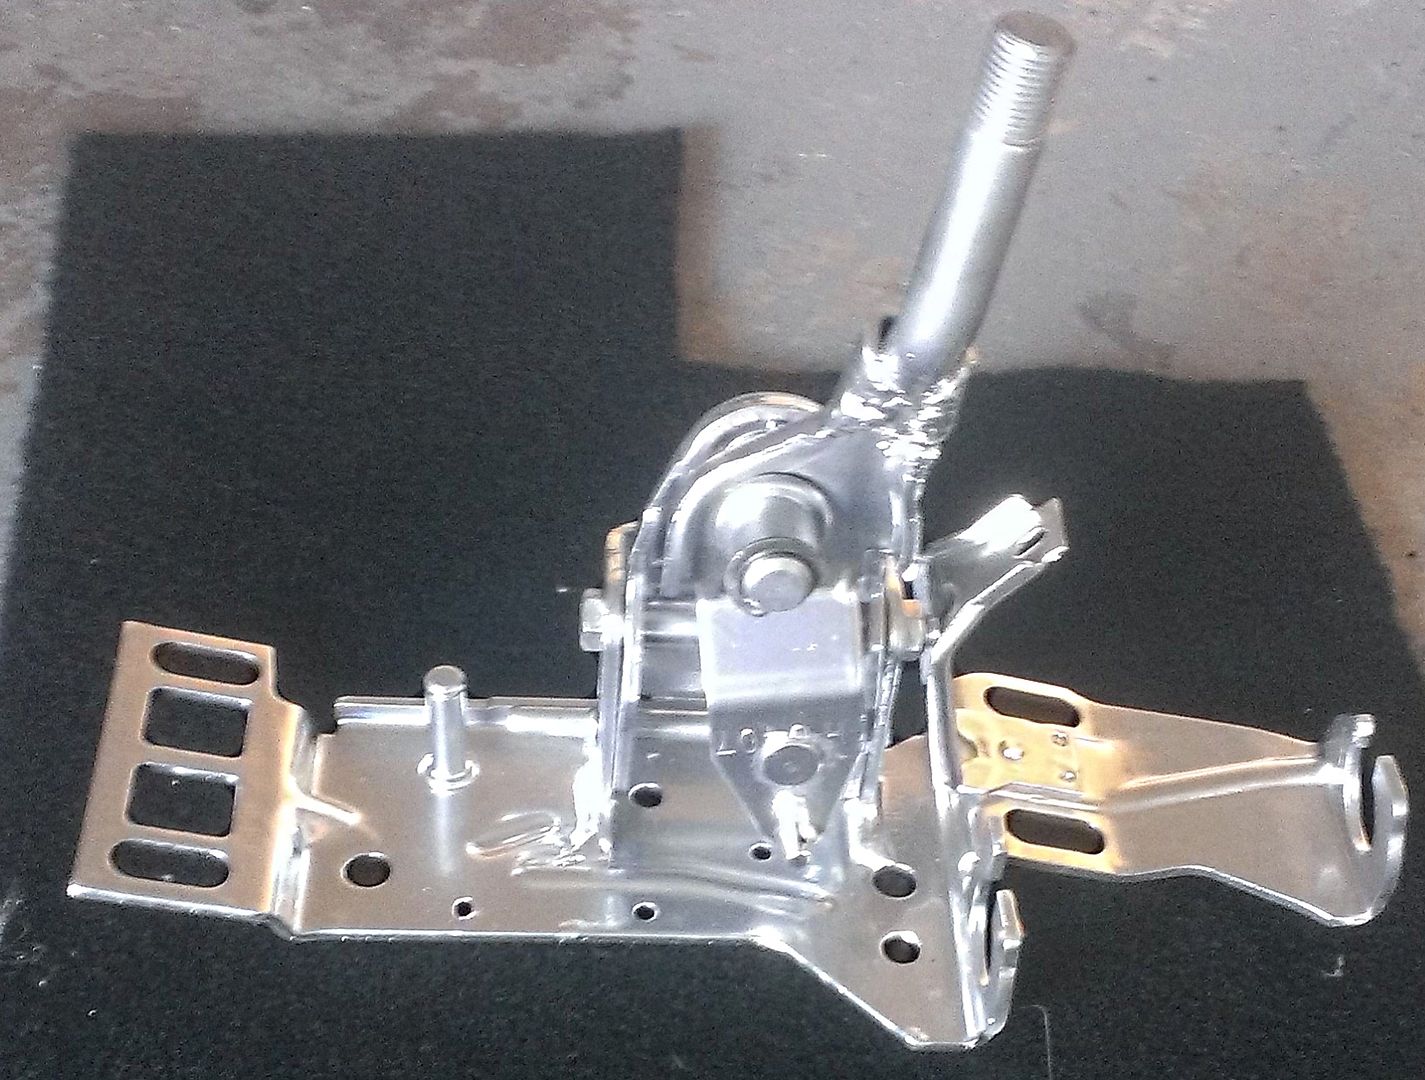
UPDATE: Working on cleaning up the shifter assembly...almost there..a little more work and I will be happy
Hard to believe that this entire piece was coated in a very nice covering of rust:
FYI...all this work is done by hand...no electric or mechanical assistance...just like doing it and the results I get from manually doing it myself.
UPDATE: US Mail just arrived!
One of my E-Bay scores....GM LS1 VORTEC PCM MOUNTING BRACKET
And after doing some reading, I decide to go with C-West voltage stabilizer over the NRG unit:

Also Tsunami battery ends:
The box truck e-brake lever also showed:

It is going to work perfect:
And last, but definitely not least...Tom's Digital Aux gauges showed up as well:
UPDATE: Mail showed up again!
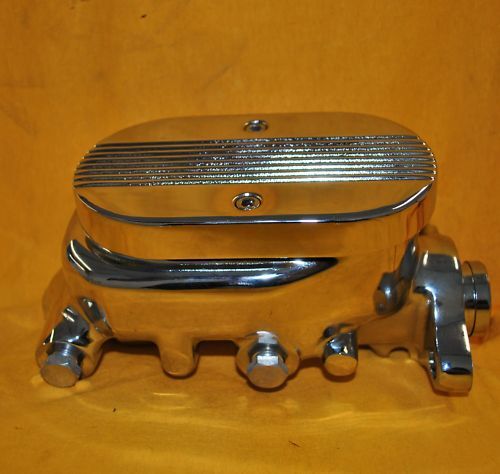
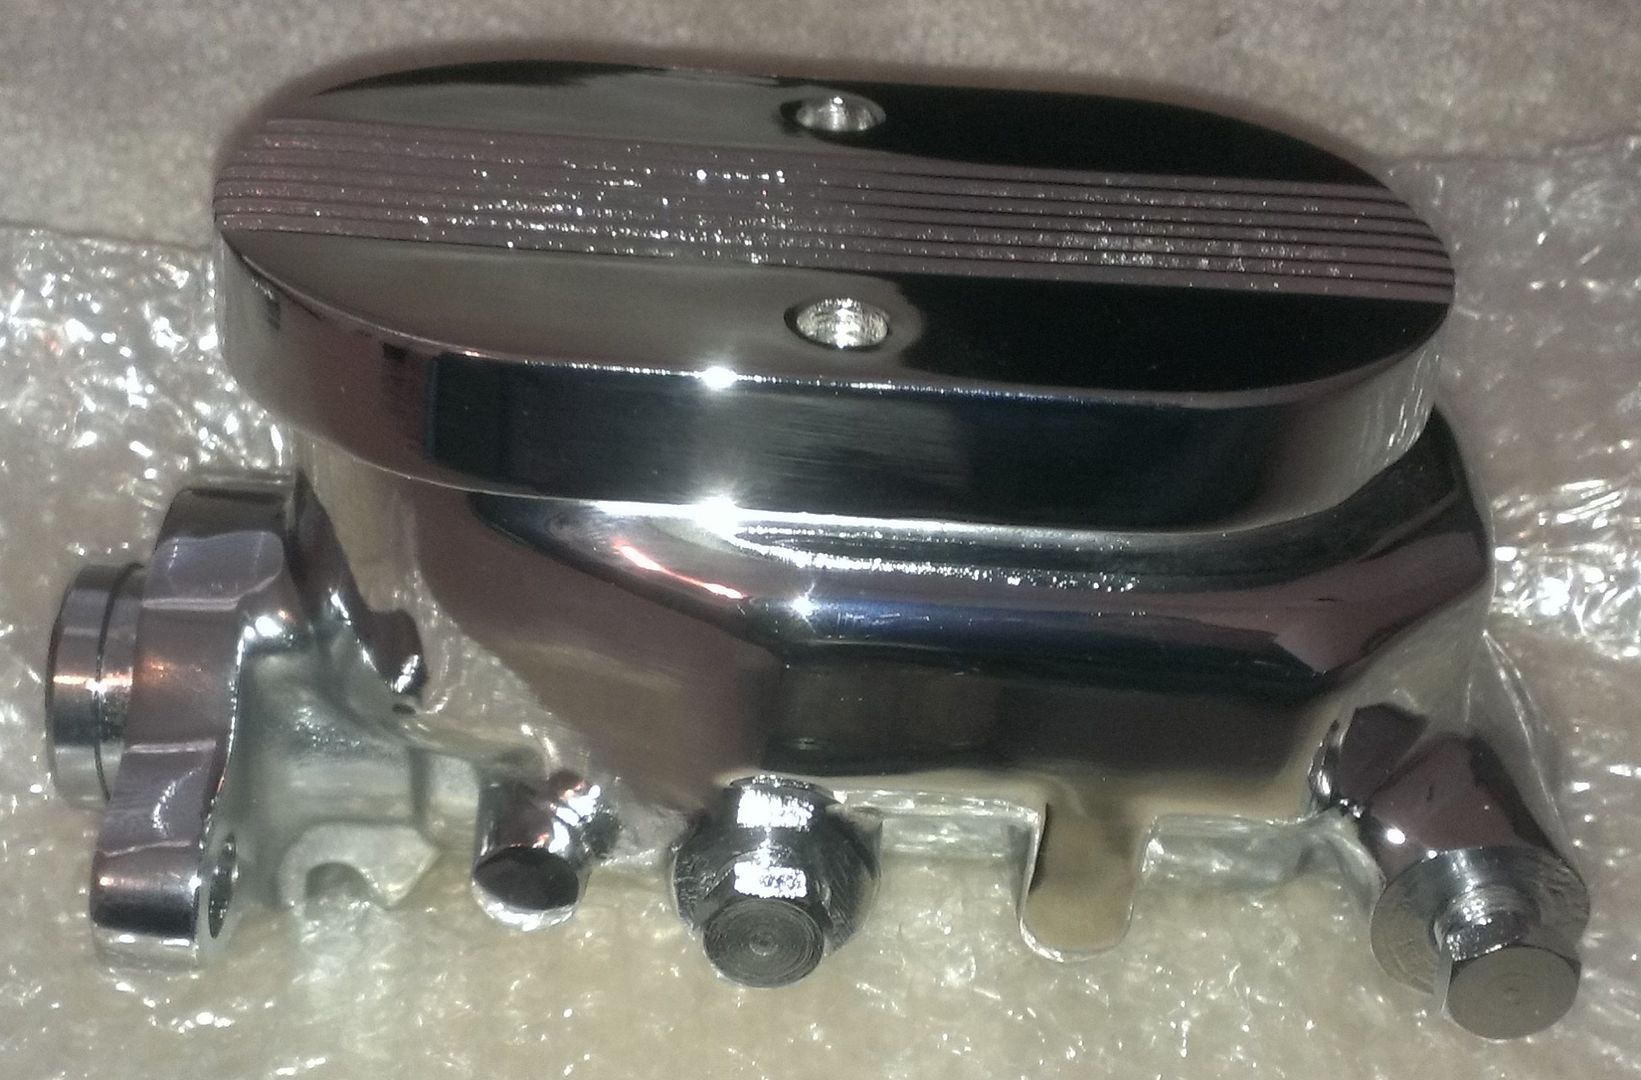
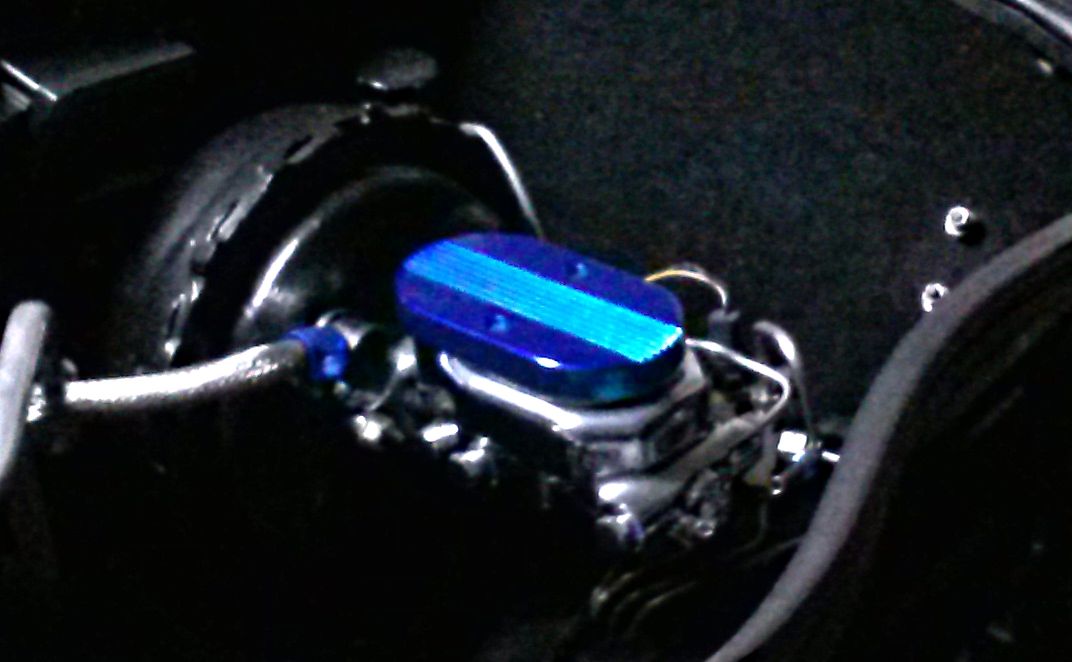
Received my new Finned Chrome Aluminum Brake Master Cylinder
I received my corvette sun visors and already modified them and prepping them to be shipped to RW for re-covering.
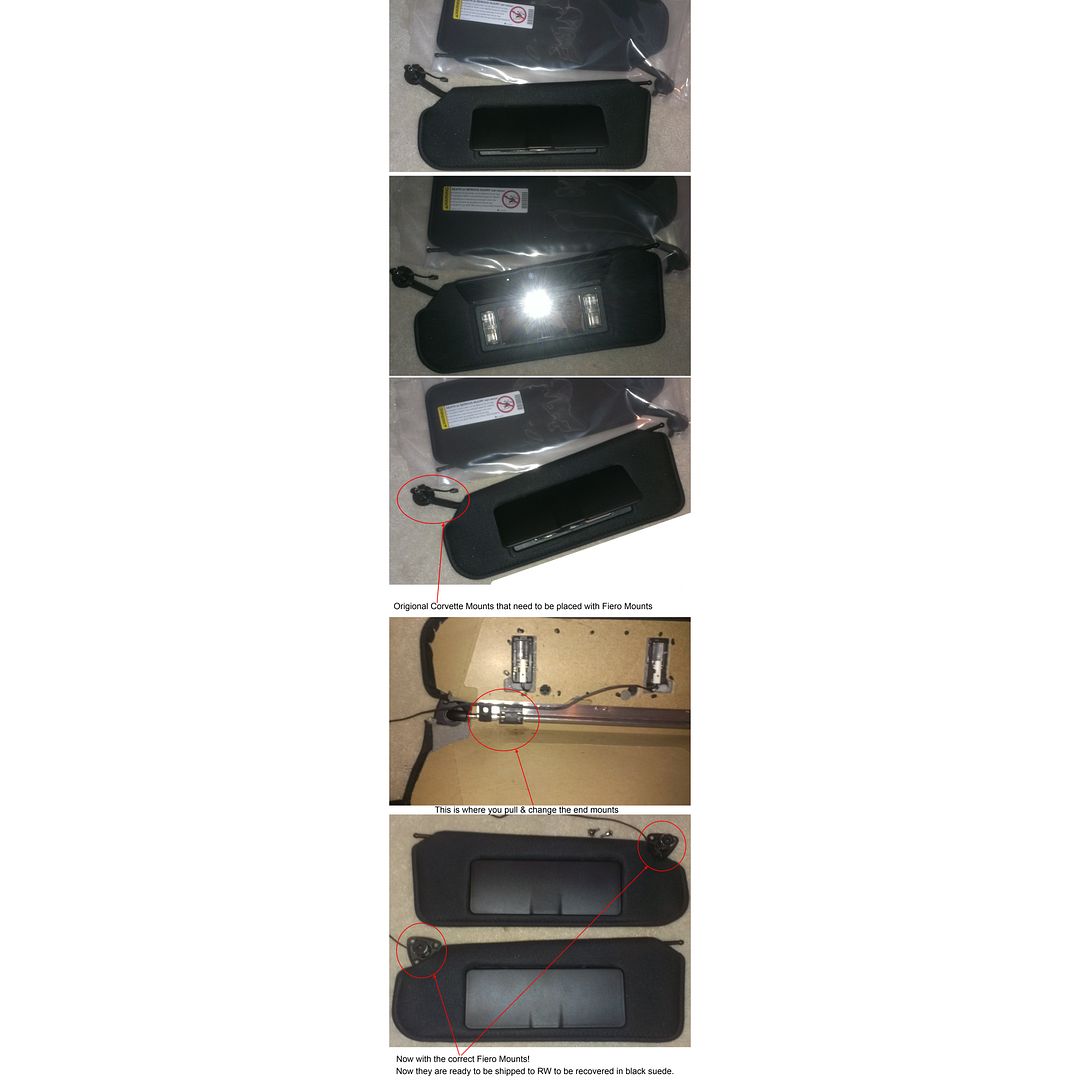
I thought I would share $30 dollars of learning with everyone to make this a very easy endeavor for everyone.
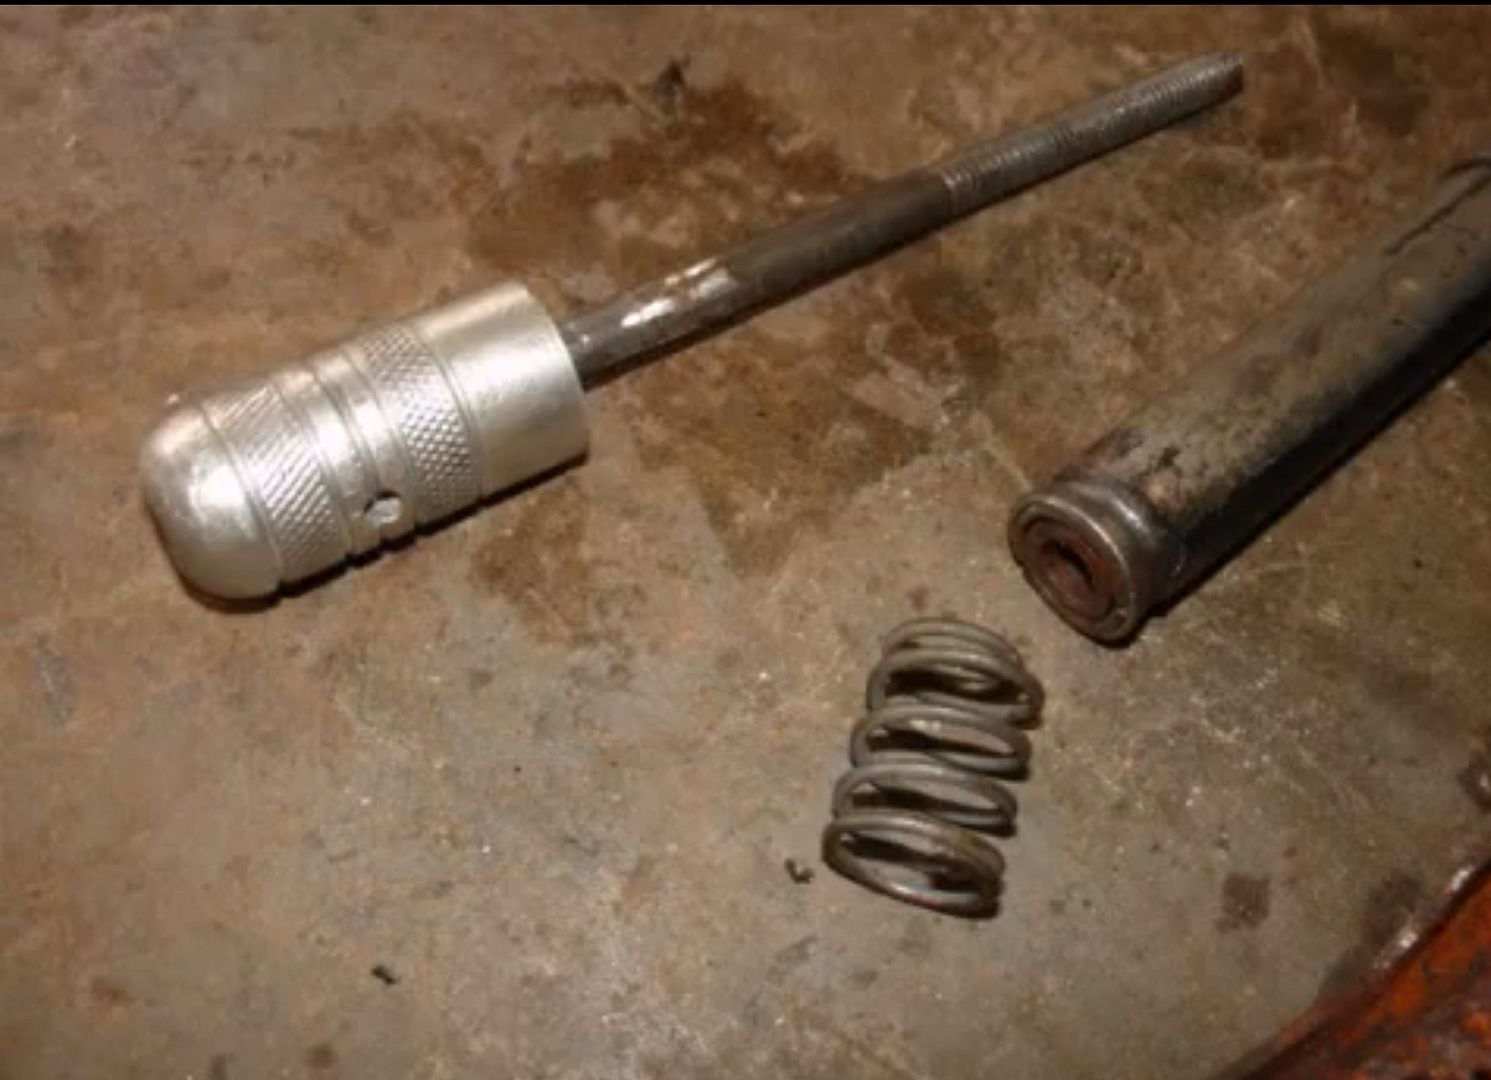
Here is part I...Taking apart the box e-brake lever:
Understand that I broke back the bottom edges of the aluminum button to make it easier to show yall a better shot...no needed...so don't
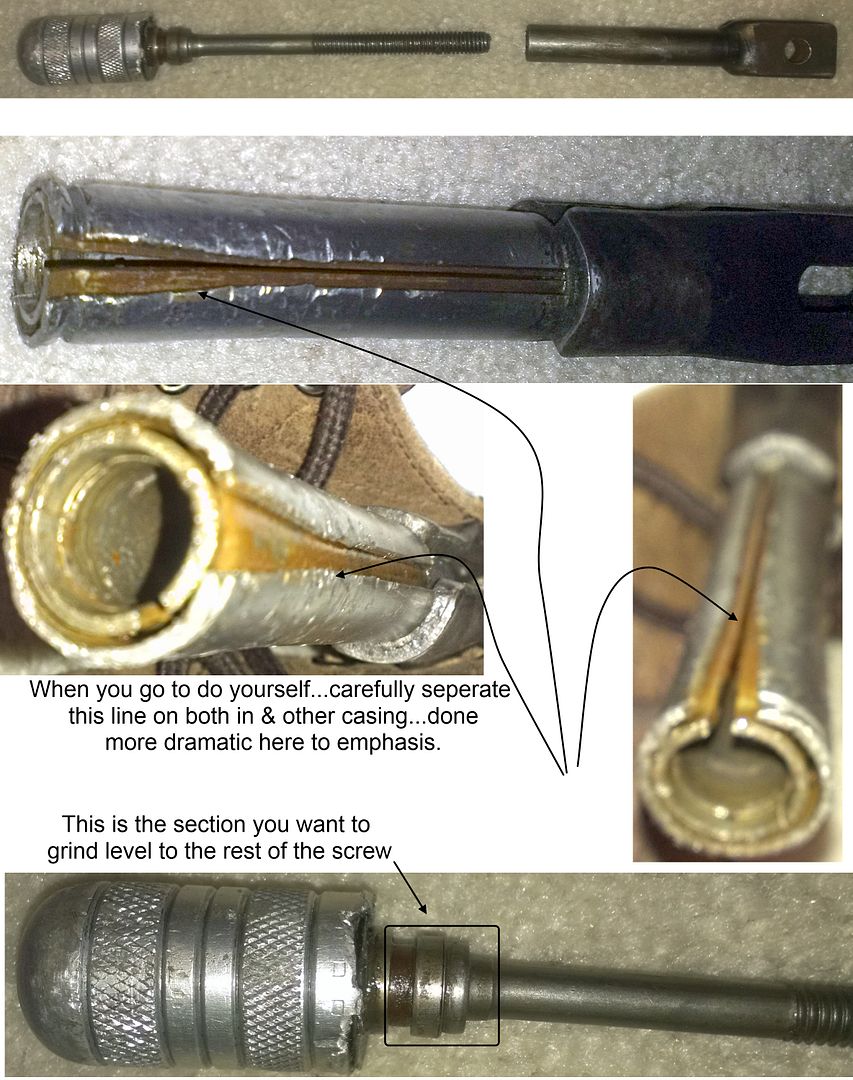
Once you get a little separation in first the outer and then the inner housing (side closest to the button)
Then place a metal bar to the bottom (opposite button) and strike with a hammer a few times to knock the button and screw assembly up through the shaft and free....not damaging the button ...which cosmetically the only piece we don't want to mess up...the remainder of the finished product will be covered by a leather boot!
Part II will follow shortly!
UPDATE:
Also received the driver's side rebuilt motor...so prepping the buckets:

Passenger side will be here in a day or two...will finish the other side then
Going to start with a set of these to start...because they were such a good price from member, "gtxbullet"

But will eventually replace for these:


UPDATE: Digital Climate Controls from member, "riceburner98"...too many Rob's in this build...not really...just makes it interesting!
I have risen the dead and now have a blue digital climate control headed my way
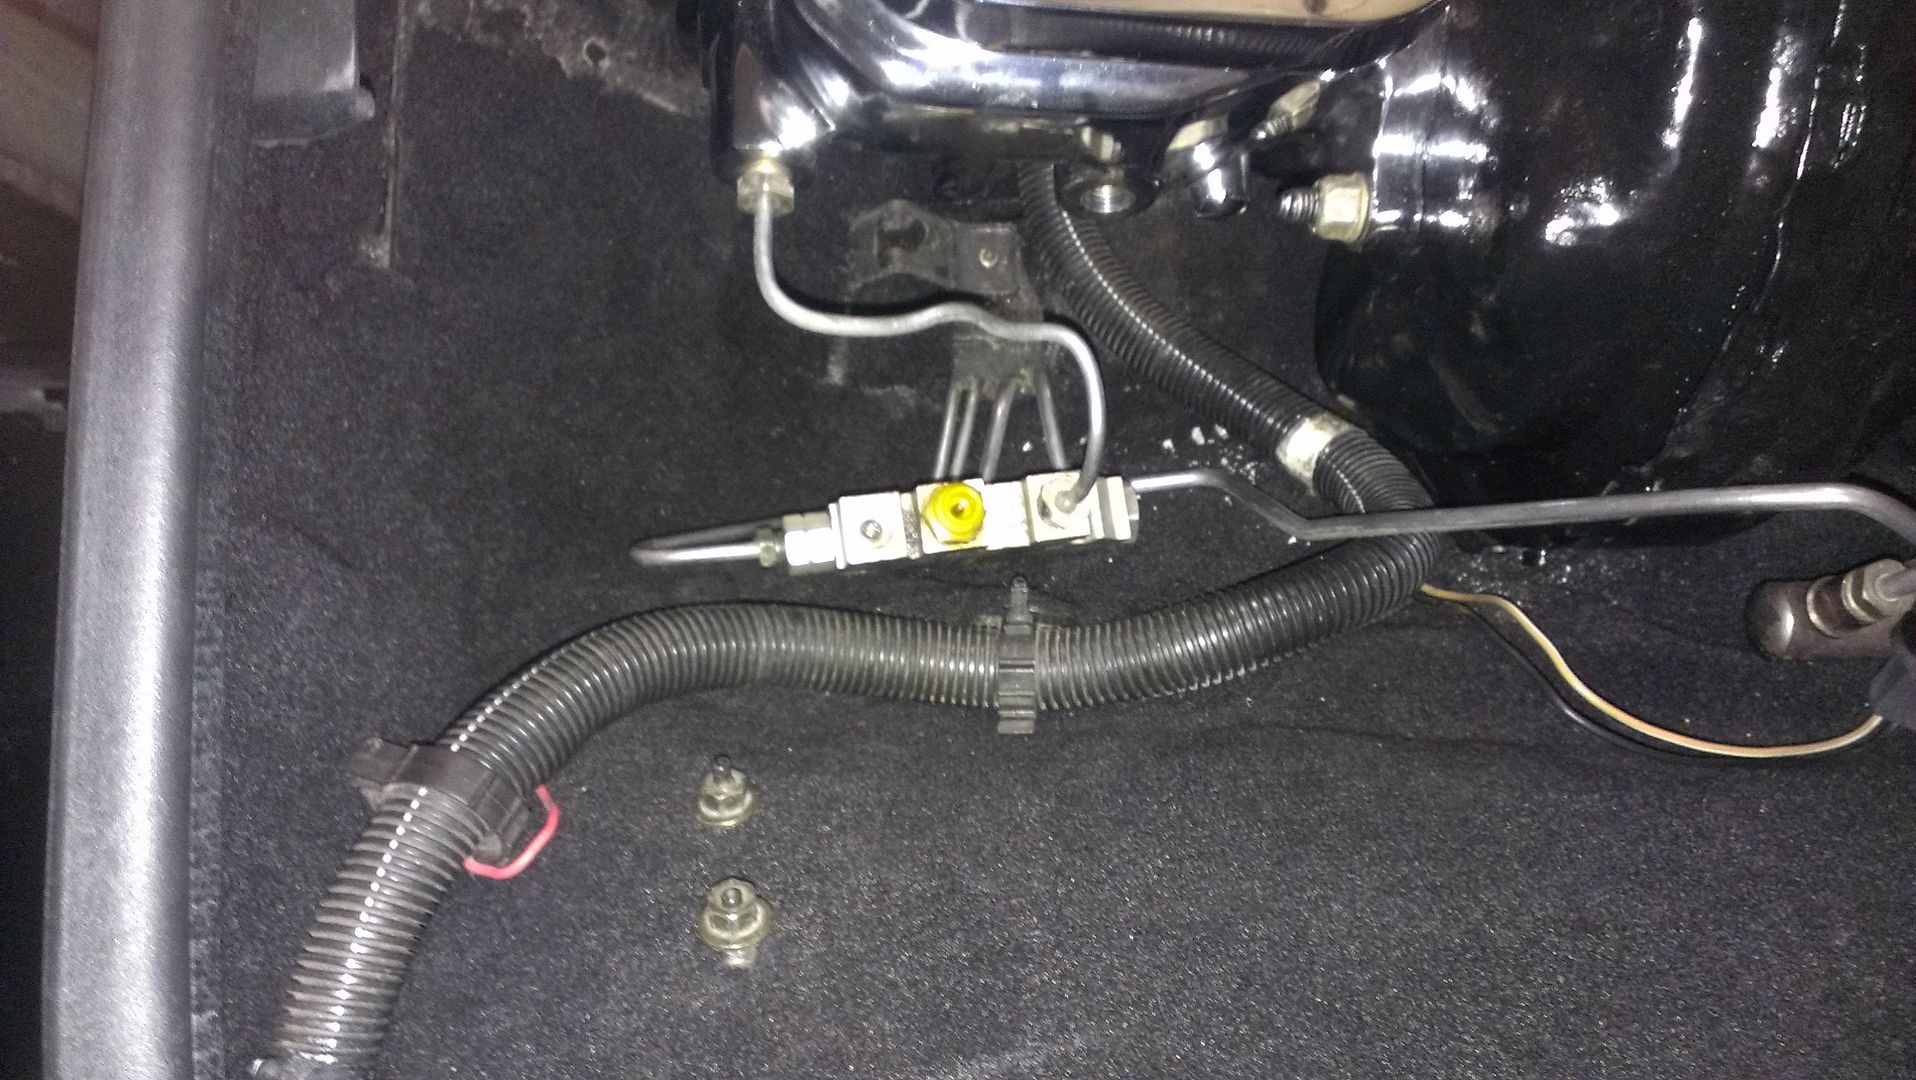
UPDATE: Installed bigger brake booster and new finned chrome aluminum brake master cylinder:
Unfortunately the screw sizes were reversed on the master cylinder...so I relocated one line with no issue.
The second line snapped
And the bolt for the line seems like it was super glued in place.
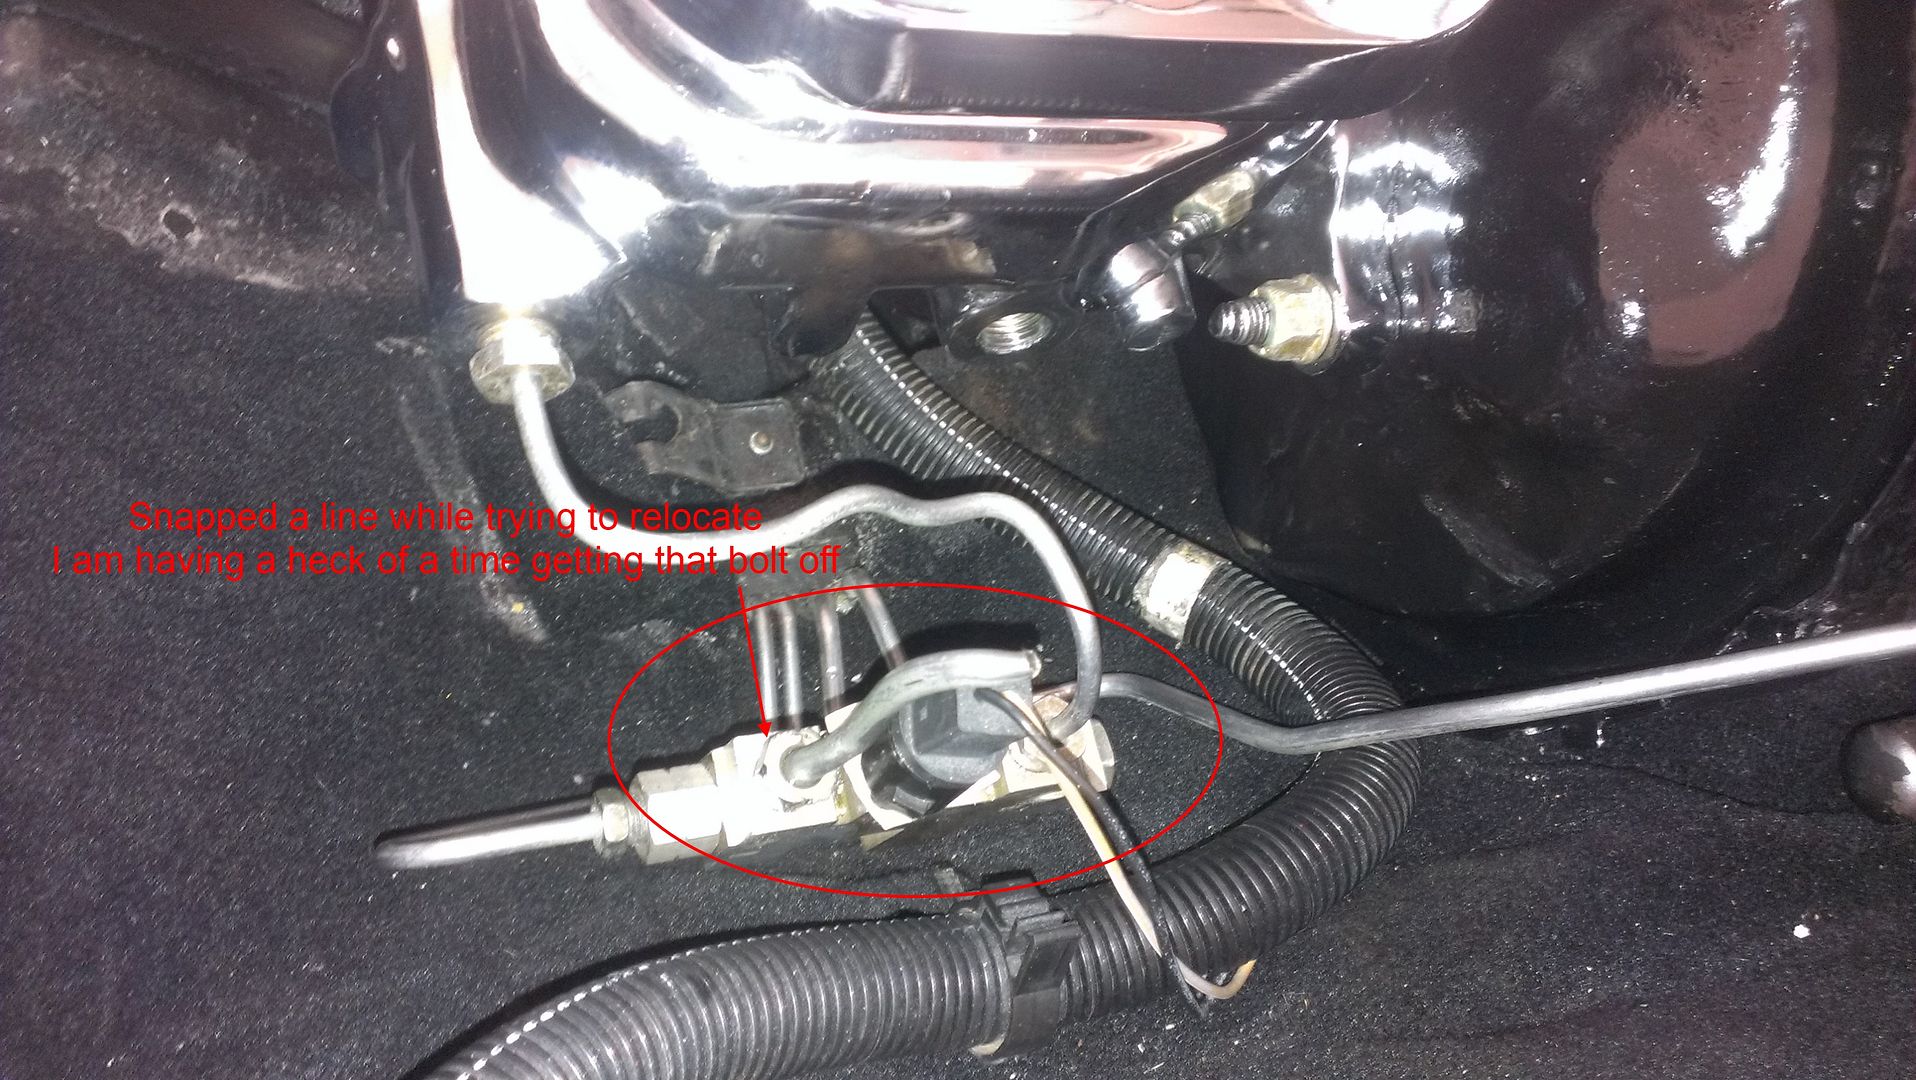
Can't seem to get the right angle and leverage on it ...any suggestions ...anyone?
Also are there some steel braided lines I could use here instead of the old piping?
I think it would clean it up a a lot if there was... hmm..time to go hunting on the net!
ORDERING MORE PARTS:
From Rodney so I can finish up and reassemble the front:
From the FieroStore:
66559 1 85-88 DECK LID RELEASE SWITCH
66562 1 84-88 REAR WINDOW DEFROST SWITCH
50159 1 84-88 REAR WINDSHIELD MOLDING
88075 1 84-88 ENERGY ABSORBER RIVET KIT
88076 1 84-88 REAR FASCIA RIVET KIT
88086 1 86-88 GT COWL SCREEN RETAINER KIT
88104 2 84-88 RADIATOR LOWER SEAL RETAINERS
88108 1 84-88 FRONT FASCIA IMPACT BAR NUTS
88121 2 86-88 ENGINE SPLASH SHIELD CLIPS
88174 1 84-88 A/C CONDENSER MOUNTING KIT
88173 1 84-88 JACK HANDLE ANTI-RATTLE BAND
88079 1 85-88 WINDSHIELD PILLAR WIRING RETAINER
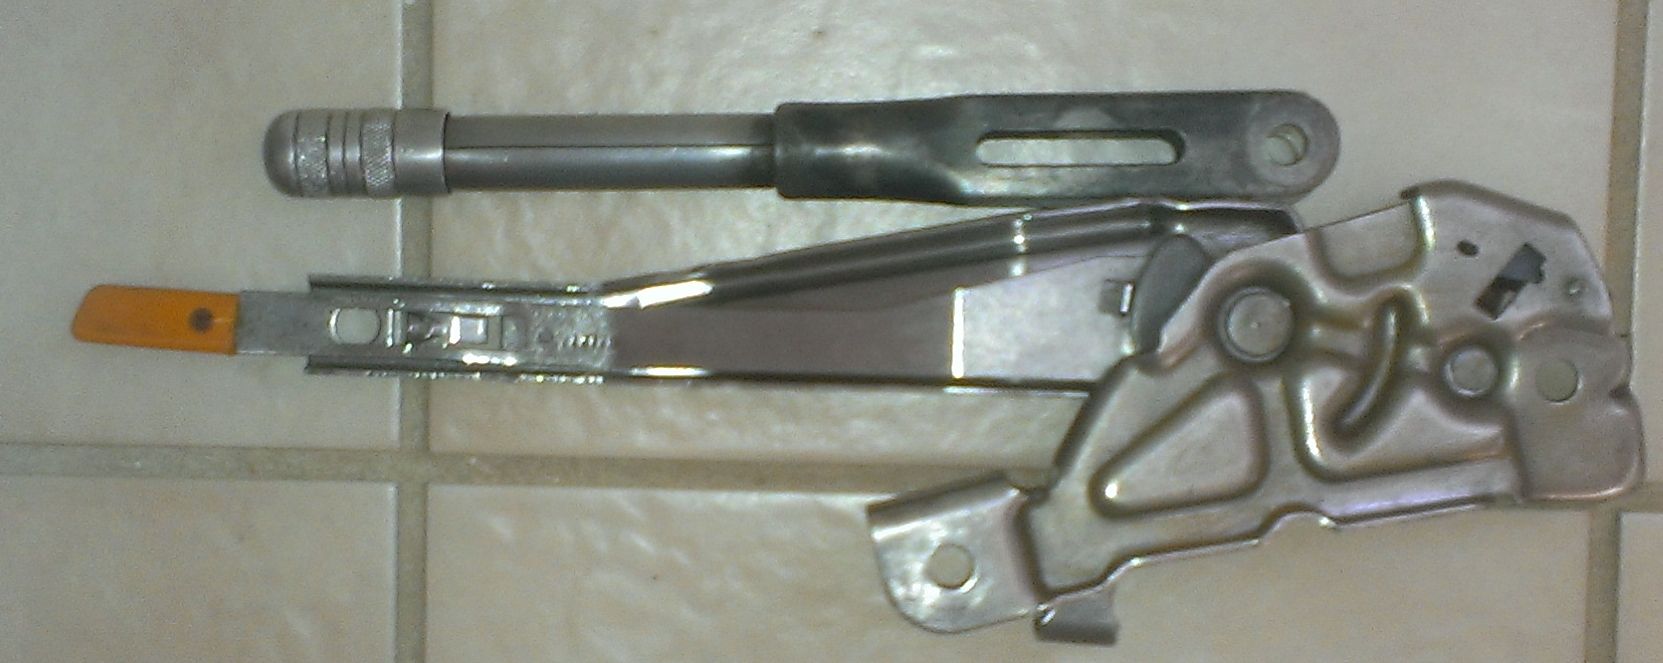
UPDATE: Shifter Assembly...finish putting it back together...13 months later
You should have seen it a year ago...covered in surface rust...gotta love people who spill cokes and don't clean them up!
20 some years later and it was a heck of a mess...lol..cleaned up pretty good!
| | | quote | Originally posted by amflyer:
Are we ever going to see actual pictures of this car? |
|
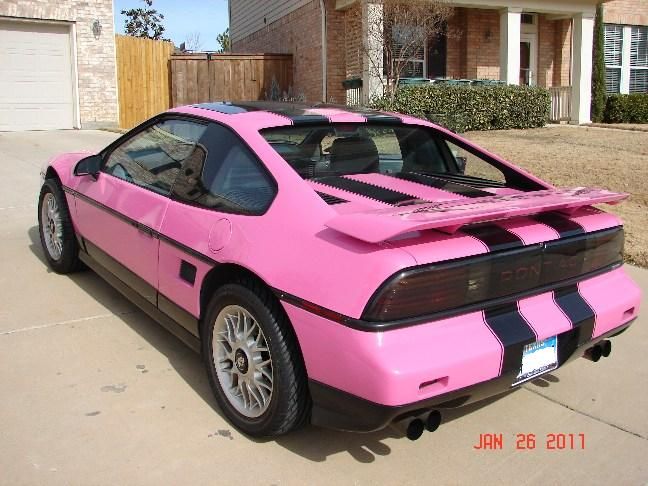
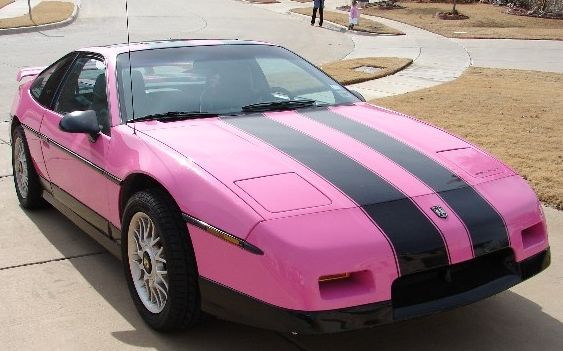
Just for you...AMflyer:

Not much to look at...in present condition...give her another 30-45 days
UPDATE: Battery Cable Setup: Just laying out and cutting the 0/1 Gauge cable in preparation of soldering the ends this week.
UPDATE: US MAIL just showed with my two options of black from Rob and example of the blue thread for the stitching
Top is called "Hampton Ebony"
Bottom is called "Grand Prix Black"
What does everyone think...which one...top or bottom?
UPDATE:
Here is what the Quicksilver door skins would look like in black:
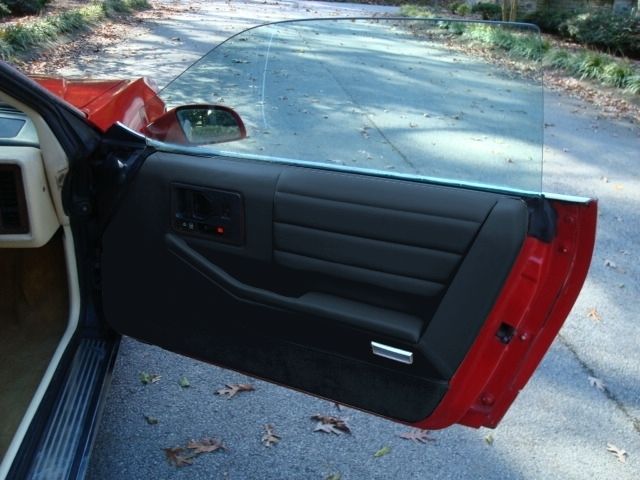
The more I look at these, the more I am sure this is the final decision...I really like them!
UPDATE: MAIL CALL... received packages from both the Fiero Store & Rodney's:
New Splash Guards from Rodney:
and New array of parts from FieroStore:
[IMG]http://i1086.photobucket.com/albums/j447/txopie/86GT/ferostoreparts_zpsd8255115.jpg[
UPDATE: Completed Shifter Assembly:
UPDATE: Test fitting the battery setup and spare tire...lots of clearance
UPDATE: Nosrac...I Won!!! I finally got that damn nut off the balance'r / proportioning valve.
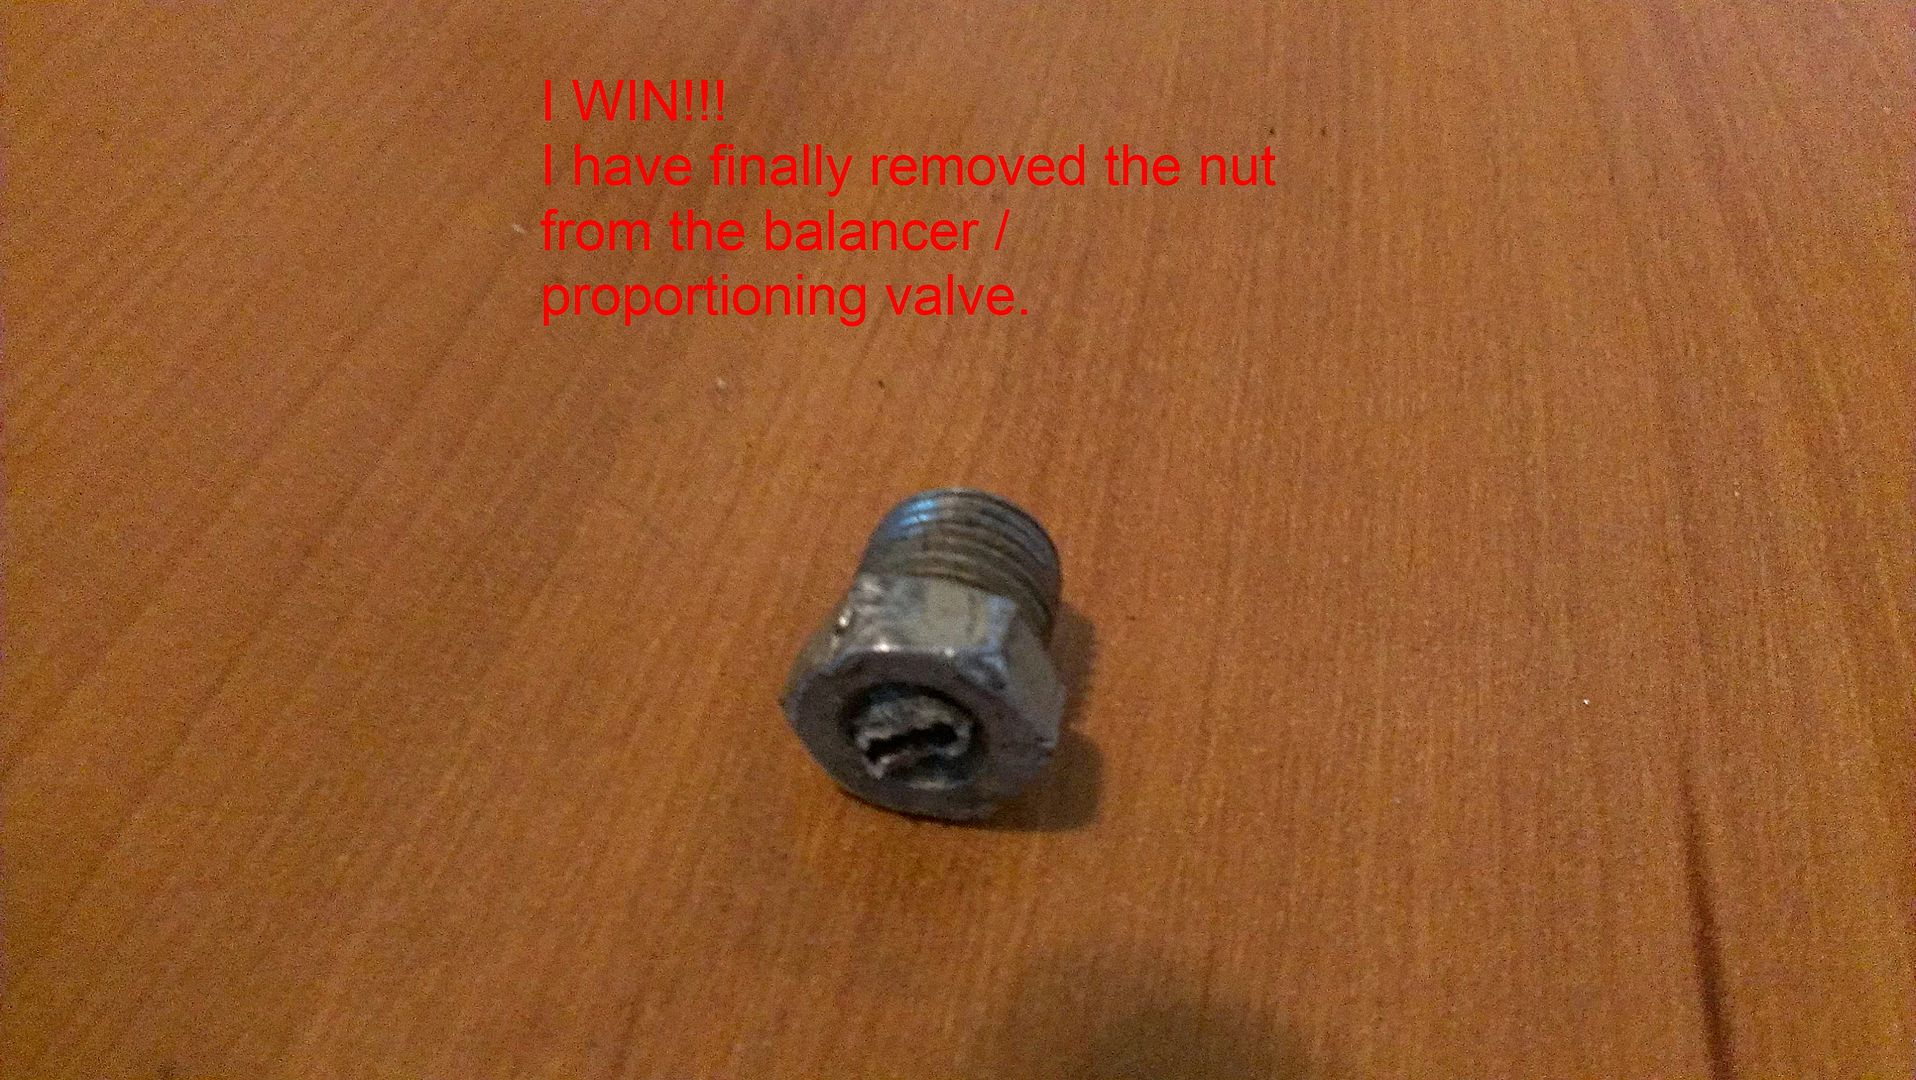
Tomorrow I will order a 3" replacement pipe with the correct ends from Inline Tube...going to send them the two ends...just to ensure it is correct the 1st time.
http://inlinetube.com/Prefo...stings/PE-CAT-02.htmUPDATE: Rented steering wheel puller from O-Reilly's:
Ready for my new C6 steering wheel, which is in route...saw a FedEx notification email earlier today
Working on the laying down my better than dyna-matt substitute:
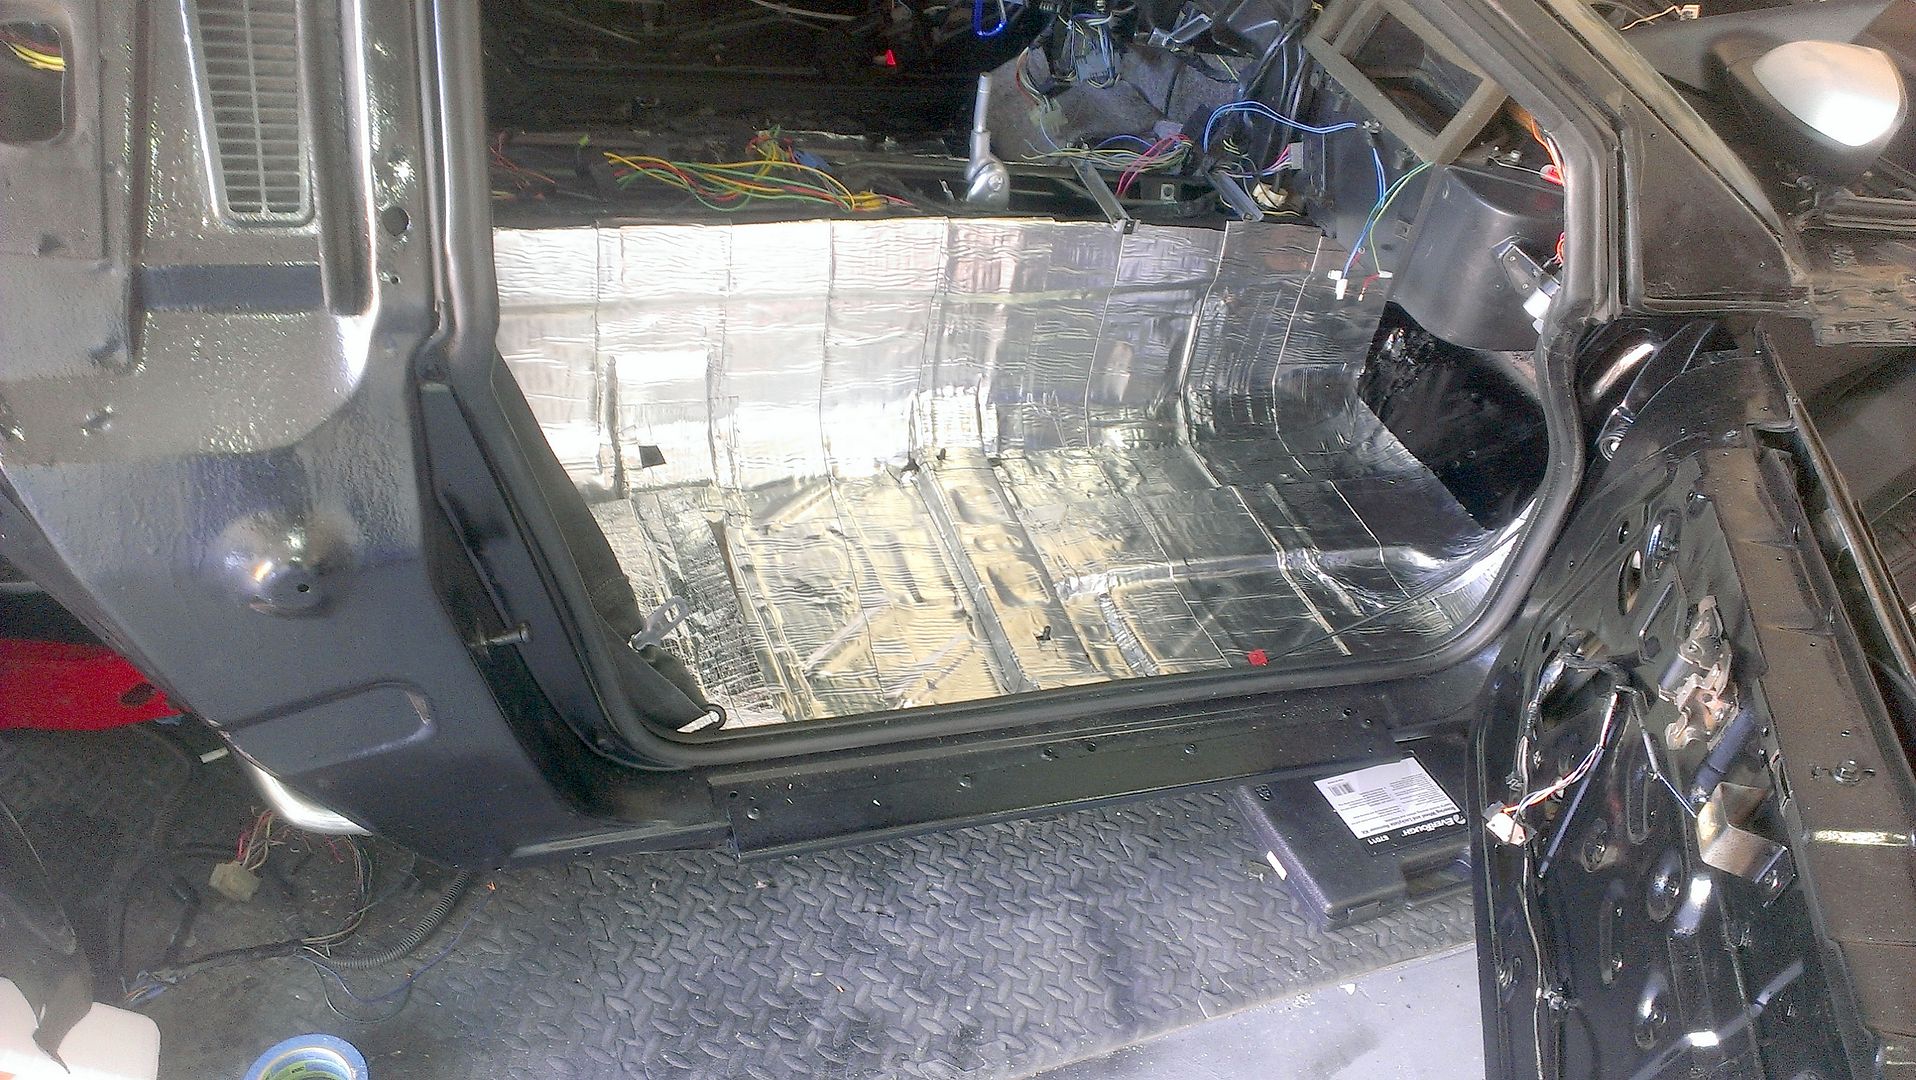
I got about 88% through it and ran out, will run to Lowes tomorrow to pick up another roll of it to complete
And of course the inner floor boards were sanded clean and nice thick coat of rust-oleum under that first!
| | | quote | Originally posted by RCR:
You can't leave us with that...What are you using???
Bob
|
|
Proven to work as good as Dyna-Matt, but no where the cost.
When done with it, will have cost me less $60 to do the entire inner cab (roof, floor, rear firewall and the doors)
UPDATE: UPS man delivered my replacement AC lines
Also had my welder out today to fix the area in the rear passenger wheel well under the stock battery tray position.
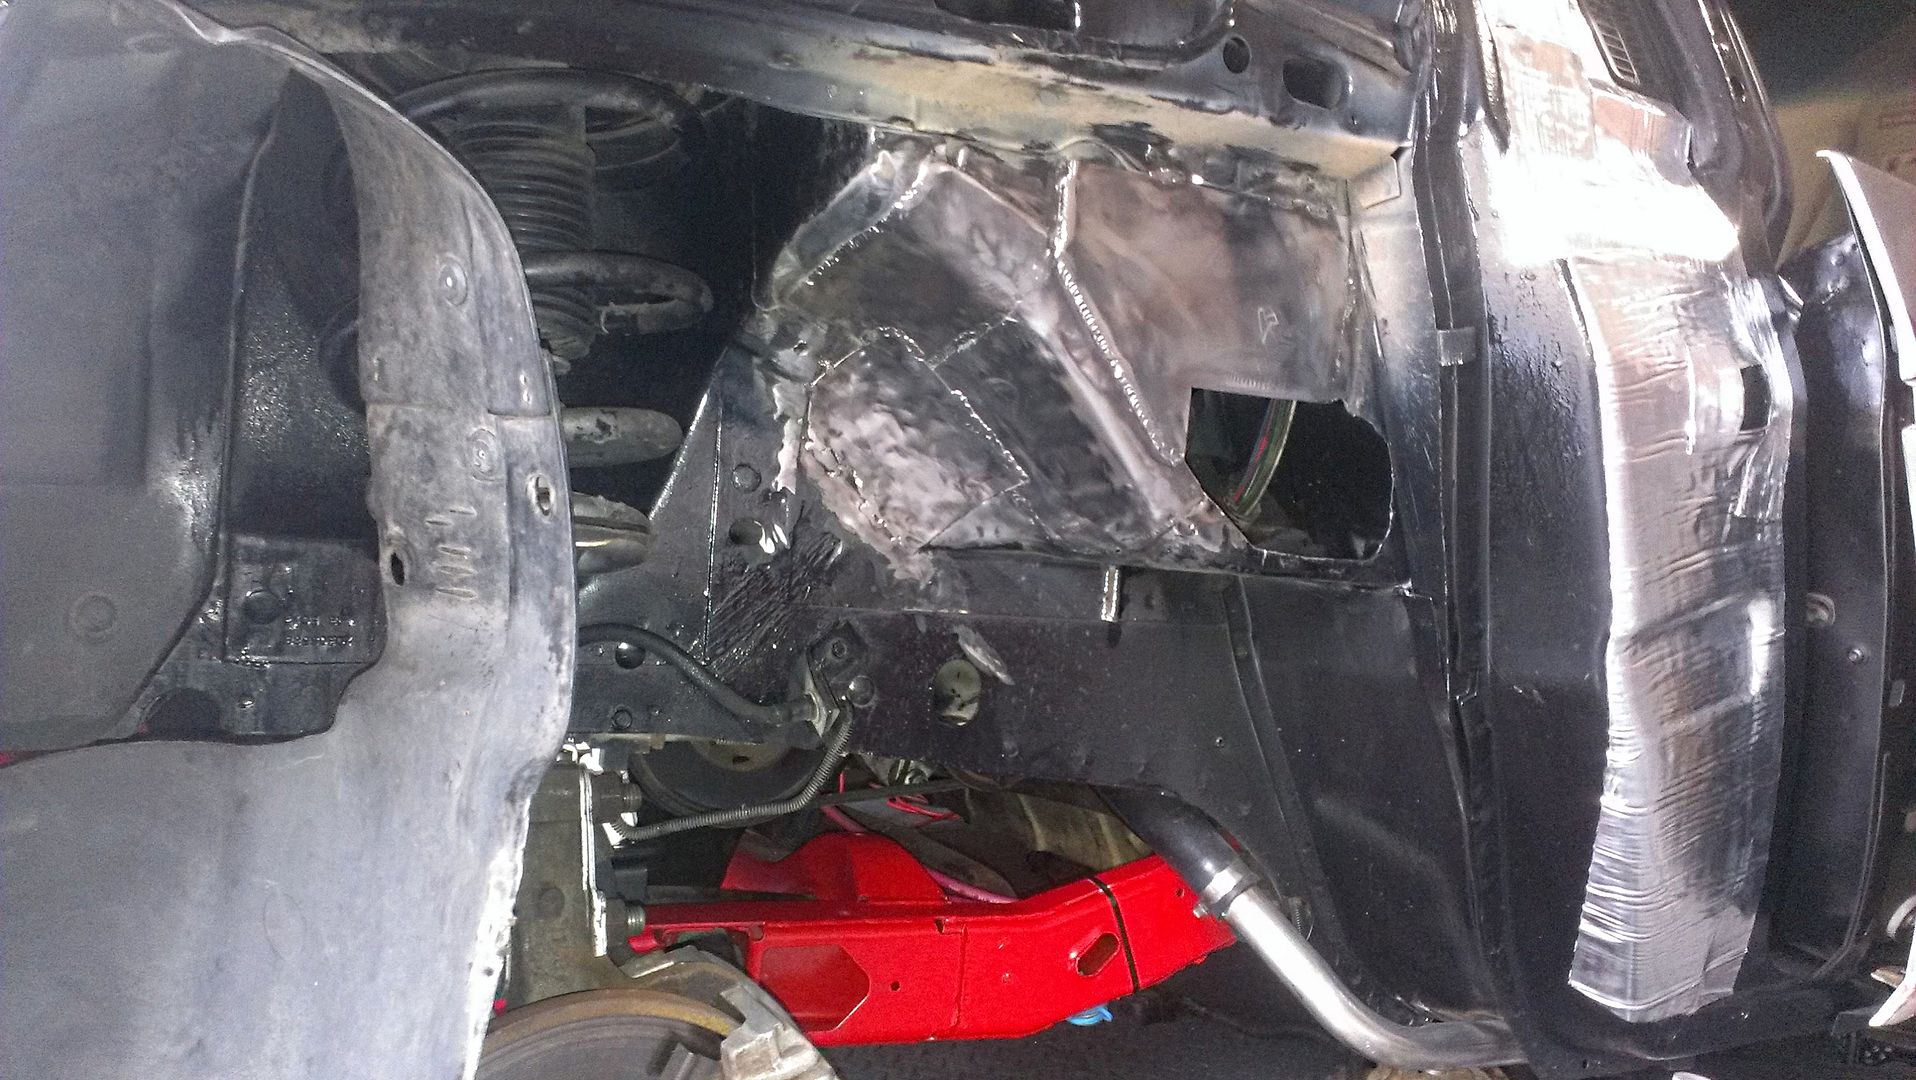
He also filled the hole for the stock radio antenna wire, since I am relocating mine to center rear on the roof with a G6 antenna that also has the GPS array in it as well.
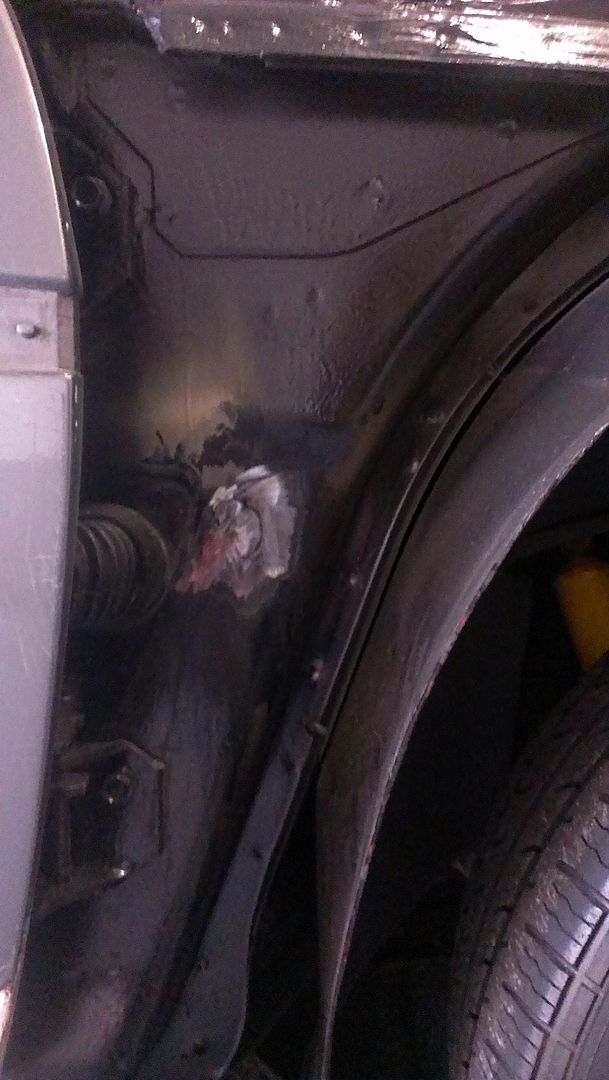
He still has cleanup to do tomorrow to make it look pretty.
Tonight he is fabricating me a bracket to re-mount my coils in the area of the stock battery tray...he will be back at sun rise tomorrow to finish up
ALSO...disassembled the C6 steering wheel getting it ready for Monday! The shop has he old steering wheel core and should have it ready.
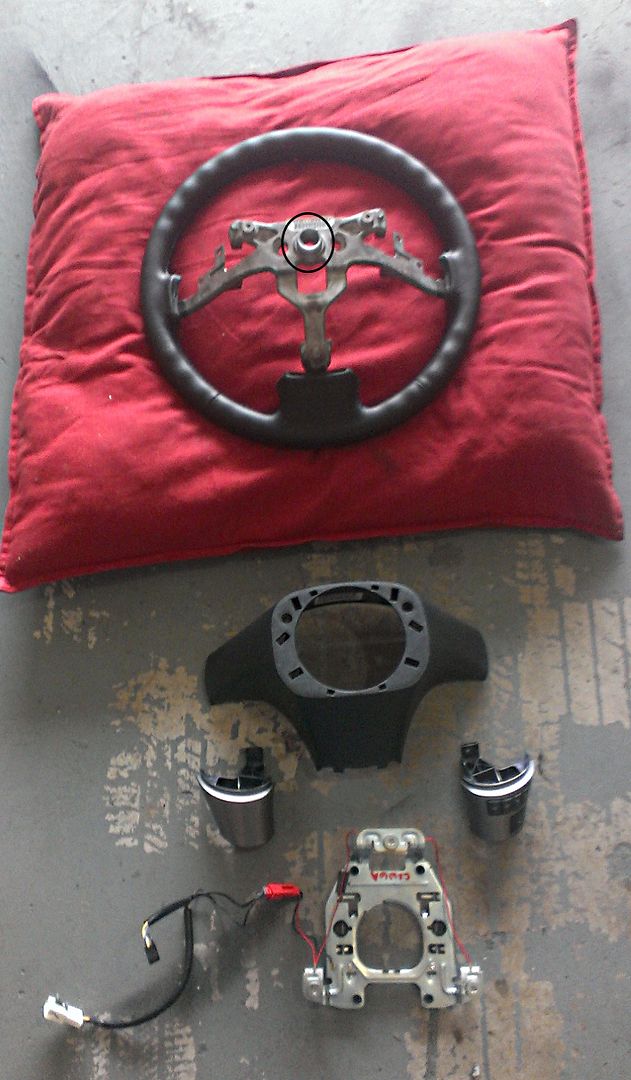
So on Monday they will drill out the C6's original spline core & then hot punch the new one they created out of the original stock steering wheels much larger core.
UPDATE:
Got the spots where he welded cleaned up and a nice coat of black rust-olum on it:

and the old antenna hole:
I have reached out to Rich (silver 85 sc) to request the following:
I am thinking he might be able to help me out...I need the following pieces (driver & passenger)
Done in a strong enough gauge metal so I can drill a hole through so I can continue the hole all the way inside for a set of these:

UPDATE:
Installed new aluminum 3 core radiator:
& new ac condenser...since I received the lines to hook it up a few days ago:
I also removed the front bucket for the spare tire:
to open up access to make it easier to install the "Full-time power steering kit" from Chris at West Coast Fiero:
That is going to get installed with the factory power steering pump that goes with my 3800SC:
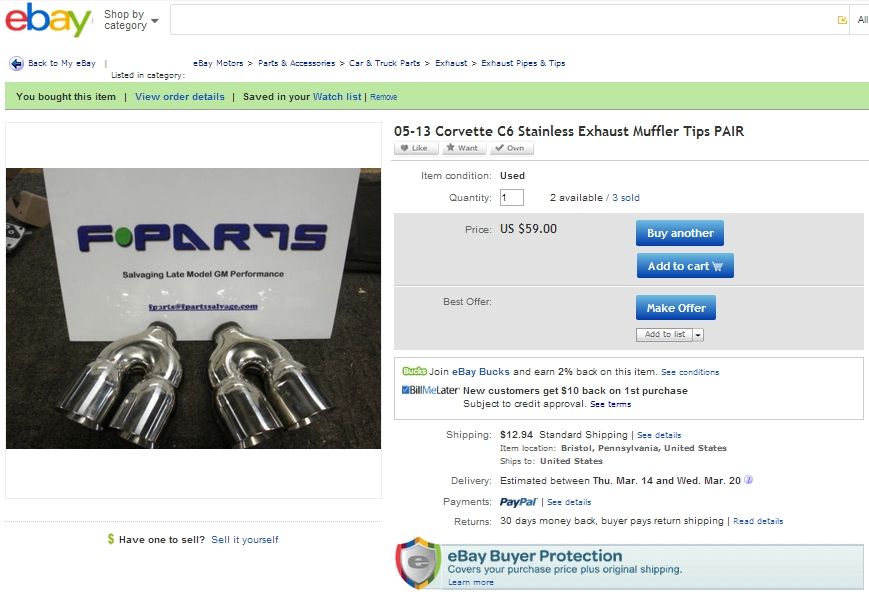
UPDATE:
Just saw that someone posted an awesome deal on C6 Corvette exhaust tips
:
Thanks for the heads up...I just grabbed me a set
Updates from Rob:
Busy making mine and Yellowstone's interiors:


Can't wait to see photos once he starts wrapping pieces
UPDATES:
and finished it out this morning with front & back:
UPDATES:
Putting back together the front... re-installed the headlights with re-built motors, radiator cooling fan and began to buckle everything back up.
UPDATE:
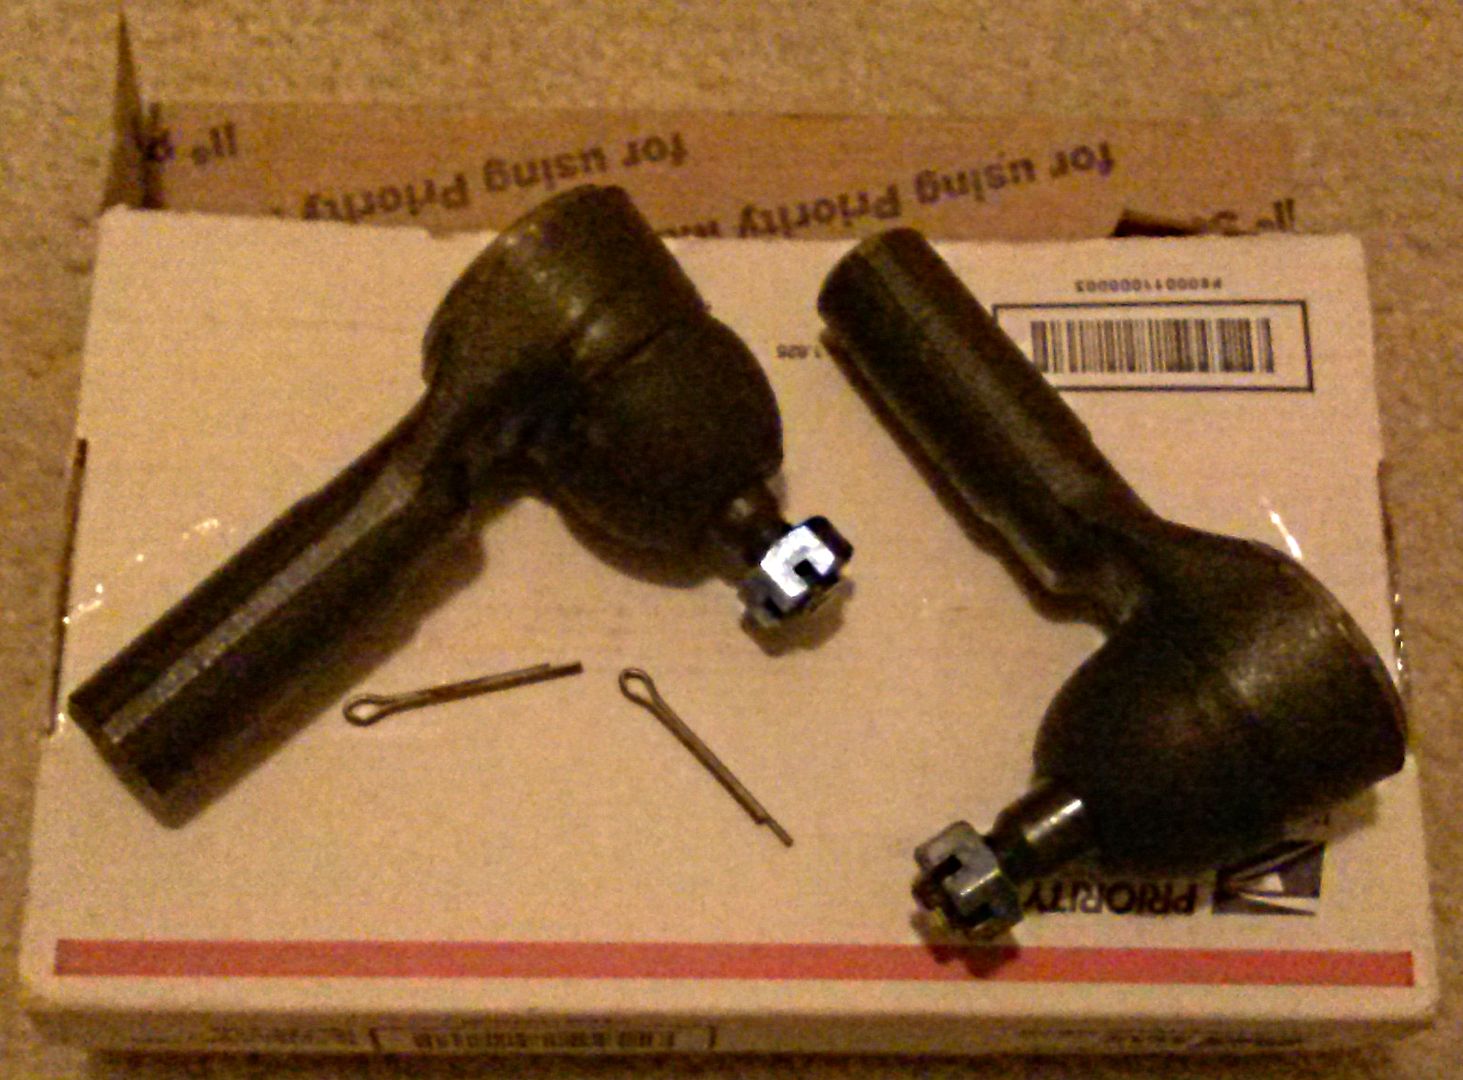
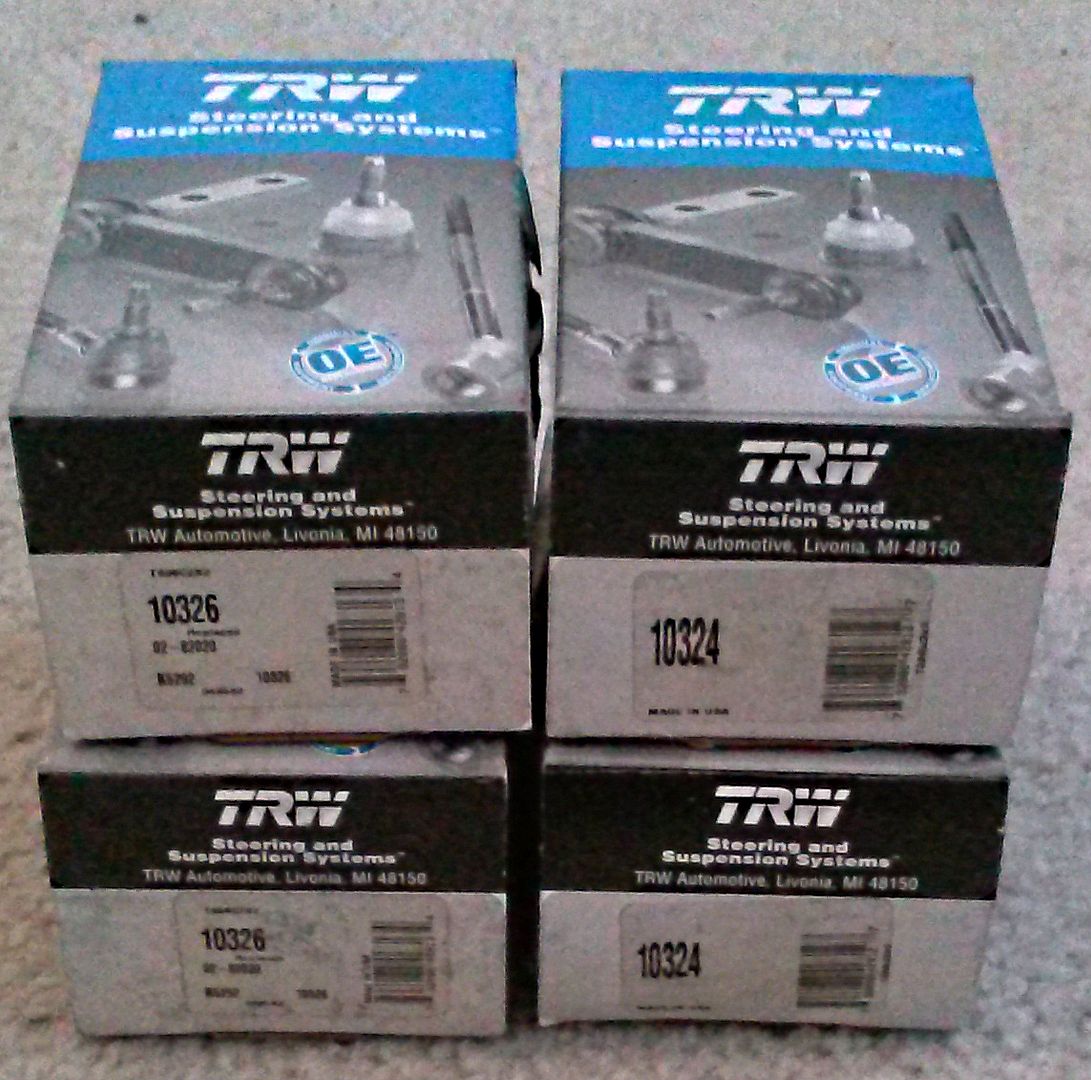
Picked up a pair of TRW Tie Rod Ends:
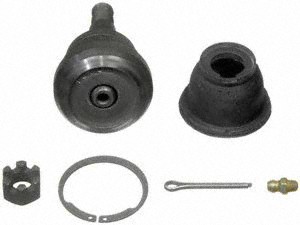
and from member,Ventura, I picked up two TRW front upper and two front lower ball joints. Part #'s 10324 and 10326

I should also see my full-time power-steering from Chris at West Coast early this week...I saw that he charged my card, which means that he should have shipped it:
Lets see...what else to update...
Steering Wheel...still at Davis Metal...they promised it will be ready by Wednesday...since I am a little project for a very large shop and they aren't charging me too much...I got shifted to the back burner...way it goes
My welder, "Mr Cool" as l like to call him...has all my 0/1 wiring system soldered and ready for drop off...he would have done it yesterday, but I am waiting on my next box truck e-brake to arrive early this week. He will drop off the cables and pick up the Fiero & box truck e-brake to make them one.
Won't be able to get it back until after week from today. I will be down in Miami next weekend to go see my daughter and check out a few So Florida members cars while I'm down there
UPDATE: I received my NOS TRW Brand Tie Rod End s:
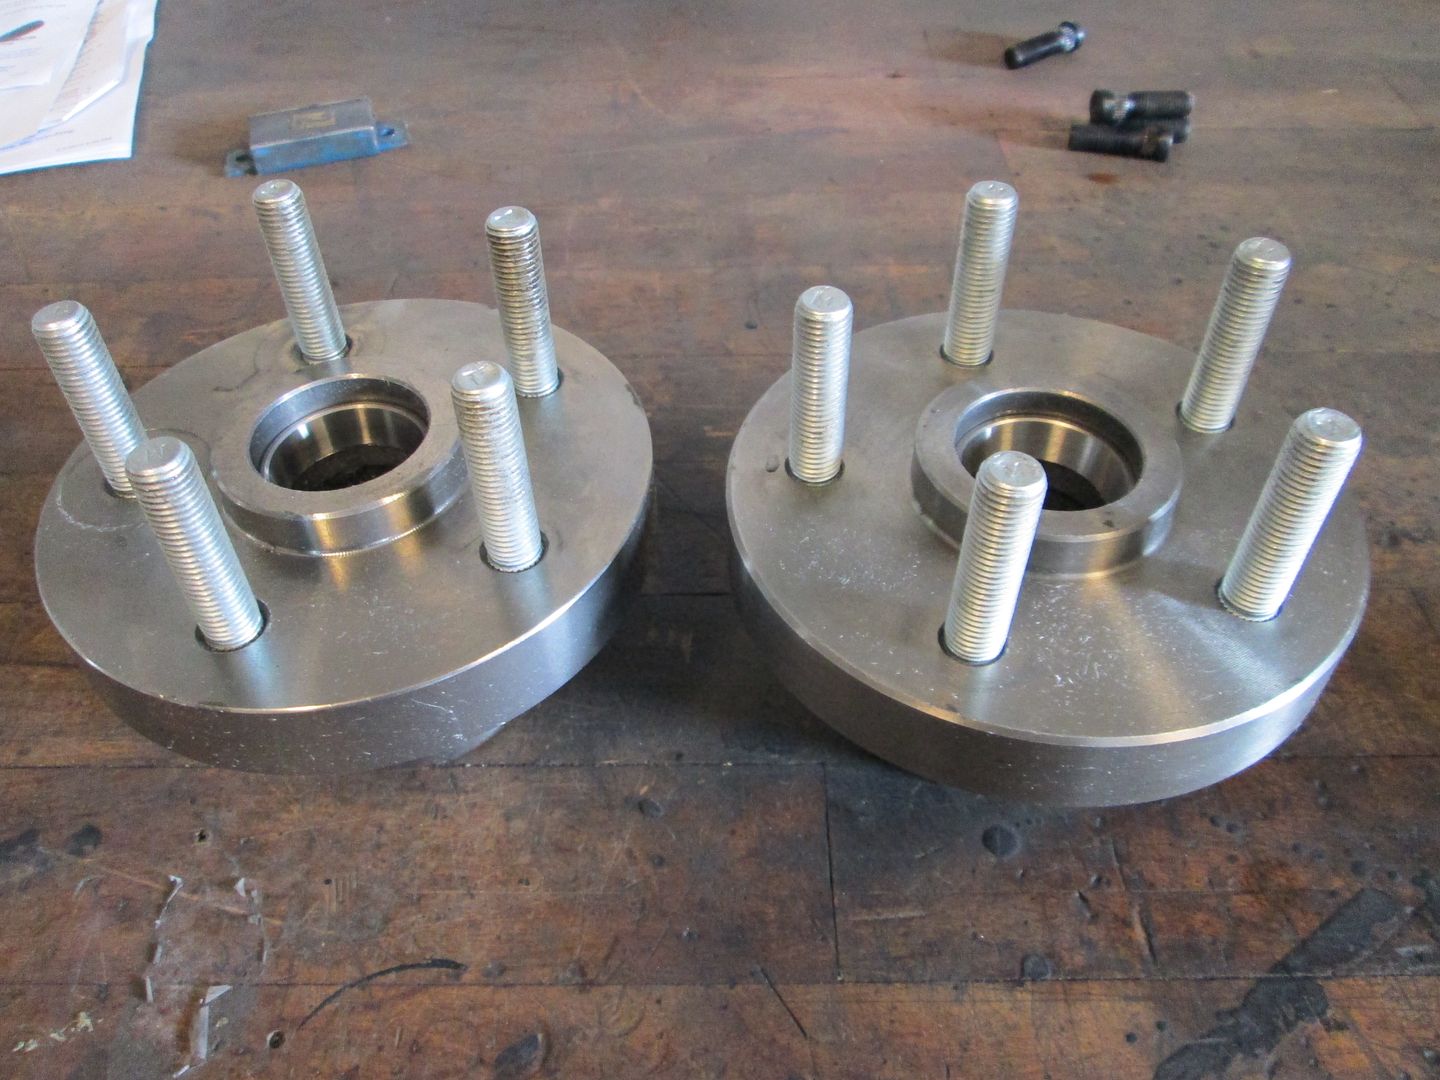
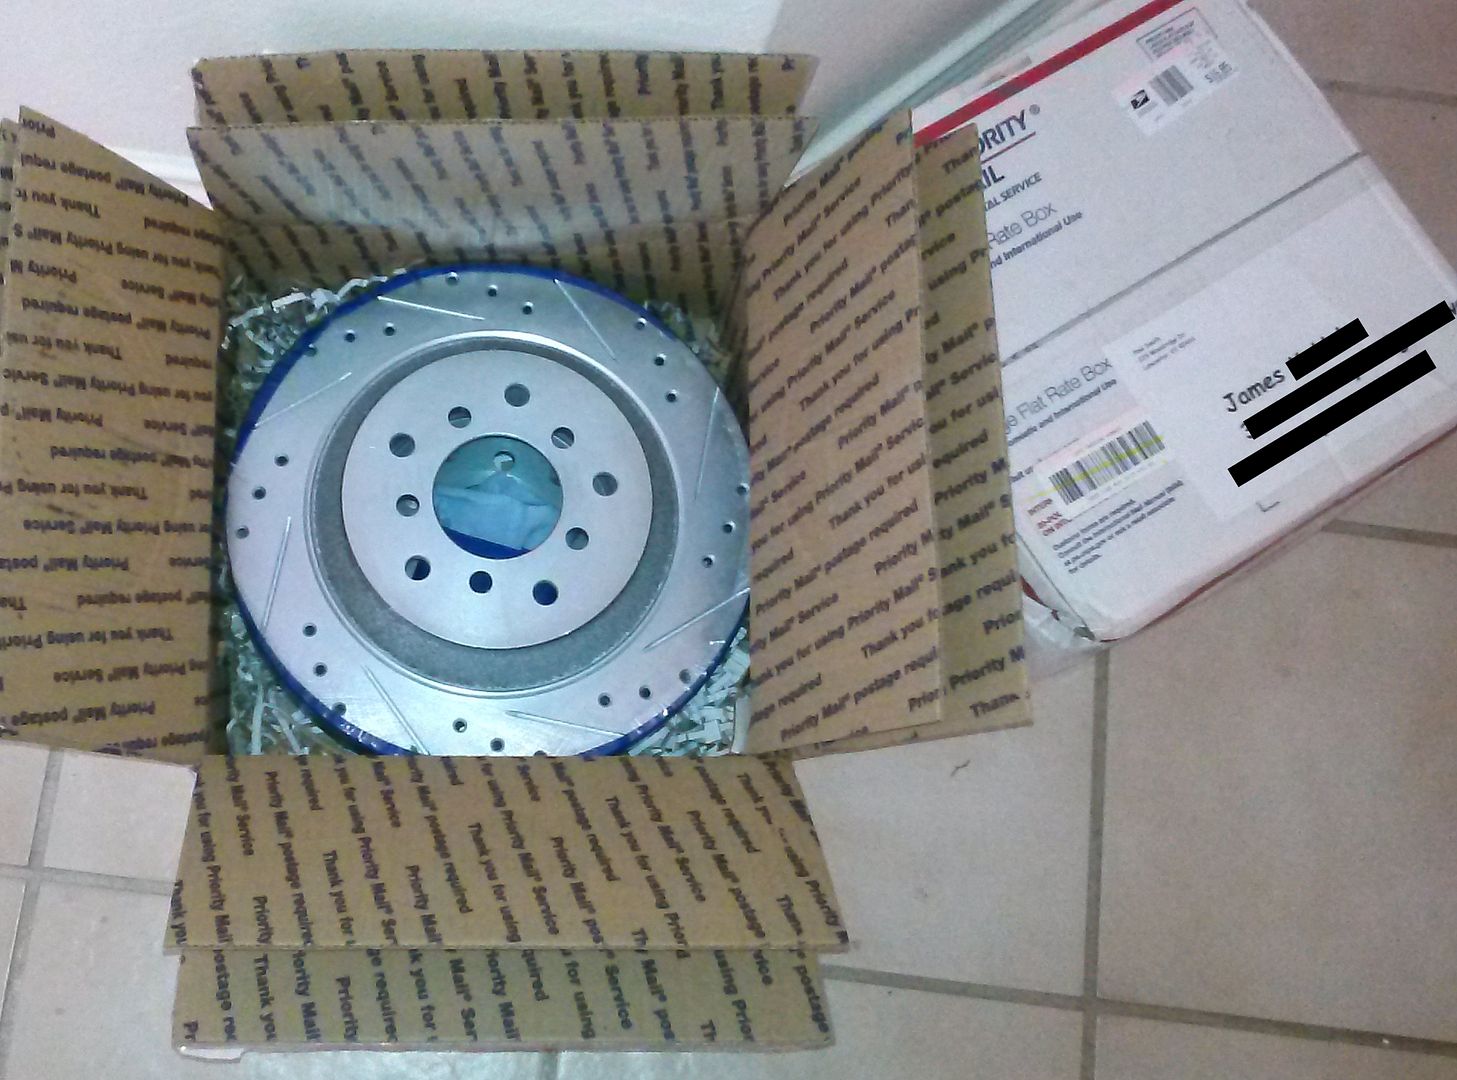
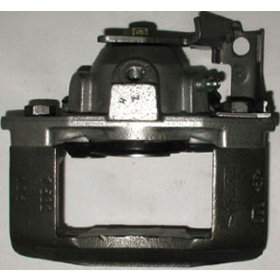
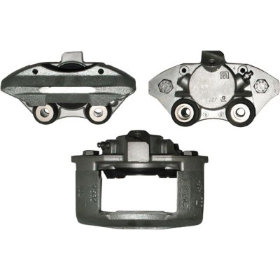
I also recieved a PM from member FieroGuru that he recieved my brand new set of Raybestos - Front Disc Brake Rotor and Hub Assemblies:

which he is going to turn into these in preparation of my 12" Brake upgrades
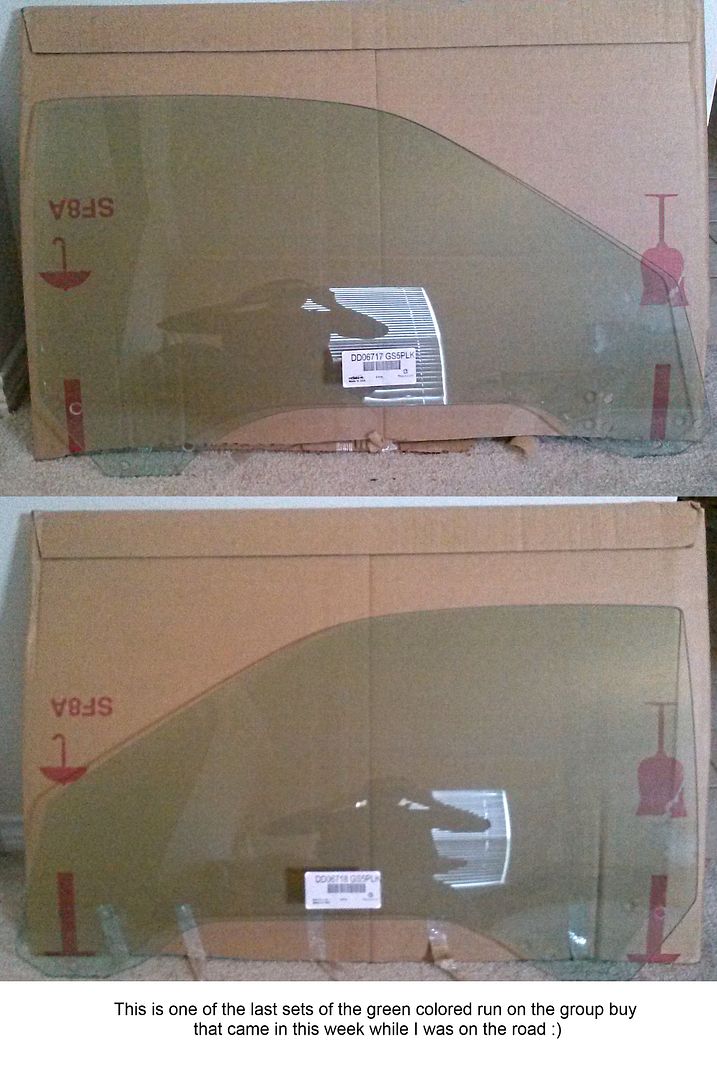
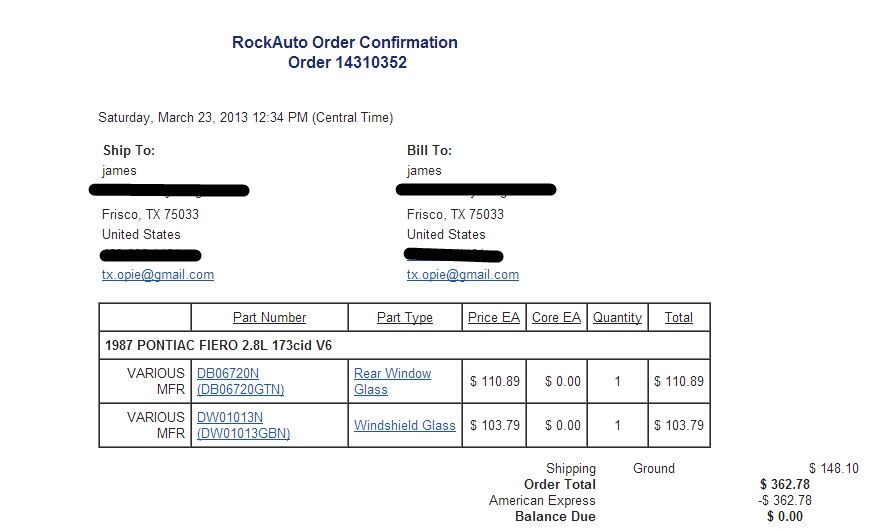
UPDATE: FEDEX just delivered my Front & Rear windshields from RockAuto:
Front with the piece already in place to attach your rear view mirror

Here is the rear glass:
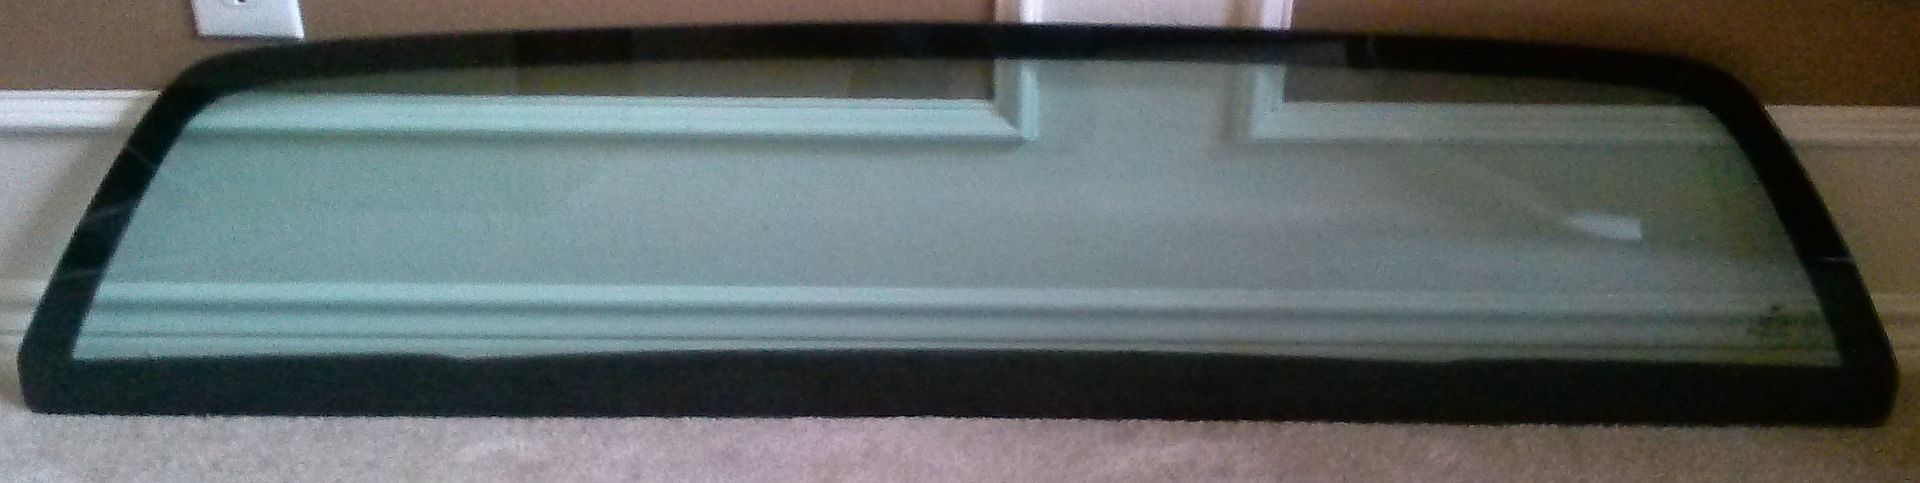
Both Pieces are great!
UPDATE: US Mail Delivery and received a package from member,Ventura, -
Two TRW front upper and two front lower ball joints. Part #'s 10324 and 10326:
BACK FROM Ft Lauderdale....This week's focus is to get re-organized and ensure that all aspects of the 86GT are being addresses in the proper order and also in a timely manor.
* Need to go get my steering wheel from Davis Metal.
* Follow up with Chris @ West Coast to figure out where my power steering is KIT is since he charged me for it almost over 2 weeks ago.
* Pay Fieroguru for the work he did on my new front hubs in prep for brake upgrade...these are my actual completed set below:

* Need to send a payment to Rob for my 308 body which he should be starting this week since the weather is finally warming up.
* Get a status from Amida how my G1 dash is coming along
*Stephen will also start logging some hours of work on the 86GT this week...with his assistance I should really start being able to make some real progress
UPDATE: My front modified hubs from FieroGuru came in:
He took brand new Raybestos:
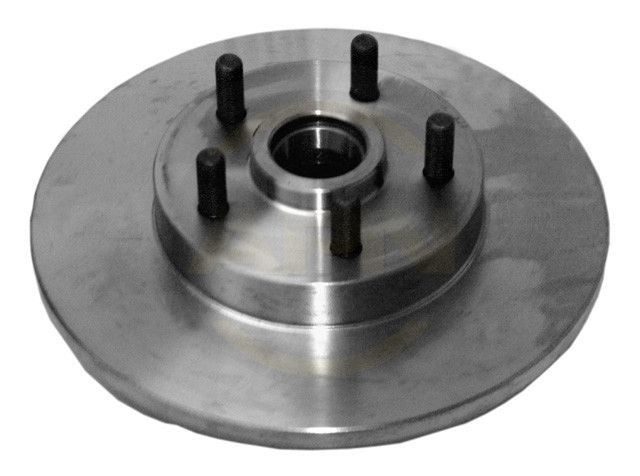
and created these:
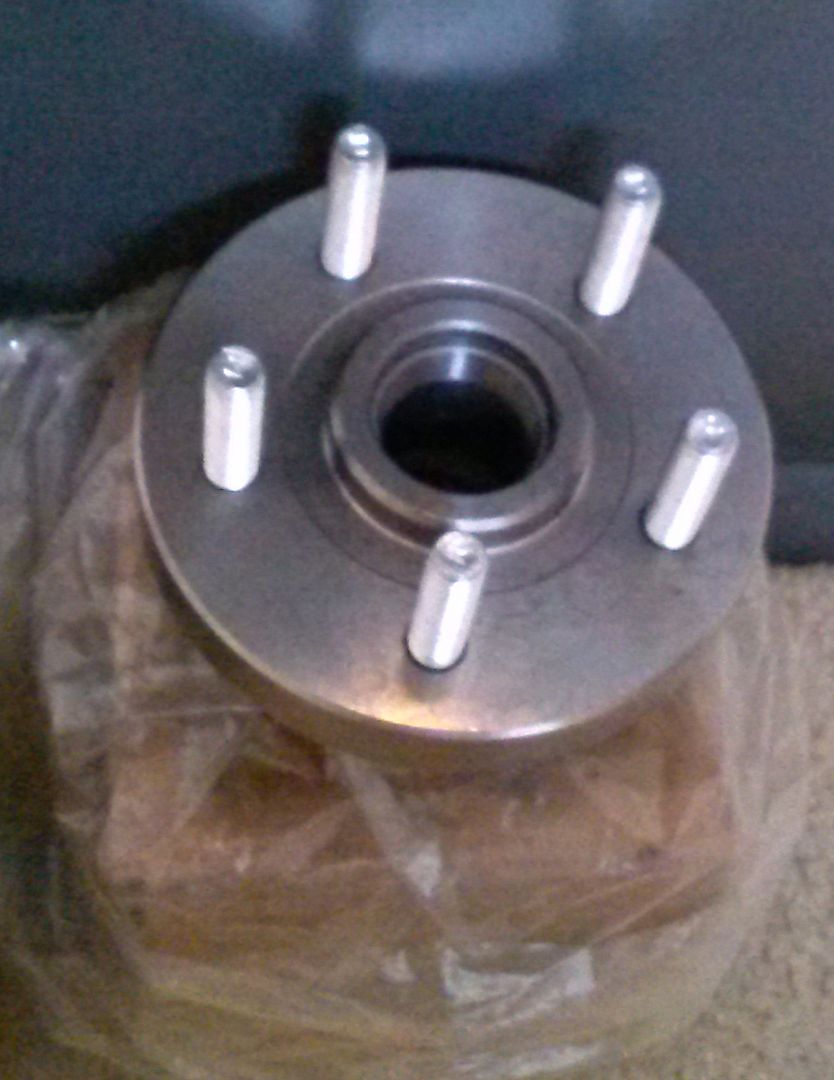
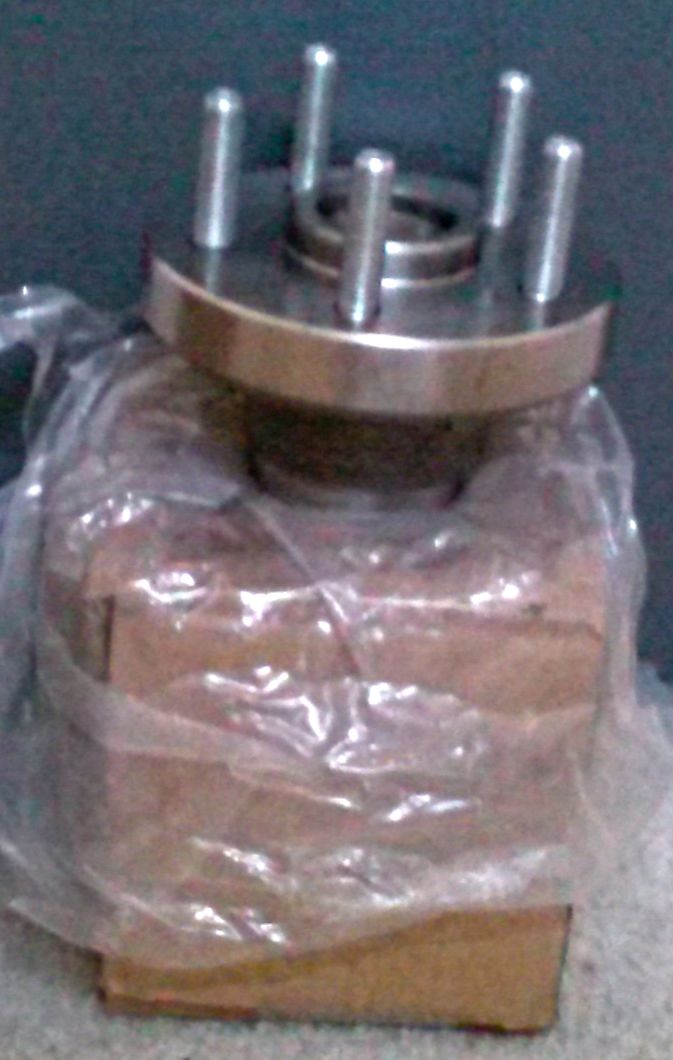
They look great and now will enable me to do the 12" brake upgrade
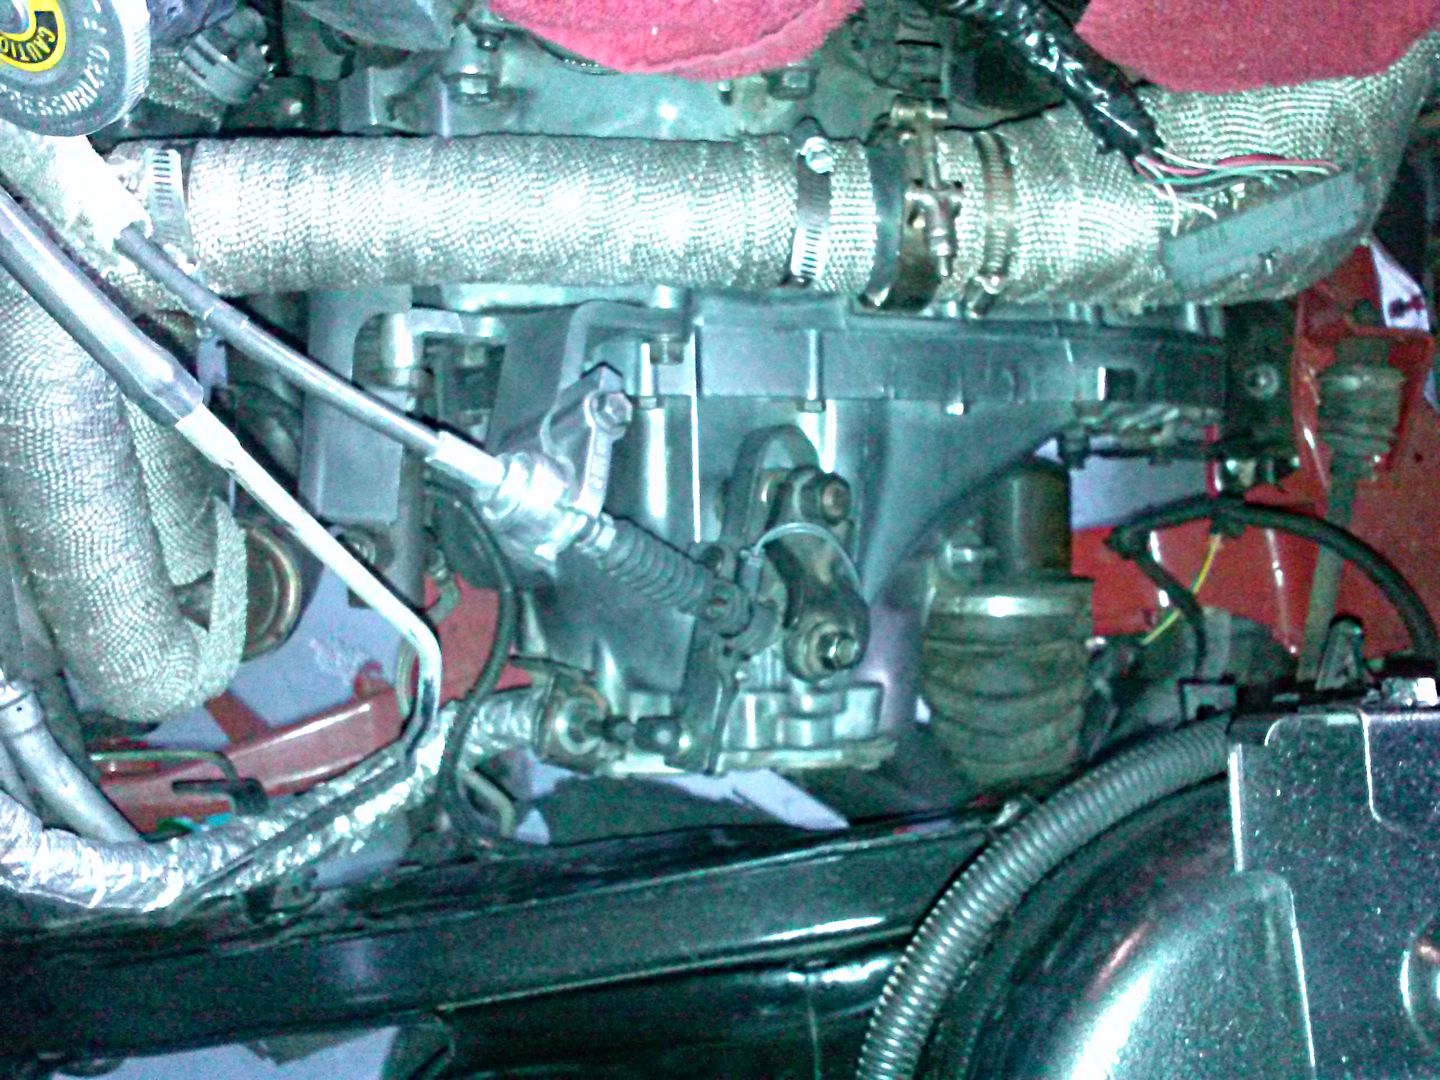
UPDATE: Stephen Poe came by this evening and we stripped down everything that had to come off the swap that was done poorly or just plan incorrectly.
Removed one sliced and mangled wiring harness in prep of installing the new wiring harness:
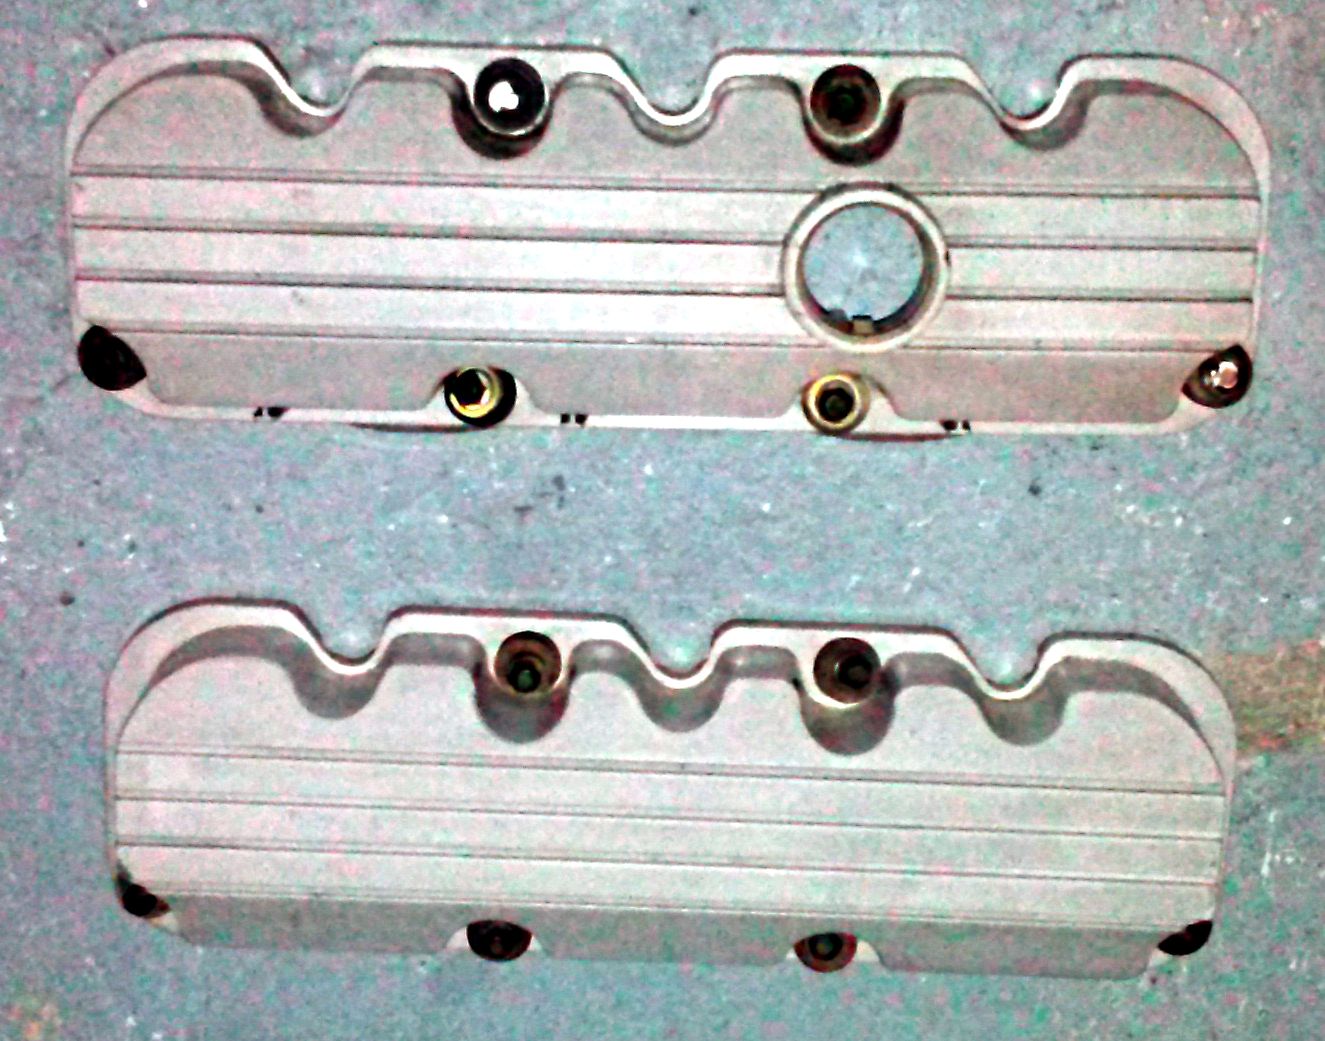
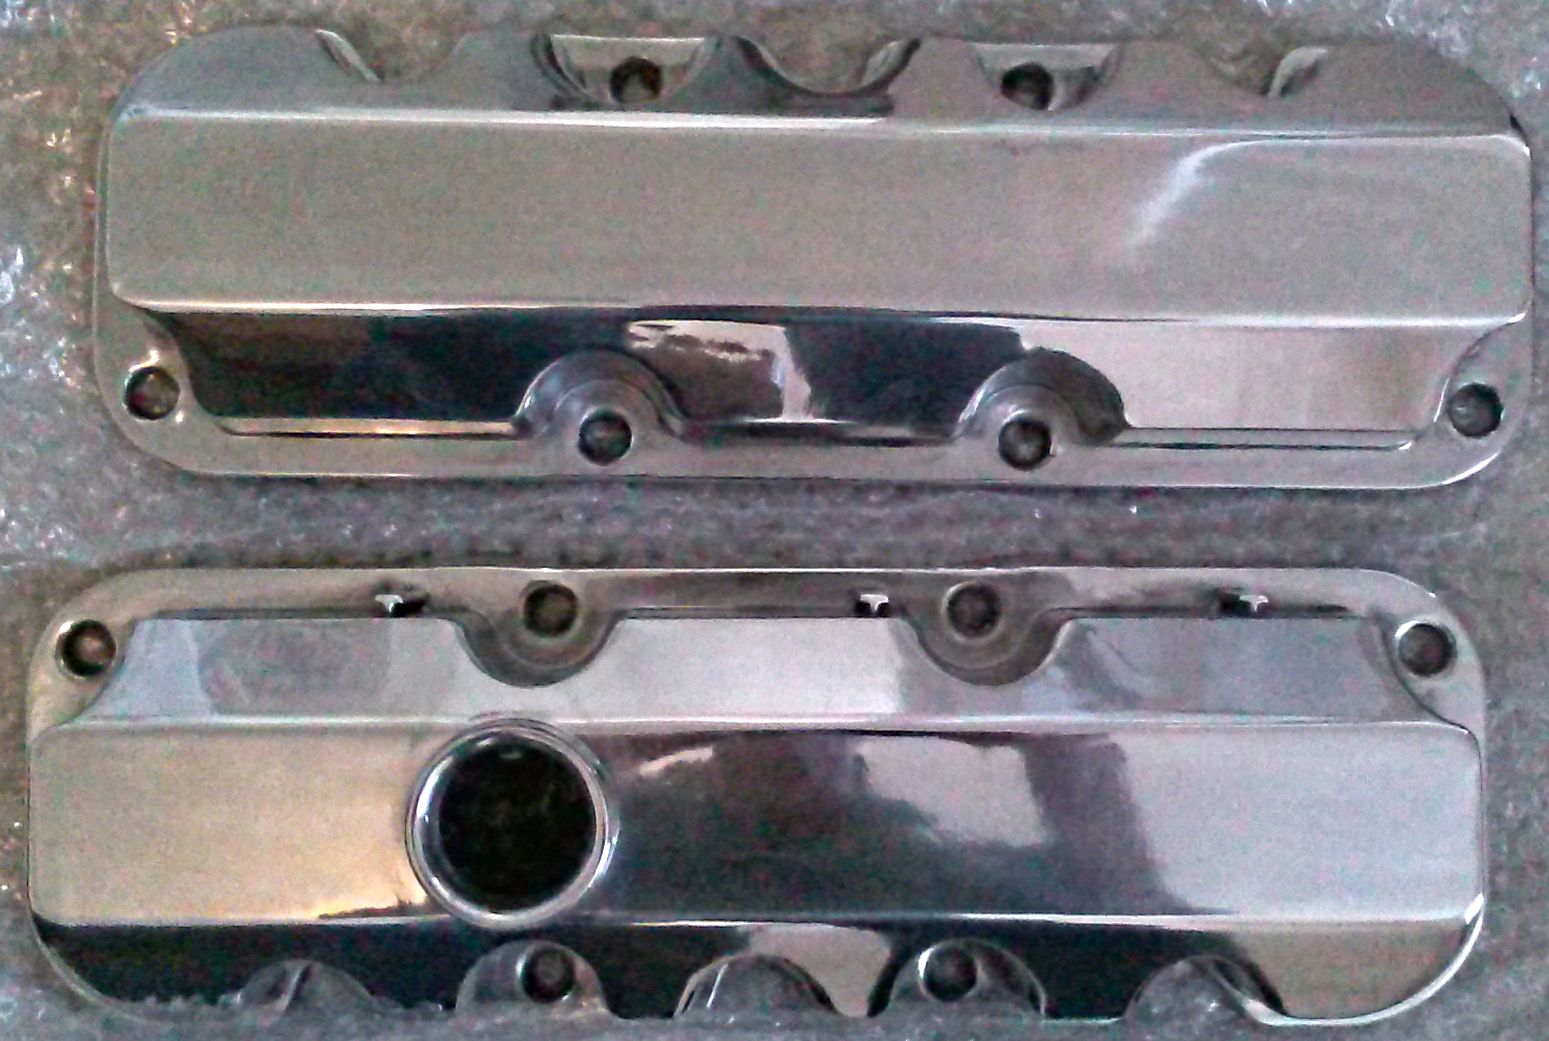
Removed the valve covers
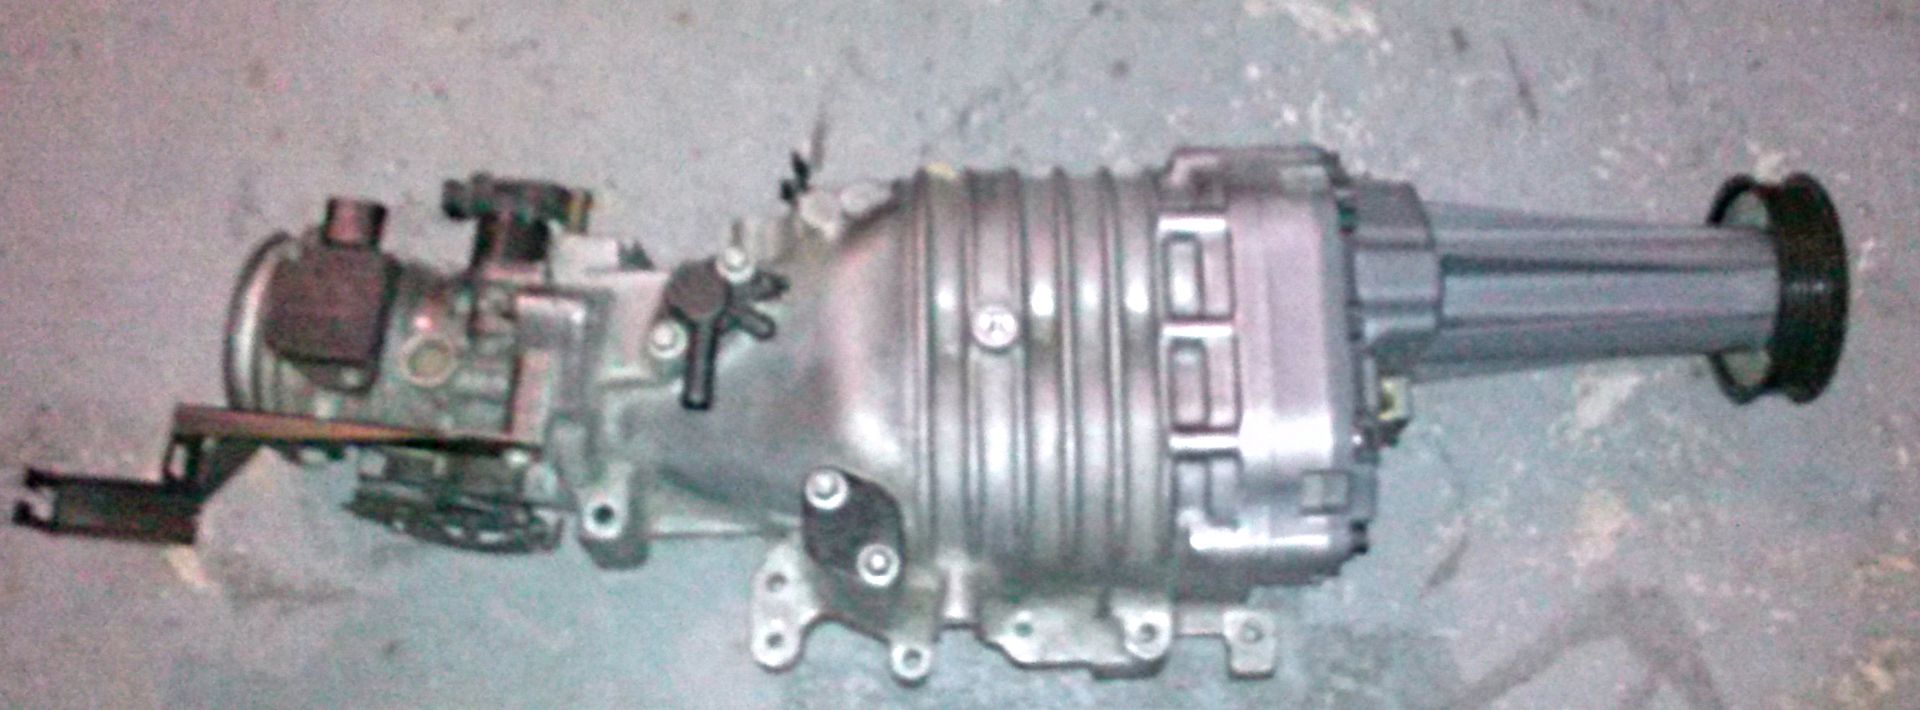
& Super Charger for painting:
* Removed the stock fuel rails,
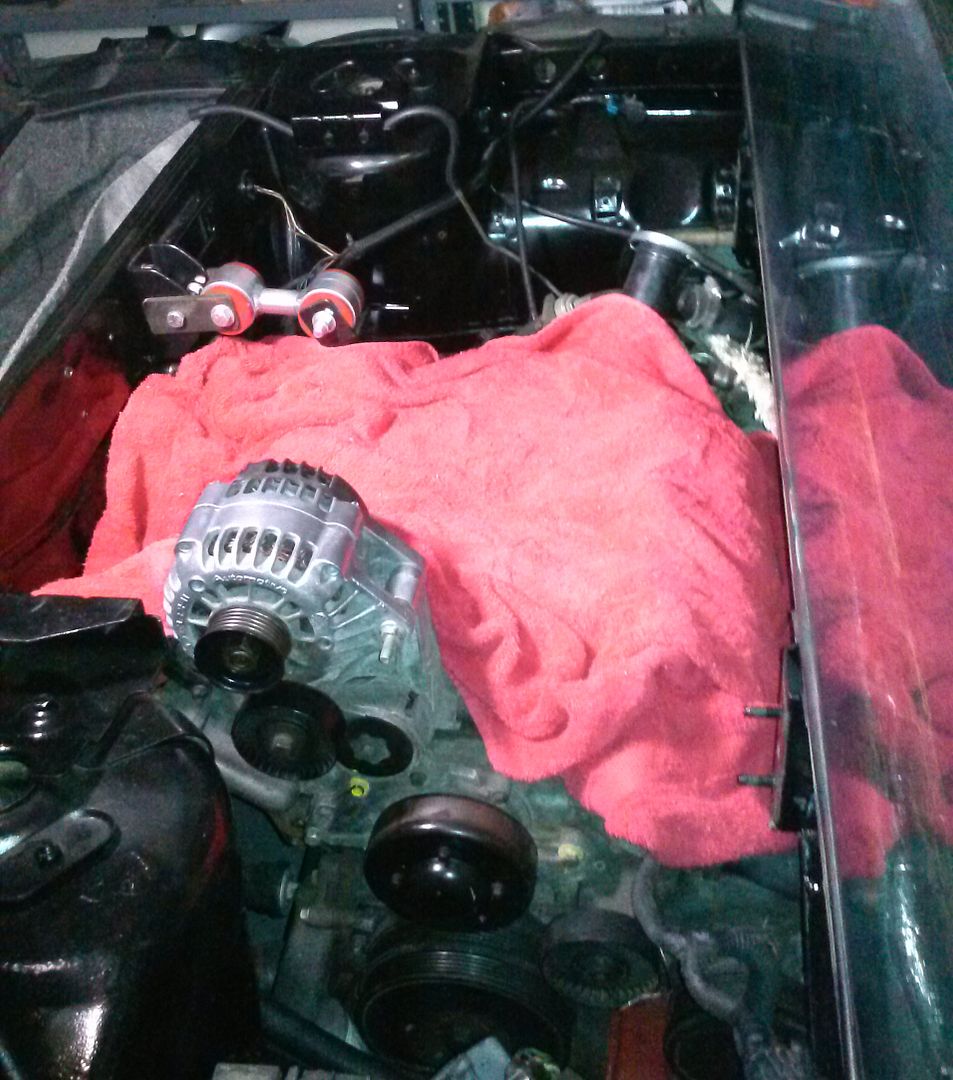
* Pulled the belt & removed dummy pulley & prepped to put the power steering pump back in
* Removed the plastic fuel lines in prep of the stainless steel lines.
* Figured out that there is no canister.
* Removed spark-plug cables in prep for custom length cables for a much cleaner look.
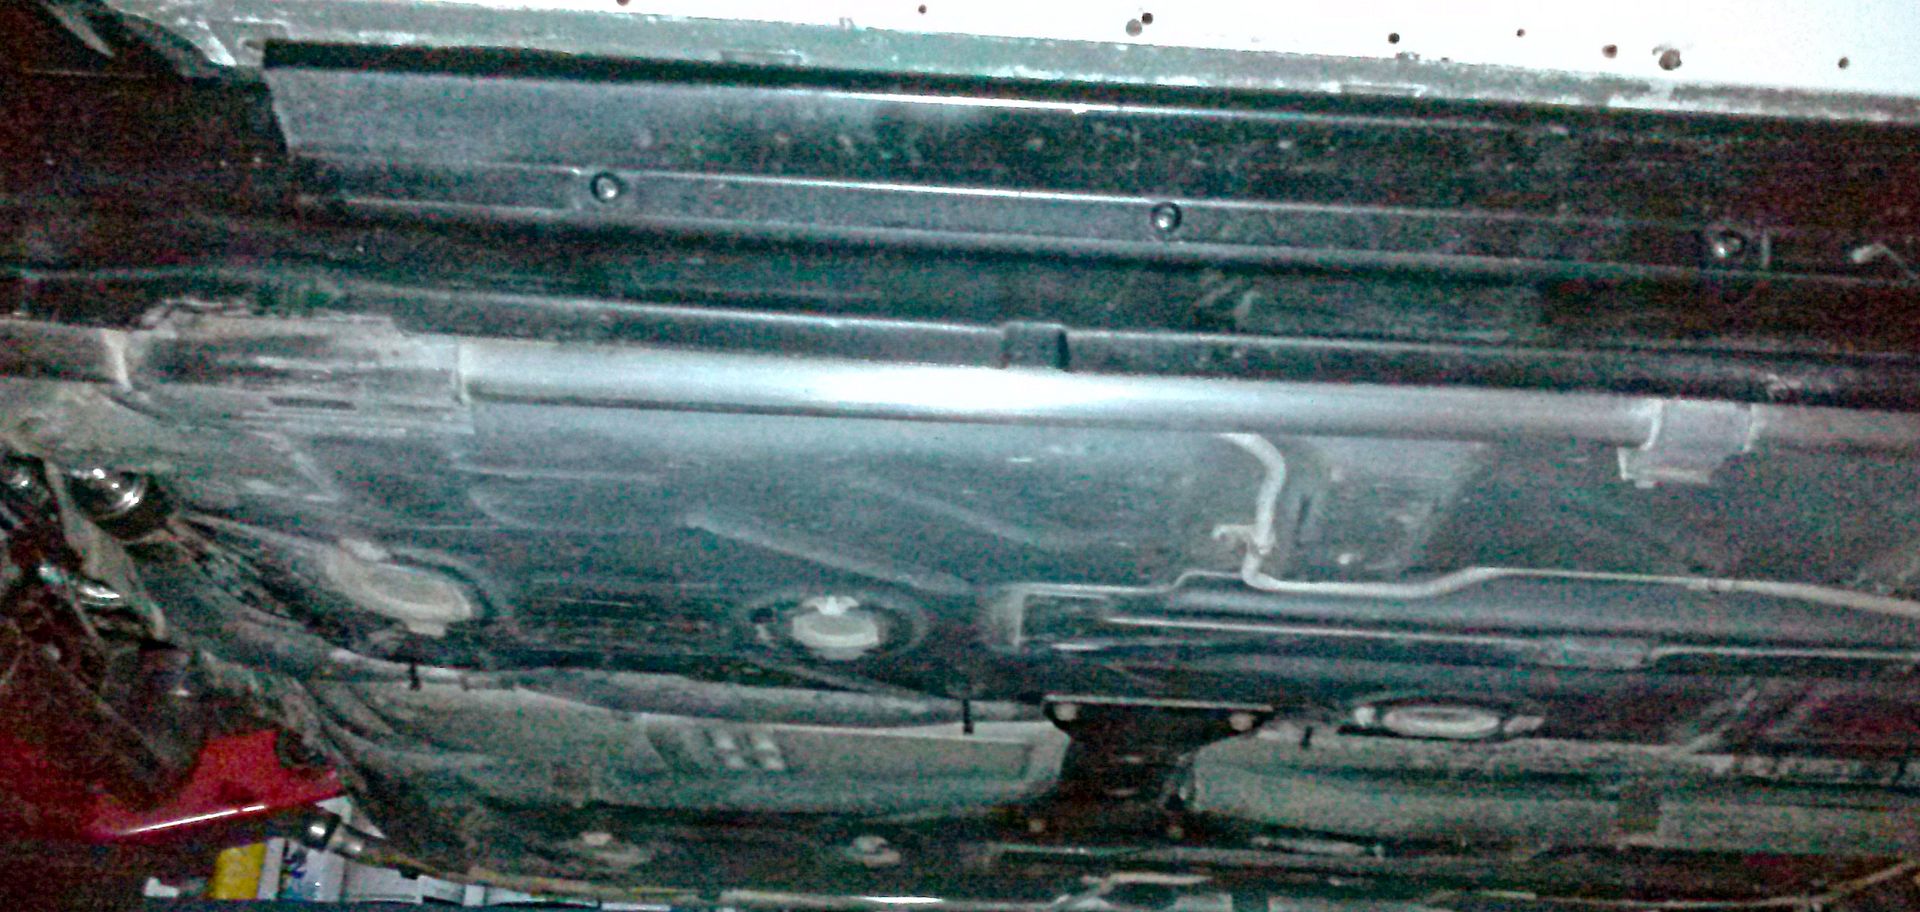
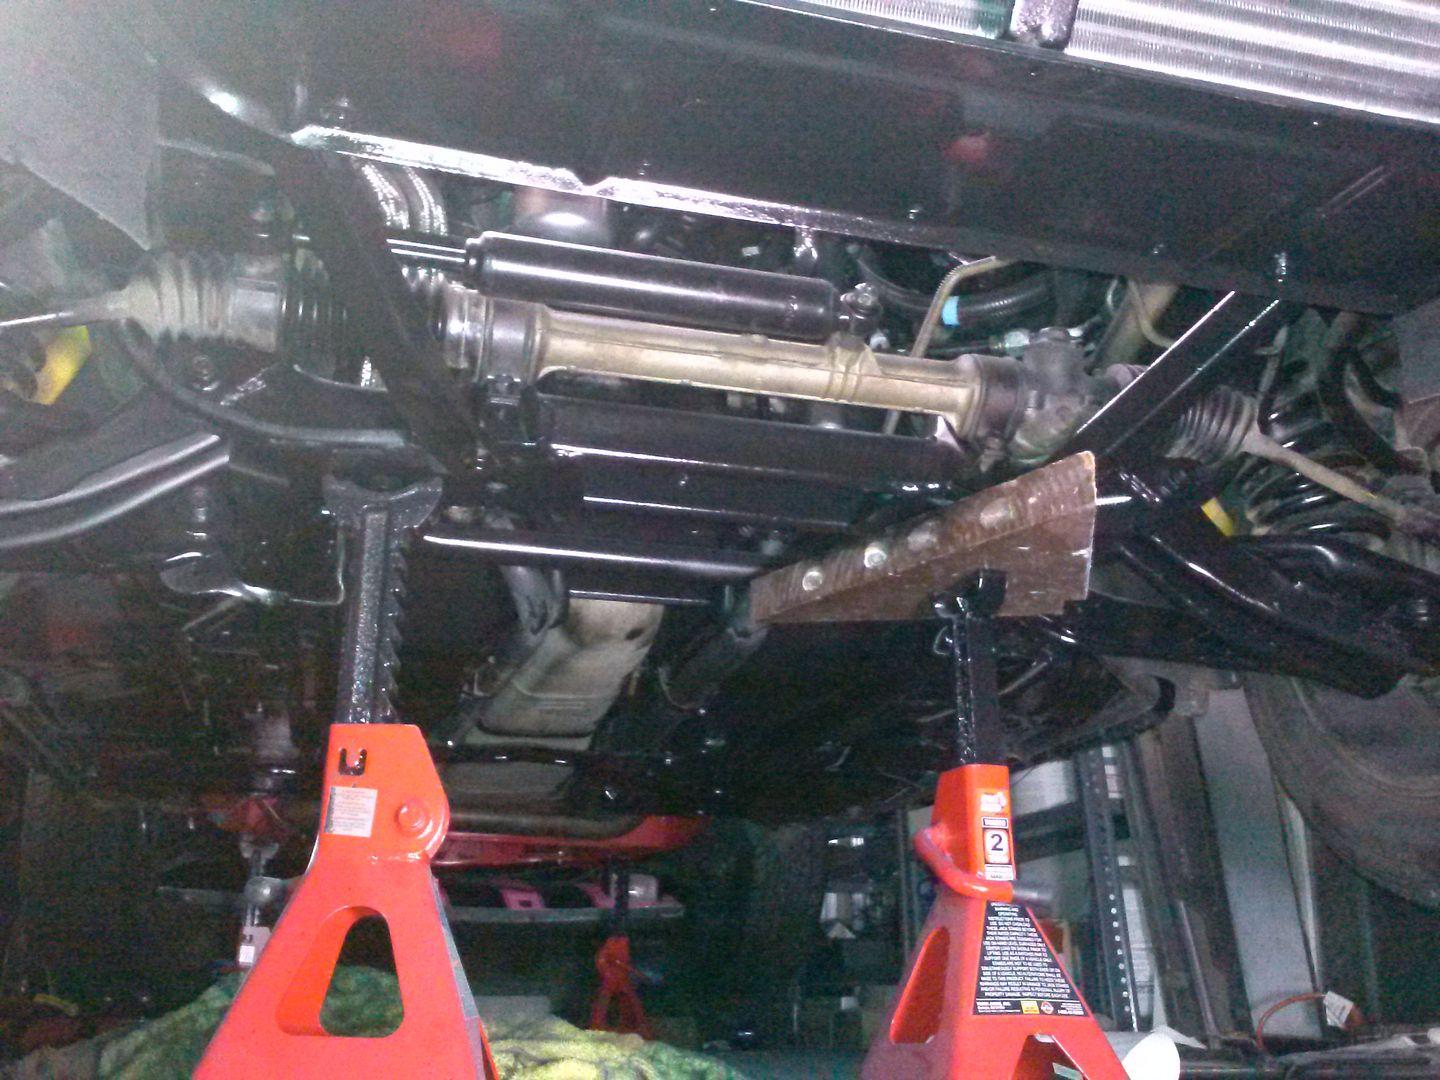
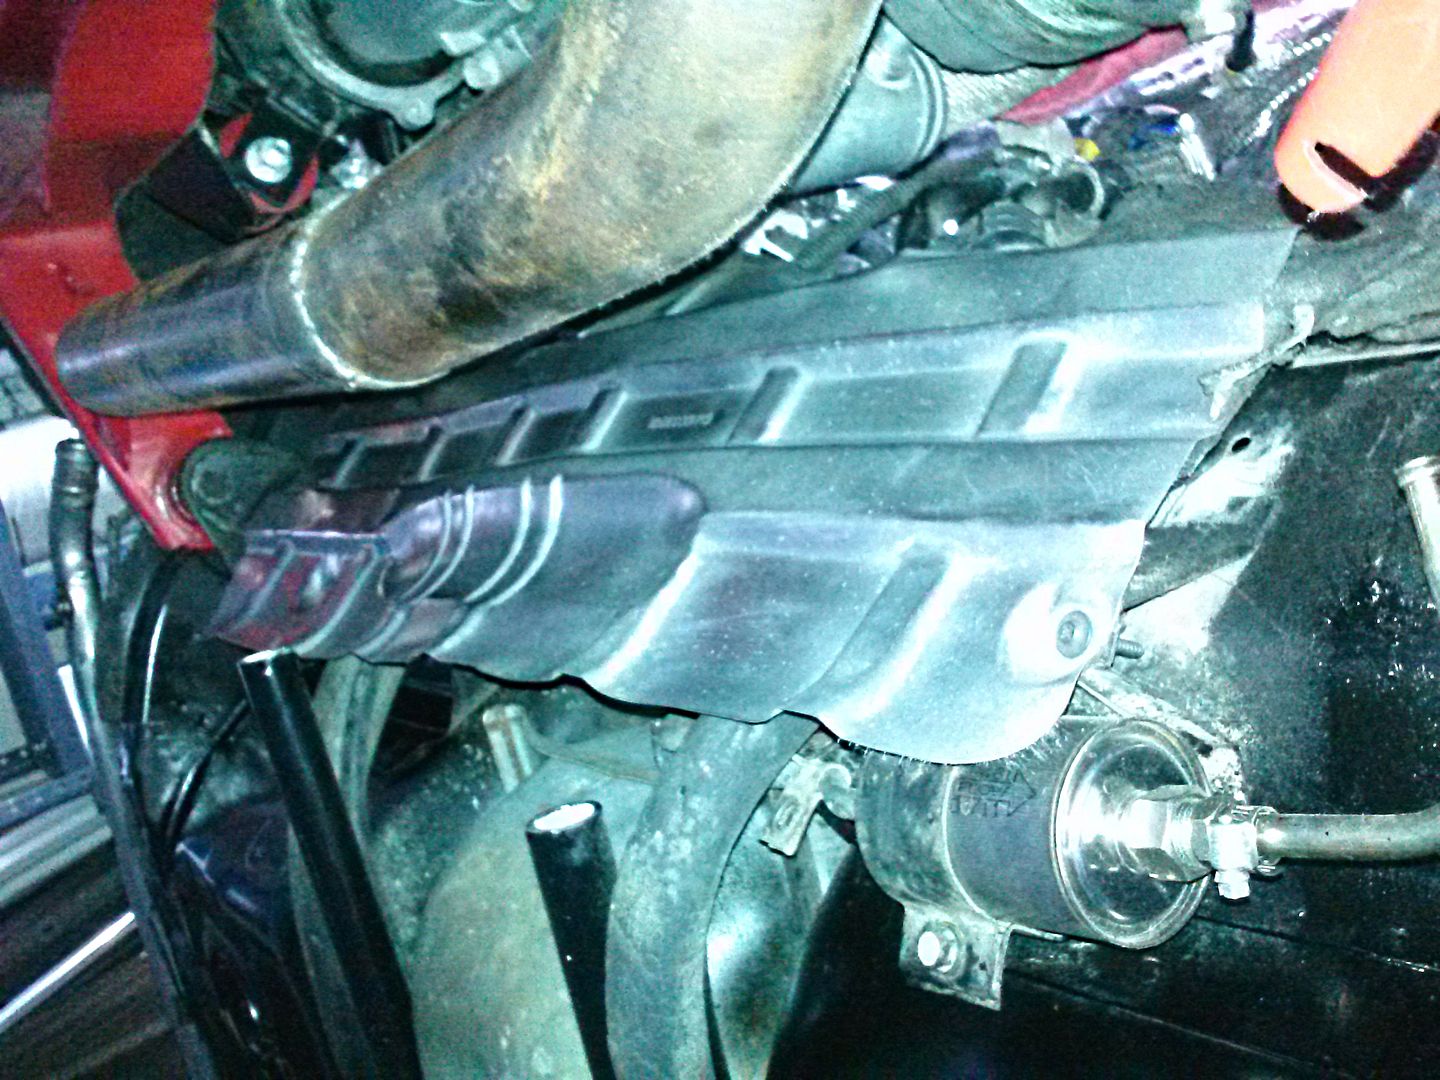
We also got her up on stands so that I can do a little clean up this week underneath her:
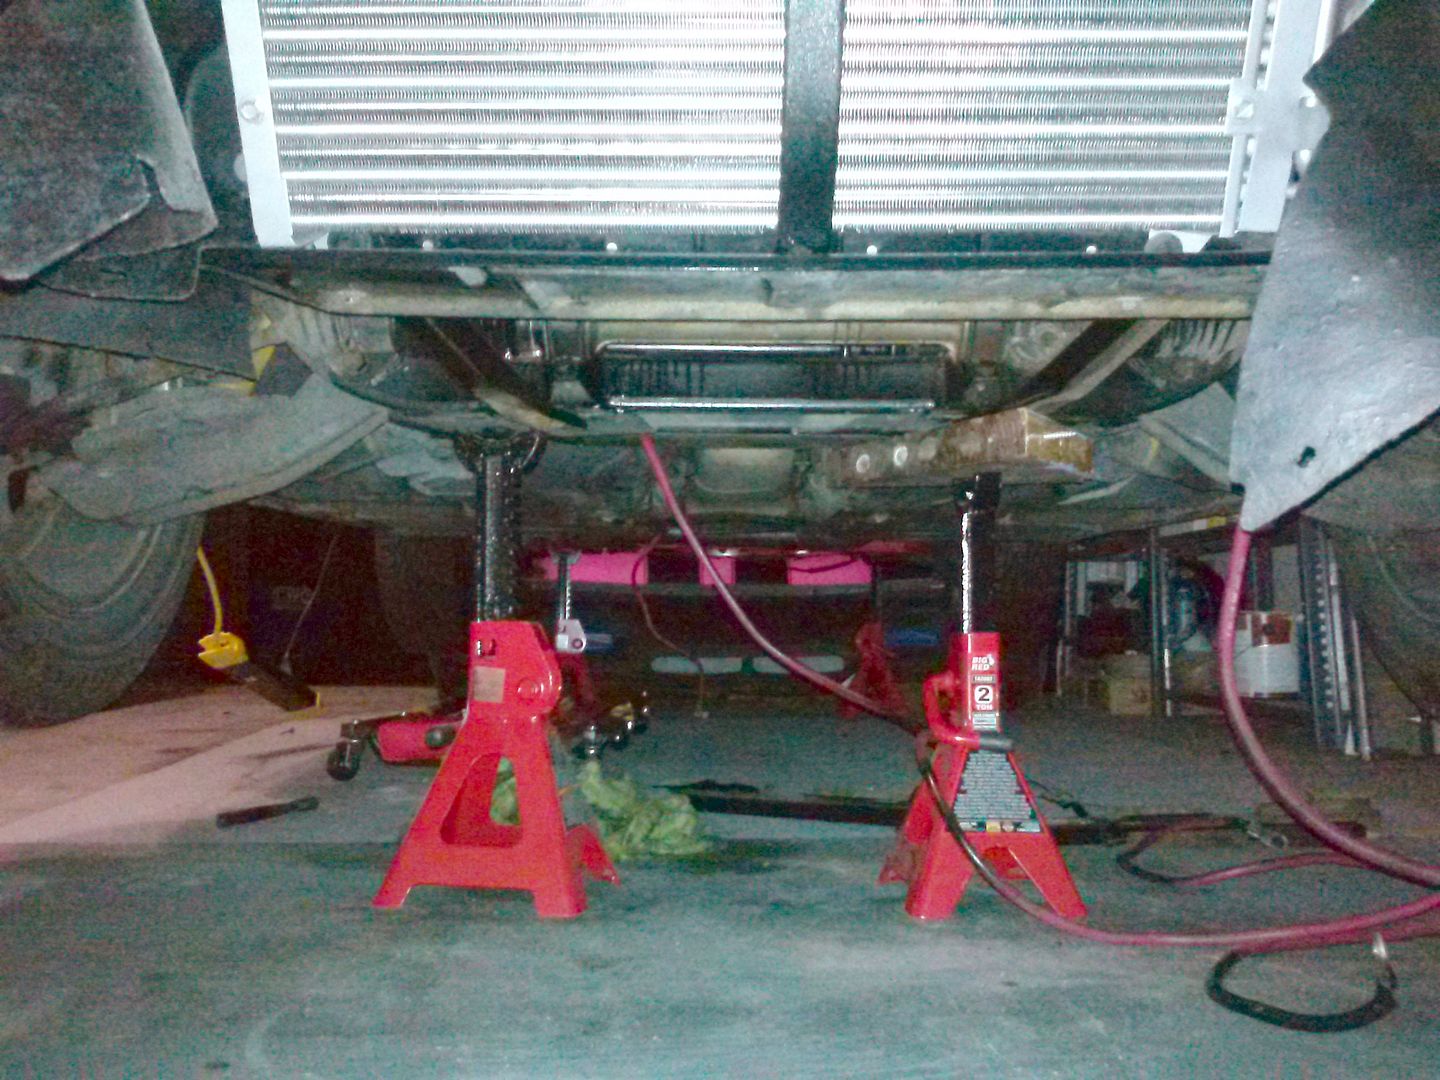
UPDATE: With the car now up on stands I thought I would finish cleaning up the bottom.
Glad to report that there is nothing but a little surface rust and it was just on the chrome pipes for the coolant down both sides.
They are now clean and back to a nice mirror finish...will post pictures tomorrow.
Wiped her under body down with a 50/50 mix of water and vinegar.
Tomorrow I will mask her off and give the bottom a nice coat of black Rust-o-luem.
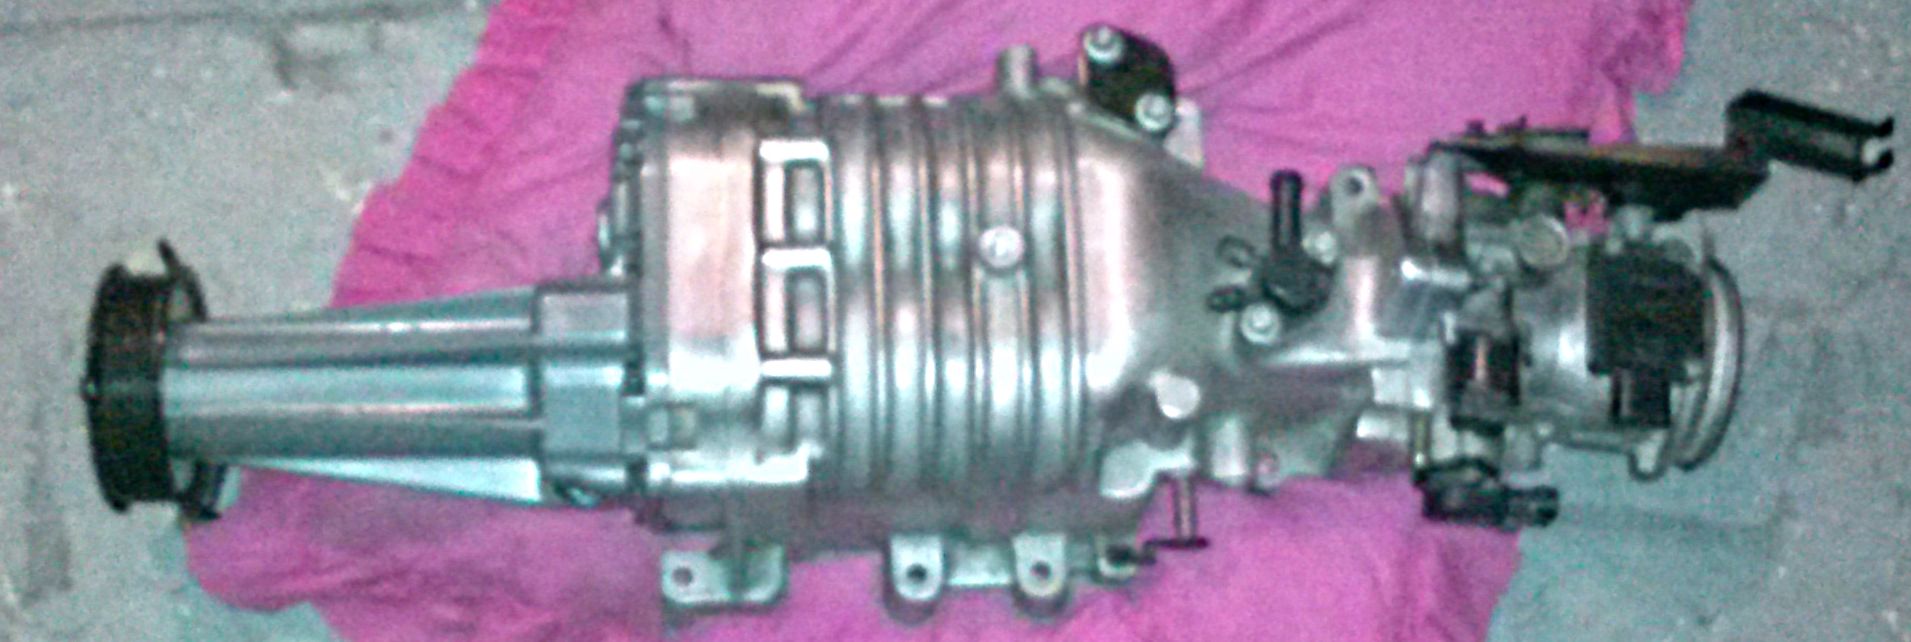

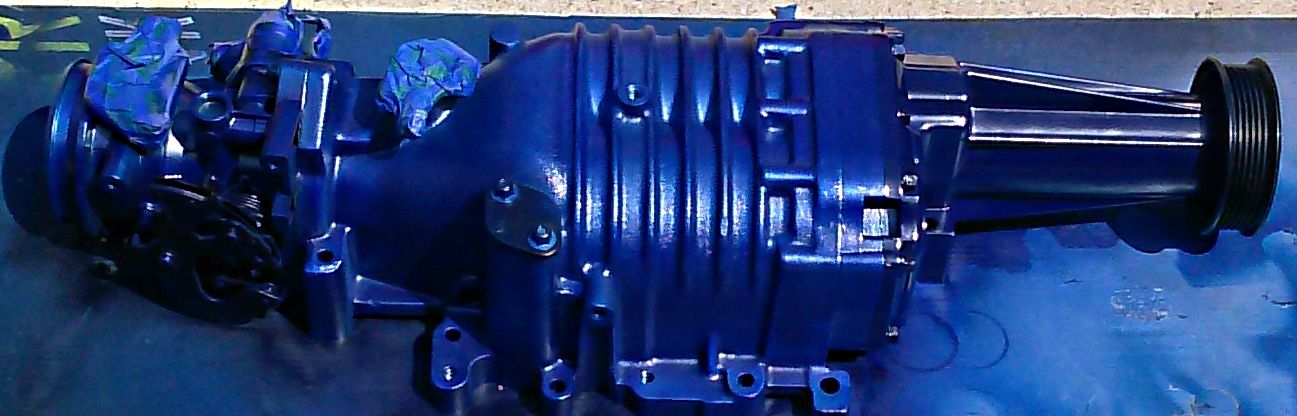
Super Charger is ready for paint now:
Re-scrub down the valve covers with a scotch pad and sprayed the primer:
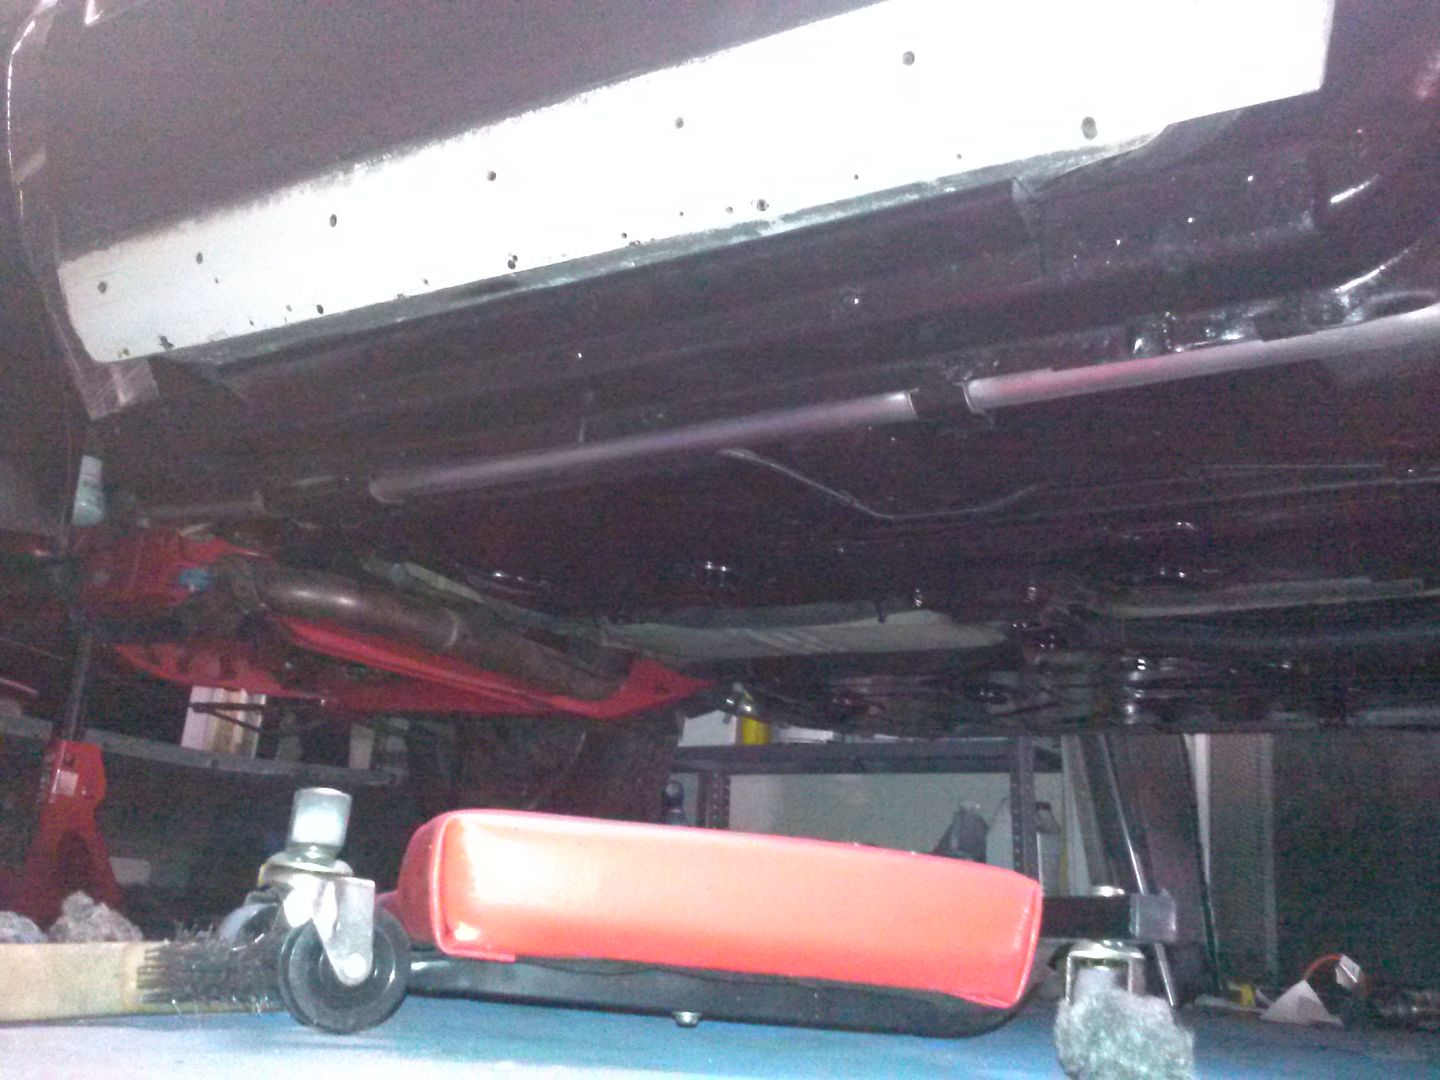
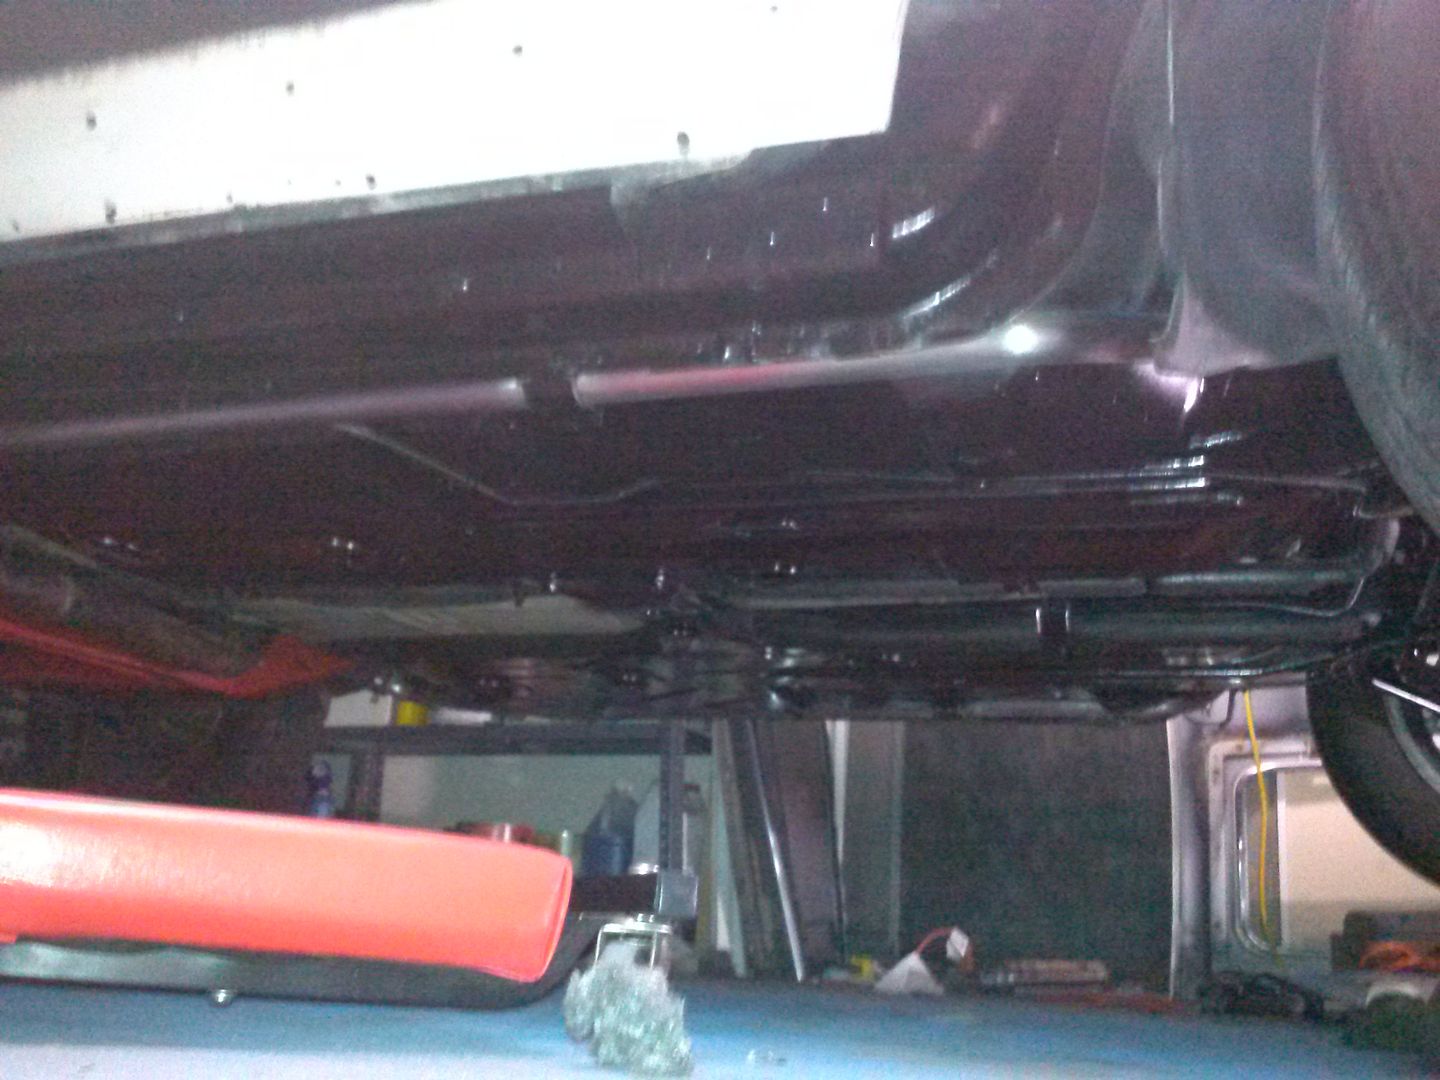
UPDATE: Got a good solid coat of black rust-o-luem on the bottom and working on getting it cleaned up
Still have the control arms and a few cross supports to sand and paint tomorrow.
Maybe next weekend I will drop the gas tank...sand and paint as well
UPDATE:
Did some more work on my valve covers. I decided to eliminate the two center grooved lines from both:
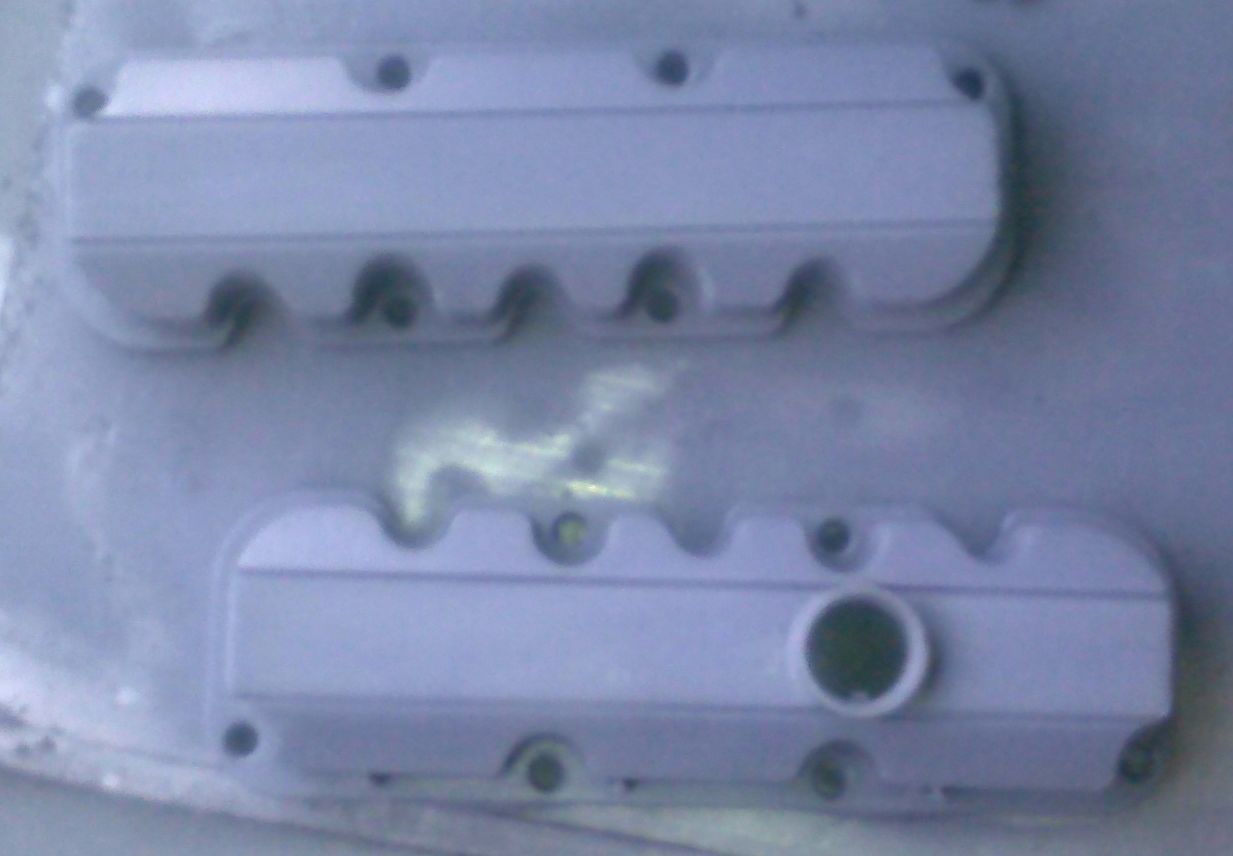
It is now sprayed in high-temp primer grey...next coat will be a high-temp silver chrome.
After that I will use vinyl lettering to mask off my lettering on the cover that faces the trunk.
Now with the vinyl lettering stuck to the silver chrome coat...I will spray it with blue anodized paint.
Once that dries, I will carefully remote the vinyl lettering and shoot a coat of high-temp clear coat.
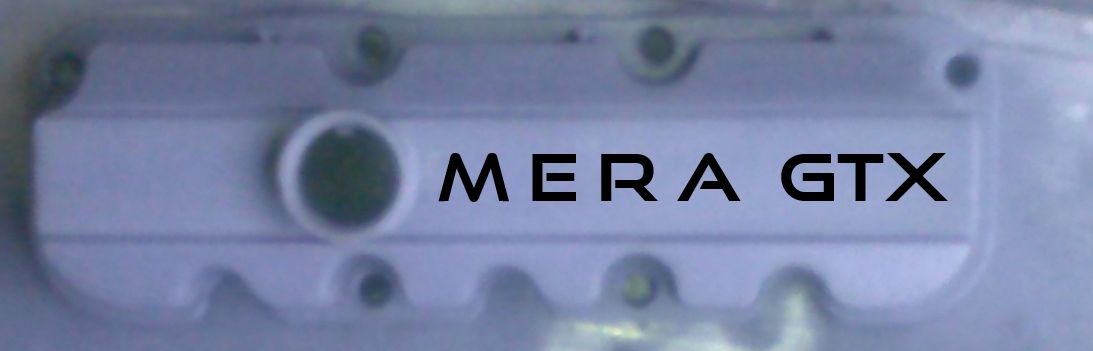
This should leave the valve covers in a nice blue anodized color and the lettering in a nice shinny silver chrome.
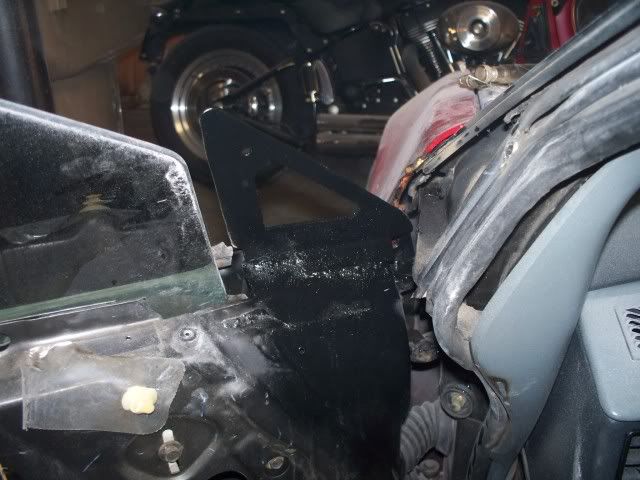
ALSO...with a bunch of the parts out of the way in the engine & engine bay,
it is giving me the room to finish cleaning up the engine bay like taking aluminum tape and securing the firewall material that has pulled up and away of the years:
I have taken a wire brush to any of the oxidized parts I can reach....need to get a few smaller brushes & some engine de-greaser to finish up...this is very slow and detail oriented work
and I also began some of the engine dressing (Mr Gasket)...what can I say, I love the classics
:
UPDATE: Finished the under body...completely rust-free and a nice coat of black Rust-o-luem.

I do not like the final product while utilizing the plastic stock valve covers...
So I went ahead and ordered a set of the Aluminum Valve Covers from ZZ Perfromance:
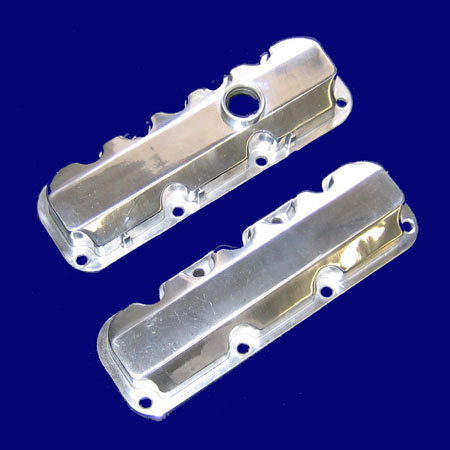
I will then shoot them with the same blue anodized paint to have it match the Supercharger exactly
When Stephen comes over next later this week, I am going to get him to assist in dropping the gas tank.
I will then do a through cleaning, light sanding and a good solid coat of aluminum color Rust-o-luem.
I also ordered and paid for 12" corvette drilled/slotted/zinc coated rotors drilled with the 5x100 bolt pattern & concentric rings from FieroGuru...getting close to having all the components for the brake upgrade
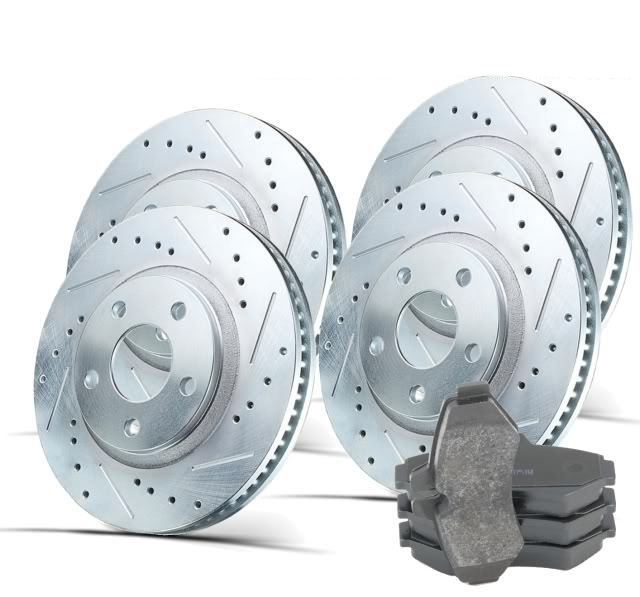
Just need to order my 88 CENTRIC SEMI-LOADED brand new front & back BRAKE CALIPERS:

Then in the next two weeks I will be ordering the Rear Bump-Steer Kit from now "AMS".
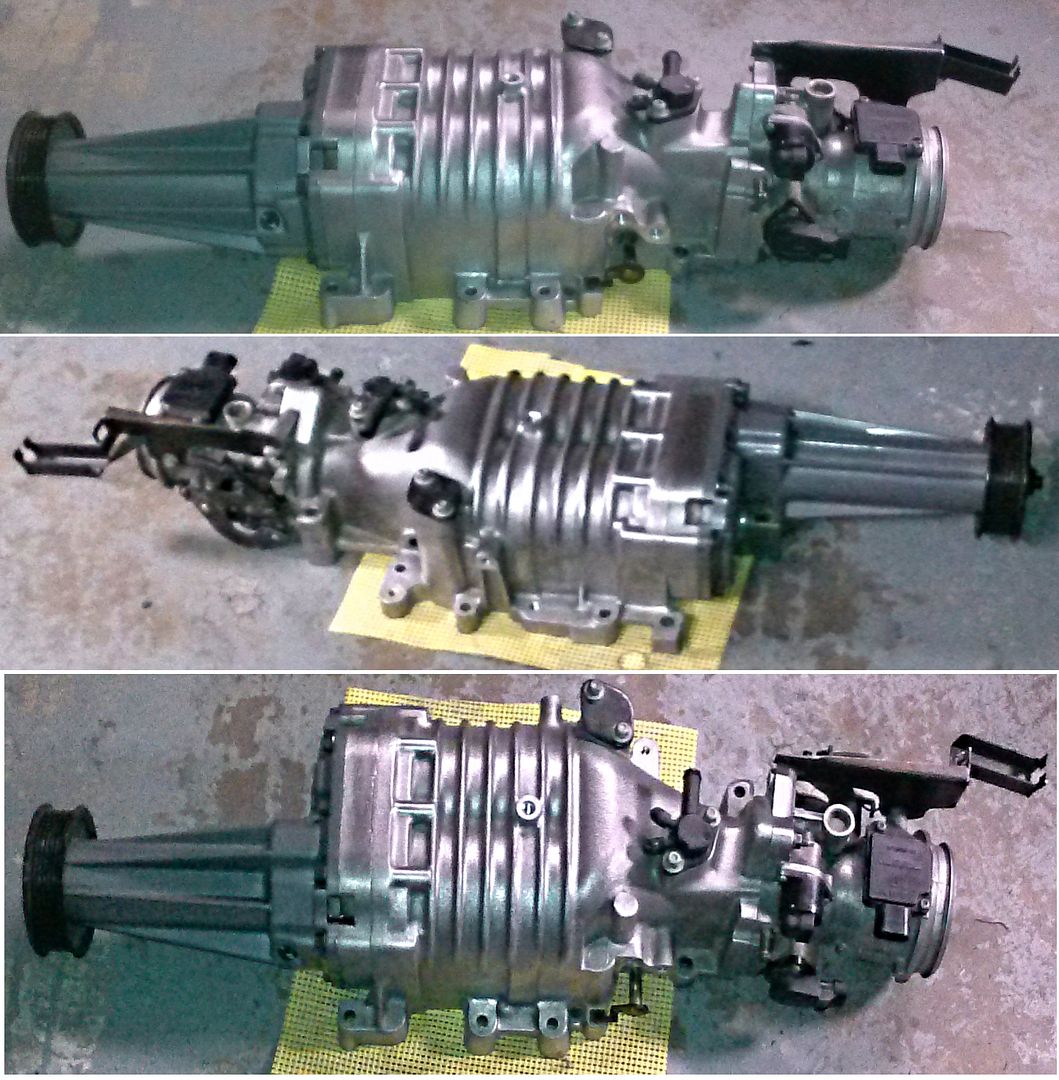
UPDATE:

...the last coat made the entire paint orange peel on the supercharger...I wish a few of you paint experts could explain what caused it to peel
This is what the look of frustration looks like:
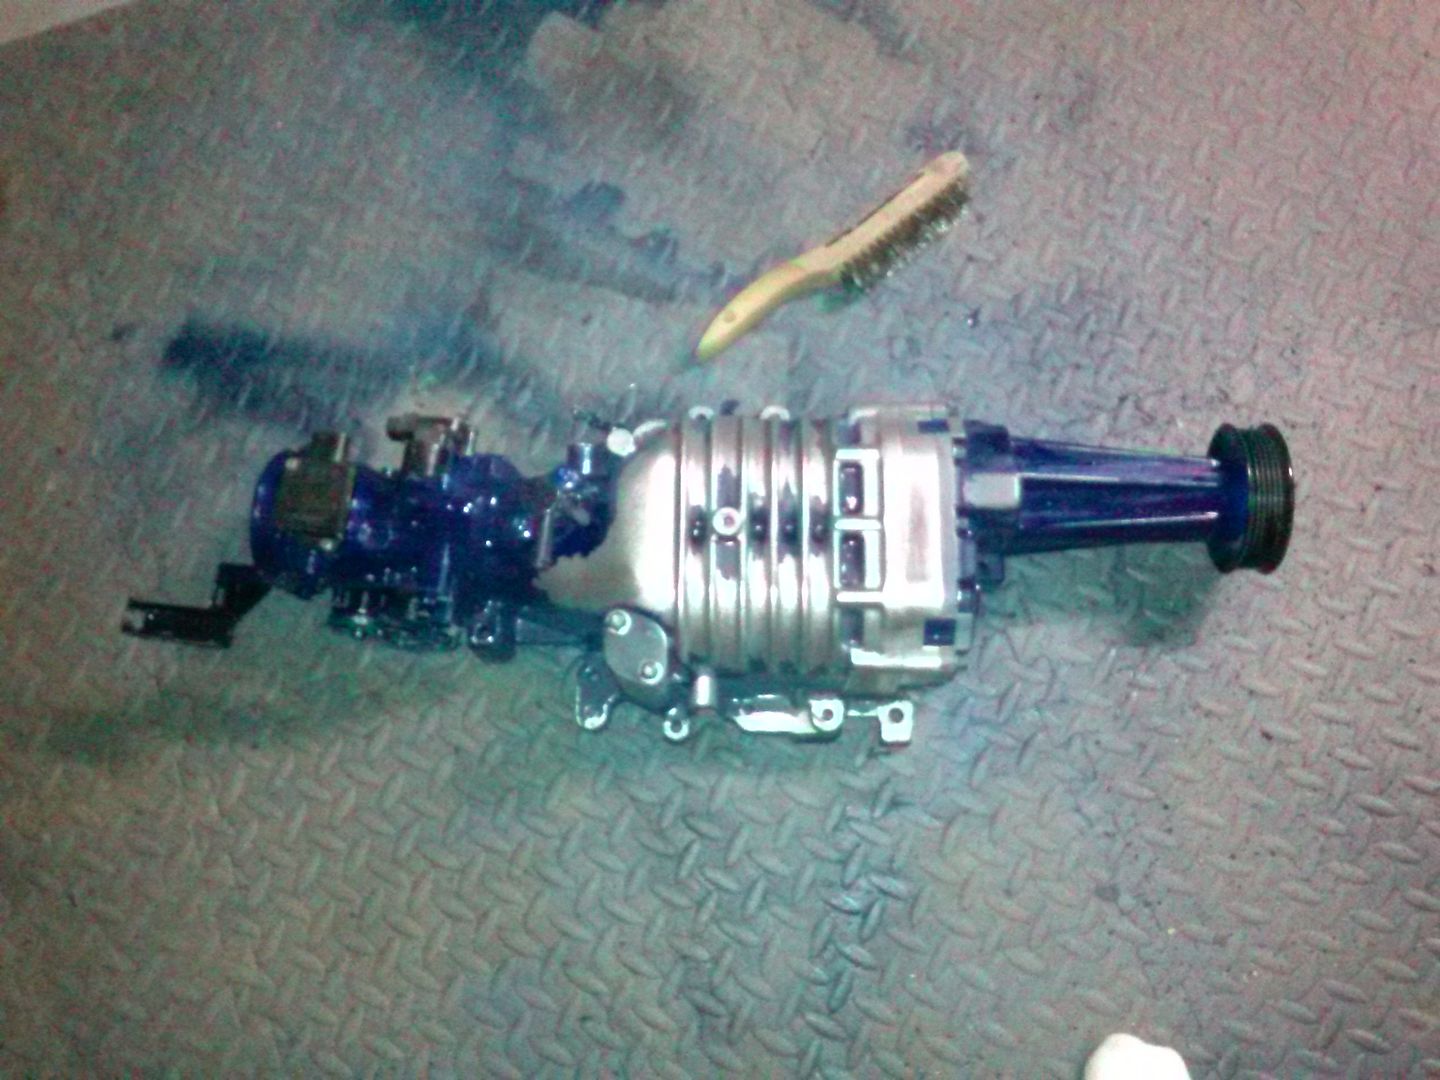
Will finish cleaning off all the paint and start from scratch & hopefully I will have better success round 2!
The outcome I truly want is to have the supercharger & valve covers to come out like the Mr. Gasket anodized blue used in many of their products. Have the blue anodized paint from dupli-color.
Sanded down the supercharger originally and clean it with dupli-color's cleaner/prepping spray. Then spray light coats. The color didn't want to seem to bond to some areas of the supercharger in the first coat, but in the 2nd those spots started to take color. After 4-5 coats everything balanced out, but was really darker than I would have liked...don't get wrong it was a nice dark anodized blue...just would have liked it lighter.
HELP!!! ...don't want to power coat...pain in the a@@...just high-temp paint
open to all ideas and comments!
UPDATE: UPS man just delivered Full-Time power steering kit from Chris at West Coast Fiero:
UPDATE: ZZP valve coves arrived:
UPDATE: Post man came a delivered my 12" rotors...one step closer to getting that upgrade completed:
UPDATE: I have gotten the Supercharger 95% clean of the dupli-color blue anodized off.
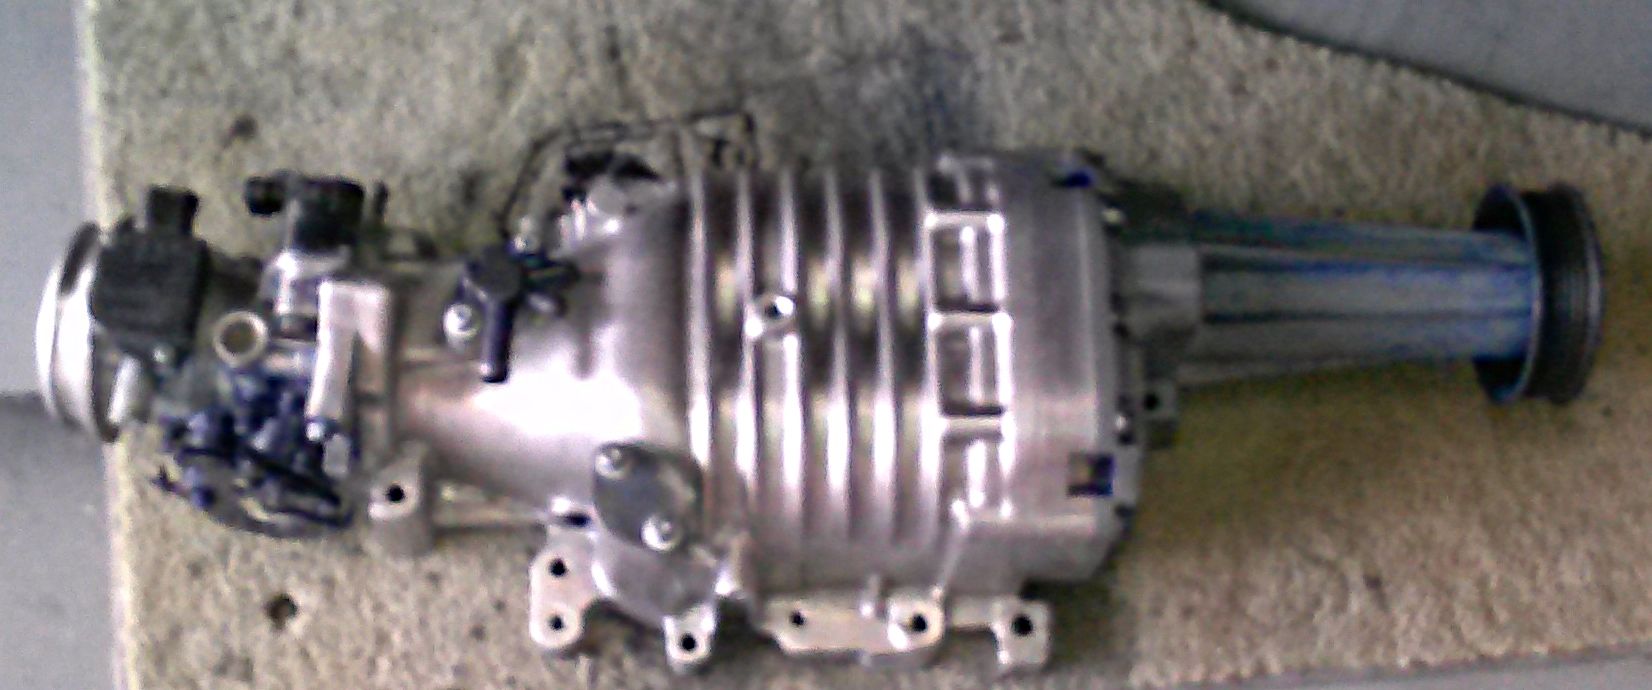
I have decided to try a different route this 2nd attempt and bring in a little assistance.
Later today, I am going to drop both my supercharger & valve covers off to a polishing shop.
They will bring my ZZP valve covers to a perfect flawless mirror finish, instead of the "B" finish that they sell and then finish cleaning up the supercharger and give it an amazing polish.
Once they all have a nice polish, its off to paint shop immediately...as in the paint shop is picking them up right after they are completed...the owner of the paint shop states...that we have a much better chance of getting a perfect outcome on the polished aluminum...the more we lessen the time between finishing the polish and spraying them...once you stop polishing...they start oxidizing!
Also the owner of the paint shop sold be on a transparent candie blue paint...that I think will look pretty awesome....time will only tell at this point
UPDATE: Here is a photo with the rotors sitting on the hub...just to get an idea of what they will look like:
UPDATE: Worked on cleaning up more of the engine bay area...trying to get everything nice and clean:

...still have more to do, but a little bit closer
Thanks Revin!
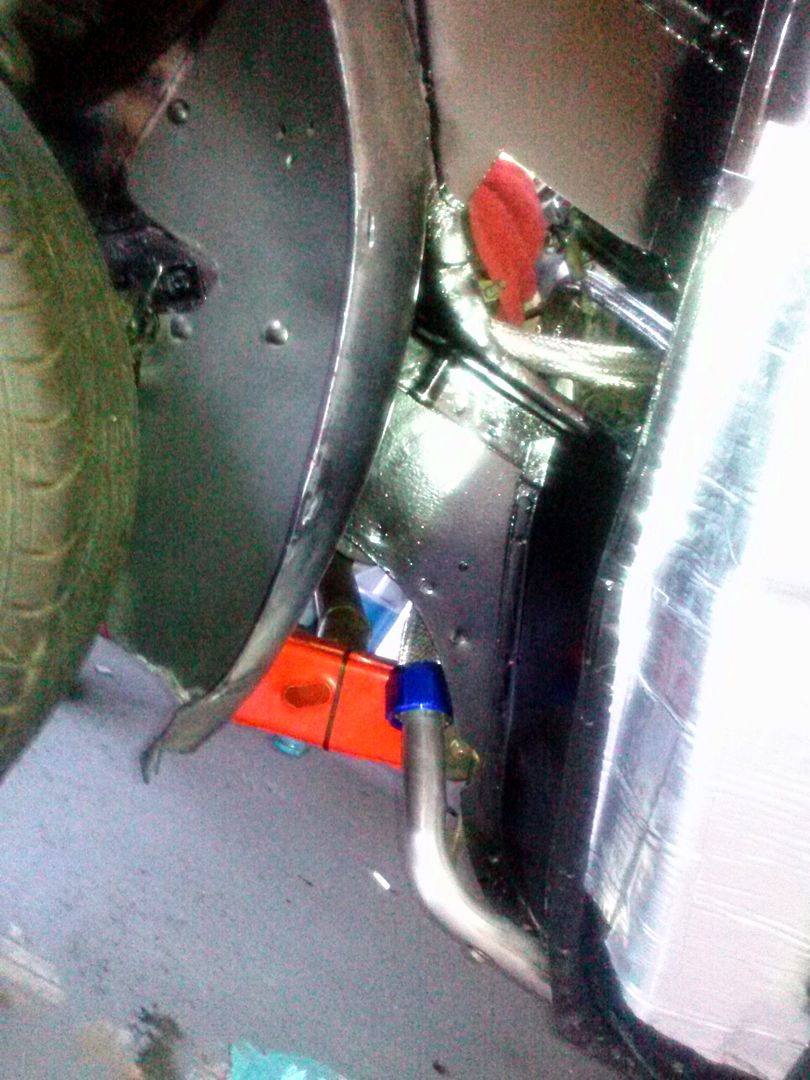
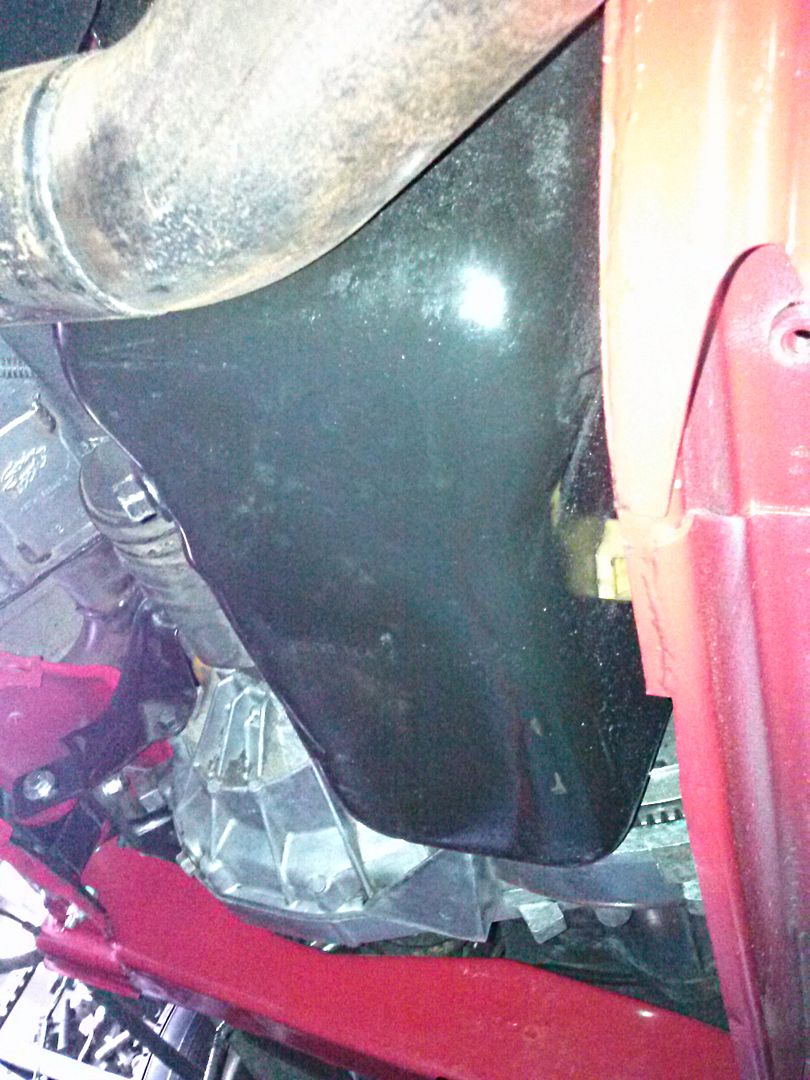
UPDATE: While cleaning the engine bay...I took off the driver's side engine bay radiator hose...because when the engine swap was done the hose laid against are part of the exhaust pipes...the mechanic that did the swap thought it would be ok just to wrap it in fire cloth a few times...the engine had less then 3 hours of drive time on it and it was already starting to melt the rubber.
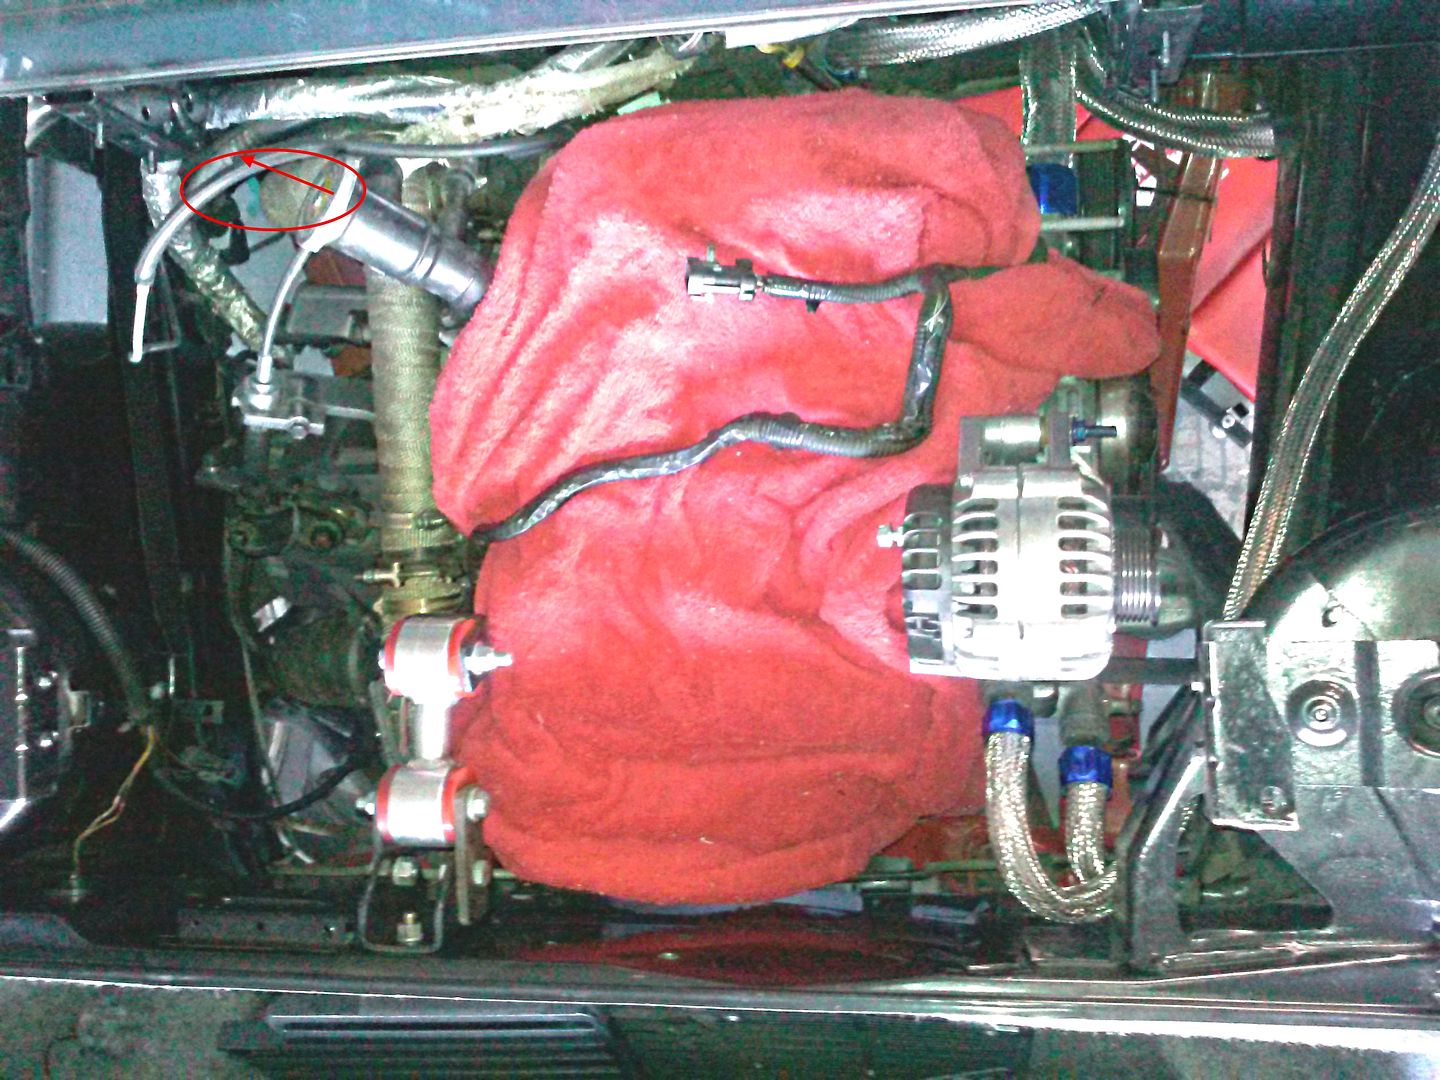
And I wanted to do my standard Mr. Gasket woven hose covers...but that would have only amplified the problem...so here is the solution I came up with:

This will allow me to route the now flex pipe away and still maintaining a polished look...will have the ends done in the Candi Blue transparent that the valve covers and SC are being done in
UPDATE: UPS dropped off my air duct to properly relocated my air filter
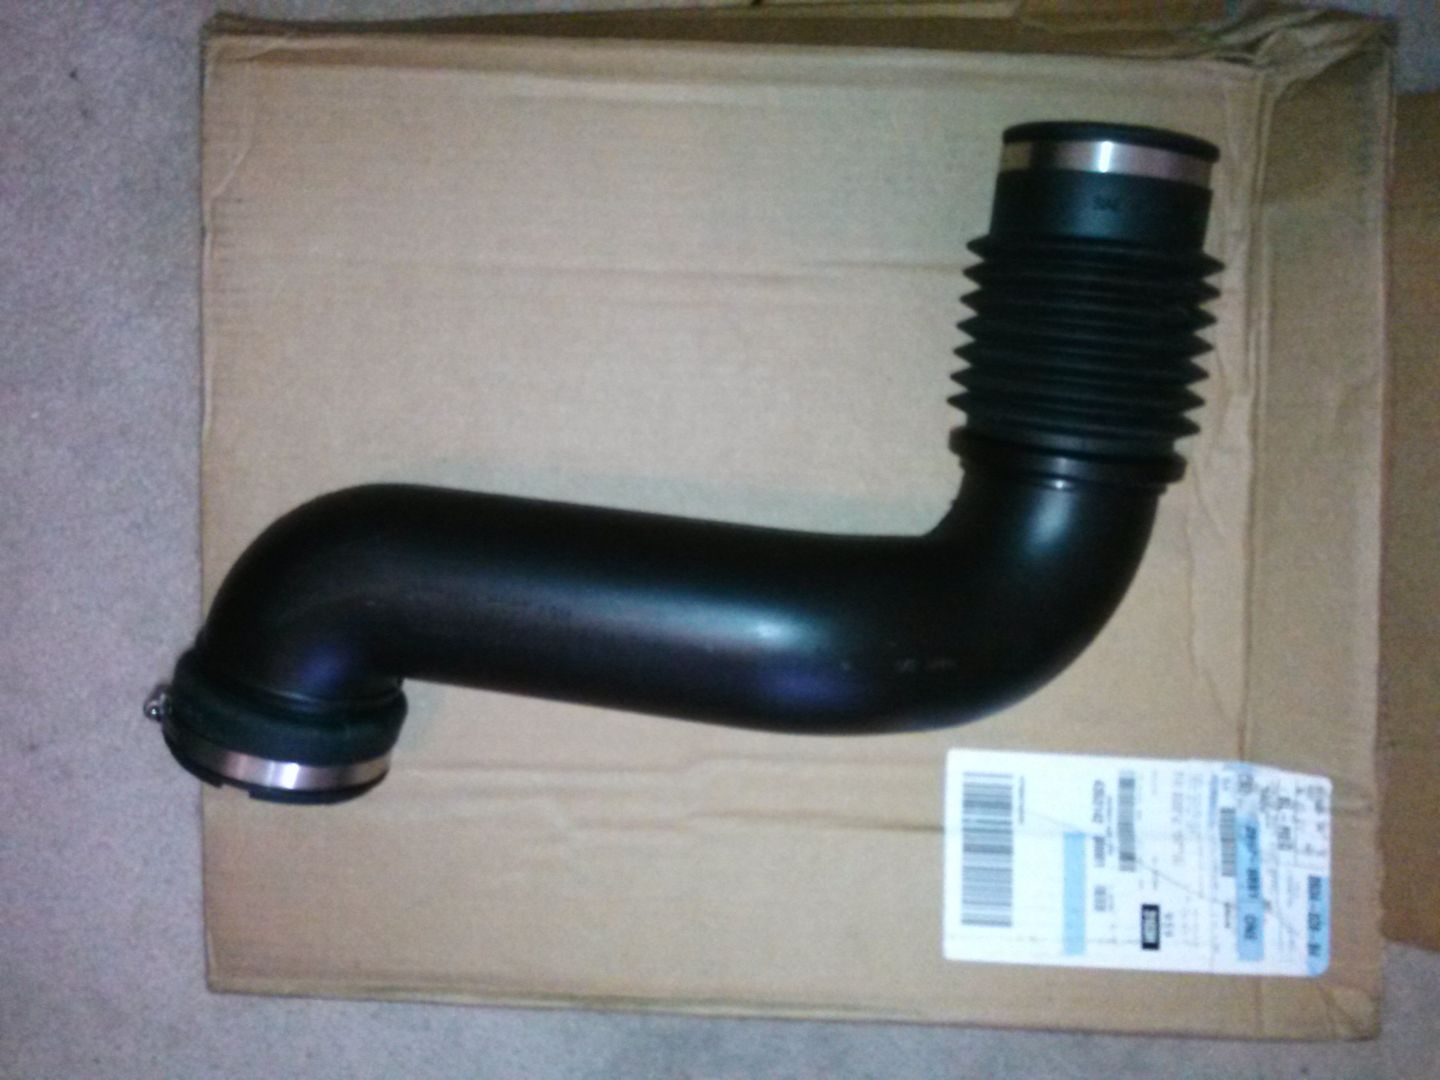
UPDATE: UPS man just dropped off my flex hose:
UPDATE: Installed Flex hose:
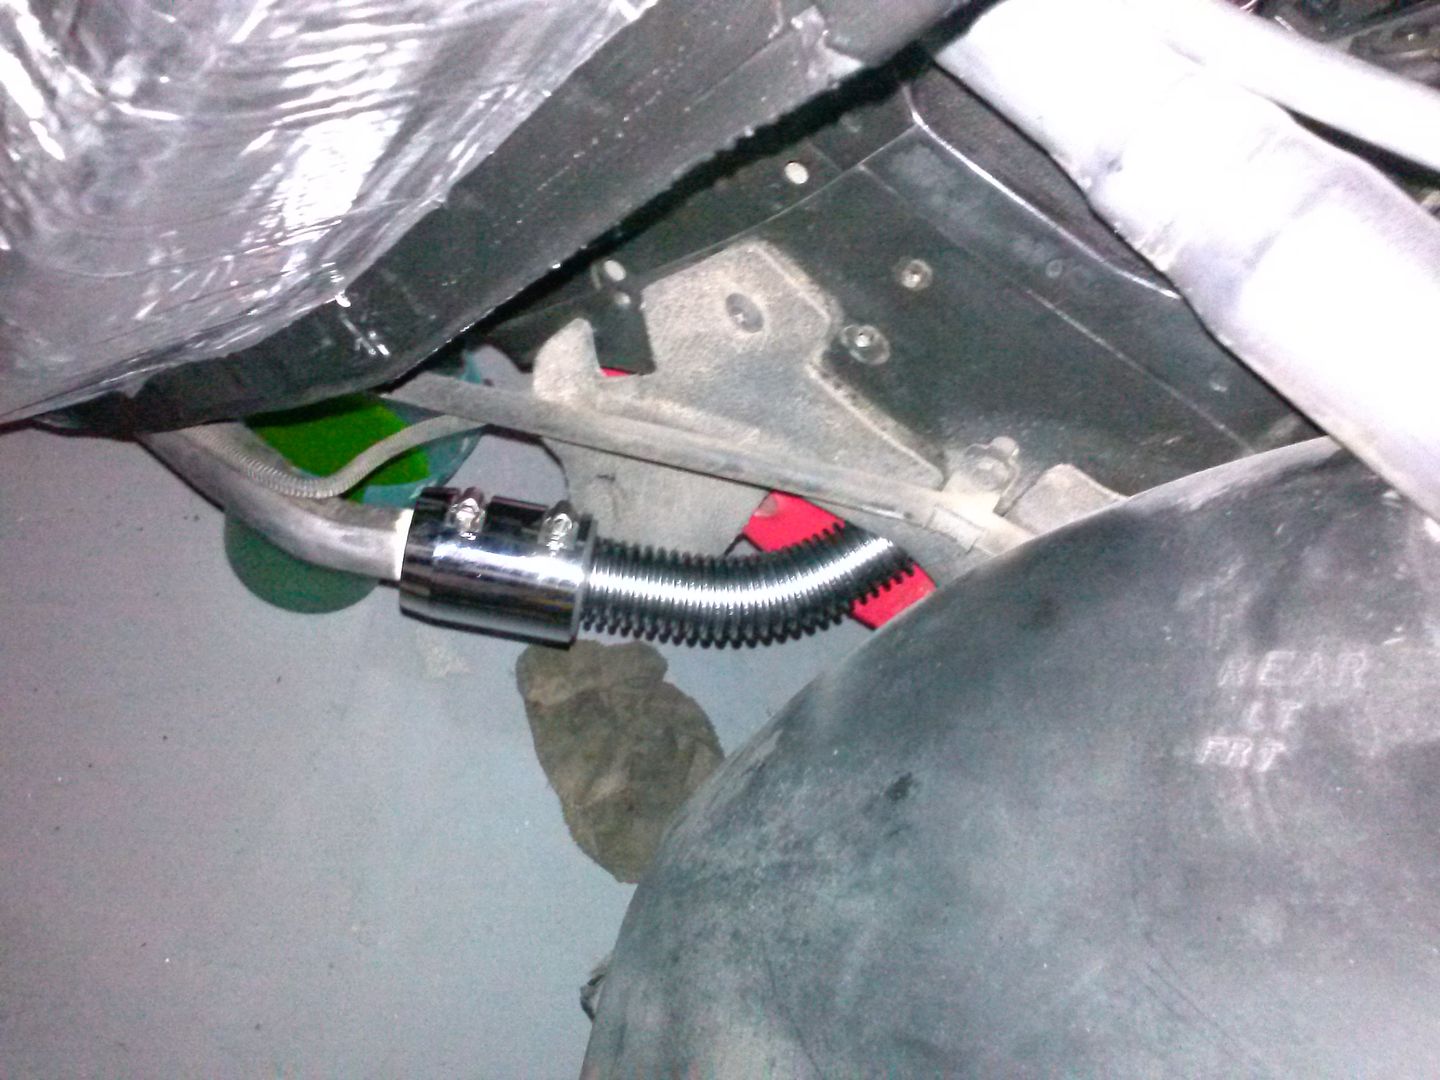
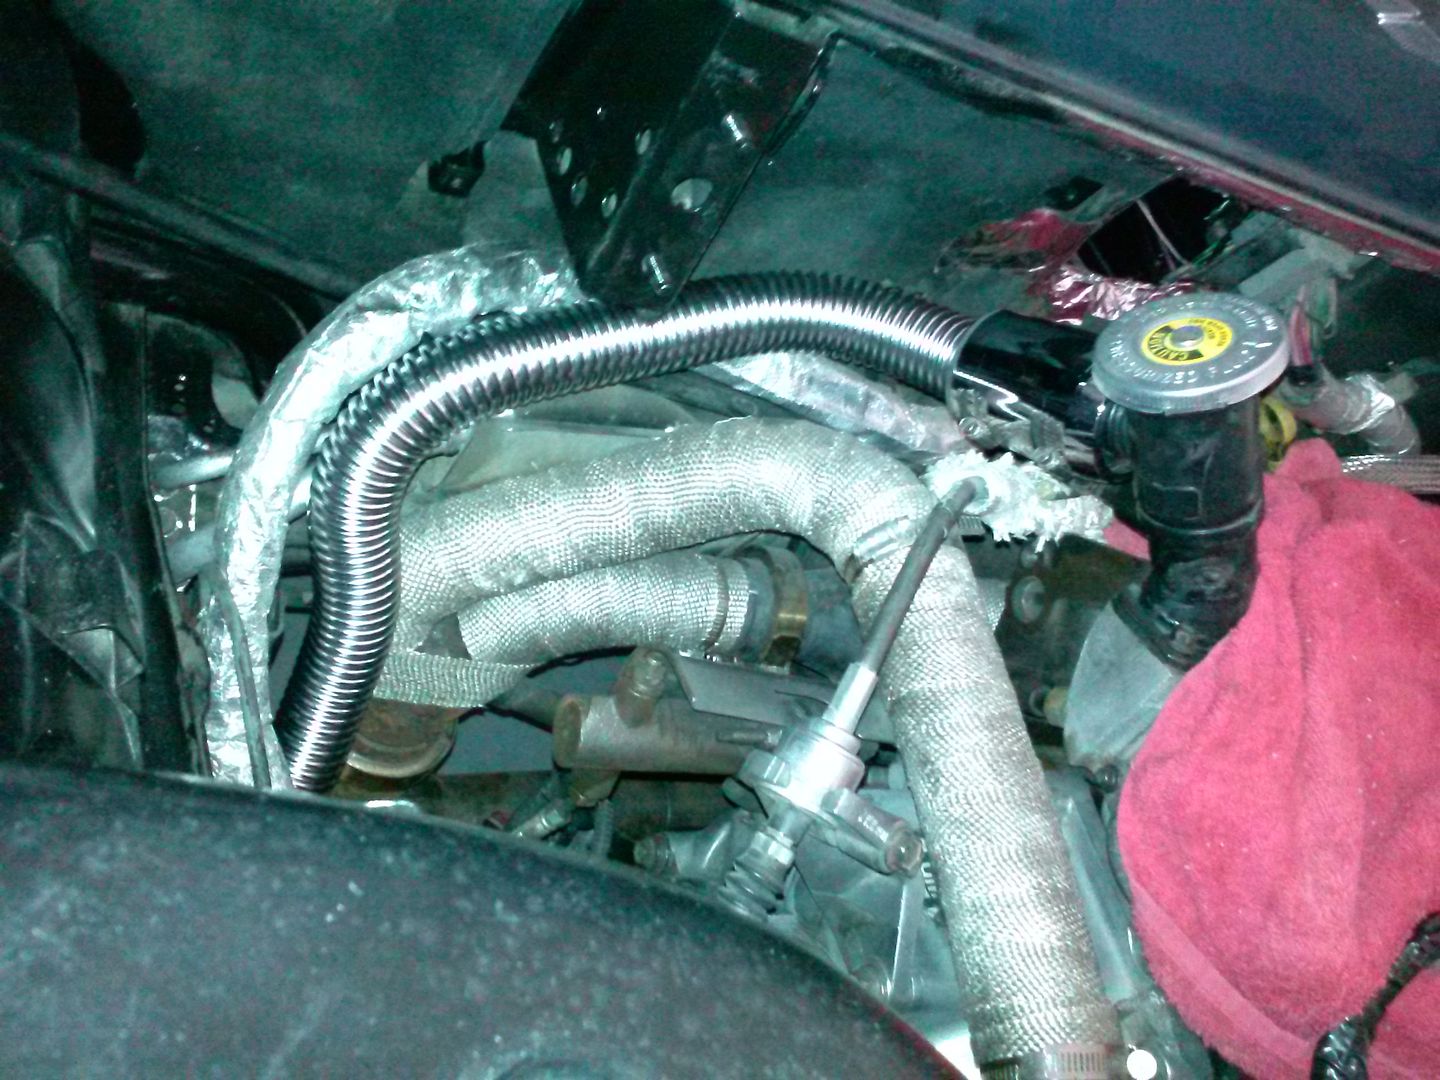
Now the hose does not even come close to the exhaust...pict above is deceiving...there is a 2" gap
I have the eMachineShop files for the 3 images below:
UPDATE: Member Tom Slick is purchasing my complete 86 GT original body since its getting the MERA body.
He is scheduled to come and pick it up tomorrow!
UPDATE: from Rob (Amida): Major components demolded. Instrument pod prep; mounting tabs added.


UPDATE: Couldn't leave well enough alone...its in my nature!
So I did one last try at the Dupli-color blue anodized paint and WOW! SUCCESS!
...the camera built into my phone doesn't even serve it justice:
| | | quote | Originally posted by KOS:
what did you do with the side camera bit? can you explain a little more and maybe post a couple of pics?
|
|
Dan,
***Should Add that this upfront in the state of TX, you legally only have to have one mirror period and the rear view mirror covers that!
...so check for what is legal in your state.
Sure glad to share! I will be utilizing the following hardware:
qfiBRfChfi-wg~~60_12.JPG)
which will be side flush-mounted on the plastic triangle area behind where the mirror would traditionally be located. The am having the plastic triangles reproduced in metal to add strength.
On the inverse side (inside the car) I will have these mounted to the inside post with a thinner 4" flex goose neck style mount with same ball insert to replace the stock mount:


Also UPDATE: I have been doing a little tweaking to bring everything together:
[This message has been edited by TXOPIE (edited 10-19-2013).]


 too bad you werent closer we could be building together!
p(dpV)BQSRRSGWSw~~60_12.JPG)


Mg~~60_3.JPG)


Gcv!~~60_3.JPG)


ZysBPjdwJLoiw~~60_12.JPG)


 [/UR
[/UR