The rules are pretty open regarding brakes. The whole LeMons thought is to keep costs "low" by placing an overall value on the car. That excludes safety equipment (brakes fall under that category), cages, wheels, tires and similar stuff. Having said that, if I show up with a set of wilwood 6-piston calipers, I'm going to get penalty laps. But if I choose to use say lincoln continental 4-piston, stock brakes, all is good.
I have additional front calipers, just was unaware of a potential issue. That's why it's great to have a resource such as this forum.
IIRC, all the geometries of the front and rear calipers are identical... The piston bore, the mounting bolt hole locations, the rotor position WRT the mounting posts. In other words, I think they're a direct bolt on in the rear and won't change any of the braking characteristics.
That would certainly be the simplest approach and shouldn't garner any unwanted attention at tech.
Well, we've just finished our last LeMons race of the year (Thunderhill, September 14-15, 2013) A year and some months after the point I left our continuing narrative. And yesterday we finished the last Reno-SCCA PDX/open-track track day at Reno-Fernley Raceway. So I should have time to move this story right along.
So we left with a blown engine. The $100 Pick-N-Pull Special 2.8 out of an '86 that we had been running and abusing let go coming off turn 23 onto the front straight at Reno-Fernley. No surprise. We saw and heard it coming. And it forced us to actually start working on our 3800SC transplant.
Surprisingly, I cannot find a photo of our damaged 2.8. Essentially, it looked like we spun a bearing and had a catastrophic failure of the rod. A little extra cross-ventilation of the oil pan was the result. Along with a missing chunk of the pan rail.
What we started with was this 3800SC Series I engine.
The source of the power plant was a '94 Buick Park Avenue. We did get some questions about using a Series I versus a Series II. But it's what we found during an exhaustive 12 minute search on Craigslist. And, to be honest, when we found the car we knew nothing about Series I or Series II. I don't think either of us had actually seen a 3800. Certainly I couldn't even identify a Park Avenue. As I write this, we've now actually bought four of these boats. But that's getting ahead of the narrative.
As anyone who has done such a swap knows, the wiring harness is a huge task. I'm not going to get involved in telling much about that part of the swap. I'll just say that it's a good thing that we had over two months time to make it all work. Ryan's (http://www.gmtuners.com) wiring diagrams were helpful as were several of the resources he makes available. As was the case with modifying the original 2.8 harness, having a real electrician on the team is something I can highly recommend. We did talk with a local tuner who recommended that at the very least we get a '97 and up (preferably up) PCM for use on the conversion. Looking around the PCMs seemed to be in the $100+ range and uncut harnesses were going for around $125. So when we found a package deal on e-bay for both the PCM and harness from a '97 Park Avenue going for $125 we made the leap. We were no longer using the C-200 and C-500 original connectors for the Fiero, so Rich utilized the bulkhead connector from the "94 Park avenue to transition from the interior to the engine compartment.
Oil Pan #3. Rich had to fabricate an oil pan for the original '88 engine. And found out that the '86 engine we actually used was different, requiring a second oil pan. The 3800 is, of course, entirely different. How different we didn't fully realize until I tried to order a new oil pump for the 3800. In order to get a jump on the work, I tried ordering a new pump before we even opened the new engine. Huh? I can't even order a new pump at Napa? Just a rebuild kit? We dropped the pan and couldn't even find an oil pump. We had a lot to learn about these new engines. Rich bent up a new pan with a larger lower sump as well as an additional 2" in depth. Again, we wanted to combat oil starvation through the long, sustained turns on the race track. But we were now faced with a problem that we had not encountered with the conventional old style oil pump found on the 2.8. We couldn't easily fabricate a newer extended pick-up tube.
After some head scratching, we settled on fabricating a spacer between the block and original pick-up tube. I cannot find a photo of the original 2" spacer. This later 1" spacer should show what we were doing.
We then bolted the stock pick up tube through the spacer with appropriate gaskets to the block.
In retrospect, 2" of additional depth added to the pan was a bit excessive. The pan, and specifically the drain plug, became the lowest point on the car. Later iterations ended up with a 1" spacer and a 1" addition to the sump depth.
[This message has been edited by DonP (edited 09-29-2013).]
We were now faced with making motor mounts and accessory mounts. Because this is strictly a track car, we did not have the same considerations that a street car has. That means we are free to mount the engine and transmission solidly. No rubber needed.
To start, we placed the cradle with the original 2.8 on a set of saw-horses. Using some adjusters built into the legs, we leveled the saw horse and cradle. We then took measurements at several points to determine the height and location of the transmission and the centerline height and lateral location of the crankshaft. Next, we bolted the 3800 to the Getrag and suspended the combination over the cradle and determined the location of the needed mounts.
Okay, just a couple quick photos of the transmission mounts. On the rear mount, Rich used the original metal framework after removing all the rubber components. I believe Rich used a 1.5x1.5 square tube to essentially mimic the thickness of the rubber mount. This allows us to unbolt the new mount from the cradle in the same way the original did.
On the front mount, Rich basically made a piece that wrapped around the corner of the cradle to spread the load. He then cut an angle on the end of another 1 1/2 x 1 1/2 square tube to match the angle of the transmission mounting plate. He positioned the tubing to match the plate, transferred the center on the mounting hole to the tube and essentially had a new mount. Once everything was bolted into position and all mounts made, he welded the base plate to the cradle. Simple and strong.
One note. On the front transmission mount we found that the cradle was cracked through the original mounting holes. We ended up plating the inside of the cradle to both repair and strengthen the area. That was before CC Rider started offering his cradle stiffeners. https://www.fiero.nl/forum/Forum4/HTML/064284.html I haven't used CC Riders product but would still heartily endorse using the piece.
Rich then moved to the engine mounts. We decided that we wanted two engine mounts, one on the front, one on the rear. The thinking was that with two independent mounts, the dog-bone becomes redundant. Not that we would remove the dog-bone. We like redundancy.
On the front side, towards the passenger firewall, Rich made a flat platform that fit to the contour of the cradle. this gave us a flat place to bolt a new mount to. He then welded in a couple 1/2" flange bolts to the underside of the new platform. This would give us the bolt-together assembly we wanted without the problem of floating, hard to start bolts that slow everything up. Once that was in place, he but a piece to match, drilled appropriate holes to match existing holes in the block and we had a solid mount.
I make this all sound easy because I was essentially just sweeping the floors and painting parts.
So far it was going well. But we wanted to change the front "U" mount to two independent mounts. We lacked a really good pick up point on the cradle at the back side of the engine. We wanted a point on the cradle basically below the dog-bone. While looking for inspiration, we looked at a spare cradle in the shop. This was out of a 4-cylinder car. That cradle had an additional pad on the driver's side designed to support the 4-cylinder transmission. Hmmmm. A quick pass of the plasma cutter gave us a new pad that we could weld to our six cylinder cradle. Once the pad was in place Rich did up a quick and simple mount for the back side of the engine.
The rear mount was designed with a step to help with rigidity.in addition, we gained a bit of needed clearance with the oil filter housing. It also wraps around the passenger side axle with lots of room to spare. The real proof of concept is that at no time while installing the various bolts do we experience any bind. So I believe we were successful in not stressing any of the supported components..
[This message has been edited by DonP (edited 10-01-2013).]
There is a ton of information out there about the components necessary to swap a 3800 into the Fiero. Check out the "official 3800 build thread list here https://www.fiero.nl/forum/Forum2/HTML/079560.html That abundance of information is also a problem because it means there are options. Try figuring out the definitive answer on just selecting a fuel pump. You got the Walbro 255lph, a couple versions of the AC/Delco EP3XX pumps, Bosch 60225 and some with funny names like Deatschwerks DW200. Deatschwerks? huh?
Eventually, we followed Darth Fiero's advice ( https://www.fiero.nl/forum/F...HTML/123315.html#p17 ) and went for a AC/Delco EP-381. So I dropped the tank for like the third time and installed the new pump. As far as the rest of the plumbing went, Ryan gave us some good direction for the necessary components at his GMtuners.com site. At each of the stock fuel lines we converted from the 16mmx1.5 couplers to a -6 AN fitting. We used Earls Performance fittings 991955ERL adapters from Summit Racing. http://www.summitracing.com/parts/ear-991955erl
We used an appropriate fuel rated hose and -6 AN fittings with barbed ends to make the actual new lines. No braided steel lines here as they are just too large a red flag for the LeMons inspectors. That and we are already spending way too much on this car.
Okay, braided steel lines might be too much, but who can resist a bit of blue anodizing?
A big problem we faced was in dealing with connecting the throttle cable to the throttle body. Again, Ryan has a great write-up including pictures and instructions. The problem is that his write-up and indeed most of the info out there assumes your NOT using a Series 1 engine. We weren't bound by that bit of conventional wisdom. The Series 1 has a bracket that hold the stock throttle cable. This bracket comes more or less 90 degree to the throttle body directly towards the drivers position in the original donor car. That means the cable heads directly towards the trunk in a Fiero. And the mechanism is different from a series II engine where the cable comes from the intake side of the throttle body. I asked for help here on the forum and got the answer that a 4-cylinder cable would work. I purchased 1... well actually 2 before I found out that "it will work" might have multiple meanings. Ultimately, Rich and Bobby were able to rig up a bracket assembly that did work while looking properly LeMony.
I used stock cable on my series1 sc ,and n/a cant get pic of sc car but can get you a pic of the n/a if it would help... my cables were long enough to turn them back around where it pulled tb correctly ,
------------------
87 GT series 1 3800sc (7.597 @88.53 1.579 60ft) (series II swap in progress) 85GT Northstar/ 4t80e 86GT 3800 n/a My Build
Thank you very much for the offer, JB1. But I'm actually a year back in the story and, well the Series 1 has exited stage left. Rich ultimately found the same thing, that the original cable could be made to work. Just.
So last night, we happened to remove the rear cradle from the car. I took the opportunity to take a quick shot of the front engine mount pad. A couple posts above, I showed the engine mount that we had made for the front of the engine.
To make it actually work, Rich cut a piece of channel to straddle and more or less conform to the cradle. The cradle in that corner kind of drops from the side-rail down maybe 2-3 inches to the side rail. Rich cut the channel to match the cradle contour and create a flat, level pad for the engine mount to rest on. He then drilled a couple holes welded two 1/2" flanged crowned/crimped locking nuts to the underside of the pad.
By welding in the nuts, he could box the ends for additional strength. The final result is what you see here.
Look past the dirt in the picture above. It was late when we got the engine out and interestingly enough, Photoshop doesn't have a "make it look like it was freshly cleaned" button. But you can also see that the alternator was mounted low and at the front edge of the engine. I don't recall the over-riding reason why we mounted alternator in this position, but I think it was in an attempt to keep the back area cleaner and more accessible.
Later on, when we added power steering, the placement of the alternator in this position was very fortunate. But that's like 6-7 months from this part of the story.
Let us start with the final piece. This is the alternator actually mounted into the finished bracket.
Recognizing that the alternator bracket needs to have minimal flex Rich figured that we needed to make the mount or bracket out of either 3/16 or even 1/4" steel. He spent some time looking at what was available in the area we wanted to mount the alternator and figured that we needed to have a 90 degree bend in the parent material. We can do alright bending 20 gauge aluminum, but this was outside of our capabilities. Unless we went blacksmithy all over a piece of steel plate. Rich's wife Chris said no way to the idea of setting up a coal fired furnace in the garage. So the solution was to look for something that already had that 90 degree bend in it. What he found was a square...well I'm not sure what to call it. It was a remnant at the local steel supply joint. It might have started life wanting to be a beam of some sort. But it is an 8" square 3/16" wall (maybe 1/4") piece of steel. Rich whipped out the plasma cutter and went to work.
You can see the small tab that was added to further brace the top arm to the cylinder head. The lower arm mounting hole (towards the outward end of the arm) was turned into a slot to allow some conventional tightening of the belt. This was to compliment the belt tensioner and give us a bit of breather room in the tightening function.
We used a stock '86 Fiero alternator. We did have the alternator from the Park Avenue, but Rich elected to use the Fiero. Something about the Park Avenue requiring a somewhat more complex and therefore possibly troublesome method of exciting the field. Or it might have just been uglier, I don't know.
[This message has been edited by DonP (edited 10-14-2013).]
So, lets say you weren't racing a LeMons car with a $500 car value target. What would you do for a clutch and even more importantly, a flywheel. Judge Phil (Chief Justice of the 24 Hours of LeMons Supreme Court) would tell us to haul our butt down to the local pick-n-pull and find the best clutch disc and pressure plate that can be bent and hammered to fit and go racin'. So naturally that is exactly what WE did!
Judge Phil, judge of all that might be "cheaty" in the LeMons race. If you are even suspected of doing something that might be cheaty you will be assigned "BS" laps.... purely at the judges' discretion with no chance of appeal.
Now the rest of this is purely a hypothetical discussion of what we MIGHT have done. Or rather what some OTHER team might have considered doing.
When you look at the flywheel situation for these conversion cars things get a bit confusing. As most of us on this forum know, the 3800SC was not available with a manual transmission. If that other team wanted to continue using a Getrag 5-speed, they would have to find a flywheel. A couple dealers like WCF offer a flywheel that has been modified and balanced for the purpose. More popularly, folks are pulling the flywheel out of 3.8 Camaro/firebirds and having them turned down and rebalanced. And then, there are a couple outfits offering aluminum flywheels. In fact, Spec Clutch offers an aluminum flywheel specifically for the 3800/Fiero 5-speed conversion. http://www.specclutch.com/conversion_combos/view/9
We have used aluminum flywheels in the past for track/race cars and really like the way they enable the engine to build revs very quickly. We sat down and did the math and elected to go with an aluminum flywheel. We did have a problem that the first flywheel we got didn't have the external weights to balance the engine. Spec sent a second with the appropriate metal plate attached to the back of the flywheel. The only part we were concerned about was getting verification that the Series 1 balance was compatible with a Series II flywheel. Nobody was willing to offer a definitive answer.
Side note: when we ran it on track I think there was a slight vibration, but could not eliminate the solid engine/motor mounts as the true source.
Choosing an actual clutch was very confusing. There's a ton of info offered here on the forum. But of course much of it is anecdotal. The "XYZ stage 3May work wonderfully for one person while it totally sucked for another. I can only say what we did.
Originally, we were trying to track down a triple disk race clutch. We have experience with these on track and they just plain work. But trying to find one for this application was very difficult. A couple folks said we could have one special ordered/manufactured. But that was a bit intimidating when factoring in the cost. And reality set in when we admitted the fact that we were not building a fire-breathing full race engine anyway. This was a used street motor out of a big boat Buick!
Being the ...uh, "seasoned" racers we are, the only name we recognized was RAM. One of the several threads we looked at https://www.fiero.nl/forum/Forum2/HTML/125998.html pointed out a RAM part number for their heavier duty clutch to fit a stock application. So we ordered up a new RAM 88644HD clutch set which also included a new throw out bearing.
To be honest, I do not know if that particular combination was the right choice for us. First, functionally it works very well for us. The take up is nice. I don't think it has ever slipped. And if we never took the engine and transmission out we would have no reservations about recommending the whole setup. But I need to mention a problem with this combination here in the story, even though it actually comes about later on.
Possibly the Series I is slightly different with regards to how far the crank extends out of the back of the block. Possibly the Spec flywheel is slightly thicker than desired. (I've seen some discussion here on what the correct thickness should be. https://www.fiero.nl/forum/Forum2/HTML/127322.html ) Or possibly the RAM clutch cover is just too tall. In any case, when we later pulled the engine we found this.
We did take a small die grinder and smooth out the groove and have had no problems since.
I'm going to stay out of the debate on flywheel bolts. I'll just say that we elected to use grade 8 bolts and not the throw-away after a single use torque-to-yield GM bolts. Instead, I went to Fastenal, picked up the appropriate bolts and torqued them down according to the Fastenal reference sheet. Used Loctite and all has been well to this point.
There's a well known theorem concerning working on race cars. The amount of work will always expand to slightly exceed the amount of time available to finish it. Maybe more than slightly.
Just a couple details that we had to work out. With the 2.8, we had used a very short glass pack. I have posted pictures near the bottom of this earlier post. https://www.fiero.nl/forum/F...L/090867-3.html#p101 With the 3800 now going into the car, we upped both the diameter and length to match. So our 9" muffler now grew to 23 inches.
Recall that we are using the series 1 engine. One thing that worked nicely for us was the fact that the series 1 exhaust incorporates a donut gasket as opposed to the flange that is used on the series II exhaust. That's pointed out with the arrow in the following photo. This configuration gave us some flex in the system without having to use those braided wire exhaust coupler we see used elsewhere. Without having a trunk, we were able to create some nice curves in the pipe as shown here.
Obviously we used a single exhaust pipe which terminated nicely in the stock exhaust cutout in the rear bumper cover.
Rich checked out several threads here on PFF showing where folks had relocated their 3800 coil packs. Because of the fact that we seem to be removing the engine on a fairly regular basis, and his desire to keep the wires as short as possible, Rich elected to basically mount the coil pack to the engine. He made a bracket to allow him to turn the pack 90 degrees and run along the top of the valve cover. This gave us just enough space to clear the hood hinges and the firewall top ledge.
The wiring took quite a bit of time and we were just a couple days from needing to head to the races. We had selected a local speed shop. Infinite Velocity (http://www.ivmotorsports.com/store/home.php ) to do the programming on our PCM or ECM or ECU or whatever it's called. We had the computer out of the '97 Park Avenue, not knowing of any differences with the more desirable later computers. . We showed up at Infinite Velocity and talked with Jay, the owner. And Rich presented him with complete wiring diagrams and pin-outs for the entire conversion. Being totally out of my depth, I quickly left and went back to work. Rich actually spent a couple frustrating days trying to get the car running.
Jay was able to do that magic stuff tuners do to the computer. Stuff like disabling the Auto tranny codes, remove the theft system and setting the rev limiter. On that last point, because this was a stock and well used original engine, we elected to keep the factory rev limiter settings. If I remember correctly, that was near 5800 RPMs.
Two big problems came out to bite us. First was a 12 volt power lead that was supposed to connect to the PCM. It didn't show up on ANY of the wiring diagrams we had. But Jay had access to some more complete sources than we did and finally tracked it down.
Secondly was that we did not have a MAP sensor. This was spotted fairly early in the process, and Jay ordered in a new unit. Unfortunately there were two different units available and you can guess which one was sent over by the parts house. I don't know what the sensor did, but the car would sometimes start and kinda idle, but that was all. We often times had to use a shot of starting fluid, something we usually only use in an "everything else has failed" situation. Not really good stuff. Because of this, we got side tracked with the fuel pump. Evidently, the computer needs a specific fuel pressure spike during the starting process. And MAYBE we weren't getting that. So I headed over to Summit Racing and picked up a Walbro 255 to replace our new AC/Delco. No joy, but we killed another day with a trip home to drop the tank and make the change.
Ultimately, the day before we had to leave for the track, one of the tech's questioned the MAP sensor. It didn't look like others he had seen. We got the replacement in, the car now started (usually) and would rev up. We took a can of starter fluid just in case.
[This message has been edited by DonP (edited 11-01-2013).]
Having fought the computer gremlins into submission, we took off to Thunderhill for the next LeMons race. That was September 15-16, 2012. We were a bit worried about how the car, now equipped with the supercharger, would be received by the judges. I mean, when we installed new shocks, the judges questioned us about using "racing" springs and shocks. The LeMons and (I believe) ChumpCar take their mission very seriously. Trying to gain an advantage at the expense of the "spirit" of the race is frowned upon. We had however approached the head judge, Judge Phil, very early on in the process. Let we quote our e-mail where we attempted to get the okay for our new engine.
------------------------------ Quote ------------------------ OK, we'll say $100 residual. That's enough to get a Bonneville SSEi engine.
On 7/17/2012 5:29 PM, Don Alexander wrote: Judge Phil, sir! I am looking for a residual value on our Pontiac Fiero. We last ran at “the track formerly known as Infineon” in March where we finished strongly in the top 80% We are looking for a residual value that will allow us to change out an engine. Ours developed an excellent crankcase ventilation system when part of the reciprocating mass declined to reciprocate in a synchronized manner. We were trying to demonstrate to the SCCA boys that, just because it’s a LeMons car didn’t mean it didn’t deserve respect. We were disabused of that notion rather quickly. At an earlier race, you encouraged us to try swapping in a supercharged engine. We’ve found one at a proper LeMons price point and are hoping that it will not be looked upon too sorely during the judging session at Thunderhill. So we are hoping that advice stands. What could go wrong? Regards, Don Alexander NAFM ( Not Another Freaking Miata) Racing --------------------------- End Quote ---------------------- So Judge Phil effectively gave us the okay to spend up to $400 for an engine! Since the car is supposed to have a value of $500 or less, and he declared our car was worth $100, we had another $400 available to spend. Cool.
Now we had to see how that would actually work out.
The LeMons races have three different classes running simultaneously. They are A, B and C. the C class is most representative of the cars LeMons truly wants to see running. These are true $500 cars that nobody would really expect to see on a race track. Here are a couple examples of the C cars.
And one of my favorites, a car that is actually driven to the track!!
It still drives to the races, even after this incident a couple years back.
The Fiero is, almost by definition, a "C" car. Unless it has been tweaked. In fact, during our first few races the tech judges just looked at it and automatically classed us as a C car class.
The "B" car is definitely expected to be a bit racier. It's hard to give definite examples. But lets say there's no way a Miata would fall in with the C cars. But it might be either a B or an A. Really prepared cars... A all the way. And interestingly, the prize structure heavily favors the C class cars.
To this point, we have always been a C car. Now we had to go through tech with a supercharger in the Fiero. Safety tech was easy. We built the car right and keep it pretty sanitary. The BS tech was a bit more difficult. We pulled up and as soon as the engine cover came up all the BS judges immediately abandoned the cars they were teching and came over to join in the bloodletting. We pulled out the documentation showing that judge Phil had officially sanctioned the swap. In fact, he wanted to see a v-8 installed. We were asked how much drive testing we had done with the new engine installed. Our honest answer was that we had driven it out of the trailer and straight to tech.
So the short story is that we were classified as an "A" car. That means we were in direct competition with some really stout cars. We could be in trouble. Race day started out okay. I was chosen to start the race for our team. Being the starter is both a pain as well as a great advantage. The pain comes in the fact that 179 cars were entered in the race. It takes quite a while to get 179 cars onto the track and circulating. So there's like 15 minutes of driving around relatively slowly until everyone is ready. The good thing is that that means you have 15 minutes to learn the track before you have to start ducking, bobbing and weaving. All the rest of the team has to jump straight onto the track in the middle of a race with no idea what turn 3 looks like.
179 cars were entered in the race. When the green flag flew, at the point we made it around the track to the start line, we were scored as being in 154th place. I saw the green flag fly from across the track and throttled down. I got the jump on several cars and was really impressed by how much more torque the 3800 made versus the original 2.8. Yeah!
But maybe 1/4 mile later, before I made it back to the start line to officially start the race, I knew we had problems. It felt like the clutch might be slipping. I would step on the throttle and nothing would happen. The engine felt like it had lost something, or was overpowering the clutch. Darn.
I took the green, but actually left the track before completing my first racing lap. This wasn't going to be an exciting day. Our first thought, after the clutch, was that the tune on the computer was too lean or too far advanced on the timing or anything else connected to the computer. What actually happened was that we spun a bearing and things were seizing up. Our used engine didn't make it.
At the end of the first hour our zero laps had us in 161st place. By the third hour we had been dropped, as had several other cars. The official car count had dropped to 164 and we weren't one of them. By noon we were headed home.
The official gallery of that race is found here.https://www.facebook.com/media/set/?set=a.10151093333354495.447664.36766739494&type=3
The Fiero Libre guys, still classified as a "C" car, finished in 44th place overall with 4 BS penalty laps given out during BS tech. The only other "C" car ahead of them was "The Soccer Moms" in 18th place driving a 1993 Dodge Caravan. The Fiero Libre's fast time was 2:27.028 versus a 2:30.620 for the Soccer Moms. By way of comparison, the overall winner, but not fastest car, ran 2:17:883. That was an "A" car - a '83 BMW 533i.
We slept in our own beds some 185 miles away.
Now we would be following the advice give here many times. We would go for a Series II instead of the Series 1. That 3800SC torque felt sooo good for the short time we had it.
[This message has been edited by DonP (edited 11-05-2013).]
Once we pulled the engine and confirmed that it had now become scrap metal material, the search for a new engine began.
The local pick-n-pull had a '99 GTP that had just hit the yard. It had some miles on it, but we had already committed to replacing bearings and rings. It wasn't until we were the better part of an hour into the task of removing the engine that I spotted what I thought was an oddly deformed oil pan gasket. It looked like the pan gasket was being squeezed out from between the pan and block rail. You know how it sometimes takes a few minutes to register what you are actually seeing? Well it wasn't the gasket being squeezed out, it was the block rail bulging outward. We've seen that before and knew what was happening. Pick up the tools and go.
One of the local wrecking yards had a Series III Supercharged engine on the shelf. We looked at that with the knowledge that we would have to re-work the throttle to get away from the throttle-by-wire setup. But the fact that they couldn't tell us the miles on the engine, as well as the $1,250 price caused us to pass.
It was now time to fall back on a tried and true strategy. We started scouring Craigslist looking for a neglected Park Avenue Ultra or SSei And then someone here commented on finding a couple flood damaged Fieros on Copart. We had never used copart before, but upon our first troll through their site found a 2000 Park Avenue Ultra with a surprisingly low 28,008 miles on the odometer. It was being auctioned off in three days in Martinez CA, some 200 miles away. Maybe we had found something that wouldn't need to be rebuilt. The pictures showed that it had been hit in the right front. The damage looked like it was fairly minor and had not gotten into the engine. We took a chance and worked through Coparts complicated method of bidding. and ended up with the car. Luckily, nobody really wants a 12 year old big tuna boat of a car enough to bid very high.
Our new donor car.
Now the worst possible thing that could happen, well it happened. The car was too good to part out. With a true 28,008 miles on it, this was a real honest to goodness one owner grandma car. And with the addition of maybe $300 in parts and some paint, it promised to be better than anything any of us were driving. We couldn't bring ourselves to pull the engine. So back to Craigslist.
In short order, two more likely donors showed up. The first was a '97 located in Sacramento. It reportedly had 92,000 miles and a bad transmission. It had been parked and somehow the keys had been lost. (that was code for "it won't start." We've been there.) The owner was asking $850.
The second was a '98 Ultra with 127,000 miles on it and a new transmission. It ran but needed some minor work. It was located in Red Bluff, CA and the owner wanted $1100. Because it ran, and the body panels could be used on the now keeper 2000, Rich splurged and offered him $500. He left him with the comment, "once the wife says get rid of it now, and before taking the $65 dollars that Pick-n-pull will give you for it, give us a call."
We made another appointment to look at the Sacramento car. Rich figured that because the guy was a no-show the first time, it was open season on low-balling the deal. That and he really wanted to beat the guy up about the head and shoulders (figuratively of course - we don't advocate violence. Often) for being such a flake. He offered him $300 and stuck to it. The lack of keys made for an easier bargaining position as well. And so he schlepped the car back over the hill to Reno.
In the mean time the Red Bluff guy's wife came through and said get rid of it. So on Sunday Rich picked that car up. So in short order we had two donor cars sitting in the back yard. Rich's wife, Chris, is great in her ability to put up with a lot. She has, however, started referring to the house as the Sun Valley Pick-N-Pull.
And started work on pulling the engines.
All in all, the whole thing worked out nicely. The '98 donor car provided a back-up engine for the Fiero. It also provided a replacement lower control arm for the now keeper 2000 ultra as well as a couple needed body panels. As far as the '97 without the keys, once we destroyed the steering column enough to be able to turn the key cylinder, the computer told us that the advertised 93k miles was actually a tick away from 180K. No wonder the keys had been misplaced.
The next west coast race was scheduled for December 8, 2012 at Chuckwalla Valley Raceway in southern California. http://goracecvr.com/ We had planned on going to this race, but held off registering until we actually had another engine in the car and running. Given that we now had two engines with well over 100k miles, and a history of blowing up engines, we decided to roll in some new main bearings and at least look at the rings. After all, it would be a real pain to drive 692 miles just to have an engine let loose on us.
Luckily for Rich and me, my brother Doug started talking without thinking and volunteered to look over the engine. Doug is our fourth regular team member despite the fact that he lives some 450 miles away in Springfield, Oregon. He's a heavy equipment mechanic during regular hours. He and I had built and raced several cars from around '83 through '94. And he has been the crew/builder on a IMCA modified dirt car for the last 10-15 years. He's also been known to do some uh, over-the-top type stuff during his racing career. For example, he purchased an SB2 NASCAR racing engine to put into his teams IMCA Modified dirt car. If you aren't sure what a modified is, they are stock front clip, tube framed dirt cars with a $500 claimer rule engine. The SB2 may, possibly have exceeded the $500 claim value.
With all that in mind, in mid October I delivered our first engine to Doug in Springfield. It also gave me the opportunity to visit Mom and get trounced yet again in those cut-throat scrabble games. And who knows where all those new card games originate. All I know is that I'm no good at any of them. We figured that a month and a half was lots of time to be ready for the next race.
In the mean time, Rich got started on his... uh let's see, .. his 4th and 5th oil pans since starting this project. Since Doug was working on one engine, we used the second as a test mule. We already established that the '88 and '86 2.8 pans are different. So that was the first pair we made. Obviously the 3800 was different, so that was the third. And of course the Series I just has to be different than the series II pans. Since we had two engines, Rich started on two new pans. I bought a couple new pans to start with. It's just not a good idea to weld on a used oil pan and expect to get a good weld. This time, however Rich approached the whole project a little differently. One of his racing competitors had a real metal brake, something that did a somewhat better job than the kinda homemade unit he had. Rich laid out the new oil pan and created a couple cardboard templates to make up a couple modified pans.
He did three different changes to the overall design as opposed to how he built the Series I pan. The first change was to change the depth of the new pan. On the earlier Series I pan, Rich had added approximately 2 1/4" to the overall depth. It looked good when out of the car, but once it was in place it looked to just a bit too deep. Meaning it was just a bit too low. There was no doubt that the oil pan was the lowest part of the car. With that change in design, he had to make a shorter engine block to oil pick-up tube adapter. On the series I he made a 2 1/4" tall extension from a block of aluminum. Now he cut that block down to 1" and lost 1.25" of depth on the pan.
The Series II had some differences in how much the main cap extended or dropped down out of the block in relation to the pan rail. You can see how Rich had to notch the adapter to clear the main caps.
We were very surprised and pleased to see the changes to the oil pan gasket used by the Series II. In essence, Buick created a windage tray! Too cool! We did have to notch the tray to clear the new extension
The second change was to eliminate the forward extension to the sump. Rich elected to extend the sump only to the rear or trunk. At the same time he simplified the construction by eliminating any gates. The pickup in the 3800 is already pretty much centered in the pan. It's not to either end of the block and so we felt that the sloshing away from the pickup wasn't as bad as that found on the 2.8. Our biggest goal was mainly to increase capacity. So the design change seemed reasonable.
Our third design change was necessitated by our desire to do away with the stock dipstick. Because we really wanted to keep the coil packs attached to the engine for easy removal with the cradle, access to the dip stick is a real problem.
Our solution to moving the dipstick was mostly the result of a joke Doug commented that many heavy equipment oil tanks were hard to monitor. Often times all they had were sight glasses. Whoa. Could it be possible to use a sight glass on the side of our oil pan?
Short answer, yes.
Rich measured up the "full" mark on the stock dipstick in relation to the bottom of the block/pan rail. Using that measurement he determined where the center of a sight glass should be. He welded in a bung and screwed in a sight glass.
Okay, this might not be a solution that you use on your street car. But it seems to work well on our track car. We can peer under the car at every pit stop and quickly determine that we have oil showing at the proper level in the sight glass. As with most tasks in building a race car, it's about trouble solving. Once we had Doug drill and tap the stock dipstick hole and install a plug, it was problem solved.
[This message has been edited by DonP (edited 12-01-2013).]
When we dropped the first engine off with Doug, we told him that we wanted to keep the engine stock, just check the rings and roll in the main bearings. Obviously that would mean new gaskets but we could pop for that. What made the whole thing work out was that Doug has been working with Tim Riel of Tim's Muscle Cars in Springfield for many years as well as Rod Riel, Tim's dad for a decade or two before that. These are the kind of guys that built the engines for , amongst other things, a nationally recognized boat racer who went undefeated for some unbelievably long time such as five years. We felt comfortable that the guys would handle such a simple project.
While they were responsible for dealing with the engine, Rich, Robert and myself were still chugging away with all the necessary fabrication work involved with changing over from a series I to a Series II 3800. We had a wiring harness that had been built for the '94 Series I. I do not recall all the changes needed to change over for the later engine. I think there was mostly changes to a couple sensors. After some consultation with Ryan at Sinister (http://www.gmtuners.com/ ) we pretty much chose which year sensors to use, maybe changed a connector or two and were pretty much good to go.
At the same time, we now had a couple '98 ECUs and decided to have Ryan flash them for use in the car. This gave use two identical ECUs, so we should always have a spare. That worked out with our intent to have a complete spare engine/transmission couple, mounted on a spare cradle and kept in the trailer. Having the entire setup assembled and ready to go would make sure we had all necessary spares. And we wanted to do the same at the front with a complete loaded front cradle.
But on to all the little things that kill so much time. On the exhaust system, we had eliminated the EGR. Welding the manifold was easy, but we had to deal with the inlet on the intake. We are too cheap to buy those real pretty block-off plates that a couple folks here offer. So I simple cut a piece of aluminum from a too-bent-to-reuse race car body and attached it to the intake manifold below the throttle body.
As anyone who has done the 3800 swap thing can tell you, filling the coolant system is a real sore point. We have not yet found a quick way to dealing with the process, but this is one solution we have now used for a year.
It's somewhat slow and painful, but works. Experience has led us to the decision that I am not allowed to touch this thing with a wrench. Ever. And that's all I'm going to say about that.
We had to change out the belts because, well they are different than the Series I. We were able to use our Series I based alternator mount. In addition, we changed out to the GTP idler pulley mount which is located just above the alternator. The GTP mount pulled the pulley in, towards the engine narrowing the whole package.
We also had to deal with that really weird casting that was used to feed the heating system from the 3800. There is a lot of discussion about that here in the forum. A few, such as ourselves are actually not running a heater core and have asked about how to handle the water flow. Several folks commented that simply threading and plugging the outlet in the lower intake manifold as well as the outlet which would feed the heater core would solve all the problems. For example, https://www.fiero.nl/forum/A...130314-2-119643.html Ultimately, Darth Fiero commented that they had actually measured temperatures and just plugging the holes created problems. So we drilled and tapped the appropriate holes to deal with them later.
Had I known it, looking at this next picture would have clearly shown the single point of failure in our next race. But we will discuss that later. (Is that a tease or what?)
Foolishly, we assumed that the exhaust from the Series I would just bolt up to the Series II. Will we ever learn? The Series I uses a exhaust donut/gasket. The Series II uses a flange to join the exhaust manifold to the exhaust pipe. The donut gives some flex to the system. Looking through the forum, I see that the majority of folks use some sort of flexible coupler, something like this http://www.summitracing.com...3gi7sCFRFhfgodRksAxA
But we had just bought a new muffler and had a nice welded system. And we are too cheap to buy that flex coupler. So, if you have an exhaust coupler that works and need to adapt, what to do?
You can see the exhaust donut in place on this next photo. We preferred the flex offered by this system over using the flex braided coupler.
If I may add to the coolant filling procedure, if you drill a small 1/8 sized hole in the thermostat, you can save yourself a lot of time in filing and bleeding the cooling system. I've done that on the last 3 L67 builds I've done with great success. -Jason
If I may add to the coolant filling procedure, if you drill a small 1/8 sized hole in the thermostat, ..... -Jason
Hi Jason,
We have done the small hole in the thermostat flange thing. And we've gutted a thermostat, using it as a restriction as opposed to an actual thermostat. But even with that gaping hole, it just seems difficult to bleed properly. Since we drain the engine with such regularity, it becomes a real pain. If we were on the street where the engine really only gets drained once every few years it would be easier to live with. I'm now thinking of doing something coming off the lower intake manifold on the opposite end of the engine.
Because we did not yet have the engine back by the registration deadline, we bowed out of the Chuckwalla race. That meant that the next race in our region was at Sears Point in March of 2013. The Fiero Libre guys however really had their act together and put together a Class C winning drive in the 24 hour race. With 114 entries total, Peter's guys finished 23rd overall. The class winning car can be seen here. https://www.facebook.com/ph...39494&type=3&theater Their 23rd place finish was with 6 BS penalty laps. I have no idea what the BS judges found to fault Peter's car over. The finish results are here http://www.specialtytiming....%2014%20CVR12812.pdf
At about this same time, I made a return trip to Oregon. Mom thrashed me again at Scrabble. I dropped off the second 3800SC and brought back the first freshened engine. We put the accessory pieces back on and continued towards getting the car ready.
we stayed with the RAM clutch despite the earlier interference.
I found a ZZP stainless header on e-bay. But we just couldn't feel comfortable using it. It was too shiny and cool looking. So we just wrapped the stock manifold and left it at that.
We had to make a new dogbone. Actually, with 4 separate solid mounts, I don't think a dogbone is required. But we went ahead and set one up.
Doug couldn't resist and replaced the supercharger pulley. He purchased the ZZP 3.4" pulley. http://shop.zzperformance.c...charger-Pulleys.aspx and at the same time he picked up their puller. http://shop.zzperformance.c...r-Pulley-Puller.aspx That puller was pretty slick. They did a great job of engineering it. Luckily, Doug sent the puller back to Reno along with the engine. We elected to remove the aftermarket pulley and restore the original pulley. It just looked too much like a performance mod. We were already running a supercharger, we didn't need to attract too much more attention.
here's a shot of an ugly method we used to move water between the lower intake manifold and heater/pump housing.
Later I dressed it up with a much shorter hose using some fancy looking anodized fittings. At this point we were still pursuing the cobbled together look.
Truth be told, this next picture is exactly what it looks like. Rich installed a handle on the roof to aid in getting in and out of the car. We only have one regular driver under 50 and only one under 225 lbs. And they are both the same guy
. Enough of the truth. We told the competition it's a sneaky and possibly cheaty aero device.
In March of 2013, we took off for our next race. This time we were returning to Sears Point/Infineon/Sonoma or whatever. We are all old enough to prefer Sears Point. So that's what we'll call it.
Truth be told, we were pretty cocky about this race. We were probably the most prepared that we had ever been. Our somewhat freshened Series II was sounding good as we drove it around the block. And it definitely put out some torque. Good stuff that torque. We had an extra engine that would be making the trip from Oregon with brother Doug. We had an extra transmission. Heck, we had extra front and rear cradles. Bobby had put new tires on the tow rig. And, unlike our last Spring race at Sears, it didn't look like rain was going to mess with us.
Wednesday, Doug called. He might not be able to make the race. His boss had some sort of serious ailment that had put him in the hospital. Life threatening stuff. Doug had to cover the mill and wouldn't have a definitive answer about going racing until Thursday evening. We had hopes that he would be in town Thursday so we could mount the spare engine to the spare transmission and onto the spare cradle. Strike one on being doubly prepared. No matter, if he could make the race, he would bring the spare engine. If he couldn't make the race, no problem. We had a good engine to start the weekend with.
Because of the uncertainty regarding Doug, Rich and I delayed taking off until Friday. Doug couldn't make the race. His boss was still in the hospital and they couldn't both be gone. Bunner.
45 minutes later, as we were hitting Truckee Ca, we started thinking about a replacement driver. We called Bobby, who would be driving over the hill later in the day, and did some brainstorming. The most likely candidates were racing in other cars. We called the Swig, but he was working at the power plant, covering an entire other team - the Mustang boys.
Finally we got hold of Jay Carpenter who had at one time started on building a LeMons car of his own. Jay works at a carbon-fiber type facility. Not only do they make parts, they teach people all around the world how to make parts. I think that about the time Jay finished making a carbon fiber hood to compliment the carbon-fiber splitter on his Scirocco, he figured he had blown completely past the LeMons spirit.
.
Anyway, Rich called Jay at work and asked if he would like to race a Fiero with us.
"Sure. When?" replied Jay.
"Well, how fast can you pack? We are just now approaching Sacramento. It's about 9:15 now and we need to get teched-in by 5:00."
??
" Uh, . . .I'm at work now. But maybe I can leave early, say around 2-2:30ish."
"That'll work. You won't need to get your personal safety gear teched until Saturday morning. We have a hotel room already booked and we will see you then." About 45 minutes later, Rich got a return call from Jay. His boss had told him that he was totally worthless around the shop after accepting our invite. "Go. Get out of here. See you Monday." Now that was an understanding supervisor. Oh, and his wife Rosa had his driving suit and toothbrush packed by the time he got home. We got through tech that afternoon. But it was a bit of a struggle. At our last race, with the series I we had pretty much sailed through tech. We had been bumped from our traditional class-C straight to Class A. We had no additional penalty or BS laps, but surely we could do better than that. After all, we could say that we had not actually finished any laps on our maiden 3800 outing. We even had Judge Phil's residual value letter opening the way to getting a replacement engine. But I think that, because Doug and Tim's compulsion to paint the engine worked against us. It now looked a little too good. And the shiny new freeze plugs.
We were immediately hearing "class A sandbaggers" and "cheaty bastards" and other encouraging terms of endearment.
We were sunk.
After a couple minutes of this, Judge Phil piped in with one question.
"What transmission are you using?"
We told him that we were using the stock Fiero Getrag.
"The Fiero 5-speed?" he asked.
"Yup."
"Okay, this is just the type of idiocy we are looking for and want to promote. Stuff a large engine in an unreliable car and go racing. I can't let you stay in the C class. I have to bump you to the B class. But given what you are driving, I'll give you one penalty lap. Now getouttamysight."
The Mustang guys were not too amused. They got shoved straight into class-A and 3 BS penalty laps with a basically stock 4-cylinder, turbo-charged engine. It was out of a Turbo T-bird, but the car was an original turbo Mustang. I think that their team Captain actually made the tactical blunder of trying to argue the point and they just kept piling on penalty laps. His team mates hauled him out before he had to start the race from the highway outside the track.
Our biggest problem was that a new judge didn't like the numbers on our car. We had added a "1" to our existing "87" because another team had grabbed our number. The 1 wasn't to his liking. So we had to modify the decal. Paula had a bunch more patience for the task than any of the rest of us.
Jay got to the track with plenty of time to spare. He got his safety gear through tech and had enough time to learn where the controls were located in the Fiero. He had to borrow Robert's seat inserts.
Okay, I gave it away a couple posts ago when I mentioned the single point of failure on our new engine. So yes, we did have a catastrophic failure. It just took a bit of doing to get there.
The day started as usual. Jay Lamm, the originator of the whole 24 Hours of LeMons did his normal "behave or else" speech to all the participants, including the "other" Fiero team, Fiero Libre.
I drew the short straw and was the first driver out. Everyone tries to not be first. The reason being, that with over 170 cars being fed onto the track, it takes a while to actually start the race. Logistically, the operators have a whole bunch of stuff to take care of, including making sure each and every car has an operating transponder. So figure several laps of cruising around at a fairly temperate speed before getting the green flag. Truth be told, however, I prefer to be the starter. Those 20 or so minutes of slow driving allow you to remember what the track is all about. Everyone else has to jump in the car and go full out without any real re-orientation.
The car was obviously great! the new engine was strong and I felt that with the torque we would definitely be competitive coming off the corners. The green flag flew, we flew and all seemed good. about 2-3 laps in there was a yellow and I slowed coming off a left turn and noticed a small wisp smoke in the rear view mirror. Probably another car. Next big left and the smoke was back. Time to pull in.
I sat in the car while the guys checked out the problem.
.
Okay. We obviously had a leak. It appeared to be at the front of the engine under the snout of the supercharger. But with the airflow making such a mess, it was impossible to tell exactly where it came from. So we used a can of brake clean, got it all dried off and went out for another lap. No joy, we still had a leak and oil was departing the engine.
To shorten the story, we spent the entire day chasing this leak. We changed valve cover gaskets. We smeared silicone all over the lower intake manifold at every joint. We replaced the oil filter in case it was a leaky gasket. We did everything. Even some stuff that didn't seem likely.
On top of the oil leak, the master cylinder started to leak that nasty brake fluid everywhere. I ran to NAPA and very close by auto shop looking for a new master cylinder. We also created a run on brake cleaner at the local parts houses. Did you know that California has different rules on what brake cleaner can be? The biggest thing we could determine is that it was weaker.
Okay, cut to 5:00. We now had like 9 laps in the books and still had no solution. 522 miles and 9 1/2 hours away was a fresh engine in Doug's garage. Something was wrong with our engine. Sooo, I called Doug, who had literally just got off work and told him I was on my way to get the engine. The guys would drop the cradle and I would get a new engine. If Doug would meet me at the Oregon border I would be back in 12 or so hours. Time to hit the shower and head out.
Thank goodness for cel phones. As I was leaving the hotel, I got a call from Rich. Doug had taken the time to look at the second engine before loading up. And he spotted something. If you recall a couple posts up I showed a picture that included "the single point of failure" on our new engine.
That hole that I have circled looks to be a blind hole in the block. In fact, that hole actually goes through the block and opens into the central galley inside the block. A galley where a lot of oil flies around. A hole that will only leak when driving hard in a left hand turn. But will never leak when test driving around the block at home.
That hole is also not visible from anywhere outside of the Fiero. You cannot see it at all. I had smeared silicone around the hole while attempting to seal the LIM.
Doug spotted the hole on the new engine and recognized what our problem was. Yea Doug. I didn't really want to do the drive.
Home Depot was outside the hotel. I picked up a complete selection of metric bolts anywhere near the right size and headed back to the track. We found the correct bolt and sealed the hole. With a bit more clean-up we were ready for Sunday.
Sunday was going to be fun. We were too far out of the race to do anything but have fun. Game on.
Let me get right to it. Our diagnosis is that all the brake cleaner softened up a hose. Said hose came in contact with the alternator pulley. A small hole ensued. Water left. Our new drive, Jay saw the temperature gauge doing funny stuff. Obviously it was a problem with an electric gauge. Our gauges are mechanical.
I put a couple laps onto Youtube. You can hear the engine going south on us. http://youtu.be/RKXCpTu09yw I think the other thing that was definitely off was the rev limiter. When we had the computer programmed, we decided to leave the rev limiter at whatever was stock. We had some discussion whether that meant 5800 or 6000 rpm. In any case, it was just a touch too low for sears point. We did hit the rev limiter quite often. We decided that, whatever engine we came back with, we needed maybe 300 more RPM to hit the sweet spot.
Man, that stupid bolt hole. The wierd thing about that is it only slings oil out at high RPM. I had this same problem 2 years ago, and thought my motor was toast. The "Bolt"
Also, wanted to give you a nice idea for a coolant filler on the cheap: I use a 2001 dodge durango 1 1/4" inline filler T. Available anywhere, and I installed it about 3" to the drivers' side of the factory thermostat. It does have a vented cap, so you can use that to feed a reservoir in the rear if you want to get rid of the factory one, but I put a 20# cap on it and used a rubber plug on the vent line to prevent sucking air back on cooldown. Makes filling a breeze, is an OEM part, and since I have a couple of 1/8" holes drilled in the Tstat, it's the perfect high spot to fill the coolant after the radiator is full and closed.
"The Bolt" That says it all. The hard part is that no matter how clearly it shows in the picture, there's no way to see it once it's in the Fiero. Your right about the high RPMs. Absolutely nothing showed doing slow test runs around the neighborhood.
Once we found that problem, we put bolts into every hole we could find at the track. I have to laugh, but now, every time the engine is out, I notice everybody at one time or another will check that bolt.
I'll have to look at the Dodge connector. Sounds like a tip of the day to me.
So our engine got hot and screamed in protested. I ran the damaged engine back to Oregon for Doug to check out. Of course I brought the second, spare engine back to Reno. Once Doug had the engine tore down, he found the extent of the damage. What showed up was a couple of collapsed piston rings. Or at least now suspect rings. The bores and actual pistons checked out as okay. He looked at both main and rod bearings, all of which looked okay. But of course he replaced them as a precaution. The crank checked out as good. It looked as though a couple valves had started to seize. That resulted in two bent push rods. And of course meant a complete tear down of the heads. I'm not sure on my recollection, but I believe one valve had very minor contact with a piston. The pistons were okay and we kept those intact. He may or may not have decided to replace the valve springs. I try not to ask too many questions so it's easy to say "it's all stock, as far as I know."
Our next race was scheduled for 3 months down the road, June 29-30 2013 at Buttonwillow Raceway near Bakersfield, CA. http://buttonwillowraceway.com/ This would be our first time at that track and would be the furthest haul to date. It is right at 400 miles and about 7 hours away.
Prior to going to Buttonwillow, however, we had the opportunity once again to run at Reno-Fernley with the SCCA Folks. We took the opportunity which also allowed us to put a few laps on our spare engine.
Running at Sears Point, even for the relatively few laps we did run, re-ignited our discussion concerning a steering quickener. You might have read this post which I made in May of 2013 https://www.fiero.nl/forum/F...L/090867-4.html#p138 Well Rich finally agreed with the rest of us that the bus stop at Sears Point would be soo much easier with a quicker steering rack. Look 5 posts back, at the end of the post for a picture of the chicane. https://www.fiero.nl/forum/F...L/090867-5.html#p186
But in truth, we know that a steering quickener would require the addition of power steering. And just the inclusion of a power steering rack would alter the stock steering ratio, probably making it faster. So I started by researching power steering here on the forum. Rickady88GT started looking for a power steering option as far back as '04. Or at least he wrote about it as far back as that. One of his first posts started with trying to adapt an "f" body rack to his '88 Fiero https://www.fiero.nl/forum/A...050410-1-044587.html and a follow-up at https://www.fiero.nl/forum/A...040710-2-044334.html He then switched to a corvette rack here. https://www.fiero.nl/forum/Forum3/HTML/000124.html
I was amazed at the number of folks who gave him grief. He stated clearly, his whole reason for doing this was to get a faster steering ratio. He wasn't all that concerned with the actual ease of steering EFFORT from the power steering unit. I understand that. Our purpose was the same. But magnified because in addition to having the inherently faster steering rack, we were going to add an additional 1.5:1 steering quickener.
I'll cut to the chase. We didn't actually finish the project before heading to Buttonwillow, almost three months later. We finished building it the week after that race. But these pictures will show what we actually built.
.
.
It's possible that we allowed the project to get away from us. Rich agreed to the power steering and steering quickener but he also wanted to change the spring diameter to allow us to change spring rates. The odd spring diameter in the Fiero gave us only two spring rates, stock or the rate available through West Coast Fiero. He also wanted more camber. The 1.8 degrees of negative camber in the stock front end just didn’t get it.
After several discussions the decision was made. If we were going to work on the front end, we were really going to work on the front end. We had two complete stock front cradles so we decided to leave the cradle in the car stock. We would take the backup cradle and design all new geometry around the steering quickener, Camaro power rack, and the stock spindle and rotor.
Our goals for the new front end were simple. Stay within the spirit of Lemons: “Don’t buy it, build it.” We wanted a front end with infinite spring rates available, a 4 inch front roll center, 3 1/5 degrees negative camber, very little loss of camber on chassis roll, up to 6 degrees of negative caster, no caster change on bump or rebound, 10 percent anti dive, and no more than .030 bump steer through 3 inches of suspension travel in compression. Very lofty goals, and we came extremely close to achieving each one.
We all worked real hard trying to finish that new front cradle for the Buttonwillow race. And honestly, we could have finished it up and installed it in the car with maybe a day to spare before the race. But in an unusual fit of sanity we decided not to do so. It really made no sense to take a completely untested suspension system directly to a race situation. Particularly one that was so far away. I know that doesn't make sense. If the track is 100 miles away or 400 miles shouldn't make a difference. Breaking down is breaking down. But it does seem much worse after hauling 400 miles.
Between Sears Point and Buttonwillow, we had the opportunity to run with the Reno-SCCA (http://www.renoscca.org/ ) guys at Reno-Fernley Raceway. Obviously we wanted to have the opportunity to run out the spare engine while our primary engine was getting some much needed attention. But we also had enough time to actually work on improving the handling of the car.
To this point we have done quite a bit of work on the suspension. Up front, we had lowered the car by installing the WCF 400# 1 1/2" lowering springs, replacing the stock 205# springs. . Doing that meant the stock shocks no longer were within their designed compress/decompress range. So we modified the front shock pick up points. https://www.fiero.nl/forum/F...ML/090867-3.html#p96 While the WCF springs didn't measure up to the advertised 400# rating, they were kinda close and obviously much stiffer than stock.
At the back, we had changed the stock 142# springs for a set of 300# units when we did the coil-over conversion process. If you've read the thread, you know that we had also done the full-on poly bushings on both the front and rear suspension. All of the ball joints and tie-rods were installed new. The suspension was tight. Probably the only real problem was that the shocks were probably overmatched by the springs. Konis aren't available.
So, with time available, we decided to actually work on refining our suspension settings. Given our (then) inability to effect spring rate changes up front, and the knowledge that we had a much better front design in the works, we decided to really work on the rear. The first step was to scale the car, taking note of ride heights. Our next step was to get another full alignment job on the car. At our last alignment session at Tires Plus, we had purchased a 3-year alignment service plan. We could get an alignment, free of charge, anytime we wanted for three years. Better yet, they had an older hot-rodder guy on staff who actually understood what alignment settings did and could deal with our out of the box setup requirements.
We then went through a setup exercise back at Race Central (aka Rich's Garage.) We again scaled the car, confirming ride heights. We then changed springs in the rear and noted the number of turns required using the rear coil-overs to re-establish the proper ride heights with different rated springs. With that all charted, we could make at-track spring changes with reasonable confidence that the alignment, ride height and weight distribution were not affected.
It's always a blast going to an SCCA track day event. Heck, it's a blast anytime you can get on the track. This time, in addition to the obvious goal of getting more seat time, we planned on actually working on improving the car. Or at least seeing if our changes at the track were positive or negative changes. But you have to follow the protocol the SCCA has established. Ideally we would have liked to participate in the RFR track's once a month open track day. We could pull on and off the track at will, making changes as desired.
With the SCCA structure, Rich and I were each assigned a separate run group. So we had to each drive the car as it was originally set up. That gave us a baseline "feel" for the car. Remember, since we weren't officially "racing" we couldn't use the timing system, even though we had our own ABM transponder on the car. So, once we each had run a 20 minute session, we got together, compared notes and tried to settle on a course of action. We agreed that the car "feel" was negatively effected by excessive body roll. It felt as though the rear end rolled over too much onto the outside tire. Our choice to deal with this came down to figuring out how much of a change we wanted to make. We were running 300# springs. We had available (because of Rich's long racing history) 350 and 375# replacement springs. So the question was how far to go. Subtlety is either of our strong suit, so we naturally chose to take the biggest swing and go to the 375# springs.
If you have converted your car to coil-overs, you probably have an idea of how RELATIVELY easy it is to change springs. So I dove into making the spring change. I really had no idea what a spectacle we were creating because I was deep into the rear wheel wells with the air wrenches. But Rich estimates fully 75% of the attendees dropped by over the next 25 minutes as we made the change. Most at least asked Rich what we were doing. Had we broken something? Evidently, at the track spring and suspension changes are fairly rare at most SCCA PDX events. Even Dave DeBorde, who is the Reno-SCCA track event coordinator and John Wood, the track manager dropped in to see what was happening. Of course John, who was a driver in IMSA, CART, USAC and SCCA as well as a development driver here in America for Porsche, understood what we were doing. Here's a link to some of his drives http://www.racingsportscars...o/John-Wood-USA.html But I think most of the rest of the participants were a bit surprised. And, honestly, I think it was the first time many realized that these LeMons drivers might actually be somewhat serious. Despite the skeleton on the rear decklid.
I was the first one to take the car back onto the track. And Rich dropped into the timing and scoring trailer. As he was entering, one of the guys was talking to another official, "yeah, they were actually making a spring change in the paddock."
For the record, the spring change was to the positive. The car felt much more planted and stable. That's not to say that the over-steer was gone, but it felt better. Less twitchy. That also left us wondering if we should be purchasing heavier springs, and if so how much heavier. Since we had a much better feel to the car, we decided to not order anything stouter until we had the new front suspension installed. We would be going to Buttonwillow with the 375# springs.
We got our primary engine back early enough to reinstall it into the car. So we were pretty confident as we headed to the next race.
Let me give you a hint of what the weekend was like
I'm in the process of moving my business office AND getting a new track car prepped for this coming weekend. I can most realistically start a follow-up on our front suspension re-design next week. We had fun building it and it does work really nicely.
I'll make an effort to move this story along. And I'll try to discuss some of the changes we made to the car.
Robert was unable to make the race at Buttonwillow. He wasn't able to get the time off and didn't really want to do the seven hour drive Friday night and return Sunday for work. Okay, it sucks when that happens. We considered going with just three drivers but decided to seek a fourth. Our go-to guys couldn't make it on short notice, so I gave brother number two, David, a call.
David lives in Phoenix, about seven hours from the track coming from the other direction. He has actually driven Buttonwillow, which none of the rest of us has done, so that was a bonus. Unfortunately he raced it on a motorcycle. That didn't say too much for his decision making process. On the positive side, he had read this thread, so he figured how hard could it be? Rather than buying a full safety package, he rented a helmet, suit, gloves shoes, the whole thing. There are a couple outfits that cater to the LeMons and Chumpcar crowd and rent full approved packages. http://www.racesuitrental.com/ Because David's helmets are all for use on bikes, they aren't approved for car races.
So Rich was feeling a little apprehensive about running with three Alexander boys. Rich's Momma didn't go to just one rodeo. Or some folksy saying like that..... Forget I said that.
We of course were not the only Fiero team to show up. Peter and the rest of his Fiero Libre Team showed up. They were ready and capable of competing for at least a class win.
Peter's brother (I'm sorry I don't have his name) pulled out all the stops and escorted his teams Fiero to the Judges for tech and BS inspections. What else would you use to escort your Fiero to the race with?
When we initially pulled into Buttonwillow, I was a bit disappointed. It looked flat and a bit uninteresting. We had been driving on tracks with significant elevation changes such at Thunder Hill and Sonoma. I think the biggest elevation change here was maybe 15 foot? By mid day on Saturday, that perception had changed as everyone thoroughly enjoyed their time on the track. It was fast and really suited the Fiero. This was our first race weekend with a fully functional 3800 SC in the back. Our last engine was smoked at Sonoma a few months earlier. I gotta say, the L67 is a great fit for the Fiero. We had gobs of torque to pull off the corners. And that's where we felt best. The spring changes that we had made at Reno Fernley (see a couple posts back) really were a step in the right direction. It was a real revelation once you gained enough confidence in the now much more manageable and predictable handling to actually drive through a corner. If you look at a map of Buttonwillow http://buttonwillowraceway....df/brp-track-map.pdf you will see an area titled the bus stop. A couple of laps in, we all felt comfortable with pretty much stomping on the throttle and letting the engine assist in powering through the corner. Previously, we would have been coasting gently through the transition. David's motorcycling experience on this track helped with that discovery. At this point we were at the point that we could seriously start talking about tuning with better shocks. No. we were not the fastest car, but we had made significant progress.
Just by looking, I can tell that this next photo was taken on the back straight/drag strip. Notice the headlight door open? It was a real shock the first time I got onto that straight with some speed. Bang! Up popped the headlights maybe 3/4 of the way down the straight away. We got used to it, but I'm sure it startled some other drivers. You could tell how well you were progressing by how soon the headlight doors popped up after entering the straight.
So, how come we didn't win with all the progress we had made? Several reasons come to mind. I don't want to sound like we are whining here... but I guess we are. A little.
The heat. We lost radio communications. With the loss of radio communications, we also lost our time keeping function. I recall being on track, having a ball and being concerned that I was overstaying my hour and a half time limit. I pulled in and was told that I had been out for 32 minutes and was wasting on-track time pulling in. Before the next race, I found the answer to that problem.
Walmart. Under $10. Timer and clock. Get one if you're going to do this.
The heat was unbearable. Ever been in Bakersfield in the Summer? The agriculture makes the humidity skyrocket.
Without the radio, you could not get the next driver ready for an efficient driver change. And nobody was willing to sit around in their driver suit in case the current driver came in. Remember, we were essentially wearing quilts when suited up.
When pushed, the fresh engine would hit 235 degrees. It's sooo hard to back down and not continue pushing it.
It was so hot that the LeMons organizers wisely called the race at 2:00 for a 2 hour siesta and mandatory cooling off period. They extended the race into the evening. The track surface registered in the 140 degree range.
We declared this as our most valuable team member
If you didn't have a cool shirt, you weren't going anywhere. We actually decided to make a cool shirt cooler for the trailer before the next race. The next driver could be suited up and stay cool and ready for a quick driver change.
David spun off track trying to avoid the Fiero Libre driver who made a sudden lane change. Both Doug and I agreed, thank goodness he spun, he was making both of his older brothers look even worse. He was actually stuck out on the track for nearly 1/2 hour. He didn't know for sure that he was allowed to re-enter a hot track and stayed put for safety reasons. The tow truck eventually came out and got him. The good thing is that the corner workers evidently decided he must have broke to end out in the dirt. Otherwise he would have driven back onto the track. If he broke, he probably didn't deserve a black flag. When he got back, we just found a water hose and crawled into the car to wash it out. Big time dust. His off can be found here. http://youtu.be/ujKcWL6g26U
Our race officially ended 10 minutes before the checker flag flew. I received a final black flag for spinning while trying to pass a VW Bug. I think it had an Audi engine in it. But it was still a VW Bug and I was too eager to pass on the final turn onto the main straight. Had I waited, he would have been dead meat on the front straight. As it was.... Well check out my less than optimal entry into the corner http://www.youtube.com/watch?v=Cy9vVMv3YqA
The saving point for the weekend was that we beat the Mustang boys from Reno. We both completed the same number of laps. And though we were sitting on the sidelines, and out of the race, we finished that lap before they did. We beat them. (insert Rocky theme here)
Of course our cause was helped when their fuel started boiling and the engine stopped. And when they had to replace a clutch. But hey, we were in front
The thermometer in the tow truck registered 108 as we drove away.
As I'm writing about the construction and work on the front cradle, I founds a couple links that I had intended to use regarding the ButtonWillow Race. Hopefully my spin entering the front straight wasn't as exciting for those following as this one was. http://vimeo.com/69524578
The Sex Pistons, driving a spitfire had an interesting take on the last couple laps. Note that about 8 seconds in the Mustang boys blow by him. Did I mention we, in turn beat them? https://www.youtube.com/watch?v=Ew-cWPhHQmk
And if you want to see the type of cars competing, check out this gallery. You may even see the Bio-diesel powered Corvette, one of the slowest cars on the track. http://www.murileemartin.com/UG/LBW13/LBW13.html
To reiterate what I said before, we decided that adding a steering quickener was really the direction we wanted to go with the Fiero. That meant that power steering was now required to make it all manageable. We checked out several threads here on the forum. Let me re-quote some links I posted a few posts back " Rickady88GT started looking for a power steering option as far back as '04. Or at least he wrote about it as far back as that. One of his first posts started with trying to adapt an "f" body rack to his '88 Fiero https://www.fiero.nl/forum/A...050410-1-044587.html and a follow-up at https://www.fiero.nl/forum/A...040710-2-044334.html He then switched to a corvette rack here. https://www.fiero.nl/forum/Forum3/HTML/000124.html
This kits was designed to use a 2000 Camaro rack and came with some adapters to change the gender at the ends of the rack and interface with the stock Fiero inner tie rods. We went ahead and purchased new inner tie rods from Rodney Dickman. http://www.rodneydickman.co....php?products_id=156
We hit the wrecking yards for a couple steering racks out of 2000 Camaros. We already had another '88 front frame assembly to build the conversion onto. We didn't want to totally disable the car if we hit delays. That turned out to be a good move.
So here's the basic deal with the WCF kit. The plan is to replace the stock Fiero rack with the Camaro rack. The Camaro tie-rod is not, however useable in the conversion. You will end up using the Fiero inner tie rods.
So, the first problem comes in that the Fiero rack ends have male threads. The Camaro rack has female threads. And of course they are different thread size and pitch.
So, WCF creates a gender changing adapter.
Of course it wasn't that simple. And we actually built our own stuff and replaced everything that came with the kit to our own specs. But the concept was sound and started the process.
In case you haven't been paying attention, I want to say that Pennock's Fiero Forum is a dangerous place to hang out in. Inevitably you are going to run into a thread like this one. https://www.fiero.nl/forum/A...130314-1-048610.html from way back in 2005. And that's what happened to us. Though we couldn't get away with building a full on tube frame Fiero, the thread was inspirational in just the amount of thought that went into the car. And if those guys could go that far, surely we could build a new front suspension for our '88. How hard could it be?
So, given that our decision to add a steering quickener inevitably led to the decision to add power steering, shouldn't that likely lead to a desire for different springs? And since, for all practical purposes, the stock suspension inherently limited our spring choices to a very small universe, isn't the next logical step to redesign and build our own suspension?
Once we had the power steering conversion figured out (we thought,) it was time to turn to everything else. So here were a couple design considerations. We would give at least a token nod to the OEM deign parameters. But we would build in much more adjustability. We would utilize some sort of home-made (remember this is for LeMons racing) coil-over arrangement for a much larger spring size selection. And we had targets for increased caster and camber as well as corrections for bump steer.
Turns out Rich had been thinking about the whole redesign for some time. The car had been a hand-full and we needed to step it up. I think the first decision was to retain the stock lower control arm geometry. We were not looking to widen the track of the car. But we wanted to set up the lower arms to accept some sort of coil-over. A couple of threads here on the forum had concerns about altering the shock pick up points on the lower arm because of additional stresses involved. We did find some inspiration in a couple threads here on the forum https://www.fiero.nl/forum/F.../HTML/000029-15.htmlhttps://www.fiero.nl/forum/A...060206-2-063742.html In the end, we decided to stick with the stock length and offsets, but make our own tubular arms. Had we just gone out and bought something Like these http://www.arrautmotorsports.com/parts/suspensions I think we would have broken the spirit of LeMons racing. Building it yourself is held in higher regard. To be honest, had we seen a picture from that last link, our final design might have been different.
So we set off to Lowes to purchase a new surface plate (AKA 3/4" plywood) for the project. Rich carefully plotted the pick-up points from the original arms and worked to recreate them.
That last picture has the outline of the stock lower control arm drawn in with a red marker. This gave us a quick visual reference as to how we could lay out the new arms. The two Heim joints were positioned to work with the stock lower control arm pick-up points on the subframe.
From this point, it came to measuring, cutting, bending, re-measuring and assembling the lower arms.
One of the local SCCA members had a band saw. Something we did not have access to. He let us use the saw to cut a couple smaller pieces of tubing, sized to fit within the actual arms and accept a 3/4" tap to accommodate the male thread of the heim joints.
The 3/4" heims then accepted sleeves to reduce the hole size to 5/8", the size bolts we would be using to fasten the arms to the sub-frame.
We drilled the frame tabs for the 5/8" bolts.
Rich took the opportunity to change out the ball joints, both upper and lower. Not only did he go with much more substantial ball joints, he elected to go with the low friction ball joints commonly used in NASCAR and other top tiers of racing. But there was no way we would spend over $100 each for these ball joints. So he called up Roush Yates who resell a lot of used stuff from the NASCAR boys. http://www.roushyatesparts....g-Products-s/108.htm To use the larger screw in ball joints, he got some weld on sleeves from UB Machine. http://ubmachine.com/index.html
This particular ball joint was used for a test session at Bristol.
Rich used the tubing notcher to mate the sleeve to the arm.
Once he nailed down the ball joint end of the arm, Rich slid the threaded tube into the main arm to the point that the heim was properly located.
You'll notice he drilled the arm in order to do a plug weld on the threaded sleeve,
Bracing Added.
And a perch for the coil-over which will get it's own write-up.
And the finished lower control arms with additional brackets and braces as needed. I'll get to what they are in later posts.
[This message has been edited by DonP (edited 10-16-2014).]
Once we had the power steering conversion figured out (we thought,) it was time to turn to everything else. So here were a couple design considerations. We would give at least a token nod to the OEM design parameters. But we would build in much more adjustability. We would utilize some sort of home-made (remember this is for LeMons racing) coil-over arrangement for a much larger spring size selection. And we had targets for increased caster and camber as well as corrections for bump steer.
Turns out Rich had been thinking about the whole redesign for some time. The car had been a hand-full and we needed to step it up. I think the first decision was to retain the stock lower control arm geometry. We were not looking to widen the track of the car. But we wanted to set up the lower arms to accept some sort of coil-over. A couple of threads here on the forum had concerns about altering the shock pick up points on the lower arm because of additional stresses involved. We did find some inspiration in a couple threads here on the forum https://www.fiero.nl/forum/F.../HTML/000029-15.htmlhttps://www.fiero.nl/forum/A...060206-2-063742.html In the end, we decided to stick with the stock length and offsets, but make our own tubular arms. Had we just gone out and bought something Like these http://www.arrautmotorsports.com/parts/suspensions I think we would have broken the spirit of LeMons racing. Building it yourself is held in higher regard. To be honest, had we seen a picture from that last link, our final design might have been different. ...
From this point, it came to measuring, cutting, bending, re-measuring and assembling the lower arms. ...
Looks great! What did you guys use to bend the small tube for the control arm?


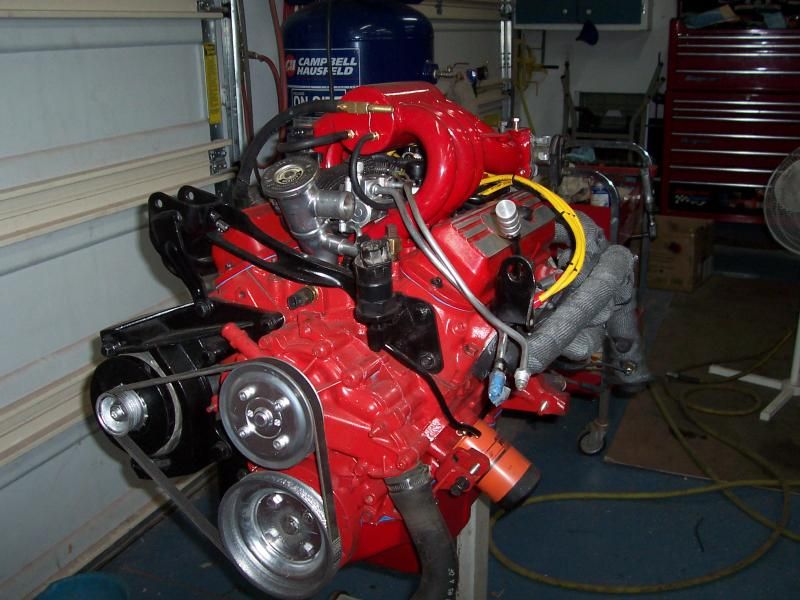 [/URL]
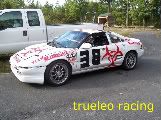 [IMG]http://i16.photobucket.com/albums/b50/francis4


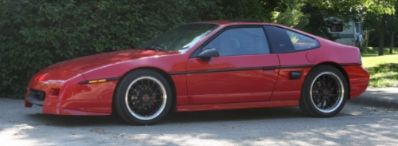


 [/UR L]


