I decided to spin a journal thread off of my intro "Newbie" thread.
Here I'll post up what journey's I go through with my new to me toy. I'll post pics and blurbs about work that I've done, places I've been, and if I'm lucky enough people I've met.
First is how I found the car that was to become mine...
I've been wanting a non-daily driver for years. Over the pst 2 years I've been working my butt off (I have 1.5 jobs) eliminating all of my wife's and my debt other than our mortgage. This is a feat that I'm particularily proud of considering we're (relatively) young, she's still in school (going for her Phd in molecular biology, wants to be a university professor) and we're basically living off of my modest income from a local construction company. Over the past little while she's been noticing me looking at more and more cars. I've been dropping more and more hints. Being far from rich, if I were to be able to get a "toy" car it had to meet some criteria.
- Be old enough to be able to insure it as a "classic". i.e. cheap insurance. - Be in good enough shape to be able to drive it and enjoy it - Be something that I would want to drive. i.e. sporty, manual transmission - Be something that I could source parts for and work on myself - Be something that I could afford to run (no 5L V8's) - Be unique
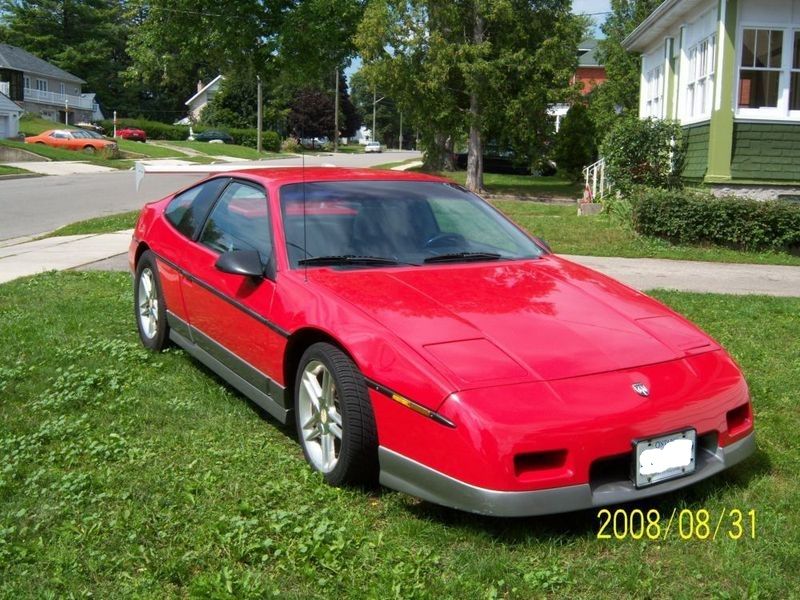
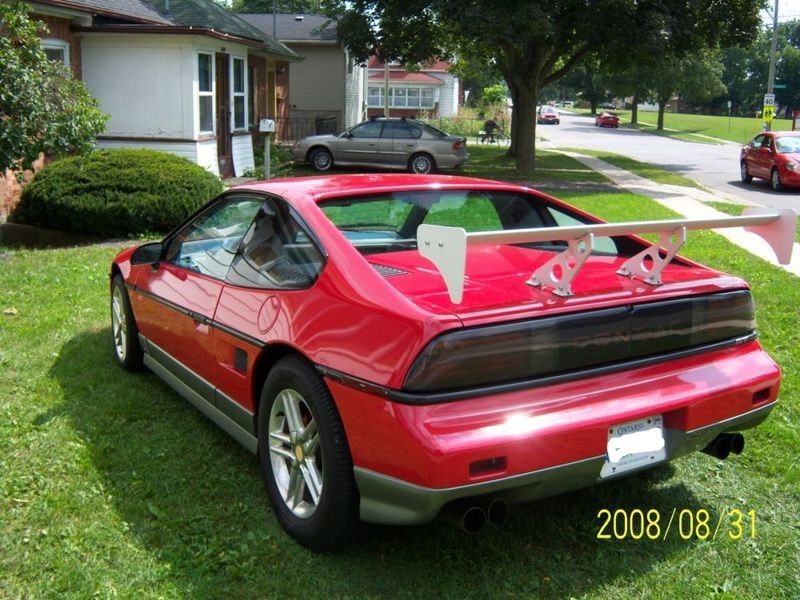
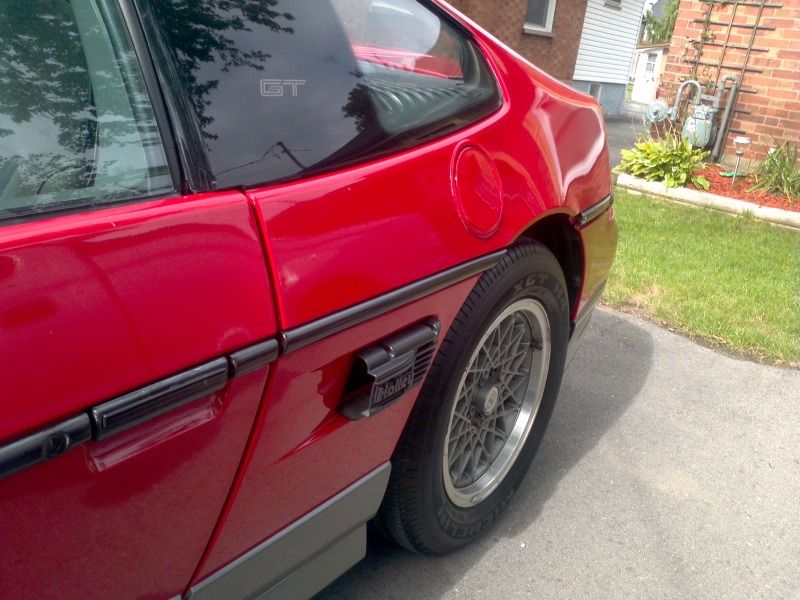
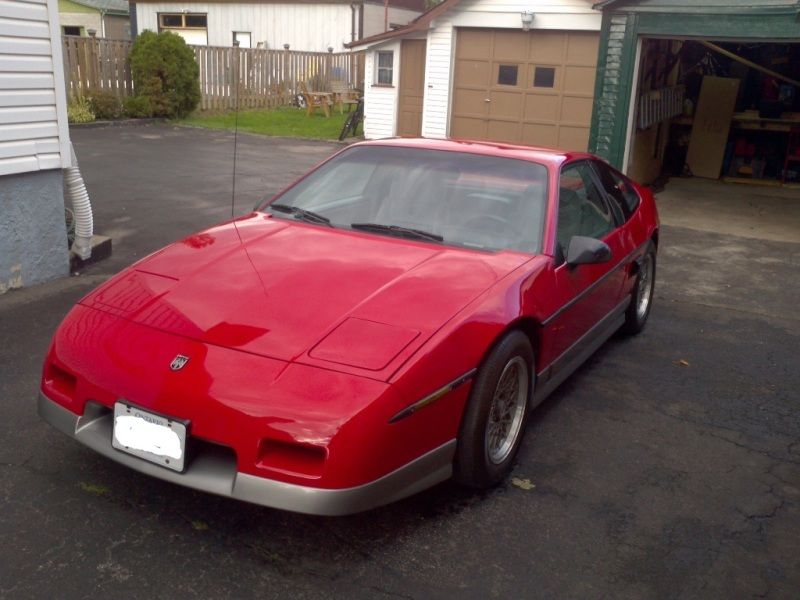
After lots of searching I came across this car, completely by fluke. I was originally looking for a 4 seat convertible, or something at least with a sunroof. I'm a sunroof advocate! (If you as nicely I'll show you the pics of me cutting one into my truck LOL) This one was a hard top, only had 2 seats, was completely impractical, had ugly rims on it (IMO), mis matched tires and a stupid looking wing. But (and there's always a but) it spoke to me.
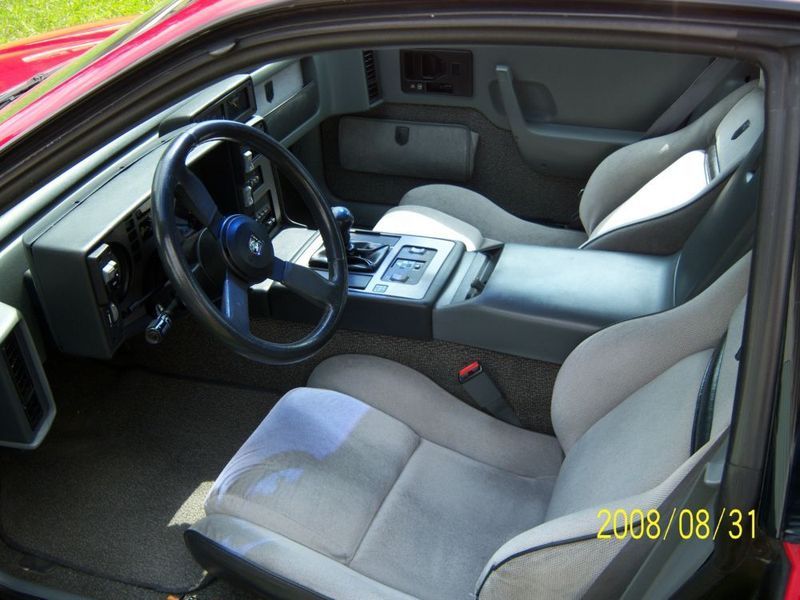
After speaking with the owner I got a little info on it. I would become the 3rd owner, and take it over at 72,777 kms. The interior was almost like new. The exterior was great for 26 years old, and I couldn't find any major rust anywhere. After a test drive that ended up in a smoke show (due to a seized caliper, not engine fire) we settled on a deal.
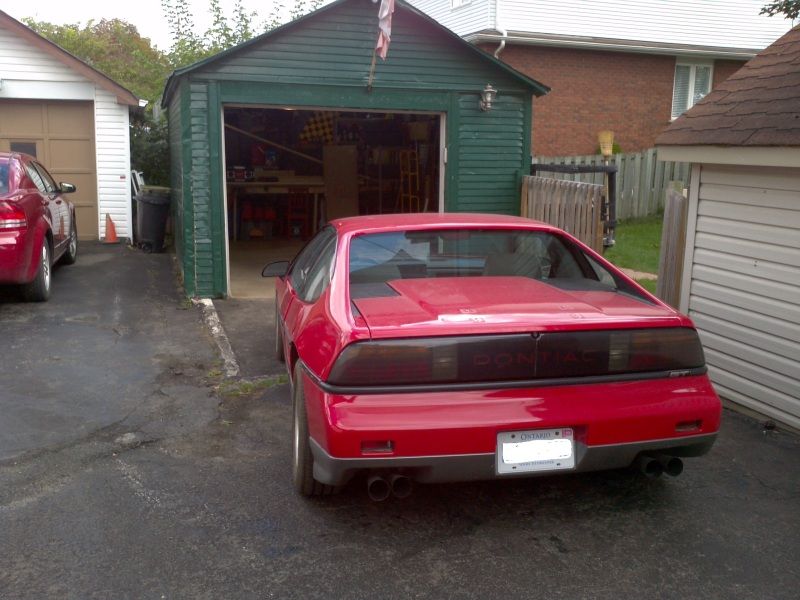
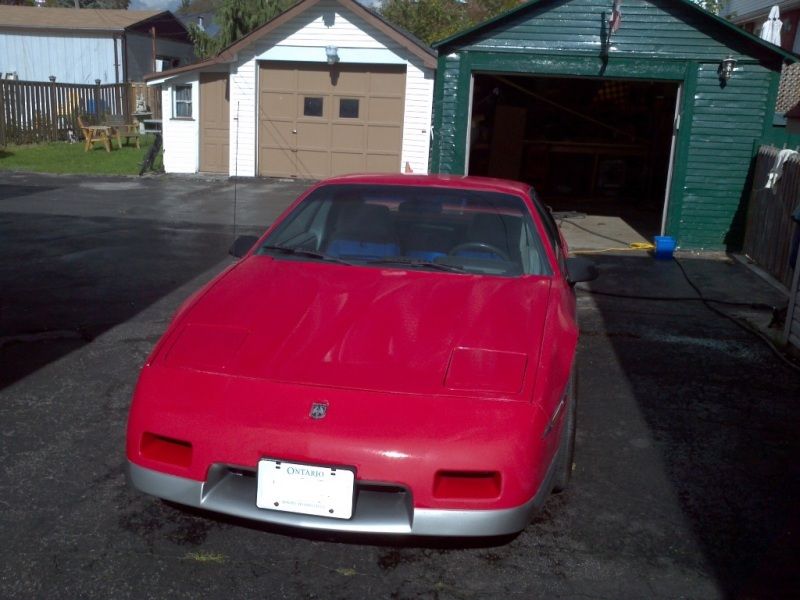
I bought the car as-is as shown below.
The car wasn't without it's quirks, it isn't perfect. But hey, if it were it would have cost me a lot more than $3g. It was sporty, had character, and was a blast to drive. That's what sold me on it.
Included with the car came a few bonus items: - The car has a cold-air intake on it (into the fender). It came with the stock intake and a K&N filter for it. - It came with the stock mesh wheels with ok tires on it. Tires aren't great, but they'll do for now. - He also threw in a Hayne's repair manual, and a universal car cover.
After taking it to my neighbour's shop for inspection (the car was owned by a friend of his) I had them replace the rear caliper and pads just so I could safely transport it. To date that's the only work that's been done on it by a shop, and it was because it wasn't driveable otherwise. Plus, he gave me a great deal on the work including the safety certificate etc and it was a hell of a lot faster for me to get the car plated this way than having to tow it around before/after repairs for inspections etc.
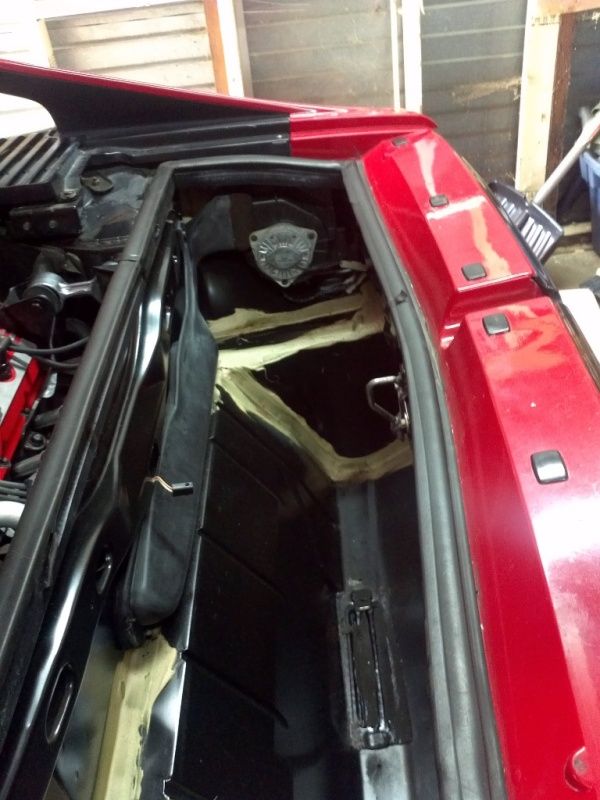
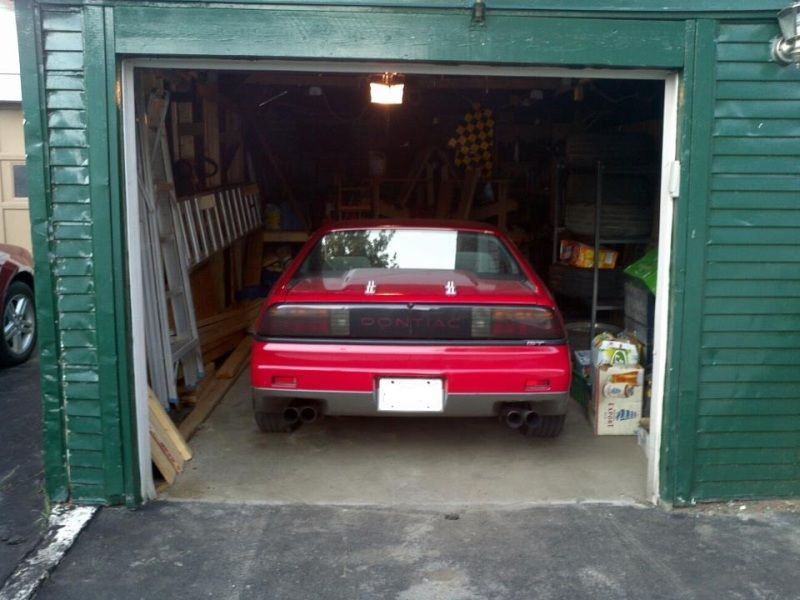
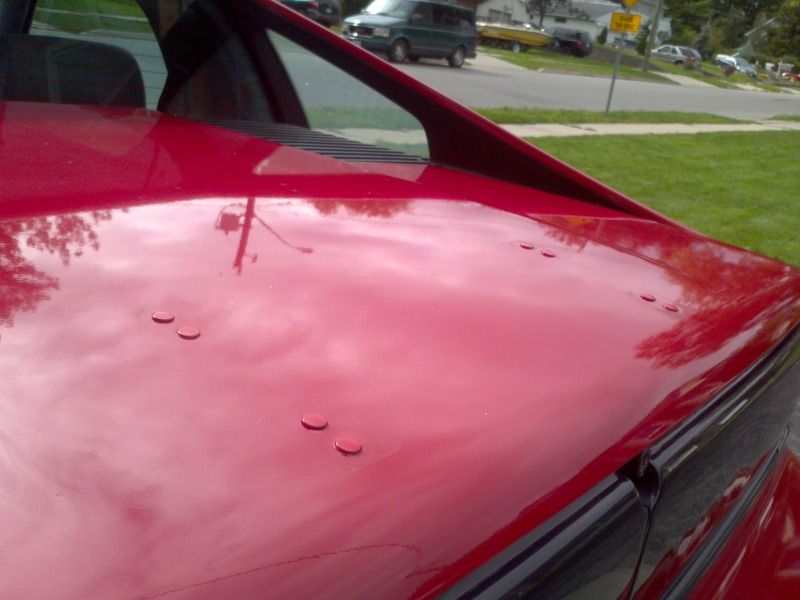
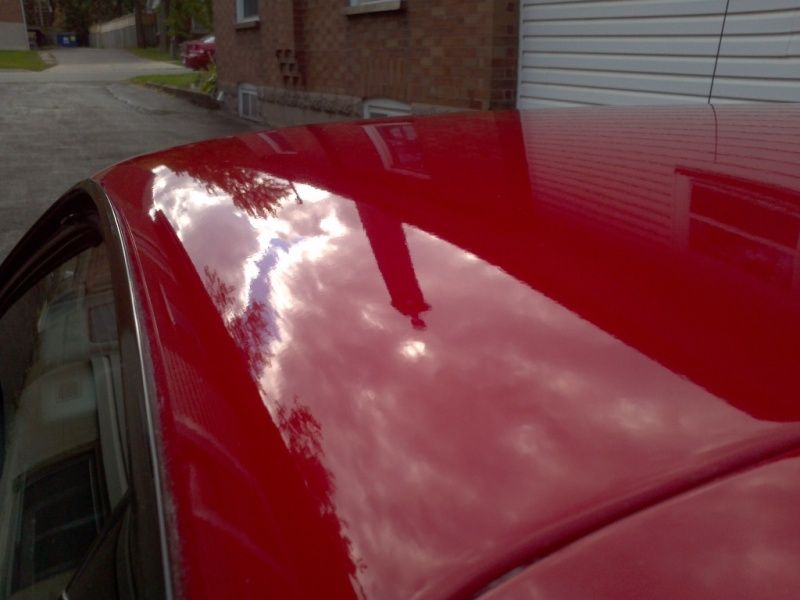
Here she is on her first night home. At this point the garage was still my workshop and barely fit the car because I had my crap everywhere. The garage usually held my utility trailer (will now be in the back yard) and obviously that was a bit smaller than the car. But most importantly she was home, and we got the door closed. Before doing that however, I had to at least get most of that hideous wing off. You can see though that the bottom mounts were still on the trunk until I could figure something out there.
I didn't have time all week to work on her, but come friday night and I couldn't wait until Saturday morning to get started. The car needed it's basics, and needed the ebrake cables replaced so I could use it. So Friday night I got the aftermarket wheels and tires off, and got the old stockers on. I like the old-school look of the meaty tires so much better, and I have a thing for those rims. They were in great shape, other than a little corosion around the outside silver part and the centre caps. I won't be able to really tell how good or bad they are until I can give the car a good cleaning.
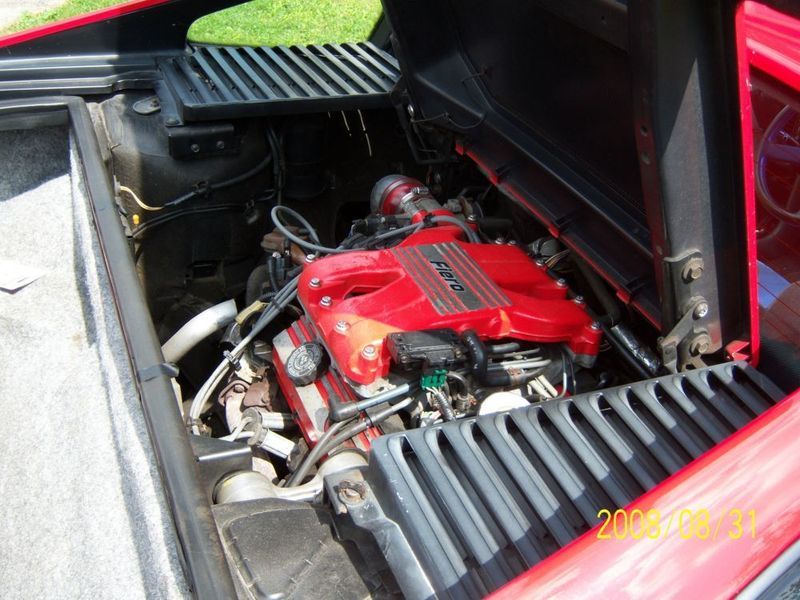
Also Friday night was an oil change, and transmission fluid change. I put in 5w30 synthetic in the engine and Penzoil Synchromesh in the transmission. The new transmission fluid made an immediate and drastic difference! It's the best money I've spent on the car so far. The best part was when my wife looked out the window and asked if I was in the trunk of the car. I absolutely was, hunched right over filling the transmission while trying not to spill. From the look of the engine bay I'm assuming I'll be getting used to this position. I also laughed at how long it took me to find the oil filter.
Here she is, back on her feet right before a little test drive with the new oils and new shoes. Already drives so much better than before! Two things I noticed: front pads were really low, and front end was a little stiff compared to the back. I noticed that the front driver's shock had leaked a bunch. New front pads and front shocks would be ordered. Also when doing the swap one of the rear wheel studs snapped when touruing the wheel back on. I think it was damaged from the heat generated by the seized caliper. On the test drive I also noticed how the driver's door bounced under my arm. I hoped it wasn't serious and hit the forums to find a solution.
The photo's blurry, it's from my phone and it was a lot darker by now than it actually appears to be in the photo.
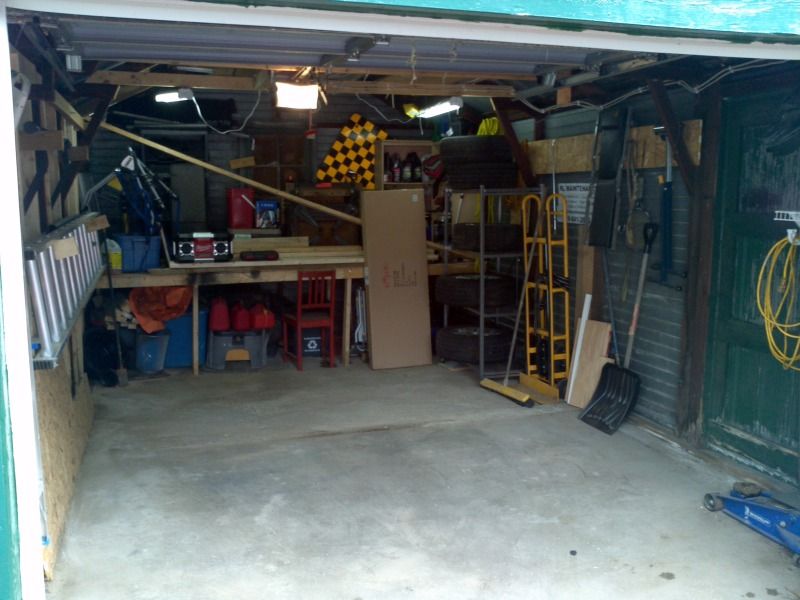
Saturday morning was upon me. Next up: clean that nasty garage and replace the ebrake cables. Cleaning the garage took way longer than I thought. But the end result was well worth it. I can find my stuff, and there's even enough space to work on certain parts of the car now if I wanted to indoors. I have a huge workbench at the back. Before the winter I am going to re-work it to give even more space to comfortably work on the front or rear if I wanted to.
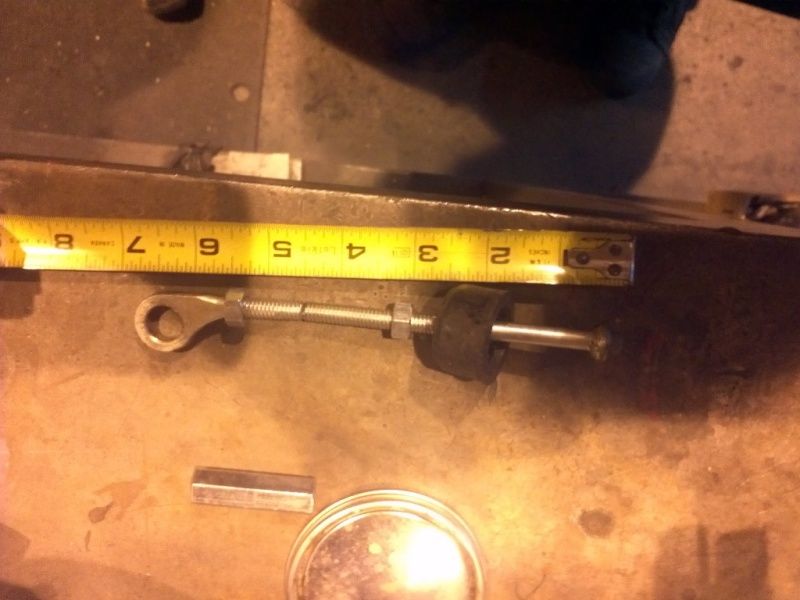
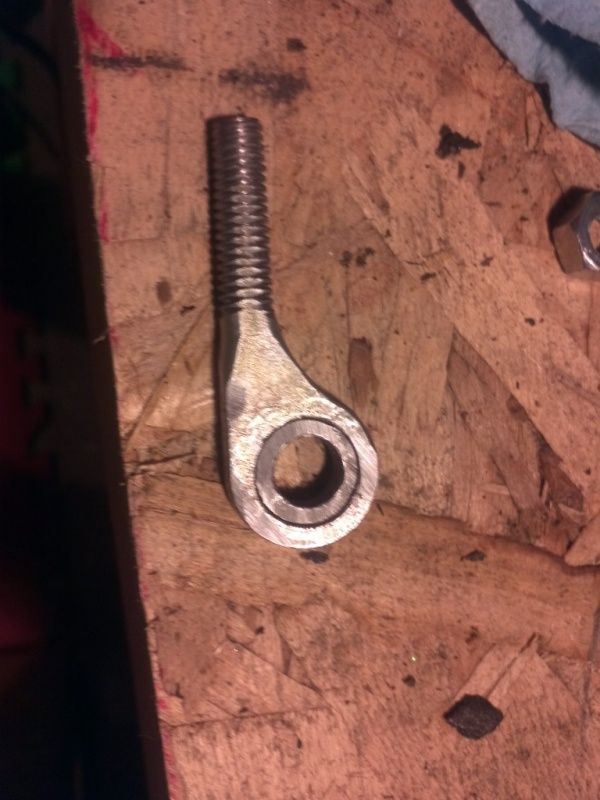
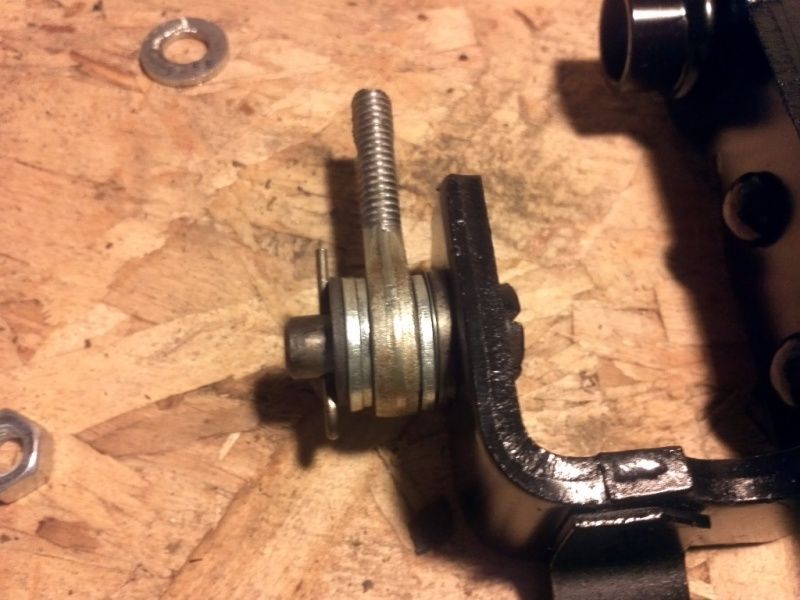
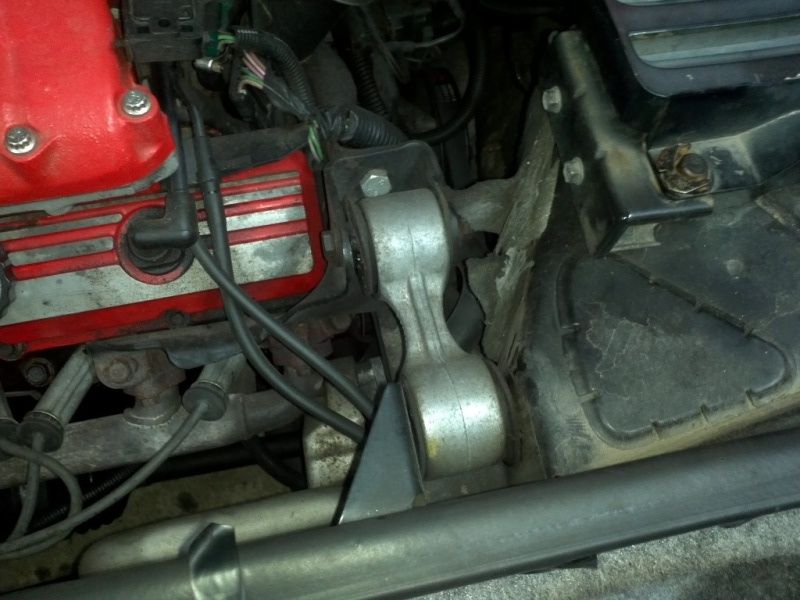
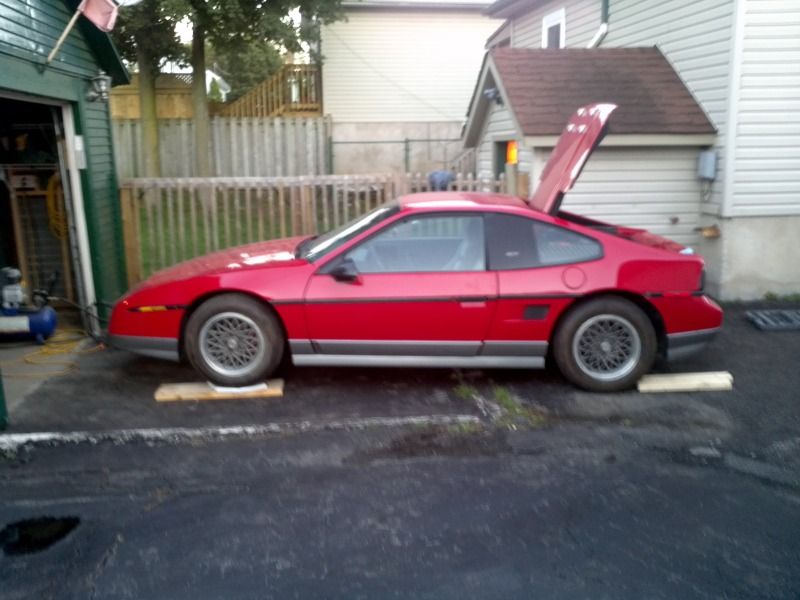
After some research on the forum I installed my new Ford door pin. No more bouncy door while driving :-) It's amazing how such a small thing can make such a big difference. Also removed the spoiler mounts before heading up to my buddy's place to work on our cars. I did the ebrake there incase I needed a hand (and I did at the end...). While I was in there I also replaced the broken wheel stud. This photo is before I left, no more spoiler mounts, just holes in the deck lid. I have no pics while doing the ebrake stuff, my hands were way to dirty to touch my phone. Unfortunately I found that both my adjuster and the clip that holds the two brake cables together need replaced. I was able to securely jimmy rig them with some worm gear clamps, but ultimately this is a temporary solution. Also temprarily repaired the left exhaust tip hanger. The metal hanger bracket is missing so we tied the wire to the bolt hole for the hanger to give some support for now. It'll work until I can find the hangar bracket. Also found the rear collant pipe hanger bracket in front of the rear wheel is rusted through and needs replaced. It's weird, because the front one is perfect. I'll need to find one of those too.
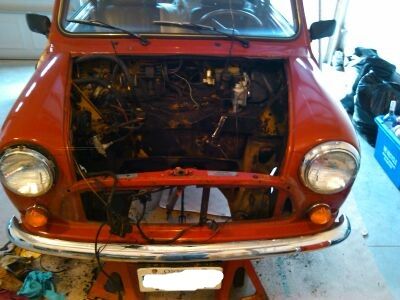
At the same time he was prepping to pull the motor in his mini. After my ebrake was done I gave him a hand finishing the rest of the prep and his motor was ready to come out. He's taking out a 1000cc and swapping it for a 1275cc. Here's a quick pic of the end result.
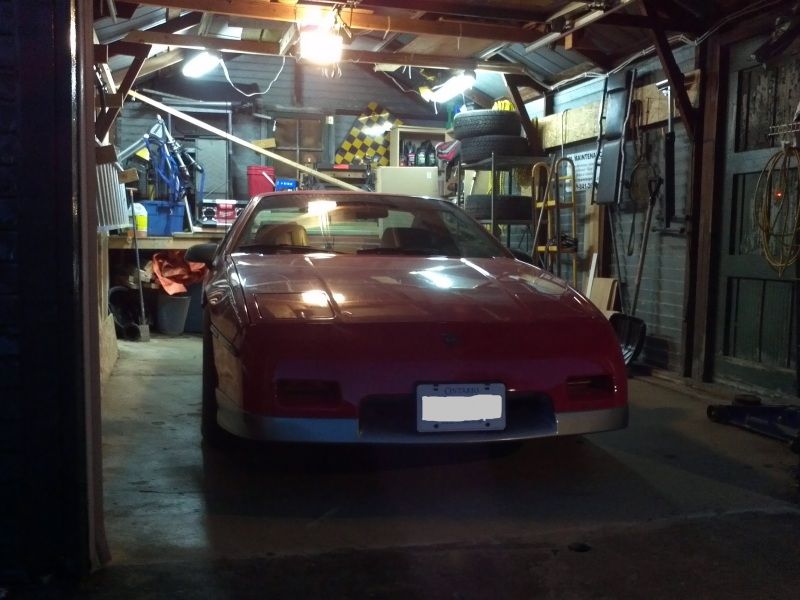
Back home, with a fixed ebrake (and working trunk popper) the car is now comfortable in the garage.
Over the course of the day I also sold the spoiler that came on it so I made a few bucks back. Now I just have to get those rims and tires out of there.
[This message has been edited by Ry86GT (edited 09-21-2012).]
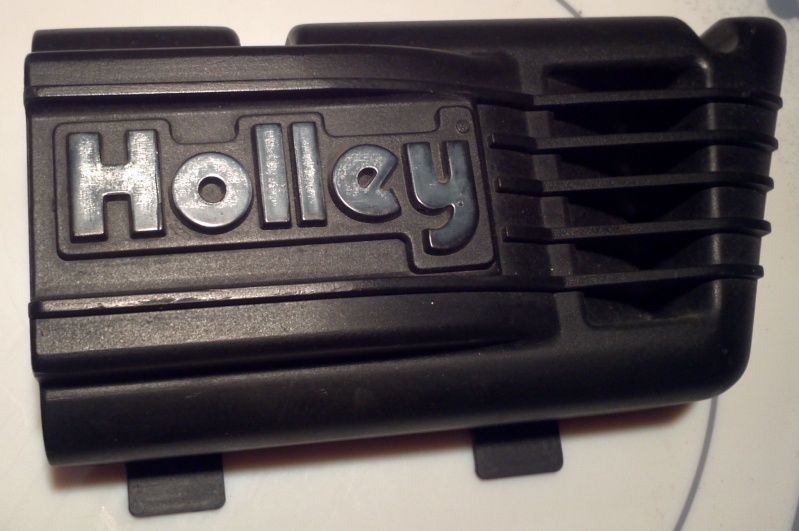
I had a goodie arrive in the mail on Tuesday. I was pretty excited, since I saw the intake scoops I wanted one, and a forum member (Asphalt Risin) was generous enough to send me one in the mail. Big thanks to Asphalt Risin.
It arrived like this: mint other than some faded lettering.
After some light sanding and polishing I have the letters looking nice and black. I'm going to leave them like this for now, I may decide to paint them red to match the body in the future. I like the look of the scoop, but I don't want to to stand out like a sore thumb so I'm going to see how this looks on the car first. I'll be putting it on when the car gets its first good cleaning. Hopefully very soon.
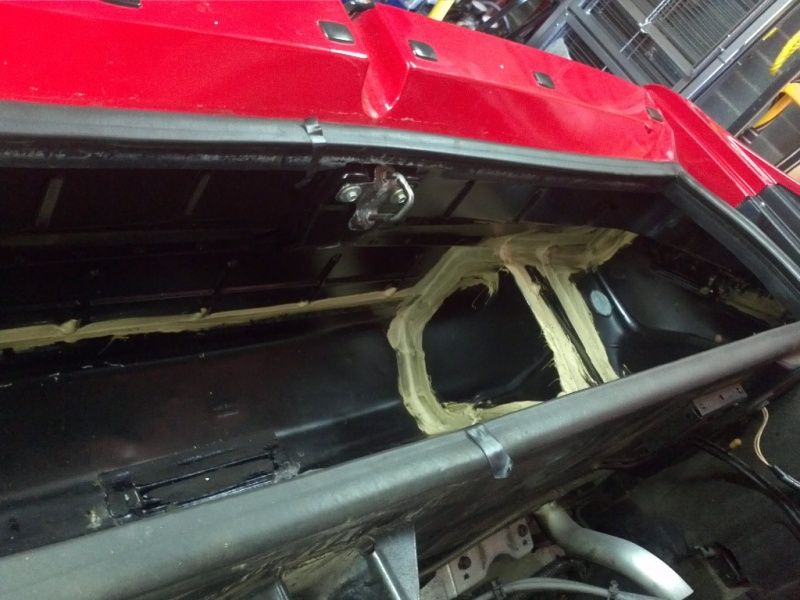
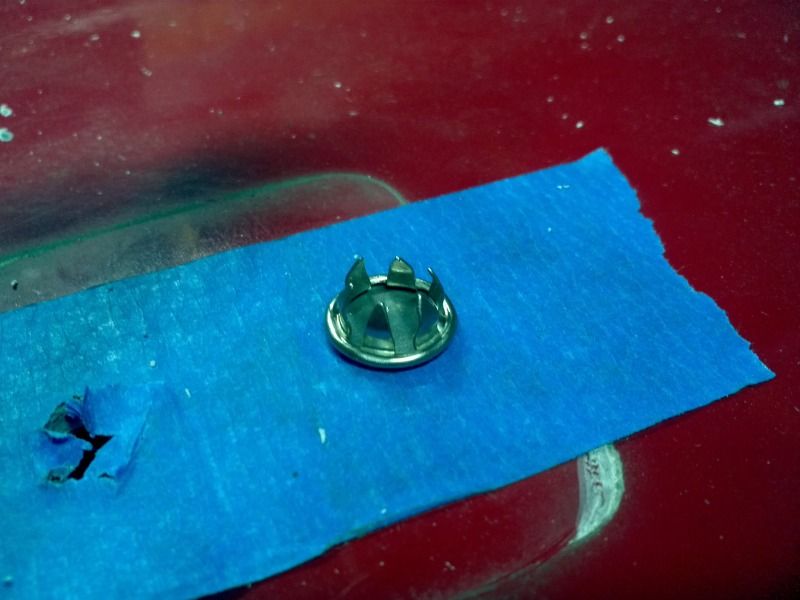
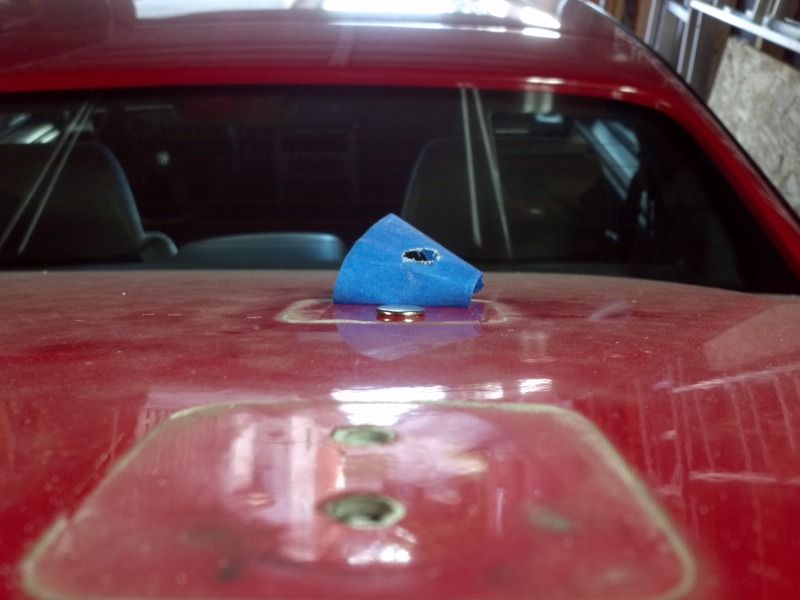
With a trip to the hardware store I also figured out what I was going to do with the holes in the trunk. I couldn't find bolts low profile enough for what I wanted, so I found these little metal hole plugs. 3/8" was the smallest that they had so I grabbed 8 of them. $6 later and I was on my way home.
Here's what they look like, and a test fit.
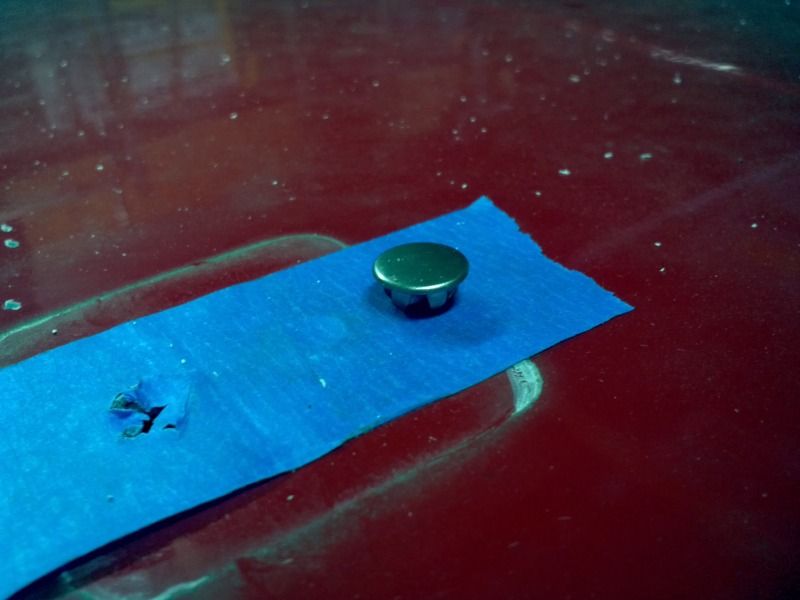
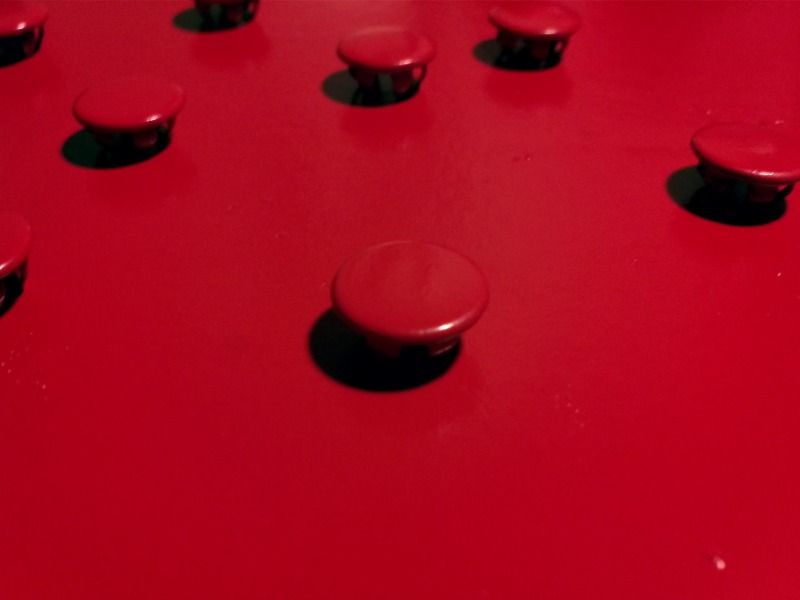
The holes in the trunk lid were smaller than that, but the previous owner couldn't drill a round hole to save his life. I had to re drill the holes to 3/8" to get them round again to properly fit the plugs. I didn't mind, the trunk already had holes anyways and that's what made the plugs fit snugly. After scuffing them up, priming then painting with exact match spray paint this is what I ended up with.
It's hard to see the red, but it's very close to the car's colour. Better than I could've hoped for. The spray paint was $13 off the shelf at the parts store and I have left overs to touch up a couple of nicks on the body itself. Shortly they will get installed into the trunk lid with silicone. Then I can be worry free about washing it, I'll just need some nice weather.
I know it's not ideal, but it's the best I can do for now without getting a whole new deck lid. I think it's as low profile as I could make it. In the future I will re-visit the hole situation, for now I just wanted it water tight.
Thanks for the tip, if I can find one locally I will look at it - but right now I certainly won't be able to swing for a deck lid plus shipping. Plus I would want to see it in person to make sure it's at least as good as mine. For now there's other places I can spend the money.
quote
Originally posted by Formula:
check out bumper plugs too, they are for covering holes that were drilled for front license plates
I had never thought of those. If what I've done doesn't work out I'll look at them next. Thanks! I managed to get to spend some time on the car today. First was to check out the plugs that I had siliconed in place. I sprayed the hose on them and inspected them for leaks and so far so good. Next test: the car wash. Still dry, and the car loved it's first wash. Some touch ups are needed, but overall for an all original 26 year old car I think it's in good shape. I want to try and give it a full detail before putting it away for storage but it may have to wait until spring.
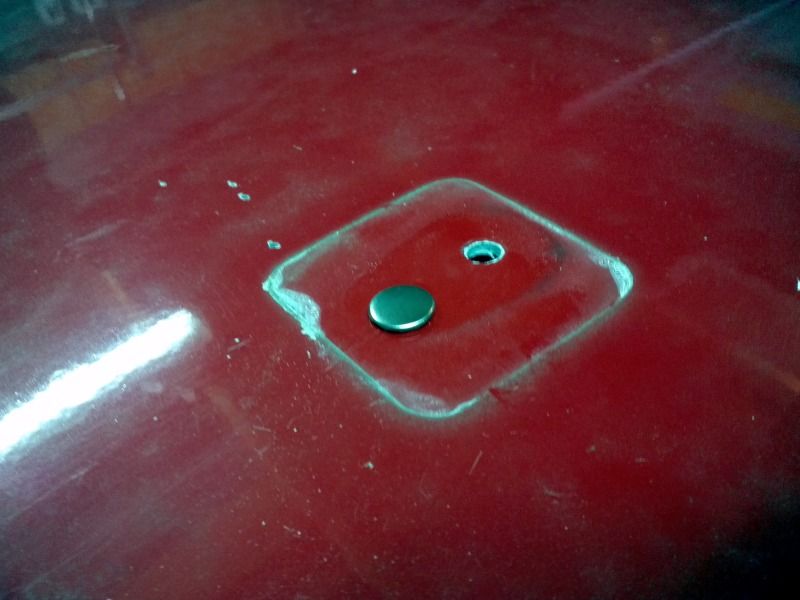
A close up of the painted plugs installed:
Looks half descent in my opinion, and even better the further away you get. I can live with this for now. I'm going to have to buff out the paint around them, it's a little stained from the spoiler pads that were under the mounting feet of the spoiler I removed.
I also got my intake scoop installed. I love it, I think leaving the letters black was the right choice once I got it on.
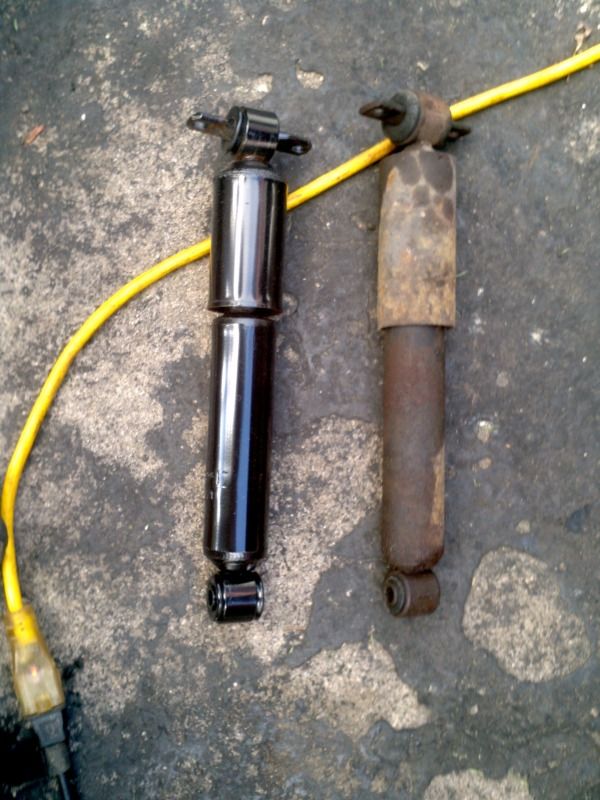
Then I got the front end up and swapped out the front shocks and front brake pads. Out with the old and in with the new. You can see how the old ones had leaked. They were definitely shot, no rebound what-so-ever. The new ones improved the ride quality considerably.
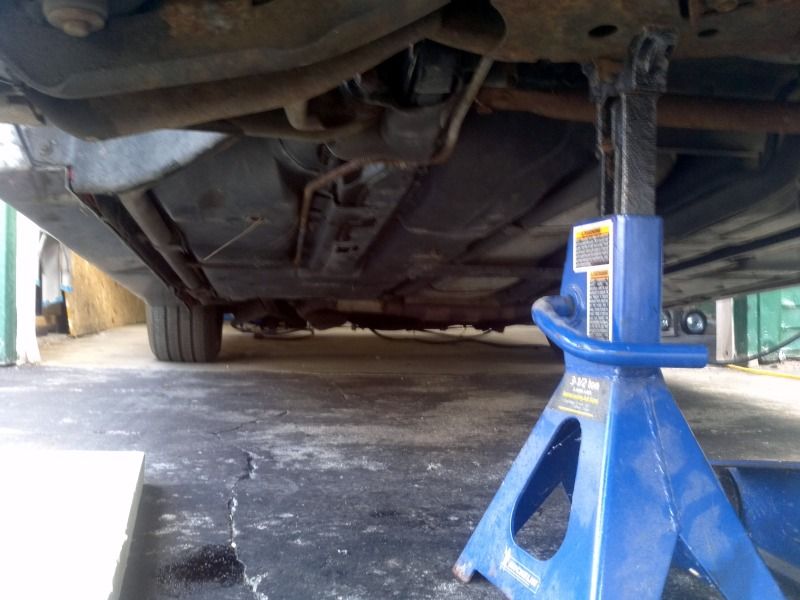
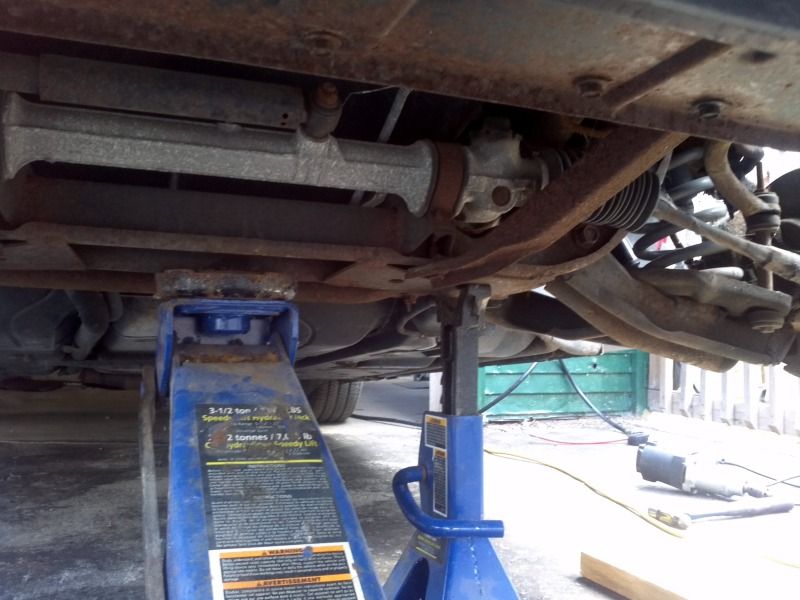
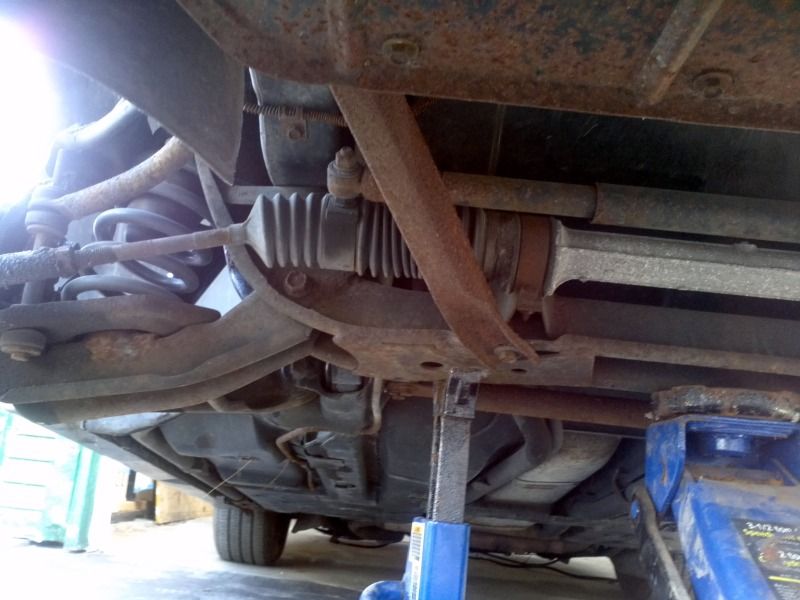
While I had the car up I took a few random pictures. Here's what I could get of the underside. I want to try and take some of the easy to remove rusty parts off to paint over winter. If they're small enough I can send them to work with my buddy and he can bead blast them and paint them for me.
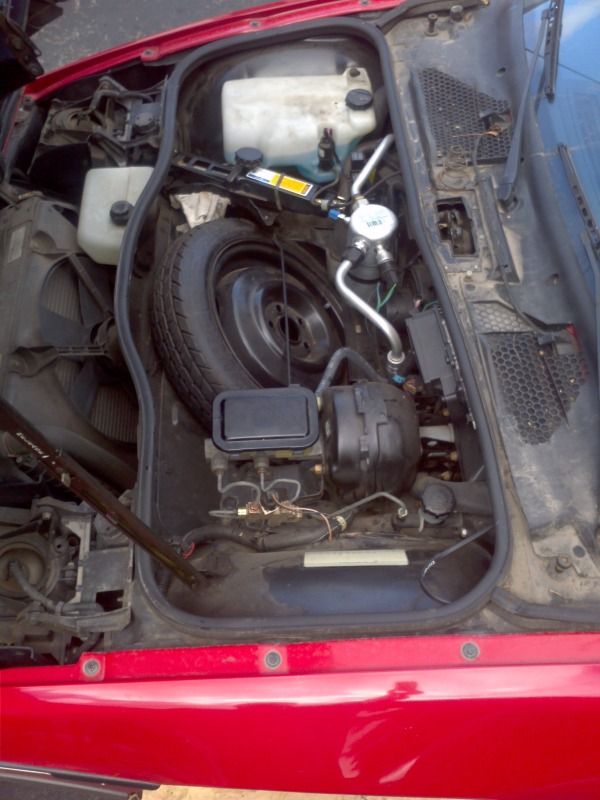
And here's the front compartments. I want to try and clean this up some also, for the most part I think it only needs a wipe down.
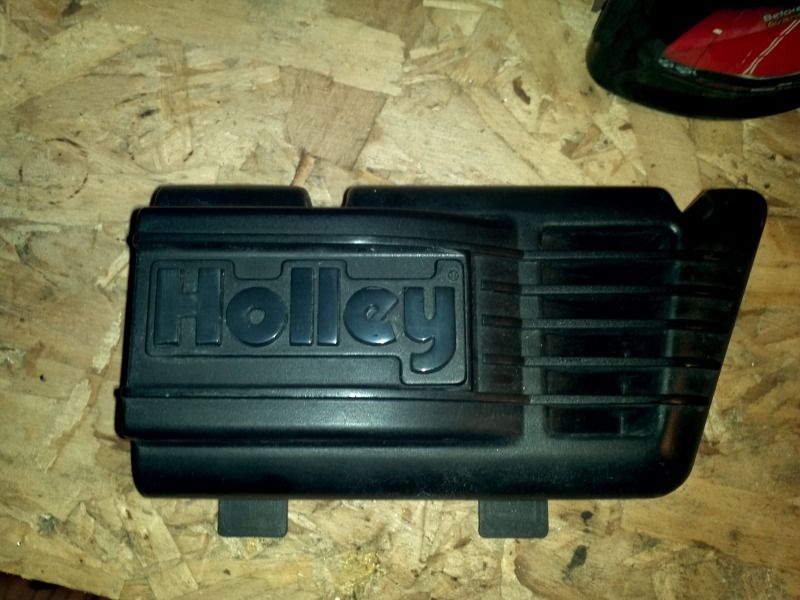
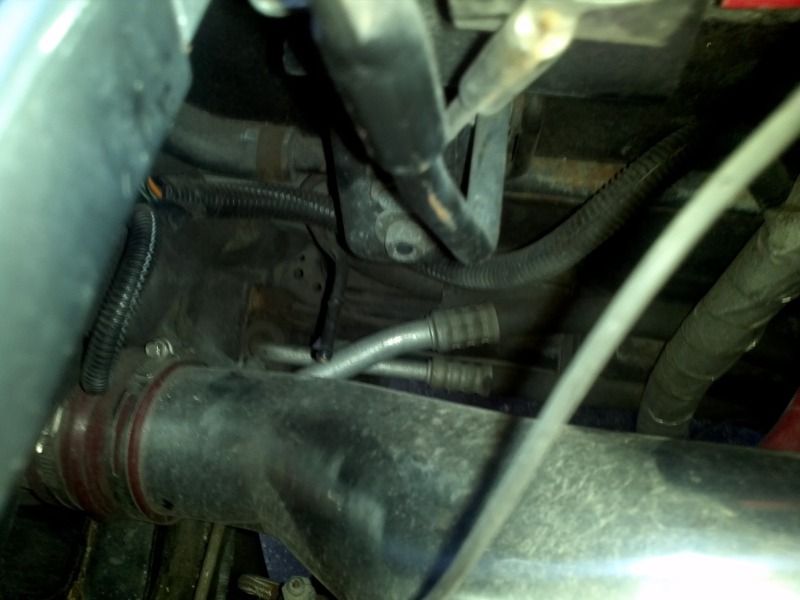
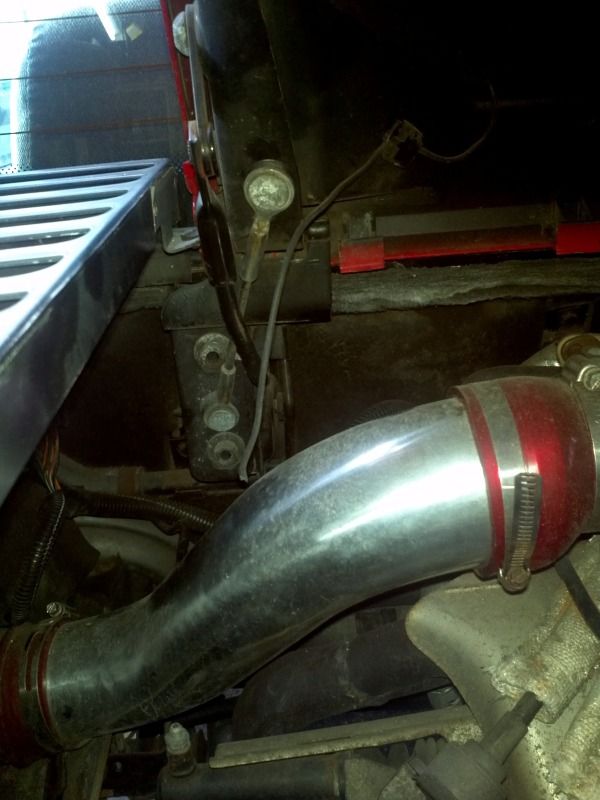
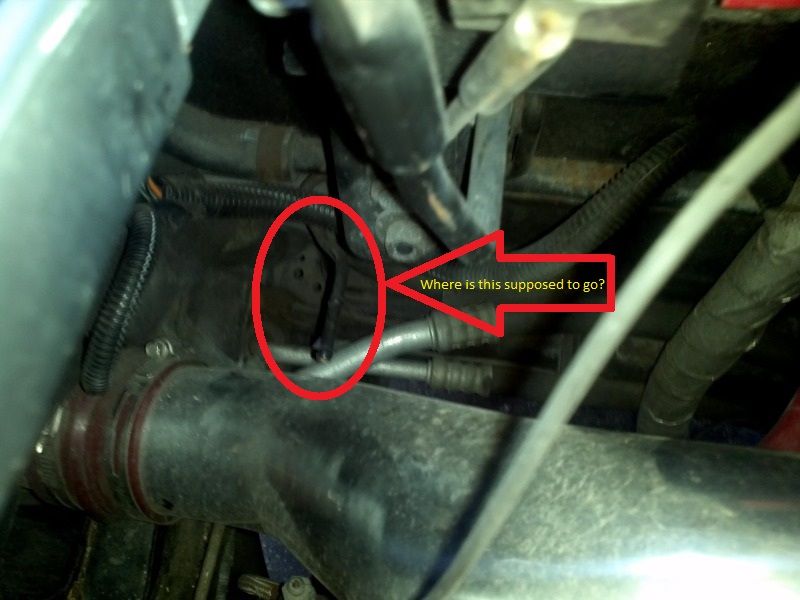
I was poking around the engine bay taking a closer look at the intake that the previous owner put in. The air temp sensor is ran through the fender and is installed into the back of the air filter (inside the fender) and the crank case vent is connected to the pipe before the throttle body. However I found this nipple without a line connected to it and after looking up the diagrams I think it's the evap return line. There's no where to connect it on the pipe. Is it ok left open like this? Or do I need to find a way to connect this to the intake pipe? The car smells like it may be running a bit rich, can this contribute to that?
Also there's what appears to be a ground cable connected to the heat shield on the underside of the deck lid. The cable is connected to the shield, but the cable seems to have been cut about 8" from where it's connected to the deck lid shield and I can't find the other end anywhere. Can anyone confirm if this is a ground cable and/or where it should go to?
Saturday with some free time I started looking at some non-working exterior bulbs. I replaced the "Pontiac" bulbs with "Nighthawk" bulbs . They're supposed to be 20% brighter than a regular 194 bulb. I have no idea and they were only $1 more so I thought I would try them out for the heck of it. I noticed the whole right side of the car was out and I wasn't even getting any voltage at the socket. Some contact cleaner and a sharp edge later and I was getting voltage again (phew...), but the builbs were dead too. Back to the store and all 4 corners got new bulbs.
While doing the above I was trying to loosen up the power door locks. They were clicking, but haven't actually worked since I test drove the car. Again the forum came to the rescue here, and the fix came courtesy of some PB Blaster and some Fluid Film. I didn't want to take off the door panel if I didn't have to and after some reading I removed the one phillips screw at the top of each door by the edge of the window, peeled back the weather stripping and stuck the nozzle for the fluids in there. First the PB Blaster to loosen it up, play with it some and repeat. Then some fluid film, play with it some and repeat. Over a few applications the door locks got better and better. Initially it took 7 button pushes to unlock/lock, then 5, then 2, and now only one :-) As a plus it's easier to unlock and lock manually from both inside and outside the car. I forgot to take pics here, but I can easily do so if anyone needs to see it.
Also while playing with the bulbs I realised I have the "you have to hold the shifter for your reverse lights to work" thing. After some reading I know what to do to fix this, just haven't done so yet.
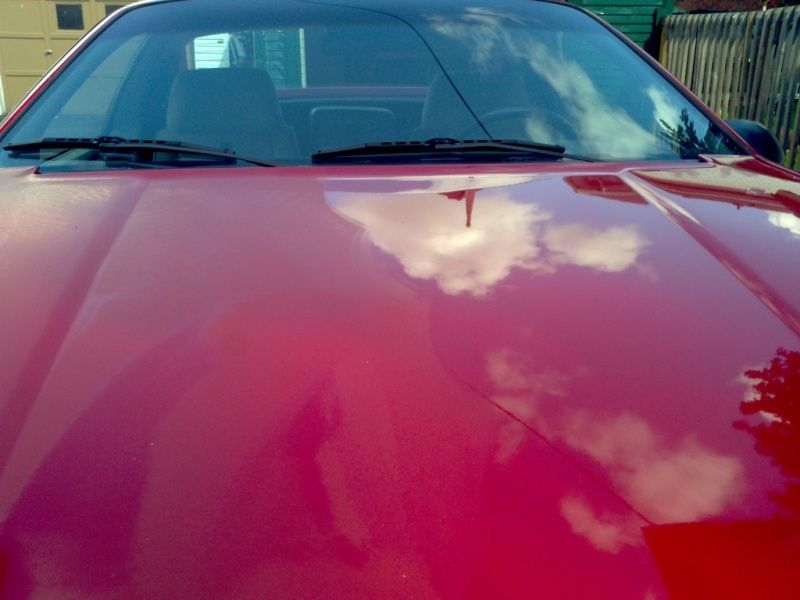
Now to when I remembered to start taking pics, Sunday the weather was awesome so I decided to take advantage and get the pre-storage wax that I wanted to do in.
After a wash and dry, I started with polishing. I know this isn't pro quality, but I wanted to see how well I could do on my own. This is the compound on the hood and half of it buffed back off. A nice improvement, but I can still see where a pro with a DA polisher would have had better results, or even applying it by hand. I only have a random orbital and two arms. In the interest of time I applied it with the random orbital and buffed it all off by hand.
Then it's wax time. I thought I had some good wax sitting around, but I was wrong. All I had was some old Simoniz liquid stuff. I used it because it was sealed.
Wax on:
Starting to take the wax off, getting excited at this point. The pictures don't show it but it was much shinier and smoother than just the polish.
After 4 hours of washing, drying, waxing, touch up paint and tire shine here's the final product:
(The wax above the rain drip got wiped off after this pic)
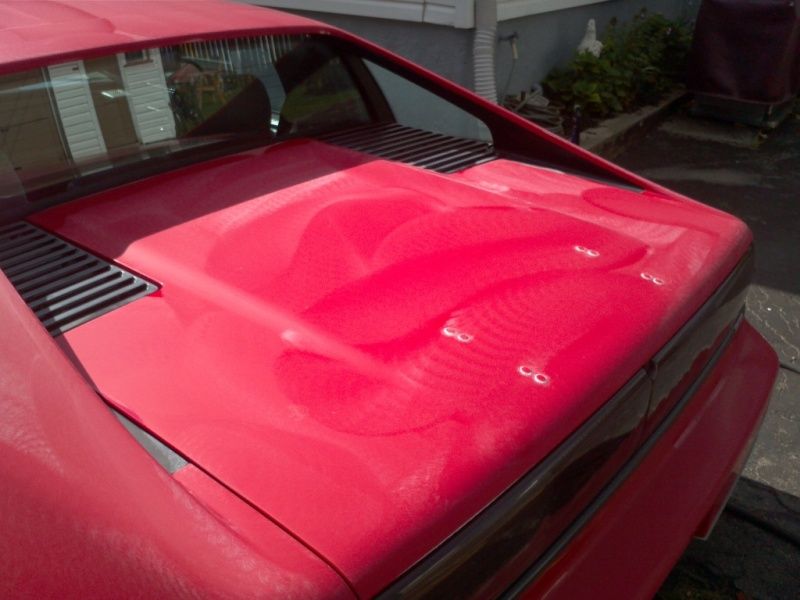
Super happy with the results cosnidering it was just old stuff I had sitting on my sheld. After some touch up paint the car looks amazing from 3-5 feet away. Only once you get really close do you start to see some of the imperfections.
Sadly after all of the work there are still a few spots that look like this:
That is about the biggest of them all and its on the rear deck lid. They're appearance was somewhat reduced after my work and they do feel pretty smooth. Is there a way to help remove this any more without repaint?
Sunday evening the wife and I went for a nice cruise. Ended up blowing the sub putting a tape in the tape player, I guess I will start searching for a replacement.
Now for today's questions, if anyone can help or has any advice. - Does anyone have any recommendations for a good, strong wheel cleaner? My wheels are kinda caked and discoloured between the meshy spokes. - Any recommendations for a good quality and easy to use DIY wax? - Can the black parts at the rear deck lid be waxed too? The pieces inside the sail panels and the deck lid vents... I didn't because I wasn't sure. - What about the plastic sail panels and the rear tail lights? Again I didn't because I wasn't sure. - Does anyone know the paint code for the grey along the bottom? I had red touch up, but I need some grey too.
- I like Simple Green for dirty wheels. That, and a bit of muscle/patience. - I stick with Meguires waxes and polishes. - Both the sails and tails can be polished/waxed. Fine scratches/swirls can be removed with polishing. Once again, muscle/patience. - The paint code can be one of three. It is located on the fender well inside the front trunk on the driver's side just left of your brake booster. I am sorry, but i can not recall the codes off of the top of my cranium.
- I'll take a look for a good Meguires wax. The compound I used before waxing was Meguires Ultimate and I liked it. - I beleive we have some Simple Green in the house. I'll give it a shot next car wash! I'll also polish and wax the sails and tails by hand. - I've seen a label inside that fender, but never really looked at it. I'll take a better look at it and see what I can find. Thanks again
For anyone who has some spare parts or is parting out a car I have posted a WTB thread. I will keep updating that thread as time goes on and I need/find parts. Please take a look and see if there's anything you can help me with. If you have something that isn't on my list that you think I may need I'm open to offers/suggestions (worst I can say is no thank you).
Meguires Ultimate is awesome. I always used the polish, but grabbed the other last time. It REALLY works.
You can polish the tails by hand, but, if you are good at the polisher, you can do them with that. I do mine that way when needed. Just be careful not to "burn" them. A polisher creates the necessary heat, but there is a fine line. It looks like you know what you are doing.
Great pics. It makes answering much easier for us. And, welcome to the forum. So many absolutely knowledgeable folks here.
Hey guys, I need an answer from the experts. I posted this a while ago but I think it got lost in my busy first posts.
I believe my car has a CRX intake tube on it. I have verified that the air temp sensor is installed (although not how I would have done it) and the crank case vent is connected to the intake tube (also needs fixed) but I'm not exactly sure where this is supposed to go. From looking at the parts book pictures I think it's supposed to be connected to the intake as well, but I'm not sure. I've tried searching and have seen a line connected to it in photos, but can't see where it's going.
Can someone confirm and tell me where it's supposed to go?
I love the sound of the intake, but I'm seriously debating putting it back to stock as long as all of the parts are in the bag like the owner said they were.
on the stock intake, just below where the hose connects to the canister is a little nipple with a hose that connects to that.
For the life of I can not remember what it is for though.
To better depict, i took a snap shot of mine. My car is the same year with stock assembly.
Looking from above.
Under the intake, on horizontal plane
There's a plate there with a nipple that the hose is attached to. I have no idea what its doing, but yours dangling is about as effective as mine, considering its not connected to anything vital
Good man! I really need to find away to upload pictures at work!
I use Photobucket If you look at my post times most of them are from work. It's when I do all my research LOL.
Thanks guys, that's the line that I thought it was but I wasn't 100% sure if it was supposed to go to the charcoal canister or the intake. I believe it is the EVAP return line. Asphalt from looking at the diagram of the parts book I believe that your hose is in the correct location but you are missing part of the intake below the air cleaner. I think there should be a rubber elbow that goes to the air/water separator in the fender. From what I see that elbow is where that line should connect. I wanted to get my bag of stock intake parts out last night but didn't have time. I'll try to get to it tonight to see what I have/don't have.
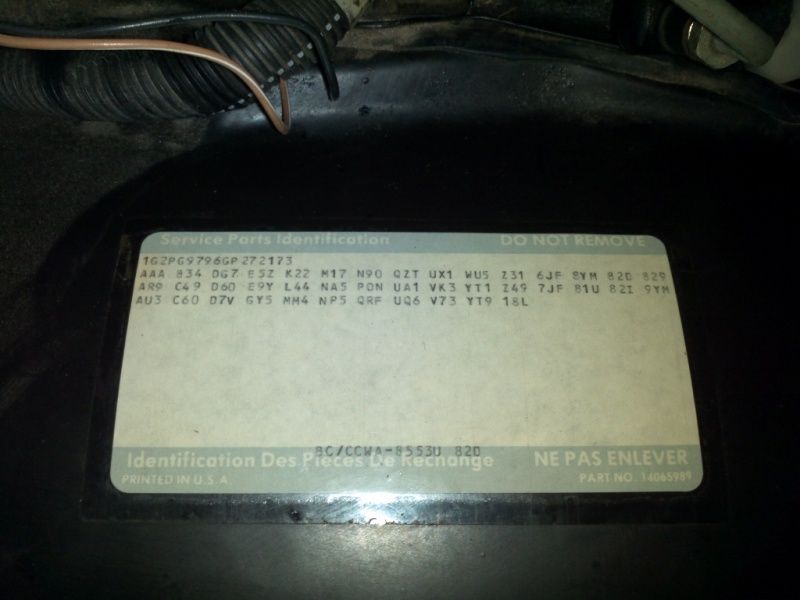
I did run to the garage quick this morning to pop the hood quick and snap a photo of the label inside my fender.
If anyone's interested, and if I've done this right, using the below link I have the following listed on my sticker:
QZT P205/60R15 blackwall, steel-belted (front); P215/60R15 blackwall, steel-belted (rear) UA1 Heavy duty battery UQ6 Speaker, sub woofer ('86-88)
UX1 ETR AM/FM stereo w/clock, cassette, auto rev, search, replay, seek & scan, equalizer, clock ('85-88) VK3 License plate, front mounting package V73 Vehicle Identification US
WU5 ???? YT1 Built-up, custom door and quarter YT9 Fisher furnished parts
Z31 ??? Z49 ??? 18L Medium Gray Metallic (lower of two tone)
6JF 6 code = left front spring code 7JF 7 code = right front spring code
8YM 8 code = left rear spring code 81U Bright Red (upper of two tone)
82D Pallex cloth, Dark Gray D (trim level) Deluxe 82I Interior Color, Medium Dark Gray
829 Seat Belt Module, Medium Dark Gray 9YM 9 code = right rear spring code
BC/CCWA-8553U 82D - Base Coat / Clear Coat, Fisher Body 8553 upper portion (Not sure what 82D means, interior colour as listed above?)
So with that said I can see that I have bright red 8553 on the body, and 18L lists as medium gray metallic on the lower portion but I don't see a paint code for it. My sticker doesn't seem to have a "/...L" number on it. Does anyone know that code is from what I've listed above, or do I go to the store and look for medium gray metallic in the GM paint section? I've searched for paint code 18L but it comes up as a blue.
Just a few random thoughts: 1) Either your after wax pics dont show it or you are not waxing the trim/belt line. It is plastic and will look nice & glossy after waxing. 2) Fierostore has exhaust NOS hanger brackets but they are quite pricey. Autozone sells some generic ones that are quite cheap and with a little bending on a vise and a little grinding & drilling you can adapt them to your applications. 3) Most Dollar Tree / Dollar Store chains carry big pkg's of Q-Tips. They are very handy for cleaning inside the diamonds in your lace wheels. Also, motorcyle aftermarket stores sell chain degreasers that really come in handy at dissolving grease & cleaning lace wheels. Someone mentioned Simple Green....it's good stuff (I use it) but it's too mild for dirty lace wheels. 4) Have you checked your upper dogbone for any play/losseness? This is often neglected on Fiero's and is very important. It's also very cheap to replace. Kit
1 - Good eyes, I didn't do the belt line because I wasn't sure (like with the sail panels and tail lights). I'm going to try and finish the job this weekend, I'll do the remaining waxing by hand. 2 - Much like you've suggested I've fashioned up a hanger to work for the left side. The clamp and rubber were on my car, just not the top metal triangle mount so my buddy helped me make something up when we did the parking brake cable. 3 - Will the chain degreaser eat into the paint on the wheel? This is the type of think I need, something to get off the caked on stuff, but the paint on the wheels themselves is great and I don't want to harm it. 4 - I looked at the dogbone, but not closely. The rubber is there, but like you said I believe it is in worse shape than it seems. I have added it to my "to-do" list and added it to my wanted to buy thread. I would prefer to do bushings only, but I guess I have to pull it first to see what kind of dog bone I have.
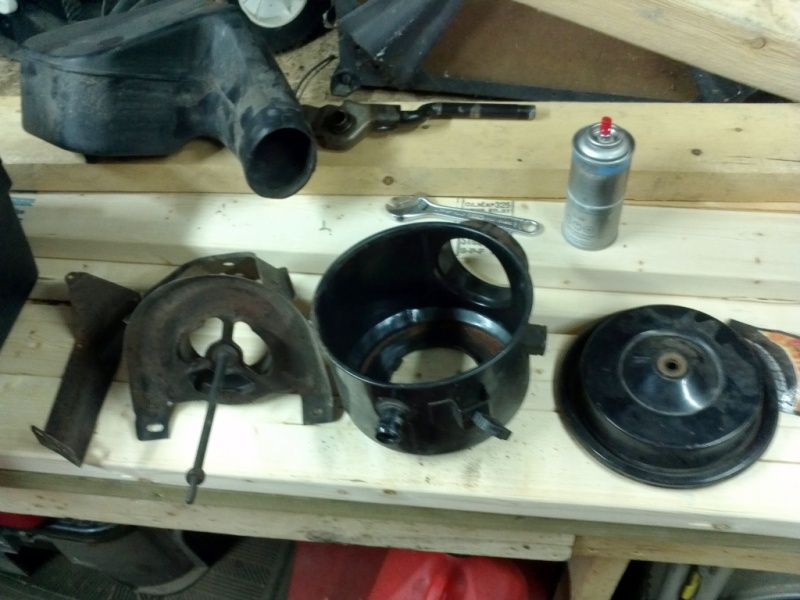
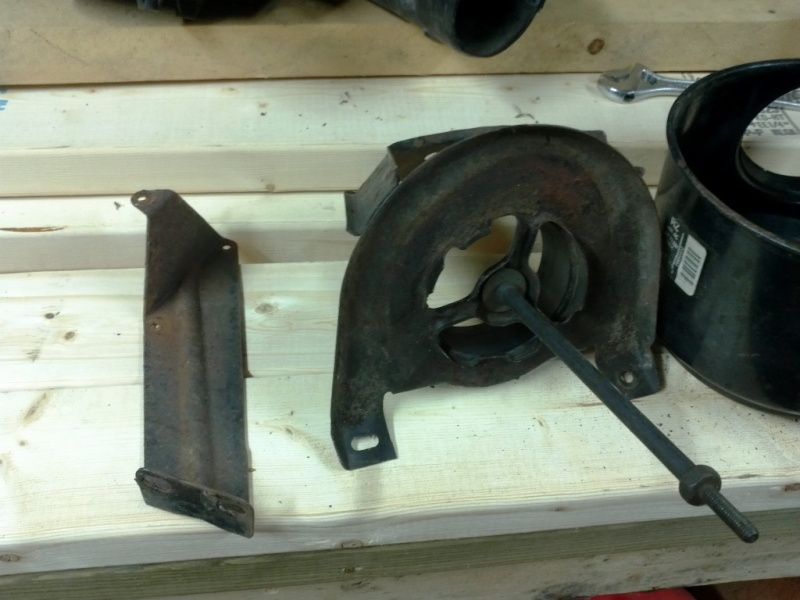
I only had 5 minutes last night due to a family emergency so I only got the intake stuff out of the bag, I didn't even have time to snap pics with my phone and the parts are still on the garage floor lol. All of the big parts seem to be there with exception of the hoses that go from the intake tube to the piping on the firewall. Will have to hunt for, or try to fashion something up for those. Other than that I'm missing all of the mounting bolts so will have to find new for those also. I was glad to see that there was only a little bit of surface rust on the mounts. The plan is to clean them up, repainting them and install the stock intake as a winter project. Pics of this process will come when I start working on it.
Asphalt from looking at the diagram of the parts book I believe that your hose is in the correct location but you are missing part of the intake below the air cleaner. I think there should be a rubber elbow that goes to the air/water separator in the fender. From what I see that elbow is where that line should connect.
Thanks for the heads up on that. I recently discovered my intake is pre-recall as well. .......it'd just be easier to swap to a 3800SC, rather than fix all that crazy stuff I think. lol
It's doubtful m/c chain degreasers will harm your paint as the people who made them knew that people were going to get some of it on their m/c rims. (which are usually painted) When in doubt read the can for warnings. Also, I believe most wheels have a clear coat sprayed at the factory to protect the paint from road grime/salts/dirt, etc.... Just dont do something stupid like I did one time by using a cleaner that is way too strong. (like using Purple Power FULL STRENGTH) (The inside of my Fiero front hood is forever dull black now) Anyways, moving right along.....would you believe I have some more diamond wheel cleaning tips for you? Cheap toothbrushes and paint brushes (also available at your local Dollar Store / Dollar Tree are great for detailing, getting wax/dirt out of the door handle pulls, belt line, marker light grooves and even lace wheel diamonds. OK, last diamond wheel tip......after soaking the wheels in a degreaser/cleaner, etc.....hit it with a high pressure garden or car wash sprayer hose. It really helps to blast out the dirt out of those little diamonds.
As for your dogbone, you can either buy the rubber type from Anchor (about $12-14 dollars) or you could burn/press the old rubber bushings out of your old one and buy poly bushings from the Fierostore.
HAHA! I knew there was a reason to keep all those old tooth brushes. My wife thought I was crazy every time I picked one out of the garbage can that she threw away LOL. I have 5 or 6 of them in a tin on my workbench. Looks like I know what one of my winter projects are I'll be giving the chain degreaser a shot too, thanks Kit. Since you seem to be an expert on the lace wheels, the worst part of mine is actually the outside rim where the clearcoat is peeling a bit. I don't have the money right now to get them professionally refinished, although I would like to in the future. Any product to use there to clean them up as nice as possible?
Asphalt, if I can I'm going to try and get to a nearby junk yard this weekend to see if there's anything there Fiero-wise. If there are any Fiero's and that rubber bend for the bottom of the can is there I'll grab it for you. I'll let you know if I find anything after I get a chance to go.
Here's a photo of my metal intake parts. Everything is there except for the nuts and bolts to put it together, and the rubber lines that run from the intake to the metal lines on the firewall, then from there to the valve cover. Not pictured is the big rubber elbow that goes on the bottom of the canister, the intake tube from throttle body to canister and the baffle from in the fender, but I do have all of those pieces.
It may be tough to see but mainly its just a bit of surface rust. I'm going to send them to work with my buddy and he's going to try and media blast them for me there. If he can he'll try and sneak it through paint, but if he can't I will just paint it myself. The hard part is cleaning them up anyways.
These are test pieces, if this works out and he doesn't get in a lot of crap for it I will be doing a bunch of random stuff like this over winter to help clean things up. I'll post up with results after/if it works. He said the only thing he's worried about is if it's too thin for the media blaster that they have there (they have their equipment setup for big heavy parts). Stay tuned...
Also sneaking in is a stock shift arm (was in the bag too). I had always been suspicious if my shifter was modded, it looked a lot shorter than some of the pics I had seen. This confirms it. I have to decide if I'm going to leave it as it, or go back to stock.
Originally posted by Ry86GT: Asphalt, if I can I'm going to try and get to a nearby junk yard this weekend to see if there's anything there Fiero-wise. If there are any Fiero's and that rubber bend for the bottom of the can is there I'll grab it for you. I'll let you know if I find anything after I get a chance to go. Also sneaking in is a stock shift arm (was in the bag too). I had always been suspicious if my shifter was modded, it looked a lot shorter than some of the pics I had seen. This confirms it. I have to decide if I'm going to leave it as it, or go back to stock.
I appreciate that. Don't put yourself out though. You've inspired me to do some engine detailing. Thats one area I always seem to neglect.
As for the shifter..... personally I find the stock shifter to feel like I'm driving a bus, and wind up being uncomfortable on the wrist during long drives due to the height. All a matter of preference, but something to consider.
Short of refinishing your wheels, there is really no "good" way to shine up the lip edges of your wheels if the clearcoat is peeling away. You could always use various aluminum polishes like Mother's Mag polish or Happich Semichrome. Or, since your clearcoat is going anyways you could try SOS pads. (use SOS just on the lip edges only and not the painted areas or you'll dull the paint) By the way, when you first enter the Fiero Forum there is a how-to on wheel refinishing. (you actually leave your rims on the car and use the engine/drivetrain as your "lathe".
Hey....want another tip free of charge? Want to freshen up your tail lights? Then go out and get some plastic polish (like 3M, Novus #2 & 3 etc....) or you can go the cheaper route by buying rubbing compound & polishing compound from Turtle Wax. Next you need to get an orbital buffer (the palm type works fine) . You can get the orbital buffer for around $20. The Turltle Wax buffing compound is kind of red/clay in color and should be used only if your tail lights have had significant sun exposure. (it's kind of gritty) Otherwise, you can simply use the white polishing paste they sell. You simply put the paste on the orbital buffing pad and go all around the outer lens on each side. (PON and TIAC) Be gentle and keep the orbital buffer moving. Polish with a terry towel/rag when done and they will look great. Oh, and I do this right on the car. Kit P.S. As a reminder, IF you decide to use the red/clay buffing compound first on your tail light lens, you need to follow that with the white paste, ok?
[This message has been edited by Kitskaboodle (edited 10-04-2012).]
Well, some good news and bad news. For now detailing the wheels is the least of my concerns and will wait until spring (or if I get bored over the winter).
My buddy just sent me a text, and my metal intake bits are all done. They ended up using it as a training piece for a guy in their shop so it got primed and painted. He said that there's a couple of little runs in one spot, but I'm not too concerned because it's not a super critical part and it'll be pretty well hidden. After all I got it blasted, primes and painted for free :-). I should have it back tonight or tomorrow, might be going to help him with his mini a bit tonight.
Bad news: I'm 90% sure my heater core is pooched. I took my brother for a drive last weekend and noticed that I couldn't get the windows to defog, at the end of the drive I noticed it looked like fog coming out of the vents. I parked the car and chalked it up as a little weird.
This morning I decided to drive the car because it was nice (but chilly) out. Again I couldn't defog, it was even worse than last weekend and seemed to actually make the window fog up and there was a bit of a funny smell to it. After some reading on here it makes me think heater core. I haven't had time to check under the dash on the passenger side, but I'm going to throw some scrap white paper from work under there for the drive home and keep the vents turned off.
A local parts place (amazingly) has one in stock. I think he said it was about $55. Rock auto is cheaper, but shipping to Canada sucks. If I want to drive the car more this year I'll have to do it this weekend, or bypass it and wear some sweaters for a few weeks while driving. I'll be deciding soon, if I decide to wait and order some more parts from the US I'll have a bunch of them shipped to Niagara, NY and make a day trip to pick a bunch of stuff up and make it worth while. I need tune-up parts, and pretty much everything is cheaper across the border. It's not much individually, but if I order a bunch of stuff it will be worth it - the down side is I'll have to drop a bunch of $ at once instead of here and there...
Had a busy day today, only had time to get the heater core bypassed tonight. I was concerned when I opened the garage door this morning so I wanted to make sure I got it done right away.
Here's what I saw when I opened the garage. A huge puddle of coolant under the car. The puddle is bigger than it looks in the photo.
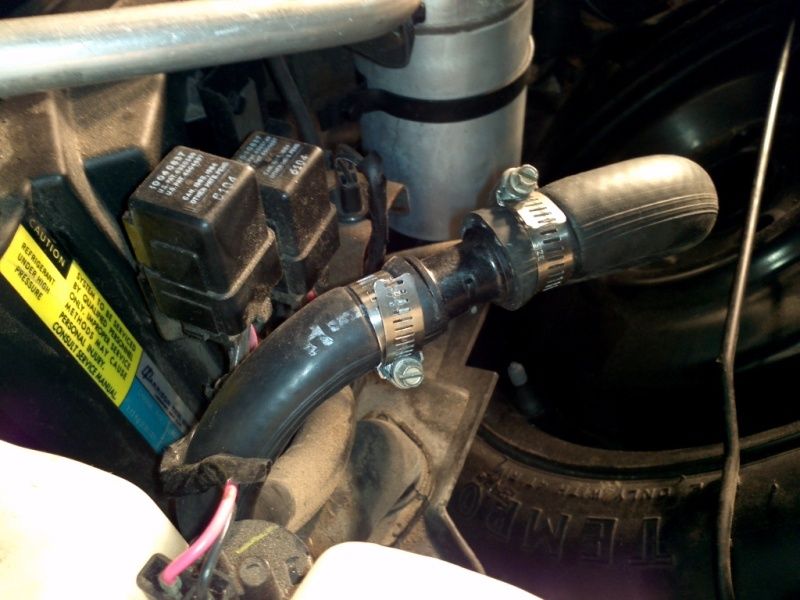
First I made sure I had what I needed, a 5/8" x 3/4" plastic adapter made for doing exactly this. I got it from my buddy's work, they happened to have one there.
Then step 1, pull the washer fluid container and set it aside. No need to disconnect anything from it.
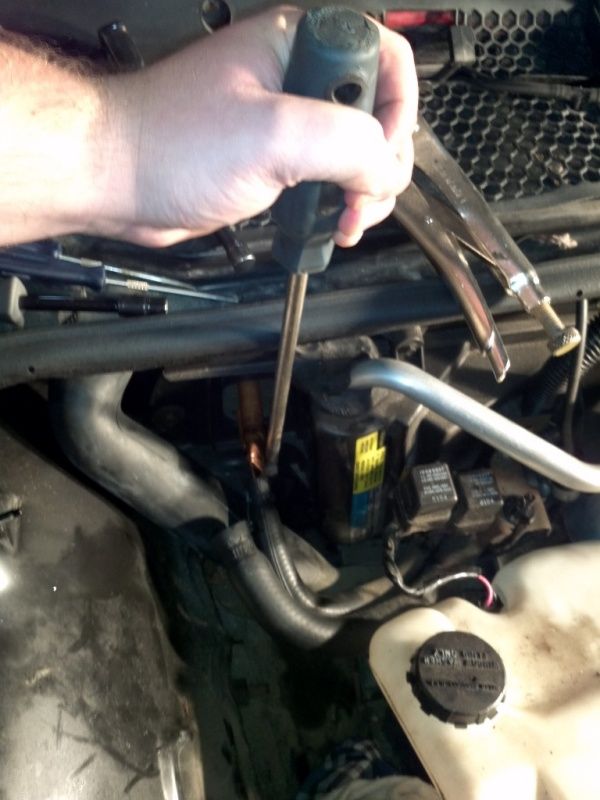
Step 2, pull the lines. After realizing that people weren't joking when they said that this was the hardest part I decided to go with the "pipe crush" method. First I grabbed my vice grips and wrapped the heads in a couple of layers of duct tape to try and stop the teeth from damaging the lines.
Then crush away
The top line came off after some persuasion. The bottom line put up much more of a fight, I couldn't get the bottom line to move even after the copper tube was crushed. After fighting with it for twice as long as it took to get the top line off I went and got my BFS (Big Effin' Screwdriver). With the leverage of the screwdriver from bracing it on the hood opening the line popped off in about 30 seconds of putting pressure on one side then switching sides and repeating.
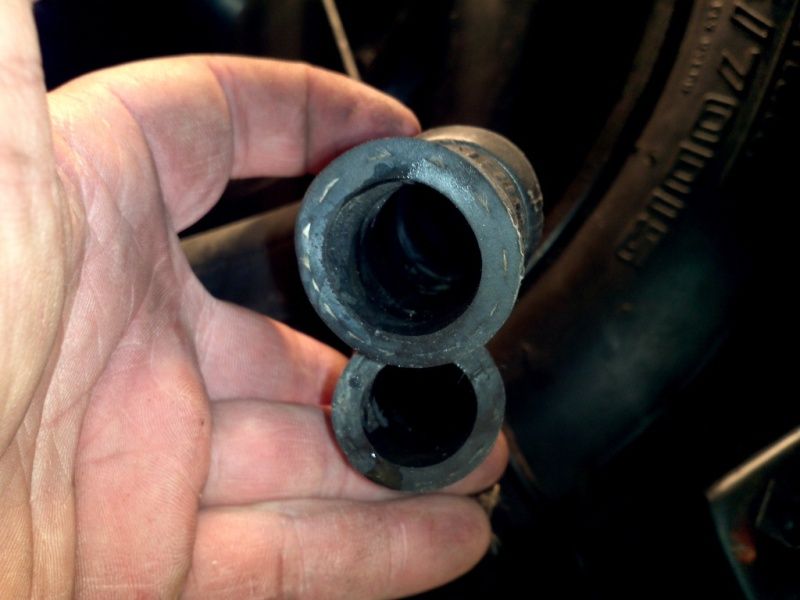
With the lines off it should be very clear which line goes on the small end and which line goes on the large end of the adapter.
Finally put the adapter in and replace the hose clamps. Start up, warm up, and check for leaks. In my case I had to top up my coolant reservoir to replace what coolant had been lost.
Hopefully tomorrow I can pull the cover of the heater box, drain the coolant that's left in there and actually inspect the core itself. Then I'll take it for a drive to make sure that there's no more leaks and coolant level stays the same.
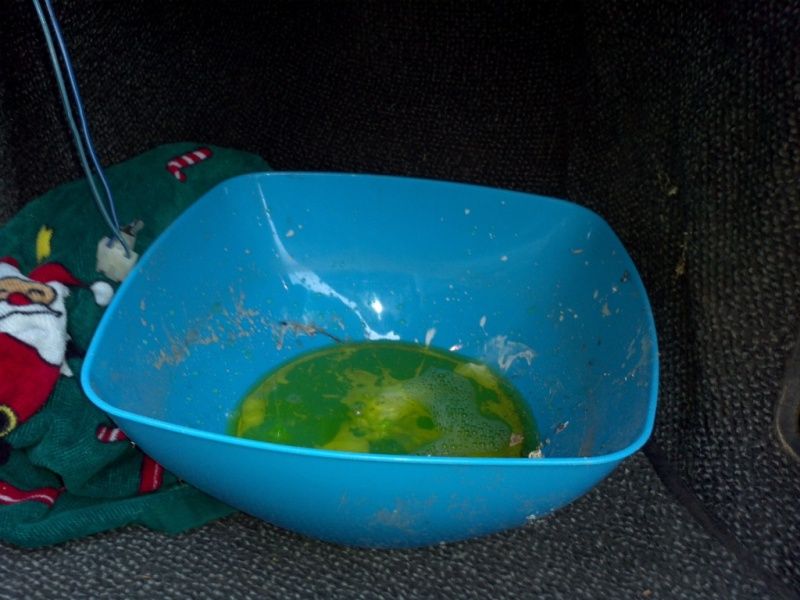
Got into the actual heater core of the car yesterday. The walk-throughs on this site were what I followed so I won't re-post everything that I did. I will note that after removing the speaker out of the dash I found that I was one of those mysterious cars that did not have the top screw installed under the speaker.
As soon as I undid the bottom screw the cover started leaking (before I only had a very minor leak in the interior). After removing the screw on the left hand side and very gently putting outward pressure on the heater core cover seam I was able to control the tidal wave of coolant that would flow out of the dash.
That was a full cup of coolant in there, not including what was stuck in the fins of the core itself.
Here's a photo of the core (wood chips are from my work bench).
No obvious signs of failure, other than coolant everywhere. I believe that there is one or several pinhole leaks in it somewhere. The last time I parked it I could hear sizzling from the heater core and the front window was steaming up even with the car completely off. Also, all of the walls of the air box seemed to be slimey like everything had been misted. The fender in the front compartment near the washer fluid container and the underside of the hood looked and fealt the same.
The foam insulator on the core pipes was actually on the outside of my air box (in the front compartment) as seen in my photo in my previous post. This is instead of on the inside where it should have been. I think this is was allowed the coolant steam to exit the air bax under the dash. In the front compartment it cooled, condensed and dripped out the drain hole in the front tub. This was somewhat lucky, because it kept a lot of coolant out of my passenger compartment. It is also probably why it took me so long to realise what had happened. It may be tough to see but the foam is discoloured around the edge of the hole for the heater core pipes. The discoloured area of the foam was damp to the touch with coolant. The one giant blob is my dripping onto it moving the core on my work bench.
I checked last night and there were no more leaks after bypassing the core, that's good because it means that my reservoir isn't leaking.
After removing the core I went for a nice cruise, the car did not overheat at all and temp stayed right around the 1/4 mark on the gauge or 1 tick higher, where it always has. When returning home there was no leaks at the bypass or the reserviour. Will be checking tonight to make sure that the reserviour didn't somehow drain itself again.
So right now the car is sitting witout a speaker, heater core, core cover or subwoofer awaiting a replacement core. For now at least it seems that I can drive the car for a couple of weeks before putting it away and wrenching on it for the winter.
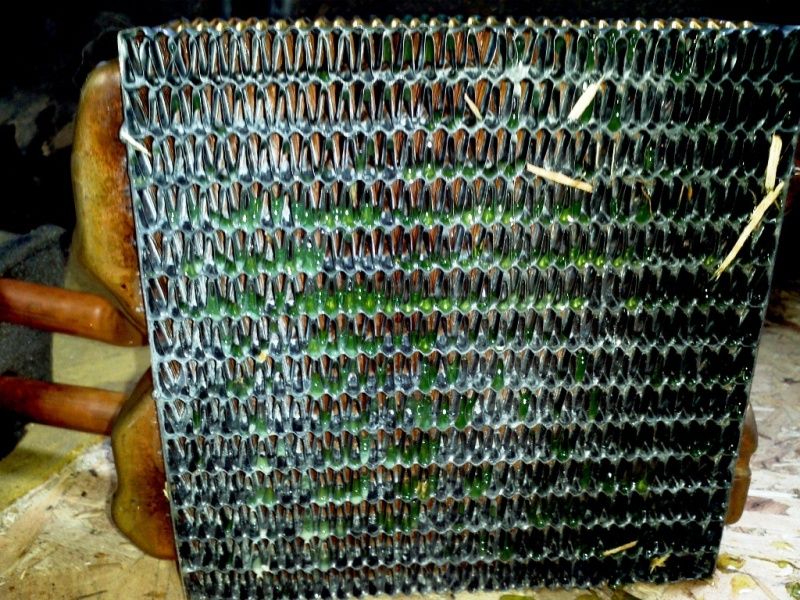
While removing the core I got to kill two birds with one stone because it was the perfect oppourtunity to investigate how my sub had "blown". After removing the sub I confirmed that the coil, spider, cone and tinsel leads are all good. After cutting off the screen over the speaker I found this:
Honestly this is what I was hoping to find, because it has the best chance of repair vs needing replacement. I'm going to attempt to repair this speaker before resorting to replacing it. It appears as though the foam just dry rotted from age and it had enough when my wife put in that Spice Girls cassette that we found. Ya... that's it... my wife was the one who did it. (Whistles while walking away) Now to try and find a new foam that will fit properly.
I don't know if there's much interest, but I'll keep posting anyways
Did some more poking around on the car this weekend.
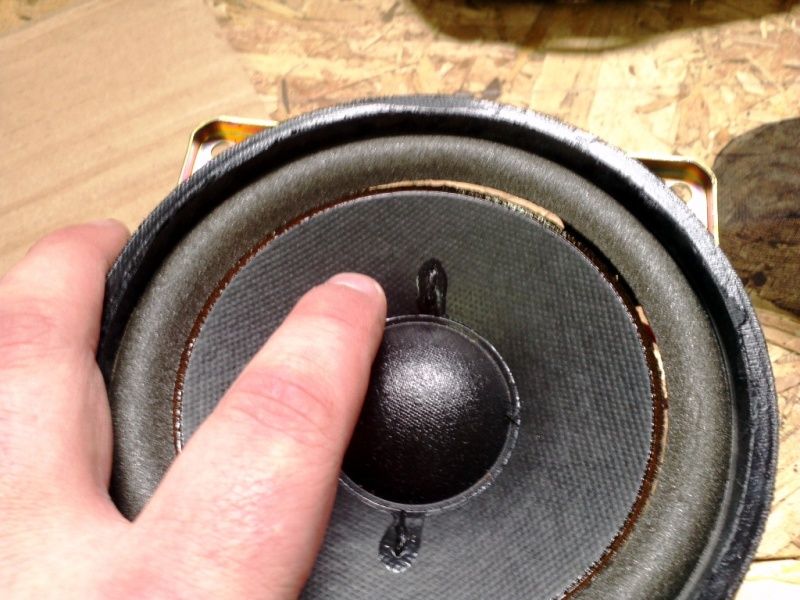
Finally completed the refoaming repair of my OEM sub. I have it in the enclosure on the floor of the car and it's working great! I am immensly happy for a $4 repair, well probably $10 if you count the 3 beers...
You've seen the before above, here's the after with the re-faomed speaker back in its enclosure:
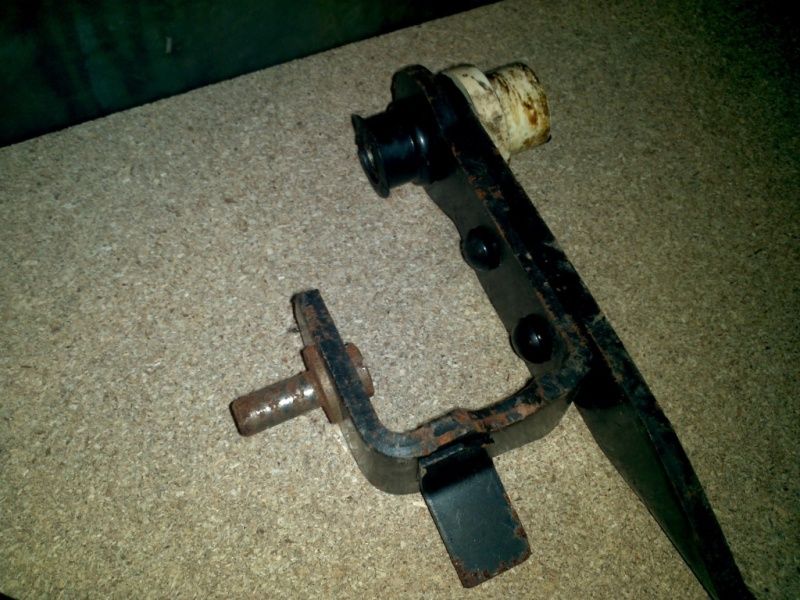
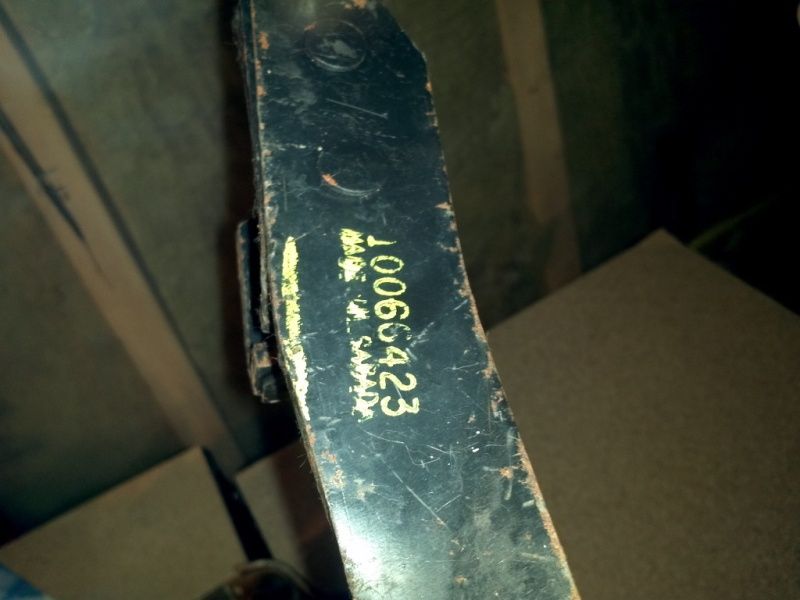
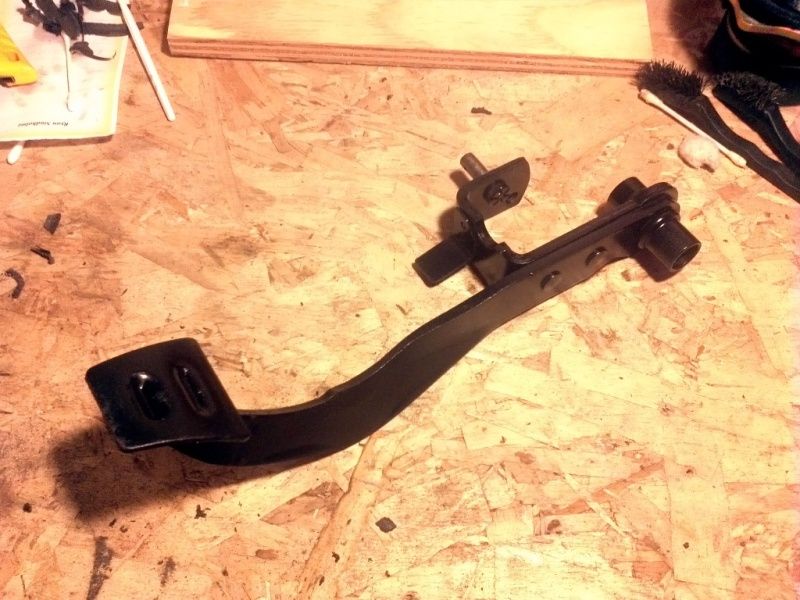
Also I finally admitted that my car was cursed with the dreaded low clutch pedal syndrome. I went to the wreckers a couple of weeks ago and two V6 notchbacks, and in one of them I found this (sitting loose in the trunk after breaking into it!): $10 later (with a few other tiny random bits and pieces included) I had myself an OEM steel pedal.
$6 for a can of paint, scuffed it and painted it and it looks like brand new
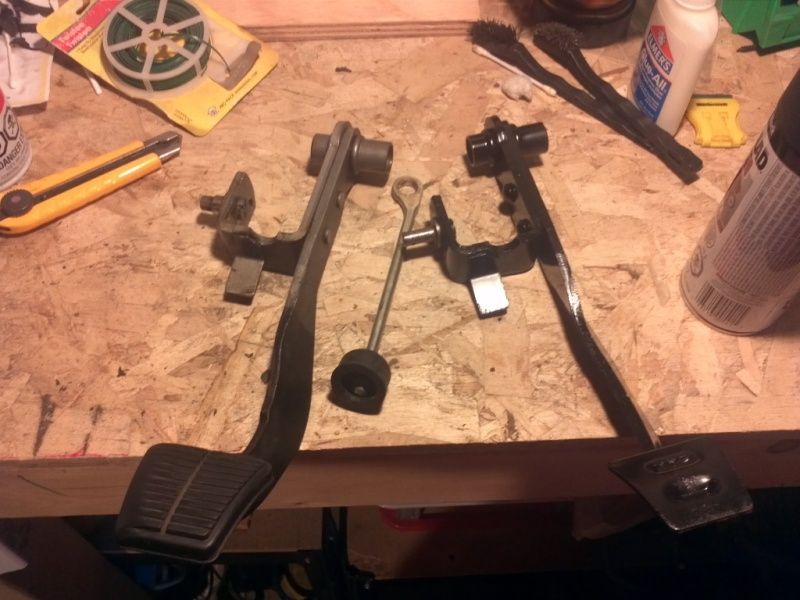
So... after some reading and searching the project happened Saturday. Out came the original, old style aluminum (I believe) pedal. Here's the old vs new (to me) replacement:
I was surprised, with how low my pedal was I was expecting it to be all bent like the many photos that I've seen. It was actually more or less straight. However, one of the top bushings were done causing lots of play side to side. Regardless I had already decided that the new steel pedal was going in.
It's tough to see, but where i did find wear was on the banjo, it was elongated by a mm or two from the wear (helping to limit the clutch throw). Even with this, I can't see why the pedal was level with the brake so out came the banjo too.
Here's a photo of the banjo.
So, still wanting to drive the car for a while and not currently needing anything else from Rodney Dickman (yet) I got my MacGgyver cap on. Enter the DIY adjustable banjo.
First I cut it towards the banjo end, then threaded the cuts ends with a 5/16 die. With a nut coupler and a couple of jam nuts I had myself an adjustable banjo.
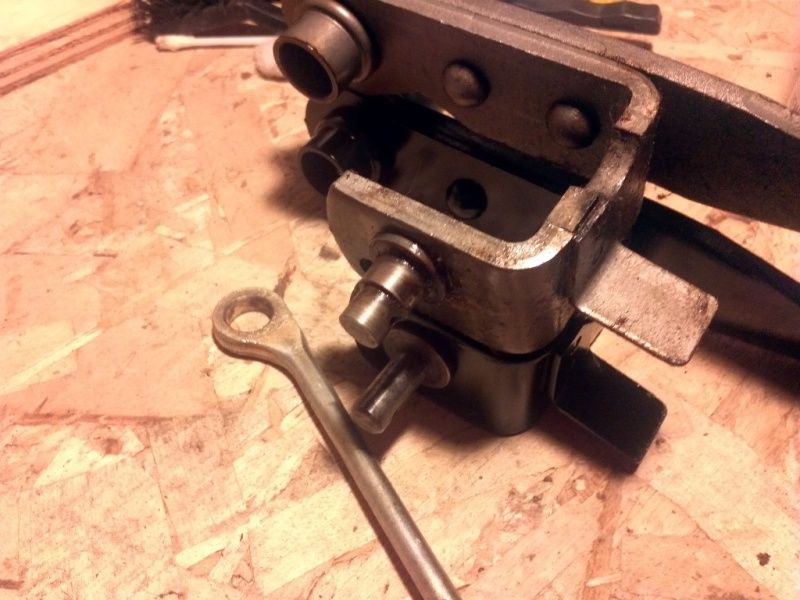
Now, as mentioned my banjo was elongated, so even if I could find a bushing locally (which I couldn't) to go from the big banjo to the new pedal there still would have been play because of the oval hole. Again, enter MacGyver. I went to see my buddy at work on Sat morning and we found a threaded bushing with a smooth outside that was very near the outside diameter we needed and a smaller inside diameter than we needed (perfect!). I drilled out the banjo to the outside diameter of the threaded bushing which was just enough to make it round again. Then we drilled out the centre of it to 3/8" to fit the pin on the pedal. Pressed the new bushing into the banjo (it's a super tight fit) and cut/grind the bushing to size. Here's the end result:
Now with the right combination of 3/8" washers there is no play at the banjo on the pedal, but it's loose enough to move freely. This is it mocked up on the bench.
I put it and the new pedal into the car (with 2 good platic pedal bushings), greased the pedal pin and the entire banjo/washer/pin assembly and adjusted the new banjo so the pedal was just off of the mechanical stop.
AWESOME!
No more squeaks in the pedal, the pedal has noticeably less slop, it is now a solid inch above the brake pedal, and the grab point for the clutch is up off of the floor so I can feather it if I need to. I never thought I had a shifting issue before as everything was working, but the shift is a little smoother after doing this. Smooth enough that I am no longer considering switching out the short shifter that's in the car for a longer one. I want to keep it how it is
FWIW I removed the banjo from under the dash in the car. I didn't want to pull the master cylinder out of the car and I couldn't get it with it pulled a couple of inches away from the firewall. Not wanting the kink the line I bolted it back to the firewall and was relatively easily able to get it out from under the dash.
I forgot brake fluid, but only lost 2 drops I think when I pulled the banjo and the pusher thing inside sprang back faster than I expected inside the master cylinder. Either way if a drop of fluid came out a bit of air got in I think. I need to bleed it still, will do so either by hand vacuum tool which I want to buy, or by gravity, or both. The fluid needs a full flush anyways.
So this is me happy that I fixed my clutch pedal for a grand total of less than $20.
When I do need to order something from Rodney in the future I plan to tack a new banjo onto that order, but for now I will be leaving it as it is because it's working beautifully. I forgot to get a pic under the dash after it was installed, I will try to grab one when I put the heater core back in.
On Sunday I had nothing in particular to do (rare for me) so I took advantage of the weather, grabbed some cold beer and had a bit of fun with the car.
First on the list was replacing my dogbone with a good used one that I purchased off of the forum here. My original one looked a little funny installed and from what I was told it's better to be safe than sorry. Here was the original in the car:
Before putting the new one in I had seen some pictures while lurking here of the dog bones polished. I decided my car wasn't going to be 100% stock so why not pretty it up a bit? I think I spent an hour and a half on it with a dremel too. It's not perfect, but was more of an experiment (and turned out rather nicely for what I put into it). Here's the replacement dog bone out of the box:
And here it is an hr and a half after my attempt at polishing:
From 2 feet away it looks awesome, but any closer and you can still see the imperfections and what I did, did not reduce any of the casting defects at all. Plus I cheated and only did the visible top side (flame suit is on...) Oh well, again it was an experiment other than the time involved this was free!
So out came the old dog bone, here's aside by side.
I was surprised, once out the old one wasn't as bad at all as I thought (or assumed) it was. Although the pins in the bushings were noticeably off centre there is no cracking in the rubber at all.
Then I decided before the new one went in I would clean the area a little. Someone has suggested simple green and I happened to have a bottle on my shelf already. One thing led to another, and eventually I was simple greening my entire engine, complete with a couple of nylon brushes and even an old toothe brush. I got a lot of grease off of the valve covers, intake manifold, heat shields, the metal fan ducting and the transmission case. Other than the water drops drying on it, it looked pretty good! It also allowed me to really see some of the flaking red paint on the intake manifold and the valve cover
Here's the new dogbone in (polished side up) and the cleaner engine bay.
The plans are to put in an MSD cap, rotor and streetfire coil with the forthcoming tune-up. I've been given a set of black Taylor Spiro Pro wires that I'm going to try and work with (they were free!) and put in some NGK UR5 plugs.
Here's a close-up of the new dog bone installed.
It looks almost exactly like the old one with the bushings being squished on one side. I had to use a ratchet strap to pull the engine back and line the holes back up on the dog bone and when letting the strap off the engine is pulling forward a bit again. Without the ratchet strap the holes were off by about an inch I would say. Seeing how much I like the polished dogbone my plan is to leave this one in there and take my time to really clean up my original one, put in some poly bushings and put it back in the car next year.
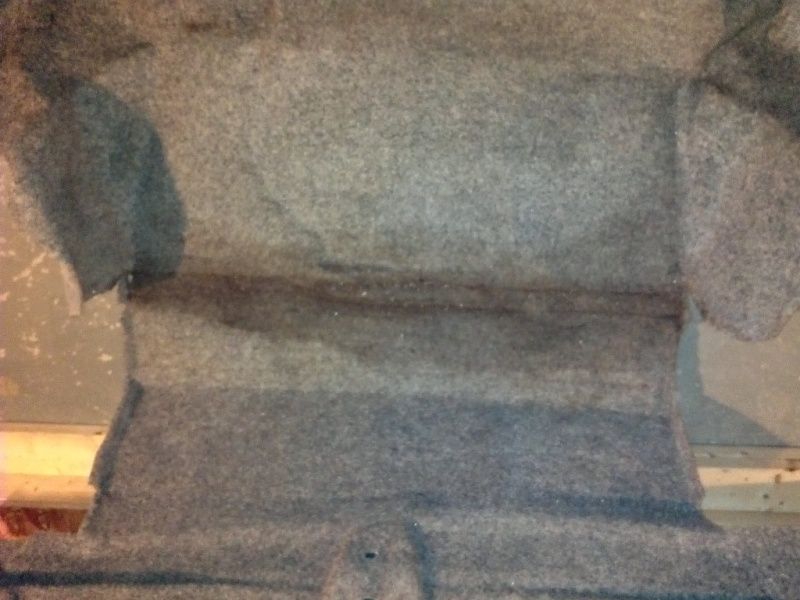
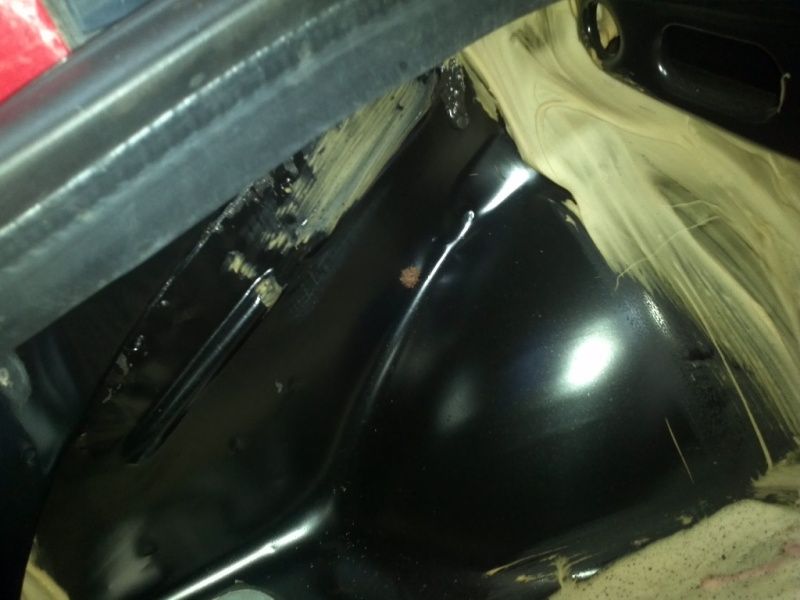
With that done and things looking pretty I was still "in the mood". One thing bugging me since I got the car was a stain in the bottom of the trunk. The metal looked solid from underneath the car, but was un sure of what it looked like from inside. I was hoping that the stain was just from the spoiler holes from the previous owner. I pulled the trunk carpet to shampoo it outside of the car and was very happy with what I saw. Its super clean!
And here's the carpet, it's not clean.
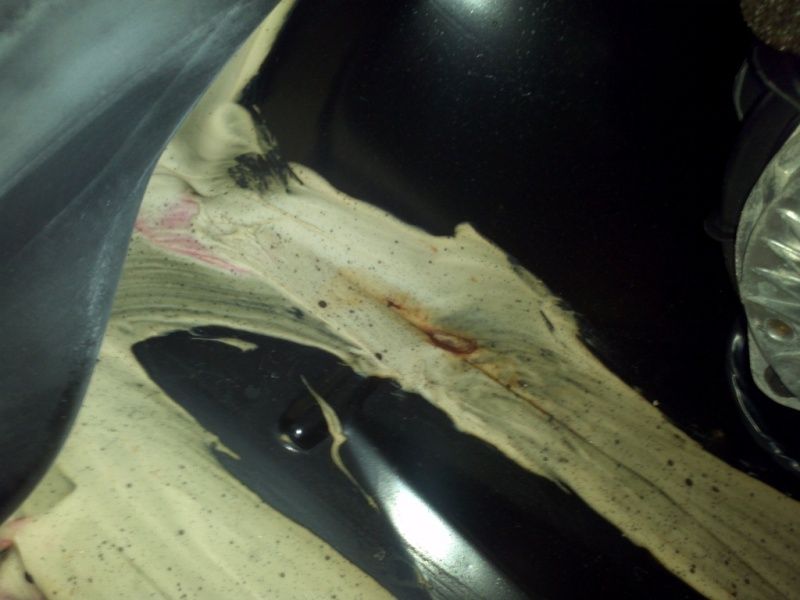
Only 2 signs of rust. A little discolouration of the seam sealer on the right side under the blower fan.
And a small speckle on the left side.
The left side will be sanded and touched up. The right side will be looked at from underneath, and hopefully I can clean it up and seal it from there.
After pulling the carpet we went for a cruise and the tach was all over the place. I had seen it bounce around the odd time before so I had suspected tach filter but this time it was pretty consistantly bouncy, very erratic. The car didn't seem like it was running right either. Back home I went, a quick search on here and I bypassed the tach filter. Back out for a drive and it was thoroughly enjoyable. Tach was rock solid and it drove as it did before the engine cleaning. I guess the little bit of water finally did in the tach filter. With that said, depending on what's involved, I'll be looking to either buy or maybe even make one (if I can find a plan).
That's it for this weeks update. Sorry for the long-winded posts. At least you have some pretty pictures to look at.
Well I've kind of let this thread fall off hte face of the earth so for my own sanity I'm going to give it a major update. If you can't tell from my other threads I've done a ton of work to the car since my last post in here and I haven't taken as many pretty pictures but I'm going to continue on with what I have.
After the trunk was stripped as above the car was parked for the fall/winter and my tune-up / freshen up excapades began. First step was to gather parts:
- NGK spark plugs (copper) - Taylor DIY 6 cyl plug wire set - MSD cap / rotor - MSD Street fire coil - New IAT sensor - Intake manifold gasket set - Valve cover gasket set
And I got some used parts to clean up and swap on: - 88 engraved plenum - Spare valve covers - 88 EGR tube - Spare Y-pipe heat sheilds
First step was to take my first attempt at refinishing the plenum and valve covers before I took anything existing apart - you know, incase I royally screwed it up.
I'm missing some photos of the before here, but the valve covers, plenum, and some of the front end underbody braces were taken to my buddy's work to get shot blasted. I figured why sand if I don't have to. Here's the parts hanging in my workshop after being coated in self-etching primer. My wife was not particulariliy happy about this (the smell of them curing).
Then there's paint: It's just the "bright red" engine paint from the parts store. I figured it would be easy to touch up that way if I had to.
Then came sanding off the strips. This proved to be a bit of a learning experience. I did not own a belt sander at the time and didn't initially bother buying the proper grits of sandpaper - I started with only what I found laying around and with a random orbital sander. I ended up finishing it by hand with a sanding block the old school way.
The underbody braces got the same primer treatment and received some semi-gloss black paint. Sorry no photos, but they cleaned up very well compared to what you saw in my previous underbody pic.
Happy with my results it was now tear-down time. I've never really gona past regular maintenance in an engine before so this was an adventure and learning experience for me. It was very nice to be able to take my time and not be stressed that it was my daily driver and had to be finished ASAP. That kept it fun for me.
Note the typical battery tray rust. She was discoloured but structurally sound. It was mostly just surface rust. I hit it with a wire brush in my drill to clean it up as best as I could then primed it and painted it. I know I have some after photos I just have to find them off of my other camera.
This was the only real rust that I found on the car - on the body itself under the battery tray and from what I gather it's rather typical. The rust here was bad enough that I decided to cut the rot out. The remaining good metal got the same treatment as the battery tray.
I will have to find the after pics. Overall I was pretty happy with the condition considering it is an Ontario car. It appears as though the previous owner's weren't lying when they said it was never winter driven.
Then came the top end tear down. This is all driven by me wanting to clean up the engine bay to make it semi-show worthy. I decided I wouldn't be happy with only changing the rear most visible valve cover so it all came out.
My first time pulling a fuel rail and fuel injectors went relatively painlessly thanks to this forum. Also at this point all of the engine bay insulation, the heat shields and metal lines that I would no longer be using were pulled from the engine bay. In this photo you can also kind of see the cleaned up battery tray.
[This message has been edited by Ry86GT (edited 07-31-2013).]
Now it was time to start the rebuilding / tune-up stuff.
I chose to start with the distributer and was a little appaled and semi-freaked out with what I saw when I opened it up.
Before I started the tune up I had taken note of a miss-fire / stumble and low speed bucking at the end of the year and with the tune-up I was trying to cure those issues. I was wondering if this was my cause (note the bent components). In the end it helped the car a lot with it repaired, but it wasn't the complete solution. I amde a thread about it here asking for help and opinions: https://www.fiero.nl/forum/Forum2/HTML/127738.html
And here it is cleaned up with the bent parts bent carefully back into alignment.
Just a fun pic of my workshop after packing it up for the night
[This message has been edited by Ry86GT (edited 07-31-2013).]
Onward and upward... here's the new cap and rotor installed. New thermal compound was put under the ICM and the distributor service was complete. Rear valve cover is installed and the front one is about to go on, note the dab of silicone on the joint of the head and lower intake manifold. You can also see how I by-passed the throttle body coolant lines - I deleted them. I used a rubber coolant line and looped the connections at the filler neck incase I ever wanted to put it back to stock. The new plugs are also in at this point.
And finally with the pretty new valve cover on and injector harness spread back out.
Then the middle intake, injectors and fuel rail were put back in. Before doing so the injectors were pulled from the rail and soaked end down in a little injector cleaner for a day or two. New o-rings were installed on both ends prior to re-installation.
Getting closer - all of the brackets that I removed to get at the valve cover were cleaned up and refinished in semi-gloss black. The vacuum lines were so brittle that they pretty much imploded in my hands at the disassembly stage. I had also decided that I wanted to do some custom routing to clean them up a bit. Thanks to this forum I was off to the hobby store to buy some aluminum tubing. I bent the lines by hand - this was very tedious and annoying to get it to look right without any kinks. If I wasn't doing the custom routing the Rodney kit would definitely be the way to go. I just couldn't buy his kit if I wasn't going to use half of his lines. Basically I was trying to elminiate any lines crossing over the rear valve cover.
Here the upper plenum and all of the brackets are back on. The new coil is in and the cleaned up heat shields, cooling tubes and throttle body are re-installed all with new gaskets.
This is it nearly complete. Most of the vac lines are connected and this shows my DIY saprk plug wires installed - incorrectly I might add. I had them one stud off on the cap. DAMN!!! That's what I get for not paying attention I guess. Luckily I was able to re-route them and re-orgnaise them without needing new wires. I had cut a couple of them shorter than I should have and it didn't leave much slack.
And here's the engine bay completed with the refinished stock intake re-installed and the spark plug wires corrected. Note my PCV was moved to the front valve cover and a breather filter was installed in the rear one to look pretty.
Much to my dismay after getting her running in the spring it was still stumbling and bucking - although no where near as bad as before. This was also accompanied by a CEL for high idle when sitting still.
After double checking all my work everything seemed right. To make a long story short I found that the stop screw for the throttle body was messed with by the previous owner - my guess in an attempt to try and "tune out" something that wasn't right (the distributor maybe???). You can read all about that here if you really want to: https://www.fiero.nl/forum/Forum2/HTML/127935.html
This forum helped me reset the throttle body set screw and reset the IAC motor. With that done the car was idling in the proper rpm range and much better, but it was still off - you could hear it. The engine was "popping" on idle. It seemed like one thing was just pointing to another at this point...
I had never checked the timing before because I had no reason to, but at this point I was questioning it and called my mechanic neighbour over. He had a timing light and taught me how to check and adjust it. He could tell from the sound of the idle that it was advanced - it was waaaaaay advanced. With the timing corrected the car was now idling smooth as a baby's bottom. It honestly seemed like a whole new car.
I happily went out for a drive with the wife to celebrate when my speedo dropped to 0 on hte highway. At my friend's house I borrowed a socket and found this:
Worried beyond belief I bought a used transmission from a very kind local member and took the VSS out of it. I used it's blue gear for a couple of days with regular cheap oil in it to see how it would run, not knowing if it would jam up on me or not. It seemed to be running ok so out came the cheap regular engine oil and in went the Synchromesh and the $40 proper red VSS gear that my dealer ordered for me from the states. The speedo was working again and by the grace of god the transmission has been fine ever since. Every once it a while there's a funny clicking sound at low speed but when I reverse it would disappear. That happened twice shortly after the gear broke and hasn't repeated. I think it was a leftover piece of the plastic gear getting caught on something and ground up.
When I did my original engine work I had deleted the cold start injector. Starting from warm was 100% fine, but I can go days or weeks between driving the car and when it sat for a day or more starting it up seemed to take a while and got somewhat annoying (and a little embarassing). At that point I decided to re-install the cold start injector that I had pulled. To do so I decided to remove the distributor to give myself some working space - again this was a first for me. Now confident in my abilities to set the timing properly I was able to do so easily and surprisingly quickly.
Here you can see my reference points on the plenum of where the distributor was pointing when seated and when it was removed. This made putting it back in pretty simple and timing was very close. The hardest part was getting that damn distributor hold down bolt back into the engine. I had some choice words trying to reach in there and get that done.
My next issue was getting the clutch bled. I had always been wary of my hydraulic system and it seemed that the grab point was back on the floor even after building my own adjustable banjo and replacing the pedal with a recall unit that I got from the pick and pull. I could never get the bleed screw on the slave un-done despite seeral half-way attempts. Then one day after a good whole-hearted attempt I finally got lucky and got it loose. My joy was shared with PFF here: https://www.fiero.nl/forum/Forum2/HTML/128781.html
Just when I thought I was on my way up I started seeing steam coming out of my back window at the deck lid vents and started finding puddles like this everywhere.
That's engine oil. It wasn't leaking when it was shut down, only when it was warmed up and running. I was lead on a search and found oil all over the back side of the block. I came two one of two conclusions myself, and the advice of those who know more than me only pointed to one - the valve cover gasket. Of course it was the front, tough to get to one. Damn...
Convinced that I wasn't going to tear it completely down again, and more experienced than before I ordered a new valve cover gasjet set and got into it. Sorry for the blurry photo, but it's my only one. It only took me an hour to get the old one out this time while leaving the fuel rail and middle intake in. It took a while trying to find the right comination of tools and running to and from my workshop in the basement for them - stupid detached garages.
Here's the rear cover out again. Without the throttle body coolant lines to fight with this was a piece of cake. I pulled the upper plenum and throttle body out as one unit and disconnected the egr tube at the egr valve. It was the easiest way that I could see to do it.
And here's what I found - a weird failure of the valve cover gasket.
I was assured that I made a mistake pinching it upon re-installation the first time around and was given tips - again from those who know more than me - on how to do it again properly without that happening. This involved a little rtv in the trough and setting the gasket in there so it would hold itself in place when re-installing. Seems obvious, but the instructions said not to use any sealant other than at the joint on the head so I didn't the first time around. So far (knock on wood) it's been a success and the problem has been solved. I took it in stride and chalked it up as a learning experience.
[This message has been edited by Ry86GT (edited 07-31-2013).]
With the car really running descently for the first time it was time to clean up the outside again and get it out to a couple of shows.
These wheels are a serious pain in the rear to clean - it took me at least a good hour and a half to do them. I hadn't done them at all since I got the car. This is before I put the lug caps on them.
Then it was wash, polish and wax time. Here's the polish going on
And the polish taken off (before wax)
And then waxed for the season
The paint isn't perfect at all - but it is original and boy does it pop when it's cleaned up.
Here she is out on her first big cruise night.
In the trunk at that time were a pair of Monroe struts that I bought off of Kijiji brand new in the box to install and match the front shocks that I put in last year. That work was done last weekend and the car was aligned. Sorry, I don't have any pics of that job - I spread it out over a few days and totally forgot to take any pics. I am so glad I did the rear struts - it has had a very good impact on the ride with the lowering springs that are installed on the car. It used to be back breaking and now it's just really rough LOL.
[This message has been edited by Ry86GT (edited 08-01-2013).]
So that's where I am right now. The work on this car never ends though - I still need to do a couple of things.
I need to put in a new ECM coolant temp sensor to try and make it run a little better after it's cold startup. It will run and idle, but immediately after starting it will dip the revs one or two times and bounce back and want to die if you put any load on it. After about a minute or so it is fine - and drives absolutely fine when it's been warmed up.
Also I had to re-bleed my clutch again last weekend. I noticed that the clutch was almost on the floor and shifting was a little notchier again. Bleeding it was much easier this time around - and had similar success as I did the first time I did it where I saw an immediate improvement. When doing it I did see a rather good sized air bubble come out of the clear tubing near the beginning of my re-bleeding efforts. This makes me think air is getting in through the slave. I plan to replace the master and slave with Rodney units so I can be done with the hydraulic issues.
Oh, and something kind of related to the car - when I bought the car it did not come with any of hte original manuals and I've always kind of wanted one. If you can't tell I'm kind of a fan of Kijiji - deals can be had there. I bnought the car, the plug wires, rear struts, sold some parts and met some good Fiero people all through kijiji. Last week I found an ad that interested me, although the seller was a good 6 hours away.
After talking with him, agreeing on a deal and him being willing to ship after I sent payment I had a package arrive last night. Yep, only last night. I was very happy when I opened the package - 3 books all in near mint condition, like 9.5 out of 10.
I am super happy about this buy and I am ok with what I paid for the package. There aren't even any greasy finger prints in the service manual (yet... hahahaha).
So that's it, that's me and my car and where I'm at with it to date. I will try and keep it more updated with more pics of my projects as I do them. Hopefully someone finds something useful in one of these posts.


 Nice find.


 If you look at my post times most of them are from work. It's when I do all my research LOL.