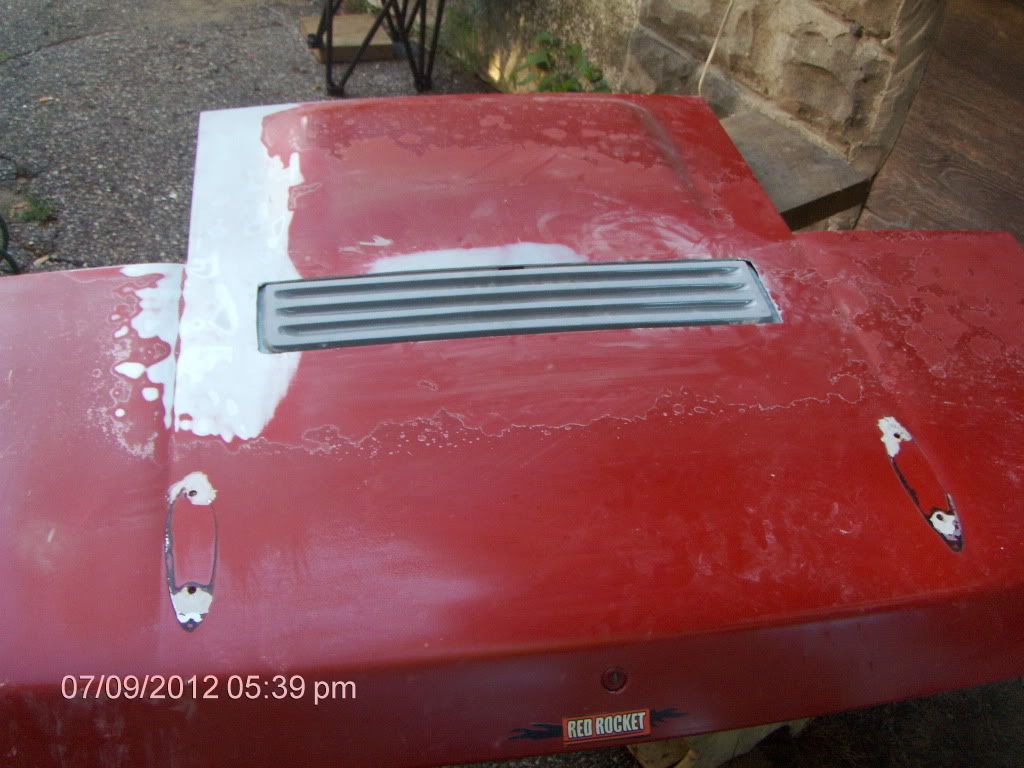
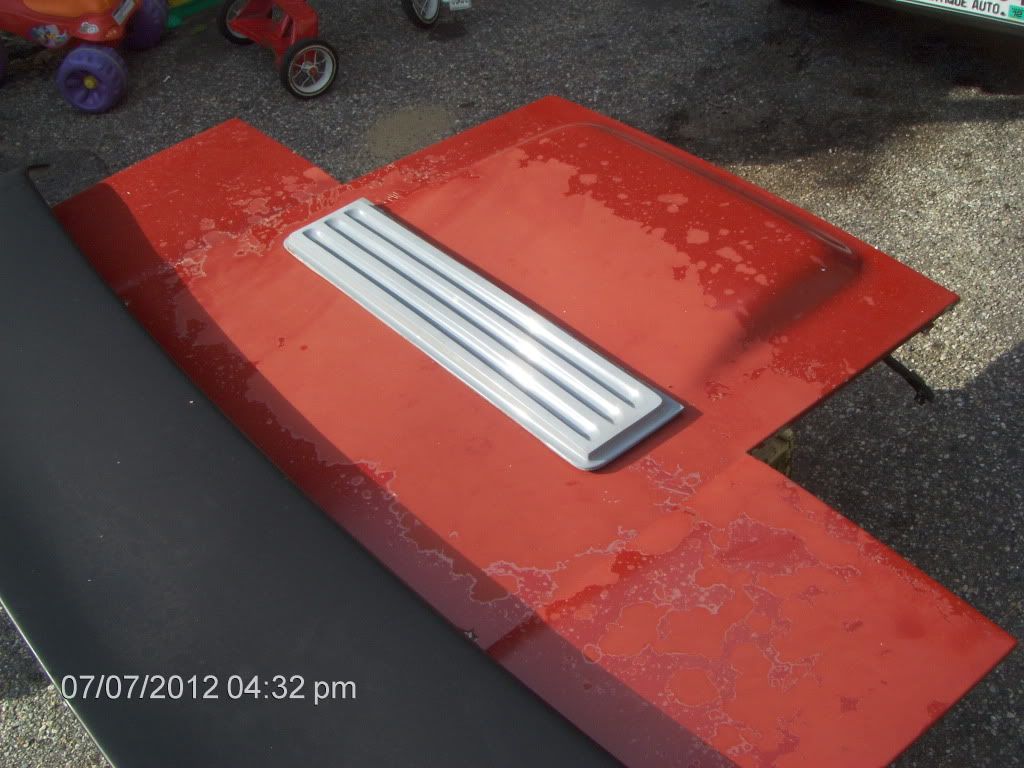
Installing Kahines decklid vent in my 86 notchie. First day of working on it today. This will be my first attempt. Also pushing the wing back some, maybe as far as possible. We shall see about the wing..
I honestly have been intimidated by this project. Finally today I said screw it and got out the Dremel. I have 2 extra decklids if I blow it on this attempt...
Pulled the wing. Man those gaskets tore chunks of fiberglass off! Grr this just means more sanding! Typical right?
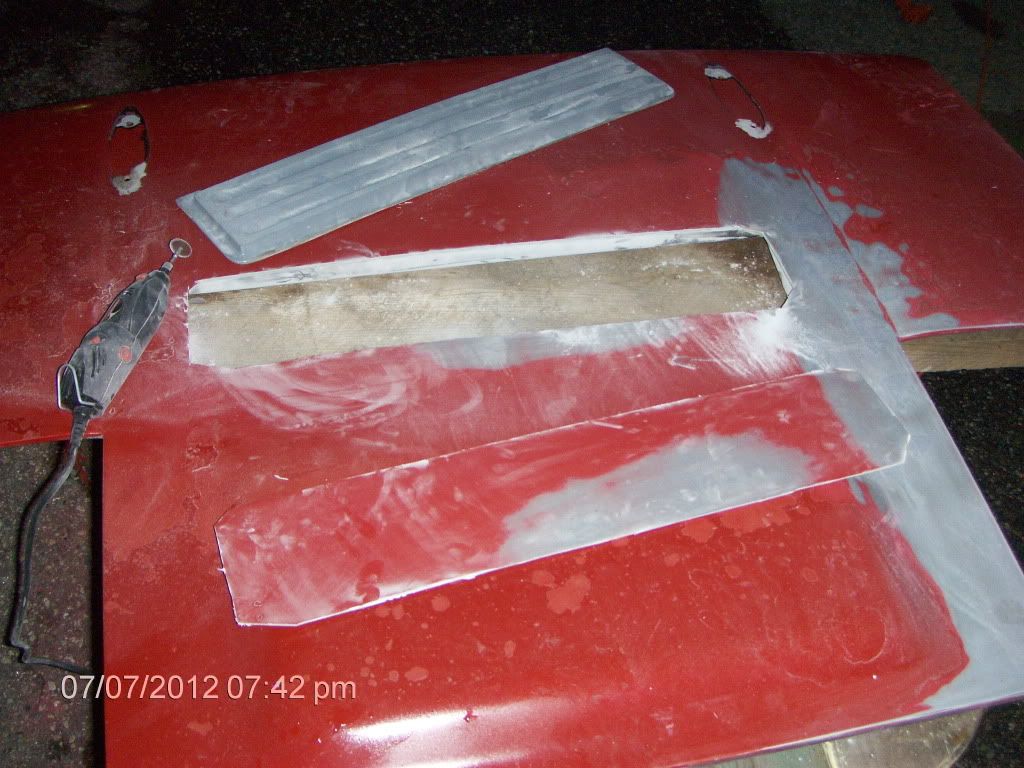
Fun with my Dremel. If you don't own one i highly recommend it. That thing has payed for itself three times over!
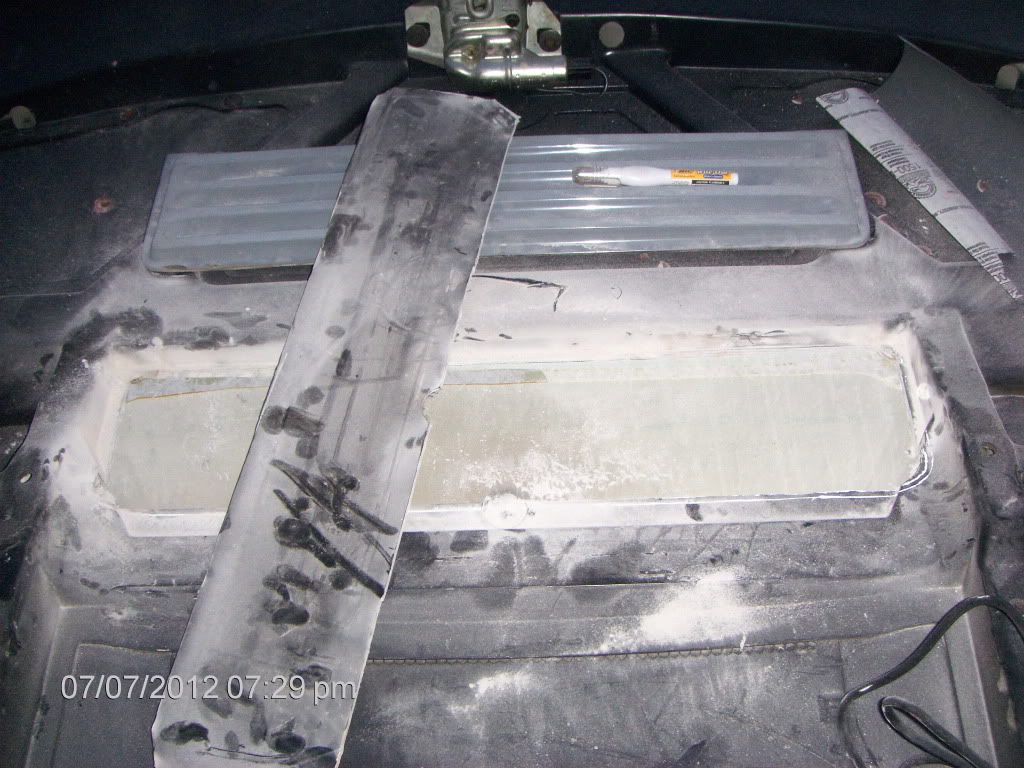
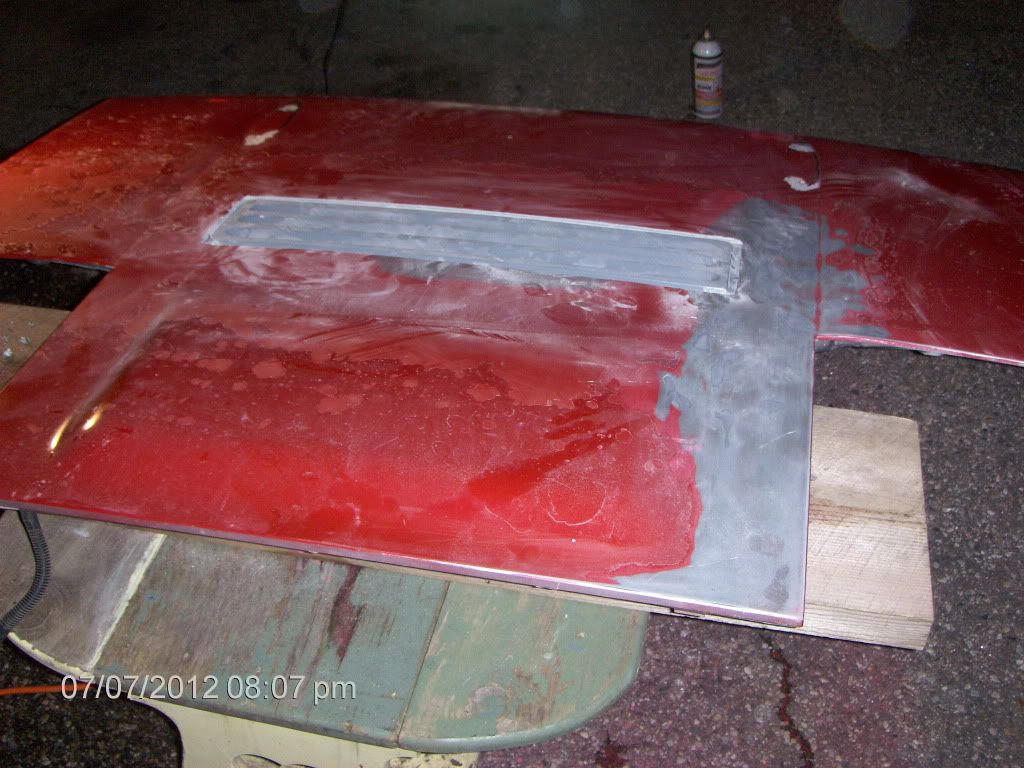
Ahh!! Now that's a hole! You know what? It felt good cutting a part up! lol
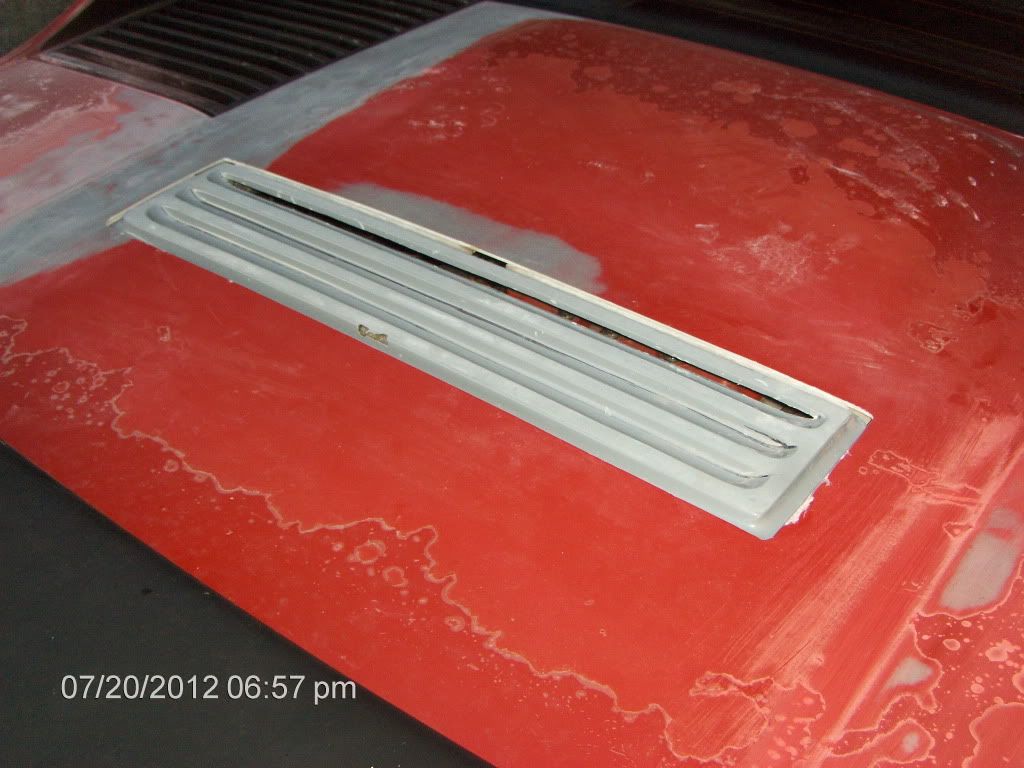
Man it's almost like the decklid was made to have a vent here. It fits perfectly in that little section thats there.
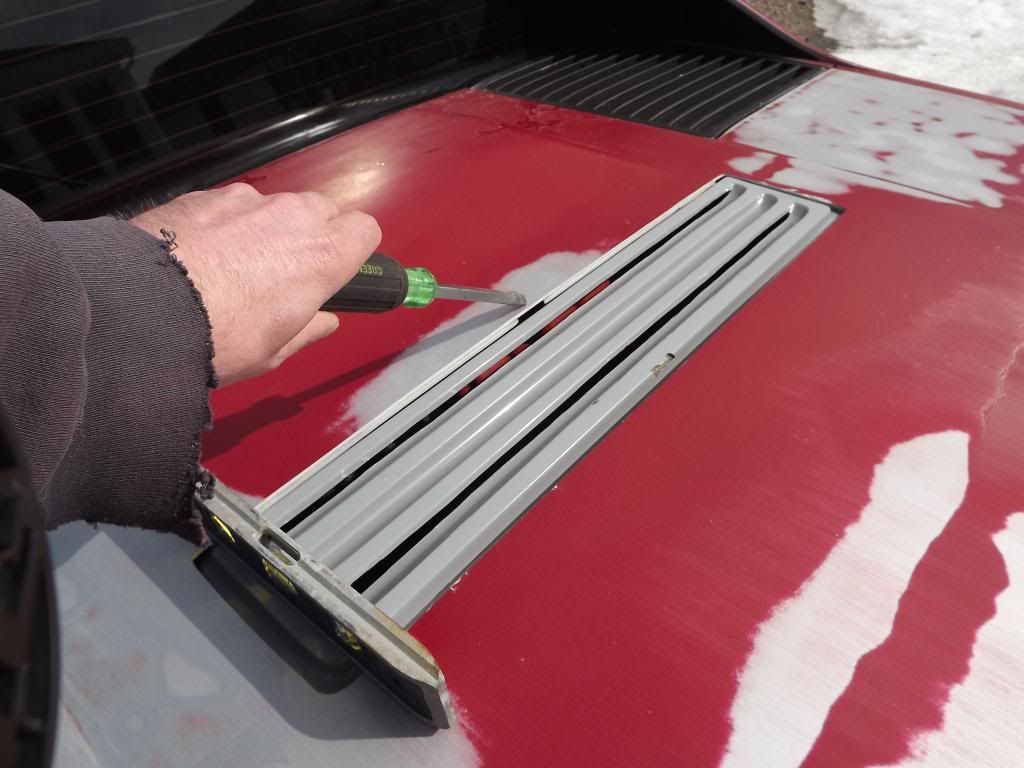
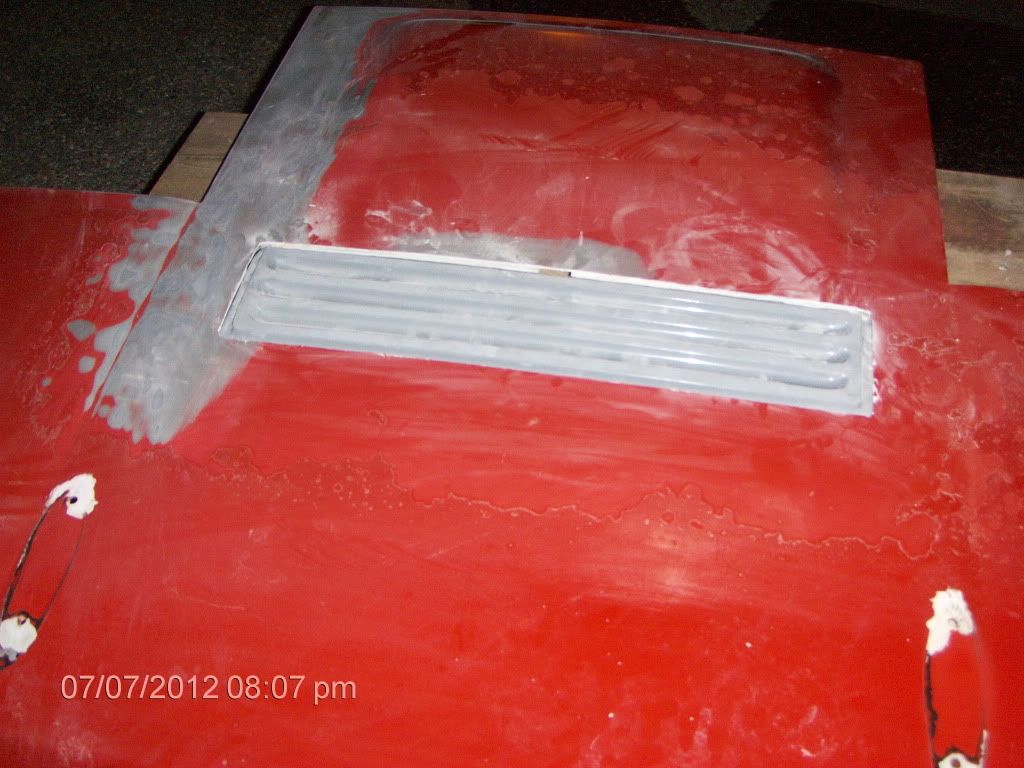
The Kahines vent is just kinda wedged in there for now. Don't mind my half hearted wet sanding. I got tired, and am doing it by hand...sigh. Also note the dreaded PO's shaker can job and how bad it's peeling...again sigh. hehe
Sorry for the crap pics, it got dark and I was working with a drop light at the end. Thats as far as I got today. Slow and go. Now the messy part. Glassing.
My questions are gonna start coming quick and I really need any help I can get. I know to use the Corvette glass I think and have some glassing experience but by far am I skilled at it...sigh.
Any tips, pointers or advice? Please feel free to chime in at any point!
edit 1 more pic
[This message has been edited by weloveour86se (edited 07-07-2012).]
Looking good! The deck lid is SMC, use an SMC to FRP bonding adhesive like Evercoat's Corvette Panel adhesive to bond the vent on. Then use an SMC compatible filler where needed. The Evercoat adhesive can fill minor gaps, but add in fiberglass (I have taken Mat fiberglass and hand shredded it to add to the adhesive) for larger gaps (bigger than 1/4 inch).
Well I kinda like the cut out look. The edges. Clean them up, make them match the Kahines vent edges. I whacked one back edge corner of the decklid but can fill it, make it match the rounded corner of the Kahines vent. The front corners would be square like the Kahines vent. If you look close you can see the difference. In the first pic we had it backwards because we were debating which way to put it, just for conversations sake. We will mount it turned the other way.
Also we still have to cut the vent strips in the Kahines vent. Oh man that is gonna be interesting!!
Man my cam sucks, I'm srry bout that.
Let me just say here that this Kahines vent is beautiful! Sorry but it's true! I can't for the life of me figure out why i didn't start this sooner...sigh.
It looks like it is sitting to far back. I am not sure, but it looks like you are venting the trunk. Nice vent!! he does good work!
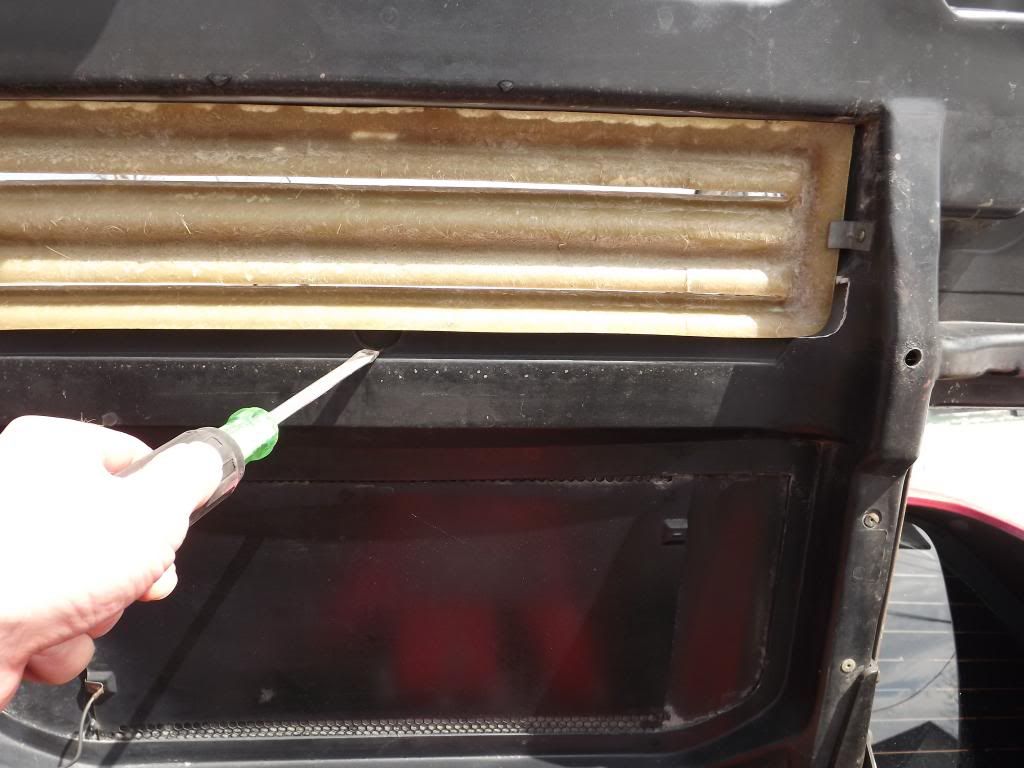
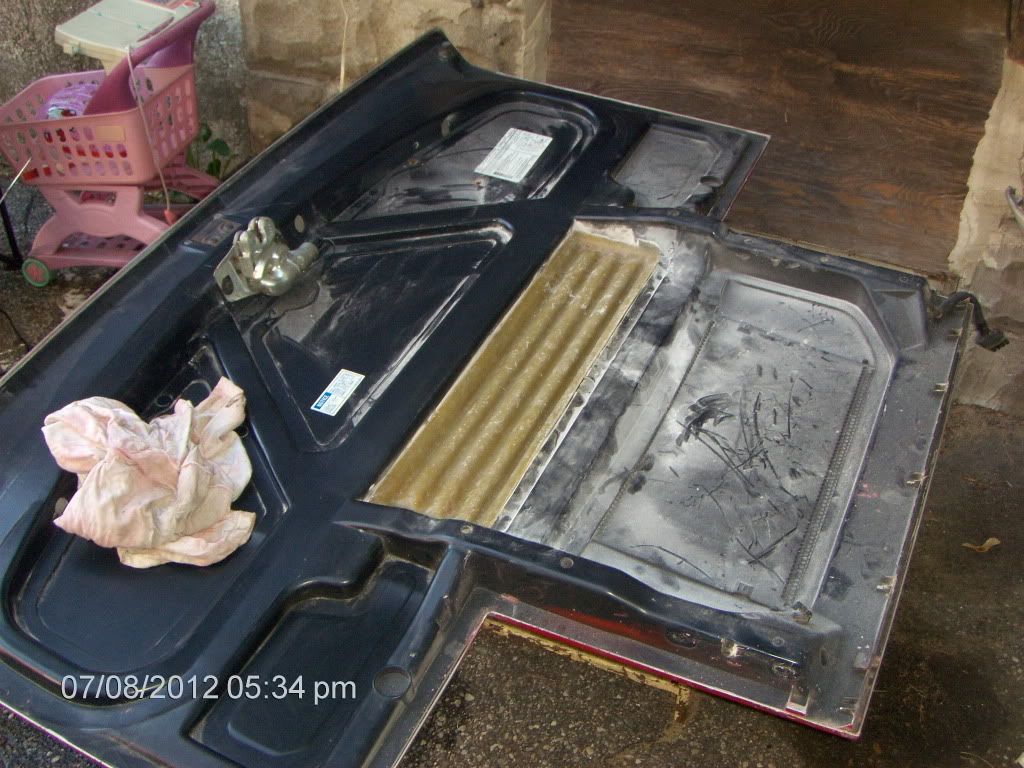
I hope not! I mean venting the trunk. Pretty sure I'm okay. If you check the underside of a standard declid theres a factory rectangle shape in the same location. Almost as though there could have been a vent there.
I really wanted to do some yarn tests with the before and after effects of the vent but I don't have time for it.
Curse you Revin, now I gotta go out and double check it
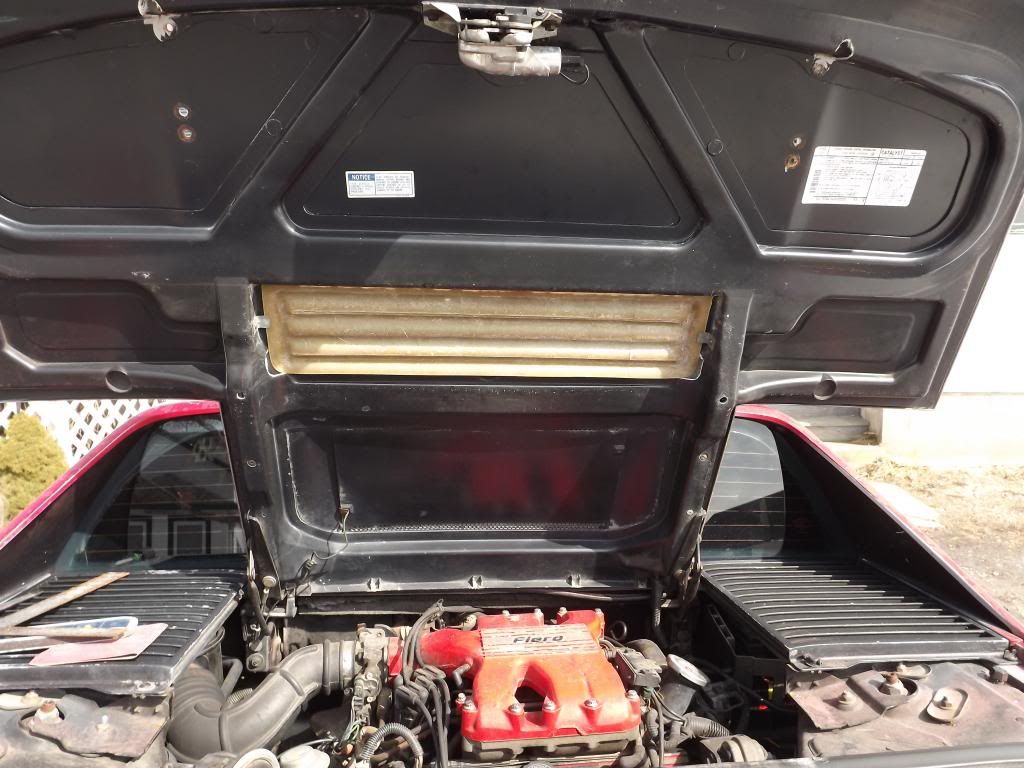
Pshew. Its in front of the trunk seal. It will be situated in the area above the gap between the motor and trunk wall perfectly. IIRC the vent was made for a fastback but I don't really see why it won't work here. Looks sharp IMO.
I read somewhere to bevel the mating edges when glassing? Maybe take it down a small bit around the edges. Then build it up for shaping and more sanding. This is definately reaching for me... Can't hurt to try tho. WTH. Plus I can cure the dreaded PO shaker can paint. Hopefully.
On my Vette build, I have gone through about a gallon. It goes a long way, if you only mix what you need... Almost all the Bondo style fillers use the same hardener, so I have mixed various fillers together to make things easier for me. For example: add the Evercoat Vette panel adhesive with the long strand filler, or short strand filler for the gaps. I like to alternate hardener color for each application of filler, so I know when I have hit a prior layer when sanding. You definitely should "V" the edges where the panels meet. When cutting the vents open, take your time and go slow. It's much easier to remove the FRP than to add it back in...
That is an interesting location for a vent. In theory it should vent out, but, you'll find it won't do that. When underway, the forward air movement is strongest in that part of the deck lid. This means you are going to get air moving down over your engine when at speed. This is actually good. Cool air over the plenum.
The negative on the design is rain. Every time the car is out in the rain, you're going to get an engine bath. But, as long as you expect it, you can plan for it.
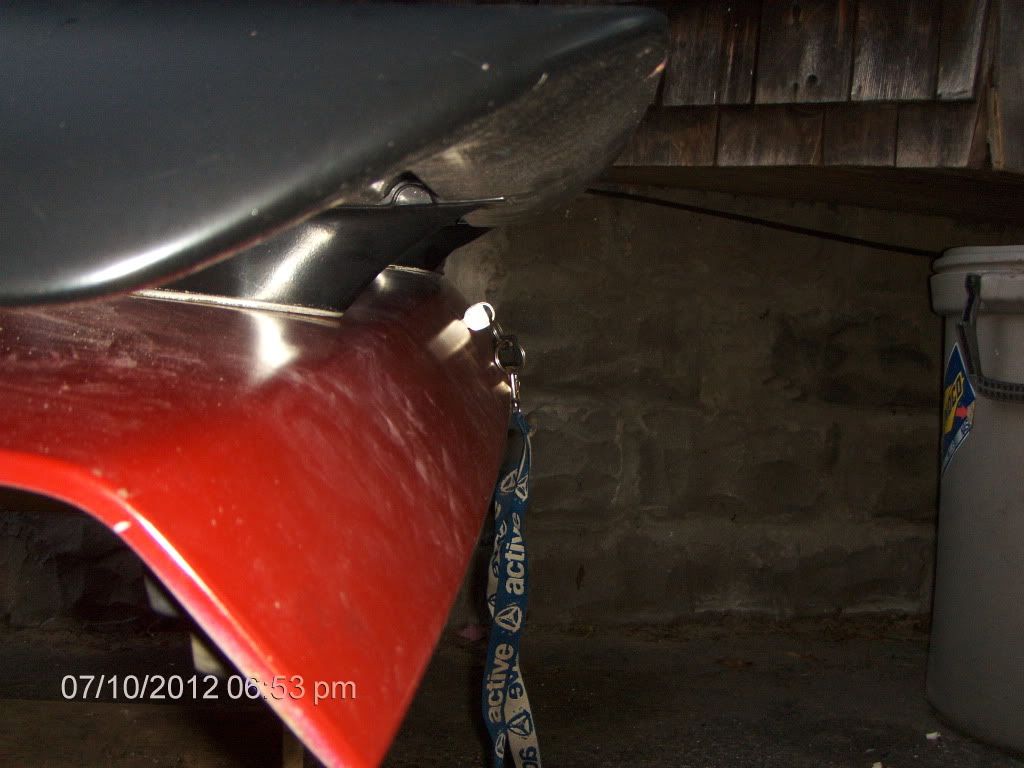
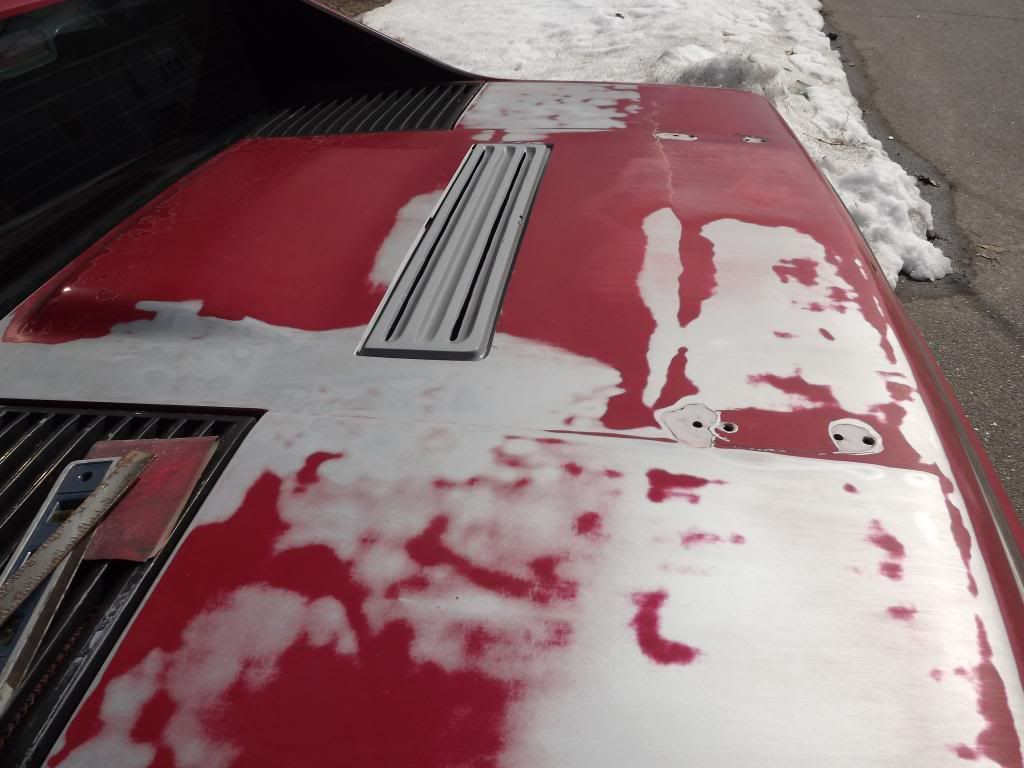
Todays few precious minutes were spent measuring and drilling new holes 1" further back. It looks very nice. Might be able to go back a little bit more. The rear wing stand mounting bolts are inside the decklid and I will have to cut access holes later. We can get to that later. The key chain is from a spare decklid I had. It's a great reference. The lines have changed greatly and I personally like it very much. Might see if I can go a 1/2 in further back. The curve of the decklid there starts to concern me tho!
I like it and in the end I guess thats all that matters. My only concern is all the reading about filling the holes and how bad some have turned out scares me!
edit the last mock up pic is without wingstand gaskets. I have on hand 1 NIP OEM gasket just need 1 more. Might have to make my own... They are not easy to find I think.
[This message has been edited by weloveour86se (edited 07-10-2012).]
My tip would be not just glass or bondo it into place. Use nuts and bolts as well or rivots so it expands and contracts together better when hot and cold.
My tip would be not just glass or bondo it into place. Use nuts and bolts as well or rivots so it expands and contracts together better when hot and cold.
Thats kinda what I been thinking about exzactly. Plus I think the edges look good, if I can mimic the factory lines. I don't think I want to glass the seams smooth on the outside. I want those edges.
edit oops forgot to say TY Aussie if i may...
[This message has been edited by weloveour86se (edited 07-11-2012).]
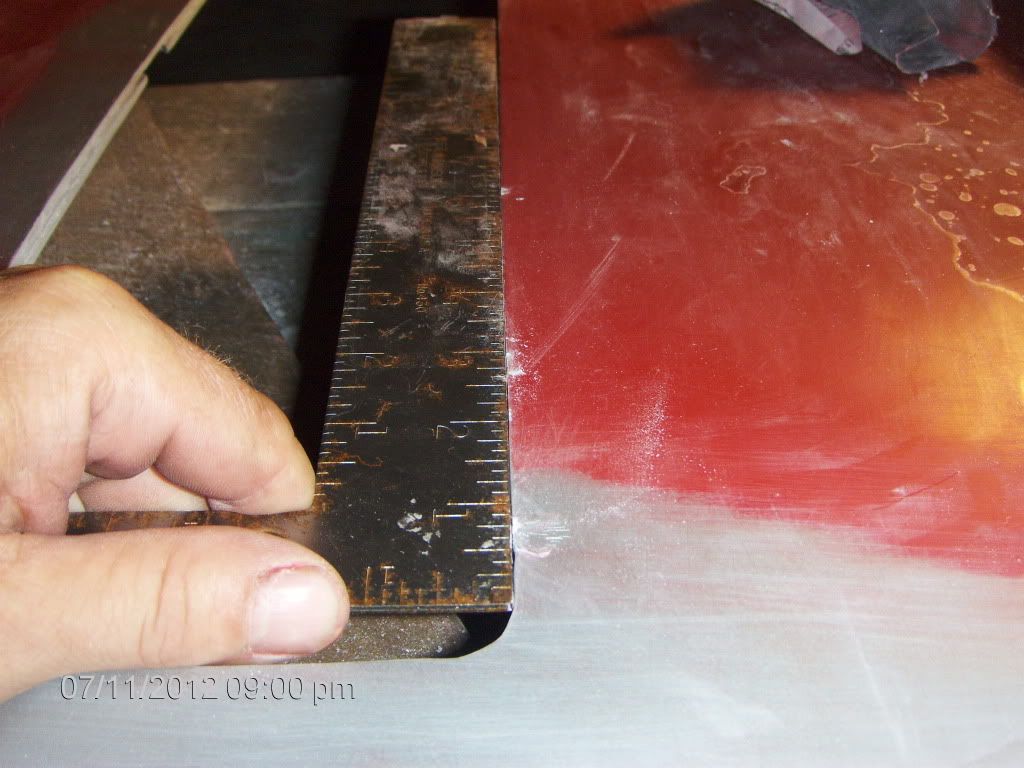
Todays precious few moments were spent with a block of wood and 200 grit wet/dry. Took some mountains down. I have to hit it again but not bad for a couple of hours. No BS here this smoking Maldavian chick came down and sat outside with us using the wifi chatting on Skype with a girl back home! Should see the pics this girl had on her computer. Model stuff. Easy dime! Pics I will try to get I promise. Victoria 24 yrs beautiful.
...ah srry distractions... anyway pics of the progress on the decklid. I still need to knock some hills down and get a nice straight edge.
Srry for crappy pics, again its dark out and I'm using a drop light and my cam suks...Fun stuff today!
Victoria! Ahhh man thats torture! Such a beautiful girl.
edit to add, oh yeah no way am I gonna try and sand this decklid by hand...I need a sander. What to use? Borrowed perhaps from a friend or neighbor..
[This message has been edited by weloveour86se (edited 07-11-2012).]
Man my photo editing skills chomp a hog... Finally, peep this edited pic. My puter bites and photobucket bogs it down.
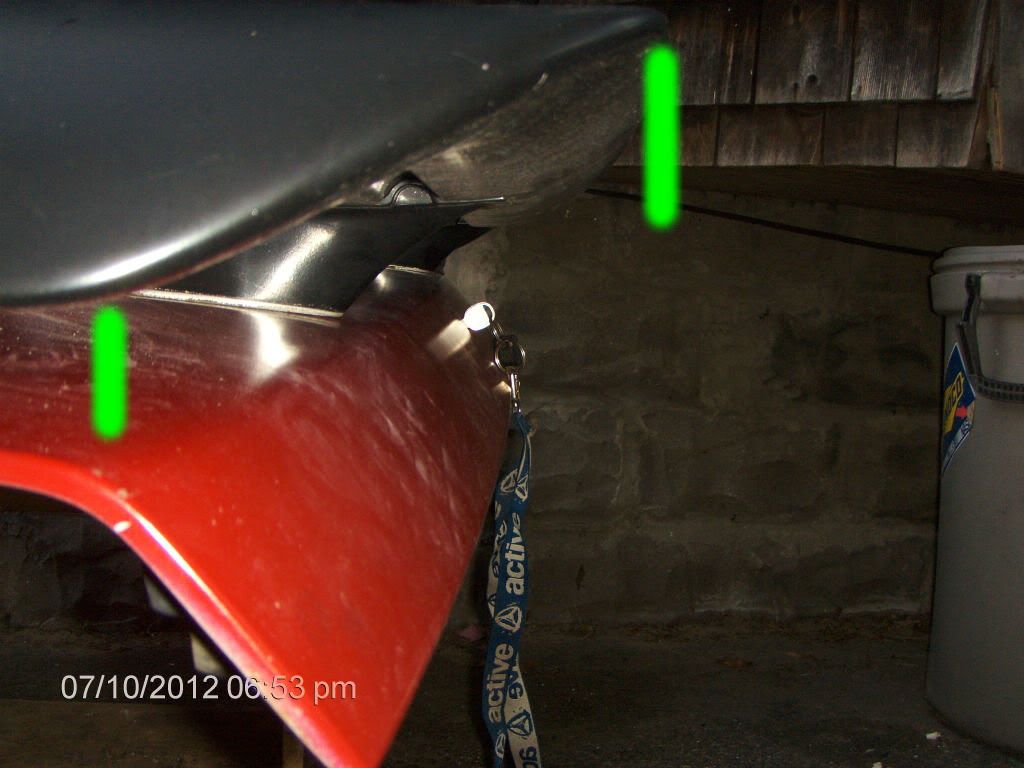
The left hand green mark shows how the lines are more even now. Those two corners line up better now. The right hand green line shows the trailing edge of the wing better. If you stand where you typically would with your key and look down the lines are perfect IMHO! The trailing edge of the wing lines up exzactly with the top edge of the tail lights! This wing movement has made a HUGH difference in the look of the decklid! It Looks great IMO.
Man, honestly there is NO way I'm gonna wanna do all this sanding by hand! Dreaded PO and his cursed crappy VIP Discount Auto Parts store spray paint cans...
What kind of sander would be ideal? A DA? Electric or pnuematic? I don't own a compressor, I do own extension cords though.
you're gonna wanna sand it by hand, one direction and dont switch. If tasteful body mods could be done over night with nothing but power tools everyone would have a 1 off car. Careful how hard you press when doing it by hand as I have seen "straight" bodys show finger marks where people press to hard when hand sanding. You are playing on a surface that has multiple curves so taking it down to SMC can be done in the blink of an eye and you will be pissed when that happens. Avoid bondo if you can. Also, there is no need to go down to factory primer, just take off the rattle can paint and the clear on the factory paint and throw some primer. When you start hitting black and yellow you've gone way to far. At this point high build primer is gonna be your friend.
you're gonna wanna sand it by hand, one direction and dont switch. If tasteful body mods could be done over night with nothing but power tools everyone would have a 1 off car. Careful how hard you press when doing it by hand as I have seen "straight" bodys show finger marks where people press to hard when hand sanding. You are playing on a surface that has multiple curves so taking it down to SMC can be done in the blink of an eye and you will be pissed when that happens. Avoid bondo if you can. Also, there is no need to go down to factory primer, just take off the rattle can paint and the clear on the factory paint and throw some primer. When you start hitting black and yellow you've gone way to far. At this point high build primer is gonna be your friend.
OK TYVM. sigh...back to hand sanding. I figured as much. Wet sanding with 200 wet/dry just to get all the flaking crap arse clear and take the red off. Then start going back with 600 then 2000 perhaps. Gonna be here awhile...
OK TYVM. sigh...back to hand sanding. I figured as much. Wet sanding with 200 wet/dry just to get all the flaking crap arse clear and take the red off. Then start going back with 600 then 2000 perhaps. Gonna be here awhile...
You don't need to get the red off or all the paint for that matter your trying to achieve a hard flat surface it isnt a metal car you just need good high fill primer for painting.
OK TYVM. sigh...back to hand sanding. I figured as much. Wet sanding with 200 wet/dry just to get all the flaking crap arse clear and take the red off. Then start going back with 600 then 2000 perhaps. Gonna be here awhile...
If your goal is to cut the paint to remove it quickly, why wet sand? Hit it with 150 or 180, then move to 200 or 220, then 320 and high build primer. Then, WET 320 to 400 then base coat. Then WET 400 to 600 and clear coat.
[This message has been edited by IFLYR22 (edited 07-17-2012).]
If your goal is to cut the paint to remove it quickly, why wet sand? Hit it with 150 or 180, then move to 200 or 220, then 320 and high build primer. Then, WET 320 to 400 then base coat. Then WET 400 to 600 and clear coat.
Sounds great! Will do. Dry sanding for the moment seems most effective. High build primer you say? Hmmm.. Honestly I'm an electrician and the most body work or painting I've ever done was on a 1:24 scale. Kinda the same but not really.
Maybe I can take a look at cutting the vent slots today. Scarey.
High fill or high build primer huh? I'm really in over my head here. lol. Honestly I was thinking of doing most of the prep work then taking the decklid to a pro for paint. I was thinking the decklid would be a good starting point for a complete paint job. I don't have access to painting guns or booths. Just some sandpaper and a dream!
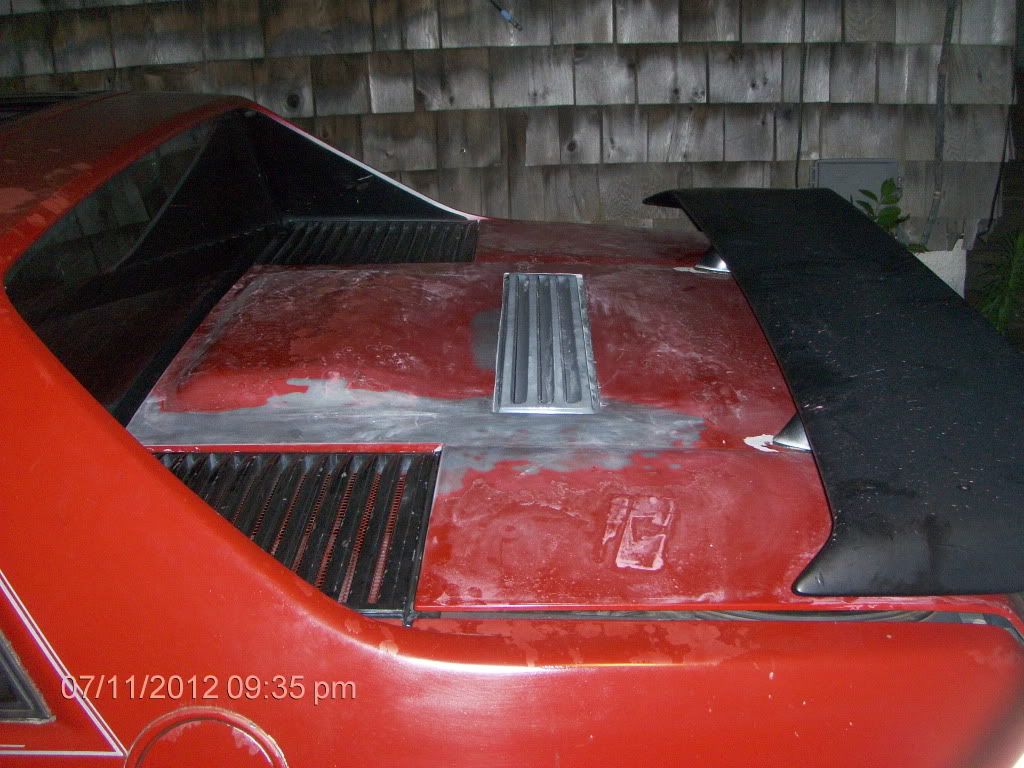
Cut the first vent. It came out nice IMO. I tried to leave more that way I can take if needed on the edges. They still need to be cleaned up.
My first concern is that the structrural qualities of the part have vastly deteriorated. If I cut the vents out on all rows the parts will be very fragile and prone to breakage. I might leave a small section of the middle vent for support. I wish I would have seen this coming because I would have left a small section unvented in the first row.
Todays few precious minutes were spent measuring and drilling new holes 1" further back. It looks very nice. Might be able to go back a little bit more. The rear wing stand mounting bolts are inside the decklid and I will have to cut access holes later. We can get to that later. The key chain is from a spare decklid I had. It's a great reference. The lines have changed greatly and I personally like it very much. Might see if I can go a 1/2 in further back. The curve of the decklid there starts to concern me tho! edit the last mock up pic is without wingstand gaskets. I have on hand 1 NIP OEM gasket just need 1 more. Might have to make my own... They are not easy to find I think.
Oh I can help you here. I moved my wingstands back as far as you can and the front bolt holes will end up over the trunk. Here's the thing, the wingstand gaskets I had were not a good fit and allowed rainwater into my trunk. Make sure the gaskets fit perfectly or put silicone into the bolt holes or else everything in your trunk will be ruined.
Oh I can help you here. I moved my wingstands back as far as you can and the front bolt holes will end up over the trunk. Here's the thing, the wingstand gaskets I had were not a good fit and allowed rainwater into my trunk. Make sure the gaskets fit perfectly or put silicone into the bolt holes or else everything in your trunk will be ruined.
Duely noted. The thought of a trunk full of water has crossed my mind. First I will try for the best seal I can get from the stand gaskets, then I can put the caulk right to her!
No major breakthroughs or progress yet, just boring old sanding. Sanding at the beach, bikinis walking by, must stay focused, got to warn the others.....
edit; dang typos
[This message has been edited by weloveour86se (edited 07-22-2012).]
I like the vent in that location. A custom pan underneath should solve the rain problem. I am considering using this vent on my Brisa / California convertible project.
------------------ " THE BLACK PARALYZER" -87GT 3800SC Series III engine, custom ZZP /Frozen Boost Intercooler setup, 3.4" Pulley, Powerlog manifold, Northstar TB, LS1 MAF, 3" Flotech Afterburner Exhaust, Autolite 104's, MSD wires, Custom CAI, 4T65eHD w. custom axles, HP Tuners VCM Suite. "THE COLUSSUS" 87GT - ALL OUT 3.4L Turbocharged engine, Garrett Hybrid Turbo, MSD ign., modified TH125H " ON THE LOOSE WITHOUT THE JUICE "
I like the vent in that location. A custom pan underneath should solve the rain problem. I am considering using this vent on my Brisa / California convertible project.
Yes a custom catch pan was something I had put some thought into, drain system and all. I did get stuck driving in the rain today and all seemed well. When in motion at speeds the rear decklid mostly stayed rain free. At traffics lights is a different story though. I guess I gotta try and just not get wet till I work it out.
Todays progress was just a bunch of boring hand sanding...sigh.
Hope not, I know its been awhile but life happens. Time to get back on this. Im highly motivated.
So I been reading up about Evercoat and 3M. Guess Ill go Evercoat. All I need really is enough to fill the factory wingstand holes and some small repairs.
So I guess my question is, how to fill the holes? Stick someting over the hole on the underside and just pour my mix in? Might sound like a dumb question but I dont think so. Do I really need to bevel the outer edge of the holes?
Second, I in my eternal wisdom I chipped the gel coat finish on the Kahines vent. Any chance I can use the evercoat on it? You can see the chip in one of the pics posted above.
As for the adhesive, I bought mine online...It's expensive, but goes a long way.
The holes: chop up some fiberglass into very short strands and mix them into a small batch of adhesive. Chamfer the holes, plug one side and force the mixture in. Let in harden then smooth it out.
Bob
[This message has been edited by RCR (edited 02-04-2013).]
Awesome link! Lots and lots of great stuff. I see Sourmug used Evercoat smc panel adhesive. I was looking at non smc Evercoat. Should I use smc panel adhesive or non?
Tyvm for the tips Bob. This mod is definately something that takes time and patients, oh and knowledge. I have time and patients but not much knowledge!
Sanding in the winter outside at the beach in Maine is not nearly as fun as the summer time.
If the dreaded PO didn't rattle can the car, I'd be so much further along.
Well I been reading up and what not and I'm 100% positive the PO used acrylic enamel cheapo spray paint cans. I understand that this paint will probably react to any real paint that goes on. Thus I'm just going to remove it all. More sanding. Almost there. I just been doing a little here a little there. No hurries.
So I need to start thinking about several things real soon.
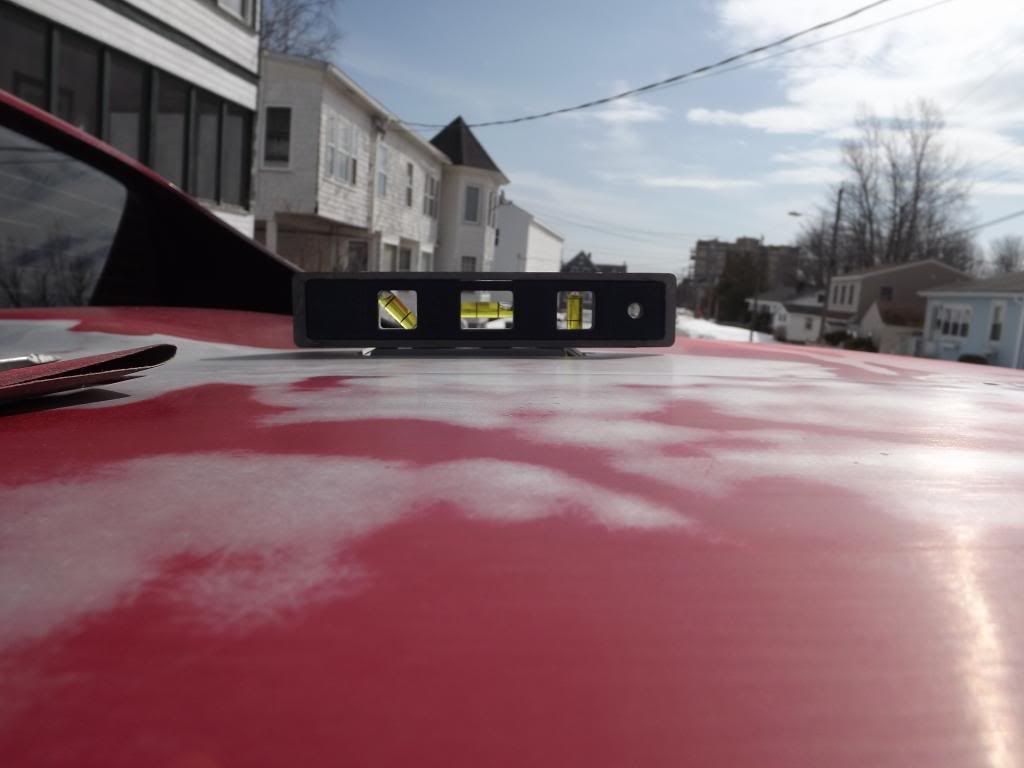
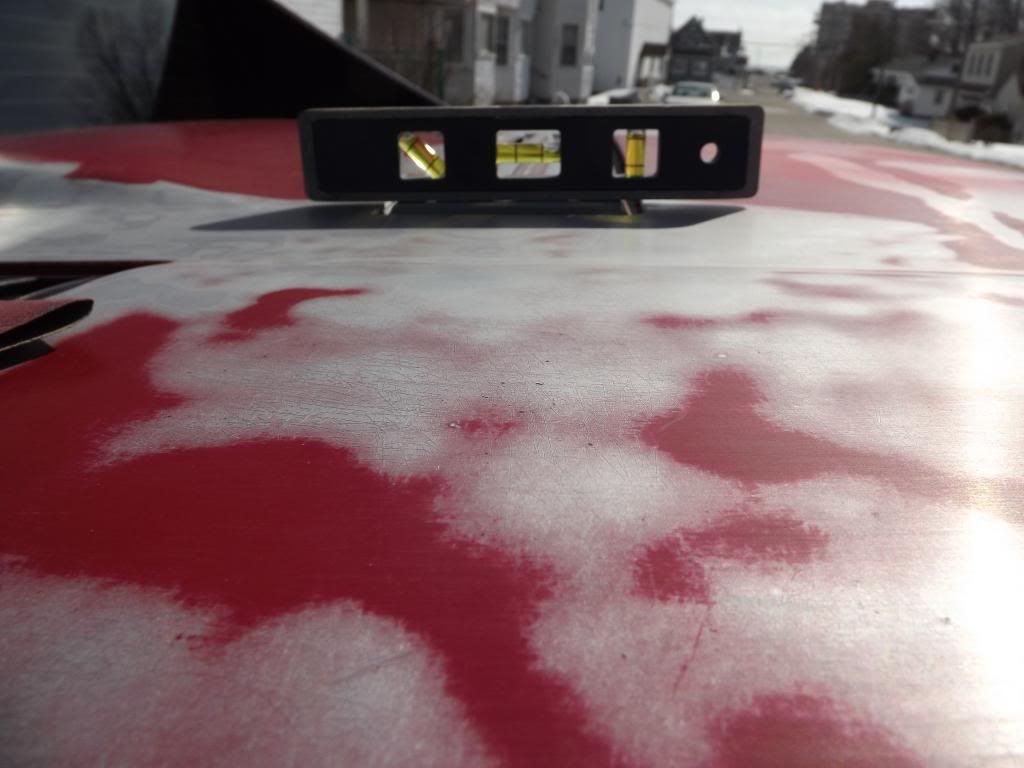
1. Finish height of the top of the Kahines vent. Should I put it flush with the decklid or just slightly higher? The Kahines vent actually matches the curve of the decklid perfectly so it doesn't flash or look out of place. Most non Fiero people that see it don't even notice that it's not factory till I tell them about it.
2. Next I need to address this round cut out. It's a luggage rack mount hole. I'm pretty sure it's on every decklid. It's part of the under layer of the decklid sandwich. Next time your poking around under a decklid look for it. You will see what I mean. Also the edges show the two layers and I need to figure how to clean that edge up. I could simply trim the inner layer around the vent cutout further back but then the vent might stick up to far. I will have to think some before I do anything drastic.
I've removed spray can paint with either acetone or paint thinner. Sure beats sanding.... And when is sanding EVER fun?
I been considering doing this. I have some paint stripper that I may try. I'm worried about any residue this stripper may leave behind though. Sanding for now. At least finish sanding the back edge under where the wing would be, dreaded PO put it on thick here. Then I will pull the decklid and set it on some saw horses for the real fun! If only I could talk Momma into letting me sand in the living room.
I had the Hines vent installed by a body man friend of mine. He is very very good with custom changes. He used SMC and I had him to install the vent higher than the decklid. Personal choice. He cut the vent slots out with a die grinder but left a connection in the middle for support. It has been on for several years now with no problems. Also I moved the wing back on mine by putting the front stud of the wing stand in the rear hole. The rear of the stand sticks off the decklid. I made 2 wing stans extensions by using some flat alluninum and cutting it to fit the wing stands and extending it to cover the bolt holes. I put a gasket under the extansion and a gasket for the wing stand on top.I made a cover to hide the exposed bolts and nuts that sticks out the back and made covers for the extensions for the plate up front. Sorry, no pics. If you are curious look at the "Hickory NC Fiero owners meeting" thread. Mine is the gold GT.
[This message has been edited by spirit (edited 03-11-2013).]
I had the Hines vent installed by a body man friend of mine. He is very very good with custom changes. He used SMC and I had him to install the vent higher than the decklid. Personal choice. He cut the vent slots out with a die grinder but left a connection in the middle for support. It has been on for several years now with no problems. Also I moved the wing back on mine by putting the front stud of the wing stand in the rear hole. The rear of the stand sticks off the decklid. I made 2 wing stans extensions by using some flat alluninum and cutting it to fit the wing stands and extending it to cover the bolt holes. I put a gasket under the extansion and a gasket for the wing stand on top.I made a cover to hide the exposed bolts and nuts that sticks out the back and made covers for the extensions for the plate up front. Sorry, no pics. If you are curious look at the "Hickory NC Fiero owners meeting" thread. Mine is the gold GT.
Awesome!! Thanks for posting. I found the thread here.
I like your vent! It looks like its painted black. This is how I'd like mine to be. I want mine to look separate from the decklid. Like the factory vents. I want to try and mirror the effect. It's great to see the vent in use and hear your feedback!


 I was just thinking....