So, here's the scoop. I've been preparing a 1986 Fiero GT for competition in the ChumpCar world series for over a year now, and thought it was finally time to get it a build thread of it's own.
For those of you who are unfamiliar with ChumpCar, the premise is simple- an endurance road race series for what we affectionately call "Crapcans." A crapcan is essentially a car that is worth less than $500 (when you exclude the safety equipment).
After seeing the first ChumpCar world series race at Portland, Oregon in October 2009, I was hooked. A few of my Fiero friends were there that day to witness the event, and we all agreed then and there that we would be participating by the race in Portland the following year. I started searching Craigslist the Monday after the race, looking for a suitable project. I had a few goals: first, the car absolutely had to be a V6. The Duke has proven to be unsuitable to the abuse that a 24-hour race series can dish out. Second, with two V6 cars at home already, I wanted the car to be very interchangeable with the current fleet. Next, it absolutely had to be a stick... 4 speed preferable, again, to match the others at home. Black or white was preferred, and hardtop was a bonus. By Thursday of the first week, I had found the car we would eventually purchase. It was listed on Portland Craigslist for $200. It didn't have a picture, but from emailing the seller, this was the info I had obtained: it was black, a stick, a 1986 with a V6, non-running due to some electrical problem, with 107,xxx miles on the odometer. It had been sitting a few years.
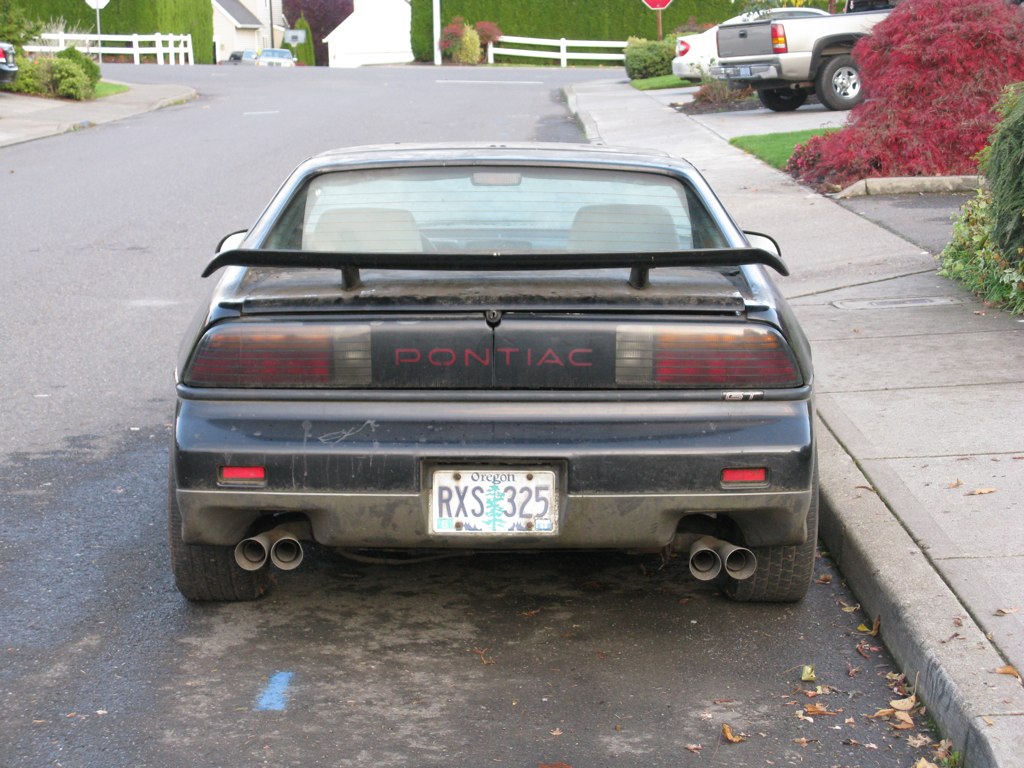
I couldn't let this opportunity pass. I went to go see the car the next evening, at the sellers earliest convenience. This is what I saw:
And this was after removing a pile of leaves about 6" deep from off the top of the car. A lot of the leaves on the ground in that pic were previously on the car. I told the owner I was extremely interested, and would arrange to tow the car home the next day. Because it didn't have a title, and because it didn't run, no one else had come to look at it. As far as I was concerned, it was perfect for us. The car had sat since 2003, and had only been driven 250 some miles since they bought it. The PO's brother was a high school kid, who used the interior as a place to smoke with his friends- there were cigarette butts, and dubious paraphernalia everywhere. The interior was essentially unusable. Since the interior had to come out anyway, this didn't matter one ounce to me.
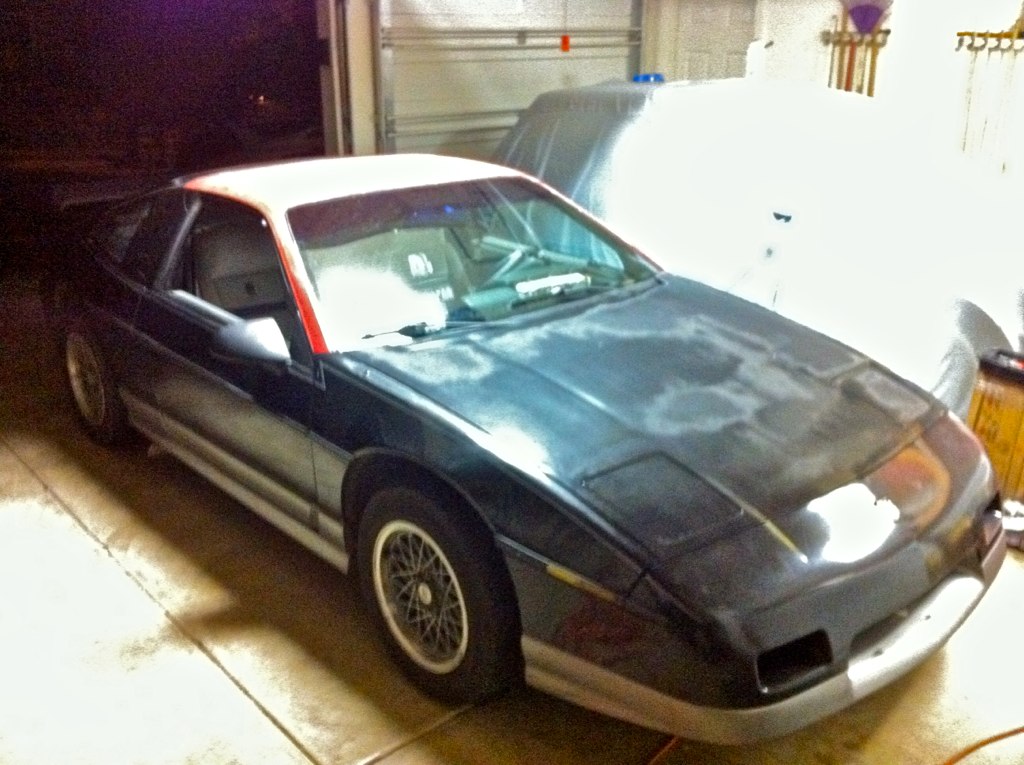
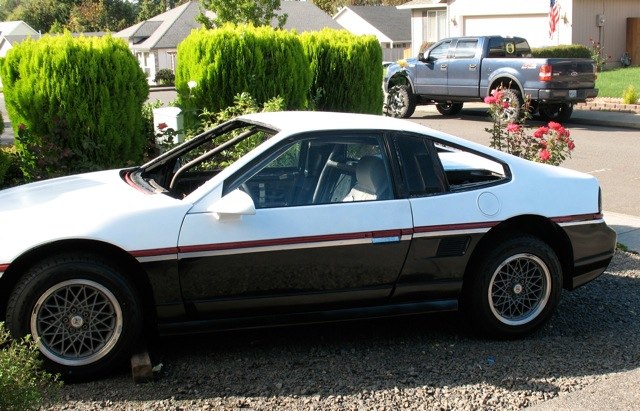
I rented a U-Haul truck, and flatbed, and brought it home the next day. This is what it looked like, immediately after pulling it off the trailer, completely untouched.
See that light blue wire which is tapped into the ignition coil? That proved to be very important, as you will soon find out.
[This message has been edited by ManMadeChickens (edited 11-13-2012).]
When I bought the car, I told my Mom that "if I don't have this thing running within 24 hours, you should be worried." The PO had told me that it didn't run because of some electrical problem. He was indeed right. The car wasn't getting spark when cranking. It had fuel (I could smell it through the exhaust), and it had decent compression, so I knew if I got it some spark, it should fire right up. I started troubleshooting ignition system basics, which led me to looking at the coil. Attached to one of the coil wires was a light blue wire, which was obviously added to the car. This led through the firewall to a Chapman style anti-theft lock. The idea behind a Chapman lock, is that it provides anti-theft protection in two ways: it has an additional trunk latch, which is supposed to prevent a thief from opening the hood without the key, and a ground wire, which grounds the ignition coil, preventing spark to the engine. Whoever installed it, just used wood screws to attach the new latch to the decklid, and the PO had very obviously pulled them out. Properly installed, this could have been a headache, but since I had access to the engine, it was a breeze removing it. I snipped that blue wire which was grounding the coil, and the darn thing fired up without any hesitation. Due to the copious amounts of plant debris caught in and around the engine, I needed to do some cleaning before I could run it for any extended period of time.
A full cleaning of the engine bay, and exterior resulted in what could be described as a very complete, but generally neglected car.
After cleaning out the flammable debris from the engine bay, and making some necessary safety/maintenance checks, this is how she ran.
[This message has been edited by ManMadeChickens (edited 11-13-2012).]
I knew from reading the ChumpCar rules that sunroofs were not allowed. The fix was generally just to weld a piece of metal over the opening, but I didn't really like that idea, since the exterior panels are all plastic, anyway. A local Fieros Northwest club member was holding an event a few weekends later, where he was allowing the club to part out a knackered '84 coupe, and anyone could keep any parts they could take off of it. I jumped at the chance, and scored the hardtop roof panel from it. Thankfully, the roof panel is the same for fastback/notchback, and the spaceframe is same for the roof panel for all years. I stashed away the roof for warmer months, and moved onto other projects on the car.
The next project was wiring. The steering column was a complete mess. The turn signal stalk was broken off, the ignition switch was broken and falling apart, and the steering wheel had been removed from the car. This meant that basically all the wiring in the column had to be attended to. While I was in there, I needed to tighten down the Torx bolts causing a wobbly steering column, and also remove the ignition wheel lock, to comply with CCWS rules. I spent an evening getting the column out of the car, and making the mechanical changes. I pulled all the wiring out of the column, and set it aside for modification. As it turns out, wiring up external switches to control all the functions in the column is not as easy as it sounds. I spent a few more nights that week wiring up everything to work as I intended. In the end, I wired up toggle switches for ignition, wipers, turn signals, and hazards. Push buttons were used for the starter, wiper mist function, and wiper wash. I have a button and spot on the switch panel for the horn, but as of yet cannot figure out why it doesn't work. That can be tackled at a later date, as the horn is not at all useful in our situation.
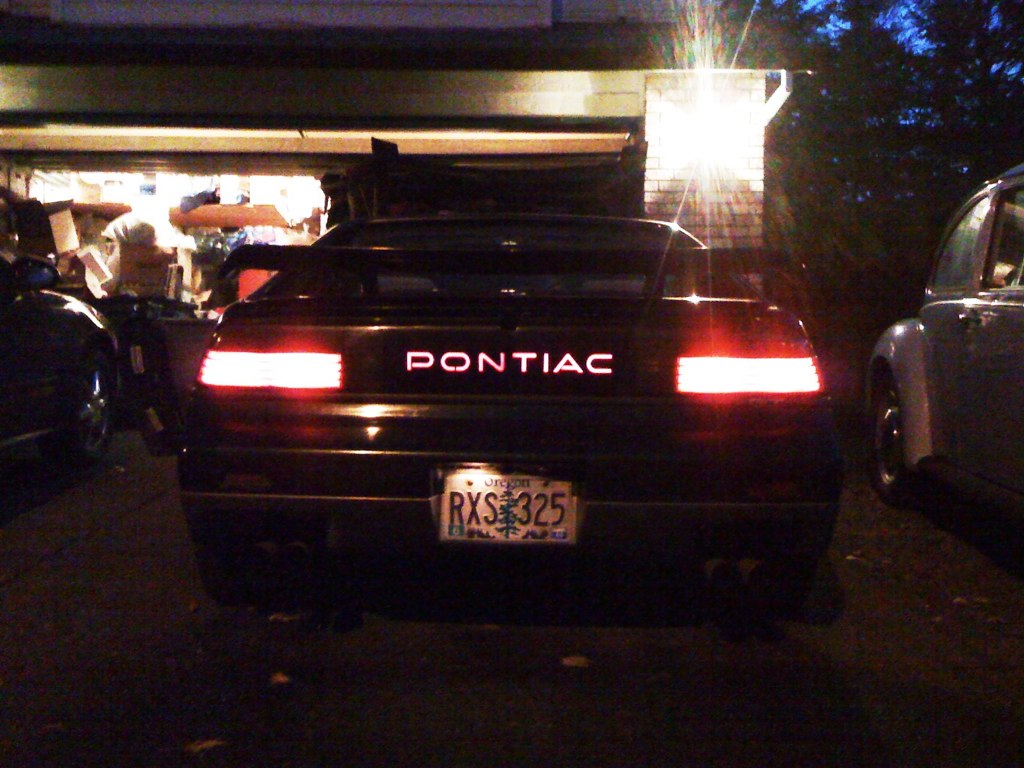
I replaced any burned out bulbs, and all the lighting worked... even the GT tails "PONTIAC" section.
I intended to keep the car road legal, mostly because I wanted to be able to show it off when it was done. This proved to be a useful idea later, as we uncovered a bunch of problems with the car by driving it around on the street. First of which was stuck front brake calipers- A common problem I have found with Fieros that have sat. This car stuck the LF caliper, and it wouldn't budge back into the cylinder no matter how hard I tried. I bit the bullet, and bought new front calipers, "stuffed" with pads. After replacing the front calipers, pads, and a thorough bleeding, the car was pretty road worthy. I drove it all over the place in the month of December, and learned a lot about how the car ran. It was a strong runner, stopped well, turned well, didn't make any funny noises, and didn't really have any major faults, with exception to massively worn out shocks and struts. I went to NAPA and ordered stock replacement shocks and struts. This turned out to be kind of an interesting challenge, as it took them nearly a week to track down a set of struts for this car. When they got those in, I set them aside to be installed later.
[This message has been edited by ManMadeChickens (edited 11-13-2012).]
The next project on the car was exhaust. Being a race car, we didn't really care about noise level, or emissions... so long as it was under 92 dB @ 50 ft, a CCWS requirement. A friend of mine gave me a free 36" glasspack muffler to use on the car. In looking at the stock exhaust, I came up with a relatively simple idea. I had seen Captain Fiero make a side-exit exhaust come out the passenger's side, immediately in front of the RR wheel. I liked this concept, and pulled the old exhaust system off to look into how to add this muffler to it.
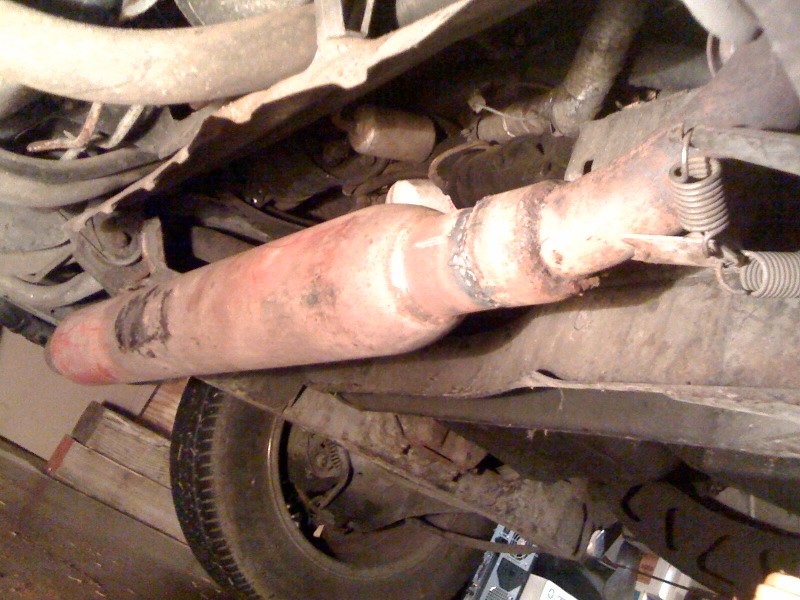
As it turns out, the glasspack was about the right diameter, and was only a few inches short of making it completely out the side. We cut the pipe where a larger diameter section had been added for the new cat, and welded on the glasspack. This was the result:
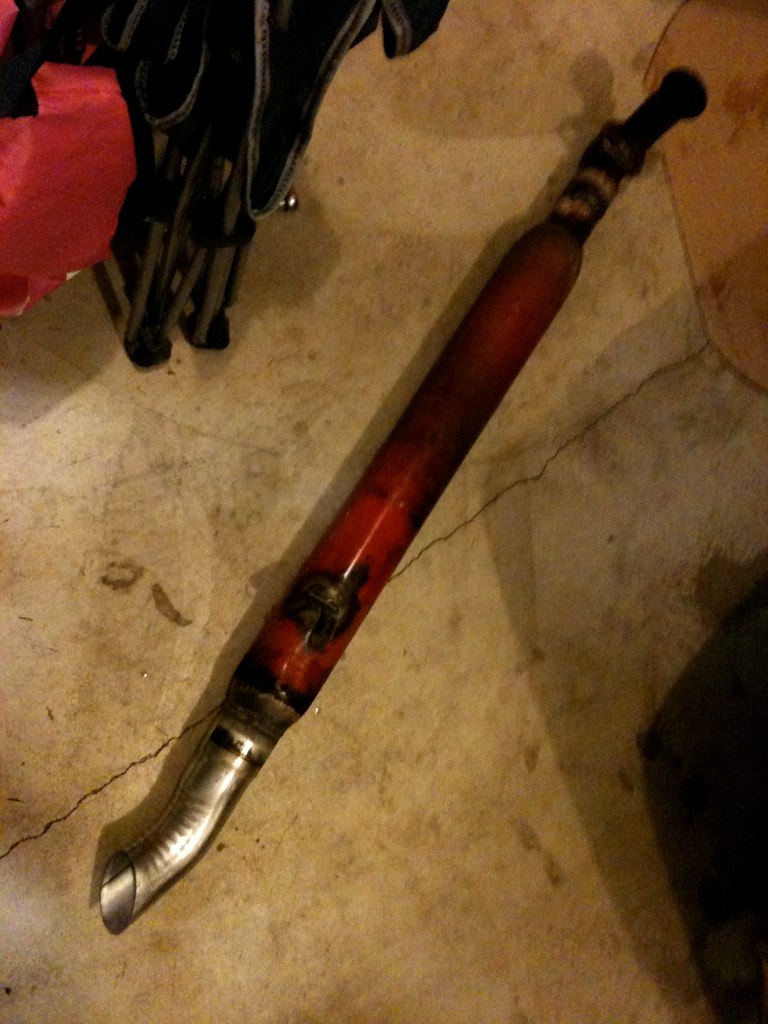
We welded on a small tab with some holes into it for the passenger's side spring hangers, and used factory hanging locations. This exhaust sounds AWESOME. It's extremely throaty, and just loud enough to show off, without being too noisy for race conditions. In it's original configuration, the exhaust dumped between the passengers seat and the right side rocker panel under the floor. This made the interior resonate too badly, and got exhaust gas trapped under the car... effectively gassing out the cabin. We added a 3" turn down to get the tip out from under the car, and turned back a bit. The result was that there was almost no resonance inside the cabin anymore, the passengers weren't gassed out, and you could finally see the exhaust tip from outside the car. This was the final product. Kind of janky, but free!
And here's how it sounds:
To this point, the car had been brought back from the dead, tuned up, stripped of it's interior, exterior cleaned, front brake work completed, and a new exhaust fabricated. I had slowly started to assemble a parts stash. Amongst these parts were an unused MSD Blaster Coil, and rear swaybar. I installed both items in early December of '09. The sway bar made a noticeable difference in the handling of the car. It effectively removed the inherent factory-tuned understeer the Fiero naturally has. Now, the car is much closer to neutral as far as handling is concerned.
With the exhaust complete, and things moving relatively well, the holiday season was upon us. Because the trip permit was set to expire, and we didn't have space to store an undrivable car the house, I stored the car away for the winter in a friends barn, waiting for spring to come.
[This message has been edited by ManMadeChickens (edited 11-13-2012).]
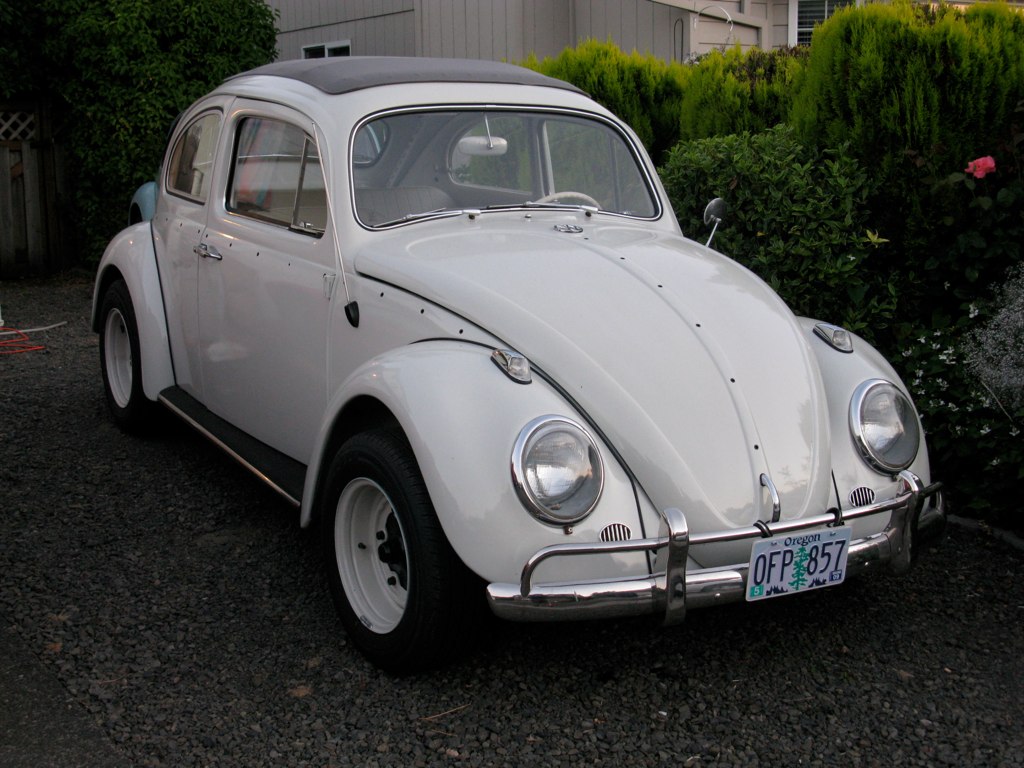
Over the winter, our prospective team members brainstormed ideas in preparation for pulling the car out of storage in the spring. We ordered a Jegs "Jegster" 12-point roll cage kit, so that we could install the necessary roll cage over the summer. Nothing else of importance really happened until the second week of August, 2010. I had been busy with Summer work, and until August 10th, had no place to put the car yet. It was then that I made a really tough decision. I had too many cars, and not enough money... and that's never a fun place to be in. It was with much regret that I sold my first car, a 1964 Volkswagen Beetle, which I had spent 7 months of my life restoring exactly the way I wanted.
Now thousands of dollars richer, and with driveway space to keep it, I was ready to bring the ChumpFiero home again. Now a new problem arose: my friend Jake, who had been keeping the car in his barn, said the car wouldn't start. I drove the 35 minutes or so to his house, and tried to diagnose the issue. Turns out, the car is not getting spark AGAIN. The car was getting power to the coil, but no spark. I swapped ignition control modules... nothing. I had a spare distributor that I had acquired for the car, which I subsequently brought back the next day, and a healthy supply of tools, and wiring diagrams. In the end, the car had failed a pickup coil in the time it sat. How, I am not sure... but using my multimeter on the pickup coil wires showed it was not functioning. The spare distributor went in, and the car ran again. I eyeballed the timing based off a reference picture I had taken before removing the first distributor, and drove the car home. It ran like a champ. I had to make a bee line for the gas station though, as it was nearly bone dry from storage. I stopped at the nearest station, and it took 9.2 gallons! I thought you could only use about 8 of the 10 out of a Fiero tank before it quit, but apparently that's not the case.
This is when the frantic work on the car began. At this point in the build, it is August, and we needed to have the car read to race by the end of October.
[This message has been edited by ManMadeChickens (edited 11-13-2012).]
By August 18th, I had some significant news to report. The roll cage kit had arrived, and roll cage fab could commence. Even more interesting was some creative work I had to do at the DMV. With some ingenuity, I was able to get the car registered, and legal to drive! I registered it with the address of my apartment during the school year, which is outside of the smog testing zone. Therefore, every two years I pay the nice people their money, and I get the tags I need.
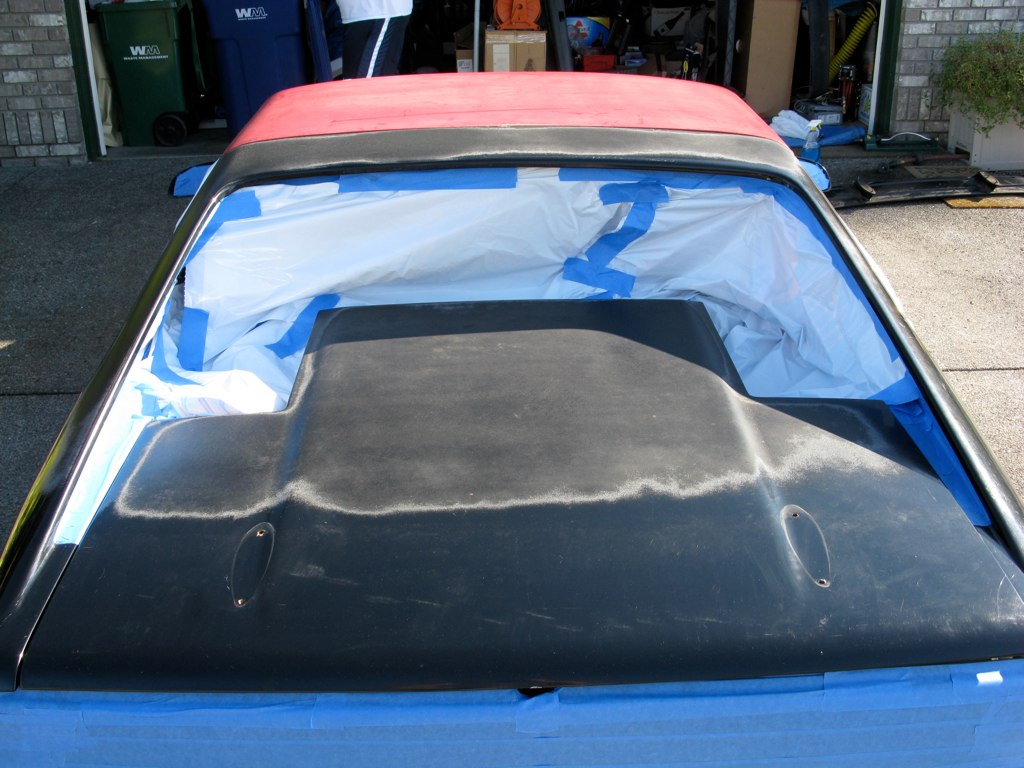
With the car back in town, I was anxious to get to work on it. That day, I set about changing the roof to the hardtop I had stashed away all winter. After hours with a ratchet, putty knife, and hair dryer, the roofs were swapped.
Unfortunately, this came at a price - whoever had replaced the windshield last had added what was obviously a very excessive amount of sealant at the base of the windshield. It was rock hard, and firmly attached to the old roof panel, where it sweeps down at the cowl, in front of the windshield. In removing this excess sealant, I nicked the edge of the windshield glass, which started a nice crack diagonally across the window. It would have to be replaced later on, as ChumpCar doesn't want badly broken windows in the race cars.
My buddy Blake, who would be welding in the roll cage had moved to Seattle in June, and was only able to come down to Portland to work on the cage a couple weekends. Therefore, I was bound by his availability. The first weekend we attempted to work on the cage was quite eventful. At this point, it is now the end of the second week in September. We hauled the car, cage kit, and a bunch of tools over the Blake's families garage, and got to work. The first interesting development was that numerous of the roll cage pipes were undersized from what Jegs said they were, and were undersized for the minimum diameter required in the rules. We were short of time, so we just went out to a local steel yard, and bought an additional 20 feet of 1.5" diameter, .120" wall DOM steel tubing to complete the cage. This additional pipe would only be used for things like the dash bar, and passenger's side single door bar. The rest of the cage was 1.625" diameter, .134" wall DOM steel. Another development was the amount of fabrication that had to be done to make everything fit. Being first time race car builders, we didn't really have any idea how much notching, cutting to length, and adaptation there would be.
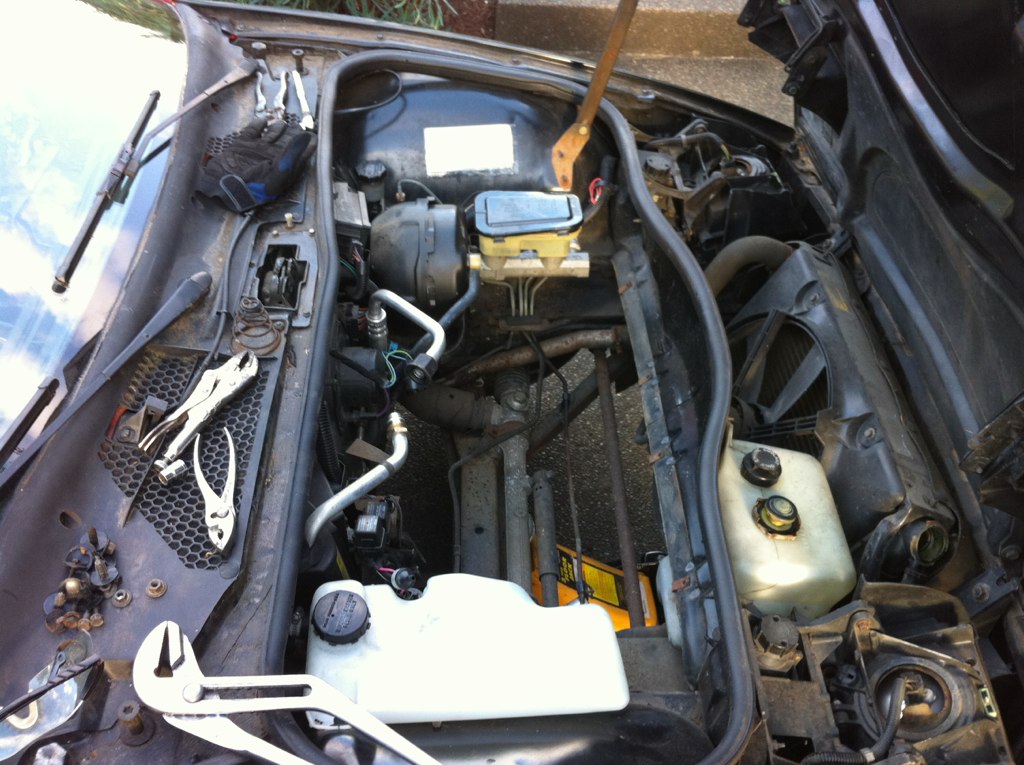
In preparation for welding the cage, we removed the front spare tire tub, so we could get to the coolant lines, which needed to be dropped to lower the cage through the floor, to weld the tops of the front legs.
This first weekend, we accomplished stripping out the interior completely, and fabricated and tacked together the main hoop.
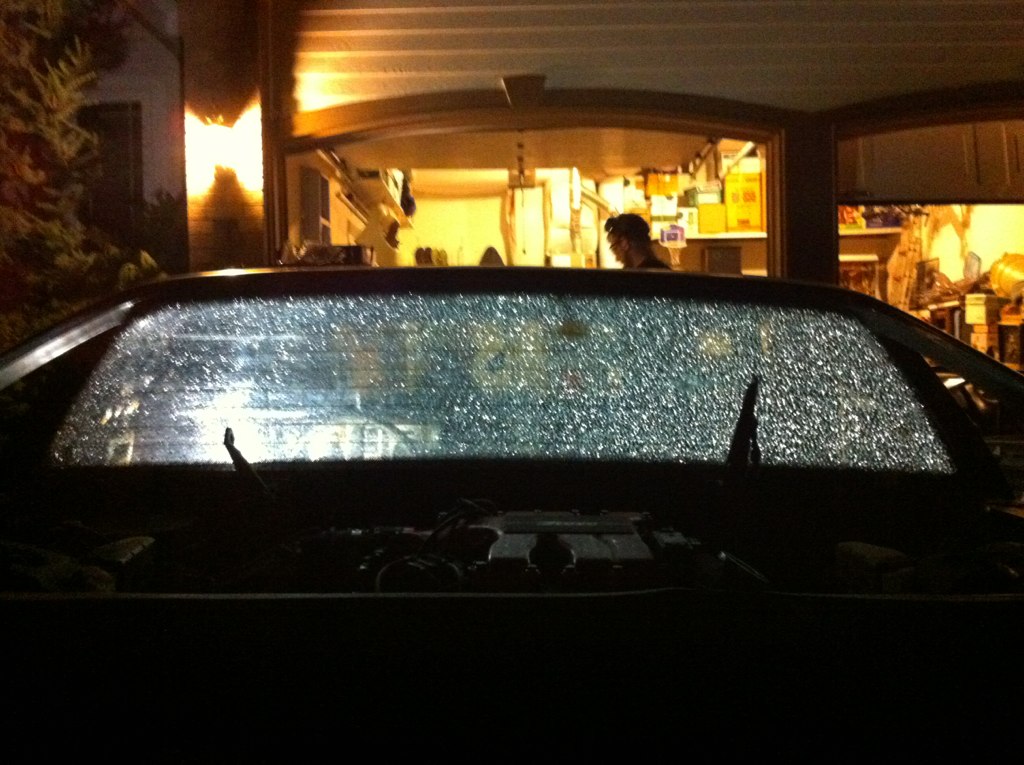
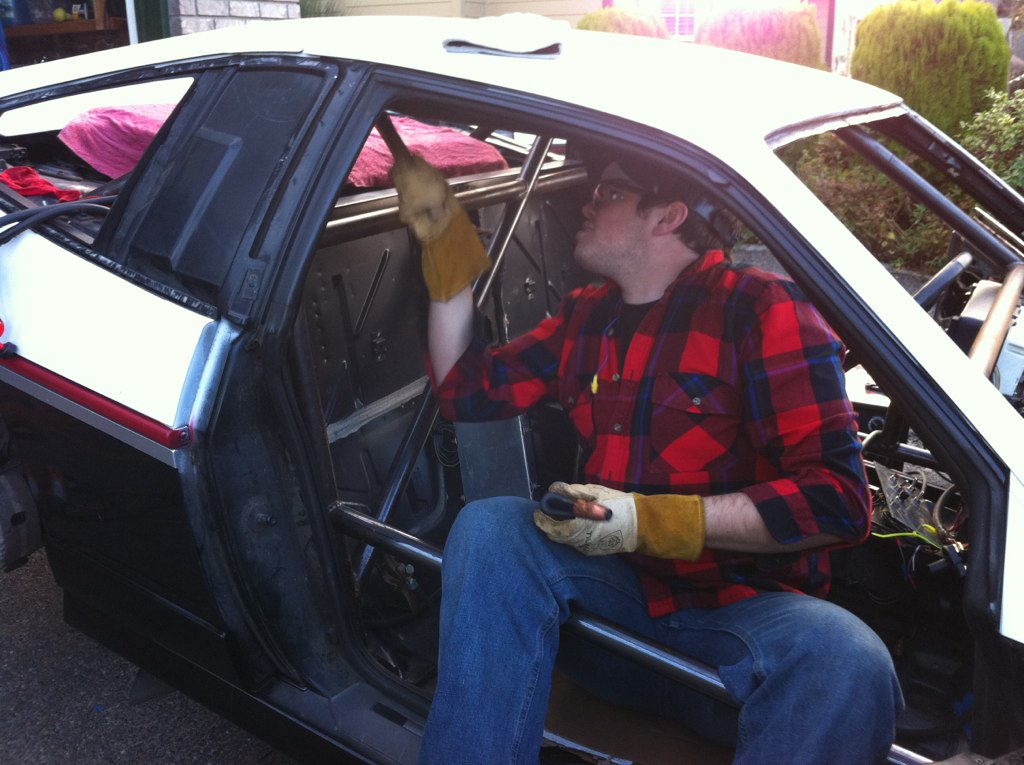
We needed to remove the rear window not only because of access for welding, but because the CCWS rules dictate having rear backstays, to support the main hoop. These backstays would be welded to the rear strut towers, and would need the opening from the rear window to be clear. Instead of taking the countless hours of removing the trim and body panels to remove the rear window, we instead covered it's entirety in packing tape, and used a spring-loaded window breaker to shatter it. This was the result:
At the end of the weekend, the car and remaining supplies had to go home, back to my house. Have two 10' sections of rollcage pipe that won't fit anywhere else? Throw them in the passenger's side, and out the recently vacated GT-quarter window openings!
[This message has been edited by ManMadeChickens (edited 11-13-2012).]
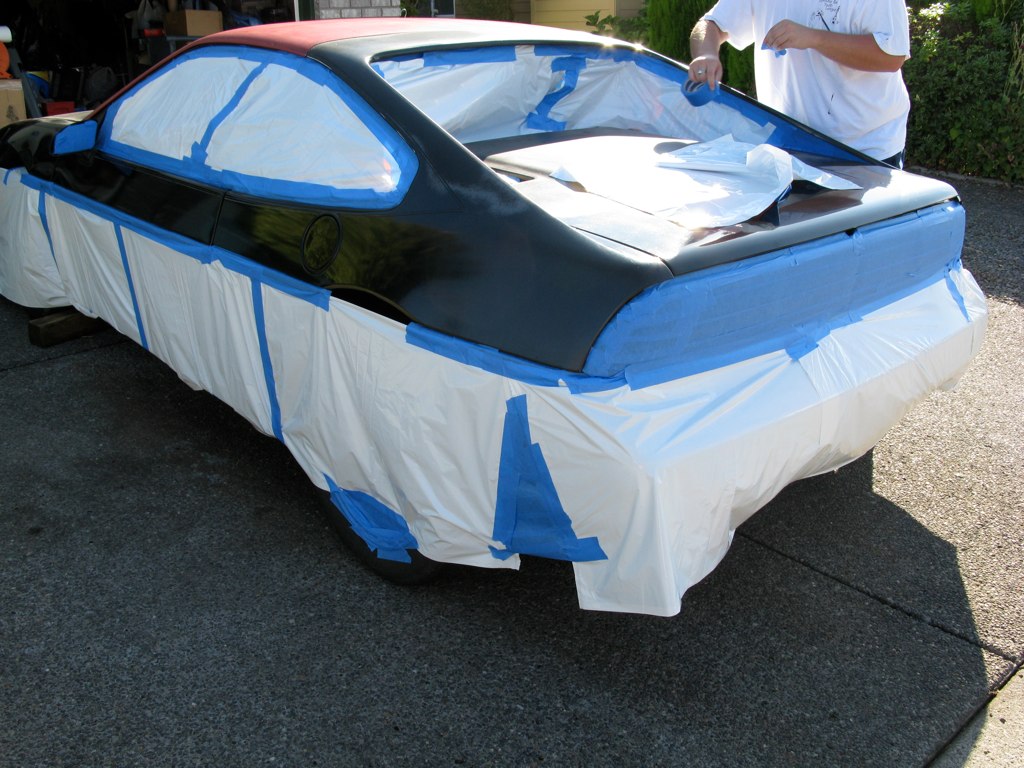
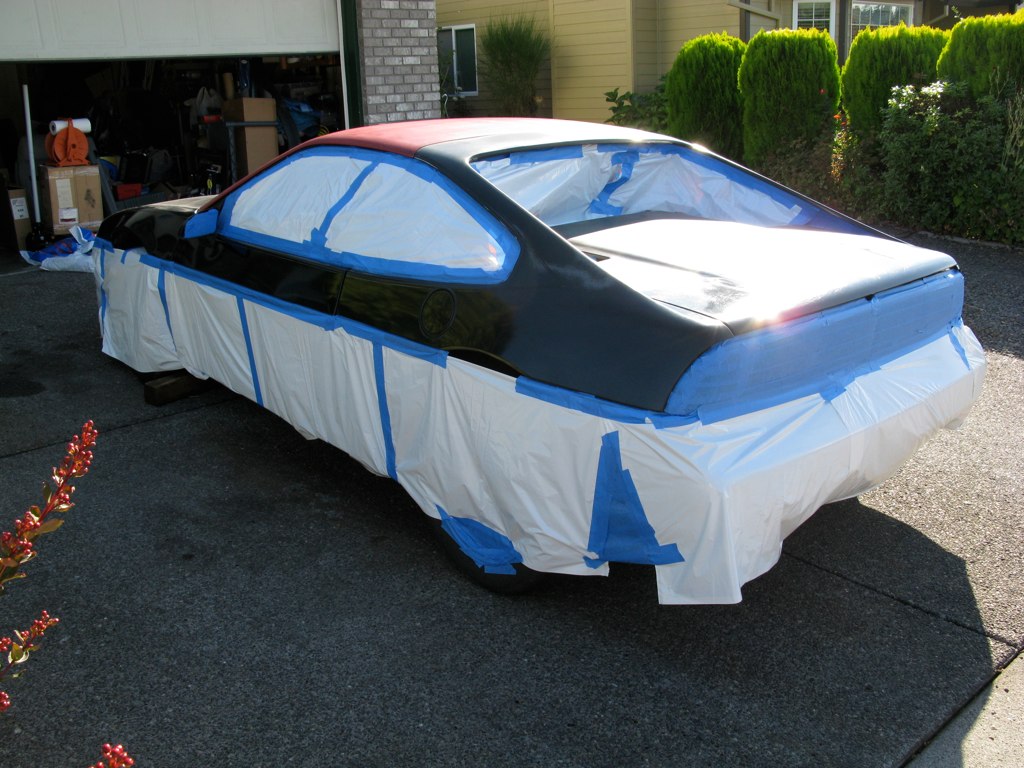
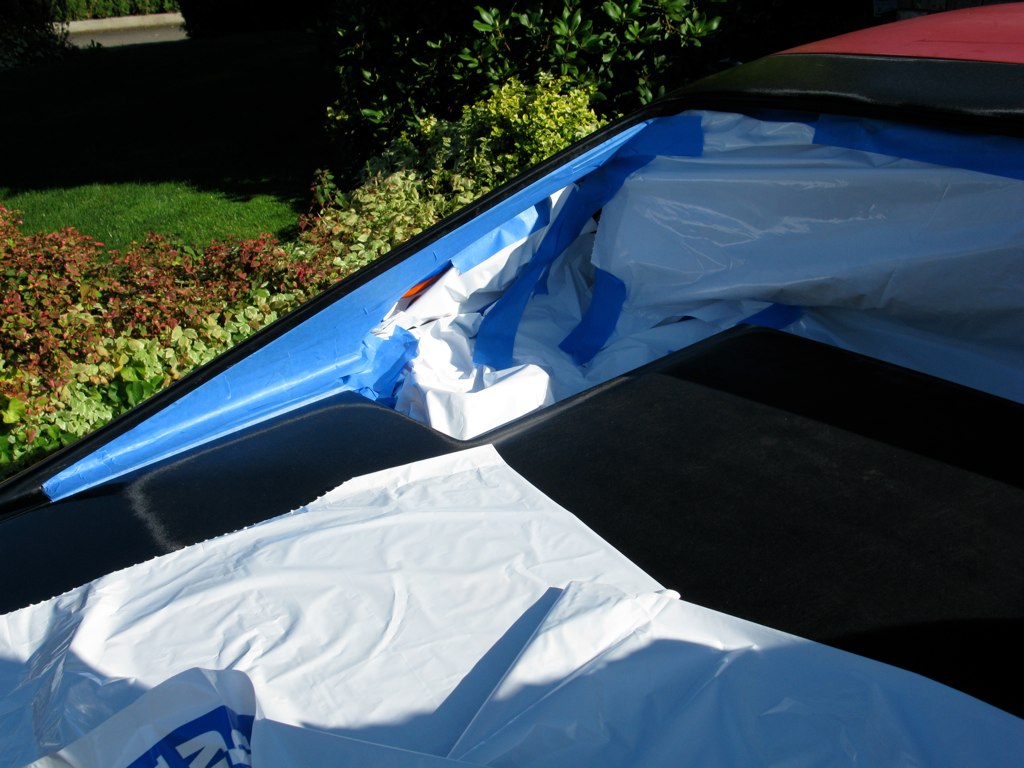
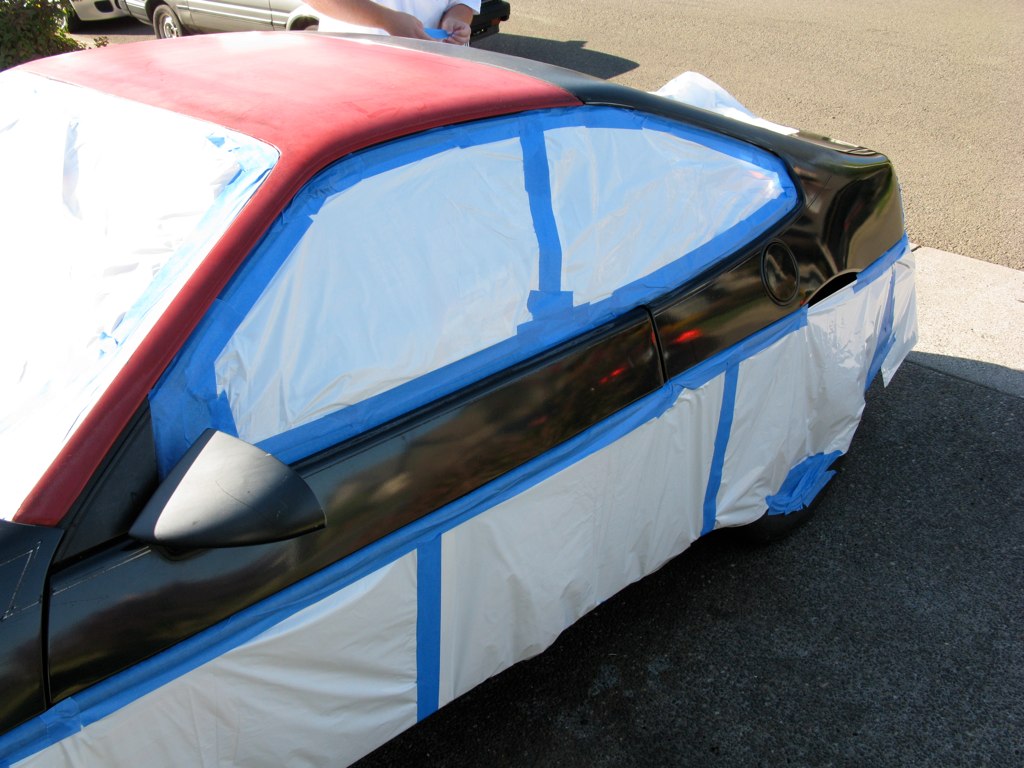
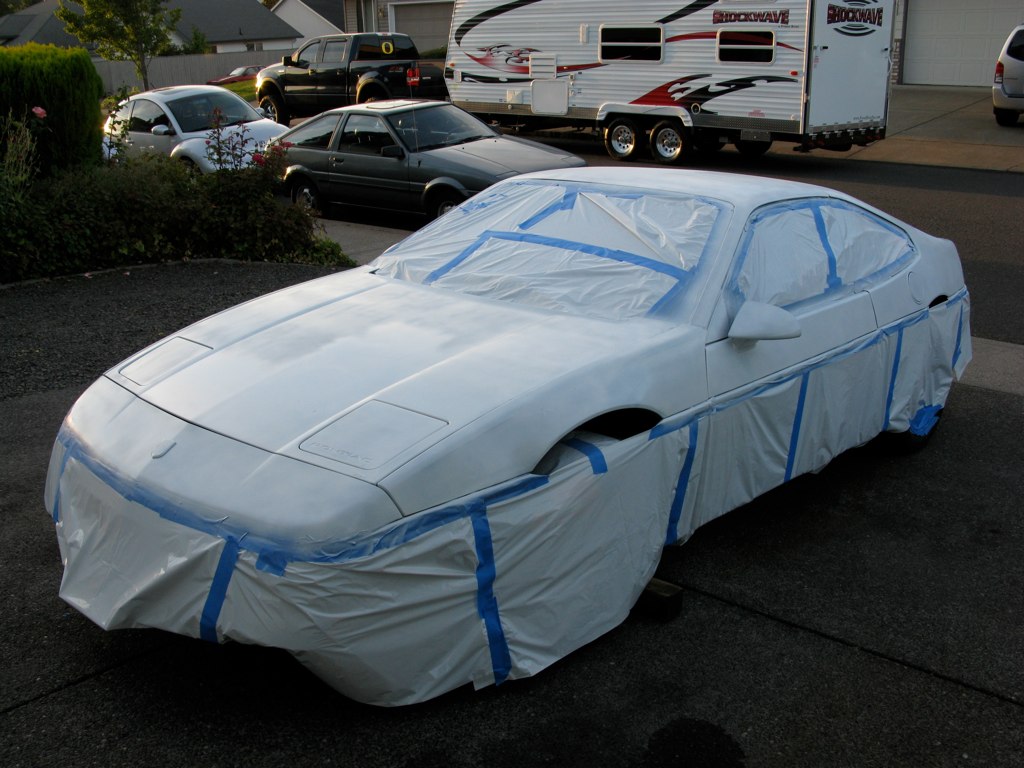
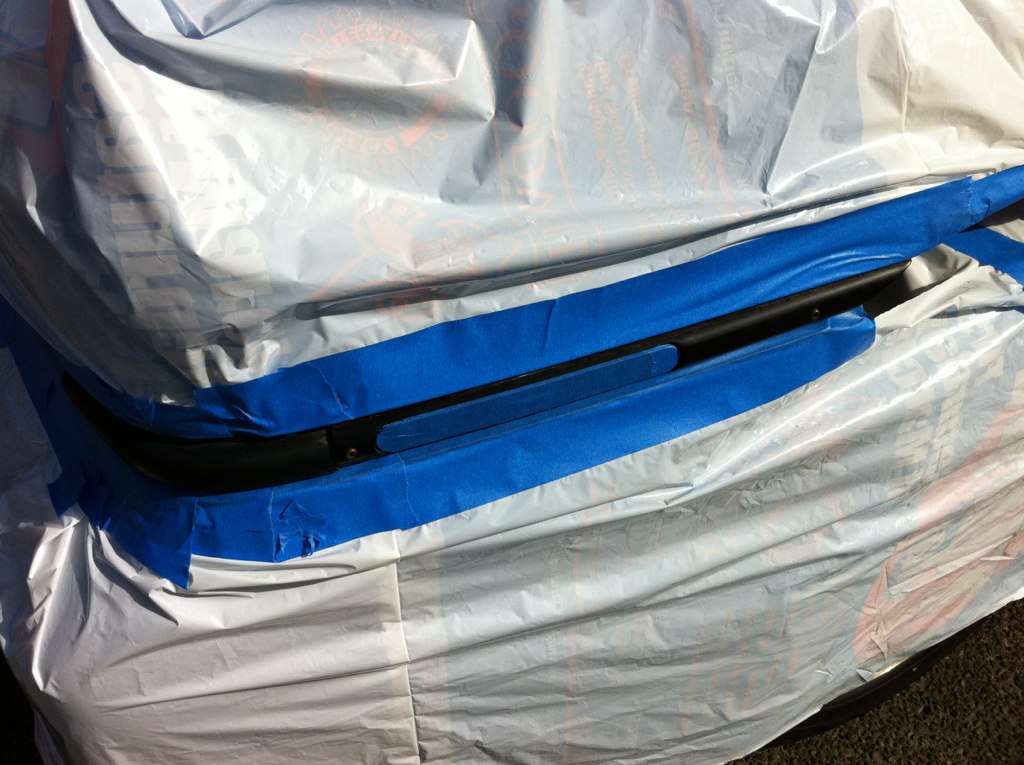
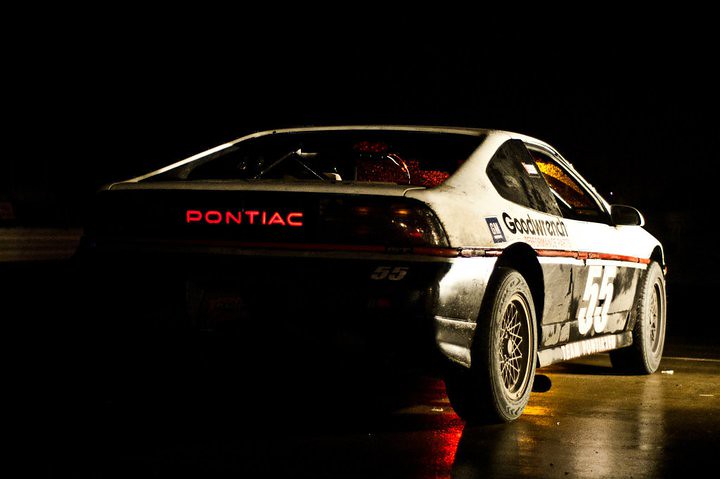
In the week between Blake being in town to weld the cage, I set out to start creating the "theme" for our race car. ChumpCar competition is all about fun, and one way that racing "crapcans" is fun is all the crazy themes and decorations people put on them. Our team wasn't about to go and do anything wild, but we wanted something memorable. We had decided that we'd like to replicate the Goodwrench Huffaker IMSA GTU car from the 80's. I had seen the real race car in person at the 25th show in Pontiac, and fell in love with it. I set out to Wal-Mart with a mission: get a ton of white, black, red, and silver spray paint. Several rolls of plastic sheeting and blue painters tape later, the thing was masked, and ready for a fresh coat of "Color Place" brand paint (just $0.96 a can!).
The next day, after the white paint had a chance to dry, I set out to make the red stripe to seperate the top and bottom colors. This required a fair bit of masking time as well. For some reason, the paint didn't want to stick real well to the rub strip, even after chemically cleaning it prior to paint. Some primer would probably have helped... but being a sub-$500 car, I wasn't too terribly concerned with the results.
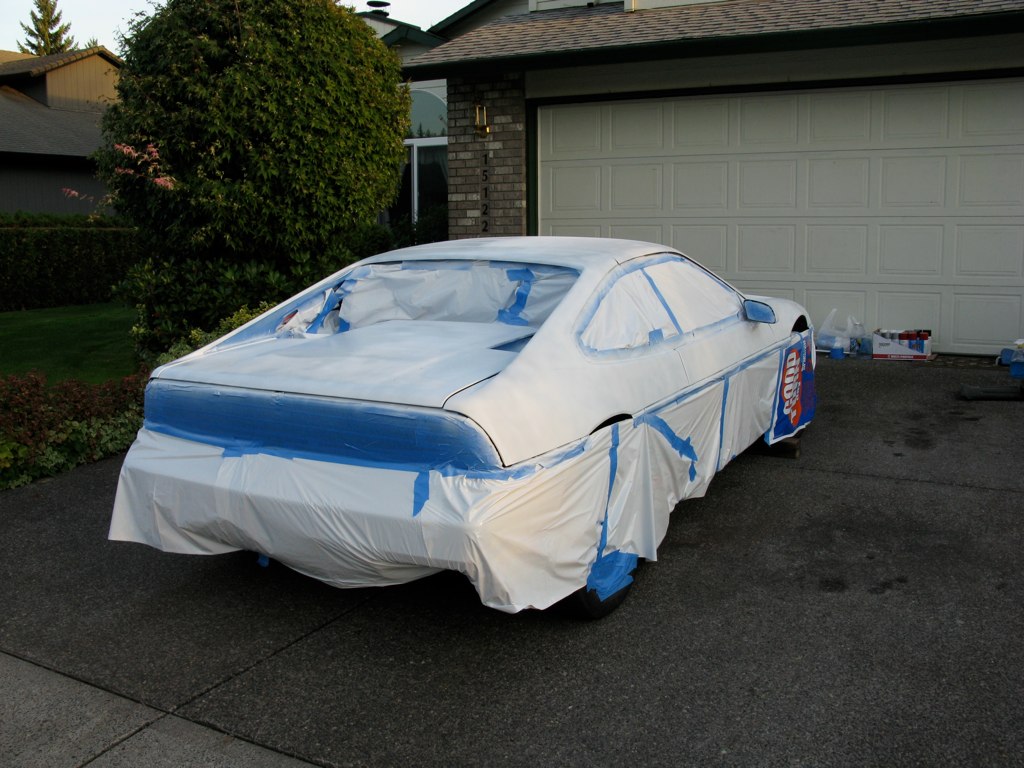
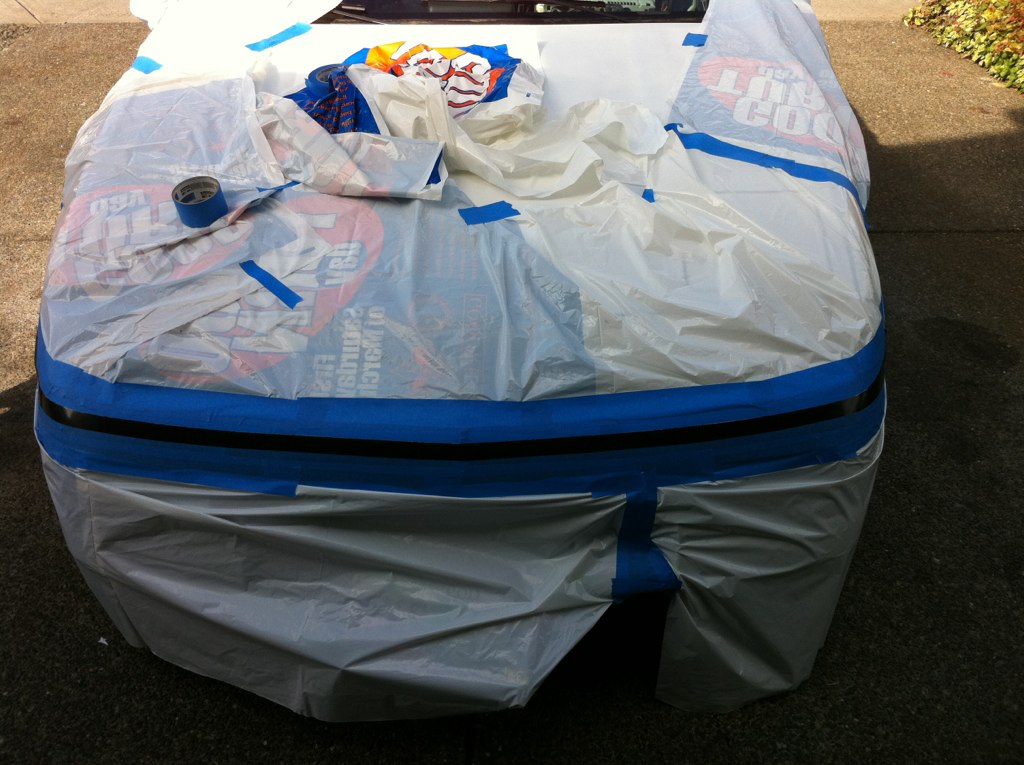
Next was the silver stripe, below the red. Because this separates the black and red portions, and because this didn't have a nice rub strip to use as reference, it took the longest to mask this section.
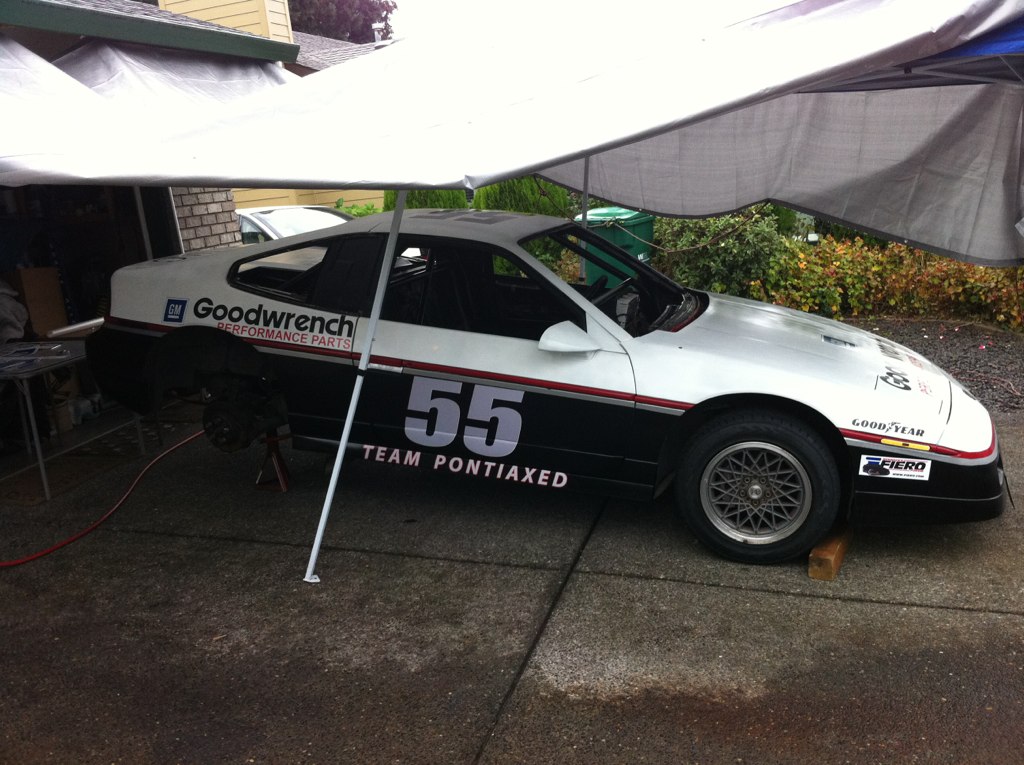
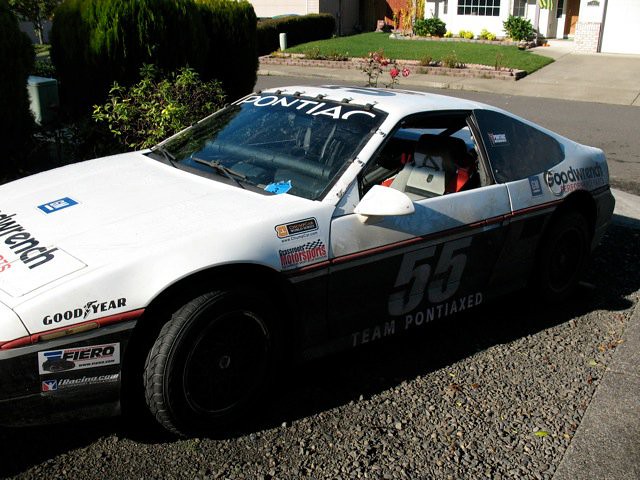
Finally, spray over the bad paint in the lower sections, and the silver rockers to complete the look.
All told, the paintjob cost just $53. This included all the paint (and I had a handful of cans of black, red, and silver left over afterwards), tape, and supplies needed to make this happen. Not bad, I'd say. It's definitely not perfect, mostly because the only prep work done was to wash the car before hand! A flawless paint job was not the goal, and having a bit of it's beat-up nature show though the paint will make it a lot easier for the ChumpCar judges to understand that it truely was worth $500 or less.
[This message has been edited by ManMadeChickens (edited 11-13-2012).]
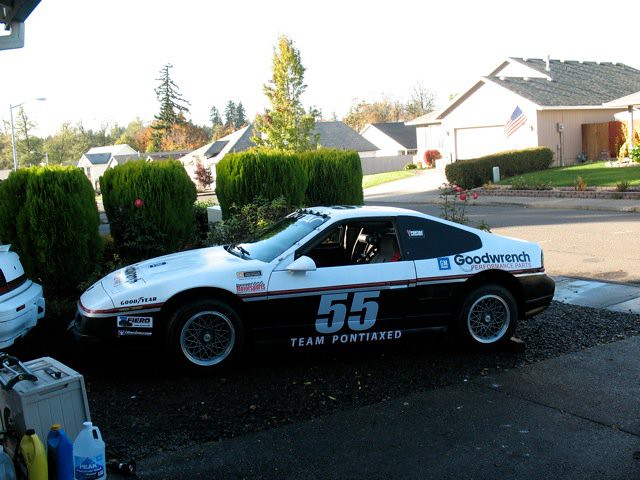
At this point, we also took the opportunity to get a spare set of 15x7 steel wheels, and cover all the wheels in Goodyear Eagle GT rubber. That's what the car had on it new, at least one season the Huffaker car raced on Goodyears, and the GT's were about the best tire we could find in the size we wanted. We bought all 8 in 205/60/15s, so that tires could be rotated without staggered sizes. Since we race in Oregon, with a possibility of Washington events in the future, we knew we needed something with decent wet-weather performance. The Goodyears were the best compromise of grip, wet performance, and cost we could find. With a UTQG wear rating of 400, they are pretty firm by ChumpCar standards, as most teams run summer tires with a rating of 200 or so.
With several more weekend of roll cage fab, things were really coming together. However, the race date was approaching quite rapidly. Add in to the mix that I was set to go back to school in September, and things were getting pretty hectic. I ended up coming the 90 minute trip home every weekend until race day, just to make sure the car got done. Here's some more shots of roll cage fab, in-progress.
Blake, ready to weld up some pipes!
We ended up finishing the cage in it's entirety October 18th. Race day was the 30th, so we had little time to rest on our laurels with the achievement. At this point, we learned that we were going to be one of SEVENTY-ONE teams racing at Portland International Raceway on Halloween weekend. Things were going to be nuts. This motivated us to forge ahead with the car.
Left to finish were a mountain of tasks. Including, but not limited to: fitting the seat, installing a window net, replacing a split CV boot, fixing a weak clutch hydraulic system, finally getting around to replacing the shocks and struts, installing the decals, making lexan replacement side, quarter, and rear windows, fabricating brake cooling ducts, etc. As you can imagine, trying to accomplish all of this in two weeks time proved to be pretty hard.
[This message has been edited by ManMadeChickens (edited 11-13-2012).]
We didn't have a whole lot of time an money to order a race seat for the car, so we ended up resorting to using the stock seat, in a very non-stock way. The CCWS rules require the top of all driver's helmets to stay below the centerline of the roll cage halo. In a Fiero, this is a tough task, especially when one of our driver's hair brushes the headliner on a stock Fiero as it is. This meant we had to lower the seat in the car, and in a very big way. First course of action was to set the seatback at a reclined angle with which our tallest driver would fit into the car, and meet the helmet rule. Once this angle was determined, the recliner mechanism was replaced with steel plates, in order to fix the seatback, another CCWS requirement. In the end, the seat tracks were just too darned tall to get into the car, and fit the drivers legally. We used 2"+ load washers made of steel plate, and metric grade 10.9 bolts through the floorboard to fix the seat in a single position. The seat is literally sitting on the floor, which at first proved kind of off, but became a nice improvement in feel and stability inside the car.
We don't have a lot of pictures of these stages of preparation, simply because we were too darned busy to take the luxury of stopping to photograph everything.
The next step I was involved in was applying the graphics to the car. A friend and schoolmate of mine co-owns a print shop, one capable of preparing graphics and vinyl wraps for automotive purposes. He worked with me on getting the graphics printed up, and cut me a remarkable deal on them. Overall, I think they turned out splendid, although there are some changes I would make if I had to replace some of them in the future.
Last-minute preparations were made, like installing the new windshield with it's nifty tabs (which allow quick removal in the future). This shot was taken mere moments before the car left the driveway for it's maiden race. It is proudly wearing PFF decals on both front corners.
[This message has been edited by ManMadeChickens (edited 04-05-2018).]
The interior, in race trim. We ended up having to install a Grant steering wheel with quick release hub, and the stock wheel made it nearly impossible to get in and out of the car, even with the tilt function.
In the end, we only had a chance to make lexan quarter windows, nothing for the passenger's side or rear window. We were also unable to fabricate any kind of brake cooling before our first race. This proved to be interesting, as Portland International Raceway has two very heavy braking zones... one of which requires the car to slow from around 105 MPH to about 40 MPH or so. The stock, unvented brakes, without any kind of cooling assistance was not our first choice, but we simply ran out of time before the event to make anything.
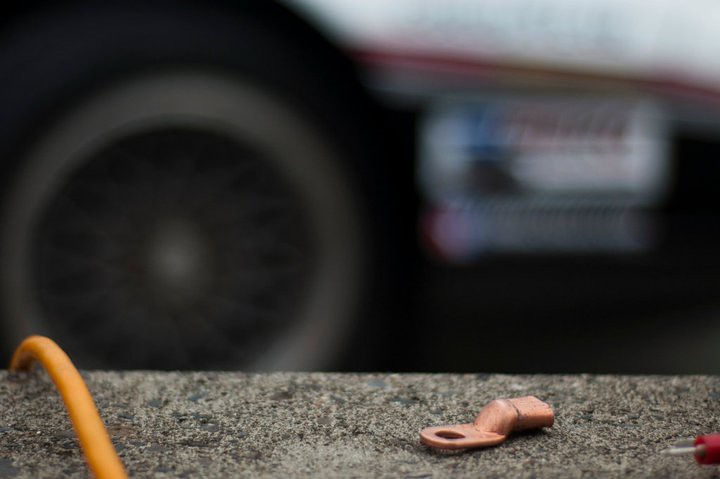
We made it to the track on time for tech inspection on Friday. With the exception of one coolant host clamp being loose, we thought the car was really well prepared. It breezed through tech inspection, but failed on account of a mis-wired battery cutoff switch. I had wired it to cut off the battery only, without thinking that it had to kill a running engine as well. Obviously, the alternator could still power the car if the engine was running. We spent a few hours Friday night rewiring the kill switch to make it legal. The car passed Tech early Saturday morning, the day of the race. We attended the driver's meeting, and got our first driver strapped into the car. It left the paddock, and lined up in the pits for pre-grid. Everything seemed to be going great. Then the car stalled when attempting to roll off for pace laps. It wouldn't crank fast enough to start on it's own, so we pushed it, and it bump started OK. ChumpCar starts a race by having all the cars turn pace-speed laps, to be sure all the transponders work, and get everybody moving. They draw a car number out of a hat, and that's now the "losing car" - the next car after it gets the green flag. Immediately after leaving the pit, our car stalled again, this time it came back to us via a tow strap and a track-owned pickup.
Obviously there were electrical problems with the car. It was only intermittently getting juice from the battery, and when it did, it had really weak voltage. We knew something was up, and we had to get it fixed quick. For weight, and for space, we had relocated the battery to the front, in a box on the front crossmember. With the extra length of battery cable to the back, it already had a slight voltage drop issue under the best of conditions, but this was abnormal. We spent about 45 minutes diagnosing and fixing the problem. In rewiring the kill switch the night before, one of the battery cable terminals had worked loose in it's crimp. We replaced the badly crimped terminal, and got the car back out on the track. Teams pitted on either side of us cheered at the sight of the car leaving under it's own power. ChumpCar folks really are a cool bunch of people. Below is the culprit- the badly crimped terminal. It's always the cheapest parts that bring the expensive equipment to it's knees it seems.
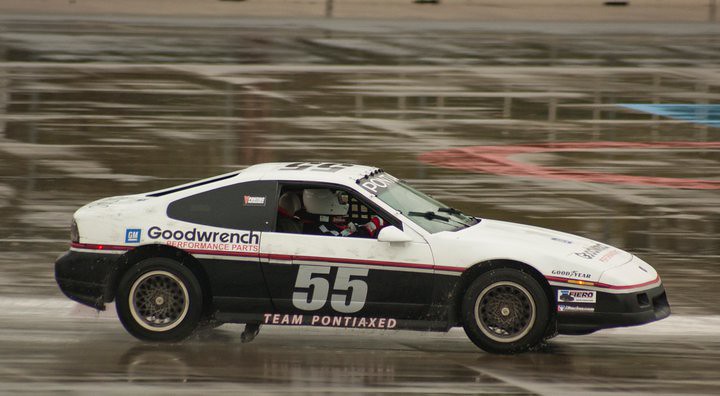
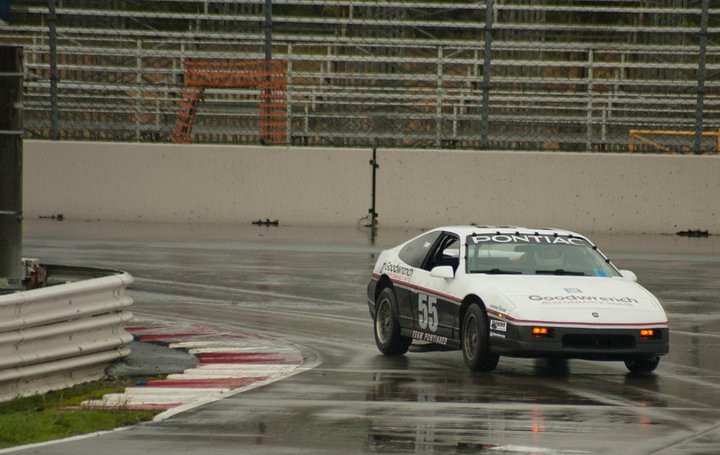
With the car now going under it's own power, we started the race... about 20 laps down. We expected to have issues during our first race, and it seems that we got them out of the way early. The car drove well, and would easily out run everybody but the V8 Foxbody Mustangs on the straights. The brakes were obviously a weak point, and we had to make an effort to brake early, and lighter to keep them from fading down to nothing. On caution laps and after pit stops, the brakes would be so hot that we were starting to boil the fluid, even though it was fresh DOT4 fluid. The first obvious improvement "for next time" was to add some brake cooling.
The wet track, heavy braking, and swift right-hand turn into the chicane proved to be an interesting experience. At one point resulting in a tidy little spin by me.
Overall, day one went really well. Only minor coolant hose clamp issues were had, and the car ran like a champ. For the 12-hour endurance race on Saturday, we had four drivers, taking two stints of approximately an hour and a half each. The car would take between 5 and 8 gallons each driver stint. If I had to estimate, I would guess the car averaged right around 10 MPG under race conditions. PIR is a 2 mile track, with some real long straights with which a Fiero can really be opened up.
We finished Saturday in 51st place, out of 71 cars. The hour or so in the pits at the start of the day is what really killed us. If we had been able to go without the battery cable and starting issues, we likely would have been a top-half team... which might not sound all that impressive, but for a group of guys with zero prior road racing experience, in a car they built themselves, and for our first event... I think we did well.
Sunday was a 6-hour enduro race, mostly for fun. Before the start of the race on Sunday, we swapped brake pads for a fresh set, which was good, because the 12 hours the day before had just about worn out a brand new set! We recrimped all the battery connections Sunday morning, but the car still refused to start on it's own most times. This was a problem, because anytime the car would spin and stall, or have an issue, it would need to be towed back in, costing a lot of time. Later we realized that the replacement battery we had installed in the car simply didn't have enough cranking amps to overcome a heat-soaked starter, and the resistance of the extra battery cabling. We've since swapped out the battery for an Optima Red Top, which has solved the cranking issue. Sunday's weather was dry, so we could push the car a lot more in the corners. Our best lap time Sunday was 8 seconds faster than the best time on Saturday, for an lap speed average of 66 MPH - a remarkable improvement.
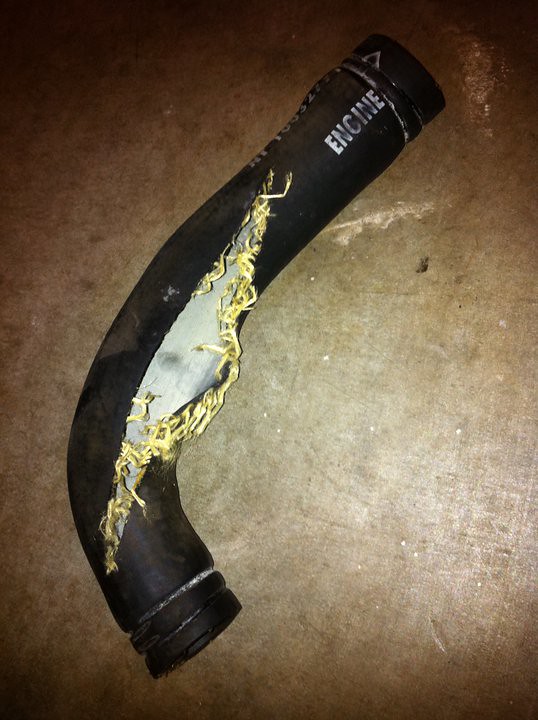
We had minor cooling hose issues all weekend, mostly just tiny leaks from loose clamps. This was odd, because we had checked the clamps as part of our race prep. On the last lap on Sunday, the hose leading to the thermostat cap blew, and in a big way. It tore an opening about 6" into the hose.
Luckily, our driver was OK, since without a rear window to protect him, the cockpit was filled with steam, from the burst hose. The windshield was fogged up, and water was everywhere.
Overall, the first event was more fun than we had possibly imagined. We learned a lot about racing, and about the car. We've got a bunch of ideas on how to improve the car for the next event, which for us is going to be in Portland again, coming up in April. So for the off season, we're planning on finally making up the lexan windows we wanted all along, and making some brake cooling. The better battery should give us the juice we need to get the car starting reliably. A change in the interior wiring should clean things up a bit, and make the car even more reliable.
[This message has been edited by ManMadeChickens (edited 04-05-2018).]
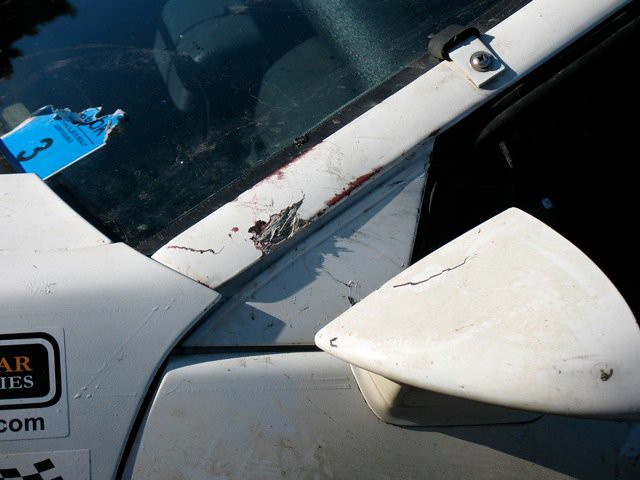
And now, some post-race photos. The car held up really well, and sustained almost no damage. Just really dirty, and with some worn out brakes.
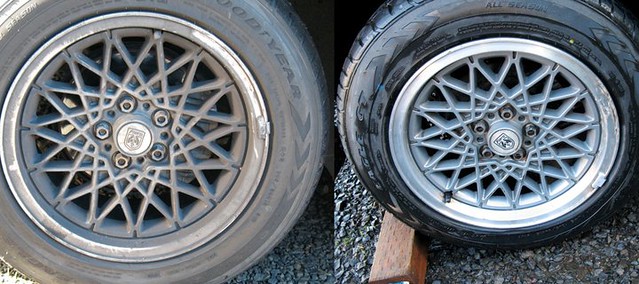
The brake dust was laid on real thick. Also what a clean wheel looks like for comparison...
Some soap and water, and it's clean again!
Some damage is visible here on the a-pillar, from the tow rope. We're installing tow hooks on both ends, so that should we need assistance in our future events, further damage will be prevented
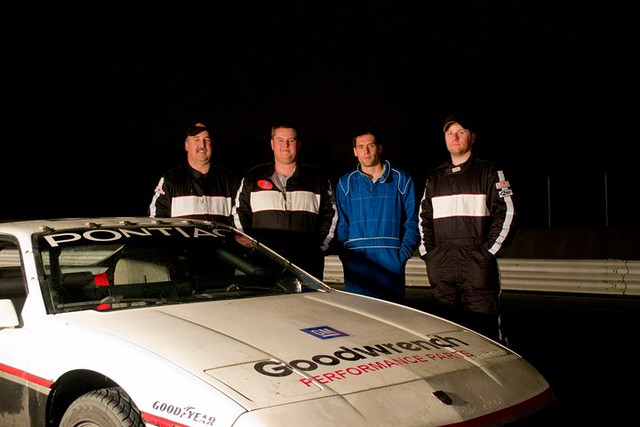
The tired but happy team, post-race, Saturday night.
If you're so inclined, we even have a Facebook fan page, with which you can follow our progress.
[This message has been edited by ManMadeChickens (edited 04-05-2018).]
Yeah, for us the car was perfect. For anyone else, it might not have been worth that. The interior was basically shot- cigarette butts, a window that was left open, tobacco residue everywhere, cigarette burns, evidence of drug use, etc. That, plus it's non-running condition, and no title with sale, meant it was practically worthless, except the the right person, lol.
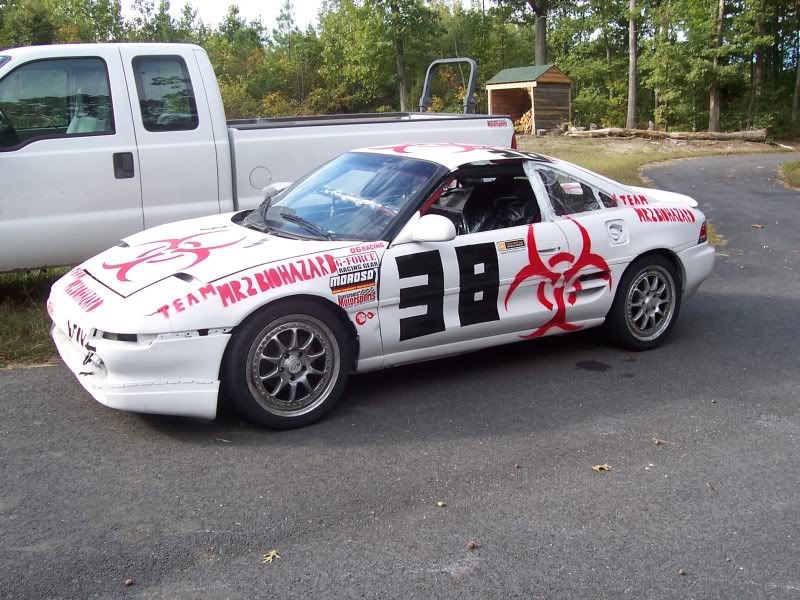
That car is way to pretty for that type of racing. My son races an MR2 in chump out here on the east coast and put near all his effort into go-faster mods. As you can see it ent pretty just functional and very light. BTW: it has a Camray V6 in it. Can;t seem to tlak him into building a Fiero for cump too. He says thye never finesh and are never in the top ten. I hope you can prove him wromg as I'd like see one do well. Good luck, like him youre no doubt cant wait for the season to open.
Fieros get the reputation for never finishing because most teams start with a Duke (yuk), or an automatic... or both. No hate for the Duke or the automatic transmission for a street car, but neither are durable enough to last 12, 18, or 24 hours in race conditions.
I get a lot of questions from people on how to get going in crapcan racing. Check ChumpCar's event page... there's going to be more events this year than there have been before. They really do try to get an event is just about every region of the US, and a few in Canada.
If you start out racing for someone else, the cost is about $1500-2000 for your first race. A lot of that is one-time costs. Every race thereafter is a lot less. If you were interested in getting a team going on your own, most team captains will tell you it takes about ten grand to get a car, get it prepared, get four people equipped, and get the car through your first race. We tended to spend less than most people, and I would say our figure was more like $8000. However, now that the car is built, and we all have gear, it's a few hundred bucks to get into the next event.
Love that paint job and I can't believe you got that body and engine for only 200. Good luck this next season and I'll definitely be following the exploits on Facebook.
DOT 5.1 brake fluid would help too! Are there any limitations to brake upgrades? Maybe Grand Am setup front and rear? The burst hose looks original to the car? A champion 3-core aluminum radiator might help with the cooling issues, too.
Brake upgrades must follow whats called the 2x rule. Upgrades are allowed, so long as they are worth no more than two times the OEM cost. Better brakes are definitely in our future. We want to try running a race with properly cooled brakes, and see what that gets us.
The burst hose was the factory original. We purchased a replacement hoses for every location, so that if something like this happened, we'd be prepared.
The car cools just fine, and runs only about 1/3 up on temp on the stock gauge, so long as it keeps the coolant in it. For some reason, we had chronic issues with the hose clamps coming loose and leaking. By the end Sunday, we had the cooling system pretty much sorted out.
So the rule is that the car has to be worth less than 500$ when you purchase it. How much money are you allowed to put into it?
Also, if you look into the lebaron brake swap, it should cost only around 2x the stock brakes and give you 11.25 inch vented brakes. They are heavier than stock though so you would be increasing your unsprung weight. Decent performance from them, but an easy swap to do. You can even fit them under your 15" wheels with some grinding on the caliper I think. I'm certain someone has done it under the 15" wheels.
[This message has been edited by doublec4 (edited 12-09-2010).]
Man Made- What a great writeup on your racing adventure. That solid red roof panel came off a car that I traded to Lucas for some parts. So, in a way, I'm along for the ride! I was at the teardown, but not sure I remember meeting you. Good luck on your adventures with the car, it looks great. Bryan
If cooling is an issue, make a nice big heat extractor hood vent. It wouldn't cost you much, and you would notice a significant cooling effect at higher speeds, and better front end stability at high speeds.
It also looks like your exhaust that you made is hanging quite low in some of the pictures. If you can push it up a little higher, it would clean up the airflow under the car.
Not sure what the rules call for, and if you run the car at night, but the pop up headlights are heavy and terrible. If you don't need headlights, just ditch them and save the weight. If you need headlights, maybe consider a fixed set up, so you could save weight and still have some kind of light output.
Not sure what the rules call for, and if you run the car at night, but the pop up headlights are heavy and terrible. If you don't need headlights, just ditch them and save the weight. If you need headlights, maybe consider a fixed set up, so you could save weight and still have some kind of light output.
Great work again!
If they enter in any of the 24 hr enduro races they should definitely look at some fixed headlights, but not get rid of them entirely.
Hmm, pictures are working for me, so not sure what the problem may have been.
The way the rules work is pretty simple. ChumpCar has what they call "The Acid Test." If you were to take your racecar, strip off the tires and wheels, take out the seat, harness, roll cage, etc. and put it on blocks in your street, with a sign "make offers." What would you be offered for the car? In this case, there's a pretty solid precedent that Fieros are within the rules as $500 cars, so we're not too concerned. They didn't even think twice at the tech inspection, and gave us no penalty laps for value. Unlike LeMons, I don't think ChumpCar assigns the car a specific value, unless you're considered to be over their $500 threshold. Since we were in the clear, it wasn't even discussed.
As far as brakes go, obviously we'll need to fit them under 15" wheels, so that's a concern. The 2x OEM rule as far as cost would certainly allow for Grand Am, LeBaron, etc. For April, we're going to focus on keeping them cool, and see how that goes. Then we can spend the rest of spring and summer making something better.
bjc 350 - That's a fun coincidence! Lucas is a really cool guy. There's a handful of Lucas Special parts on this car. I know the roof, replacement dizzy, and some smaller things are from him. My Father and I attended the teardown- we're the two drivers on the left side of the last picture. I remember meeting a bunch of people, but as this was over a year ago now, I can't recall exactly who.
When we had eliminated the cooling hose leaks which slowly drained the coolant, the car ran nice and cool... almost too cool, actually. The design of the standard Fiero cooling system seems adequate for our usage.
The exhaust is indeed hanging low in most of these photos. On my Father's first stint, he had a slight off-course excursion, and it dragged on something off course, and came off some of the hangers. It's since been fixed, and the tip is only about 5/8" below the rocker panel like it started out at.
We've discussed replacing the headlights for something lighter. Currently, we are looking to stick to running Portland this season, and look to expand to possibly Spokane and NorCal events in coming seasons. Portland's races do require headlights, so this is an issue we will need to deal with. It currently runs the stock headlight buckets and all, which aside from the weight, work quite well. The car doesn't get up quite fast enough to force open the doors on the straights, and the headlights being up didn't seem to slow the car down any at night. We're probably losing a fraction of our fuel economy at night, but so do practically all the teams. Most teams run very large diameter round rally style lights, which If I had to guess, would be less aerodynamic than what we've got stock. It would be nice to make up a low-rise setup. It's something we have on the list of "to-do's."
I'll be heading home from college for winter break in the next couple days, and am thinking I should take some photos of the interior, front compartment, and other assorted things that aren't well detailed here.
Again, thanks everybody for the support. It's a lot of fun to be able to get out there and race, but it's tough sometimes to try and explain to people that the Fiero isn't nearly as terrible as they think. It's nice to be able to share with guys and gals here who "get it."
[This message has been edited by ManMadeChickens (edited 12-09-2010).]
Here's tip for those considering chump racing and how to build a quick car within the allowed $$. My son was able to swap out the MR2 4 banger for a Camray v6 and do ther improvements by: buying a wrecked Camray, swapping the engines out and and parting out the rest of the Camray, parting out the interior and other not needed items from the MR2, taking the hulk to the scrap yard for metal $$. Thus he was able to deduct near all that money from what he spent to upgrade his racecar. Save every recite and document everything.
I'd been sort-of turned off of LeMons because of the 'crass-ness' that seems to be promoted, it seems like a huge belligerent party with a race-theme. ChumpCar, however, seems like it's focused on having fun while racing. That I am much more inclined to liking. If I had (a lot) more time I'd build one, I have some good ideas I think.
I also think you should upgrade to vented brakes, if you're boiling the fluid I don't know that just having airflow directed at them will help much. What it really needs is the centrifugal pump action of vented rotors, as well as the larger amount of metal to dissipate the heat, and of course the leverage advantage helps as well. Upgrading to thirdgen F-body Calipers is better too because, again, there is more meat to dissipate heat. Add in moderate level racing pads to the mix so they don't fade as much (I think EBC makes a good one). All of that should be fairly cheap and should all but eliminate the problem. 15" wheels hold more heat in (especially with vented rotors), I think going to 16's would help too. I'm thinking more along the lines of increased durability rather than increased (initial) stopping power.
Either way, I hope the issues are all solved and you can get out there and do what you really built it for. I'm looking forward to seeing more pics.
------------------ '88 Fiero GT - Project MIDTRBO '10 Camaro LT/RS There's no replacement for turbo placement
I've always put it this way to friends: LeMons is a party where a race also happens. ChumpCar is a race, where we also party.
We'd really like to go to 16" wheels, and fit bigger brakes... but for now, we're stuck with 15" wheels, as we have 2 sets of tires on 15" wheels... the stock meshies with about 16 hours of racing on them, and a set of steelies with brand new tires on them. I'm not about to abandon $800 worth of tires for new brakes yet... maybe down the line.
the 11.25 brakes fit under the stock wheels. It's tight, but they fit. You could do them very cheap by using non Ebrake calipers on the rear. you could slowly switch over to 16's. There are a lot of factory cars that use 16s with the fiero bolt pattern.
I read all the rules. That just makes me want to do it more. Too bad It's going to be another 18 months minimum before I'm living back in the states again.
Did anyone notice the "Chase Race" sticker on the dash board of the car in the video?!? That is Doug Chase's company. I would assume he did the roll cage for that car. If this information was burried in the thread earlier, please forgive the repost.


 this is great, and sounds like a blast. Great job!


 I'm looking forward to seeing more pics.


