Well, I guess it is about time, that I start documenting everything. I bought the car about a year and a half ago, and decided to start the work log, and catch up to where I am now. I figured it was best to hold off, and do a post with more than just a picture of the car a year and a half ago, and start a thread with a little more info.
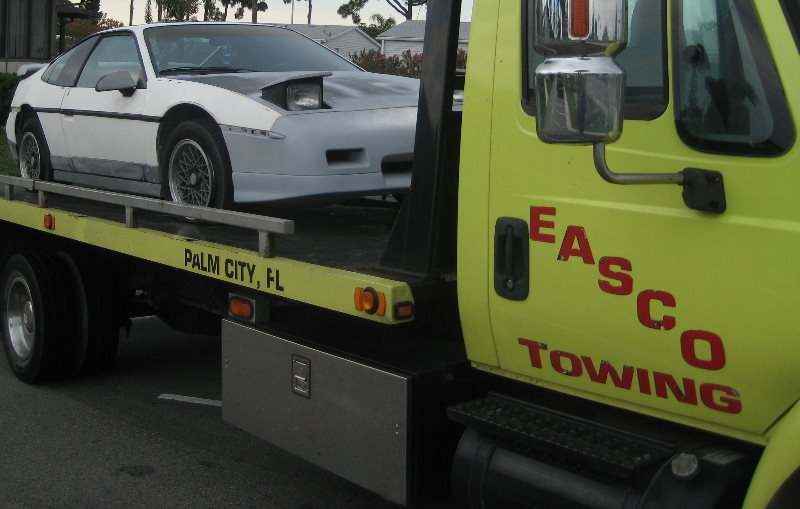
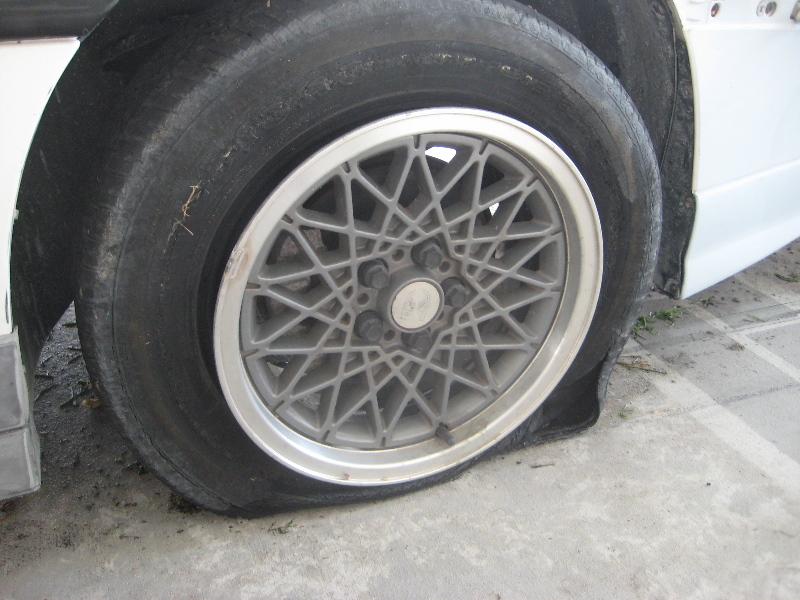
How it began: I have always loved the lines of the Fiero and 2 seater cars in general. I found a 1986 GT Fastback about 100 miles from me, and decided to take the plunge. The car was pretty rough, and I was told that it ran decent when it was put in his garage. I picked it up for $400. I had to have it hauled home on a flat bed truck, as it was not running, and all 4 tires were shot. So bad in fact, I could reach through the side walls of a couple of them and touch the inside of the rim.
Here it is the day I bought it, backing up into my driveway to "dump it off"
Some shots of the car they day it got here:
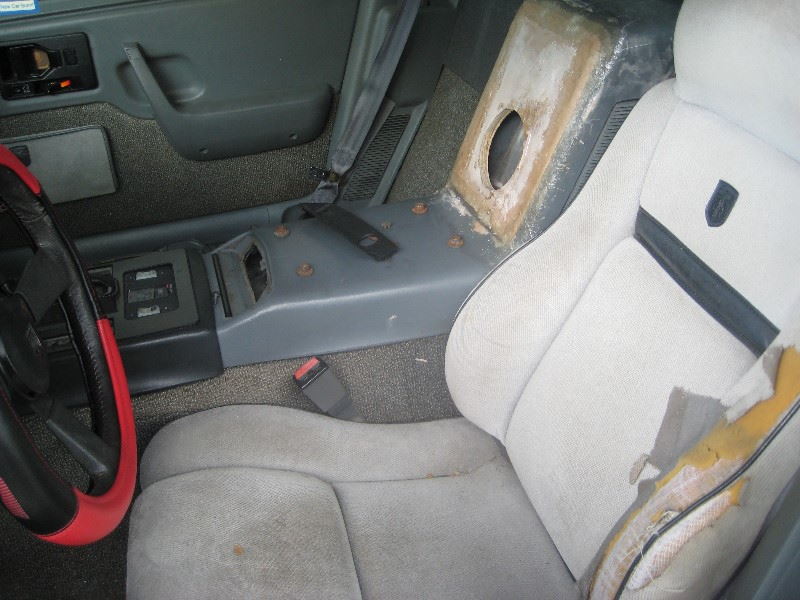
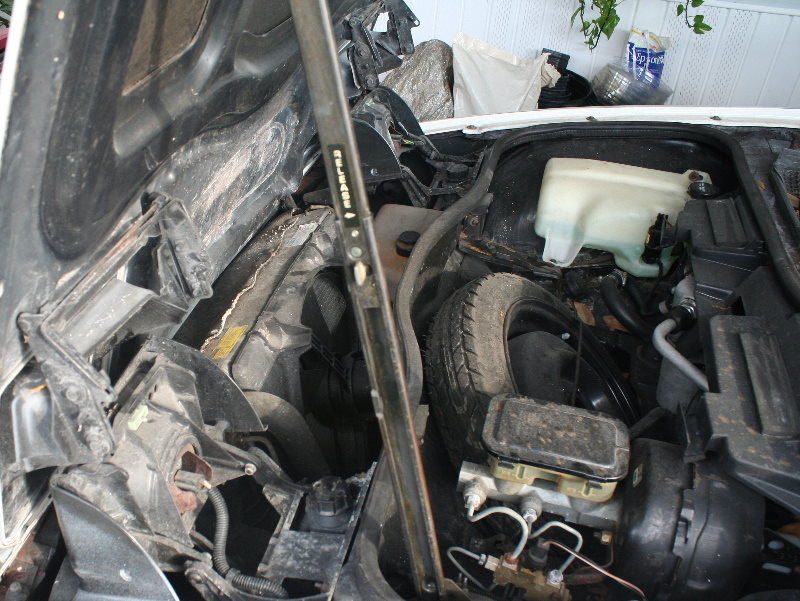
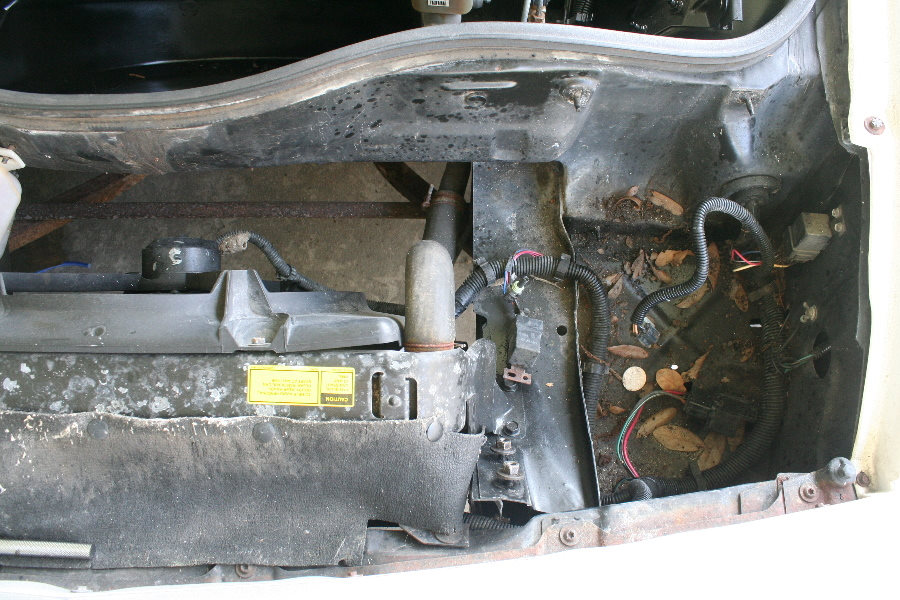
The seats are shot, and someone did a half arsed job at trying to install a sub in the console. A nice mess under the front trunk, hood, deck, whatever anyone wants to call it
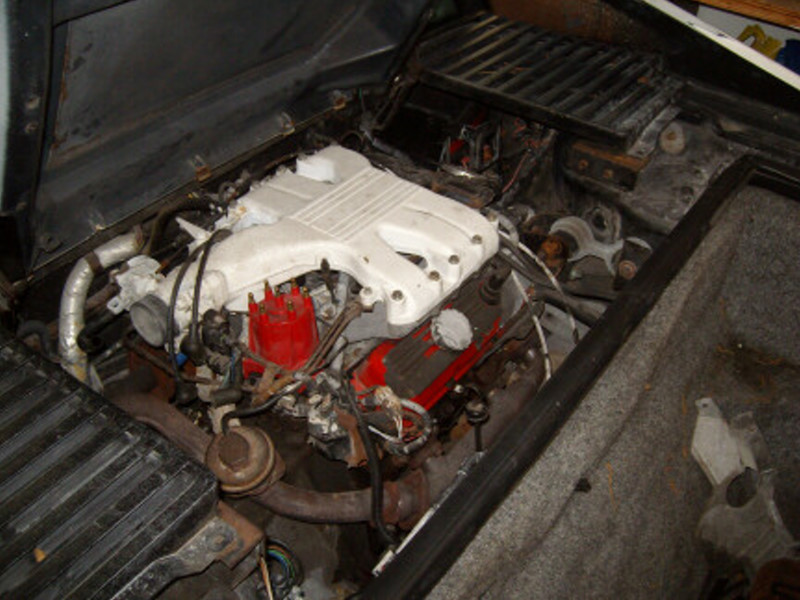
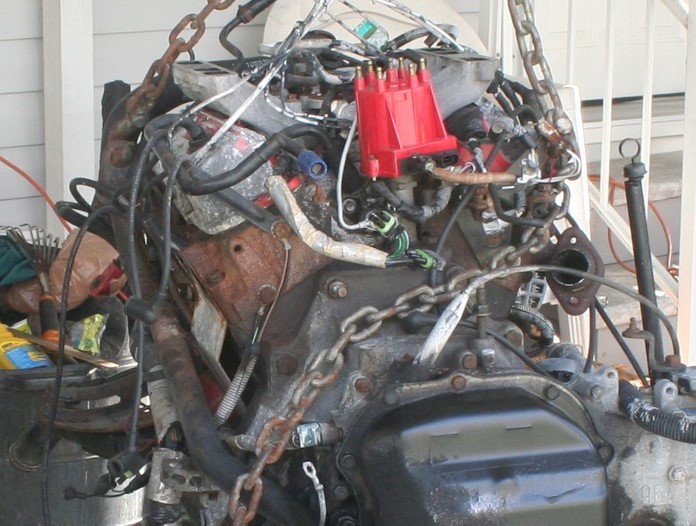
The engine, with most everything disconnected: (A white Plenum... Really????)
It had been sitting so long, the tires not only were dry rotted, they just fell apart!
About a week later, after hooking everything back up (PO started removing wiring and such, to do an engine swap, that he just stopped at the early stages of) I fired it up for the first time. The engine had a VERY sever knock, enough that I backed away in anticipation of a rod flying out at me! On top of that, the typical, as I have learned now, cracked manifolds in the back.
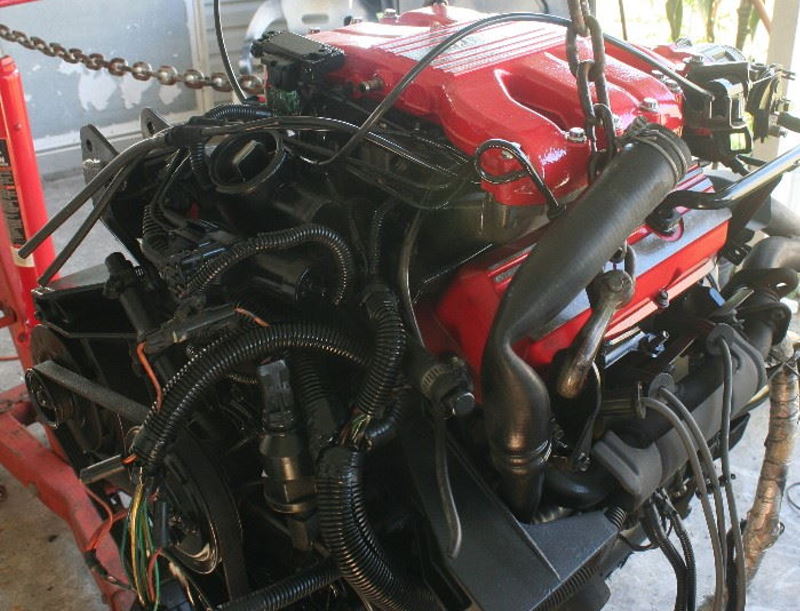
I started to look at engine swaps, and determined it was just more than I wanted to tackle at the time, and found a nice 2.8 replacement about 350 miles from me. The owner's engine in his Fiero went bad, so he bought a crate engine, assembled it and installed it in his car. He drove it from Colorado to Florida, and after getting here, decided that even being a brand new engine, thinking it would be much "peppier" he decided it was still not good enough, and decided to do a V8 swap. Thus the 2.8 was for sale. I rented a U-Haul, and went to Jacksonville Florida to get it. It was covered with a tarp in the corner of a large garage. I paid the $300 and brought it home. The best guess is the engine, according to him, has around 2,000 miles on it. Judging by the block when I got home, and later the rockers and such, that seems about right from what I can tell. The block still has that brand new shine to it, and is not even surface rusted. The lifters when I replaced the valve cover gaskets looked like they were not a day old, and the oil was nice and clean. It was not leaking oil, but I figured the engine is sitting here, may as well replace all gaskets while everything is super easy to get to. From there I put all new parts on the engine as well. New A/C compressor, water pump (metal impeller) new alternator, belts, hoses, plugs wires cap, rotor ect ect.
So, out with the old:
And in with the new:
I am NOT a mechanic, but can do the little stuff. I had friend who is a mechanic put the engine in for me. He had never done a swap on a Fiero, and the concept of taking an engine out the bottom was a new experience to the both of us! hahah! What would take some on here a matter of hours, took us a couple months from starting to remove the old engine, and starting the new one. This was not steady work, but him coming by maybe once a week for a couple hours in the evenings.
So, now the engine is now in the car, and purrs like a newly born kitten! Shew done...... Woah there!!!! Not so fast! Come to find out the transmission on this engine is frozen up for some reason (Automatic tranny) Using even long channel locks on the shifting plate on the tranny, even with a LOT of force, it will not budge in any direction! I walk over to my old engine, and sure enough, you can shift it through the gears by simply turning it with my hand. So now to go back 4 steps, take off the tranny from both engines and swap them.
So, while they are separated, why not?
We figured it would be easier to just lift the motor a bit, and drop the tranny and replace it. WRONG! It was a royal pain, and would have wound up being easier to just drop everything again. Oh well, Live and learn!
Here is the engine hoisted up to swap the tranny's:
So my tranny from my blown engine, put onto the new engine, it all goes back in the car again. Finally done, I was able to take the car around the block for the very first time!
Here is the second time it was started, I forgot to record the first time a couple minutes earlier...
In the mean time, between visits from my mechanic, I was plugging away at getting other stuff on the car done. The first place to start was the front.
I removed the headlights and snapped another picture:
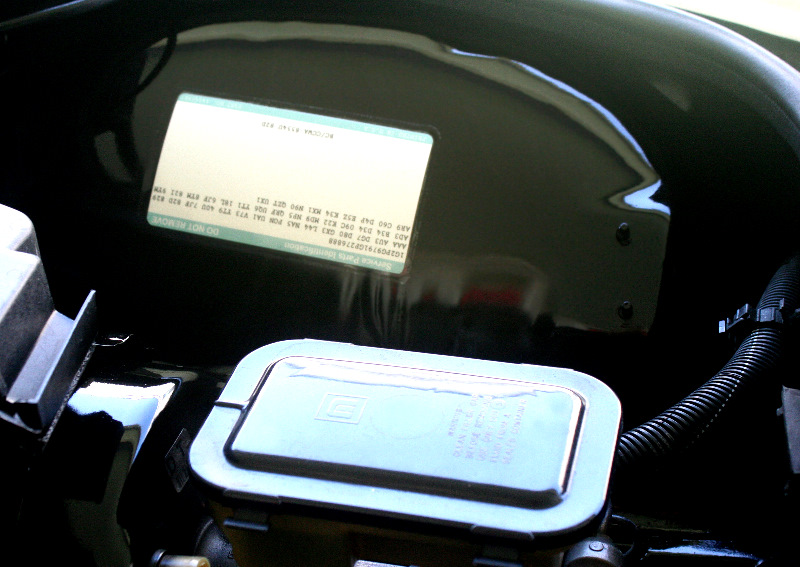
After a lot of cleaning, taping stuff off, sanding, I painted up everything nice and pretty. I printed out a new RPO sheet, and did up some vinyl stickers to finish off some of the little touches:
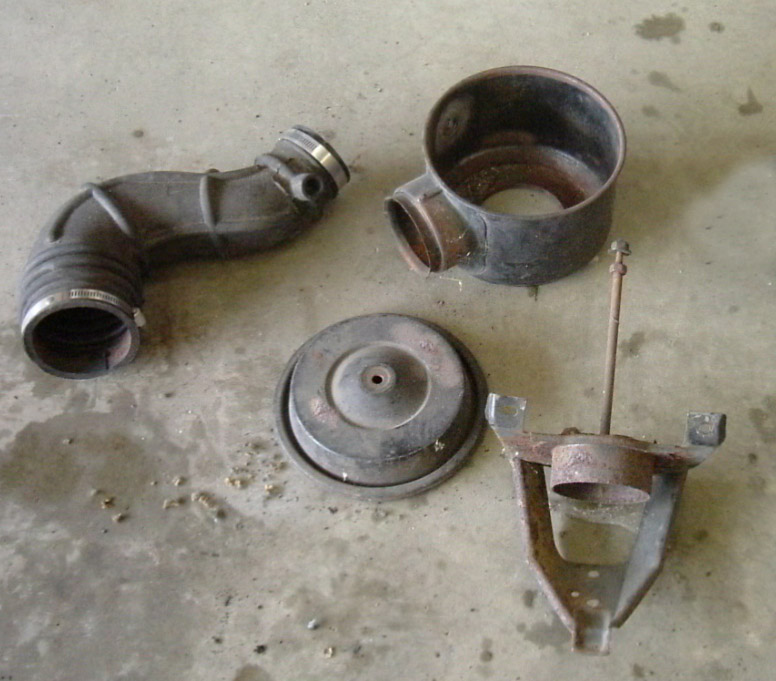
I also started cleaning and painting stuff to go back in the car when the engine was back in. Here are some of the parts I started with:
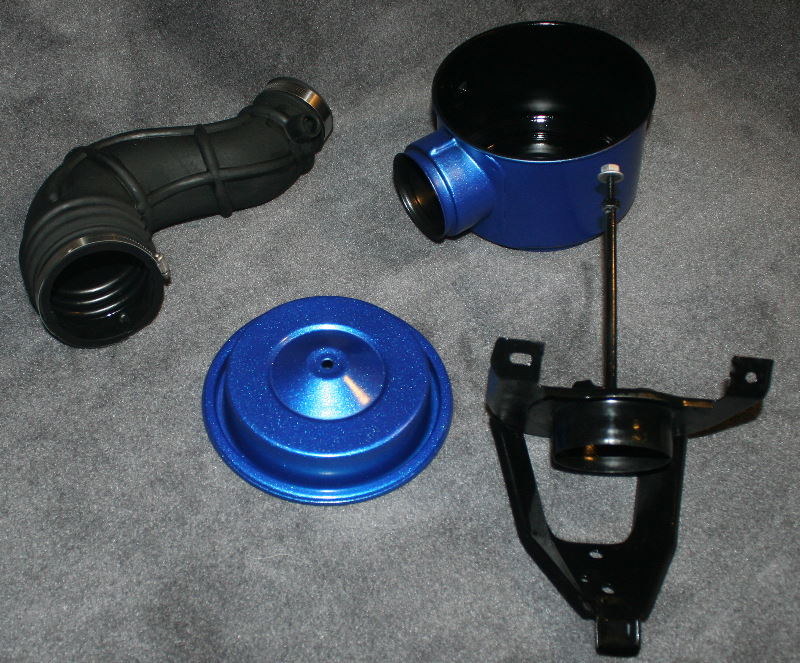
And how they look after lots of sanding, priming and painting:
Well that's about it for this first post. I have done some of the interior work, and will post about that in the days to come.
[This message has been edited by JohnWPB (edited 11-21-2011).]
PK, I know I am gonna get a lot of flac about having an automatic transmission, but that is what I intentionally went with. In South Florida, the stop and go traffic is brutal. I would literally be shifting non stop. Ya would get the nice humm at the top end of 2nd gear, just about to up shift, and bam, brake and down shift instead....
This car is not gonna be for racing, but for pleasure and taking to an occasional show. I love the feeling of control with a stick shift, don't get me wrong, but more so when on the open road. My best friend has a Mini Cooper 'S' and I make him let me drive it every chance I can get Man that is a fun little car!!!! But for use as a daily driver, in rush hour, twice a day, I opted for an Automatic.
PS and with no stock cup holder, I would be spilling my iced tea all over the place!
PPS: PK, are you feeling alright man? You did not mention IMSA in your post?!?!? Someone call 911 ! ! !
[This message has been edited by JohnWPB (edited 01-11-2011).]
PK, I know I am gonna get a lot of flac about having an automatic transmission, but that is what I intentionally went with. In South Florida, the stop and go traffic is brutal. I would literally be shifting non stop. Ya would get the nice humm at the top end of 2nd gear, just about to up shift, and bam, brake and down **** instead....
This car is not gonna be for racing, but for pleasure and taking to an occasional show. I love the feeling of control with a stick shift, don't get me wrong, but more so when on the open road. My best friend has a Mini Cooper 'S' and I make him let me drive it every chance I can get Man that is a fun little car!!!! But for use as a daily driver, in rush hour, twice a day, I opted for an Automatic.
PS and with no stock cup holder, I would be spilling my iced tea all over the place!
PPS: PK, are you feeling alright man? You did not mention IMSA in your post?!?!? Someone call 911 ! ! !
Lol well if you day isant complete without it.. My IMSA has a stick shift . lol just messin with ya.
You and me seem to have diffrent opinions on stick shift i geuss. I love stick shift. I love being in complete control of my car. I prefer stick for a pleasure driver. but as i said keep up the fgood work
Originally posted by pontiackid86: Lol well if you day isant complete without it.. My IMSA has a stick shift . lol just messin with ya.
You and me seem to have diffrent opinions on stick shift i geuss. I love stick shift. I love being in complete control of my car. I prefer stick for a pleasure driver. but as i said keep up the fgood work
I think he's saying the same thing.. he prefers a stick for a spirited driving..
But, rush hour commute in south Florida is *NOT* pleasure driving.. Though, maybe if you had a job you would know that? <grin>
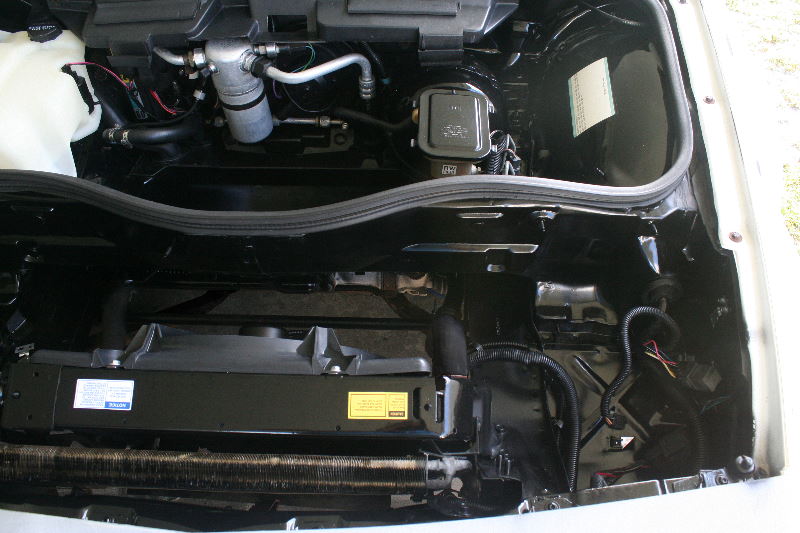
That drivetrain and front compartment clean up that you did should be inspiration for all Fiero owners with such areas in need of attention. It shows a lot of patience and work can produce very amazing results. Good job.
PK, I know I am gonna get a lot of flac about having an automatic transmission, but that is what I intentionally went with. In South Florida, the stop and go traffic is brutal. I would literally be shifting non stop. .....
I lived in West Palm for 2 years. I had a 5 speed S-10 at the time. I know exactly why you kept the auto!
Edit to add: The front trunk looks great! ------------------ 86 GT 87 coupe restoration project.
[This message has been edited by nmw75 (edited 12-03-2010).]
Nothing more rewarding than taking a dirty ugly thing and make it pretty. Did you use gloss black on the front compartment? Looks nice
I used Rusteolum Laquer paint from Home Depot. It's about $5 a can.
I have learned a lot from rattle canning parts on the car. I found the hardest part, is to use just the right amount of paint. Too little, and it will not come out smooth. Too much and it will run. I found that I had to put it on pretty heavy, but stop just before it seems like it could run. I didn't think I could get such a nice smooth finish with a rattle can, but it came out pretty good I think. I used it on the brake booster and entire front trunk area.
[This message has been edited by JohnWPB (edited 07-19-2014).]
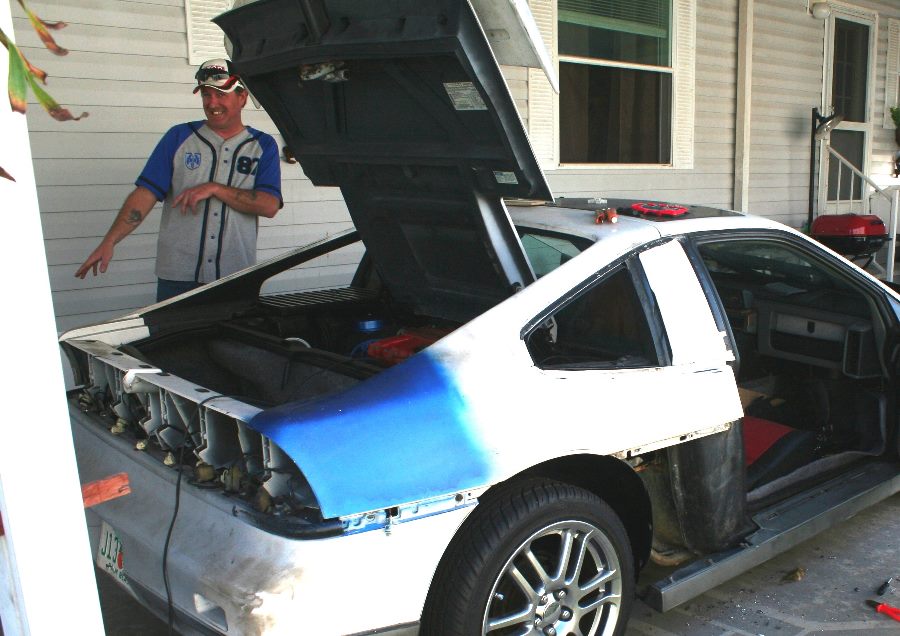
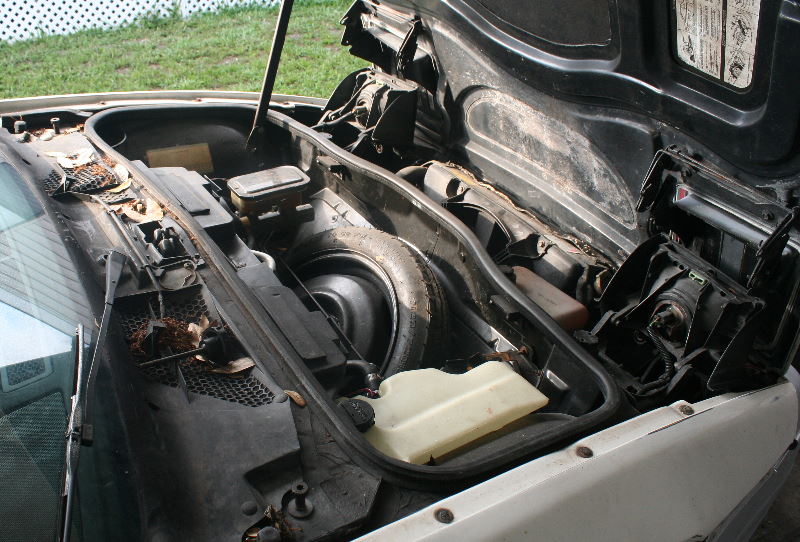
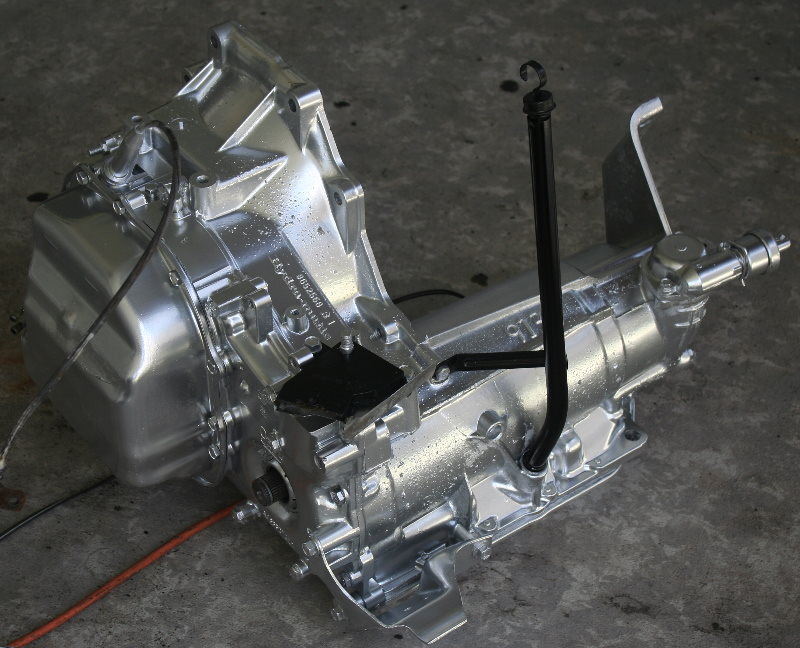
Was just going through some pictures, and ran across this one. It was taken with my iphone, and it was almost dark, so it's not the greatest picture. It was taken when we changed the automatic transmission, with the engine still in the car. As mentioned above, that was a mistake in the first place! Anyhow, I bet most have not seen an engine in a Fiero like this! With a little more work, we could have actually taken the engine out through the top!
I will say, that the proximity of the engine in relation to the rear window had me on pins and needles the whole time!!!!!
[This message has been edited by JohnWPB (edited 01-11-2011).]
Great work john! I fully expect to see that pretty little trunk of yours in frazee 2011! Lmao! Seriously though, you gotta drive that thing up, meet us in indy and we'll make the rest of the trip together. I have extra room at my place for you to crash even. Looks like we've got a good number of cars goin this year from the indy area.
Oh, here is some of the interior work I have been tinkering with.
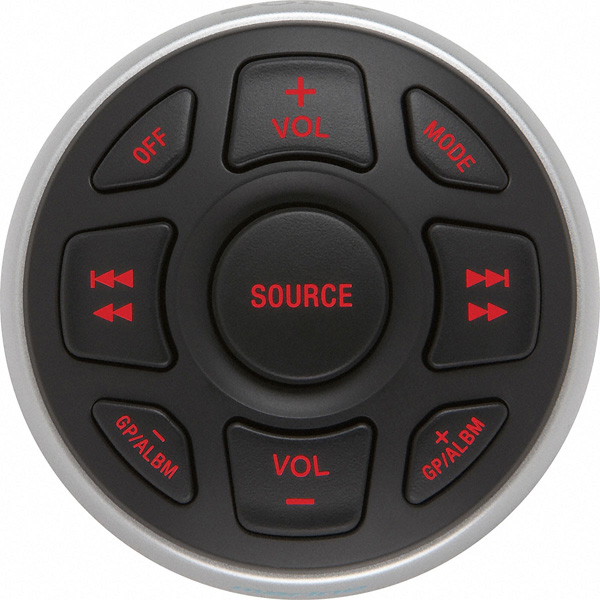
Being I am going to have a CarPC in the car, I purchased a RcJoyCon to use some of the one wire remotes by Sony and others to control the PC. I intend to use the buttons as labeled , except for the "Source" button in the center. That one will be used to trigger the system to listen for voice commands when speaking to the system. EA: "Play artist Journey", "What is the weather forecast for today" ect ect.. When I got the remote/input pad, it was illuminated in orange:
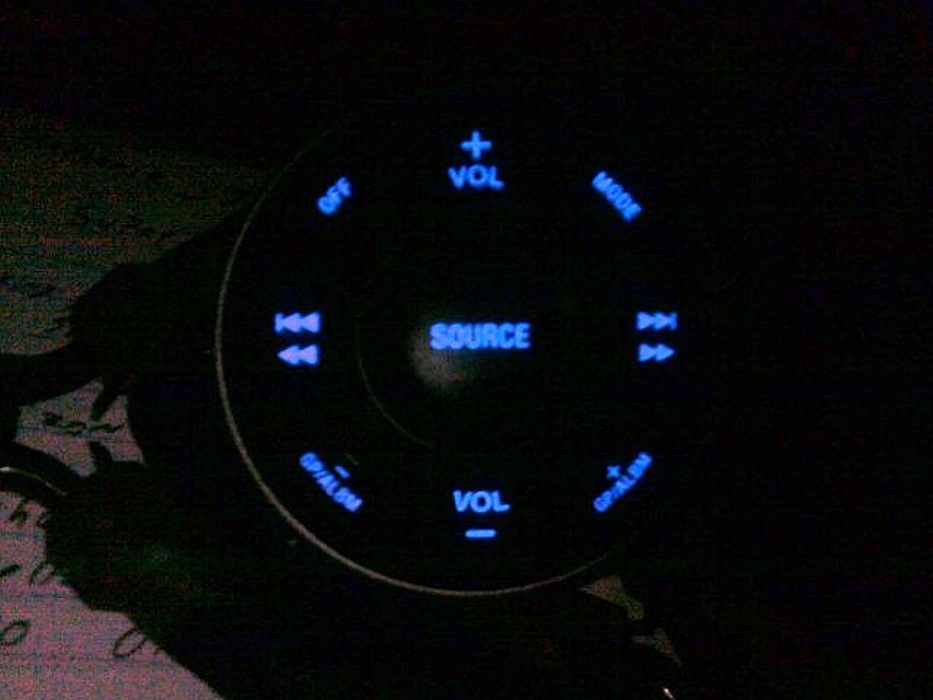
The entire interior of my car is going to be based on blue back-lighting. I wanted this the same way, and thought a simple change of colors on the back of the plastic was in order. After taking it apart, I find these VERY tiny SMD LED's surface mounted on the board.
They are about the size of a half of a grain of rice! There is no way I have to skill to solder something like that! DIY_Stu to the rescue! He had the know how, tools and SMALL SMD LED's in blue. I shipped it off to him, and in a matter of a couple of days it was done! MUCH better!
I plan to put this in the center console, right in front of the arm rest, giving easy access while driving.
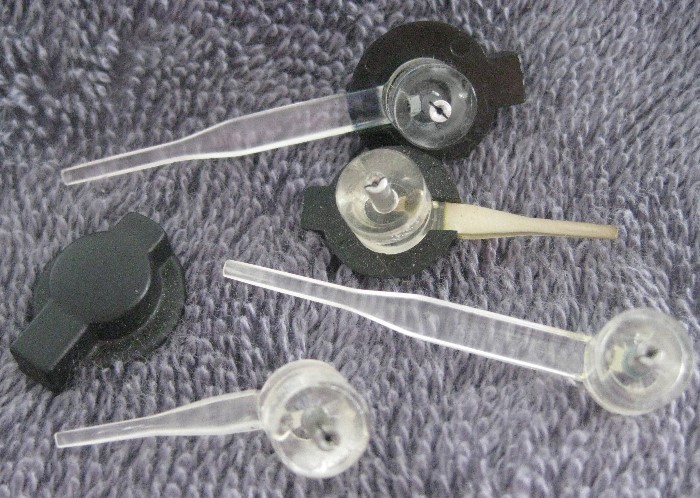
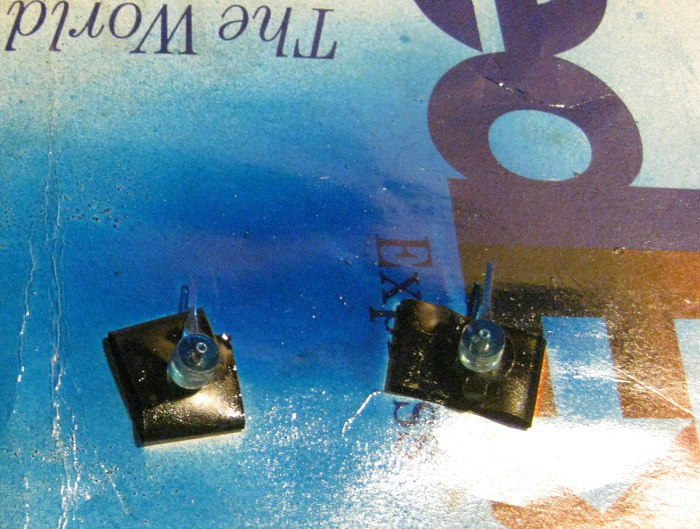
On the subject of the interior lighting being blue, I had to change the color of the dash as well. The needles on the gauges needed to be changed from factory orange. I took them all off, removed the orange paint, and re-did them in a transparent blue.
Here are the needles removed, and all orange paint removed except for one of them:
Now spraying them with the transparent blue. (I rolled over the electrical tape to hold them in place while painting them.... I found out the hard way they are so light, that they moved while spraying them )
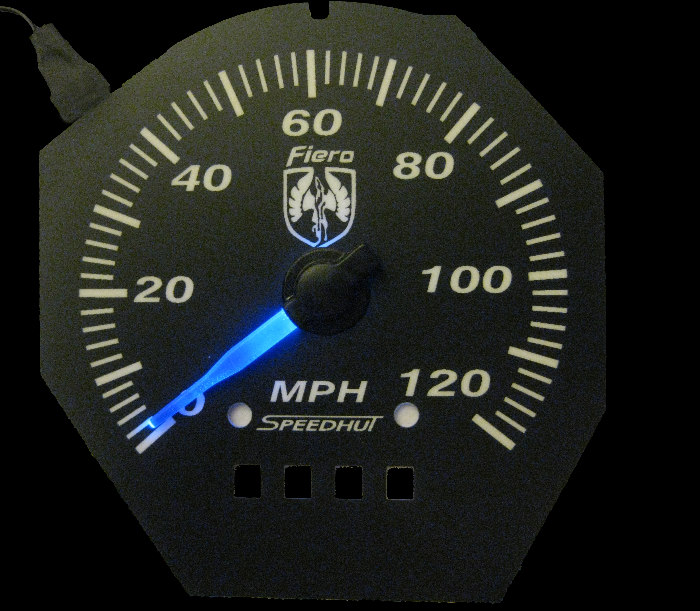
And here they are, all lit up from behind. The gauges are the reverse glow gauges, and the numbers and Fiero logo light up in a bluish white.
Hey John, looking good! (the car not you ) Hey just a little bit of advice that will help you down the road with that auto trans. Change out the torque convertor solenoid and the third gear switch while you have the trans out, if it;s still out. A failing TCS can make you have a bad day, but thankfully mine gave me a little warning so I was able to just unhook it for now until I replace it. When it starts to fail, it will make the car want to stall when you slow down, kind of like leaving the car in third gear and not pushing in the clutch while taking a 5 MPH turn.
P.S. Those gauges are friggin' sweet!!! Love the blue.
[This message has been edited by Hulki U. My-BFF (edited 12-27-2010).]
Don't lie Hulki! I saw you checking out my butt at Tyler's car show LOL. Thanks, I thought the needles came out good too. I can't wait to get all the power hooked to em and see the reverse glow gauges and needles all lit up in the dash. I plan on replacing all switches in the car with backlit ones done in blue, windows, electric mirror switch, trunk popper ect.
Too late for the sensors Trans and engine all in the car now. Got to take it around the block a couple of times and it ran really good! It has been timed, but have some adjusting to do, as it feels a little bogged down when you punch it. I Can't go much further with no lights at all on the car I have removed everything getting ready for painting, all molding, quarter windows, all sunroof hardware, marker lights, tail lights ect. I have to wait to get it to the paint shop, then gonna take out the front window as well. It is delaminating in the corners pretty bad, so gonna have it replaced. I figured was a good time to remove it just before painting it.
JimmyS has offered to come over after the first of the year to help me with the installation of his 355 bumper and side scoops. Who better to have the help from that the person that makes them!
Still trying to figure out one last thing for the exterior. both side windows are scratched up pretty deeply from the PO not replacing the dew wipes I don't think there is any type of buffing that can get the scratches out, as you can easily feel them when running your fingers over the glass.
I have been working on stuff that I can bring inside to do for the most part. All summer I had been waiting for some cool weather, and as they say, be careful what you wish for! It skipped cool and went right to cold. It's gonna be around 30 degrees in the morning, and windchill in the low teens. I know, I know, nothing compared to what you guys deal with in the "great white north", but thats COLD for here!
[This message has been edited by JohnWPB (edited 01-20-2012).]
Well Stu, I said you had it done in a couple of days after getting it.... I said nothing about it being about 5 months ago that I sent it to you and have yet to see it back here LOL JK, I told you I was in no hurry, as I have not started on the console as of yet.
Yea, I can vouch for that! When I was riding with Stu at Tyler's Car Show, he never once let his auto shift on his own. Started out in L1 at every stop, and would push the revs up before changing into 2nd and so forth....
I've already painted my entire front compartment with the VHT Chassis Epoxy, but I think I may do my brake booster in that laquer you posted... definitely looks nice!!!
WooHoo! Well I just talked to JimmyS today. He has kindly offered to drive a couple hours over from the other coast and help me install his Ferrari F355 Style #2 bumper (With side molding inserts) and his GT Style #1 Side Scoops. The date is going to be the last Saturday of this month, the 29th.
Of course will be taking pictures during the whole process and posting them here in the work log.
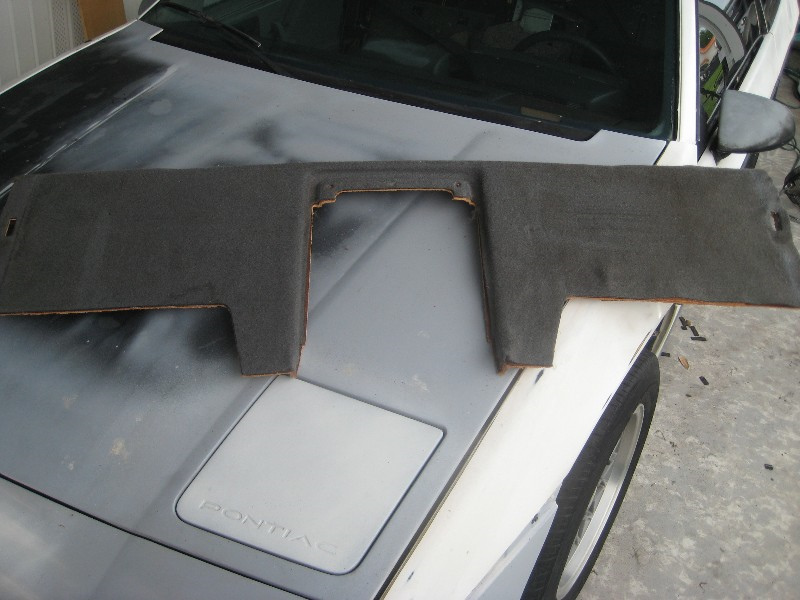
In the mean time I tackled the nasty fuzzy thing on the interior firewall.
Removing the carpet was not too bad, but man they used TONS of staples to hold it in place, and had to use needle nose pliers to get them all out. The surface was pretty smooth, but had bumps and rough spots as well. I decided to you a 1/4" fuzzy backing to help hide any blemishes when the vinyl was attached.
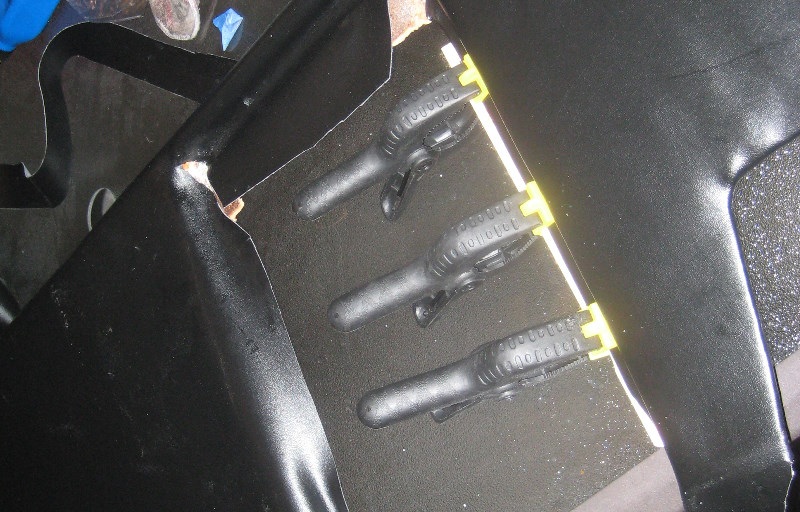
Laying down the vinyl was pretty basic, just cutting out and lining it all up. After it was cut to the right shape, I used 3M spray adhesive to start attaching it. I used clamps to hold it in place till it dried.
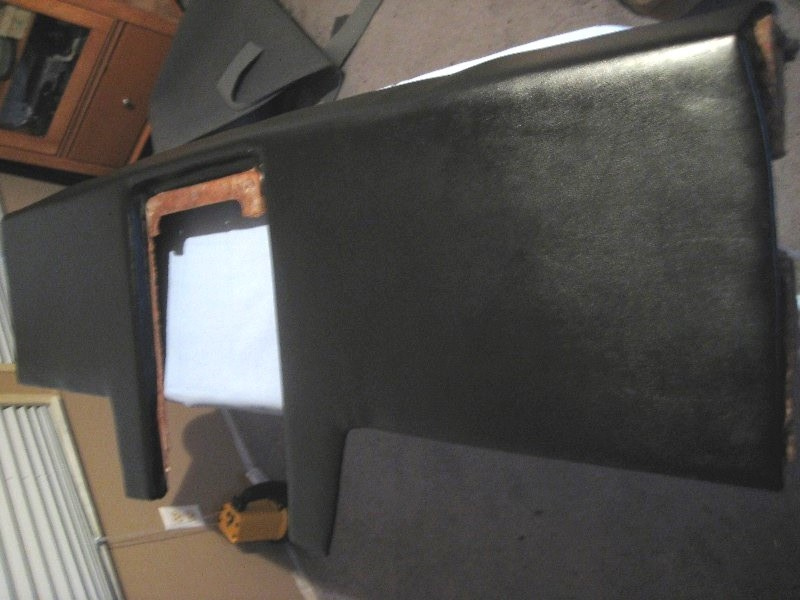
I think it came out fairly decent, and certainly an improvement over the fuzzy stuff that was on there before.
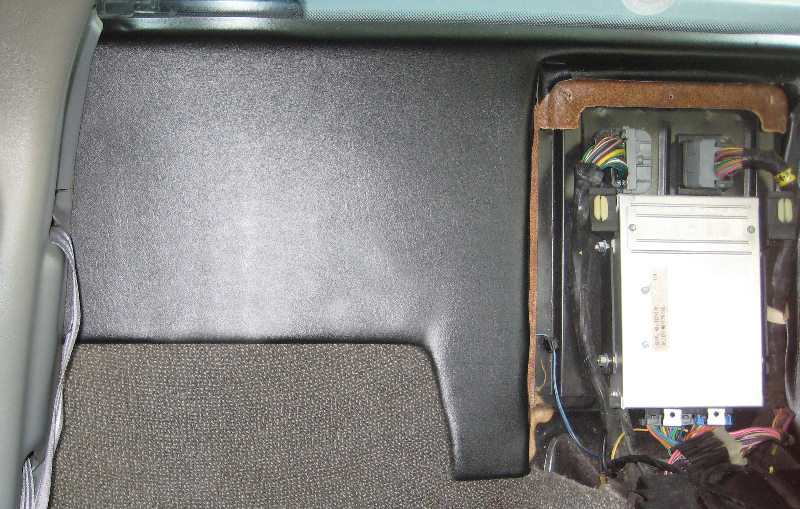
Here it is installed in the car. Not bad for a couple hours work.
[This message has been edited by JohnWPB (edited 07-19-2014).]
Wow, It was done less than 24 hours ago, gimme a chance
Ok, here are some pictures:
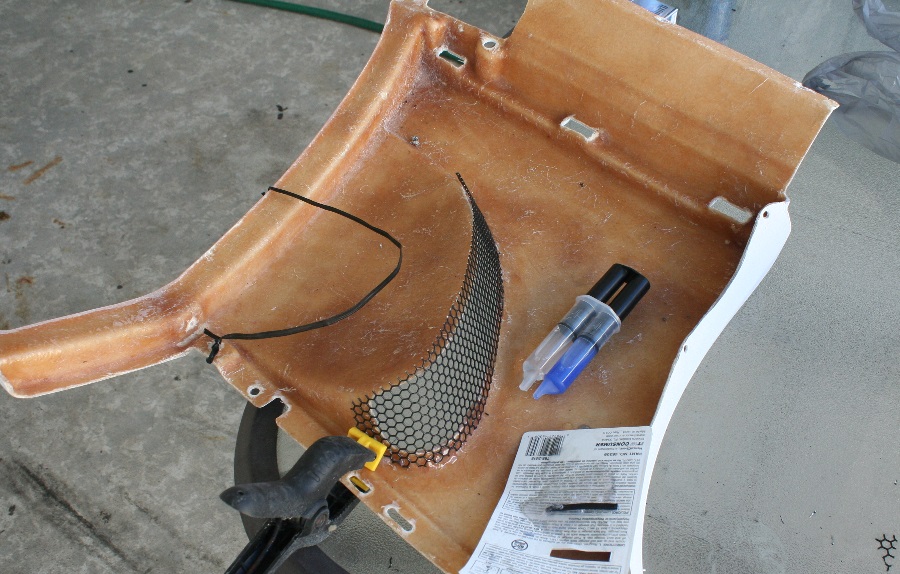
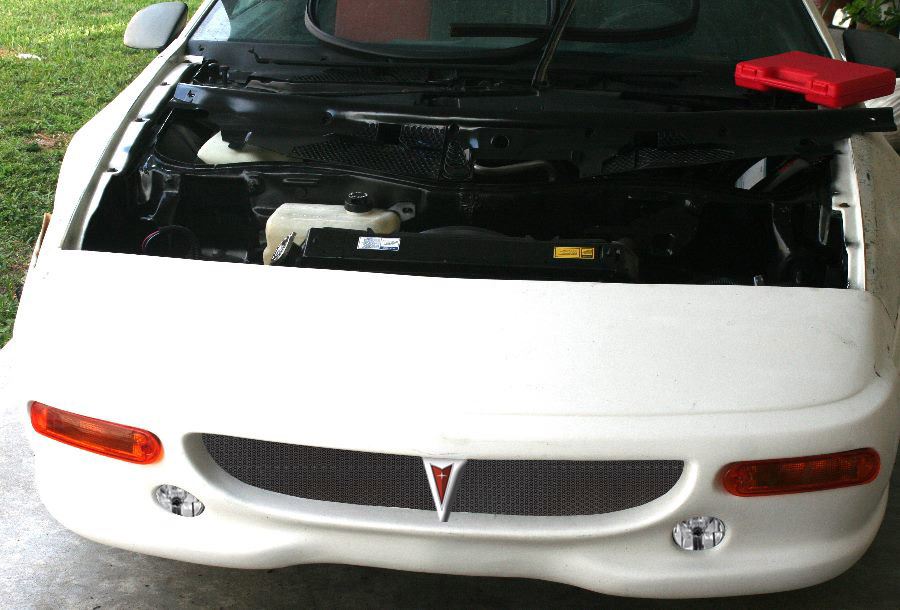
First off, attaching the mesh with 2 part epoxy from the inside. (I Will have to tape them off when the car is painted)
Jimmy starting to remove the rear fender well to get to the bolts to remove the old panels:
Here is the old panel off, and no, I have NO idea why Jimmy is doing the Hula Dance there in the background! The blue on the back quarter panel was just a rattle can test to try a blue that I had in mind for the car....
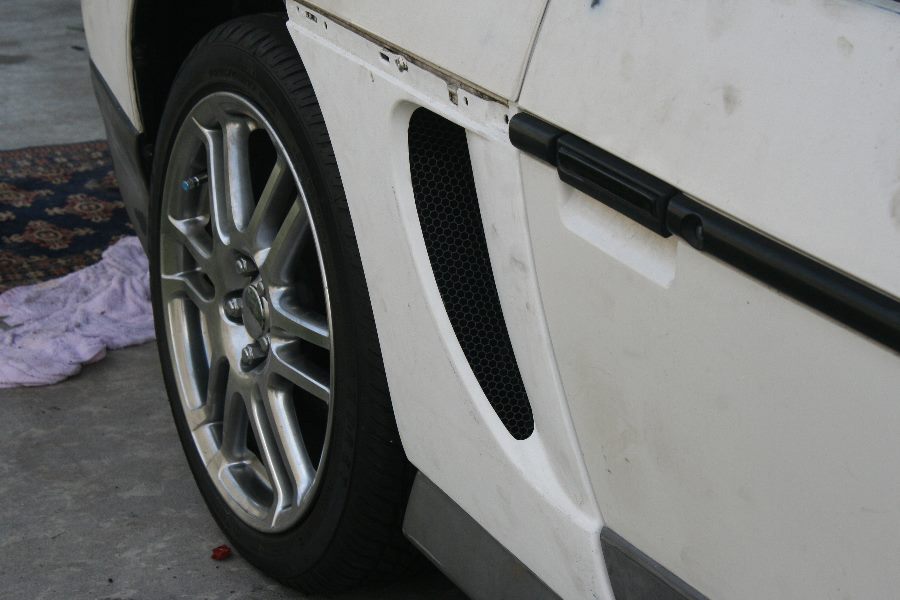
Here is the new scoop all bolted and riveted in place:
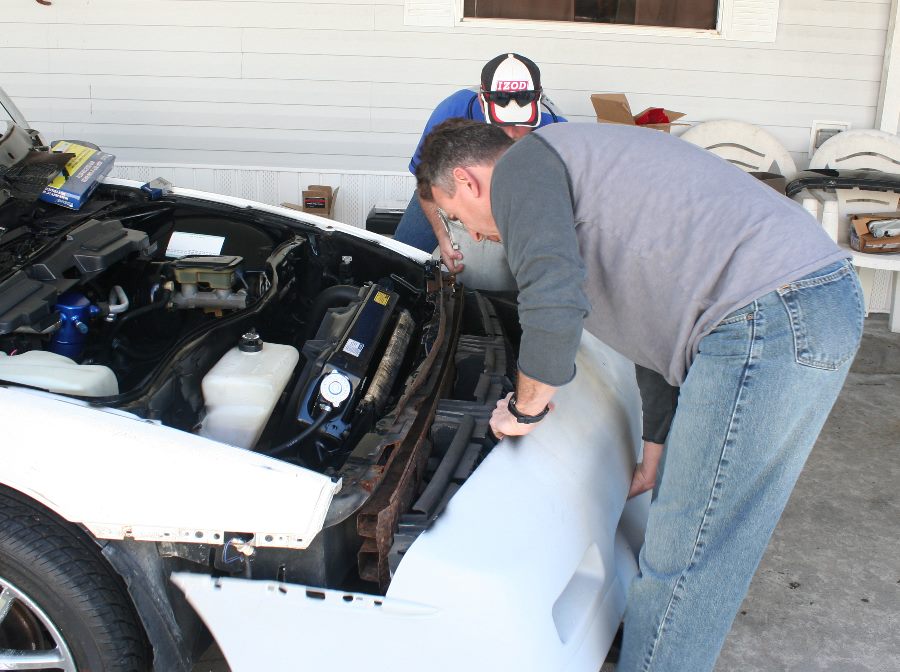
As for the front bumper, take all the bolts out, then its off with the old:
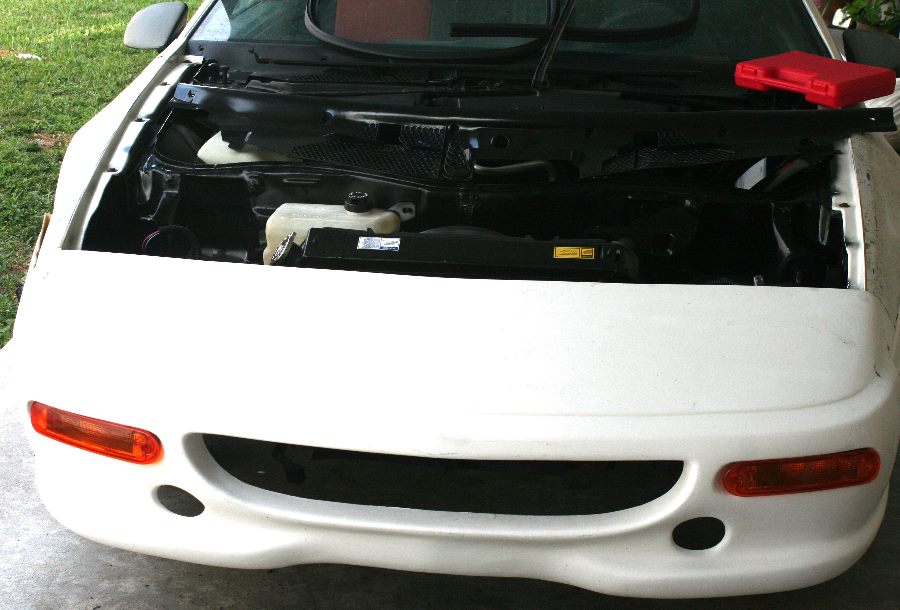
And in with the new! (I just set the parking lights in there to take this picture)
The front bumper is not attached in any way yet. It needs to be drilled and a couple small places, the fiberglass needs to be sanded for a nice clean fit. This will also give me a chance to take care of the rust, and get that all painted to help prevent it from coming back or getting worse.
I had a great time hanging out with Jimmy Dean.... err....ummm... Jimmy AND Dean rather We talked about a lot of great ideas, shared stories and chowed down on pizza. It was a great day, and look forward to going over to Jimmy's in a few weeks to help out and meet everyone that's gonna be there.
Jimmy has something in the works, that is going to be awesome when it's ready! I hope to get the first one from him when it is ready It is going to make a mod that I have had planned all along, a LOT easier! When he is ready, he will share more about it
[This message has been edited by JohnWPB (edited 01-30-2011).]
I was toying around in Photoshop a little bit... this is a rough idea of what I am wanting to do with the front bumper. Keep in mind, that the car is going to be blue when I am done with it.
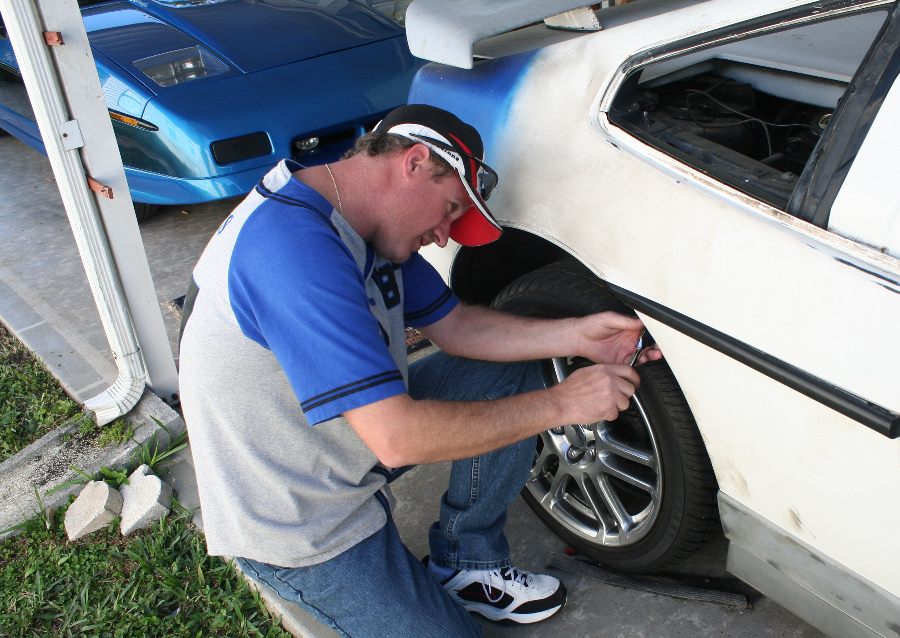
Curious why there are no pictures of you working on the car, John. I realize it might mess up a fresh manicure, and oil stains on your skin while flocking to the beach would truly dampen your day, but you must do something?
Well I was the one with the camera! I had to keep remembering to go pick it up to even update with pictures at all. I did do some of the work, but in all honesty, other than epoxying the mesh in the scoops, Jimmy did most of it. It's kinda a one person job, and nothing I could really help with at most parts of it.
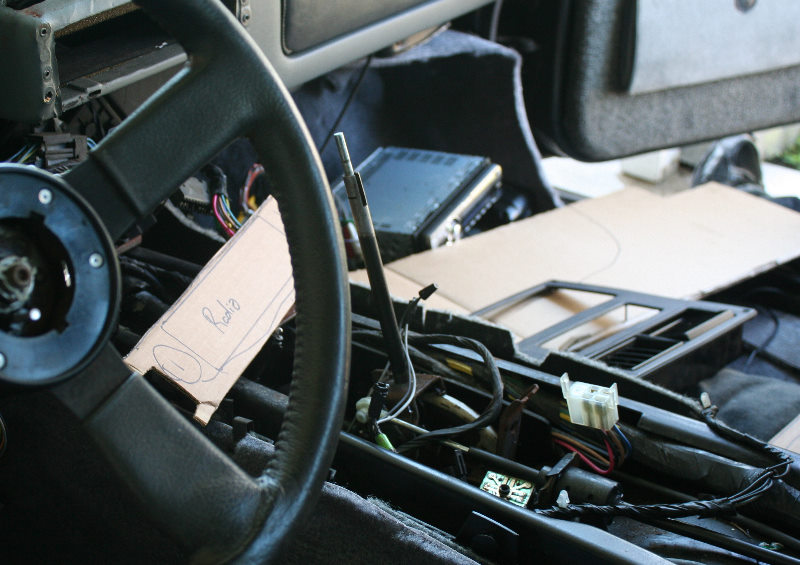
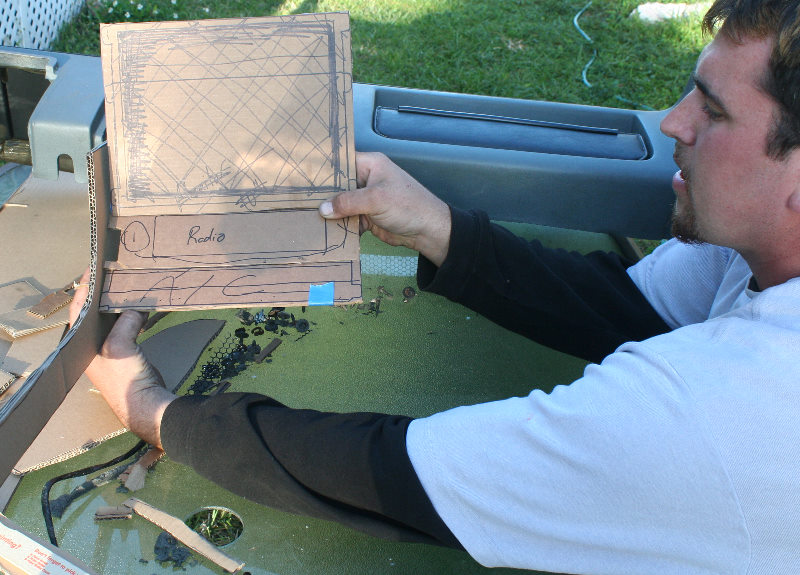
Well, I got some work done on the car today! A buddy of mine came over (He used to do custom interiors) and helped me out. We started with ripping everything out, and playing with cardboard. The mock up face plates were made for the A/C controls, the Head Unit, and the 10" touchscreen for the CarPC:
Next was to hot glue the individual pieces together and see how the curves, sizes of stuff, and everything lined up.
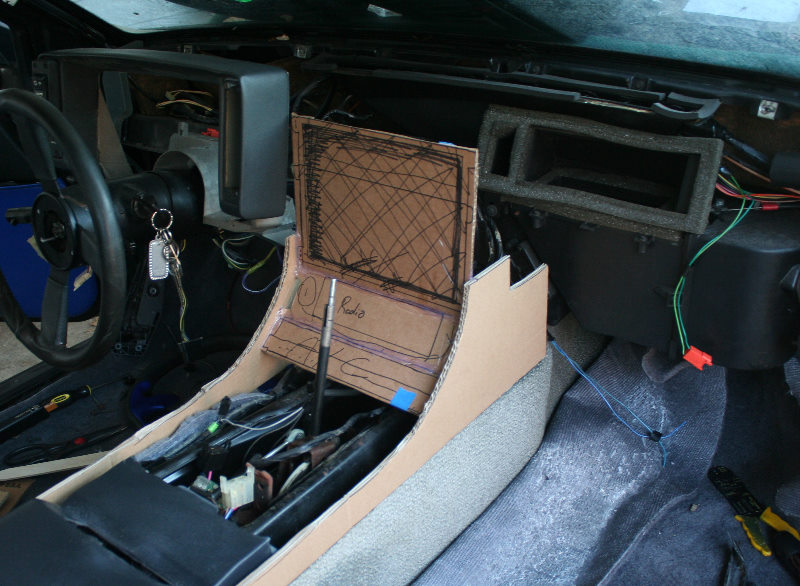
And here it is in the car to see how it all is going to look when we actually start the console:
I still have yet to shorten the shifter, and I swapped out the T-Handle for a Camaro shifter. Also, looking at the photo again, I see the whole console will actually be going towards the front a couple more inches. It is almost butted up against the shifter in the photo.
I decided to go with the A/C controls on the bottom, as they are pretty shallow, and can go in on that angle. The head unit on the other hand is much deeper, and would not fint on the bottom, unless it was almost level.
Next will be to take all the measurements of the cardboard pieces and transfer it to the 1/8" door skin I have here. Glue all that together, make final adjustments and then delve into the fiber glassing of everything.
It's all pretty rough right now, but I can at least finally get a picture of it in my head of how it is going to look.
[This message has been edited by JohnWPB (edited 03-13-2011).]
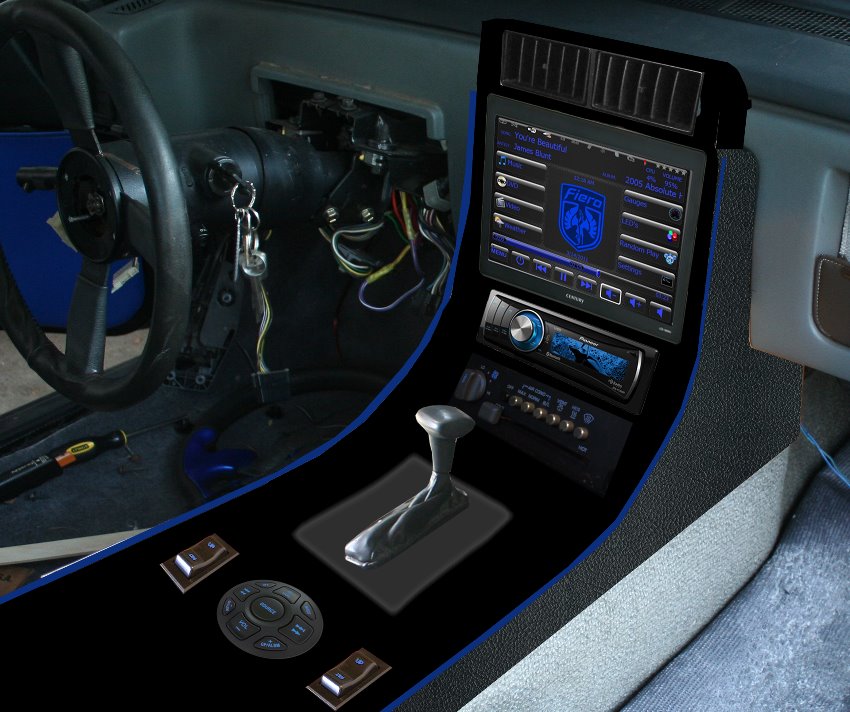
Ok, it's dark outside, and no garage to work in..... So what to do?
Fire up Photoshop of course! This is a VERY rough idea of where I am headed. The corners will be rounded in the actual version, but it gives me something visually to work with, and alter from there in the real world.
[This message has been edited by JohnWPB (edited 03-16-2011).]
The more I think about this, the harder it seems I am making it.... I am trying to figure out how to attach the console & secure it, without having screws visible all over the place. I plan on covering the sides in vinyl, and having that come over the lip of the console just a bit, with the blue piping. Any suggestions on some sort of design to hide the screws and such?
[This message has been edited by JohnWPB (edited 11-10-2012).]


 ... good luck with the build john I'll be looking in on it.
 Man that is a fun little car!!!! But for use as a daily driver, in rush hour, twice a day, I opted for an Automatic.
 . lol just messin with ya.


 Trans and engine all in the car now. Got to take it around the block a couple of times and it ran really good! It has been timed, but have some adjusting to do, as it feels a little bogged down when you punch it. I Can't go much further with no lights at all on the car