Pennock's Fiero Forum
  General Fiero Chat
  87 Coupe project (Page 4)

Post New Topic  Post A Reply
Email This Page to Someone! | Printable Version

This topic is 10 pages long:  1   2   3   4   5   6   7   8   9   10 
Previous Page | Next Page
next newest topic | next oldest topic
87 Coupe project by 30+mpg
Started on: 06-17-2005 06:31 PM
Replies: 385 (27848 views)
Last post by: richard in nc on 08-26-2023 09:41 PM
30+mpg
Member
Posts: 4049
From: Russellville, AR
Registered: Feb 2002


Feedback score: (2)
Leave feedback


Total ratings: 97
Rate this member

Report this Post04-22-2006 07:42 PM Click Here to See the Profile for 30+mpgSend a Private Message to 30+mpgEdit/Delete MessageReply w/QuoteDirect Link to This Post
Sprayed the paint & let the panels dry enough to hang them.


After paint has set overnight to fully cure, the paint will be finessed and touched up.


[This message has been edited by 30+mpg (edited 04-24-2006).]

IP: Logged
30+mpg
Member
Posts: 4049
From: Russellville, AR
Registered: Feb 2002


Feedback score: (2)
Leave feedback


Total ratings: 97
Rate this member

Report this Post04-24-2006 06:14 PM Click Here to See the Profile for 30+mpgSend a Private Message to 30+mpgEdit/Delete MessageReply w/QuoteDirect Link to This Post
Panels door size or smaller get color sanded in the utility sink in the basement.
IP: Logged
30+mpg
Member
Posts: 4049
From: Russellville, AR
Registered: Feb 2002


Feedback score: (2)
Leave feedback


Total ratings: 97
Rate this member

Report this Post04-24-2006 10:16 PM Click Here to See the Profile for 30+mpgSend a Private Message to 30+mpgEdit/Delete MessageReply w/QuoteDirect Link to This Post

30+mpg

4049 posts
Member since Feb 2002
Hope I can get the rest of the panels to turn out this glossy.

IP: Logged
twofatguys
Member
Posts: 16465
From: Wheaton Mo. / Virginia Beach Va.
Registered: Jul 2004


Feedback score: (2)
Leave feedback


Total ratings: 227
Rate this member

Report this Post04-25-2006 02:13 AM Click Here to See the Profile for twofatguysSend a Private Message to twofatguysEdit/Delete MessageReply w/QuoteDirect Link to This Post
Sweeeet.

Is it gonna be ready for the 6th?

Brad
IP: Logged
Fiero1Fan
Member
Posts: 4364
From: Brachttal, Germany
Registered: Sep 2005


Feedback score:    (19)
Leave feedback


Total ratings: 100
Rate this member

Report this Post04-25-2006 08:38 AM Click Here to See the Profile for Fiero1FanClick Here to visit Fiero1Fan's HomePageSend a Private Message to Fiero1FanEdit/Delete MessageReply w/QuoteDirect Link to This Post
Nice job on the paint. It'll look real good.
IP: Logged
30+mpg
Member
Posts: 4049
From: Russellville, AR
Registered: Feb 2002


Feedback score: (2)
Leave feedback


Total ratings: 97
Rate this member

Report this Post04-25-2006 11:31 PM Click Here to See the Profile for 30+mpgSend a Private Message to 30+mpgEdit/Delete MessageReply w/QuoteDirect Link to This Post
 
quote
twofatguys:
Sweeeet.
Is it gonna be ready for the 6th?
Brad


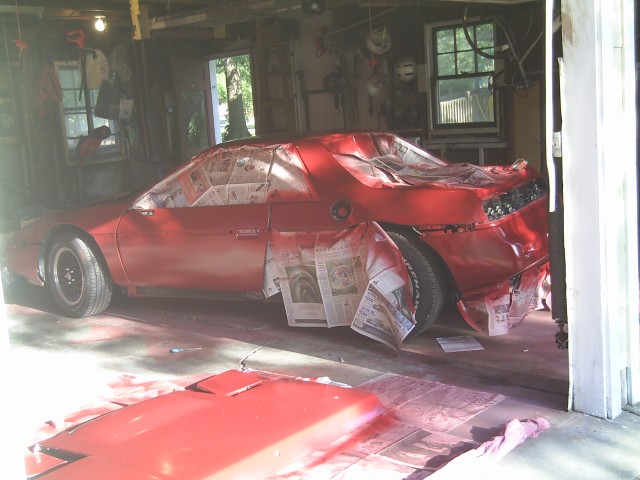
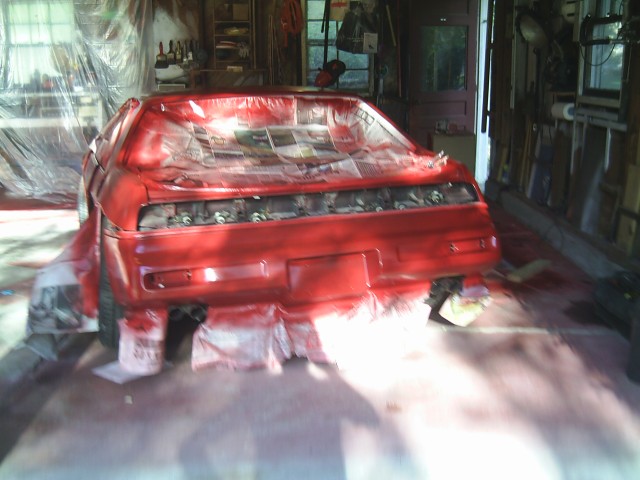
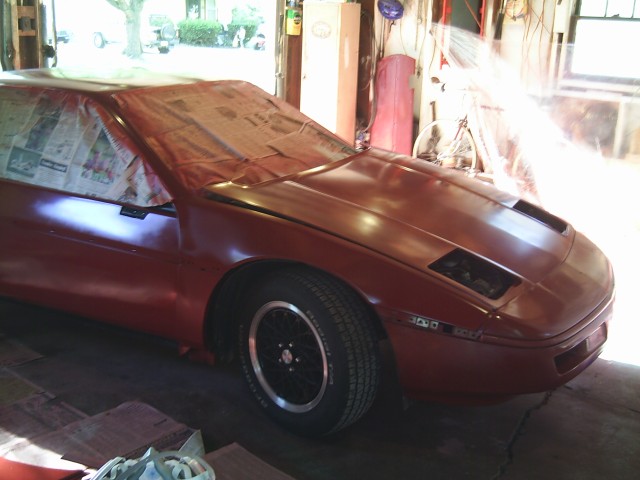
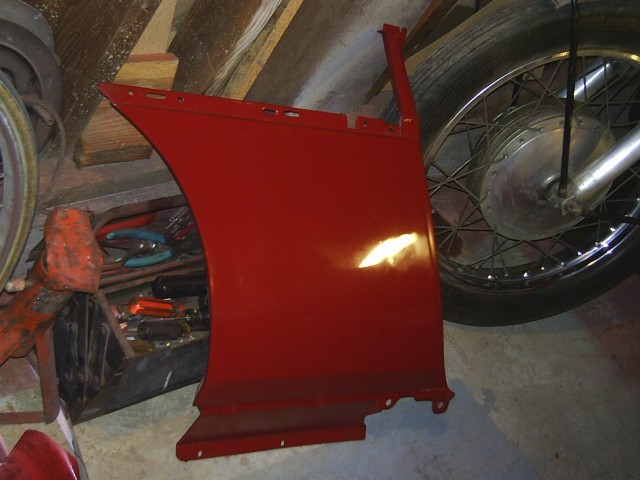
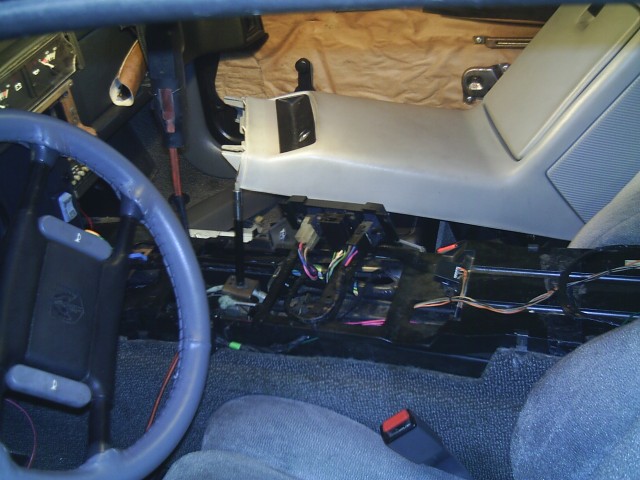
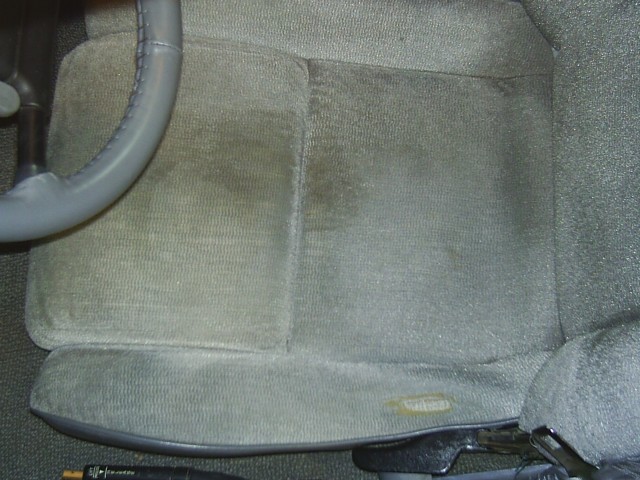
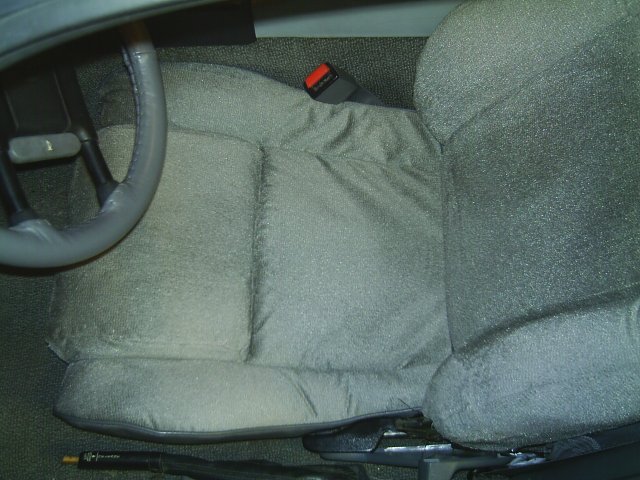
That's the plan. Touch up paint is done. Rear bumper cover and R lower 1/4 panel is on.
Hopefully, I'll receive a power window wiring harness in the next couple of days. That would permit the motors & wiring to be installed before the door panels go back on. Also I have a pair of interior door panels w/ map pockets waiting to be installed.

IP: Logged
30+mpg
Member
Posts: 4049
From: Russellville, AR
Registered: Feb 2002


Feedback score: (2)
Leave feedback


Total ratings: 97
Rate this member

Report this Post04-29-2006 09:58 AM Click Here to See the Profile for 30+mpgSend a Private Message to 30+mpgEdit/Delete MessageReply w/QuoteDirect Link to This Post
Installing power windows.


Got the wiring in & the switches & motors work. Have to get 1/4 x 1/2" bolts w/ nylock nuts to mount the motors and window rails after I get the rest of the rivets out.

Then I can put on the door skins & panels.
IP: Logged
30+mpg
Member
Posts: 4049
From: Russellville, AR
Registered: Feb 2002


Feedback score: (2)
Leave feedback


Total ratings: 97
Rate this member

Report this Post04-29-2006 06:42 PM Click Here to See the Profile for 30+mpgSend a Private Message to 30+mpgEdit/Delete MessageReply w/QuoteDirect Link to This Post

30+mpg

4049 posts
Member since Feb 2002
The power window motors that came w/ the car (in the trunk) don't fit. Not for a Fiero. So I put the manual crank back in.

At least now I have working switches and a harness installed. Anyone have a spare pair of working power window motors they'd like to part with?
IP: Logged
30+mpg
Member
Posts: 4049
From: Russellville, AR
Registered: Feb 2002


Feedback score: (2)
Leave feedback


Total ratings: 97
Rate this member

Report this Post04-30-2006 09:15 PM Click Here to See the Profile for 30+mpgSend a Private Message to 30+mpgEdit/Delete MessageReply w/QuoteDirect Link to This Post
Got the panels back on.


Initial machine polishing has been done.

[This message has been edited by 30+mpg (edited 05-01-2006).]

IP: Logged
30+mpg
Member
Posts: 4049
From: Russellville, AR
Registered: Feb 2002


Feedback score: (2)
Leave feedback


Total ratings: 97
Rate this member

Report this Post05-01-2006 08:24 AM Click Here to See the Profile for 30+mpgSend a Private Message to 30+mpgEdit/Delete MessageReply w/QuoteDirect Link to This Post
Next is to buff using an 8" lambswool pad & #9 swirl remover.
IP: Logged
30+mpg
Member
Posts: 4049
From: Russellville, AR
Registered: Feb 2002


Feedback score: (2)
Leave feedback


Total ratings: 97
Rate this member

Report this Post05-01-2006 09:40 PM Click Here to See the Profile for 30+mpgSend a Private Message to 30+mpgEdit/Delete MessageReply w/QuoteDirect Link to This Post

30+mpg

4049 posts
Member since Feb 2002
Prior to waxing


Ka-Chow!

[This message has been edited by 30+mpg (edited 06-12-2006).]

IP: Logged
PFF
System Bot
30+mpg
Member
Posts: 4049
From: Russellville, AR
Registered: Feb 2002


Feedback score: (2)
Leave feedback


Total ratings: 97
Rate this member

Report this Post05-11-2006 10:39 PM Click Here to See the Profile for 30+mpgSend a Private Message to 30+mpgEdit/Delete MessageReply w/QuoteDirect Link to This Post
Installed the second torque rod for the engine lid. Even with both rods at the lowest torque setting, when the button for the release is pushed, the lid pops open all the way.

[This message has been edited by 30+mpg (edited 05-11-2006).]

IP: Logged
30+mpg
Member
Posts: 4049
From: Russellville, AR
Registered: Feb 2002


Feedback score: (2)
Leave feedback


Total ratings: 97
Rate this member

Report this Post05-19-2006 07:39 AM Click Here to See the Profile for 30+mpgSend a Private Message to 30+mpgEdit/Delete MessageReply w/QuoteDirect Link to This Post
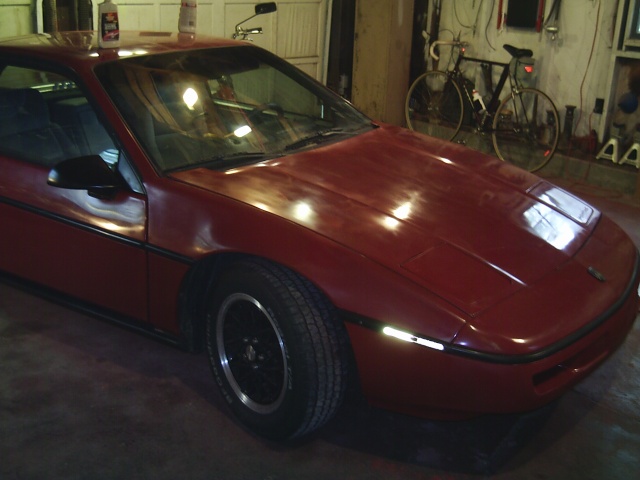
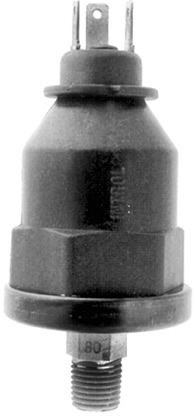
Oil pressure sender diaphragm ruptured on the sender.

This allowed 60psi oil into the top of the housing and squirt in a steady stream out of the side just under the top ring onto the strut tower wall.

Was over 120 miles from Parsons, but less than 2 miles from a Goodyear tire center where a mechanic who owns a couple of Buick GN's was able to remove the sender & screw in a plug. After topping up the oil, I made it back w/ no problems. Now to buy an new sender.
IP: Logged
30+mpg
Member
Posts: 4049
From: Russellville, AR
Registered: Feb 2002


Feedback score: (2)
Leave feedback


Total ratings: 97
Rate this member

Report this Post05-20-2006 08:43 PM Click Here to See the Profile for 30+mpgSend a Private Message to 30+mpgEdit/Delete MessageReply w/QuoteDirect Link to This Post
New sender installed. Gauge & warning light fully functional.

Filled gas tank. 30+mpg.
IP: Logged
darkhorizon
Member
Posts: 12279
From: Flint Michigan
Registered: Jan 2006


Feedback score: (1)
Leave feedback


Total ratings: 451
Rate this member

Report this Post05-21-2006 06:32 PM Click Here to See the Profile for darkhorizonSend a Private Message to darkhorizonEdit/Delete MessageReply w/QuoteDirect Link to This Post
You found $130 under the trunk mat, thats sooo cool!!!

Heck I paied $150 for my whole car.
IP: Logged
30+mpg
Member
Posts: 4049
From: Russellville, AR
Registered: Feb 2002


Feedback score: (2)
Leave feedback


Total ratings: 97
Rate this member

Report this Post05-23-2006 06:02 PM Click Here to See the Profile for 30+mpgSend a Private Message to 30+mpgEdit/Delete MessageReply w/QuoteDirect Link to This Post
 
quote
Originally posted by darkhorizon:

You found $130 under the trunk mat, thats sooo cool!!!

Heck I paid [edited] $150 for my whole car.


$150, was it drivable when you bought it?

[This message has been edited by 30+mpg (edited 06-03-2009).]

IP: Logged
30+mpg
Member
Posts: 4049
From: Russellville, AR
Registered: Feb 2002


Feedback score: (2)
Leave feedback


Total ratings: 97
Rate this member

Report this Post05-23-2006 09:48 PM Click Here to See the Profile for 30+mpgSend a Private Message to 30+mpgEdit/Delete MessageReply w/QuoteDirect Link to This Post

30+mpg

4049 posts
Member since Feb 2002
Starting on A/C electrics.

Put in a dryer w/ a cycling switch. Cut green wire loop from A2 to A3 on C100 and wired in leads to connect to the switch.

Connected L Green wire from switch to L blue wire C9 on ECM to provide A/C signal to computer.
IP: Logged
30+mpg
Member
Posts: 4049
From: Russellville, AR
Registered: Feb 2002


Feedback score: (2)
Leave feedback


Total ratings: 97
Rate this member

Report this Post06-01-2006 08:05 PM Click Here to See the Profile for 30+mpgSend a Private Message to 30+mpgEdit/Delete MessageReply w/QuoteDirect Link to This Post
Removed the condenser. Flushed it, the evaporator and lines w/ a 2 stage flush. Mineral spirits followed by lacquer thinner. Remounted the condenser and assembled the lines.
Plugged the open ends & pulled a deep vacuum.

[This message has been edited by 30+mpg (edited 06-01-2006).]

IP: Logged
30+mpg
Member
Posts: 4049
From: Russellville, AR
Registered: Feb 2002


Feedback score: (2)
Leave feedback


Total ratings: 97
Rate this member

Report this Post06-01-2006 08:27 PM Click Here to See the Profile for 30+mpgSend a Private Message to 30+mpgEdit/Delete MessageReply w/QuoteDirect Link to This Post

30+mpg

4049 posts
Member since Feb 2002
Another project to tackle is the driver's seat bottom.


Typical wear. Fabric on front center is worn thin, also notice the hole next to adjuster.

I still have lots of gray seat cloth left. Time to pull the seat & remove the seat bottom upholstery.

Many Fieros have loose fitting aftermarket seat covers, but I prefer a tight, clean unworn OEM look.

[This message has been edited by 30+mpg (edited 06-22-2006).]

IP: Logged
30+mpg
Member
Posts: 4049
From: Russellville, AR
Registered: Feb 2002


Feedback score: (2)
Leave feedback


Total ratings: 97
Rate this member

Report this Post06-01-2006 10:49 PM Click Here to See the Profile for 30+mpgSend a Private Message to 30+mpgEdit/Delete MessageReply w/QuoteDirect Link to This Post

30+mpg

4049 posts
Member since Feb 2002
For the "How to" on the seat bottom, go to this thread:

//www.fiero.nl/forum/Forum2/HTML/066632-2.html#lastpost
IP: Logged
30+mpg
Member
Posts: 4049
From: Russellville, AR
Registered: Feb 2002


Feedback score: (2)
Leave feedback


Total ratings: 97
Rate this member

Report this Post06-12-2006 10:40 PM Click Here to See the Profile for 30+mpgSend a Private Message to 30+mpgEdit/Delete MessageReply w/QuoteDirect Link to This Post
Checked the plugs. Looked good. However, they were gapped at .050". Stock is to be .060".

So I gapped them at .065".

In Dr. Jacobs book "Performance Ignition Systems", it states that increasing the gap .006" over stock should give "4% increase in gasoline mileage, noticeably smoother operation, no change in power."

I figure going from .050" to .065" should give me at least a 5% increase in gas mileage.

For example, that would change 30mpg to 31.5mpg.
IP: Logged
PFF
System Bot
30+mpg
Member
Posts: 4049
From: Russellville, AR
Registered: Feb 2002


Feedback score: (2)
Leave feedback


Total ratings: 97
Rate this member

Report this Post06-12-2006 10:55 PM Click Here to See the Profile for 30+mpgSend a Private Message to 30+mpgEdit/Delete MessageReply w/QuoteDirect Link to This Post
OK, here's the after pic.


Yeah, it's a little wrinkley, but it should smooth out with use. At least it is clean, no wear and no holes!

BTW, it's no longer a heap!

[This message has been edited by 30+mpg (edited 06-12-2006).]

IP: Logged
30+mpg
Member
Posts: 4049
From: Russellville, AR
Registered: Feb 2002


Feedback score: (2)
Leave feedback


Total ratings: 97
Rate this member

Report this Post06-13-2006 11:06 PM Click Here to See the Profile for 30+mpgSend a Private Message to 30+mpgEdit/Delete MessageReply w/QuoteDirect Link to This Post
According to "Performance Ignition System" a .010" smaller than stock plug gap gives

"6% improvement in power above 4,000 rpm...7% loss in mileage when driving slowly."

So by going from .010" under to .005" over stock spark plug gap, I should pickup a better than 5% increase in gas mileage.

[This message has been edited by 30+mpg (edited 06-13-2006).]

IP: Logged
30+mpg
Member
Posts: 4049
From: Russellville, AR
Registered: Feb 2002


Feedback score: (2)
Leave feedback


Total ratings: 97
Rate this member

Report this Post06-15-2006 09:06 PM Click Here to See the Profile for 30+mpgSend a Private Message to 30+mpgEdit/Delete MessageReply w/QuoteDirect Link to This Post
CV joint grease on the suspension & frame.

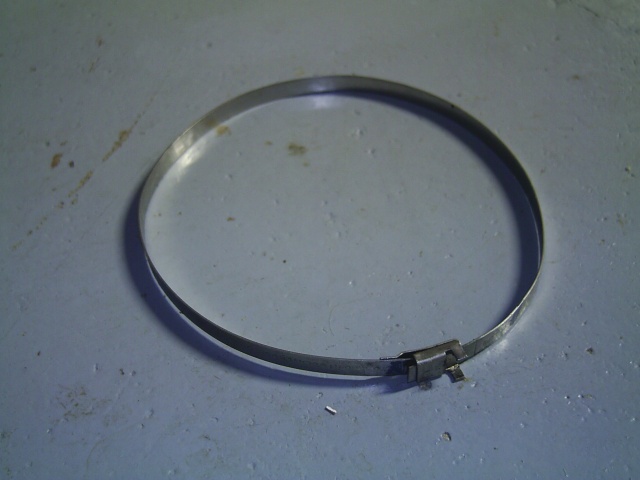
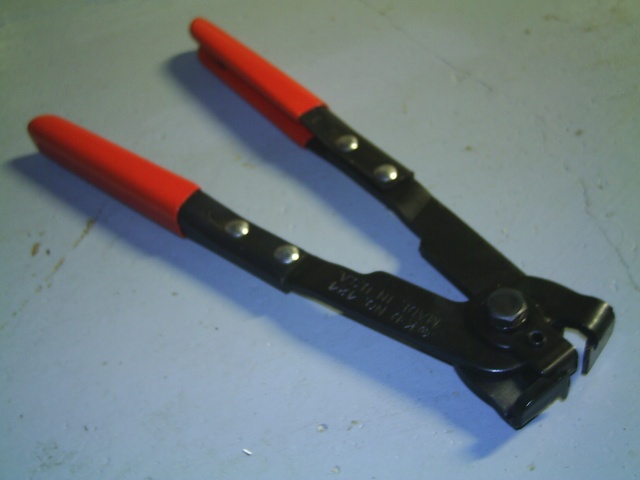
Checked driver's side boot. Clamp ring on the big end of the inner joint had shifted slightly. Boot was OK. Clamp was OK, too. Carefully unbent clamp tabs, strap and removed clamp.

Thought about pulling the axle, but pulled the boot back and stuffed a finger load of semi-synthetic grease into each of the 3 nodes of the tri-pot housing.

Hammered the wrinkles out of the band to permit reuse.

Not enough room to tighten the clamp w/o removing the axle. Went to auto parts store and bought a 4" hose clamp because I thought they had the same band-it clamps as pictured above. Turns out they had the crimp style boot clamps.
I even have the special tool for those style.

But I had checked before I went to the store for clearance for the clamp screw, so I stayed with the hose clamp. If I would have used the crimp clamp, I would have had to make sure I had the correct size. With the hose clamp, no problem, just turn till tight. Also it is reusable.

Boot is securely clamped in place.

[This message has been edited by 30+mpg (edited 06-15-2006).]

IP: Logged
30+mpg
Member
Posts: 4049
From: Russellville, AR
Registered: Feb 2002


Feedback score: (2)
Leave feedback


Total ratings: 97
Rate this member

Report this Post06-16-2006 12:40 PM Click Here to See the Profile for 30+mpgSend a Private Message to 30+mpgEdit/Delete MessageReply w/QuoteDirect Link to This Post
Top left corner of the Aux. gauge housing had a small piece missing from the vinyl. So I thought I give a liquid vinyl repair a try.


The hole is filled, but the results could have been better.


A corner is tough to do, about 4 or 5 flat surfaces (not really, they are all curved). A single flat surface would be easier.

[This message has been edited by 30+mpg (edited 06-16-2006).]

IP: Logged
30+mpg
Member
Posts: 4049
From: Russellville, AR
Registered: Feb 2002


Feedback score: (2)
Leave feedback


Total ratings: 97
Rate this member

Report this Post06-16-2006 01:11 PM Click Here to See the Profile for 30+mpgSend a Private Message to 30+mpgEdit/Delete MessageReply w/QuoteDirect Link to This Post

30+mpg

4049 posts
Member since Feb 2002
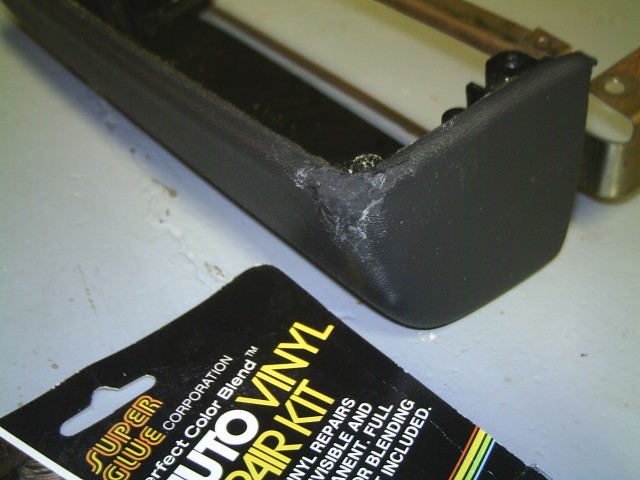
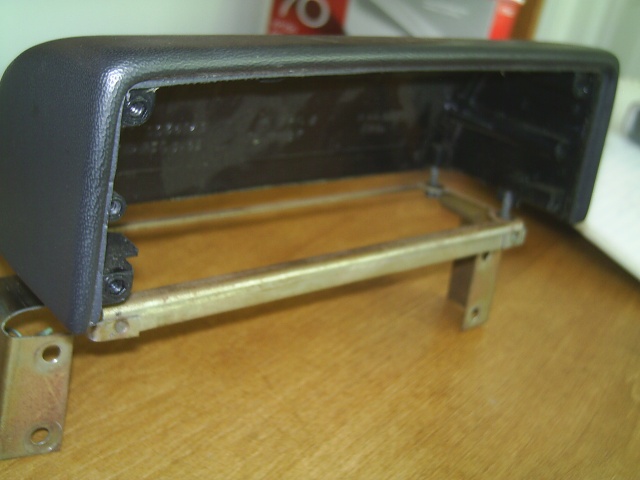
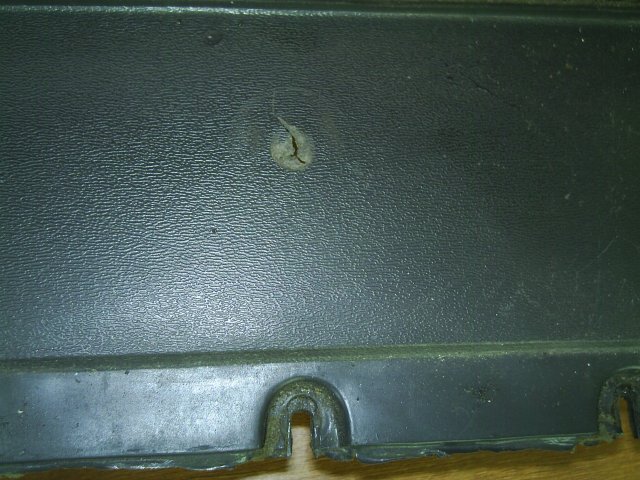
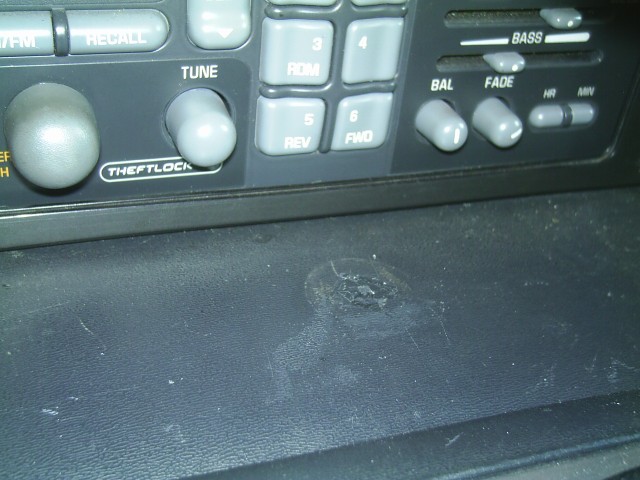
Dug out a spare aux. housing. The bottom 4 screw bosses are all broken, but I could get the screws in far enough to hold.

Looks alot better than the one above.

Sometimes, spares are nice to have.

[This message has been edited by 30+mpg (edited 06-16-2006).]

IP: Logged
30+mpg
Member
Posts: 4049
From: Russellville, AR
Registered: Feb 2002


Feedback score: (2)
Leave feedback


Total ratings: 97
Rate this member

Report this Post06-16-2006 07:05 PM Click Here to See the Profile for 30+mpgSend a Private Message to 30+mpgEdit/Delete MessageReply w/QuoteDirect Link to This Post

30+mpg

4049 posts
Member since Feb 2002
So let's look for a flat surface to fix. How about this hole in the foward console?


When viewed from this angle it yields about a 70% improvement in appearance.
IP: Logged
fierodustin_86
Member
Posts: 970
From: Joplin, Missouri
Registered: Aug 2002


Feedback score: N/A
Leave feedback

Rate this member

Report this Post06-16-2006 11:05 PM Click Here to See the Profile for fierodustin_86Send a Private Message to fierodustin_86Edit/Delete MessageReply w/QuoteDirect Link to This Post
Looking good Bill, keep up the good work. I think that I got my GT all lined out. CAI mod(done). I stole the Beretta brake upgrade from my SE. Now I just need shocks, springs and struts. Keep intouch.
dustin
IP: Logged
30+mpg
Member
Posts: 4049
From: Russellville, AR
Registered: Feb 2002


Feedback score: (2)
Leave feedback


Total ratings: 97
Rate this member

Report this Post06-24-2006 02:42 PM Click Here to See the Profile for 30+mpgSend a Private Message to 30+mpgEdit/Delete MessageReply w/QuoteDirect Link to This Post
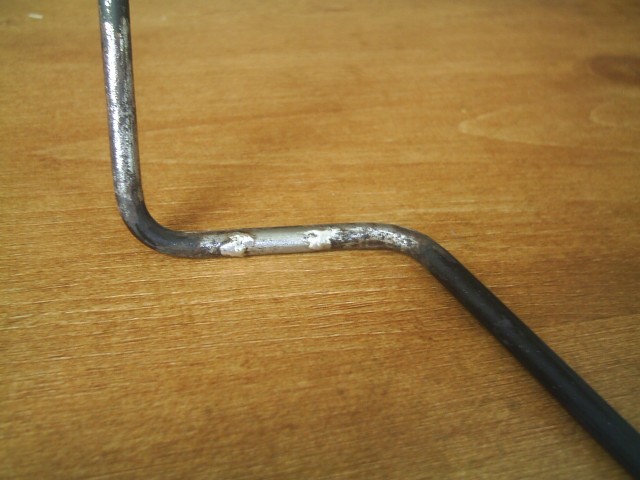
While cleaning rust from the vac line that goes to the 4t60 modular, I noticed a Dremel wheel slice thru the tube wall. Hmm, doesn't do much for the vacuum signal to the modulator.

Fixed it

& painted the tubing.
Tightened the hose clamps on a transmission hose & added some ATF.

Now, the A/F gauge indicates not quite as rich mixture. That's going to help the old mpg a little.
Also, the 2-1 downshift clunk is gone. Things just keep on improving.

[This message has been edited by 30+mpg (edited 11-17-2009).]

IP: Logged
30+mpg
Member
Posts: 4049
From: Russellville, AR
Registered: Feb 2002


Feedback score: (2)
Leave feedback


Total ratings: 97
Rate this member

Report this Post06-24-2006 03:23 PM Click Here to See the Profile for 30+mpgSend a Private Message to 30+mpgEdit/Delete MessageReply w/QuoteDirect Link to This Post

30+mpg

4049 posts
Member since Feb 2002
In the little over 17 months that I've had this car, I've only paid someone to work on it 3 times.
1. Weld on exhaust tips
2. Replace blown muffler
3. Remove leaking oil pressure sender & install plug.

I could have done # 3 myself if it weren't for the fact that it happened 120 miles from home & I didn't have a 15mm open ended wrench or a threaded plug.

[This message has been edited by 30+mpg (edited 06-24-2006).]

IP: Logged
30+mpg
Member
Posts: 4049
From: Russellville, AR
Registered: Feb 2002


Feedback score: (2)
Leave feedback


Total ratings: 97
Rate this member

Report this Post06-24-2006 04:30 PM Click Here to See the Profile for 30+mpgSend a Private Message to 30+mpgEdit/Delete MessageReply w/QuoteDirect Link to This Post

30+mpg

4049 posts
Member since Feb 2002
Did some more engine "cleaning". I think I've removed most of the oil over spray.

Time once again to obligatorily provide the ubiquitous three angle engine shots. Enjoy.


IP: Logged
PFF
System Bot
Silentassassin185
Member
Posts: 3186
From: Joplin, Mo
Registered: Nov 2003


Feedback score: (5)
Leave feedback


Total ratings: 93
Rate this member

Report this Post06-24-2006 04:35 PM Click Here to See the Profile for Silentassassin185Send a Private Message to Silentassassin185Edit/Delete MessageReply w/QuoteDirect Link to This Post
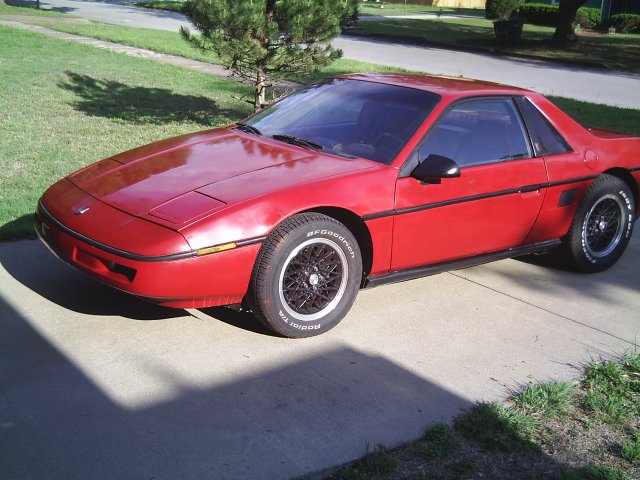
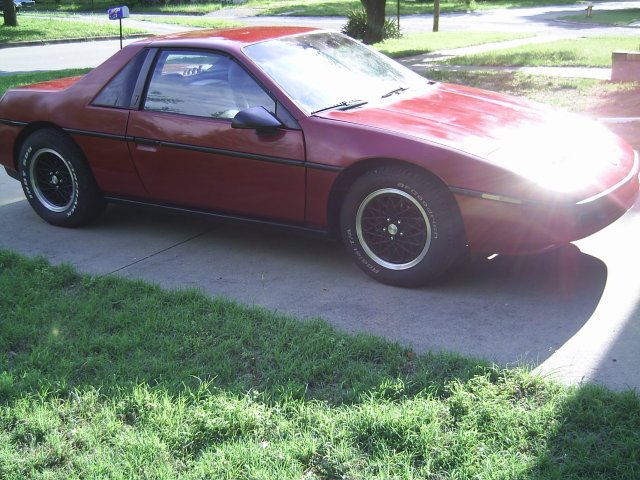
Gotta say you're doing a real clean job with this car. I've seen it in person and its really nice. Seeing this one, I wanna get another Fiero and put a 3800 in it. Gotta finish my current project first though.
IP: Logged
30+mpg
Member
Posts: 4049
From: Russellville, AR
Registered: Feb 2002


Feedback score: (2)
Leave feedback


Total ratings: 97
Rate this member

Report this Post07-03-2006 10:16 PM Click Here to See the Profile for 30+mpgSend a Private Message to 30+mpgEdit/Delete MessageReply w/QuoteDirect Link to This Post
Developed a metallic rattle in the right front suspension when traveling over bumps.
Checked brake pad, not loose.
Ball joints, solid
Removed the shock, then removed the upper A-arm bolt to check the bushings. Bushings intact.

Greased bolt and reassembled components.

Rattle gone.

I think the lower shock bolt may have not been a snug as required.
IP: Logged
30+mpg
Member
Posts: 4049
From: Russellville, AR
Registered: Feb 2002


Feedback score: (2)
Leave feedback


Total ratings: 97
Rate this member

Report this Post07-04-2006 11:54 PM Click Here to See the Profile for 30+mpgSend a Private Message to 30+mpgEdit/Delete MessageReply w/QuoteDirect Link to This Post
Noticed some flex in this bracket


that holds the accelerator cable & the TV cable, when at WOT.

Here's a before shot

and here's the after mod's shot.

A lot less flex.

IP: Logged
30+mpg
Member
Posts: 4049
From: Russellville, AR
Registered: Feb 2002


Feedback score: (2)
Leave feedback


Total ratings: 97
Rate this member

Report this Post07-07-2006 05:08 PM Click Here to See the Profile for 30+mpgSend a Private Message to 30+mpgEdit/Delete MessageReply w/QuoteDirect Link to This Post
Getting ready for a car show next weekend!

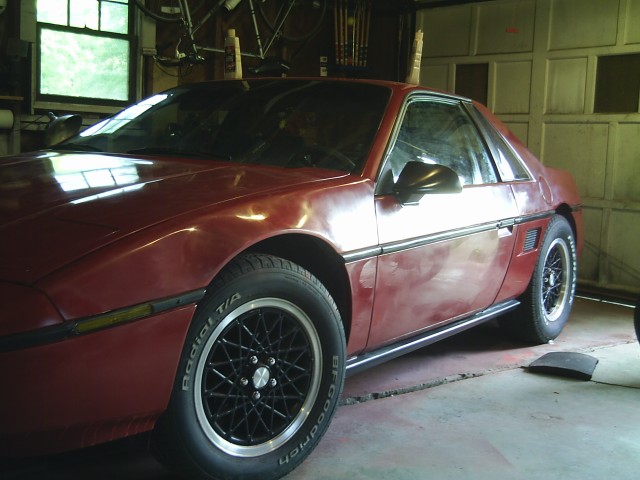
Cleaned the lace GT wheels.
Touched up what little chipped black paint areas there were on the wheels.
Removed the wheels & cleaned the tuner lug nuts.

Wire brushed the rusty rear Grand Am brake calipers and painted the outside (visible when wheel is in place) half of the caliper silver.

The stock front calipers are already silver.
IP: Logged
rotten
Member
Posts: 170
From: Clinton, MO, USA
Registered: Jun 2006


Feedback score: (1)
Leave feedback

Rate this member

Report this Post07-07-2006 06:10 PM Click Here to See the Profile for rottenSend a Private Message to rottenEdit/Delete MessageReply w/QuoteDirect Link to This Post
 
quote
Originally posted by 30+mpg:

Getting ready for a car show next weekend!


Which car show???
IP: Logged
30+mpg
Member
Posts: 4049
From: Russellville, AR
Registered: Feb 2002


Feedback score: (2)
Leave feedback


Total ratings: 97
Rate this member

Report this Post07-07-2006 08:06 PM Click Here to See the Profile for 30+mpgSend a Private Message to 30+mpgEdit/Delete MessageReply w/QuoteDirect Link to This Post
Erie, Ks east side of Hwy 59, about 15 miles north of Parsons, or about 65 miles from Nevada, Mo.

Soldiers & Sailor reunion Sat July 15. Parade on Main St. starts @ 10:30 a.m.

Car show 3 blocks east of Main after the parade, usually 40-60 cars. On the grass & in the shade. Entry fee was $12 in the past. Don't know if it's been raised.

[This message has been edited by 30+mpg (edited 07-07-2006).]

IP: Logged
30+mpg
Member
Posts: 4049
From: Russellville, AR
Registered: Feb 2002


Feedback score: (2)
Leave feedback


Total ratings: 97
Rate this member

Report this Post07-12-2006 09:49 PM Click Here to See the Profile for 30+mpgSend a Private Message to 30+mpgEdit/Delete MessageReply w/QuoteDirect Link to This Post
Left horn paddle is not operating prorperly and will require attention.
IP: Logged
30+mpg
Member
Posts: 4049
From: Russellville, AR
Registered: Feb 2002


Feedback score: (2)
Leave feedback


Total ratings: 97
Rate this member

Report this Post07-13-2006 01:38 PM Click Here to See the Profile for 30+mpgSend a Private Message to 30+mpgEdit/Delete MessageReply w/QuoteDirect Link to This Post
Used a putty knife to pop horn pad off. Unscrewed 2 Phillips screws holding left paddle switch assembly on.

Sanded brass area that the screw head seats on and the underside of the screw head.

Used 2 narrow strips of duct tape on the underside of the plastic bump that presses on the brass "switch" to make the bump deeper. This decreases how far the paddle must be pressed to beep the horn.

Reassembled.

Paddle switch works great!
IP: Logged
30+mpg
Member
Posts: 4049
From: Russellville, AR
Registered: Feb 2002


Feedback score: (2)
Leave feedback


Total ratings: 97
Rate this member

Report this Post07-25-2006 11:58 AM Click Here to See the Profile for 30+mpgSend a Private Message to 30+mpgEdit/Delete MessageReply w/QuoteDirect Link to This Post
Car has developed a minor squeak from the rear when turning at low speeds. It is an intermittent rotating squeak. Sounds like the warning scraper on one of the rear brake pads. Need to check it out.
IP: Logged
Previous Page | Next Page

This topic is 10 pages long:  1   2   3   4   5   6   7   8   9   10 
next newest topic | next oldest topic

All times are ET (US)

Post New Topic  Post A Reply
Hop to:

Contact Us | Back To Main Page

Advertizing on PFF | Fiero Parts Vendors
PFF Merchandise | Fiero Gallery | Ogre's Cave
Real-Time Chat | Fiero Related Auctions on eBay


Copyright (c) 1999, C. Pennock