Pennock's Fiero Forum
  General Fiero Chat
  Transfer screws. Bought 'em, love 'em.

Post New Topic  Post A Reply
Email This Page to Someone! | Printable Version


next newest topic | next oldest topic
Transfer screws. Bought 'em, love 'em. by sspeedstreet
Started on: 09-02-2016 01:07 PM
Replies: 5 (386 views)
Last post by: northeastfiero on 09-05-2016 12:05 PM
sspeedstreet
Member
Posts: 2306
From: Santa Maria, CA
Registered: Dec 2002


Feedback score:    (18)
Leave feedback


Total ratings: 53
Rate this member

Report this Post09-02-2016 01:07 PM Click Here to See the Profile for sspeedstreetSend a Private Message to sspeedstreetEdit/Delete MessageReply w/QuoteDirect Link to This Post


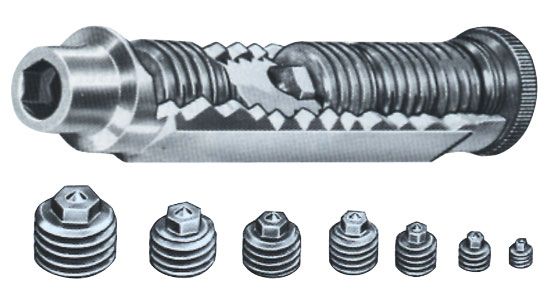
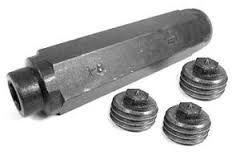
I bought a set with M6 X 1, M8 X 1.25, M10 X 1.5 and M12 X 1.75 off eBay for $32.00 with shipping. The M10s made fabbing up my 6-speed mounts a breeze. Wish I'd found them a long time ago.

Yes, I know you can make your own. For this price, life's too short.

[This message has been edited by sspeedstreet (edited 09-02-2016).]

IP: Logged
PFF
System Bot
Patrick
Member
Posts: 36401
From: Vancouver, British Columbia, Canada
Registered: Apr 99


Feedback score: (1)
Leave feedback


Total ratings: 458
Rate this member

Report this Post09-02-2016 03:46 PM Click Here to See the Profile for PatrickSend a Private Message to PatrickEdit/Delete MessageReply w/QuoteDirect Link to This Post

Maybe I've simply forgotten ... but I had to look up what "transfer screws" are. I (re)learned something today!

 
quote
From Here

Transferring hole locations is one of those finicky operations that a budding machinist has to learn. Most of us start out clumsily measuring things with digital calipers and then wondering why they're off by quite a lot. It's hard to measure holes precisely!

Pretty soon we discover transfer punches, which are really cool. Eventually, we have a blind hole and can't use a transfer punch. The answer there is a transfer screw. It has threads on one end and a point on the other. Screw it into the blind hole and voila: you can transfer! I was so pleased when I discovered these that I promptly ordered all the small imperial sizes I like to use. These things are not cheap, but I find I use them pretty often.


IP: Logged
fieroguru
Member
Posts: 12128
From: Champaign, IL
Registered: Aug 2003


Feedback score:    (45)
Leave feedback


Total ratings: 258
Rate this member

Report this Post09-02-2016 08:19 PM Click Here to See the Profile for fieroguruSend a Private Message to fieroguruEdit/Delete MessageReply w/QuoteDirect Link to This Post
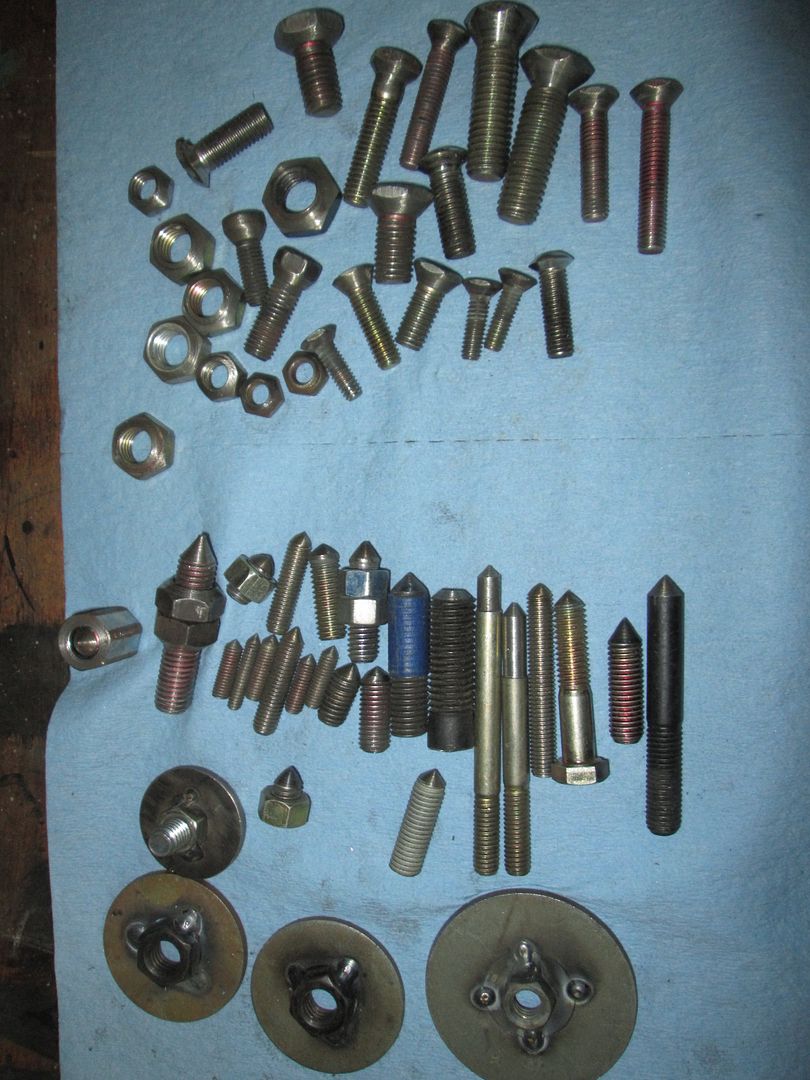
I use them all the time and have a collection that have been made over the years. As well as tapered nuts and bolt heads to center washers around holes for nice rounded corners on the brackets.

IP: Logged
sspeedstreet
Member
Posts: 2306
From: Santa Maria, CA
Registered: Dec 2002


Feedback score:    (18)
Leave feedback


Total ratings: 53
Rate this member

Report this Post09-02-2016 08:53 PM Click Here to See the Profile for sspeedstreetSend a Private Message to sspeedstreetEdit/Delete MessageReply w/QuoteDirect Link to This Post
Nice collection! I can't tell you how many brackets I've made and re-made trying to get things lined up. I've made a few tools like those over the years, but due to manufacturing tolerances they always wiggled in the holes. These seem to be a bit over-sized; they fit precisely in the threads.

[This message has been edited by sspeedstreet (edited 09-02-2016).]

IP: Logged
fieroguru
Member
Posts: 12128
From: Champaign, IL
Registered: Aug 2003


Feedback score:    (45)
Leave feedback


Total ratings: 258
Rate this member

Report this Post09-02-2016 10:12 PM Click Here to See the Profile for fieroguruSend a Private Message to fieroguruEdit/Delete MessageReply w/QuoteDirect Link to This Post
The longer the threads, the better they fit.

Also, it helps to have a good set of drill bits in 1/64" increments so you can drill tight holes. Like for a 10mm bolt, I use a 13/32 bit (.406" vs 10mm = .394")
Then the process is use the transfer punch to mark a single hole, drill it with the tightest bit you have. Then move the transfer punch to the next hole, install a bolt in the 1st hole (use countersunk head if hole isn't tight) and mark the 2nd. Drill, move the transfer punch, install 2 bolts... and repeat until all holes are drilled and fit tightly. Once the holes are located, then refine/trim the outer shape.

Another trick (or if you screw up the first one) is to drill the hole oversize in a 16ga template (or the original bracket), use tight fitting washers (or countersunk/tapered bolts) around the mounting bolts, tack weld them to the template... now you have the precise hole location. Then take the template and space/clamp it about 1/4" above the final bracket material and drill through it into the final material with a drill press. I make everything in 16ga templates to start (easy to mark, drill, and cut) then once I am happy with the fit/shape, transfer everything to 1/8" or 3/16" material for the bracket.

IP: Logged
northeastfiero
Member
Posts: 511
From: Norwich / Uk
Registered: Mar 2005


Feedback score: N/A
Leave feedback

Rate this member

Report this Post09-05-2016 12:05 PM Click Here to See the Profile for northeastfieroSend a Private Message to northeastfieroEdit/Delete MessageReply w/QuoteDirect Link to This Post
I could have done with theese.

[This message has been edited by northeastfiero (edited 09-05-2016).]

IP: Logged

next newest topic | next oldest topic

All times are ET (US)

Post New Topic  Post A Reply
Hop to:

Contact Us | Back To Main Page

Advertizing on PFF | Fiero Parts Vendors
PFF Merchandise | Fiero Gallery | Ogre's Cave
Real-Time Chat | Fiero Related Auctions on eBay


Copyright (c) 1999, C. Pennock