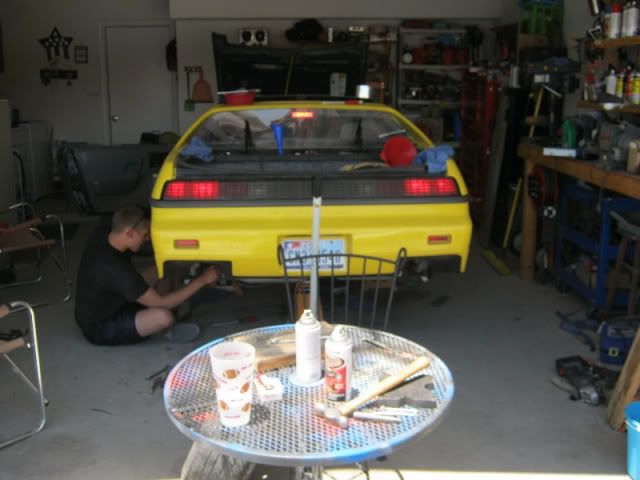
I have been posting some of the progress for this project in the "El Paso Fiero Fest" thread but Jordan would like to have his own build thread as he has extensive plans for this car. Some of you know this car as "Ol Yeller" or "The Short Bus". It has gone through many transformations over the last 3 years - most of which has been documented here on PFF. This will be the continuation of it's transformation under it's newest owner. We will start with the 3800 SC swap and go from there.
When Jordan bought the Bus, he immediately expressed his interest in swapping in a 3800SC. At first I did not think he was serious but I soon found out how serious he was.
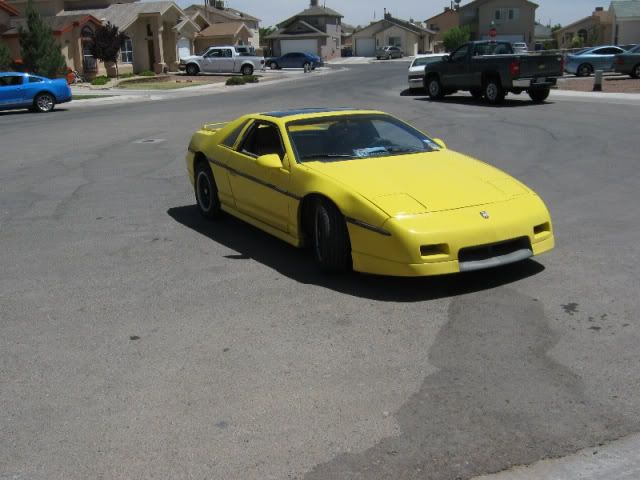
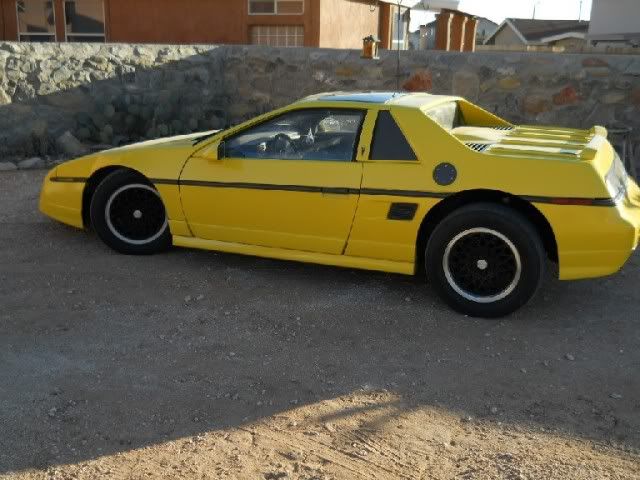
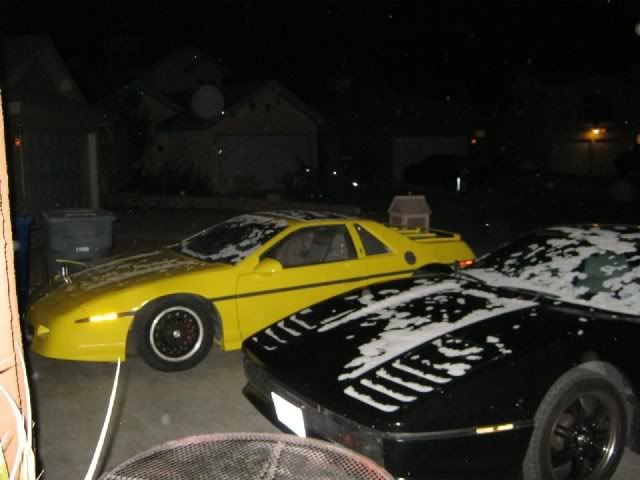
The Bus pre sale to Jordan:
The night he came to look at it. Anyone that would come out on a night like this in El Paso had to be serious!
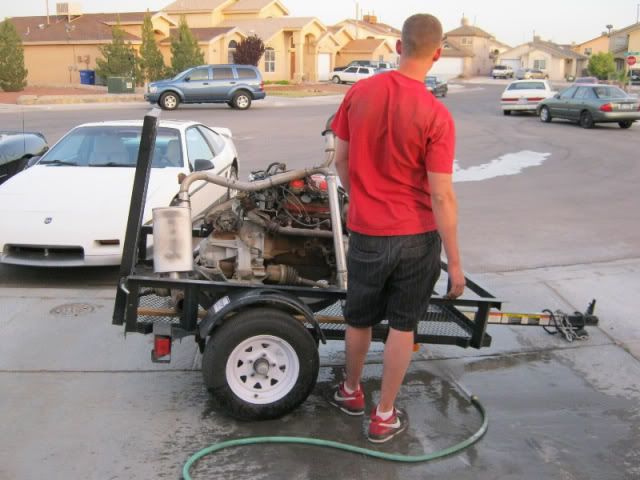
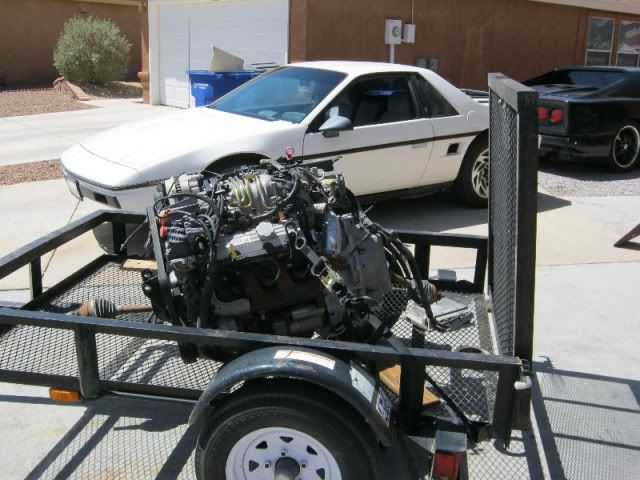
3 weeks ago, he talked Jeff into going to the junk yard with him to look for a motor. 2 hours later they were back and his wallet was a little lighter. He found a 1998 Series II 3800SC out of a Bonneville. The yard pulled it from the car and we went to pick it up.
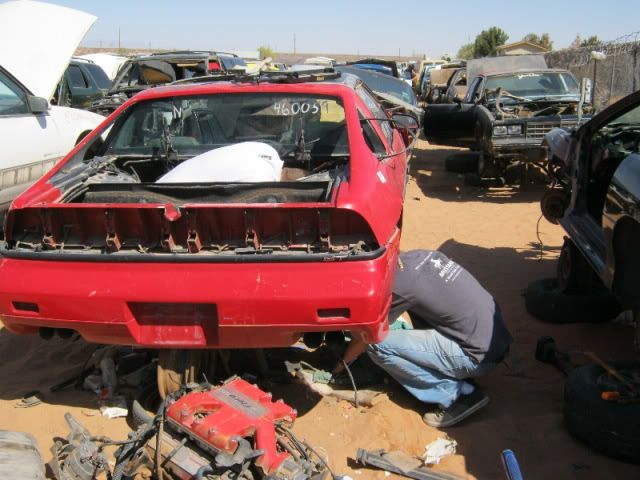
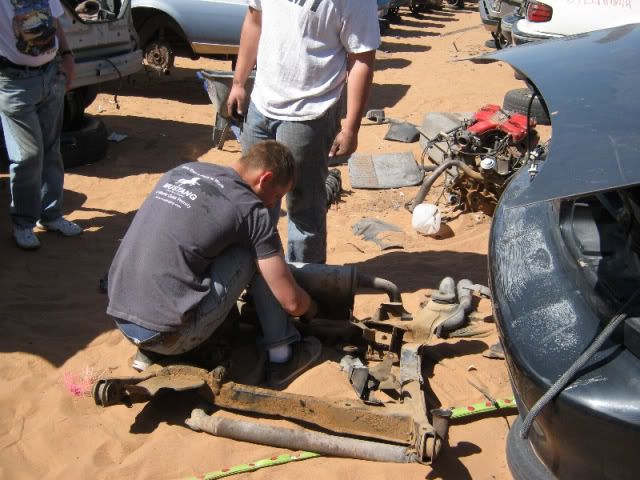
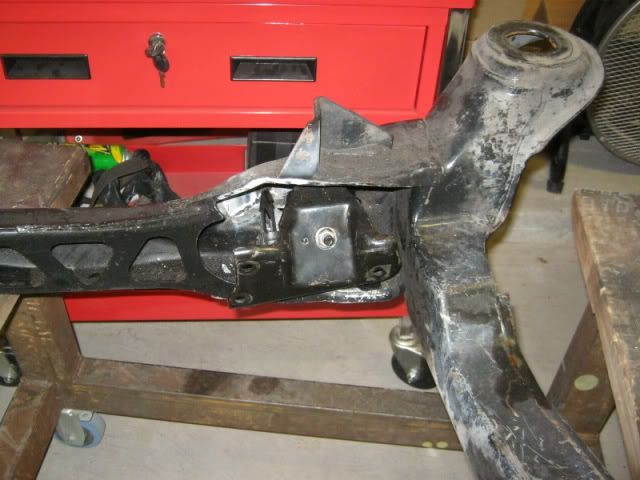
Our next order of business was to find a suitable cradle - off to the Mega Pull where Jordan and Chris yanked a cradle from a 86 GT T Top.
While Jordan and Chris were getting the cradle, Jeff and I scoured the yard for swap parts. Our main goal was to get the proper trans mount brackets. Mid 90's GM cars along with Trans vans and Olds Silhouette vans with 3800's and 4t60's are a good source for the trans brackets. As we roamed around the yard, we found several "donor" cars and vans - we just had to pick one and get after it. We were standing between a couple vans and I noticed a cradle laying on the ground - the trans and motor was missing but much to my joy, both trans brackets were laying on the ground next to it! SCORE! I simply picked them up and headed back to the Fiero where the boys were working. These brackets allow us to use stock Fiero trans mounts bolted to these brackets - bolted to the trans. Once a little "slotting" is done on the cradle, the motor will set in the spot we want and allow us to build the front motor mounts.
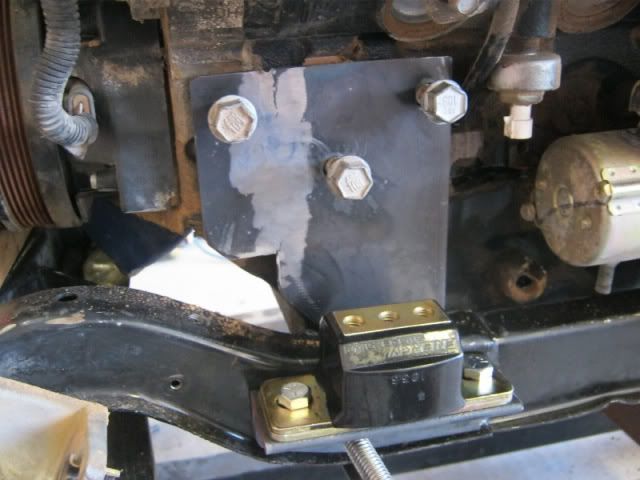
Firewall side trans mount bracket with stock Fiero trans mount:
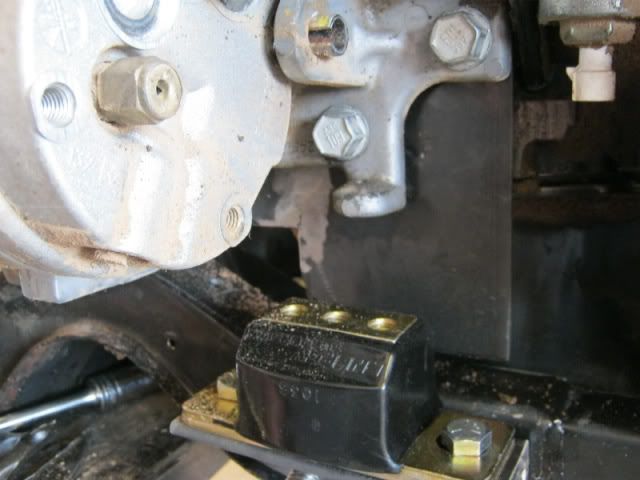
Trunk side trans mount bracket with stock Fiero trans mount:
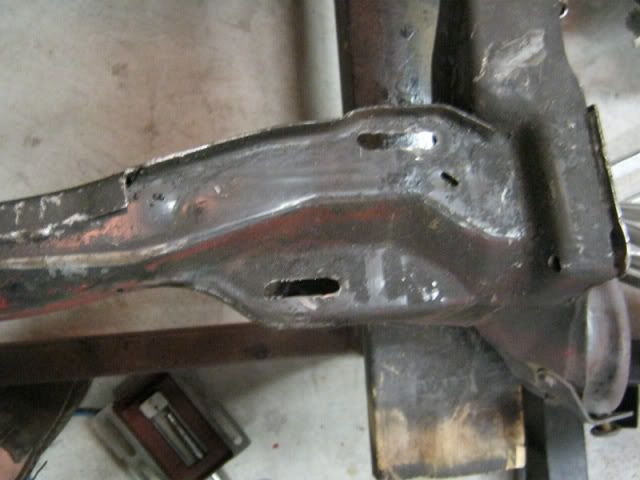
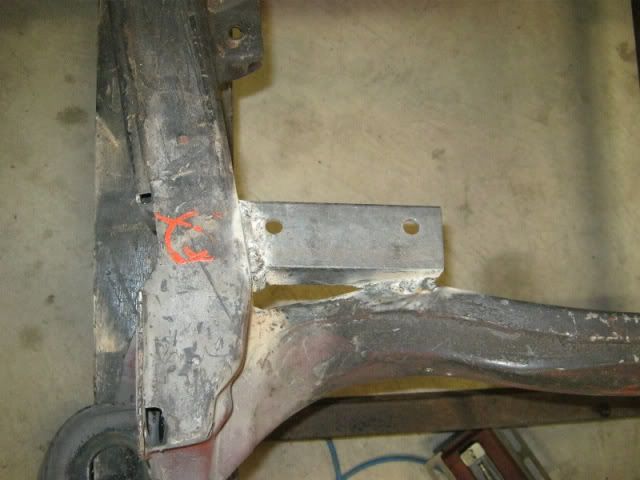
For firewall side trans mount on the cradle, there are 4 slotted holes. We will use the "inner" set of holes in this swap. For the trunk side, I simply extended the slots about an inch (the same distance from the outer holes to the inner holes on the firewall side):
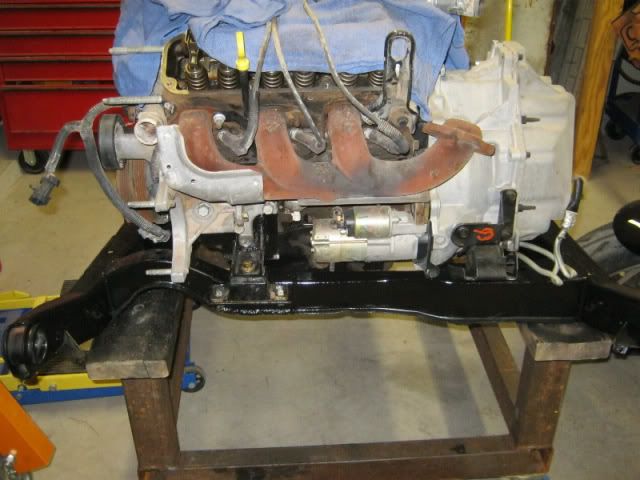
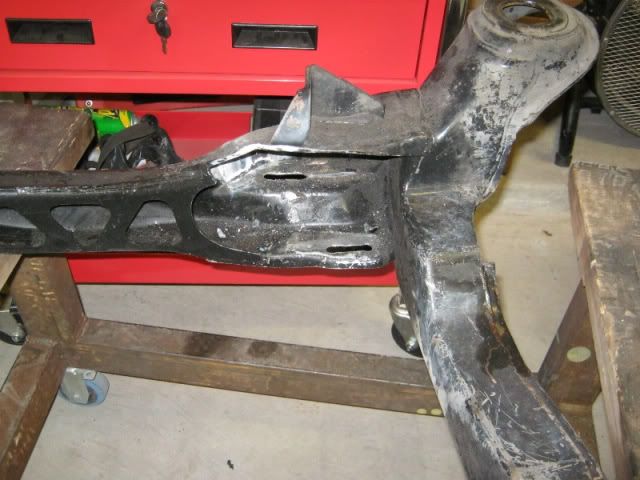
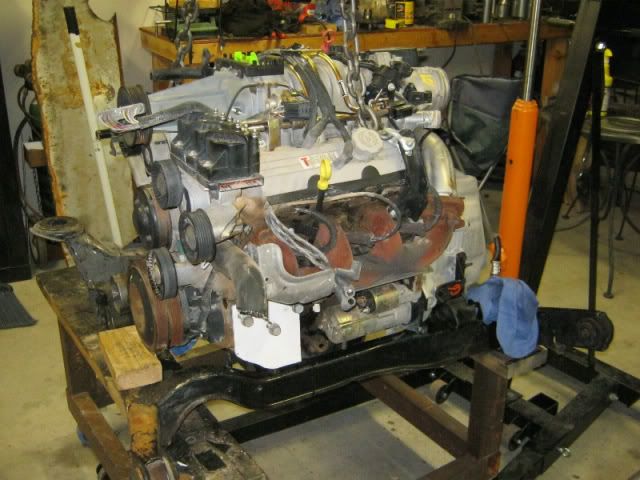
Once the holes were slotted and the mounts bolted up, we set the motor on the cradle then work getting the motor square and level on the cradle so we can start fabbing the motor mounts:
More coming!
[This message has been edited by katatak (edited 04-10-2011).]
IP: Logged
01:28 AM
PFF
System Bot
katatak Member
Posts: 7136 From: Omaha, NE USA Registered: Apr 2008
First let me say that there may be an easier / better way to do this but this works for me! The front motor mounts are pretty straight forward. Once the motor is sitting where I want it, it's a matter of fabbing the metal parts. I have a template that I made for the last 3800 swap we did so the firewall side of the motor mount was pretty easy. We used 2 Energy Suspension Poly GM trans mounts, some 3/16" plate, about 10" of 2X2X3/16 Angle and 6" of 2X1X3/16" "C" channel. Sorry - I have no set of drawings or specific measurements - these are built by hand/eyeballing. I'm not sure that a set of drawings or specific measurements would work on every swap anyway. The last 3800 swap we did was on an 88 Cradle and this is an 86 - there are some differences and actually the 86 cradle is easier to mount to than the 88!
For the firewall side, I fab a plate that fits behind the AC bracket using the AC mount bolts through the AC bracket and the plate. There is a forward mount bolt on the front of the AC bracket that I elongate so that the bolt can be used. This places the AC Compressor out from the motor another 3/16" but it makes no difference as we are using custom length belts. I also cut a piece of 2X2 angle a little longer than the Energy Suspension Poly mount (5.5"), trim the angle to fit the cradle and then dirll the mount holes. I bolt the poly mount to the angle and then hold it on the carriage with a "C" clamp.
Then I reinstall the AC bracket and the compressor so I can check for clearance, cut the "C" channel, measure for the mount hole and drill the "C" channel. Then I bolt the "C" channel to the mount and tack the "C" channel to the plate, tack the Angle to the cradle then disassemble to weld it out.
I add a few "gussets" to the motor half of the mount to add some strength and then weld it up, reinstall the poly mount and bolt it all together tightly. After a little paint, this side is done:
Trunk side next!
IP: Logged
01:52 AM
katatak Member
Posts: 7136 From: Omaha, NE USA Registered: Apr 2008
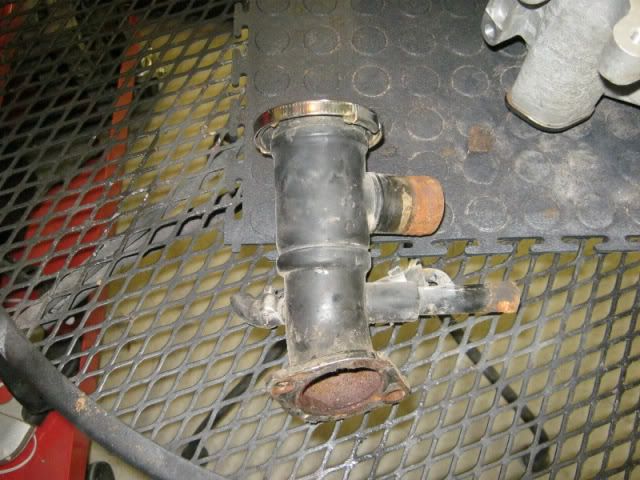
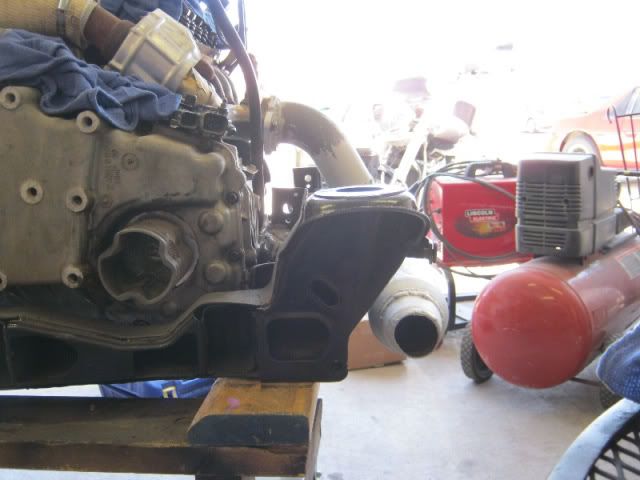
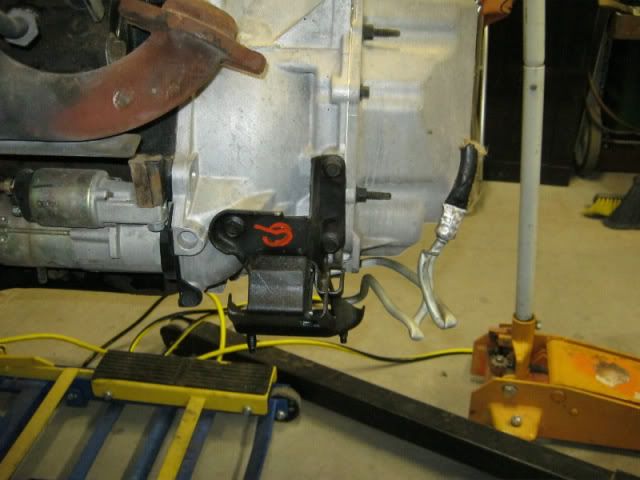
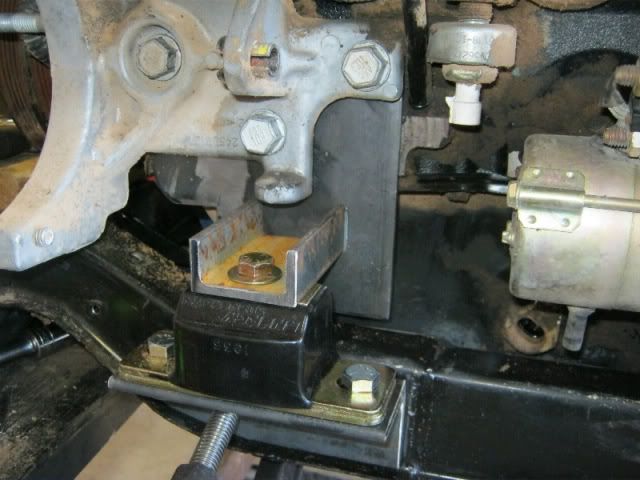
Next is the trunk side motor mount. Again, this works for me, there is no set way that I do it other than I try and use part of the origianal 3800 trans output bracket. This specific braket was actually the torque strut mount. I cut the ears off the bracket and then bolted it back to the trans. Next I cut a 5.5" piece of 2X2 angle, drilled the 2 poly mount holes, bolted the poly mount to the angle and "eyeballed" where I thought it should sit in relation to the trans bracket. Using a few clamps, I tacked the angle in place. With the lower mount in place, I used another 3" piece of the "C" channel and trimmed it to fit the angle of the 3800 trans bracket, drilled it for the mount and bolted it together. With it fit up, I tacked it in place then disassembled everything to weld it out.
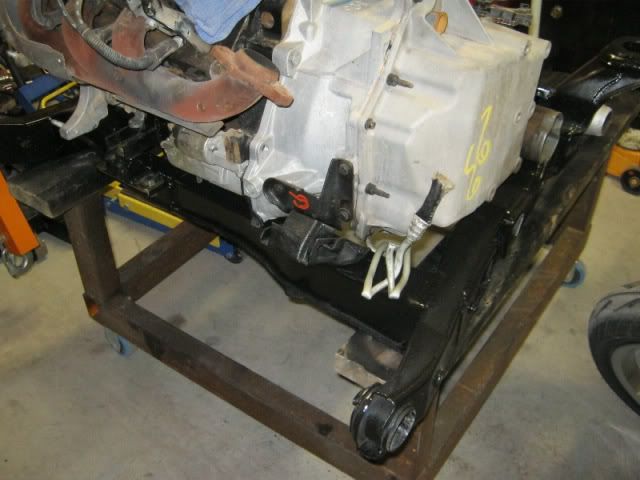
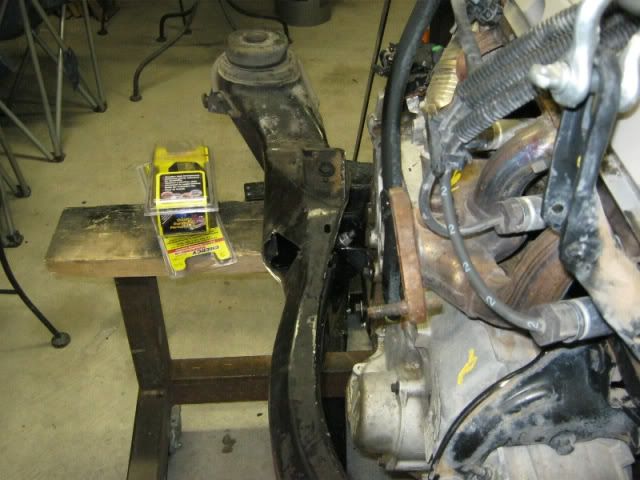
And a shot of the firewall side without the motor:
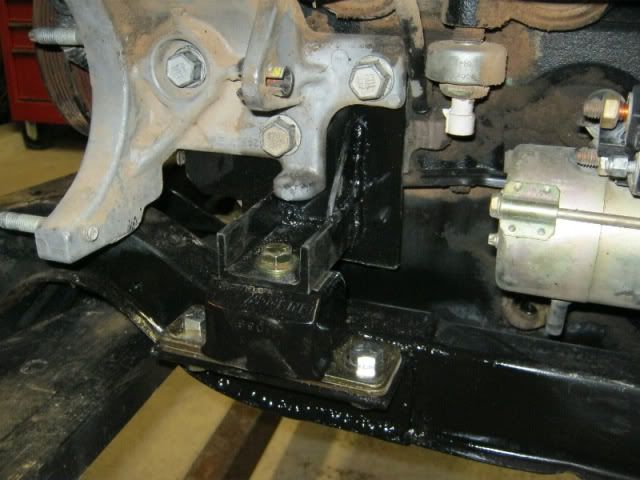
After some more welding, grinding and cleaning, we will give the cradle a good paint job then remount the motor.
More to come!
IP: Logged
02:04 AM
katatak Member
Posts: 7136 From: Omaha, NE USA Registered: Apr 2008
The next items we have to consider are wiring harness, ECM reprogram, deletes, power adders, exhaust and axles. I sent the harnesses off to Mike Gonzales and Sinister will do the ECM. I'd try the wiring myself but Jordan does not have that kind of time! Plus I'm electronically challenged. It's just easier and quicker to have Mike take care of the wiring. We are going to delete the EGR, BBV and EVAP. We have ordered a ZZP 3.4 modular pulley setup along with using the 99 GP GTP short idler bracket to allow for maximum hinge clearance. The exhaust is already done. I built an exhaust for the last swap for Jeff that was too loud for his liking so we removed it and built another one using stock V6 Fiero pieces. This one is 3" mandrel bent to a 3" "Y" splitting into 2 - 3" Summit Glass Packs. It was built to fit the 88 cradle leaving the trunk intact. I am pretty sure it will fit the 86 cradle but we can adjust it if needed. I pretty much have the axles figured too. This one is mounted pretty closely to the last one - only difference is last was an 88 - this one is an 86. I will use a stock Driver side Auto Fiero axle on the driver's side and build a custom axle for the passenger using the 97/98/99 GP GTP/Regal passenger side inner tripot, 97/98/99 GP GTP/Regal driver side axle shaft and the Manual Fiero outer CV. I know it sounds complicated but it's really simple and I know it works.
Some say you can use a driver side manual Fiero axle and the GP/Regal passenger side tripot? It may work for me as well but I do not have a driver side manual Fiero axle to work with. Other pieces and parts that can be used are the 04 Cavi axles - at least the outer CV's as they are the same as the manual Fiero outers.
Yesterday, I went to the pick and pull to get some seat belt bolts for my V8 Coupe and while I was there, I decided to look around for some axle parts. We already have the GP/Regal passenger side tripot, an 04 Cavi axle (for the outer CV) and just needed the GP/Regal driver side axle shaft. Now this is where I get into "experimental" mode. I have a bad habit of wanting to try different pieces and parts just because! As I was wondering, I found a 99 Buick Century. The driver side axle was laying in the sand complete except for the tripot. I looked it over and thought that it was similar to the GP/Regal driver side axle shaft. So I grabbed it! Once home, I started taking some measurements and comparing info that I had gathered during the last swap. Turns out that the Buick Century DS axle shaft is the same as the GP/Regal! So now I have an axle shaft and all the pieces and parts I need to make the passenger side axle. You would think that I would stop there.
After looking at it for a while, I believe that the Cavi axle shaft I have is the same as well. I thought I could just swap the tripots - the Cavi one for the GP/Regal and be done but the Cavi uses the larger "square" shouldered rollers in the tripot. But maybe I can swap the spider/rollers from the Buick Centruy axle to the Cavi axle then slip it inside the GP/Regal tripot. Confused yet? Regradless of which direction I go, I will test fit the axle prior to finishing the swap to make sure it does not bottom or pull out of the tripot. More on that later.
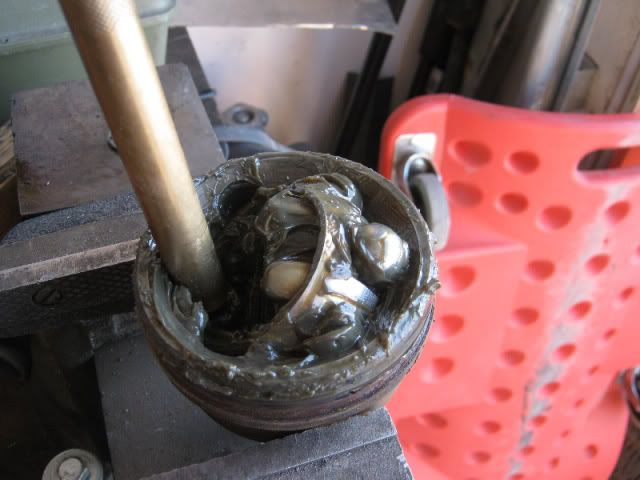
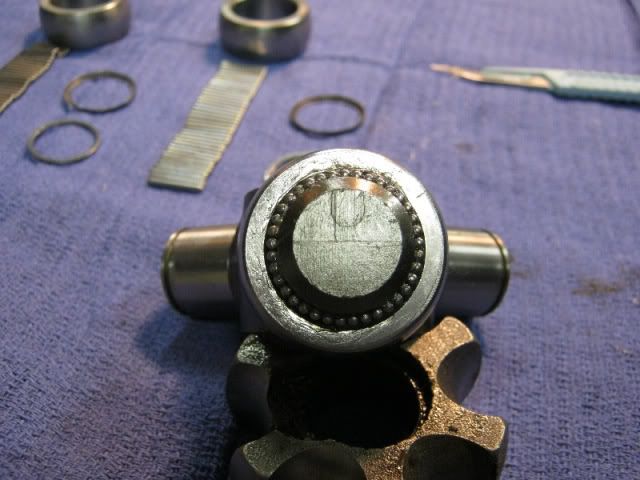
Now, I have these axle pieces and parts that are full of sand - especially the spider/rollers. This evening, I decided to take the spider/rollers apart to clean them. Again, I have to say that there may be another way - this works for me!
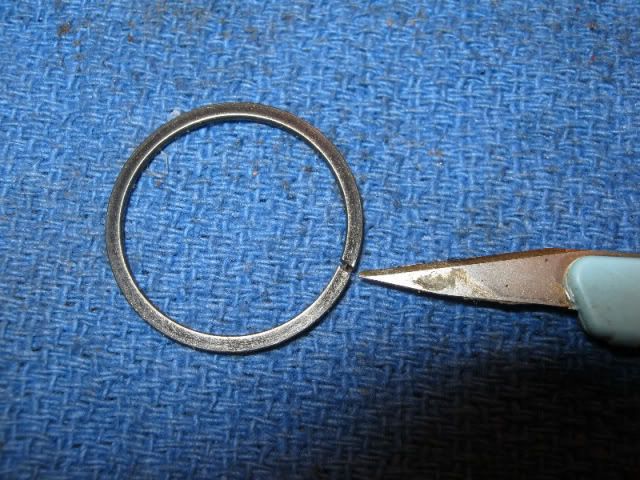
First you have to remove the small lock ring from the roller post. You will notice that the lock ring sits in a "cup" washer. The cup washer has 3 small "notches". You will need to line up one of the notches with the "split" in the lock ring. Also, the lock ring "split" is angled. The side that is easiest to pop out has the "point" of the angle cut to the outside of the ring. With the notch in the cup washer lined up with the cut in the lock ring, I take a razor blade and pry out and up on the end of the lock ring until I can get a small screw driver under it then work my way around it prying it up as I go. You may have to use a small awl to hold the lock ring from spinning. It can get like a game of twister holding the awl, razor blade, cup washer, screw driver and the spider to get the lock ring off!
The cup washer with notches:
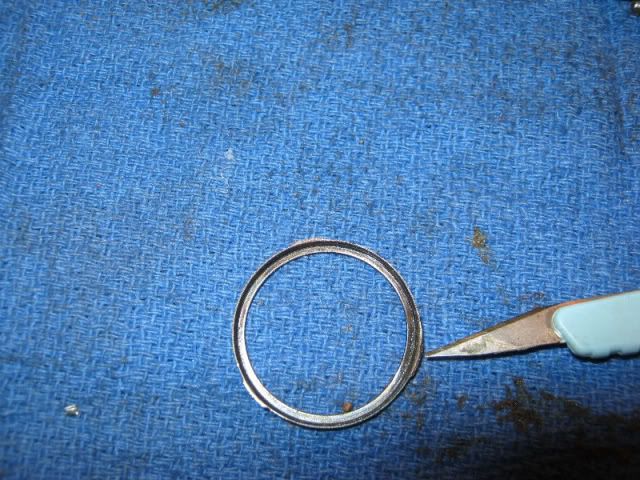
The lock ring:
Razor blade prying out and up:
Prying it up with a small screw driver:
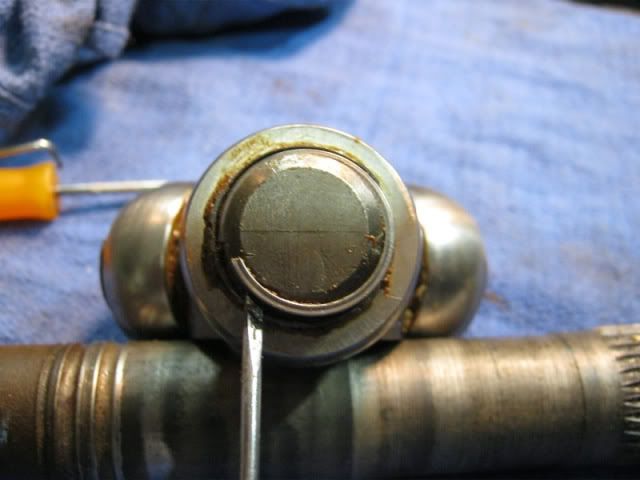
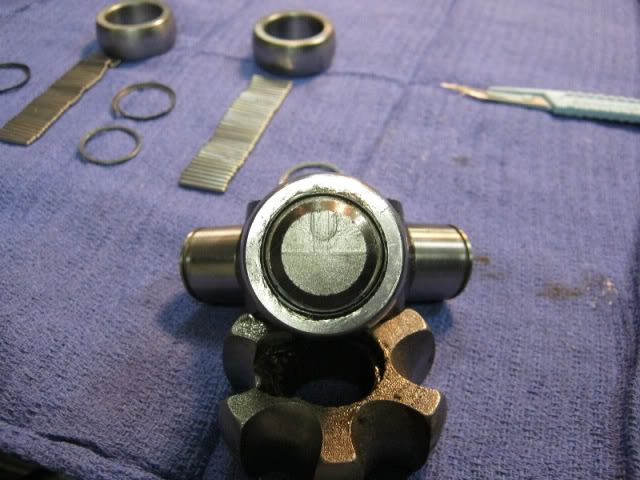
With the lock ring removed:
And the cup washer removed:
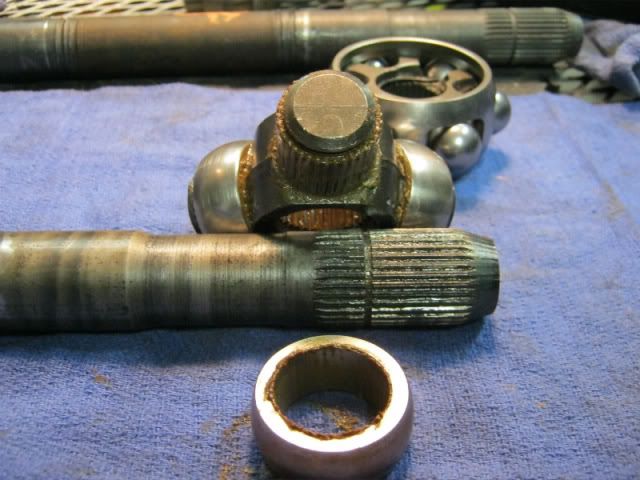
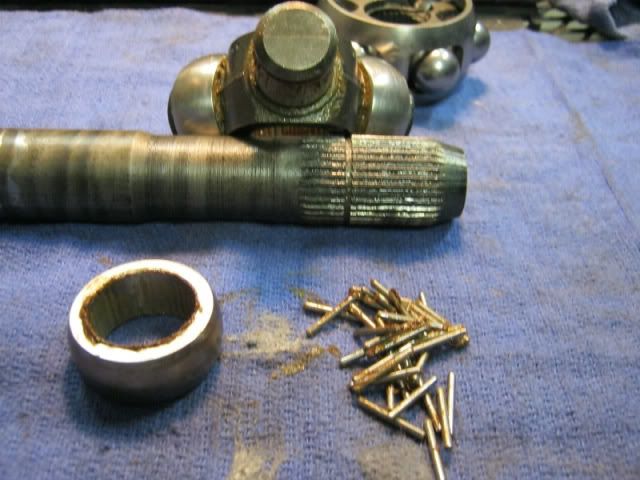
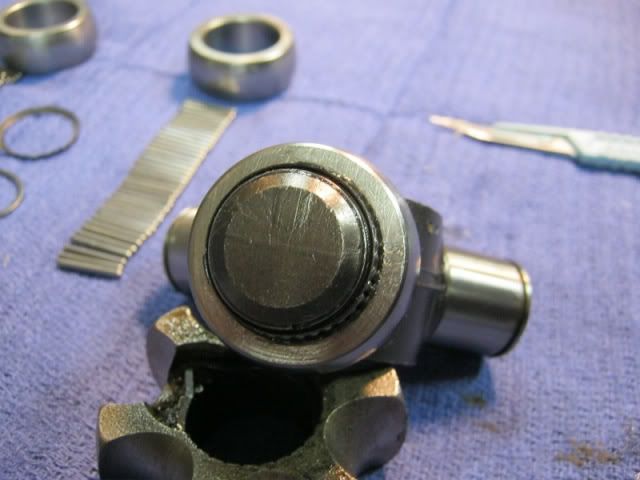
Roller removed - use care and caution here - the little needle bearings like to run off and hide from you!
And the needle bearings removed. For this particular spider/roller assembly, there are 37 needle bearings per roller!
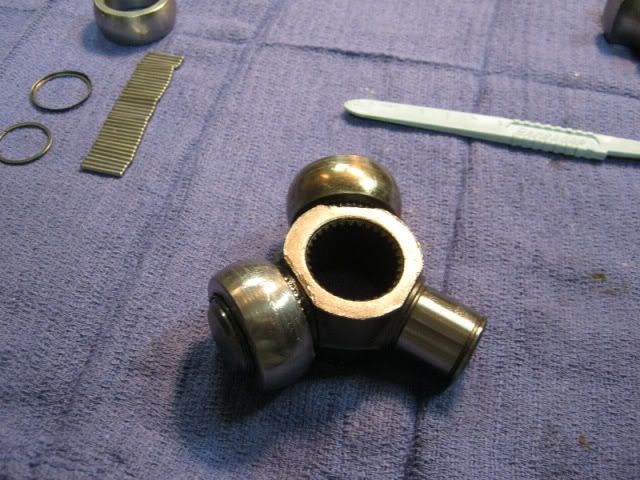
Once you have all three rollers apart, it's time for a cleaning - clean as if you were in an operating room.
Assmebly next!
IP: Logged
02:51 AM
katatak Member
Posts: 7136 From: Omaha, NE USA Registered: Apr 2008
Once the parts are clean, reassembly is easy - a little tedious but easy. I take a little axle grease and coat the roller post and the inside of the roller. I suppose that I should use CV grease as I have read that it is not always compatible with other greases and oils? I have done quite a few of these CV axle rebuilds and never had an issue - just saying.
Once it's greased up, I slip the roller over the post and start putting the needle bearings in place. after about 5, I use the razor blade to "square and bunch" the needle bearings together. Add five more, adjust and so on. At the same time, I slowly spin the roller - this helps keep the needle bearings square as I add more. Make sure that you get all that came out back in! 37 for this setup. Once all the needles are in place, I install the cup washer and then the lock ring. The lock ring will slip on fairly easy but you have to make sure and get one end of the lock ring in it's groove before pushing the rest of the ring in place. The small screw driver works good to press the ring in place. Repeat - repeat and it's ready to go back on the axle shaft.
All clean and ready to go back together:
Needle bearings in place:
Cup washer in place:
Lock ring in place:
2 done:
Finished:
Everything needed except for the manual Fiero outer. You will need to swap the GP GTP/Regal CV guts (Cage/Spider/Balls) into the manual Fiero outer as the Fiero axle shaft is a smaller diameter than the GP/Regal axle shaft. I will cover this swap process later.
Inside the GP/Regal tripot:
Nearly complete:
More later!
IP: Logged
03:08 AM
DMendez7 Member
Posts: 118 From: El Paso, Texas Registered: Apr 2010
And to think I wanted to buy this car! It's getting better treatment with Jordan than any I would have ever given it! Awesome work so far
Thanks for the reply D. You should come to one of our gatherings - just about every weekend we are doing something Fiero related. Would be great to meet another El Paso Fiero nut!
Pat
IP: Logged
12:48 PM
Frizlefrak Member
Posts: 2921 From: El Paso, Texas Registered: Aug 2003
I'm jealous, your alot further on your way then me. My sister lives near you guys, I was told by her I have to visit her in August. Maybe we could meet up, a cruise with 2 yellow chop tops ?
-Chris
IP: Logged
05:08 AM
PFF
System Bot
katatak Member
Posts: 7136 From: Omaha, NE USA Registered: Apr 2008
I'm jealous, your alot further on your way then me. My sister lives near you guys, I was told by her I have to visit her in August. Maybe we could meet up, a cruise with 2 yellow chop tops ?
-Chris
Let us know when you are in the area and we will make a plan for some Fiero fun!
IP: Logged
12:50 PM
Alex4mula Member
Posts: 7410 From: Canton, MI US Registered: Dec 1999
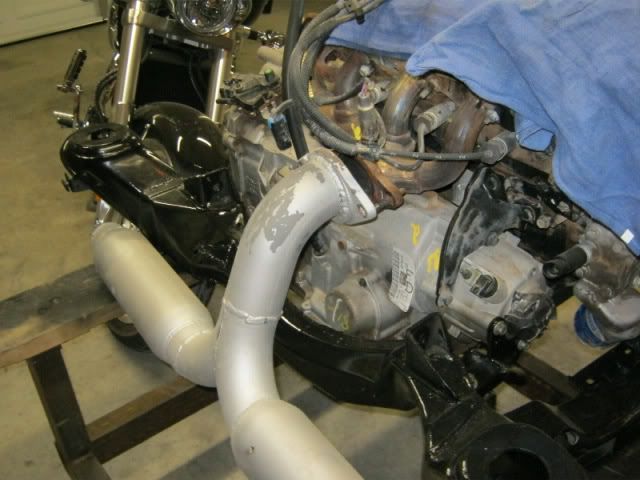
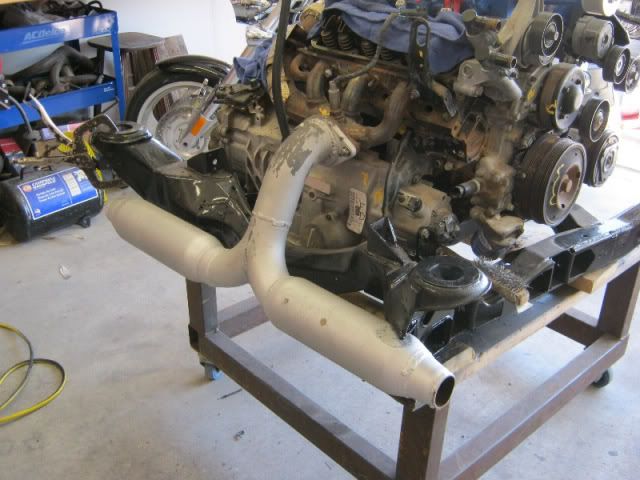
Not much accomplished today. Jeff got the stock pulley pressed off and the ZZP modular hub pressed back on. Jordan wants to paint it so we will have to wait till next weekend for that. Got the cradle painted and the motor mounted back on it. Did a quick "fit up" of the exhaust and it looks like I will have to "modify" a little bit for it to fit.
Cradle looking good!
This was the first exhaust I made fro Jeff's 3800 SC swap - it was too loud for him. This was built to fit an 88 Cradle. I'll have to do a little mod work to get it to fit the 86 cradle:
The new ZZP modular hub:
And dug this out of the parts bin:
No progress will be made until next weekend due to the dirty four letter word known as "WORK".
Pat
[This message has been edited by katatak (edited 04-09-2011).]
IP: Logged
11:15 PM
Apr 17th, 2011
katatak Member
Posts: 7136 From: Omaha, NE USA Registered: Apr 2008
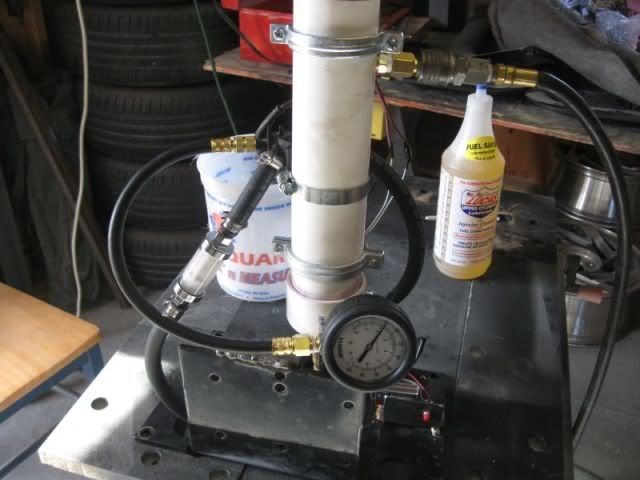
Got some more progress done on Jordan's swap today. Jordan came by to do some cleaning and painting and I worked on the injectors. I ordered a "rebuild" kit from Mr. Injector out of Idaho - Great business and great people to deal with. After soaking the injectors in Lucas Injector cleaner for the last 2 weeks, I removed the old filters and pintle caps today, finished cleaning the injectors, installed the new filters and ran each one through my home made injector cleaner. All seem to flow the same and have a nice even spary pattern. After installing new orings, I installed the new pintle caps - these are a little bit of a PITA as they are hard as a rock. Mr. Injector suggests using a heat gun on low to heat the pintle caps then using a hard flat surface, press the injector into the cap. Works great if you follow the instructions.
My ultra hi tech injector cleaner!
The goodies:
Pulling out the old filters:
All done!
More later!
Pat
IP: Logged
09:42 PM
Apr 22nd, 2011
katatak Member
Posts: 7136 From: Omaha, NE USA Registered: Apr 2008
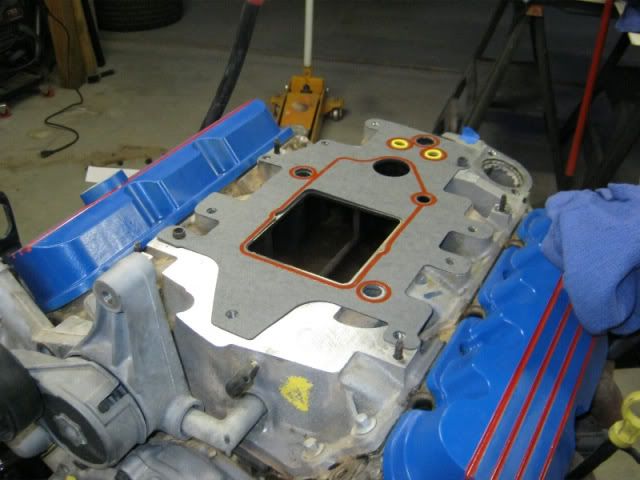
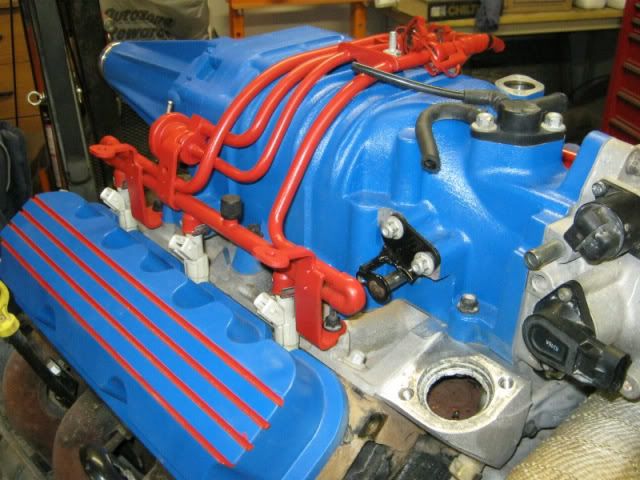
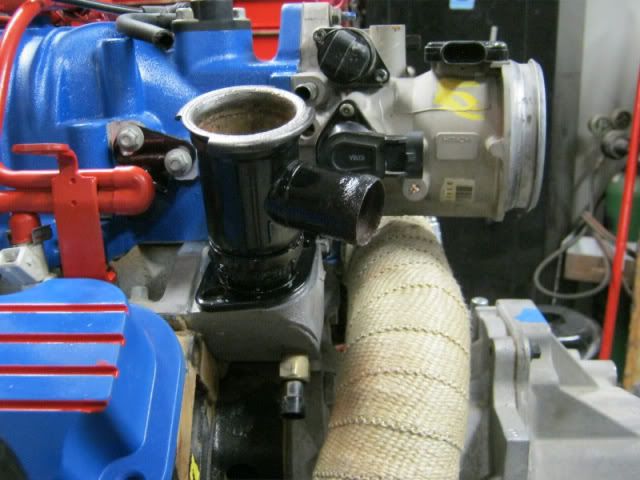
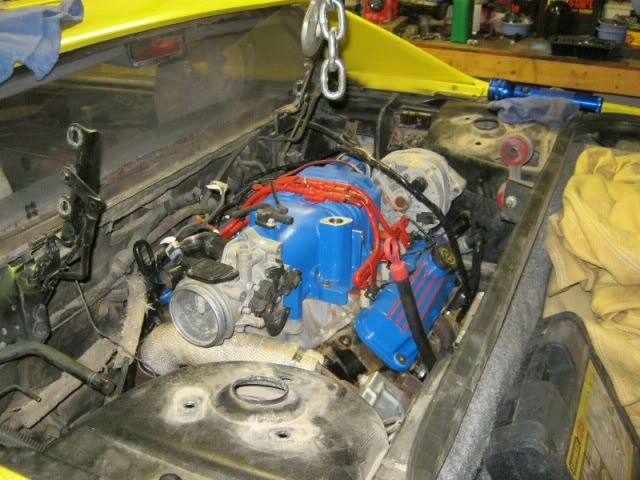
A few more details finsihed up today. Got the Blower back on and torqued down, Injectors and fuel rail reinstalled. Got the 2 EGR plugs fabbed and installed. Cut and clocked the T Stat housing. Fabbed the BBV hold down and isntalled it. The AC pump is back on. TB is installed with all the snesors. Wrapped and reinstalled the crossover. Made a plan for the new dog bone/torque strut. Ran into a little snag. Jordan picked up a valve cover with the oil fill hole because the original had the corner broke dut to the front end damage on the donor car. After he spent a lot of time painting, and masking the valve covers, we discovered that the one he picked up would not fit - it does not have the cut outs for the injectors - not sure what the cover is off of?
New blower gasket: Note the left valve cover - no place for the injectors?
Torqued down:
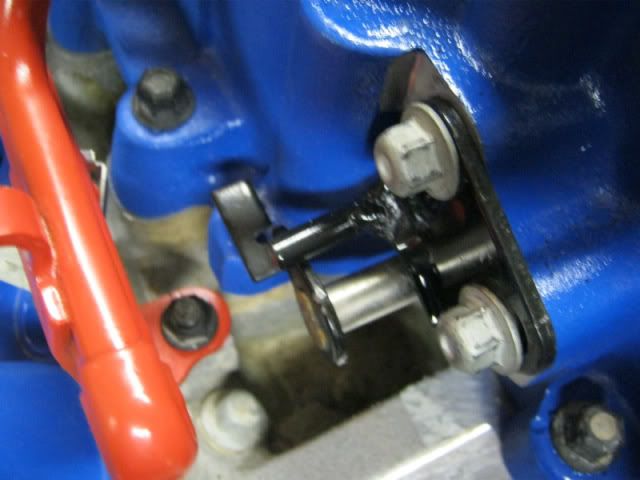
BBV bypassed - hold down bracket made from cutting the BBV mount off the valve and then flipped - then a short piece of round stock was welded to the bracket and bolted in place. The bracket has slotted holes so it has plenty of adjustment.
Injectors and fuel rail installed:
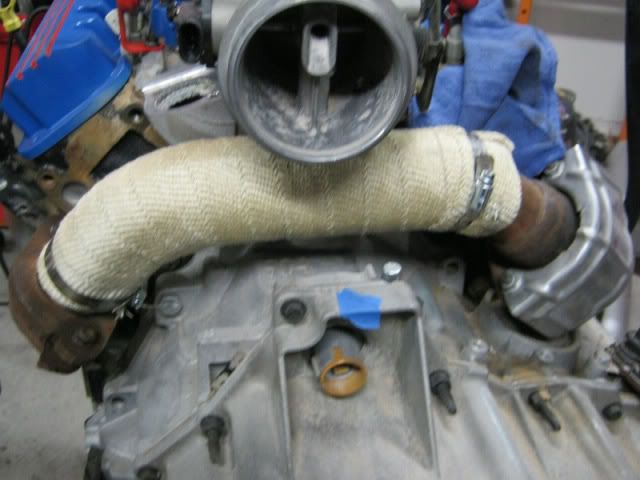
Crossover wrapped:
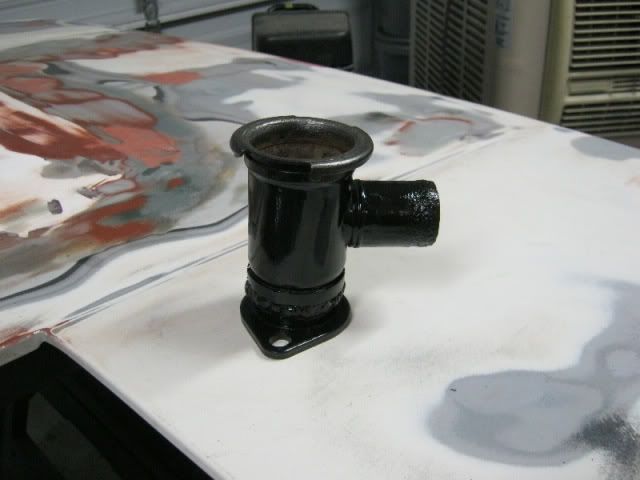
TStat housing cut and clocked:
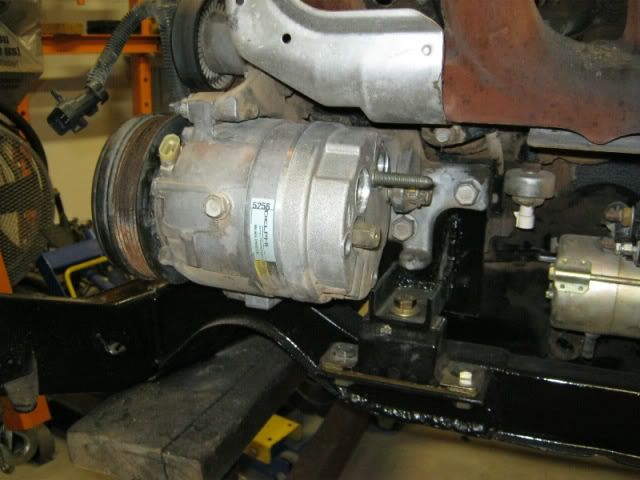
AC comp fits great - plenty of room for the new manifold and hoses:
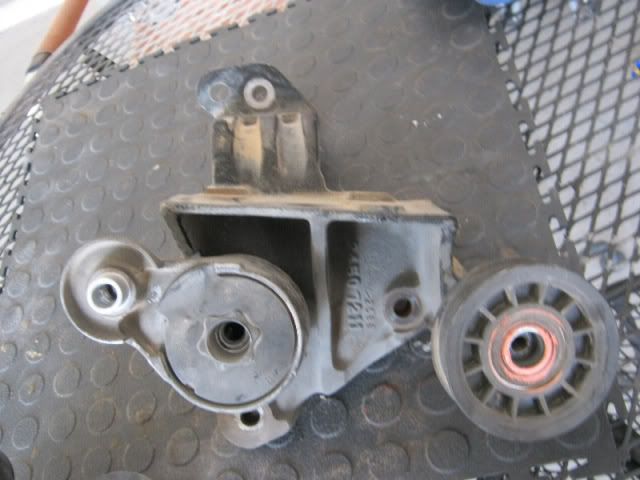
Also got a 98 Grand Prix blower idler bracket. This bracket brings the idler lower and slightly closer to the motor allowing for more room at the firewall / passenger side trunk hinge - no cutting on the Fiero required with this setup.
The "Dog Bone" mount portion of the bracket will be cut off:
Hard to see in this pic but the top is the 98 GP and the bottom is the 98 Bonny. 98 GP drops the idler to a lower and closer to the motor position. Easy way to determine you are getting the right bracket is that the GP/Regal braket is cast iron - very heavy and the Bonny is aluminum!
More later!
Pat
[This message has been edited by katatak (edited 04-22-2011).]
Spent the entire day finishing up odds and ends for Jordan's swap. I cut the dog bone bracket off the blower idler bracket, cleaned and painted it and mounted it in place. Went over all the mounts and made sure everything was tight and that we had the motor sitting where it should be. I cut the cradle and fitup the exhaust - once I had everything where I wanted it, I welded some reinforcement pieces back in the cradle - ground it all smooth and shot some paint on it then installed the exhaust. Jordan picked up the right valve cover - got it cleaned up and the first coat of paint on it. Got the TStat housing mounted. Blower pulley installed, all the idler and tensioner pulleys installed.
I have a "safety" tip to share. More of a "what not to do" kind of thing. Today while I was trimming the cradle to fit the exhaust, I was using my oxy/acet setup and when I was done cutting, I layed the torch head in the tray on the bottle cart. I have been in the habit of turning off the bottles everytime I put the torch down. This particular time, I did not turn off the bottles. I started grinding on the cradle and the next thing I know, my rtorch head is shooting flame right at the acet bottle, regulator and hose. I managed to get to it and shut it off before a catastrophy took place. I must have knocked the acet valve when I set the torch in the tray. Over a few minutes, it filled the tray with acet and when the sparks from the grinding hit it POOF! I'm very lucky that I did not burn my garage to the ground. So here's my tip for the day: When using a oxt'acet set, always turn off the bottles when you put the torch down - do not do anything else until the bottles are in the closed position.
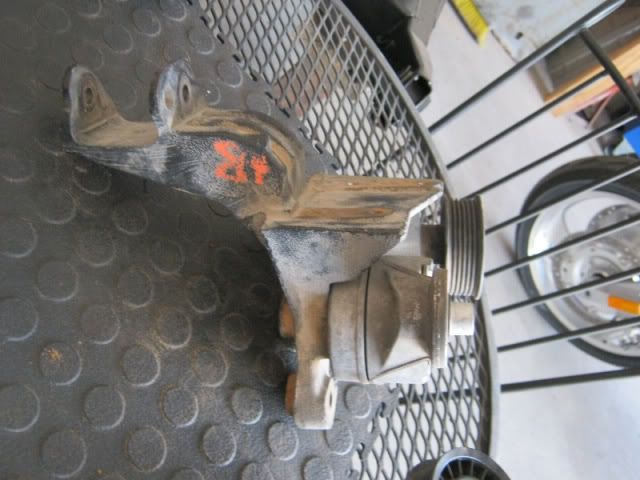
98 GP Blower Idler bracket with the dog bone bracket cut off:
Painted and mounted:
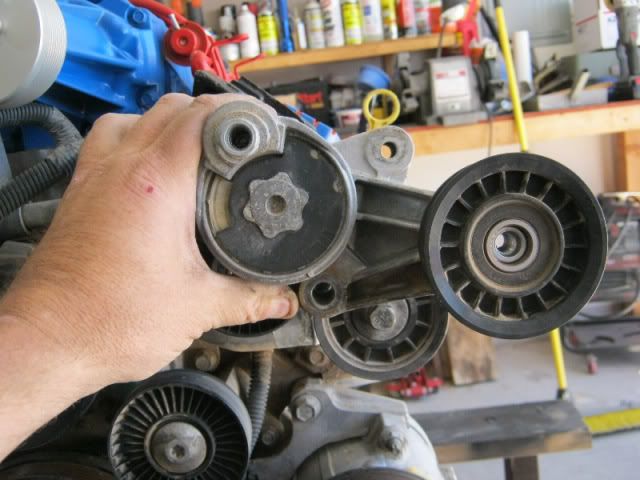
Here is a comparison between the stock Bonny blower idler and the 98 GP blower idler:
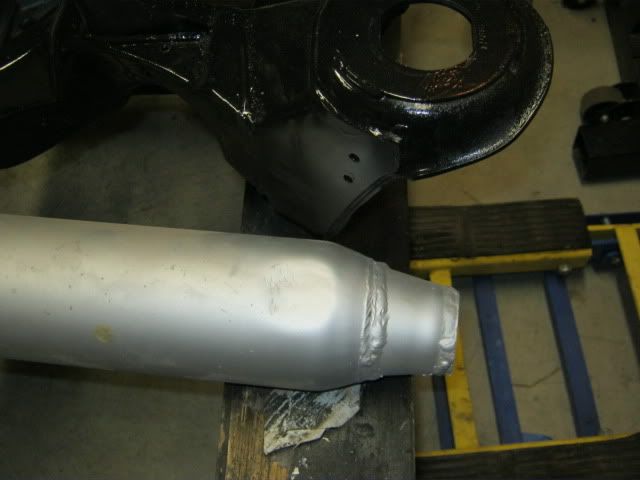
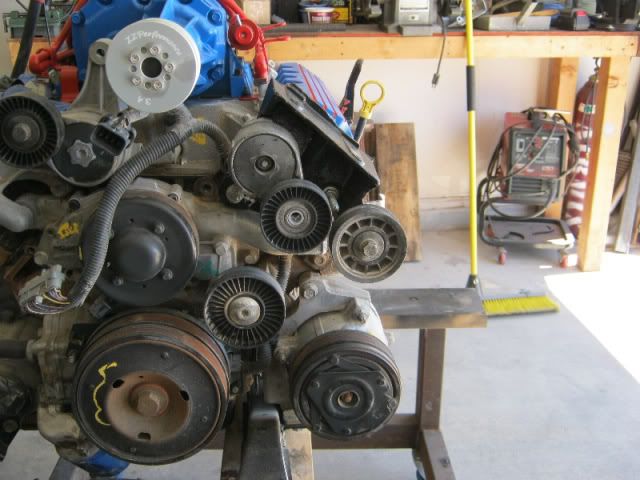
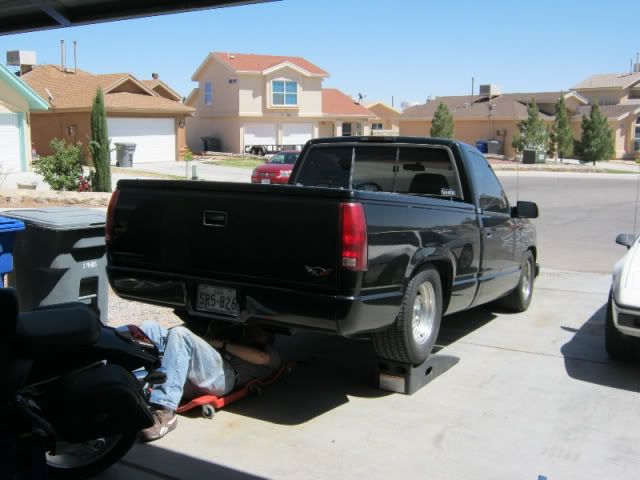
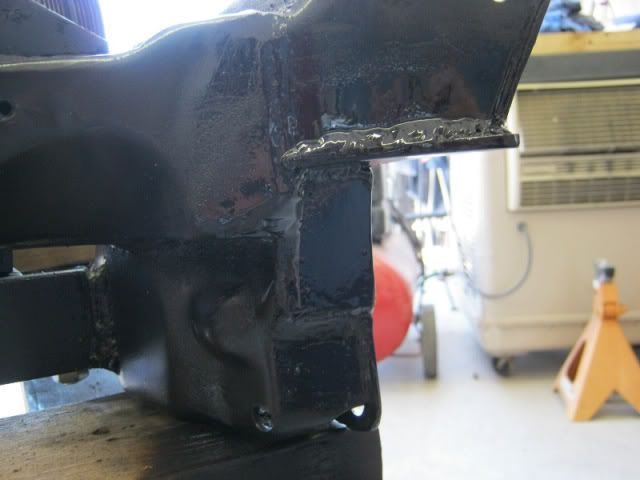
Jeff installed some new shocks on his Super Charged Chevy Truck:
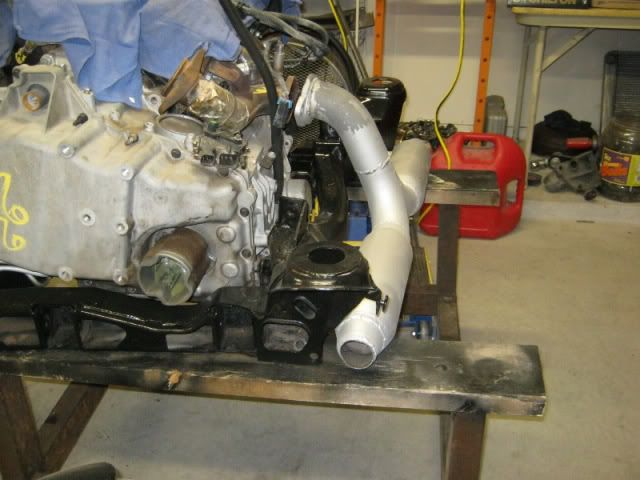
The notch I made in the cradle to clear the exhaust:
Exhaust fit up:
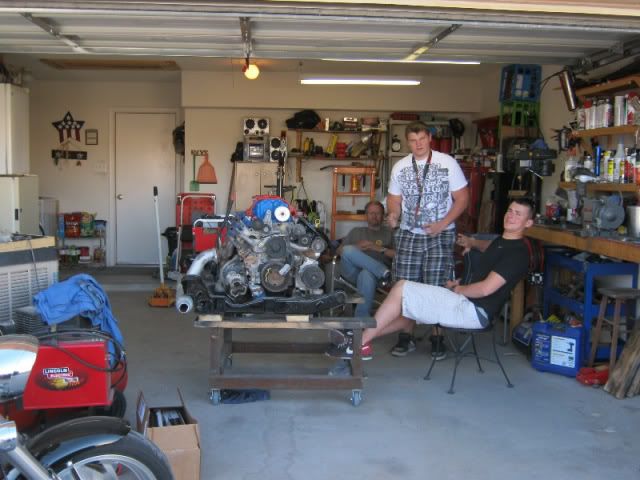
And the required Union meeting coming to order:
More later!
Pat
[This message has been edited by katatak (edited 04-23-2011).]
IP: Logged
12:01 AM
Apr 24th, 2011
katatak Member
Posts: 7136 From: Omaha, NE USA Registered: Apr 2008
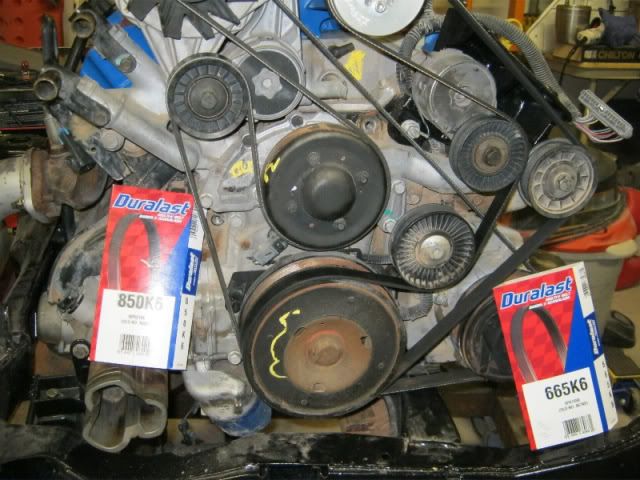
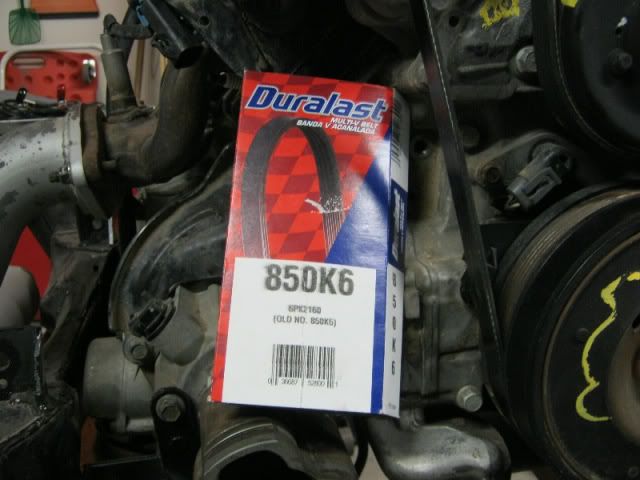
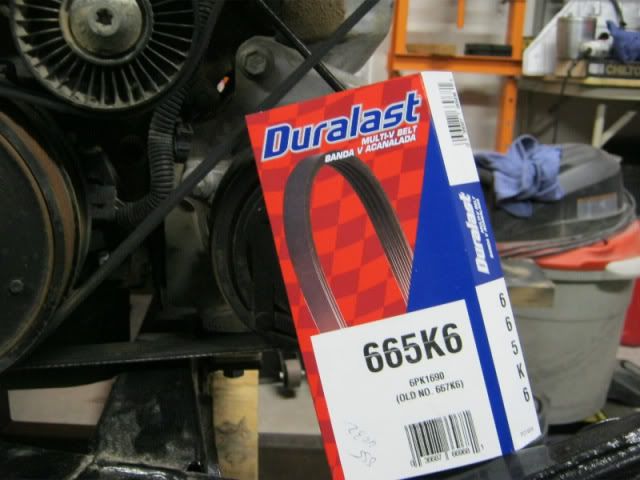
Not a lot done today! Jordan got the other valve cover painted. Got the valve covers isntalled and worked out the belts / routing.
Belts & Routing - AZ belt numbers:
Alternator / water pump / AC with no PS or PS delete pulley - stock mount alternator:
Super Charger - using the 98 Grand Prix / GTP idler/tensioner:
Pending parts arrival, we will install next weekend!\\More later!
Pat
edit to add: I should mention that to run the alternator belt the way I did, you will have to "trim" the stud that holds the plastic crank sensor bracket by approx. 1/4" to keep the belt from rubbing it. Once the stud is cut off, I use some super gray or black RTV to keep the plastic "stuck" to the stud. In case anyone is worried about the lack of "wrap" on the crank pulley for the Alt/H2O/AC belt, we have been running another 3800 SC this way for nearly a year with no porblems - same goes for trimming the stud!
Edit to also add: The tensioner pulley for the Alternator needs to be changed from a smooth type to a grovved type!
[This message has been edited by katatak (edited 04-24-2011).]
IP: Logged
12:50 AM
Apr 25th, 2011
nosrac Member
Posts: 3524 From: Euless, TX, US Registered: Jan 2005
Stock (replacement - Airtex I believe) Fiero V6 pump. We used the same pump in the previous 3800SC swap - almost a year ago and have had no issues with it.
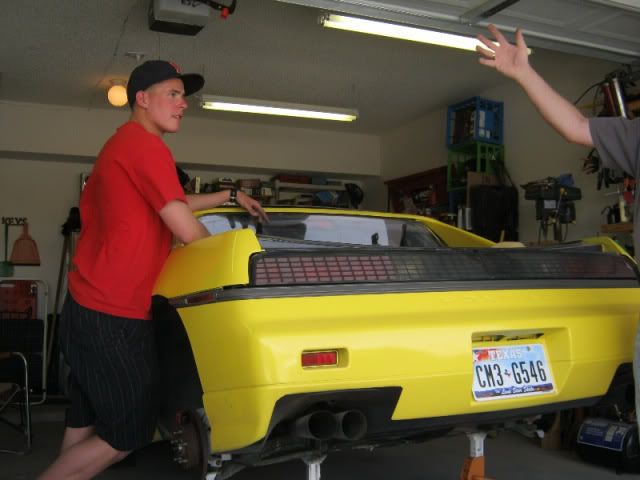
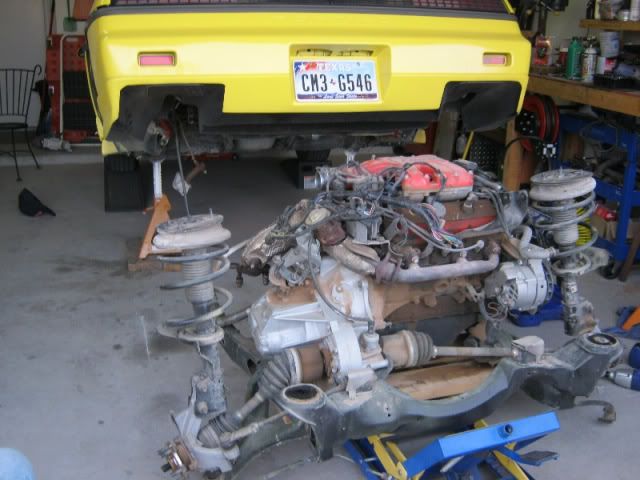
Got a lot done today! We had a crew of 4 and everyine was motivated to reach our goal - Out wiht the old and in with the new. Pretty straight forward stuff here. Get the old 2.8/4spd out and stuff the 3800SC/Auto in! Mission accomplished by 8:00 PM
The proud owner!
Anyone want to buy a Mera Motor?
Off to storage with the old boat anchor!
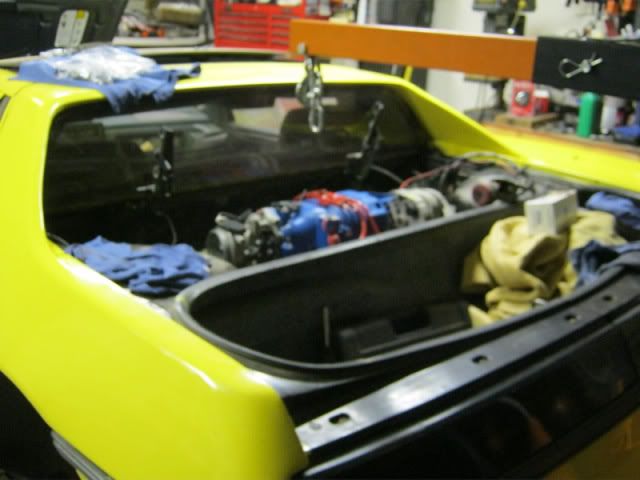
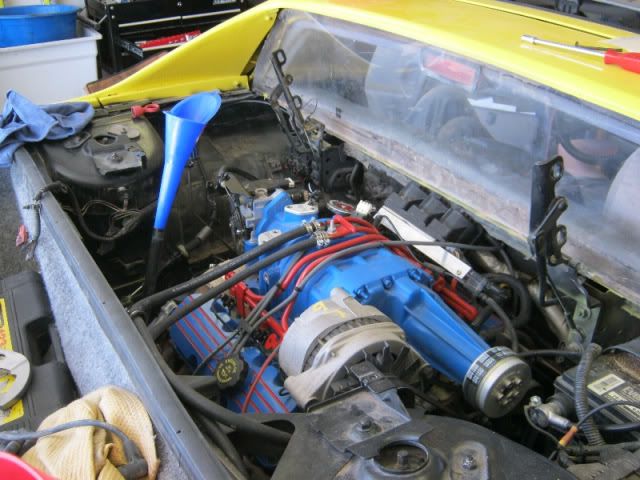
The new Heart is in!
Once it was bolted in the car, we broke out the lawn chairs and the Fat Tires! Special thanks to Dan and Jeff for jumping in and turuning wrenches! We got a lot doen to day and would not have without thier help! Fire in the hole tomorrow!
More later!
Pat
[This message has been edited by katatak (edited 04-30-2011).]
IP: Logged
11:58 PM
Apr 30th, 2011
katatak Member
Posts: 7136 From: Omaha, NE USA Registered: Apr 2008
The goal was to get it to the point where we could start it. Ran into a few things that are different swapping into an 86 versus the 88. Had to build fuel lines, install and plumb the trans cooler - tear the 4 speed shifter and cables out, get the clutch pedal out, etc. etc. I am happy to report that the Bus lives once again. I was trying to think how many motors this car has had in it. It's original that my son blew up, a rebuilt 2.8 that I installed just befoer it went to Carver, the 3.4 that Carver installed, the Mera 2.8 that we installed and now the 3800SC - 5 motors in 2.5 years! Maybe have some video up tomorrow? I'll be out of town all next week so there will be no progress until next weekend.
I would like to give a shout out and a BIG THANK YOU to Mike Gonzales! Mike did a great job with the harness and was there to answer any questions we had. The really cool thing was that Mike donated a couple of his very nice SC block off plates - exactly what the SC needs to top it off. Can't thank you enought Mike!
More next weekend.
Pat
IP: Logged
11:48 PM
May 2nd, 2011
josef644 Member
Posts: 6939 From: Dickinson, Texas USA Registered: Nov 2006
I love the way this is coming along. Fire in the hole yet?
Thanks Joe! Yes it runs - we fired it a few brief times. She fired right off - had a little lifter noise but quited right down and idled smooth. No smoke! Still have to run all the cooalnt lines, mount the coil pack and finisht the suspension. Should be driving it next Saturday.
Got started early this morning on the swap. Goal was to get it on the road but we missed the goal by a couple hours. Should be driving it by noon tomorrow! Had lots of little odds & ends to tie up today. We tied up all the wiring, got the coil pack mounted. Throttle cable done. Passenger side axle finished - suspension and brakes installed. Auto Shifter and cable installed and picked up the coolant hoses - still have to install those - we need to do some surgery on the coolant tubes as both are crushed. Other than the coolant lines, all that's left is the ebrake cables, fill with coolant, install the deck lid and drive it!
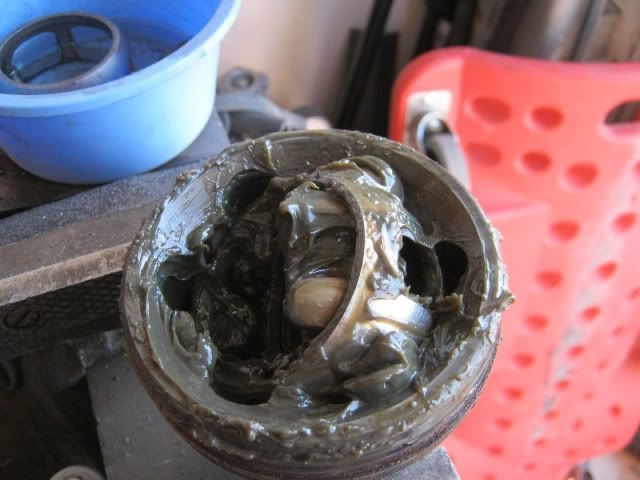
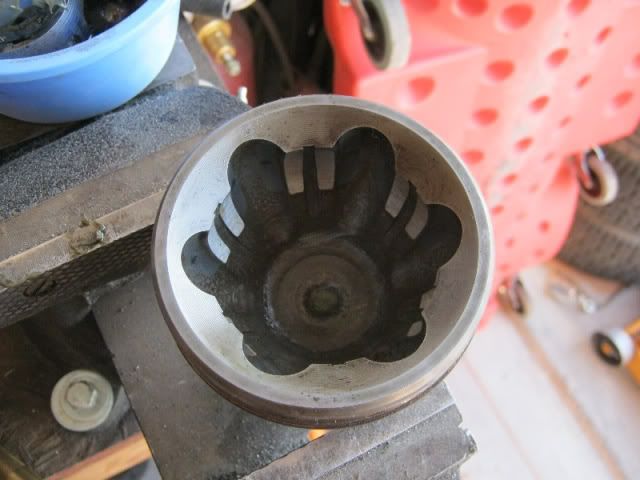
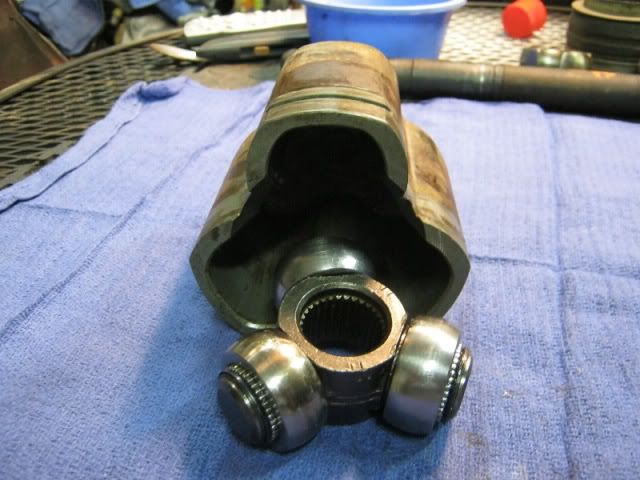
In case any one wants to know, below are some pics showing the process of swapping the cage, spider and roller balls on the Fiero outer axle stub. We removed the stock Fiero manual cage/spider/balls and installed the GP cage/spider/balls so that we could use the GP driver side axle shaft to build the Passenger side Fiero axle.
Once the axle is removed from the outer stub, use a brass drift and drive the cage/spider down
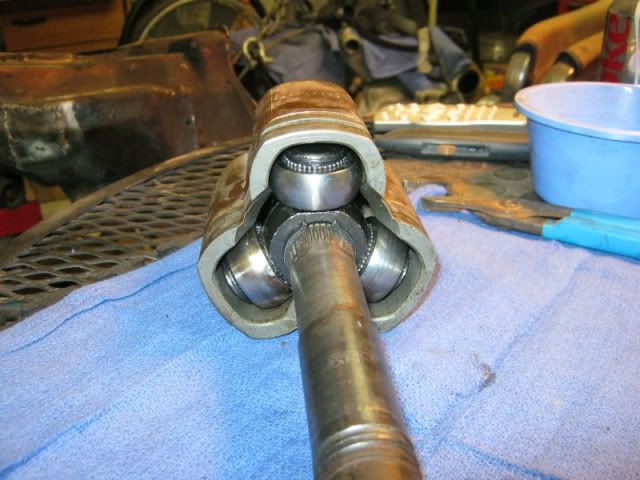
This will roll the cage up on one side and the ball will "pop" out
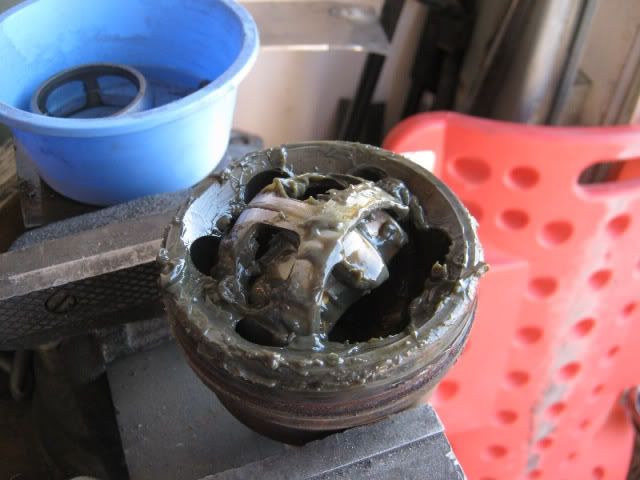
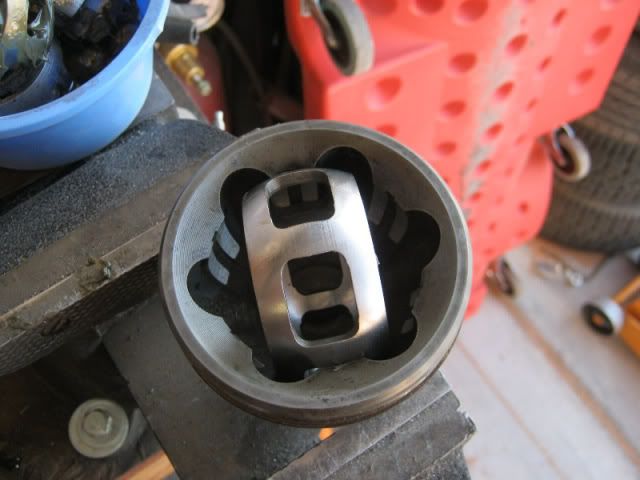
Move to the opposite side - where you just removed the ball and drive it down
Work your way around in a star pattern until you have all the balls removed. turn the spider 180* inside the cage then line up the "legs" of the spider with the "windows" in the cage and pull the spider out.
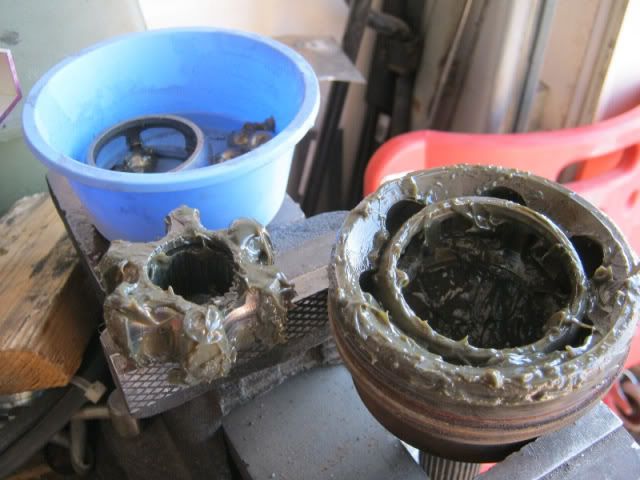
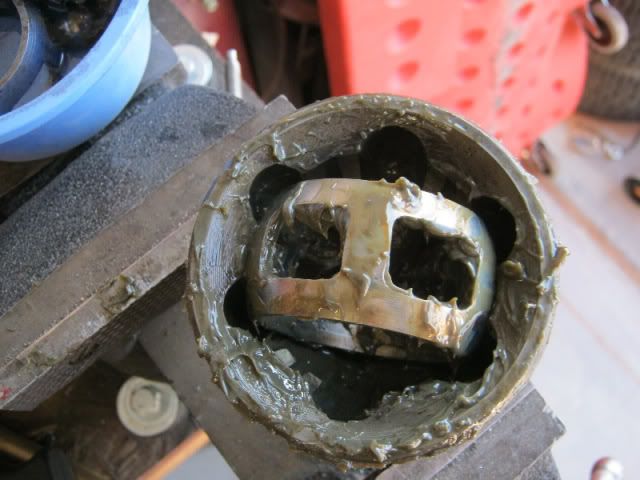
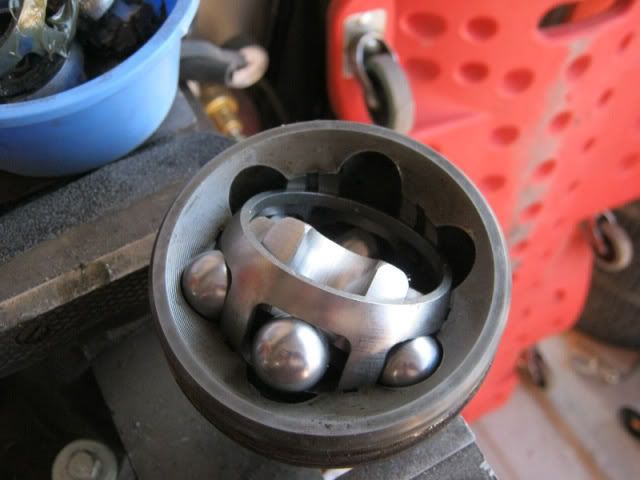
Roll the cage 180* and line the "windows" up with the "legs" of the stub and pull the cage out
Clean out all the grease in the outer stub
Reassemble in the reverse order
Video of it driving away tomorrow!
Pat
IP: Logged
12:19 AM
Mike Gonzalez Member
Posts: 5093 From: Colorado Springs, CO. USA Registered: Jul 2001
We finished the Jordan Swap today. Had a few things to finish up this morning, filled her with coolant and fired her up - let it run to check for leaks, fan, edtc. All went well - everything works great.
Special thanks to Mike Gonzalez foir the fine harness work and the Block off plates. Ryan at Sinister for the great ECM works and Pete Matos for the "CHOPTOP" nose badge!
The car left my garage under it's own power at around 2:00 this afternoon. Jordan took her for its first ride with the 3800SC. Came back all smiles. Then it was my turn. I still can't believe what a difference these 3800's make in a Fiero. Everything works great - shifts great - pulls hard, etc. etc. We ran down to Taco Cabana for a late lunch and some Margahrita's. Still have a few little things to finjsh up - mainly the AC - got to get some lines made. Then go over it again to make sure everything is tight - has clearance, etc. All in all it was a great project - went fast. Definitely will be doing another 3800 SC in a Fiero.
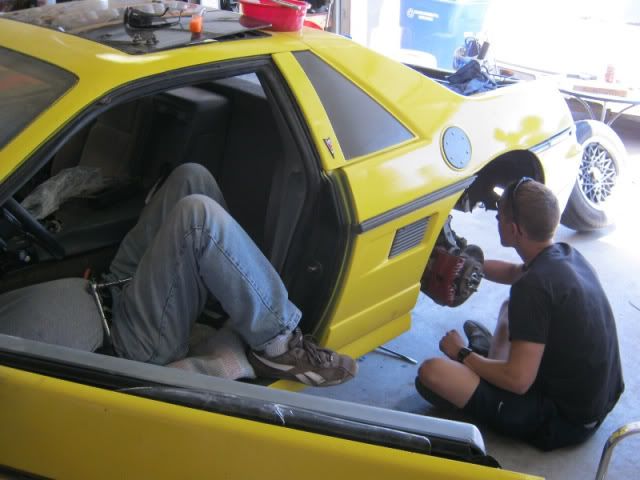
Finishing touches - Jeff dove in to remove the clutch pedal while Jordan went around checking all the bolts.
Added some trans fluid!
Backing out of the dirveway - video coming soon - it's loading now!
And the aftermath of a 3800SC swap!
More later!
Pat
IP: Logged
06:42 PM
May 9th, 2011
johnyrottin Member
Posts: 5513 From: Northwest Florida Registered: Oct 2007
I think with the motor/trans, harness, ecm, axles, mounts, hoses, exhaust and all the little odds & ends, he might have right around 2k in it. Maybe a little more by the time it's complete with AC. We have a total of about 8 days in labor - some of that was wasted sitting in the lawn chairs drinking beer! Could probably do this in a couple weekends with a motivated crew.


 ?
?