This is a build that has been being planned for months, but has been delayed by her convertible purchase. Well....we are jumping in head first. I assume that everyone else just looks at pics too....so I will try to post lots of them.
The plan: 3400 with an Isuzu 5 speed. All stock, controlled by a 98 Venture ECM (already tuned by Sinister Performance). Clean, polish, and paint everything in the engine compartment. Complete suspension rebuild including Eibach springs, KYB shocks and struts, RCC bumpsteer kit, poly bushings, new joints all the way through, all parts cleaned polished and painted.
We welcome any and all advice and criticism.
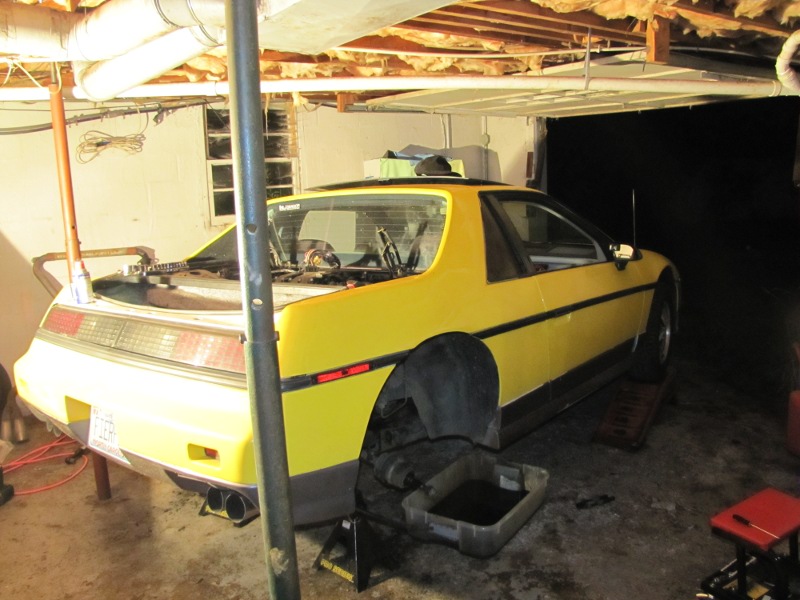
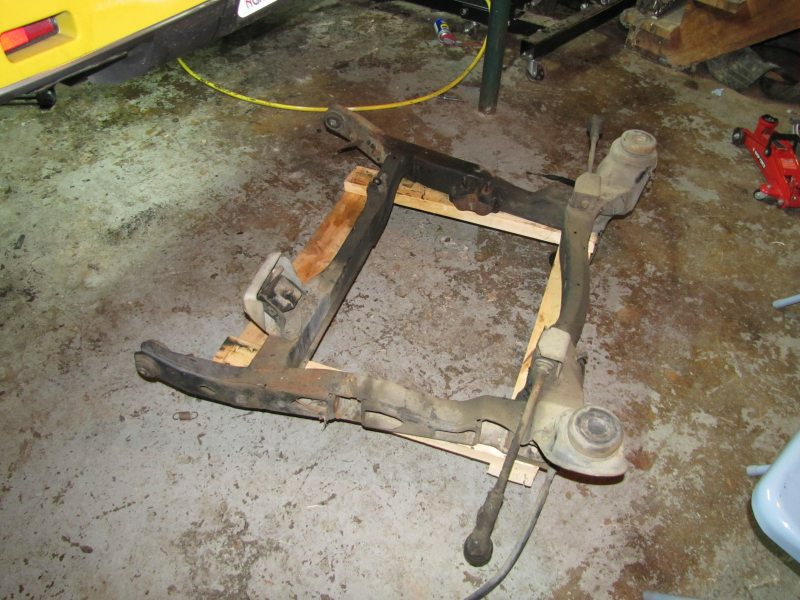
First day of work. Not sure if I am happy with where we got to or not...but...Cradle is ready to drop, and rear suspension pulled off. I will drop the cradle tomorrow after work.
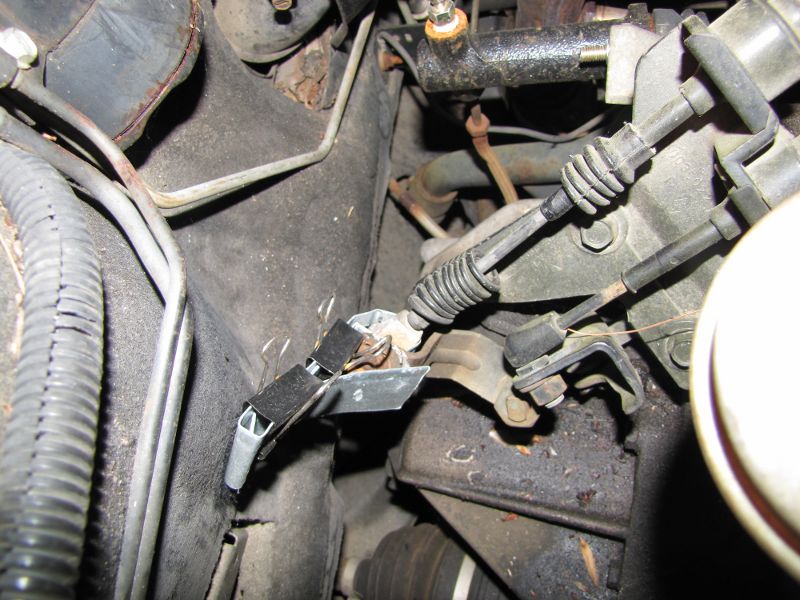
First, Fierfly won't let me get by without posting this. This was a temporary repair to the shift cable (kept popping off the little ball) that never got fixed correctly because it worked so well. Yes, those binder clips held this thing together for thousands of miles including Run For The Hills 14 at Tail of the Dragon, a trip to Georgia, and a trip to the Outer Banks.
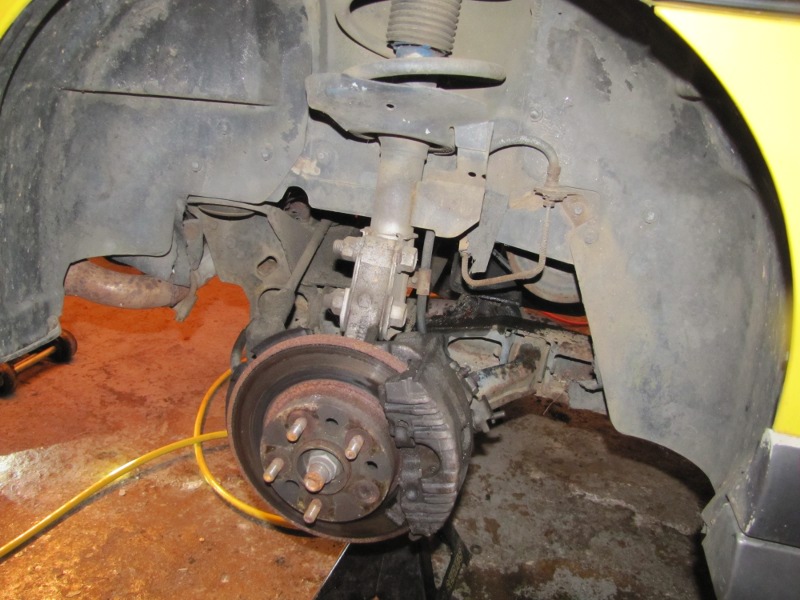
Rear suspension before turning wrenches...
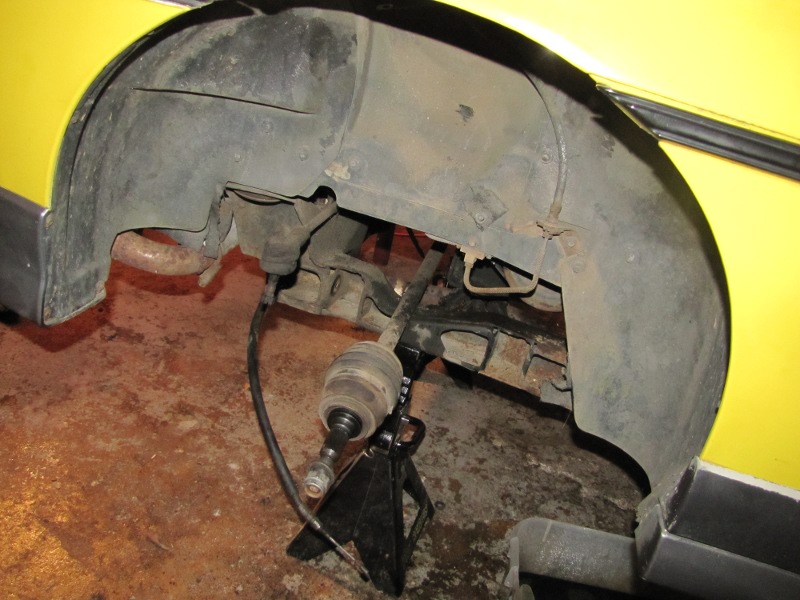
Rear suspension when we called it a night...
Overall scene on the way out...
How do you pull the axles out of the tranny? It is going to pour out tranny fluid when I do that, right? Guess I need to pull out the Service Manual.
IP: Logged
11:38 PM
PFF
System Bot
Aug 1st, 2010
eph_kay Member
Posts: 943 From: Independence, MO Registered: Apr 2006
When you pull the axle the fluid will come out, but if you are dropping the cradle and you already have the suspension undone you can leave them in. Other wise I use a prybar between the inner tripot and the tranny case and if you give it a swift "pop" they will pop out easy.
Chris
IP: Logged
12:21 AM
CowsPatoot Member
Posts: 2792 From: Skidway Lake, MI Registered: May 2007
Thanx...I thought that is how it was done, but wasn't sure. I would be easier to get to with the cradle out....but it would be easier to catch the tranny fluid while it is still up in the air. Hmmm...
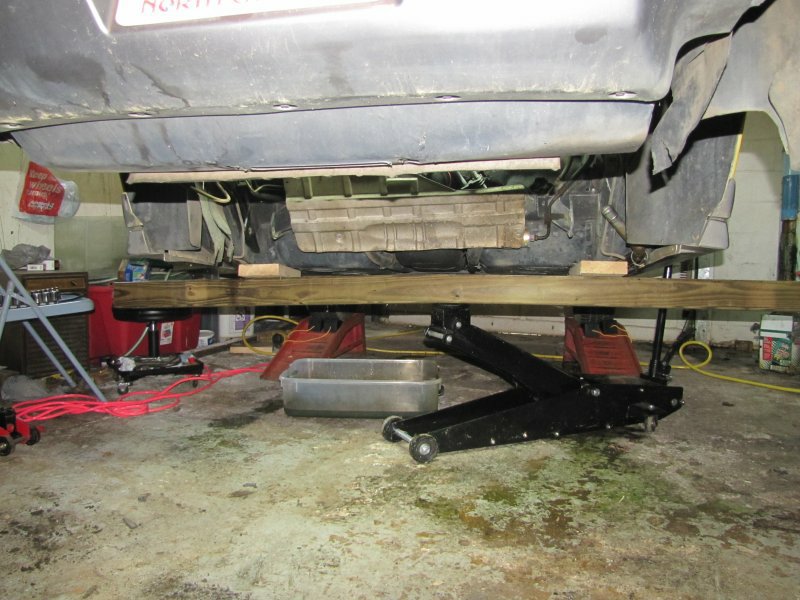
I plan to lift the car with the jack in the middle method. I have a high lift jack that will take it up 32" at that point without repositioning things, I figure with a single 4x4 under the car that will be enough to bring it out the side on the dolly....especially without worrying about the suspension dragging. Sounds easier than fighting with the legs of the cherry picker when lifting by the crossmember in the trunk.
IP: Logged
02:32 AM
Aug 7th, 2010
CowsPatoot Member
Posts: 2792 From: Skidway Lake, MI Registered: May 2007
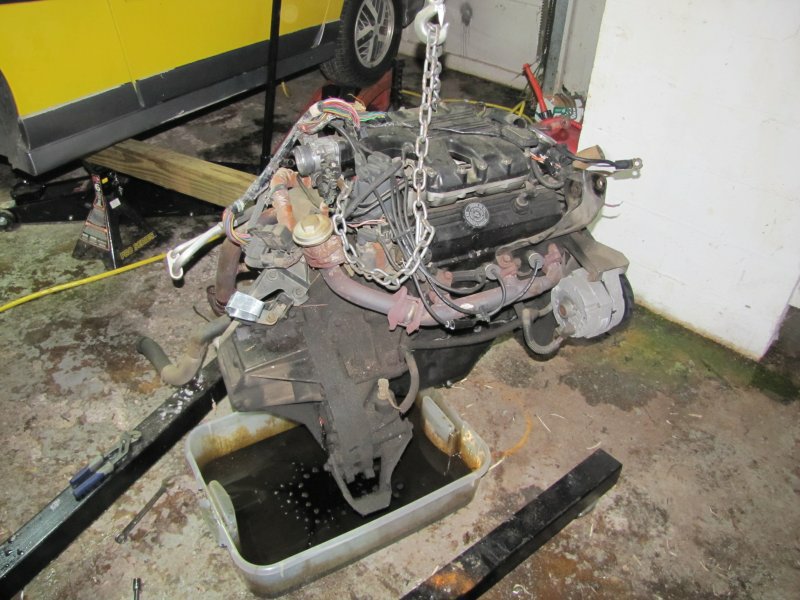
Not much to report....we got the engine yanked with a couple necessary pics...
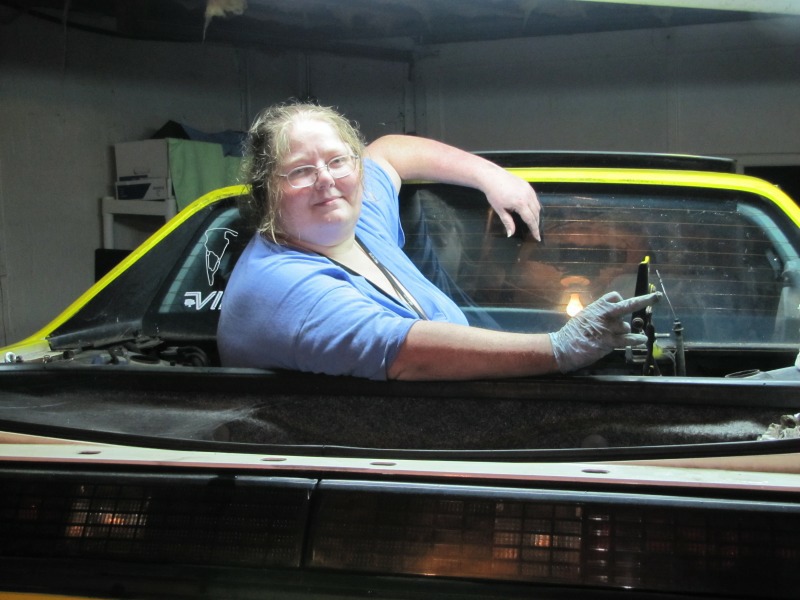
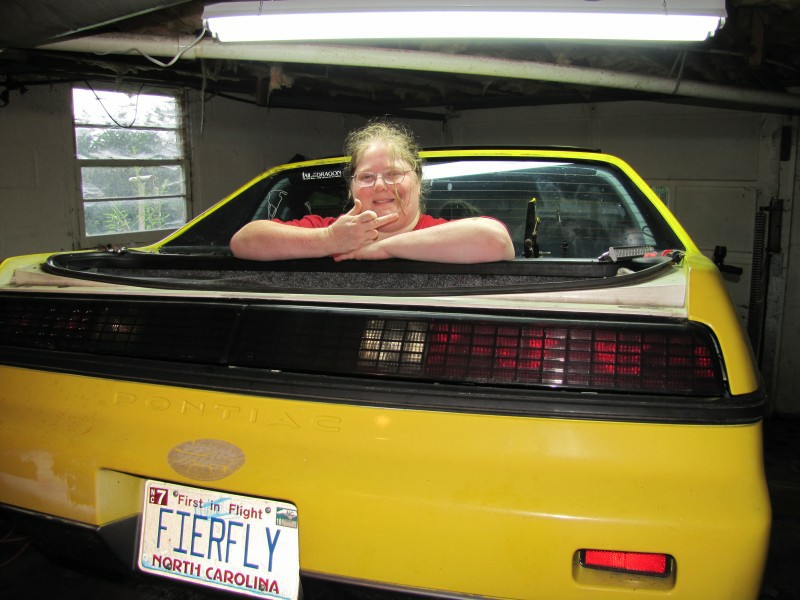
Fierfly standing in the engine bay....doing her best Joey impression.
This is how we lifted the car. Worked great. We had a pair of 2 ton jacks available for manipulating the cradle. Easiest I have ever had one come out...I will definitely go this route rather than the cherry picker for my next one too. There are certain tools that you always wonder how you ever lived without....and that jack is one of them.
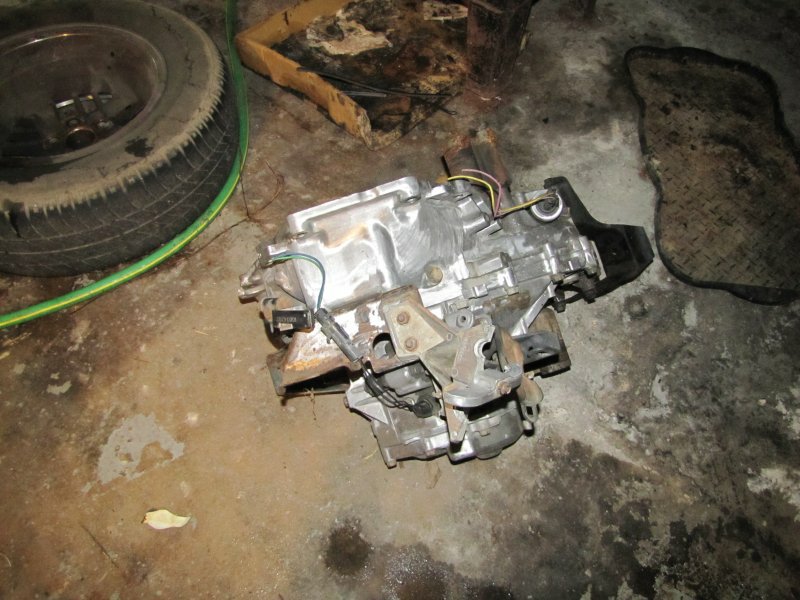
The removed engine. Most parts will be for sale (so you are welcome to start staking your claim if you need anything). Now to remove it from the cradle and clean up....
[This message has been edited by CowsPatoot (edited 08-07-2010).]
IP: Logged
08:21 PM
CowsPatoot Member
Posts: 2792 From: Skidway Lake, MI Registered: May 2007
can't wait to follow this..this is teh swap i plan to do.
------------------ Cliff's 610th Positive Feedback Giver. #12 NYFOC Member In recent times, the custom aftermarket car/automobile roadwheel has become a status symbol. These wheels are often incorrectly referred to as "rims". The term "rim" is incorrect because the rim is only the outer portion of a wheel (where the tire is mounted )
IP: Logged
02:51 PM
Aug 13th, 2010
CowsPatoot Member
Posts: 2792 From: Skidway Lake, MI Registered: May 2007
Started doing some test fitting tonight. I want to get all mods that I need done before we POR15 things.
Here is Fierfly doing some engine bay cleaning...
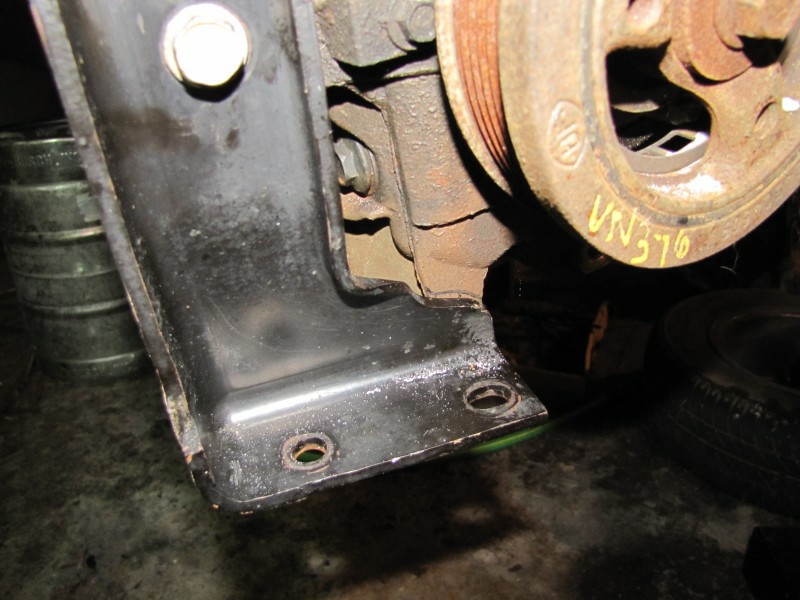
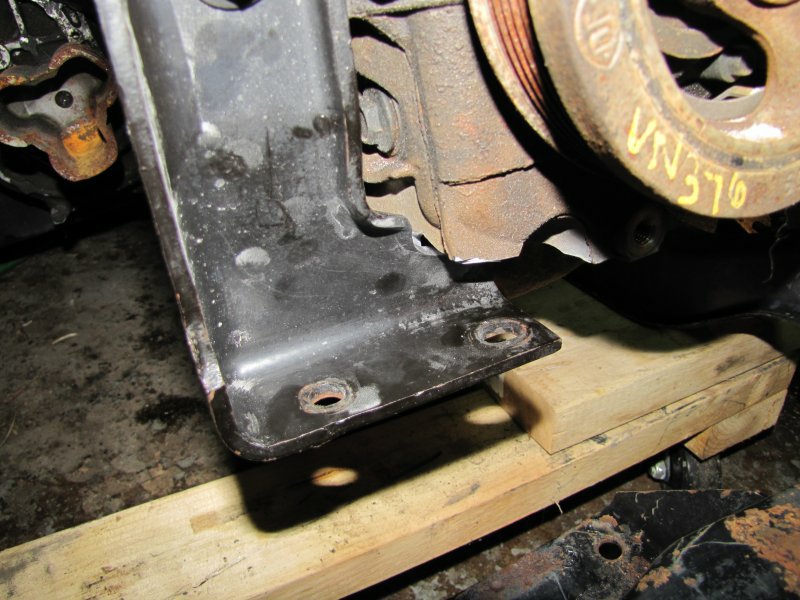
I was expecting this interference...will be some minor trimming of the cast oil pan, and perhaps some minor trimming of the engine mount....but x-thumpr-x already advised me on this outcome...
This one wasn't expected. The clutch arm hits the crossover pipe. It looks like I can trim the end off, then weld in a new reinforcement, and call it good...
Tomorrow we will get the engine mount done, and test fit it into the car. Coolant lines and heater hoses don't look to be much of an issue, but the gas lines might cause some headaches. I would like to avoid running them around the engine bay like x-thumpr-x does, but I suspect I may find he does that for good reason. I will also be able to get measurements to start the wiring tomorrow.
IP: Logged
12:43 AM
Aug 14th, 2010
CowsPatoot Member
Posts: 2792 From: Skidway Lake, MI Registered: May 2007
Engine is partially mounted on the cradle, but we discovered we have an 88 poly motor mount rather than the proper 84-87. We now have the correct one from Rodney (the 88 is for sale in the mall if you are interested). Judging by the fit of the other two, I'm sure it will be a direct replacement for the original....so I will install the original back in to test fit it into the car. Then...I can work on the wiring in the evenings.
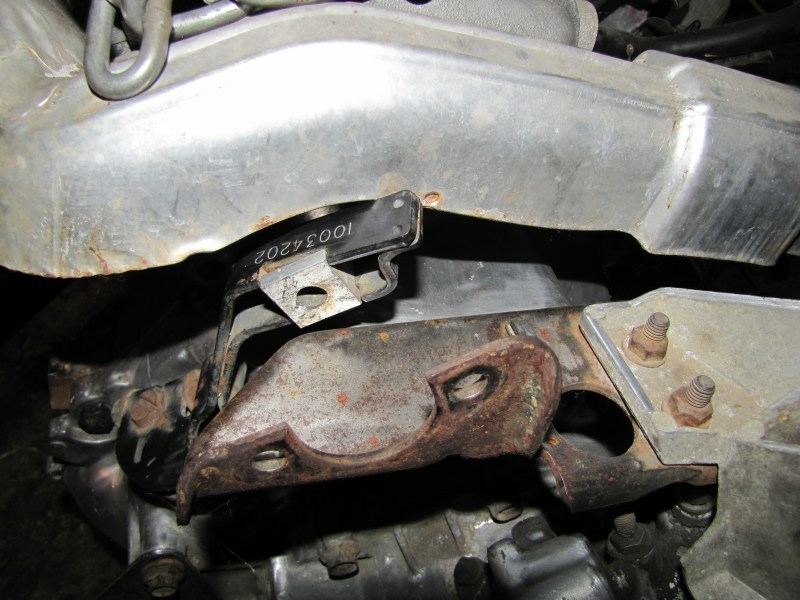
On the brighter side of things....I got the mount bracket attached to the engine. Required grinding both the oil pan and the bracket....but nothing critical on either one.
We have a new clutch arm on the way....this one is cast rather than stamped, and avoids the extension on the end.
IP: Logged
10:00 PM
Aug 20th, 2010
CowsPatoot Member
Posts: 2792 From: Skidway Lake, MI Registered: May 2007
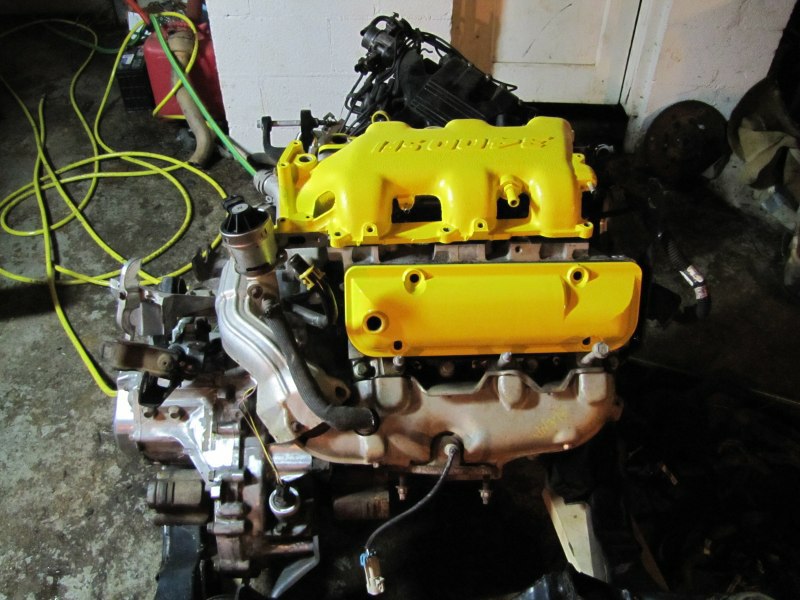
A bit of eye candy today...got some parts back from Kento.
A general idea of where we are going:
Color comparison between this and the car body. A repaint of the body is next year's project...and we decided we like the color it is.
Now back to the boring part....more of a status update than real info at this point. I test fit the engine into the car, and see no issues. Coolant lines look to be pretty simple and straight forward. Vacuum lines are pretty basic on this engine, so I don't expect an issue there. Fuel lines are going to be a bit of a headache....didn't want to re-route them, but looks like it will need to be done.
Wiring. I started to dig into it. I have the C500 and the C203 prepped and marked....now just have to tackle the harness from the 3400. I certainly understand why people charge as much as they do for these harnesses....but I am glad to be doing it myself.
This weekend's project is to fit the rear swaybar (Don't want to drill holes through new paint), yank the front suspension, then clean, clean, and clean some more, then prep for the por15. Somewhere in there I have to figure out what I am going to do about the rust around the old battery tray.
IP: Logged
11:20 PM
Aug 21st, 2010
KurtAKX Member
Posts: 4008 From: West Bloomfield, MI Registered: Feb 2002
A bit of eye candy today...got some parts back from Kento.
A general idea of where we are going:
Too bad you could not swap that intake around! I know a good TIG welder that could cut it out and flip it for you hehehehehe
quote
Originally posted by CowsPatoot: Color comparison between this and the car body. A repaint of the body is next year's project...and we decided we like the color it is.
I say that is a close color match. Just buff and wax the body and I think it will be real close!!! ------------------
**************************************** Found a 88 formula Waiting to get a fence so I can re-home it There are Two kinds of Fiero's : Notchies and Donors!
[This message has been edited by Kento (edited 10-24-2010).]
some of the 3400 vans came with blank upper plenums. if it were me I'd use that instead. I just dont see the point of looking at 3400 SFI when its upside down...
IP: Logged
10:53 AM
CowsPatoot Member
Posts: 2792 From: Skidway Lake, MI Registered: May 2007
Don't know if this is possible but couldn't you just cut out the '3400 SFI' part, spin it 180 and then TIG in place? There is that one guy who mods the stock Fiero intake to increase the plenum volume so this should be do-able.
Don't know if this is possible but couldn't you just cut out the '3400 SFI' part, spin it 180 and then TIG in place? There is that one guy who mods the stock Fiero intake to increase the plenum volume so this should be do-able.
Gary
It's doable, sure. But it's better to move the throttle port, which can allow you to get some weld on both sides. Cutting out part of the top and turning it round, you are only going to get to weld from the top side. So it can end up bad pretty fast. The Fiero plenum enlargement mod is done on the bottom, so it's not so unsightly when you put it back on, if you can't get a perfect grind.
IP: Logged
08:33 PM
Stubby79 Member
Posts: 7064 From: GFY county, FY. Registered: Aug 2008
Don't know if this is possible but couldn't you just cut out the '3400 SFI' part, spin it 180 and then TIG in place? There is that one guy who mods the stock Fiero intake to increase the plenum volume so this should be do-able.
Gary
I just sanded mine right off and painted the plenum....ready to be stickered or whatever, should I want it to have anything written on it.
IP: Logged
10:59 PM
PFF
System Bot
May 11th, 2011
Fierfly Member
Posts: 154 From: Millers Creek, NC Registered: Jul 2009
It's doable, sure. But it's better to move the throttle port, which can allow you to get some weld on both sides. Cutting out part of the top and turning it round, you are only going to get to weld from the top side. So it can end up bad pretty fast. The Fiero plenum enlargement mod is done on the bottom, so it's not so unsightly when you put it back on, if you can't get a perfect grind.
Sounds scary and expensive... I don't mind upside down so much. I did look into having LKN Speed machine it off, but Scott (who does awesome work btw) said it would be iffy.
------------------ A good man is hard to find...but a good Fiero mechanic is "rare".
Turbo it.. you know you want to... also look into investing in a 3500 upper intake plenum. it allows for better air flow but you will nee to use a N* TB
[This message has been edited by pontiackid86 (edited 05-11-2011).]
IP: Logged
11:10 PM
Fierfly Member
Posts: 154 From: Millers Creek, NC Registered: Jul 2009
I am avoiding scope creep on this project, and trying to stick to a low budget. This will not be a monster car; as it is, it will be more car than i need.
The engine swap was prompted by a failure. I just want it drivable again, reliable, and fun.
I am avoiding scope creep on this project, and trying to stick to a low budget. This will not be a monster car; as it is, it will be more car than i need.
The engine swap was prompted by a failure. I just want it drivable again, reliable, and fun.
Even without the turbo there still little torque monsters just keep an eye on your gaskets as these engines have been known to eat them. i would still look into the 3500 intake though. it would be a nice little preformance upgrade on the cheap.


 Looks like a fun project you have going on there.