Pennock's Fiero Forum
  General Fiero Chat - Archive
  Getrag Slave Rebuild Using Rodney Dickmans New kit!!

T H I S   I S   A N   A R C H I V E D   T O P I C
  

Email This Page to Someone! | Printable Version


Getrag Slave Rebuild Using Rodney Dickmans New kit!! by DLCLK87GT
Started on: 09-01-2010 04:43 PM
Replies: 7
Last post by: fierosound on 10-23-2010 12:24 PM
DLCLK87GT
Member
Posts: 2694
From: South Jersey, USA
Registered: Feb 2009


Feedback score:    (9)
Leave feedback

Rate this member

Report this Post09-01-2010 04:43 PM Click Here to See the Profile for DLCLK87GTSend a Private Message to DLCLK87GTDirect Link to This Post
Well I volunteered to help out Rodney Dickman with some R&D with his new Getrag 5spd slave cylinder rebuild kit http://rodneydickman.com/ca....php?products_id=288 and I was very impressed with it so now I’m going to share with you. First let me say this rebuild process is very simple and straightforward. On a scale of 1 to 5, it’s a 1 and anybody can do it. The only special tool you need is a pair of snap-ring pliers and if you don’t already have one, HF has them for about $4.

Ok so here’s my slave…yuck! It looks pretty bad doesn’t it? Good thing that heat shield was hiding it!


Ok first thing we need to do it clean it off, then open it up. Wow, that’s worse than the out side! The bleeder was very tight so I clamped the slave in my vise, gave it a good blast of Liquid Wrench and let it sit overnight. I probably could have forced it but didn’t want to snap it off.


Here’s the original mess next to Rodney’s kit. You can see the difference in the seals on the piston and why this is a great kit; double seals versus the original 1 seal. That and everything looks to be better quality than OEM.


[This message has been edited by DLCLK87GT (edited 09-01-2010).]

IP: Logged
PFF
System Bot
DLCLK87GT
Member
Posts: 2694
From: South Jersey, USA
Registered: Feb 2009


Feedback score:    (9)
Leave feedback

Rate this member

Report this Post09-01-2010 04:59 PM Click Here to See the Profile for DLCLK87GTSend a Private Message to DLCLK87GTDirect Link to This Post
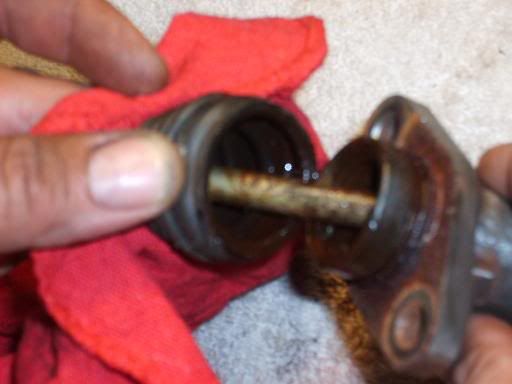
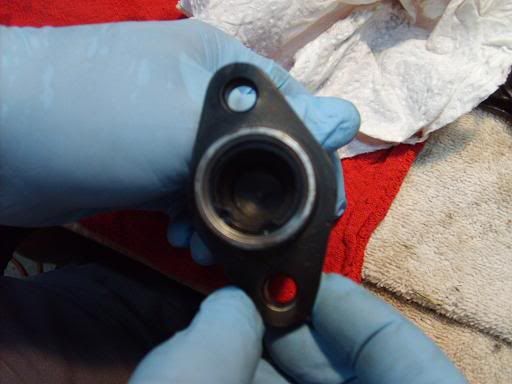
OK my next problem is the inner cylinder walls are pretty nasty and even a spot or two of rust…somehow water must have gotten in. Hopefully you don’t have this issue but if you do you can use a brake cylinder-honing tool to clean it up. Or you can even use a makeshift honer by wrapping some sandpaper on a screwdriver handle, stick it into a drill and use that. You want to make sure it’s very clean and smooth inside so as to not ruin the new piston seals. I couldn’t get a good picture of the inside but trust me, it was bad.
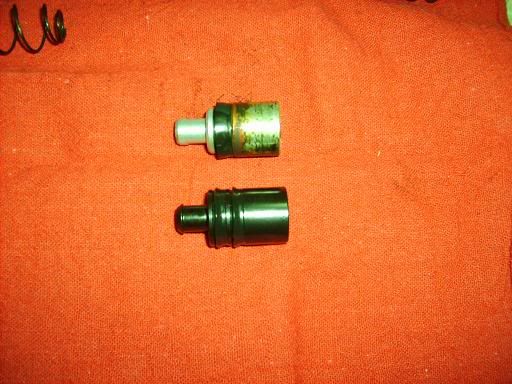
OK, so after I took care of the inside and some time in the parts cleaner, this seemed like the perfect time to play with my powder coater. So a little grinding of the corners, rough spots more cleaning and wall-la!


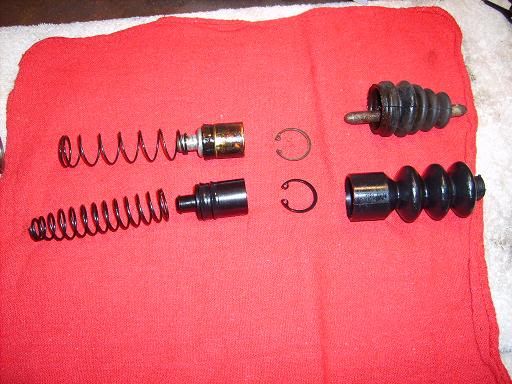
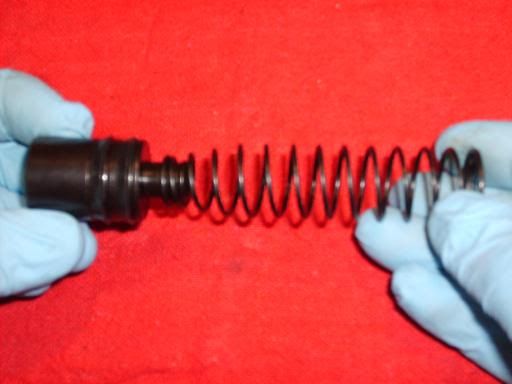
OK so now that it’s cleaned up and ready to go, time for reassembly. First the new spring on the backside of the piston, then you’ll want to pre-lube the seals so they’ll slide in a little easier and create a good seal. I found the piston to be a nice snug fit. I’m sure there will be no leaks here!


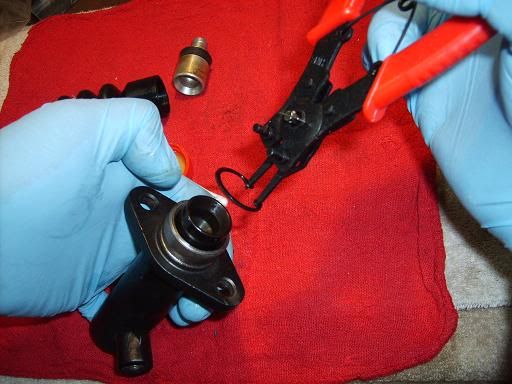
Now you can have a helper push in on the piston if needed while you put the new snap ring on


Now a quick cleaning of the shaft, a touch of paint on the exposed end and it’s ready to slide into the new boot from the kit


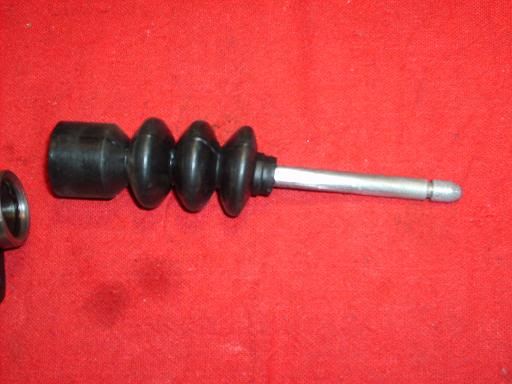
Now that’s done all that’s left to do it slide the boot onto the end being careful not to rip it or anything and you’re all done, piece of cake!


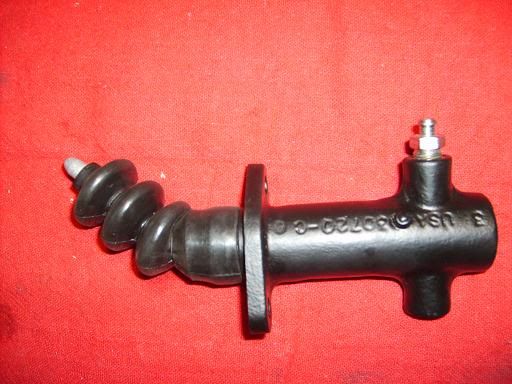
If it wasn’t for the frozen bleeder screw or the rust I’d say I could have easily done this in less than an hour. If it’s a POS like mine was and you want to paint or PC it, figure a couple hours but even with the issues I ran into, it was still a very simple job to do.
One thing I would recommend is changing the bleeder screw. Rodney has them for a couple bucks and while you’ve got it off, you might as well. Much easier now, then later when it’s back on the car especially if it’s frozen & rusty like mine was.

I think Rodney is still in the R&D stage with this rebuild kit but when it’s available I highly recommend it. It was about as simple a job as it gets, should prove to be superior to the OEM setup and for $16.95 it’ll be well worth it.

[This message has been edited by DLCLK87GT (edited 09-01-2010).]

IP: Logged
DLCLK87GT
Member
Posts: 2694
From: South Jersey, USA
Registered: Feb 2009


Feedback score:    (9)
Leave feedback

Rate this member

Report this Post09-01-2010 05:04 PM Click Here to See the Profile for DLCLK87GTSend a Private Message to DLCLK87GTDirect Link to This Post

DLCLK87GT

2694 posts
Member since Feb 2009
oops, dbl post

[This message has been edited by DLCLK87GT (edited 09-01-2010).]

IP: Logged
Rick 88
Member
Posts: 3914
From: El Paso, TX.
Registered: Aug 2001


Feedback score: (5)
Leave feedback

Rate this member

Report this Post09-01-2010 05:24 PM Click Here to See the Profile for Rick 88Send a Private Message to Rick 88Direct Link to This Post
Looks like Rodney has done it again. I would rather rebuild mine than take a chance on an aftermarket piece.
IP: Logged
Rallaster
Member
Posts: 9105
From: Indy southside, IN
Registered: Jul 2009


Feedback score: N/A
Leave feedback


Total ratings: 84
Rate this member

Report this Post09-01-2010 05:38 PM Click Here to See the Profile for RallasterSend a Private Message to RallasterDirect Link to This Post
I didn't get any pics, but his Isuzu rebuild kit is identical to that save for it's sized for the Isuzu slave cylinder. If his Getrag S/C kit is like his Isuzu S/C kit(it's Rodney, so it's only going to be of the highest craftsmanship), you'll be able to beat on it (I do) and not have any problems.
IP: Logged
Rodney
Member
Posts: 4715
From: Caledonia, WI USA
Registered: Feb 2000


Feedback score: (4)
Leave feedback


Total ratings: 267
Rate this member

Report this Post09-02-2010 10:16 AM Click Here to See the Profile for RodneyClick Here to visit Rodney's HomePageSend a Private Message to RodneyDirect Link to This Post
I now have these available on my web page:

http://rodneydickman.com/ca...h=61&products_id=288

These were made to rebuild my aluminum Getrag slave cylinders but they also seem to fit the GM slave and the aftermarket cast iron slaves.

------------------
Rodney Dickman

Fiero Parts And Acc's Web Page:
All new web page!:www.rodneydickman.com
Rodney Dickman's Fiero accessories
7604 Treeview Drive
Caledonia, WI 53108
Phone/Fax (262) 835-9575

IP: Logged
Rallaster
Member
Posts: 9105
From: Indy southside, IN
Registered: Jul 2009


Feedback score: N/A
Leave feedback


Total ratings: 84
Rate this member

Report this Post09-02-2010 10:29 AM Click Here to See the Profile for RallasterSend a Private Message to RallasterDirect Link to This Post
 
quote
Originally posted by Rodney:

I now have these available on my web page:

http://rodneydickman.com/ca...h=61&products_id=288

These were made to rebuild my aluminum Getrag slave cylinders but they also seem to fit the GM slave and the aftermarket cast iron slaves.


Yessir, they do. They work beautifully in GM and aftermarket cast irons.
IP: Logged
fierosound
Member
Posts: 15144
From: Calgary, Canada
Registered: Nov 1999


Feedback score: N/A
Leave feedback


Total ratings: 286
Rate this member

Report this Post10-23-2010 12:24 PM Click Here to See the Profile for fierosoundClick Here to visit fierosound's HomePageSend a Private Message to fierosoundDirect Link to This Post
I just did a rebuild with this kit on a Getrag's OEM steel tube slave cylinder.
I also had to clean up the cylinder's bore with a brake hone first.

Excellent kit!

------------------
My World of Wheels Winners (Click on links below)

3.4L Supercharged 87 GT and Super Duty 4 Indy #163

IP: Logged


All times are ET (US)

T H I S   I S   A N   A R C H I V E D   T O P I C
  

Contact Us | Back To Main Page

Advertizing on PFF | Fiero Parts Vendors
PFF Merchandise | Fiero Gallery | Ogre's Cave
Real-Time Chat | Fiero Related Auctions on eBay


Copyright (c) 1999, C. Pennock