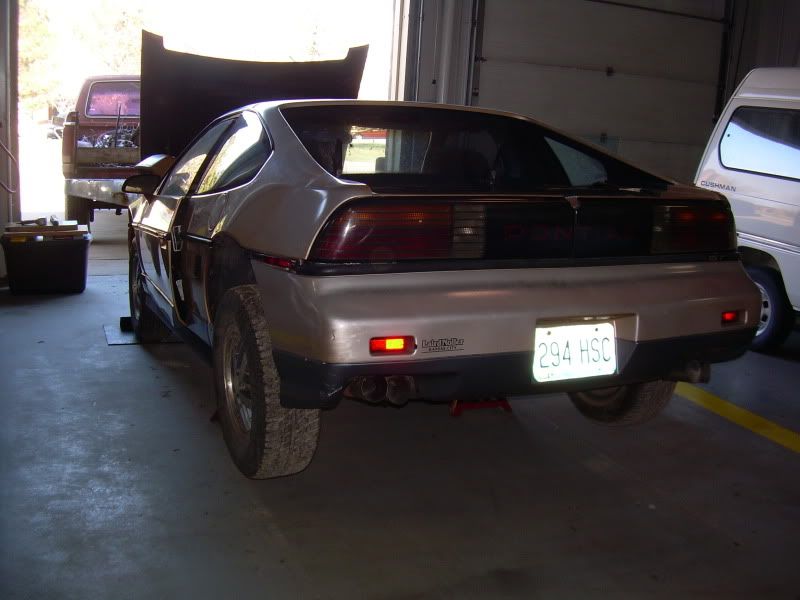
I thought that after a year and a half of having my '86 GT that I should start a build thread as I originally intended to do about a year ago. I have a ton of pictures of the initial build up and I can link to threads where I started installing my various modifications. This car started life as a basket case with a dead engine and a crust-covered transmission and thus far I've been able to de-heapify it enough to be a respectable DD.
I'm going to break the build up in several stages by each post so that I don't have one enormous post with everything in it all at once. I assume nobody objects to that
Current specs:
-1986 Pontiac Fiero GT -
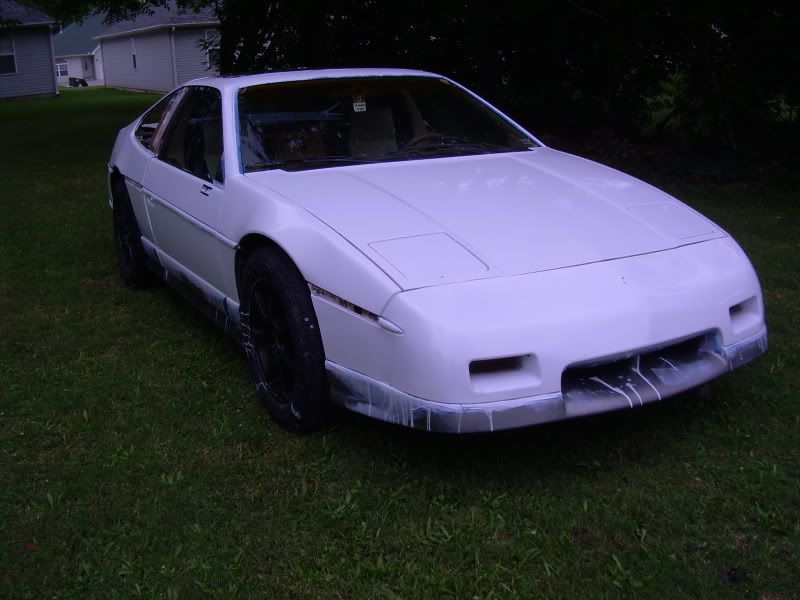
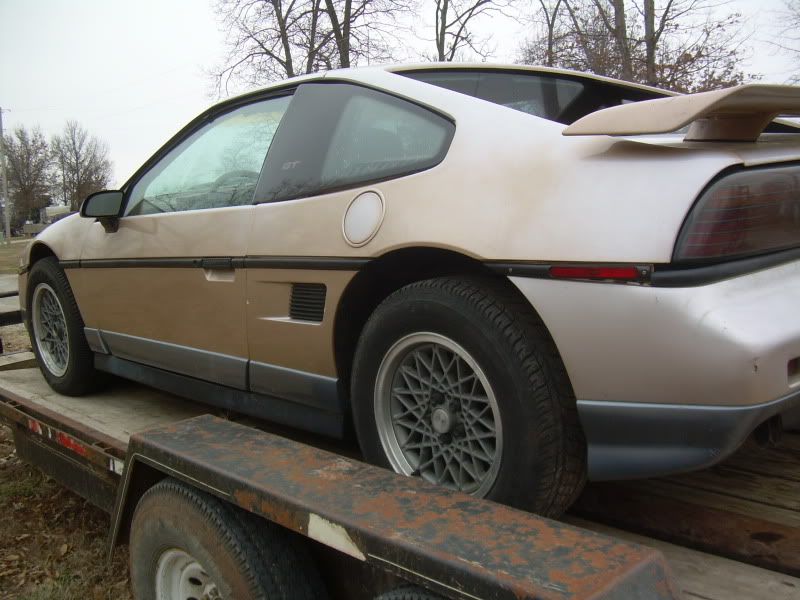
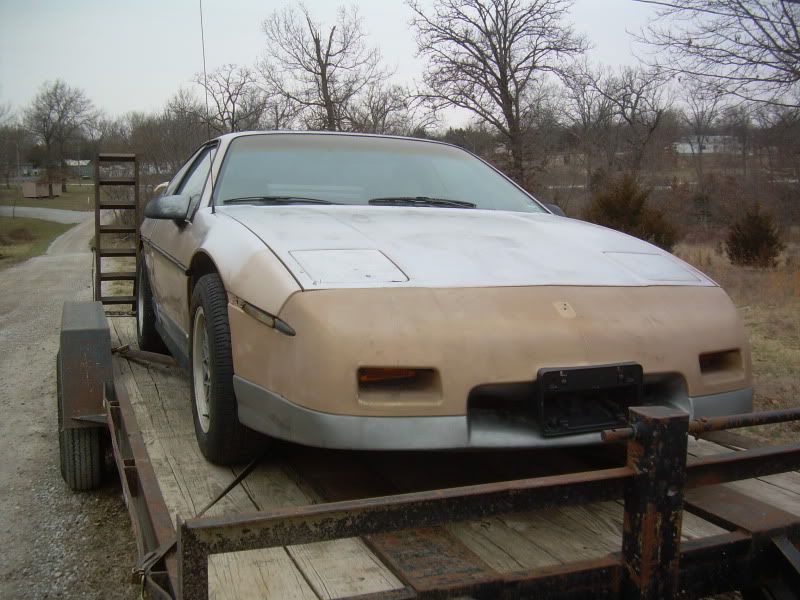
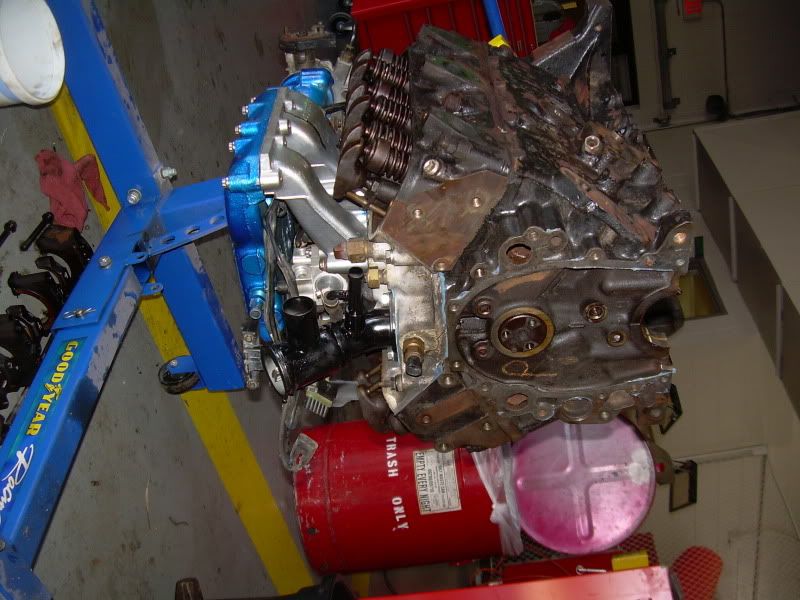
-Currently has 107k miles on the odo -2.8 block from an '88 w/ ~100k miles on it swapped in -4T60 transmission from '89 Pontiac Bonneville mounted with RockCrawl/FieroAddiction mounts -CS130 Alternator swap -FieroStore alternator bracket -Rodney Dickman Power Pulley set -Pontiac Vibe AM/FM/CD/Cassette radio -IGGEE seat covers -TLG Automotive cup holder -Rustoleum paint job (gold to white) {in progress}
Stage 1: Finding a car Edit: I found my original build thread that I was using when I was actually doing the work the first time around. Some of the details are better and I've got a couple pictures of parts that aren't currently in this one: https://www.fiero.nl/forum/A...100421-2-098976.html
I've been wanting a Fiero since I was about 16 when I found out what they were. Super neat little cars with lots and lots of aftermarket bits to put on them for fun. I was getting my LeSabre T Type project mostly put together so I started to look for another project car and decided to try to find a Fiero for cheap just to screw around with. I was browsing the forums one day and found a cheap car a couple of hours away that I really wanted, but since I wasn't registered someone else had bought it by the time I got OK'd by Cliff.
Darn.
So, I decided to just post a thread in the mall to see if anyone had a car reasonably close to me. I'd post the link, but I don't think mall threads are archived. I had a few offers of project cars about 6 hours away, but that was just too far for me considering I don't have a trailer to move a bunch of cars around with. Eventually I got a message from Todd of TheFieroFarm with an offer of a gold GT. It was a solid car, just didn't run and he was going to part it unless I wanted the whole car.
Since I had no way to fix said car, I asked for help and a fellow just south of Kansas City offered to help.
We decided to go for it over my spring break and in the mean time I started buying parts that I knew I would need like gaskets, axles, accesory drives, etc.
I used these threads to help me organize what parts I needed to get:
Engine parts: This thread apparently no longer exists? I have no idea what happened to it but I asked what parts I should buy for putting onto a bare block and I got answers like gasket sets, water pump, timing chain, alternator, rear main seal, etc.
[This message has been edited by Alibi (edited 07-09-2010).]
I was getting help from forum member thumper_64735, aka Matt for the initial pick-up. In return for his help I traded him some of the parts I didn't want that he wanted for his cars (wing and honeycomb rims) and I bought all the gas, food, and cigarettes. He happened to have a friend that he was borrowing a huge trailer from that we could use to move the car with, he had a big truck to pull said trailer, and he had access to the hobby shop at Whiteman Air Force Base -- a big plus.
On the day that I was to drive up there, I had to go and pull my donor transmission. I had pulled the engine out of a car that a friend was junking and had left it in their back yard hanging on a cherry picker until I had a chance to get the trans pulled. I removed the passenger seat in my Buick and put down some cardboard, pulled the transmission, somehow got it lifted by myself into the car, and I was on my way.
After I got up to Matts place, we hooked up the trailer and headed off to Todd's Fiero Farm. It was dark by the time we got there, but we looked the car over for a bit, made sure I had all the engine parts I needed to put the car back together, looked around Todd's shop, and loaded up the Fiero. At this point I was buying a Fiero and had never even sat in one until earlier that day when I sat in one of Matt's. Needless to say, I was pleased anyway
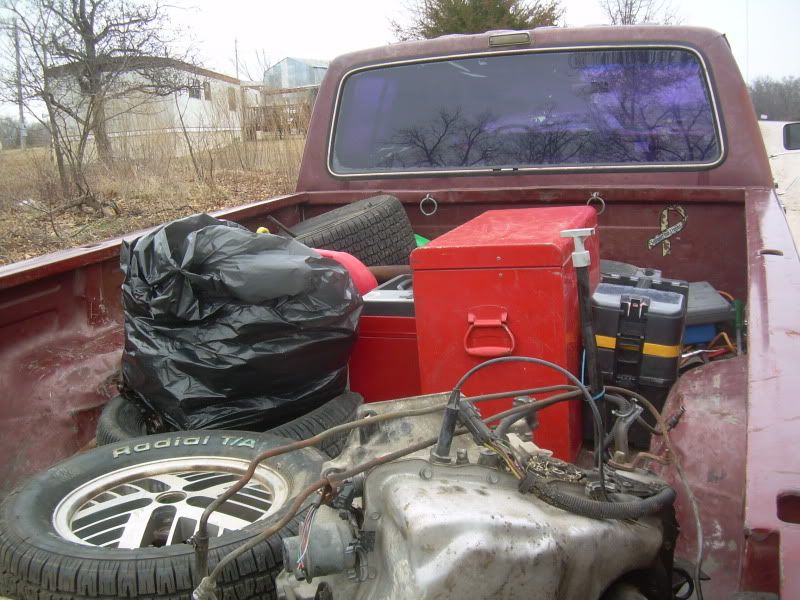
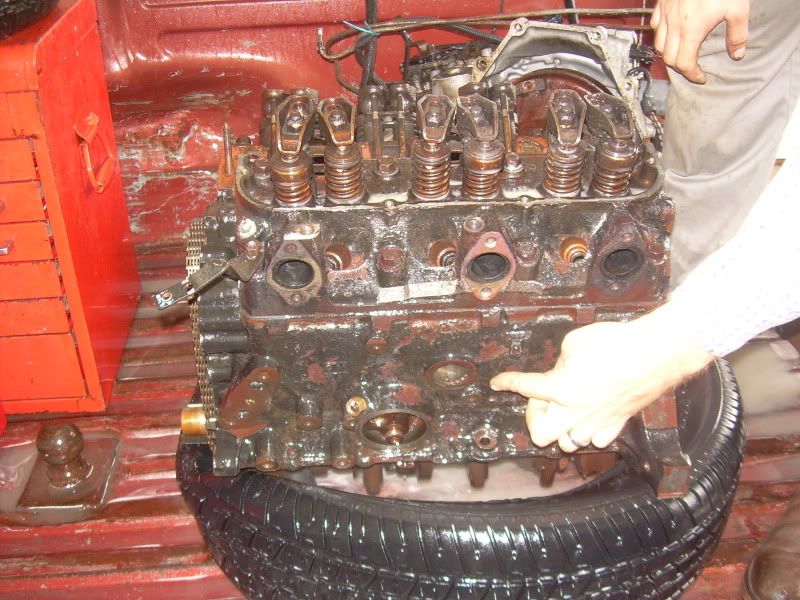
Todd had told me that the engine was FUBAR and that the trans was questionable, so I bought an engine block from him that he had pulled for a customer that wanted a 3.4 swap. The engine was fine, it just needed to be put back together. We took an old tire and tossed it in the back of the truck and put the engine block on it then pushed the Fiero to the edge of the ramps leading up the trailer. I had the fun job of sitting in the car and controlling the brakes while the other two cranked the car up with a come-along.
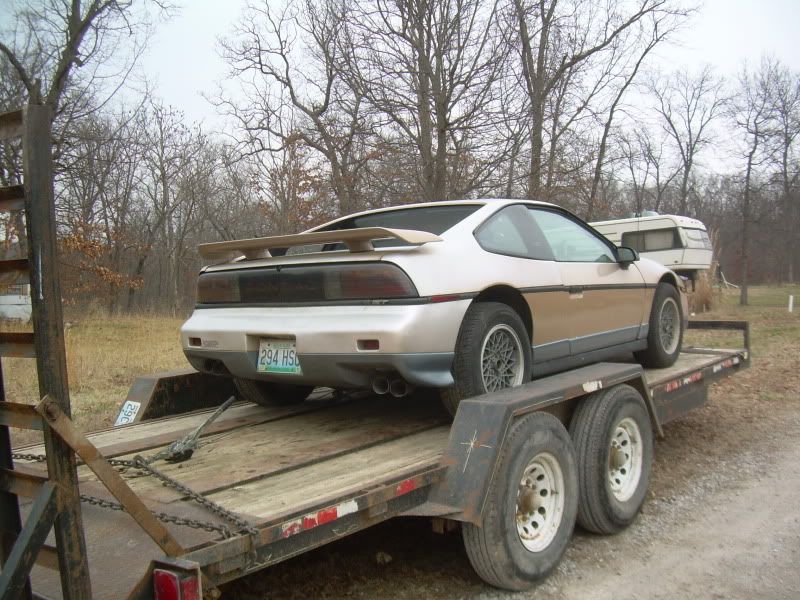
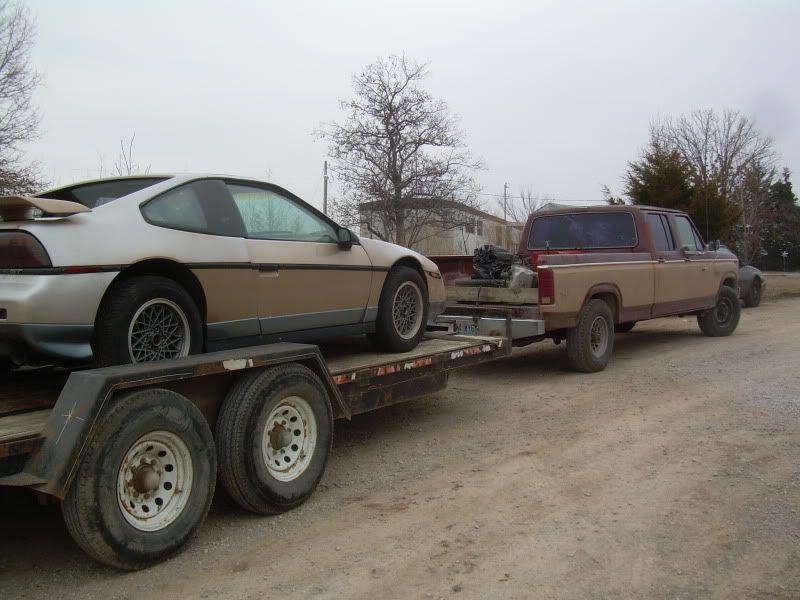
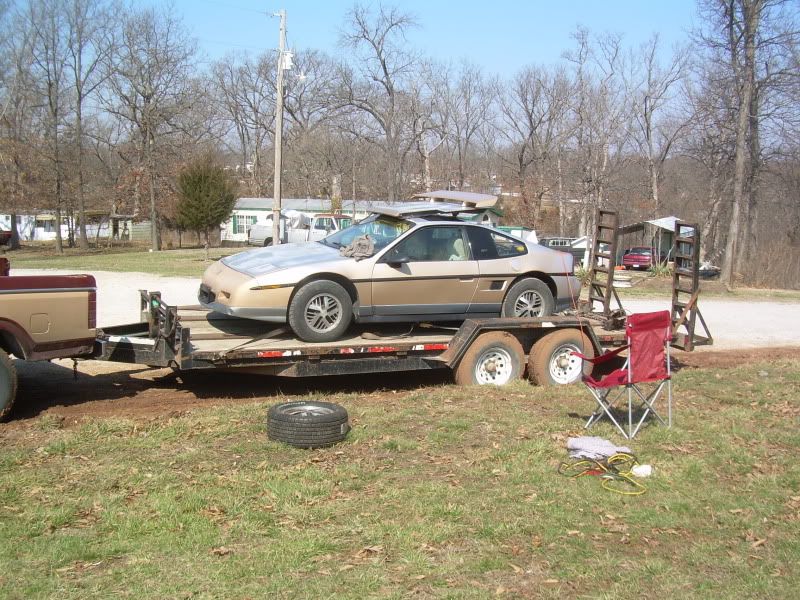
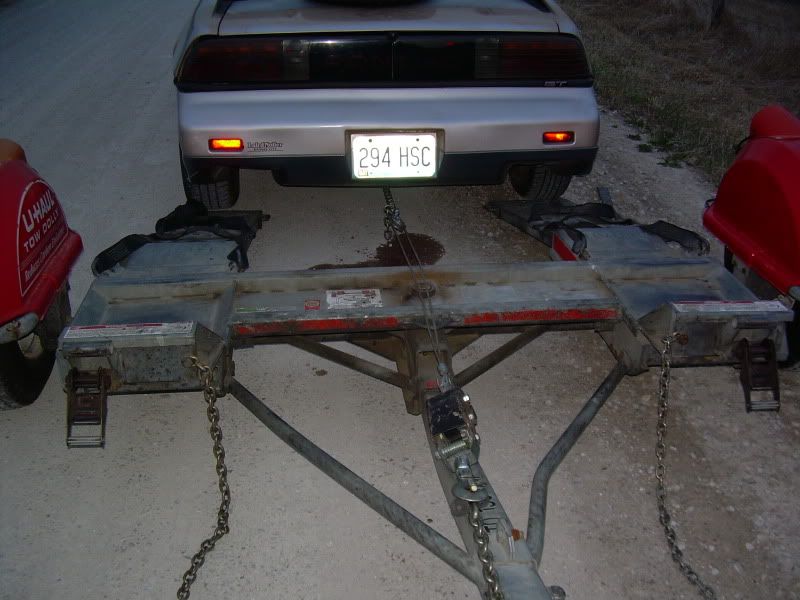
The next morning I went out and took pictures of the Fiero sitting on the trailer:
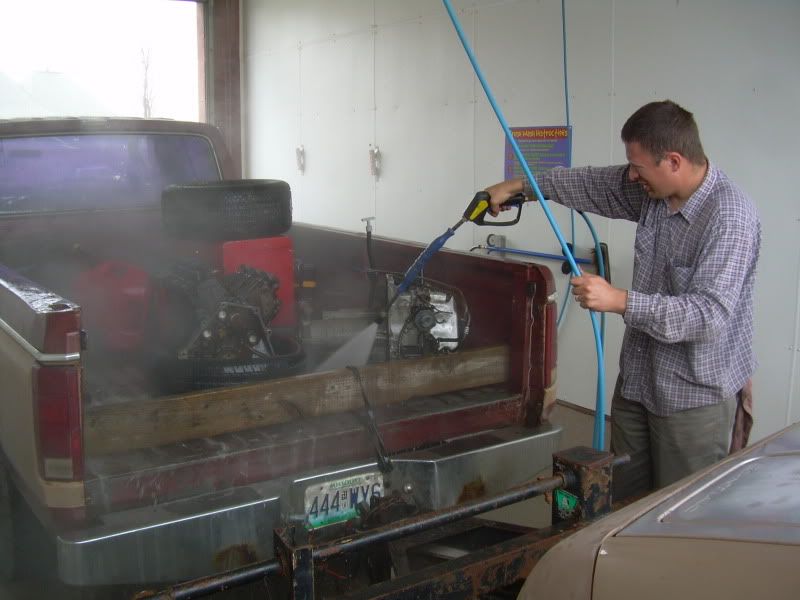
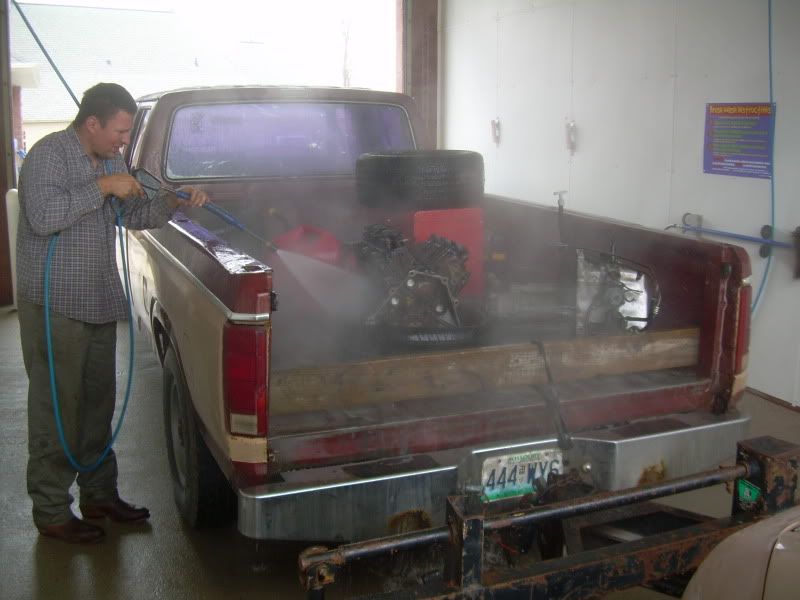
At this point, we loaded up the tools and headed over to Whiteman to get started in the hobby shop... only to find out that the hours had changed since the last time Matt had been by and they weren't open. Great. So instead of calling the whole day a bust we stopped at a car wash and hosed the car, the engine block, and the trans off and headed back to Matt's.
Stage 3: Parts clean-up and sub-assembly in Matt's yard
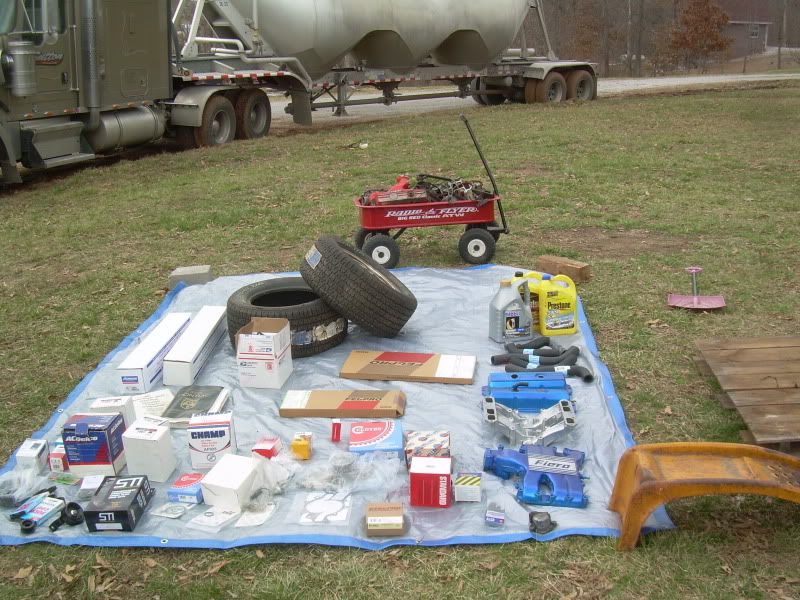
Since we couldn't get into the shop, we decided to do as much as we could in Matt's yard. First we spread out all the parts.
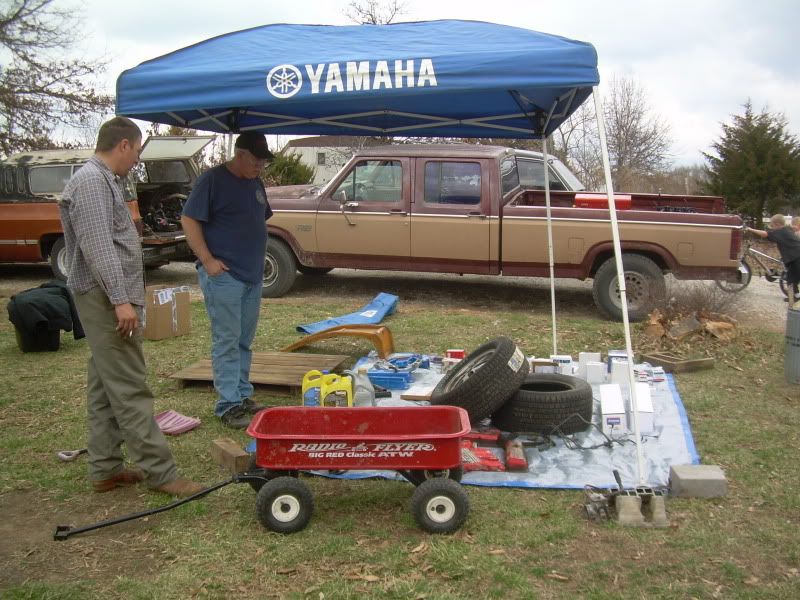
And set up a tent to keep the sun off of us
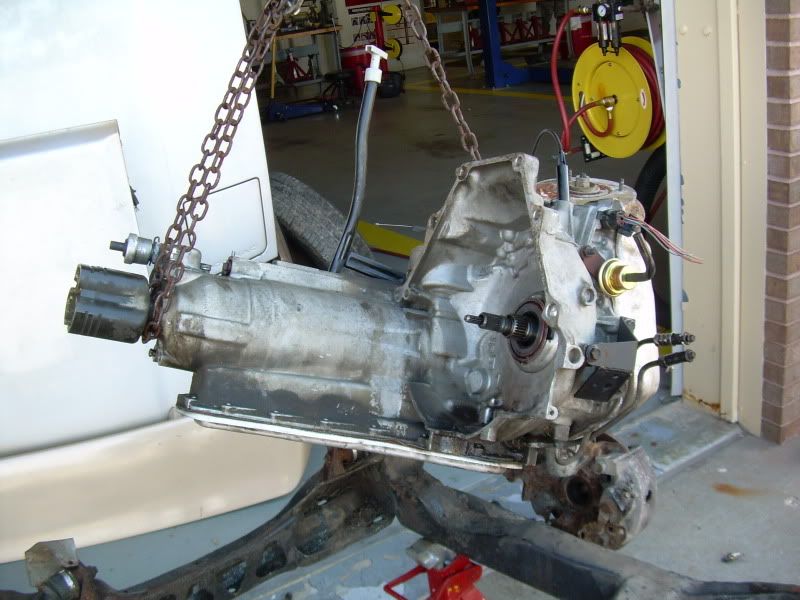
Then we converted the transmission from a digital VSS to a mechanical unit using an older style 4T60 cap that I got from BrewCheese. We somehow buggared up the threads and had to re-tap them, but it wasn't a big deal.
Salvaging the mechanical gears out of the TH125:
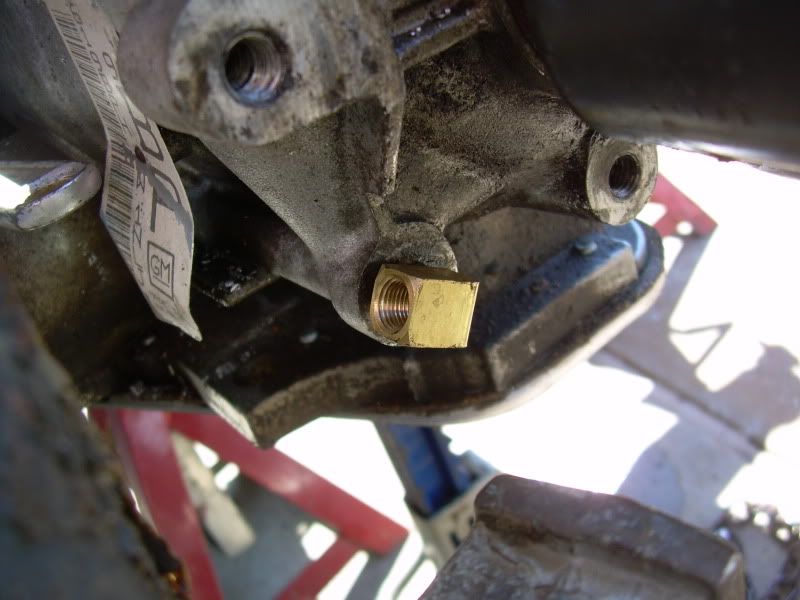
And then we put in a pressure sensor to run the overdrive switch on the 4T60.
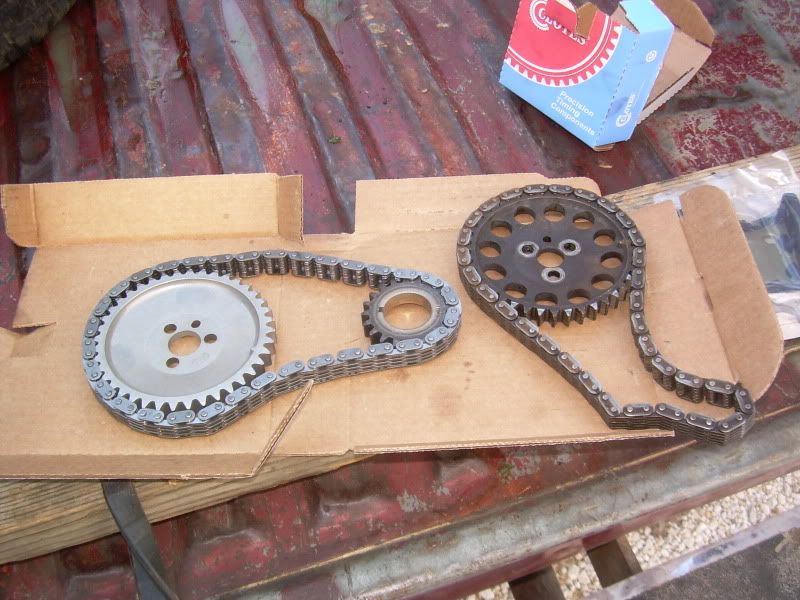
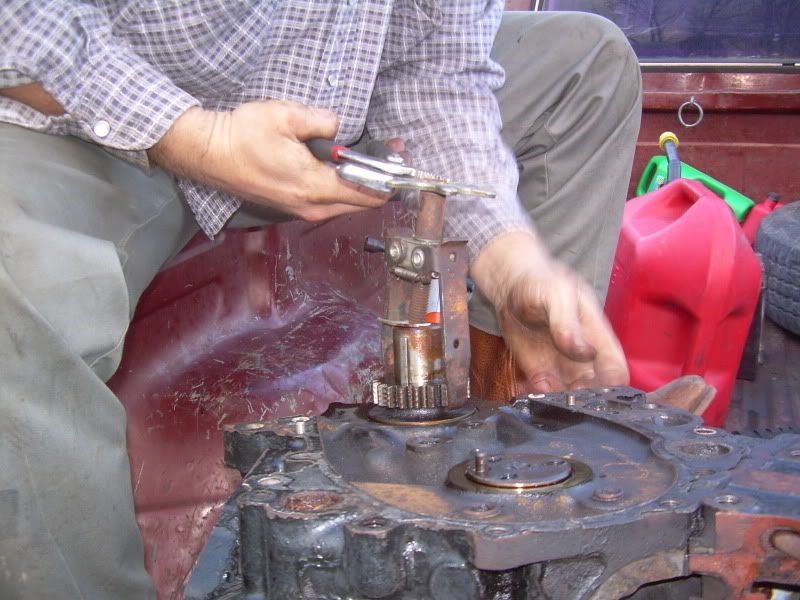
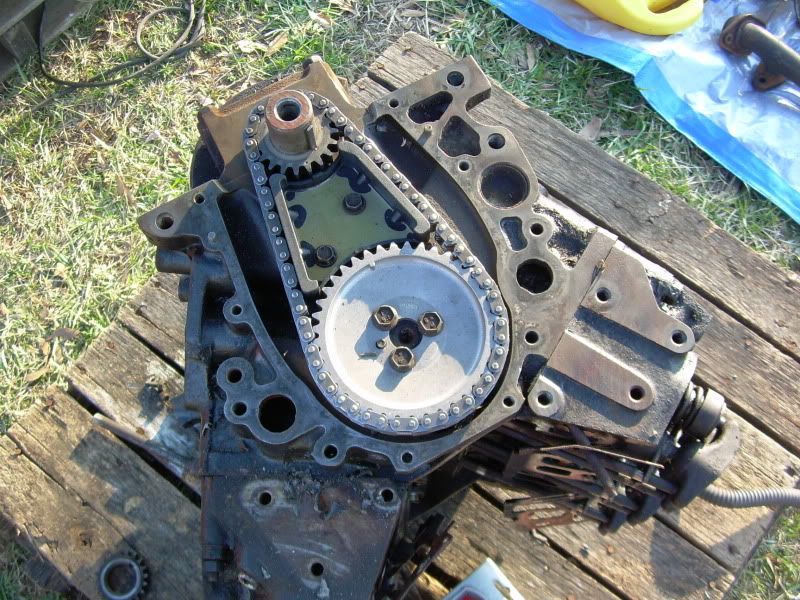
Then we changed out the timing set (like my makeshift gear puller?):
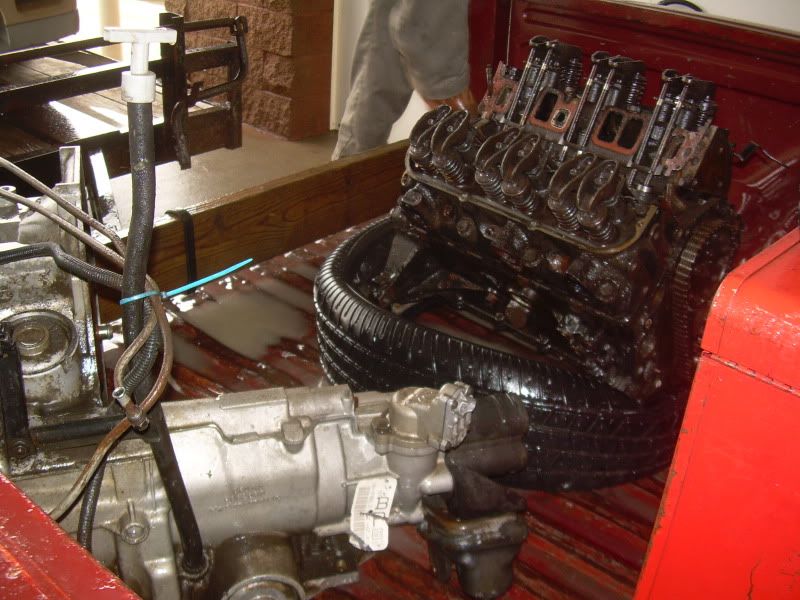
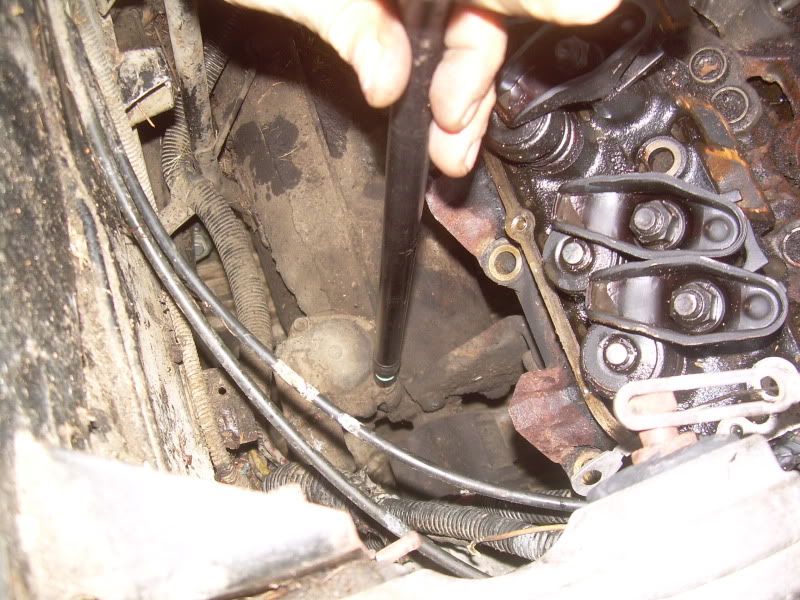
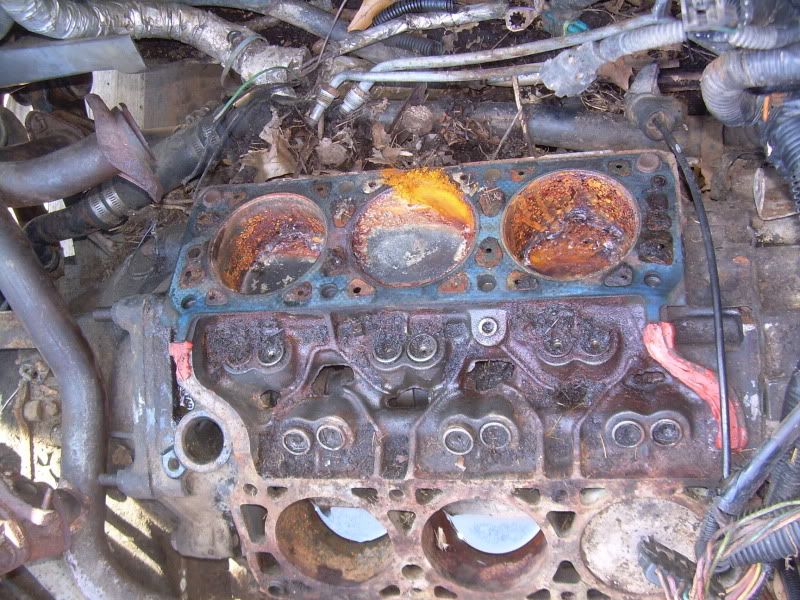
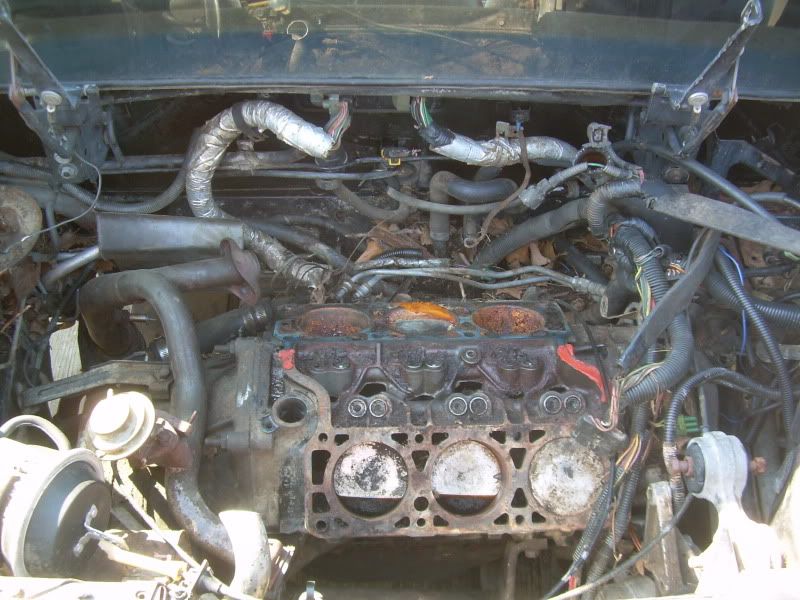
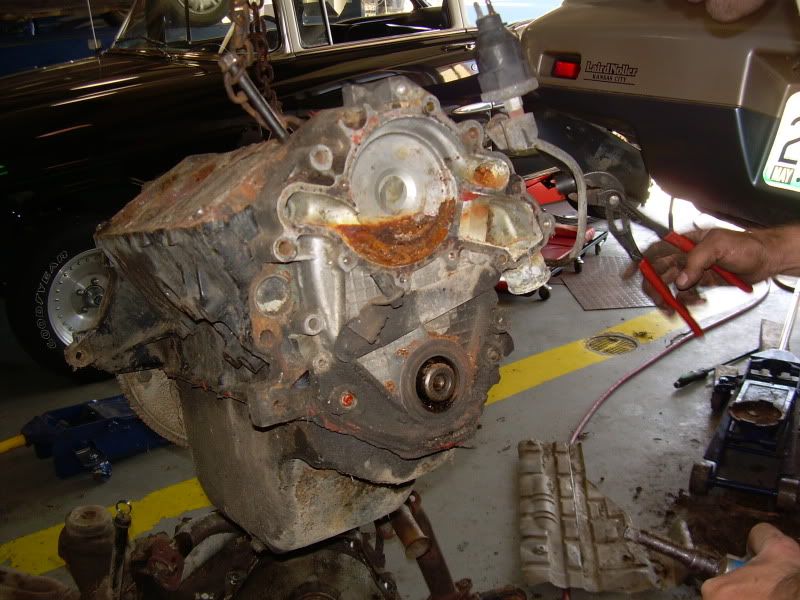
Then we decided to pull the heads off the old engine to get the exhaust manifolds and heat sheilds off. By the rust, I'm thinking the engine blew a head gasket and the oil turned to goop. When we later had it removed, we had a hard time turning it over.
Then I traded my honeycomb rims for a set that Matt had. He preferred the honeycombs where I didn't really care as I had a set of aftermarket rims to put on the car at home anyway.
Then we went into clean-up phase. We cleaned up the manifolds, put 1 working throttle body together from 3-4 spares that Todd had gave us, cleaned up the fuel rail, put new O rings on injectors, etc.
After the day was up, we packed up and got ready to head to Whiteman the next day (again ).
[This message has been edited by Alibi (edited 07-09-2010).]
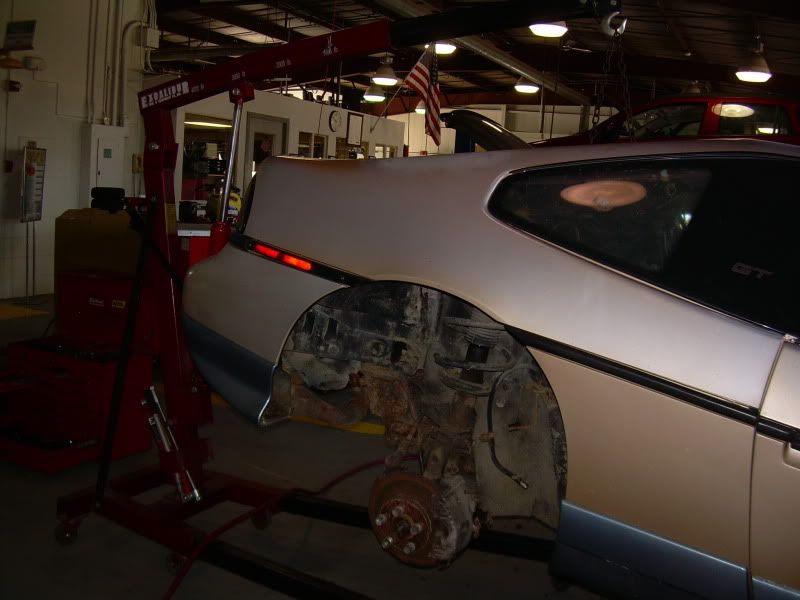
Stage 4: Dropping the car off at Whiteman and pulling the motor
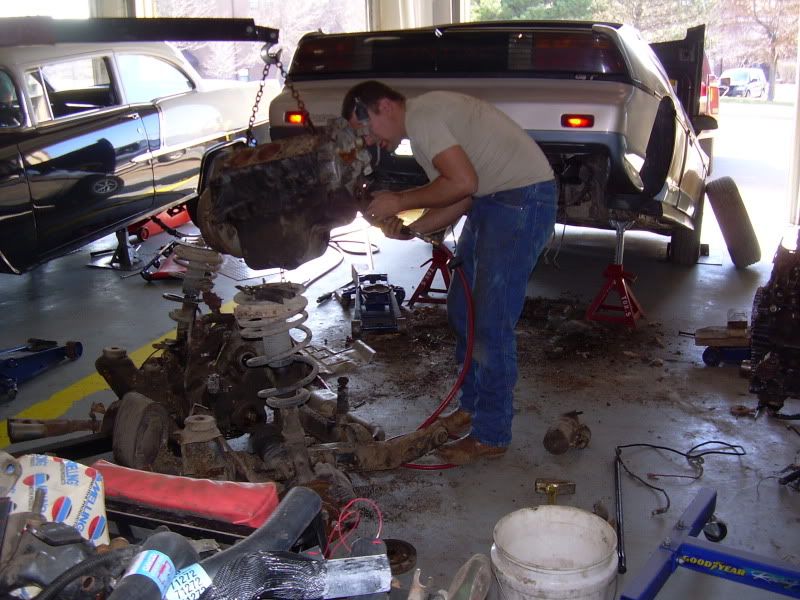
The next day we got up early and were on our way to Whiteman. I had to get a guest pass and then we went over to the shop. We backed the car in and started tearing into it.
With a sigh of relief, all 4 cradle bolts came out with ease! Huzzah!
Pulling the last bits off the firewall...
And its out!
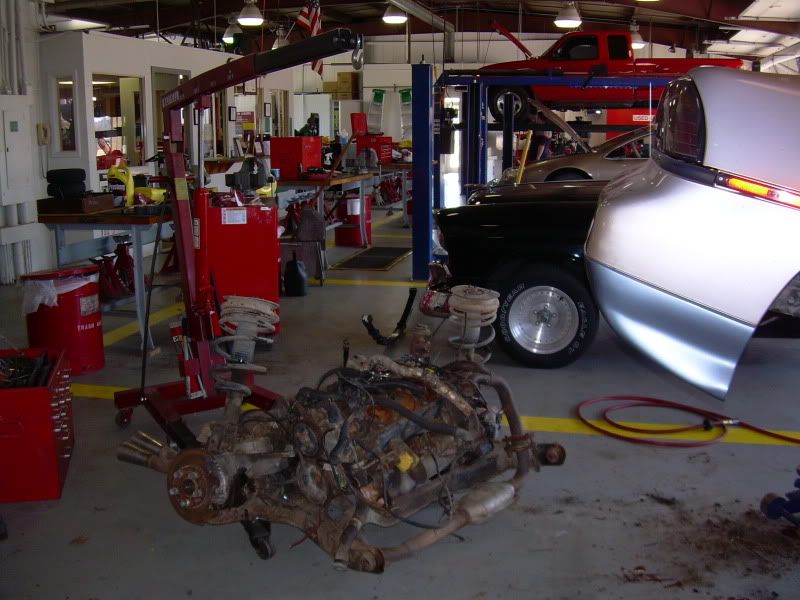
It piddled a little on the way out though. This pile would eventually grow quite large after I spent an hour or so picking out leaves, rat nests, old fiberglass insulation, sticks, etc. out of the bay.
Well, where abouts in Missouri are you? Whiteman is southeast of Kansas City. Matt now lives just south of KC in Independance. I was hoping to be able to make it up to visit him and help him with his 4.9 swap sometime this summer but so far things have been pretty crazy down here with moving and getting the Fiero running better than it has been.
I don't actually live up that way. At the time we did this I was living in Joplin (about 2 hours south of KC) but now I live in Pittsburg KS (40 minutes NW of Joplin, still 2 hours SW from KC). Theres several guys in the area if you ever wanted to come down this way to hang out. Theres also a pretty active group around KC if they're closer to you.
[This message has been edited by Alibi (edited 07-09-2010).]
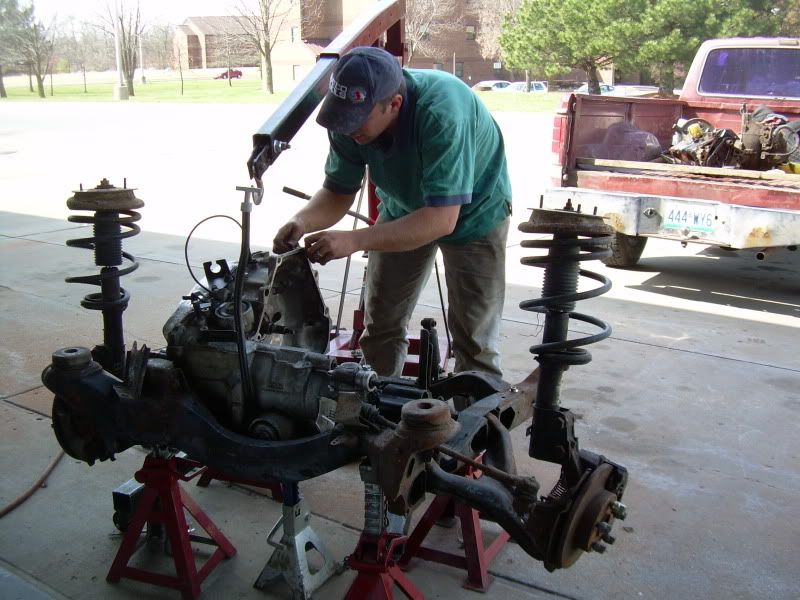
Stage 5: Disassembly and cradle prep for new powerplant
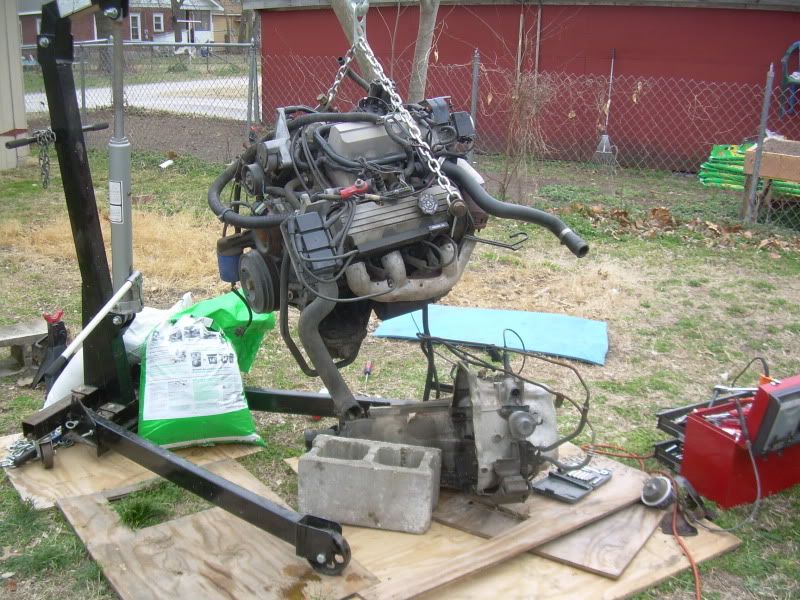
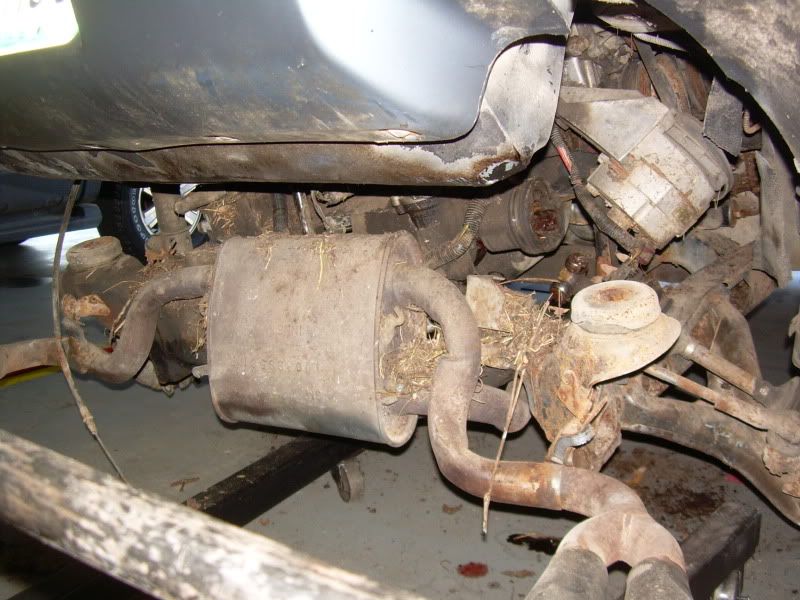
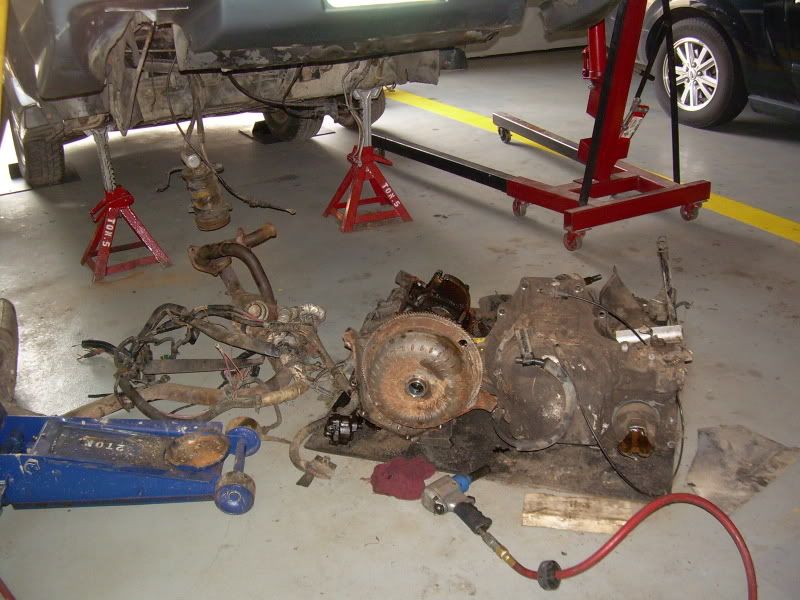
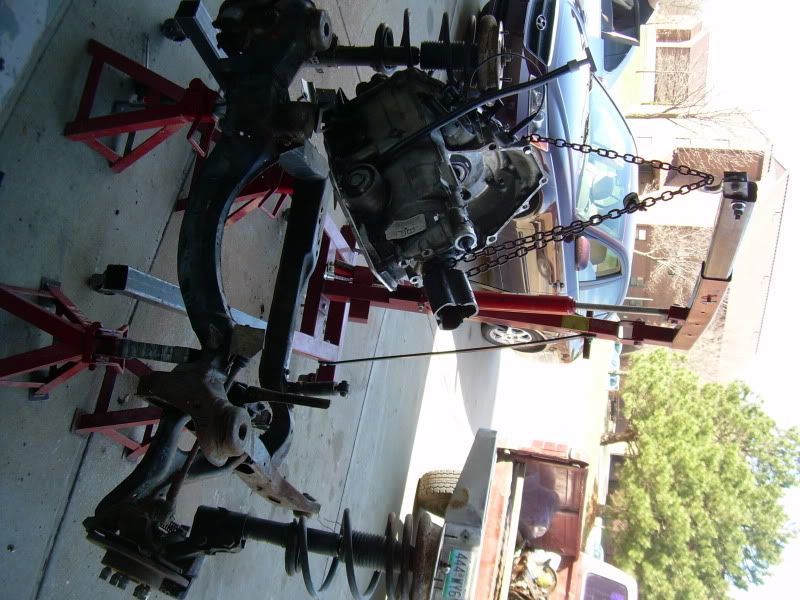
Now that we had the cradle out, it was time to yank the dead 2.8 and the crusty TH125 off the cradle so we could prep it for the 4T60 and the "fresh" 2.8.
Remember the giant pile of leaves and insulation debris I promised? The best I can tell is that the car sat for about 8 or 9 years under a tree with lots of mice and squirrels around to wreak havoc on the engine bay.
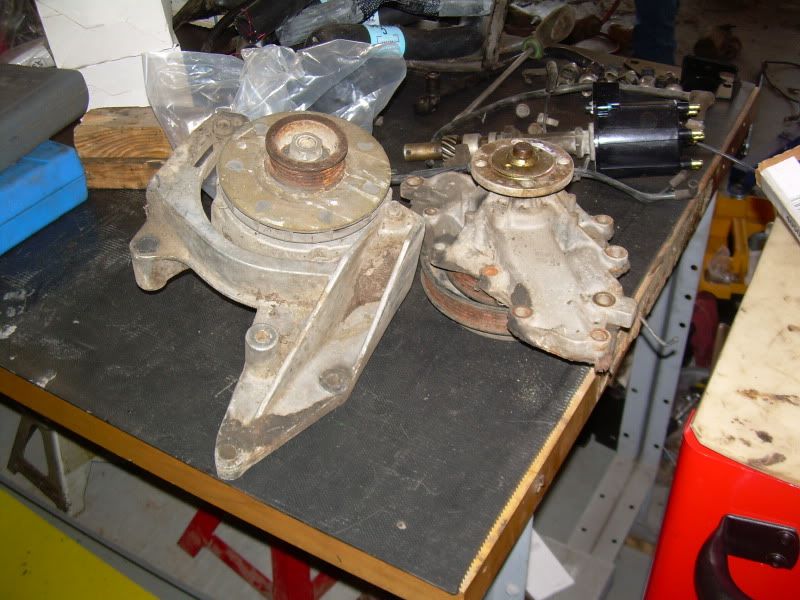
After we got the engine out we started pulling all the bits off it that we would need for the Fresh block. The alternator was the old SI 12 style and it was rusted solid. Also, the water pump was pretty nasty...
Matt getting the block off the cradle:
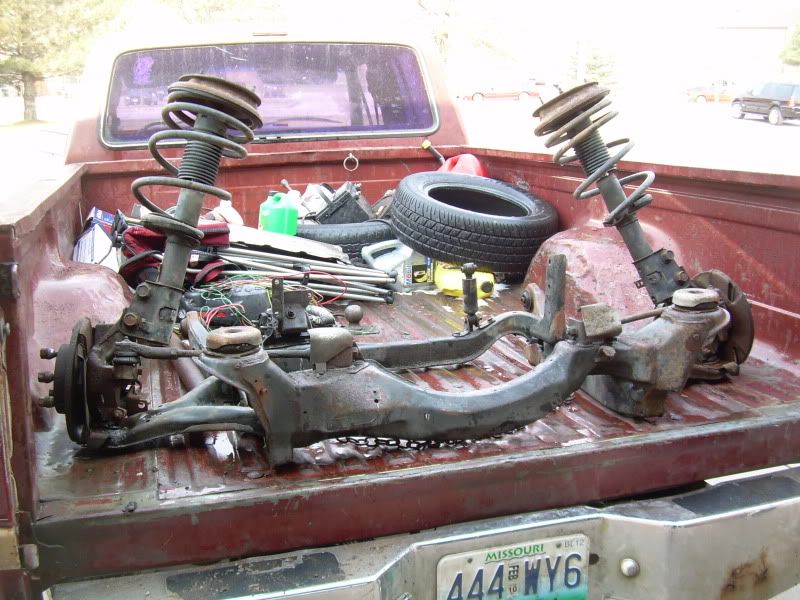
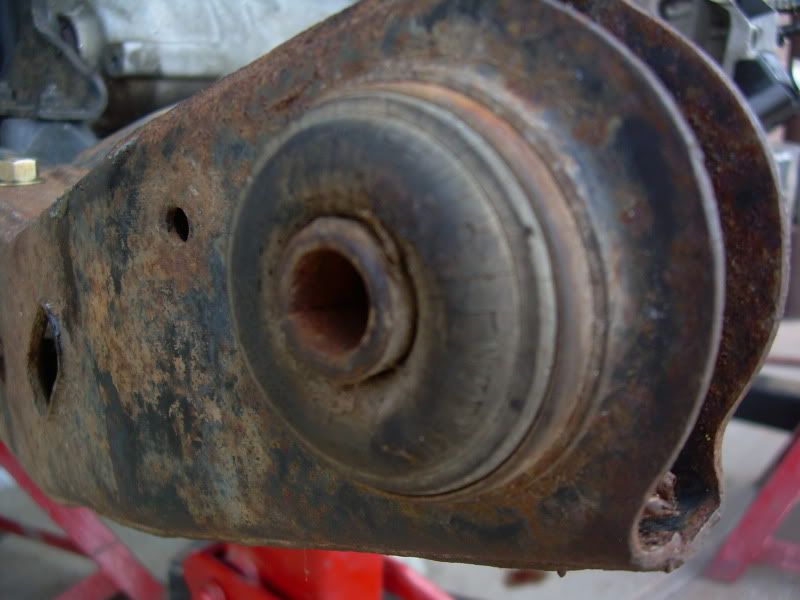
And the bare cradle, well, relatively bare We loaded the cradle up in the truck and took it over to the same car wash that we used to hose off the engine, trans, and car the day before and it cleaned up fairly nice. After we got the crud off I noticed that one of the rear control arms had paint on it like it came from a junk yard. The car must have had a light hit in one corner that bent that control arm because the bumper was a bit out of whack on that corner as well. We didn't find any other damage so we assumed everything was OK.
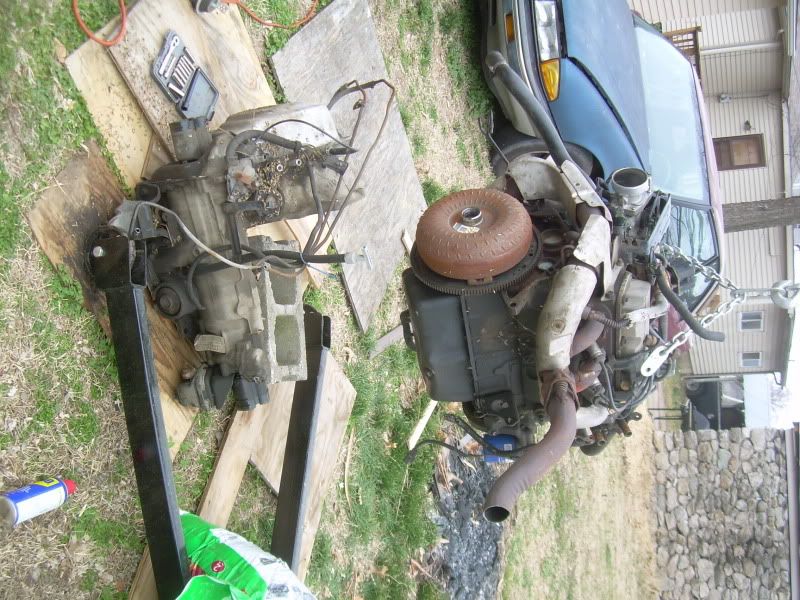
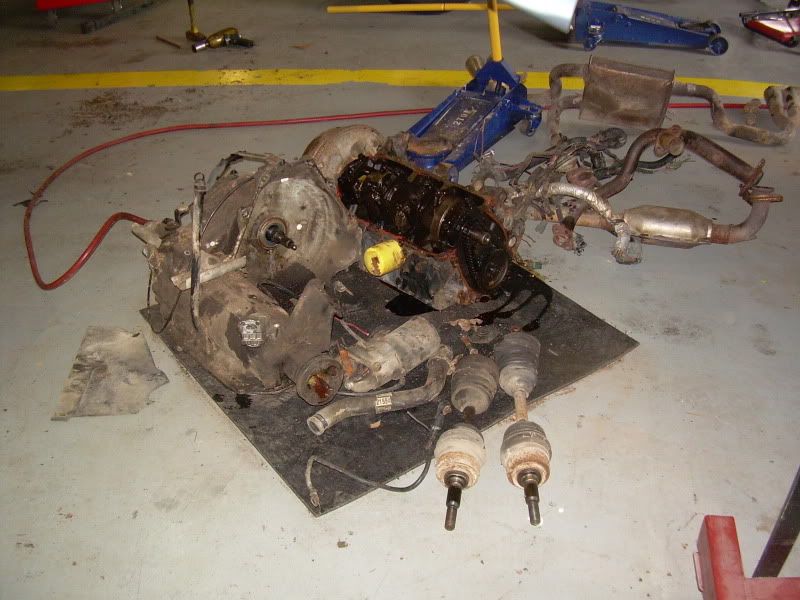
Here is our pile of dead parts: old block, trans, axles, alternator, water pump, and any other loose crap that we didn't need anymore. Eventually we loaded it all up in Matts truck after we stripped them of the parts we needed for the new stuff and Matt junked them. I assume he made a little money with all the steel and aluminum bits but I never asked.
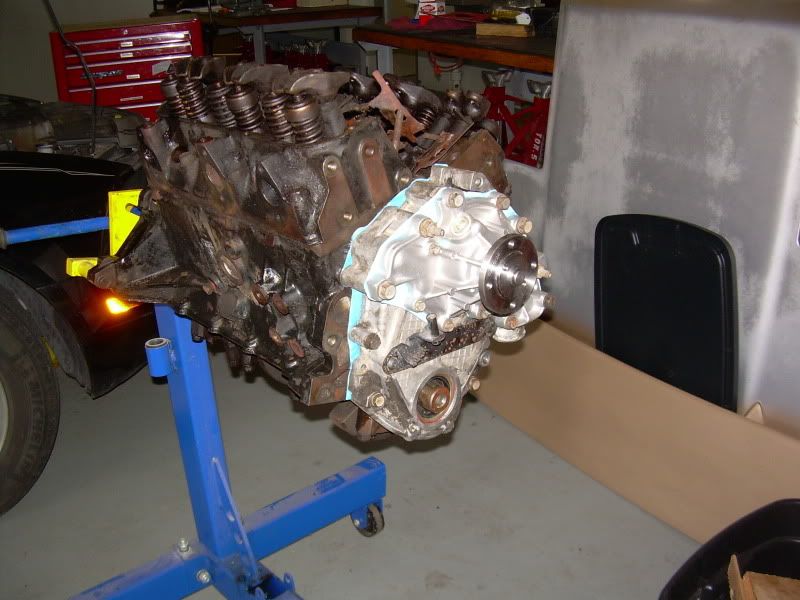
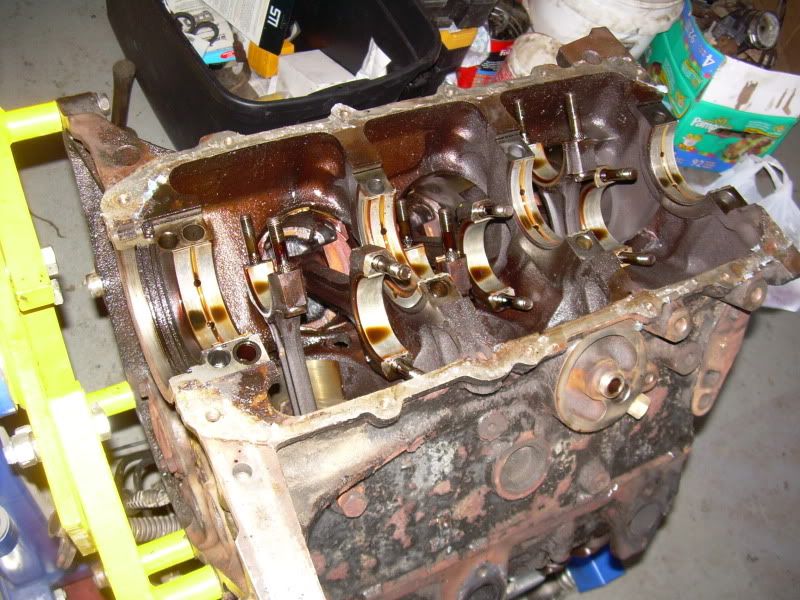
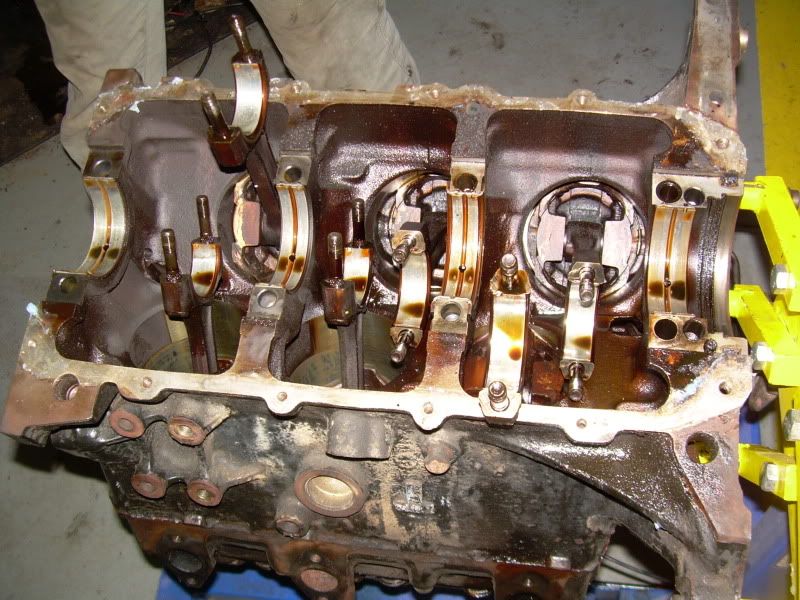
After we got the old parts off the old powertrain, we started working on putting the parts back onto the cradle. First we had to put the engine back together. This didn't go very smoothly because we were missing some parts that Todd hadn't noticed that we didn't have and NAPA gave me the wrong oil pump so we had to source that as well. It was just a big mess, really. In any case...
Anyway, the block on the stand with the front cover in place. We had a bit of a setback which forced us to focus on the transmission but more on that in a minute.
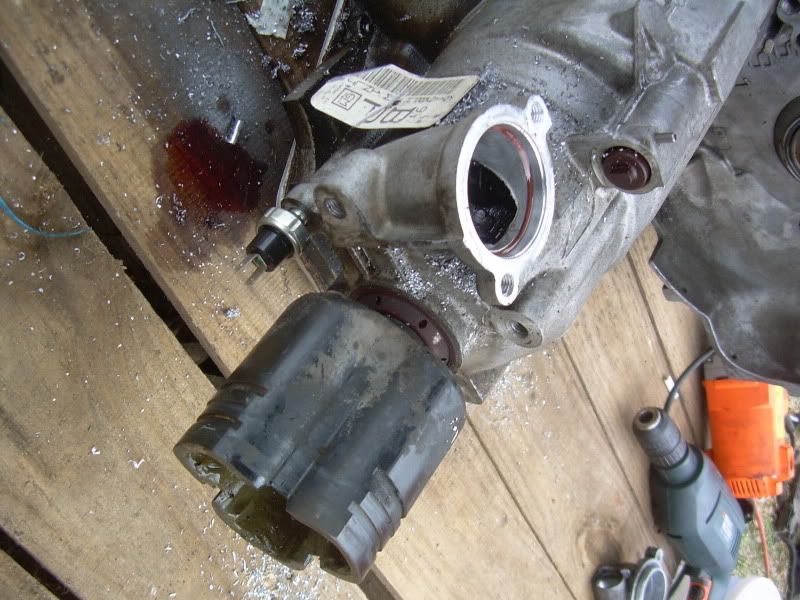
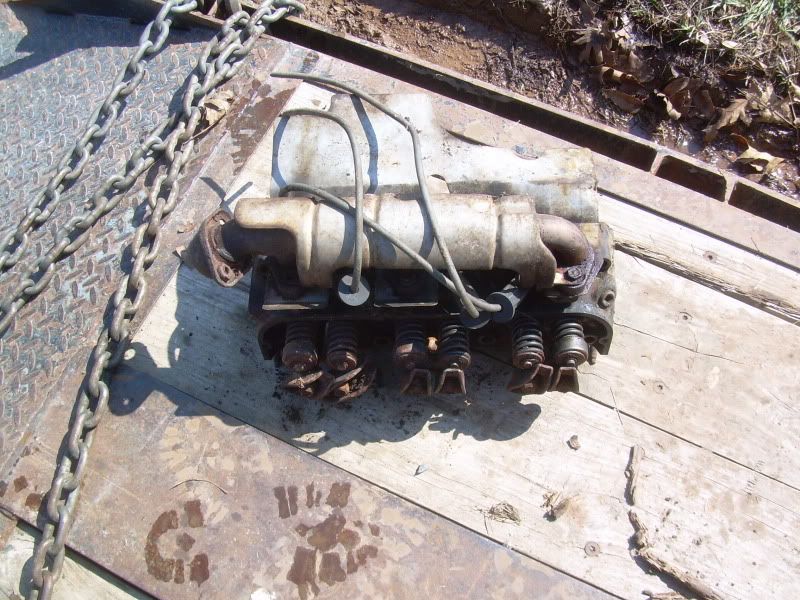
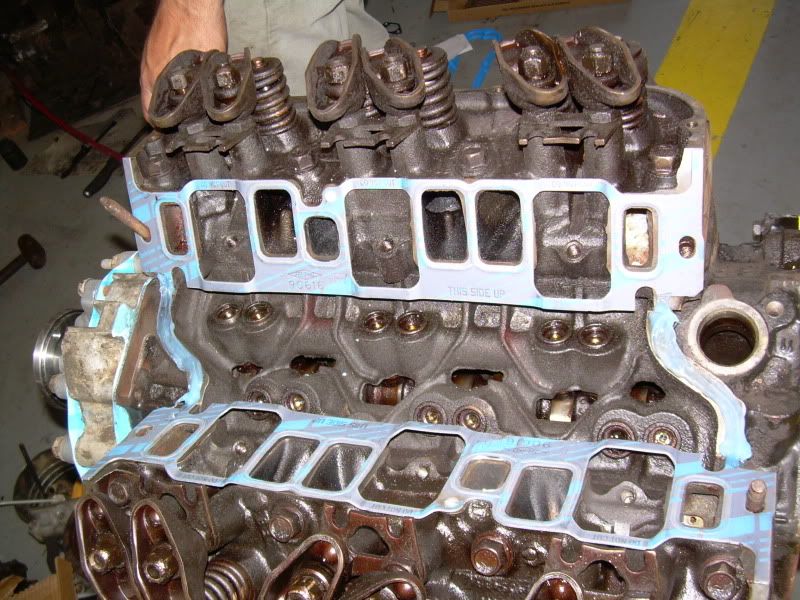
Lower intake gasket:
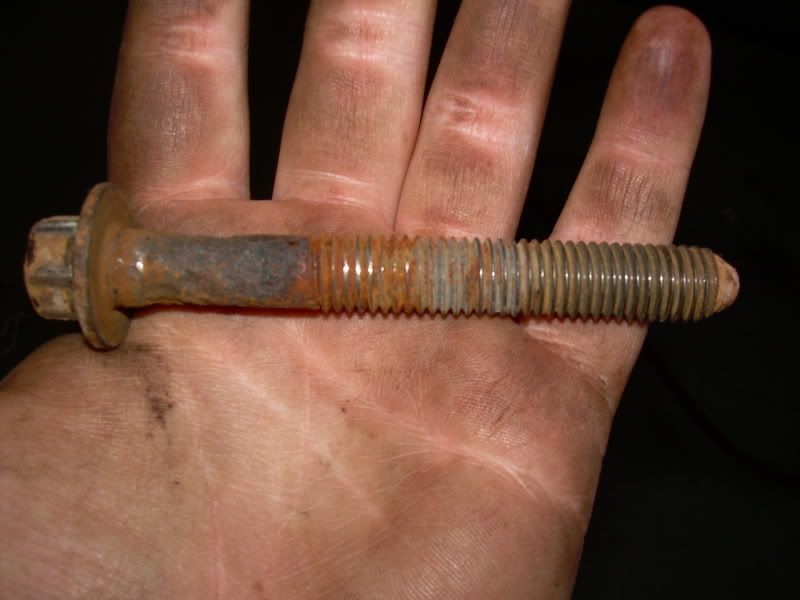
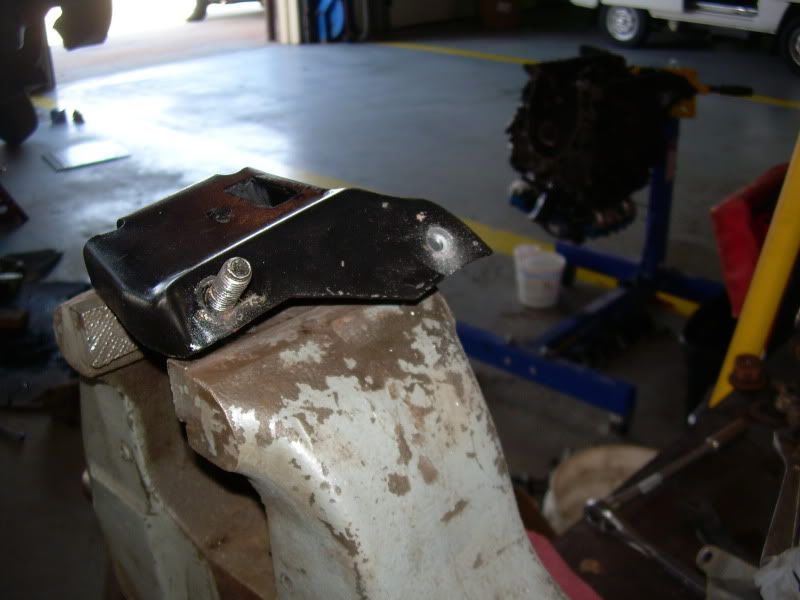
Then one of my mounts had a broken stud. Great. So we scrounged around in the shop's spare bolt bin until we found something that would work.
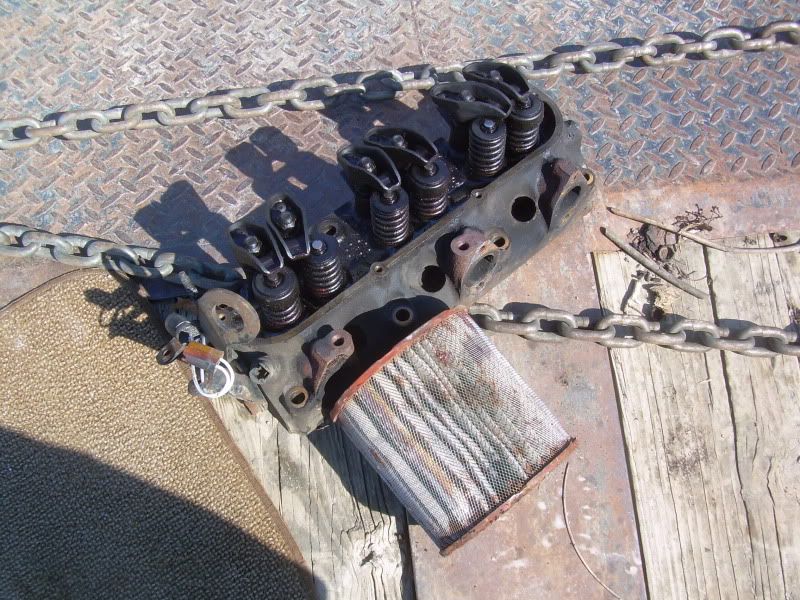
At this point we have the intake bolted on without the valve covers. Why? Because we are silly and thought that we could adjust the lash when the motor was running. Yeah... that wasn't going to work. That and its practically impossible to put the valve covers on with the intake in the way. Neither of us really knew what we doing, but at least I had a factory manual to help us along. More on that later.
Here we're using the cherry picker to lower the transmission in place while we try to figure out how the RockCrawl mounts worked.
There we go! We figured it out and got the transmission mated to the cradle. While it was out in the sun we checked over the cradle mounts. I had ordered a set from a member on here who I paid, and then never heard from again. Laiho1, you owe me $50 for those poly mounts I bought from you!! Jerk. Anyway, my rubber mounts looked like they were in pretty good shape so I wasn't too worried about not having the poly mounts.
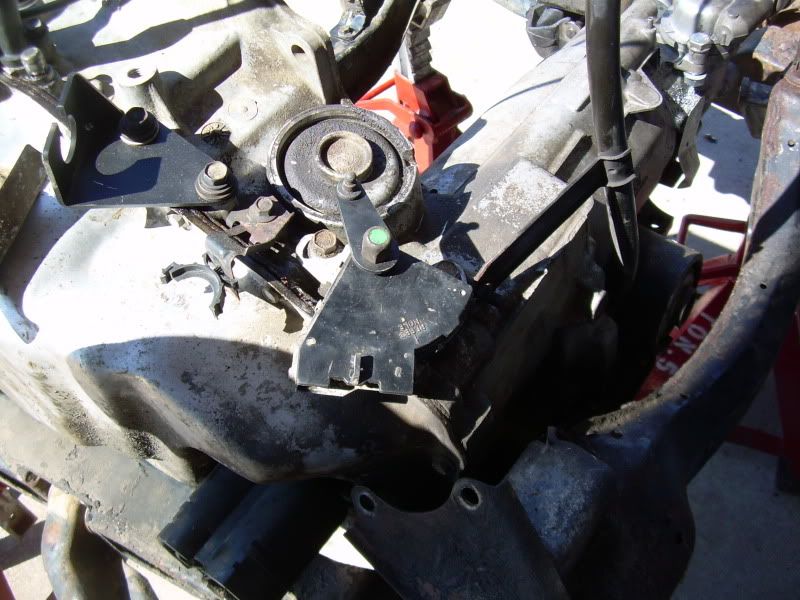
After the trans was on the cradle, the TH125 park/neutral switch was modified and mounted. Also, you can see the RockCrawl cable mounts installed as well.
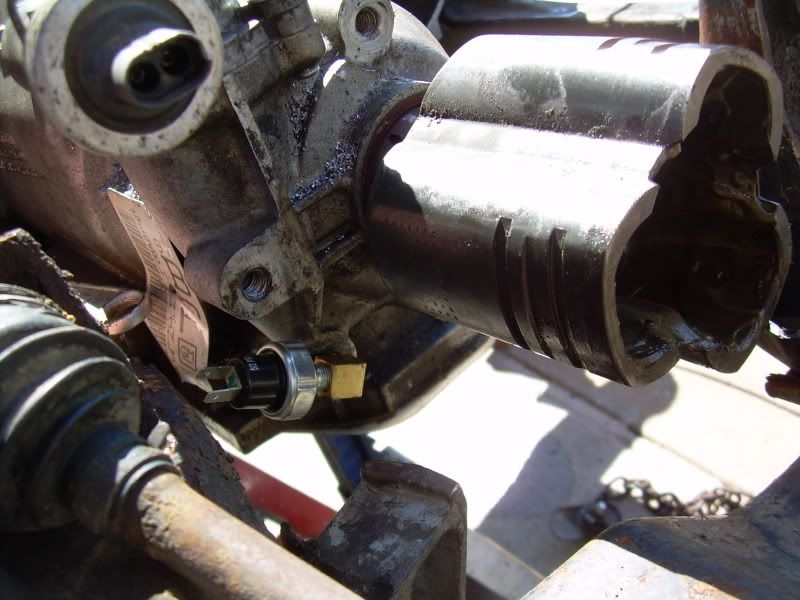
And the pressure switch needed an elbow to move it enough to clear the axles:
[This message has been edited by Alibi (edited 07-09-2010).]
Stage 7: A setback occurs and then the motor (finally) gets mounted to the cradle
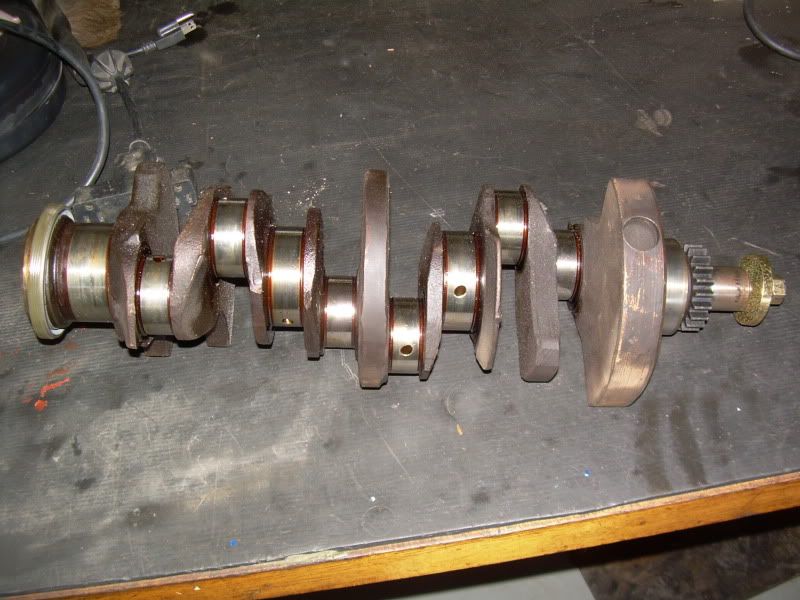
While we were installing the harmonic balancer, we ran into a snag. The freaking mounting bolt snapped. Arrrrrgh! We first tried to remove it with reverse drill bits and easy outs but nothing was working. Our only option was to pull the pan, and pull the crankshaft out and get the old bolt drilled out and the hole re-tapped.
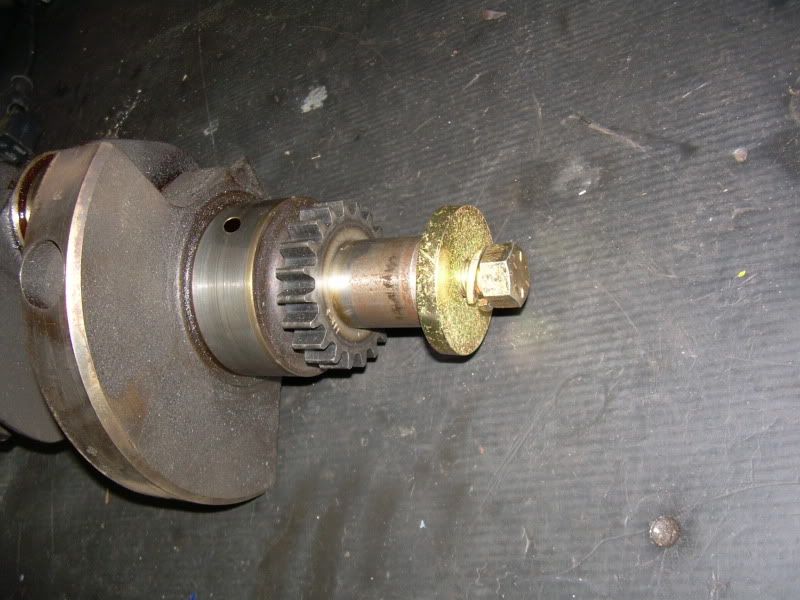
So we took the crank to a local machine shop and left it there overnight. We picked it up two days later (in which time we were working on the transmission and anything else we could without the crank on) where it had been re-tapped to 1/2-22, I believe, a standard dampener bolt size for older American cars. At least that made finding a replacement bolt fairly easy.
And back in:
And now back to putting the balancer on.... this time tapping it in place instead of using the bolt to pull it down. We should have used a proper install tool though, which I ended up using a few months later to replace the balancer with a new one. Worked much, much better than tapping it in place.
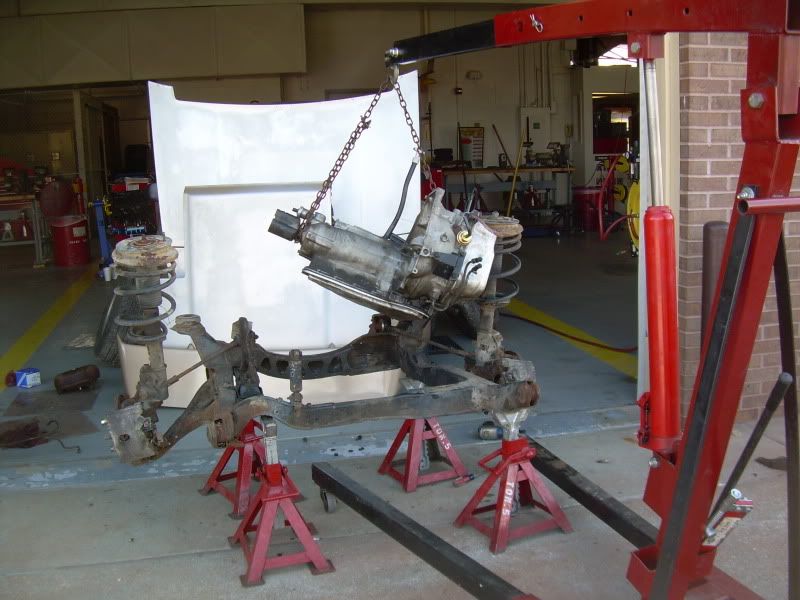
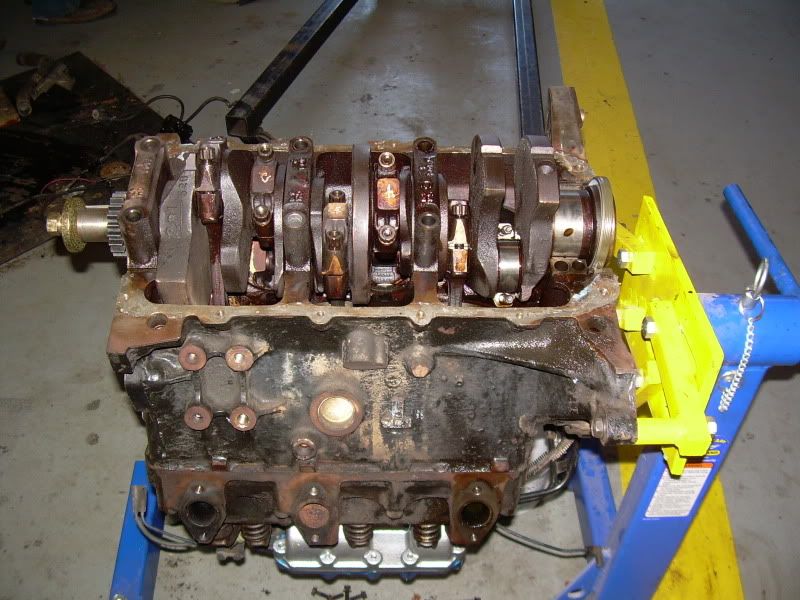
Now with the motor back together its time to pull it from the stand and put it on the cradle:
At this point I'm running out of days for my spring break and its getting painfully obvious that the car isn't going to be driveable to get it back home. I'm not sure why I ever even thought that it would so I took a day off to shuffle some cars around.
I drove about an hour north to swap my Buick for my brother's pickup. He lived up in North KC at the time and had inherited my grandfather's old 95 F-150 with a straight 6. I figured it would do well enough to pull the Fiero back home before class started and then I would finish the car in my car port now that the hardest part of the swap was done (the motor/trans shuffling). Sounds simple enough, right?
Well... the girlfriend was annoyed that I hadn't spent any time with her for the whole break so I figured that since I took the day off of working on the car that I'd go see her and hang out. So I drove the truck two and a half hours south back to Joplin to eat a nice dinner and watch a movie with my girlfriend. Went over well untill I told her I had to go back the next morning and that I had to leave at about 7 AM.
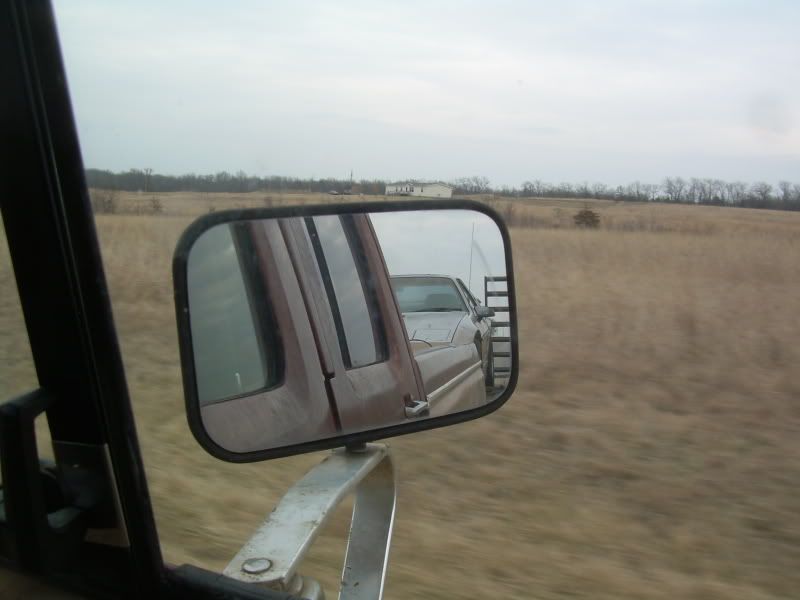
Anyway, I got up the next morning and on my way I gave Matt a call so that he could meet me at the gate of the base and let me in with the visitor pass (I have to be accompanied with him to get in) at which point they had to search the truck. Kinda interesting to watch them go around it with a mirror to check under the truck.
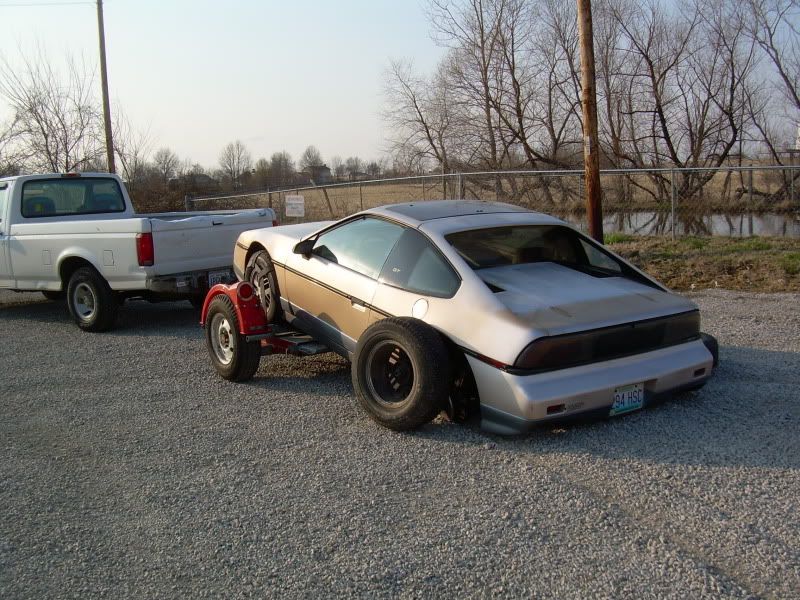
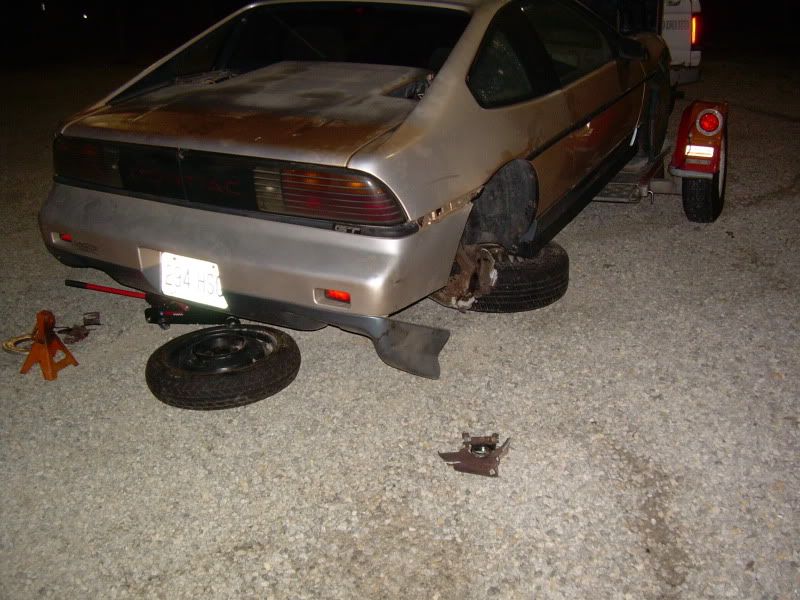
Anyway, we got back into the shop where we pulled the cradle up the car and bolted it in, picked up all my tools and tossed them into my brothers truck. We had a huge mess to clean up and it took us probably a couple of hours to get all the tools back to where they belonged and then getting all the grease, oil, dirt, old parts, etc. picked up. After we finally did, I pulled my brothers truck around to the garage door in front of the Fiero and we rolled it onto a Uhaul dolly I had rented that morning on my way into the base.
We were in a hurry and didn't think everything through. First, we put an automatic-trans car nose-first on a dolly. Second, we did that because we thought it wouldn't matter because we didn't hook up the axles. And yeah, the main mistake was that we didn't hook up the axles. More on that in the next stage.
In retrospect, I should have just gotten a flat car hauler and not a dolly...
Like I said in my earlier post, I borrowed my brother's truck and rented a dolly to move the car. We got it loaded at Whiteman and we were on our way. Unfortunately, neither I nor Matt thought that leaving the axles out would cause a problem. At the time I didn't know that the axles where the only thing holding the rear hubs together! Arrrrgh, if I only I had known and I would have made sure that the axles were put in before loading the car. Hind sight is 20/20.
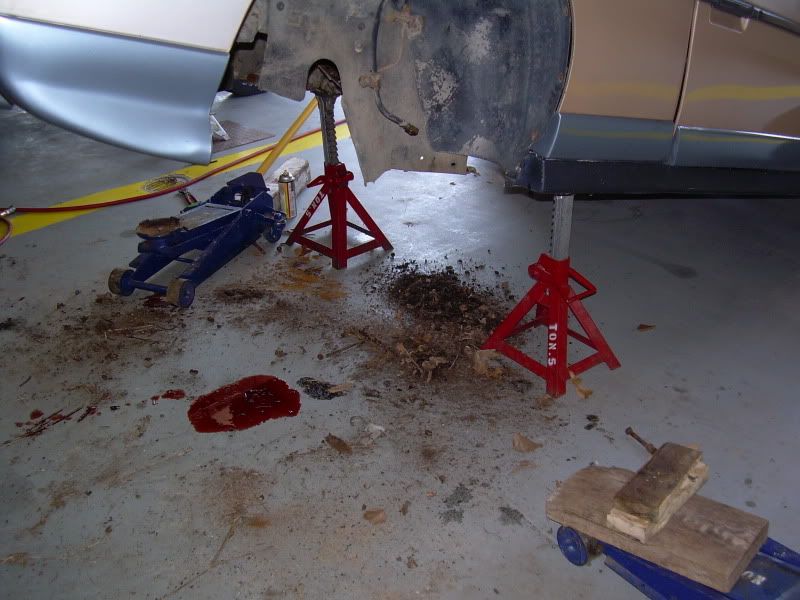
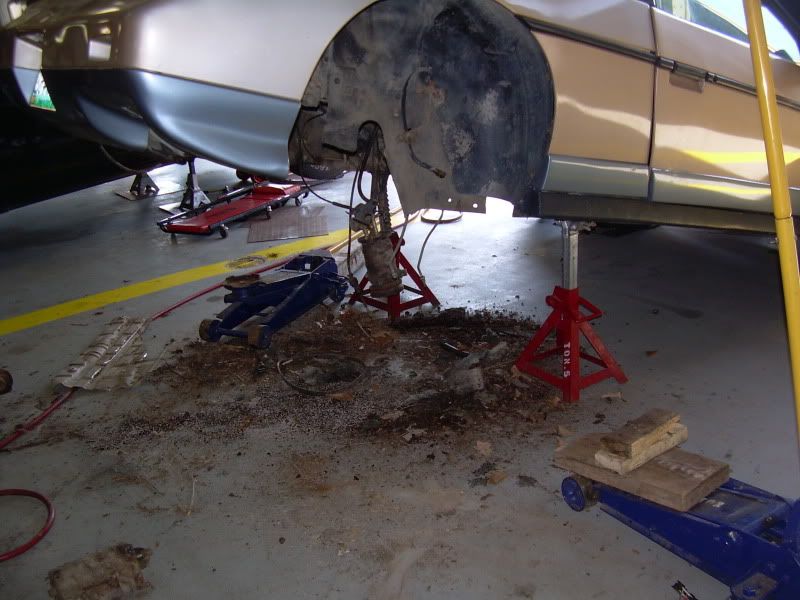
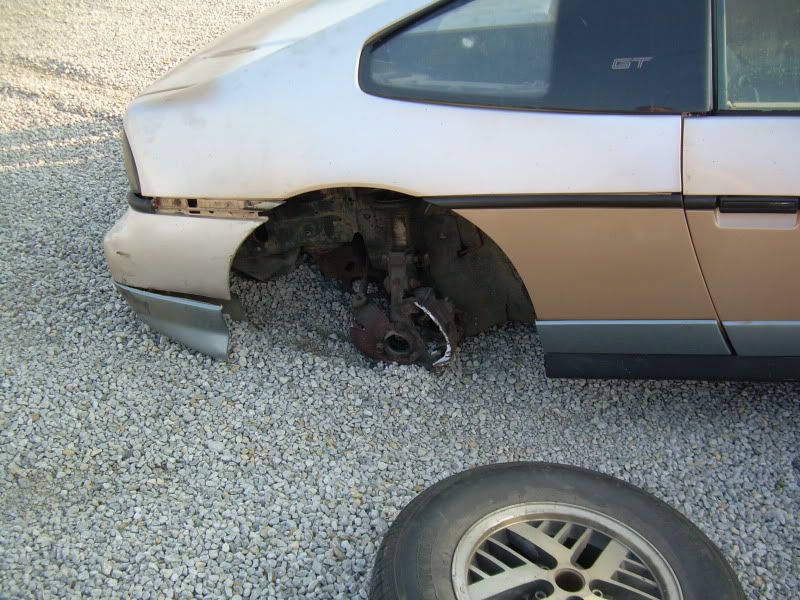
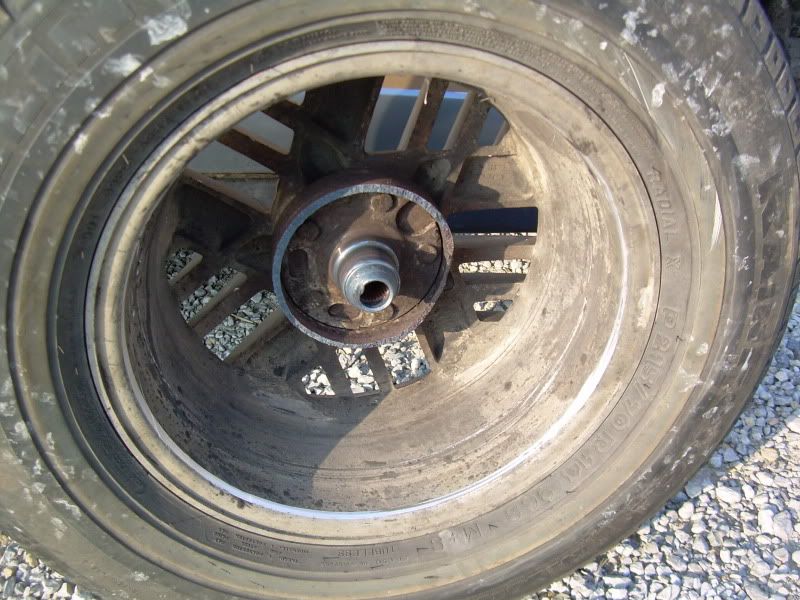
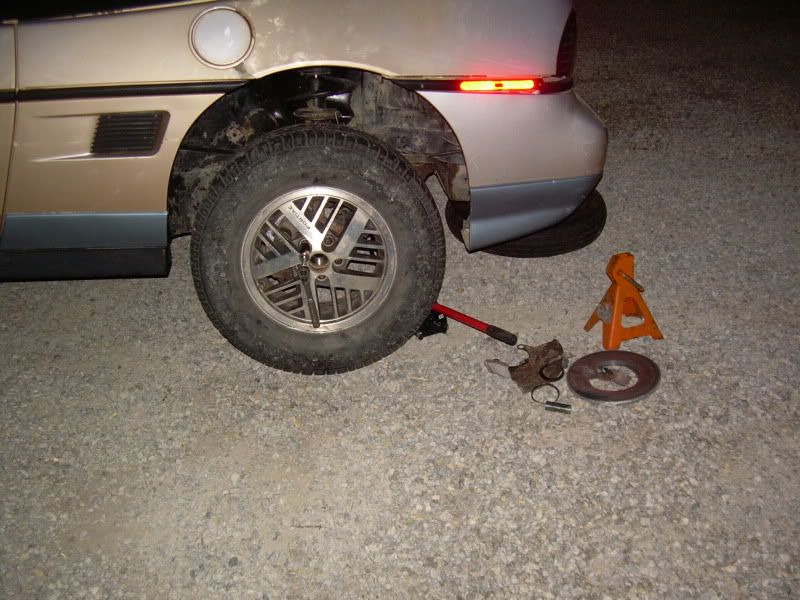
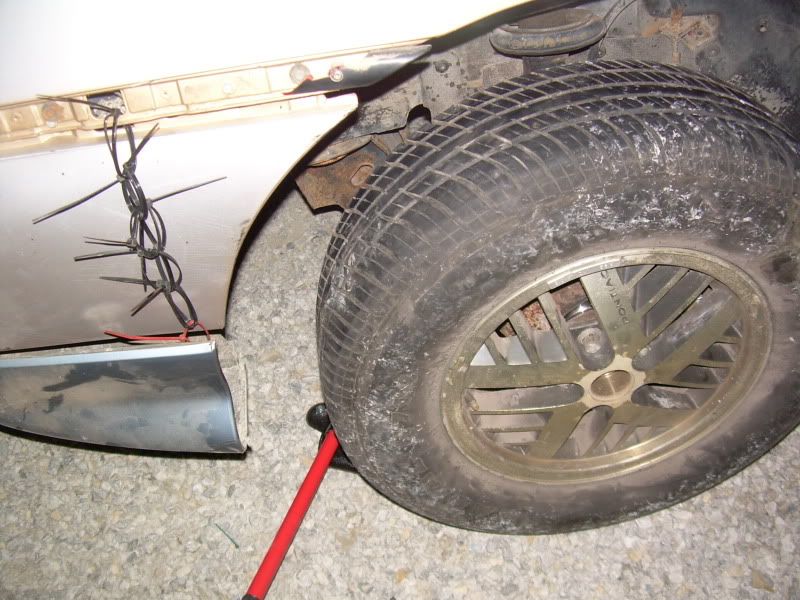
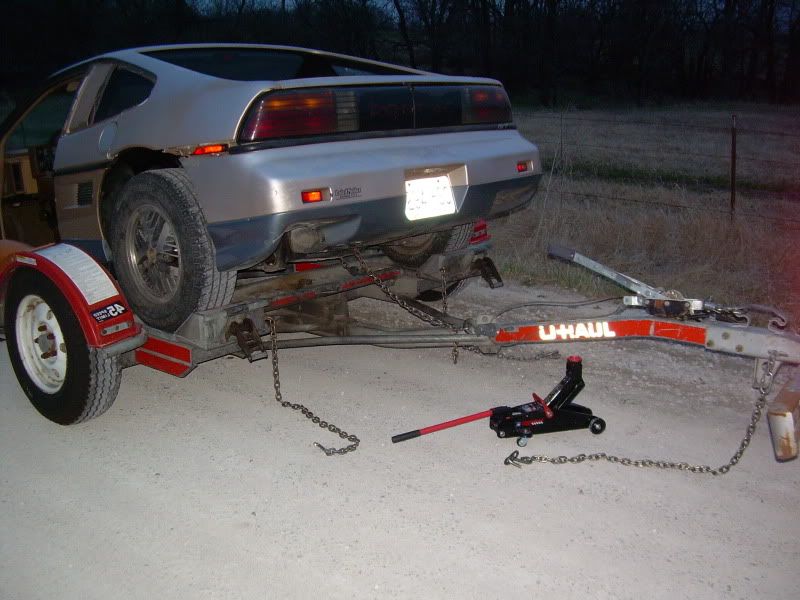
A few miles out of the base we were heading towards a gas station to top off the tanks and double check the tie-downs on the car when it started to fish-tail really bad. I slowed way down and started to pull over when the DS rear hub decided to separate, which only made the PS hub fail as well. So yeah, both wheels off, the rear of the cradle dragging on the gravel of the shoulder.
To just get the car off the shoulder I just dragged it slowly through a gravel parking lot and parked it. It was between a gas station and a strip club, but it was towards the back and out of the way so it was OK. Both rear calipers, lower ball joints, hubs, disks, and brake lines were FUBAR. The force of the wheel popping off also cracked the fastback clip and a chunk came off, but I managed to save the piece and it was later glued back together.
Unfortunately, Matt had to get back to his life so he had to leave but he advised me that I just chill out in the parking lot for the night, get up in the morning and head to a junkyard and get a couple of junk axles and suspension bits to just put the car together enough to get it home. I didn't want to wait so I got on my phone and started calling local auto parts stores to try to find some new hubs (thank god for Goog-411 ... google it if you don't know what it is). I found a couple, in different stores of course, and I was on my way in my brothers pickup to get them. I also didn't have a jack on me so I dropped by a wal-mart on the way back and picked up a cheap jack.
After I got back to the dollied Fiero, I pulled off all the broken bits, jacked up the rear of the car the best I could (using the wheels as jack stands) and replaced the hubs.
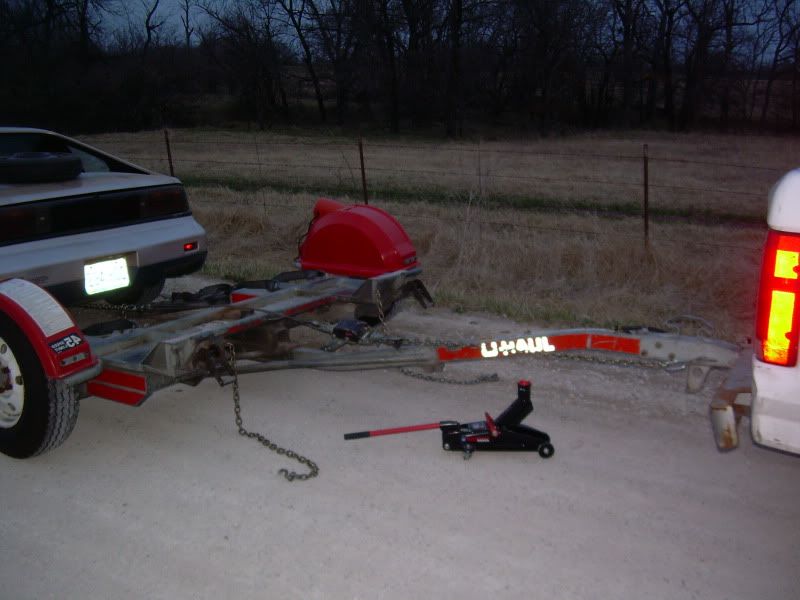
Now that I had the hubs replaced, how would I keep this from happening again? I called Todd and he suggested that I go ahead and pull the rear suspension off and install my axles and then take the car off the dolly and put it on rear-first. Well, I didn't put the axles in like I should have, but I did roll the car off the dolly, unhooked the dolly from the truck, rolled it by hand to the rear of the car, hooked it back up to the truck, and pulled the car back up onto the dolly by using a come-along that I borrowed from Todd and the security chains that I pulled off the dolly.
The trip back home was very nervewracking considering how spooked I was about having something else fail on the car and I had NEVER towed anything before in my life. Going down the narrow winding roads leading to the interstate really sucked, but after I got on the interstate it was actually quite pleasant. It was a cool, dark night without much traffic so I just kept it slow and took my time getting home. After I got the car turned around I finally made my way back home. It was probably 1 or 2 AM when I finally made it back in town.
I was exhausted so I didn't bother to unhook the dolly so I just brought my tools inside and went to bed. The next morning I got up, removed and returned the dolly to my local Uhaul and used my brother's truck to drive to class. I drove back up to KC to drop the truck off after class and picked up my Buick and came home that night. Needless to say, it was one hell of a long week, but it was also one hell of an experience. I made some friends, learned a lot of pulling cars apart, and learned how to fend for myself when I was stuck with a problem alone.
I think I did ok.
IP: Logged
10:17 PM
Jul 13th, 2010
thumper_64735 Member
Posts: 704 From: Lebanon, MO, USA Registered: Sep 2006
It was definately an experience for both of us. I've got a new project car, and the collection has grown to three since the last time we got together. I'm also about an hour or so closer to ya now, as I live in Adrian. Some time when your coming up this way let me know and we'll try to get together and have some BBQ. The car is looking great, and has came a long way from the night we first picked it up. Maybe ya can help me out on a little paint project I have. Keep up the good work, and how about some engine/interior shots?
IP: Logged
08:58 AM
Synthesis Member
Posts: 12213 From: Jordan, MN Registered: Feb 2002