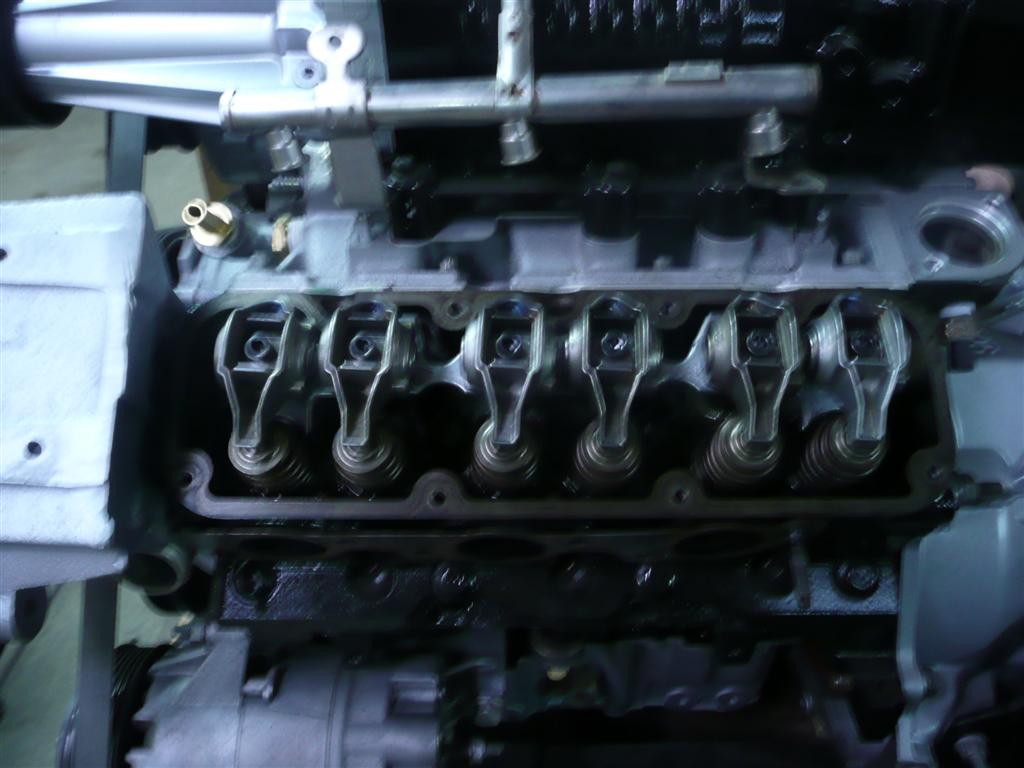
Looks like I have plans for this Saturday to go up and help... so we should have some new pics soon!!! I got the 1.9 rockers and the 3.4 pulley from ZZP today.... so those will get installed - and maybe get the engine in the bay!
IP: Logged
02:46 PM
Phoenix4404 Member
Posts: 69 From: Louisville Ky Registered: Nov 2009
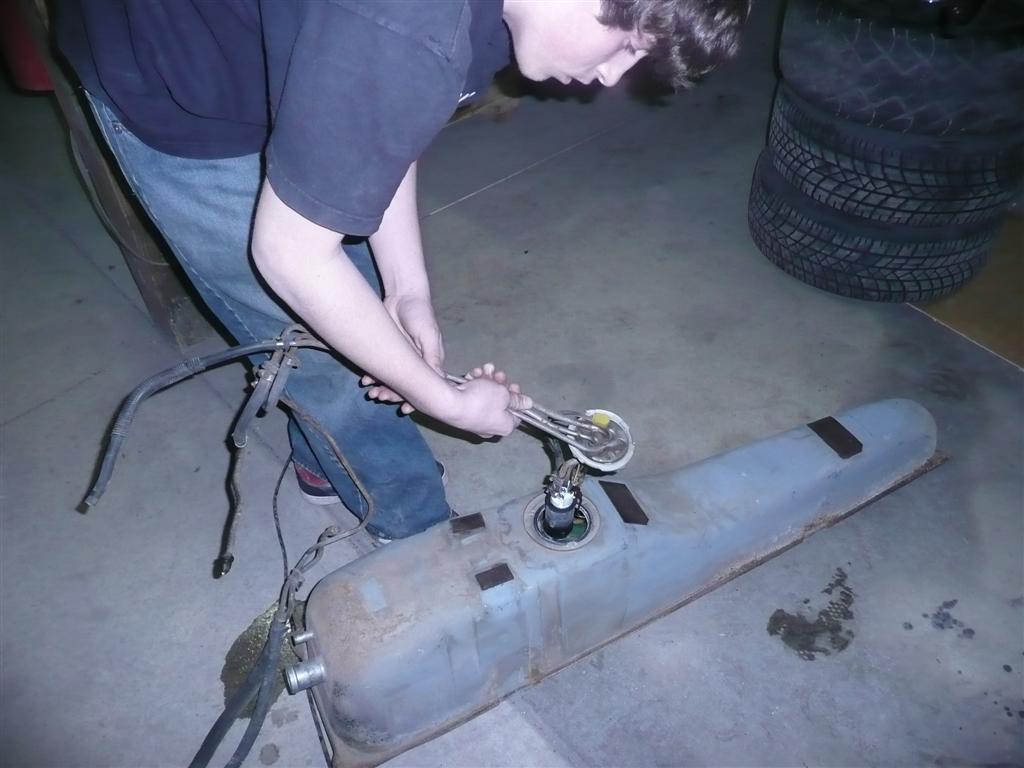
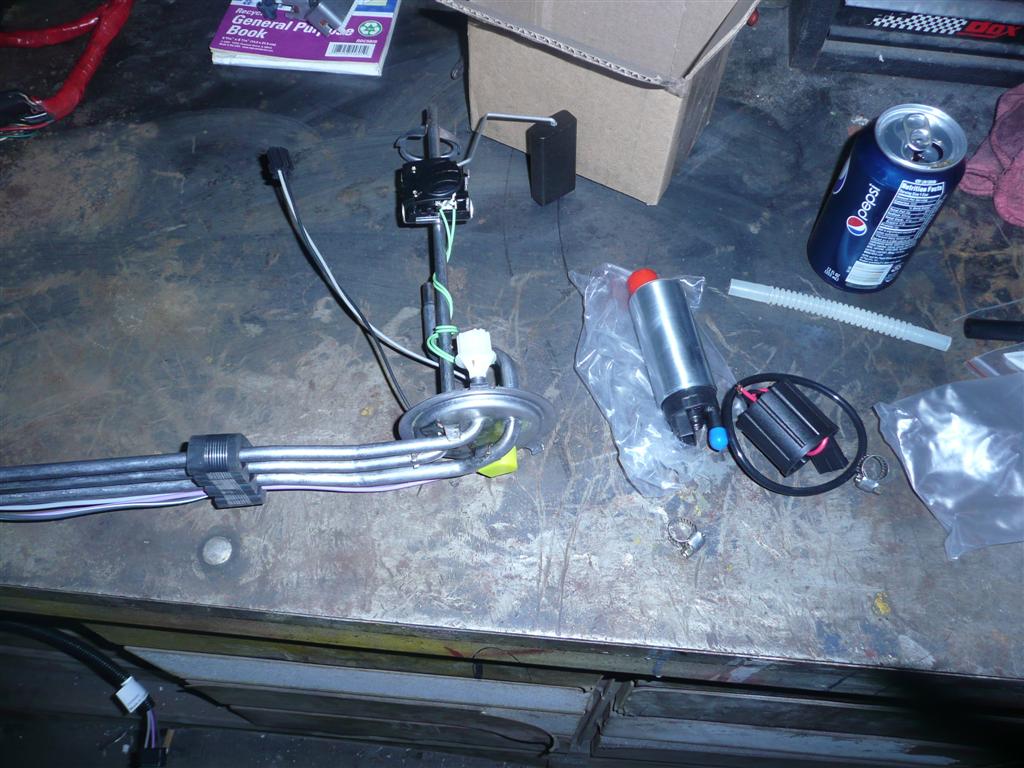
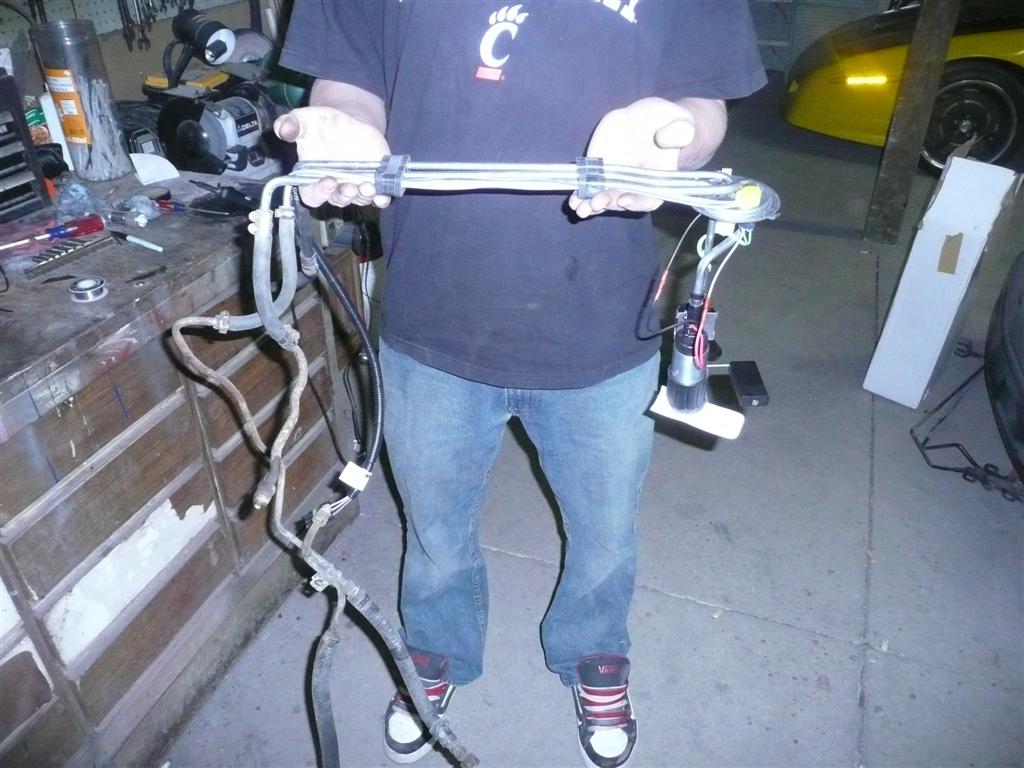
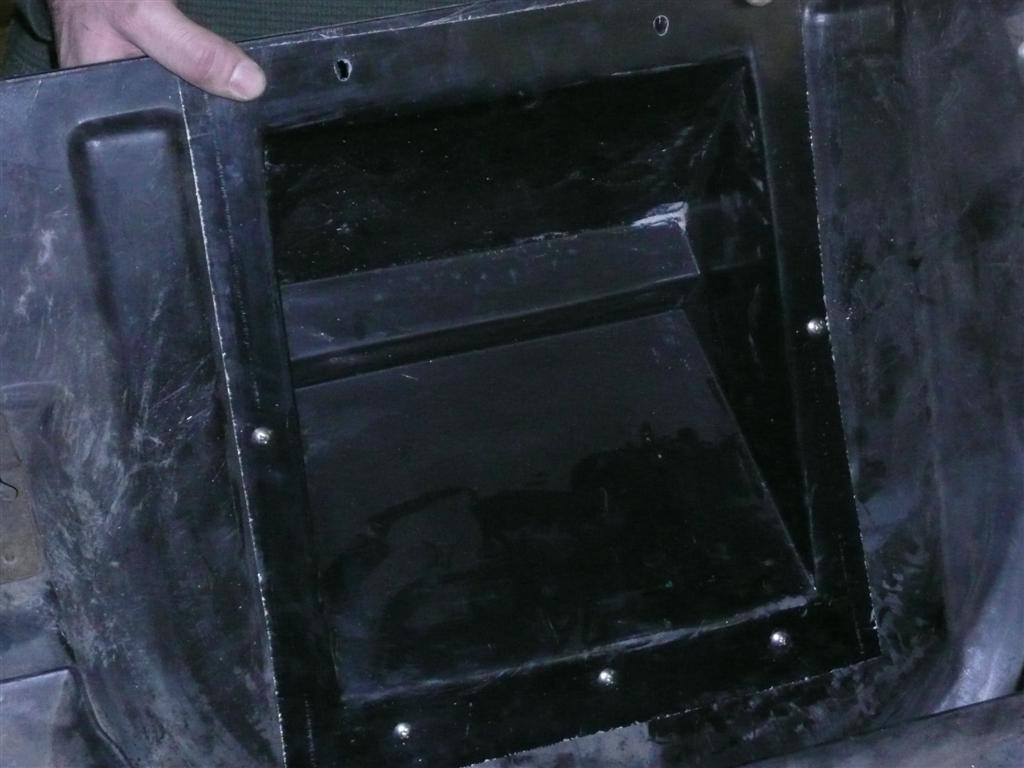
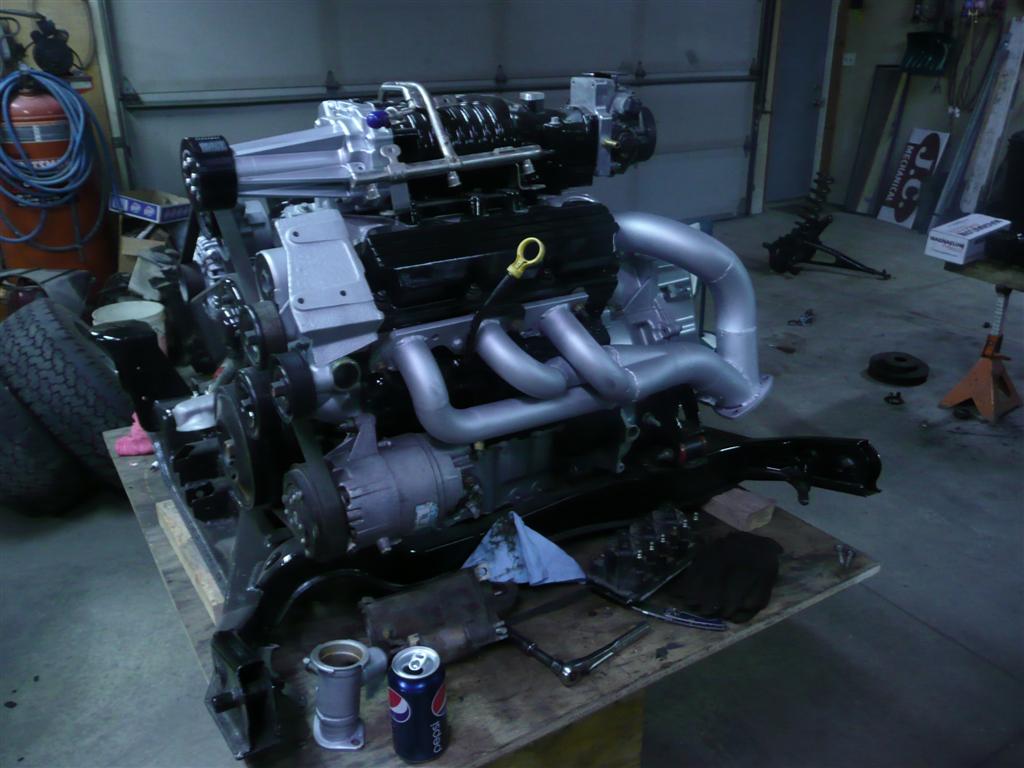
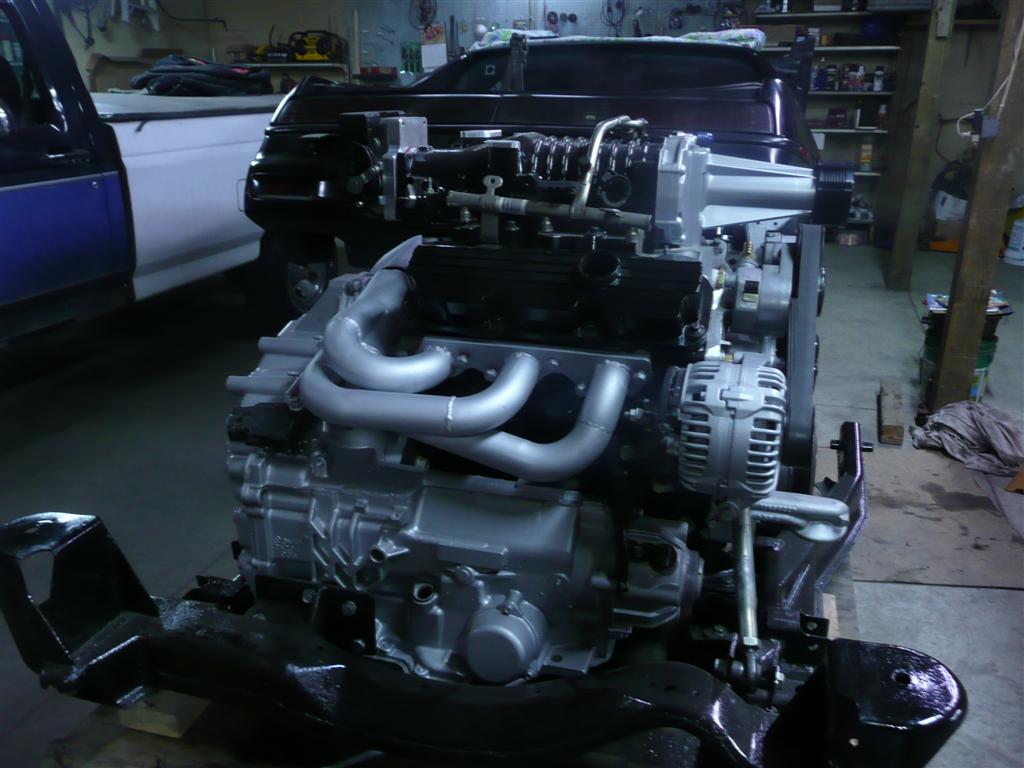
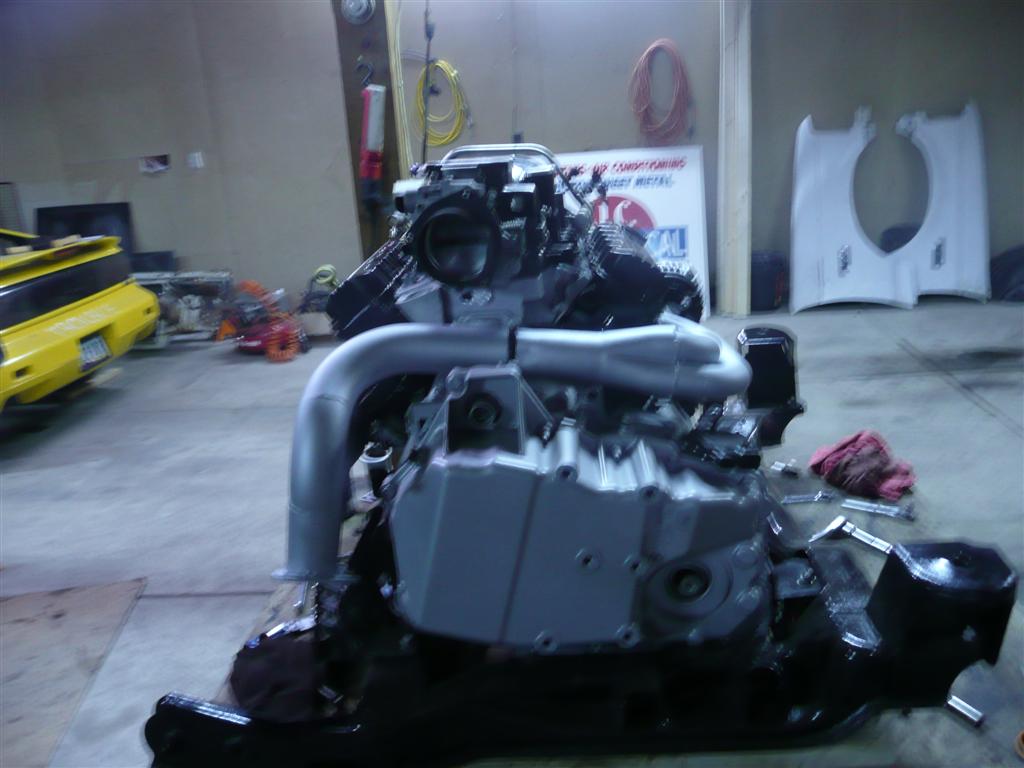
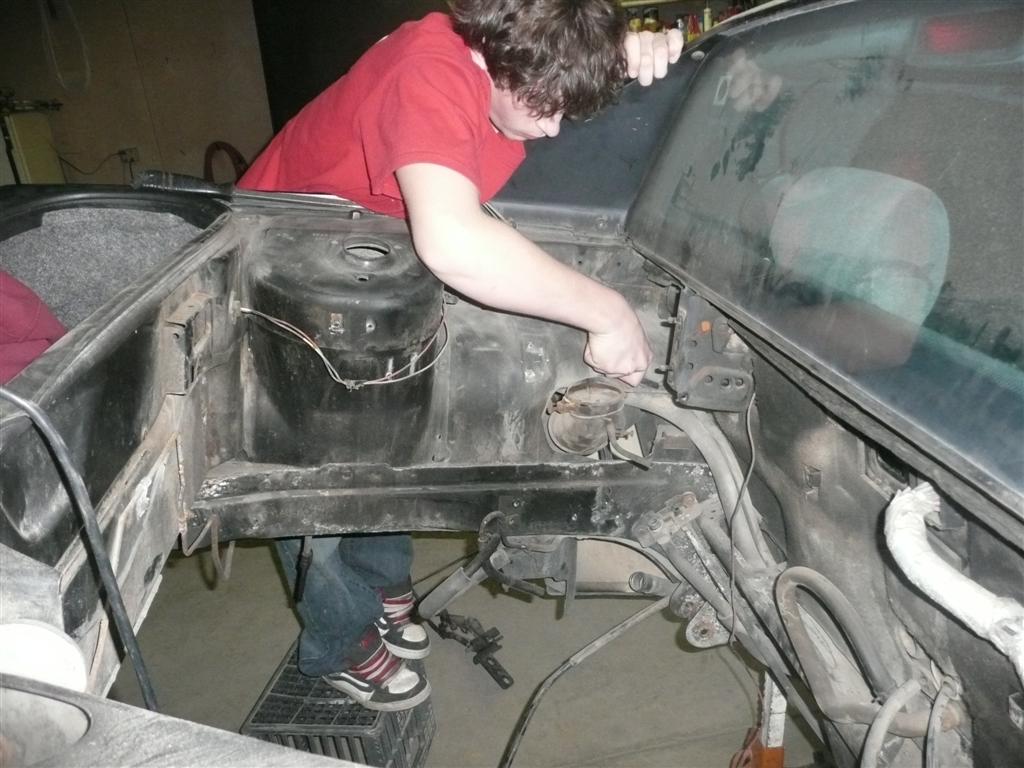
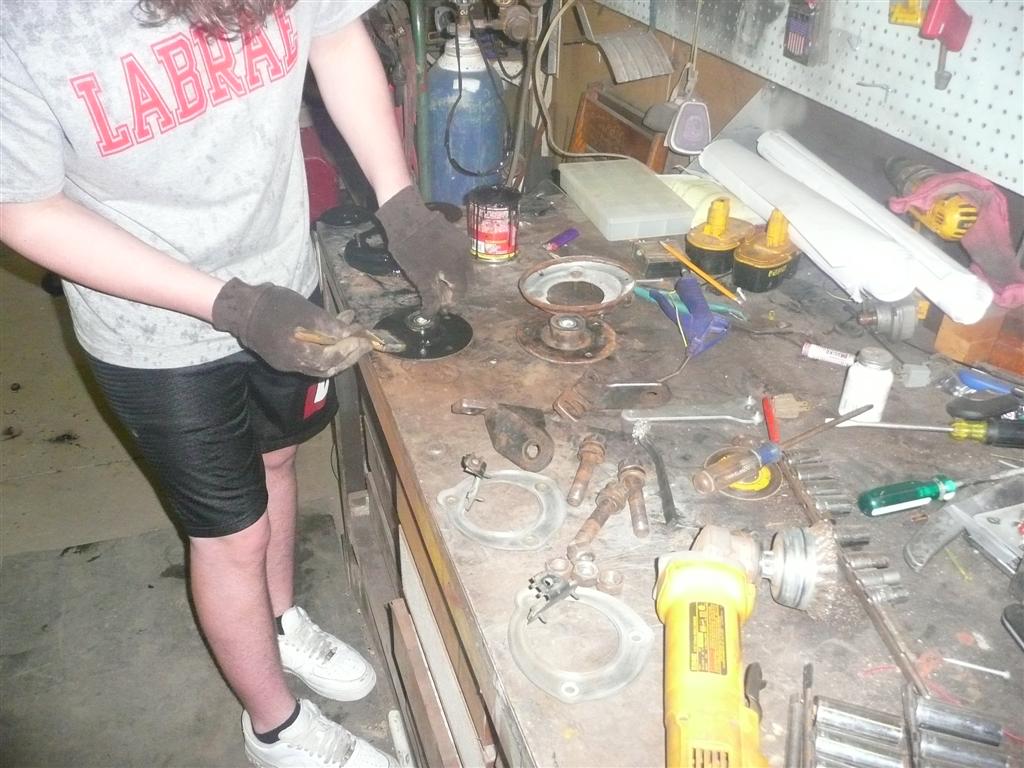
Well jason came up yesterday about noon and we worked til about 8pm. Time sure moves along when you get working on a fiero. We got quite a few things done + he got to see all those shinny new parts he paid for and shipped to me. We kept busy, I think he enjoyed it. No women, big shop full of fieros whats not to enjoy right? I got some pics of my son getting the fuel tank, new sending unit, and new pump ready then he gave it a good coat of por15. We got the 3.4 pulley and 1.9 rockers installed, pulled the front tub out to install the front mount battery box and put it back in, cut the tension bars off the deck lid hinges, bolted the custom built headers on. We're using the 05 fuel rail that came on it so its needed a little work to fit the way I like. Keeps the 1 fuel line pointing toward the firewall for a cleaner look.. Well on with the pics.
[This message has been edited by Dementia (edited 02-28-2010).]
IP: Logged
09:39 PM
Mar 12th, 2010
TM_Fiero Member
Posts: 1076 From: Brookville, PA Registered: Jun 2002
I think Chris has a few more pics to post... He sent me one with the motor in the car.... I plan to go up next Friday and hopefully get an alignment and an exhaust made... As long as we get a programmer computer back in time from loyde.... I will be able to drive it home!! Keeping my fingers crossed....
IP: Logged
07:31 PM
Mar 19th, 2010
Fierokid87 Member
Posts: 4954 From: N. Ridgeville, Ohio, USA Registered: Jan 2001
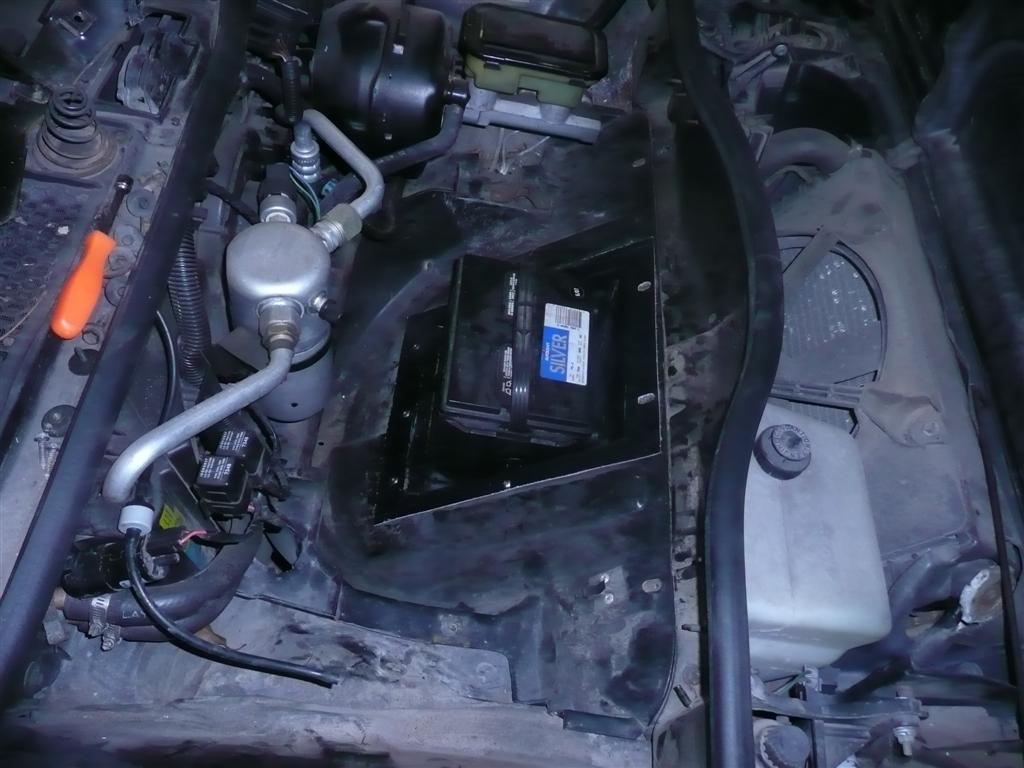
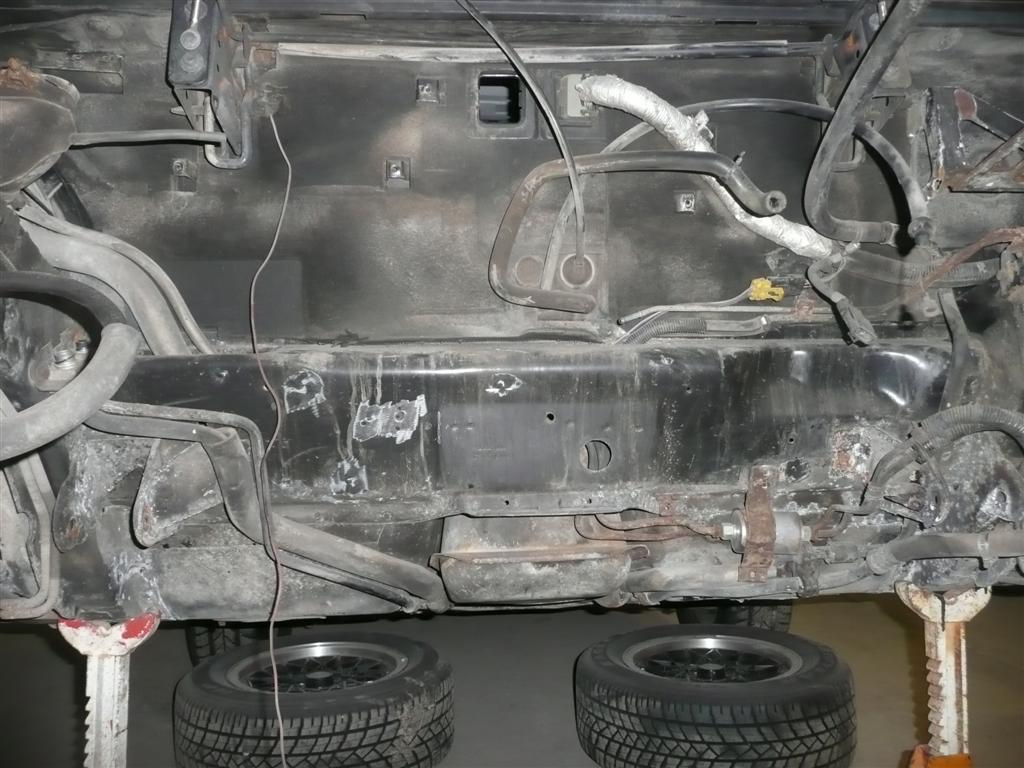
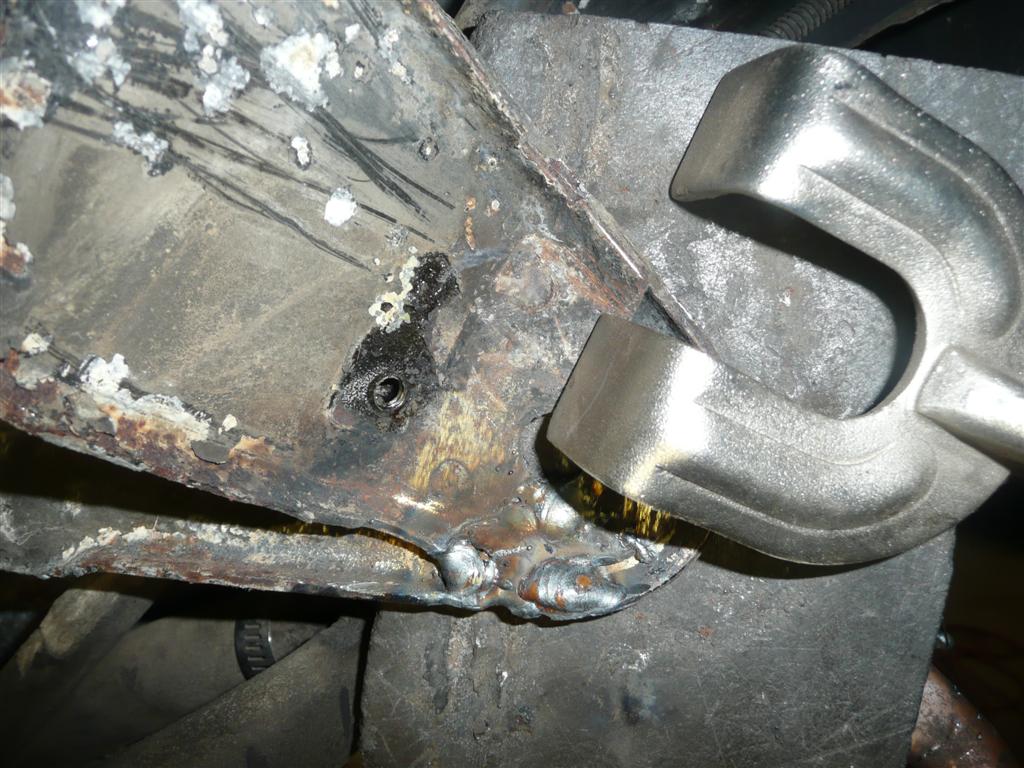
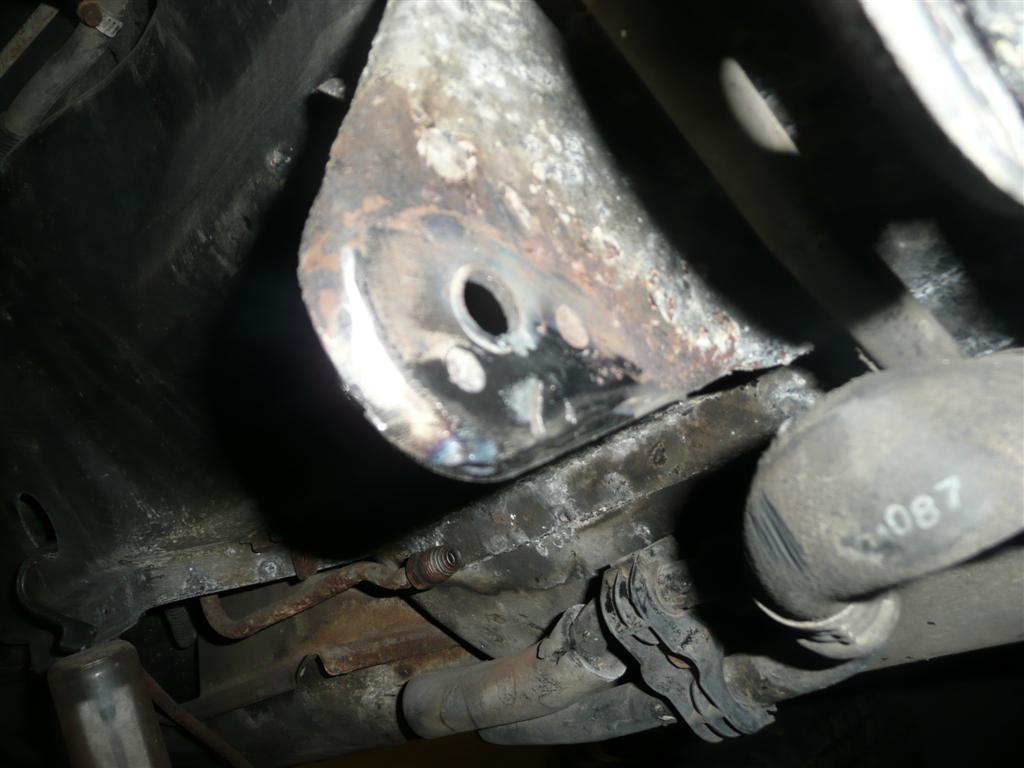
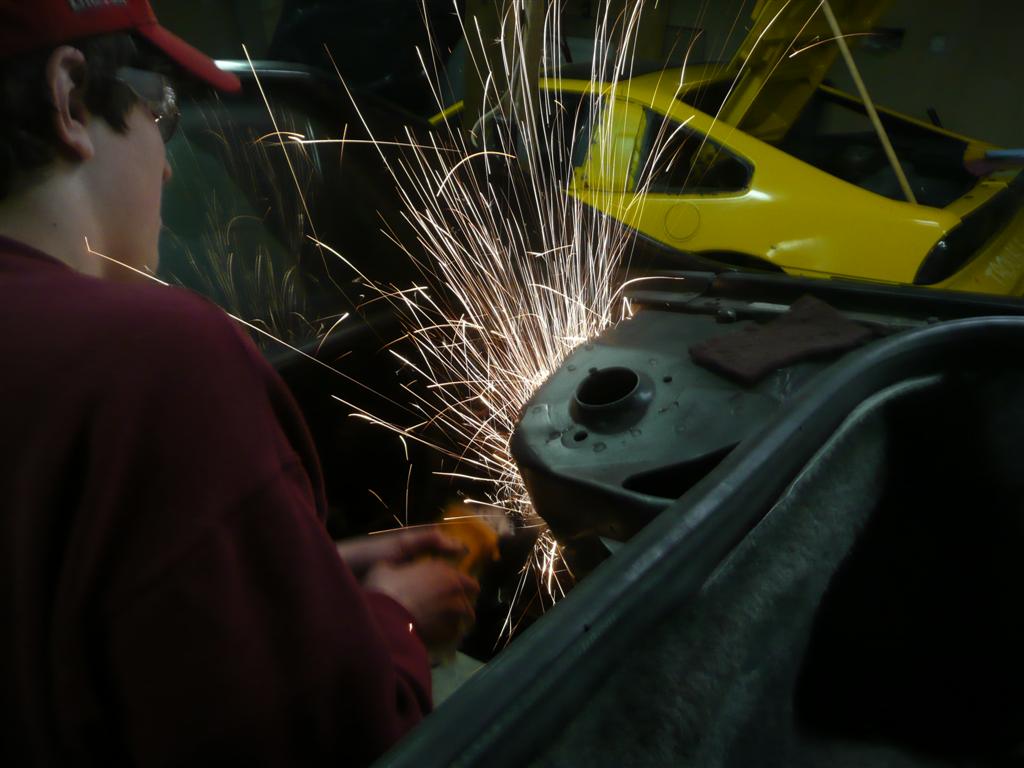
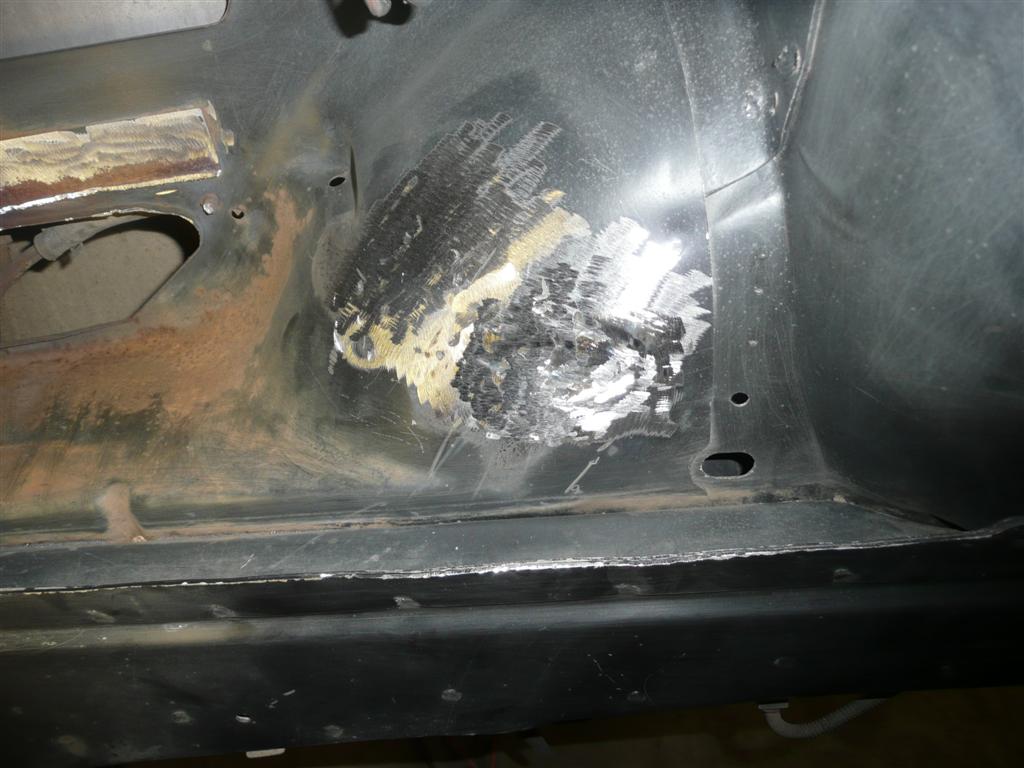
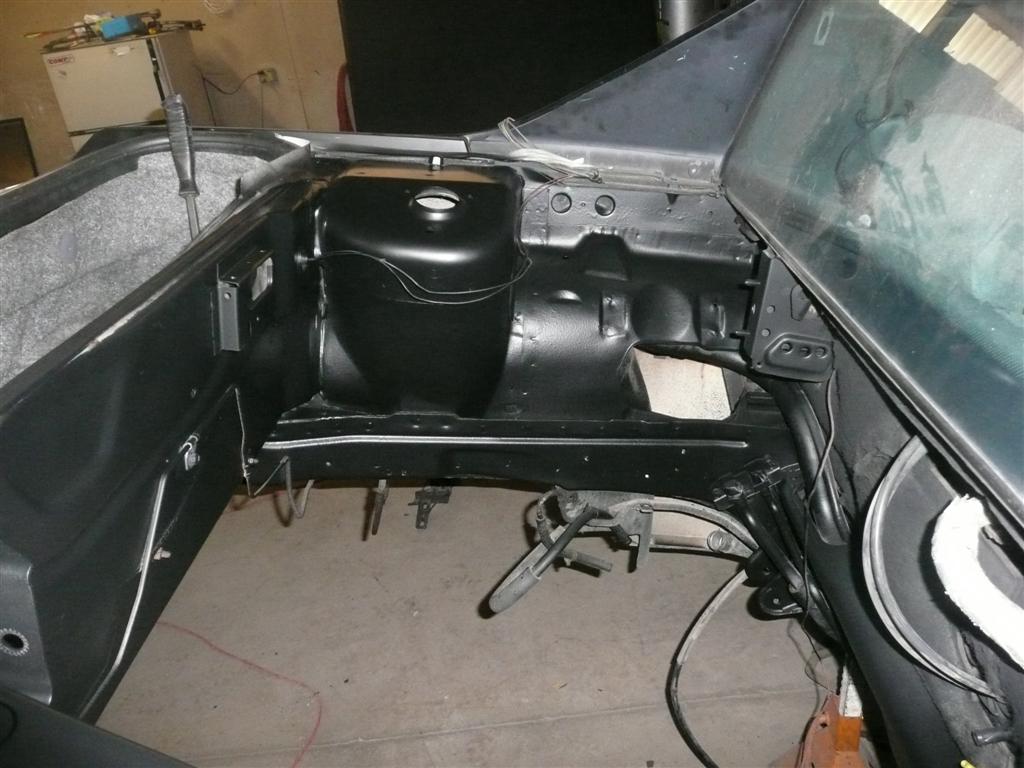
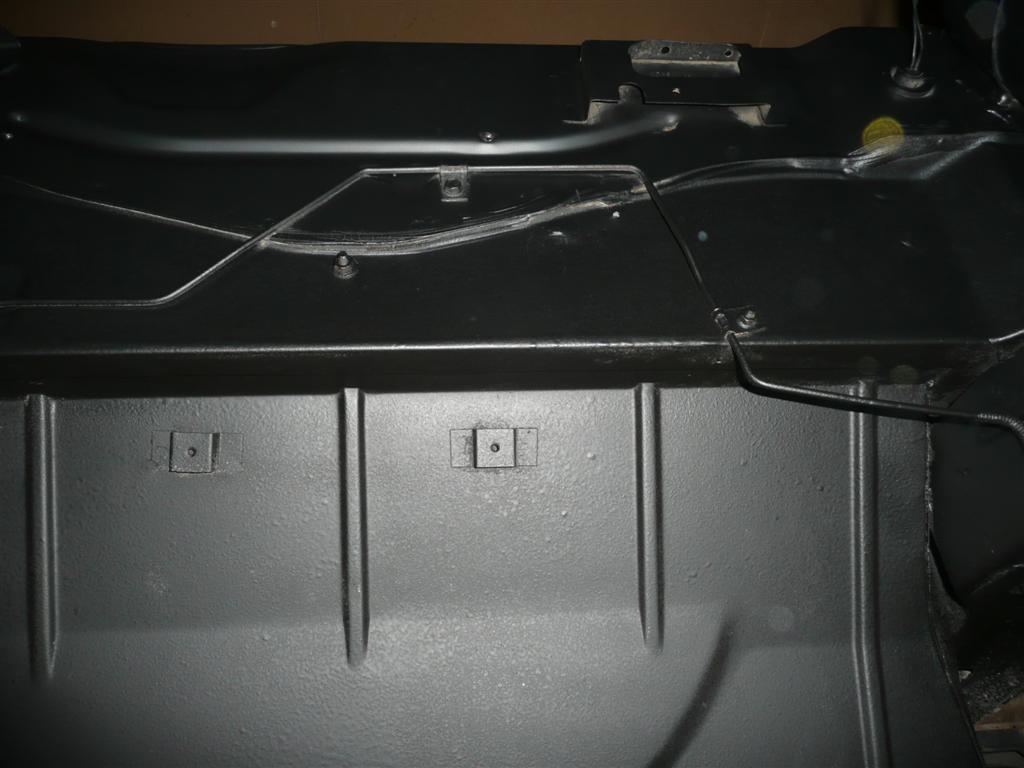
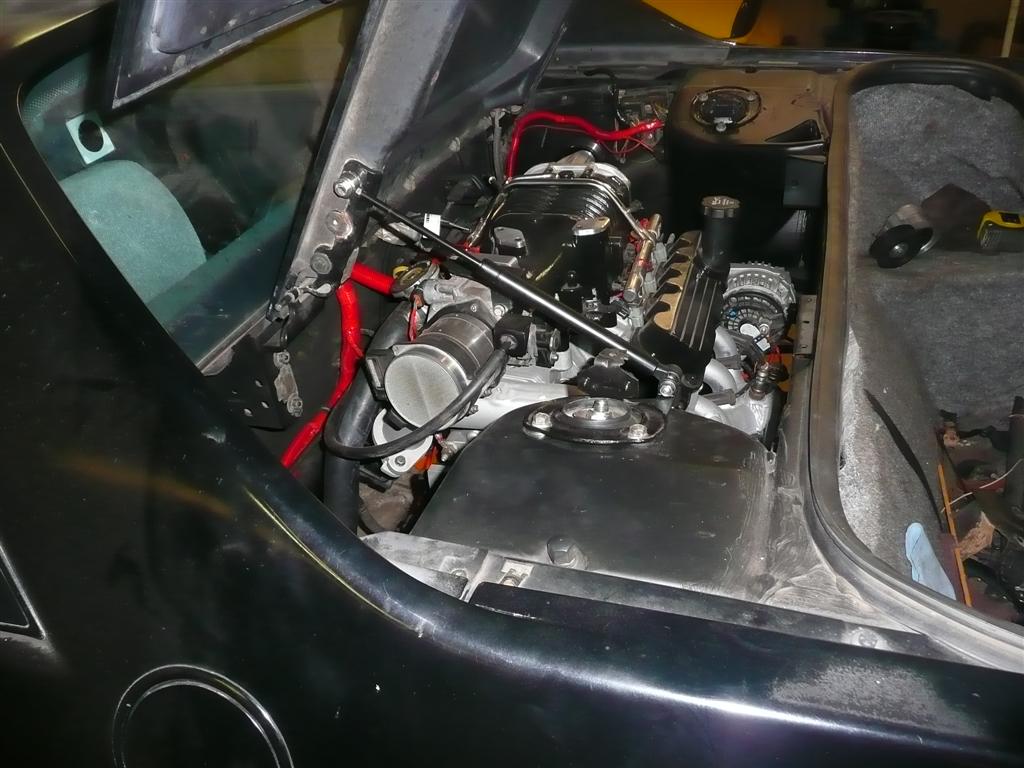
I got the engine bay stripped, cut the battery box out, cut some of the extra mounting tabs off, cleaned it, sanded, ground it!, and all kinds of other good junk. Removed deck lid hinge tension bars, had to fill in some little holes by the battery box and also the front passenger side cradle mount. That bolt wouldn't come out. After I got the cradle down I bet I had to beat on, drill, and heat that bolt stuck in the cradle for at least an hour. I didn't think it was come out but it finally broke free. I used a little bit of icing over the welds by the battery box, 3M undercoat down low then top coated it and the rest of the engine bay with a satin black. IMO thats damn close to factory color it even had a fiero on the can.
Wow I wish i could do that with my engine bay. But everytime the engine is out Im am rushed to put the engine back in and get it out of the shop Now If i could talk my dad into letting me use his garage and drop the motor out again lol. Seriously though it looks awesome.
Originally posted by Fierokid87: Wow I wish i could do that with my engine bay. But everytime the engine is out Im am rushed to put the engine back in and get it out of the shop Now If i could talk my dad into letting me use his garage and drop the motor out again lol. Seriously though it looks awesome.
I will say this.... There is something else that is getting changed in the engine bay.... It will make a huge difference... But I don't think me or Chris will say what it is..... We will see who notices it
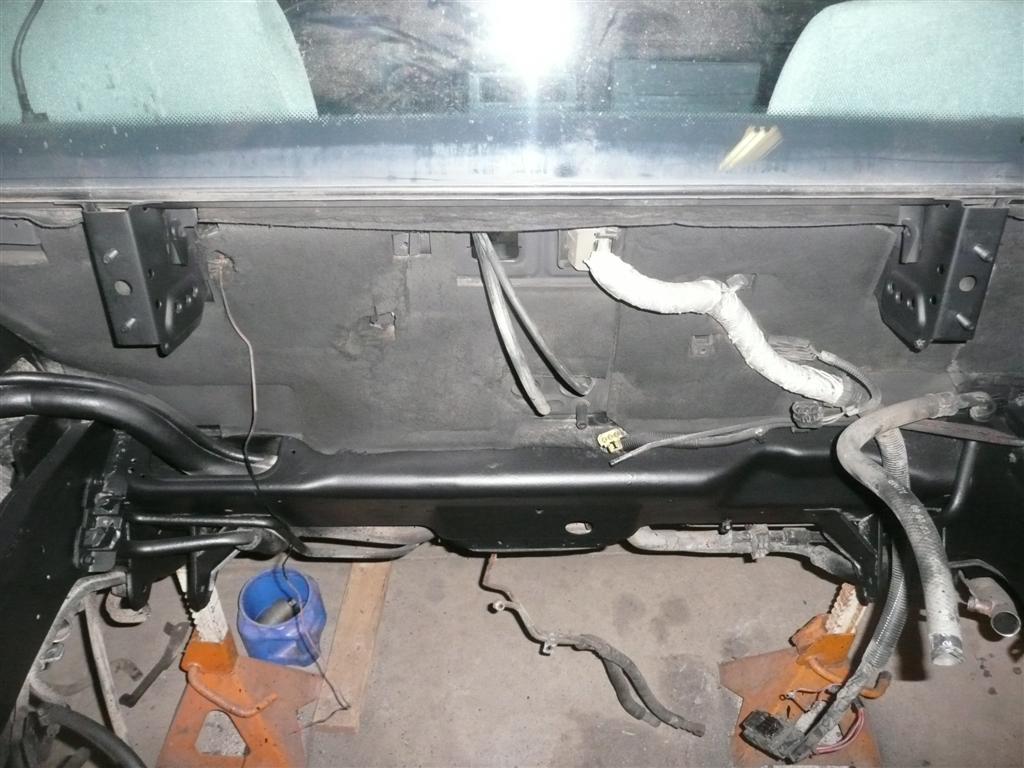
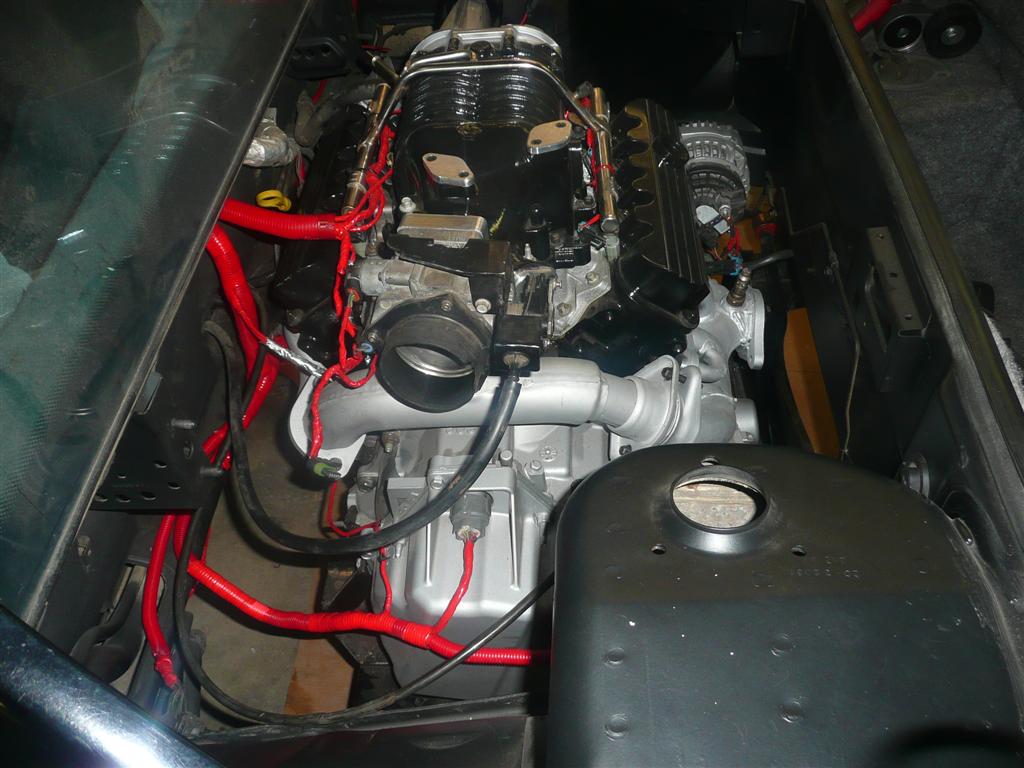
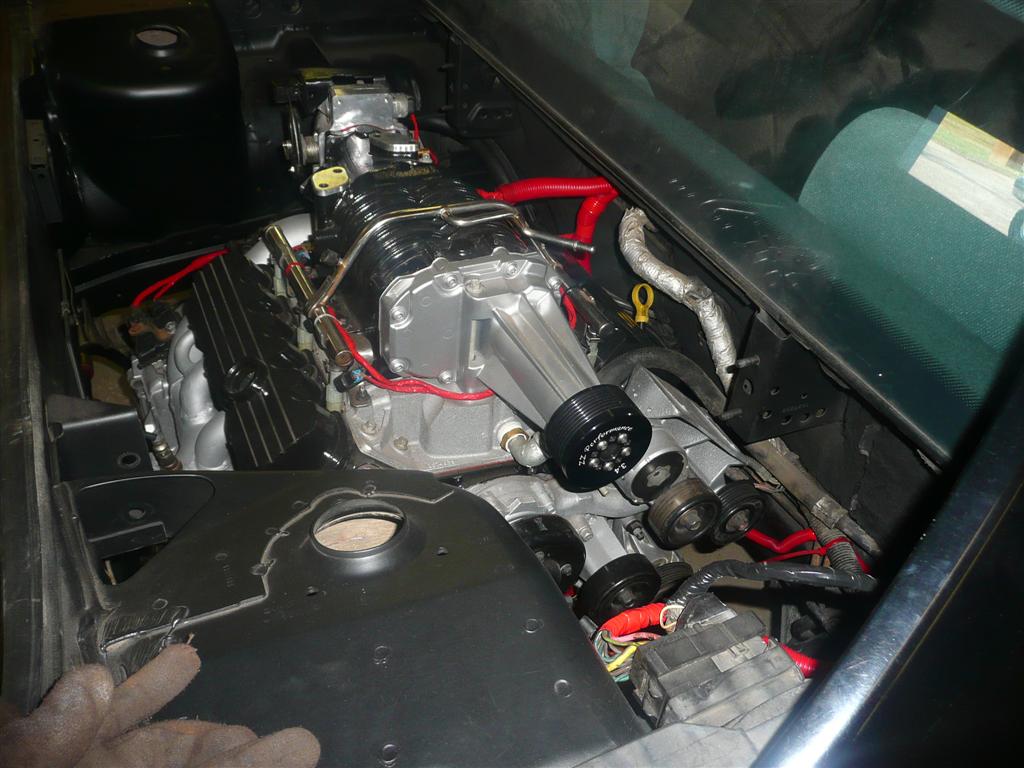
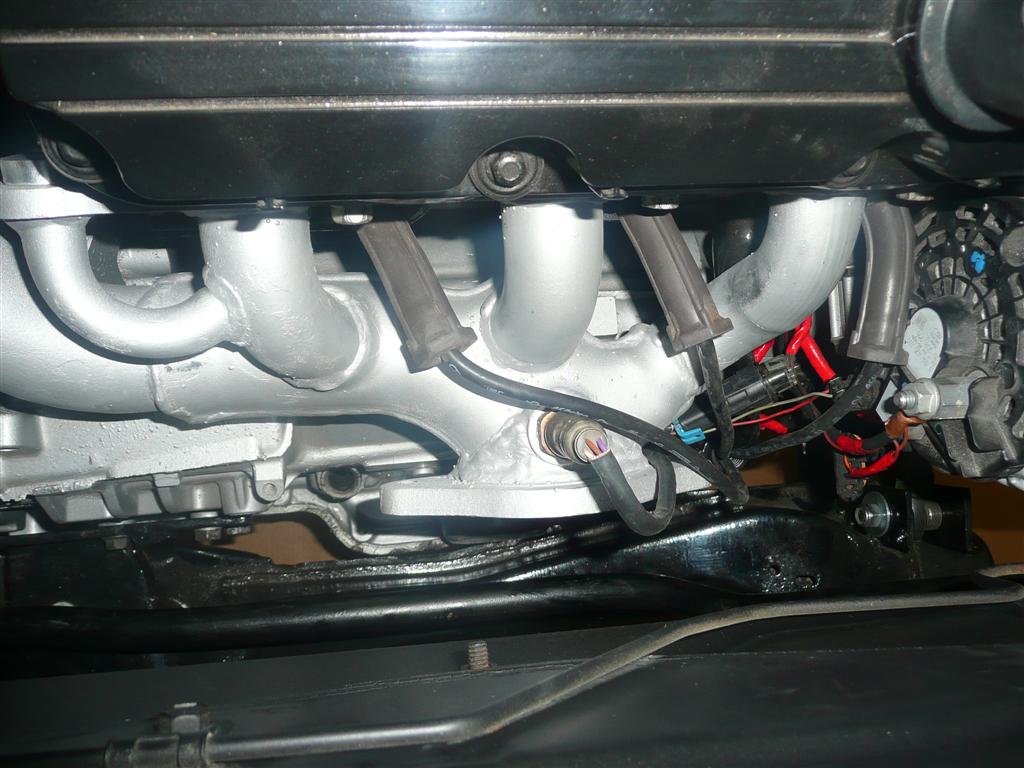
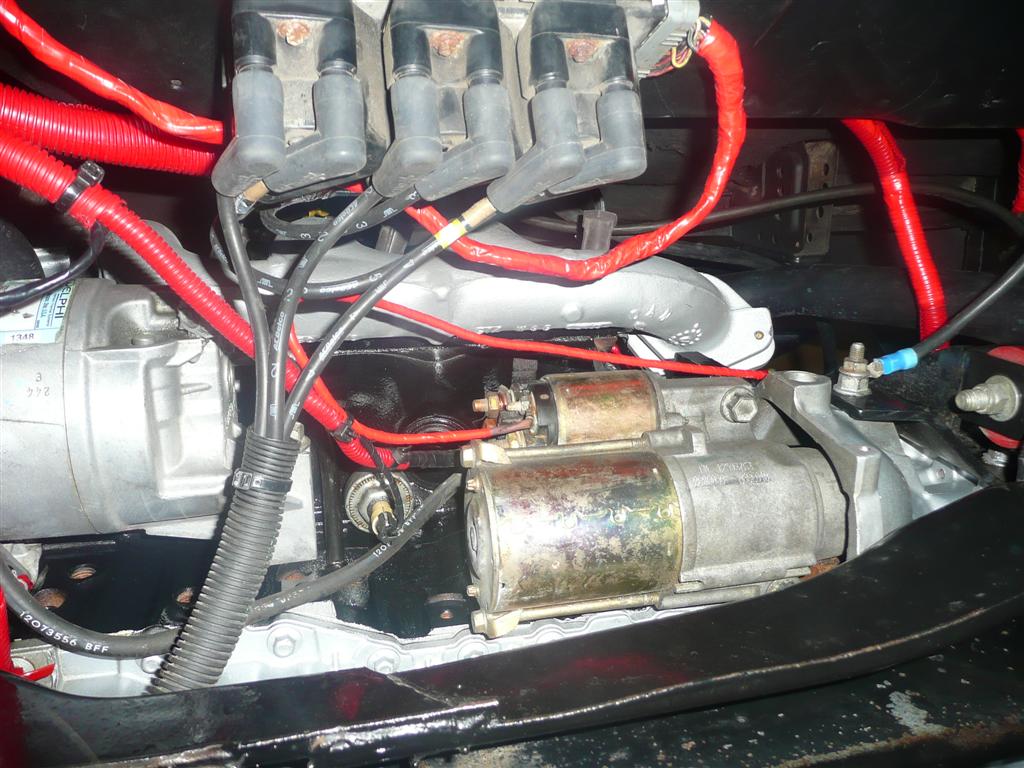
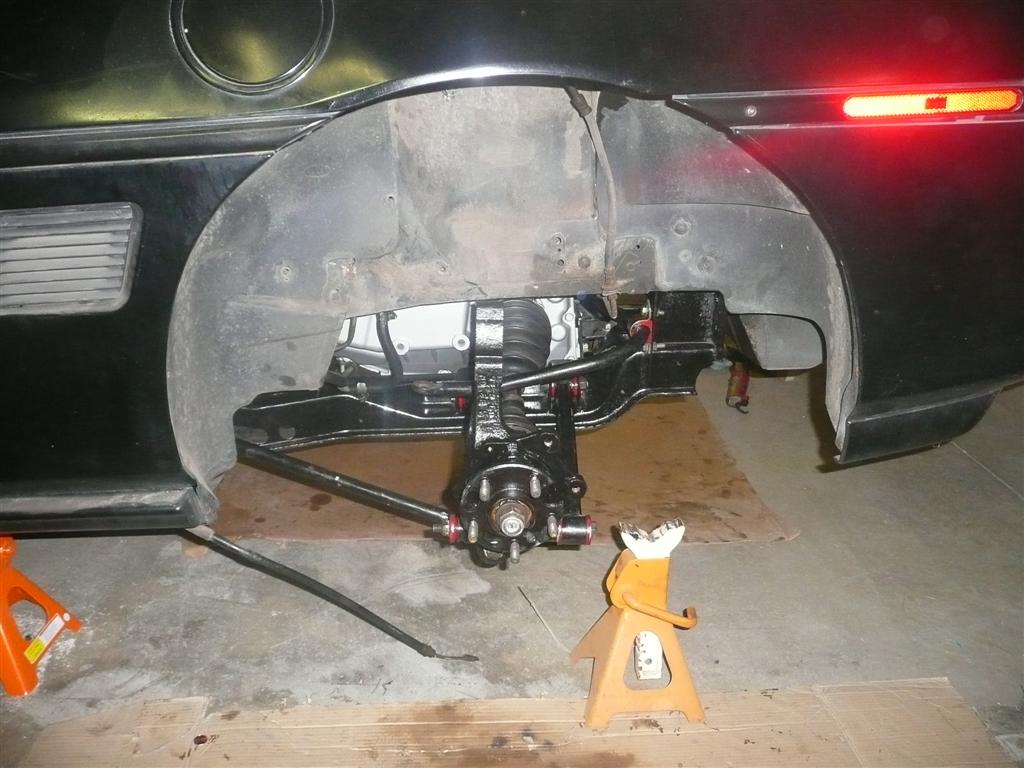
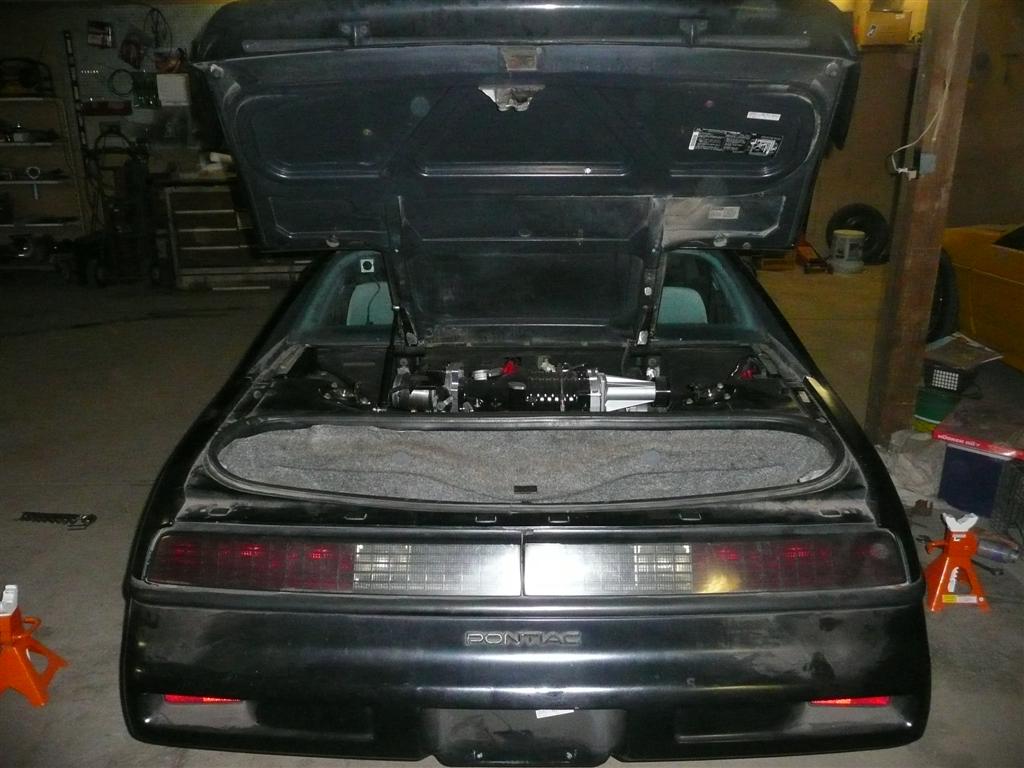
Well time for an update. I got the engine combo up in the bay, wiring harness done, low mounted coil pack with spark plug wires ran under the engine, coolant hoses hooked up, and trans lines. Still have to do the fuel line. We're using the one of the filter/return line/ regulators from loyd and his tune so when I get them it should be ready to fire. I'm getting started today on the suspension. It should go pretty smooth. Everything is already cleaned and painted and the rest in new. More to come later. Chris
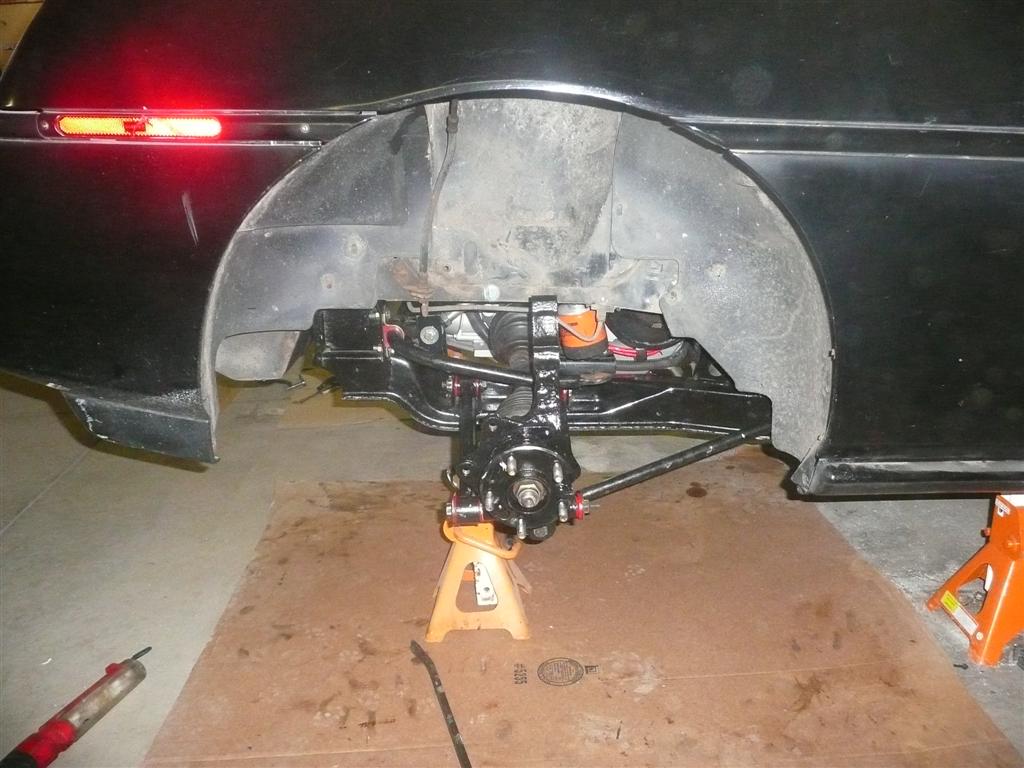
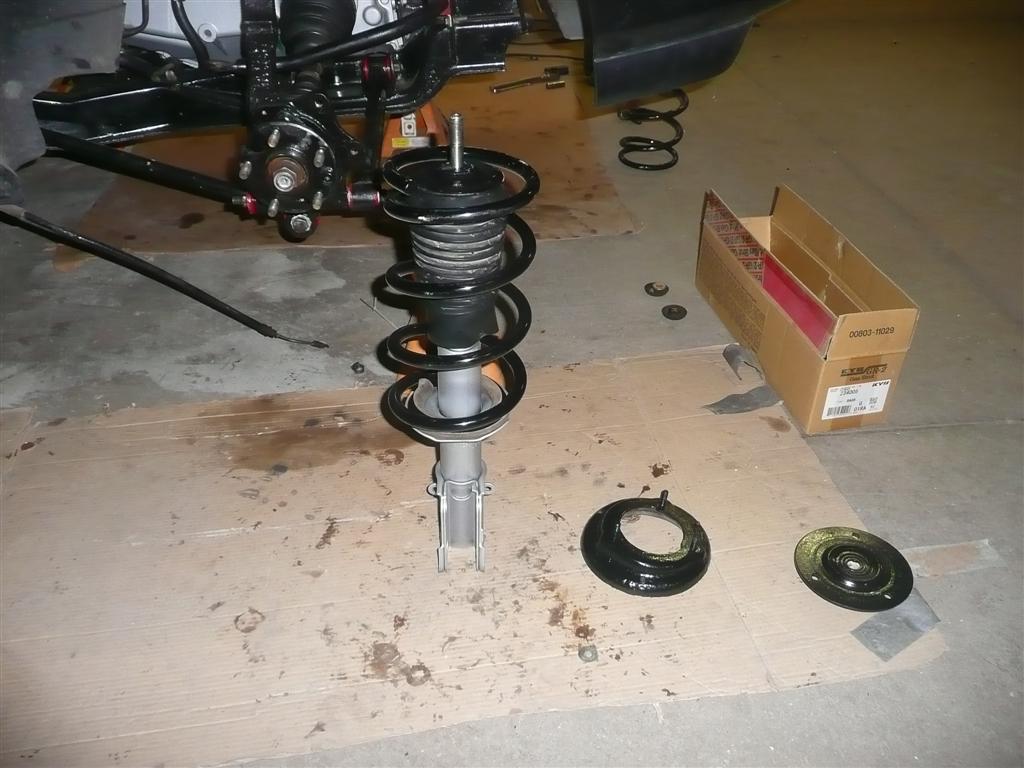
I got most of the suspension on today. I lied when I said everything was clean and easy. I forgot to clean and paint the strut hats and related parts and also the brackets for the sway bar. The suspension should be all done tomorrow evening. Thanks for all the nice words. Been a rough month from back hurting, to DD problems( had to resort to a whole new front end rebuild on my trusty old 4x4 ford including front clip, and now a cold the last few days. It never ends does it? Anyway I'll post some pics and critique away.
[This message has been edited by Dementia (edited 03-22-2010).]
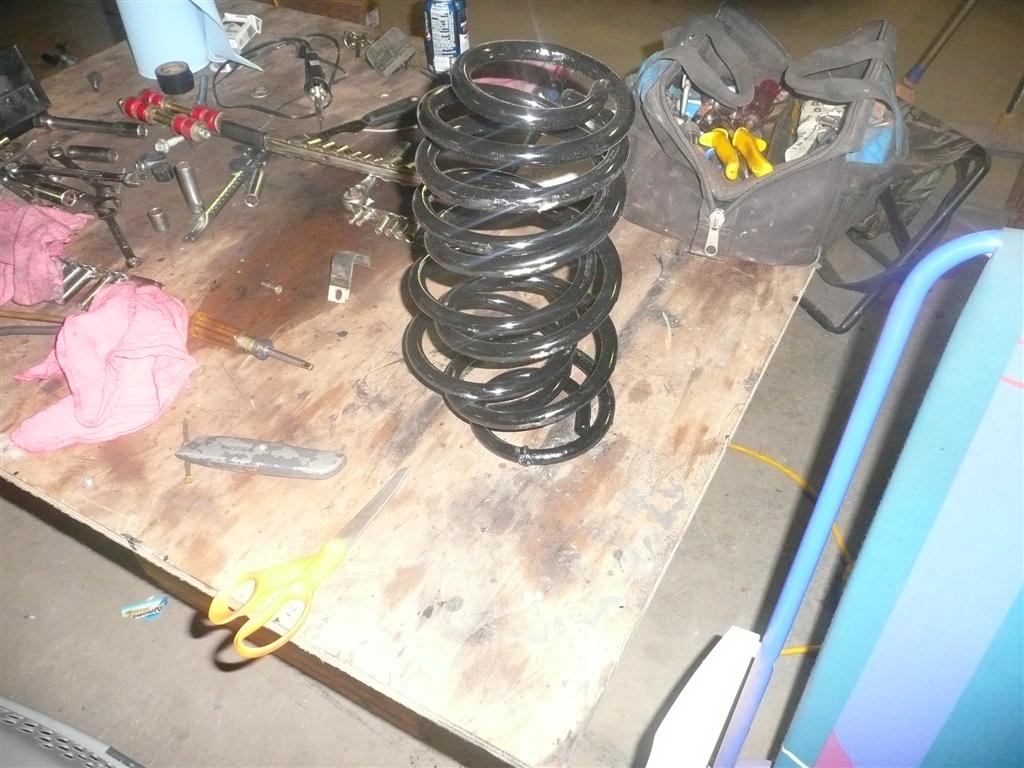
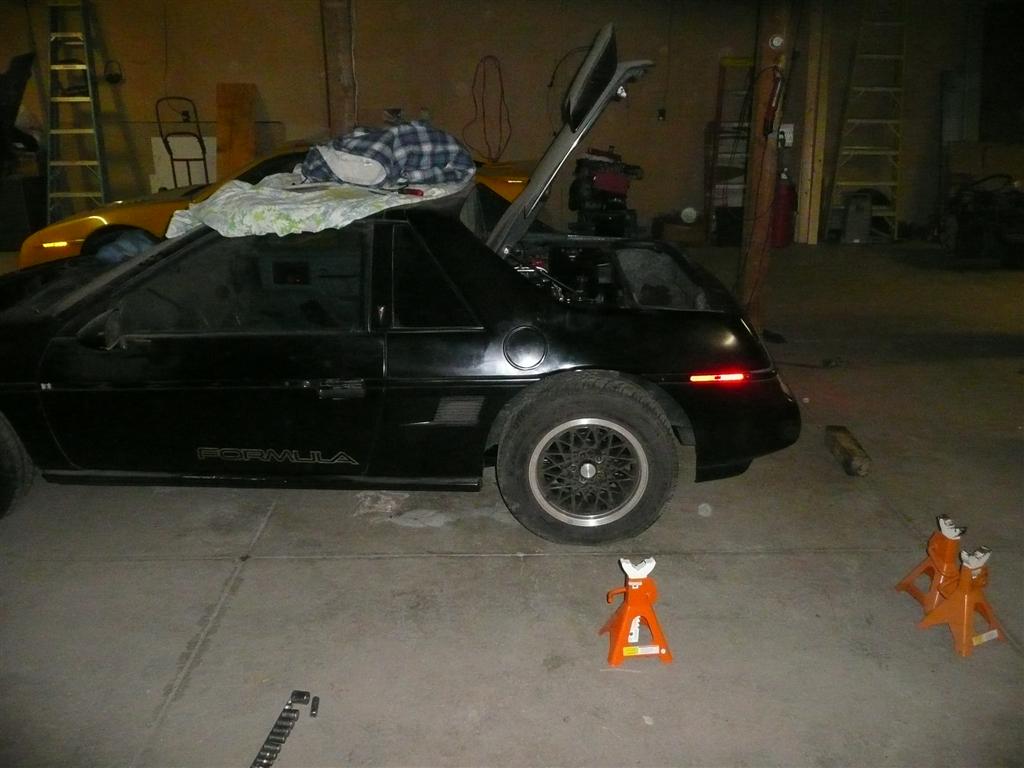
Well I got the new 1" lowering springs on the struts and got them installed. I forgot to take a picture but I will when the brakes go on. I went a head set it back down on its own wheels while I wait for the fuel line stuff and whatever brake set up Jasons going to use. Sure is a nice sight back on the ground. I put the rodney deck lid strut on. Pretty nice IMO. Bolted right up, holds up well, and lowers easy. Next up is the exhaust. Should be fun. Heres some pics.
That engine compartment looks sharp! I'd definitely like to do that with mine when I drop my motor this fall. It looks like you left this insulation on the firewall - what did you do to clean it up so nice?
That engine compartment looks sharp! I'd definitely like to do that with mine when I drop my motor this fall. It looks like you left this insulation on the firewall - what did you do to clean it up so nice?
Well its kind of top secret. Nah just kidding I wanted to keep the insulation there because it really does do its job. it gets so noisy in the cabin of the car when its not there. The foil back insulation just doesn't trip my trigger. So I just got out the blow gun, then went over it with the shop vac, and then just lightly dusted a few coats of flat back. It come out pretty good.
Jason you have a lot of work a head of you. Well worth it though. You're going to have a very nice fiero.
Thanks for the tip! I take it then the stuff around the strut towers isn't so much a big deal... always looks like hell on every fiero I've ever seen.
I'll get there some day on my formula! Right now I'm tearing into the front end and just making it safe to drive. Keep the pictures coming! Love seeing somebody going ALL OUT on their build!
IP: Logged
09:37 AM
Mar 30th, 2010
Fierofreak00 Member
Posts: 4221 From: Martville, NY USA Registered: Jun 2001
Well I am happy to say that the car is running!! I have talked with chris about maybe getting it sometime this week.... I know he is ready to get it out of his garage.... And I am too!! Thanks for all the comments.... Hopefully somemore pics here soon.... Jason
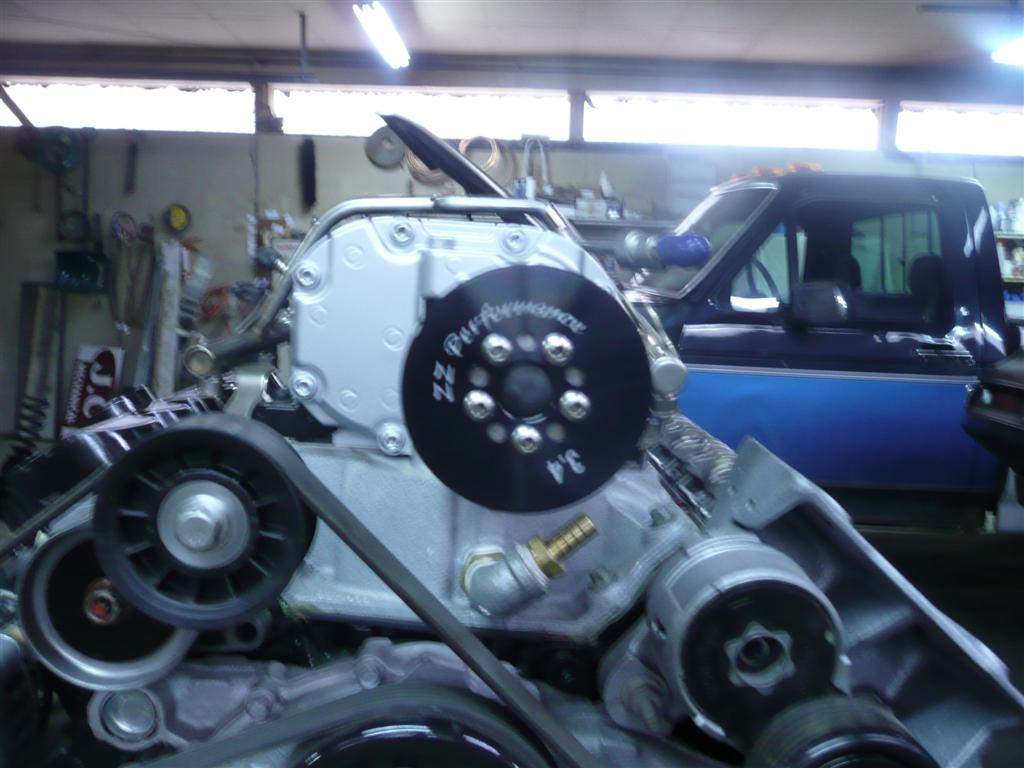
Heres pics of the tensioner spacer for the acc. belt. It came out pretty good and everything seems to hold tight with no movement. I'll keep working with design to try to improve it and maybe make a bolt on kit for it and the low mount heim joint. And yes I know the belt is bad It was just one I had here and used for test.
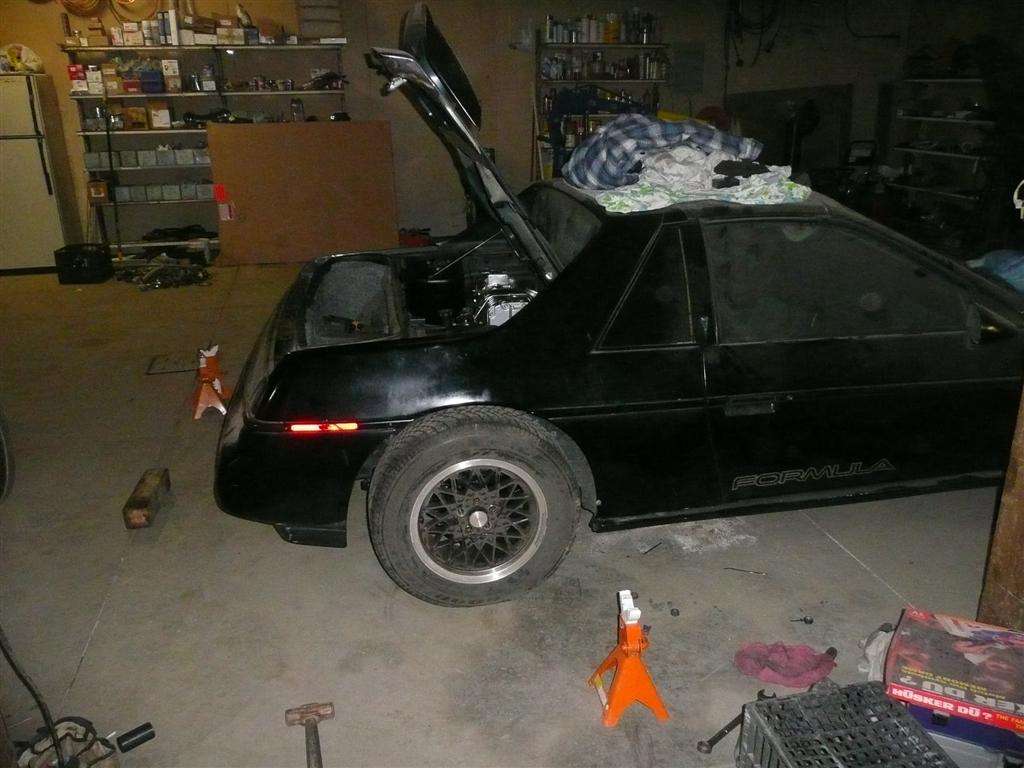
Well onto the car now. i took a few pics so you guys can see how it sits. The 1" lowering springs are in the rear but the front hasn't been done. I'm sure thats the first thing jason does. After working out a few bugs at start up its running beautiful. We'll be ready for you friday morning jason! I have video of the car running and driving but i cant load it here. Cant have jason seeing me burn the tires through 2nd gear
I want to say I saw this thing in person the other day. Jason you are going to be so happy with this install. HE was still tweaking it when I was there and I heard it run. All I can say is wow. The wiring is so clean that the pictures don't do any justice for the work. That motor sounded real strong as well even before he got some bugs out of it. Keep up the good work guys cant wait to see that black one and the yellow one sitting in the corner back on the road.
IP: Logged
12:26 AM
Fierofreak00 Member
Posts: 4221 From: Martville, NY USA Registered: Jun 2001
Heres pics of the tensioner spacer for the acc. belt. It came out pretty good and everything seems to hold tight with no movement. I'll keep working with design to try to improve it and maybe make a bolt on kit for it and the low mount heim joint. And yes I know the belt is bad It was just one I had here and used for test.
For the right price I could use one right now! Are you seriously thinking about making them and selling them? -Jason
Good to see ya again tstang. Thanks for the pedals and a pillar trim. I would start on the drive line of the yellow car but this guy gave me a machined instrument cluster cover thats now attracted my attention to fitting the gauges into. Thanks theo Fierofreak I can have you one of the spacers made if you want. Not ready to offer a whole kit up yet though. I'll call the machinist today and get a time line. Fortunately for him and unfortunately for us he's real busy. It took about a month to get that part but he had to do all the set up work for the cnc. IMO its way better than any cut down dog bone bracket and has a nice flat surface to mount to not just a few ribs sticking out. Reasonably priced as well. Chris
IP: Logged
09:04 AM
Fierofreak00 Member
Posts: 4221 From: Martville, NY USA Registered: Jun 2001
Good to see ya again tstang. Thanks for the pedals and a pillar trim. I would start on the drive line of the yellow car but this guy gave me a machined instrument cluster cover thats now attracted my attention to fitting the gauges into. Thanks theo Fierofreak I can have you one of the spacers made if you want. Not ready to offer a whole kit up yet though. I'll call the machinist today and get a time line. Fortunately for him and unfortunately for us he's real busy. It took about a month to get that part but he had to do all the set up work for the cnc. IMO its way better than any cut down dog bone bracket and has a nice flat surface to mount to not just a few ribs sticking out. Reasonably priced as well. Chris
PM sent thanks for the quick response. -Jason
IP: Logged
11:56 AM
Apr 14th, 2010
tomanyfieros Member
Posts: 2702 From: Albany, Ohio Registered: Nov 2000
Well just to update what has been goingon... The car has been picked up by me.... And needless to say I am very happy with the swap! The car was dropped off at the "muffler man" and I am waiting to hear back from them that they are done. More pics to come soon!
Sorry I haven't updated the thread in a while.... I was gun ho bou this car until my wife started gettingon mebout moving her stuff.... Anyways - the exhaust turned out decent.... The muffler man wasn't too happy w how it turned out - but it was finished. Right now it's sitting out in my drive way w the interior stripped out of it. I have added full power to it - power windows power locks and power mirriors. Inam waiting to cut up a performance sound sub slider and fnish up that install.... Kneed to get a headliner board - cut it down and get it covered... Next week I will be going back to my other house to get the rest of the suspension to finish up the front. Right now the biggest problem is my other project... It's a 2009 dodge ram 2500 diesel roll over. I am building it to drive or sell - but i need to sell my other truck... To finish this one.... So I'm kinda in a bind.... Anyways I will see bout getting some pics up soon... Stay tuned!
I need that Alt mount some kind of SERIOUS! It's the last piece I need for my belt routing. I tried the fastfieros dogbone trick but it hits the 88 strut tower. Make me one and let me know when it's ready.
I noticed that you are using the fuel rail and that you switched them around. Did you have to make any modification to them to make them fit? I tried doing the same but the holes for the support do not match. Am I doing anything wrong?
IP: Logged
08:16 AM
Sep 28th, 2010
Kemp3 Member
Posts: 282 From: Carmel Valley CA, USA Registered: Sep 2007
I noticed that you are using the fuel rail and that you switched them around. Did you have to make any modification to them to make them fit? I tried doing the same but the holes for the support do not match. Am I doing anything wrong?
I flipped mine around , I had to re-bend the legs coming down. I think there was 2 I had adjust to make the holes line up and to keep the correct height.
Updates...since this build thread is so good, I'll continue it as long as that is okay with Jason.
I got the car up and running very well after replacing a failed ZZP fuel pump and getting a lot of the other bugs fixed. It is very, very fast, but currently has no interior, no windshield washer lines/etc. It's kind of a barebones car right now, being that I was most focused on completing the swap. I got some wider tires on the back (225) but they didn't help much with the "traction problems" Dementia mentioned...I don't think there's a whole lot you can do about these sort of traction problems in a 3800SC Fiero. It also got an alignment and had the tires balanced, fresh fluids and oils throughout the car, and some other routine stuff you do when you buy a car.
The To-do list is pretty long but a lot shorter now that the immediate problems have been dealt with. It's becoming the "Make me broke" Formula for me, too...lol Still on the to-do list:
Solve charging issue...It has BARELY enough extra juice to charge the battery and needs to be run for a while to avoid a dead battery when you try and start it next time.
Relocate battery back to rear...I hate not having a steering stabilizer. Please, look into this before you do a front-battery install that requires removing it.
Redesign alternator bracket...it's starting to warp and the belt is pulling the alternator at an angle.
Reassemble Interior, or wait and get a good interior setup. Haven't decided yet. Whatever happens it will be mostly stock as will be the entire car.
Paint. Done in 2 or 3 weeks, painting it jet black, no metallic, high gloss clear.
Relocate ICM higher/to trunk wall or construct an enclosure for it. The one installed during the initial build caught too much road debris and water and failed.
Repaint blower and valve covers...had a little incident with the fuel pressure gauge that leaked some fuel on the valve covers and blower and stripped the paint.
Brake upgrade...the stock ones work well, especially being the 88 system, but not well enough for the driving style I have with this thing.
90mm Hella headlamp upgrade happening soon, already have buckets in the works. Anybody have Hella 90mm modules for sale?
LOTS of misc aesthetic work.
------------------ 1988 Formula Modded Series III 3800SC - CJB T-Tops
You might be a redneck if you use lug nuts as cradle bolt nuts. They do work, though... - MadDanceSkillz
[This message has been edited by MadDanceSkillz (edited 10-08-2010).]


 Now If i could talk my dad into letting me use his garage and drop the motor out again lol. Seriously though it looks awesome.


 I wanted to keep the insulation there because it really does do its job. it gets so noisy in the cabin of the car when its not there. The foil back insulation just doesn't trip my trigger. So I just got out the blow gun, then went over it with the shop vac, and then just lightly dusted a few coats of flat back. It come out pretty good.


