Greetings, and welcome to my build. I'm a complete and total noob to Fieros. I'm also by no means an experienced mechanic, body man, or anything of that nature. I do, however, learn quickly and have a passion for cars. I've been on car forums since 1997 and believe that, without the internet, I would have never become as big an automotive fanatic as I am.
Going forward, the first post will be edited to include the most recent picture of my Fiero and a budget total from anything purchased related to the project. Pictures will be provided within subsequent posts with the story behind anything done, related frustrations and as many how-to write ups as I can provide for anyone wishing to duplicate the project. I will also try to include details on the information I researched ahead of time in order to provide concise information for others who might also be noobs to their Fiero and related projects.
I was feeling very lonely for a few weeks. SCCA Solo II season was suddenly here, and I had sold my beloved Ti, leaving me with only a Ford Explorer. Needless to say, the Northwest Ohio Region of the SCCA frowns upon AutoX'ing in vehicles with cautionary notices about rolling over in high speed turns. I began searching for a new toy with a budget of $3,000 to spend.
I first looked at 60s mustangs, however with only $3,000 there wasn't much out there to find. My hope was to find something relatively clean that I could cruise in, even if it only had a v6. I had minimal luck and found plenty of scams, but not pony for my stable.
My lack of quality finds led me to look for a Miata, a great AutoX candidate if there ever was one. Alas, living in Ohio with our 3 months of salted roads turned up little as well. I did find a spectacularly riced out one in my price range, however the molded front end and my propensity for smacking cones on the Auto X course made me hesitate.
I was searching on craigslist, and decided, "Why not throw up Fiero?" I always liked the "hatch" style Fiero GT. They are classed relatively well for AutoX, so I figured that they must handle fairly well. The Fiero also would be relatively inexpensive if I could find something. I ended up coming across an 87 GT auto just shy of two hours from my home, and sent the owner an email. He got back to me and we arranged a meeting time on Sunday morning.
Joy of joys, I was at my girlfriends house until about 5:40 the night before, however I jumped out of bed at 7:00 AM, excited to check out the potential of the car. I knew it needed some work from the advertisement, that the headlights weren't functioning and that the brakes were mushy. The ad was asking $1,500.
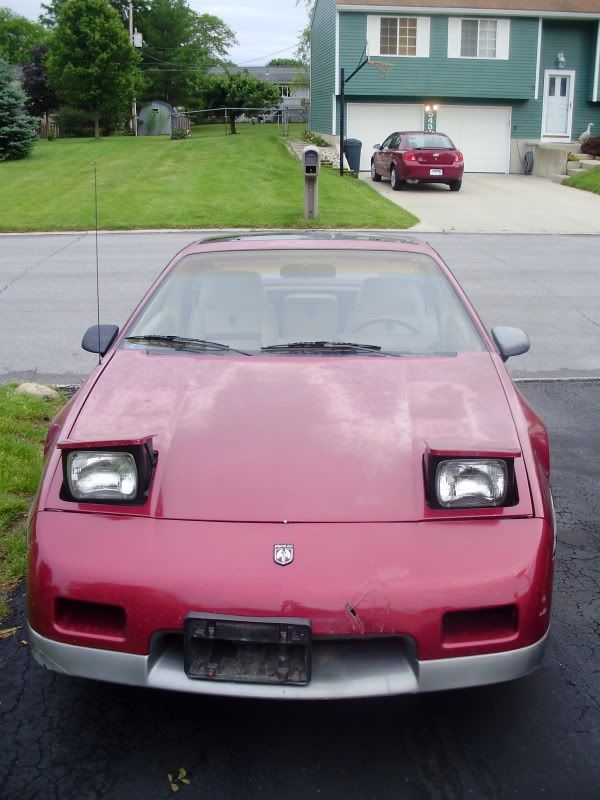
I arrived and, at first site, was a bit sad. The pictures from the Craigslist ad were a bit misleading. The pictures did not show the sun-faded paint, the cracked sail panels, the cracked windshield or the cracked bumper and fenders. This was not going to be a turnkey car for $1,500! I got to talking to the owner, though, and realized that the dirty little Fiero might have some potential. It had new shocks, new brakes, and the transmission had recently received some work. This filthy little bugger could have some potential. I looked in the window only to find that the driver's seat had tears, the headliner was sagging and the vinyl in the interior was also separating. I had researched Fieros back years ago, though, and realized that parts weren't NEARLY as expensive as the BMW. I took it out for a spin and realized that the power was anemic at best, though the suspension was tight. With the wheels off, I also realized that the underbody was CLEAN. It turns out this nasty little boy was sunfaded because he lived outside in Texas!
During the conversation I explained that I wasn't overly concerned with the paint as it would be sanded and completely re-sprayed. While getting the body back in shape I could still race, so it was pretty much an assured sale. The only thing necessary to figure out was the price.
"How much will you take as it sits?" (Thinking to myself, I'll offer him $1,300 and hope it sticks." Humms, Hawws, and finally, "I guess $1,300 would be fair." "Sold." Handshakes ensued.
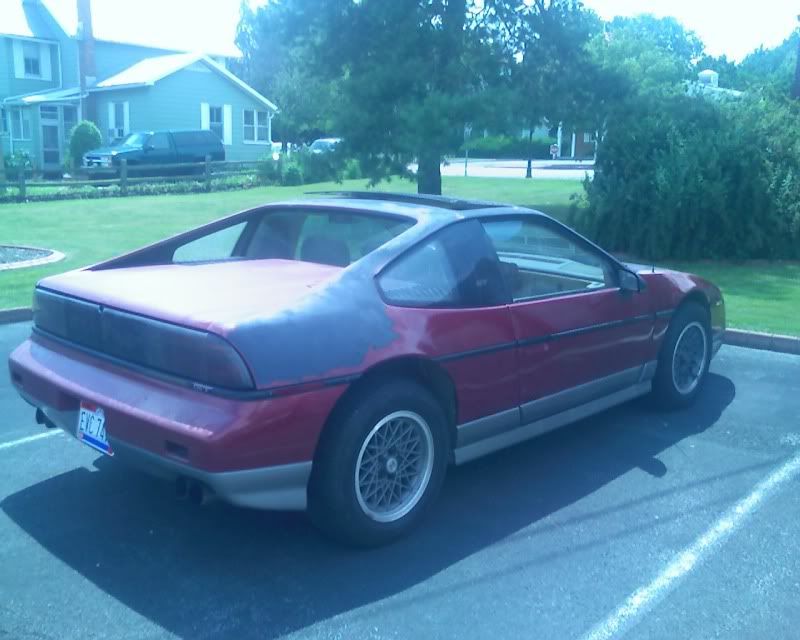
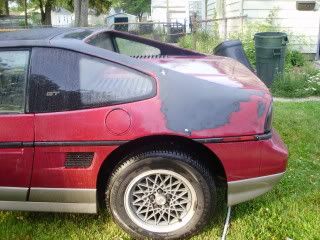
Three days later I arrived again with a friend in tow to escort the dirty bugger back home. These were the pictures taken at pickup:
I arrived back at home and got him in my garage. It was dark and I was tired, but I snapped another two;
Having posted my project on another local forum, with the original intention of trying to do the prep work myself and take it to Maaco, one of the guys from the club offered to assist. He owns a body shop and would let me prep, but also meet with him periodically during the prep to answer any questions I have about prep work. I've never successfully prepped and painted a car before, so having a resource is a good thing. Also, it needs a windshield, so I can pop the windshield at his place, paint, and have the new one installed so that there's no gap at the pillars or seems between old paint and new paint. I can also remove the rear lights, etc. myself while its at his place before paint. Good stuff.
What I did learn ahead of time is this:
Block sanding will take a TON of time, but come out much better.
Block sanding means using a block and sandpaper, and removing the paint by hand. My research on this site indicated the following tips: 1.) Use 400 grit to knock down the paint. In my case, I'm only knocking down to the primer. 2.) Be sure to get the edges of all the panels REALLY well, because if not the paint will lift from the edges 3.) When sanding, don't sand with the lines of the body, or the paint won't come out as good. (I have no clue why, but it was said, so I'm doing it that way.) Instead, sand diagonal as much as possible. 4.) Wet sand! 5.) Be prepared for many many many hours of sanding.
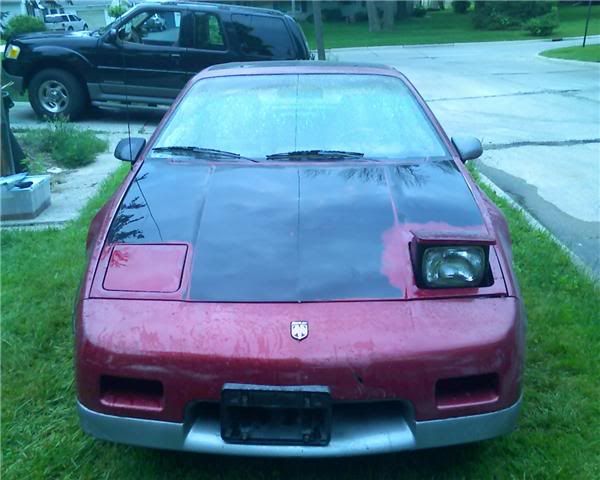
I've been wet sanding now for MANY hours at a time, working on the hood. I started in the driver's side corner and need to do a few things under the hood in order to get the light cover done. For any newbies to sanding, here's what I also learned: 1.) At first the "wet" mixture will come out white and milky. 2.) After white and milky it will turn pink 3.) Then deep red (or whatever color your paint is currently) 4.) Then eventually black. It appears that the hood is gel-coated?
Here's the most recent picture of the sanding experience:
[This message has been edited by Blueiii (edited 06-19-2009).]
IP: Logged
09:54 AM
Khw Member
Posts: 11139 From: South Weber, UT. U.S.A. Registered: Jun 2008
Welcome to the madness! This is the only place to get the correct answers to all of your Fiero related questions. Good luck with her. You have a great starting point in that car. We will be watching.
I am no pro, but I think you are wasting your time wet sanding the whole time. If your are looking to strip the paint off you should start with some course/ dry sand paper, then move to your finer/ wet paper.
I also got a set of fenders we can work out a deal on.
[This message has been edited by LitebulbwithaFiero (edited 06-08-2009).]
Wet sanding with 400 grit = 320 grit dry. (At least in what I've read!)
I probably don't need to knock it down to the gel coat, however from what I've read the results are better. Also, the paint was pitted from the sun damage down to the gel, so I want to make sure I have a good base before primer and paint.
I'm meeting with a member in 90 minutes to go get fenders, but thank you for the offer and if they don't work out I'll let you know.
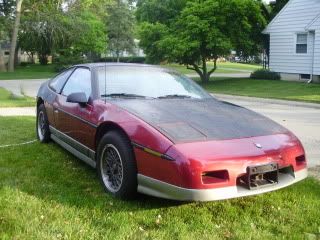
Yes, the bracket is crooked. The front end got smacked and has about 20 different cracks, though none of them are deep enough to indicate frame damage. Mostly just spider cracks and the hole in the front.
Another 3 hours of sanding complete. I need to jump in the shower to go out and get the title transferred, then get the bumper and fenders. More pictures will be posted later tonight. (I'm on vacation this week, and only have 2 days of activities planned currently!)
IP: Logged
01:33 PM
mid engine monsters Member
Posts: 754 From: south alabama Registered: May 2009
So, a few updates. I did manage to fix one of the two lights yesterday, then got some more sanding done on the hood. I'm debating filling the headlight cover where it says "Pontiac" and smoothing it out.
The pictures in the garage aren't the greatest because of the glare, but it was raining out for the first part of the day and I didn't feel like sanding in the rain.
I got the titled transferred, then headed to Michigan with another member to pick up fenders and a bumper. Unfortunately the bumper was cracked already, so I only got the fenders. Talking to Jerry for a while and got some ideas, then the phone rang. My girlfriend was stranded and I ended up spending the rest of the day working on her car instead of mine. I get to work on it again today and hopefully get it running. (Alternator wire burned up quite nicely.)
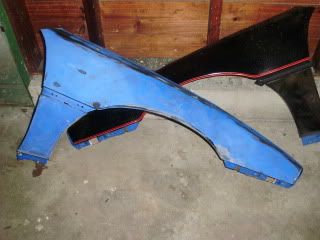
So, pictures from yesterday after the sanding, and the picture of the fenders I picked up. You might notice they are both black and blue. More sanding. . . grrrrr.
The crack in the fender is VERY visible in this picture:
IP: Logged
09:10 AM
Tony Kania Member
Posts: 20794 From: The Inland Northwest Registered: Dec 2008
That is some of the smoothest sanding that I have ever seen. Wow! Good job. I have always refered to my vehicles as a female. Not knocking anybody's preferance here, but I myself like to ride "in" women. I am never into riding "in" men. Just my twisted theory.
The paint maybe a little misleading due to the water that was sitting on it. Still, a very smooooooth job with 400 to start, I was originally going to knock it down again with 600, however my body man said otherwise.
I got a bit more done today, but not a whole heck of a lot. On the plus side, fixing my girlfriend's car while she was stranded in a parking lot, in the parking lot, got me an extra punch on my man card.
Getting in the cracks for the panel edges is the hard part, but I'll pop the hood and go through it again later. Right now the goal is to just get it knocked down enough to start seeing some of the results. I did touch up some of the edges better, cleaned up the lip around the windshield, got the edges sanded out near the windshield, rough sanded the passenger pillar and half the top in front of the sunroof.
I'm VERY detail oriented, and want this car to come out looking right. I see no reason to do it halfway, especially since half the fun is the project itself. So yeah, I'm going to make sure the entire body is smooth as possible before it goes to paint. This car is not going to be a 50 footer.
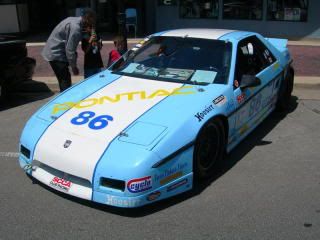
For anyone interested, here's a picture of my old baby!
[This message has been edited by Blueiii (edited 06-19-2009).]
Updated, waiting on the dryer, so I snapped another picture after more wet sanding of the pillar. It looks like I need to go back over it since there are some lines, though it could be wash down from the hood. . .
If you plan on primering the car after you sand, the primer is not going to adhere well to that smooth a surface. You should sand with 120, then primer, then sand the primer with 320, then 600 wet and then paint.
Took the car over to the guy that's going to spray it today. I was a bit nervous based on some posts here, so to clarify, according to a professional auto painter.
Given the pitting in my paint the best thing I can do is to sand it down the way I am, with 400 grit wet (320 cut.) He indicated that primer is made to be sprayed on 320 cut, and as long as there aren't any contaminates in the paper that would cut deeper, this is the best way to get a good finish. He suggested a DA is much faster, however I have a tendency of cutting too deep with a DA and prefer to block sand. Its much slower, yes, but I can make sure I'm not cutting past the primer when I'm doing it by hand.
For anyone else looking at this thread and debating painting, if your paint is decent but just sun-faded, you do not need to cut this deep into the paint. The reason I need to is because the clear was worn off and the paint was actually pitting in (many) spots. Of course, previous owners had also waxed the pitting paint.
IP: Logged
01:34 PM
winger1955 Member
Posts: 579 From: toledo-ohio-usa Registered: Jan 2008
car is looking good pal. i just finished putting new black carpet and new mr.mikes seats in my black 87GT. get a chance stop by and check it out. your car is going to be awesome!!
car is looking good pal. i just finished putting new black carpet and new mr.mikes seats in my black 87GT. get a chance stop by and check it out. your car is going to be awesome!!
Thanks Jerry! Sorry I didn't get back to you. The g/f's car broke down so I got to spend Monday night and Tuesday morning wrenching on it, followed by Cedar Point Wednesday, running errands yesterday and - finally - met with the body guy today after adding it to my insurance. My finger tips on my right hand are pretty much sanded off, and you can see blood through the skin. Oops. Its a little painful to type.
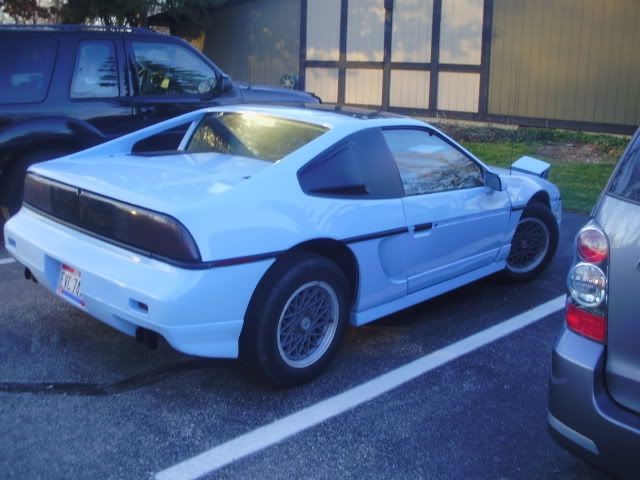
Before heading to the body shop and on my first day of really driving the car, I ran it through a car wash, then snapped a few quick pictures. . .
I'm currently playing with the budget and trying to decide between needs and wants. . . And how much money I want to dump into the Fiero before paint.
I figured that putting it down "in print" might help clarify some things for me (and anyone who wants to chime in on less expensive solutions is welcome to do so!)
Required before paint Front Bumper: $50 (used, lots of sanding) Rear Bumper: $50 (used, lots of sanding) Outer Dew Wipes: $125 (I think Stu is the guy from the site that makes them? I sent him a PM since it looks like it might be a while.) Total: $225
Want before paint, but not required Sail Panels: $110 (Ebay, not concerned with aftermarket or original) GT Style # 1 Side Scoops $250 (uncut, still debating whether I should cut my own or pay to have it done) Rear "Camaro" spoiler: $200 (I like the look of these molded in, still not sure if its in the budget) Total: $560
After Paint Molding all around: ????
Has anyone used the scoops from Fierofiberglass and cut your own? How difficult is it??
[This message has been edited by Blueiii (edited 06-24-2009).]
I ordered the Ebay sail panels today. Nothing special to look at but I'll add the picture anyway, because vacation is over and I'm stuck at the office NOT working on Grrr.
The headlights were simply disconnected for some reason. I plugged everything back in and connected the arms and the headlights are fully functional. I did notice a difference in speed and it seems that the passenger side is sticking a bit, so it might need some adjusting.
Bought more sand paper as I was out, so budget has been updated. . .
I will post more pics of the progress later this week. (My battery was dead when I went to photograph the progress.)
I was originally going to, however I talked to the body guy and got more clarity.
Summarized explanation:
"Primer adheres best to paint or other primer and is designed to adhere to a 320 grit cut. 400 grit sandpaper, when sanding wet, equates to 320 grit dry. Sanding at 400 dry will work best." As such, I will not be sanding with 600 after the initial wet sand.
Also, around the edges he suggested a scotch-brite pad with some type of liquid for scuffing. I'll have to get more info on this later. I did check to see if the little "scuffs" of paint were okay. Again, as long as its smooth and the clear is gone, no problem.
The pictures look REALLY smooth in some cases because the car is wet still.
[This message has been edited by Blueiii (edited 06-16-2009).]
I realized, while staring out the office window, that the cameras in cell phones do, in fact, have a purpose. In fact, they have many purposes, including snapping a quick photo of the most recent sanding escapades!
Minor update to clarify since there has been a LOT of discussion in multiple posts about painting.
1.) I am wet sanding with 400 grit ONLY down to the primer. You do not need to take it down to the plastic for good adhesion. 2.) Any spots where the cut is deeper than the primer will need to be sealed, then primed and feathered in. (120 grit for the plastic, then sealed and primed, then sanded down to 320 grit dry or 400 grit wet.) 3.) Sanding down to the plastic is not needed in all cases. It is recommended for either dark cars that are show quality finish.
The biggest problem you are going to have, if you don't primer the car before paint, is going to be high and low spots. Your car will look really wavy once it is painted.
You are best to primer the whole car and then block sand the new primer.
IP: Logged
12:45 AM
LitebulbwithaFiero Member
Posts: 3381 From: LaSalle, Michigan Registered: Jun 2008
From what I've read, a wet sand is actually a deeper cut. I thought the same thing initially. My only thinking is that the water allows the paint "dust" to clear out faster.
If you notice, when dry sanding, you get a quick build-up in the paper. With wet sanding you don't get as much sand build-up, which would result in a deeper cut. (Just my thoughts on that as I don't know the actual science of it.)
Got some more sanding done last night. For anyone sanding for the first time, I'd like to offer the latest finding(s).
It appears that when these cars were painted they were painted with the panels on the body. I noticed that on the hood, roof and even around the sail panels there was a LOT more primer. I managed to burn through the primer in several spots, even while block sanding.
I snapped off a bunch of pics, which are forthcoming.
From a budget standpoint, I'm still not 100% sure what I'm going to do. I've had a very difficult time tracking down bumper covers. I might have a lead on a rear bumper to be picked up this weekend. Another guy keeps telling me he has them, but hasn't returned my calls or emails.
As it stands, I might end up having to forego some of my plans of "extras," including the side scoops and spoiler due to having to buy fiberglass bumper covers. Not good since I autoX!
When I originally started this project I had three color schemes I was debating.
The first was green. I've looked at TONS of green fieros now online, and noticed that they tend to look either ricestastic when too light or dated when too dark. A lot of that could be from photography and the color, so nothing against anyone with a green Fiero. There is actually one that I saw a picture of from the forum that I really dig.
Having looked at LOTS of pictures to figure out what look I wanted, I came across the orange fiero with side scoops on FieroFiberglass.com and really liked the color with the side scoops, though felt it needed something more. Namely, something to offset the color.
My original plan was to go with the GT style side scoops and Camaro lip spoiler with an offset chrome blue stripe and matching pin stripe down the hood. This would then include the center of the tail lights color matched with the tangerine and the actual tail lights night-shaded in. I was going to also have a decal cut with the pegasus logo and inset into the spoiler lip during painting. After the stripe it would be removed and show the tangerine through the chrome blue.
All of this was originally being planned for a budget of under $3,000, including new windshield glass, sail panels, trim, AND the car itself.
I've already spent just shy of $1500 and the parts are adding up quickly.
My original budget: Used front bumper: $50 Used rear bumper: $50 Window: $190 Side Scoops: $325 Spoiler: $210 Outer Door Seals $114 Total: $939
With what I've already spent, I'd be at $2414, which would leave me just under $600 for paint. Very do-able for the look I wanted!
Unfortunately, finding good used bumpers is going to be a problem at the price I originally budget. I'm looking at $720 for fiberglass from FieroFiberglass.com. This obviously blows my budget out of the water pretty bad.
I've been playing with the numbers and looking for parts. I've managed to track down rear bumpers, but not front for my price. SO. . . New adjusted budget:
New FieroFiberglass.com bumper: $360 Used rear bumper: $50 Window: $190 Spoiler: $210 Outer Door Seals $114 Total: $924
I'm back in line with what I originally had budgeted.
BUT, I lose the scoops. With the orange and no scoops it will look like every other orange fiero, which is definitely not my goal.
Luckily, there's plenty of inspiration for paint jobs out there. Here's my latest inspiration. . .
And its back within my budget.
Jim, hope you don't mind the hyperlinks for added Google stacking!
[This message has been edited by Blueiii (edited 06-19-2009).]
When it comes to building a custom Fiero, it is nearly impossible to stay on budget. The way I see it is... If you have to go $300 over budget to get the look you really want, then go for it. I am about $5,000 over budget on my car and will be $10,000 over budget by the time i'm done with everything I want to do. LOL
I learned a long time ago... NEVER settle for less than what you want. You will NEVER be happy if you do.
the car you show for color belongs to kris munson of reddick,florida. he makes the flushmount headlights. if you need my help call me..419-868-6504 later chris.
I might swing out tomorrow. I saved your number in my cell phone before we headed up to Adrian.
Jim,
Its like any project car. You start with an idea, but there is a wallet that holds you back. When I was originally looking at ideas I had posted on my local club requests for photoshops of a few different things. The blue was definitely on my list with the secondary "look." I've got some major life changes coming up in a few months, so I need to watch the duckets. I firmly believe in doing things right the first time, but there comes a point when a project is a project for too long. I worked on my DSM for two full years and ended up selling it without ever really enjoying it because I had too many irons in the fire. Lesson learned, take it step by step.
I also noticed that my previous pictures were too big. I doubt anyone still uses dial-up, but I did shrink them down for general consumption.
I also spent 6 hours in the Explorer tonight picking up a Urethane rear bumper. I would much rather have a Urethane bumper than fiberglass because of autoX. Those cones will sneak up on a person! It will likely end up going to Keystone. I need to talk to Jason (body man) tomorrow anyway, so I'll see what he thinks.
The first AutoX of the season is only a few days away, and I was getting some TERRIBLE vibration from the wheel. I ended up deciding to take it in to Firestone for an alignment. . . . The front driver's wheel was almost a FULL degree off!!!!
So, add that to the budget. . . However, some of the vibration did go away. I'm of the mindset that the suspension is still using the original bushings, so poly bushings might be added to the list at some point in time.
1.) 6/19/09 - I got ahold of a guy with a bumper, so I headed to Michigan almost immediately after work. What was supposed to be a 2 1/2 hour total round trip turned into 6 hours! Thanks Tom Tom! (I-75 was closed with detours.) Somewhat exhausted when I arrived, I didn't notice a small hairline crack in the bumper. Whoops! Looks like Keystone is going to be touching this one up!
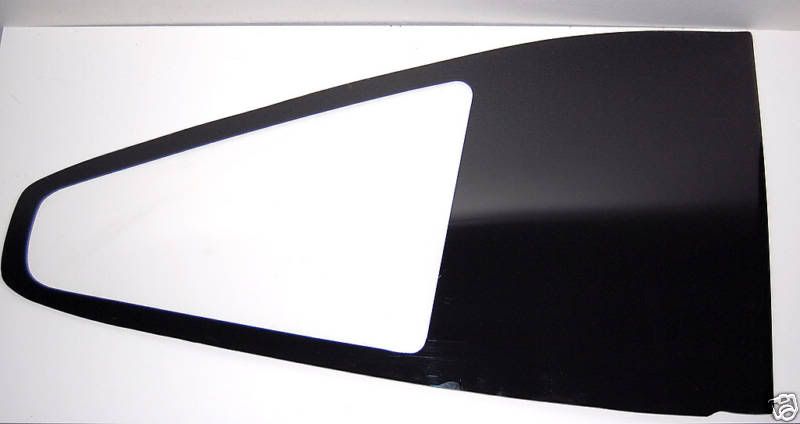
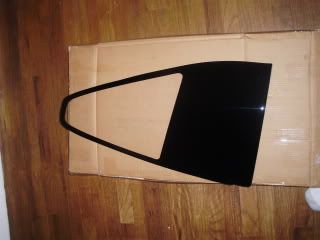
2.) 6/19/09 - I arrived home just moments after the sky opened up in a massive downpour. I decided to leave the bumper in the car as I was rather beat from the drive and detours. Sitting in my living room, I decided to check my front door as I remembered the sail panels might have arrived! Sure enough, wrapped in a plastic bag courtesy FedEx, my sail panels were here!
3.)6/20/09 - I woke up and decided that the week is going to be somewhat hectic and felt the need for some stress relieving sanding. A few hours later and the driver's side rear showed a bit more progress. I also removed the drip rail and the paint off underneath the drip rail.
4.) 6/22/09 - I got home from work and decided to start on one of the fenders. I ended up getting most of the rattle can off the fender. I'm not going to take it down to plastic and, in this case, don't think taking it all the way down to primer is going to work because the paint (and primer) is way too thin. I'll be running it up to my body guy next week to have him check it over and give me some advice on what he wants me to do with it.
4.) 6/22/09 - I got home from work and decided to start on one of the fenders. I ended up getting most of the rattle can off the fender. I'm not going to take it down to plastic and, in this case, don't think taking it all the way down to primer is going to work because the paint (and primer) is way too thin. I'll be running it up to my body guy next week to have him check it over and give me some advice on what he wants me to do with it.
You are going to want to make sure you get all that rattle can paint and rattle can primer off of that fender. True auto paint and rattle can paint don't play well together.
Huh. I thought I responded this morning but apparently not. . .
Thanks again for the heads up Jimmy. The fender pictures were taken Monday after I did my initial sanding. I spent a solid 4 hours to get it to where it was in the picture, however I wasn't quite finished. I went back last night and hit a few more spots but again, its still not finished. My only concern was that I was cutting too deep into the original primer in a few spots. (Apparently the paint / primer on vertical panels was put on VERY thin!)


 .
.