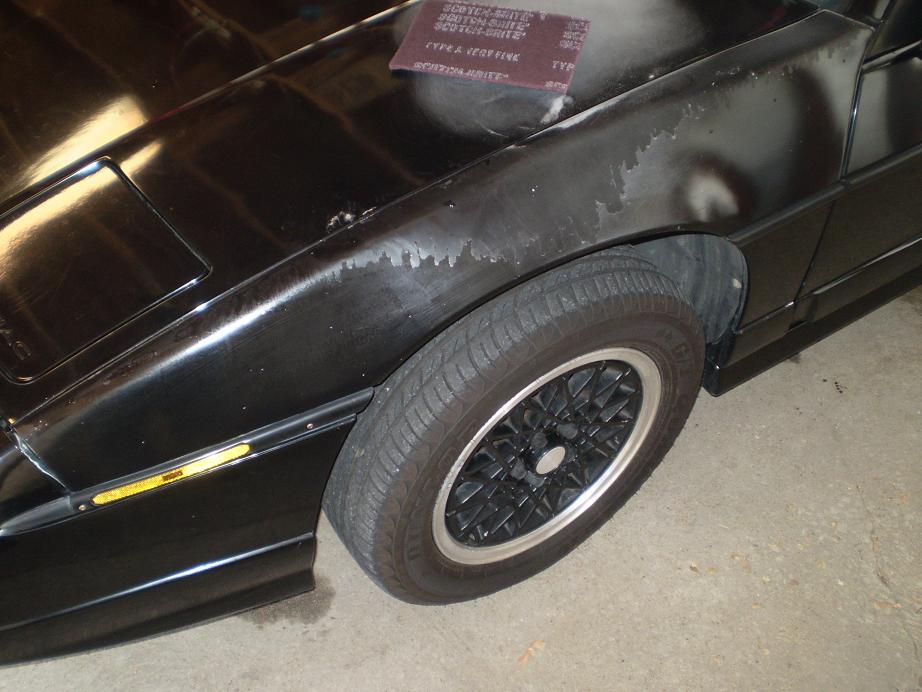
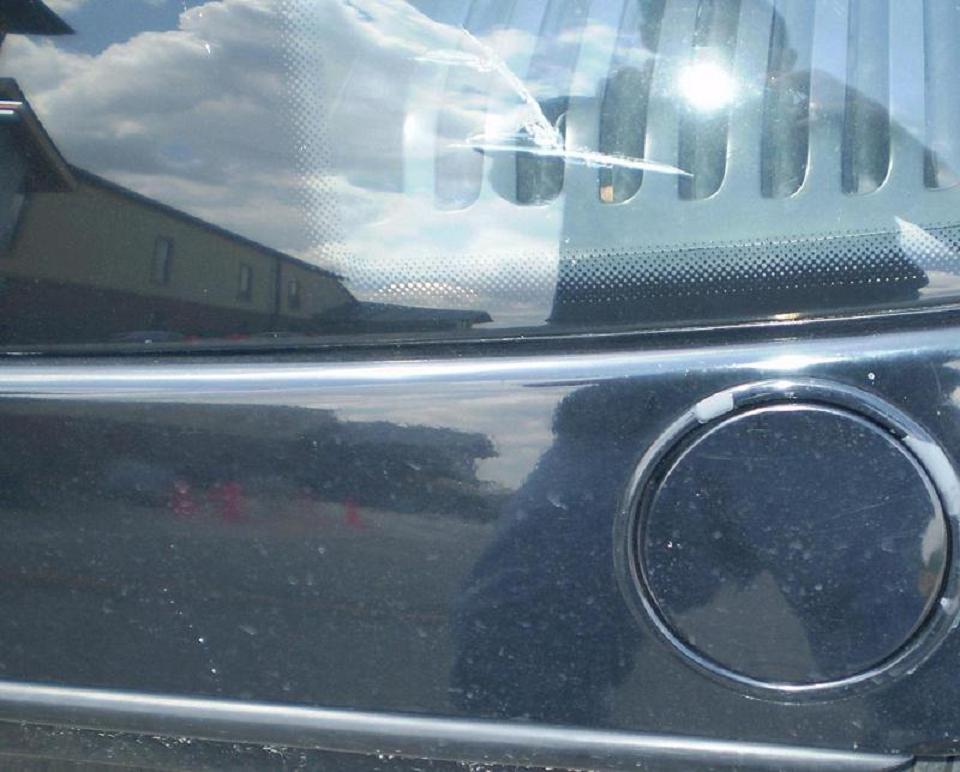
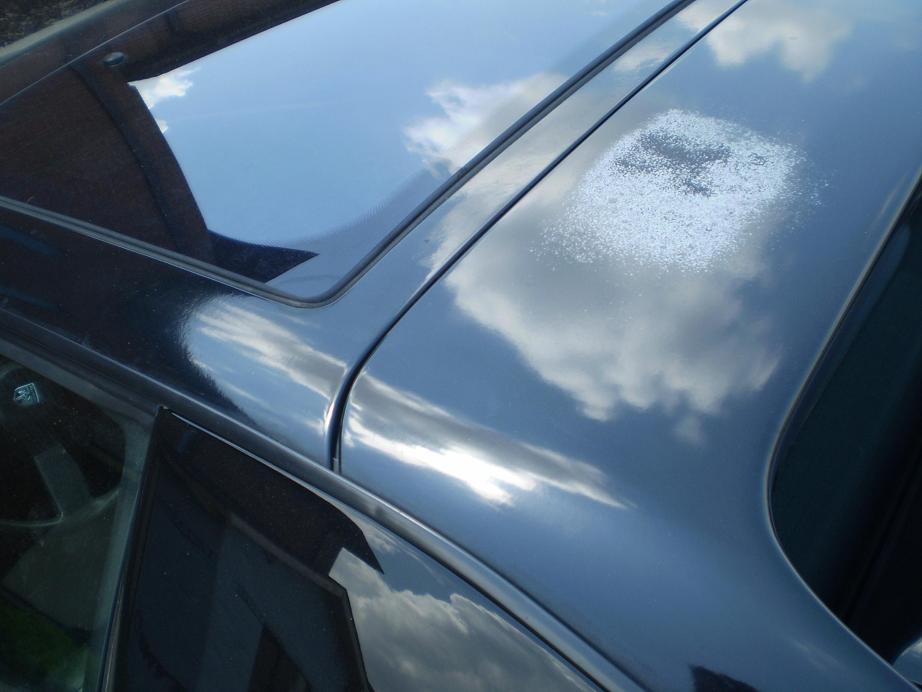
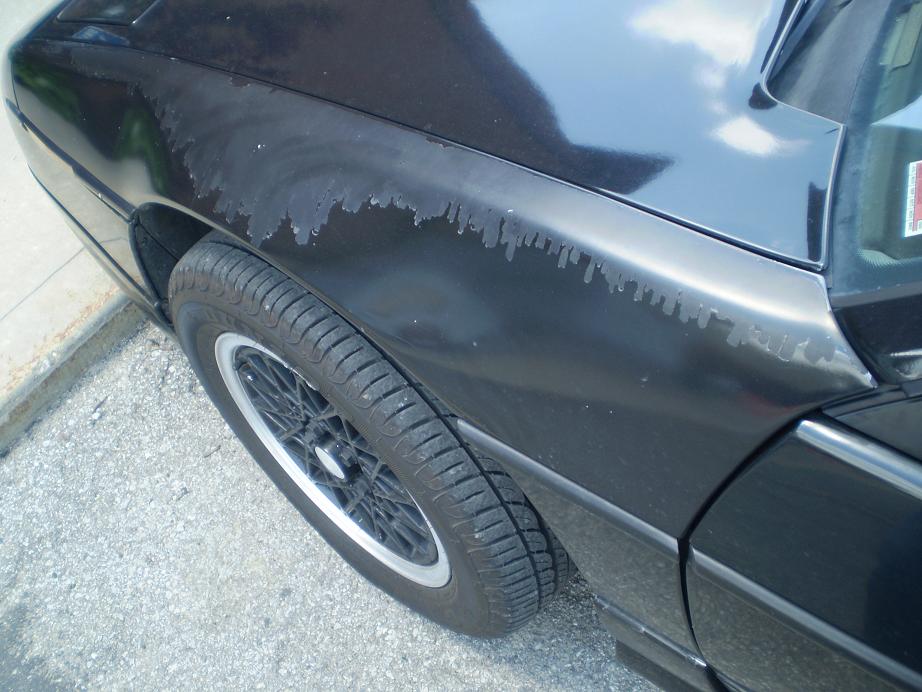
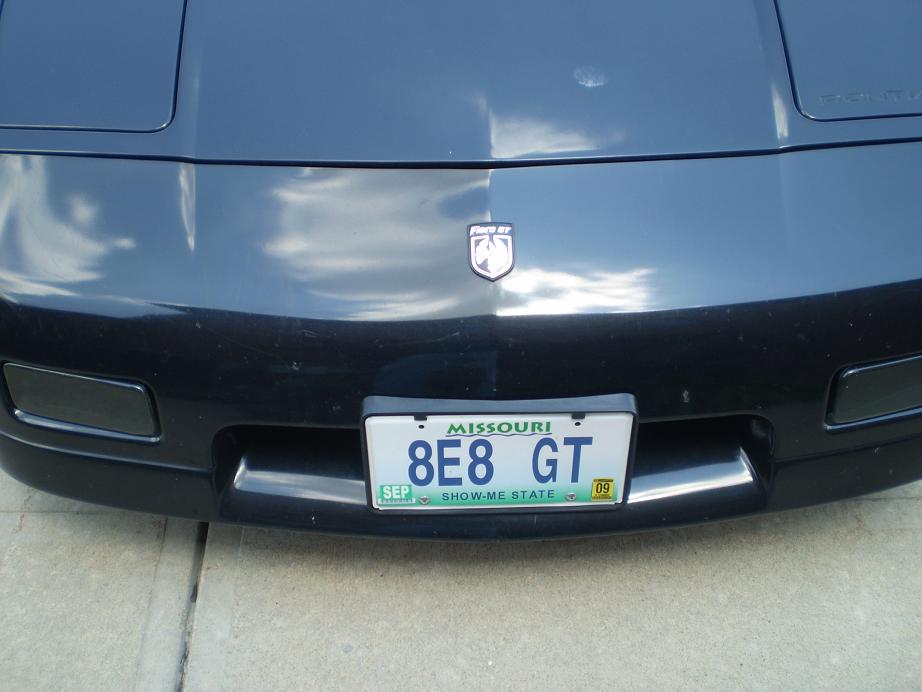
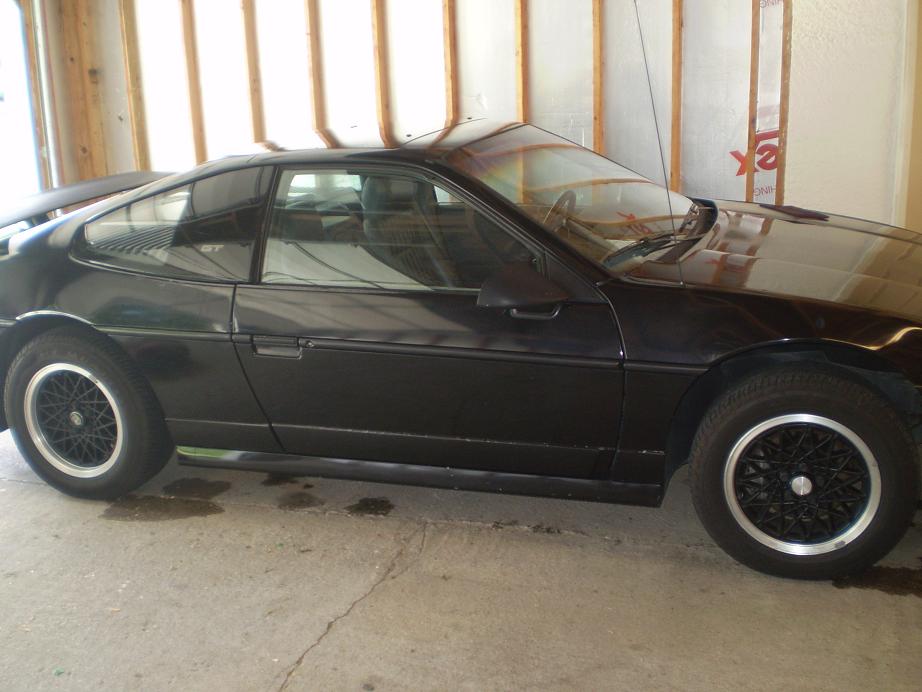
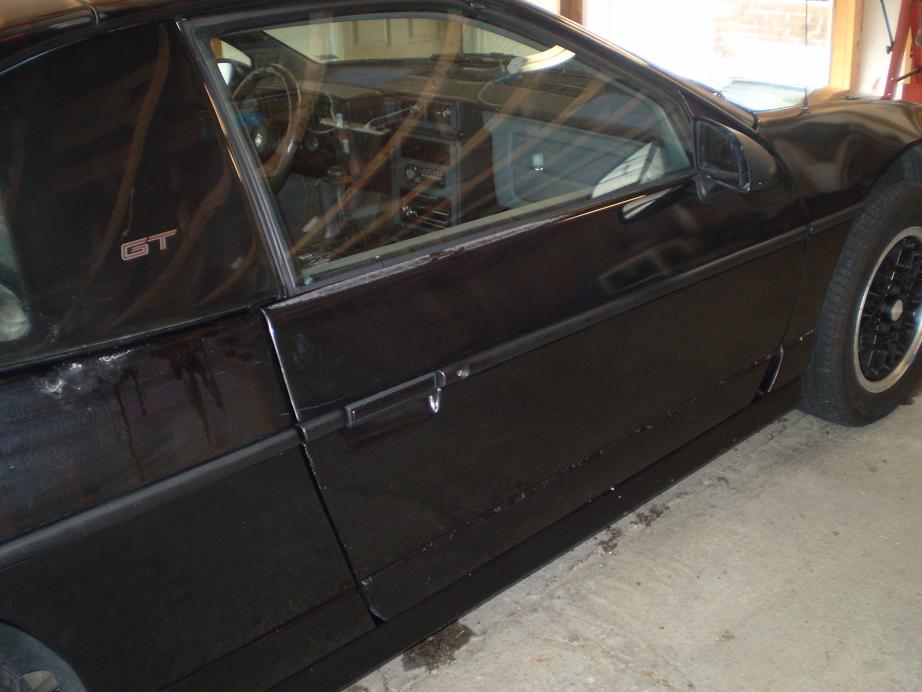
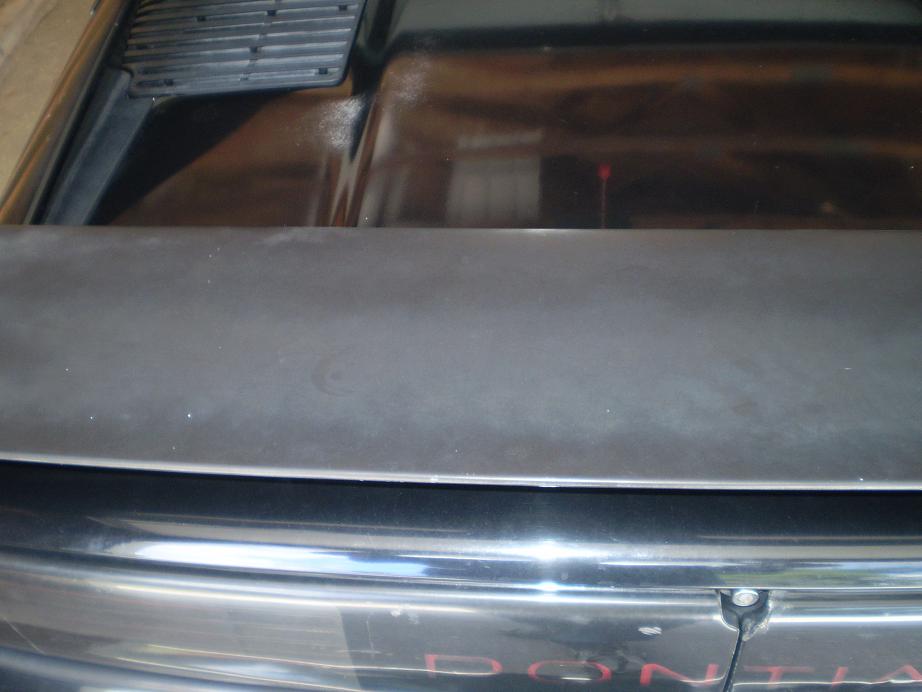
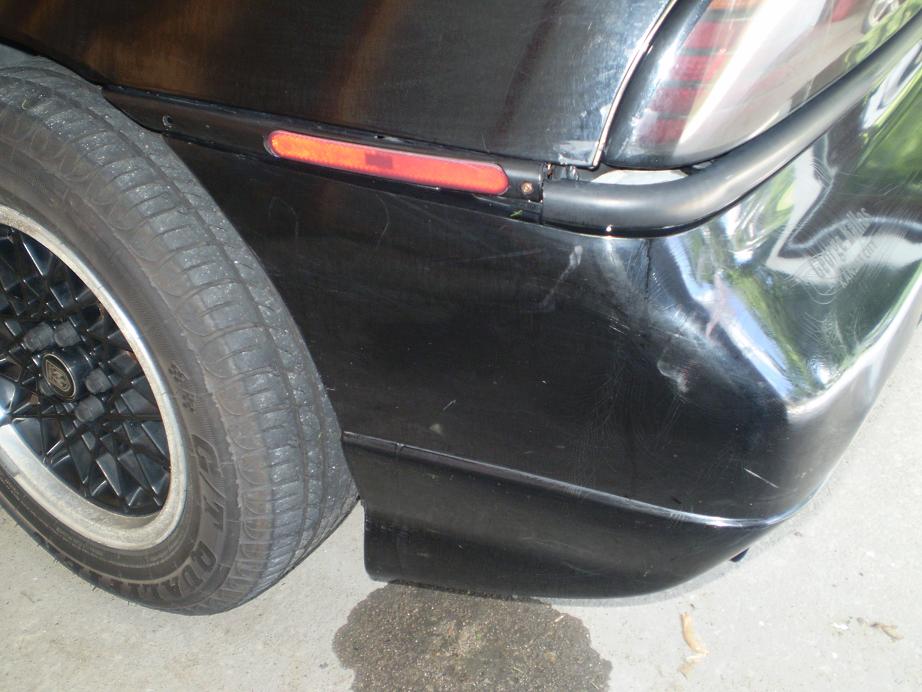
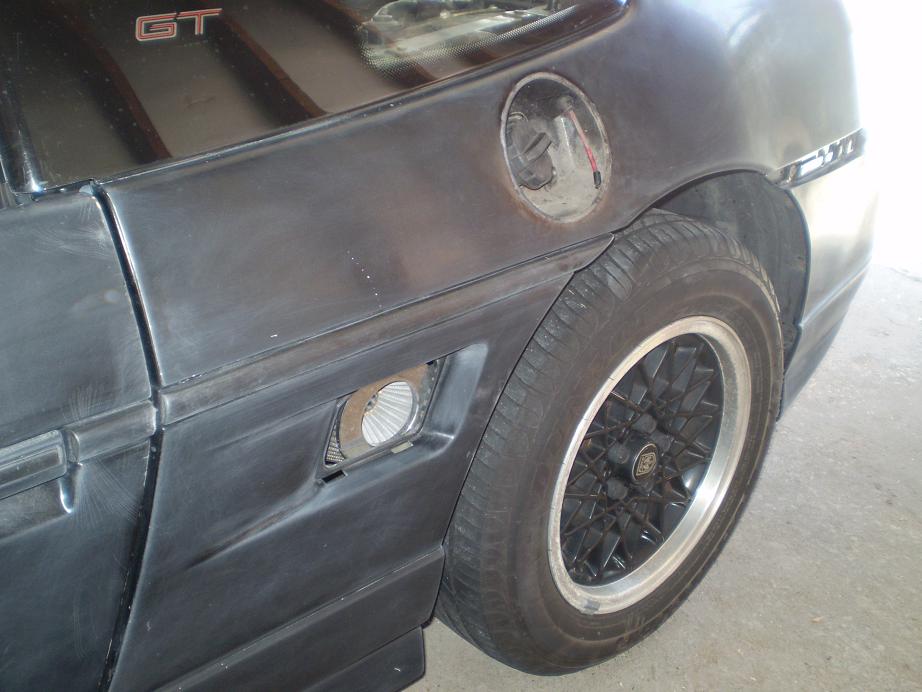
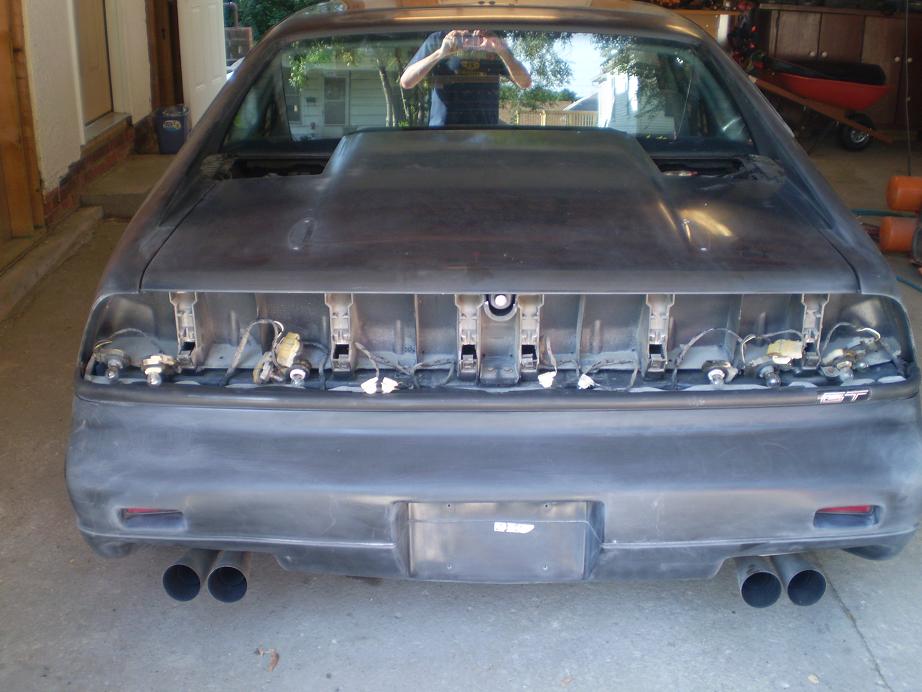
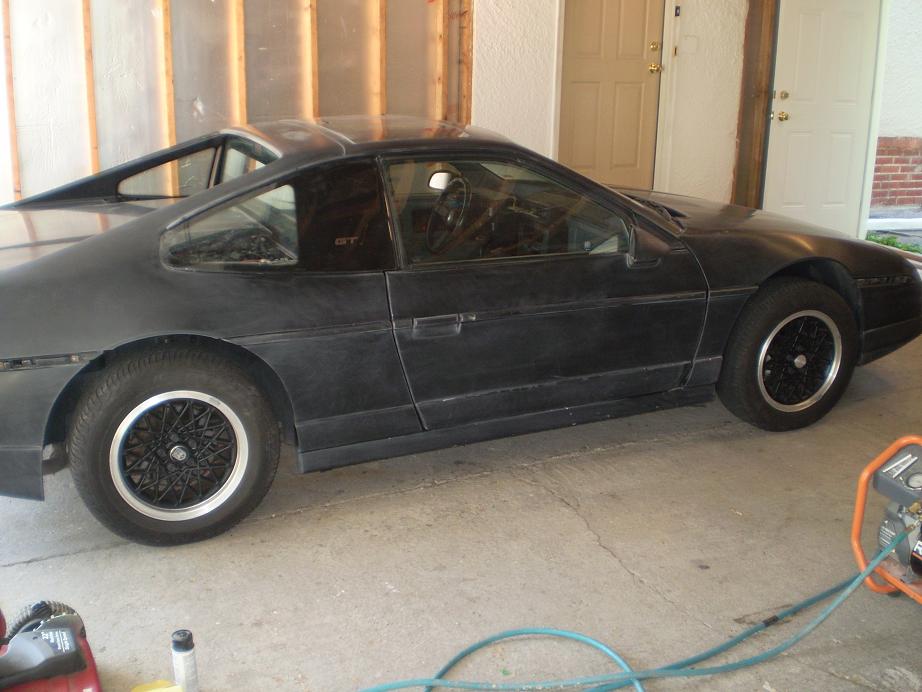
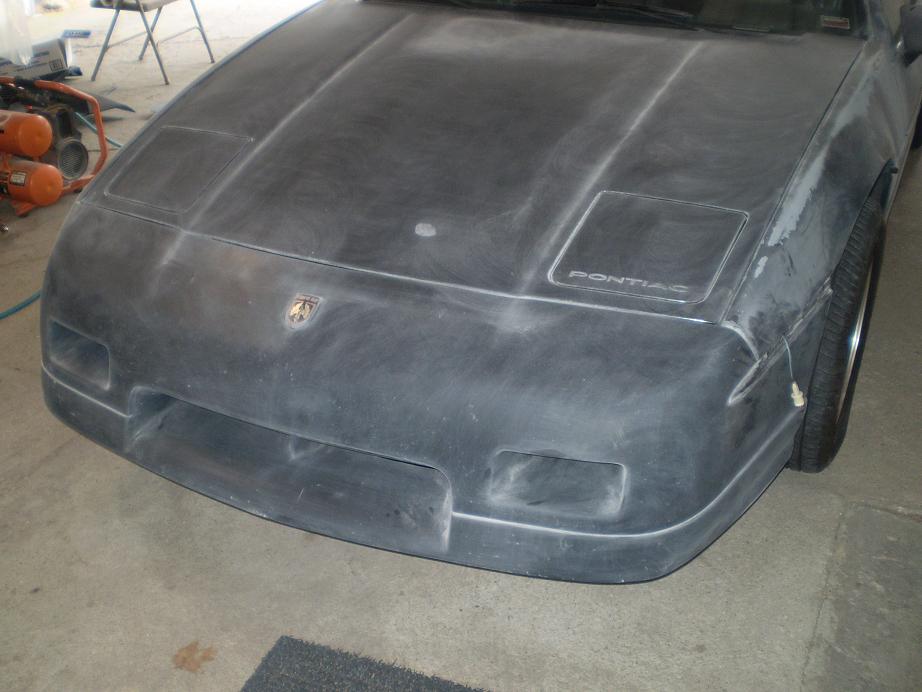
Hey everyone - here's a thread that says "if I can do it, you can do it" I want to thank the Forum for all their help along the way. I've wanted to paint my 88 GT because of some clear flaking, oxidation, weathering, etc see pics) for some time. I'd read Macs86GT's thread of his excellent paint job at Maaco and really thought I'd end up there. However, their quote for me was over $1300. Bummer. Another local shop was $1200. So I began reading, researching, and picking peoples brains on how to do this thing. Special thanks to JimmyS and to DeLorean00 fot the threads you've both posted - they have helped alot. THANK YOU!
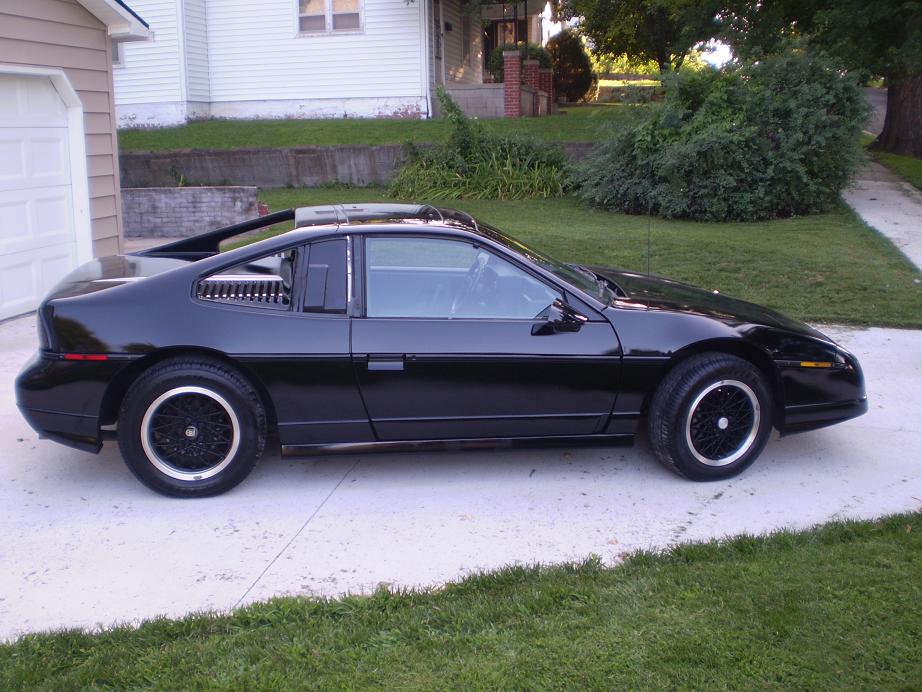
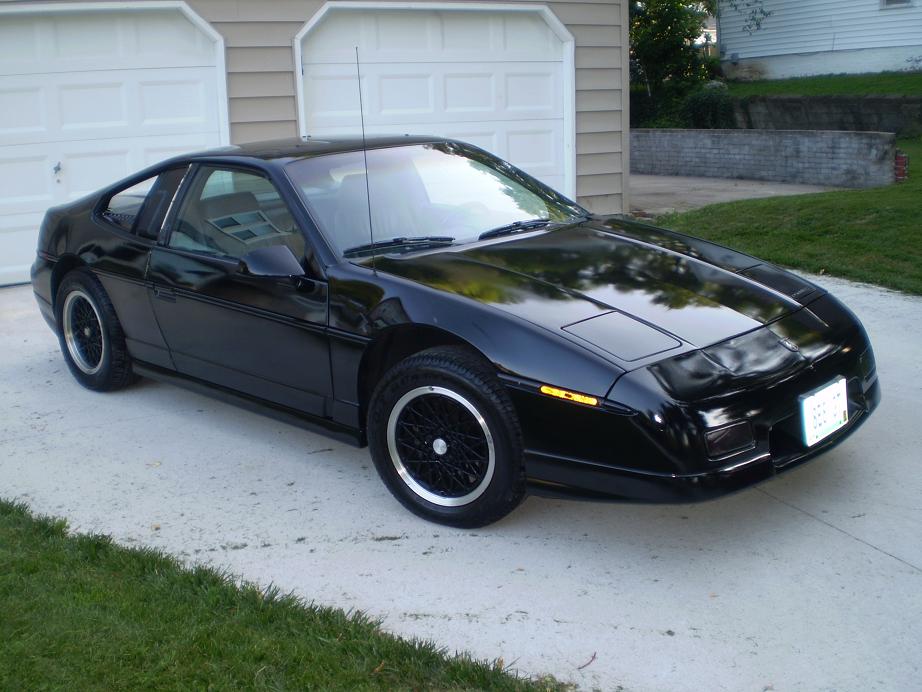
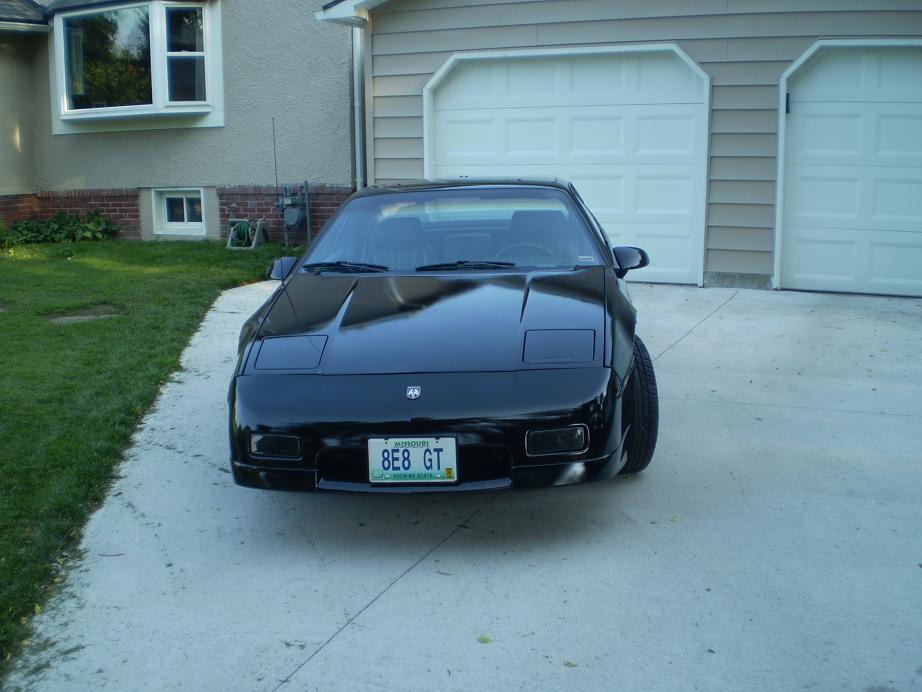
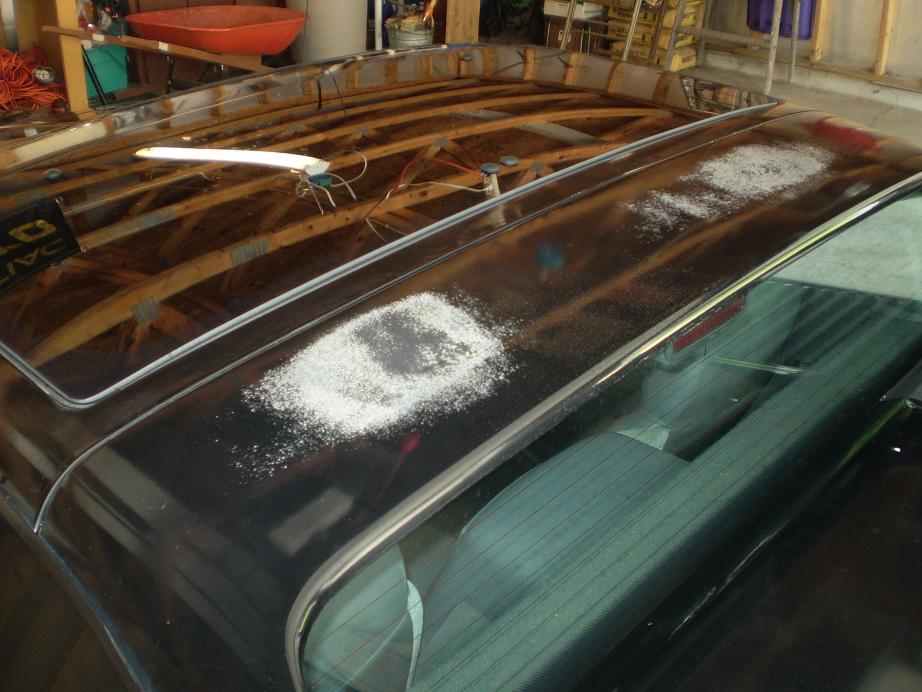
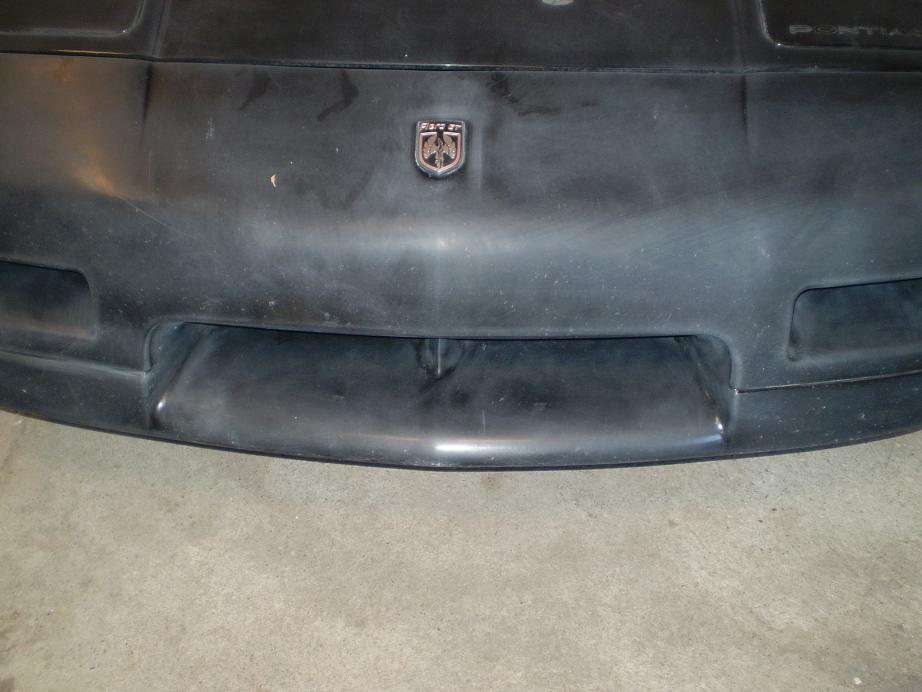
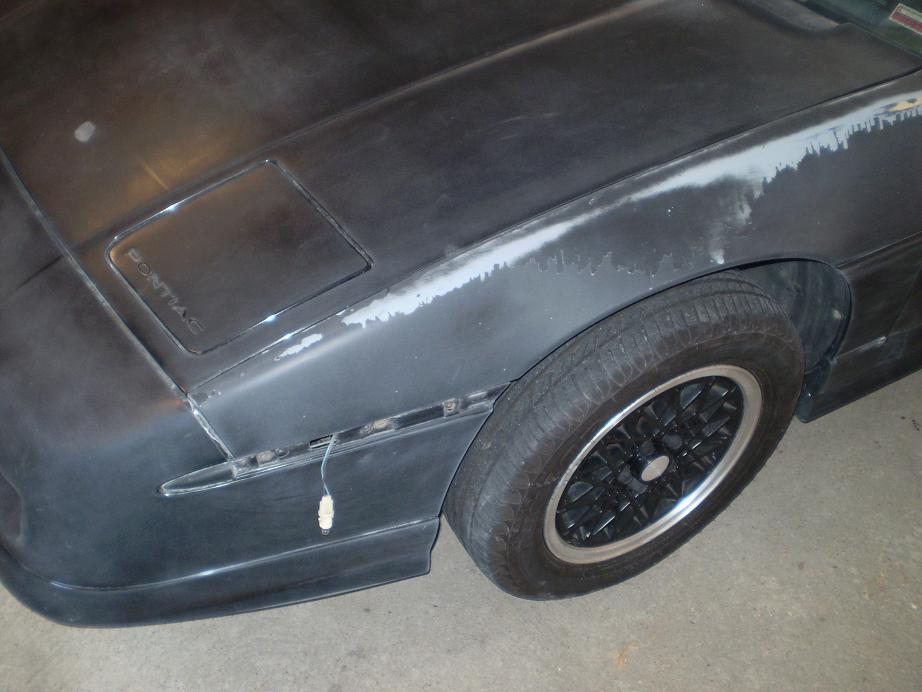
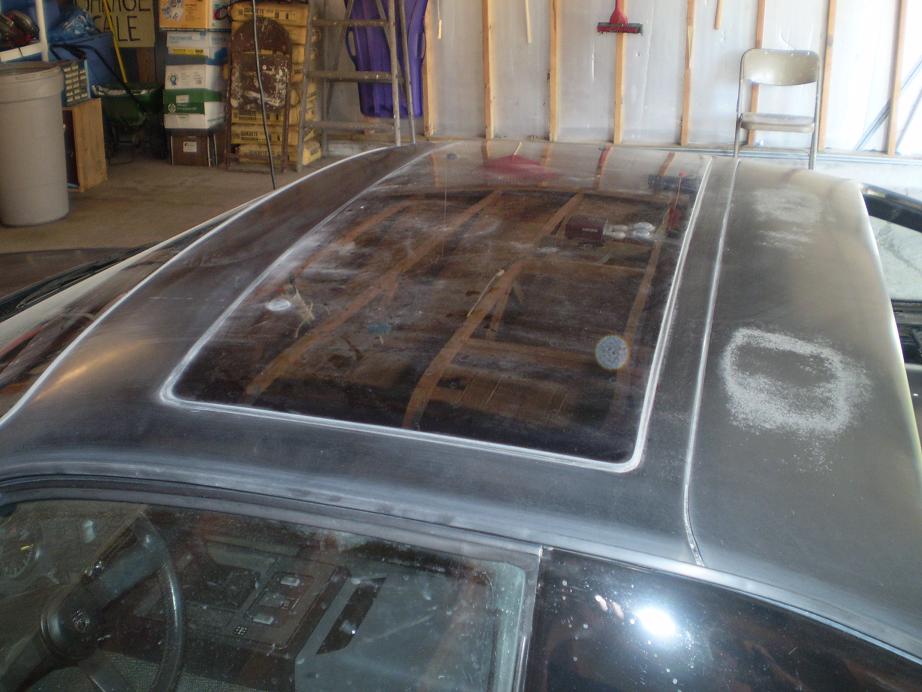
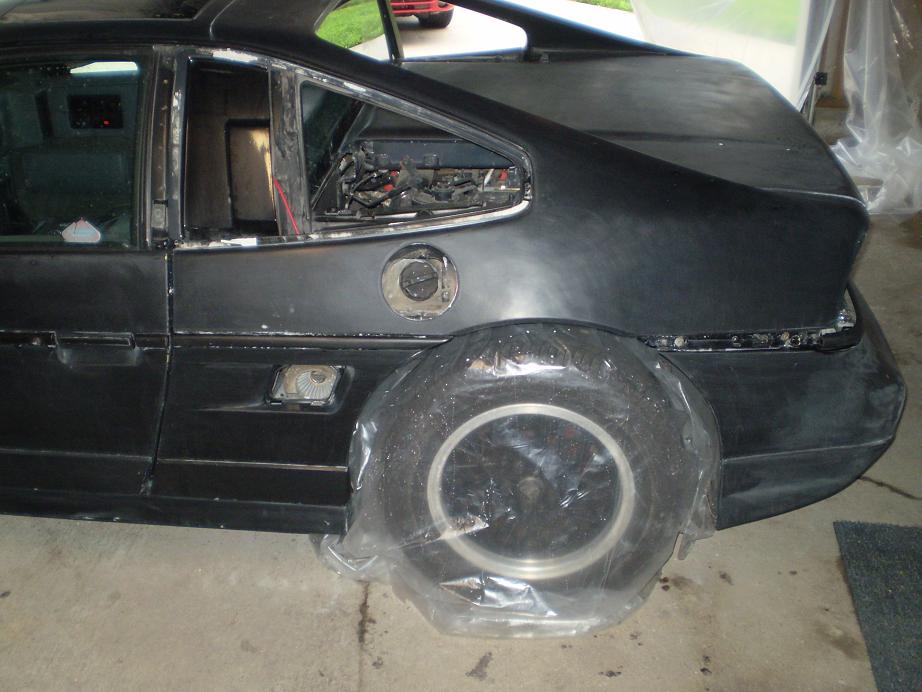
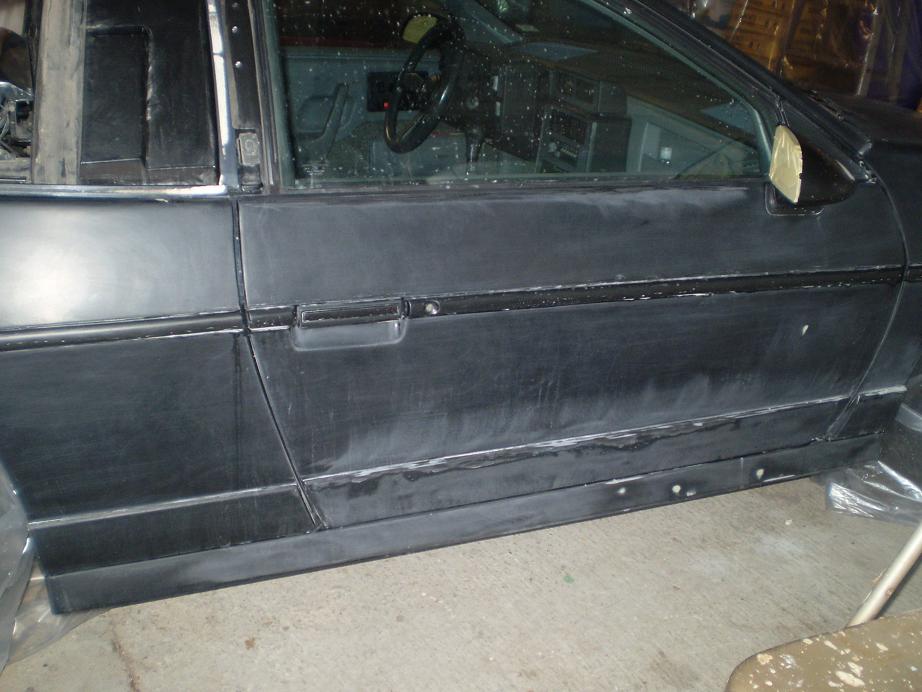
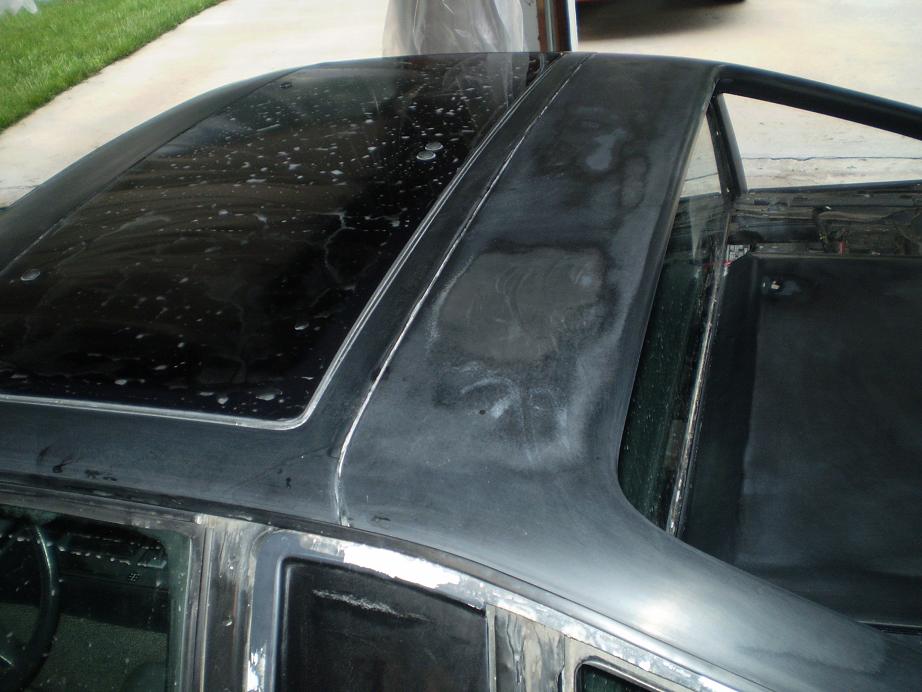
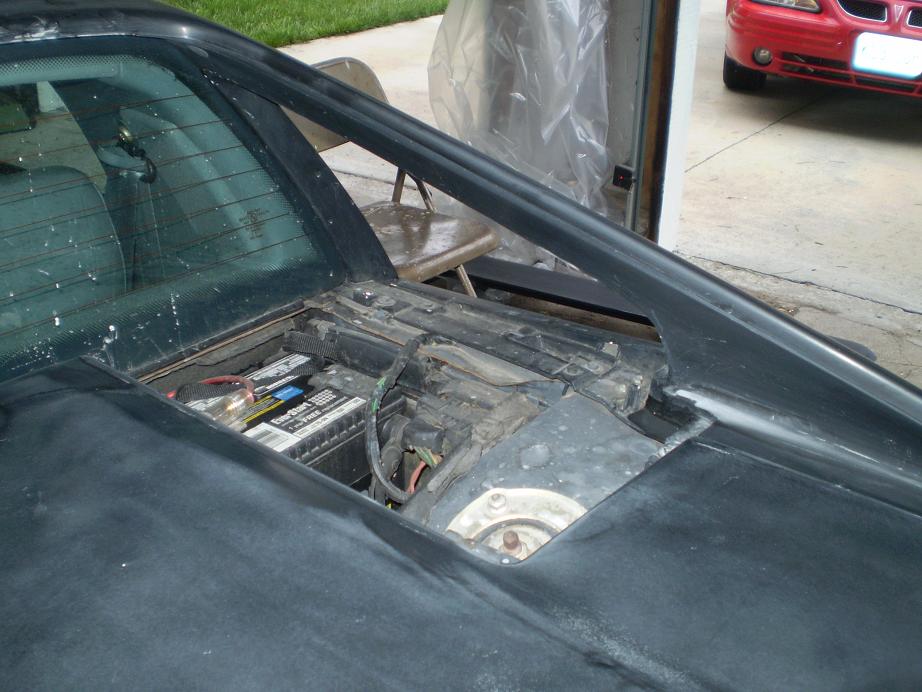
I'll try to post pics as I go. Here's what she looked like on July 5, 2009
IP: Logged
07:59 PM
PFF
System Bot
pastor Dennis Member
Posts: 189 From: St. Joseph, MO USA Registered: Jul 2007
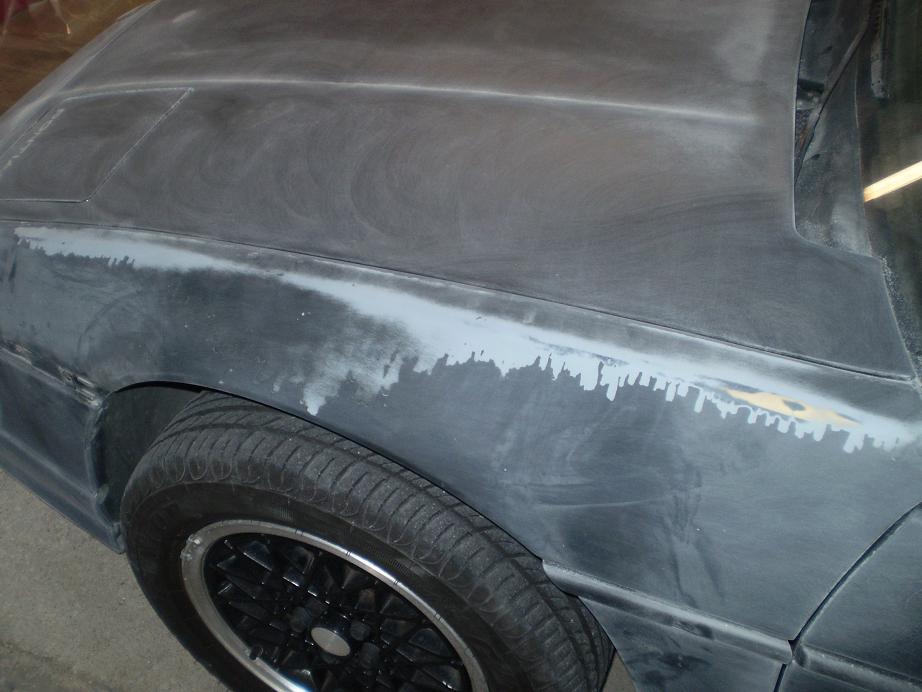
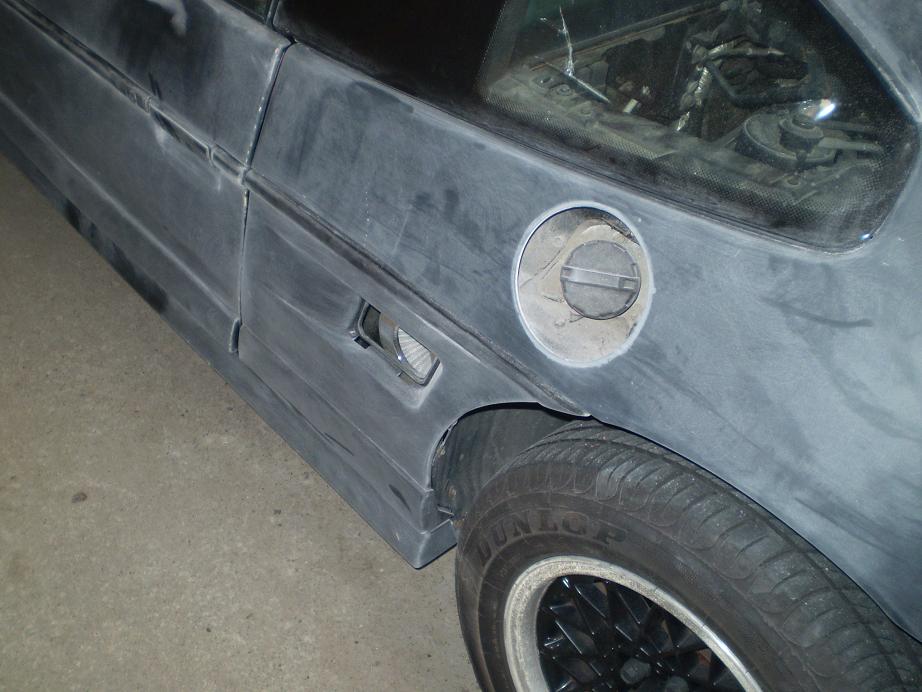
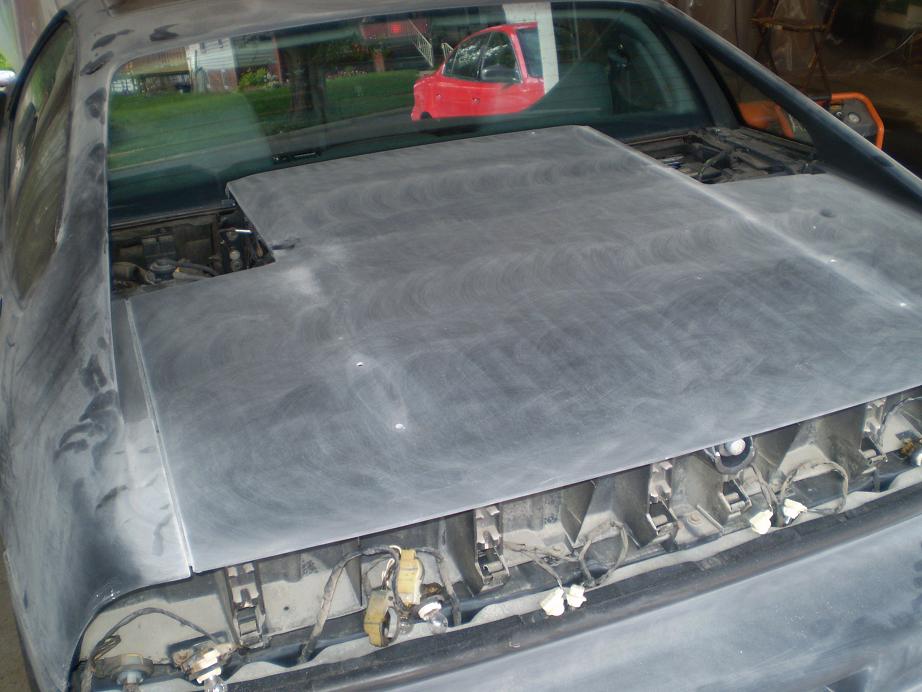
Another round of small circles with scotch brite pad.....so far, all by hand. I want to get past the shine but not go thru the paint. I only want to prime the few areas that will need it ( Left front quarter, both mirrors)
IP: Logged
08:33 PM
pastor Dennis Member
Posts: 189 From: St. Joseph, MO USA Registered: Jul 2007
My arms are tired and my garage is starting to look like a paint booth. Got the DA and the paper to take care of some rough spots. The primer is an automotive plastic primer - it is clear and is hard to tell where you've sprayed. Hope it works.
IP: Logged
08:38 PM
pastor Dennis Member
Posts: 189 From: St. Joseph, MO USA Registered: Jul 2007
A friend of mine, who'll actually be shooting the car, came by and DA'd the bad spots. Since one quarter window was cracked, I order a new pair from modernman and have them ready to go. Next came filling the chips, then a wet sand at 400.
IP: Logged
08:46 PM
pastor Dennis Member
Posts: 189 From: St. Joseph, MO USA Registered: Jul 2007
Next comes a good cleaning. I'll do that tonight and post the pics in the morning. So far, I've been without the car since the 5th of July - 2 weeks now - and am having Fiero withdrawls....Is this normal?
Next comes a good cleaning. I'll do that tonight and post the pics in the morning. So far, I've been without the car since the 5th of July - 2 weeks now - and am having Fiero withdrawls....Is this normal?
You're only NOW having withdrawls? What kind of cold-hearted unfeeling monster are you?
Car is looking great so far, keep it up with the pics!
Next comes a good cleaning. I'll do that tonight and post the pics in the morning. So far, I've been without the car since the 5th of July - 2 weeks now - and am having Fiero withdrawls....Is this normal?
I am surprised you lasted this long. I can only go a week before I miss my fiero. Keep up the good work I will be watching this thread.
------------------ Thank for the sig. Bobadoofunk 1984 Fiero Sport Coupe 1990 Buick Reatta 2002 Chevy Impala base
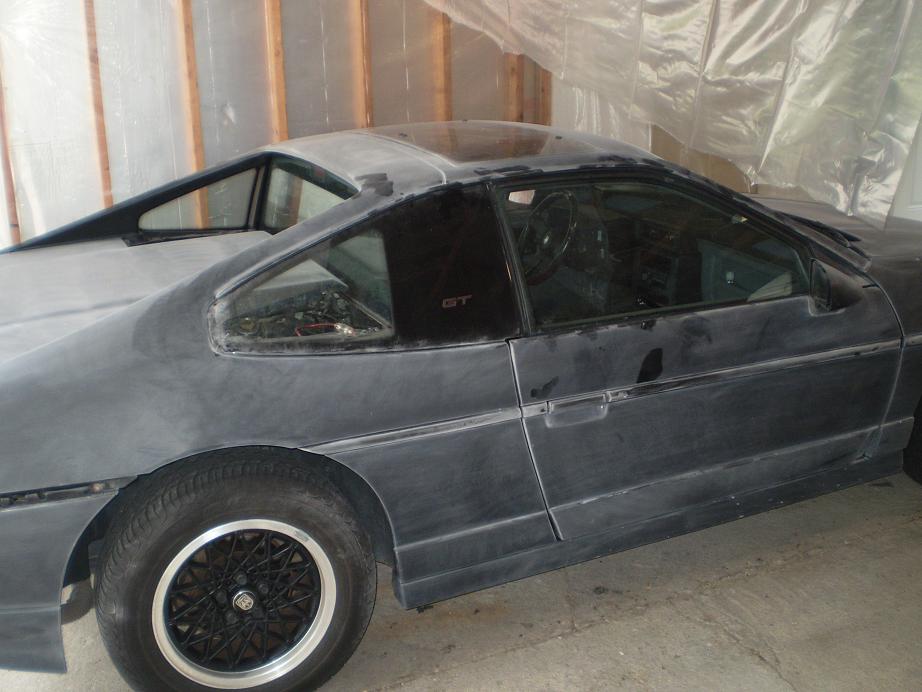
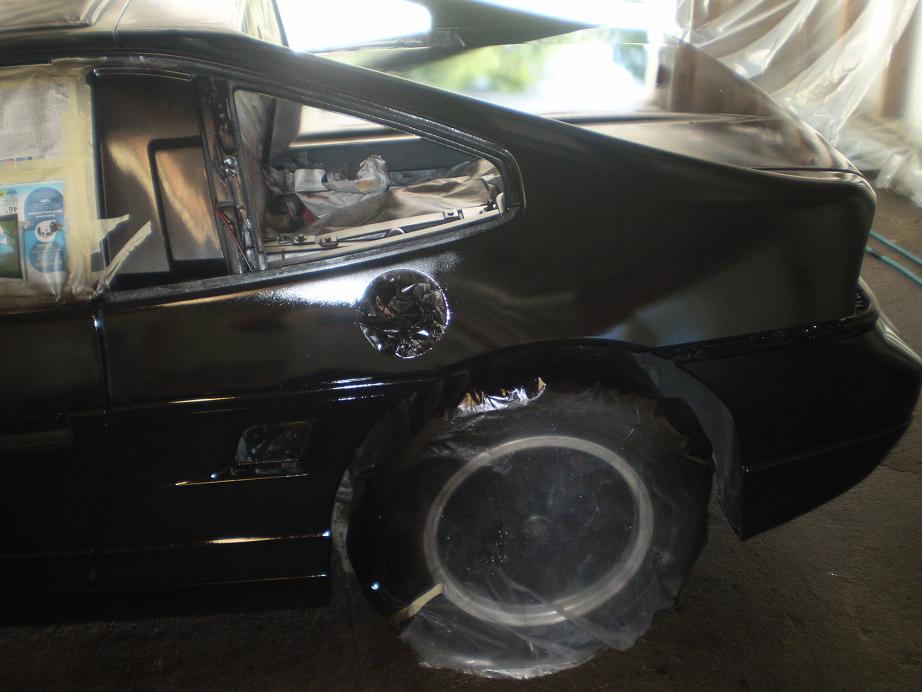
I think the Fiero withdrawls started late for me since I've been out there every night sanding (did I mention by hand - oh yeah, I did). It's been hard work, but so far I'm gonna need a plastic surgeon to get this smile off my face. Here's what she looks like this AM after the first washing. More washing to come, tack, tack, then taping, masking and hopefully paint in the cool of tomorrow morning.
Hey, all you paint guru's : I've got some questions on which areas to NOT paint... Do you suggest NOT painting the plastic pieces just inside of the mirrors? What about the plastic pieces inside the fastback clip behind the quarter windows (last picture)? What about the engine vents? High temp or normal?
Thanks in advance. Dennis
What about the mouldings on the side? I've seen some taped, some painted? What are your thoughts? thanks!
1.) Vents - definitely high temp 2.) Moldings - personal preference whether you want them color matched or not. What color are you paiting the car? If you're staying black, they're color matched anyway. 3.) Piece inside the fastback clip - again, a preference.
I'm keeping the black molding so that the lines flow well. Too much "color" without it, unless you're doing something to help offset the scheme.
IP: Logged
09:14 AM
pastor Dennis Member
Posts: 189 From: St. Joseph, MO USA Registered: Jul 2007
Thanks Buleiii - I've read your thread as well and a big THANK YOU for all the help you've given me. I'm shooting the mouldings and plastic pieces - taking the advice of you paint guru's - thank you for the pm's.
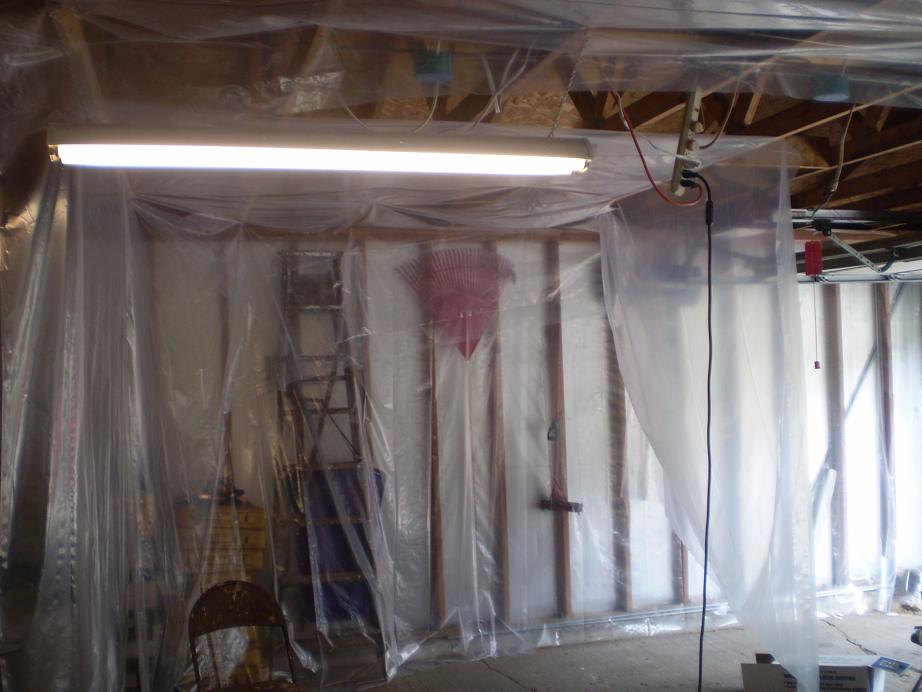
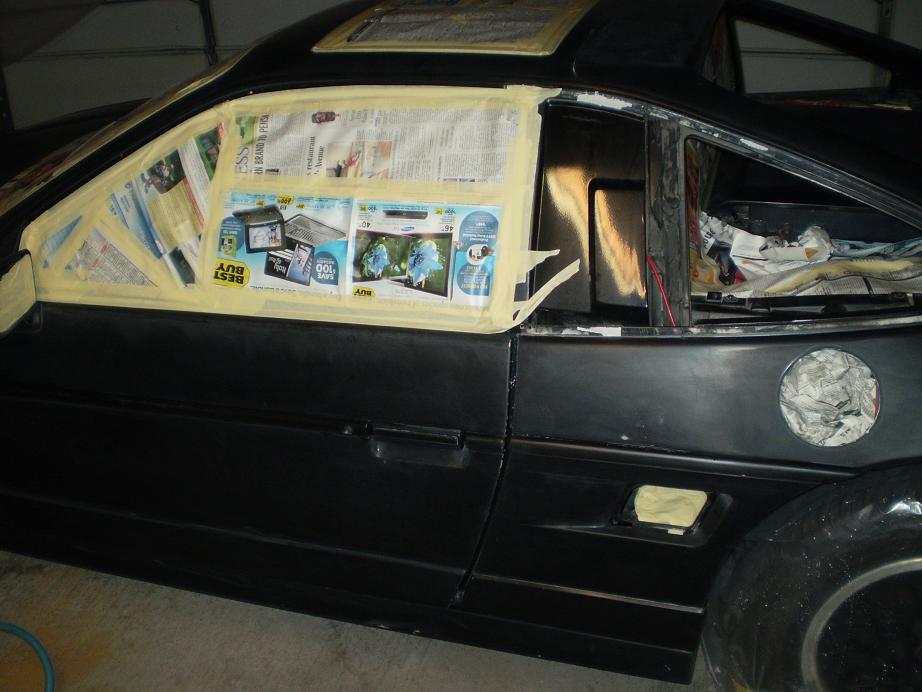
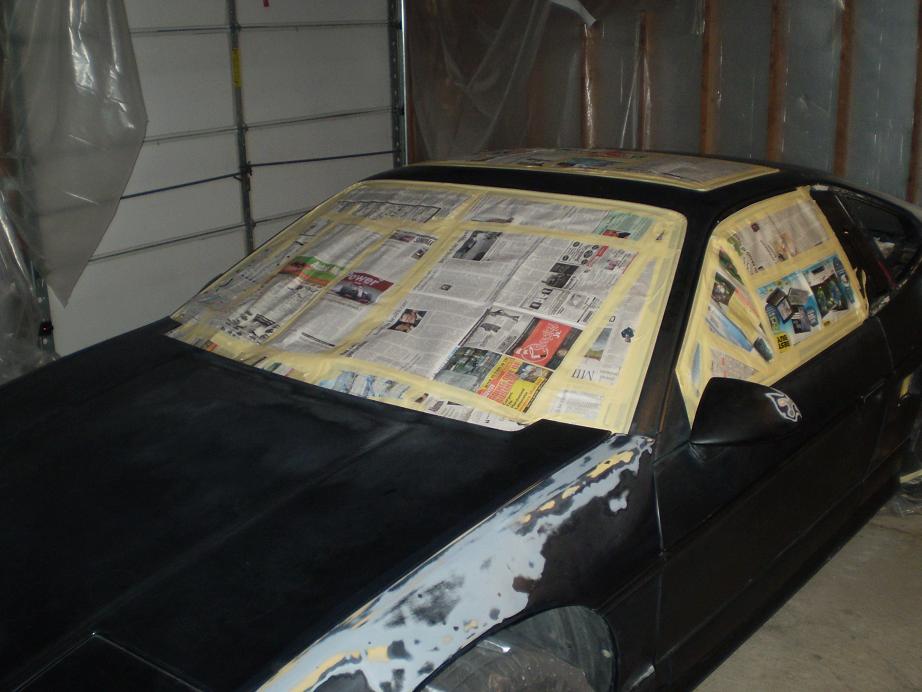
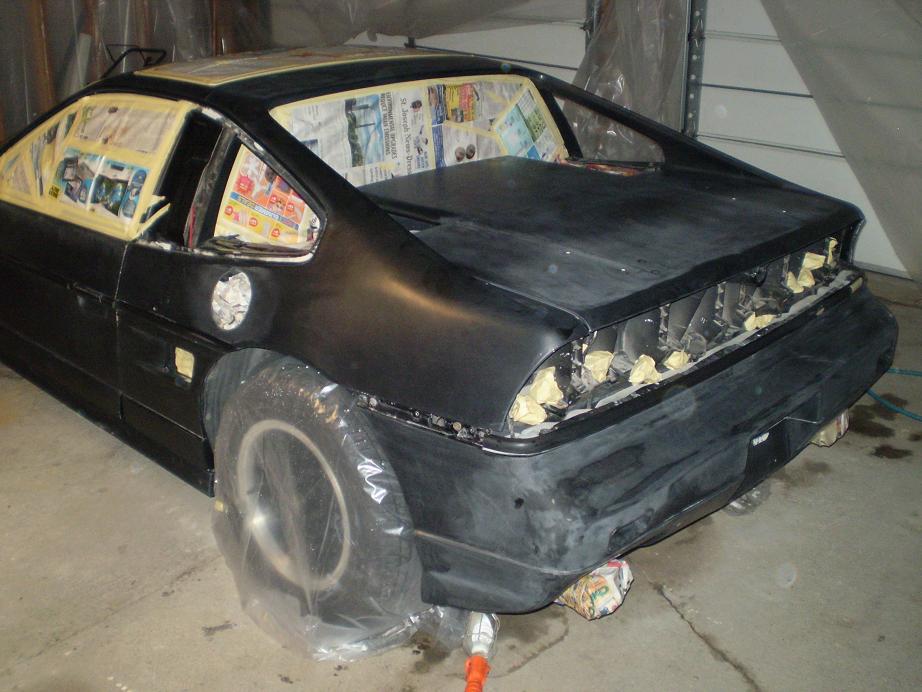
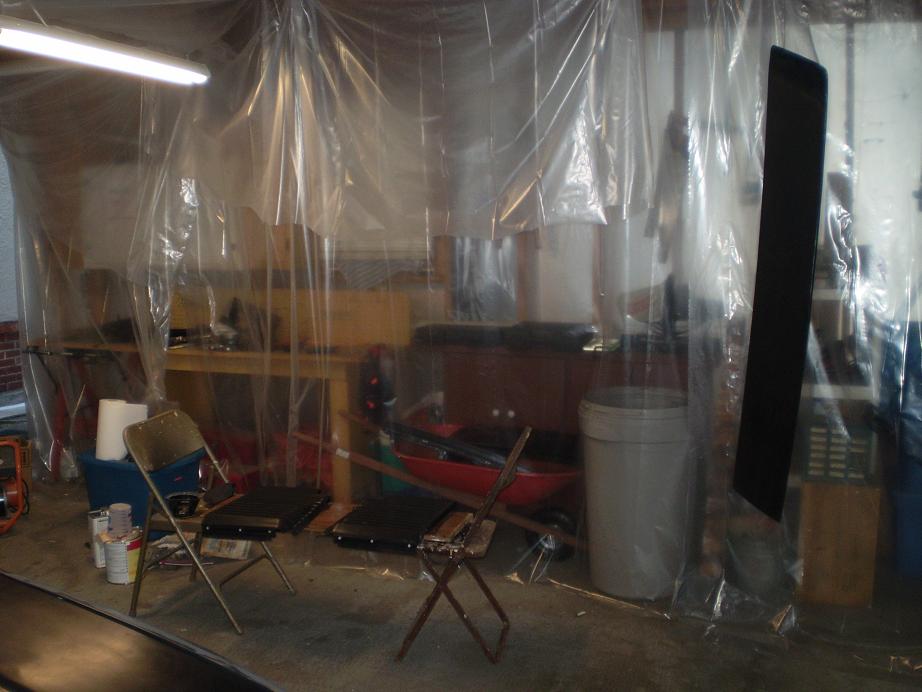
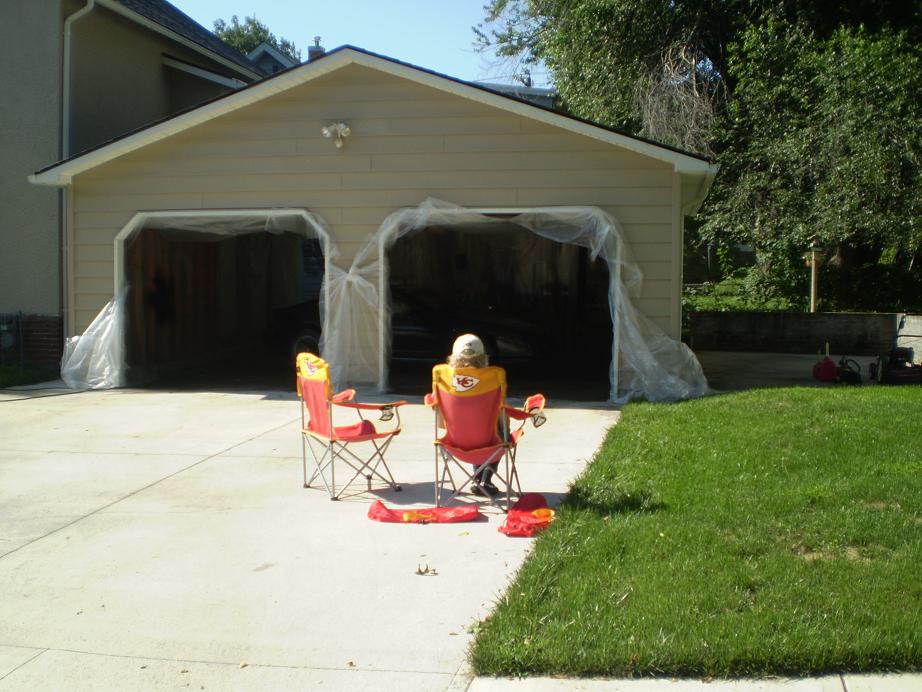
Tonight, I taped, taped and more taped. Windows, heat shields, exhausts, under the holes in the rear deck lid for the spoiler, and many more areas that I cant think of right now.
Soryy these are dark, but it's late and I'm shooting it tomorrow am. Here's what it looks like tonight:
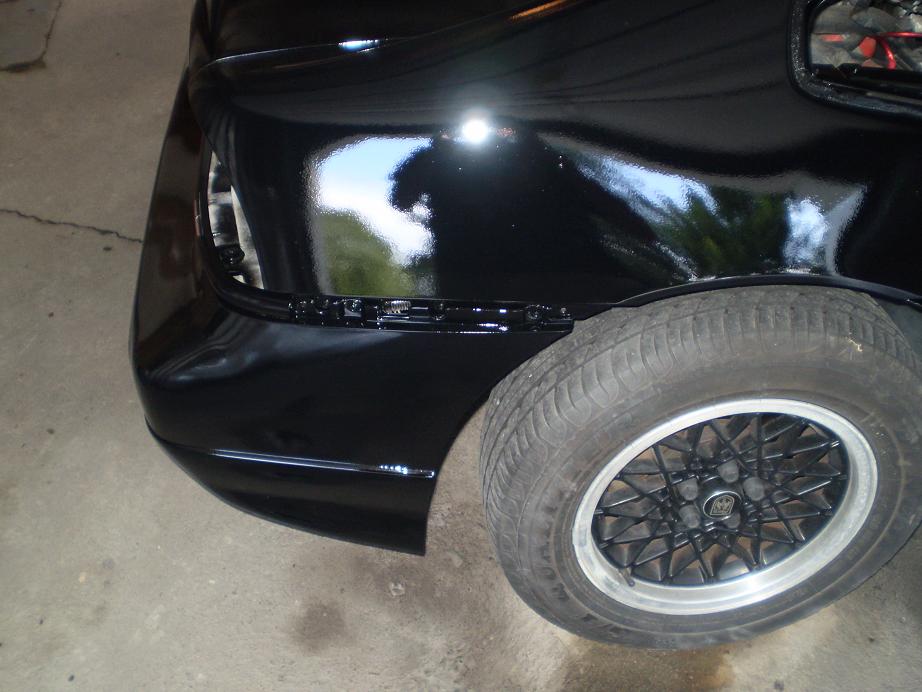
Tomorrow morning I plan on stapling up the last of the plastic sheeting to form the paint booth. Then fixing / adjusting the left rear bumper issue (see early above pics).
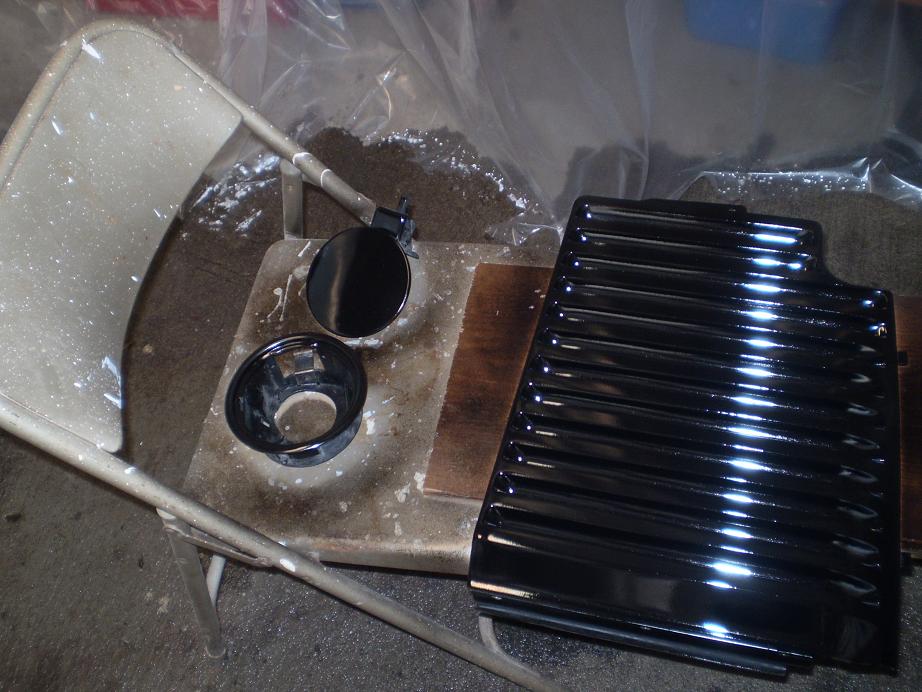
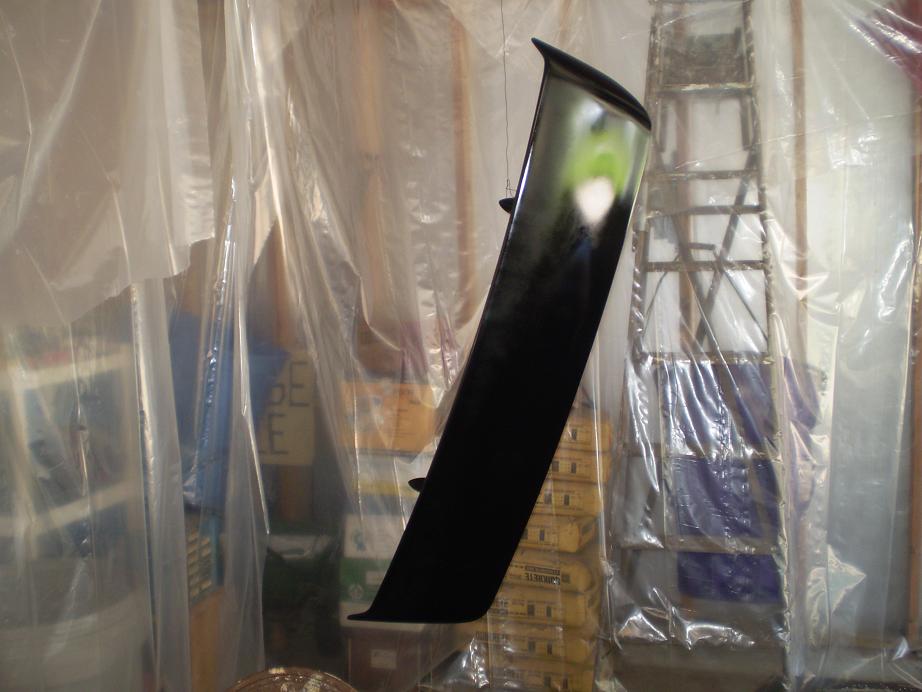
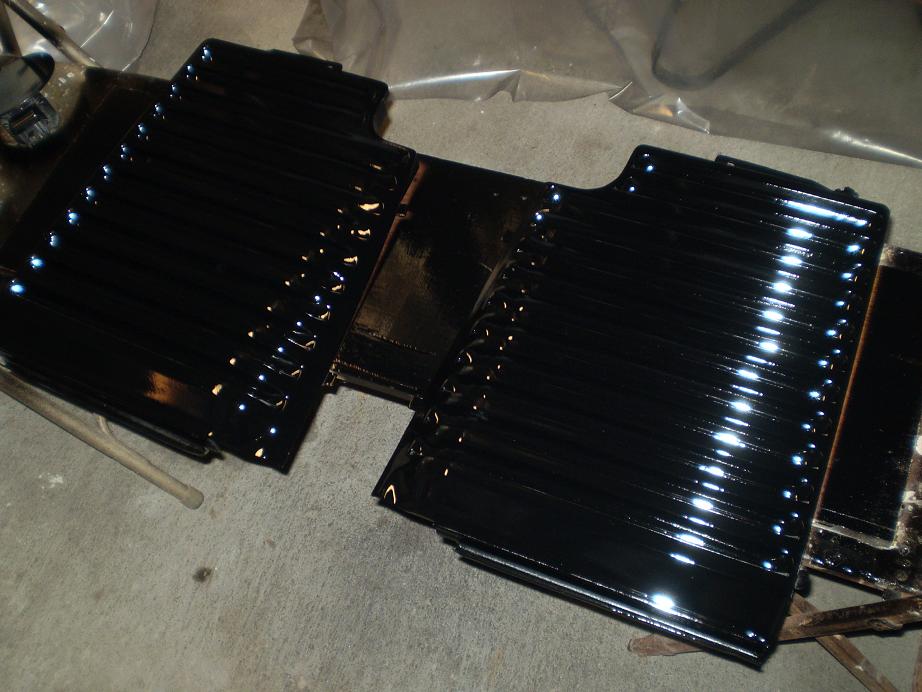
I've got the spoiler hanging from the rafters and the fuel door parts on a makeshift bench.
From what I understand, tomorrow morning will consist of wetting down the floor, tacking the car (twice?) and a few coats and we'll see what happens.
After that, from what I understand, we
IP: Logged
11:07 PM
Jul 22nd, 2009
amflyer Member
Posts: 1389 From: Westminster,Maryland Registered: May 2006
I would suggest that you remove the moldings from the car. The main reason is that you cannot wet sand down in the cracks and later the new paint will start to peal away from the surface. The new clips to put the molding back on the car can be purchased for less than 100 dollars from Fiero Jon. It is well worth the extra time to do this, you can still paint the moldings off the car except the one accross the rear bumper cover which is part of the cover itself. Good luck on your project.
------------------ 1984 Indy Pace Car President of Mid Atlantic Fiero Owners Association
IP: Logged
07:21 AM
BtotheB Member
Posts: 2581 From: Peterborough, Ontario Registered: Dec 2001
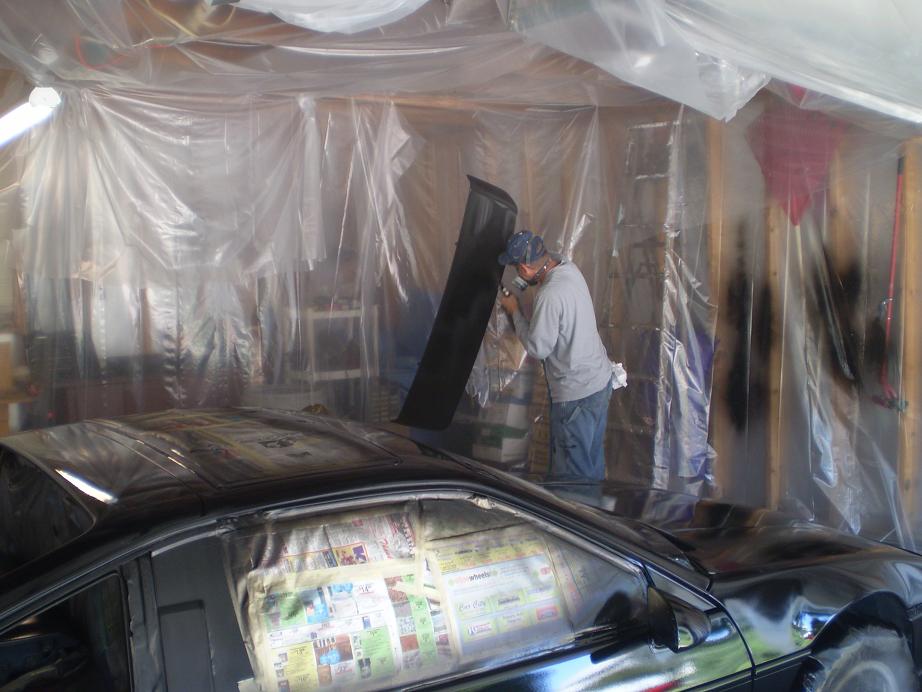
Another thing I wish I'd done on my first paint job was to remove the headlight doors and paint them off the car. There's another area where you'll have a hard time getting paint in the cracks - it's only a few minutes to remove them also. If it was me, I'd remove the decklid and hood also and paint them off to the side.
Looks good though, my black GT has paint about the same or worse than your before shots. Can't wait to get mine prepped for paint this winter...
Brad
IP: Logged
09:06 AM
LAMBO Member
Posts: 1677 From: Lucas, Iowa, USA Registered: May 2000
Hey Dennis, thanks for posting this up and giving me the inspiration to paint my daily driver this fall. I've been waiting 5 weeks now on my daughters car to get done at a local body shop. No body work, just sand and paint on a front clip. Lots of excuses. Might be done by the end of the week. Yeah, right. I can surely re-paint a fiero in less than 6 weeks, and save myself a bundle and the frustration.
IP: Logged
10:41 AM
pastor Dennis Member
Posts: 189 From: St. Joseph, MO USA Registered: Jul 2007
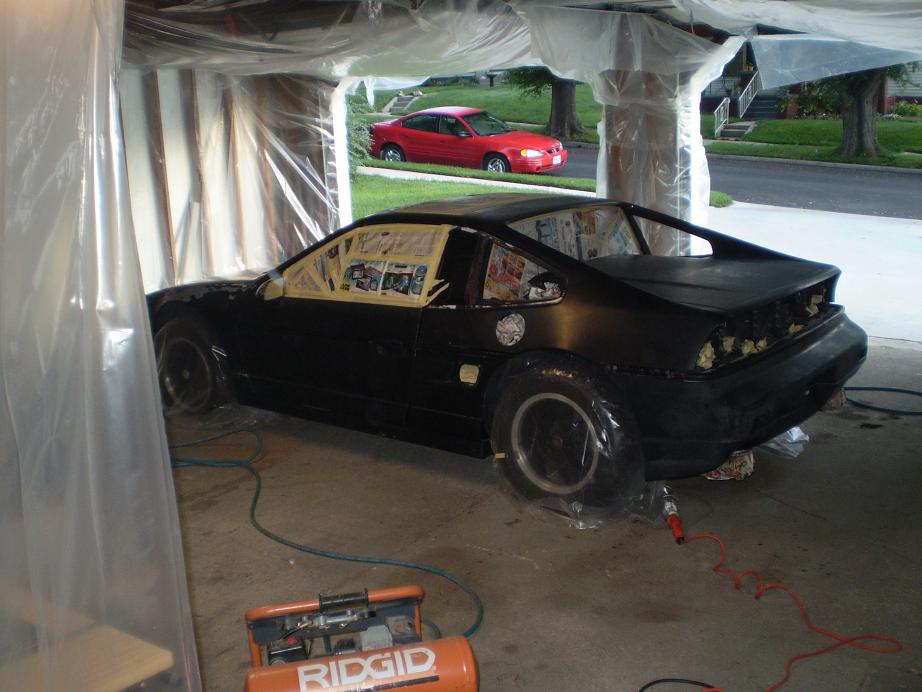
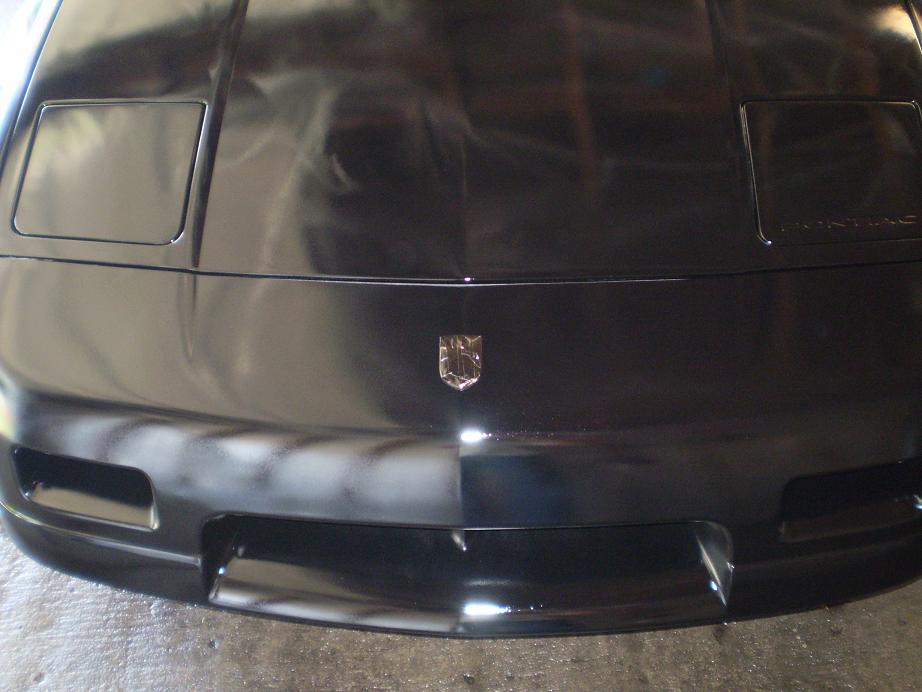
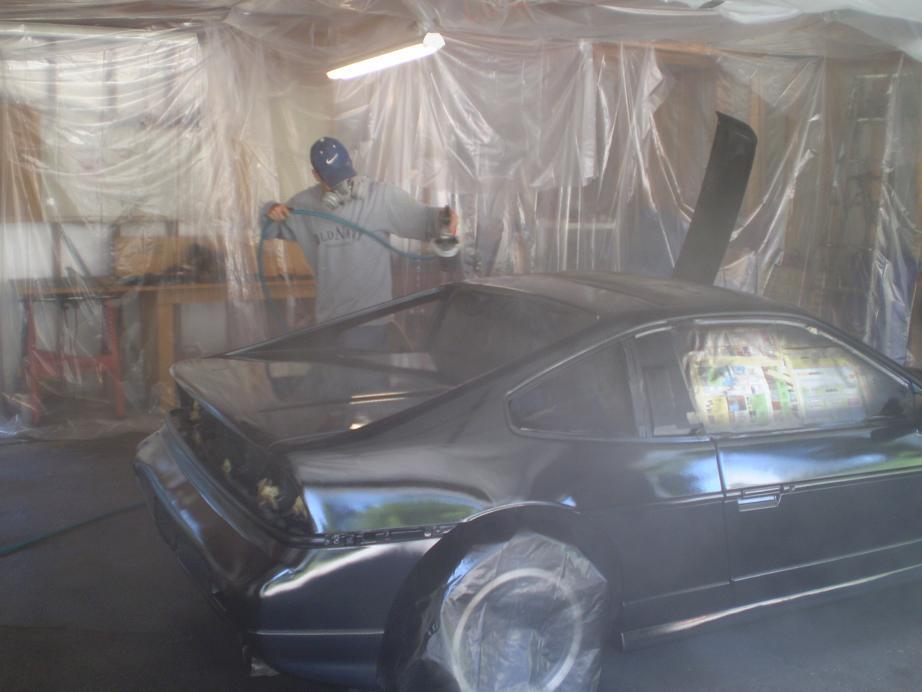
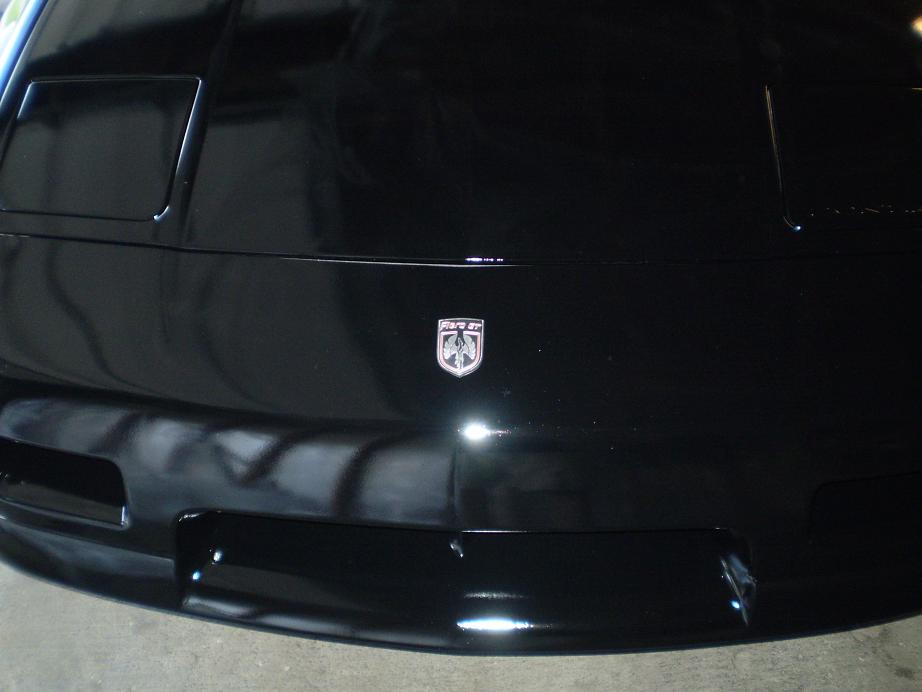
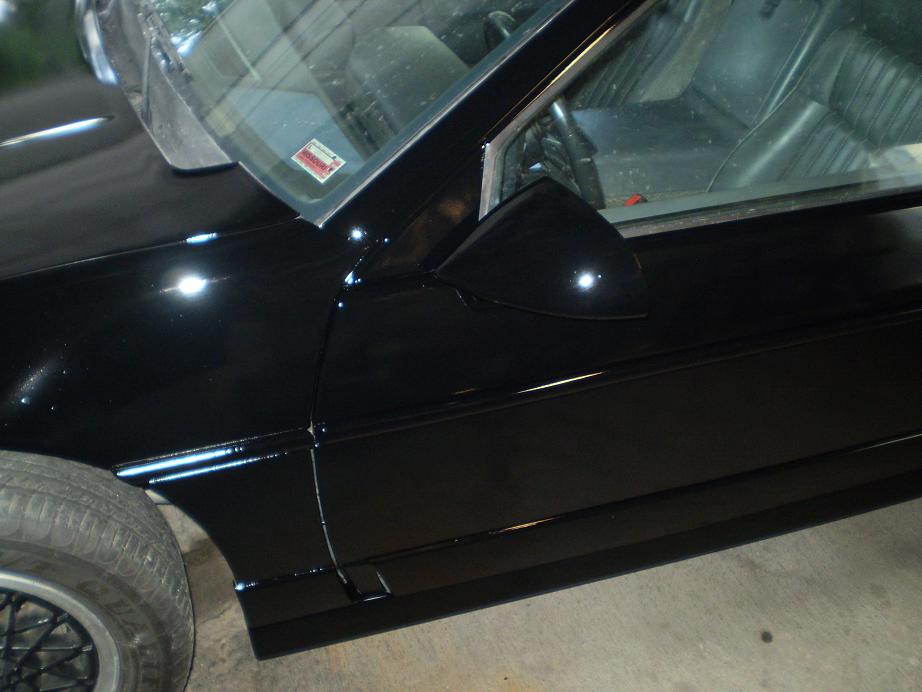
IT'S ALIVE !! Painting this morning went great! Jay did a fantastic job ! It took us a little longer to pull up the sagging rear bumper than we thought, but it's done.
Temp was 70 degrees and beautiful. Isnt that incredible?!
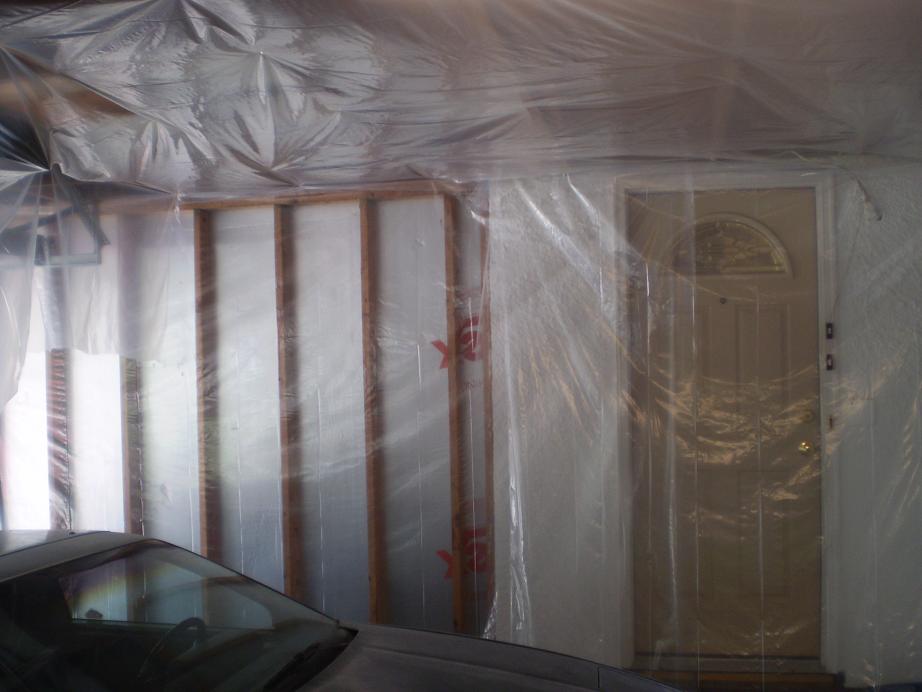
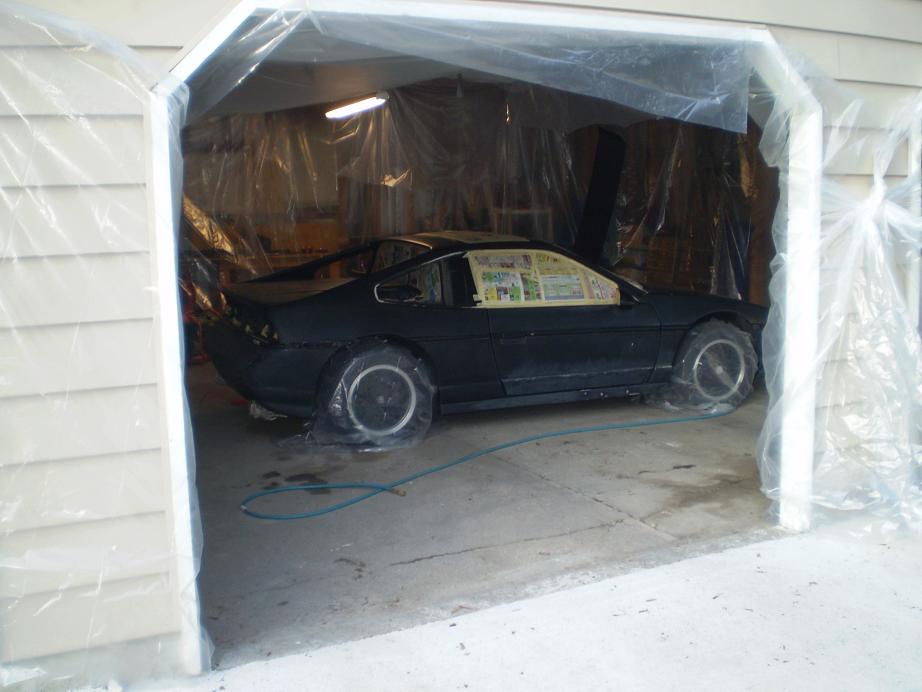
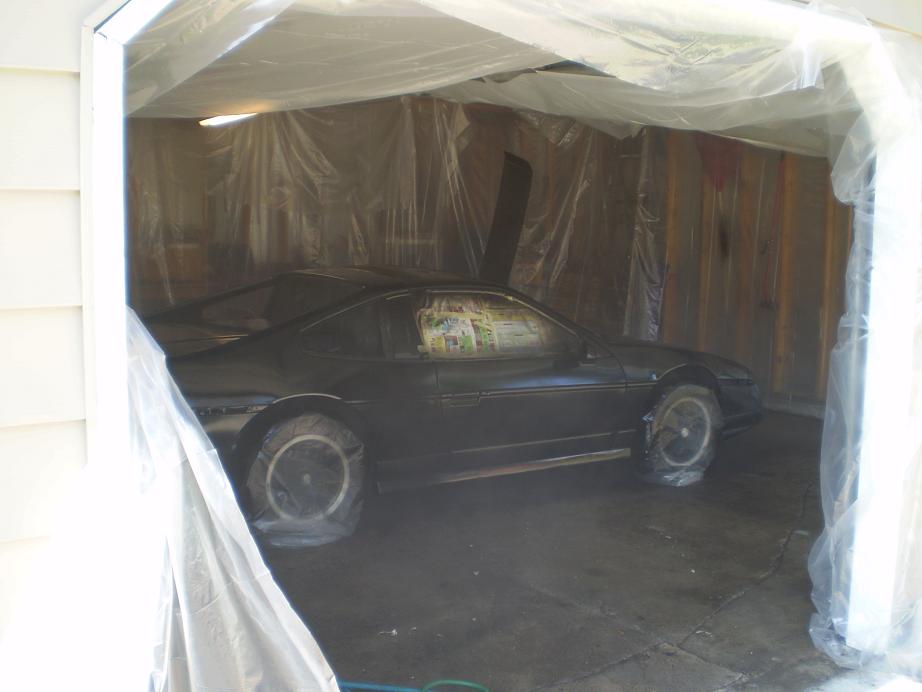
I put up the rest of the plastic and got everything out of the garage that I didnt want to end up black. Here's the garage and car in the paint booth:
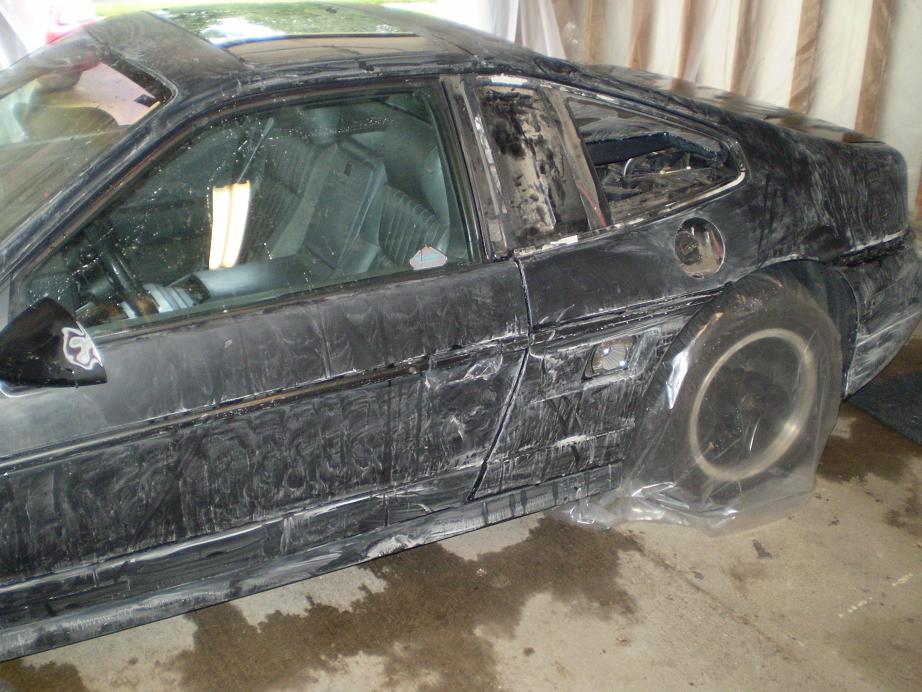
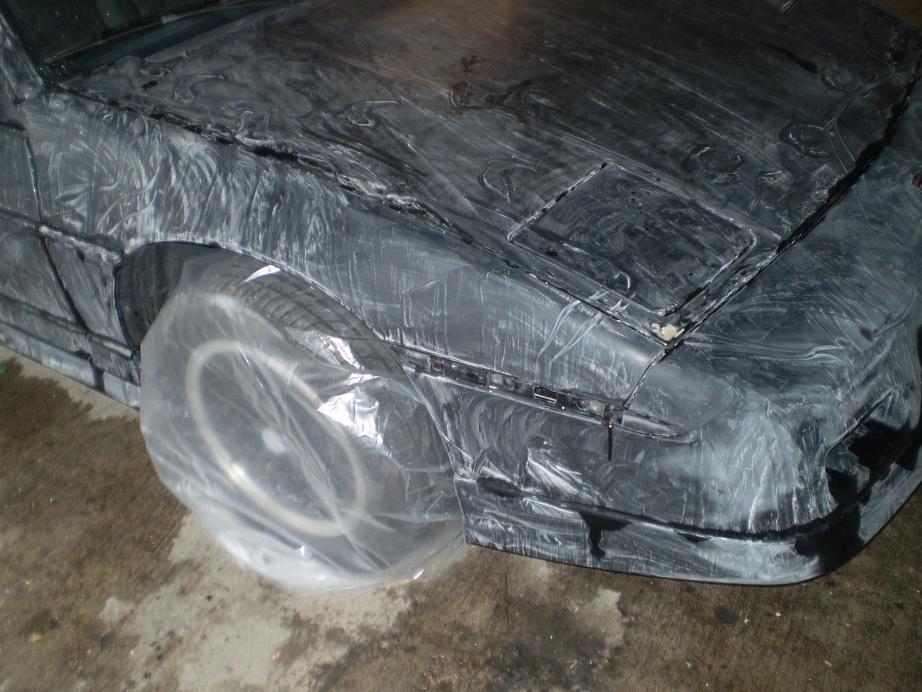
wet down the floor and tacked the car. Here she is with one coat:
2 coats here:
IP: Logged
12:59 PM
pastor Dennis Member
Posts: 189 From: St. Joseph, MO USA Registered: Jul 2007
AWESOME right up!! I am planning on doing this myself, atleast the prep part because I dont have a gun or space to spray. I am painting my faded black 87 GT to a shiny black 87 GT.
How did you sand through the burnt clear coat spots on the high areas of the car? Which grit and did you use a DA?
IP: Logged
09:32 PM
PFF
System Bot
pastor Dennis Member
Posts: 189 From: St. Joseph, MO USA Registered: Jul 2007
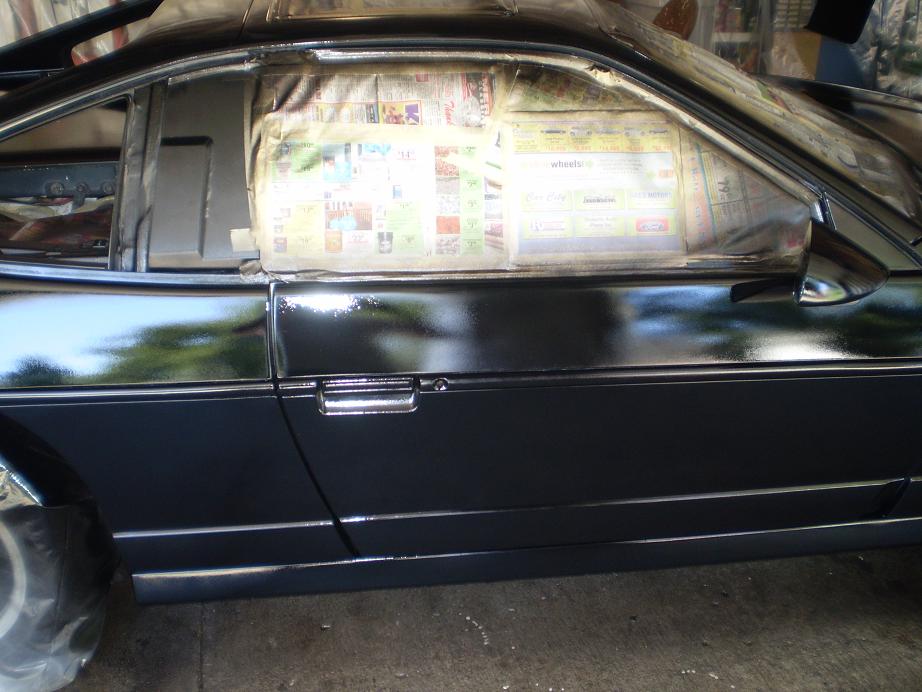
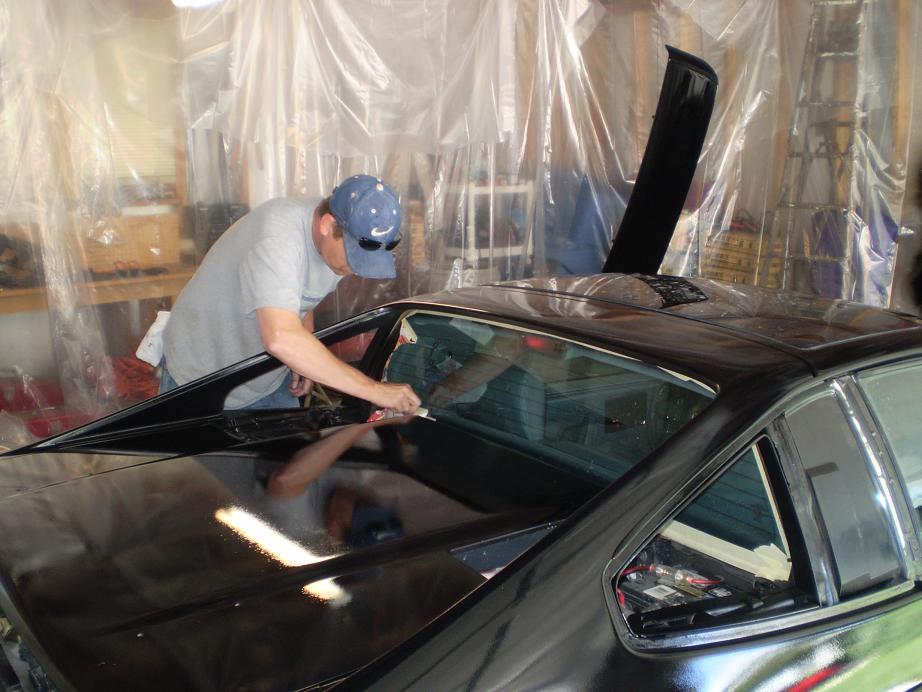
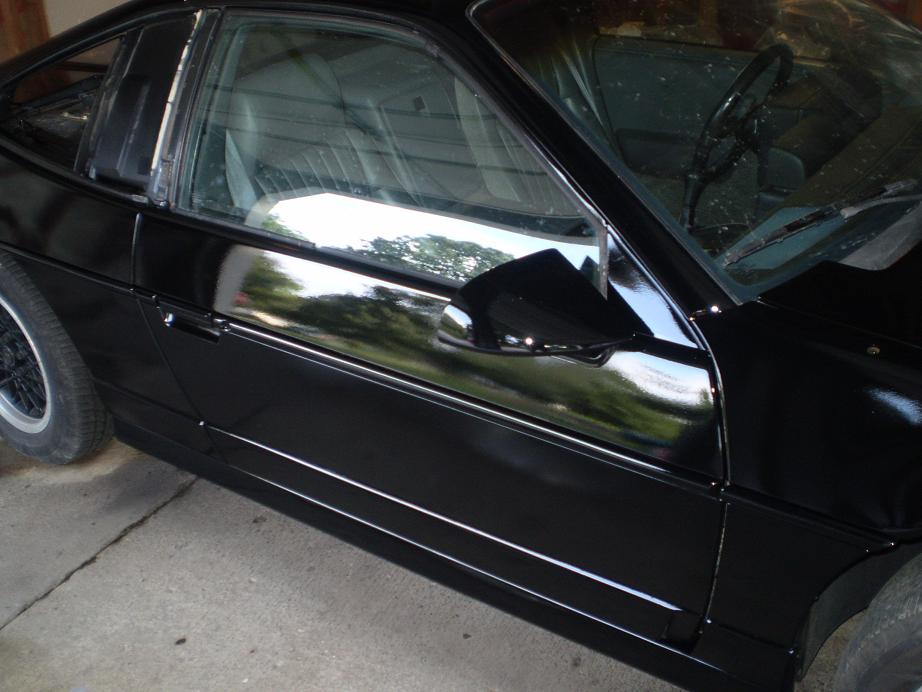
I used a scotch brite pad (fine, then ultra fine) for the initial sanding. There was still some work to do on the roof, hood, etc that Jay hit with a DA. I'll look later to see what paper he used. I hope to post pics of all the materials used and rough costs later. Again, I'm not the brains in this thread - the credits go to those who have done it before us who showed us how. Thanks again to the forum members who helped on this project. A HUGE BIG THANK YOU to Jay who did all the tough work! Hope those pics do it justice. Like I said before: It's gonna take a plastic surgeon to get this smile off my face. I hope to have it back together Friday afternoon and I'll post a few more then.
Your not done yet grasshopper. I am assuming that you used a single stage paint? No clear coat? Now you have to go back and guess what... more sanding. Wet sand the new paint and then buff it out to get rid of any orange peel and dust particles that are in the paint. Once you do that, you will have a nice mirror like finish.
Kudo's to you for tackling it yourself. I have been working on mine since the end of March. I still have a lot of work left ahead of me but I don't mind. The end result is what I strive for.
Wow Dennis, you weren't kidding when you said you were going to do this yourself! I think yours was actually worse than mine but mine was repainted improperly by the P.O. and now I have to strip it and start over again. I think I will give it a go when things slow down this fall. I look forward to seeing it next month on the St Jo. cruise!
IP: Logged
10:57 PM
crazyinkc Member
Posts: 198 From: At Your Mama's House Registered: Apr 2006
It looks great a huge improvement over the its faded factory paint, but now the fun starts "WET SANDING". Just remember be careful when you wet sand on a single stage there's not clear on top to work so you are on the color coat and can hit primer really fast which means more repaint time. A light wet sanding is far more aggressive then even the most aggressive polishing compound.
IP: Logged
09:52 AM
Jul 25th, 2009
pastor Dennis Member
Posts: 189 From: St. Joseph, MO USA Registered: Jul 2007


 I think yours was actually worse than mine but mine was repainted improperly by the P.O. and now I have to strip it and start over again. I think I will give it a go when things slow down this fall. I look forward to seeing it next month on the St Jo. cruise!