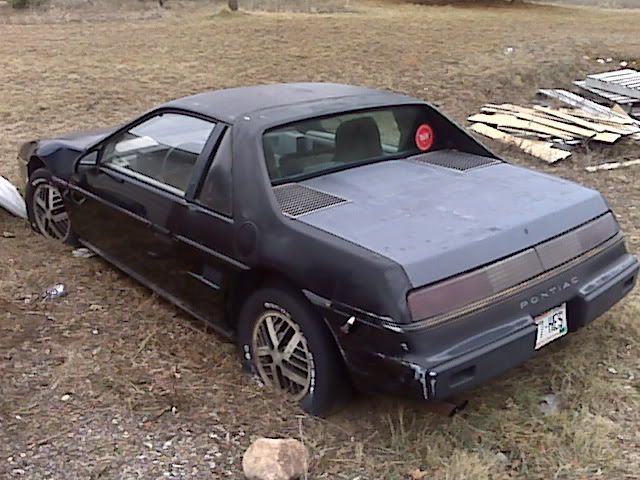
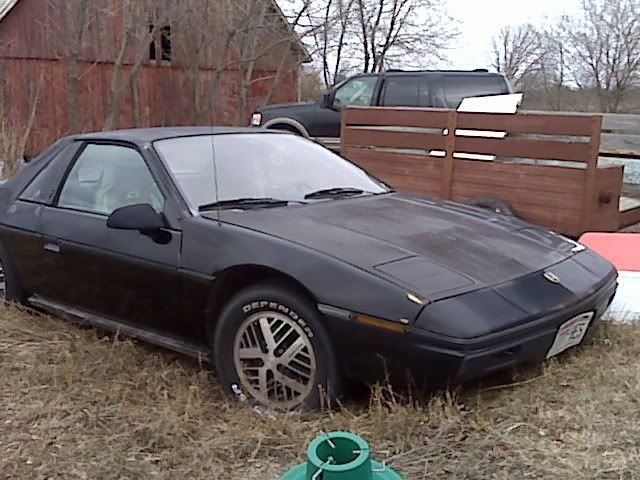
Hey everyone, as you know, or don't know, I recently bought a 1985 2M4 that needs some TLC. But that's the fun part! Here I'll be documenting all my progress on the car until it's complete--whenever that may be, haha. Let's begin!
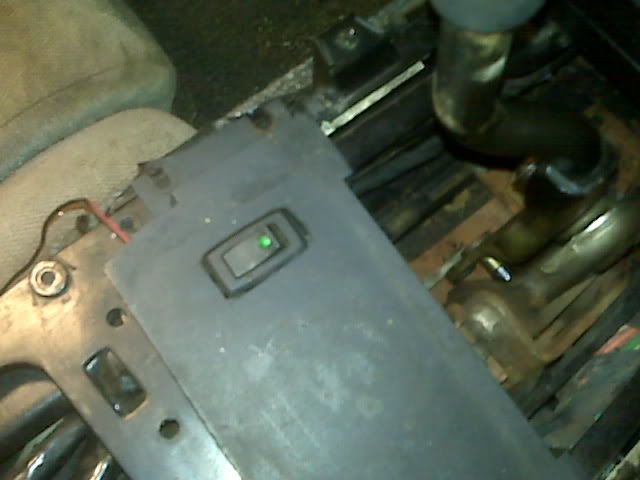
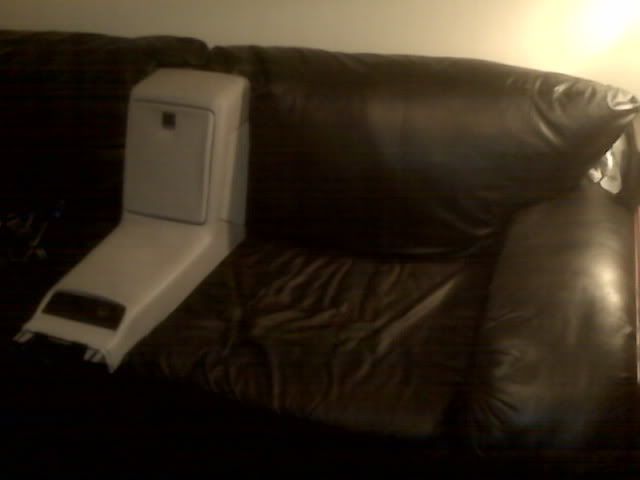
Tonight, I finally managed to get a little time to work on it. I started cleaning the interior. I took out the passenger seat, and vacuumed that whole side. The passenger seat was held in with only 1 bolt! Oh well, easy to remove. But there was some weird wire all wrapped up around it, so I cut it. The wire was connected to this switch: The guy installed blue LED strips along the bottom of the car! Ha! I jumped started my car (battery is shot) and flipped the switch, but only 1 side worked now, because of my snips. No biggy, I didn't plan on keeping the lights on there anyway.
Next, I started taking apart the center console. This wasn't very hard, either. Only 2 bolts and everything came off! Where all the other screws went, I'm not sure but I'll definitely be taking a trip down to Ace Hardware soon.
Now I'm taking a Magic eraser to the pieces to get all the scuffs and stains off. More updates coming tomorrow!
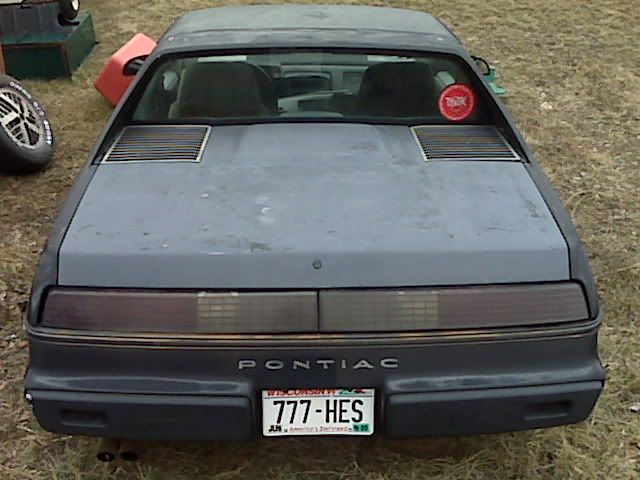
You do realize that 2M4 stands 'manual 4cyl' right? I say that bacause im pretty sure that hump in the decklid was only on 6cyl cars.. anywho, good luck on your project
edit: Well i guess the decklid is in primer, so its possible they swapped out the old decklid for this one.. meh
[This message has been edited by kawana (edited 04-07-2009).]
You do realize that 2M4 stands 'manual 4cyl' right? I say that bacause im pretty sure that hump in the decklid was only on 6cyl cars.. anywho, good luck on your project
edit: Well i guess the decklid is in primer, so its possible they swapped out the old decklid for this one.. meh
Indeed. It is a manual 4 cylinder. The decklid was swapped, but that's not primer... The paint is that faded... ha.
IP: Logged
01:03 AM
kawana Member
Posts: 2329 From: Abbotsford, BC, Canada Registered: May 2007
You do realize that 2M4 stands 'manual 4cyl' right? I say that bacause im pretty sure that hump in the decklid was only on 6cyl cars.. anywho, good luck on your project
edit: Well i guess the decklid is in primer, so its possible they swapped out the old decklid for this one.. meh
Actually, 2M4 stands for 2-seat, Mid-engine, 4-cylinder. Same for 2M6, except it is a 6-cylinder.
And Mattwa is correct, all 85-88 notchies used the same decklid. Only 84's were different.
You do realize that 2M4 stands 'manual 4cyl' right? I say that bacause im pretty sure that hump in the decklid was only on 6cyl cars.. anywho, good luck on your project
edit: Well i guess the decklid is in primer, so its possible they swapped out the old decklid for this one.. meh
/\ aggg he got to it before me. Iv seen that decklid on 4 cylinder stock cars to i think 86's all had them. And 2M4 stands for 2 seater mid engine 4 cylinder or 6 cylinder for whatever number is at the end.
if thats what you ment up there.
just like on toyots MR2. Mid engine rear wheel drive 2 seater.
[This message has been edited by pontiackid86 (edited 04-07-2009).]
IP: Logged
09:36 AM
Apr 8th, 2009
aeffertz Member
Posts: 798 From: Ladysmith, WI Registered: Feb 2009
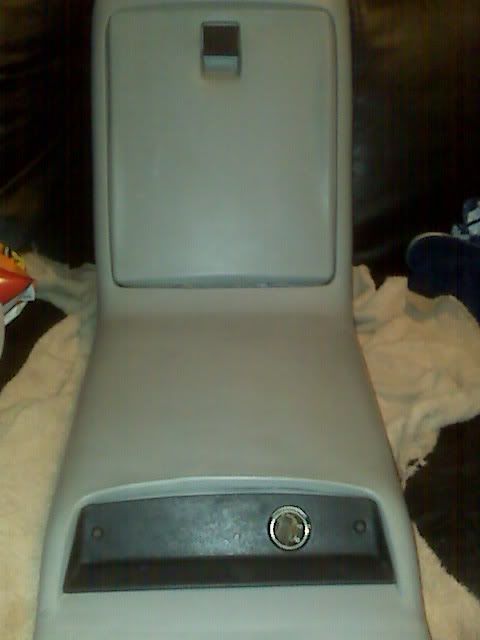
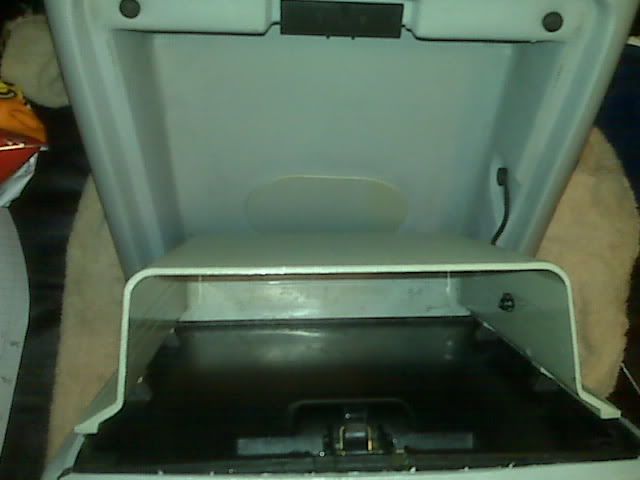
Small update I suppose. I cleaned up the center console late last night. Here are some before and after pics. Before:
and After:
A big step, for me, happened tonight, though. I finally got the drivers door open! The locking mechanism was broken, so I had to get the inner door panel off somehow, witch it in the car. I got about half way and managed to squeeze my hand into the door and find the right switch to flip to unlock it. Took about 5 hours of messing around before all was said and done. So, nothing really looks different other than the door opens now. More updates tomorrow. I don't have to work after school so I should be able to get a lot done.
EDIT: Also, if I wanted to paint the center console black, would I want like paint that's meant for plastic, or regular, or what? How does is the quality after you paint it? Thanks.
[This message has been edited by aeffertz (edited 04-08-2009).]
IP: Logged
01:30 AM
Apr 9th, 2009
aeffertz Member
Posts: 798 From: Ladysmith, WI Registered: Feb 2009
Another update, as promised. After school today, I didn't have to work, so I got the pressure washer out and gave it a quick wash. I was mostly focused on getting the engine clean so I could pinpoint where exactly it was leaking oil. Good news! It appears that the valve cover gasket is just old and worn out. Easy and pretty cheap fix. Nice! I'm also happy the trunk is basically rust free! Hard to believe considering this thing was driven all over Wisconsin, and we're know for our salty, crappy roads. Nice, again! Here's a few pics just for you guys, because I know you like pictures.
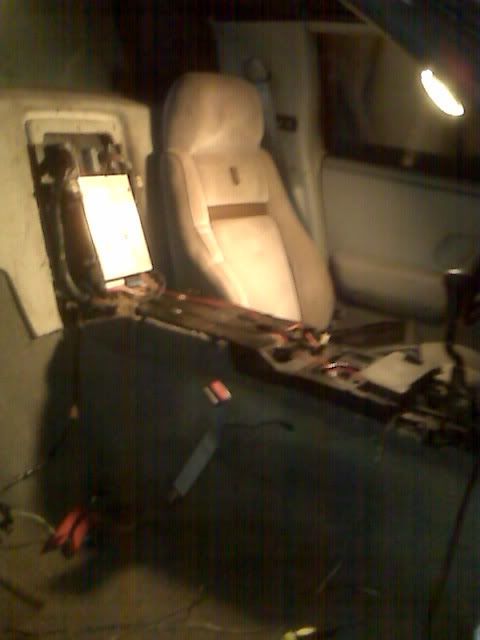
It got dark a lot faster than I was expecting (and colder) so I moved it back into the garage to work on the interior some more. I sprayed some PB Blaster on the driver seat bolts before I started washing it, because they were genuinely rusted on. That did the trick! After a few smashed and skinned knuckles later, the drivers seat is now out.
Man that is dirty! After a while with the shop vac, here's how she looks now:
Much better! Oh, I also got the door panel off. I need to get the locking mechanism out of there soon.
Moving right along, I got this piece out. If someone could tell me what it's called, that'd be great!
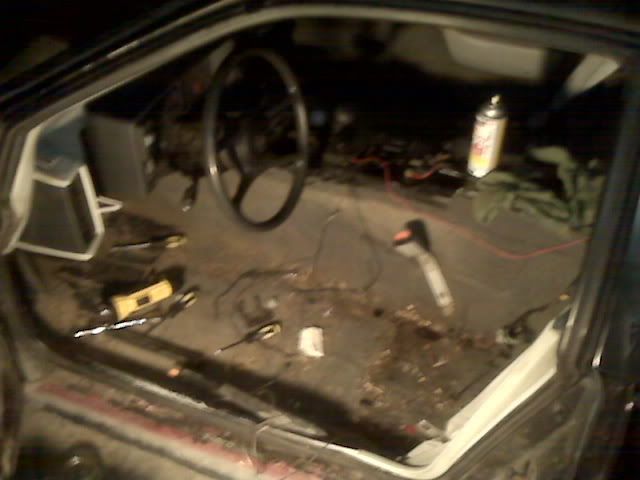
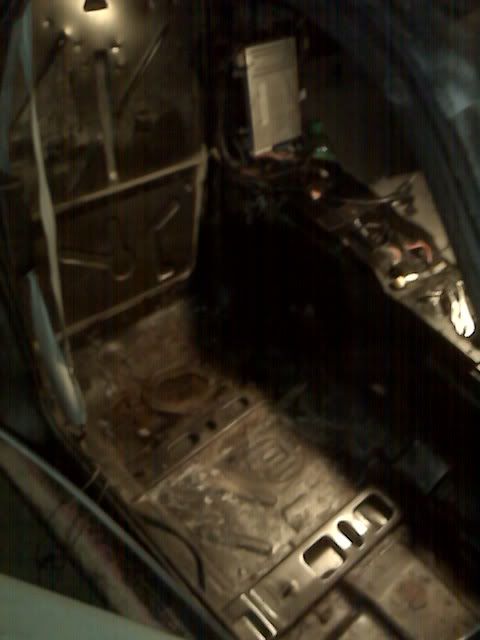
After I removed the seat belt snatcher thing, I had to take out the rest of the dash. I forgot to take a picture! Well, time to pull the carpet, I suppose.
That was a lot easier than I thought! This stuff stinks, bad! Not sure if it's dog/mouse/human piss, but either way, something peed on the floor and it wreaks! Other than the stench, things are just going good tonight. Another thing that made me happy: An almost rust free floor board. Nice! Here's the only rust spot I found, and it was caused because the cover that goes here has been missing. Not too bad, should be pretty easy to patch up.
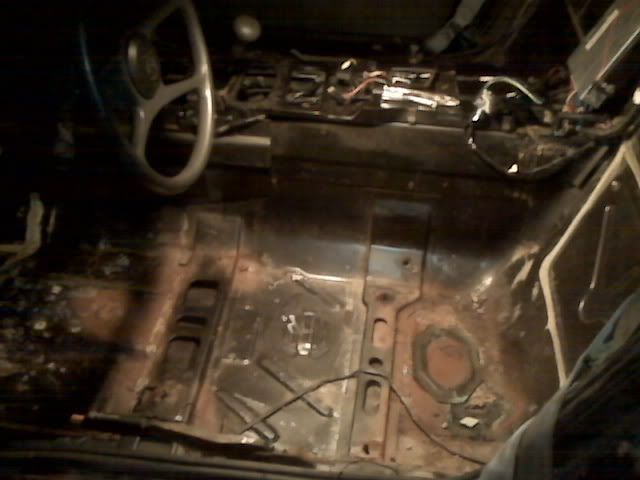
Now to the drivers side. Had to remove the two pillars, and seat belt and it was ready again. There it is! All done.
The floor board on this side is pretty good, but has a small hole. Again, shouldn't be too big of an issue.
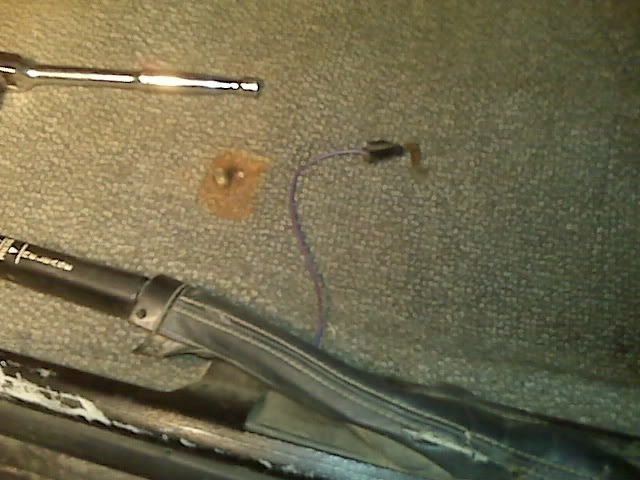
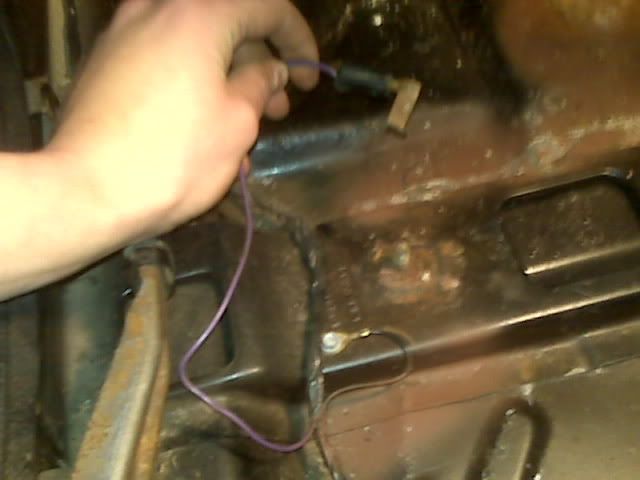
That's it for now. I do have a few questions for you guys, though. 1. What do these cables do?
This is the one that plugs into the seat, I just don't get what it does.
2. How do you reconnect the parking brake? I know how to get the cable into it's retainer, but other than that, it's kinda messed up. When you pull the cable out, should it pull itself back in, or is that what the spring thing is there for.
3. Last question is this. What are the official names for these pillars? Like, I think they're A, B, and C, but I'm not positive, plus I don't know which ones are which.
That's all for tonight! Tomorrow I plan on pulling off the air cleaner, and intake system to clean out the mouse nest/house. I found out that hard way today that you should check those kind of things before you run the car, after it has been parked for several years. Once that's done, I'll probably clean the floor boards and get it ready for the Dynamat that's going to get laid down.
Good night!
[This message has been edited by aeffertz (edited 04-09-2009).]
Purple wire is for the ebrake - lights a dash light and makes the blue dingy thingy "ding" when the e brake is on. It appears that the connector is broke. The copper piece attached to the black connector is supposed to be attached to the e brake housing.
Looking good so far!
Pat
IP: Logged
02:00 AM
Apr 12th, 2009
aeffertz Member
Posts: 798 From: Ladysmith, WI Registered: Feb 2009
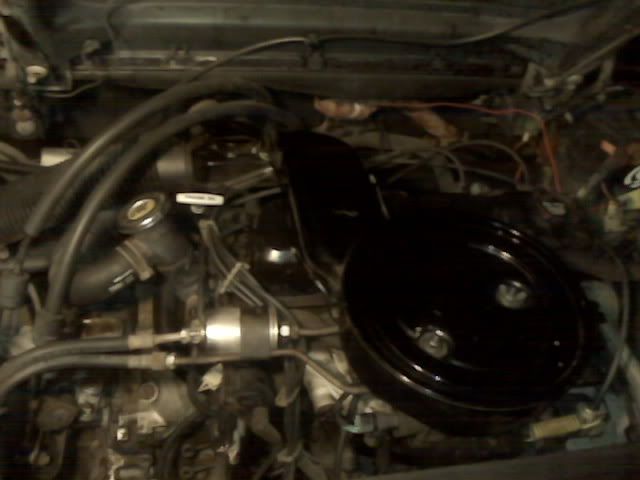
Update! I went and bought a new valve cover gasket because mine was leaking pretty bad.
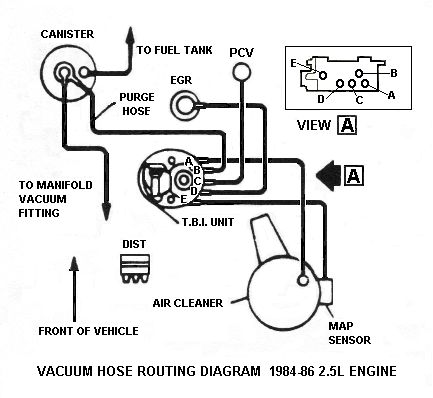
Working on getting the EGR valve off, I noticed some unplugged hoses. That hose connects to the air cleaner and the EGR one was missing.
Oh, I found it!
Should I hook this back up, or no?
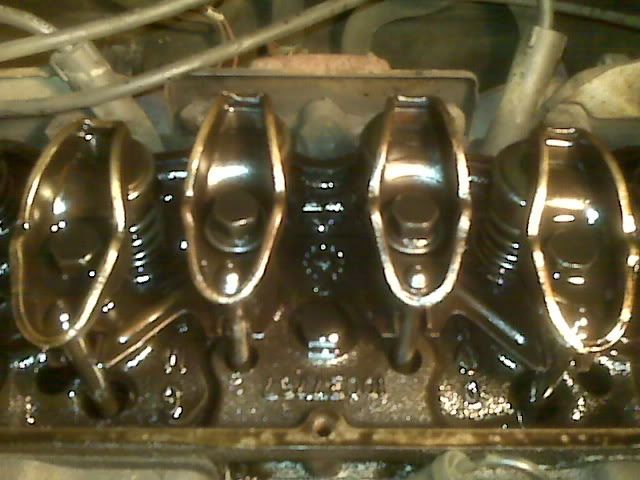
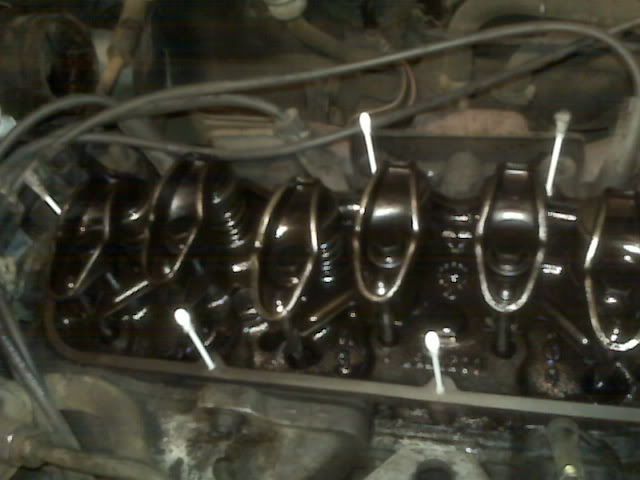
Here's what it looks like after I get the cover off: It was really wet, like full of oil. I'm pretty sure that's normal, but if it isn't, someone let me know.
Here was the problem area: You can kinda see all the black, charred oil by the bolt holes.
After I cleaned it up all nice, I put the new one in place and se4t the cover back on. I need to know the torque for these bolts, though. Any help on that, please? And that's all for tonight. I'm ordering the Dynamat and Dynapad this weekend when I get paid, so I'm pretty excited about that.
[This message has been edited by aeffertz (edited 04-14-2009).]
IP: Logged
11:52 PM
Apr 15th, 2009
Tony Kania Member
Posts: 20794 From: The Inland Northwest Registered: Dec 2008
IMHO the top of that head looks great. Did you find any gunk in there? I can't see any issues with it being old. Check your valves while you got the cover off. See if there is any play. Or any metal shavings. Other than that, looks good. Good luck with her.
------------------
IP: Logged
12:12 AM
aeffertz Member
Posts: 798 From: Ladysmith, WI Registered: Feb 2009
No, there was no gunk or shavings. But there was this one weird shaped hole in it that I wasn't sure was normal. Here's a pic: Under the 2nd valve...
Also, I have a Dynamat question. When I install it on the floor, will I still have to use the stock insulation/sound deadener, or is the Dynamat thick enough by itself to not use any of it. Thanks!
Those are the original plastic vacuum lines, I'd replace those all ASAP with new rubber ones. Here's the routing diagram
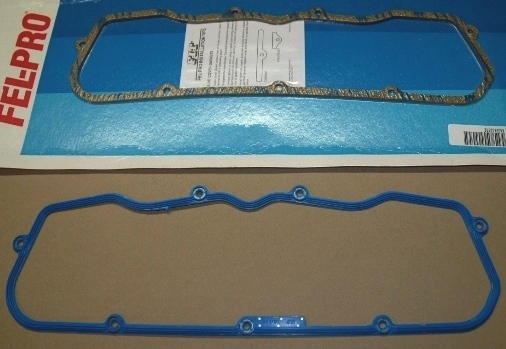
The valve cover gasket: Yes there is supposed to be a lot of oil in there I wouldn't use that flat rubber gasket, I'd use the blue Felpro gasket VS50179T Make sure the head and cover mating surfaces ARE COMPLETELY SQUEAKY CLEAN before putting the gasket on. My 84 manual says the bolts should be torqued to 6 lb-ft. Leaking valve cover gaskets are extremely common on these engines, and was a major contributor to the engine fire problem.
Awesome! Thank you, thank you, thank you. I can see why it was a big contribution to the problem-- the oil leaked right out onto the exhaust manifold. Uhm, you said you wouldn't use the flat, rubber gasket. How come? The original was cork, and this was supposedly an upgrade, seeing as it was more expensive. It seems like it was the right choice, but why wasn't it? Thanks, again.
IP: Logged
12:35 AM
Tony Kania Member
Posts: 20794 From: The Inland Northwest Registered: Dec 2008
The cork may have been an upgrade back in the 80's.
You really don't need to install the old jute sound deadening material. Just do a good job cutting and fitting the DynaMat. I recommend getting a couple of cans of that thick rubber undercoating before the DynaMat. Spray the undercoating on the metal seams and corners. This will greatly inprove the sound deadenig ability of the DynaMat. God luck to you, and keep posting.
IP: Logged
11:07 AM
PFF
System Bot
fierosound Member
Posts: 15253 From: Calgary, Canada Registered: Nov 1999
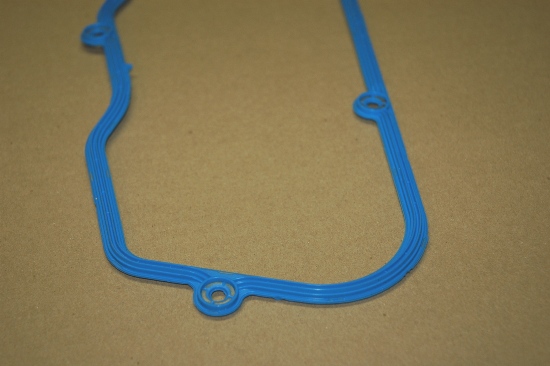
The valve cover gasket you want to use on the Duke is Felpro PN FEL-VS50179T. The cork or cork/rubber ones like the top one always tend to leak. This silicone rubber/steel gasket has raised edges to seal properly and comes with all the hardware needed for installation.
Ahh, alright. I'll see if this one holds, and if it leaks, I'll know to get that one instead.
About the Dynamat. I was thinking about putting a layer of the rubber coating, but wasn't sure. Now I'll be doing that, too. I just wasn't sure if the carpet would fit weird if I didn't use any of the insulation foam stuff.
IP: Logged
04:49 PM
Apr 16th, 2009
aeffertz Member
Posts: 798 From: Ladysmith, WI Registered: Feb 2009
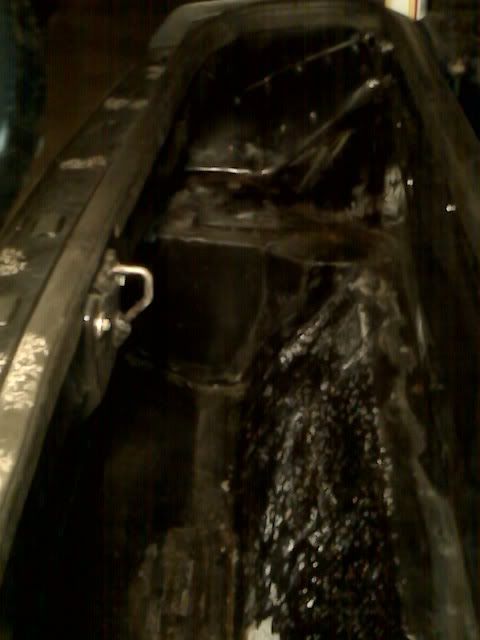
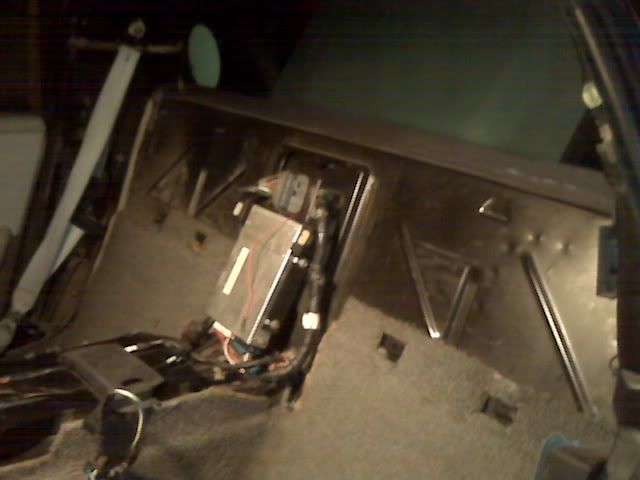
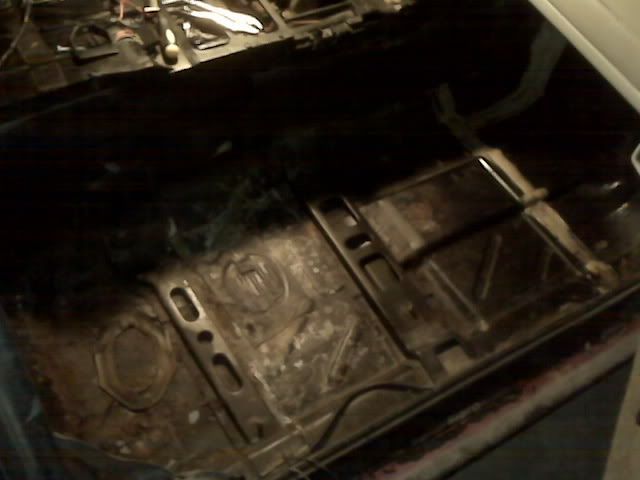
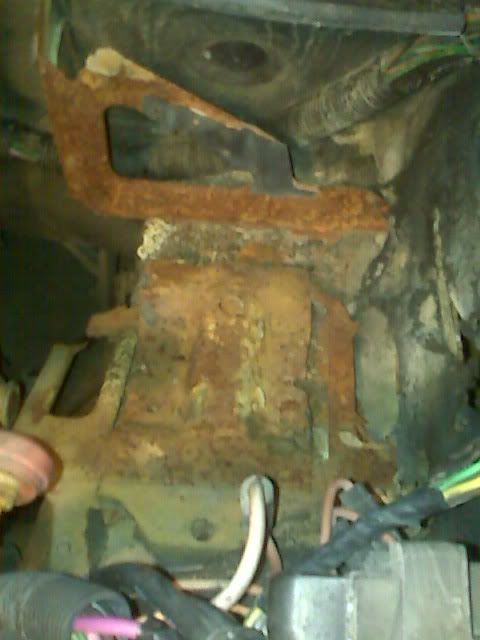
Work on it a little after work tonight. The battery is shot. It must've leaked everywhere because the whole battery tray is rusted and broken. I'm also ordering the whole new battery tray package from The Fiero Store this weekend. Here's some pics of the tray:
How do I remove this old tray? I could only find one bolt, got it out, but I'm not sure if there are any more because I can't pull it out. Also, has anyone ever ordered/used the Fiero Store's battery tray? If so, how do you install it? I know I'll have to cut the old one off of the firewall, but how does the new bolt stay in place? Do I have to weld it in, or can I just bolt it in? Thanks!
IP: Logged
11:38 PM
Apr 17th, 2009
Mr.Goodwrench Member
Posts: 315 From: Deer Park WA. Registered: Mar 2008
The valve cover gasket you want to use on the Duke is Felpro PN FEL-VS50179T. The cork or cork/rubber ones like the top one always tend to leak. This silicone rubber/steel gasket has raised edges to seal properly and comes with all the hardware needed for installation.
Thanks for that info! I've been plagued with leaky valve covers on my Fiero and my 90 Grand am Duke
IP: Logged
12:53 AM
Eclipse Member
Posts: 2040 From: Woodstock, Ontario Canada Registered: Jun 2004
That's not uncommon for Fiero battery trays. They lead to a lot of rot in that corner. A lot of us simply cut them out and relocate the battery to the front or to the trunk.
btw, be very careful not to overtighten the valve cover bolts. The 4 cyl covers are light stamped metal and a LOT of leaks come from guys overtightening them and warping the cover. Been there, done that.
------------------ Jay Brintnell Southern Ontario Fiero Association Yellow 85 Notchback(A.K.A. GodFearN)
IP: Logged
01:20 PM
aeffertz Member
Posts: 798 From: Ladysmith, WI Registered: Feb 2009
I've thought about just getting that tray, but I don't have the right tools to complete the job. I would have to cut a chunk out of that compartment, and I have no clue what to do with the wires and everything else.
IP: Logged
05:01 PM
Apr 19th, 2009
aeffertz Member
Posts: 798 From: Ladysmith, WI Registered: Feb 2009
Well, I didn't get as much done as I wanted, but here's a small update I suppose. The It was bugging me how poorly the valve cover gasket was fitting, and I suspected that I put it on wrong. As I was removing the valve cover bolts, I dropped my wrench down into the engine compartment. I heard it clank a couple times, but never heard it hit the floor. Ugh! I looked for it for a good 2 hours, above and under the car, before I finally found it. Once, I got the cover off I realized I put the gasket on there upside down. Anyway, I purchased some brake parks cleaner, and some gasket sealer this weekend and really cleaned out the bolt holes and sealed the gasket up nicely. Here's how I was cleaning out the bolt holes to remove all the oil that was in them, preventing the Loc-tite to work: I sprayed brake cleaner on the q-tip and swabbed it until a q-tip came out clean, and I could see silver threads. Finished all that, and put it back together. Then I put the new battery in and hooked it up.
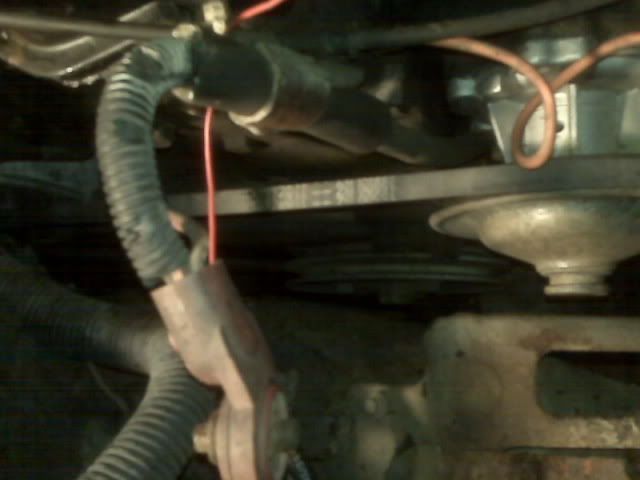
Now, I'm really confused at how I'm suppose to replace the belt. I read in my repair guide how to do it, but it's not too helpful. It says to loosen 2 bolts, and remove it, but I don't know which ones to do or anything. Any help would be greatly appreciated! Here's a picture I suppose to maybe help someone describe how/which bolts to loosen and whatnot. Thanks again!
[This message has been edited by aeffertz (edited 04-20-2009).]
Does the car have air conditioning (that works)? If so you'll have to remove that belt first. Once that's out of the way, loosen the 13mm bolt on the top of the alternator, this is the adjusting bolt. You'll also probably have to loosen the lower pivot bolt, 13mm or 15mm, been a while. Then push the alternator towards the engine to put slack in the belt, take it off, and put the new one on. Use a prybar to put tension on the alternator while tightening the pivot bolt, then the adjusting bolt. When it's tight, put your finger on the middle of the top of the belt, and push down. There should be about half an inch of deflection. You don't want the belt too loose, or too tight.
Belt and battery are both 5 minute jobs. I usually use a 15500 belt but I see you have a 15505, the extra half inch probably won't make any difference, though.
IP: Logged
09:26 AM
aeffertz Member
Posts: 798 From: Ladysmith, WI Registered: Feb 2009
Here's an update for you guys. I ordered some Dynamat yesterday, so I figured I would finish up the inside of the car so it's ready for that stuff to be laid down. There were a few problem areas, as you can see in a few posts back, but nothing some aluminum, rivets, and waterproof sealer couldn't fix. Here's where the hole was on the drivers side floor: Before:
After:
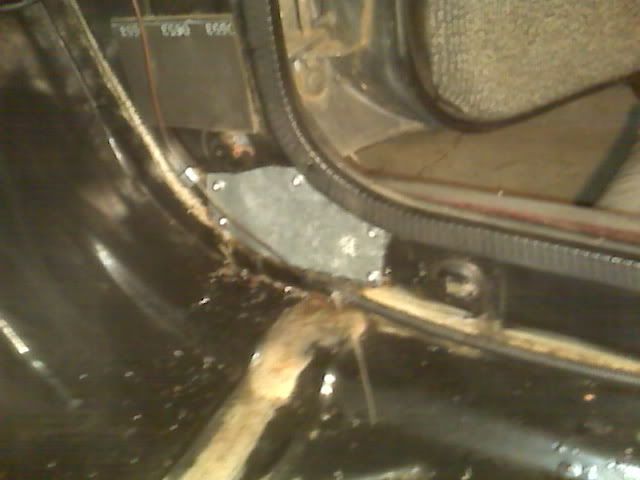
Here's the hole that was on the passenger side: Before:
After:
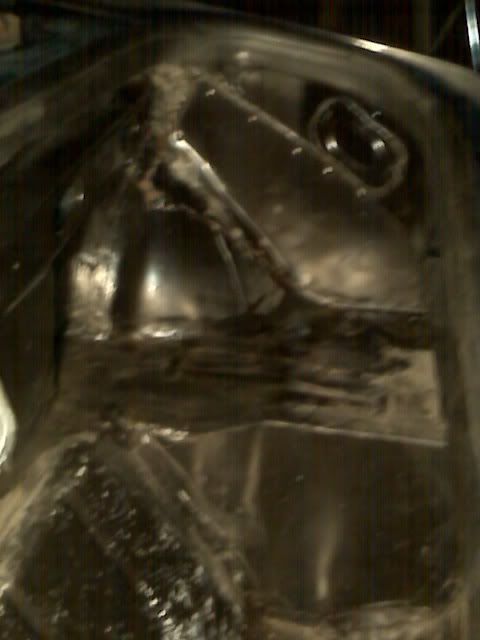
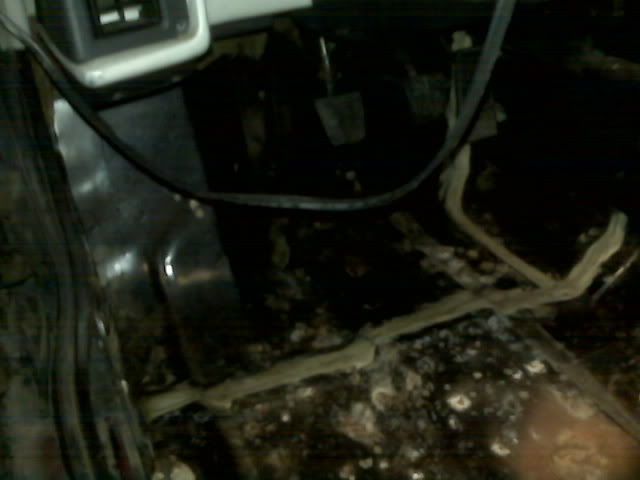
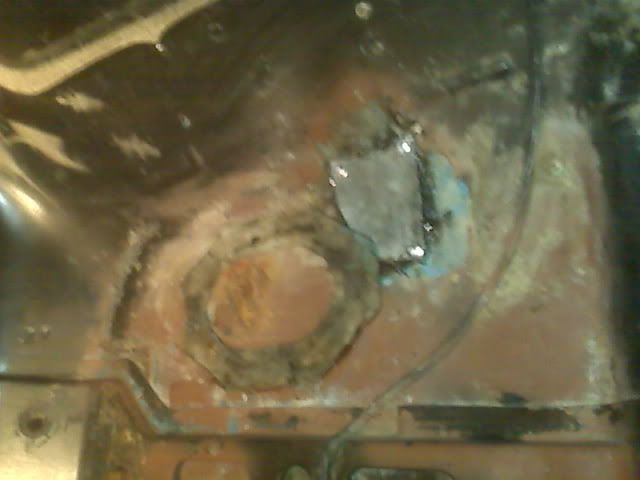
And I found a big crack on the firewall the the battery tray made... Before:
After:
Then I got the new belt installed thanks to your help!
Now I'm test fitting my prototype bucket seat for the car... Needs a little bit of trimming, but other than that, it should be perfect!
I'm broke again, so I can't really do anything until the Dynamat shows up. If you're looking for cheap Dynamat, check out Amazon.com. That's where I ordered mine from. I got the new Extreme Dynamat bulk pack and the heavy duty roller for just about $165 shipped. That's half the normal price and it's brand new! That's pretty much the only reason I bought it; it was such a good deal. Haha. That's all for now...
EDIT: When is this thing going to have 2 pages?!
[This message has been edited by aeffertz (edited 04-21-2009).]
IP: Logged
10:52 PM
Apr 22nd, 2009
ktthecarguy Member
Posts: 2076 From: Livonia, MI USA Registered: Jun 2007
That seat looks very comfy! One thing to check for; look at your upper alternator bracket for cracks. I had one on mine, and it caused the alt to be slightly out of alignment. This caused the alt to flip the belt over, burning it up in a few minutes. The only fix was to get a new(er) bracket with no cracks. Haven't had a belt problem since.
IP: Logged
05:55 AM
Apr 23rd, 2009
aeffertz Member
Posts: 798 From: Ladysmith, WI Registered: Feb 2009
I'll probably look like an idiot asking this, but did you put your new belt on inside out? In the last picture of it it shows the cogs of the belt facing away from the pulleys, and I've only ever seen them facing the pulleys.
I don't ask because I'm trying to point out something you did wrong, I'm more curious if this is the way to do it or is acceptable either way?
Good work so far - keep it up!
------------------
IP: Logged
09:48 AM
Apr 26th, 2009
aeffertz Member
Posts: 798 From: Ladysmith, WI Registered: Feb 2009
I'll probably look like an idiot asking this, but did you put your new belt on inside out? In the last picture of it it shows the cogs of the belt facing away from the pulleys, and I've only ever seen them facing the pulleys.
I don't ask because I'm trying to point out something you did wrong, I'm more curious if this is the way to do it or is acceptable either way?
To be honest, I don't really know. That's the way the belt came, and I tried to turn it inside-out, so the cogs were on the inside, and it wouldn't stay like that. Plus, on the non-cog side, it's sorta like a V, and that matches the same V-type groove on the pullies. It fits good and everything, so I don't know.
To be honest, I don't really know. That's the way the belt came, and I tried to turn it inside-out, so the cogs were on the inside, and it wouldn't stay like that. Plus, on the non-cog side, it's sorta like a V, and that matches the same V-type groove on the pullies. It fits good and everything, so I don't know.
Perhaps its the wrong width belt, or one of the pulleys are wrong, as the 'cogs' and the base of the 'v' should be 'in' the pulleys.
IP: Logged
01:06 PM
fierosound Member
Posts: 15253 From: Calgary, Canada Registered: Nov 1999
To be honest, I don't really know. That's the way the belt came, and I tried to turn it inside-out, so the cogs were on the inside, and it wouldn't stay like that. Plus, on the non-cog side, it's sorta like a V, and that matches the same V-type groove on the pullies. It fits good and everything, so I don't know.
I've seen belts both ways, cogs inside and cogs on the outside. On the inside, they grip the pulley better. On either side, they also dissipate heat better.