Hello everyone. Over the past few weeks I have been having a lot of fun fixing frame rust, stripping the rear end down, and built some coil-overs. I have about 90 pictures that show how to make coil overs, removing the rear clip, fixing the upper frame rails, and some interior pics. Webshots pictures: http://community.webshots.com/user/NYRED85GT Youtube movie: http://www.youtube.com/NYRED85GT
If anyone need explanations or more pictures let me know and I will take some. Enjoy!
Mike
IP: Logged
08:44 PM
PFF
System Bot
fieroluv Member
Posts: 1951 From: Ft Wayne, IN USA Registered: Jul 2002
That is some nice work there. Did you just weld sheet metal for the upper frame rails? I have been considering the same thing. Although mine isn't anywhere near as bad as yours were. I was considering doing RubyRed Fiero's technique, but thought that my frame rails weren't gone enough for his write up.
Thanks for posting these pictures of your teardown of your fiero. I'm contemplating doing the same to my recently purchased '87 GT. I've known about the rust on my car, just been hesitant to take her apart and see everything. I've never done anything like this, so I like viewing your progress.
I think I'll start mine this weekend.
IP: Logged
10:18 PM
May 10th, 2007
NYRED85GT Member
Posts: 360 From: Niagara Falls, NY Registered: Apr 2007
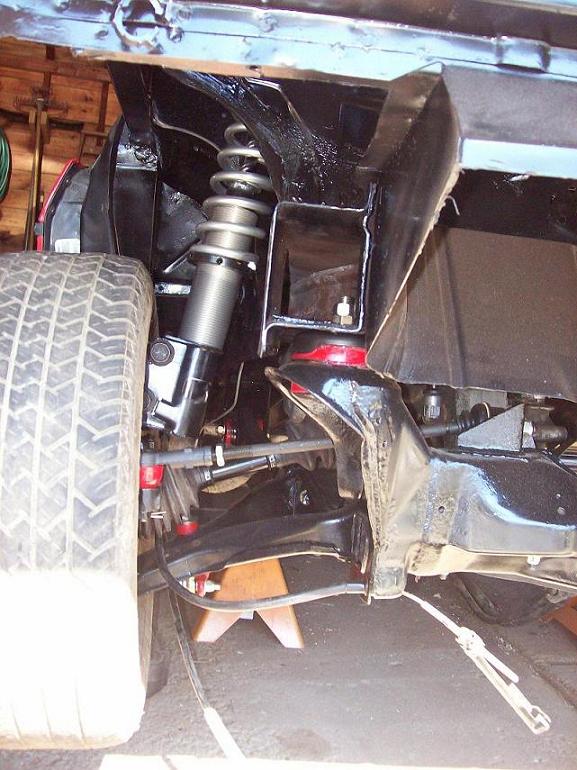
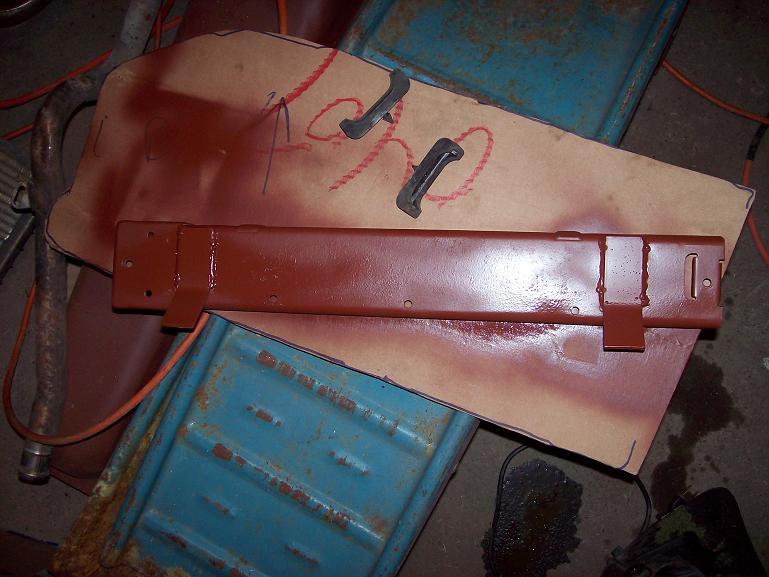
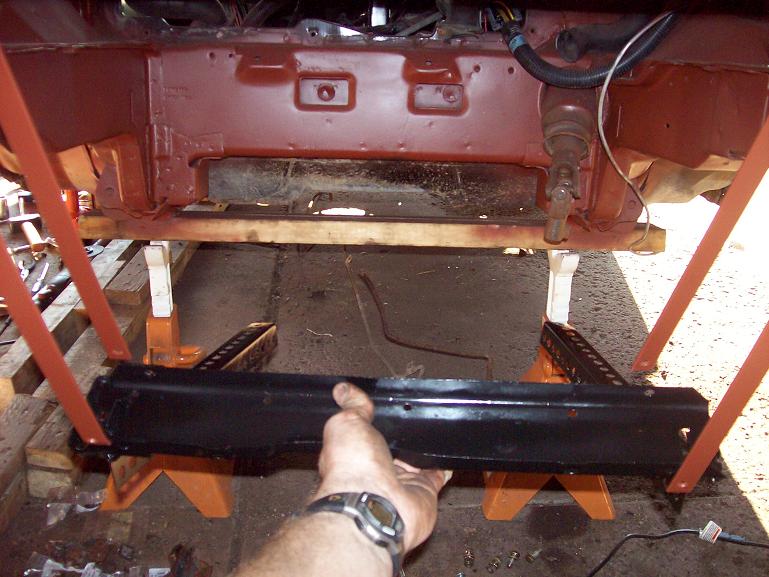
The upper frame rail I used 2"x2"x .120 inch thick square tube. Original thickness was .080 I believe. The sheet metal between the upper and lower frame rails is 16 gauge. I think the original was 22 gauge maybe? Go here for the upper frame rail blueprints: https://www.fiero.nl/forum/A...060811-2-068409.html My Fiero was stored for about a year after I bought it (was in the sand box a few weeks after I purchased it). I towed it home earlier this year, and using this forum, tore and cut it all apart. Now it is stronger than ever with thicker metal that is seam welded instead of spot welds. I have to do the rocker panels (metal square tube is on the way) and a days work on the front for rust repair. After that I am dropping the cradle to junk the engine, get rid of the rust on the cradle, and completely re-build the suspension. So in the next 3 weeks I will have more pictures to post. If anyone is thinking about doing their frame rails it isn't that hard really. Just time consuming for the first timer (me) and lots of measuring before cutting. Get some cardboard to use as templates so you don't mess up any sheet metal.
Mike
[This message has been edited by NYRED85GT (edited 05-10-2007).]
IP: Logged
11:14 AM
May 19th, 2007
NYRED85GT Member
Posts: 360 From: Niagara Falls, NY Registered: Apr 2007
I started welding in the new passenger rocker tonight. Later this week I will do the drivers side. Then move on to removing the engine and trans. from the cradle so I can do a complete performance rebuild on the suspension and brakes.
[This message has been edited by NYRED85GT (edited 05-20-2007).]
Hello everyone. Over the past few weeks I have been having a lot of fun fixing frame rust, stripping the rear end down, and built some coil-overs. I have about 90 pictures that show how to make coil overs, removing the rear clip, fixing the upper frame rails, and some interior pics. Webshots pictures: http://community.webshots.com/user/NYRED85GT Youtube movie: http://www.youtube.com/NYRED85GT
If anyone need explanations or more pictures let me know and I will take some. Enjoy!
Mike
That rear clip removal series is cool, ill have to save that for next year when i take mine off for painting/repair so i dont forget a bolt.
IP: Logged
09:01 AM
NYRED85GT Member
Posts: 360 From: Niagara Falls, NY Registered: Apr 2007
I don't think it was in salt water hehe. But the car has lived in the North-East its whole life. I figure if I find a 86 or 87 GT in better shape I will transfer everything (several thousand dollars in parts) to the better car. I have never done anything like this before so it has been fun learning. And I want to show others who might be too intimidated to fix their car and let the rust keep getting worse. The worst part is the rocker panels and rear clip hide everything. So without a very through inspection (removing rivets) people do not know. And especially those who want to do engine swaps. The first thing should be safety (fix rust,upgrade brakes,upgrade suspension) and then more HP. I just need to find a 3.4 DOHC car in Western NY I can strip down for cheap....
IP: Logged
03:46 PM
May 29th, 2007
NYRED85GT Member
Posts: 360 From: Niagara Falls, NY Registered: Apr 2007
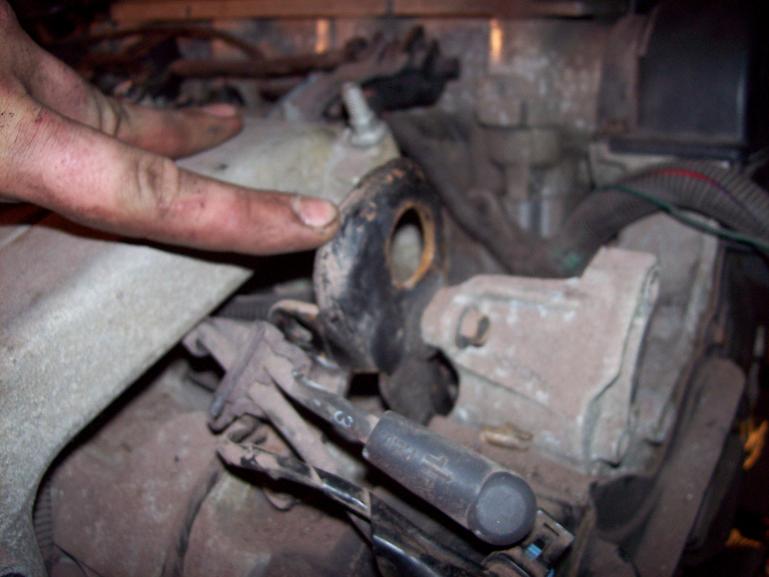
And finally a crappy video I made of removing the rubber bushings. In the bottom right of the video there is a "full screen" button that makes it a little easier to see. http://www.youtube.com/watch?v=VA_5KPNeXFA
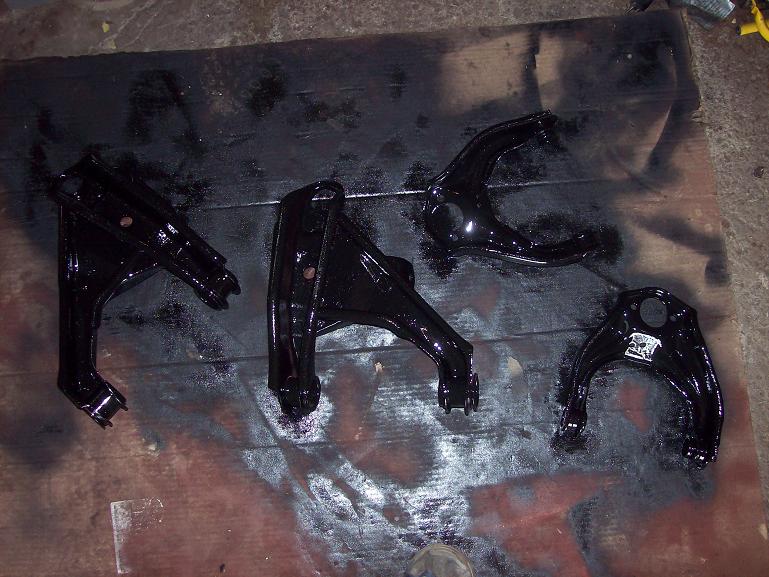
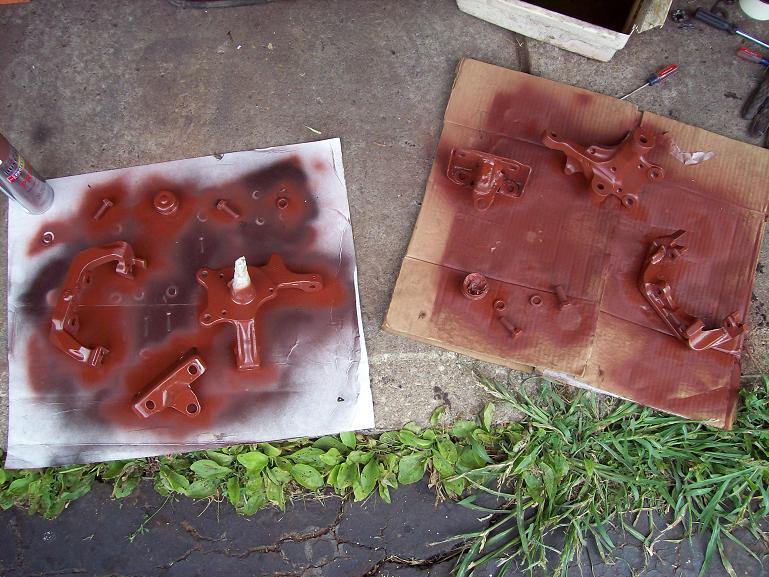
Tomorrow I have to pressure wash the cradle after work. Than I have to wire brush, prime, and paint the control arms, cradle, and steering knuckles.
IP: Logged
11:22 PM
Jun 3rd, 2007
NYRED85GT Member
Posts: 360 From: Niagara Falls, NY Registered: Apr 2007
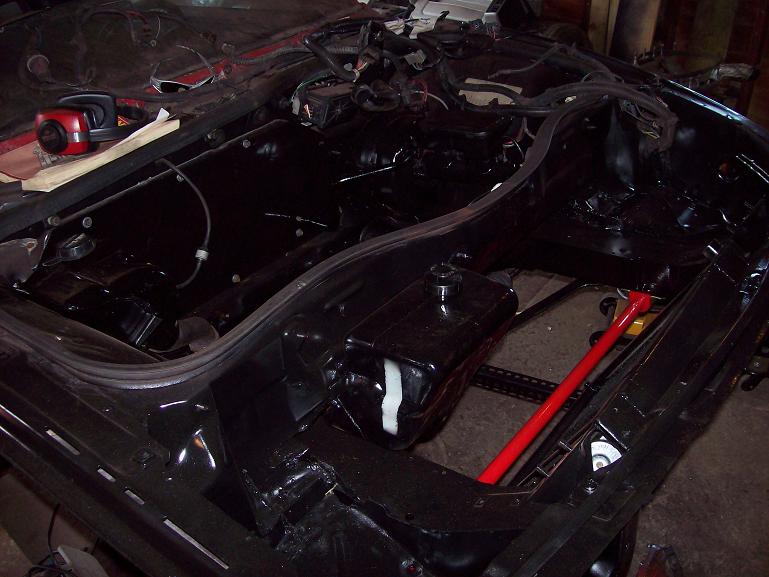
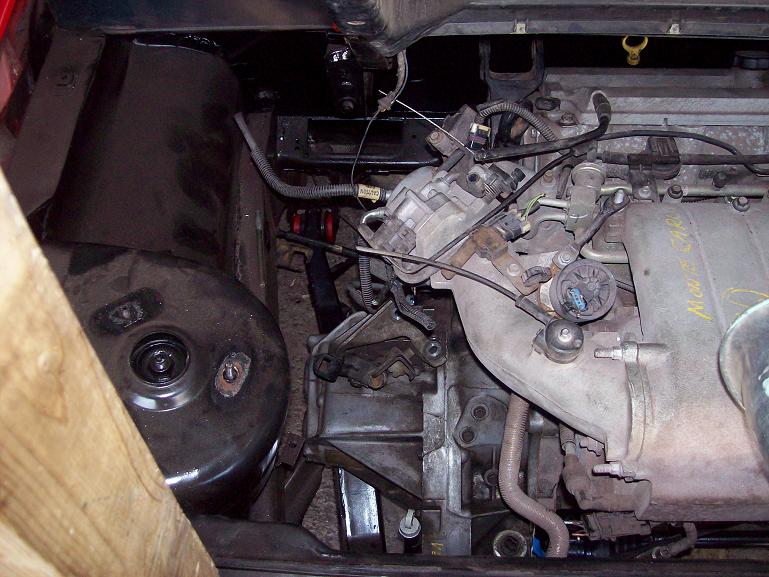
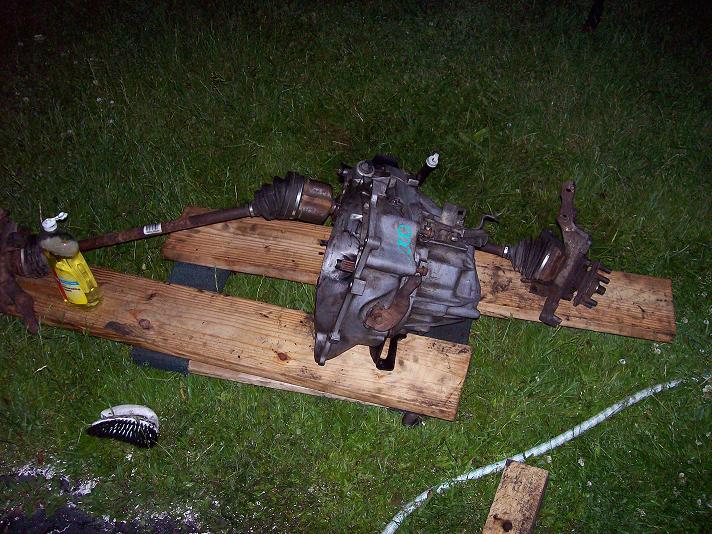
Here are a couple of new pictures of the cradle and cleaned up transmission. Its actually silver colored and not covered in a thick layer of grease and grime!
Synthesis: I have to take another movie when I do the front bushings. I was on my last rear bushing when I thought of taking the movie and it turned out crappy.
IP: Logged
09:42 AM
Jun 8th, 2007
NYRED85GT Member
Posts: 360 From: Niagara Falls, NY Registered: Apr 2007
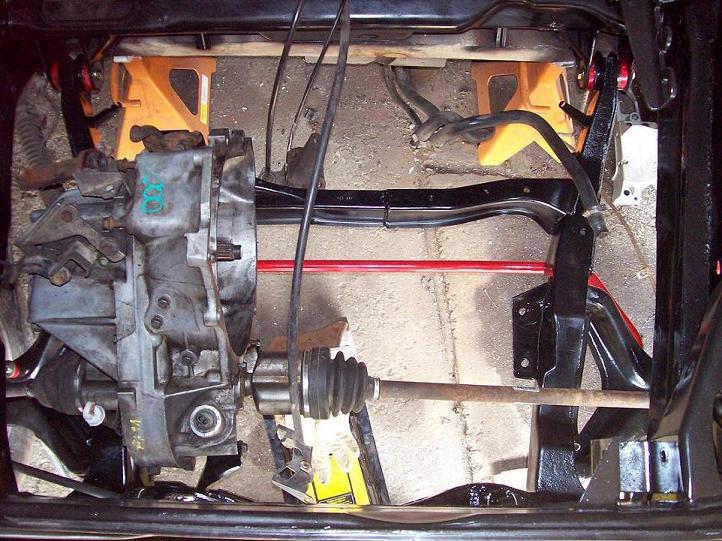
Everything is loosely bolted in now. I have to wire brush and paint the rear calipers, knuckles, and axles this weekend.
Things left to do:
Finish cleaning up rear end- wire brush, paint, and connect shift cables. Replace drivers side rocker panel and weld floor pan patches in. Rebuild front end- need Grand Am calipers and rotors, S10 brake booster, fabricate lower radiator mount, lowering springs. Remove A/C components. Route new brake lines to front and rear. Install new sunroof rails and gasket. Completely re-do interior- fit Beretta dash, new seats, carpet, headliner. Try to build a fiberglass front bumper and modify hood for better air flow. Try to fiberglass new rear bumper. Find a 3800 Series II or 3.4 DOHC for a swap. Replace fuel tank, pump, blah blah.
Ug I need more time in my day!
IP: Logged
05:35 PM
Jun 19th, 2007
NYRED85GT Member
Posts: 360 From: Niagara Falls, NY Registered: Apr 2007
Axles, calipers, rotors, and steering knuckles have been wire brushed and painted. Rear calipers are re-built. Fiero dash is out and the Beretta dash is sitting in its place. I have to cut in three pieces and do some fiberglassing. New seats are on order. Next is cutting out the drivers rocker panel and welding a new one in. More pictures to come in a few days.
IP: Logged
11:58 PM
Jun 20th, 2007
BobadooFunk Member
Posts: 5436 From: Pittsburgh PA Registered: Jun 2003
The sweet looking red poly was purchased from the Fiero store. I looked for like 3 years before I found a Fiero in western NY that was in my price range. I figure I will learn a lot re-building this one and if I find a 85-87 in better condition I will transfer everything over to the better car. I have spent at least $4995.84 so far, that includes the price of the car. I hate being an addict sometimes!
IP: Logged
01:52 PM
NYRED85GT Member
Posts: 360 From: Niagara Falls, NY Registered: Apr 2007
I have to cut the dash on each side of the center vent/radio area and glass in some spaces. The drivers side needs to come over 1.5" and the passenger side about 2.5" (didn't measure it yet).
IP: Logged
05:47 PM
Jun 21st, 2007
NYRED85GT Member
Posts: 360 From: Niagara Falls, NY Registered: Apr 2007
Well I have gotten a little off track with welding a new drivers side rocker panel. BUT other progress has been made!
No more a/c or heater stuff.
Guess where the battery is being re-located?
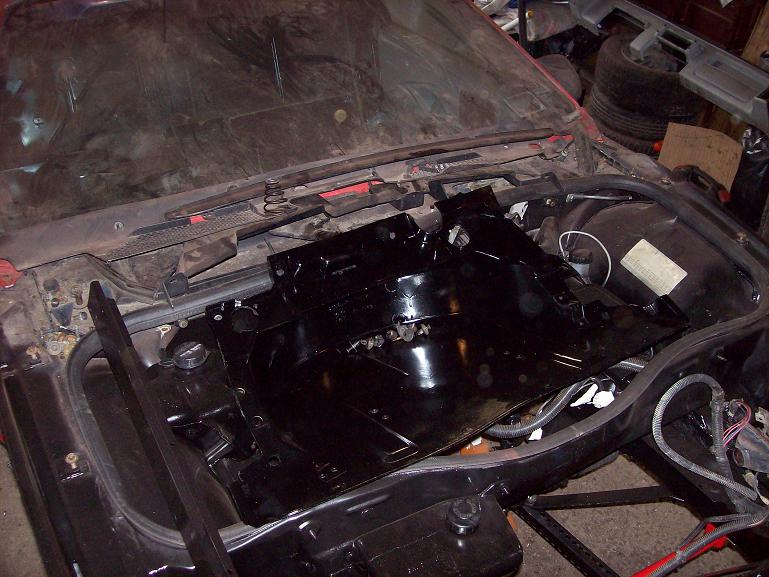
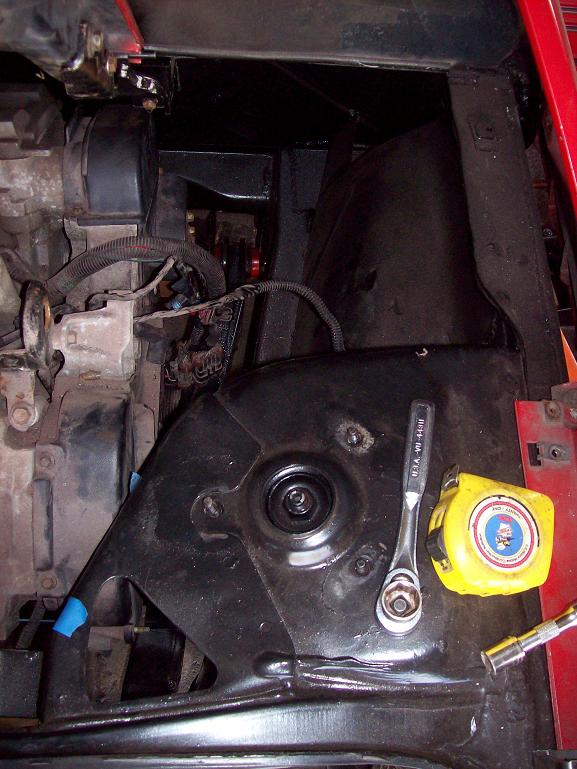
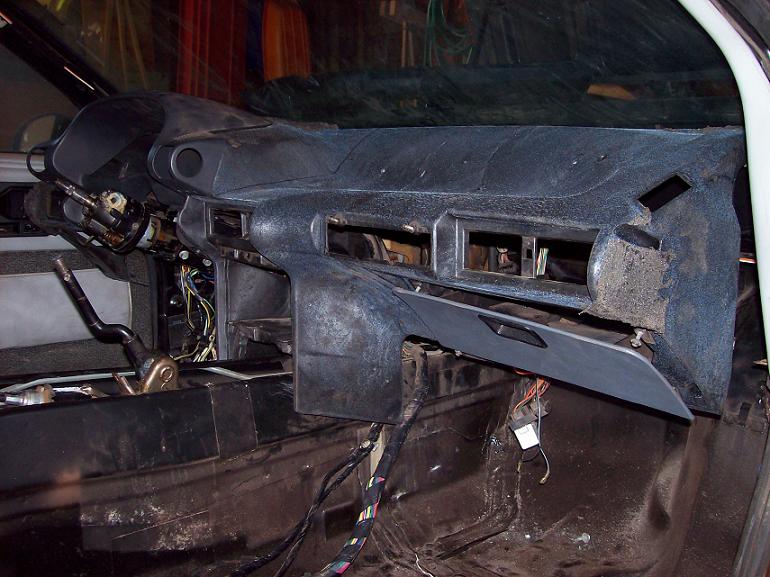
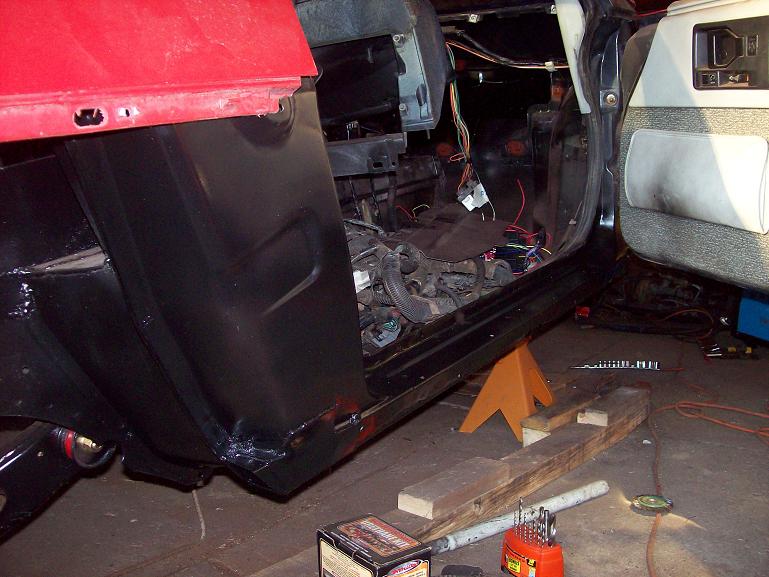
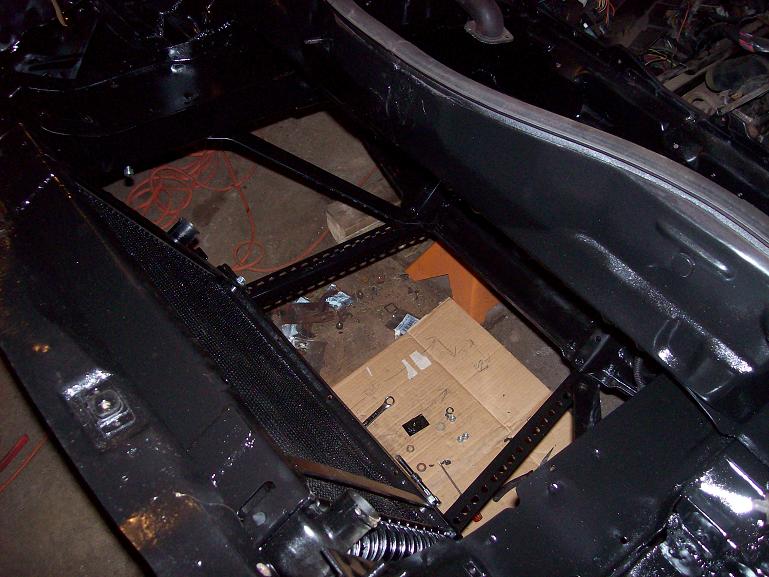
Looking into the front trunk. LOTS of room now!
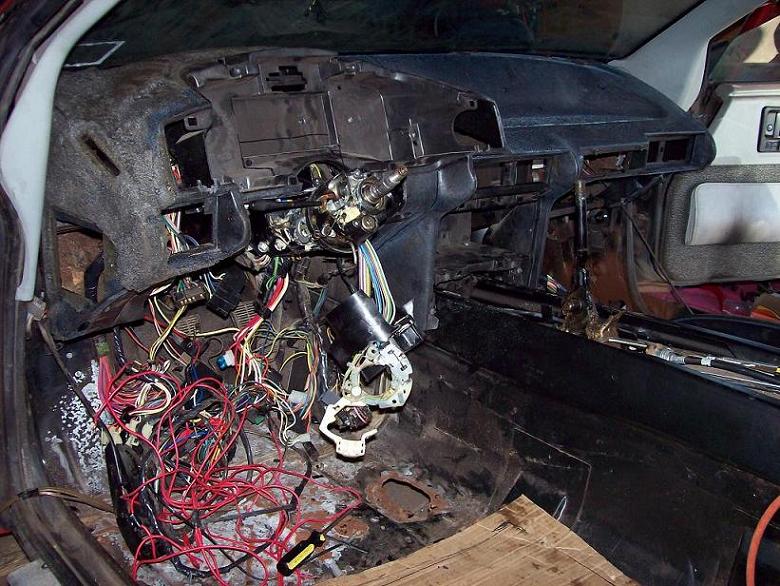
Good-bye Fiero dash.
"New" dash WITH a real glove box!! I will also be able to fit a sub behind here.
What I plan on doing is using the stock heater core and using a small 12volt fan wired to a variable switch for fan speed. I will make a simple duct to the windshield and side windows. If its too hot I will store the sunroof in the front, roll the windows down, and do 80 if its that hot hehe. This will save a lot of weight since I will use 22guage aluminum and plastic pipe. The dash, radio, and all the climate control stuff weighted a good bit! The battery is going to go where the a/c accumulator(I think thats what it was) used to be. The car had no a/c since there was no compressor on the engine?!
[This message has been edited by NYRED85GT (edited 06-21-2007).]
IP: Logged
06:45 PM
Jun 26th, 2007
NYRED85GT Member
Posts: 360 From: Niagara Falls, NY Registered: Apr 2007
More progress has been made but for some reason I cannot post pictures with Pennock's Image Poster anymore! UG....
New things I have done now:
Finished cleaning up the front end (body) and re-painted it. Removed the old rubber suspension parts. Modified the front of the car so I can drop the radiator down a lot and made new brackets. Finished up the rear body,suspension, and brakes. Bought a 3.4 DOHC from the mall here (gotta pick it up the 11th). Removed the headlights for future flushmounts. Removed the a/c and heater core. I will be making a basic heating system for the front windshield. Bought new black/gray racing seats.
Things I will do next:
Weld patches in floor pan and replace drivers side rocker. Buy and install lowering springs, Grand Am calipers, and larger brake booster. Finish cleaning up front control arms and install all new poly. Buy a radiator fan and make a radiator fan shroud.
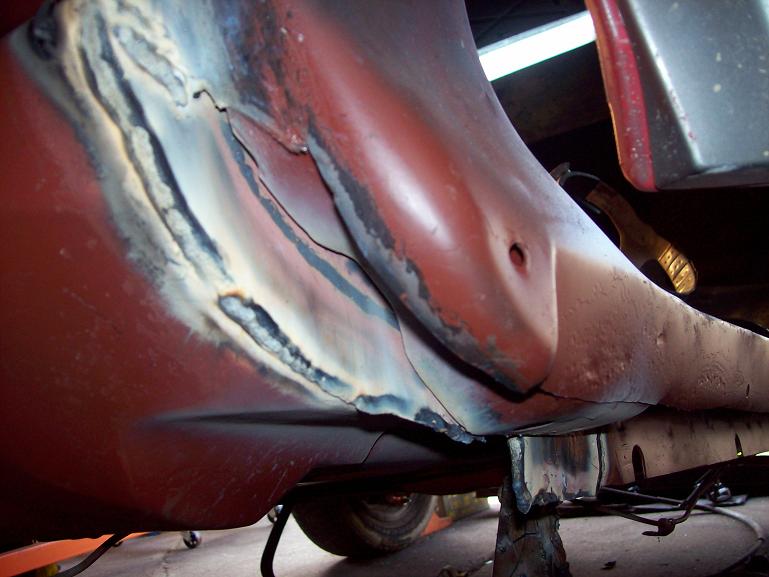
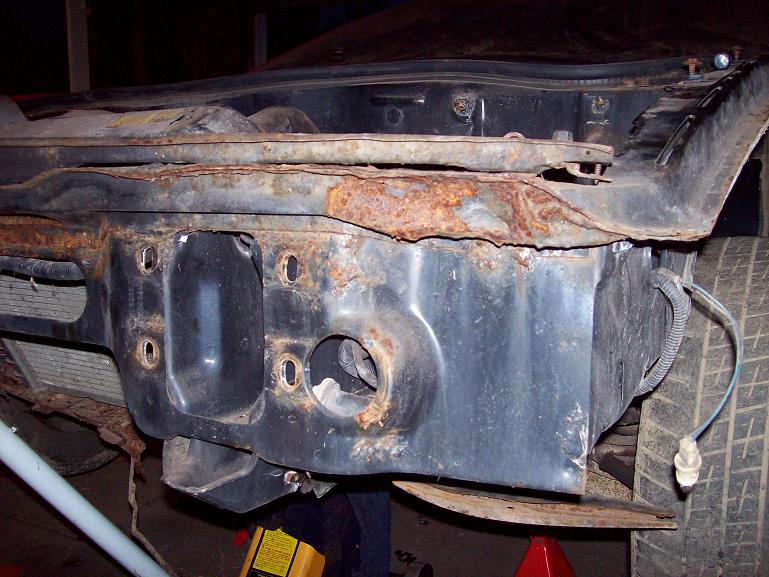
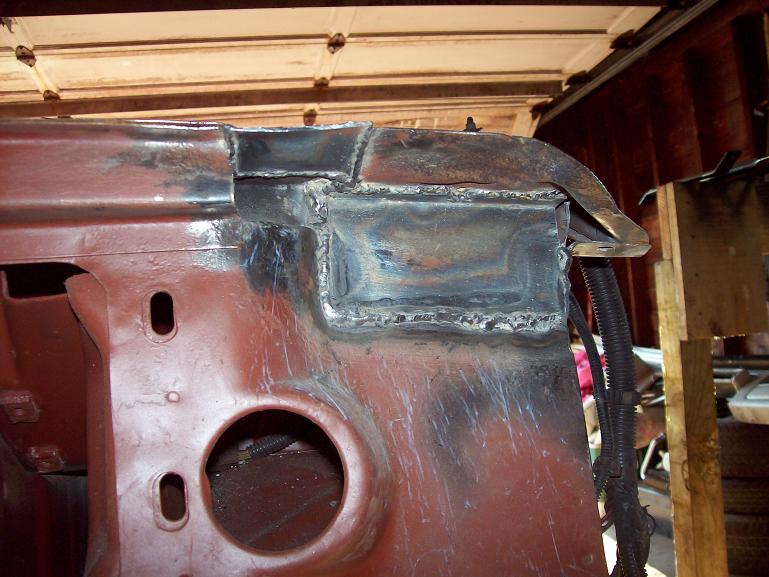
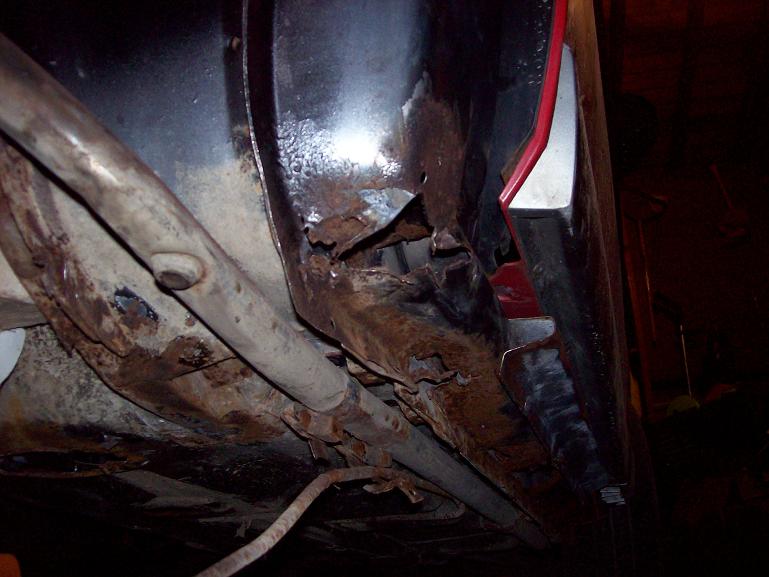
Better shot of the drivers corner damage: Cut out the bad and started welding the patches in:
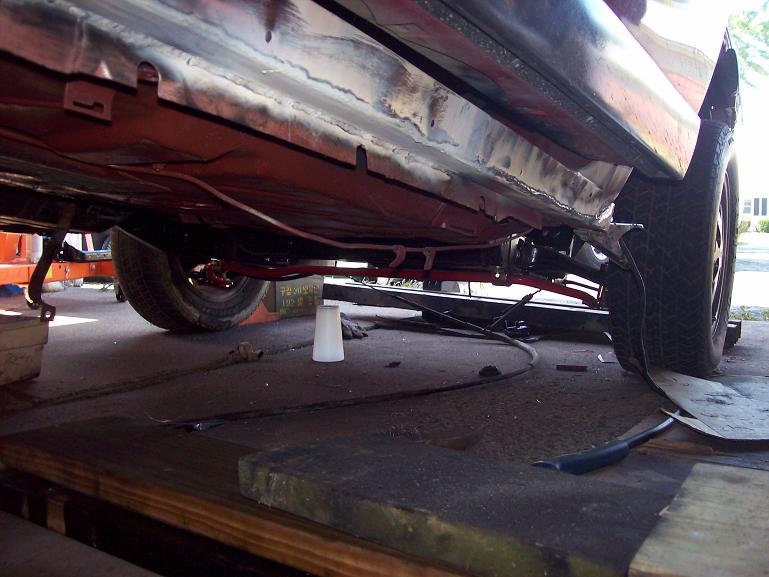
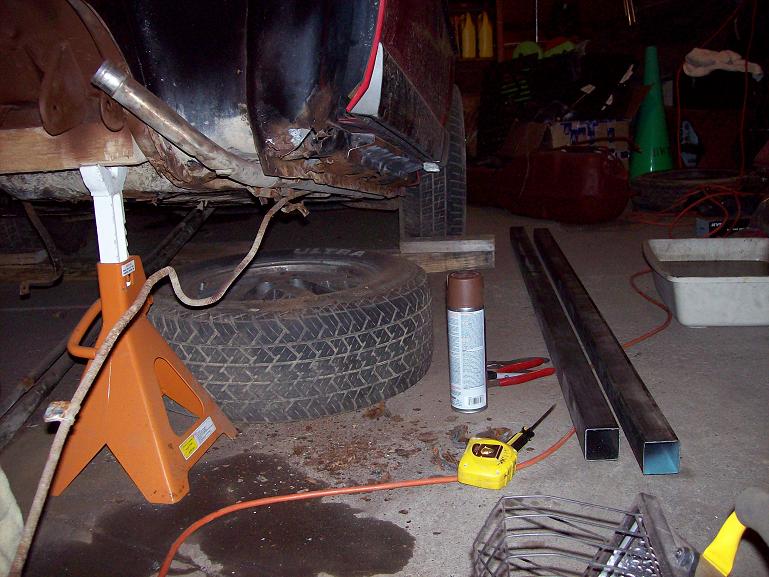
Rusted out rocker panel and my fix/reinforcement to stiffin up the body: Bad rust. The cut off wheel is alot of fun! NO MORE RUST and much stronger.
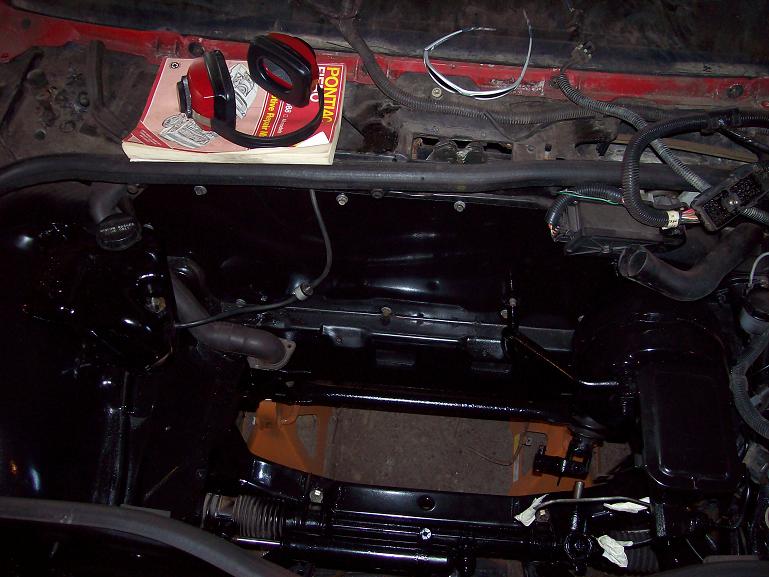
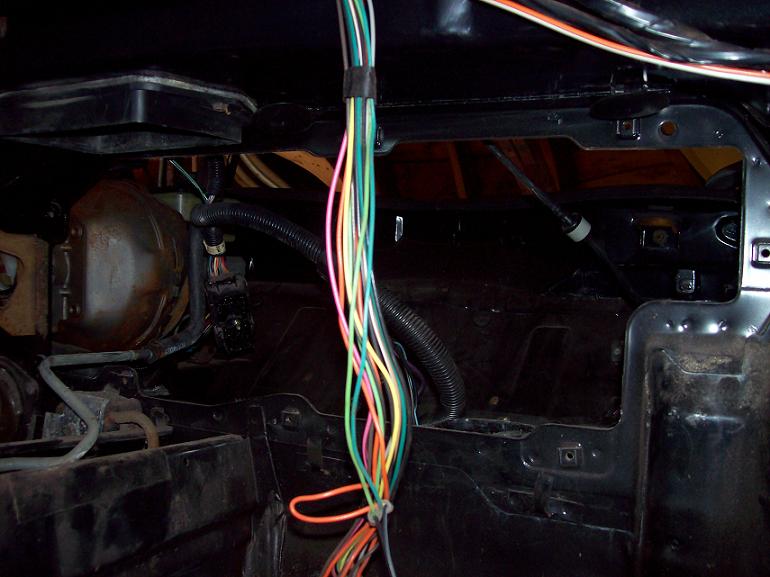
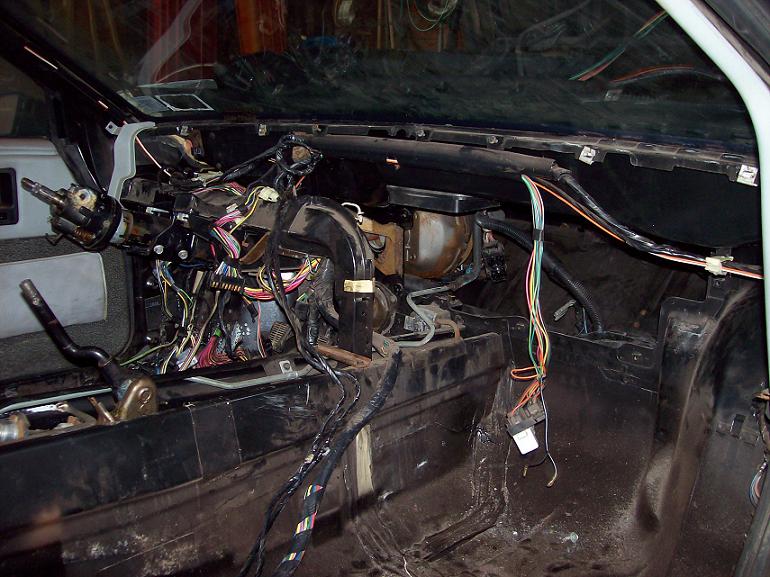
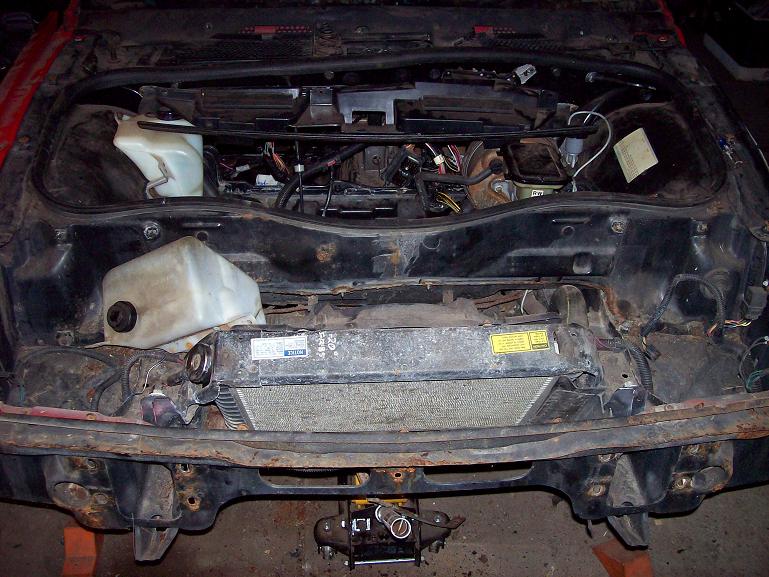
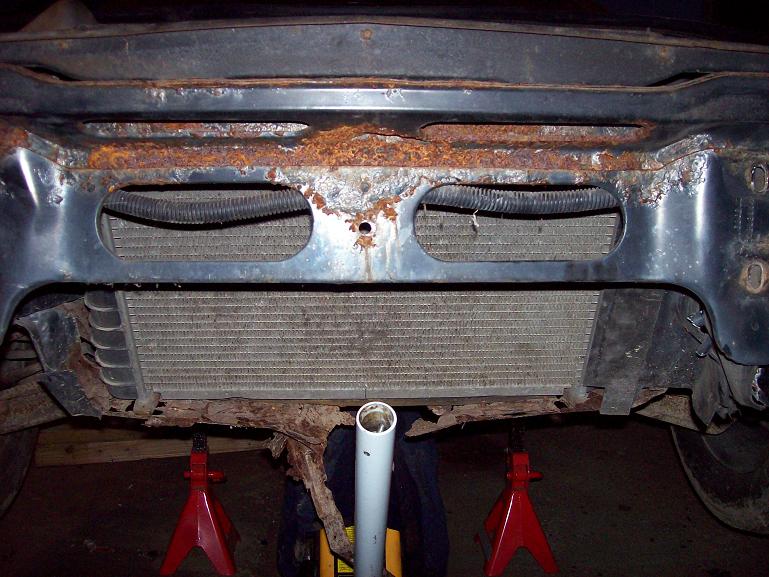
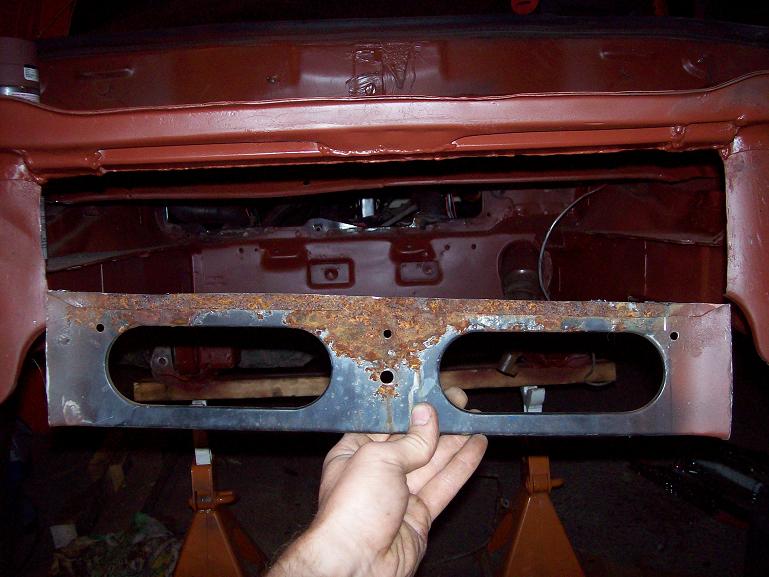
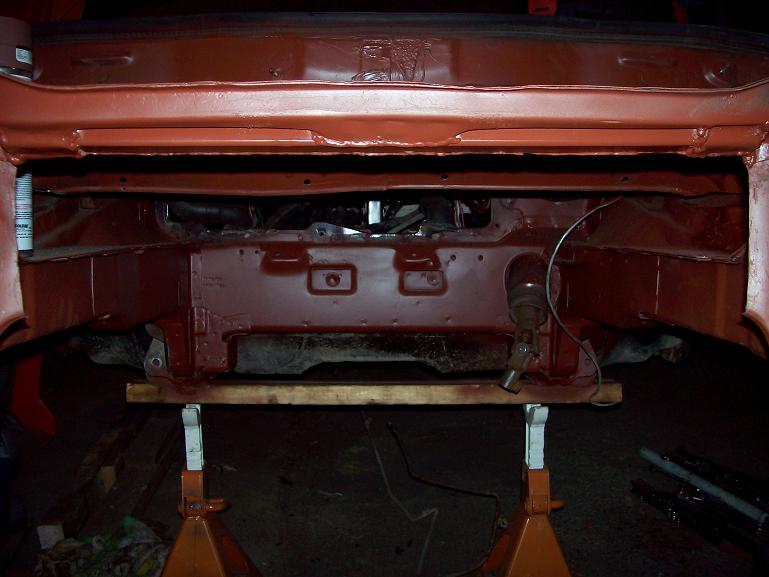
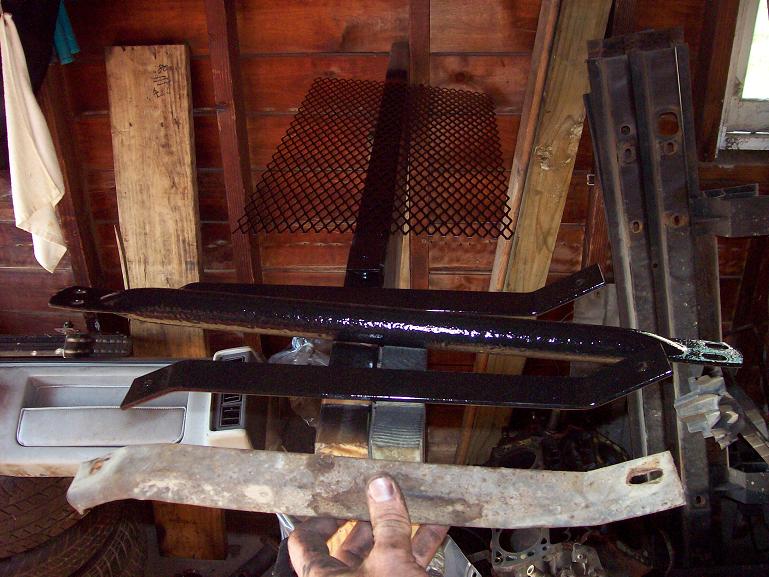
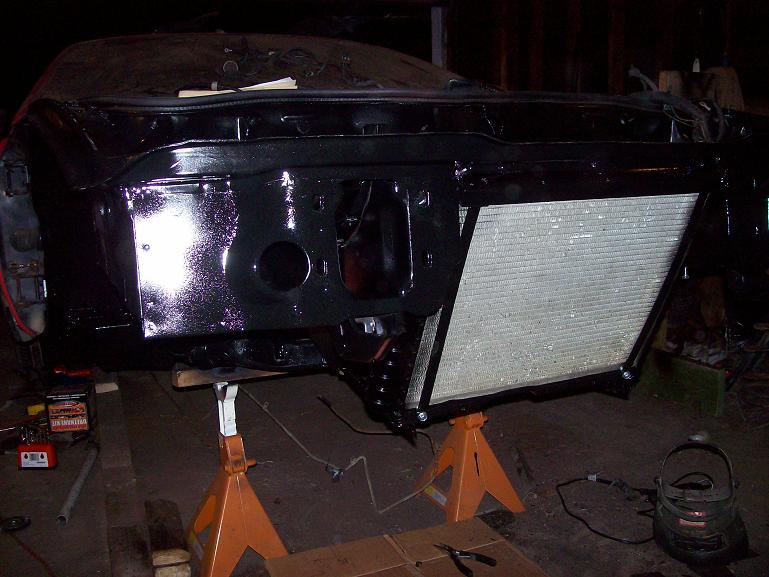
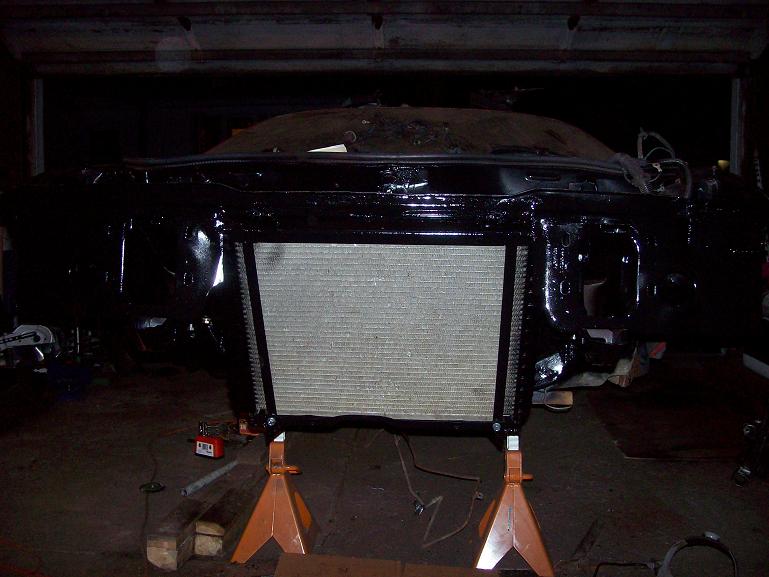
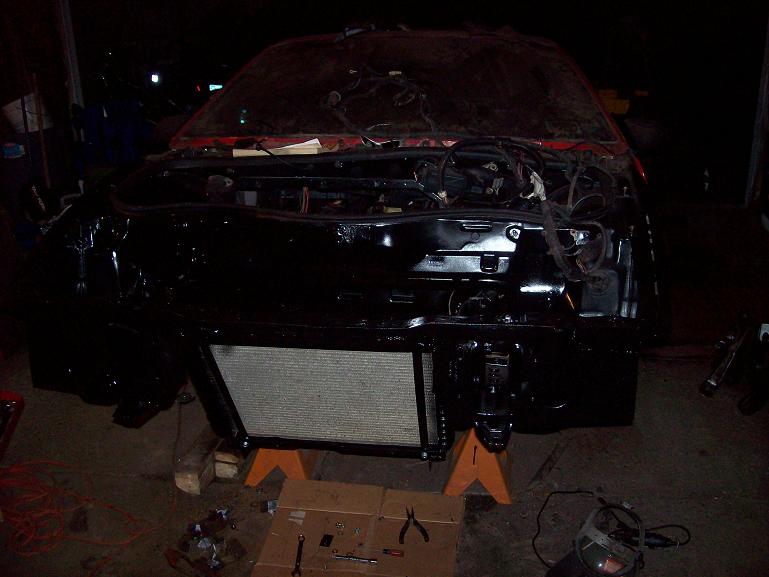
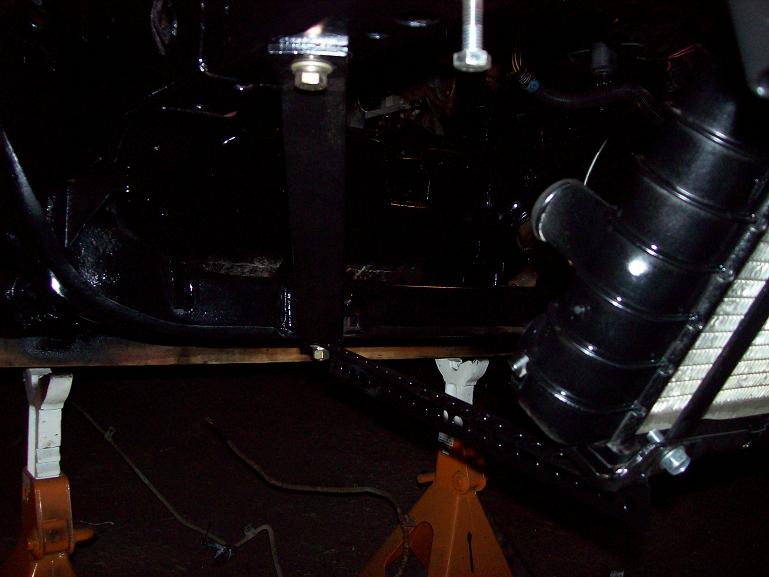
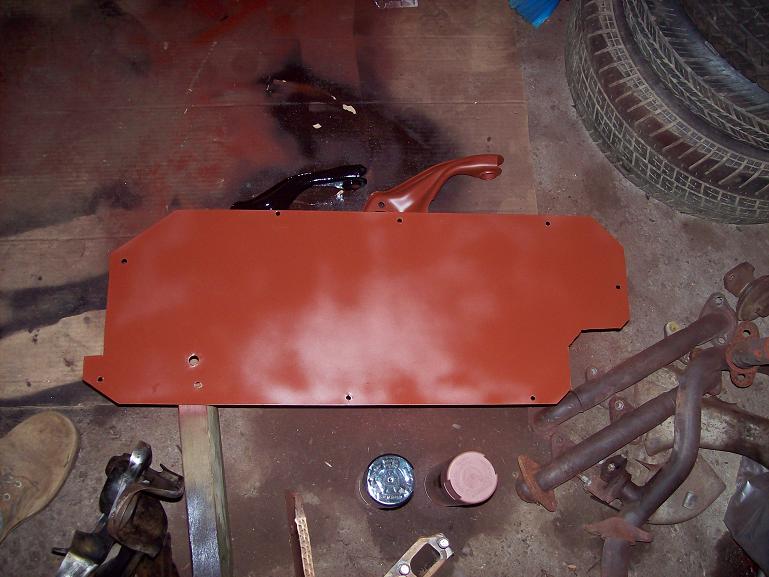
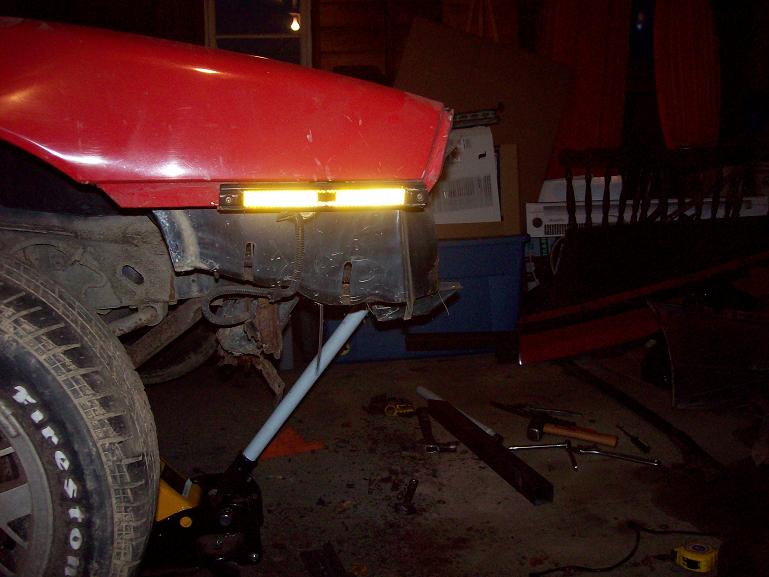
Hood is off and everything that could be removed was and MUCH modifying: Look at all of this ugly stuff. Yikes! The remaining "strip" of the front has been reinforced by welding in a length of thick walled square tube steel. I am lowering the radiator for better flow. Upper mount has been modified and the lower mount is actually an upper mount turned upside down and the ends chopped off. Origional front braces were rusty. Starting to reassemble the front. Everything has been cleaned up and painted high gloss black. Looking at the front cross member. Plenty of clearance for the lower radiator lose. I will be building a shallow box that the anti-sway bar will run through via holes that have rubber grommets to seal the box. The radiator fan will be mounted on the box and a hole will be cut in the hood for additional airflow out of the front (reduce front end lift). This will protect the radiator from debris. The new front firewall since I have no a/c or heat for the car anymore. Once I get the dash installed I will run the stock heater core with an 8" fan to provide heat to the windshield.
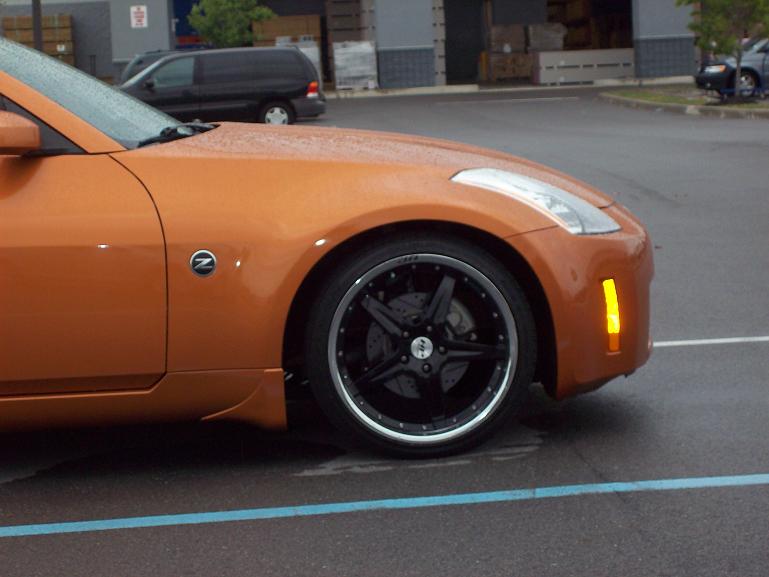
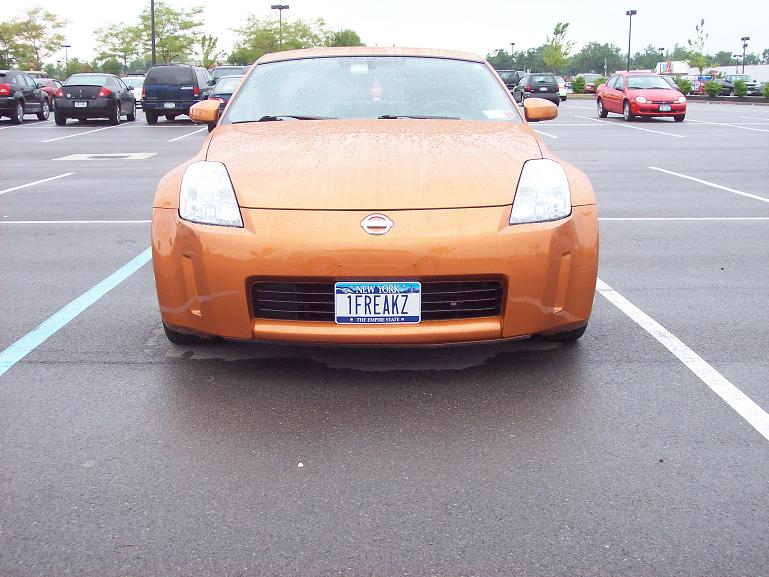
Front bumper profiles- I am really liking the short and stubby front nose look: Fiero. 350Z- such a SWEET car!
[This message has been edited by NYRED85GT (edited 08-12-2007).]
IP: Logged
11:00 PM
PFF
System Bot
Aug 16th, 2007
NYRED85GT Member
Posts: 360 From: Niagara Falls, NY Registered: Apr 2007
Here, take a break and watch someone else who is having a tough day...
Aaah, don't take it so hard, I think that people are just enjoying watching you work and share the progress pics. I wish some others would take the time to do just some of what you're doing when they repeatedly take their cars apart and put them back together again. Sure it takes a little longer, but that time could also be considered useful in planning the next step instead of rushing to make mistakes. I think it's great that you're putting so much time into this project. Seeing someone else take stuff apart and put it back together certainly makes me feel more comfortable in tackling my project.
IP: Logged
09:37 PM
BobadooFunk Member
Posts: 5436 From: Pittsburgh PA Registered: Jun 2003
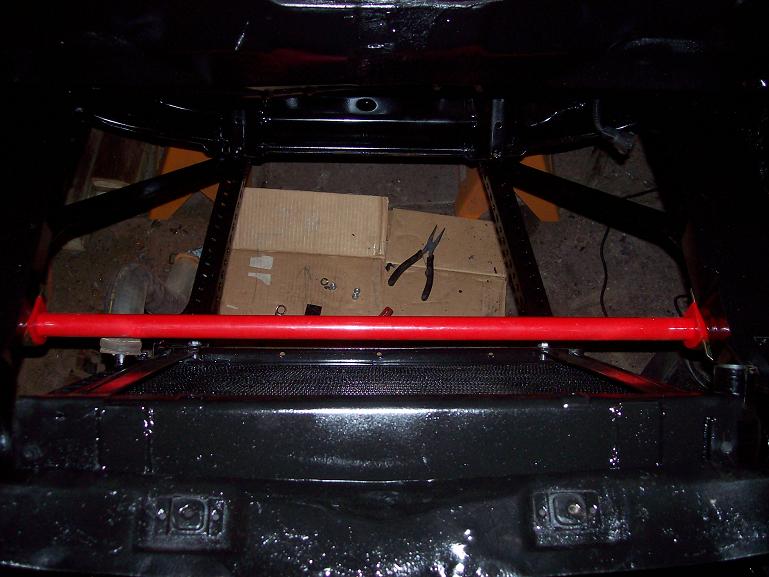
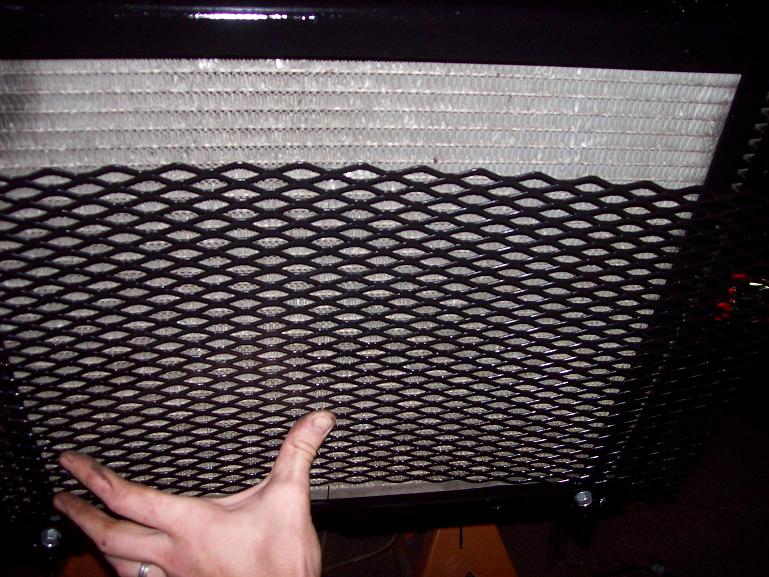
There is life in my thread!!!! I will continue to post pictures then. I picked up a 3.4 DOHC last weekend and I have been resisting VERY much to tinker with it, but I need to finish the car frame first! Last night I popped off one of the rocker covers to check out the wear on the cams/lifters and DAMN this engine looks darn near new on the top end!!! The approximate 26,000 miles on it like I was told is true mileage. I still have to drop the oil pan to check out the bottom end though. I am starting to re-assemble the front of the car. Rack and pinion is bolted onto the cross brace. Wind shield washer and coolant overflow tanks are painted black and mounted. Brake booster and master cylinder is back on. Radiator is fully mounted with the steel mesh rock guard. This weekend I will have the front suspension w/poly bushings put back in. I have to get lowering springs and front tie rods soon too. Once I get the front in I will drop the rear cradle again (ug) and bolt up the engine using some SWEET looking custom poly mounts that came with the engine. I am planning on making a custom upper intake SO if that is what hits the decklid then I will leave the engine mounted a little high. I will have 4 lower mounting points ( 2 on engine and 2 on transmission) and 1 "dog bone." Thats the plan anyways- still have to see about clearance issues with the exhaust and a turbo I have to fit in there.....
Mike
IP: Logged
12:24 PM
fieroluv Member
Posts: 1951 From: Ft Wayne, IN USA Registered: Jul 2002
I'm basically doing the same thing to my car. I quit posting in my thread because of all the negative feedback I was getting. I'm surprised that it hasn't started in yours yet. I just plain got tired of people telling me that I needed to just buy a rust free car and part mine out. That's not what it's about.
But I congratulate you for saving another one from the crusher. Thank You. At least there are some people out there that aren't afraid of rust. It can be fixed people, all you need is a welder.
Ok I'm done complaining... LOL ... Sorry for hijacking your thread.
IP: Logged
01:59 PM
NYRED85GT Member
Posts: 360 From: Niagara Falls, NY Registered: Apr 2007
No problem fieroluv- hijack all you want if it pertains to our restorations. I think I posted a few times in your thread too. Its good to hear that you are saving your car from getting squished too. I have NO formal automotive experiance at all. Everything I have learned was from my 92' Beretta (R.I.P.) , reading, and asking questions. This is the first time I have tried to do anything like this! I am naturally good at fabrication and problem solving so it has helped me alot. But I am a rookie like many of you guys so DO NOT BE INTIMIDATED!! Have some faith in yourself and you will see positive results!
Mike
IP: Logged
05:16 PM
Aug 18th, 2007
ly41181 Member
Posts: 1013 From: The Vill of Hodgens, ky Registered: Sep 2002
I am using an industrial rustoleum spray paint. First I get the metal as clean as possible with a wire brush on my angle grinder, then 2 coats of primer made for slightly rusted metal, then 3+ coats of high gloss black to finish it off.
That movie was funny as hell! I wish I could do stuff like that, but my computer kung-fu isn't too good.
Mike
IP: Logged
12:12 PM
PFF
System Bot
Aug 19th, 2007
gaas88 Member
Posts: 435 From: Burlington,Ontario,Canada Registered: Dec 2003
I could never do that. Anyone who has the presence of mind and patience to tackle such a job is truly a fan of the Fiero. You sir are a credit to the Fiero community! My hats off to you..........great job!
IP: Logged
08:25 PM
NYRED85GT Member
Posts: 360 From: Niagara Falls, NY Registered: Apr 2007
Most of my day was spent working on the old girl. I am letting the upper and lower front control arms dry for the next few days and I am almost finished painting the front knuckles and brake mounts. Lowering springs and new front outer tie rods are on order to finish off the front suspension. The drivers side rocker and the front and rear inside corners have been cut out. That took me about 5 hours (with lunch and dinner brakes) to do. Over the next few days I will be killing the lite surface rust, welding in the new rocker, and painting it. So more pictures to come. Then I will weld in patches to fill the body plugs in the floor pan and paint. MAJOR WELDING AND RUST REPAIR WILL BE DONE!!!!! Then I just have to figure out where everything goes and assemble the car....... Now that is going to be fun.
Mike
IP: Logged
10:16 PM
Aug 23rd, 2007
Lewis87GT Member
Posts: 42 From: Irving, TX 75060 Registered: Nov 2006
--I am a rookie like many of you guys so DO NOT BE INTIMIDATED!! Have some faith in yourself and you will see positive results!--
Yeah that would be me too. I have not worked on my car for about a month, you have inspired me. My car passed inspection, is street legal and runs well, but I know I have to deal with the rust sooner than later. Keep the updates coming, I'm sure updating the thread also inspires you to keep going.
I fixing the rust issues yourself is the way you like handling your hobby, I say do it your way no matter what advise you get to the contrary.
IP: Logged
03:26 PM
Aug 28th, 2007
NYRED85GT Member
Posts: 360 From: Niagara Falls, NY Registered: Apr 2007
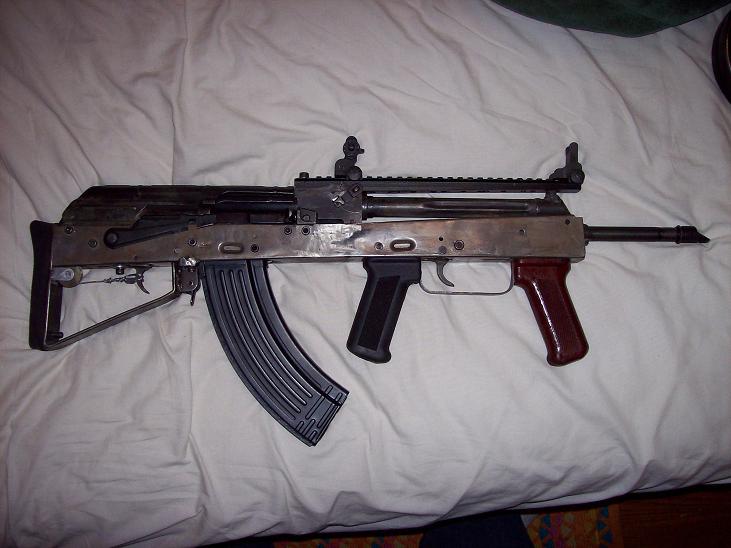
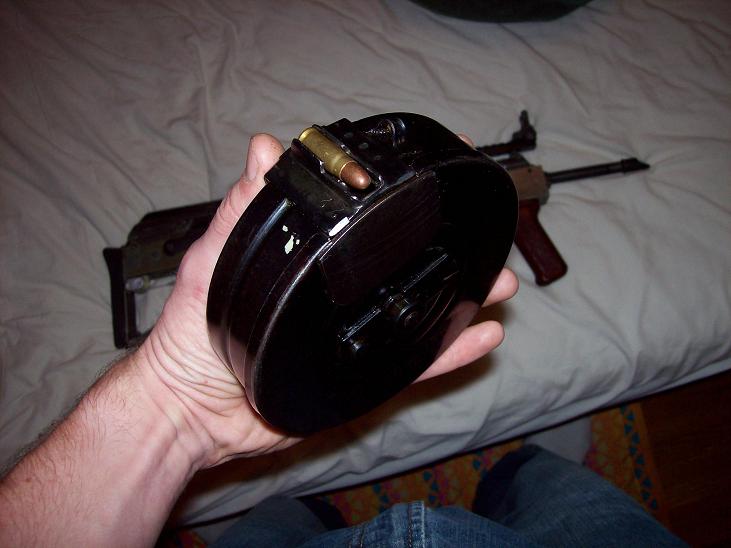
Ok a little more progress has been made. Last week it rained a lot and it was too humid to paint anything so I spent some time on my other LEGAL hobby: AK-47 parts kit is the core of this build, but in a bullpup format. This is the third firearm I have built in the past few years. Next build is going to use these 71 round drum magazines and be a bullpup configuration also muahahahaha.....
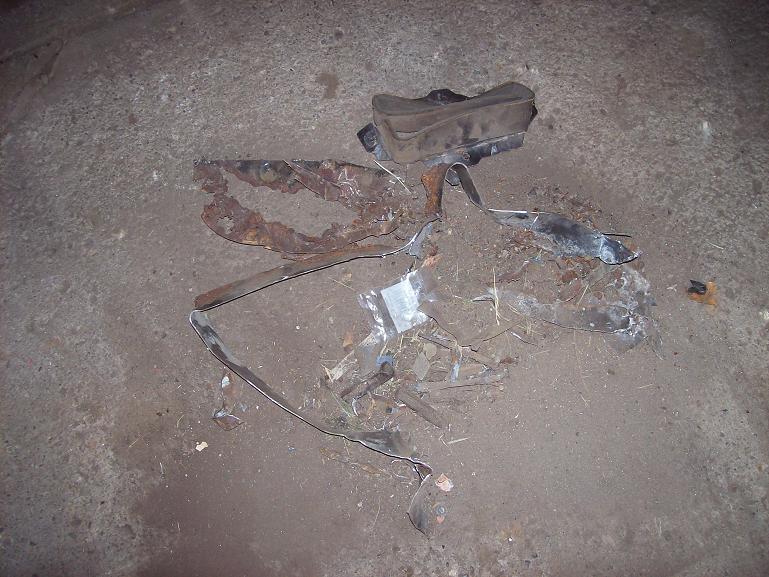
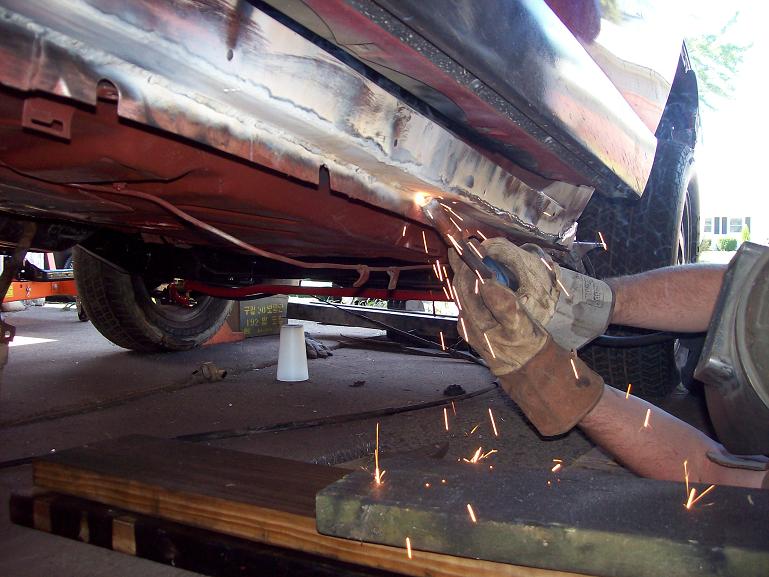
Ok back on topic..... Everything shown here is the drivers side rocker panel area. Front corner: Cut out the bottom of the rocker with an angle grinder and I an using a chisel to break the spot welds: Rust knocked loose and the bottom of the rocker: All the dust on the floor, dirt caked in the rocker, and loose rust knocked free:
Everything in this segment is the front drivers corner only.
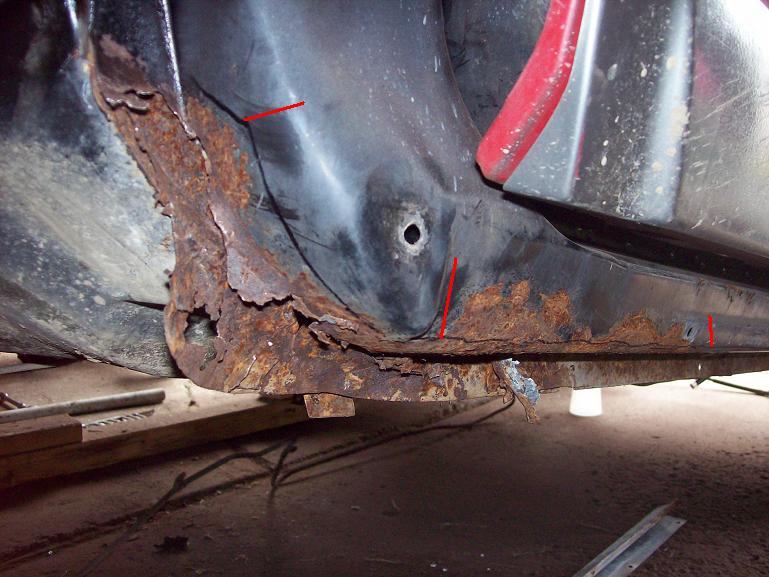
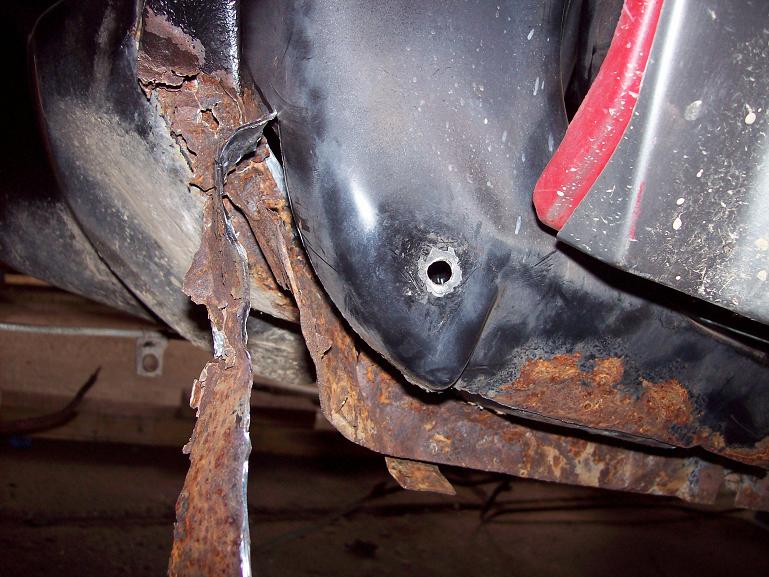
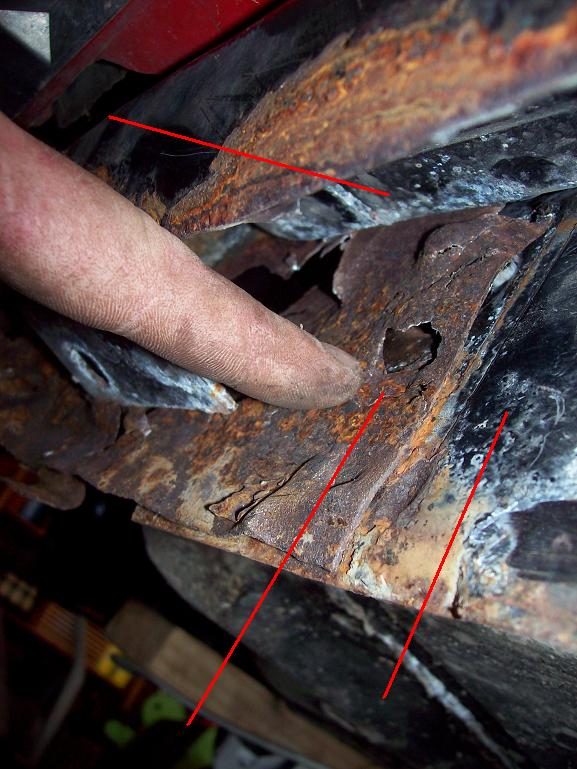
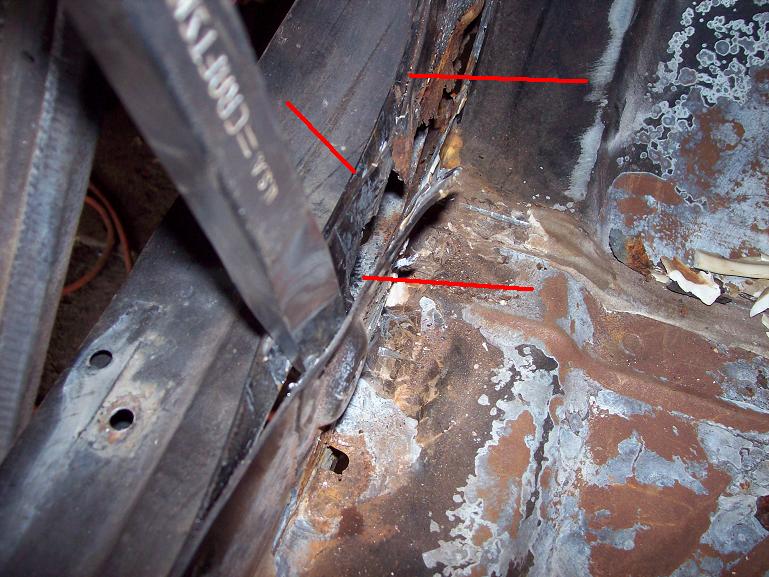
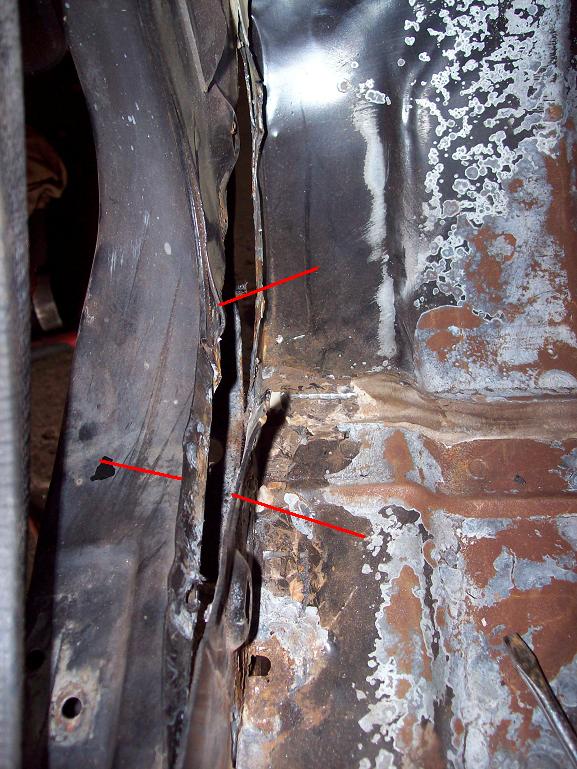
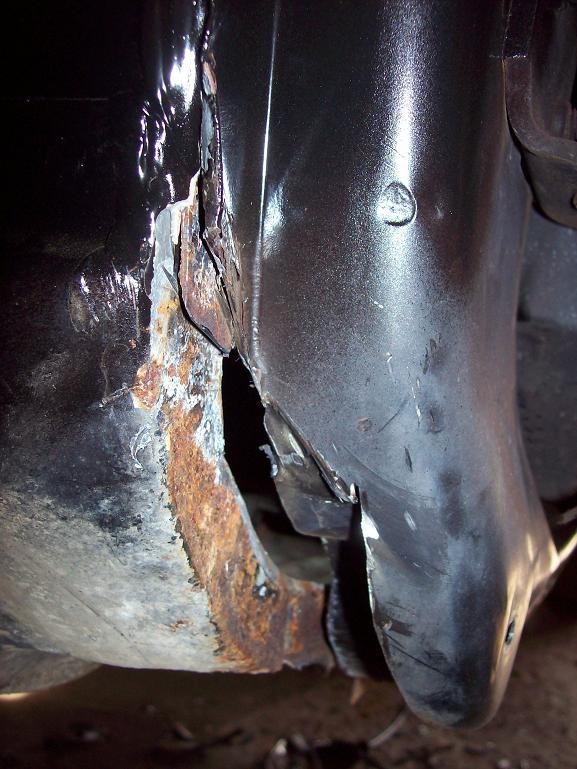
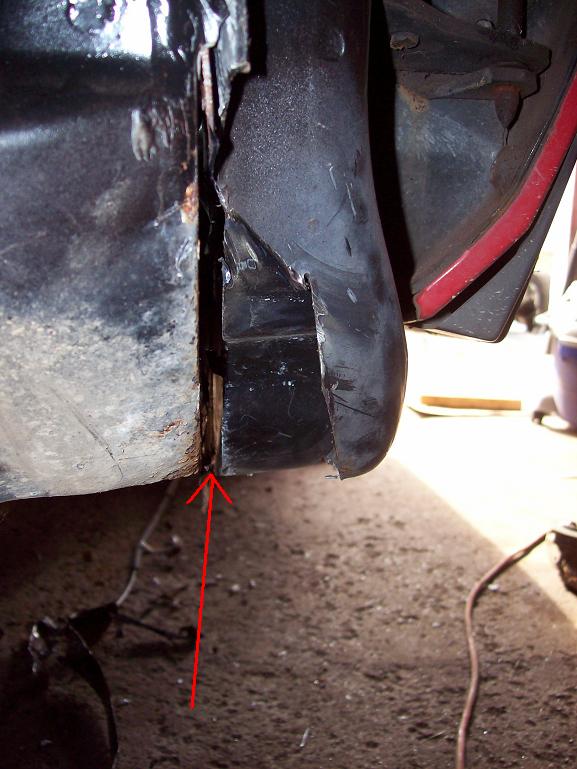
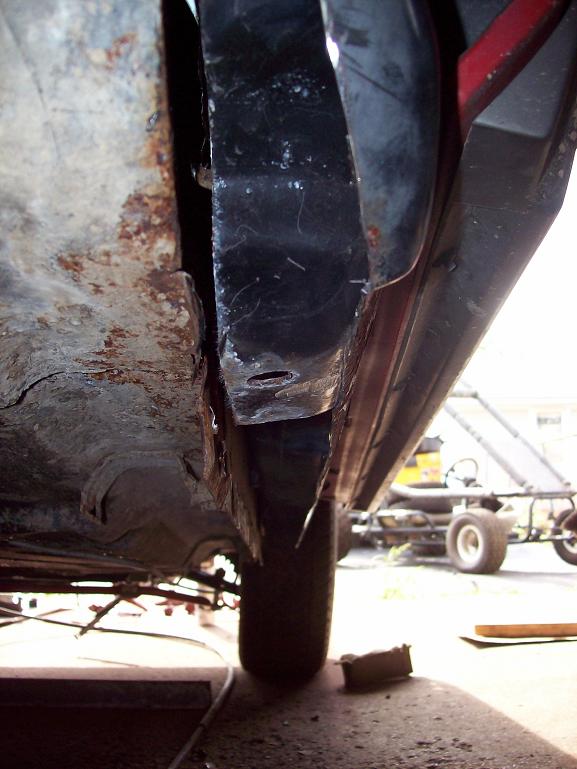
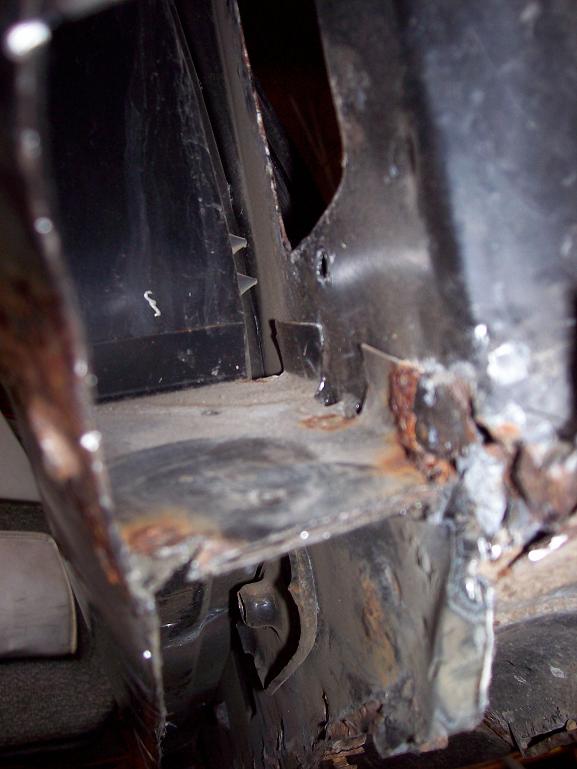
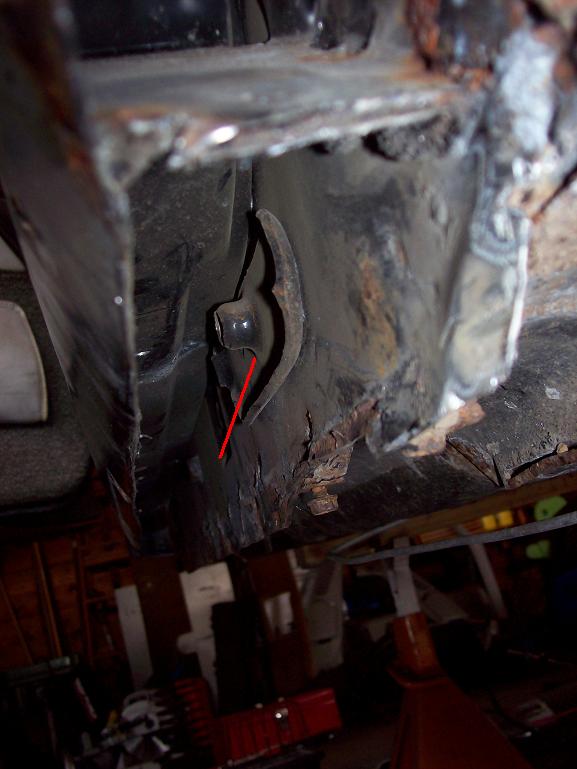
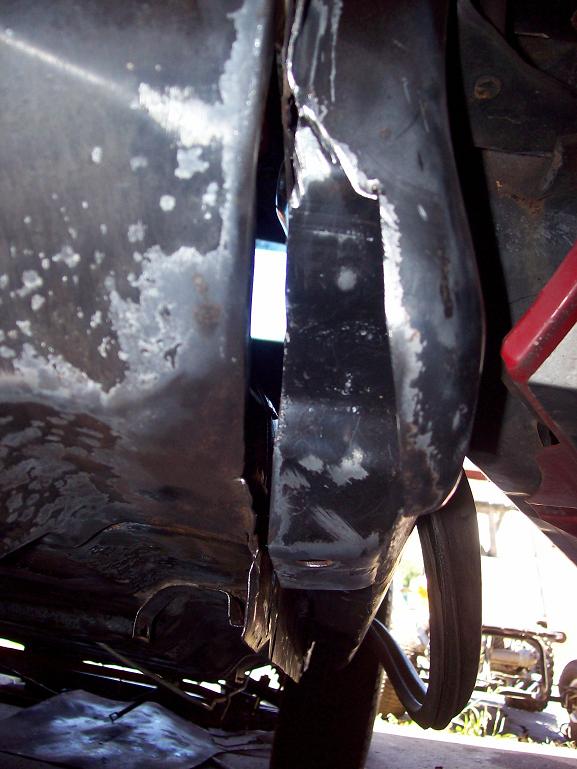
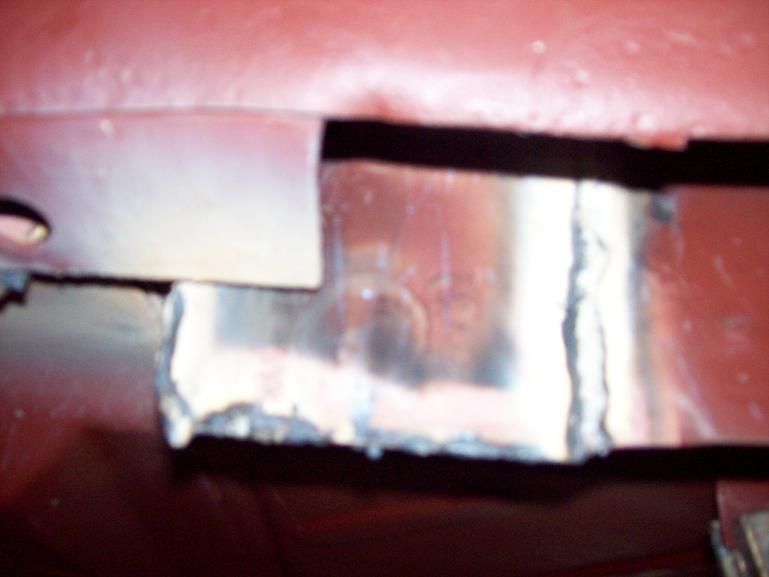
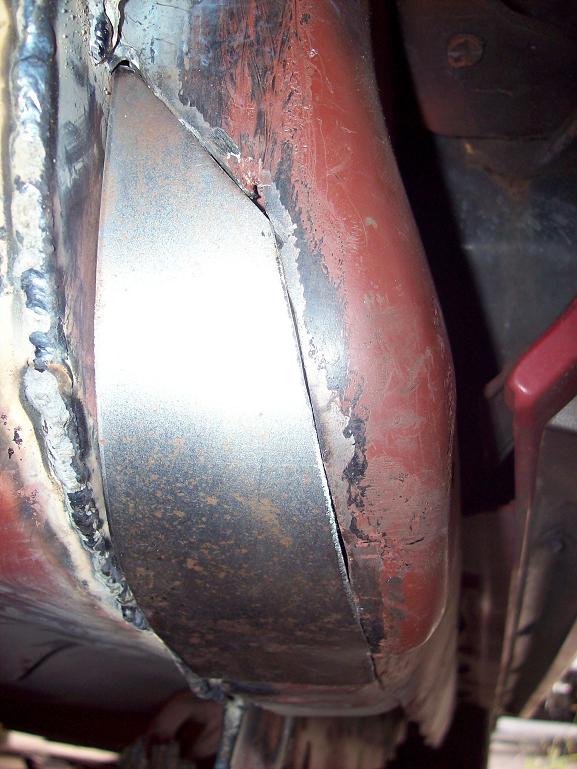
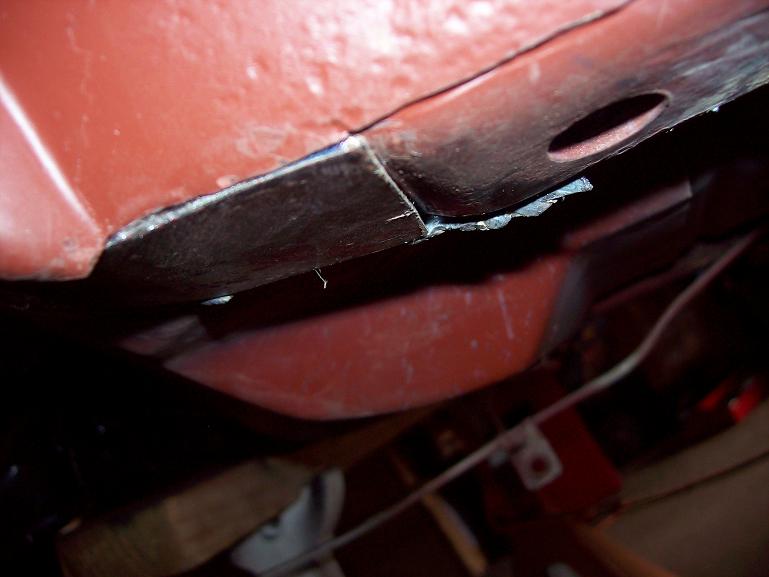
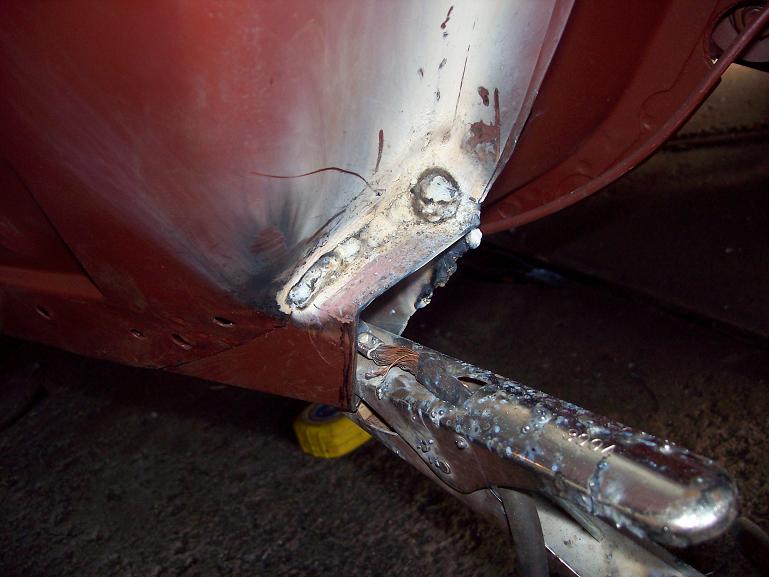
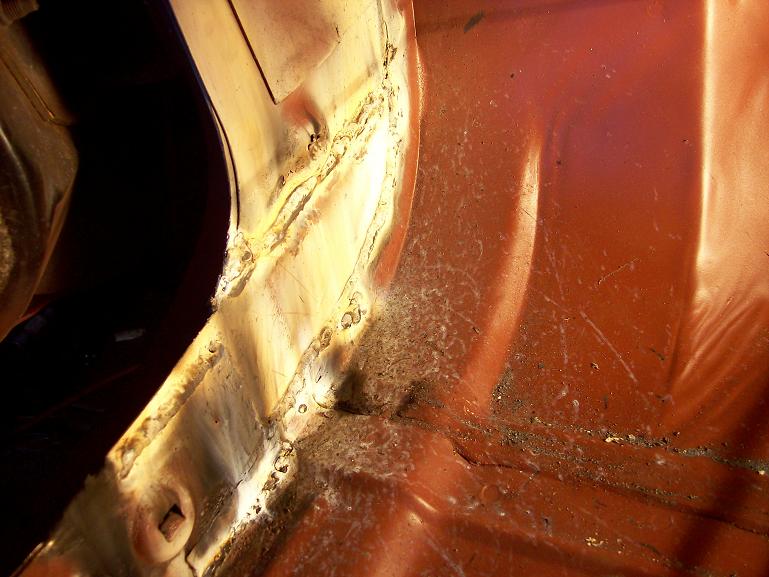
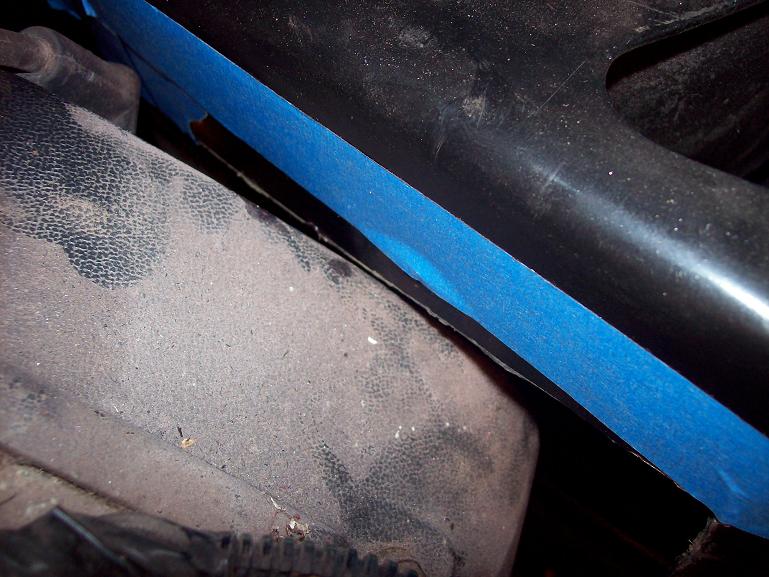
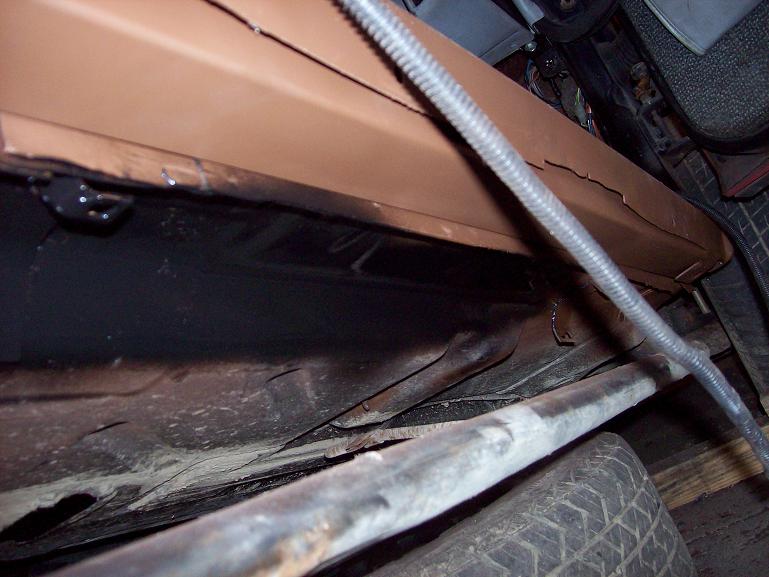
Need to remove one piece of rusted sheet metal: Closer look: Inside foot area- the surface rust is very light here on the floor pan: Looking where the rocker panel is cut out. There are 3 pieces of sheet metal that come together here and the middle one is the one that you will see rusted out. The outer pieces are usually intact: Use a chisel to break the spot welds and so you can seperate the 3 pieces: The middle piece has been seperated and cut out: Showing what is left of the front corner after it is removed: Outside front corner view: The gap is supposed to be there (red arrow). The square tube that I am going to weld in will bridge the gap and be seam welded: Looking down the length of the rocker:
Next is the rear drivers corner only.
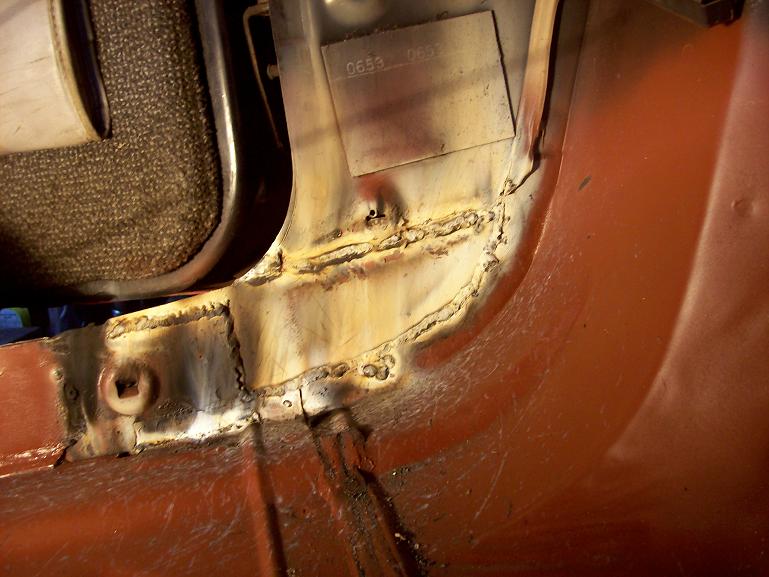
Looking straight up at the rear corner: This is the seatbelt mount. I need to remove this so I can fit the square tube into the rocker: It is a pain in the butt to remove because there are ALOT of spot welds! Showing the removed piece and the hole I will be patching:
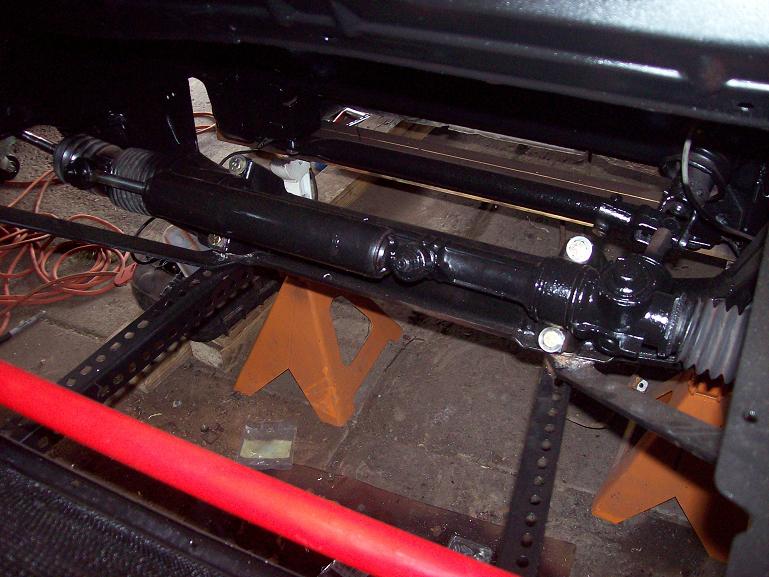
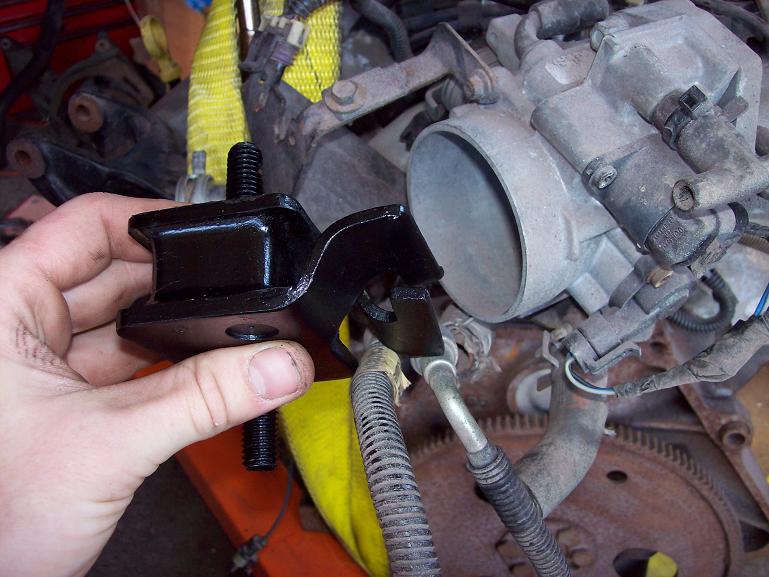
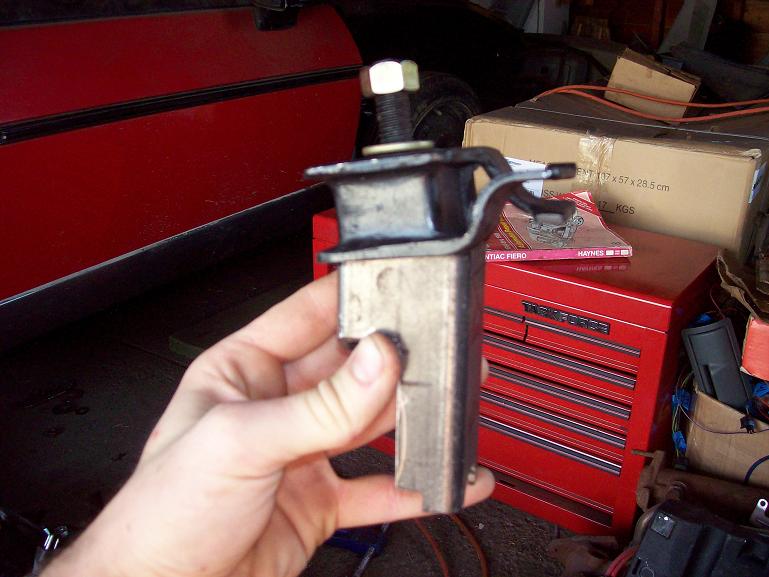
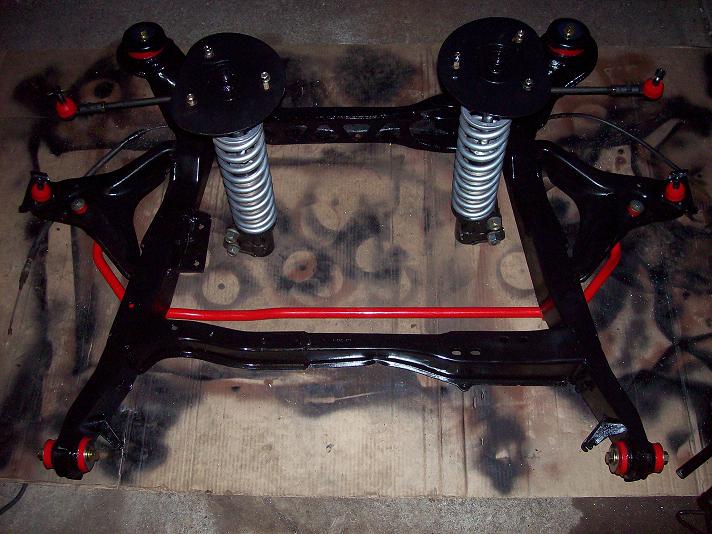
And here are some other progress pics. Front firewall being fitted in place: Front closer to completion: Front suspension getting painted: Rack and pinion- I have new boots on it now thanks to The Fiero Store! Spare tire tub has been painted high gloss black with paint made for plastic: I am going to try and make this mount work on my 3.4 DOHC project. It is two seperate mounts cut and welded together. This makes 2 mounting points for the engine, 2 for the transmission, and I might weld another engine mount on it later. The reason for it is I will be adding a turbo next year and I need the strength- might not need a "dog bone" mount if I add a 3rd engine mount.
Enjoy!
Mike
[This message has been edited by NYRED85GT (edited 08-28-2007).]
IP: Logged
01:35 AM
Oct 6th, 2007
NYRED85GT Member
Posts: 360 From: Niagara Falls, NY Registered: Apr 2007
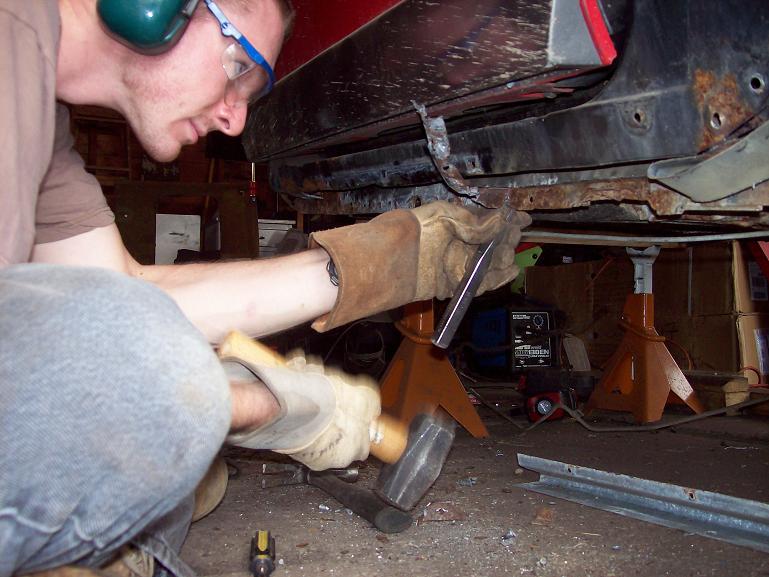
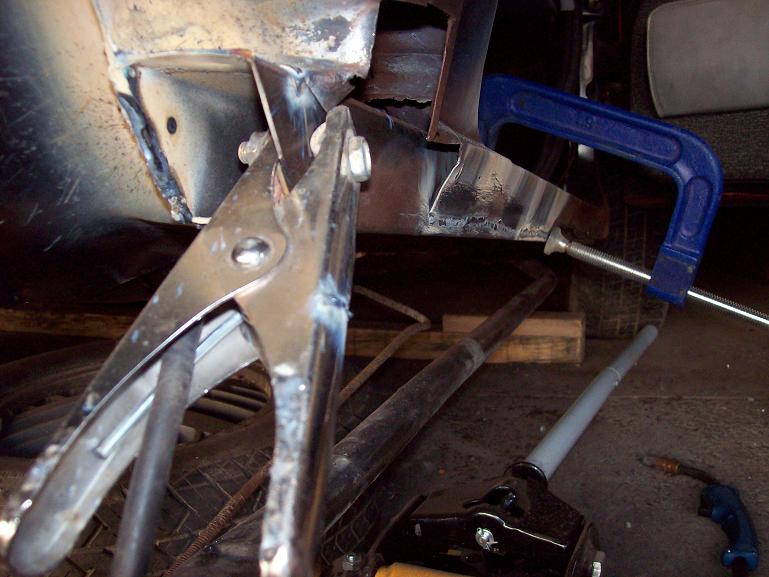
Cut out and cleaned up with a wire wheel on my angle grinder. Front inside corner has been cut out because of rust. Welding in new sheet metal on the front inside corner-rocker view. Cut a patch to perfectly fit. It stayed in all by itself. Square tube is in and getting welded at the rear. Square tube getting welded at the bottom. Me in action.
IP: Logged
02:19 PM
NYRED85GT Member
Posts: 360 From: Niagara Falls, NY Registered: Apr 2007
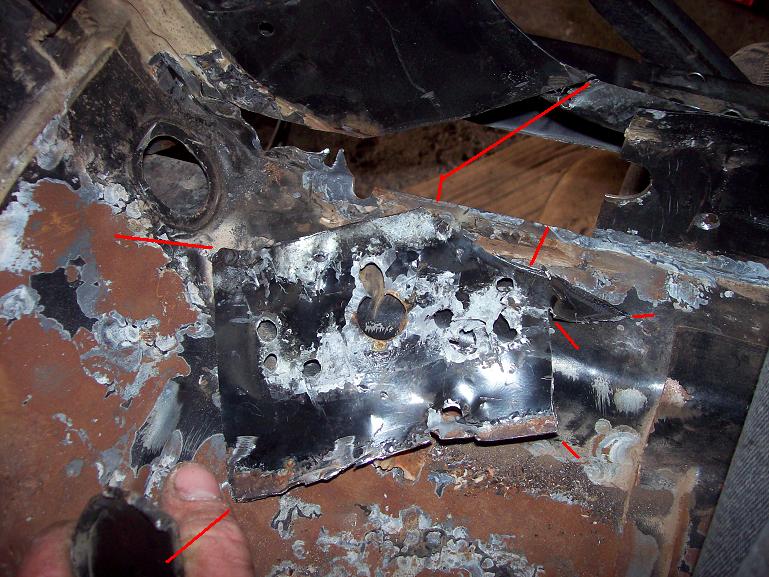
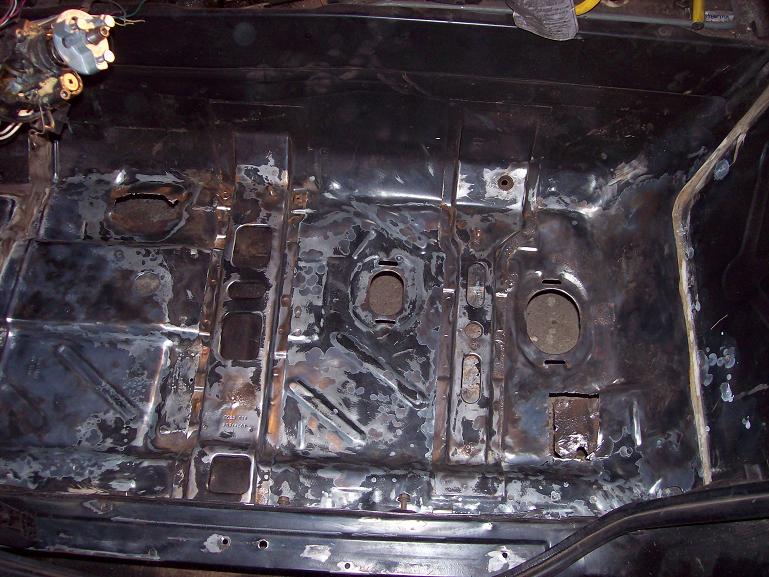
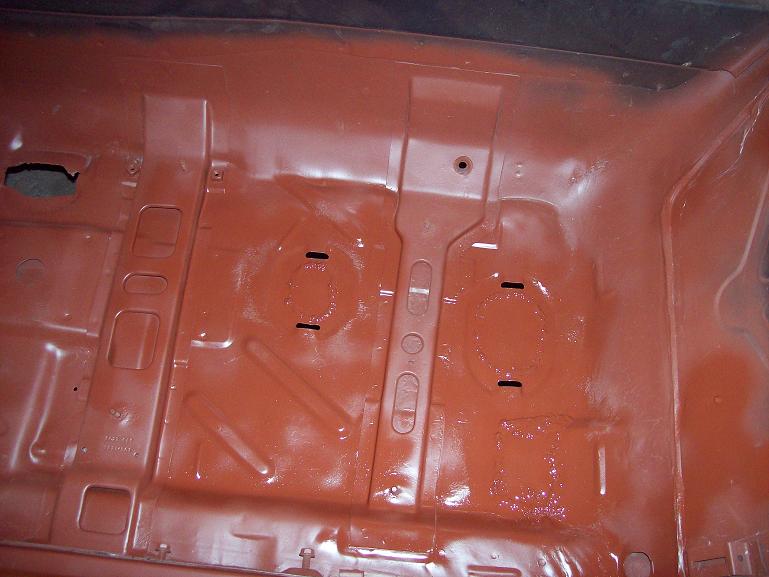
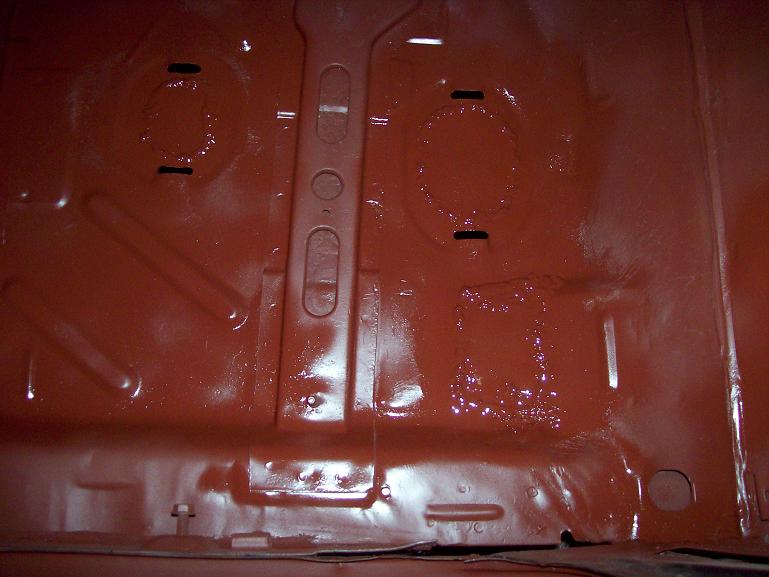
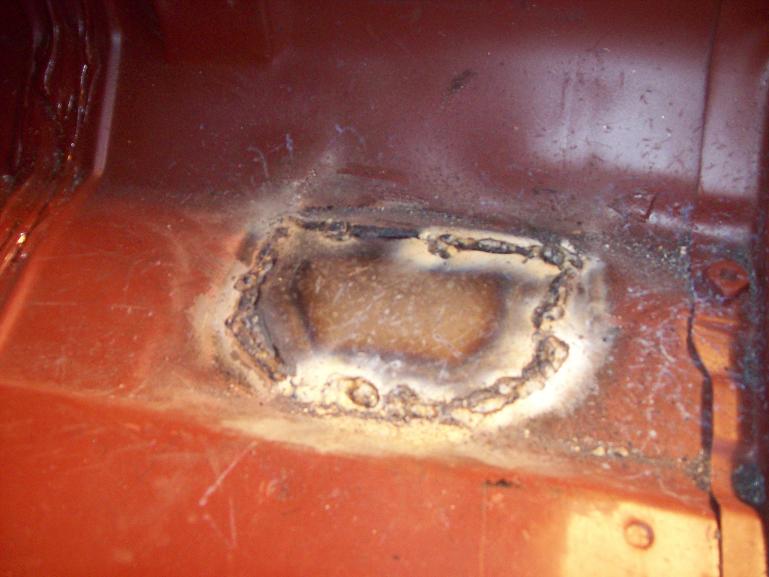
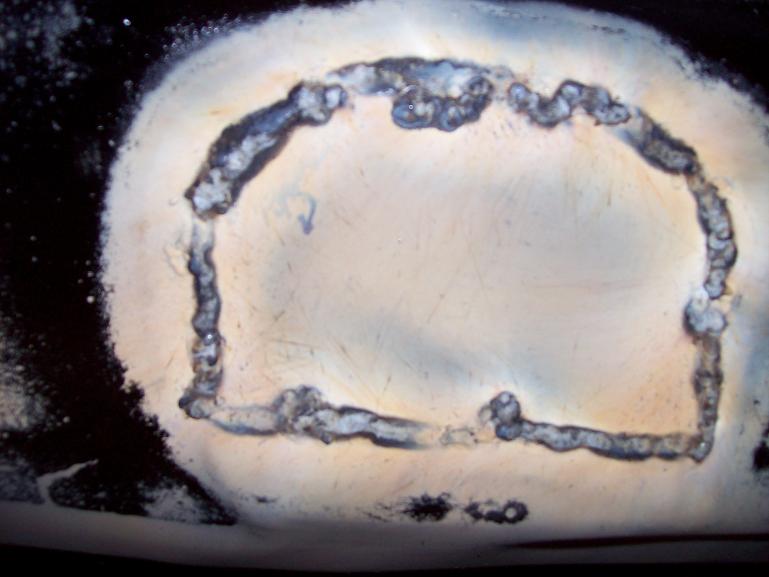
Now the floor pan. Look above and you will see what it used to look like.
Wire burshed to clean off the surface rust and loose paint. Three of the four patches welded in so far. Still wet coat of primer on it. Last patch on the drivers side. Top view. Bottom view. Inside front corner patch.
IP: Logged
02:26 PM
NYRED85GT Member
Posts: 360 From: Niagara Falls, NY Registered: Apr 2007
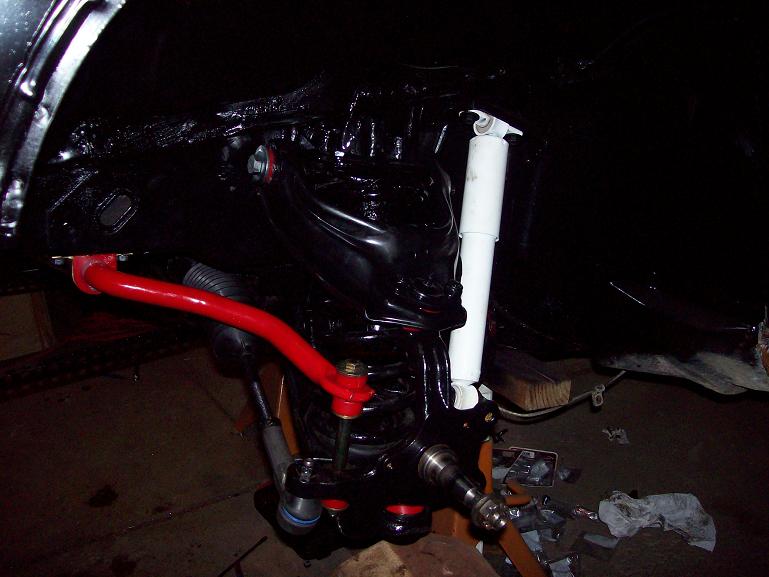
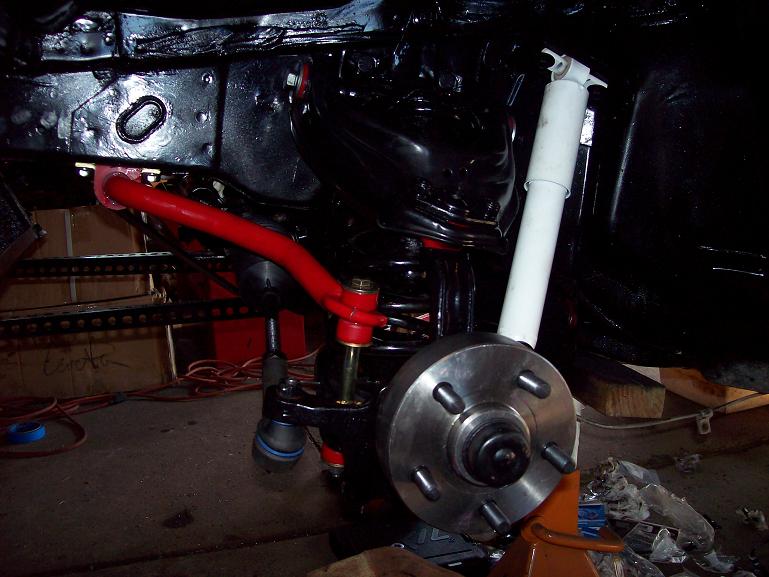
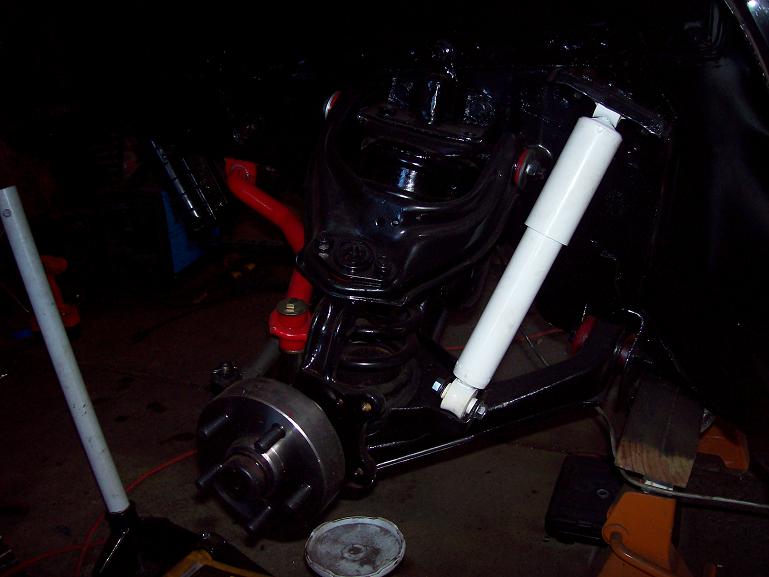
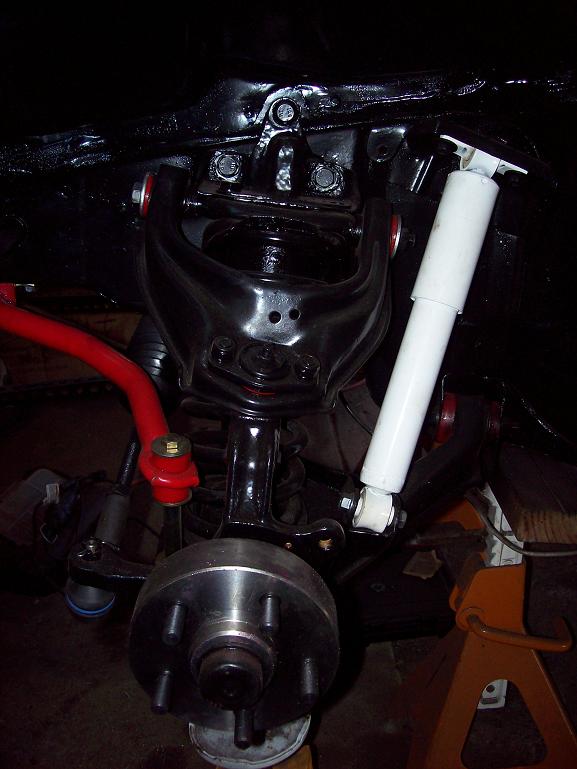
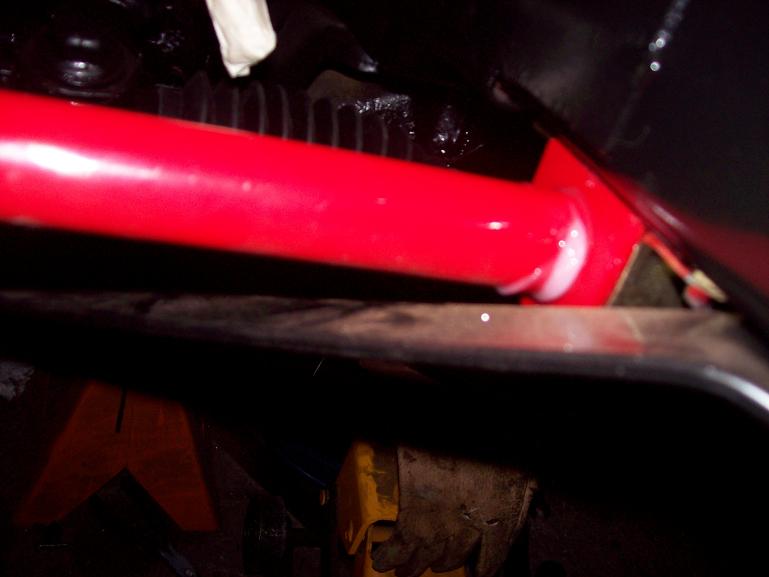
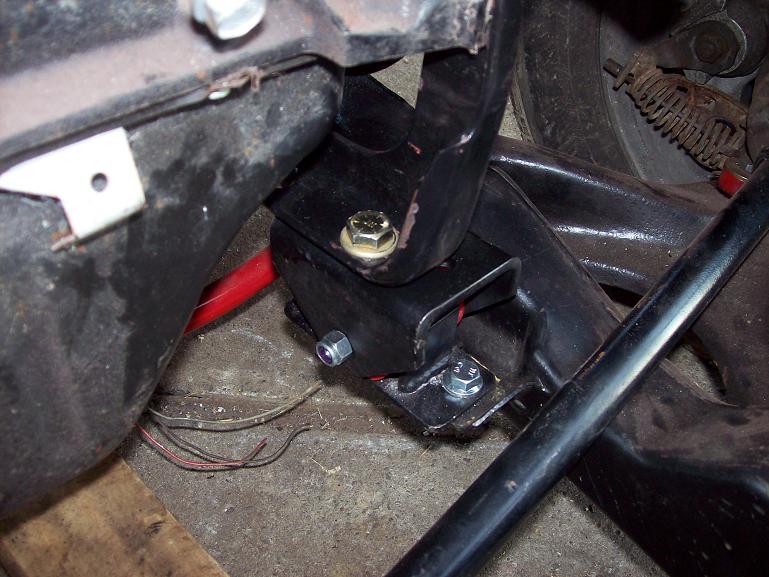
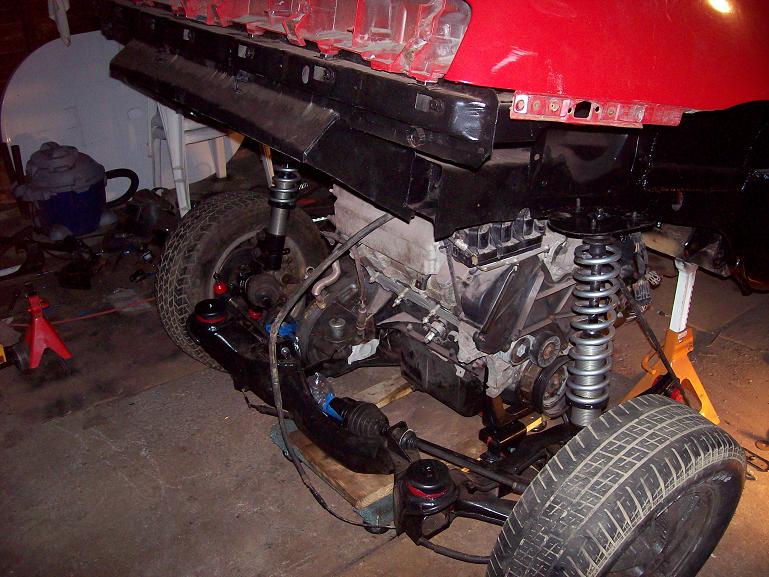
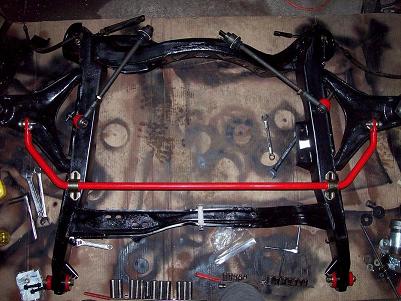
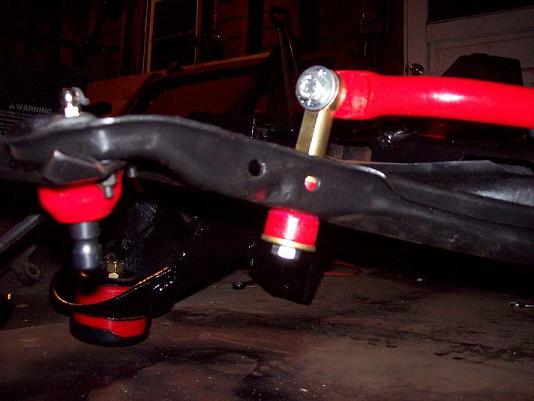
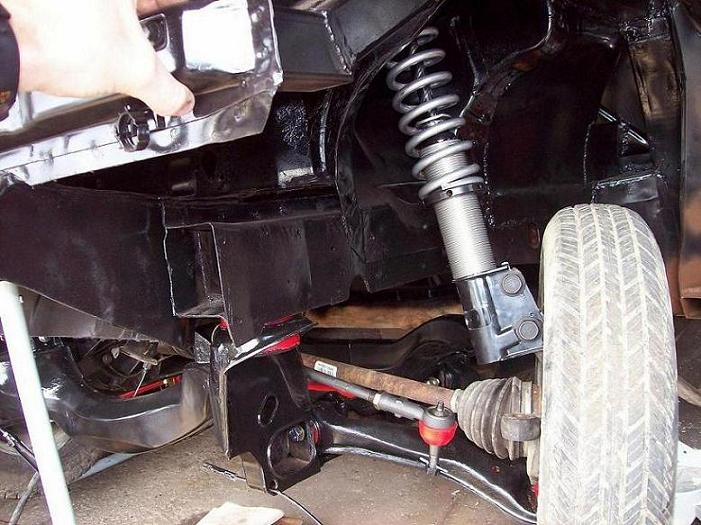
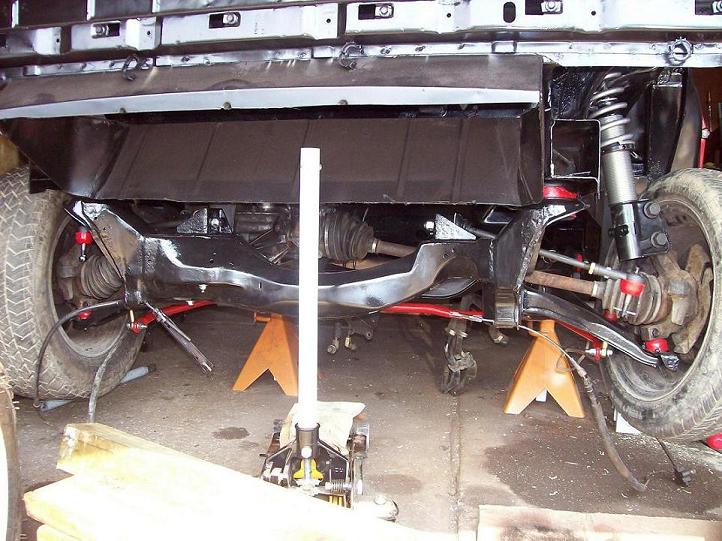
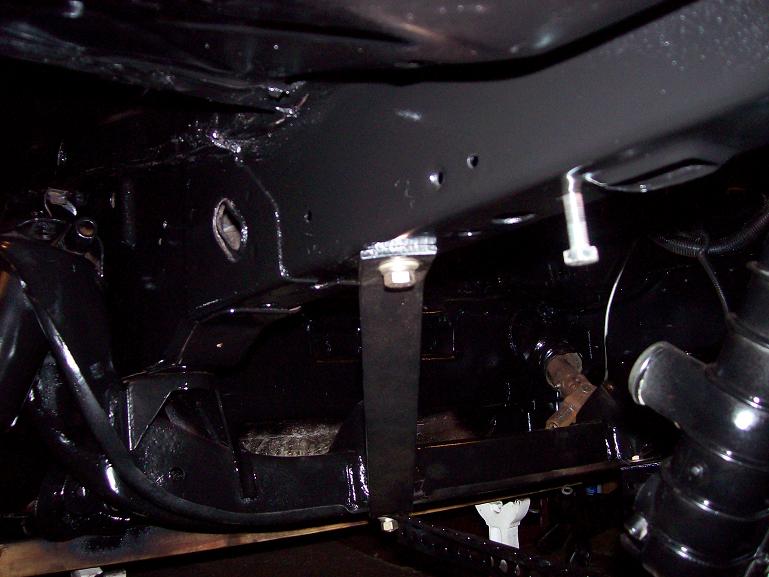
Front end is done except for brakes. The anti-sway bar was not mounted in the correct place, now it is......don't ask hehe.... I have about 1/4"-3/16" of clearance here.
[This message has been edited by NYRED85GT (edited 10-06-2007).]
IP: Logged
02:30 PM
NYRED85GT Member
Posts: 360 From: Niagara Falls, NY Registered: Apr 2007
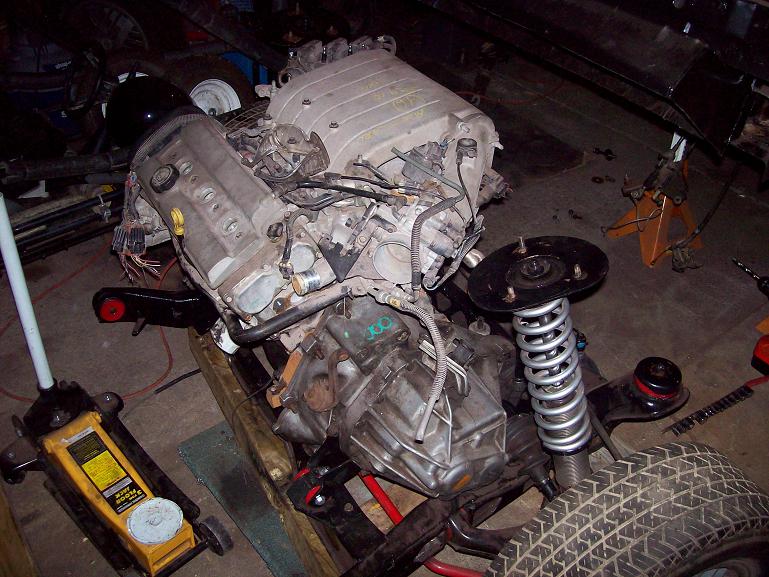
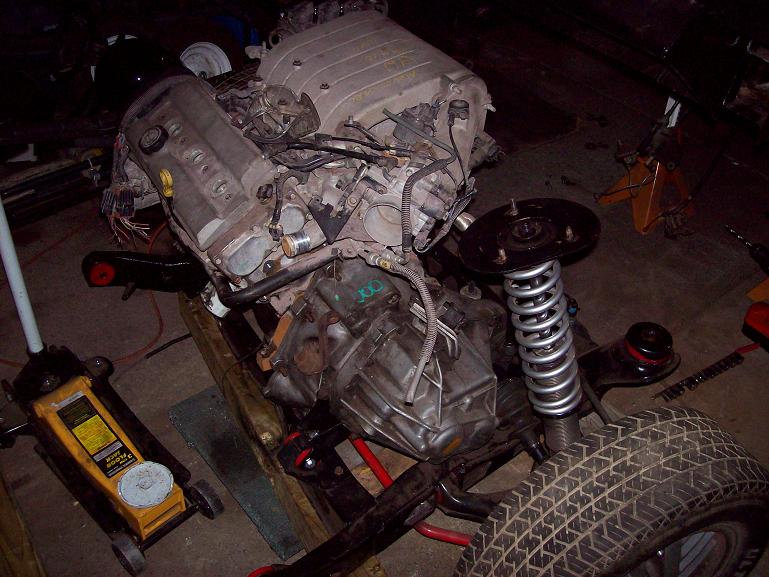
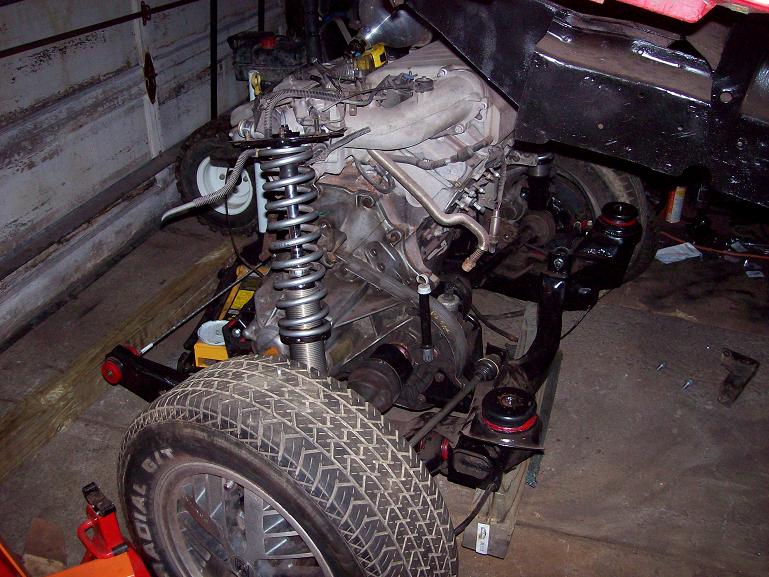
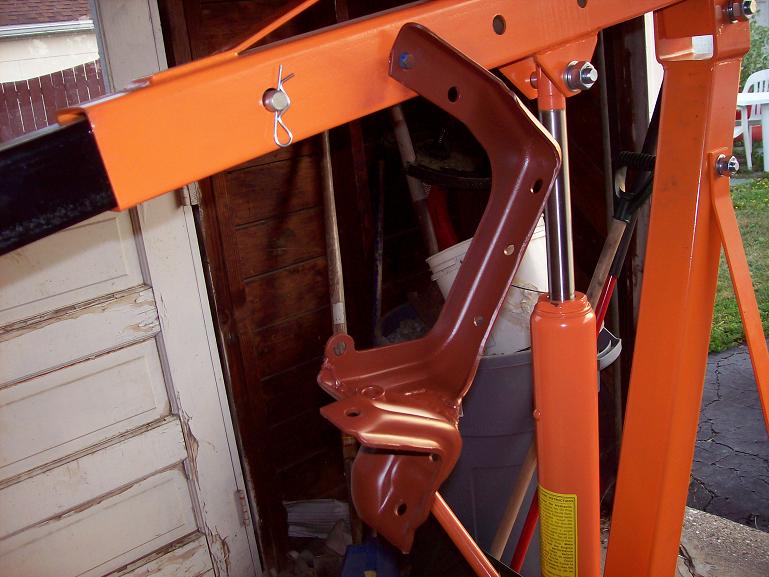
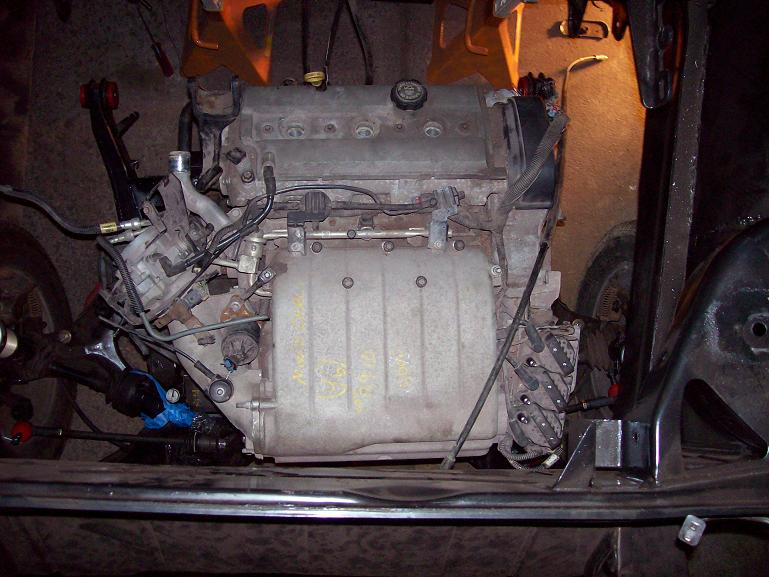
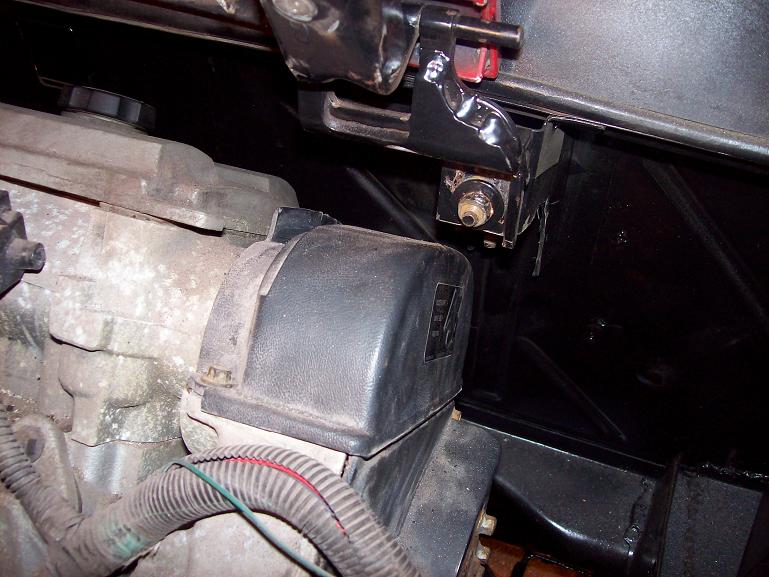
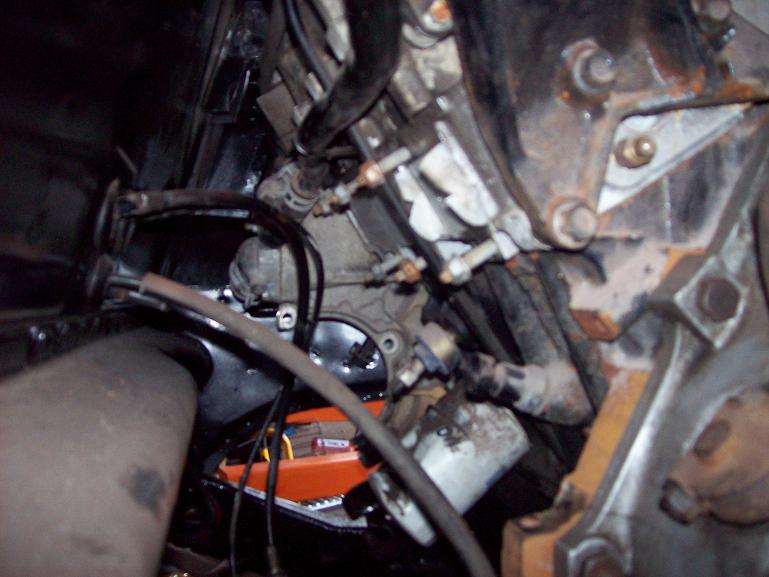
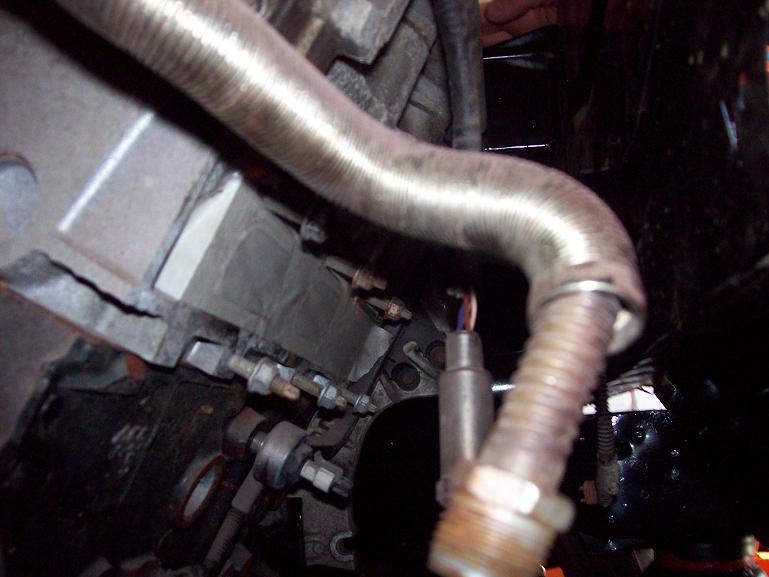
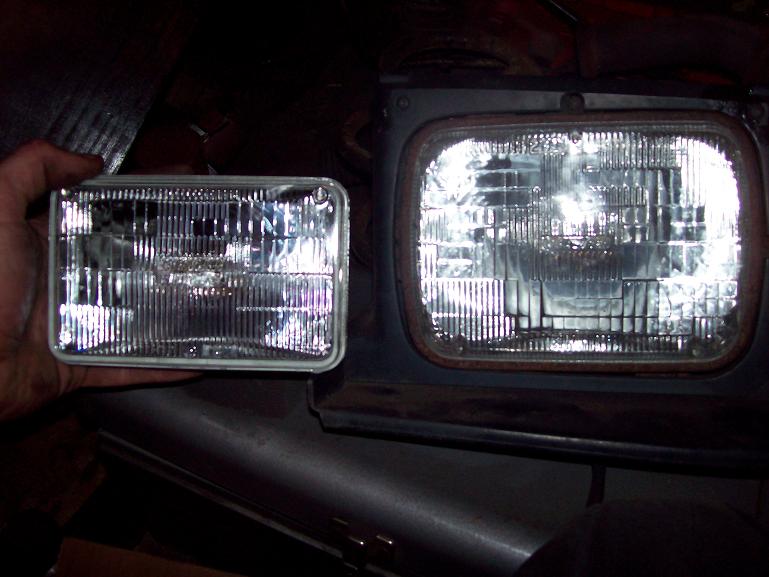
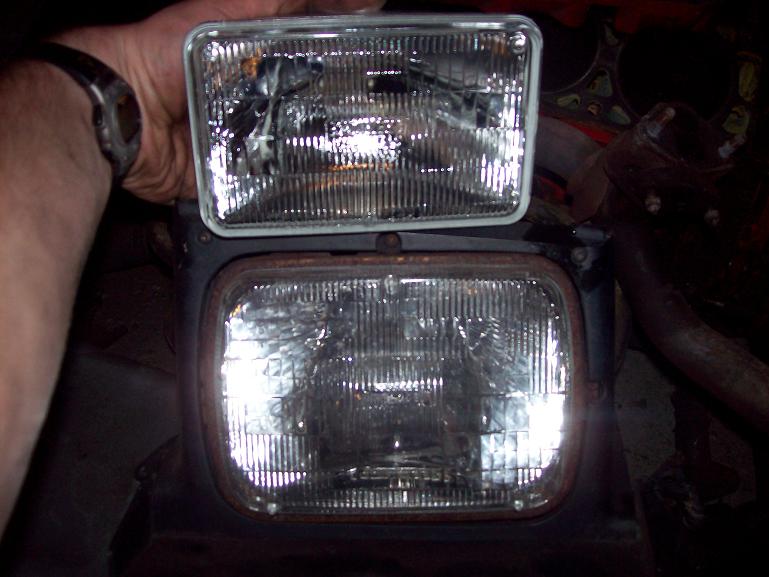
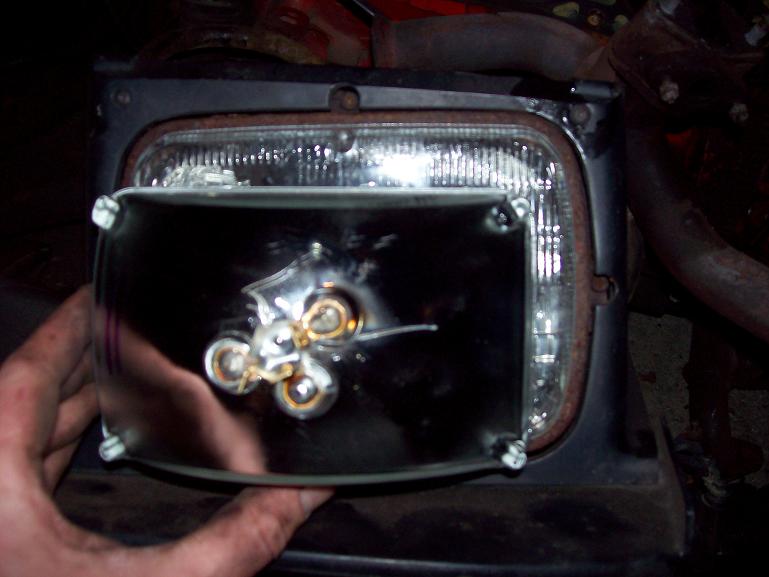
Engine is mounted on the 2 transmission mounts and resting on the stock position engine mount. I have not drilled a hole to connect the poly mount to DOHC engine bracket when these were taken. Newer pictures!! All of the bolts that came with the mounts that I bought second hand were either too short or too small diameter for what I have planned for next year. SO I bought some #12 metric grade 10.9 with the integral washers (the nuts and bolts flare out so you don't need to put washers in them). Front transmission mount. Rear transmission mount. Under the crank pully mount with a 1/2" grade 8 bolt connecting the DOHC bracket to the poly mount. This is posted above also, but here is the mount I am using on the pully side. It was made using two seperate mounts that were welded together to make sort of a "girdle." I think I will be adding another mount to the trunk side so more will be welded on. Here the the big Dodge truck mount. Prototype mount bracket for the Dodge mount at the firewall side. I need to make another so that I can get a socket through the bottom to tighten the nut. Possible dog bone mount? Just a thought at this point. Lining up the engine! Ohhh getting closer! Trimmed hinge. I will be welding the trimmed part back on so that it will also bolt up to the bolt on the bottom. Need to trim the "dog bone" mount some more. I have like 1mm of clearance from what I guessed it needed to be cut. Deck lid hits this lift point. It will be coming off soon.... How much room there is. Headlights I found at Advanced Auto. They are smaller, have brighter low beams, and are high beam/low beam all in one. The only thing is that they use a different 3 prong connector? Is there any reason I couln't just unsolder and resolder it to match the Fiero connector?
IP: Logged
02:56 PM
Oct 11th, 2007
NYRED85GT Member
Posts: 360 From: Niagara Falls, NY Registered: Apr 2007


 Sure it takes a little longer, but that time could also be considered useful in planning the next step instead of rushing to make mistakes. I think it's great that you're putting so much time into this project. Seeing someone else take stuff apart and put it back together certainly makes me feel more comfortable in tackling my project.