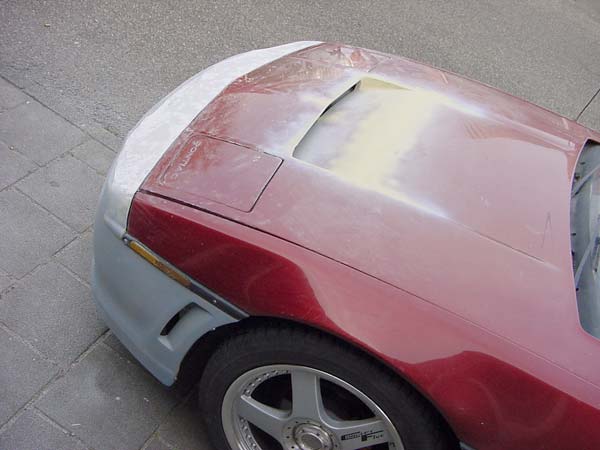
I chose a different route for my hood scoop project - I took the bubble off another rear decklid - reversed it cut an opening out and blended it into the hood. you can check some pics of it here (pardon the unfinished page - its free and i just use it to host my pics for online use)
[This message has been edited by Kohburn (edited 07-16-2003).]
IP: Logged
09:56 AM
JacobHaley Member
Posts: 269 From: Columbus, OH Registered: Feb 2003
cure time depends on humidity - temperature - and the cure time as stated on the resin you purchase they have everything from 5 minute to 2 hours resins
IP: Logged
09:53 AM
Smoooooth GT Member
Posts: 8823 From: Lake Palestine, Texas Registered: Jun 2001
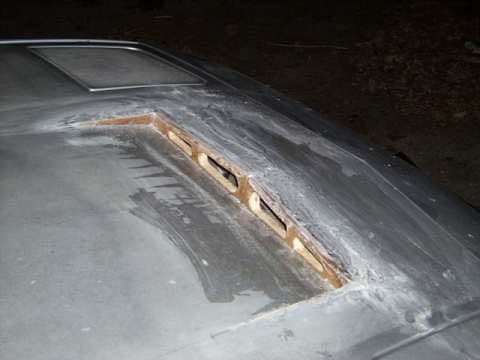
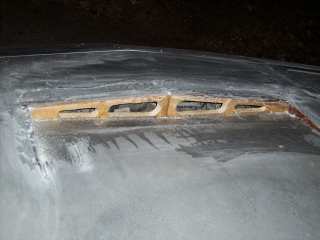
I have a small problem on the hood scoop project. First off I got it to where i cut the wall that seperates the hood down enough to where there wouldnt be no problem with the hood landing with the new scoop. Now I put it down to see how it would look and BAM, problem number 1... It looks like the hood wont close all the way. So i go in and check and trim out some more on the wall. I measured it and it looks perfect. Wont fall still. I pull the headlamp door up on the left side cause that side of the hood looked like the problem. the hood jumps down a little more when i pull the hood lamp door up. So now I got about 2 inches of space i still cant figure out. Especially when the hood is closed. It has nothing to do with getting the hood aligned, this i know for sure. Any ideas??? I'm thinking about taking the left headlamp out, since the right is already out right now too. Other than that I'm open to all opinions.
Kruz
------------------ These are the Kruz'n Machines: '84 SE 2m4 (PROJECT CAR that runs perfect) '87 GT V6 '83 Mint Dodge Ram 150 Royal
Just a suggestion, remove the headlight doors from your hood until you have fixed any alignment issues, then bolt them back on the already mounted hood. Only two bolts each and your job will be alot easier.
Ira
[This message has been edited by Monza76 (edited 08-21-2003).]
I didnt follow the first page directions right I think. I used the glass on the top with the fiberglass sheets and then I put the body filler which was still needed over that. I now just have to wait for it all to dry to sand it. I'm not sure if I messed up or not. Anyone have any clues?
Another quick question, what kind of primer is best used afterwords. I have more mods to be done to the body so it will be sitting there for awhile just primed and not painted. Is there a special type of bondo primer I need to use. I will be having maaco do the painting in the end when the entire body work is done. Thanks!!!
Kohburn: I like your decklid hump idea. It looks pretty cool.
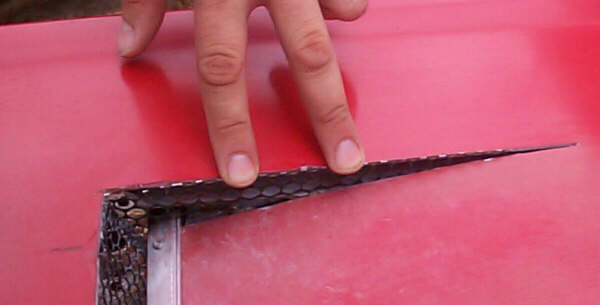
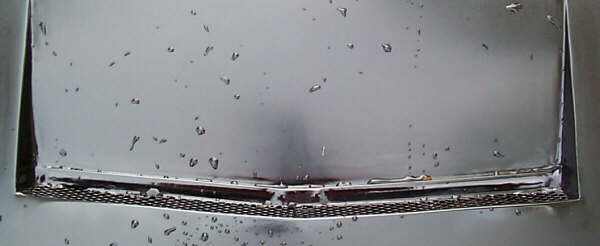
Everyone else: if you're looking for honeycomb steel mesh, one of my friends sells this stuff. He sells it on his website at www.mnpctech.com. Look for the "modder's mesh".
(sorry, that was kohburn not kruzn machines)
[This message has been edited by Blacktree (edited 07-20-2003).]
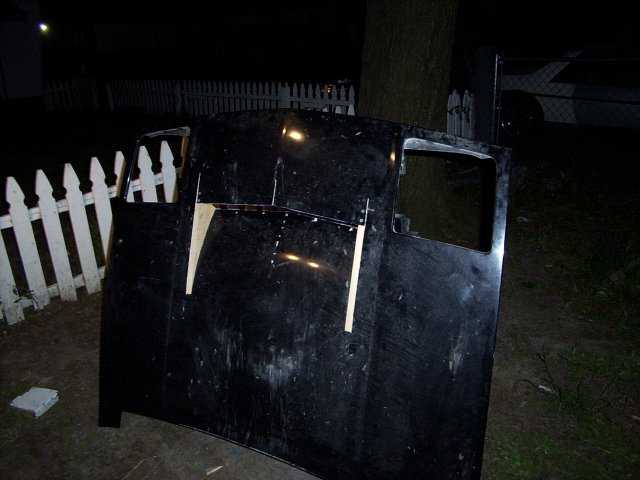
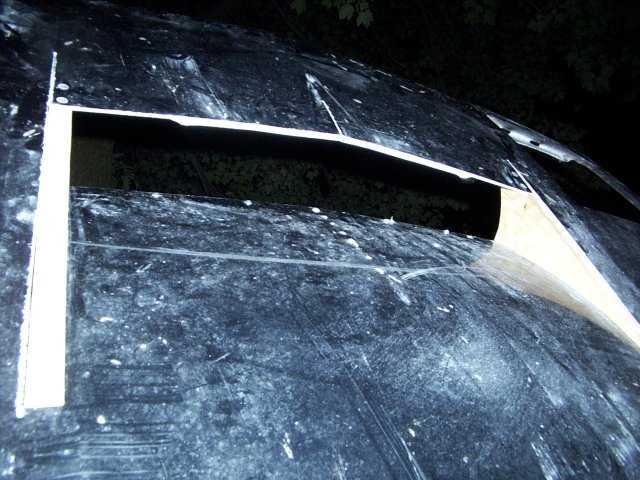
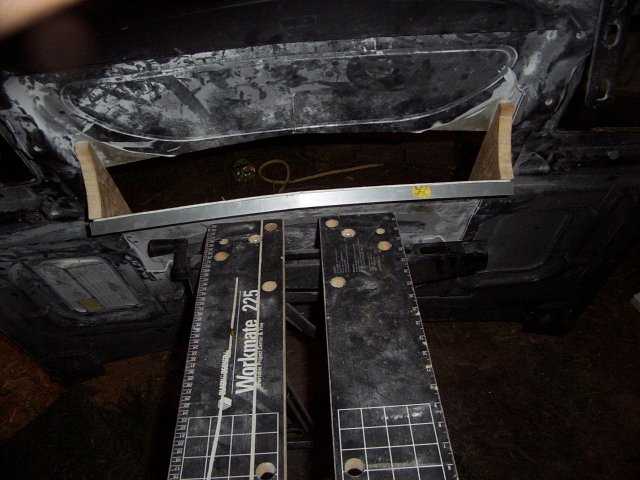
The first one I did is on the car now. I was working on another one but I have changed my design again and will start a 3rd and final one. This time I wont be using wood I will use 16 guage sheet metal.
This is my first one in progress.
now for my second and larger more functunal one.
I had some problems with the wood swelling. That is why I am not going to use it on my next one. One problem I have with the first one I did was that it was to far forward. The opening was above the radiator and a little forward. The second one I moved farther back which should make it work better. However I will have to modify the wall so the hood will fit But not to much. My next one will need extencive modification and I will loose my spare. but thats what I want. Pics to come..
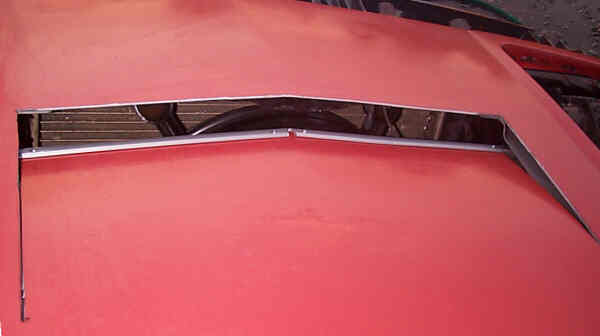
Earl, I like your second design, too bad about the problem with the wood. Mine is somewhere between your two designs in functionality:
I do get flow through the radiator but not to the extent you are. It is better than the wood block types however because the opening is not as restricted. Hopefully, by using aluminum, I will not run into any problems with cracking.
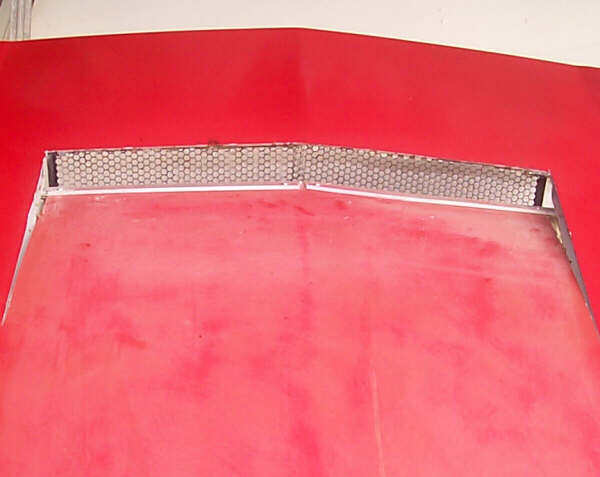
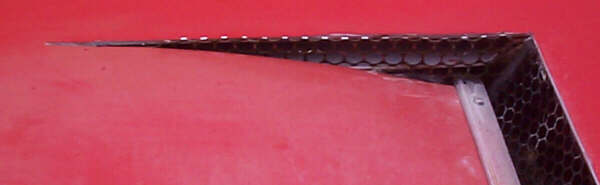
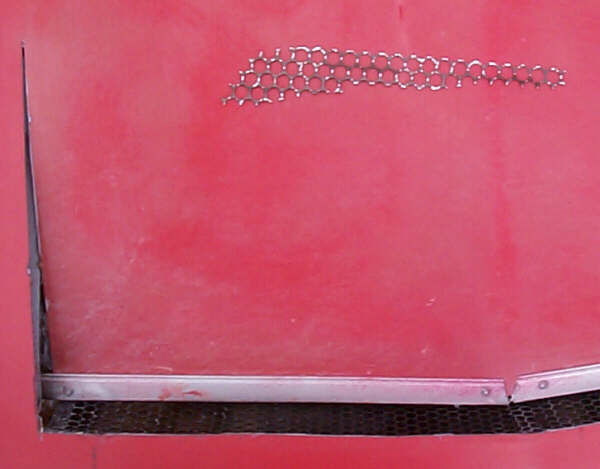
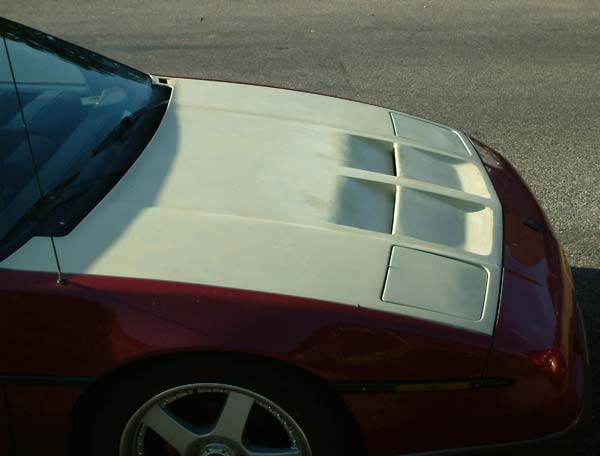
Just need to sand and shoot the final paint, used this gloss black rust paint because it would show flaws well, and fill scratches. It will be sanded off and the hood will go red (except fot the grill which will remain black).
It isn't perfect but at least it is presentable.
This thread has been the motivation I needed to try something on my own (even if it did take almost 2 years for me to get this far.
Ira
[This message has been edited by Monza76 (edited 08-18-2003).]
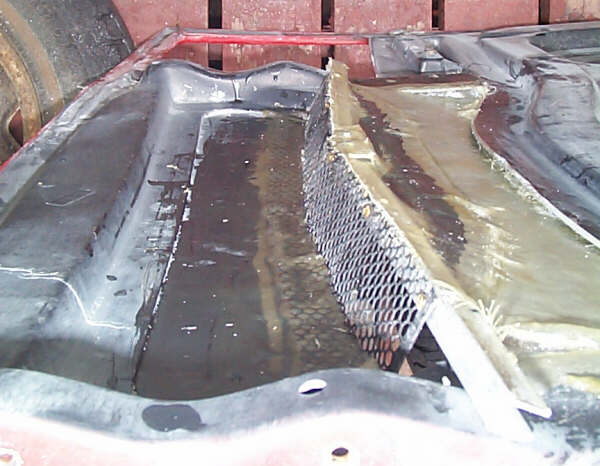
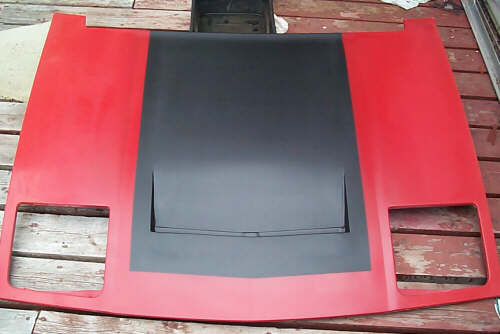
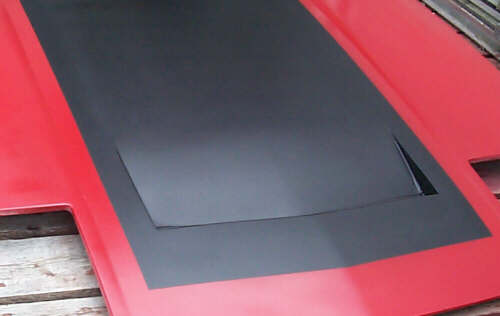
Changed my mind, went with the big flat black stripe, same paint as on the trailing edge of the rear spoiler, I like the continuity. The hood goes on next nice day, here it is:
and a little closer up.
and the headlight covers:
you like my workbench, an old changing table
Ira
A special thanks to My7Fieros, Archie, and anyone else who helped me make this a reality.
Hey Kruz, here it is, next shots will shoe it on the car.
good that this is still floating around. i'm going to replace one of my vents with this style. wondering how far you can push the cut part down if you use the original cut measurements? i'd like to push it down as far as possible.
IP: Logged
12:07 PM
Dec 18th, 2003
Bradbitz11 Member
Posts: 1826 From: Kawkawlin, MI Registered: Dec 2002
Not sure if I'm getting Earl's plan correctly, but it seems as though he is using the pieces of wood on either side to hold the vent portion down, as well as to bond the filler to. I like that, because you could theroetically leave the "front" open, whilst still having the vent supported down! Correct me if I'm wrong, because when I do this, that seems to be the way I'm going to want to do it.
------------------
86 GT -- All Options except Performance Sound
IP: Logged
08:34 PM
Archie Member
Posts: 9436 From: Las Vegas, NV Registered: Dec 1999
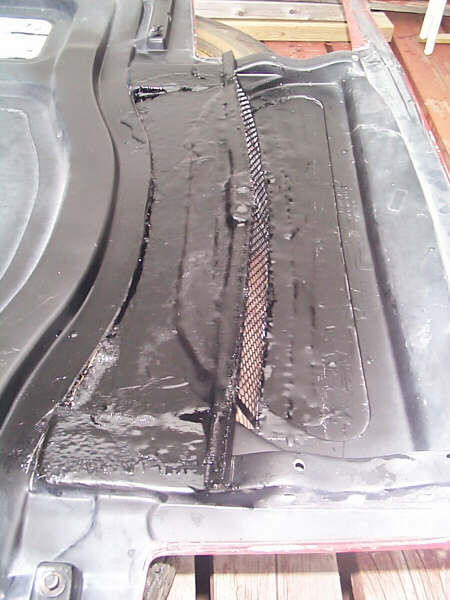
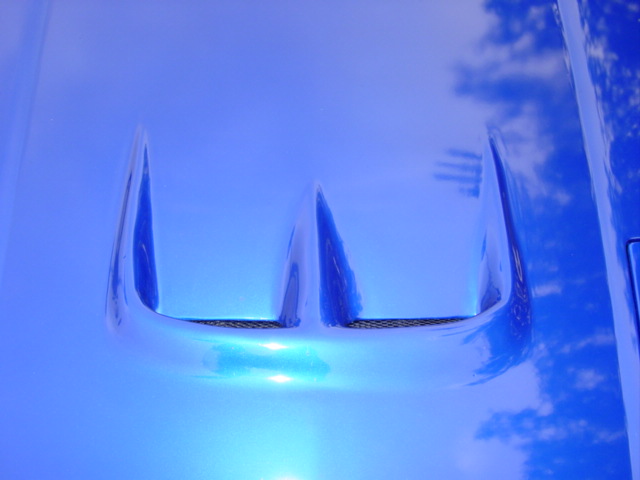
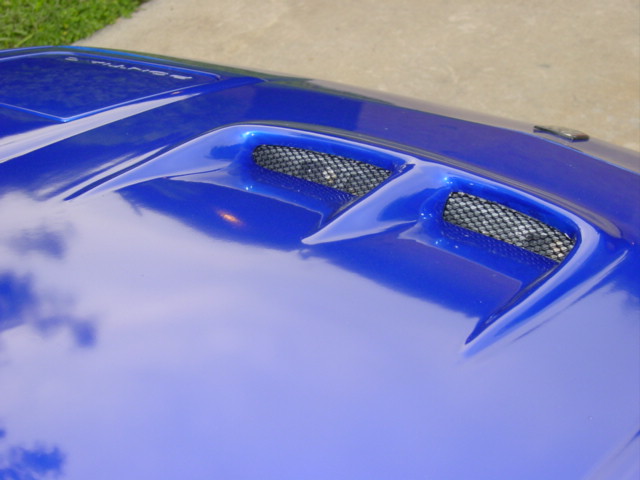
I made my hood scoop a little different than those. I don't have any buildup pics, but it took a long time to do. Lots of bondo and fiberglass. It took a guesstimate of about 60 work hours.
Some people have confused this with rockcrawls hood vent, but this is all hand made. What do you think?
I made my hood scoop a little different than those. I don't have any buildup pics, but it took a long time to do. Lots of bondo and fiberglass. It took a guesstimate of about 60 work hours.
Some people have confused this with rockcrawls hood vent, but this is all hand made. What do you think?
That one looks great too! Very unique design! !!!
------------------
IP: Logged
01:34 AM
gaas88 Member
Posts: 435 From: Burlington,Ontario,Canada Registered: Dec 2003
Very nice. I really like the fact that the scoop is recessed yet raised above the hood line at the same time. Very ingenious design and I can appreciate the amount of hours that you put in, + rating for you.
IP: Logged
08:20 AM
Fie Ro Member
Posts: 3735 From: Soest, The Netherlands Registered: Sep 2001
87GTBRO, Nice scoop. And being that it is hand made makes it even nicer! I know the time and skill that goes into custom work. My body man spents hundred of hours on my Karmann Ghia to get that body right.


 Curing time depend's on ALOT of thing's...