I was gonna wait till tomorrow when I could post the pics, but my excitement has gotten the best of me. I finally finished one of my Area 51 modifications-anyone ever before seen on a fireo....a shaker hood scoop? Yep, that's right,just completed the fabrication and installation of my new shaker scoop! (remember I have a 390 4bbl on my 85 GT) Pics to be posted tomorrow.
IP: Logged
09:23 PM
PFF
System Bot
Formula88 Member
Posts: 53788 From: Raleigh NC Registered: Jan 2001
I hand laid the fiberglass to form all of the parts of this assembly. Took me about 3 days to do the whole thing. It encloses an 8" air filter. It has provisions for capturing water through the opening in the hood, as well as draining off any water that might enter the scoop opening. Hoses route the water out of the engine compartment. More Taijiguy AREA 51 pics to come
[This message has been edited by Taijiguy (edited 04-30-2001).]
IP: Logged
08:49 PM
May 1st, 2001
Eric Member
Posts: 916 From: Columbus, Ohio Registered: May 99
I wouldn't say it shakes a great deal, since I have poly bushings in the dogbone. The rubber bushings in the lower mounts allow for some amount of movement. So it does respond. I had an image in my mind of what I wanted, and this turned out as perfectly close as I could ever hope of getting to that image.
Eric, I didn't know there was another autocross this weekend, I'd love to come out. Where is it this week? ~Taiji
IP: Logged
07:46 AM
WKDFIRO Member
Posts: 1637 From: Cerritos, California, USA Registered: Nov 1999
Well, the plumbing is pretty simple actually, it just sits right on top of the carb. There's a flat base plate with a 5 1/8" opening that sits on top of the carb. The filter sits on top of the base plate, and has a cover. A threaded rod runs through the cover as any air filter, and helps to hold the filter, and the base plate in place. Then the scoop is attached to the base plate. I've been playing with a method of doing this with the fuel injection and I have it pretty much worked out, but I don't know if there's any demand. Would anyone be interested if I were to make these for fuel injection? They would probably be a bit pricey since it's hand made....although I could probably make a casting to cut down fabrication time. Just curious... ~Taiji Just another angle
During the fabrication and test fitting stages
[This message has been edited by Taijiguy (edited 05-01-2001).]
IP: Logged
02:58 PM
rogergarrison Member
Posts: 49601 From: A Western Caribbean Island/ Columbus, Ohio Registered: Apr 99
Thanks Roger. The manifold is an Edelbrock Torker II. It's a two piece setup with a lower manifold, and an upper piece that you can get in a two barrel, or four barrel design. And of course, I opted for the 4 bbl, otherwise whats the point, eh?
IP: Logged
03:53 PM
PFF
System Bot
Oreif Member
Posts: 16460 From: Schaumburg, IL Registered: Jan 2000
Looks good! OK now, What did you do to adapt to the carb? What size carb is it? Is it possible to take a stock 2.8L and retrofit it to a carb? Where did you get the manifold? How does going to a carb affect the computer? What about the fuel pump? Now you've got me VERY curious. I think going to a carb would make adapting my Indy scoop a breeze.
(OOps, I just re-read the first post 390 4-bbl, what brand?)
[This message has been edited by Oreif (edited 05-01-2001).]
Oreif- It's a Holley 4160 Series, (8007 stock number) Actually, the carb retro is pretty easy, my 2.8 is a standard block. I did the mod primarily because I bought the wildest cam I could find, and it was just too much for the fuel injection system, even with an ADS Strip Chip. (The MAP sensor was always confused) And I just didn't have the cashflow for an aftermarket F/I system, or custom chip work. The manifolds I got from Jegs and Summit (upper from one place, the lower from the other, each had one piece in stock but not the other) It's a direct bolt on to the 2.8. I used a distributor from a late 70's or early 80's Blazer 2.8 for the vacuum advance capabilites. The computer is non-existant. I sold it. As for the fuel pump, I just modified the wiring so it operates as stock, running through the oil sending unit. I installed a tee fitting, with a 3/8" inlet, a 1/4" outlet that serves as a return line, and another 3/8" line that feeds the carb. I used a small clamp to add restriction to the return line. I need to install a bypass fuel regulator when I can afford it, since the current method isn't very precise and I wonder about fuel pressure. All in all, it runs pretty good. I still average about 20-22 mpg at 70-75 mph (I modified a 5 speed from a front wheel drive while I was at it) And it runs great. I posted MP3' of the way it sounds a while back, http://members.core.com/~taijiguy/zerotofifty.mp3http://members.core.com/~taijiguy/Zerotosixty.mp3 I love the way it sounds with the 4bbl on there.It's alot deeper and authoratative.
If you decide to do the mod, let me know, and I'll give you my carb tuning specs. I mentioned earlier, I found a guy in AL who sells parts really cheap, and seems to be a wizard with them. He's offered to help me tune the carb for best performance, so I'm sure whatever I do should get anyone else with a similar motor pretty close to optimum. I want to do some serious autocrossing, and he told me the idle circuit can make or break an autocross car. Can't wait to impliment his ideas and see what happens. ~Taiji
[This message has been edited by Taijiguy (edited 05-01-2001).]
IP: Logged
07:18 PM
Mach10 Member
Posts: 7375 From: Winnipeg, Manitoba, Canada Registered: Jan 2001
Upper and lower pieces were about 100 each. Carb was around 130 on Ebay. Distributor ran, oh, 40 bucks from a boneyard. I installed an Accel coil pack just for good measures. In all, I spent maybe 400 bucks on the project, but then I sold all the fuel injection components, all the way down to the air box, and recovered almost every cent of my investment Not too shabby.
Formula: You might be able to make an adaptor that would allow you to use the stock air intake setup. I probably could have used a low profile filter, but I've always wanted to do this project. with the acrb in place on top of the Edelbrock, there's only about 4 to 4 1/2 inches from the carb throat to the bottom of the deck lid. Allowing 1/2 to 3/4 inch for movement, it doesn't leave alot of room. I'll be happy to help you design something if you want. LMK.
Frosty: Thanks for the compliment...I'm actually thinking of adding a glass pack into the system to tone it down a bit. It's just a wee bit raucous for me....but I do love the way it rumbles and burbles
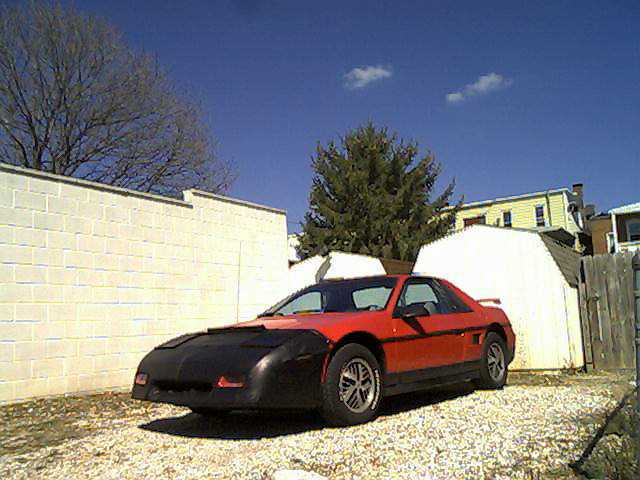
Here are more Area 51 pictures. The quality isn't great, but you get the idea. The hood is modified to take a set of Beretta headlights. I'll porbably sell this hood if anyone is interested, I've decided to go with a shorter set from a late model Cutlass. I was planning on installing a set of LED turn indicators next to the headlights.