Pennock's Fiero Forum
  Technical Discussion & Questions - Archive
  Spark Plug Wire Organization

T H I S   I S   A N   A R C H I V E D   T O P I C
  

Email This Page to Someone! | Printable Version


Spark Plug Wire Organization by Ry86GT
Started on: 10-29-2012 02:48 PM
Replies: 35
Last post by: PatrickTRoof on 05-23-2013 02:06 AM
Ry86GT
Member
Posts: 227
From: Ontario, Canada
Registered: Sep 2012


Feedback score: (2)
Leave feedback

Rate this member

Report this Post10-29-2012 02:48 PM Click Here to See the Profile for Ry86GTSend a Private Message to Ry86GTDirect Link to This Post
Has anyone done anything fancy with organising their plug wires?

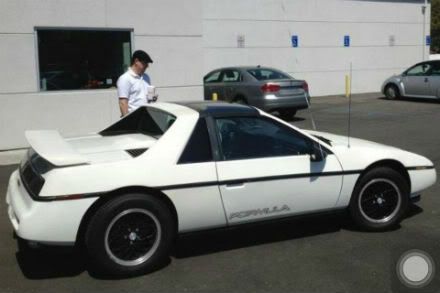
My car is staying 99% stock, the only place where I'm trying to add my own touch is in cleaning up the engine bay a bit and I'm looking for ideas with how to keep the plug wires looking pretty and organised.

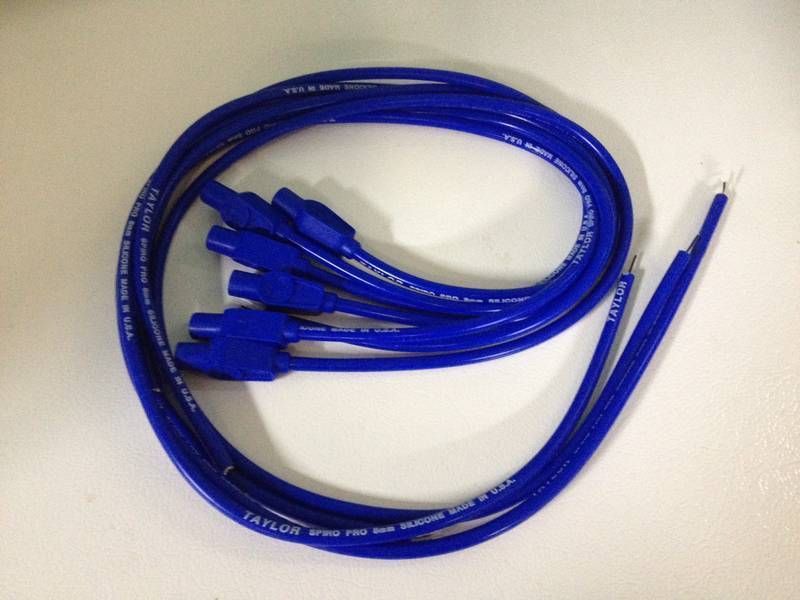
I'm running the stock 2.8 and the upper intake manifold and valve covers will remain factory red. I am ordering a MSD cap/rotor kit and will be ordering an MSD coil as well. In my case I will be running a Taylor cut-to-length set of spiro pro wires in Blue to break up the sea of red. It will be the only blue in the whole car.

I'm having trouble deciding on what to use for plug wire separators and haven't had any luck searching to see if anyone has secured them to look pretty on the stock motor or if they've just been left dangling.

I was going to order a set of Taylor clamp on wire separators when I order my cap/rotor/coil but I can't decide on a colour for them, or if there is something different to use than just the standard clamps.

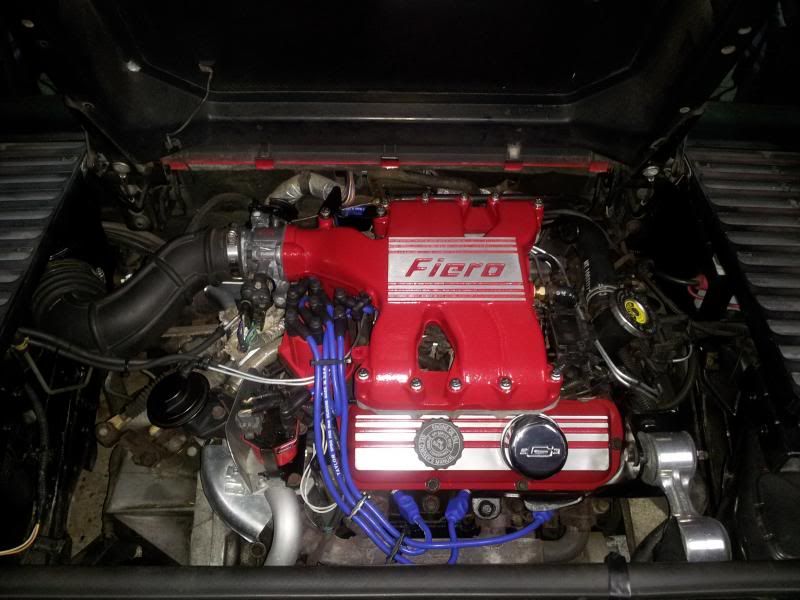
Here's my engine bay currently


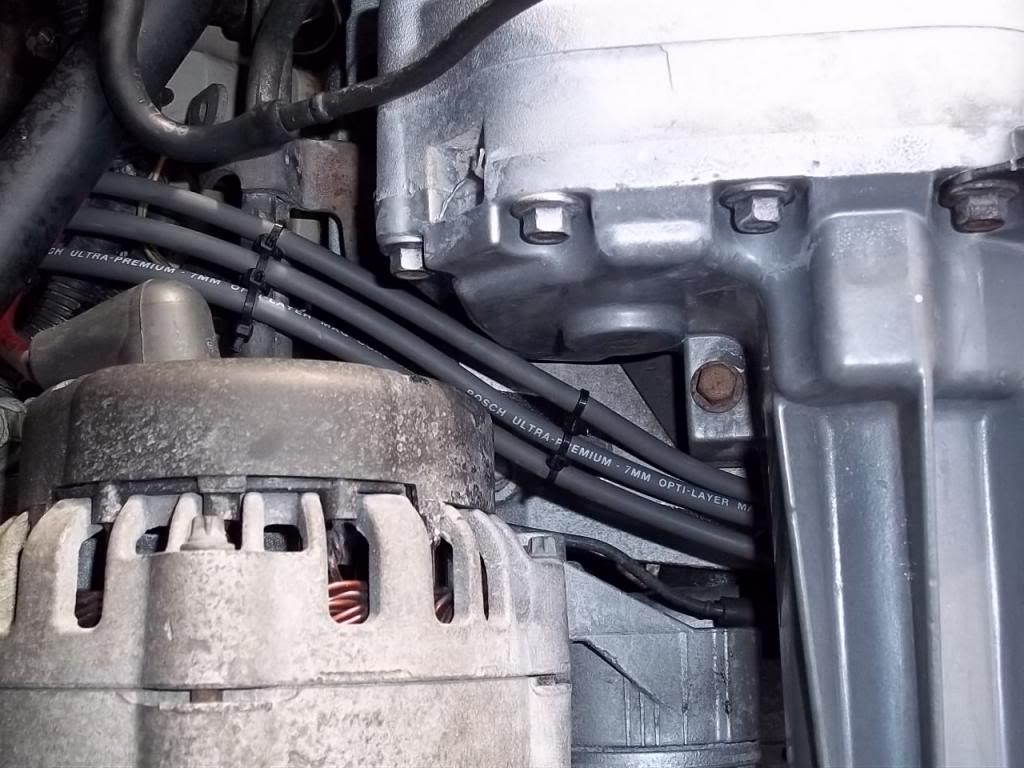
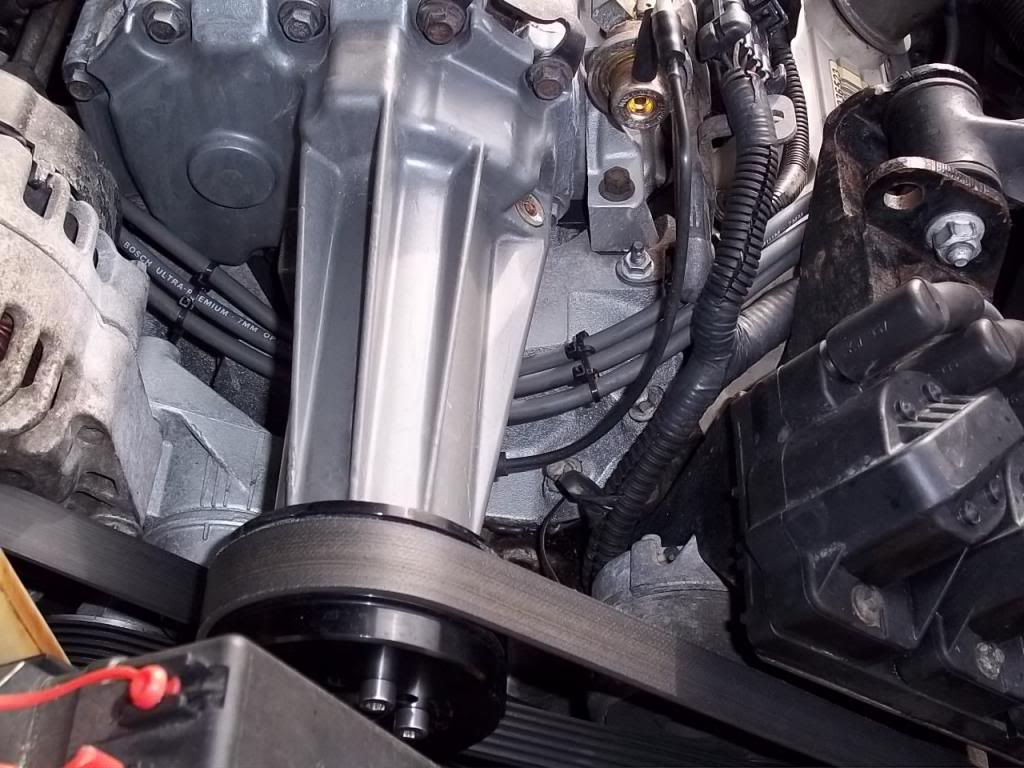
Here's the wires that I'll be installing when I figure out how to run them the neatest way possible


With regards to the rest of the engine: I have the stock intake refinished in factory black ready to be installed because I don't like the air filter being in the fender. The dog bone is DIY polised and will eventually be getting urethane bushings. As mentioned above the coil and cap will be red. I will be removing the heat shields that I can get to so I can clean them up and repaint them silver. I'm un-decided what to do with the throttle body, either clean and try to polish the exterior or paint it silver like the heat shields so it looks fresh or try that chrome paint stuff. Any other parts that I can get to relatively easily will be cleaned up and re-painted either black or silver (based on what colour it should be).

Has anyone used something like these on the valve cover bolts?


or


Or has anyone bought a wire loom and modified it to fit, or even better bought on that fits? Something like this


Any opinions? Looking for pictures of examples of what's been done on the stock looking engine to clean up the wires wires...

Thanks in advance

[This message has been edited by Ry86GT (edited 10-29-2012).]

IP: Logged
PFF
System Bot
sirtimeless
Member
Posts: 386
From: Hartford, WI, USA
Registered: Oct 2011


Feedback score: N/A
Leave feedback

Rate this member

Report this Post10-29-2012 03:25 PM Click Here to See the Profile for sirtimelessClick Here to visit sirtimeless's HomePageSend a Private Message to sirtimelessDirect Link to This Post
and subscribed!

I was actually thinking about this last night, my zip tie method just looks a little to tacky.

------------------

IP: Logged
Ry86GT
Member
Posts: 227
From: Ontario, Canada
Registered: Sep 2012


Feedback score: (2)
Leave feedback

Rate this member

Report this Post10-31-2012 09:45 AM Click Here to See the Profile for Ry86GTSend a Private Message to Ry86GTDirect Link to This Post
Anyone out there want to show off their spark plug wire installations?
IP: Logged
Tony Kania
Member
Posts: 20794
From: The Inland Northwest
Registered: Dec 2008


Feedback score:    (7)
Leave feedback


Total ratings: 305
User Banned

Report this Post10-31-2012 10:00 AM Click Here to See the Profile for Tony KaniaSend a Private Message to Tony KaniaDirect Link to This Post
This is my routing...

------------------

Fieroking Customs

IP: Logged
Ry86GT
Member
Posts: 227
From: Ontario, Canada
Registered: Sep 2012


Feedback score: (2)
Leave feedback

Rate this member

Report this Post10-31-2012 03:17 PM Click Here to See the Profile for Ry86GTSend a Private Message to Ry86GTDirect Link to This Post
Thanks Tony, that looks amazing!

I also found this while randomly lurking on the board. From the thread I found it in it is "I ANNOY" 's old setup before he swapped


The two of you are really making me rethink the whole staying red thing... And have shown me that you don't need anything too crazy to keep the wires neat and tidy. The above photo just happens to be my exact wires. That's my first time seeing them on a fiero although I'm sure that there's others out there. I think for now I'll just order a set of clips like you guys are using, I'm just in a toss up of which colour (like wires or chrome like how I'm dreaming of polished things).

I would still love to see what others have done
IP: Logged
jw3
Member
Posts: 376
From: ct
Registered: Apr 2011


Feedback score:    (44)
Leave feedback

Rate this member

Report this Post10-31-2012 11:49 PM Click Here to See the Profile for jw3Send a Private Message to jw3Direct Link to This Post
Maybe try under the neck of the plenum. I think it looks cleaner. Just a thought.
IP: Logged
Blacktree
Member
Posts: 20770
From: Central Florida
Registered: Dec 2001


Feedback score:    (12)
Leave feedback


Total ratings: 350
Rate this member

Report this Post11-01-2012 12:04 AM Click Here to See the Profile for BlacktreeClick Here to visit Blacktree's HomePageSend a Private Message to BlacktreeDirect Link to This Post
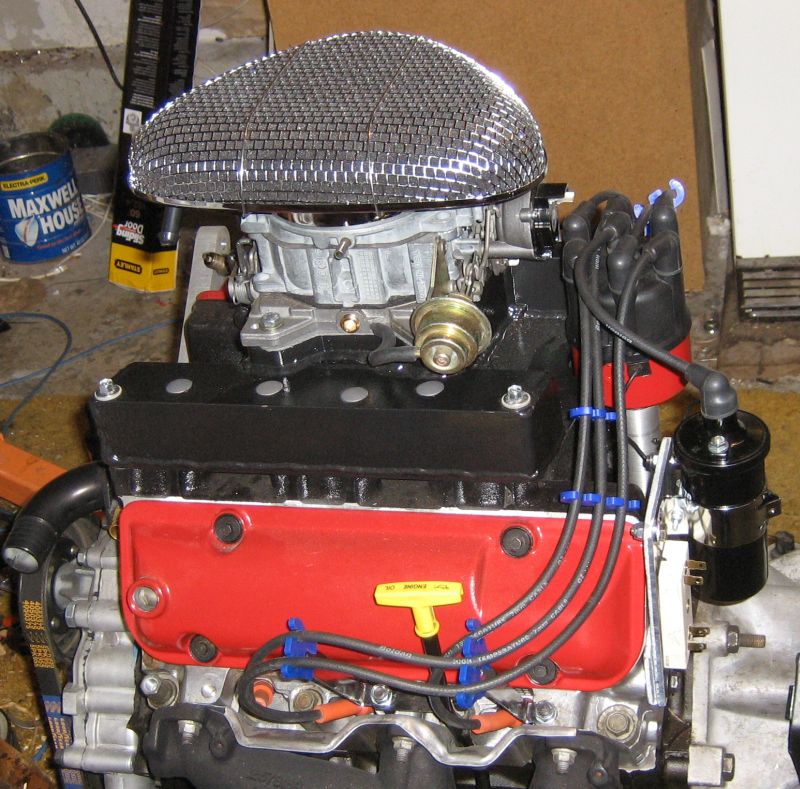
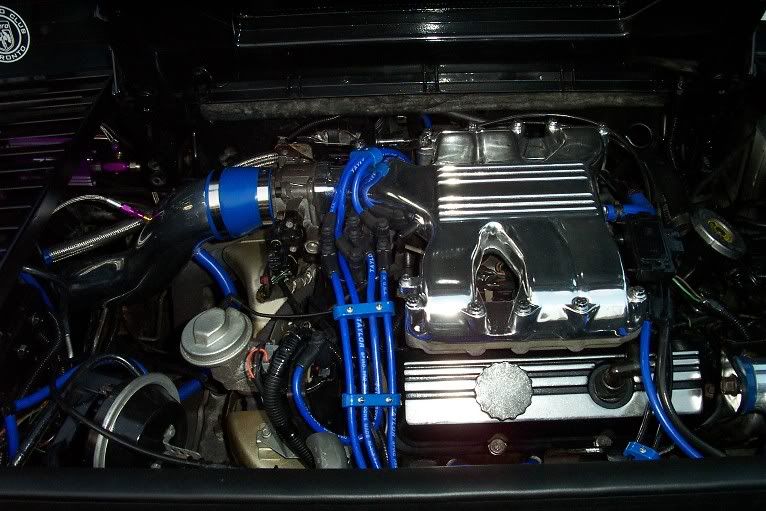
I remember seeing where someone routed the spark plug wires underneath the plenum (not just under the neck, but all the wires underneath the plenum). Then the wires came out from under the plenum and down to the spark plugs. It looked really clean.

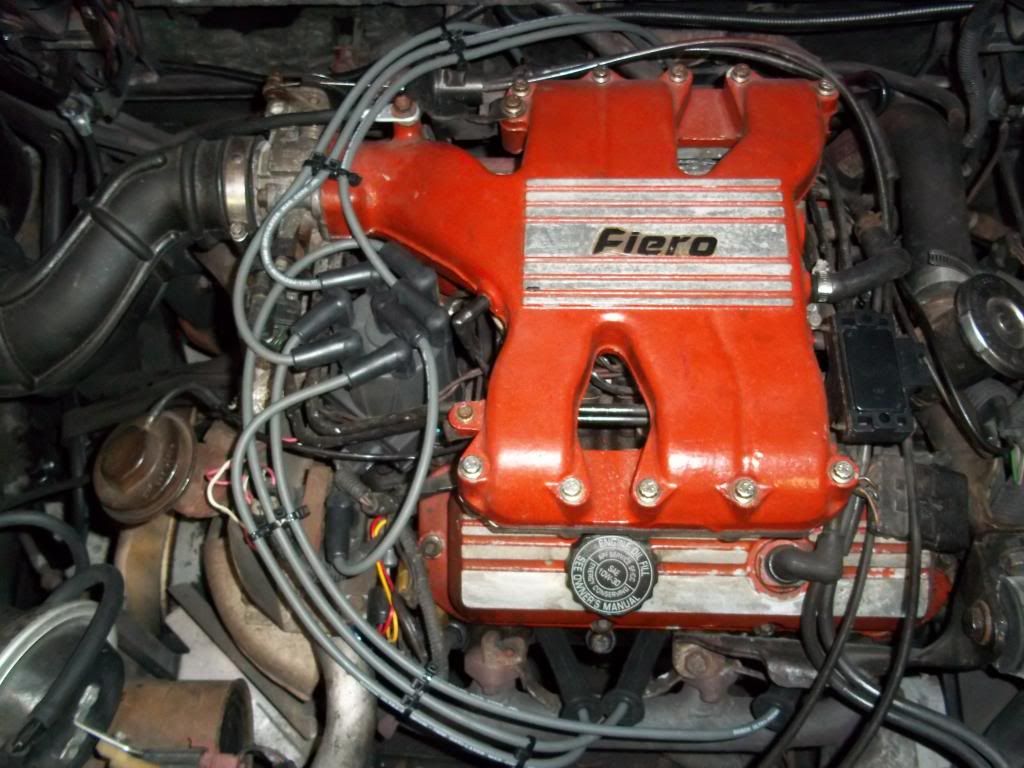
I tried to emulate that with my own engine, but the Trueleo intake doesn't hide the wires as well. Here's an old photo of my engine, so you can see what I mean:


That style of plug wire routing should look much nicer under a stock Fiero plenum.

[This message has been edited by Blacktree (edited 11-01-2012).]

IP: Logged
Ry86GT
Member
Posts: 227
From: Ontario, Canada
Registered: Sep 2012


Feedback score: (2)
Leave feedback

Rate this member

Report this Post04-05-2013 10:12 AM Click Here to See the Profile for Ry86GTSend a Private Message to Ry86GTDirect Link to This Post
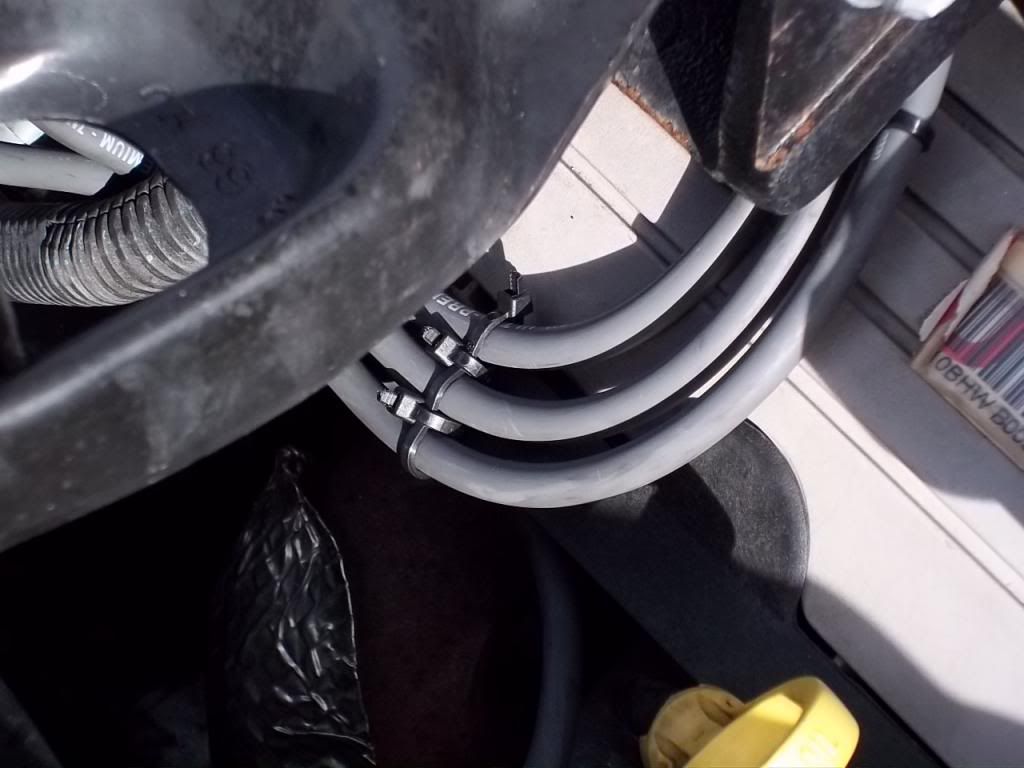
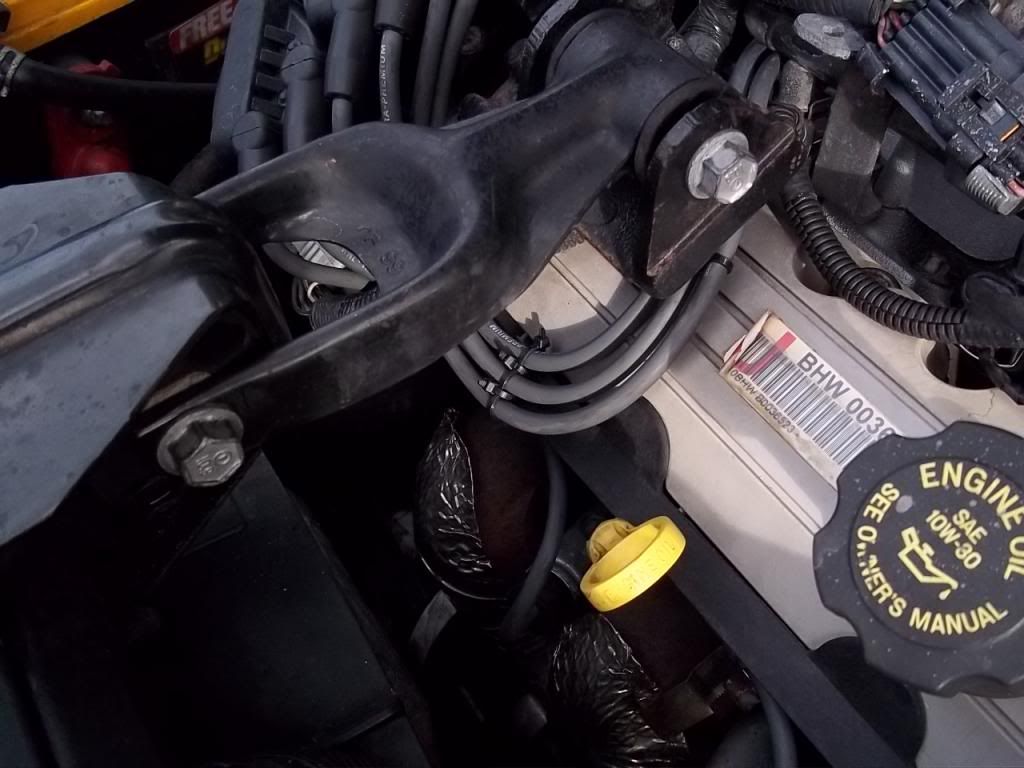
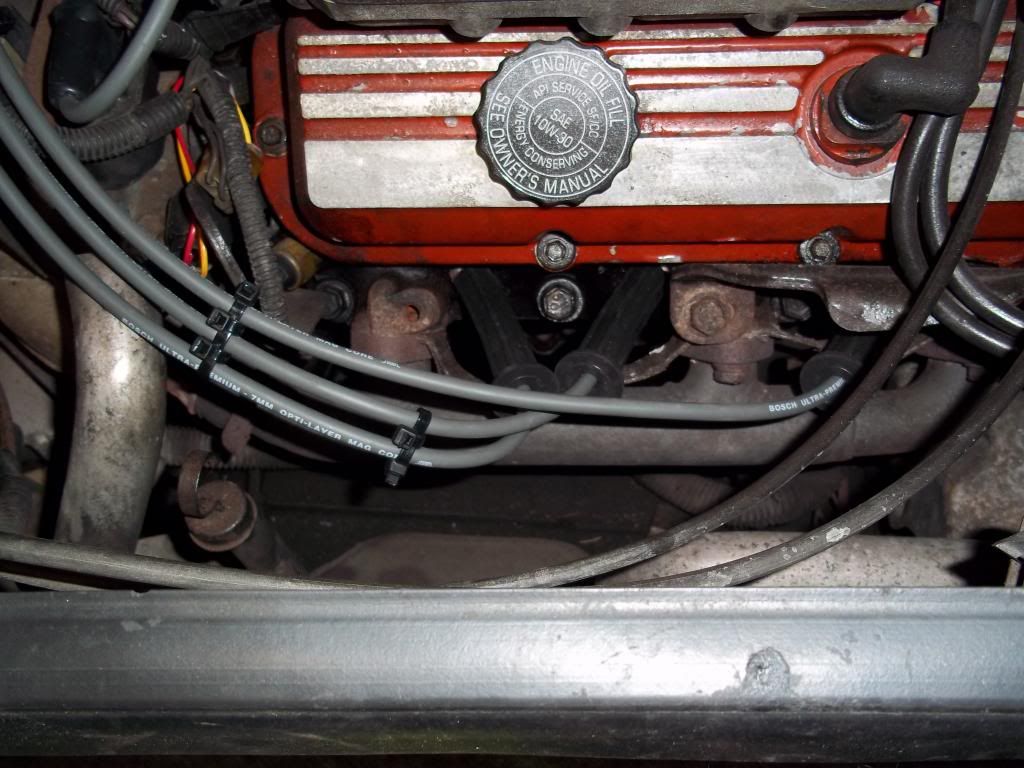
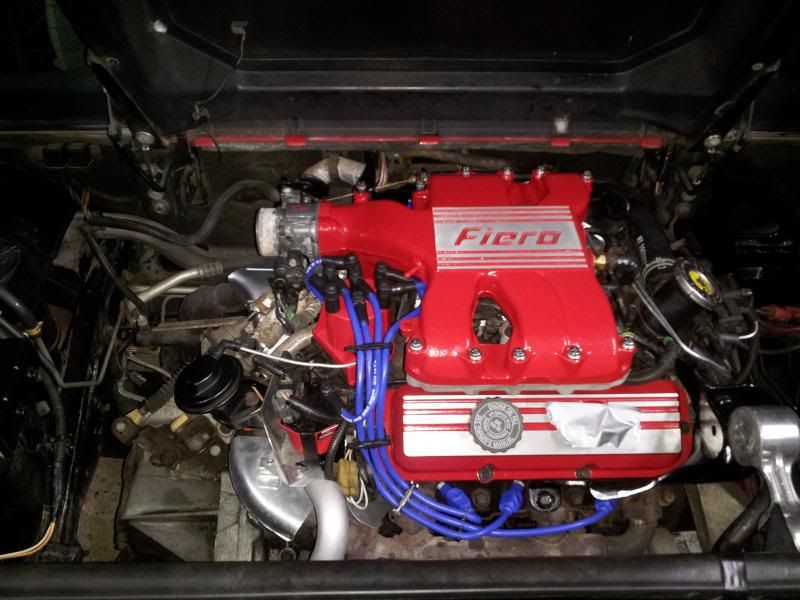
It's been a long while since I posted, but seeing as I started the thread I thought I would follow up. Last night I FINALLY finished my plug wires. Due to the space and trying to keep things clean (and inexpensive) I kept the fastening/ties simple by re-using what was on the old set of wires. I think it looks ok for my first attempt at self made wires, kind of like a waterfall lol.

Hopefully they work ok when I get around to installing the intake and trying to start it up.


EDIT: OH ****, now looking at the photos I'm wondering if I even have them wired onto the cap correctly. Am I off by 1 terminal on the cap connections? I wired it up using this thread as a guide:

https://www.fiero.nl/forum/A...020511-2-018190.html

Can anyone please confirm if I did it correctly or not?

[This message has been edited by Ry86GT (edited 04-05-2013).]

IP: Logged
Boostdreamer
Member
Posts: 7175
From: Kingsport, Tennessee USA
Registered: Jun 2007


Feedback score:    (24)
Leave feedback


Total ratings: 98
Rate this member

Report this Post04-05-2013 10:25 AM Click Here to See the Profile for BoostdreamerSend a Private Message to BoostdreamerDirect Link to This Post
That is going to depend on your distributor's orientation. Judging by the connections, you have the potential to be correct.

Jonathan
IP: Logged
Ry86GT
Member
Posts: 227
From: Ontario, Canada
Registered: Sep 2012


Feedback score: (2)
Leave feedback

Rate this member

Report this Post04-05-2013 10:42 AM Click Here to See the Profile for Ry86GTSend a Private Message to Ry86GTDirect Link to This Post
Damn, I've got that sinking feeling.

EDIT:

I just found this thread, and I wish I found it before:

https://www.fiero.nl/forum/A...001019-2-003234.html

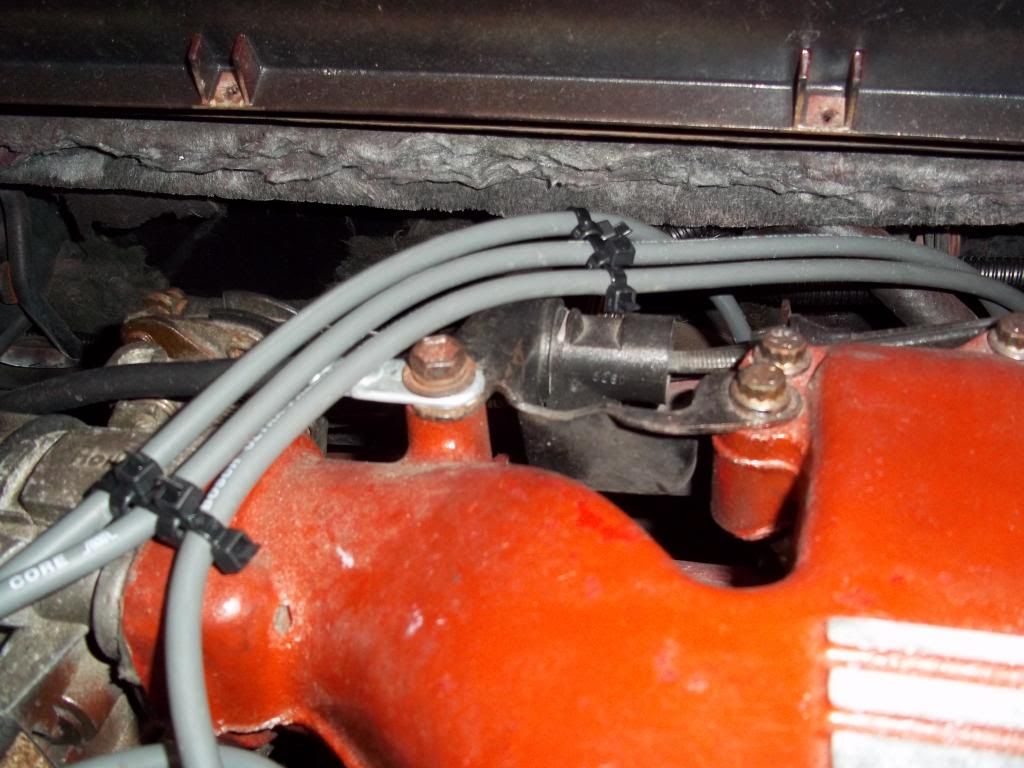
I believe I've made a fool of myself by posting in here this morning. Hopefully someone else can learn from my mistake. Looks to me like based on the pictures above (even the one of my own engine bay!) and the thread above that I have to rotate my plugs 1 terminal counter clockwise. Hopefully I can still make it look pretty after re-working the cap connections and I haven't wasted all my work last night. Either way it has to be corrected.

I've had a few moments lately working on this thing. I feel super dumb.

[This message has been edited by Ry86GT (edited 04-05-2013).]

IP: Logged
fieroguru
Member
Posts: 12130
From: Champaign, IL
Registered: Aug 2003


Feedback score:    (45)
Leave feedback


Total ratings: 258
Rate this member

Report this Post04-05-2013 11:08 AM Click Here to See the Profile for fieroguruSend a Private Message to fieroguruDirect Link to This Post
My recommendation is to buy the cut to fit plug wires so you can make them the exact length needed. Then focus on routing the wires in a logical/efficient manner to the plugs. On the 2.8, I always ran the wires for the front bank under the intake neck to make them disappear. The rear ones that remain visible just need to be equally seperated and have the proper lengths to make them flow in an orderly manner. Another rule of mine, no spark plug wires crossing over the valve cover.
IP: Logged
PFF
System Bot
Ry86GT
Member
Posts: 227
From: Ontario, Canada
Registered: Sep 2012


Feedback score: (2)
Leave feedback

Rate this member

Report this Post04-05-2013 11:12 AM Click Here to See the Profile for Ry86GTSend a Private Message to Ry86GTDirect Link to This Post
 
quote
Originally posted by fieroguru:

My recommendation is to buy the cut to fit plug wires so you can make them the exact length needed. Then focus on routing the wires in a logical/efficient manner to the plugs. On the 2.8, I always ran the wires for the front bank under the intake neck to make them disappear. The rear ones that remain visible just need to be equally seperated and have the proper lengths to make them flow in an orderly manner. Another rule of mine, no spark plug wires crossing over the valve cover.


That's exactly what I did, this was my first time making my own plug wires too. I just screwed up where they plug into on the cap. I will switch them around tonight, I should be able to make what I have already done work. My tightest cable will be for Cyl 1, the rest will have enough slack to sort them out... I think.

[This message has been edited by Ry86GT (edited 04-05-2013).]

IP: Logged
css9450
Member
Posts: 5426
From: Glen Ellyn, Illinois, USA
Registered: Nov 2002


Feedback score: (2)
Leave feedback


Total ratings: 85
Rate this member

Report this Post04-05-2013 11:30 AM Click Here to See the Profile for css9450Send a Private Message to css9450Direct Link to This Post
 
quote
Originally posted by fieroguru:

The rear ones that remain visible just need to be equally seperated and have the proper lengths to make them flow in an orderly manner. Another rule of mine, no spark plug wires crossing over the valve cover.


Agreed. And the "droop" needs to be consistent. I've seen some where the #1 plug wire is stretched really tight, the #3 droops way, way down and the #5 is somewhere in-between. Makes me wonder if they bought a set of wires and mounted them in the wrong places.

IP: Logged
S-toon
Member
Posts: 396
From: Arizona
Registered: Feb 2006


Feedback score: (1)
Leave feedback

Rate this member

Report this Post04-05-2013 12:42 PM Click Here to See the Profile for S-toonSend a Private Message to S-toonDirect Link to This Post
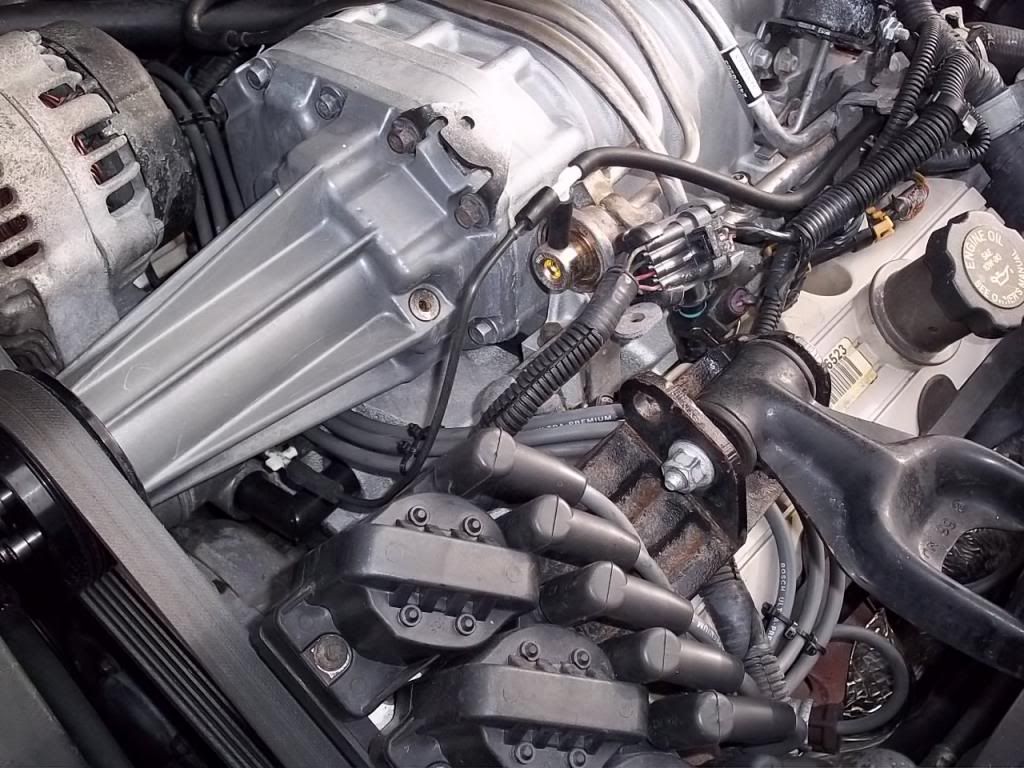
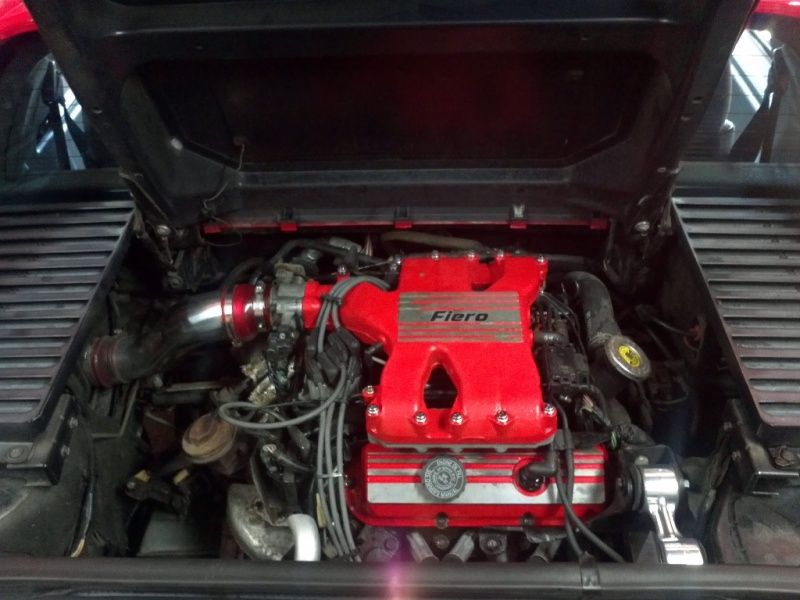
Here is mine, MSD cap and rotor, MSD ignition coil, and STI red ignition wire set comes with the little clips to separate them, not the best but works, all bought from The Fiero Store.

http://img267.imageshack.us...5/20130206154607.jpg

http://img29.imageshack.us/...9/20130218170557.jpg
IP: Logged
My87gt
Member
Posts: 142
From: New York, NY
Registered: Jul 2003


Feedback score: N/A
Leave feedback

Rate this member

Report this Post04-05-2013 12:57 PM Click Here to See the Profile for My87gtClick Here to visit My87gt's HomePageSend a Private Message to My87gtDirect Link to This Post
 
quote
Originally posted by Tony Kania:

This is my routing...


Tony can you tell me about that thick red gasket you have between the Holly and the upper plenum? I have never seen one that tick before... Also nice battery disconnect, I have to take the vent off to get at mine .

EDIT: So doing my research says that what I saw could be a throttle body spacer?? Did it do anything for your preformance or is it all smoke and mirrors? Sorry not trying to hijack this thread, just figure I would ask.

------------------
White 88 Formula with factory T-TOPS. Number 1016 out of 1252

http://i1167.photobucket.co...35/My87gt/Sig1-1.jpg

[This message has been edited by My87gt (edited 04-05-2013).]

IP: Logged
zkhennings
Member
Posts: 1922
From: Massachusetts, USA
Registered: Oct 2010


Feedback score: (3)
Leave feedback

Rate this member

Report this Post04-05-2013 02:20 PM Click Here to See the Profile for zkhenningsSend a Private Message to zkhenningsDirect Link to This Post
To the OP:

What cold air intake setup is that? I wan't to do something similar. Engine bay looks really nice by the way
IP: Logged
Ry86GT
Member
Posts: 227
From: Ontario, Canada
Registered: Sep 2012


Feedback score: (2)
Leave feedback

Rate this member

Report this Post04-05-2013 03:18 PM Click Here to See the Profile for Ry86GTSend a Private Message to Ry86GTDirect Link to This Post
 
quote
Originally posted by zkhennings:

To the OP:

What cold air intake setup is that? I wan't to do something similar. Engine bay looks really nice by the way


Thanks for the compliment.

Not sure what that intake it is to be honest. It was on the car when I bought it. I am going back to the stock system. From looking around I believe it is a CRX intake. I didn't want the air filter in the fender anymore so I decided when I was re-doing things I would be going back to stock.

If you want it and will pay me for the shipping it's yours. I have no idea what the shipping would be worth though.

IP: Logged
Boostdreamer
Member
Posts: 7175
From: Kingsport, Tennessee USA
Registered: Jun 2007


Feedback score:    (24)
Leave feedback


Total ratings: 98
Rate this member

Report this Post04-05-2013 11:06 PM Click Here to See the Profile for BoostdreamerSend a Private Message to BoostdreamerDirect Link to This Post
 
quote
Originally posted by fieroguru:

Another rule of mine, no spark plug wires crossing over the valve cover.


For cosmetic or performance reasons?

Jonathan

IP: Logged
fieroguru
Member
Posts: 12130
From: Champaign, IL
Registered: Aug 2003


Feedback score:    (45)
Leave feedback


Total ratings: 258
Rate this member

Report this Post04-06-2013 08:03 AM Click Here to See the Profile for fieroguruSend a Private Message to fieroguruDirect Link to This Post
 
quote
Originally posted by Boostdreamer:


For cosmetic or performance reasons?

Jonathan


Cosmetic. Intakes and valve covers are typically the main focal points of the engine, so you should have an unobstructed view of them.
IP: Logged
Ry86GT
Member
Posts: 227
From: Ontario, Canada
Registered: Sep 2012


Feedback score: (2)
Leave feedback

Rate this member

Report this Post04-06-2013 08:51 PM Click Here to See the Profile for Ry86GTSend a Private Message to Ry86GTDirect Link to This Post
I got them all fixed up and they look pretty much the same so I'm a happy camper. The wire for cyl 1 is a little tight, the tightest of them all, but it shouldn't be a problem.
IP: Logged
josef644
Member
Posts: 6939
From: Dickinson, Texas USA
Registered: Nov 2006


Feedback score:    (71)
Leave feedback


Total ratings: 103
Rate this member

Report this Post04-06-2013 09:38 PM Click Here to See the Profile for josef644Send a Private Message to josef644Direct Link to This Post
I installed a new MSD cap/rotor kit as you did. At around 5000 miles I picked up a miss while driving. Sorta in and out. After taking off the cap and rotor looking for a cause I found the center of the cap had deteriorated :


Top inside of the cap:


I replaced both with AC Delco parts. Miss is gone.

The camera flash made these parts look orange. But they were not.

[This message has been edited by josef644 (edited 04-06-2013).]

IP: Logged
PFF
System Bot
josef644
Member
Posts: 6939
From: Dickinson, Texas USA
Registered: Nov 2006


Feedback score:    (71)
Leave feedback


Total ratings: 103
Rate this member

Report this Post04-06-2013 09:46 PM Click Here to See the Profile for josef644Send a Private Message to josef644Direct Link to This Post
 
quote
Originally posted by Tony Kania:

This is my routing...


Tony this is sharp looking! Is that silver powder coat, or paint? I used engine enamel. It is sort of lost it's sparkel with about 10K on the engine now.
IP: Logged
mark1970
Member
Posts: 170
From: Apopka, Fl USA
Registered: Aug 2012


Feedback score: (1)
Leave feedback

Rate this member

Report this Post04-07-2013 12:29 PM Click Here to See the Profile for mark1970Send a Private Message to mark1970Direct Link to This Post
or you could use zip ties... i have some pics i could send you as i dont have them linked anywhere.... they look great and what is done on all the race cars

http://i1281.photobucket.co...0272_zpsb699c92d.jpg

http://i1281.photobucket.co...0273_zpsc8058538.jpg

http://i1281.photobucket.co...0274_zpsd12a6f76.jpg

http://i1281.photobucket.co...0275_zps6eafe298.jpg

[This message has been edited by mark1970 (edited 04-07-2013).]

IP: Logged
Niterrorz
Member
Posts: 4119
From:
Registered: Sep 2010


Feedback score: (3)
Leave feedback


Total ratings: 132
Rate this member

Report this Post04-07-2013 02:19 PM Click Here to See the Profile for NiterrorzSend a Private Message to NiterrorzDirect Link to This Post
 
quote
Originally posted by josef644:

I installed a new MSD cap/rotor kit as you did. At around 5000 miles I picked up a miss while driving. Sorta in and out. After taking off the cap and rotor looking for a cause I found the center of the cap had deteriorated :


Top inside of the cap:


I replaced both with AC Delco parts. Miss is gone.

The camera flash made these parts look orange. But they were not.


MSD's will make you burn through rotors and caps just fyi because of how much more voltage they run through them. not a super big deal but thats what a lot of people report.
IP: Logged
Ry86GT
Member
Posts: 227
From: Ontario, Canada
Registered: Sep 2012


Feedback score: (2)
Leave feedback

Rate this member

Report this Post04-08-2013 09:07 AM Click Here to See the Profile for Ry86GTSend a Private Message to Ry86GTDirect Link to This Post
All fixed up and seems to be running well after a CEL and bit of trouble shooting.

IP: Logged
josef644
Member
Posts: 6939
From: Dickinson, Texas USA
Registered: Nov 2006


Feedback score:    (71)
Leave feedback


Total ratings: 103
Rate this member

Report this Post04-11-2013 07:07 PM Click Here to See the Profile for josef644Send a Private Message to josef644Direct Link to This Post
 
quote
Originally posted by Niterrorz:


MSD's will make you burn through rotors and caps just fyi because of how much more voltage they run through them. not a super big deal but thats what a lot of people report.


The bad cap and rotor were MSD's. My ignition coil was a stock 87 Fiero V6 one.

[This message has been edited by josef644 (edited 04-11-2013).]

IP: Logged
zkhennings
Member
Posts: 1922
From: Massachusetts, USA
Registered: Oct 2010


Feedback score: (3)
Leave feedback

Rate this member

Report this Post05-15-2013 03:35 PM Click Here to See the Profile for zkhenningsSend a Private Message to zkhenningsDirect Link to This Post
Do you have links where you bought your cap rotor and wires?
IP: Logged
mark1970
Member
Posts: 170
From: Apopka, Fl USA
Registered: Aug 2012


Feedback score: (1)
Leave feedback

Rate this member

Report this Post05-15-2013 08:21 PM Click Here to See the Profile for mark1970Send a Private Message to mark1970Direct Link to This Post
 
quote
Originally posted by mark1970:

or you could use zip ties... i have some pics i could send you as i dont have them linked anywhere.... they look great and what is done on all the race cars

http://i1281.photobucket.co...0272_zpsb699c92d.jpg

http://i1281.photobucket.co...0273_zpsc8058538.jpg

http://i1281.photobucket.co...0274_zpsd12a6f76.jpg

http://i1281.photobucket.co...0275_zps6eafe298.jpg


Adding photos now linked


IP: Logged
mark1970
Member
Posts: 170
From: Apopka, Fl USA
Registered: Aug 2012


Feedback score: (1)
Leave feedback

Rate this member

Report this Post05-20-2013 08:55 PM Click Here to See the Profile for mark1970Send a Private Message to mark1970Direct Link to This Post
just did new wires in my 86 SE using Bosch wire set and the zip tie method... here is a few pics. comments please


[This message has been edited by mark1970 (edited 05-20-2013).]

IP: Logged
gen2muchwork
Member
Posts: 861
From: dearborn, MI
Registered: Feb 2012


Feedback score: (1)
Leave feedback

Rate this member

Report this Post05-21-2013 07:08 AM Click Here to See the Profile for gen2muchworkSend a Private Message to gen2muchworkDirect Link to This Post
 
quote
Originally posted by mark1970:

just did new wires in my 86 SE using Bosch wire set and the zip tie method... here is a few pics. comments please


Thats a neat trick. Wonder if it looks better or worse with the zip clip and cut end down out of sight?
Looks like a creative use for zip ties.

IP: Logged
Boostdreamer
Member
Posts: 7175
From: Kingsport, Tennessee USA
Registered: Jun 2007


Feedback score:    (24)
Leave feedback


Total ratings: 98
Rate this member

Report this Post05-21-2013 08:27 AM Click Here to See the Profile for BoostdreamerSend a Private Message to BoostdreamerDirect Link to This Post
^^^
X2! I like the zip tie method also and agree it would look better with the locks on the bottom.

------------------
Jonathan

'68-69 GTO Nose - The Project has Begun!
My '85 L67 Build Thread

IP: Logged
PFF
System Bot
trotterlg
Member
Posts: 1378
From: WA
Registered: Aug 2011


Feedback score: (2)
Leave feedback

Rate this member

Report this Post05-21-2013 12:34 PM Click Here to See the Profile for trotterlgSend a Private Message to trotterlgDirect Link to This Post
You can make any terminal on the cap #1 by just taking the distributator out and clocking the rotor to point to it while the engine is set to tdc on the compression stroke on number one. This is my routing. Larry

IP: Logged
zkhennings
Member
Posts: 1922
From: Massachusetts, USA
Registered: Oct 2010


Feedback score: (3)
Leave feedback

Rate this member

Report this Post05-21-2013 01:18 PM Click Here to See the Profile for zkhenningsSend a Private Message to zkhenningsDirect Link to This Post
Just got my friend's 81 Cj7 fired up for the first time in 5 years of not running (he just bought it, it is a Frankenstein jeep, major parts from 4 jeeps), I used the ziptie method when I was routing his spark plug wires, it works and looks really good! Thanks for that tip
IP: Logged
mark1970
Member
Posts: 170
From: Apopka, Fl USA
Registered: Aug 2012


Feedback score: (1)
Leave feedback

Rate this member

Report this Post05-21-2013 06:24 PM Click Here to See the Profile for mark1970Send a Private Message to mark1970Direct Link to This Post
 
quote
Originally posted by gen2muchwork:


Thats a neat trick. Wonder if it looks better or worse with the zip clip and cut end down out of sight?
Looks like a creative use for zip ties.


Thats is an idea... i never thought of doing them from the bottom, as in the late model stock car world it is done done for easy quick tear downs and also most setups the wires are run under the headers not on top...so looks is not needed....

i may try your idea this weekend, and maybe try using color ties as well.
IP: Logged
lateFormula
Member
Posts: 1048
From: Detroit Rock City
Registered: Jul 2002


Feedback score: (2)
Leave feedback

Rate this member

Report this Post05-21-2013 09:09 PM Click Here to See the Profile for lateFormulaSend a Private Message to lateFormulaDirect Link to This Post
 
quote
Originally posted by mark1970:


Really, you don't have $10 you could spend on some real ignition wire separators?

That barely qualifies as ghetto.
IP: Logged
PatrickTRoof
Member
Posts: 605
From: Baltimore, MD, USA
Registered: May 2013


Feedback score: N/A
Leave feedback

Rate this member

Report this Post05-23-2013 02:06 AM Click Here to See the Profile for PatrickTRoofSend a Private Message to PatrickTRoofDirect Link to This Post
I like to go for the "natural" look. It makes it a lot easier to change them when the time comes.

I'll probably put on the original wire looms at some point.

[This message has been edited by PatrickTRoof (edited 05-23-2013).]

IP: Logged


All times are ET (US)

T H I S   I S   A N   A R C H I V E D   T O P I C
  

Contact Us | Back To Main Page

Advertizing on PFF | Fiero Parts Vendors
PFF Merchandise | Fiero Gallery | Ogre's Cave
Real-Time Chat | Fiero Related Auctions on eBay


Copyright (c) 1999, C. Pennock